 Gold ornament on my tree. Photo by Diane M. Lilly, 2022. I had many trendy ideas for decorating my Christmas tree this year…and until I checked my bank balance! Lol! Jokes aside, this year has been tough financially, and there isn’t enough money left in the pot to handle gifts, food, bills, Christmas dinner, AND expensive holiday decor. So, we scaled things back a little… This year, I have challenged myself to work with what I have on hand for all my holiday decor…and it WAS a challenge. Some areas could use more “stuff”—if I wanted to go out and buy extra decor—but for this year, it has to be what it is. Artificial pre-lit tree So, this project started with a gorgeous pre-lit tree we bought a couple of years ago. This beautiful 7ft tree came with berries and pinecones, which made it easy for me to find faux florals to add to the branches.  My artificial pre-lit Christmas tree. Photo by Diane M. Lilly, 2022.  The faux red berries on my Christmas tree. Photo by Diane M. Lilly, 2022. Assessing materials on hand Besides the artificial tree, I collected all of the faux florals, greenery, ribbon, and ornaments from storage that I thought would work well with this year’s decor scheme. All this potential material somehow ended up on my dining room table and sat there for days until I worked everything out! Anyway, the point is that what you see on the table is pretty much all I had to work with to decorate my dining and living rooms for the holidays.  This year's holiday decorating stash. Photo by Diane M. Lilly, 2022. Choosing a style and matching the faux florals The first important task was to decide on color and style. Almost all of my existing Christmas decorations are traditional in style, so since we are using what we already have for this season’s decor, we are sticking with that theme. After carefully assessing how much material was available between all the florals and ornaments, I decided on a color scheme of green, red, gold, and white. All the floral picks for this year’s Christmas tree had to be red, white, or gold. 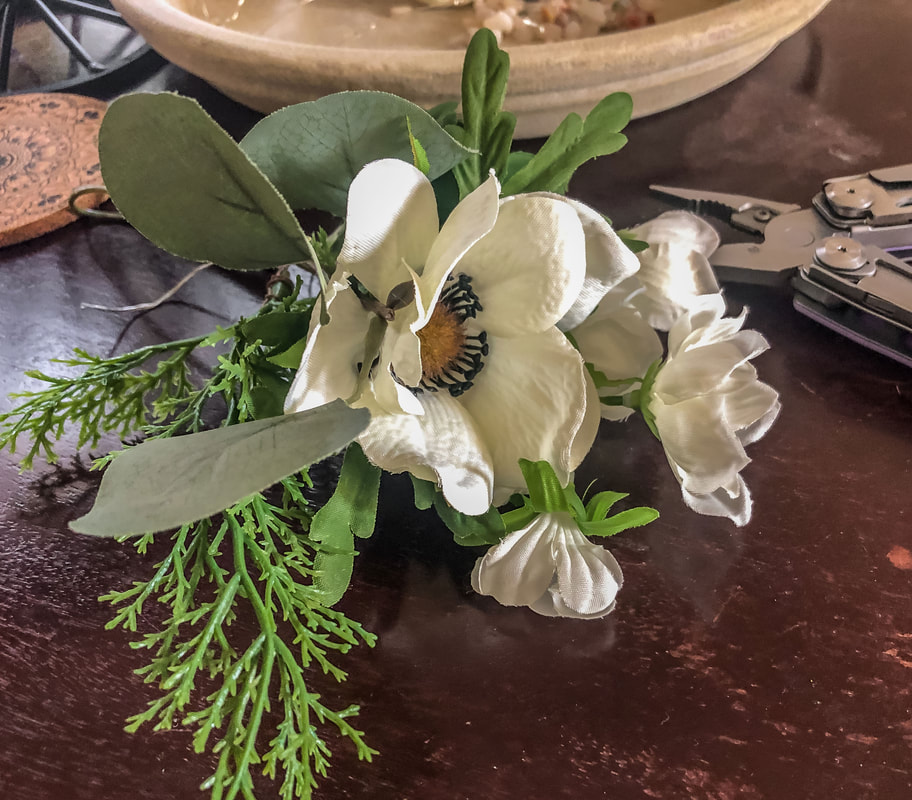 Faux white flowers being prepped for the tree. Photo by Diane M. Lilly, 2022. 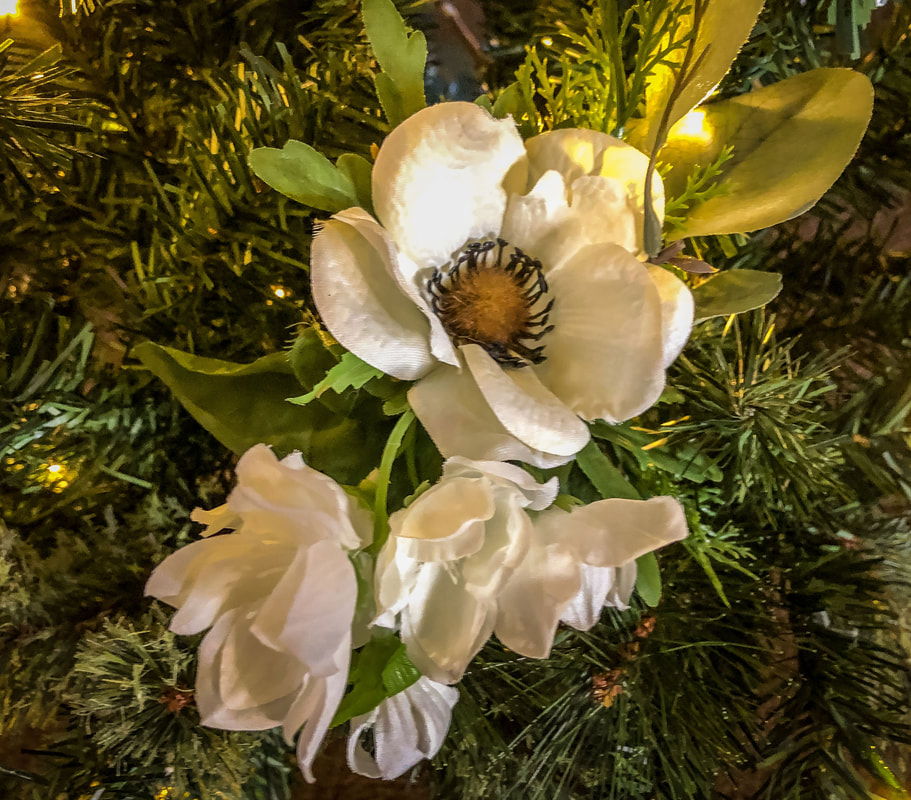 Faux white flowers inserted into the tree branches. Photo by Diane M. Lilly, 2022.  Faux red flowers inserted into the tree branches. Photo by Diane M. Lilly, 2022.  Red and white faux florals in the tree. Photo by Diane M. Lilly, 2022.  A bundle of white clematis inserted into the tree. Photo by Diane M. Lilly, 2022.  Gold fabric poinsettia attached to a tree branch. Photo by Diane M. Lilly, 2022. Assessing ornaments on hand There are some cool trends this year for Christmas tree decor, and one of them is using clusters of large ball ornaments. As much as I love that look, it simply wasn’t in my budget to go out and buy a bunch of large ornaments…sigh. Maybe next year. But I made the best of things and used the ornaments I already had in storage…and I think they look so classy on my tree!  White tassel ornament. Photo by Diane M. Lilly, 2022.  Red ball ornament. Photo by Diane M. Lilly, 2022.  Gold glitter snowflake ornament. Photo by Diane M. Lilly, 2022.  Decorated tree before the ribbon is applied. Photo by Diane M. Lilly, 2022.  Top of the tree before the ribbon is applied. Photo by Diane M. Lilly, 2022. Choosing ribbon for the tree The ribbon was another sore spot for me this year. I love the thick, voluptuous loops and bows on all the designer trees these days…but the ribbon is not cheap! I did splurge for one new ribbon because I needed a solid ribbon to help the translucent ribbons I already had stand out. I think over the year, I will keep my eyes open for some fancy wide ribbons for next year, but I made the best of what I had and dressed my beautiful tree in my best ribbons for the holidays. 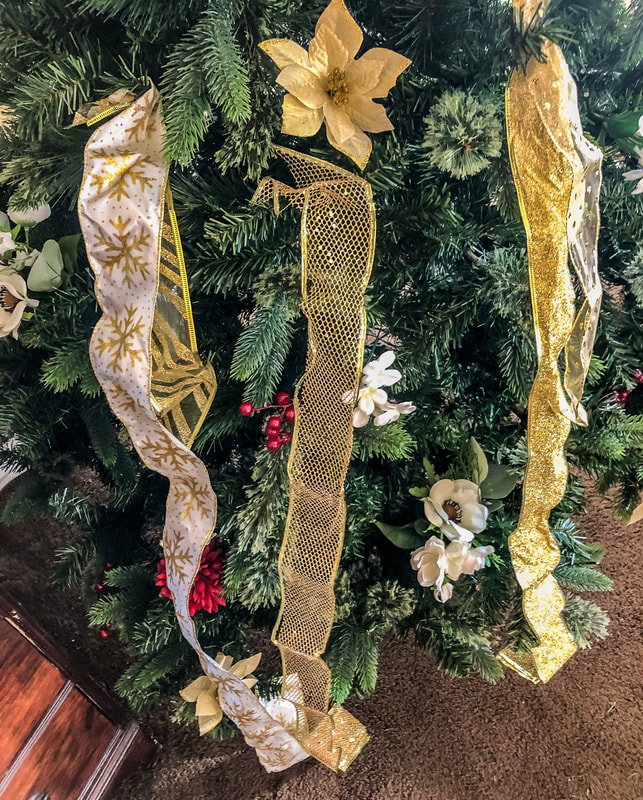 My ribbon choices for this year's Christmas decor and tree. Photo by Diane M. Lilly, 2022.  Top of tree with a fabric bow. Photo by Diane M. Lilly, 2022.  View of tree with fabric bow. Photo by Diane M. Lilly, 2022.  Closeup of the top of the tree with faux florals and fabric bow. Photo by Diane M. Lilly, 2022.  Tree wrapped in several types of ribbon. Photo by Diane M. Lilly, 2022.  The white and gold ribbon on the tree. Photo by Diane M. Lilly, 2022.  Deep red berries with fancy white and gold ribbon on this year's tree. Photo by Diane M. Lilly, 2022. Finishing touches And the tree is done! Just a couple of finishing touches…This year, my tree skirt is made with white and gold fabrics from my stash swirled around the bottom. My son then decided he had enough room to set up his train tracks…so he could play with his train and reminisce about his childhood. (He’s 21!)  Finished tree with garland behind. Photo by Diane M. Lilly, 2022.  This year's finished Christmas tree. Photo by Diane M. Lilly, 2022. This year's decorations may have been accomplished on a VERY slim budget, but the result was elegant. It was a challenge, but when there’s a will, there’s a way, right?! This tree was only one of several Christmas projects. I made three DIY wreaths, dressed up three rather sad garlands, and used leftover materials (which wasn’t much) to decorate four miniature trees. There are links to a few of these projects below. So, I hope you enjoyed seeing this year’s tree here at Di’s Studio Designs! From my family to yours…Merry Christmas and Happy Holidays! Related blogs you may want to read: How to make a simple faux floral wreath for the winter How to make a super easy faux ivy vine wreath for Christmas How to make cheap garland look festive for the holidays in just six steps DIY chalk painted tray with chippy effect DIY chalk painted tray with Celtic border Tips for creating a floral spring wreath A spring makeover for my small rental bathroom How to care for faux florals Nine hygge decor ideas Eight ways to create cozy winter interiors after the holiday decor comes down This article may contain a few items or commercial mentions, but I only used them for demonstration purposes only. I am not endorsing any particular product or receiving any monetary gain for this blog.
0 Comments
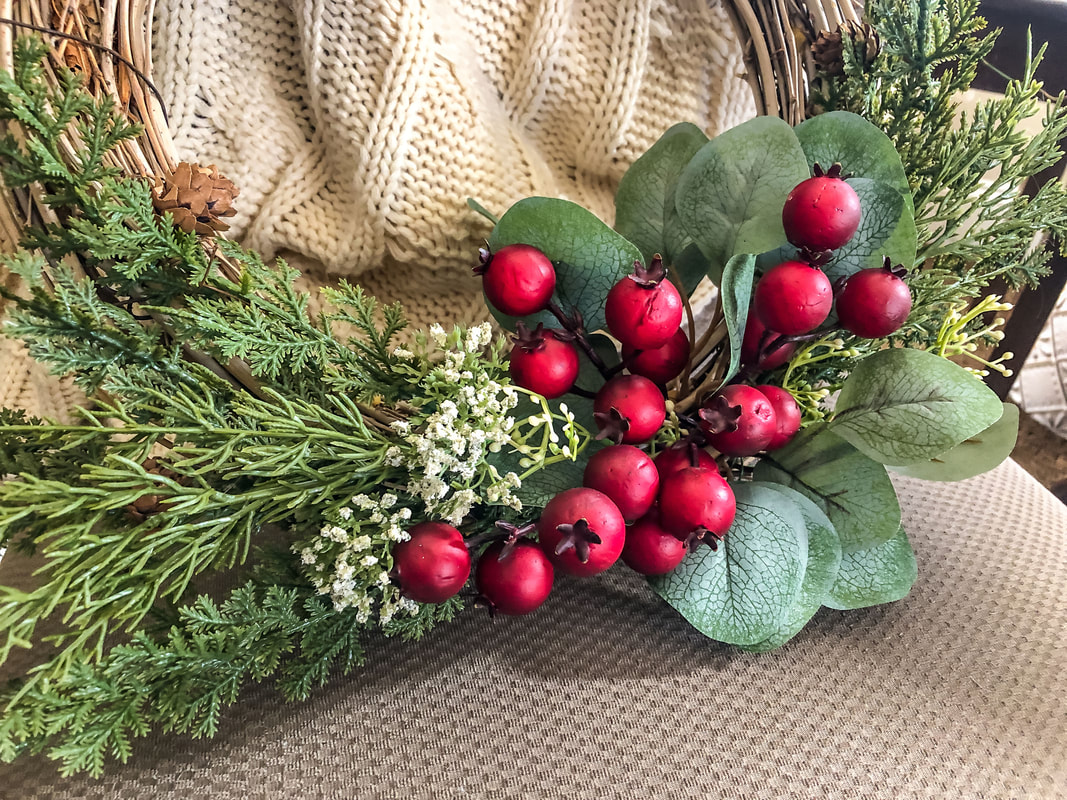 DIY wreath berries and faux greens. Photo by Diane M. Lilly, 2022. If you’ve read any of my previous blogs—or follow me on social media—chances are you’ve seen this wreath base before. The vine wreath base with the “Welcome” sign has become a decor staple, providing the perfect template for an ever-changing assortment of seasonal faux floral arrangements. 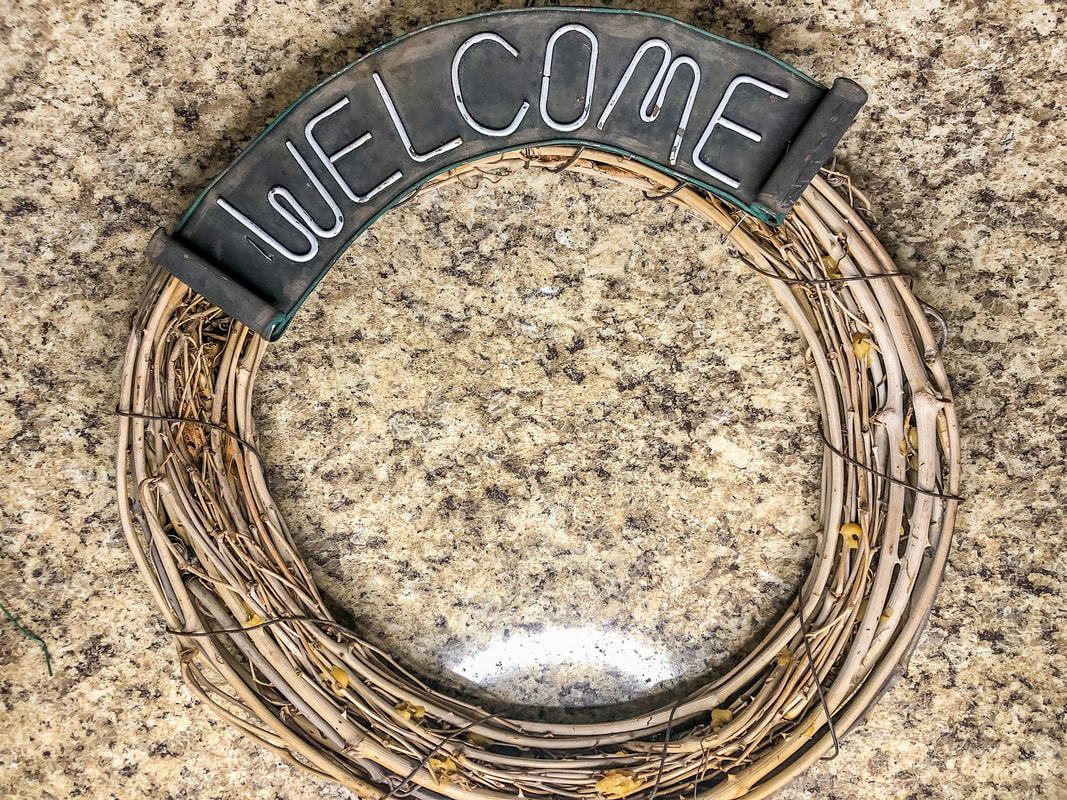 Empty vine wreath base. Photo by Diane M. Lilly, 2022. This wreath base will be used to create a holiday wreath that will stay up throughout the winter. I also had the added challenge of using only what I had on hand to economize during these trying economic times. Honestly, this arrangement was so easy to do! Here are the steps I took to create this gorgeous but simple holiday/winter wreath… Step 1—Choosing the greenery and floral elements For this design, I chose four greens, large red berry picks for the focal point, and small white accent flowers. Ideally, you want a variety of colors and textures with your greenery but always choose greens that complement each other and the focal florals. Speaking of focal florals, this simple design only requires one main focal element with a couple of contrasting florals to help make the main event stand out. 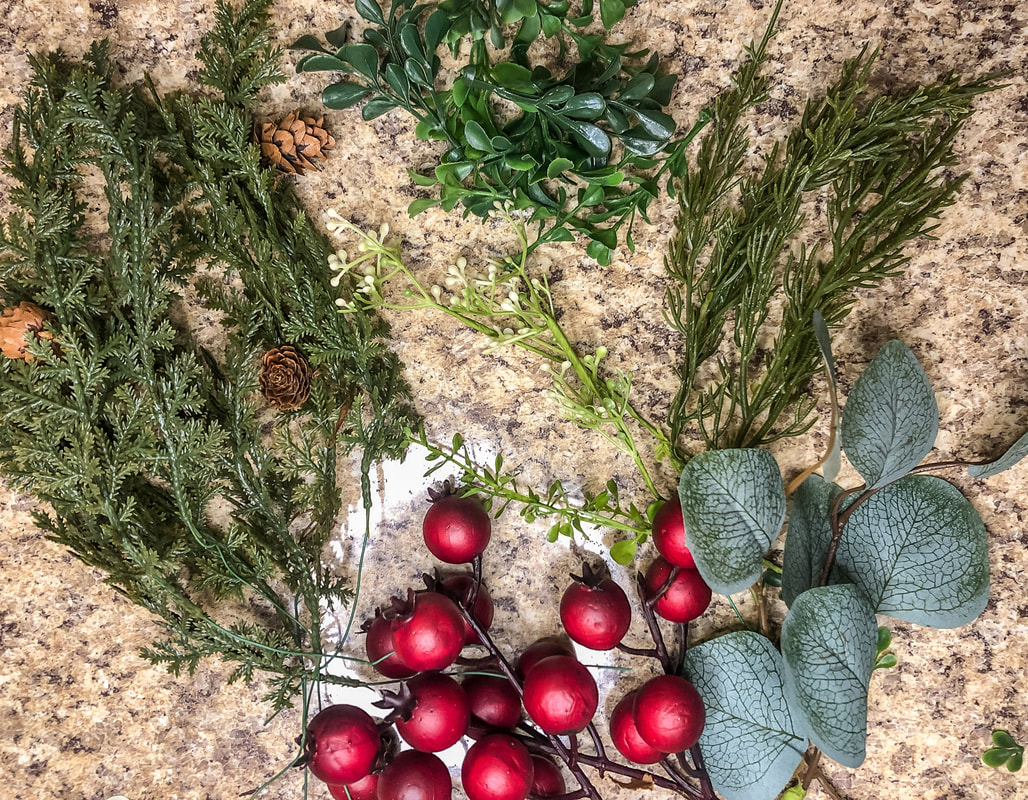 Assembling the faux greens and berries for the project. Photo by Diane M. Lilly, 2022. Step 2—Lay out the design In this stage, you will gather your materials to brainstorm and work out the desired look. Planning the design at this stage will make it much easier to make changes and additions before you attach your florals to the wreath base.  Planning out the design layout. Photo by Diane M. Lilly, 2022. Step 3—Insert the berries The focal point for this arrangement is a cluster of red berries, with the rest working outwards from there. A helpful tip: Wrap a piece of thin piece around each berry pick so your stems can be easily inserted and secured. 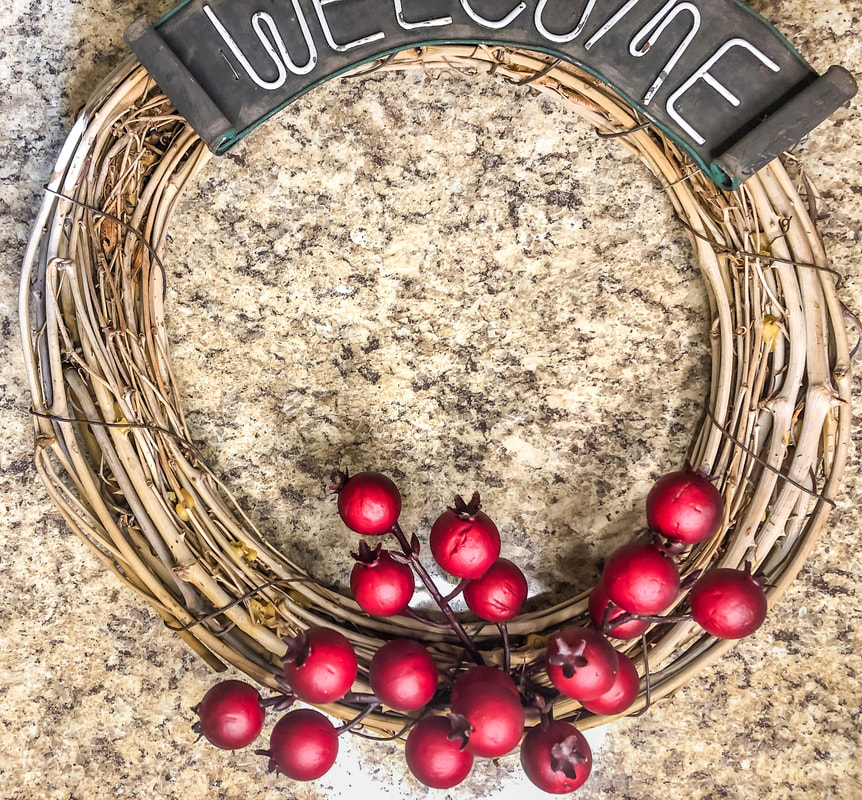 Berries inserted into the wreath base. Photo by Diane M. Lilly, 2022. Step 4—Insert the greenery Once the berries are nicely arranged and in place, start building up the design with the greenery. I started with the eucalyptus picks, inserting them under and around the berries and securing them within the vine with thin wire. At this point, a couple of sprigs of tiny white berries—one of two of my accent florals—were pushed into place. Next, I inserted the pine branches into the vine base on either side of the berries, balancing each side of the wreath. The branches should more or less follow the curve of the wreath, but it’s ok if a branch or two goes rogue and hangs a little. It will look a bit more natural that way! 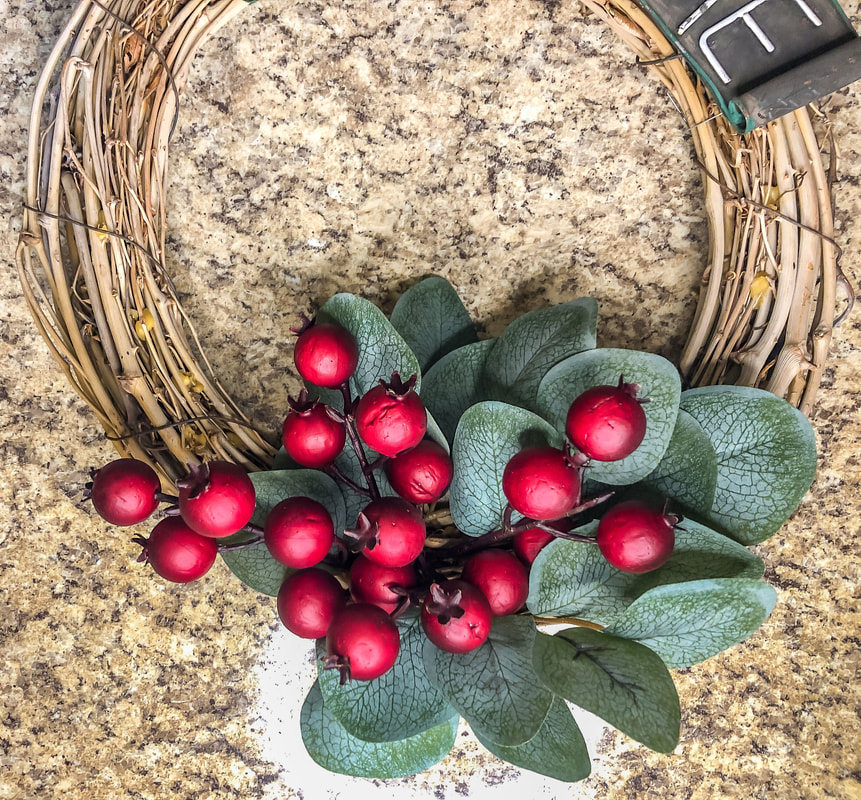 Eucalyptus inserted into the wreath base. Photo by Diane M. Lilly, 2022.  Small white berries inserted into the wreath base. Photo by Diane M. Lilly, 2022.  Faux greens inserted into the wreath base on one side of the red berries. Photo by Diane M. Lilly, 2022.  Wreath with all faux greens inserted. Photo by Diane M. Lilly, 2022. Step 5—Add in accent florals Finally, a few white flowers can be pushed into place to provide more contrast so that the berries stand out more. And that’s it!  Finished wreath with faux pine, eucalyptus, berries, and white flowers. Photo by Diane M. Lilly, 2022. This was one of the easiest faux floral arrangements I have ever done with this wreath base, and I love it! This project was limited to only what I had on hand, but you can make your wreath fuller with more greens, accent florals, and even pinecones. So what do you think? I encourage you to be brave--upcycle those old faux floral wreaths and create your own design with fresh faux florals. It’s really not too hard. All it takes is patience and imagination to give new life to an old wreath! There is a second vine base DIY that is also super easy, and I’ll include the link below! Happy Holidays! 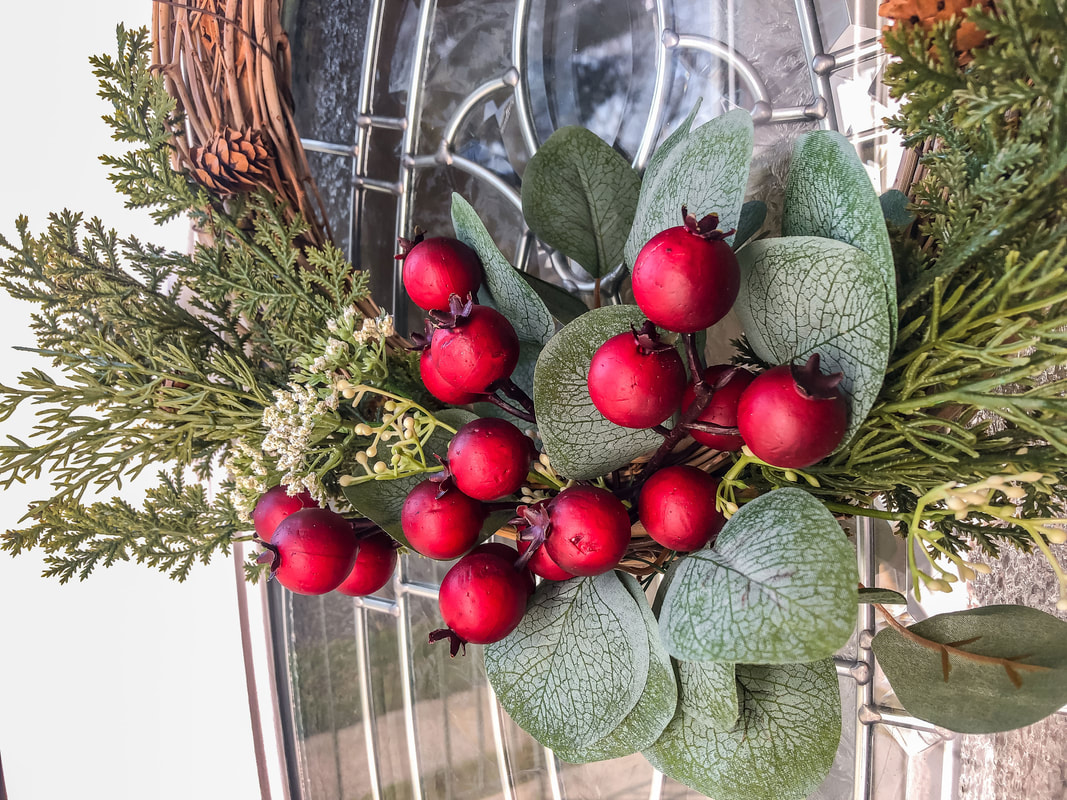 Closeup of DIY wreath hanging on the front door. Photo by Diane M. Lilly, 2022.  Full view of the DIY winter wreath hanging on the front door. Photo by Diane M. Lilly, 2022. Related blogs you may want to read: How to make a super easy faux ivy vine wreath for Christmas How I decorated my tree on a budget this year How to make cheap garland look festive for the holidays in just six steps DIY chalk painted tray with chippy effect DIY chalk painted tray with Celtic border Tips for creating a floral spring wreath A spring makeover for my small rental bathroom How to care for faux florals Nine hygge decor ideas Eight ways to create cozy winter interiors after the holiday decor comes down This article may contain a few items or commercial mentions, but I only used them for demonstration purposes only. I am not endorsing any particular product or receiving any monetary gain for this blog. 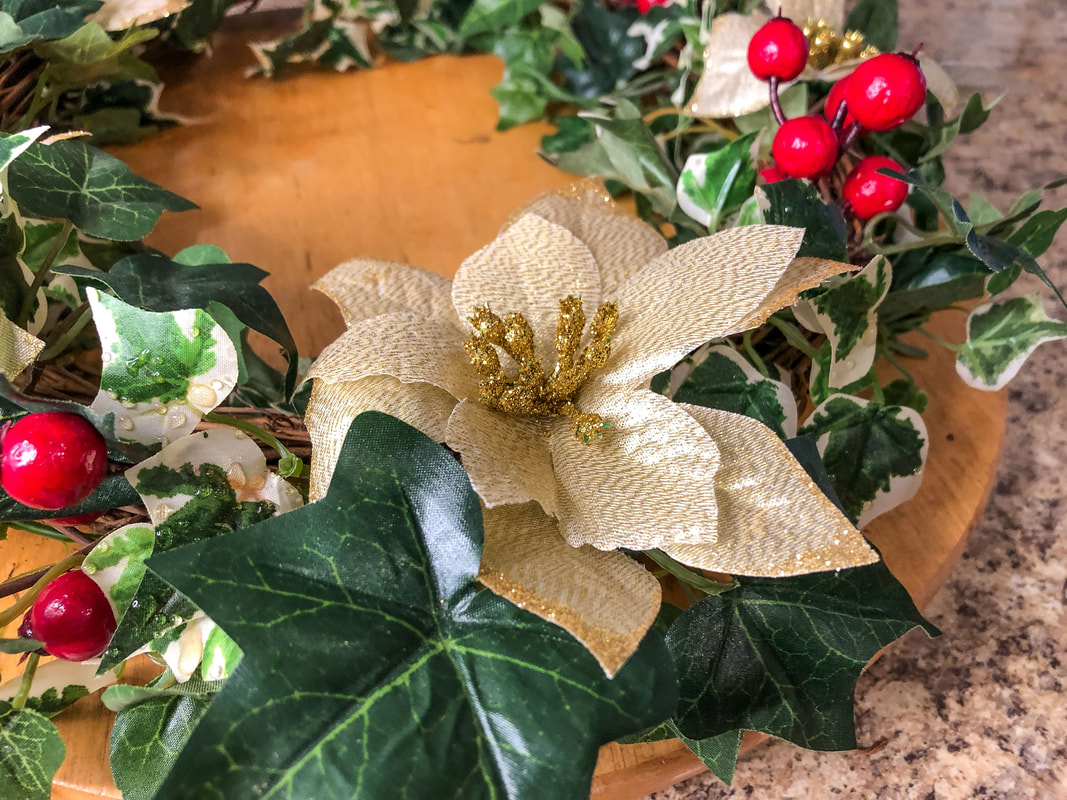 Closeup of ivy, gold poinsettia, and berries on this DIY wreath. Photo by Diane M. Lilly, 2022. This holiday decorating season has seen a lot of DIY projects, including this super simple ivy vine wreath! As with another recent DIY wreath project (see below), I started with a twisted vine wreath base stripped of all its old faux florals.  Another DIY wreath with red berries for my front door. Photo by Diane M. Lilly, 2022. Why so many DIY decor projects, you may ask? Well, it’s all about being economical this year and working with materials I already have rather than going out and spending money that I need for other things…like gifts! So what you see on this table (plus a box or two of Christmas ornaments) is all I had to work with for this holiday season’s greenery. A lot of thought also went into creating a sense of continuity in design between the different groupings, the dining room table, and the living room decor. Just because you are on a budget doesn’t mean you skimp on design!  This year's Christmas tree. Photo by Diane M. Lilly, 2022. 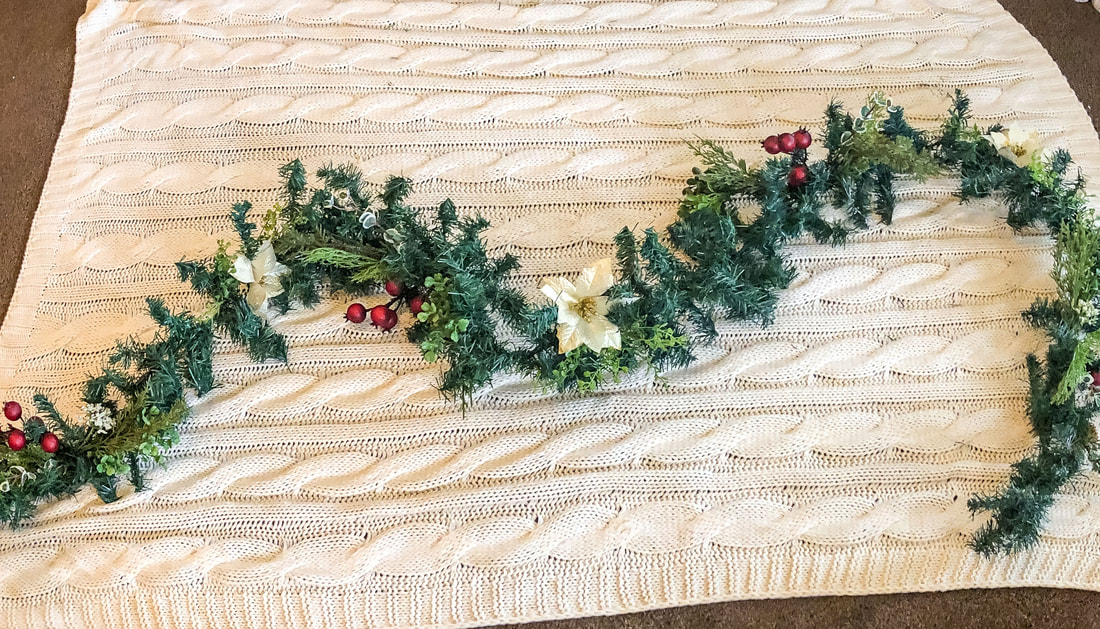 A DIY garland with gold poinsettias and red berries. Photo by Diane M. Lilly, 2022. This faux ivy wreath design was so quick and easy that I had to share it! Here are the four steps to make this simple wreath… Step 1—Wrap the green ivy Wrap the solid green ivy around the wreath and secure it into place by pushing the ends into the twisted vine. Wrap as much ivy as you like to create the desired thickness of the wreath. 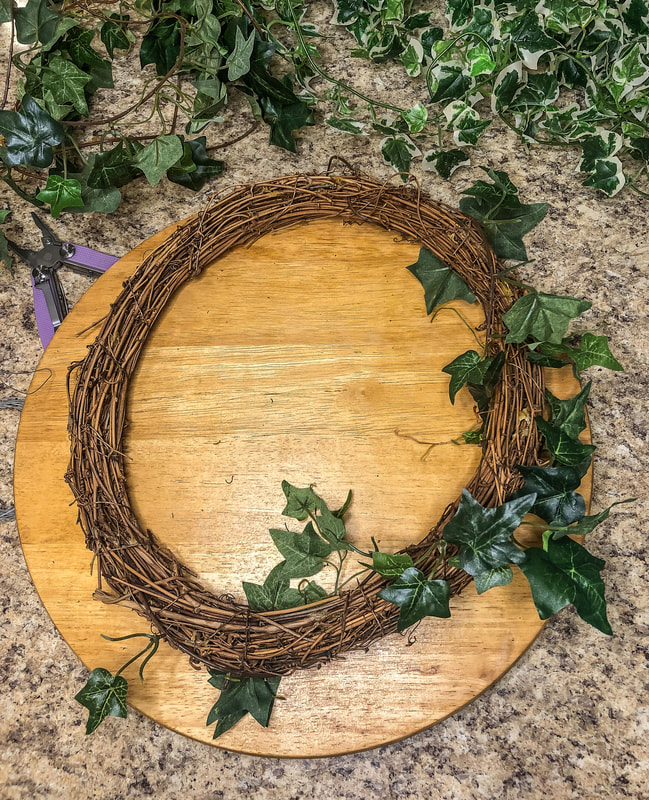 Vine wreath base with a few pieces of green ivy. Photo by Diane M. Lilly, 2022. 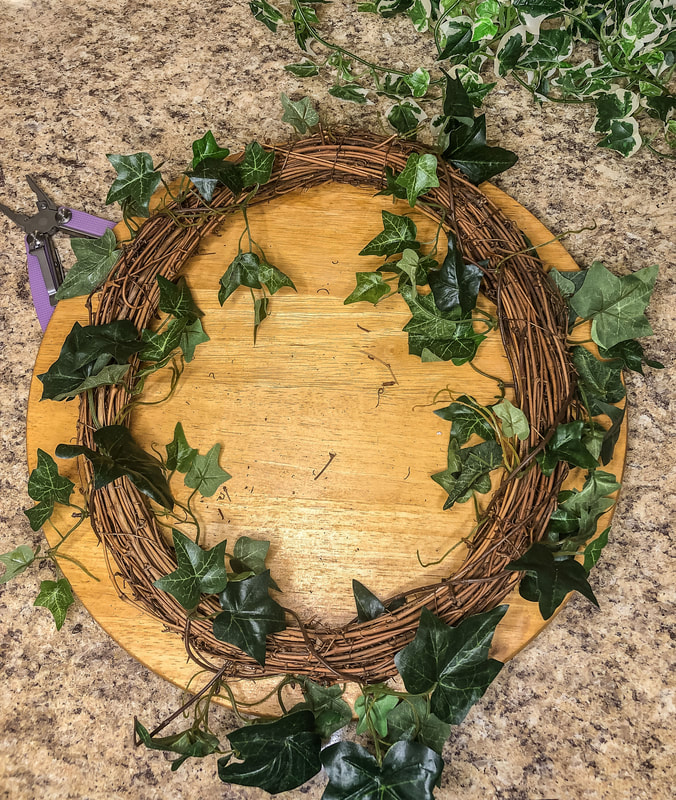 Working out how I want to fill the wreath base with the ivy. Photo by Diane M. Lilly, 2022. Step 2—Wrap the variegated ivy The variegated ivy—which provides visual contrast—can be wrapped over the green ivy, filling in the gaps between the vines. As with the green ivy, wrap it as many times as you like to create the desired thickness for your wreath, and push the ends into the wreath base to secure it in place. Keep the spacing even for a more balanced finished look. 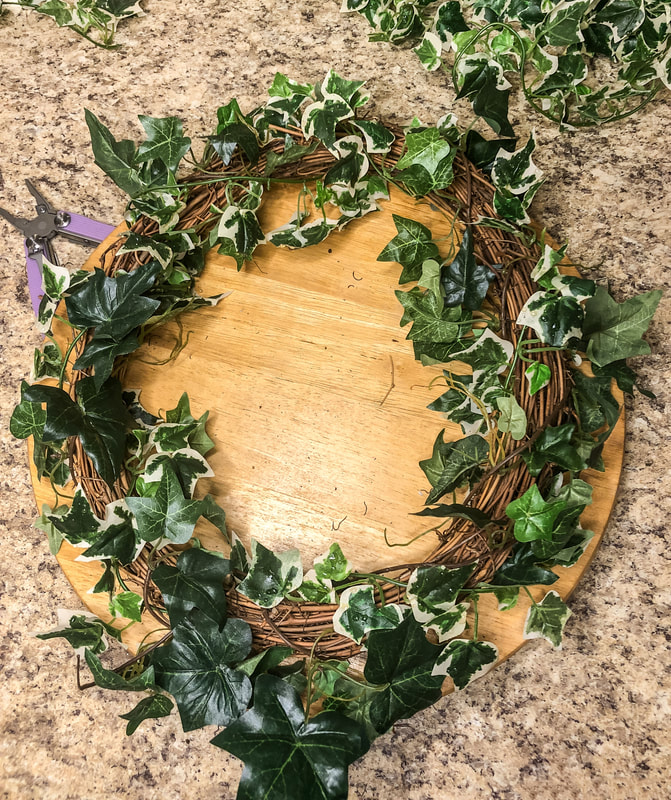 Wrapping the wreath base with the variegated ivy. Photo by Diane M. Lilly, 2022. Step 3—Add in berries This design calls for clusters of red berries to provide contrast and visual interest. When working with wreaths, it is essential to evenly space florals to create a sense of balance. Odd numbers are preferable, so I used five clusters, but this design would also work perfectly well with just four berry clusters. The berry picks are secured into place by pushing the stems into the twisted vine base. If the stems are too short, add thin wire to attach to the wreath. 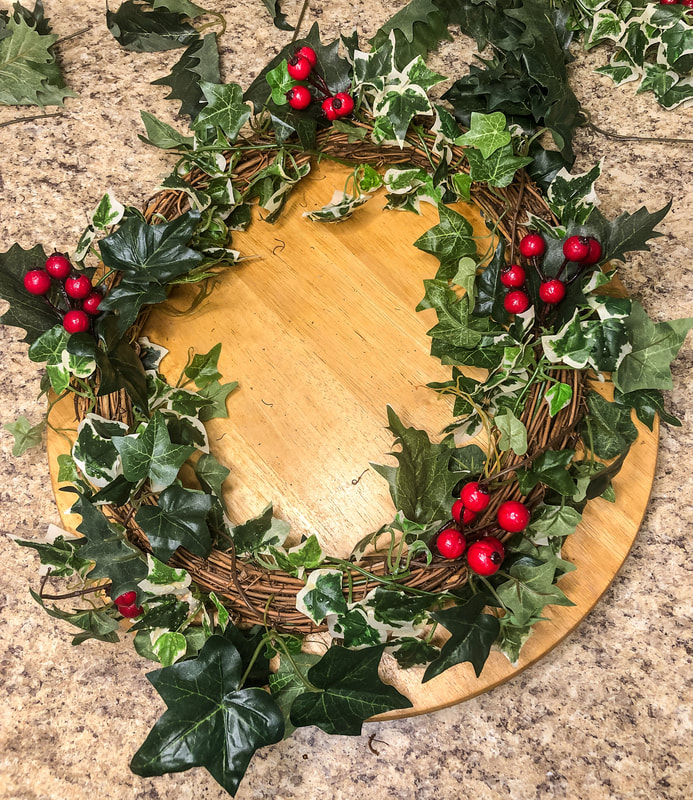 Adding the berry clusters to the wreath. Photo by Diane M. Lilly, 2022. Step 4—Attach gold poinsettias As with the berries, the poinsettias should be evenly spaced around the perimeter of your wreath. Five poinsettias were evenly spaced between the red berries. Since these poinsettia flowers had no stems, I used thin wire to attach each to my wreath.  The finished wreath with gold poinsettias added. Photo by Diane M. Lilly, 2022. And that’s it! Super simple, and yet very festive! All that’s left is to hang and dress up your wreath with fairy lights. I even had enough ivy left over to create a small wreath with no base—just ivy vines twisted into an oval and topped with a bow!  One view of the finished ivy wreath hanging over some mirrors in my dining room. Photo by Diane M. Lilly, 2022.  Another view of the finished ivy wreath. Photo by Diane M. Lilly, 2022.  The extra wreath made by twisting the remaining vines into and oval shape. Photo by Diane M. Lilly, 2022.  The extra ivy vine wreath with a plaid bow. Photo by Diane M. Lilly, 2022.  A final look at the finished DIY faux ivy vine wreath with red berries and gold poinsettias. Photo by Diane M. Lilly, 2022. So let me know in the comments whether you have tried anything similar, and don’t forget to check out my other holiday wreath DIY (listed below). Happy Holidays! Related blogs you may want to read: How to make a simple faux floral wreath for the winter How I decorated my Christmas tree on a budget this year How to make cheap garland look festive for the holidays in just six steps DIY chalk painted tray with chippy effect DIY chalk painted tray with Celtic border Tips for creating a floral spring wreath A spring makeover for my small rental bathroom How to care for faux florals Nine hygge decor ideas Eight ways to create cozy winter interiors after the holiday decor comes down This article may contain a few items or commercial mentions, but I only used them for demonstration purposes only. I am not endorsing any particular product or receiving any monetary gain for this blog.  Wiry garland with faux greens, pinecone, and red berries. Photo by Diane M. Lilly, 2022. This year’s holiday season has been devastated by the current chaotic economy. It’s turning out to be a very lean holiday season indeed! This year—in particular—the festive decorations have become a beacon of light in the darkness, at least for me. But what do you do if you can’t afford to indulge in the latest trends in Christmas decorations? What if all you have to work with is cheap, wiry—and obviously fake—garland? This year, I have three cheap garlands, two hung over the top of my windows and one wrapped around the staircase railing. In this DIY, I'll share how I dressed them up to make them look festive. There were two stipulations for this decorating project: 1) I could only work with materials I had on hand, and 2) The final look had to match the rest of the holiday decor in my dining and living rooms. I picked through all of my faux florals, faux greenery, ribbons, and ornaments to see if I could come up with enough ideas to fill two rooms with holiday spirit while creating a cohesive look to the space. As you can see, I made such a mess of my dining room table! But it was worth it. Laying everything out in front of me allowed me to see what I had, explore what goes together, and assess how much of each material was available. What you see on this table (plus a box of ornaments) is all I had to work with for this year’s holiday floral decorating.  This year's supplies for holiday floral decorating. Photo by Diane M. Lilly, 2022. That decorating scheme also included creating two faux floral wreaths and filling out the pre-lit Christmas tree (I will leave links to those projects at the end), so everything you see on this table had to be carefully stretched to meet all my decorating needs. What a challenge this turned out to be!  This year's Christmas tree. Photo by Diane M. Lilly, 2022.  One of two DIY wreaths with faux greenery. Photo by Diane M. Lilly, 2022.  Another DIY wreath with faux greens and berries. Photo by Diane M. Lilly, 2022. So, let’s look at how I made my cheap garland look festive… Step 1—Fluff the garland The first step to making this cheap garland workable is to fluff every branch. As tedious as this sounds, you have to make sure to touch every single branch. Pull the branches apart and outwards in various directions away from the central wire. This creates a workable base for all of the materials you will add. Step 2—Plan out your spacing Take each bundle of greenery and experiment with the desired placement. I like to start with locating the center of the garland so that my end design has a pleasing symmetry. If you have an odd number of miniature floral arrangements, you will start in the center and work out, evenly spacing your greens. If your design calls for an even number of arrangements, you will carefully space out the bundles on either side of the central point. Either way, you will lay out your garland and greens before attaching anything to get the correct spacing. Using symmetry is the simplest way to make a dramatic visual impact! 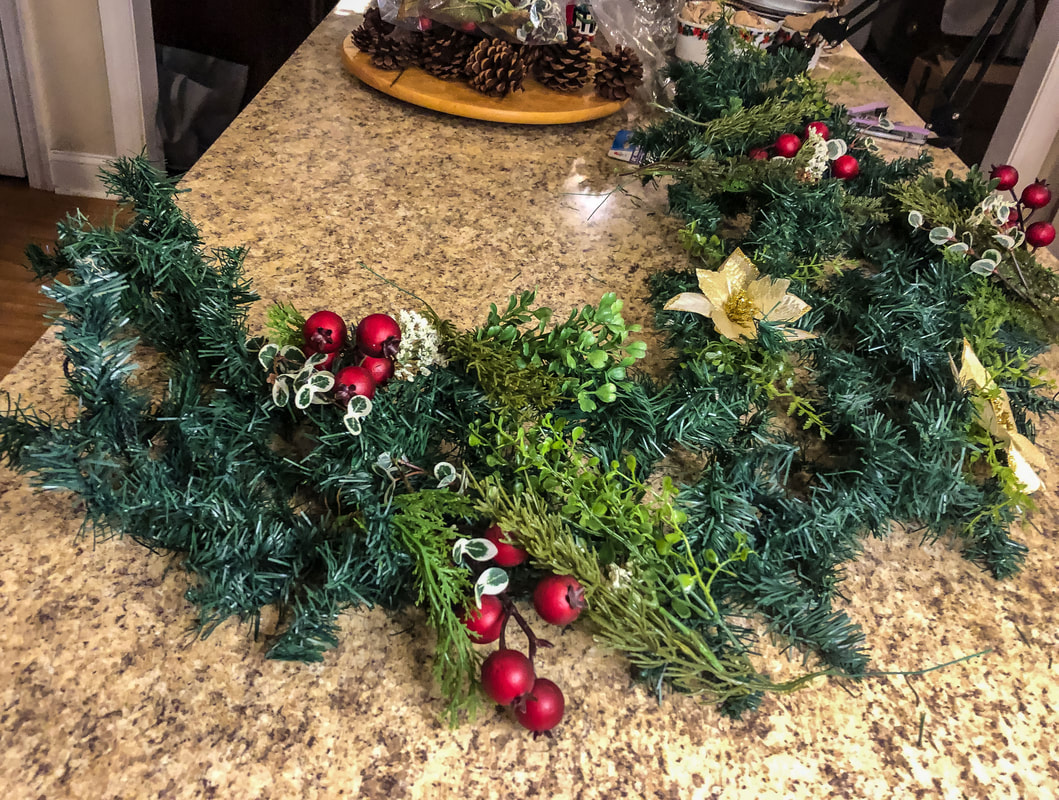 Planning the layout for my extra greens and florals. Photo by Diane M. Lilly, 2022. Step 3—Choose your faux greenery Ideally, you want more than one type of faux greenery to create visual interest. You’ll want to use greens that complement each other and the garland yet creates much-needed contrast. I used three or four different greens, including faux pine and variegated leaves. You don’t have to choose “Christmas” greens. You can use whatever works visually, and that’s ok! Just remember to keep in mind that you want a sense of continuity in the space, so try to use at least one type of greenery that appears elsewhere in your room. I used thin wire to attach and arrange my stems on either side of a central spot. This spot will be filled later with flowers. This set the stage for several miniature arrangements to be created along the length of the garland. 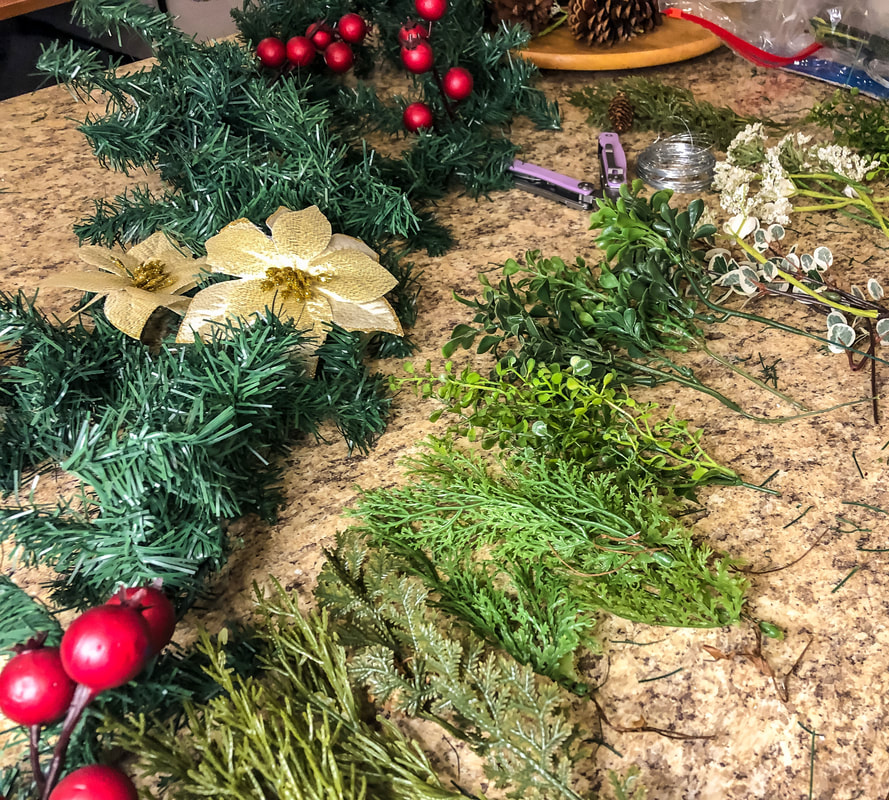 Laying out all the greenery for this project. Photo by Diane M. Lilly, 2022. 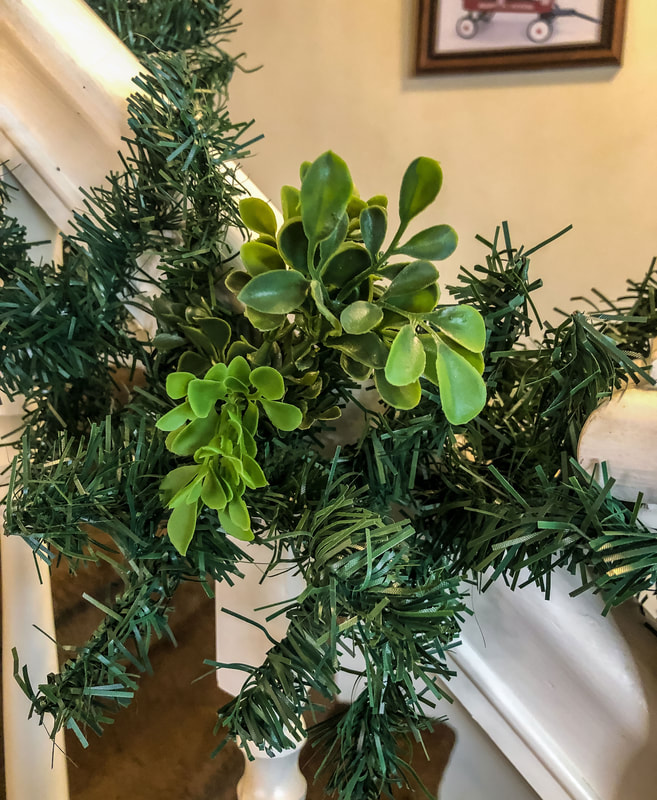 The first bit of greenery for the railing garland. Photo by Diane M. Lilly, 2022. Step 4—Layer in faux florals The faux florals in this project became individual focal points for the miniature arrangements on the garland. As I mentioned with the greenery, it is important to use repetition of design elements so that the garland blends in with the rest of your holiday decor. One of my garlands was wrapped around the staircase railing in the dining room. As there was quite a lot going on in that space already, I kept the garland simple. The other two garlands also had red berries, with the addition of gold poinsettias. Red berries, pinecones, and gold poinsettias are decorative elements in both my dining and living rooms. My tree, garlands, wreaths, and other decor all have some or all of these elements, making both spaces feel cohesive, even though I could not go out and buy expensive decorations this year. 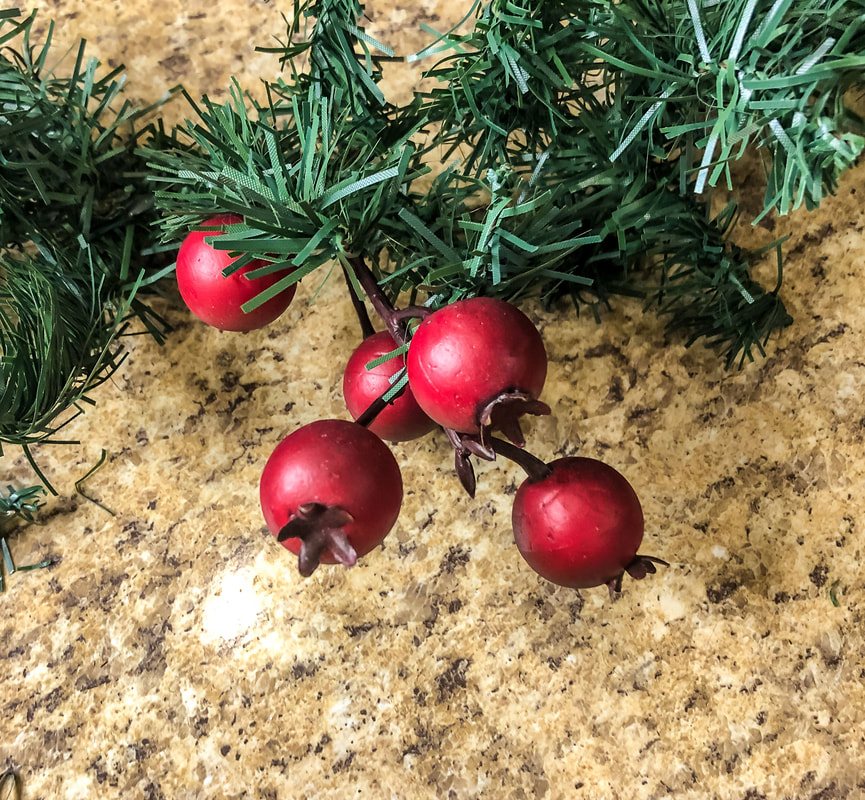 The red berries for the second garland. Photo by Diane M. Lilly, 2022. 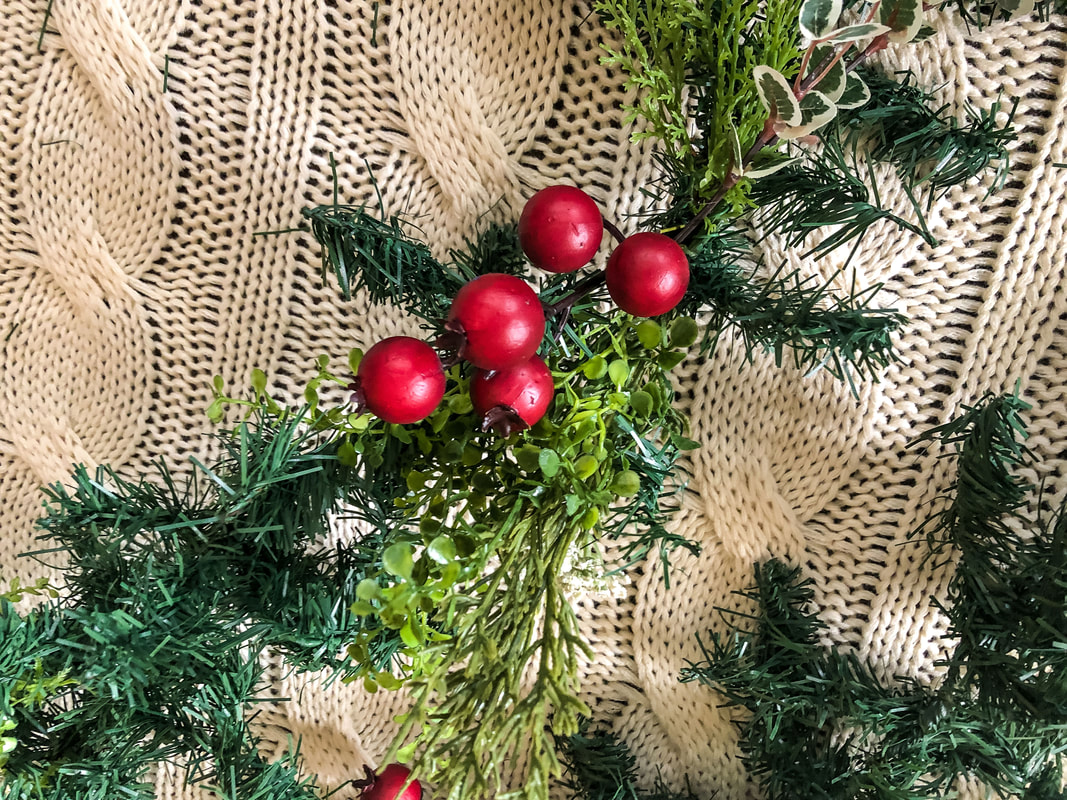 Filling in the berries and faux greenery for the second garland. Photo by Diane M. Lilly, 2022. 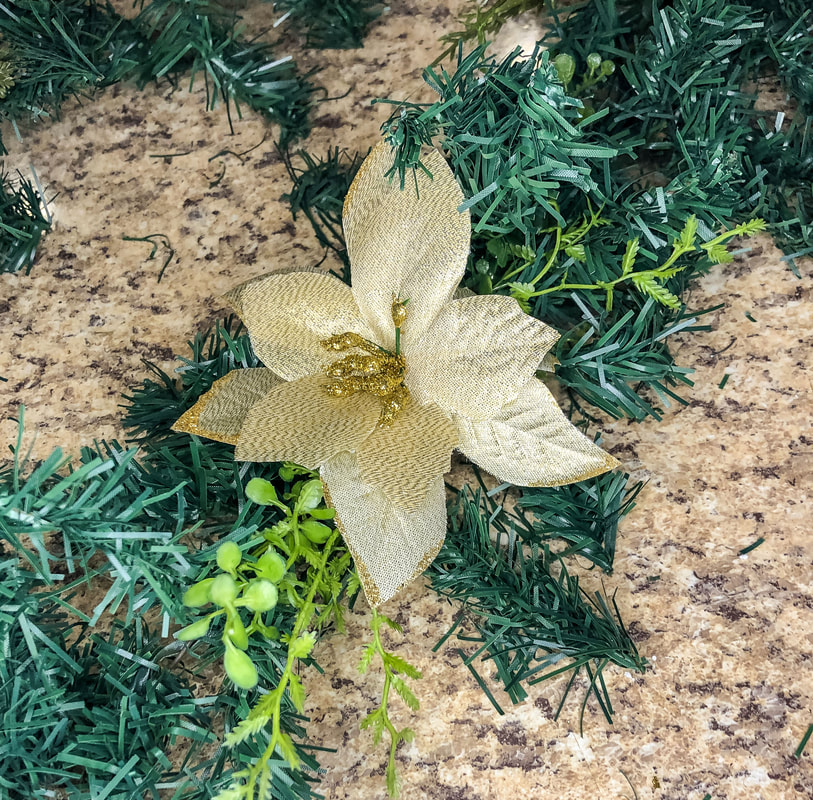 Filling in the gold poinsettias for the second garland. Photo by Diane M. Lilly, 2022.  The second garland is almost ready to be placed over the window. Photo by Diane M. Lilly, 2022. 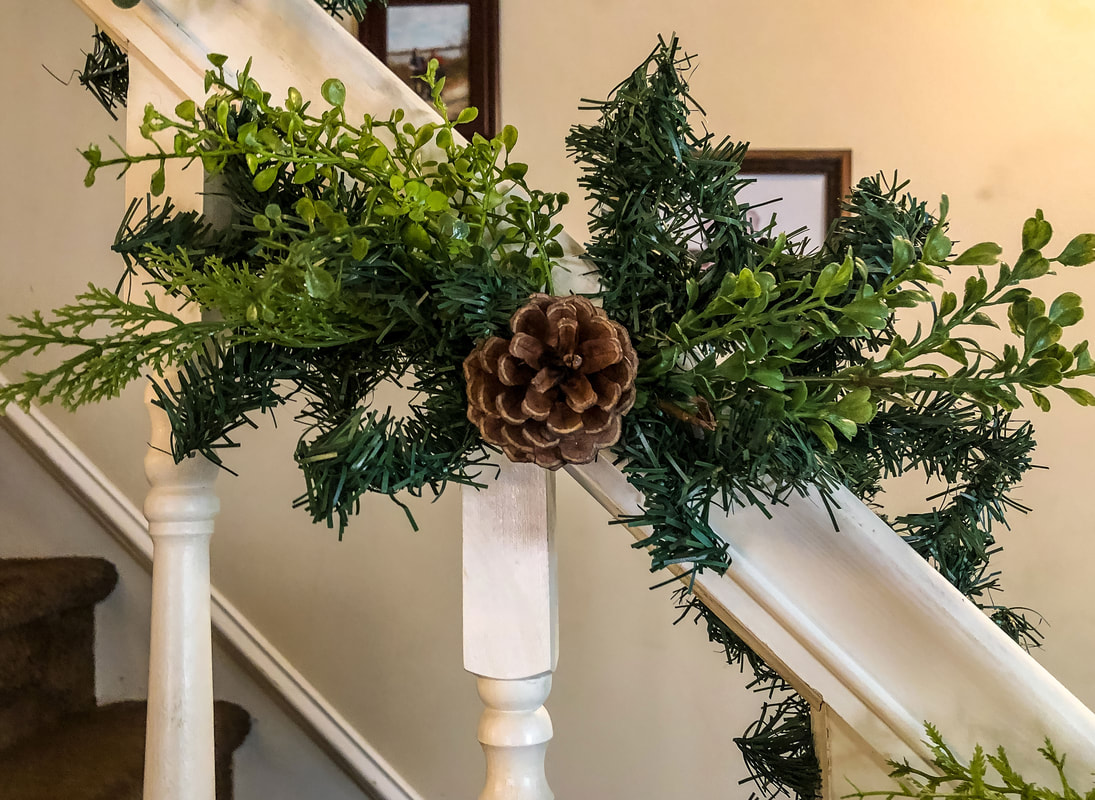 More greens and a pinecone added to the railing garland. Photo by Diane M. Lilly, 2022.  A wider view of the railing with the garland to check the spacing and miniature arrangements with pinecones. Photo by Diane M. Lilly, 2022. 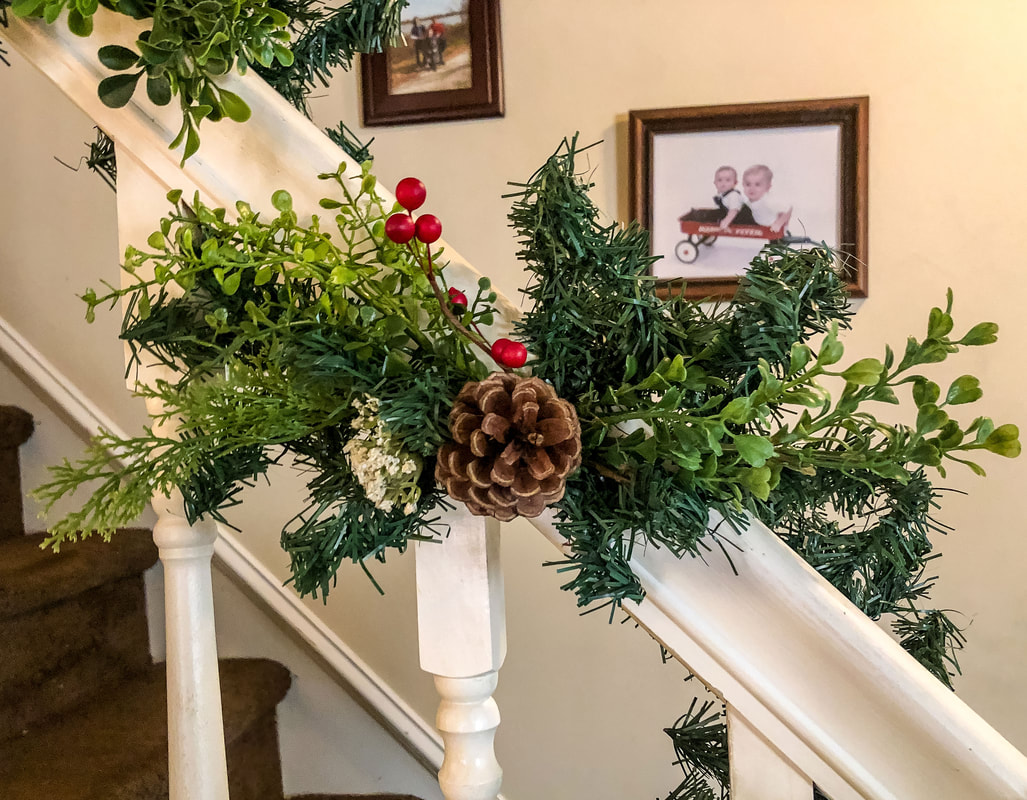 Red berries added to the clusters on the railing garland. Photo by Diane M. Lilly, 2022.  A wider view of the railing with the garalnd with berries added. Photo by Diane M. Lilly, 2022.  Another view of the railing garland with pinecones and berries. Photo by Diane M. Lilly, 2022. If you have enough materials to work with, continue to add in to further “fluff” the garland. The more florals and greenery you add, the more “expensive” the garland will look. As I worked with only what I had this year, I left the garland simple. If you have them, add ornaments to take your design up a notch! Step 5—Add ribbon Another way to make your garland look stylish and festive is to add ribbon. This year, the goal was to work only with what I had on hand, and unfortunately, I didn’t have enough ribbon left for bows! At some point, I will either have to splurge and buy a bit more ribbon or come up with an idea for how to use what I have interestingly. The image below is from last year’s garland…Doesn’t it just look so festive?! Your bows should match the rest of the room decor and be placed in natural corners and focal points along the garland. Space evenly for a cleaner look, and fill in gaps between the bows with smaller bits of ribbon to fill out the look.  Last year's garland with gold ribbon around the newel post. Photo by Diane M. Lilly, 2021. Step 6—Add lights The last step to making your garland look festive is to light it up! I used fairy lights for the railing garland but traditional LED Christmas lights for the garlands above the windows. (I don’t love seeing the cords, so I’ll have to find a way to hide them.) Whichever lights you use, push them into the garland to light up nooks and crannies and create a more polished look.  Closeup of the window garland with lights added. Photo by Diane M. Lilly, 2022.  View of the garland with lights over the window. Photo by Diane M. Lilly, 2022.  View of the window garland with the tree. Photo by Diane M. Lilly, 2022.  View of the railing garland with fairy lights added. Photo by Diane M. Lilly, 2022. When I started this decorating project, I was dubious about whether or not I had enough material to create a festive holiday space. While I wish I had more greenery and faux florals to fill out my garlands, I did pull off an economical yet stylish look. My new plan is to collect more materials for NEXT year so my holiday decor will have fuller greens and florals. So, I hope I inspired you to use what you have on hand to create festive garlands. It IS challenging to create a nice look with a limited budget! But it feels so good when you look around and see the holiday decor that YOU created! It is possible to take that cheap-looking garland and give it a makeover! If you have any thoughts or tips about creating beautiful holiday garlands, please share them below! And Happy Holidays!  Closeup of the final pinecone and faux greenery arrangements on the railing garland. Photo by Diane M. Lilly, 2022. Related blogs you may want to read: How to make a simple faux floral wreath for the winter How to make a super easy faux ivy vine wreath for Christmas How I decorated my Christmas tree on a budget this year DIY chalk painted tray with chippy effect DIY chalk painted tray with Celtic border Tips for creating a floral spring wreath A spring makeover for my small rental bathroom How to care for faux florals Nine hygge decor ideas Eight ways to create cozy winter interiors after the holiday decor comes down This article may contain a few items or commercial mentions, but I only used them for demonstration purposes only. I am not endorsing any particular product or receiving any monetary gain for this blog.  Festive vegetable bake dish. Photo by Diane M. Lilly, 2022. Are you tired of having green bean casserole during the holidays? I have been using a recipe for several years now that is a variation of the green bean casserole using mixed vegetables, and it has been a hit at my holiday dinners! And since we are on the doorstep of the winter holiday season, why not change things up a little bit with a new recipe with that same home-cooked goodness? This is the easiest recipe ever…just FOUR main ingredients! But of course, you can play with the recipe and make it your own! I usually double the ingredients to feed more people, but here is the basic recipe… Ingredients 16 ounces frozen mixed vegetables (I use the cauliflower, carrots, and broccoli mix) 10 3/4 oz condensed cream of broccoli soup 1/3 cup of milk 2.8 oz can of French onions dash of salt (opt) dash of pepper (opt) splash of Worcestershire sauce (opt) Preheat oven to 375˚. Grease a baking pan of your choosing. (I usually use a 9 x 13 glass pan.) Mix the first three ingredients plus about a third of the French onions in a bowl. Pour into your greased pan. (The grocery store was out of cream of broccoli, so I substituted cream of celery.) Spread the remaining French onions evenly over the top. Bake in the oven for 30-35 minutes.  Glass pan sprayed with oil. Photo by Diane M. Lilly, 2022.  California mixed vegetables spread out in the baking pan. Photo by Diane M. Lilly, 2022.  Cream of celery, substituted for the cream of broccoli. Photo by Diane M. Lilly, 2022.  Worcestershire sauce. Photo by Diane M. Lilly, 2022.  Milk for the recipe. Photo by Diane M. Lilly, 2022. 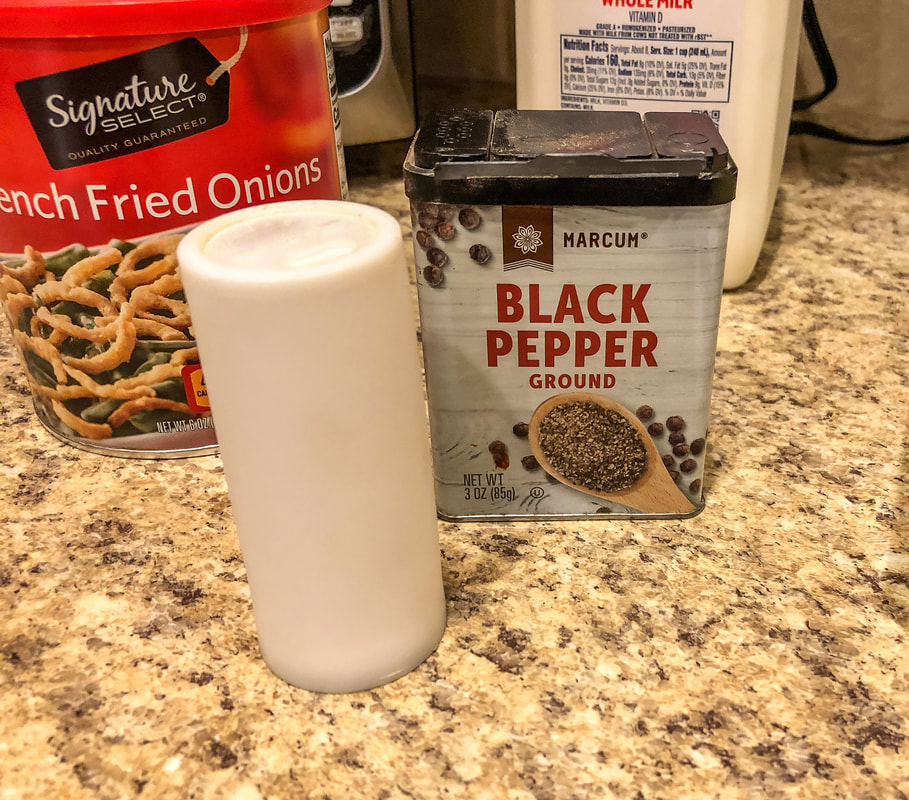 Salt and pepper. Photo by Diane M. Lilly, 2022.  French onions. Photo by Diane M. Lilly, 2022.  All ingredients mixed into the vegetables with French onions on top. Photo by Diane M. Lilly, 2022.  Finished festive vegetable bake. Photo by Diane M. Lilly, 2022. It’s that easy!!! This recipe has been one of my favorites for the holidays every year. It’s quick, easy, and inexpensive…What’s not to like about it?! Give it a try, and let me know what you think in the comments below! And Happy Holidays!  Closeup of the finished festive vegetable bake dish. Photo by Diane M. Lilly, 2022. Related blogs you may want to read: Spicy crock pot chili recipe Homemade chicken noodle soup recipe Potato soup recipe Tuna noodle casserole recipe Chicken vegetable pot pie Salmon chowder recipe How to eat healthy with chicken and roasted vegetables This article may contain a few items or commercial mentions, but I only used them for demonstration purposes only. I am not endorsing any particular product or receiving any monetary gain for this blog.  Chili cooking in a crockpot. Photo by Diane M. Lilly, 2022. Each year when the weather turns cold, the anticipation in my household runs high, everyone eagerly waiting for me to bust out one of our favorite meals—belly-warming chili! Nothing is better than warm, spicy food on a cold, wintry day! And when I say spicy, I mean spicy!!! We’re talking “make your family cry” spicy…and yet they all go back for seconds and thirds! I know, we’re sick people! Today, I’ll share the recipe for my homemade spicy chili. The recipe you will find below is a general one--I make it less or more spicy, depending on my mood. Once in a while, other spicy ingredients make their way into the pot, my sinister way of experimenting on my family to see just how much they can take! As for how much spice to use, that is totally up to the individual taste. To be honest, I don’t measure. Every time I make chili, it tastes a little different. But the main ingredients are all the same. The spice list starts with chili powder, and from there, you can use any quantity and combination of other spices to get the taste you want. This recipe fills two crockpots, so if you want less, just cut all the ingredients in half. So here goes… 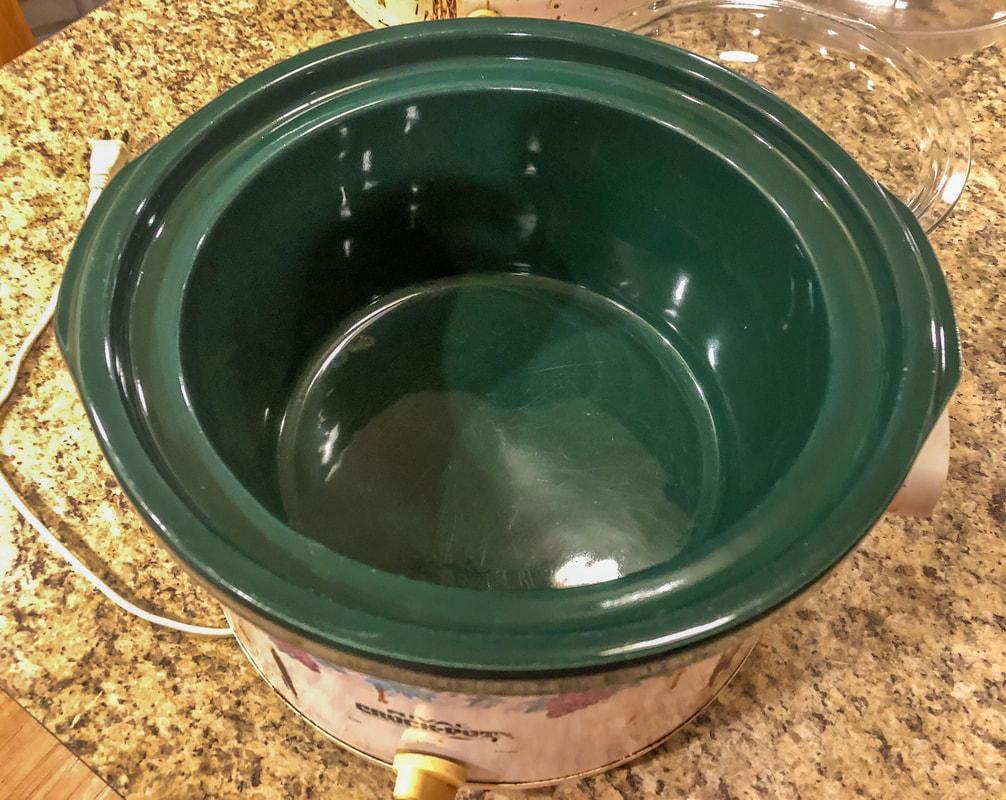 One of two crockpots I will be using. Photo by Diane M. Lilly, 2022. Main ingredients for two crockpots: 5 lb ground meat 4 cans kidney beans (I use a combination of both light and dark) 2 cans stewed or diced tomatoes (with or without seasoning) 2 jars mild/medium salsa splash of soy or Worcestershire sauce (optional) 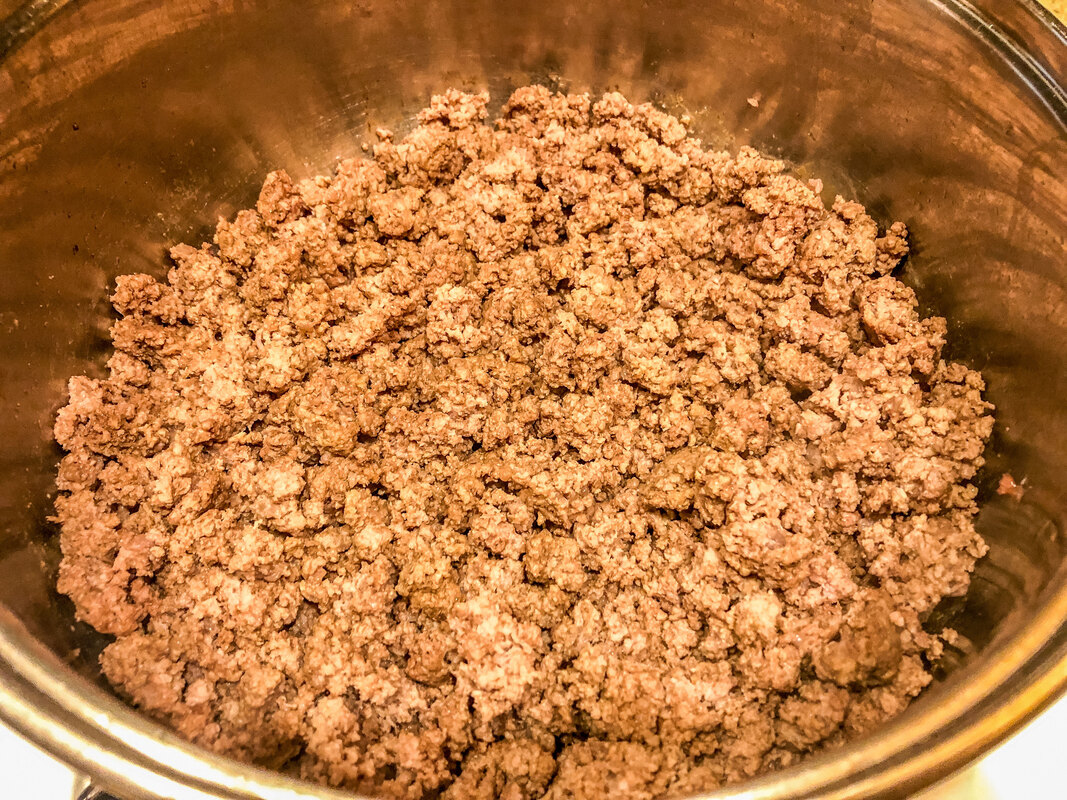 Cooked ground beef. Photo by Diane M. Lilly, 2022. 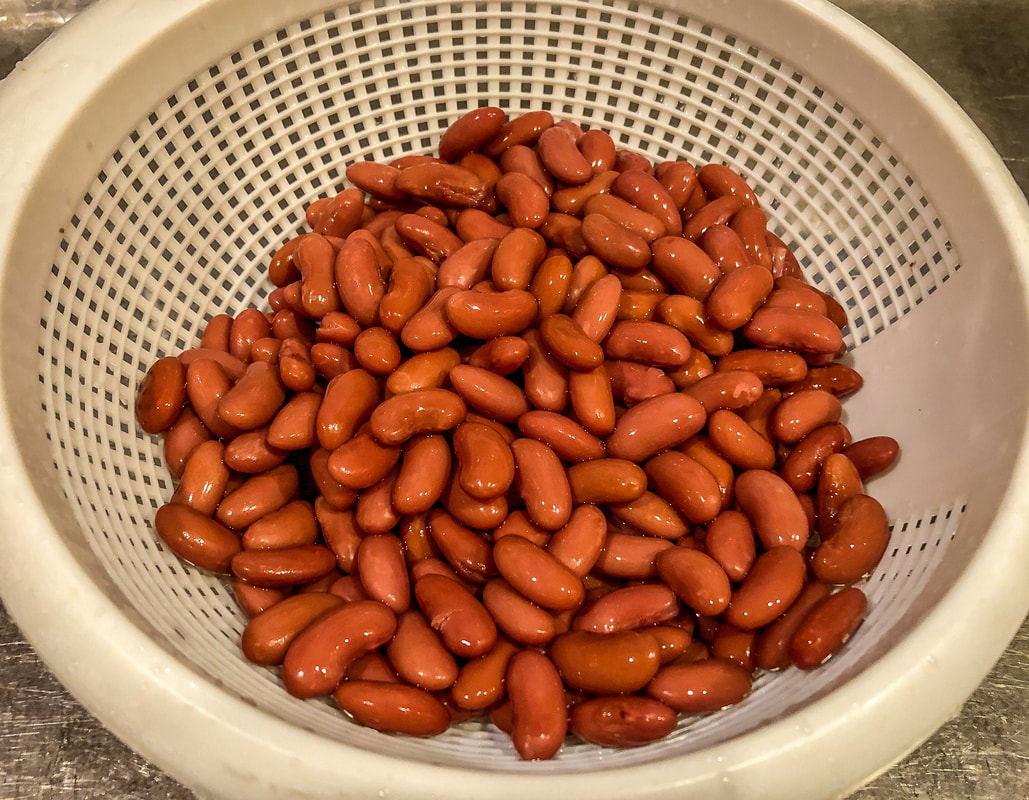 Rinsed kidney beans. Photo by Diane M. Lilly, 2022.  Diced tomatoes. Photo by Diane M. Lilly, 2022.  Medium salsa. Photo by Diane M. Lilly, 2022.  Soy sauce. Photo by Diane M. Lilly, 2022. Seasonings & spices for two crockpots: 2 packs chili seasoning chili powder (approx. 6 TBS) salt (approx. 2 tsp) pepper (approx. 2 tsp) cayenne (approx. 3 tsp) red pepper flakes (approx. 1 tsp) paprika (approx. 3 tsp) garlic powder (approx. 2 tsp) Italian seasonings, optional (approximately 1 tsp)  Chili seasoning packet. Photo by Diane M. Lilly, 2022.  Spices for the chili. Photo by Diane M. Lilly, 2022. 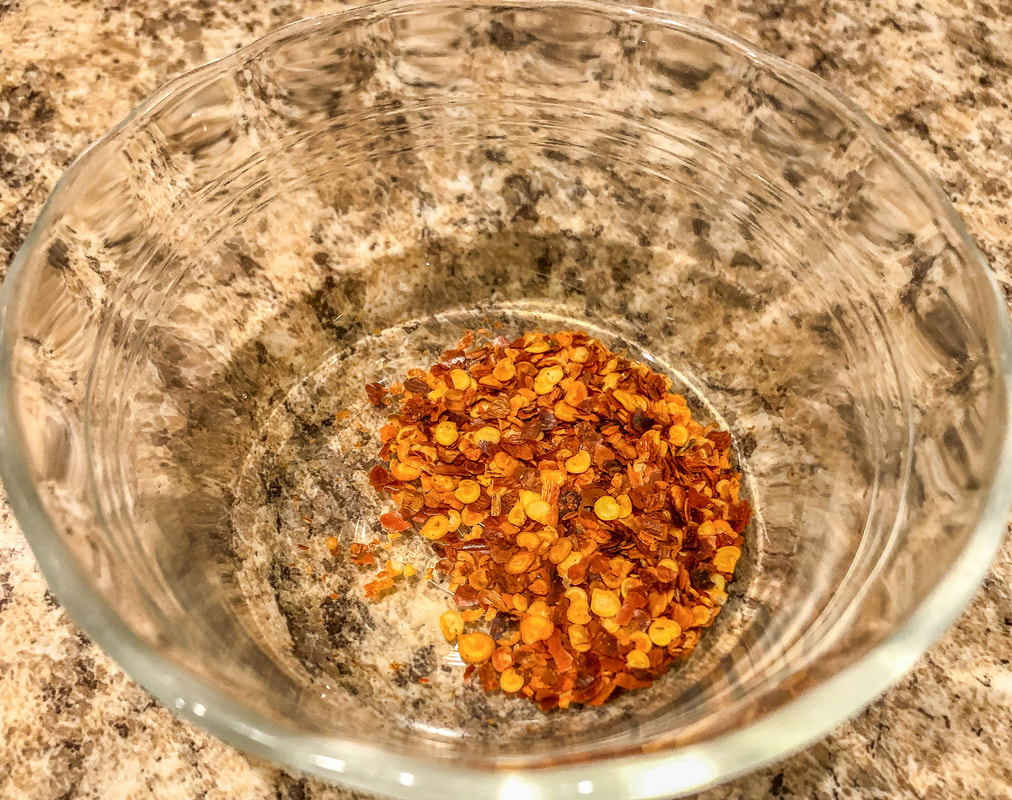 Red pepper flakes. Photo by Diane M. Lilly, 2022. 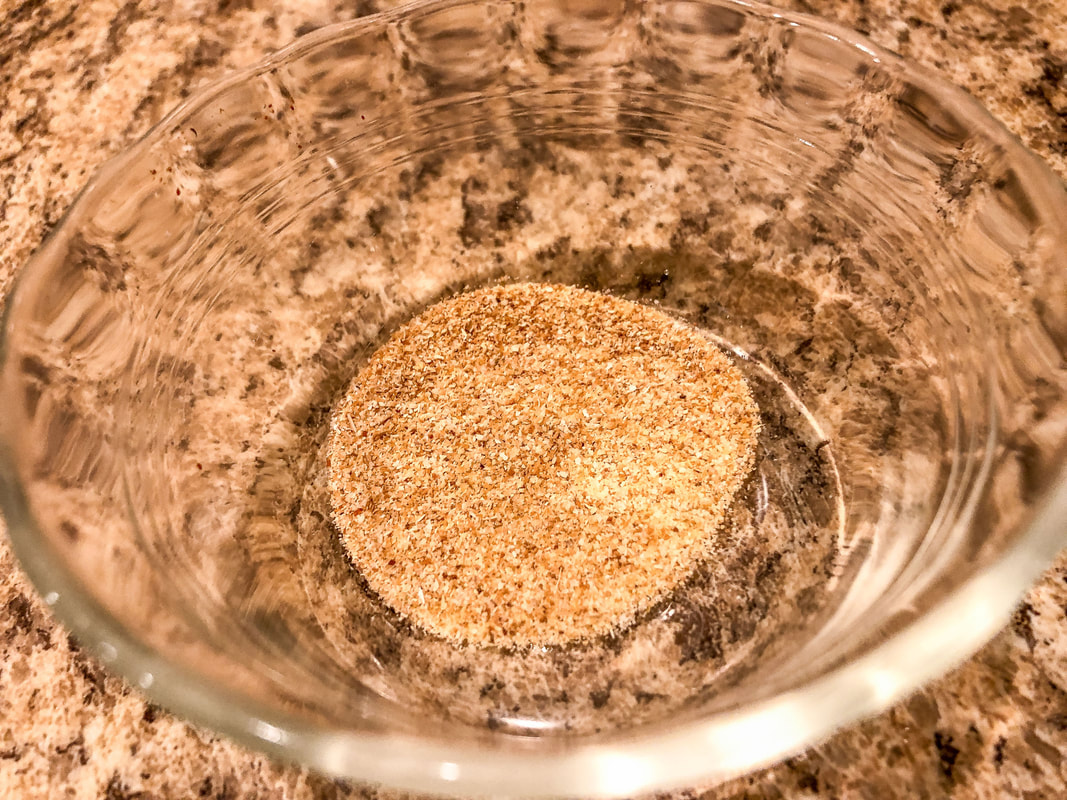 Garlic powder. Photo by Diane M. Lilly, 2022. 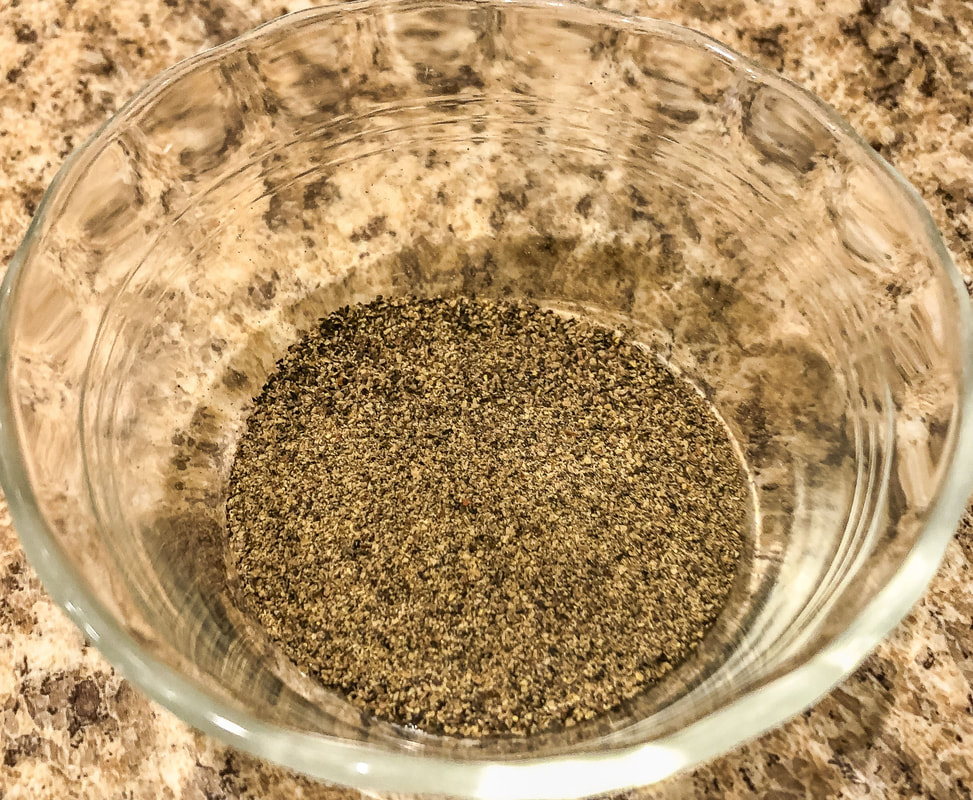 Black pepper. Photo by Diane M. Lilly, 2022. 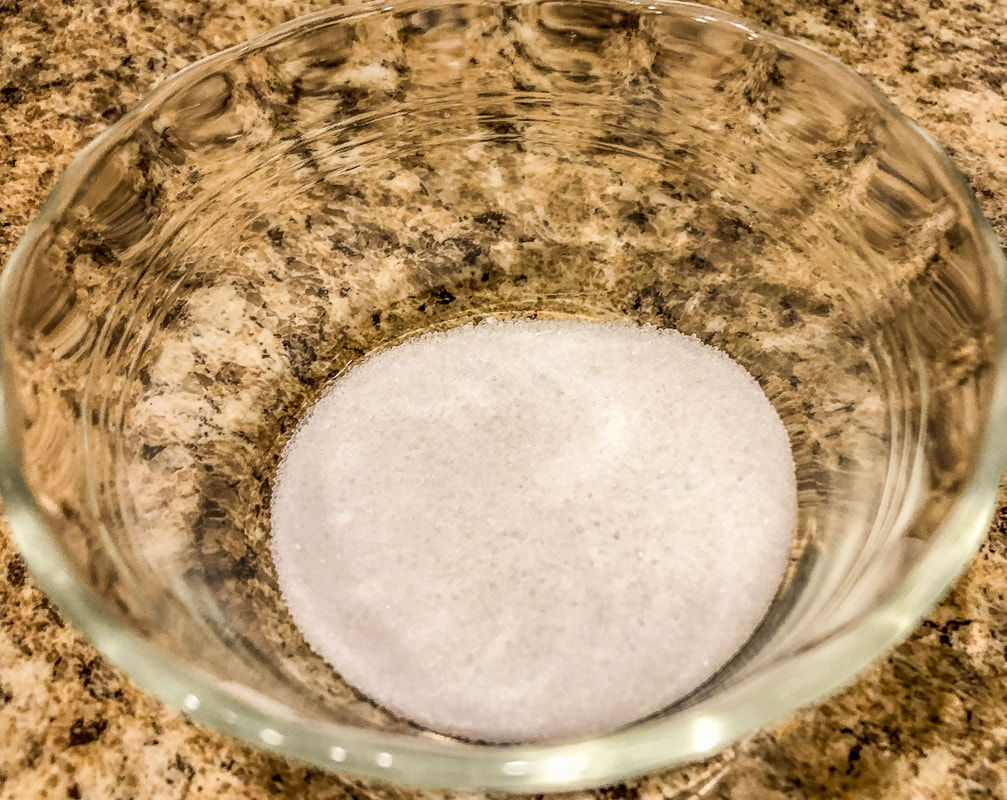 Salt. Photo by Diane M. Lilly, 2022. Brown the beef in a large pot and then rinse the grease. Drain well. Divide the cooked ground beef in half and pour into two crockpots. Next, rinse the kidney beans until the water runs clean, and divide between the two crockpots (2 cans per crock pot). Pour one can of stewed or diced tomatoes into each crockpot. Add one jar of mild or medium salsa to each crockpot. Add a splash of soy or Worcestershire sauce to each pot. (This is optional, but I find it adds a bit of flavor, as long as you don’t use too much.) Pour one pack of chili seasoning into each pot. Add in the rest of the seasonings to taste. Mix them in a bowl and then pour them into the crockpots or eyeball them while adding each spice directly into the pot. I usually eyeball it…keeps things simple! Finally, mix everything and turn the crockpot on low to cook for 5-7 hours (or on high for 4-5 hours).  Cooked chili in the crockpot. Photo by Diane M. Lilly, 2022. This chili recipe tastes delicious with shredded cheese and buttered bread, but I have also served it over wide egg noodles or rotini. So that’s my recipe for spicy chili! Let me know in the comments below what you think. Do you have your favorite recipe you’d like to share? And—just curious—do you prefer your chili spicy or not? Drop a comment below!  Homemade spicy chili served with shredded cheese. Photo by Diane M. Lilly, 2022. Related blogs you may want to read: Homemade chicken noodle soup recipe Potato soup recipe Tuna noodle casserole recipe Chicken vegetable pot pie Salmon chowder recipe How to eat healthy with chicken and roasted vegetables This article may contain a few items or commercial mentions, but I only used them for demonstration purposes only. I am not endorsing any particular product or receiving any monetary gain for this blog.  Homemade rosemary muffins with eggs and sausage. Photo by Diane M. Lilly, 2022. For some crazy reason, the fall weather has awakened a craving for breakfast muffins! After weeks of brainstorming, this recipe on Epicurious for rosemary muffins came to my attention, and the proverbial lightbulb went off. I have this wily-looking rosemary plant that needs to be pruned and harvested…But what to do with all of that herbal goodness?!  Freshly cut sprigs of rosemary. Photo by Diane M. Lilly, 2022. This was the perfect opportunity to kill two birds with one stone—harvest my rosemary plant AND make delicious muffins! The recipe listed below differs a little from the original. This recipe has been doubled to make 12 muffins instead of the original six. I also used all-purpose flour because that is what I had on hand. The skim milk was replaced with Lactaid. The final change was the addition of lemon peel grinds. So let’s get on with the recipe, shall we?! Ingredients: 2 cups flour 2 tsp baking powder 1/4 tsp salt 2 TBS sugar 2 tsp chopped rosemary 1/2 tsp lemon peel grinds 1 cup Lactaid milk 2 TBS olive oil 2 eggs spray oil  All purpose flour. Photo by Diane M. Lilly, 2022.  Baking powder. Photo by Diane M. Lilly, 2022.  Salt. Photo by Diane M. Lilly, 2022. 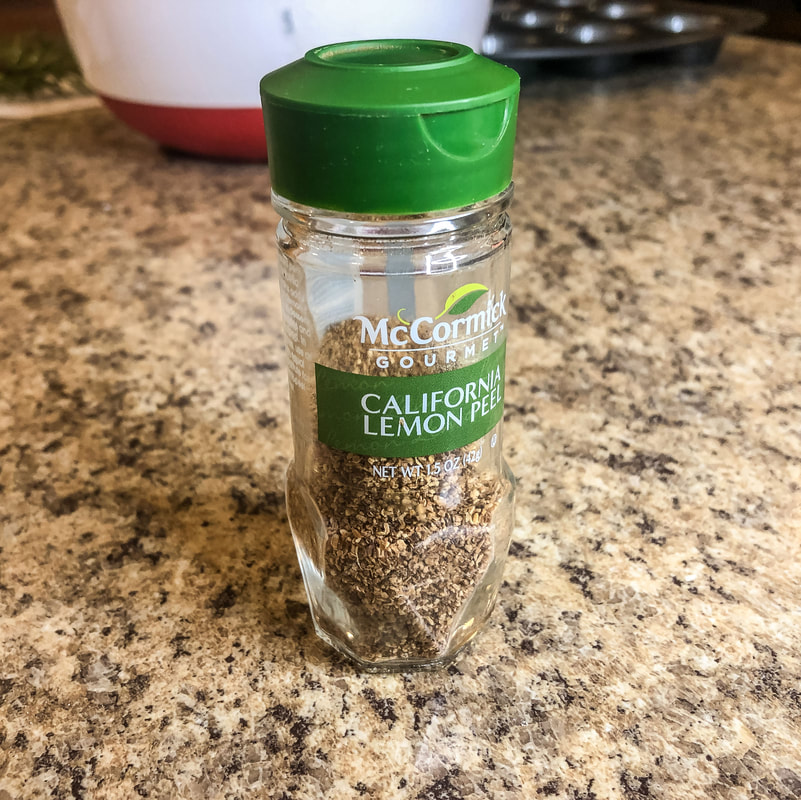 Lemon peel. Photo by Diane M. Lilly, 2022. 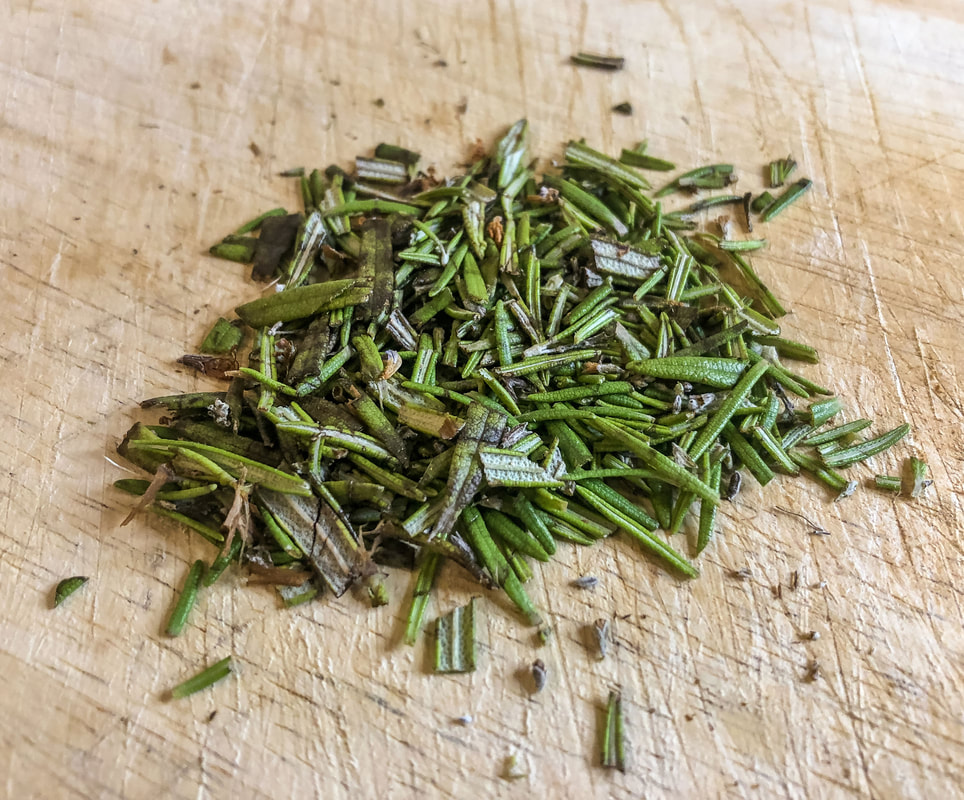 Chopped rosemary. Photo by Diane M. Lilly, 2022. 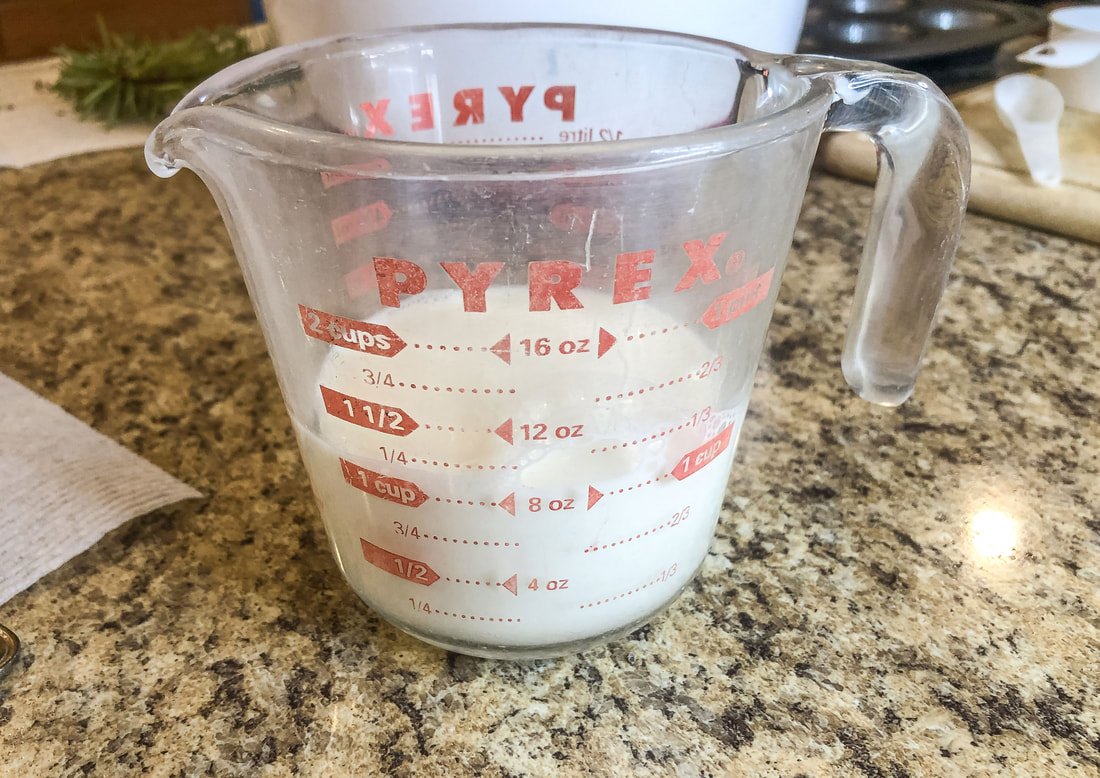 Cup of milk. Photo by Diane M. Lilly, 2022. 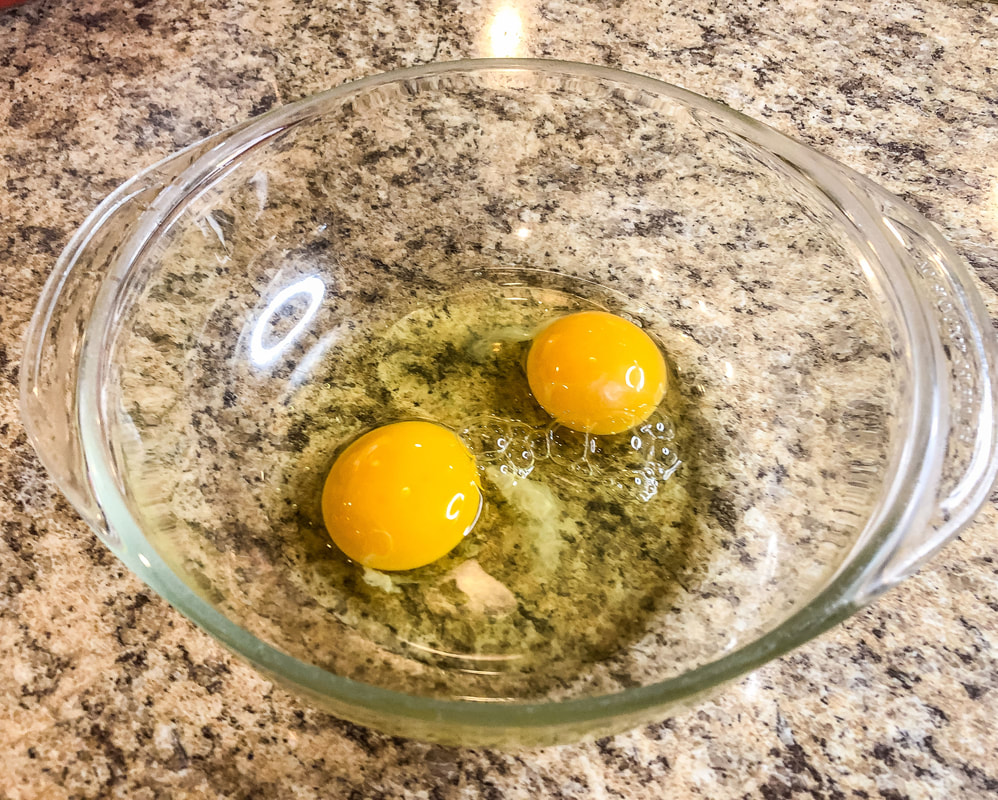 Two fresh eggs. Photo by Diane M. Lilly, 2022.  Olive oil. Photo by Diane M. Lilly, 2022. Combine all of the dry ingredients in a large mixing bowl. Combine the lightly beaten eggs, 1 cup of milk, and the oil in another bowl and mix well. 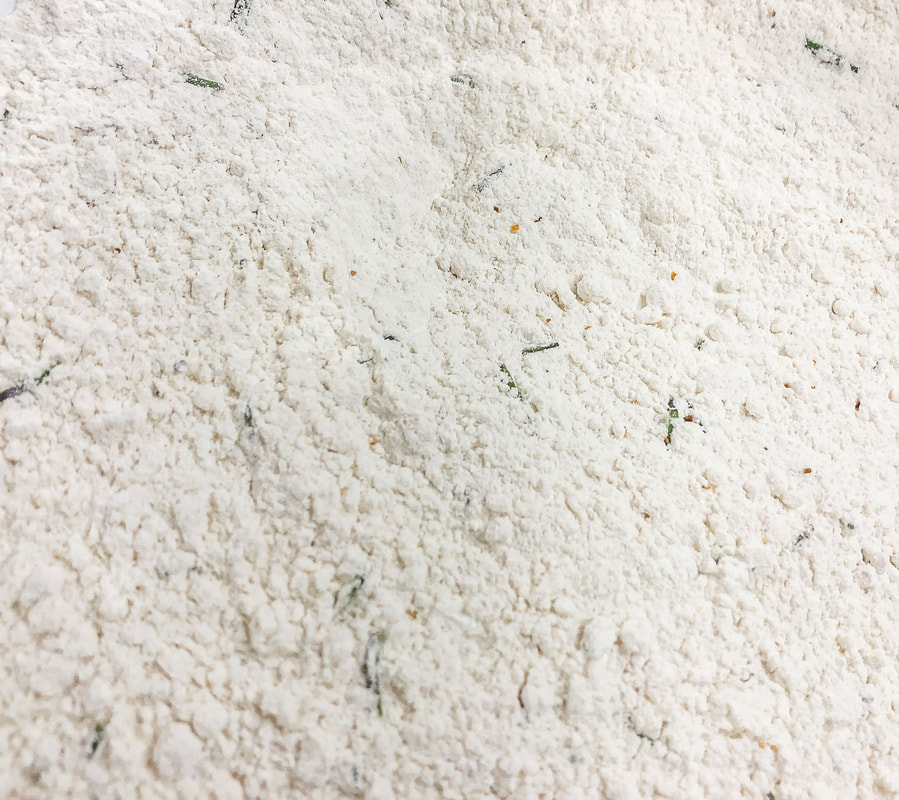 Flour and other dry ingredients for muffin mix. Photo by Diane M. Lilly, 2022. 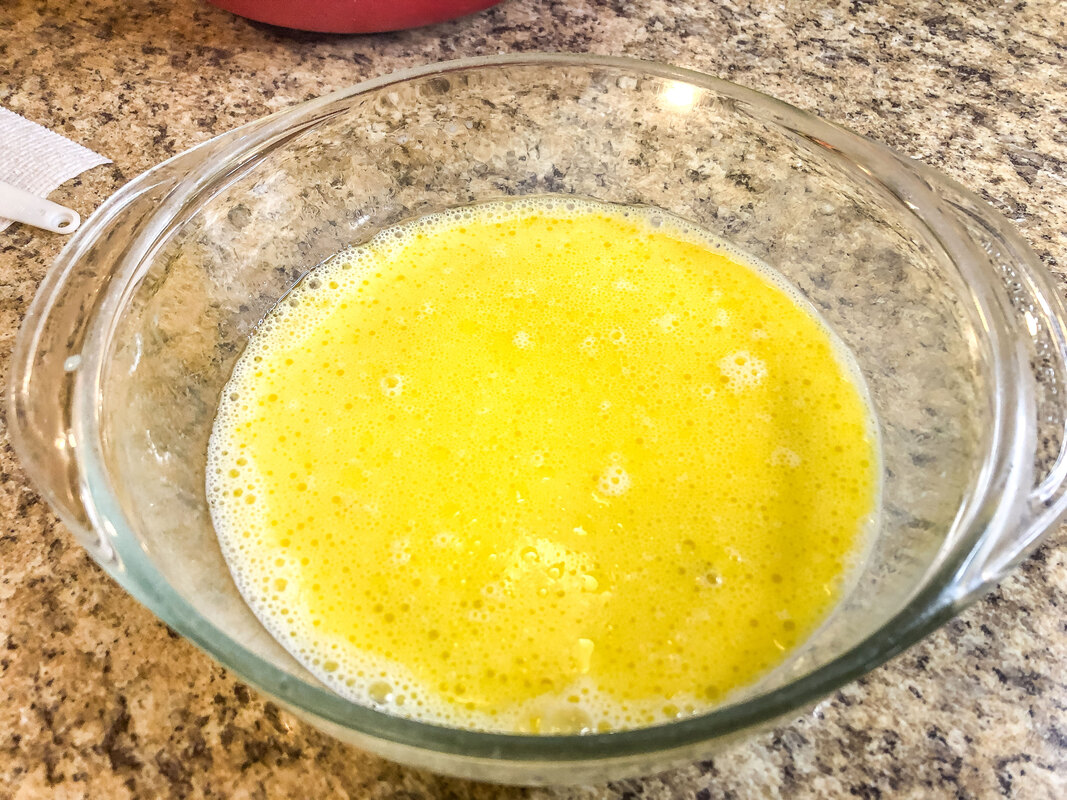 Eggs, milk, and oil mixture. Photo by Diane M. Lilly, 2022. Create a well in the center of the bowl with the dry ingredients and pour it into the wet mixture. Mix all ingredients until well blended. Do not over-mix, or your muffins will come out dry and tough. Spoon rosemary batter into greased muffin tins, filling each 3/4 full.  Cooking spray. Photo by Diane M. Lilly, 2022.  Greased muffin tray. Photo by Diane M. Lilly, 2022.  Muffin mix poured into tray. Photo by Diane M. Lilly, 2022. Bake at 400˚ for 18-20 minutes. This recipe makes approximately 12 muffins (I was actually half a muffin short, but I’ll do better next time!)  Freshly baked rosemary muffins. Photo by Diane M. Lilly, 2022.  Closeup of freshly baked muffins. Photo by Diane M. Lilly, 2022.  Yummy looking rosemary muffin. Photo by Diane M. Lilly, 2022.  Freshly baked muffin ready to serve. Photo by Diane M. Lilly, 2022. My take on this recipe… The rosemary taste was strong so I will use less next time. Also, I feel like this recipe needs a bit of citrus to take it to the next level—maybe lemon extract or lemon juice mixed into the batter. Even though I used lemon peel grinds, I didn’t feel like it created the desired flavor. Also, these muffins would probably taste amazing with some sweet lemon glazing. A little butter spread over these rosemary muffins takes things to the next level! After all, is said and done, though, these would make a tasty—and healthy—addition to your morning breakfast or even lunch, and I’ll definitely be trying out various renditions of this recipe until I get just the right flavor. Let me know in the comments whether you’ve tried this recipe—or one similar—and how it worked out for you. Feel free to share any tips for a making better rosemary muffin recipe!  A look at the inside of the rosemary muffins. Photo by Diane M. Lilly, 2022. Related blogs you may want to read: Apple crumble recipe Homemade chicken noodle soup recipe Banana and raisin bread recipe Potato soup recipe Tuna noodle casserole recipe Chicken vegetable pot pie Salmon chowder recipe How to eat healthy with chicken and roasted vegetables This article may contain a few items or commercial mentions, but I only used them for demonstration purposes only. I am not endorsing any particular product or receiving any monetary gain for this blog. 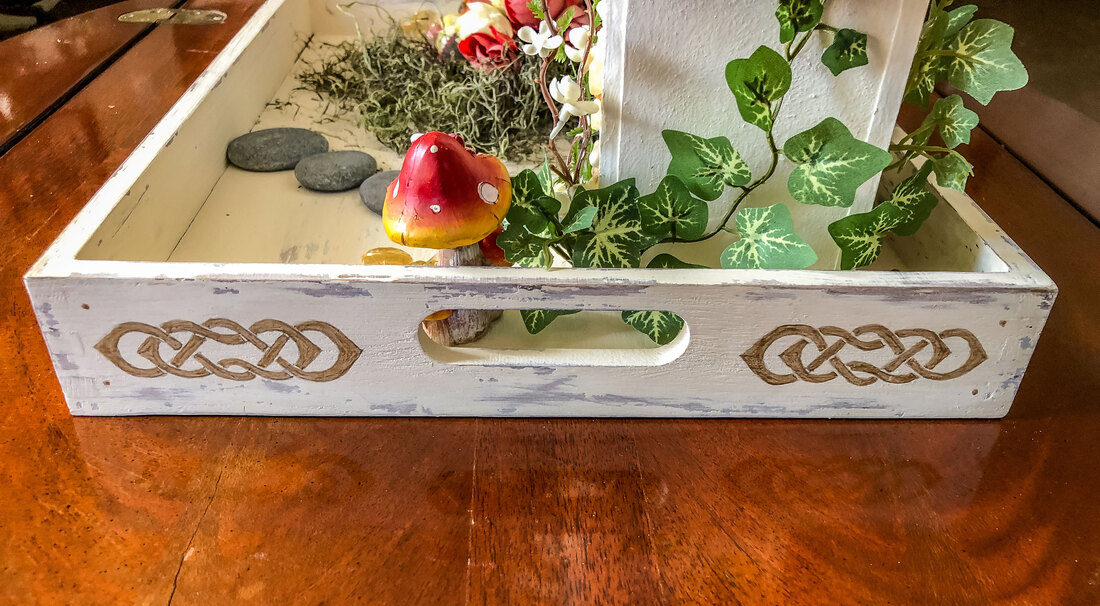 Celtic knot painted on a decorative tray. Photo by Diane M. Lilly, 2022. Welcome to part two of my DIY chalk-painted tray project! In part one, I chalk-painted a decorative tray using a “chippy” weathered effect. Now, let's go through the steps I took to design and paint a border around the vertical exterior sides of the tray. This will not be a tutorial on creating Celtic knots—that would turn this blog post into a book (which is in the works, by the way)! The goal is to help you create a simple design that can be traced onto the newly painted decorative tray for a bit more pizzazz.  DIY chalk painted decorative tray before knotwork details were added. Photo by Diane M. Lilly, 2022. I love Celtic art and knotwork! I am always looking for ways to sneak some Celtic knots into my decor, so when I started painting a decorative wood tray for my living room, it was inevitable that it would end up adorned with a Celtic knot border! So here we are at part 2 of this project, where I walk you through how I drew and painted a beautiful knot border onto the sides of my newly painted tray. So let’s dive right in and go through this process step by step… Materials needed: pencil eraser ruler grid paper tracing paper tape scissors craft paint sandpaper (optional) varnish (optional) Step 1—Get measurements The first thing you need to do in a project like this is to get some basic measurements. My tray is 16” x 12” with 2” H sides. The long side of my tray is 16” L x 2” H. The short sides of the tray have holes for handles that split the empty areas into two parts that are 4 1/2” L x 2” H each. Step 2—Plot out measurements on grid paper If you’re creating a freehand design, you won’t need grid paper, but you’ll still need to measure the drawing area on your paper so your template will fit the area to be painted. Using grid paper may help keep your design symmetrical and more accurately aligned. For this project, I plotted out one section measuring 16”x 2” and another measuring 4 1/2” x 2” on my grid paper. Marking the edges, I then plotted out the ‘working” area, meaning I made decisions on how much space to leave between the design and the edges of the tray. I took this opportunity to mark the midpoints for each section on the paper and the tray. This helps tremendously later on when we have to align the template onto the tray to get the design perfectly level…so don’t skip this step! 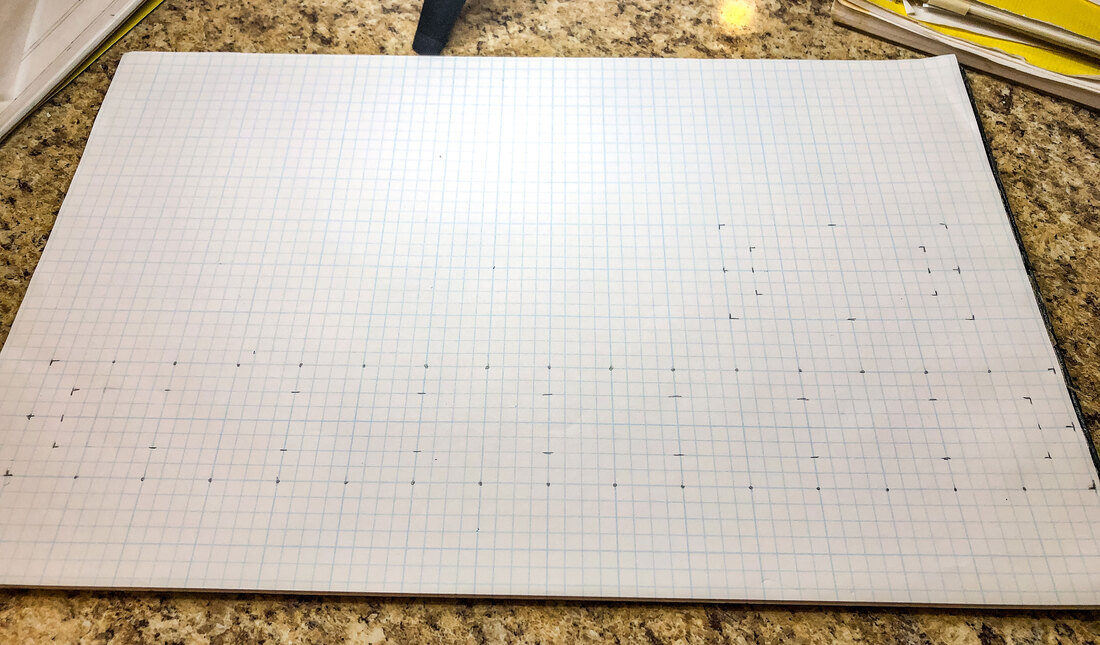 Grid paper maps out the exact measurements for the tray sides and work areas for the knotwork border. Photo by Diane M. Lilly, 2022. Step 3—Create a simple line design I am in the process of putting together future tutorials on how to create Celtic knots, but for the sake of this project, I will share one of the simplest ways to draw a Celtic knotwork border—starting with drawing a single line. I found a Celtic-style border knot in a linked pattern and then reverse-engineered it to make it work for the dimensions of my tray. To speed up and simplify the process, I decided to work it out with a single line first. (My rough grid includes the “breaks”—I’ll go into more detail on how to do that in a future tutorial.)  The grid pattern with breaks planned out before the knot is drawn. Photo by Diane M. Lilly, 2022.  A section of the small knot mapped out on the grid with breaks. Photo by Diane M. Lilly, 2022. 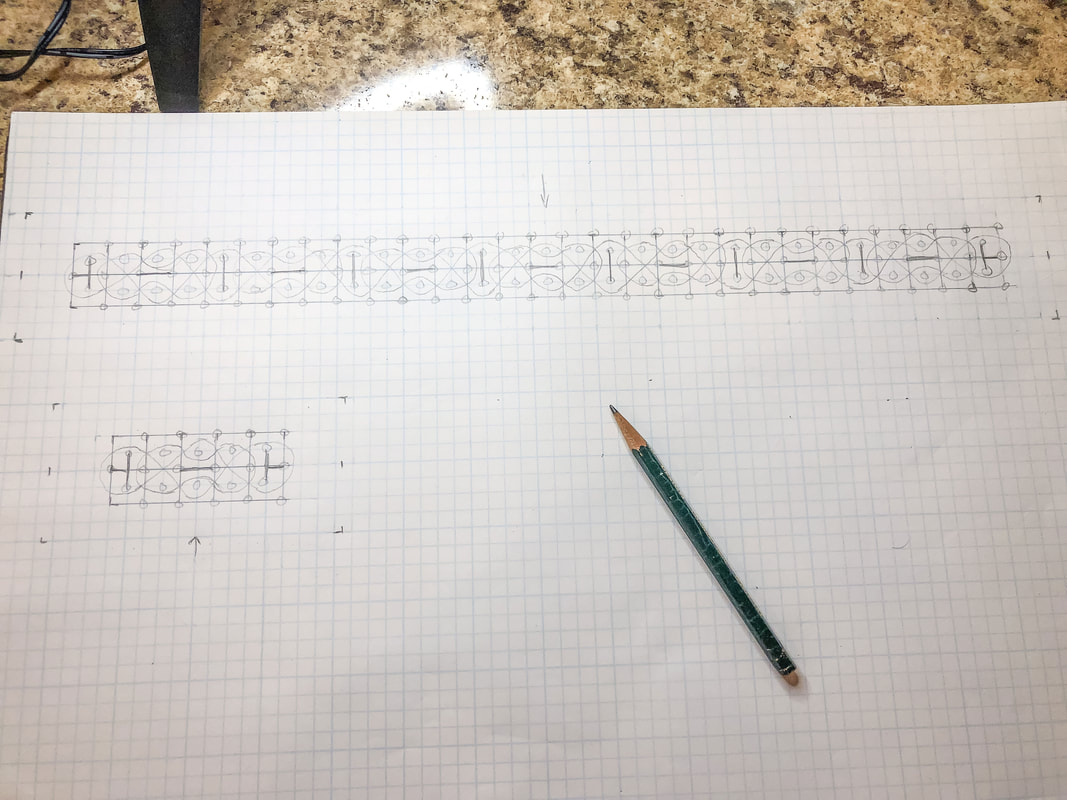 My basic line for my design drawn out on the plotted grid pattern. Photo by Diane M. Lilly, 2022. Step 4—Create the “thread” with “overs” and “unders” Now, it’s time to use the simple line as a guide to create the actual thread. Draw parallel lines on either side of your single line, working your way through your design. Don’t worry about drawing over other lines. All unnecessary lines will get erased when you start marking out the “overs” and “unders” (the weave pattern for your design). Once the “thread” has been established, erase that first single line. It’s done its job, and you don’t need it anymore!  The double lines have been drawn and the single line erased to create the thread, overs, and unders. Photo by Diane M. Lilly, 2022. Now it is time to work through the “overs” and “unders”… Pick a starting junction and decide which thread will go under and which will go over, creating what some call a “bridge and tunnel” or the beginnings of a weave. Erase the lines accordingly and work through the design by following that thread, alternating over and under. DO NOT JUMP AROUND! Stay with that thread until you come back to your starting point. Work through any additional threads, double-checking that your overs and unders alternate. Once satisfied with your overs and unders, clean up the drawing and add stylistic details.  My basic thread knot has been stylized by adding points at the end. Photo by Diane M. Lilly, 2022.  The small knot and a section of the large knot. Photo by Diane M. Lilly, 2022. Step 5—Create the template using tracing paper The new design can now be traced onto tracing paper to create the template. There are many techniques for creating templates--I am just sharing one that has worked well for me. Place a sheet of tracing paper over your drawing and securely tape it in place so it doesn’t move or bubble. Carefully trace your design lines with a pencil using fairly hard pressure. Mark the edges of your template (using a straight edge) and indicate the midlines on all four sides.  My knotwork redrawn on tracing paper for a template. Photo by Diane M. Lilly, 2022. Carefully cut out the templates along the edges. You should now have two templates with your new knotwork borders that perfectly fit your working space on your project. For my project, one template measured 16” x 2” and the other 4 1/2” x 2”.  The small knot cut out as a template. Photo by Diane M. Lilly, 2022. Step 6—Trace the design onto the tray Turn the template pencil side down and securely tape it into a place where you want your design, carefully lining up the edges and midpoints for each of the four sides. Trace the lines with a pencil. Use enough pressure to transfer the pencil marks onto your workspace. If you’re unsure if you’re using enough pressure, remove a bit of tape (carefully) and check to see if you can see the design on the tray. Repeat this step on all four sides of the tray.  The small knot template taped onto the tray. Photo by Diane M. Lilly, 2022. 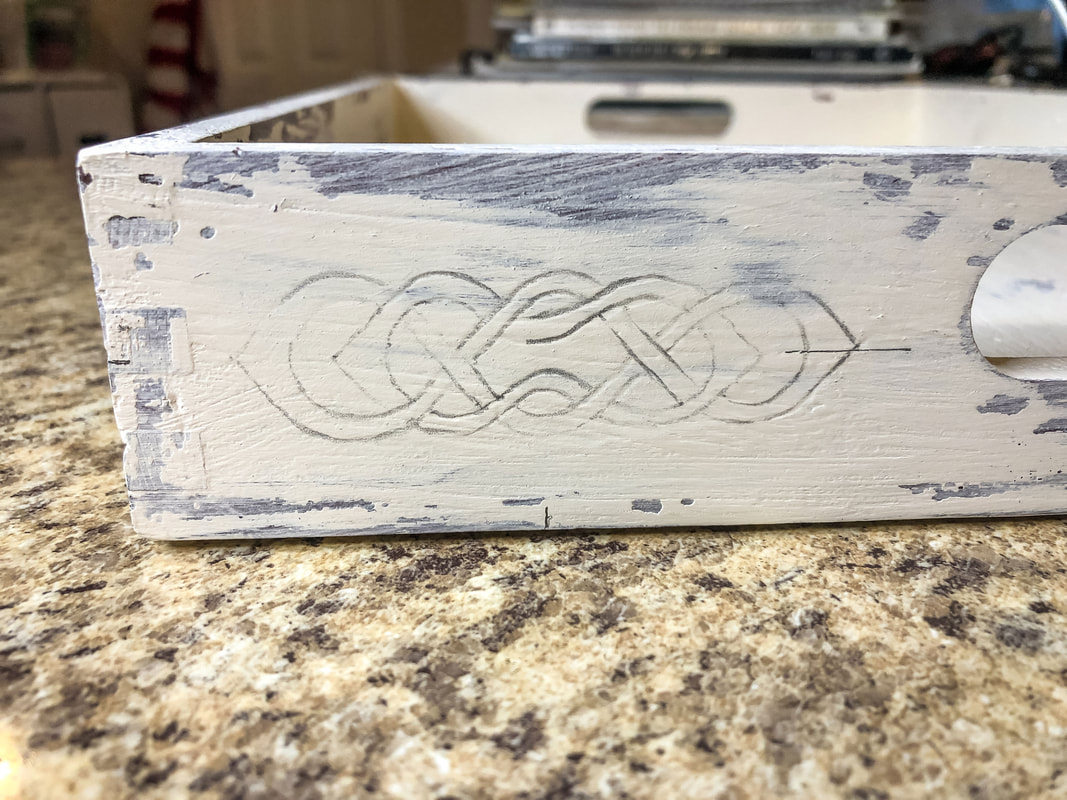 The small knot traced onto the tray. Photo by Diane M. Lilly, 2022. 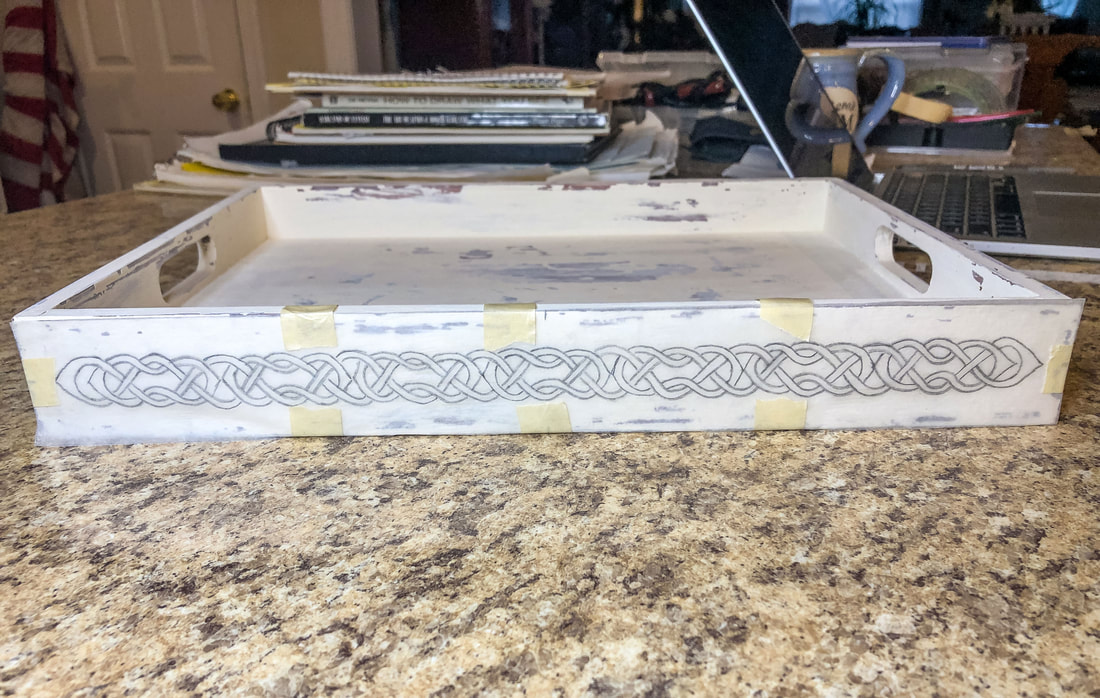 The large knotwork border template taped into place. Photo by Diane M. Lilly, 2022.  The large knotwork border traced onto the tray. Photo by Diane M. Lilly, 2022. Step 7—Paint the design Choose a paint color and a small paintbrush with pointy bristles, and start painting your design! This may require two to three coats, depending on the desired look. 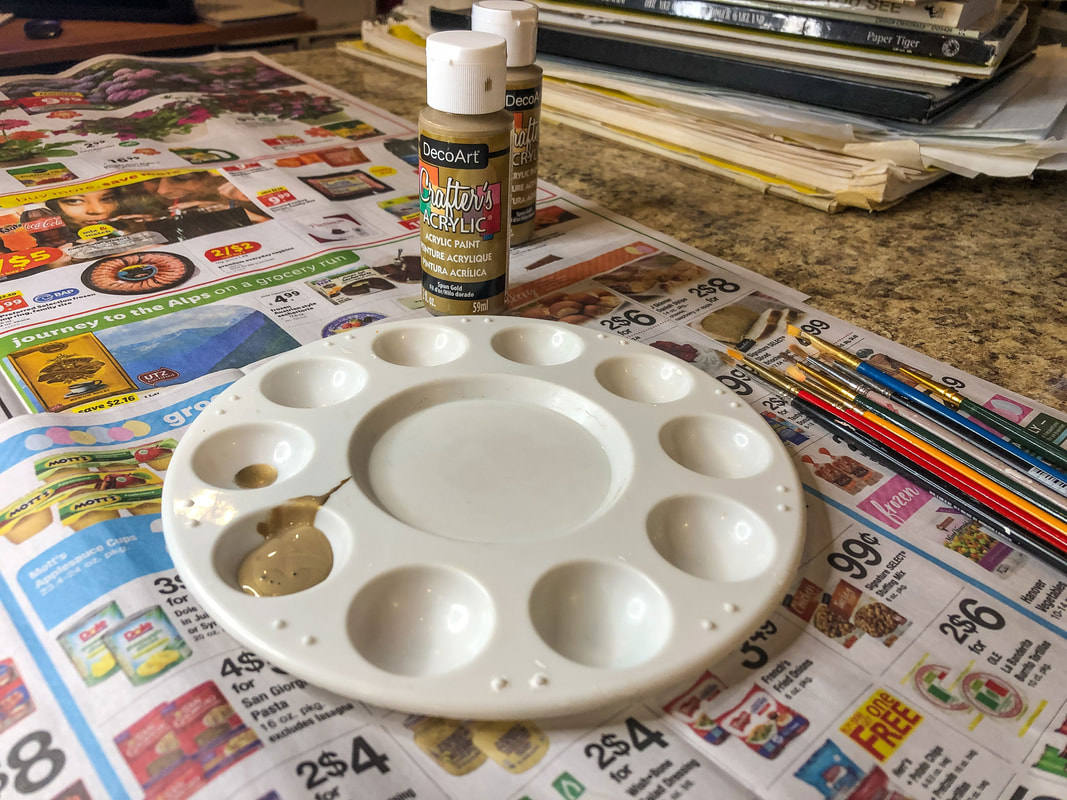 Gold craft paint. Photo by Diane M. Lilly, 2022. If you do not have a steady hand--or do not have the patience for hand painting--try using paint pens instead. For this project, I suffered through it and used the paint and brush technique, but I also purchased some gold paint pens from Amazon for another project and found the process much easier. The technique you use for this project is completely up to you. In part one of this project, the tray was painted to look used and battered, and I was satisfied with the results. Once the knotwork was finished, however, I decided the tray still needed more work. So, I took some 220 grit sandpaper and did a bit more sanding to get the final weathered effect. 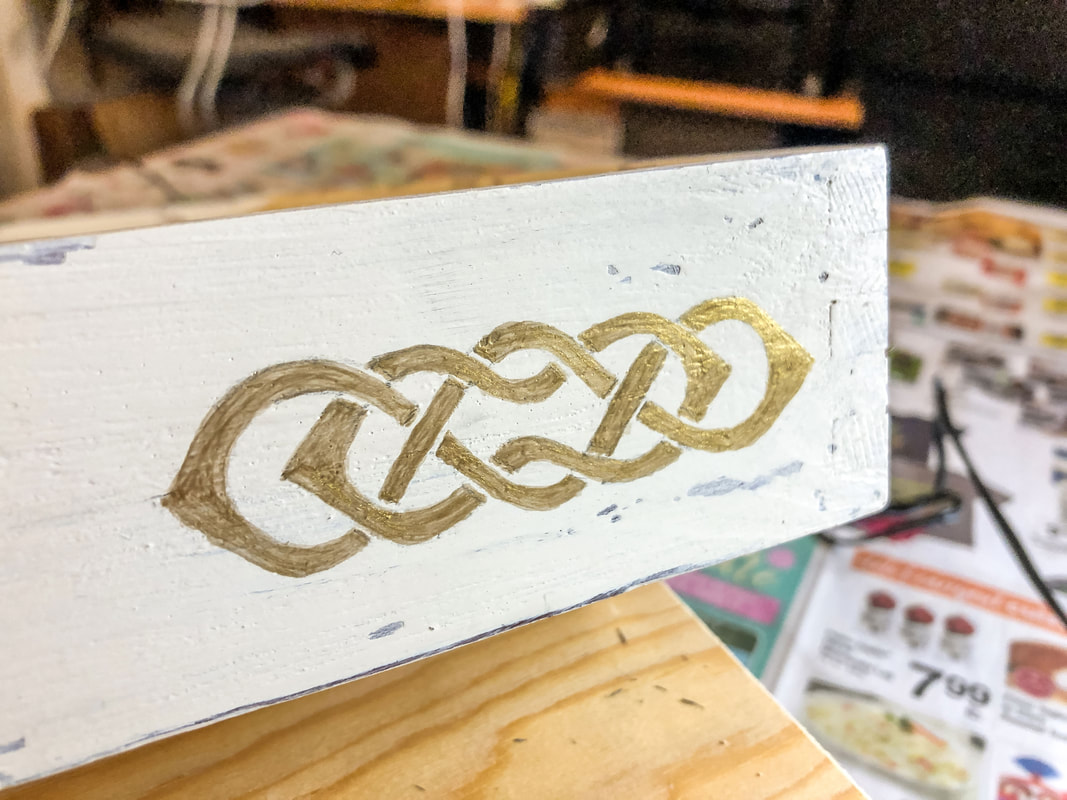 The small knot painted on tray in gold. Photo by Diane M. Lilly, 2022. 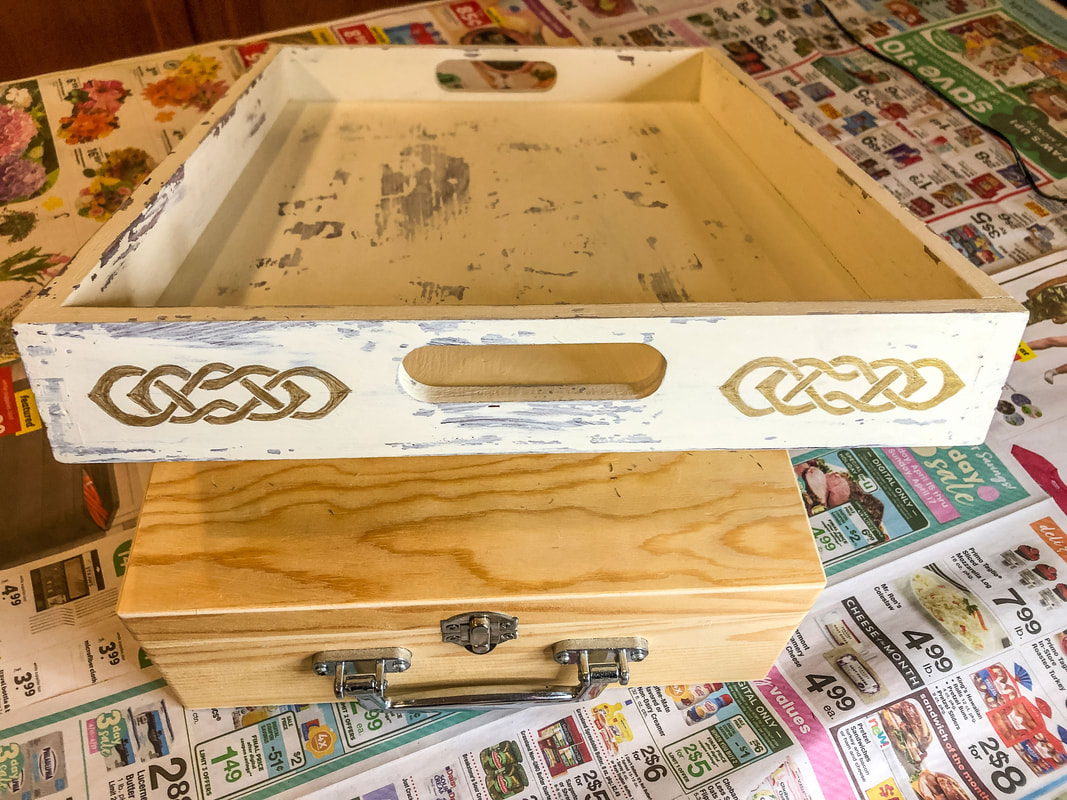 Knots painted on short end of tray. Photo by Diane M. Lilly, 2022.  The long end of the tray being painted with a gold knotwork pattern. Photo by Diane M. Lilly, 2022.  Celtic borders finished and more sanding done to tray. Photo by Diane M. Lilly, 2022. 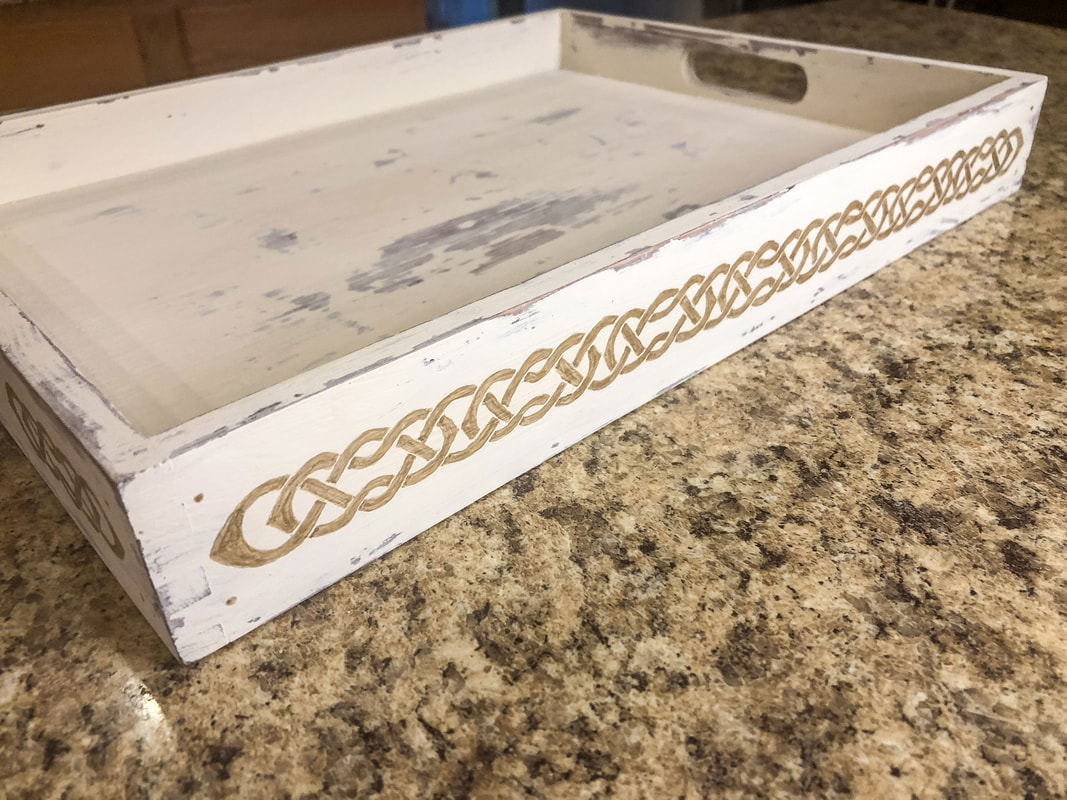 The long side of the tray with its new Celtic knotwork border. Photo by Diane M. Lilly, 2022. Step 8—Varnish to protect the paint (optional) This step is optional, but it can be a good way of protecting all your hard work! I’ve decided not to varnish my tray, at least for now. Usually, when I do a project like this, I add soft pads to the bottom to protect surfaces, but I may decide to make alterations or additions to this tray, so for now, I will forego the pads and varnish until later. So there you have it! The Celtic border knot was WAY more work than planned for this project, but I’m glad I did it. I love that I now have another decorative piece with beautiful Celtic art on it--Celtic art I drew and painted myself! This tray was a lot of work, but I love the rustic, charming look.  My tray is finished and staged with one of my new Celtic fairy houses. Photo by Diane M. Lilly, 2022. 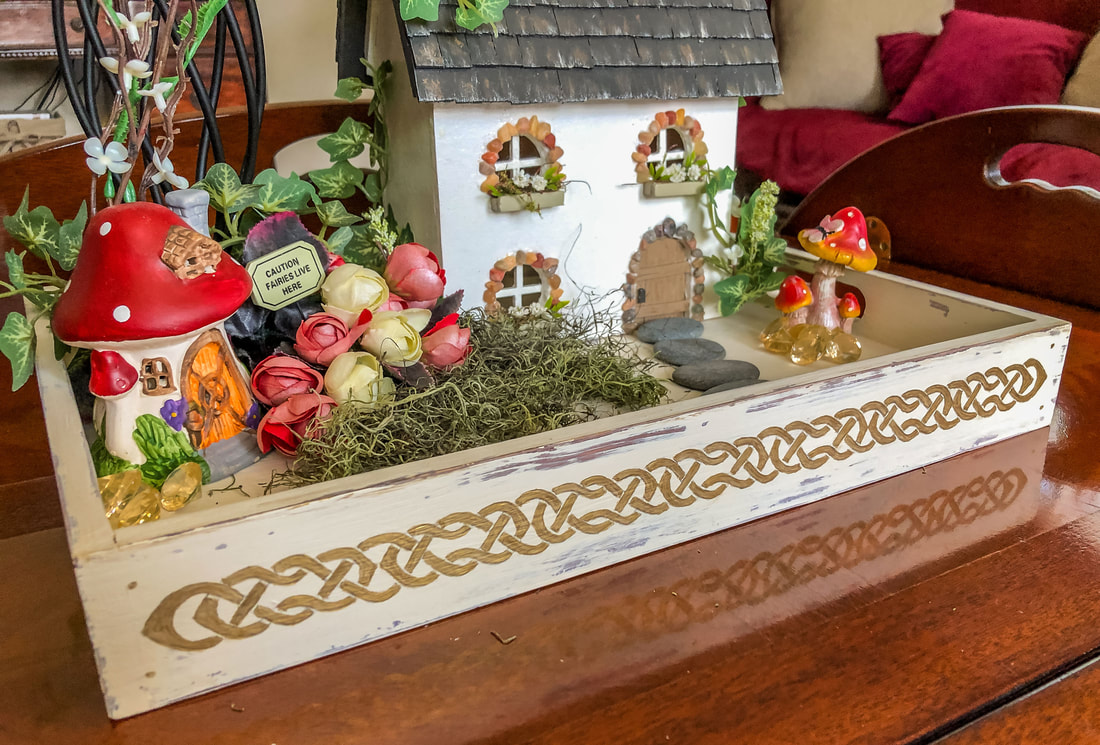 A look at the long side of the tray. Photo by Diane M. Lilly, 2022. 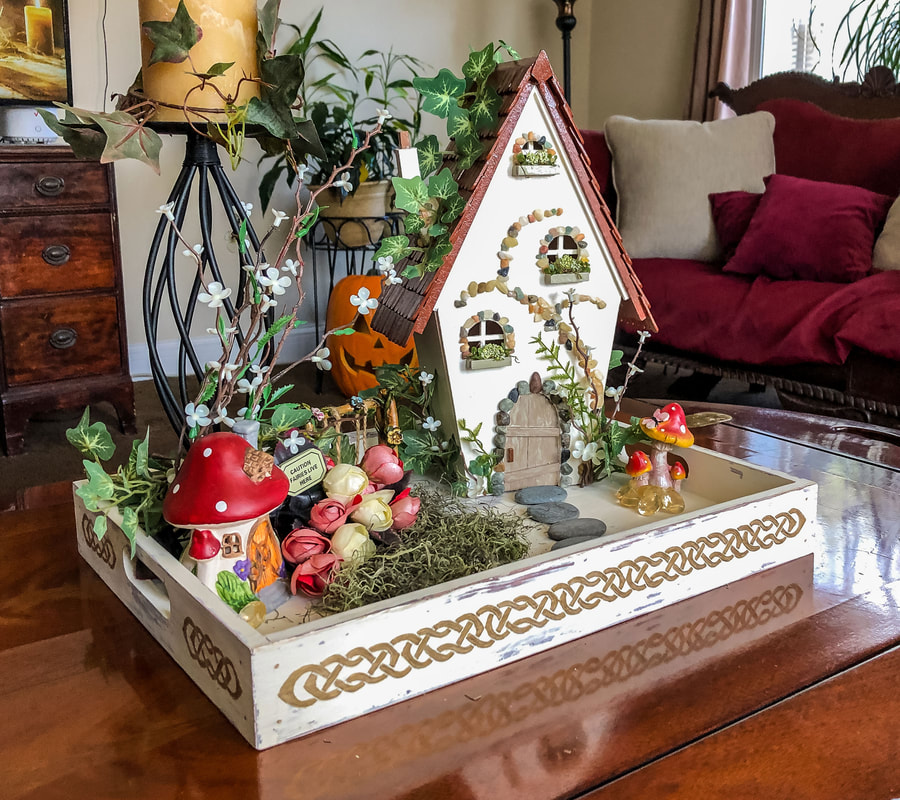 My Celtic inspired diy tray staged with the new Fairy House cottage. Photo by Diane M. Lilly, 2022. 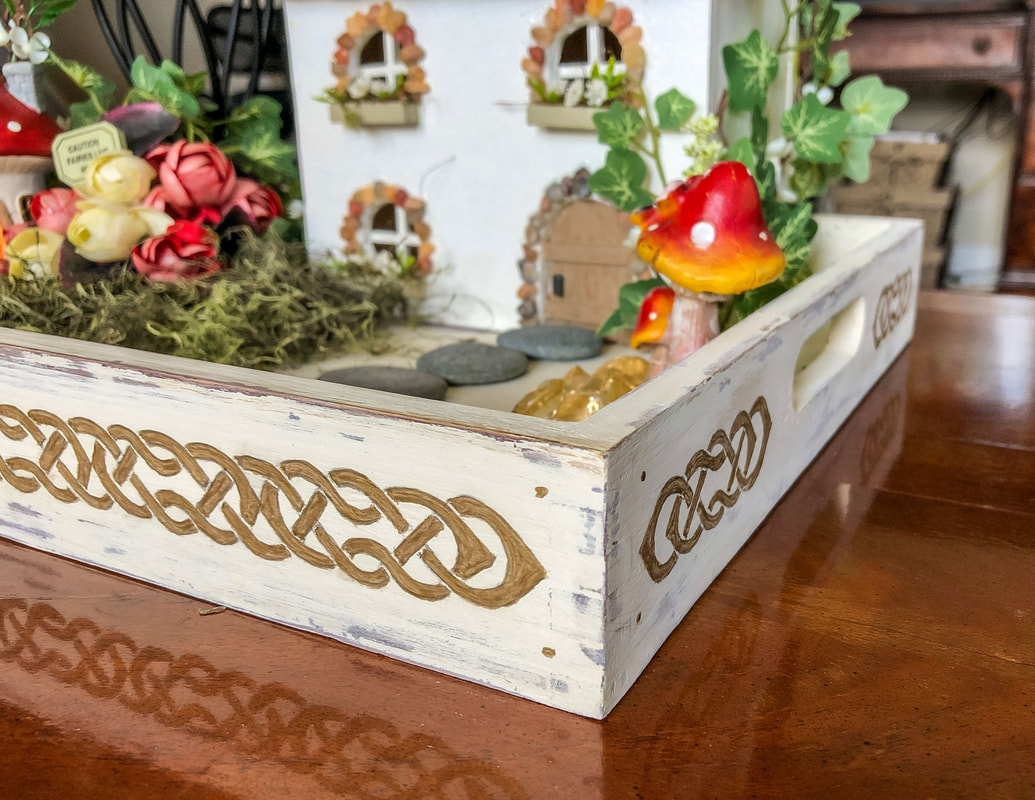 Closeup of the tray corner with views to both sides and Cletic knot borders. Photo by Diane M. Lilly, 2022. I know this was a complex project to throw out there, and the thought occurred to me that people might want to learn how to draw this kind of intricate artwork, so I have decided to start work creating and compiling downloadable ebooks with tutorials on how to construct Celtic knots. I’m unsure when they will be available, but sign up for periodic emails for updates on these ebooks and other projects. Let me know in the comments if you've done anything similar and what you think of this project! Related blogs you may want to read: DIY chalk painted tray with chippy effect A little project with jute twine and an old foot stool DIY refurbishment of a dining room cabinet A fun DIY project with paint and a thrifted mirror part 1 A fun DIY project with paint and a thrifted mirror part 2 Creating a kitchen coffee bar On a mission to recycle this neglected vintage stool The stain stripping stage of rescuing my vintage stool Staining my vintage stool with brewed tea My tattered vintage stool transformed into a beautiful plant stand Homemade candle recipe with a eucalyptus fragrance Homemade candle recipe with a hazelnut fragrance Affiliate Disclosure Some of the posts in this article contain affiliate links. This means if you click on the link and purchase the item, I will receive an affiliate commission at no extra cost to you. I will only recommend products or services I use personally and/or believe will add value to my readers, so there is no conflict of interest. 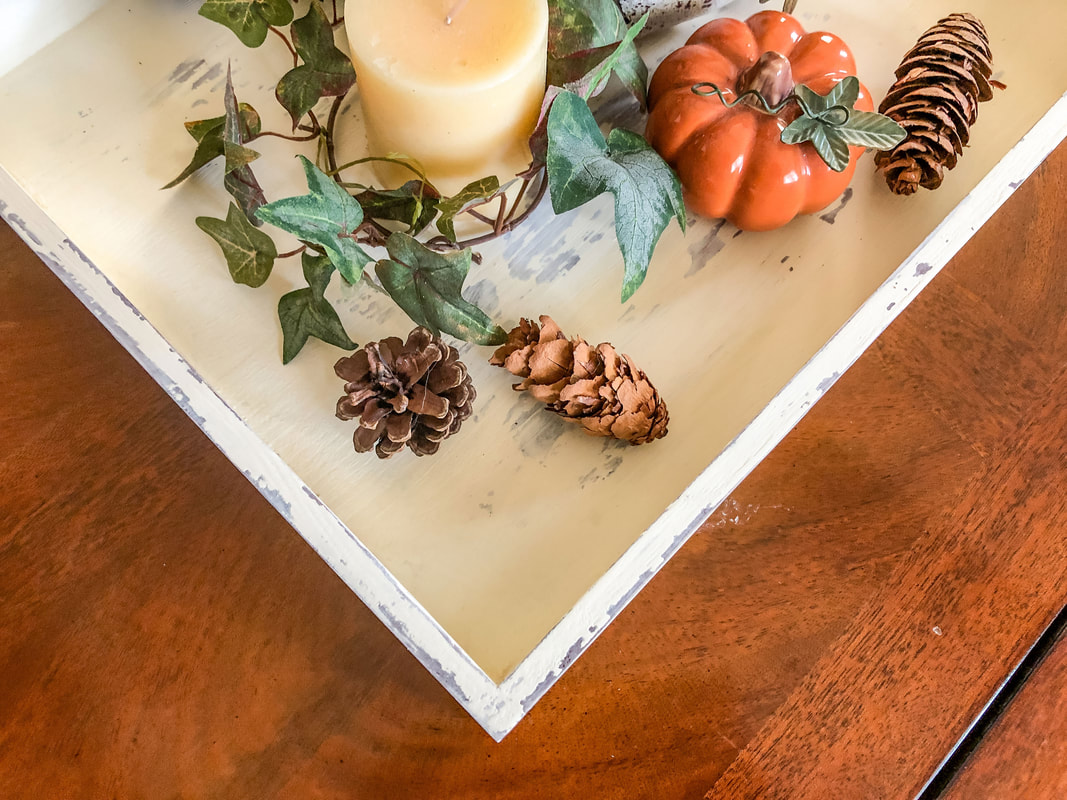
Finished diy weathered tray with some fall decor. Photo by Diane M. Lilly, 2022.
This month, I tackled a simple DIY project using an unfinished wooden tray, furniture stain, and chalk paint. The tray was one of those items that kept getting moved from cabinet to cabinet…because "someday" I would come up with an idea for a DIY project! 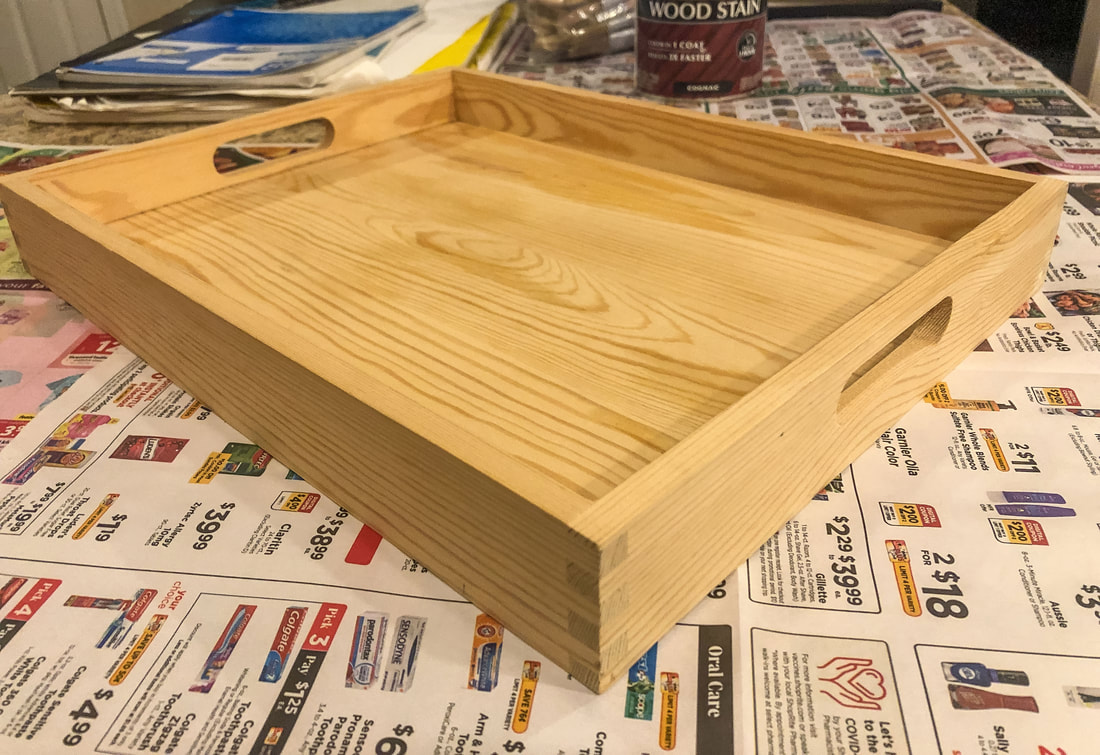
Unfinished wood tray. Photo by Diane M. Lilly, 2022.
Well, the time has finally come. The stars have finally aligned, allowing me the time to take my idea and make it happen! And speaking of time, my time is limited, so any DIY project HAS to be simple…and inexpensive. The inspiration for today’s DIY project came from a technique I found on The Country Cottage that I thought I’d try. I’ll modify the materials to fit my project, and we’ll see how it turns out! This tray project has two parts…The weathered paint technique will be covered in this blog (which I am calling “part 1”), and the second part will be a “part 2” blog on how to create a Celtic border on the sides of the tray. But first, let’s tackle part 1… All that is needed for part one of this project is a dark coat of paint (I used Varathane Cognac wood stain), some candle wax (I used my homemade soy candles), and some light-colored chalk paint (I used Rust-oleum Chiffon Cream Ultra Matte chalk paint). The idea for this project is to create a worn look to this tray as if this was something found in an old dusty attic or picked up from a flea market. I want it to look aged but not too beat up. And not too much like Farmhouse, although the result could work well in a Farmhouse decor scheme. In other words, I want it chippy but not TOO chippy, if that makes any sense! 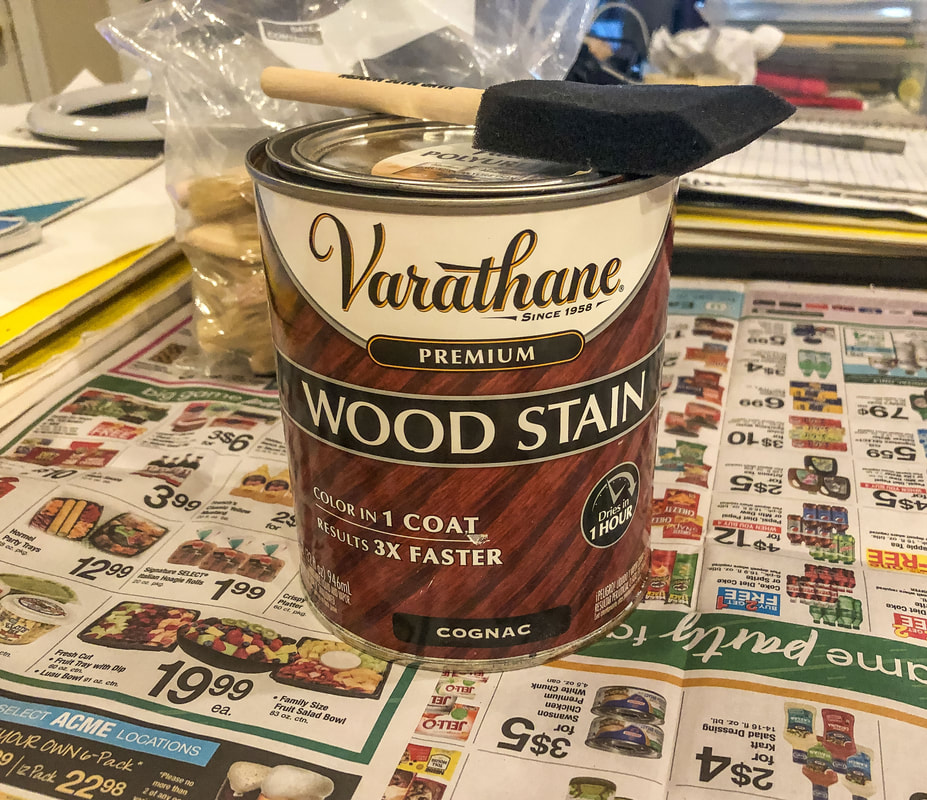
Cognac wood stain by Varathane. Photo by Diane M. Lilly, 2022.
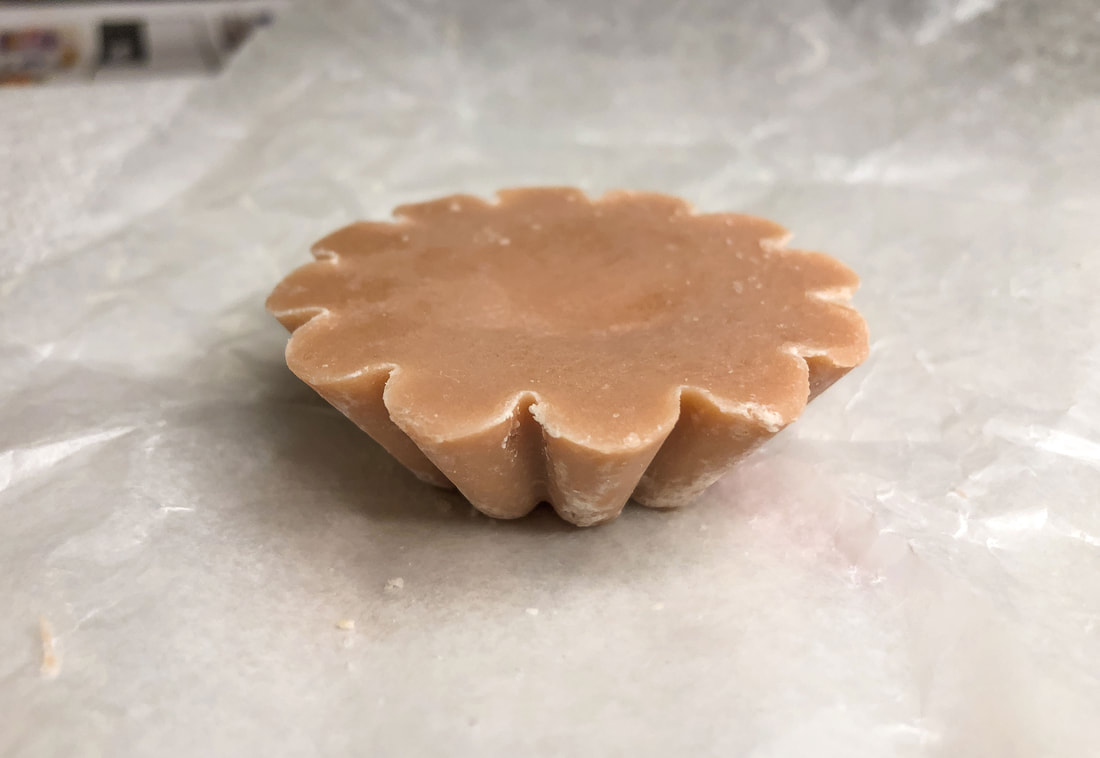
A handmade soy wax melt. Photo by Diane M. Lilly, 2022.
 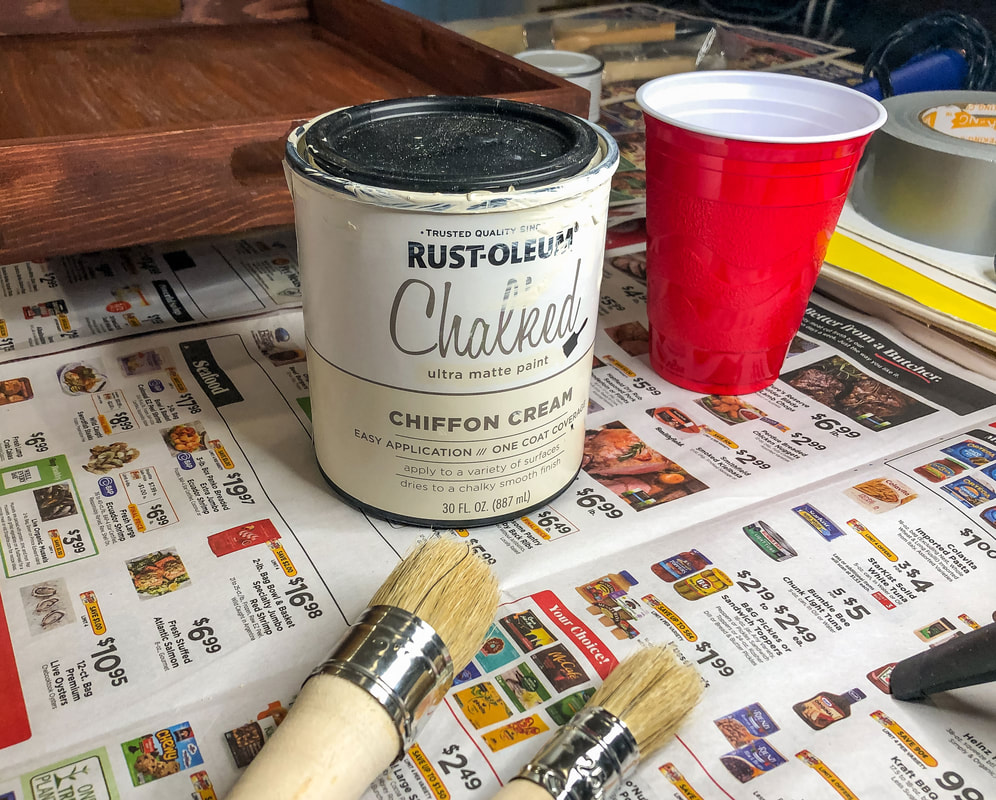
Chalk paint and paint brushes. Photo by Diane M. Lilly, 2022.
Materials needed: dark base paint or stain paint brushes or sponges candle wax chalk paint chalk paint brushes heat gun duct tape water sandpaper, 220 grit
Step 1—Sand the tray
Prep the bare wood for paint (or stain) with a light sanding. This cleans up any dirt and helps rough up the surface to help with stain or paint absorption. If I’m being honest, I forgot to do this step, but it all worked out okay anyway! Step 2—Apply the dark base coat The tray needed to blend in with my existing decor, so I chose a base color previously used in a DIY project in my dining room. I used the same stain and chalk paint from a dining room cabinet I painted last year. When you apply stain, you usually let it sit for some time (depending on how dark you want the color) and then wipe off the excess. This time--instead of wiping it off--I let it dry at full strength to achieve a rich, dark color. You’ll do whatever works best for your specific project. Make sure everything is dried completely before moving on to the next step. 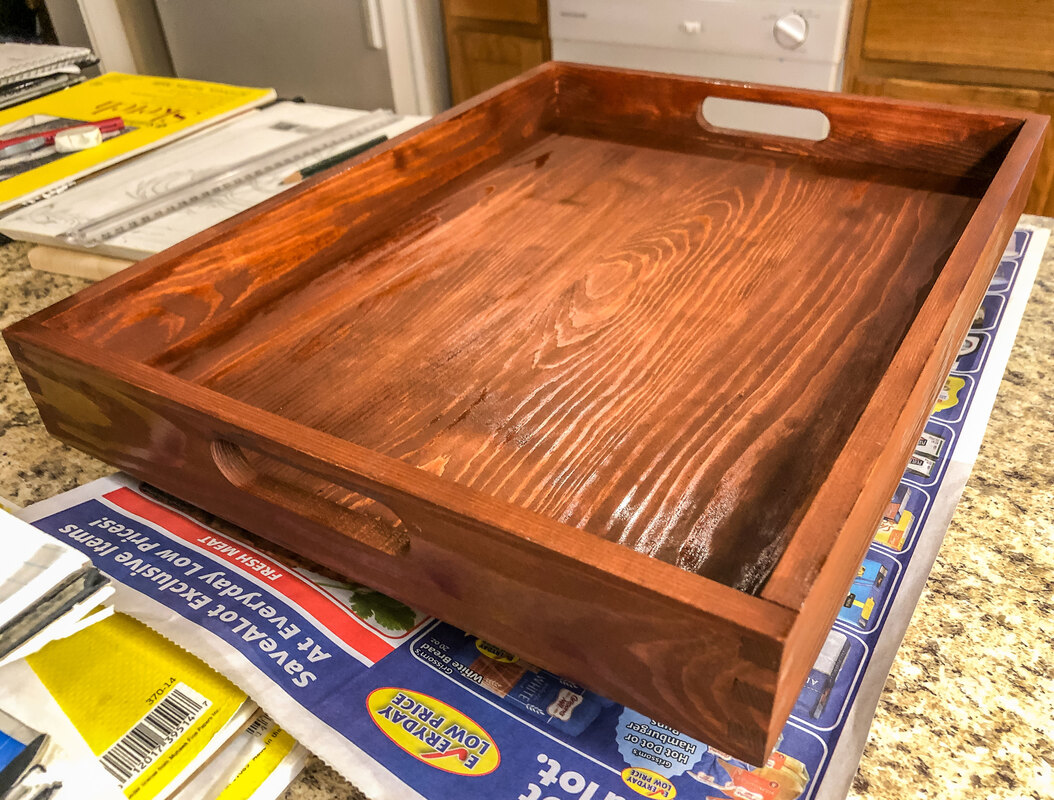
Tray with Cognac wood stain applied. Photo by Diane M. Lilly, 2022.
Step 3—Rub the wood with wax Once my stain was fully dry (the next day), I rubbed some of my homemade soy candle wax in areas I’d like to weather. I chose spots that would see wear and tear, like inside the tray and the edges and corners. 
Wax rubbed into the wood tray. Photo by Diane M. Lilly, 2022.
Step 4—Apply the chalk paint top coats In the next step, I applied two coats of chalk paint over the wax and then the stain. There’s nothing complicated with this step--just slather it on! 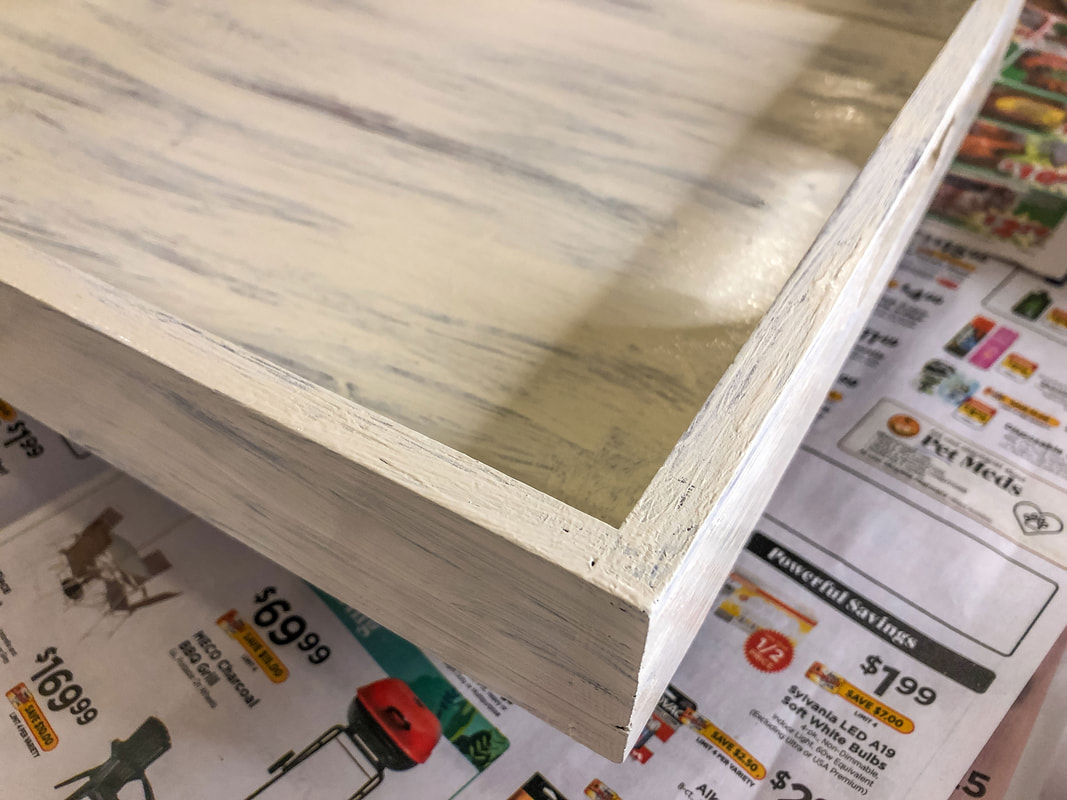
First coat of chalk paint on tray. Photo by Diane M. Lilly, 2022.
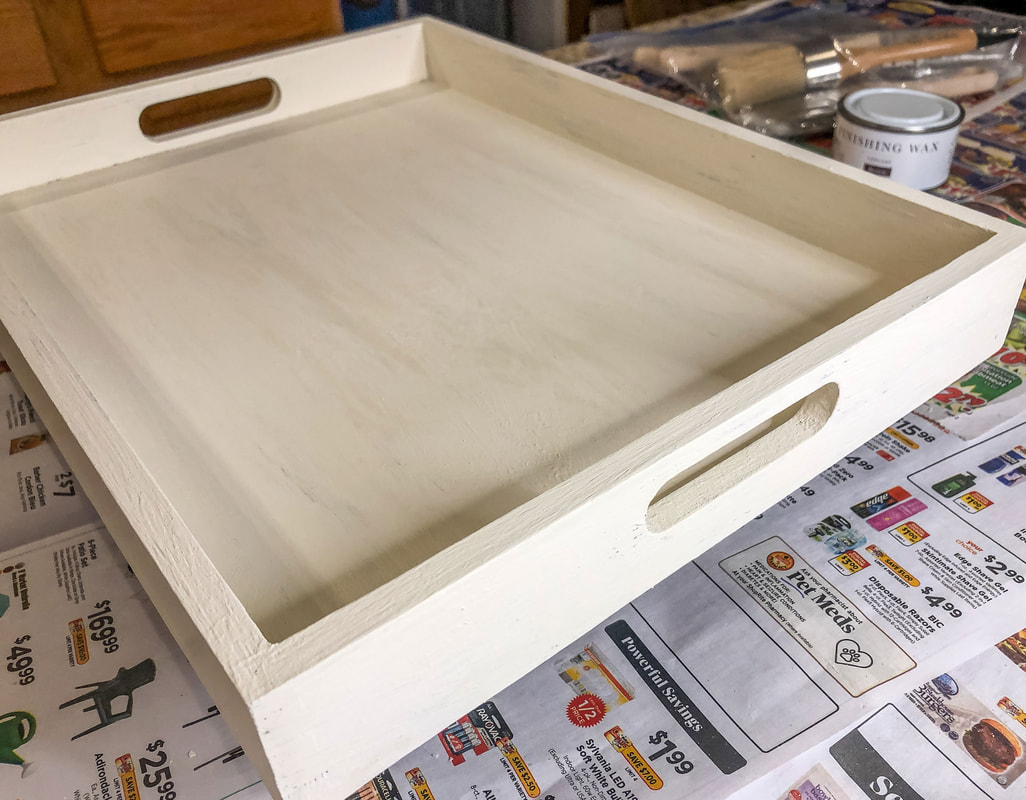
Second coat of chalk paint on tray. Photo by Diane M. Lilly, 2022.
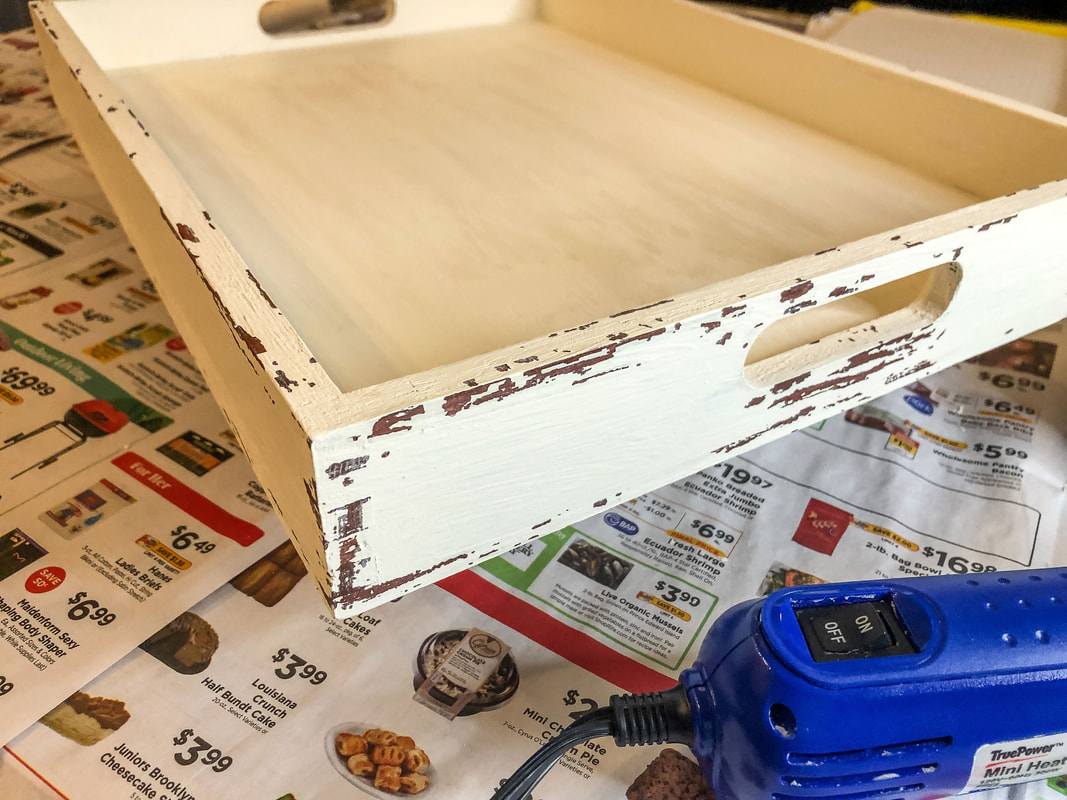
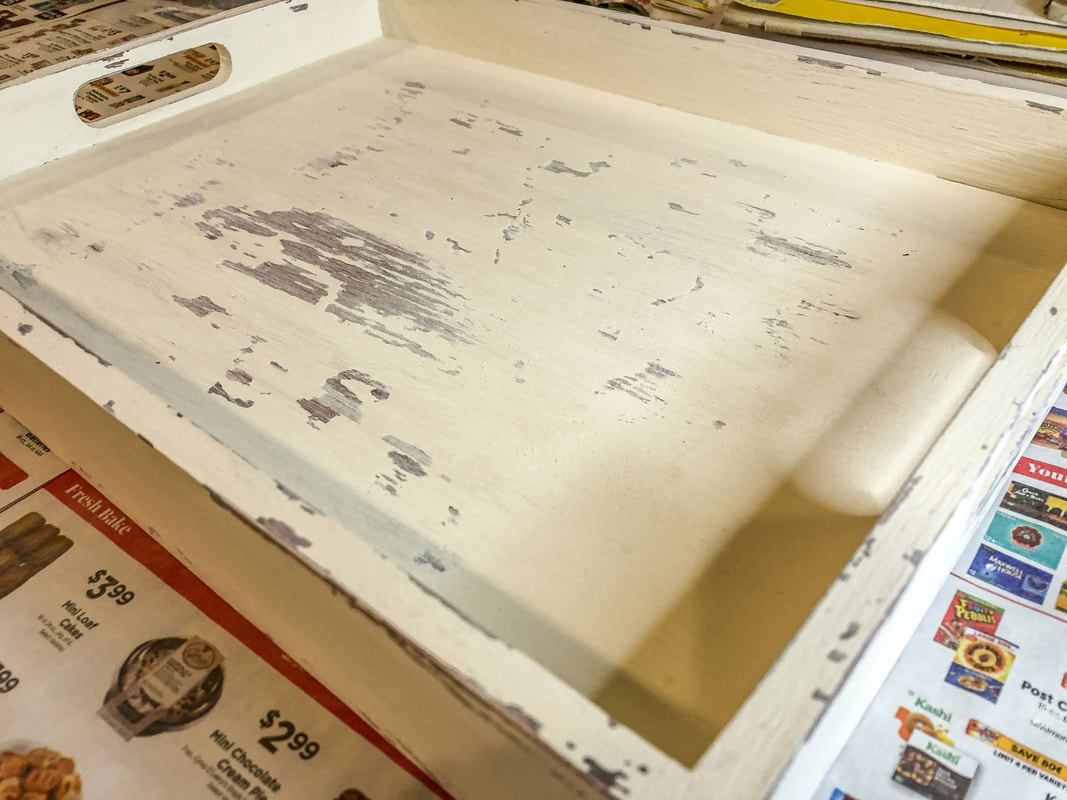
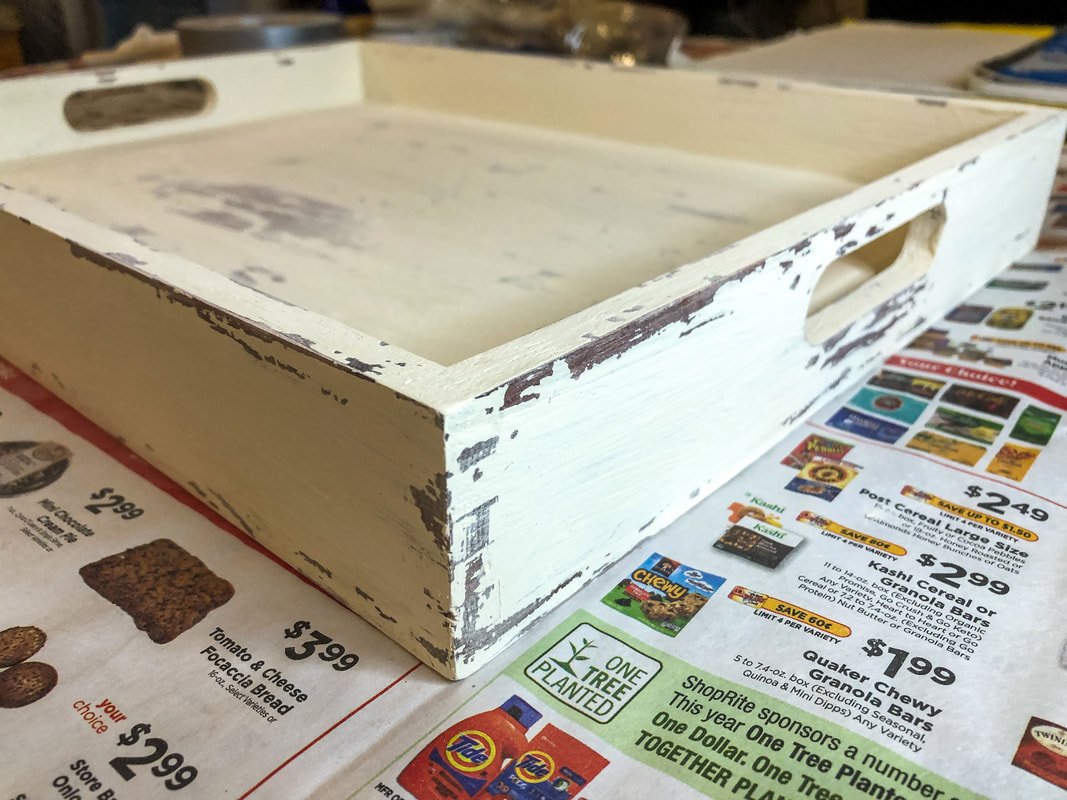
Step 5—Heat and remove paint Using a heat gun (you can also use a hair dryer), I heated the areas where I wanted the paint chipped. It didn’t take much, just a few seconds. Now, here’s the tricky part…The directions say to take a small piece of duct tape and LIGHTLY apply it to the area, removing it immediately. I cannot stress enough that you must do this quickly and lightly, or you will remove too much top paint! The tape has to lightly stick and remove only small bits of the chalk paint top coat. I did pretty well until I got to the tray bottom, where I took off bit more than planned…but the look grew on me, and now I think it looks like it’s supposed to be that worn. 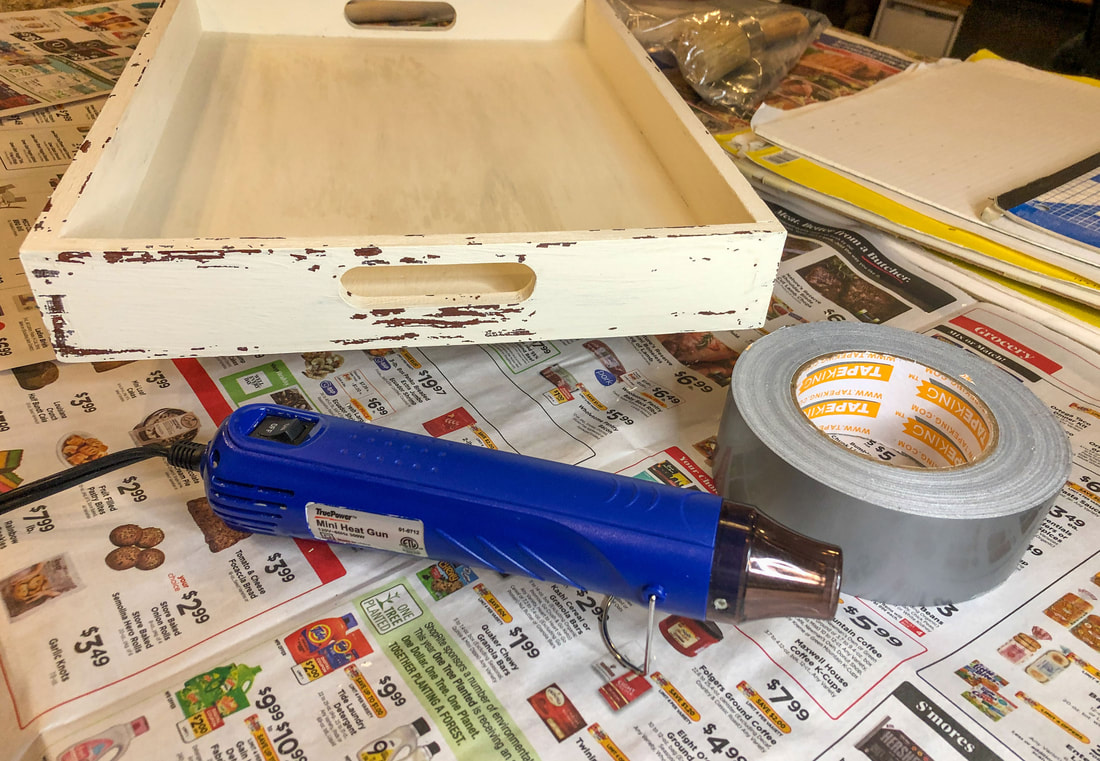
Tray sides weathered with heat gun and duct tape. Photo by Diane M. Lilly, 2022.
Closeup of tray corner after weathering technique has been applied. Photo by Diane M. Lilly, 2022.
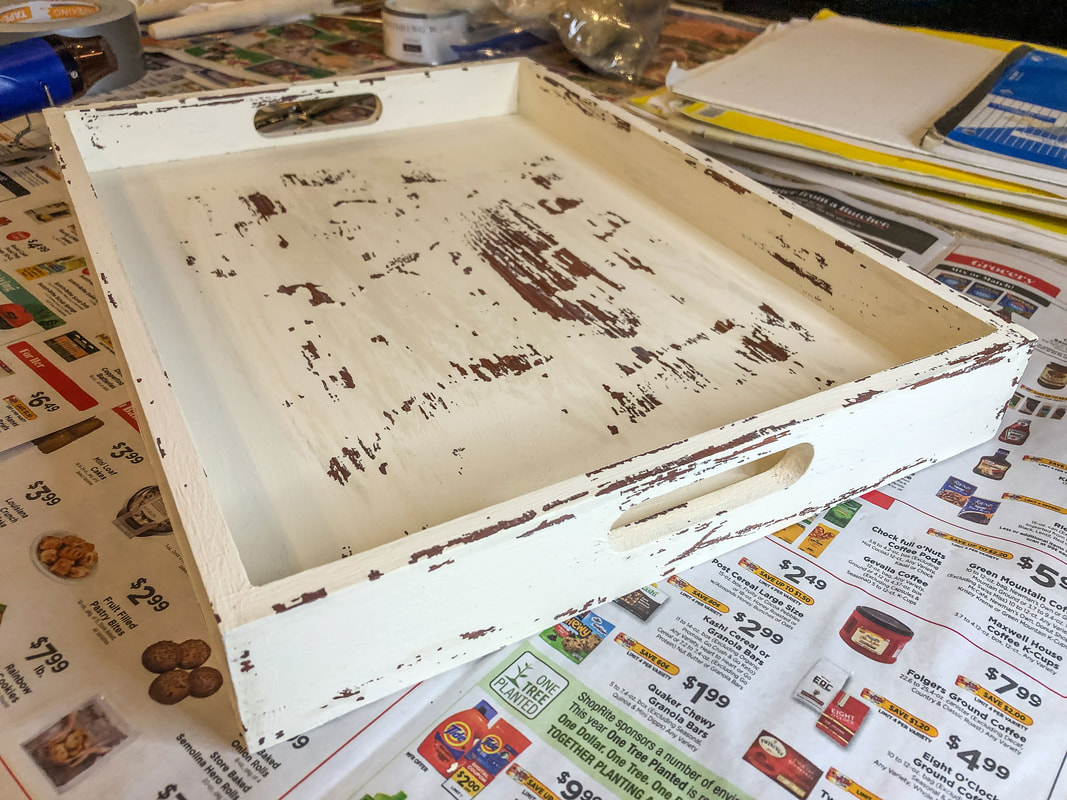
Tray after weathering technique has been applied. Photo by Diane M. Lilly, 2022.
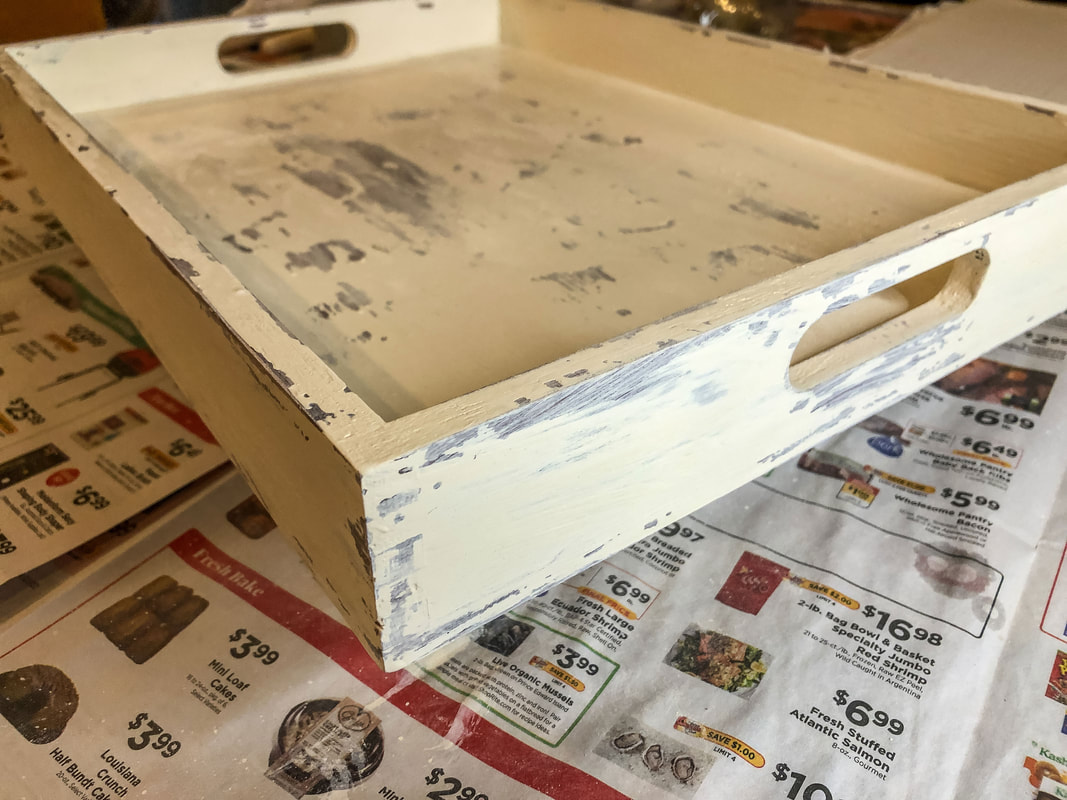
Step 6—Lightly sand So here’s where I diverged from the original technique…I liked the chippy effect that this technique created, but it was just way too much like Farmhouse for my taste. (Sorry Farmhouse lovers!) For this tray to fit in with my decor style, I needed the “chippiness” (I just made up that word!) toned down a bit. I used 220 grit sandpaper to lighten the areas where the paint was chipped away, and that improved the situation somewhat…but it still needed to be lightened up even more. 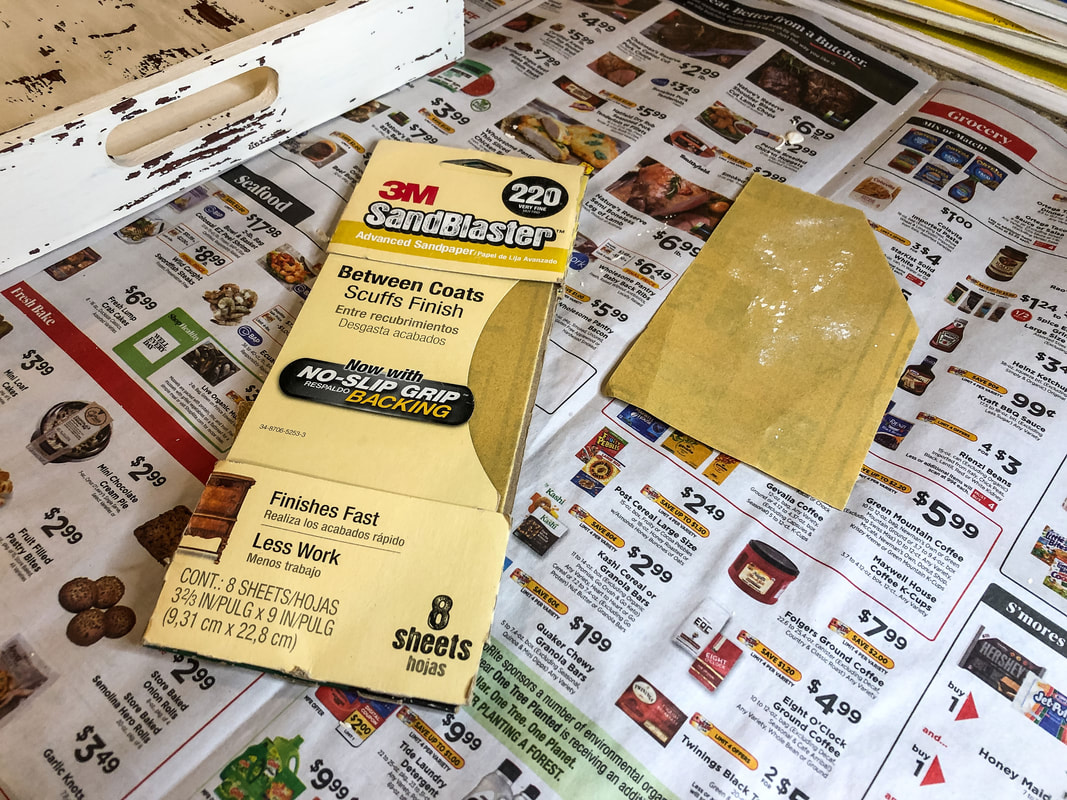
220 grit sandpaper for smoothing out the paint chip areas. Photo by Diane M. Lilly, 2022.
Tray after the paint effects have been sanded. Photo by Diane M. Lilly, 2022.
Bottom of tray blended with sandpaper. Photo by Diane M. Lilly, 2022.
Closeup of tray corner after sanding. Photo by Diane M. Lilly, 2022.
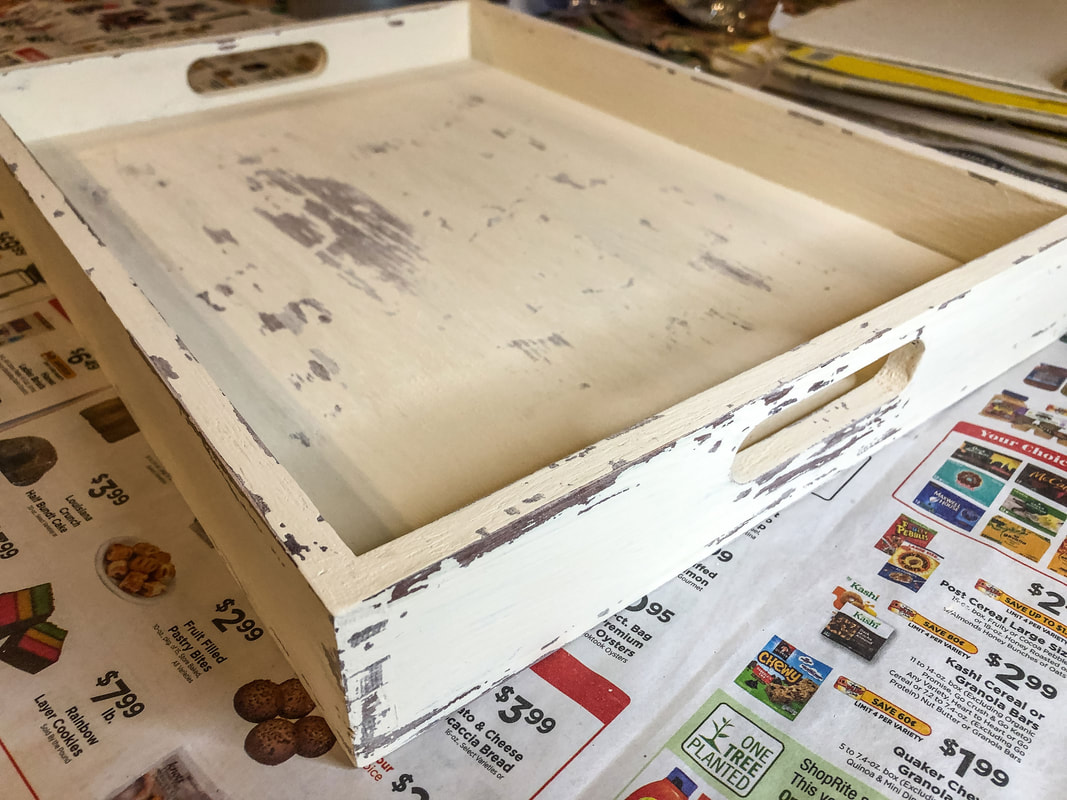
Step 7—Blend with a damp brush To lighten the chipped paint effect even further, I took a slightly wet paintbrush and blended the chalk paint over the areas where the paint had been chipped off. Chalk paint is ideal because you can dampen the paint and rework or blend any trouble spots.) I loved the result! I feel like this tray now has the look of something old and worn without being too chippy. 
Water to blend the paint even further. Photo by Diane M. Lilly, 2022.
Tray corner and sides blended with water. Photo by Diane M. Lilly, 2022.
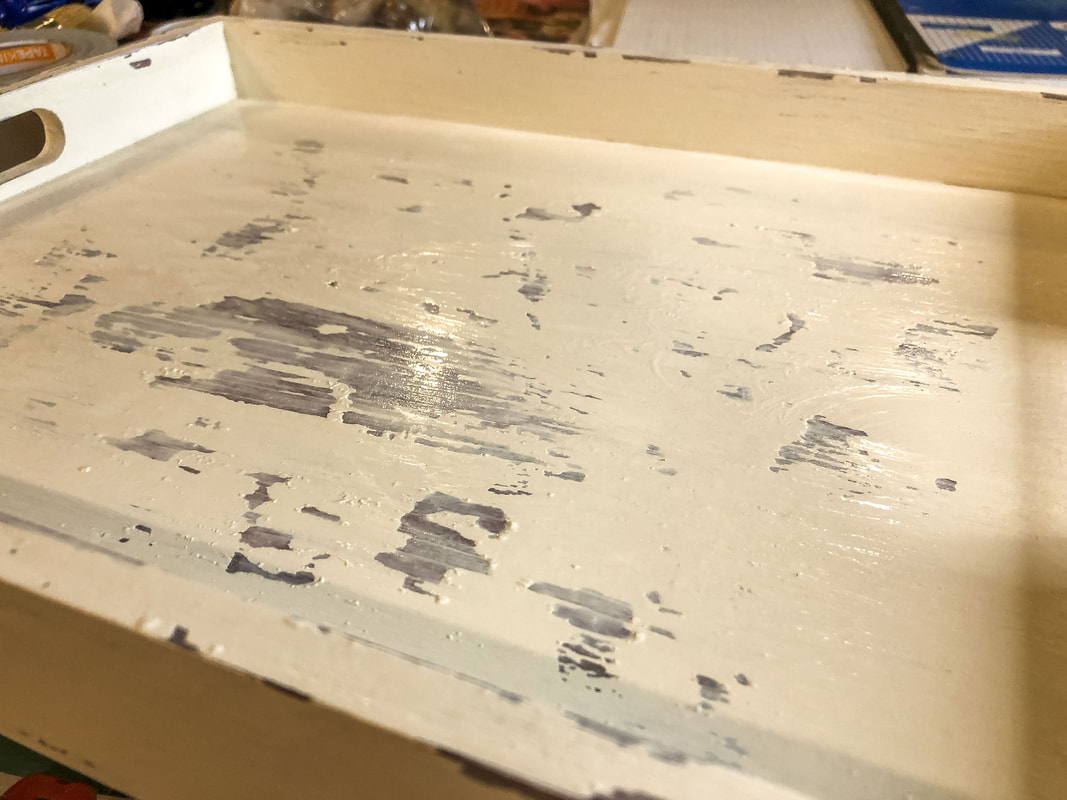
Tray bottom blended with water. Photo by Diane M. Lilly, 2022.
So that’s the end of the painting phase of this project. The technique was simple and quick, taking only two days to complete. What I learned, however, was that—as fun as it was to use wax, heat, and duct tape to create a chippy appearance—you don’t need to do that step. Later in the process (in “part 2”)—while taping border templates onto my tray sides—I accidentally removed more chips of paint from my top coat, which leads me to believe that you could probably skip the wax and use tape to remove areas of the top coat. I don’t know how well this would work if the base coat was also painted (since I used stain), so I don’t know how much paint would be removed, but a little trial and error and a lighter touch might yield good results. 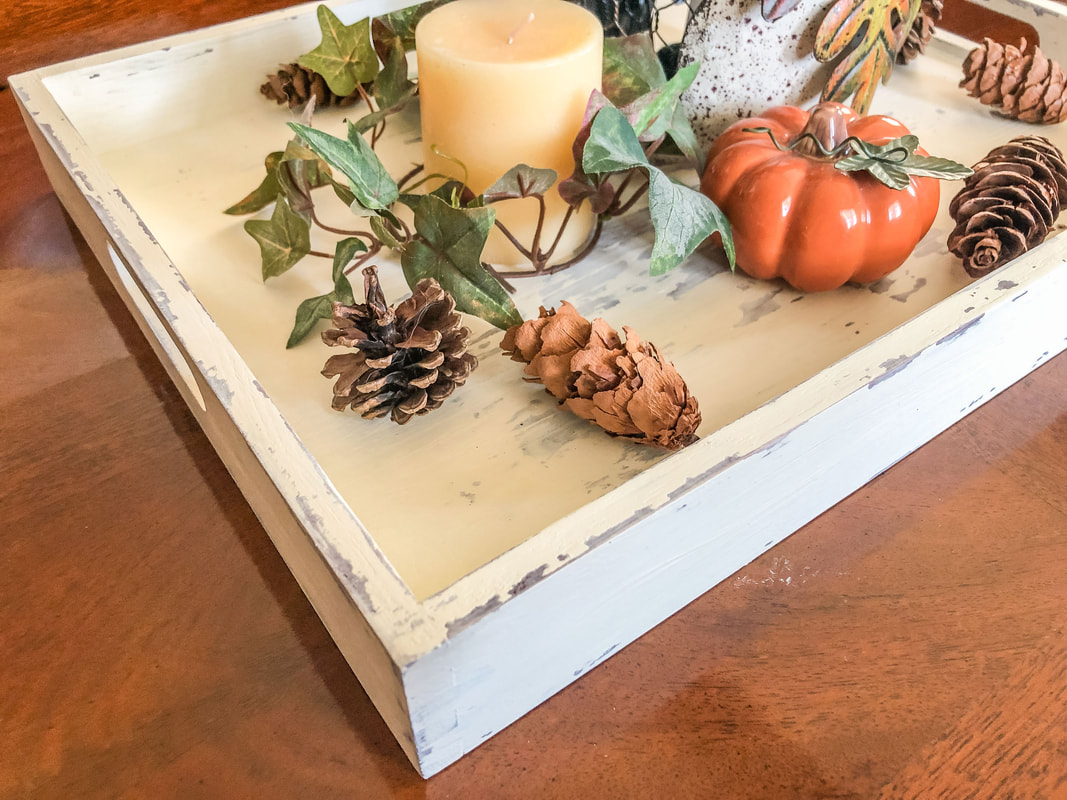
Decorative tray with weathered effect finished and staged with some Autumn decor. Photo by Diane M. Lilly, 2022.
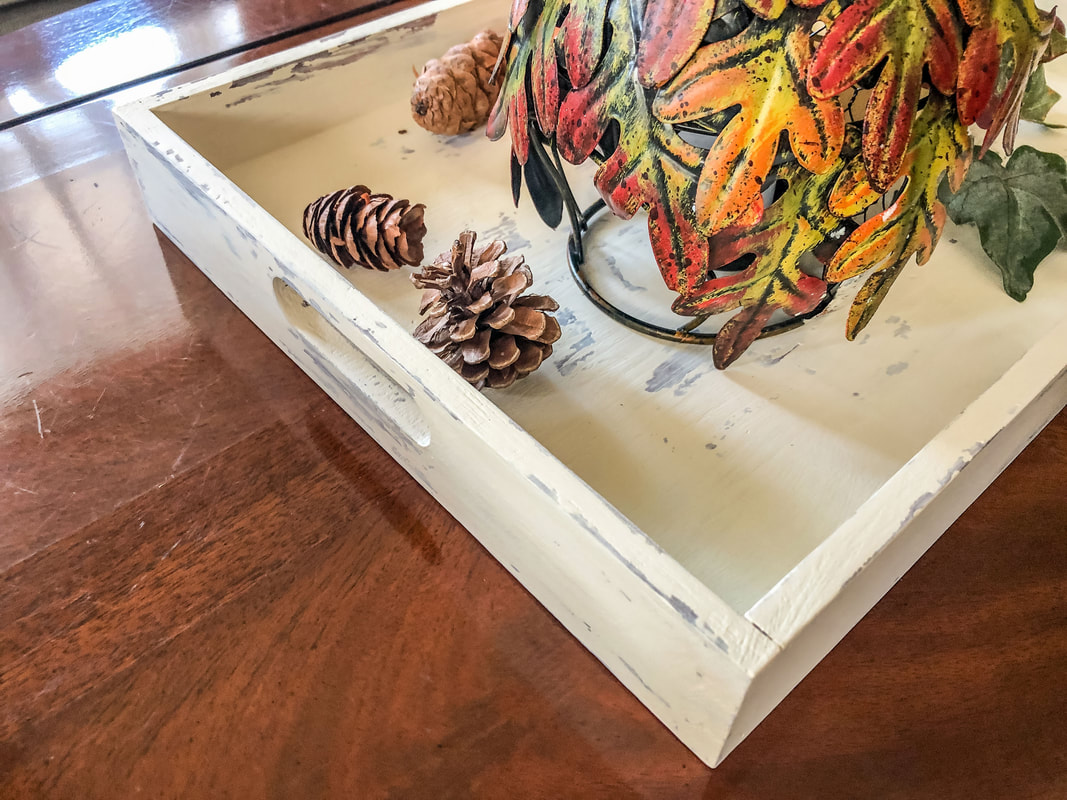
Another angle of the finished tray with diy weathered effect. Photo by Diane M. Lilly, 2022.
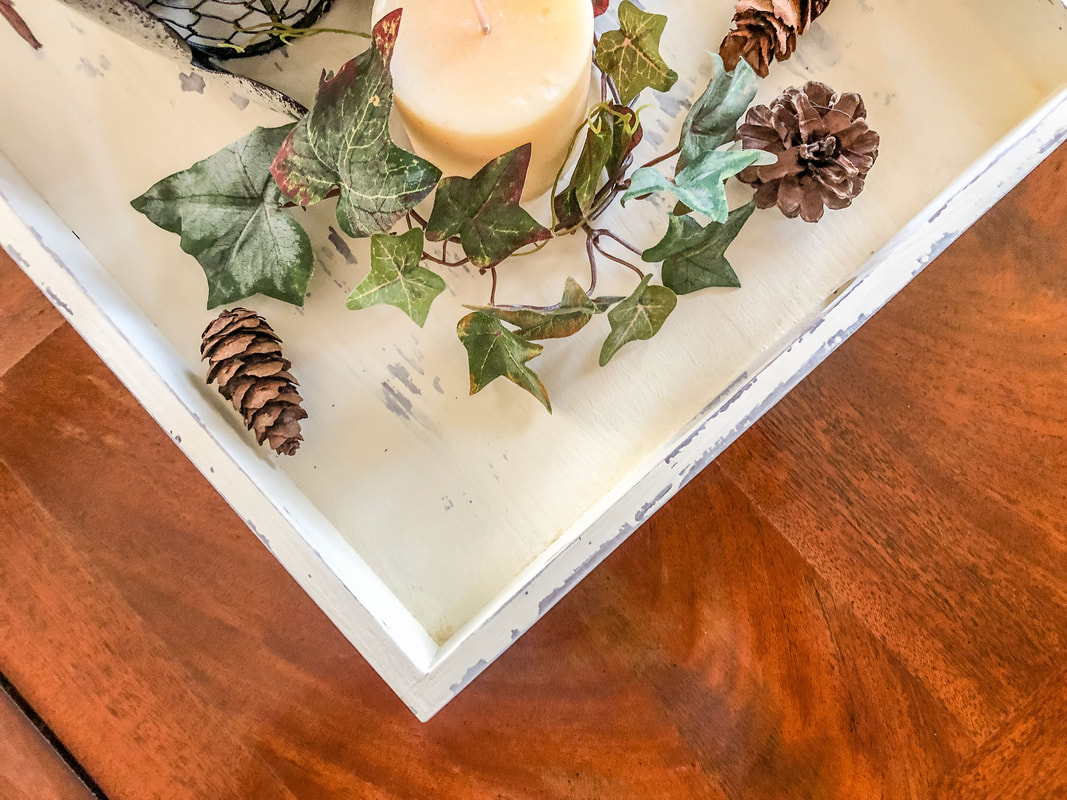
Final look at my DIY decorative tray with weathered technique using chalk paint. Photo by Diane M. Lilly, 2022.
All in all, this was a fun project, and I’m pleased with the outcome. But—as always—my sadistic side kicked in, and I had to take things up a notch! So, I had this crazy idea to paint a Celtic knot border around the exterior sides. Part two of this blog will take you through the basic steps needed to create a knotwork design for the sides of this tray. But you can also create any design of your own…vines, flowers, leaves, or any decorative motif you like to spruce up your tray! So what do you think? Have you done any similar projects with chalk paint? Do you have any tips or tricks for weathering paint effects you’d like to share? Feel free to drop a comment below! And don’t forget to read part two here, where I torture myself with a hand-drawn and painted Celtic knot border.
Related blogs you may want to read:
DIY chalk painted tray with Celtic border A little project with jute twine and an old foot stool DIY refurbishment of a dining room cabinet A fun DIY project with paint and a thrifted mirror part 1 A fun DIY project with paint and a thrifted mirror part 2 Creating a kitchen coffee bar On a mission to recycle this neglected vintage stool The stain stripping stage of rescuing my vintage stool Staining my vintage stool with brewed tea My tattered vintage stool transformed into a beautiful plant stand Homemade candle recipe with a eucalyptus fragrance Homemade candle recipe with a hazelnut fragrance Affiliate Disclosure Some of the posts in this article contain affiliate links. This means if you click on the link and purchase the item, I will receive an affiliate commission at no extra cost to you. I will only recommend products or services I use personally and/or believe will add value to my readers, so there is no conflict of interest.  Apple crumble dessert with vanilla ice cream. Photo by Diane M. Lilly, 2022. Something about the crisp fall air triggers the inner baker in me! In my household, apple and pumpkin pies appear in October and become staple desserts throughout the holiday season. And even though it’s a heck of a lot of work, I usually insist on making my apple pie crusts from scratch using the good old-fashioned flour and rolling pin. Sometimes, I even take it to a whole new level of insanity by creating a two-crust pie (one bottom crust and crust for the top), but on those occasions when I need a shortcut, the crumble topping makes a delicious sugary substitute. (If you’d like to see my homemade apple pie recipe, you can find it here in an older blog post from a few years back.)  Homemade apple pie with crumble topping. Photo by Diane M. Lilly, 2020. Lately, I’ve been spending time on Pinterest looking for recipe ideas. While happily pinning away, I stumbled across a recipe for an apple crumble--a recipe that was essentially my apple pie without the bottom crust. As much as I love baking apple pies, I don’t enjoy all the work that goes into creating the pie crust, so this crumble recipe is an excuse to cut corners but still end up with a delicious dessert! As this recipe is similar to my apple pie filling, I used my recipe—minus the pie crust—with a few tweaks taken from the Pinterest recipe to experiment with flavor. And I had to adjust for the servings because I’m a family of five, so I need to make a LOT! This apple dessert has two main parts: apple filling and crumbly topping. For this recipe’s filling, I used 14 McIntosh apples to fill a 9 x 13 baking pan. So here’s the recipe I used for this mouthwatering apple dessert… Apple filling ingredients: 14 apples, peeled and sliced 2 TBS lemon juice 1/2 tsp vanilla extract 1/3 cup granulated sugar 1/4 cup brown sugar 1/4 cup all purpose flour 1/2 tsp salt 1/2 tsp ground cinnamon 1/2 tsp nutmeg  McIntosh apples. Photo by Diane M. Lilly, 2022.  Lemon juice and apples. Photo by Diane M. Lilly, 2022. 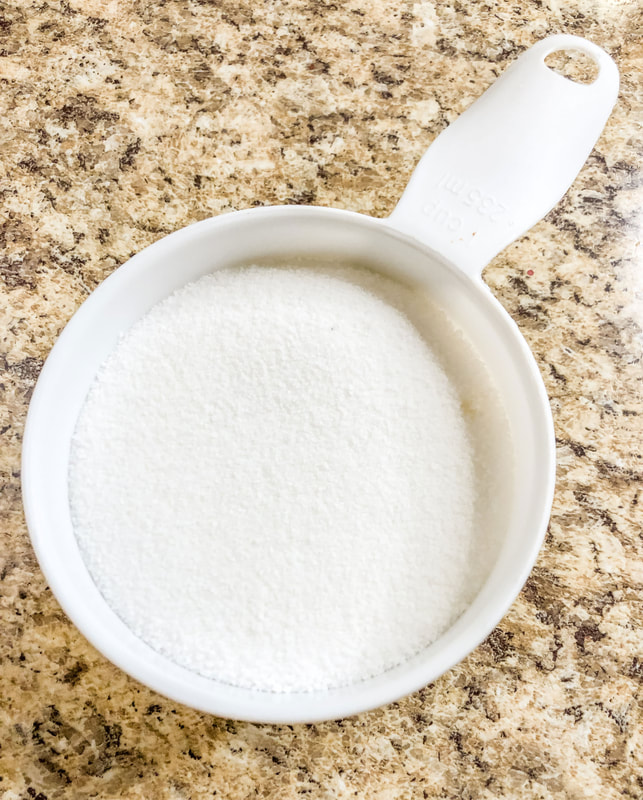 Cup of sugar. Photo by Diane M. Lilly, 2022.  Dark brown sugar. Photo by Diane M. Lilly, 2022.  All purpose flour. Photo by Diane M. Lilly, 2022.  Iodized salt. Photo by Diane M. Lilly, 2022.  Spices and vanilla extract. Photo by Diane M. Lilly, 2022. Crumbly topping ingredients: 1 stick butter, unsalted 1 cup all purpose flour 1 tsp baking powder 1/2 cup packed brown sugar (light or dark) 1/2 tsp ground cinnamon 1/2 tsp salt  Butter. Photo by Diane M. Lilly, 2022.  Baking powder. Photo by Diane M. Lilly, 2022. Preheat oven to 375˚. Peel, core, and chop apples. Coat in lemon juice. Add vanilla extract, brown sugar, sugar, flour, salt, nutmeg, and cinnamon. Pour mixture into a greased 9 x 13 baking dish. 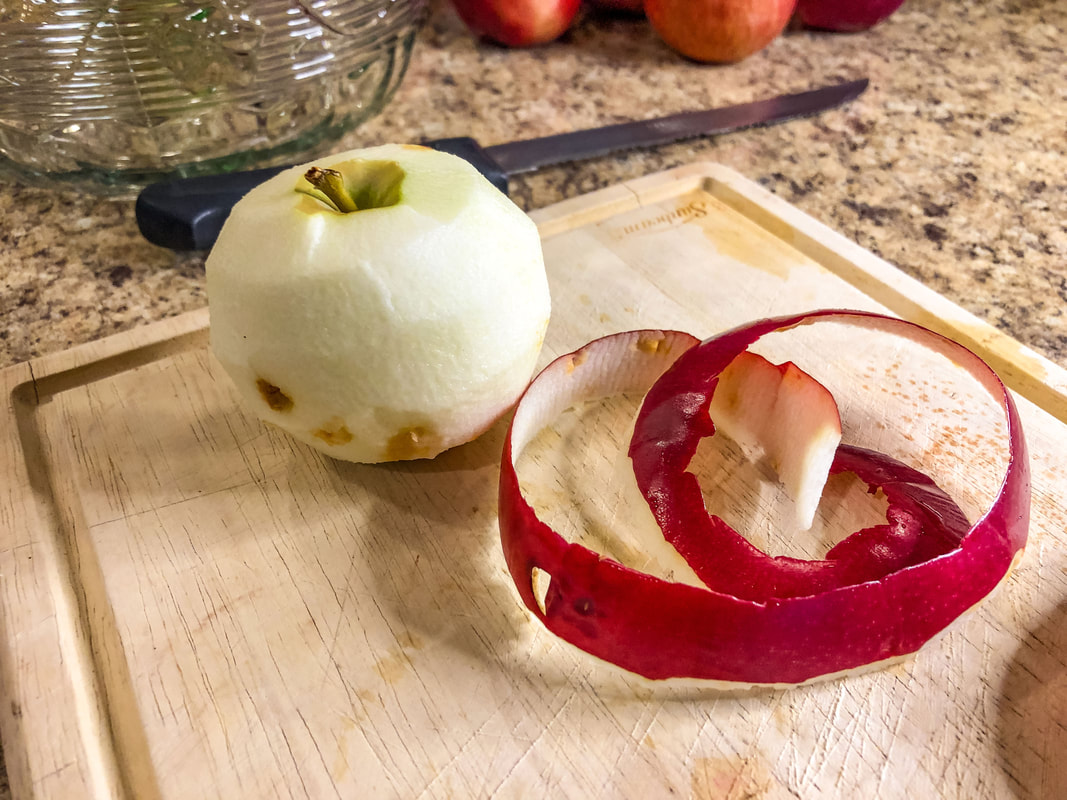 Apple peeled. Photo by Diane M. Lilly, 2022. 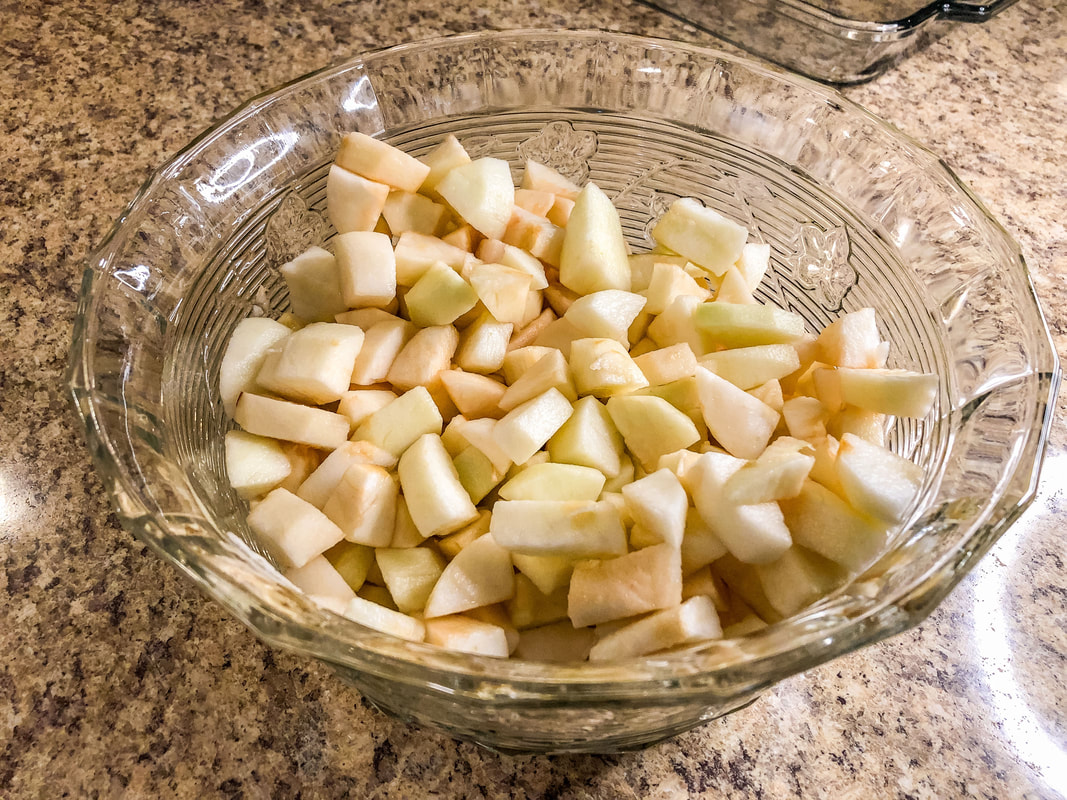 Apple chunks. Photo by Diane M. Lilly, 2022. 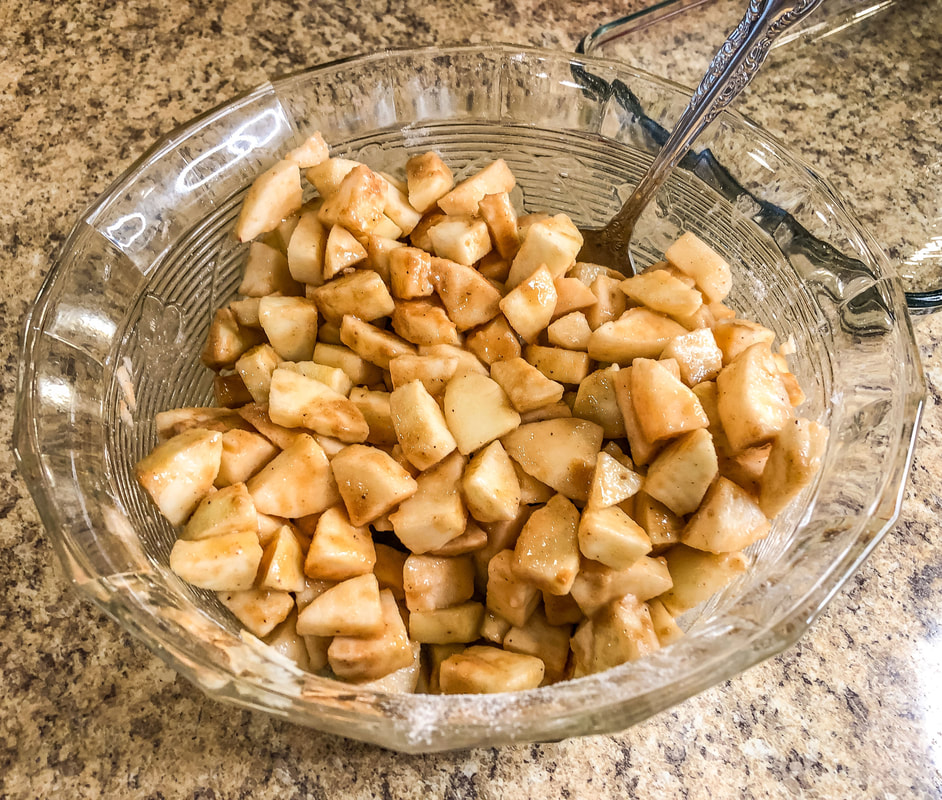 Apple chunks with sugars. Photo by Diane M. Lilly, 2022. 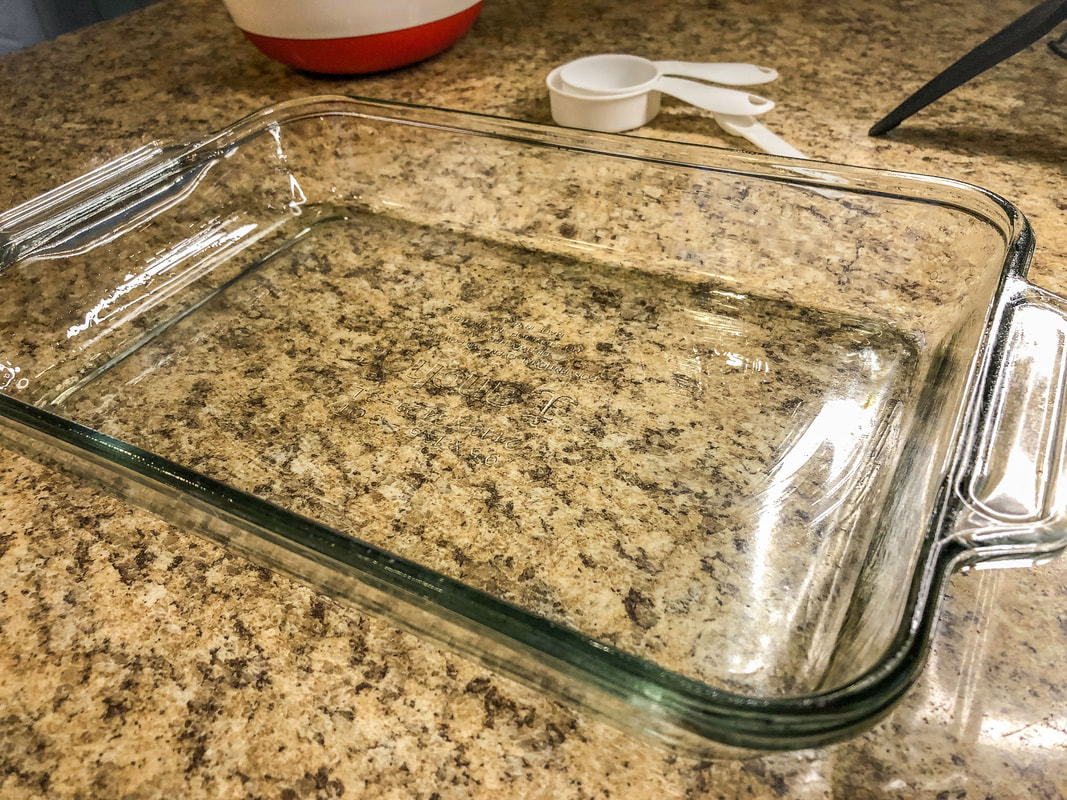 9 x 13 greased baking pan. Photo by Diane M. Lilly, 2022.  Apple mixture in pan. Photo by Diane M. Lilly, 2022. Mix dry ingredients in a bowl for crumb topping. Cut in melted butter until you get a crumbly texture. Spread evenly over the top of the apple pie filling.  Apple mixture with crumb topping ready for the oven. Photo by Diane M. Lilly, 2022. Put in oven and bake for approximately 40 minutes. When done, remove from the oven and let sit for 10-15 minutes so the filling thickens.  Apple crumble dessert fresh out of the oven. Photo by Diane M. Lilly, 2022.  Apple crumble dessert. Photo by Diane M. Lilly, 2022. Once cooled, a sliver of this warm apple dessert was served with a scoop of vanilla ice cream and chopped pecans…and WOW! It all just melts in the mouth! The tartness of the apple mixes perfectly with the sweet vanilla ice cream and the nutty flavor of the pecans. This could also be served with melted caramel, whipped topping, or nuts. You could also mix raisins into the apple mixture before baking for a delicious variation. 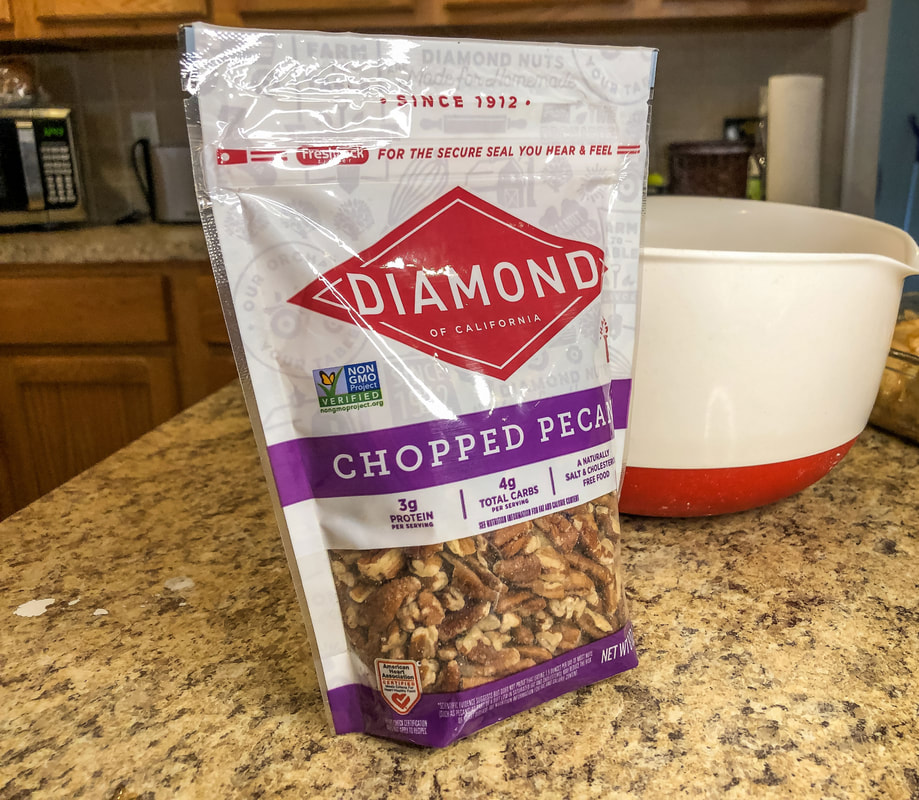 Chopped pecans. Photo by Diane M. Lilly, 2022.  Vanilla ice cream. Photo by Diane M. Lilly, 2022. The one thing I will do differently the next time I make this delicious apple crumble will be to double the ingredients for the topping. I just felt like the topping was a bit on the skimpy side…Not that the result tasted any less heavenly!  Apple crumble dessert with pecans and vanilla ice cream. Photo by Diane M. Lilly, 2022. Do you have a favorite apple dessert for the fall holidays? Drop a comment below with your recipe tips, tricks, or variations. I’d love to hear other delicious dessert ideas! Btw…If you like recipes, follow me on Pinterest, where I have started boards for dessert and meal recipes. Related blogs you may want to read: Homemade chicken noodle soup recipe Banana and raisin bread recipe Potato soup recipe Tuna noodle casserole recipe Chicken vegetable pot pie Salmon chowder recipe How to eat healthy with chicken and roasted vegetables This article may contain a few items or commercial mentions, but I only used them for demonstration purposes only. I am not endorsing any particular product or receiving any monetary gain for this blog. 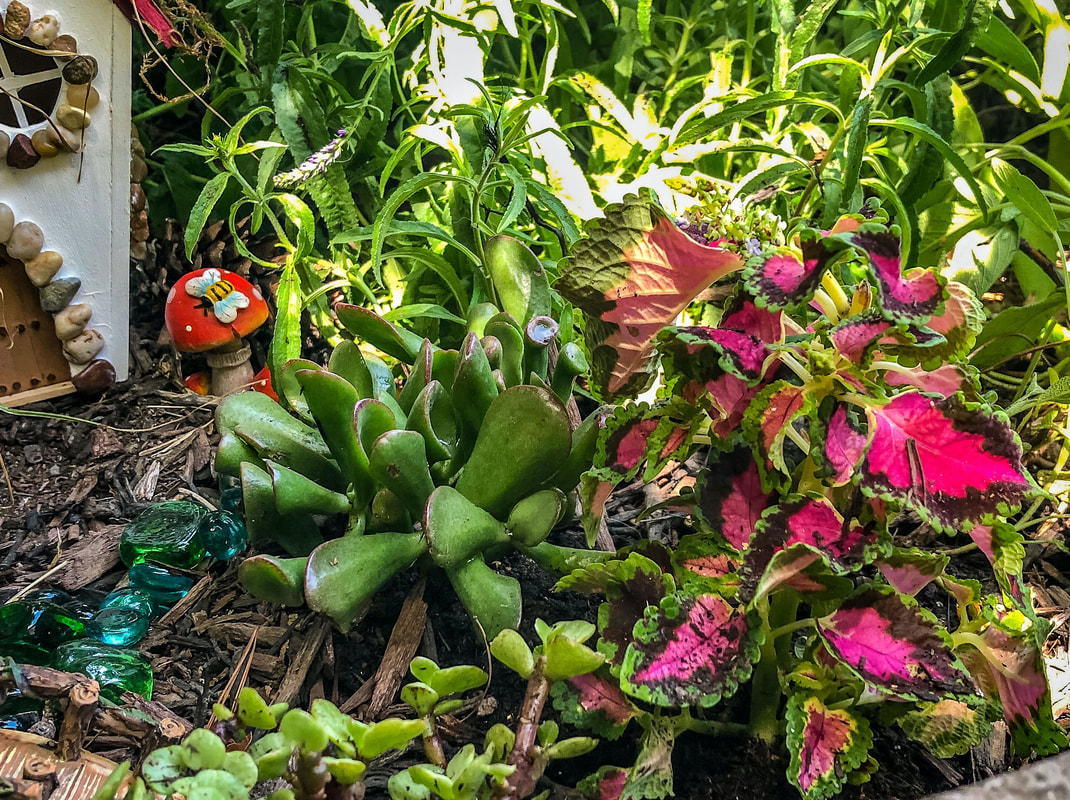 Succulents and coleus planted in my outdoor fairy garden. Photo by Diane M. Lilly, 2020. As a child, I loved everything related to castles and fairy tales. The irresistible pull of the unseen world wormed its way into my psyche and never let go. The sense of wonder I felt when I imagined worlds full of magical folk like fairies, elves, gnomes, and talking animals was perhaps a way to escape a troubled childhood.  Image by Sebastien Berthelot from AdobeStock. But it was something more than that…something hard to describe. There is just something about the world of miniatures that has always held my imagination. What is more fascinating than doll houses with miniature versions of our world, with tiny bits of furniture and interior decor? Or how about model train landscaping with streets, buildings, and train tracks? These are entire worlds where “little people” go about their business, oblivious to us mere mortals staring down at them like giant Cheshire cats.  Image by Luidmyla from AdobeStock. Fairy gardens evoke the same sense of intrigue and fascination, and creating a fairy garden is the perfect invitation to allow your imagination to again enter the realm of magic. Creating a fairy garden is essentially an activity inspired by nature and all that exists in the natural world, with a touch of whimsy that gives us a space tp escape the “rational” world for just a bit. So, what makes a fairy garden? What types of things are “essential” to a fairy garden? Let’s take a moment or two to suspend belief and discuss the ten essential elements that I believe are necessary for a successful fairy garden!  Image by Bari Garrett from Pixabay. Fairy habitats When it comes to creating a fairy habitat, the sky is the limit! Fairies love a habitat that is attractive to birds, bees, and butterflies…but maybe your fairy has other ideas! At its core the fairy garden is a tiny haven full of miniature structures surrounded by all sorts of things that attract the typical garden wildlife. But—again—your fairy might cut against the grain and embrace their inner alien or beach bum! (I’ve seen both…it gets interesting!) In the interest of keeping things simple, though, we’ll just discuss the typical garden or woodland fairy habitat.  Image by anca enache from AdobeStock. Fairy gardens are typically part of a larger garden (although they don’t have to be), so think of this space as a garden within a garden…a special little patch of real estate set aside just for your magical fairy resident. And put some thought into it! Put yourself in your fairy’s shoes…Visualize yourself about 3 inches tall and look around. (Maybe put that camera phone down to ground level and take some photos, just to get a more realistic perspective.) 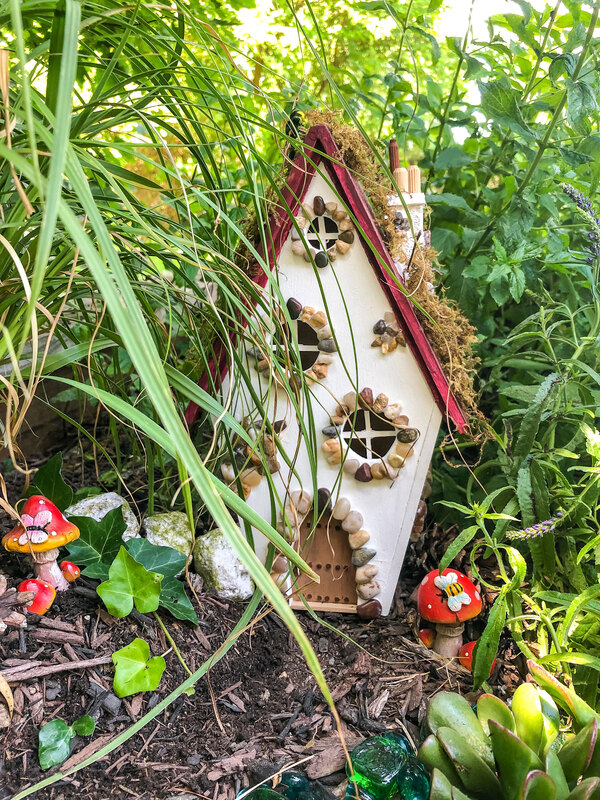 Outdoor fairy garden featuring handcrafted fairy cottage. Photo by Diane M. Lilly, 2020. Are there trees and tree stumps with hollows to live or hide in? Are there mushrooms for your fairy to sleep on or shelter under during a rainstorm? Is there a patch of flowers with vibrant colors and attractive fragrance that attracts birds and bees? Maybe there is even a hollow woodland log with clumps of ferns clinging to its reclining form on a forest floor. Whatever your choice of habitat, make it something fun, whimsical, and enchanted! Make it a place that will make your fairy feel welcome and want to stay. 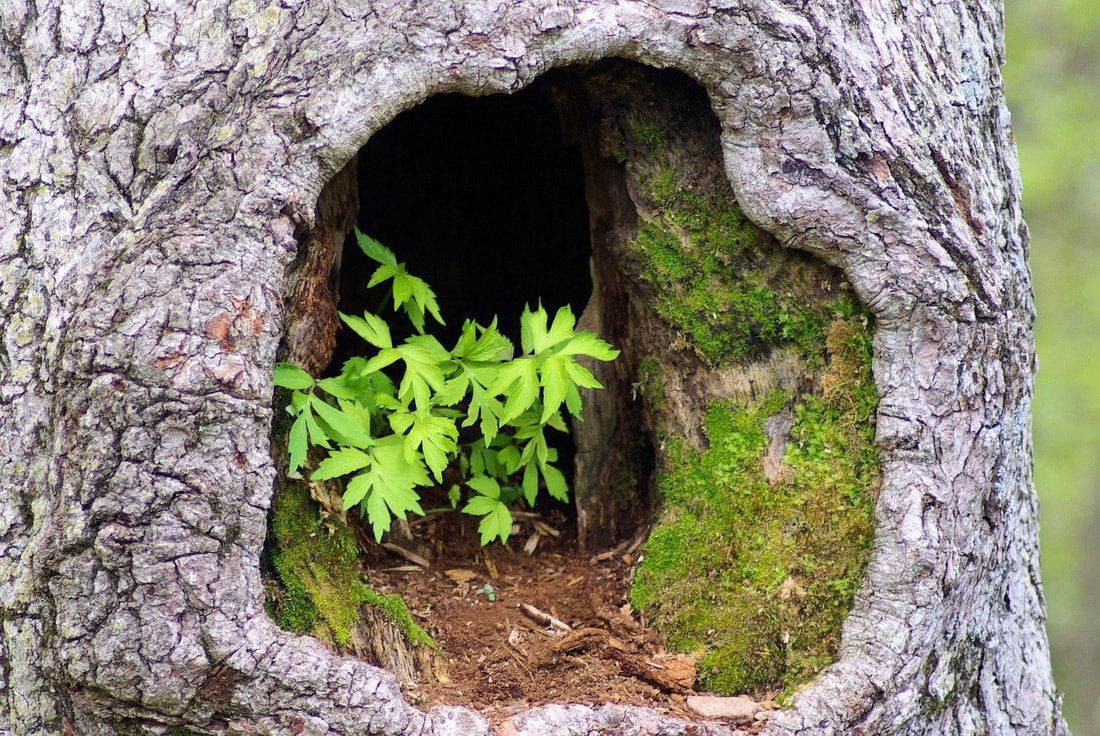 Image by Mike Goad from Pixabay. A comfy fairy home If your fairy does decide to stay in the habitat you’ve so carefully chosen, she’ll need a place to do all the “domestic” stuff, the stuff of daily living. So what type of home will your fairy want? When it comes to fairy homes, this will depend on your chosen habitat, and—of course—your fairy’s preferences! A fairy’s house could be provided by nature, taking the form of a tree hollow, toadstool, or miniature cave made of rocks. Or maybe she’s an environmentalist who embraces the idea of repurposing old pots, wheelbarrows, or planters. Or maybe you are one of those crafty fairy guardians who builds her a birdhouse or fairy house. Whatever type of home you and your fairy choose, it should be attractive and comfy and provide shelter from wicked weather. 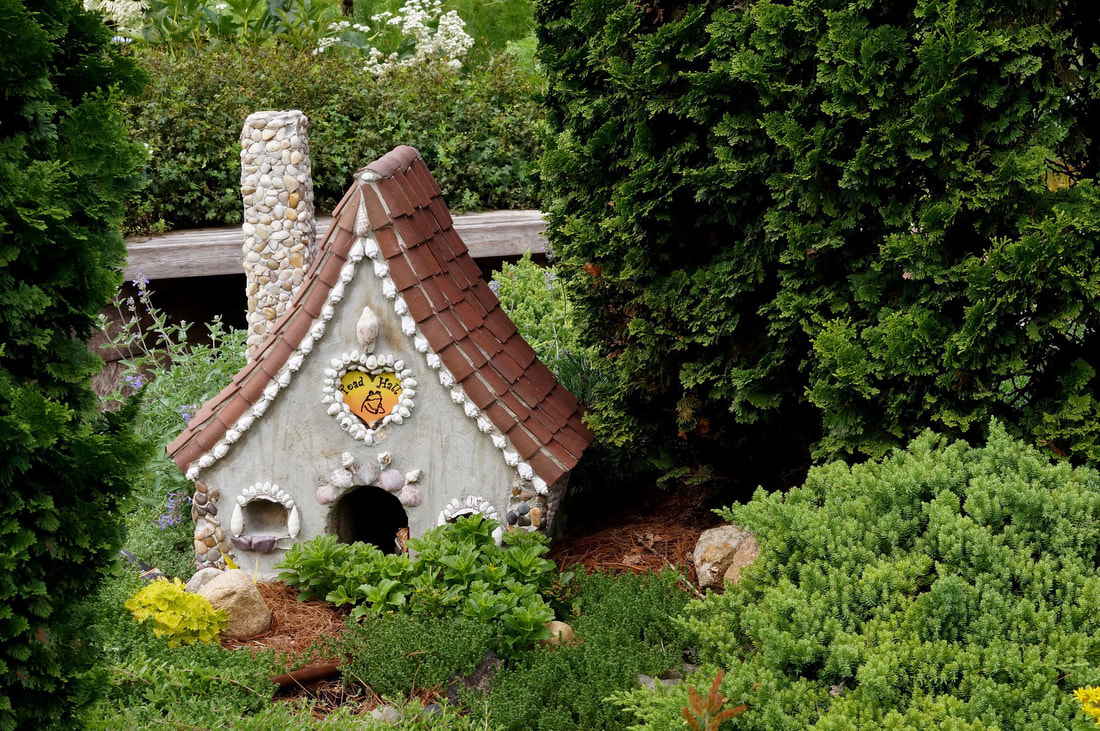 Image by 2000holmes from Pixabay. 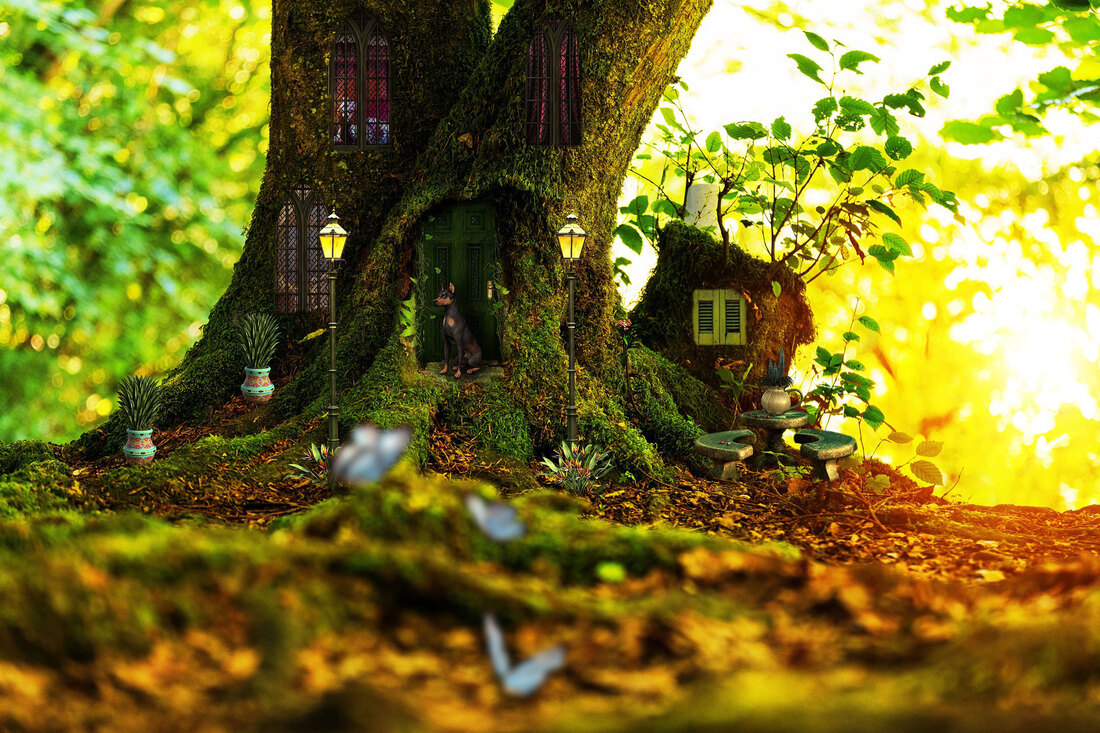 Image by ImaArtist from Pixabay. Shelter & hiding places for fairies Your fairy will not spend ALL day inside her home! She will be out and about, exploring her gardens and surrounding areas, looking for food, and visiting friends. And sometimes—while she is out having too much fun—she gets caught in a rainstorm! Remember those tree stumps, toadstools, and flowers I mentioned before? This is where they come in handy! It is essential to your fairy’s happiness to provide places of shelter, even if it’s a thick bush or large leafy flower under which your fairy can hide from unwanted visitors or shelter from that occasional summer rainstorm. 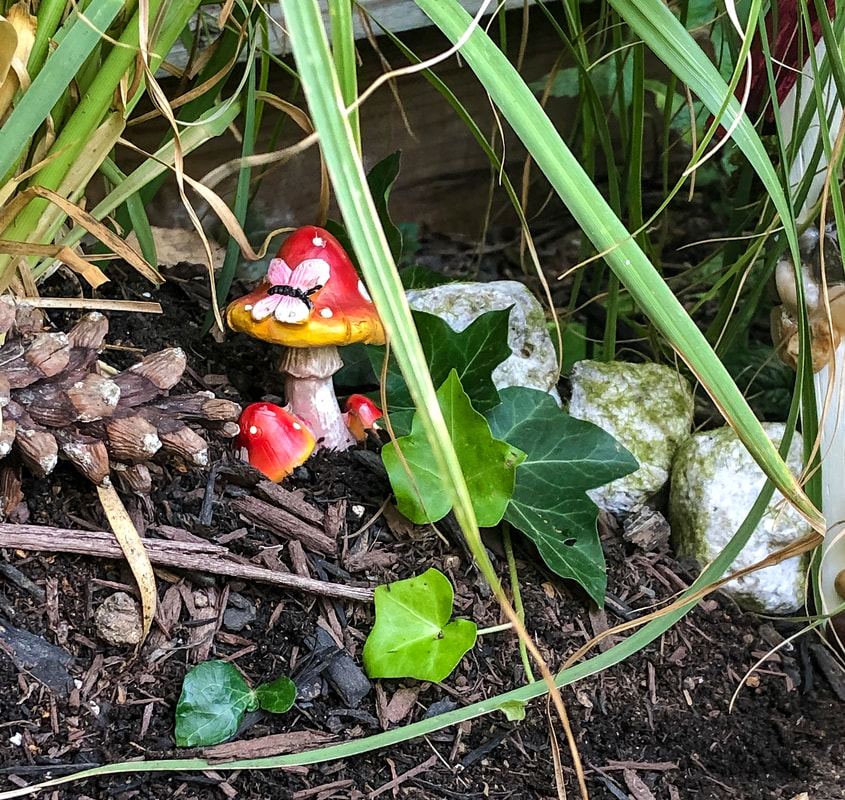 Little hiding space in my outdoor fairy garden with a mushroom and pinecone. Photo by Diane M. Lilly, 2020. Fairy friends & companions Speaking of friends…We all need friends, and your fairy is no different! The perfect habitat will naturally attract butterflies, frogs, hummingbirds, and ladybugs all of whom will be curious about your resident magical being and easily befriend her. Maybe the neighborhood squirrels and rabbits pop in for a quick visit while on the way to find their morning meal. You could even invite companions from the fairy world, like gnomes and elves. (Don’t worry that they are resin statues…they come alive when you are not looking anyway!) Maybe your cat or dog makes a daily trek outside to pay a visit. (Make sure they are friendly to your fairy, or you may incur her wrath!) And don’t forget that YOU are her friend as well! Visit her now and again to check up on her and catch up!  Image from Pixabay.  Image by Jeroen from AdobeStock. Miniature garden areas for fairies Having a resident fairy comes with responsibilities, and one of those responsibilities is creating a beautiful garden in which your fairy can quietly meander on a cool misty dawn or entertain friends on a sunny summer afternoon. Nestling your fairy’s magical home into existing flower gardens is one of the easiest—and most natural—ways to surround your fairy with her very own garden patch.  Image by jonnyseek from AdobeStock. Or…maybe this is where you have fun doing miniature landscaping! Creating miniature gardens is an art form that goes back decades, but lately, the fairy garden has become all the rage! How can you resist creating all those miniature walkways, garden patios, and landscaping?! If you decide to go this route, you’ll need miniature plants--succulents, miniature roses, or any relatively small plant that won’t get out of control and become overgrown. Maybe some plants are in pots, and maybe some grow from the soil…Just think low maintenance. (That doesn’t mean NO maintenance! You’ll have to visit your fairy friend often to do upkeep.) Whatever you choose to do for your fairy, creating a magical homestead for your fairy will entice her to stay…And that means good luck for you!  Image by Darwin Carozza from AdobeStock. Flowers in the fairy garden While we’re on the subject of gardens and flowers, let’s talk a little about the type of flowers and plants that will have your fairy swooning… So what types of plants and flowers attract fairies? Fairies are known to have a fondness for aromatic herbs, like thyme and rosemary. Planting herbs in and around your fairy garden attracts bees and other insects which are beneficial to the health of your garden…and the happiness of your fairy. And did I forget to mention the amazing scent that fills the air?! Beautiful flowers—like petunias, tulips, foxglove, pansies, and even wildflowers—can also add to the symphony of fragrances in your fairy’s garden. Flowers that have large petals also provide much needed shade on a sunny day, or even attractive places to hide in or sleep. Fruit trees and bushes make a good food source for your fairy, and having them close to home means she won’t have to risk traveling too far away to find her morning breakfast.  Ladybug climbing on a chamomile plant. Photo by Diane M. Lilly, 2022. 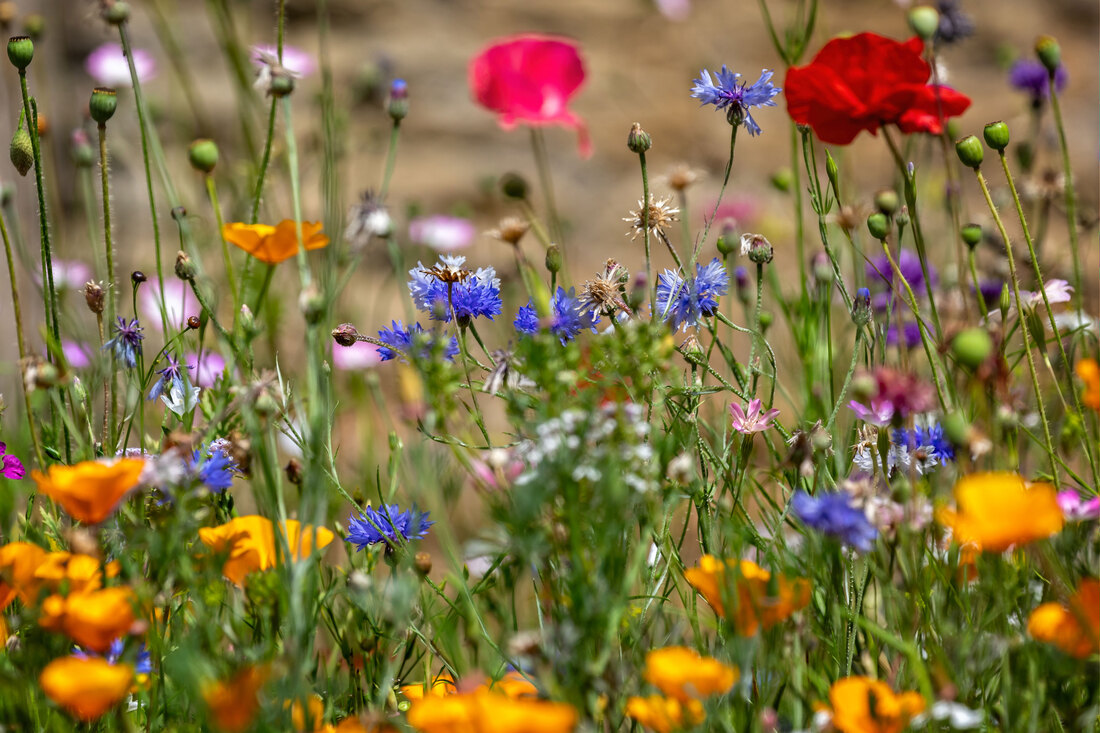 Image by Nigrl from AdobeStock.  Purple petunia with raindrops. Photo by Diane M. Lilly, 2022. Shiny objects and fairies In case you didn’t already know, fairies like shiny things! It is said that fairies are attracted to glittering shiny items, like fairy lights and sparkly gems. They are attracted to the light like moths to a flame, so it is important to use this to your advantage as you try to lure a fairy into your garden and entice them to stay. As you create your fairy garden, think about incorporating things like crystals, gem stones, glass beads, sparkly flocked decor, fairy lights, and even water. Your fairy will be mesmerized! 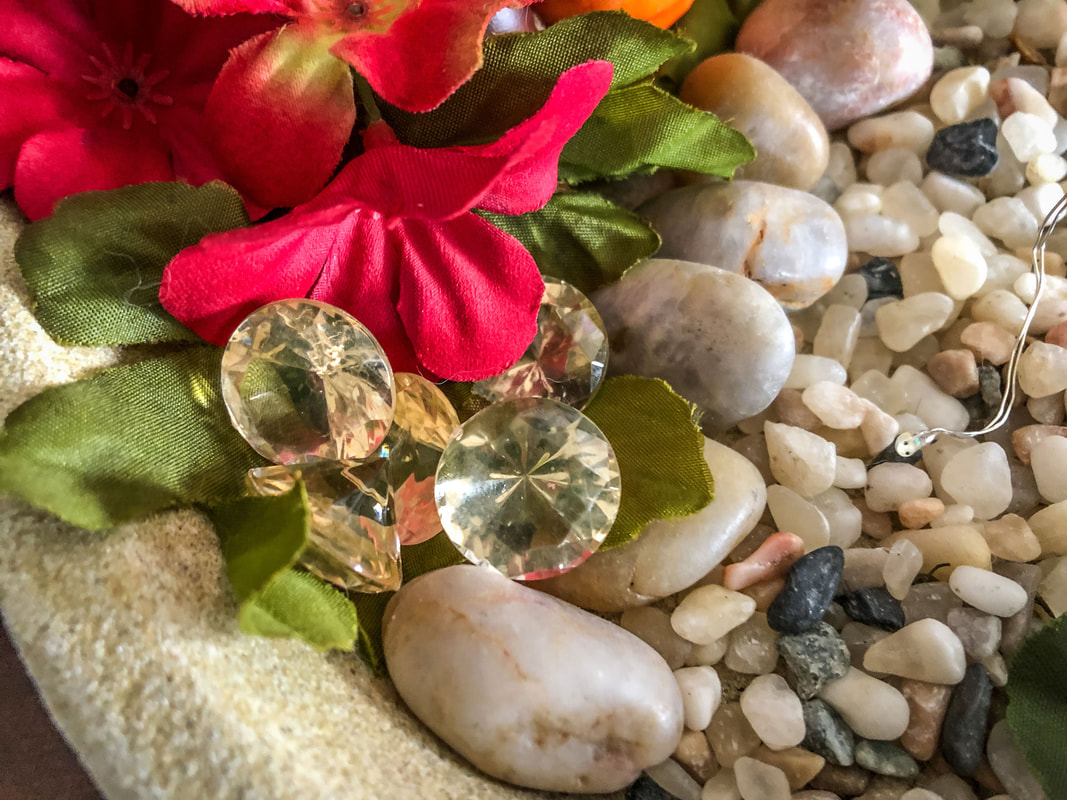 Sparkly gold crystal gemstones in my fairy garden. Photo by Diane M. Lilly, 2022. Water sources in the fairy garden Water is the source of all life…and fairies love it! The presence of water provides several benefits. Fairies like it for its shimmering properties, but they also bathe in pools of water and drink from nearby water sources. In ancient myths water had magical properties and represented a portal to another world. Remember, fairies are ethereal magical creatures that belong to another realm of reality, and the presence of water gives them easy access to that world. Ponds, streams, bird baths, or any pool of water—even miniature fountains—make excellent water sources for your fairy garden and any visitors that might arrive. 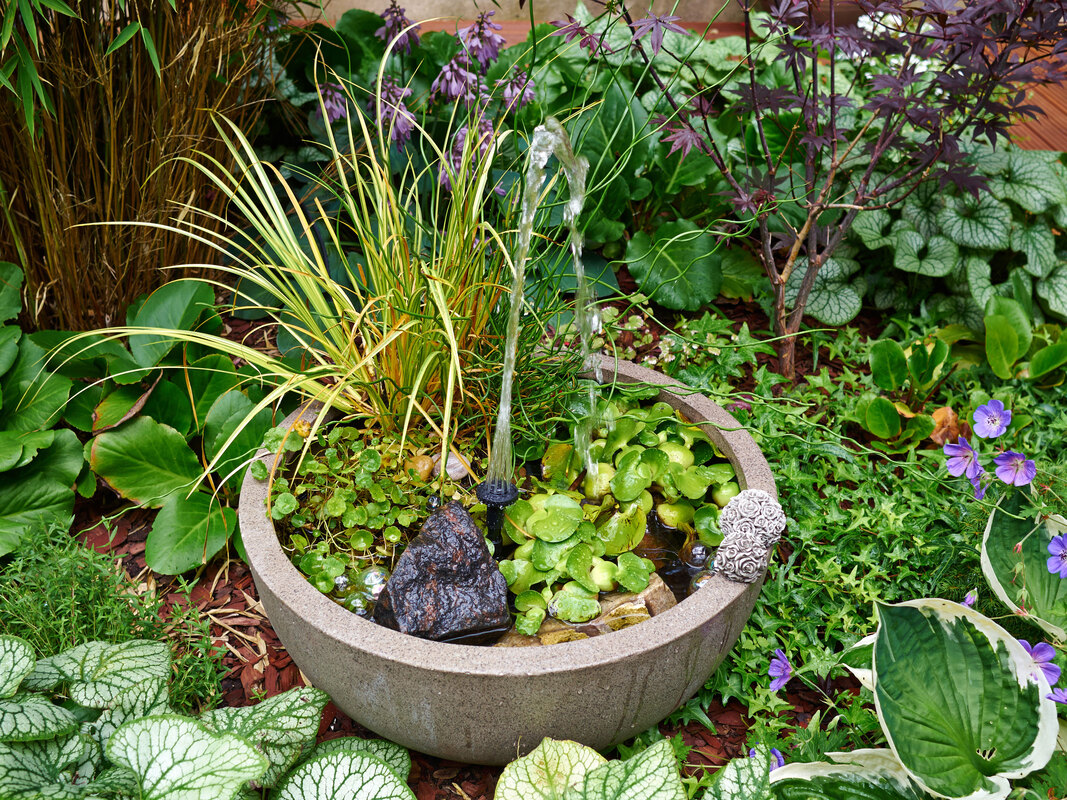 Image by Rony Zmiri from AdobeStock. What do you do if you can’t provide a source of actual water? Go “faux”! Even just the illusion of water is beneficial and will make your fairy happy. It can be as simple as blue stones arranged like a pond. Or you can get more decorative with decor filled with resin resembling a waterfall. It’s up to you! As long as the effort is there, your fairy will be grateful. 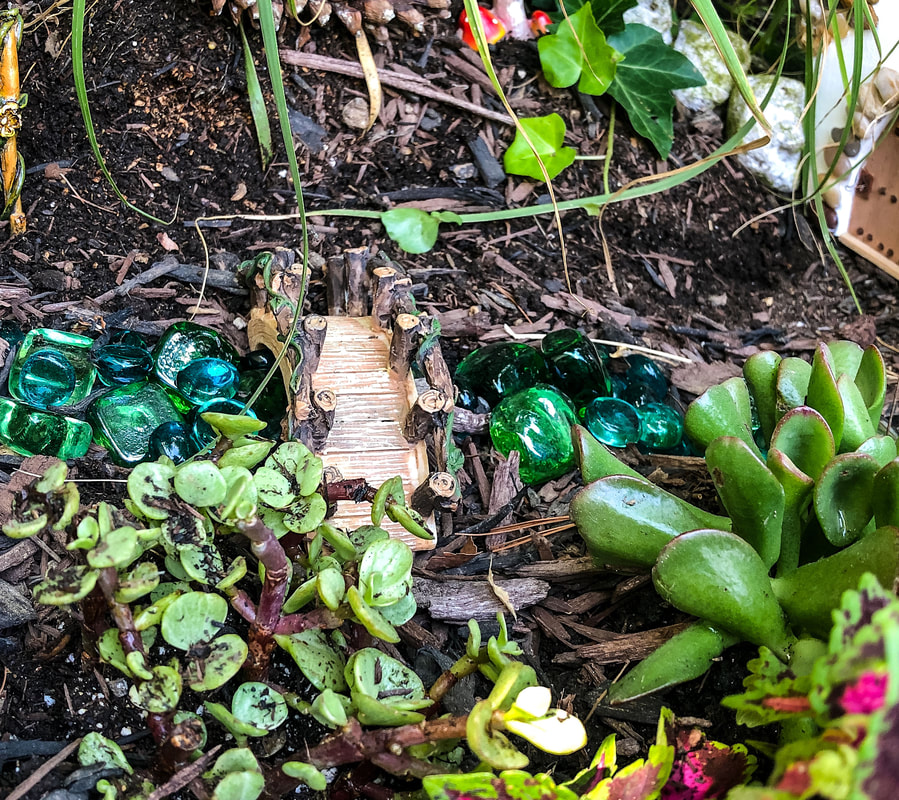 Outdoor fairy garden with a miniature bridge and blue gemstones to mimic water. Photo by Diane M. Lilly, 2020. Soothing sounds in the fairy garden We often forget about sound when we are creating gardens, but sound can have a powerful effect on us, for better or for worse. A pleasant sound—like the soft gurgling from a water feature—sets the tone for a calm quiet place to sit and meditate or daydream. All creatures—magical or otherwise—will benefit from such a place! The sound of wind chimes in the garden can also have a spellbinding effect on anyone who happens to be within earshot. The musical tones that keep time with the breeze take us to another level of sublime consciousness. The same sounds that are soothing to us are also loved by fairies, so this is a great opportunity to create relaxing tones that will make your fairy’s homestead more magical, but will also entice YOU to linger a few moments in your miniature garden and revel in your handiwork.  Image by Carla Burke from Pixabay. Using your imagination And finally…The number one essential element for creating a fairy garden is your own imagination! Use your imagination to come up with a garden that has a story to tell. Create a theme that tells the story of your garden fairy. Don’t be afraid to tap into that inner child and dream! Sit a while and think about little worlds and all the magic folk. Experiment with different setups, plants, decor. There is no right or wrong way to do it…just as long as you do it! 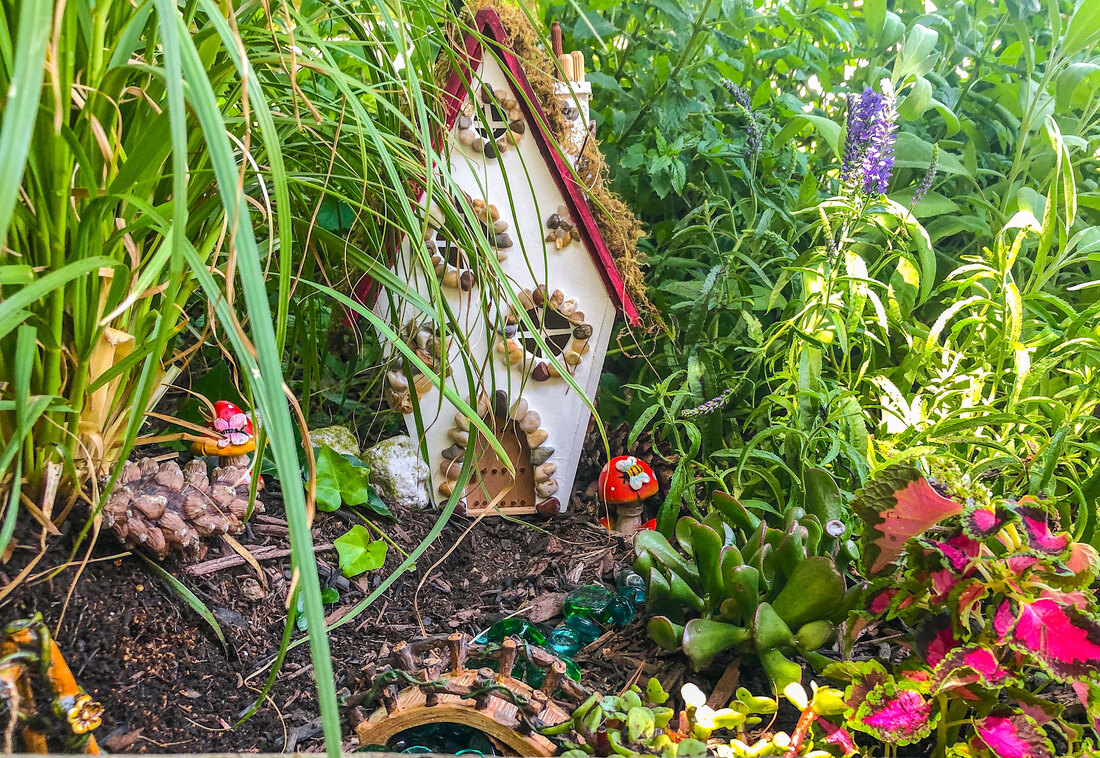 Outdoor fairy garden faeturing a handcrafted miniature fairy cottage. Photo by Diane M. Lilly, 2020. Creating a fairy garden is an opportunity to get your hands dirty and play with ideas for miniature landscaping. Even if you don’t believe in fairies, this is a way to be creative and expressive. The process of working in a garden is a fun way to relieve stress and escape—even if for just a few moments—from the craziness of our everyday lives. So go forth and dream…and create a whimsical magical world for your own resident fairy! So those were my top ten essential elements for creating a fairy garden. Now that you are inspired to go create your own magical fairy garden, what kind of garden do you think you will make? Or do you already have a resident fairy happily living in your garden? I’d love to hear your thoughts and experiences in the comments! Just an FYI…You can create beautiful decorative indoor fairy gardens as well. It is so much fun putting together indoor fairy gardens with faux florals and miniature decor! Decor can be easily changed out for the seasons or holidays to give you a fresh new vignette or tablescape whenever you like. If you have a moment, go check out my handcrafted fairy houses created specifically for indoor fairy gardens. 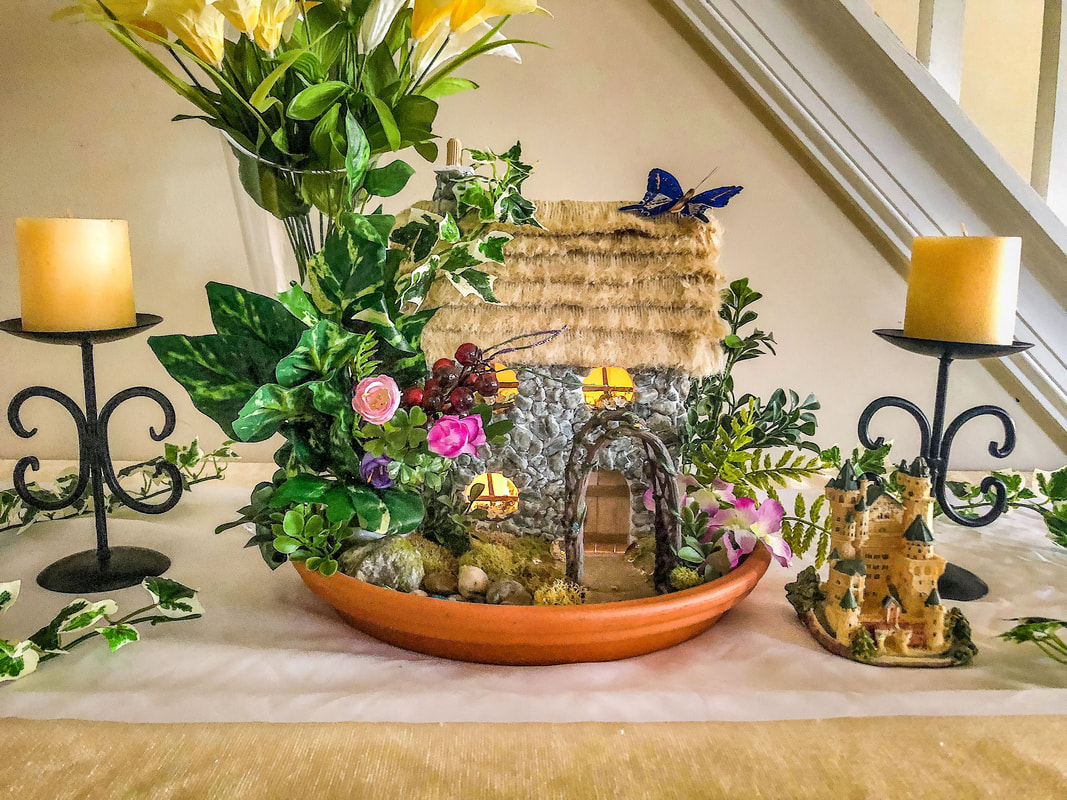 Indoor fairy garden featuring a handcrafted miniature English Cottage. Photo by Diane M. Lilly, 2019. Related blogs you may want to read: A brief history of the origins of fairy gardens My spring 2022 indoor fairy gardens Spring makeover for my indoor fairy gardens My outdoor fairy garden My fairy house project Sources: https://www.gardeningknowhow.com/special/spaces/attracting-fairies-in-the-garden.htm https://theforestfairy.com/flowers-that-attract-and-welcome-the-fairies-into-your-garden/ https://obsessionwithbutterflies.com/2019/08/miniature-fairy-gardening/ https://fifthseasongardening.com/the-magical-world-of-fairy-gardens https://www.almanac.com/gardening-miniature http://www.buckscountrygardens.com/the-enchanted-garden-miniature-fairy-gardens/ https://davesgarden.com/guides/articles/view/2080 This article may contain a few items or commercial mentions, but I only used them for demonstration purposes only. I am not endorsing any particular product or receiving any monetary gain for this blog. 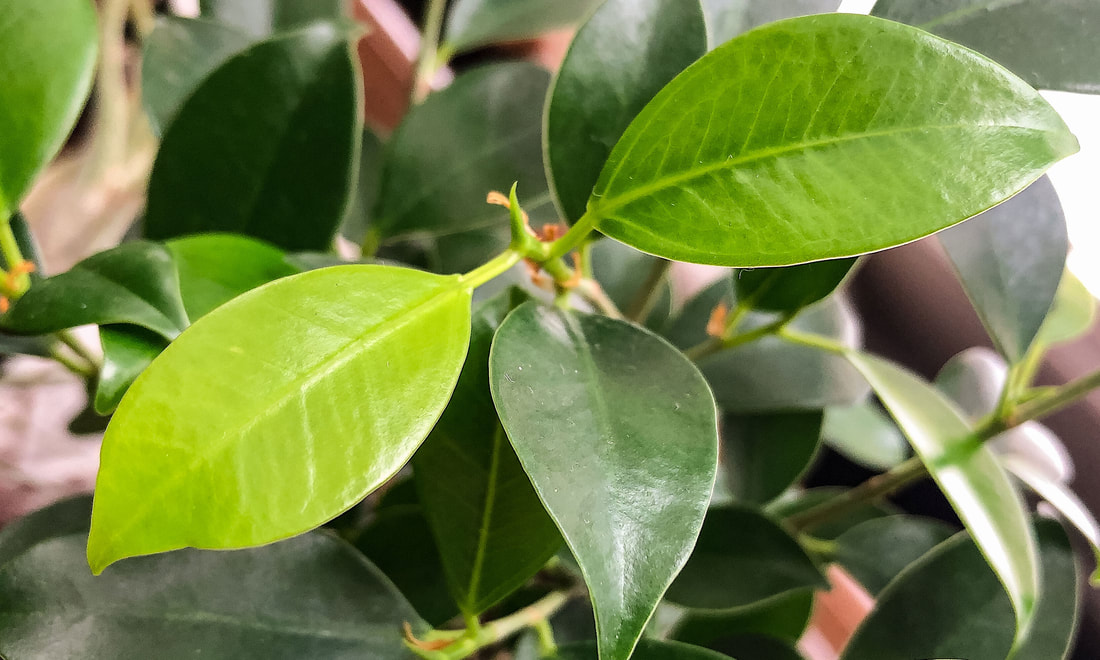 Closeup of bonsai ficus leaves. Photo by Diane M. Lilly, 2022. If you have a small bonsai ficus that has become a little unruly or has over grown its pot, today’s blog has a few tips that may help you repot that burgeoning bonsai tree! Last year I purchased a bonsai ficus retusa and over the past year it has become side heavy, leaning to one side and pulling itself out of the soil. The tree leaves themselves are flourishing and look amazing, drinking in the warm sunlight from its tranquil spot in front of my south facing window. The severe lean that is causing the roots to be exposed, however, has me concerned that this tree may soon find itself in distress. An intervention is needed! 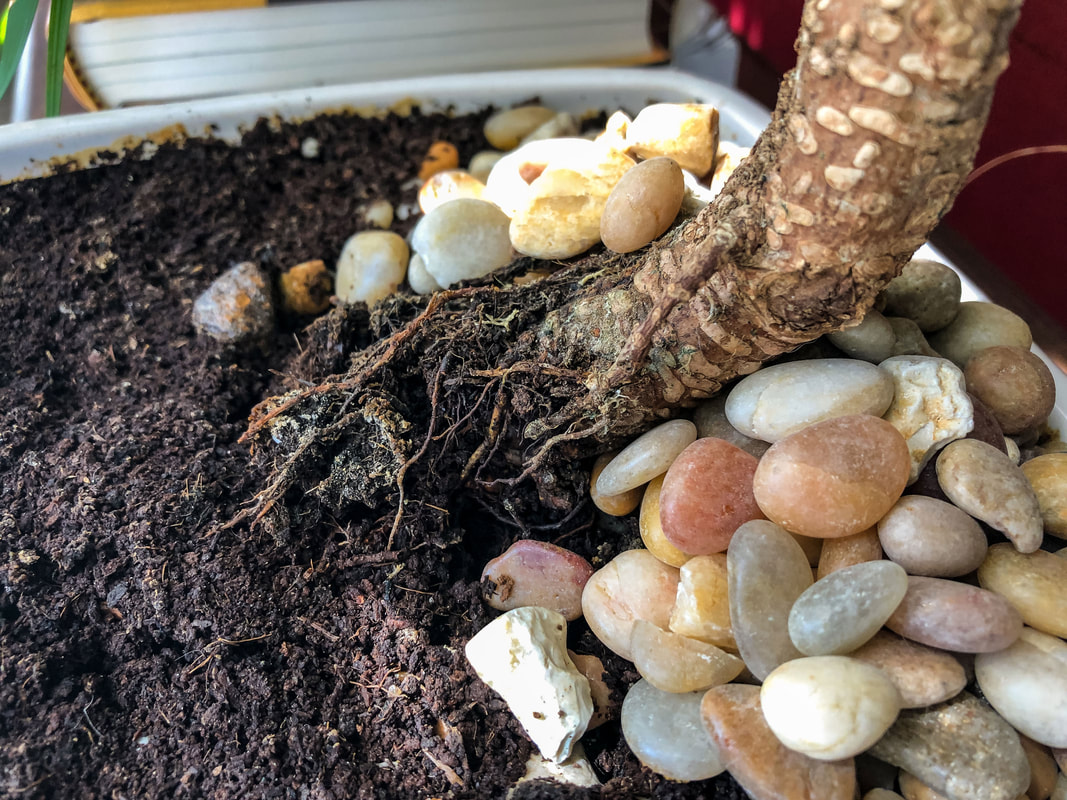 My bonsai ficus plant pulling itself out of the soil. Photo by Diane M. Lilly, 2022. Originally from Asia, this type of tree loves humid environments, but does not like to be soggy, so keep that in mind when choosing pots and soil. The bonsai ficus retusa is said to be a very forgiving, undemanding plant for beginners and I can certainly vouch for that! 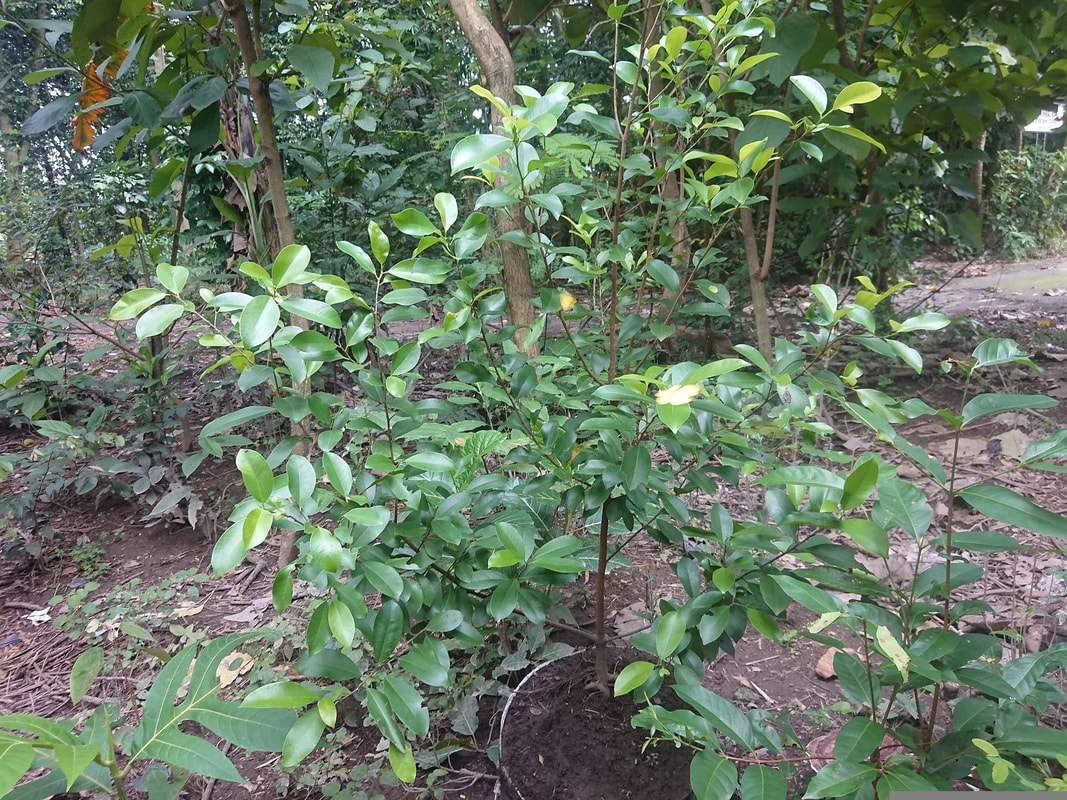 Image by Samudra Dirgantara from Pixabay. Having said that, the thought of transplanting this tree was just a wee bit intimidating to me. But, like anything else, you have a to do a little research and then just dive in, right? So, I’m going to share with you the things I learned and my process for transplanting my latest plant baby... 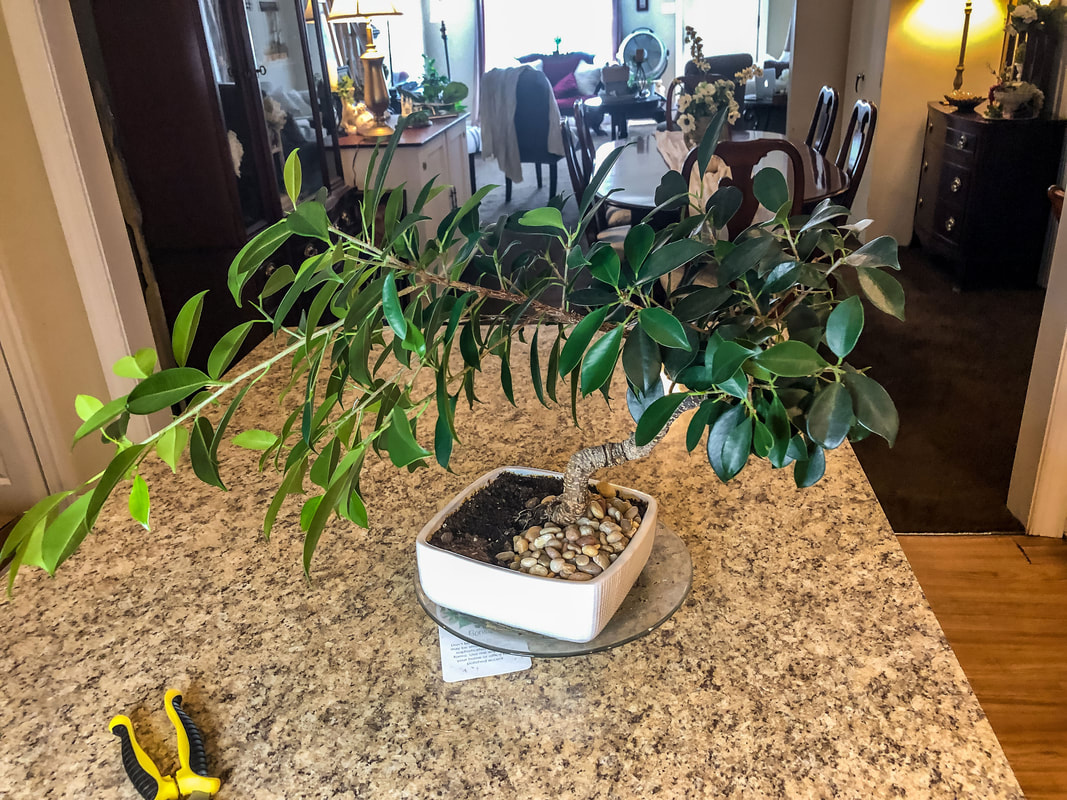 The "before" shot of my overgrown bonsai ficus. Photo by Diane M. Lilly, 2022. When to repot a bonsai ficus For most houseplants, the going wisdom is to repot in early spring, but the timing for repotting a bonsai tree depends quite a lot on the specific type of tree. (And it’s important to note that bonsai plants are miniature trees, not a typical houseplant.) My specific tree (as mentioned previously) is a bonsai ficus retusa, so my timing for repotting this plant is not in early spring but in mid to late summer. This may be an oversimplified overview of repotting the bonsai ficus, and it’s only fair to share a little of the abundance of information I have found on the topic. I have discovered (frustratingly) that there are different opinions on the topic, but much of how you care for your bonsai ficus will depend on a few key points:
According to one source--Bonsai Empire—you should avoid replanting bonsai trees in summer or winter, but other sources indicate that indoor plants are less vulnerable to the changes in the season and will tolerate repotting at other, less ideal, times of year.  Image by StockSnap from Pixabay.  Image by teerapon from AdobeStock. Kaizen Bonsai (a source that I found invaluable as I was researching the topic) recommends repotting according to your tree’s species, and for my tropical ficus, that means repotting the plant in summer when its growth has slowed. You can repot your bonsai ficus every other year or as needed, such as if the tree has rapid growth or has become root-bound. Type of pot for a bonsai ficus Most times, when you see a bonsai tree, it will be in a low flat pot. The art of caring for bonsai trees is an ancient one steeped in tradition that has a very distinctive visual style. The design aspect of bonsai leans on a basic design theory of the rule of thirds. The pot of the bonsai should be 1/3 the height of the tree, just like with vases for floral arrangements. You may need a pot 2/3 the width of the tree to create the right balance, forming a triangular shape for your display. When choosing a pot, remember you will be shaping your bonsai using triangular geometry in your design.  Image by teerawit from AdobeStock. Having said that, Kaizen Bonsai says that you can use any pot that works well with the size and shape of the tree, so don’t get too stuck on the idea of using traditional shallow pots. Just focus on finding a well-balanced container size with good drainage that highlights the tree's beauty and form. I purchased the perfect pot with two drainage holes, mesh, and wire from Amazon. 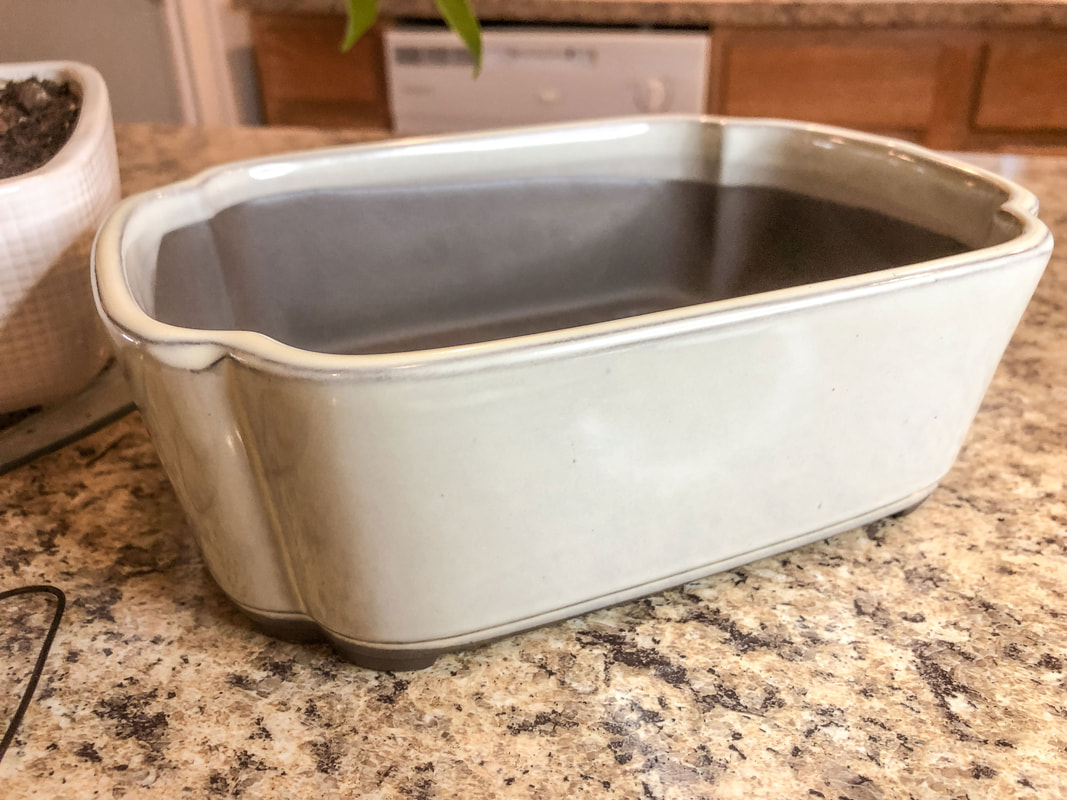 New pot for my bonsai focus. Photo by Diane M. Lilly, 2022. Cover the holes in the pot base with mesh to limit soil loss and allow good drainage. Also, there is usually a type of floral wire that is fed up from the bottom holes of the pot and wrapped around the tree to anchor it so it doesn’t tip over. (During the repotting process, I discovered that my plant was never properly anchored in, making the plant top-heavy and tippy.) 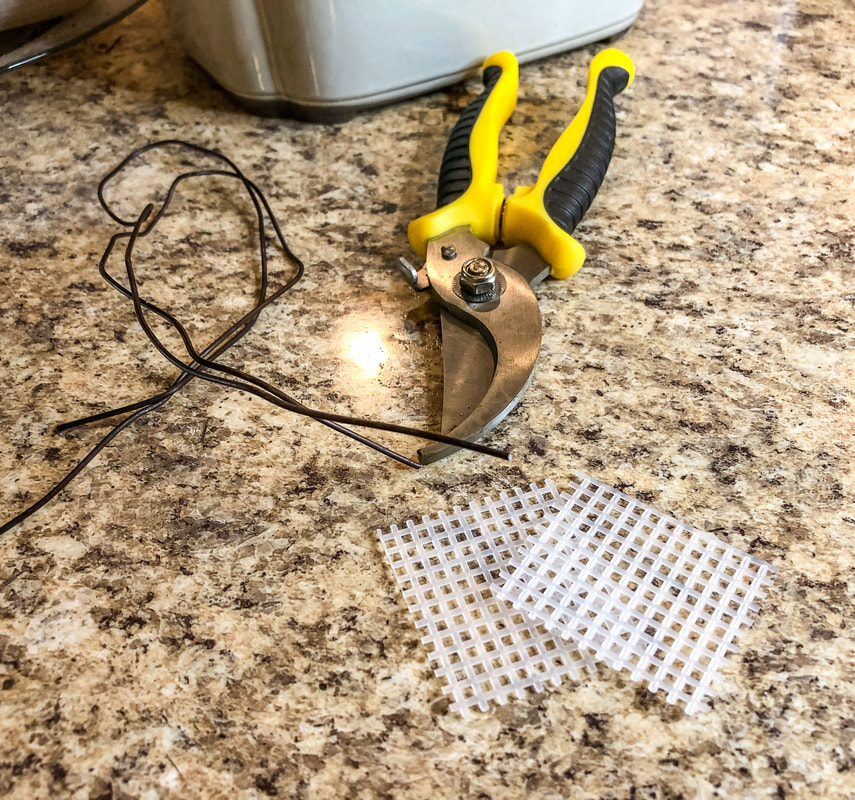 Wire, cutters, and mesh for the repot project. Photo by Diane M. Lilly, 2022. 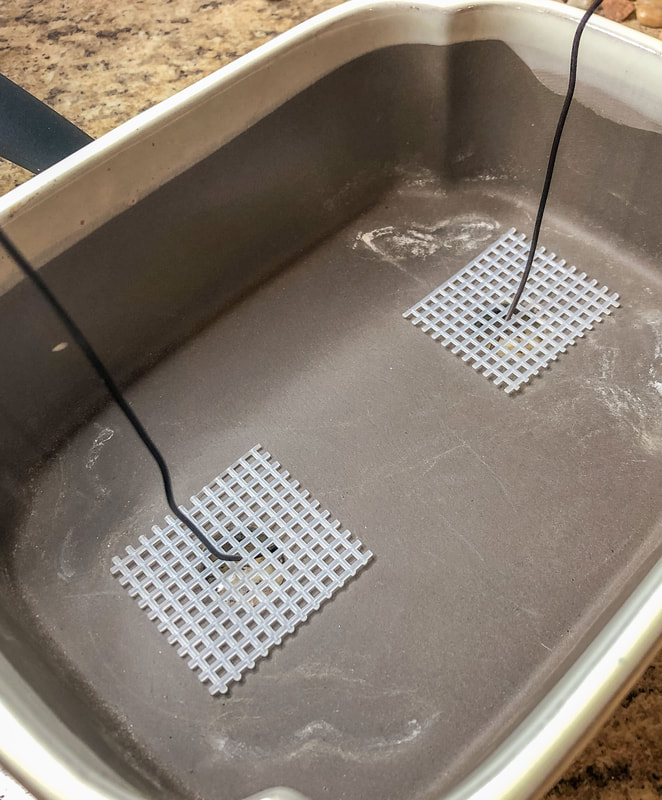 Mesh and wire prepped at the bottom of the new pot. Photo by Diane M. Lilly, 2022. Best soil for a bonsai ficus Now that we’ve addressed the pot for the bonsai, let’s talk about soil. What type of soil will you need for your bonsai ficus? Just like I mentioned before, there are different schools of thought depending on who you ask, but Below are a few suggestions from my research:
I have also been told that cactus soil is good to use in a bonsai soil mixture for its drainage properties. It’s a good idea to tailor the soil mixture to the type of tree and the humidity in the environment. You want an overall well-draining soil. You want your soil to hold just enough moisture for the tree to thrive without sitting in soggy soil. For my mix, I used a mixture of what I had on hand—cactus mix, sphagnum peat, potting mix, and orchid bark. For the fungicide (for the branch I cut off and potted), I used a TBS of apple cider vinegar in 1 cup of water. 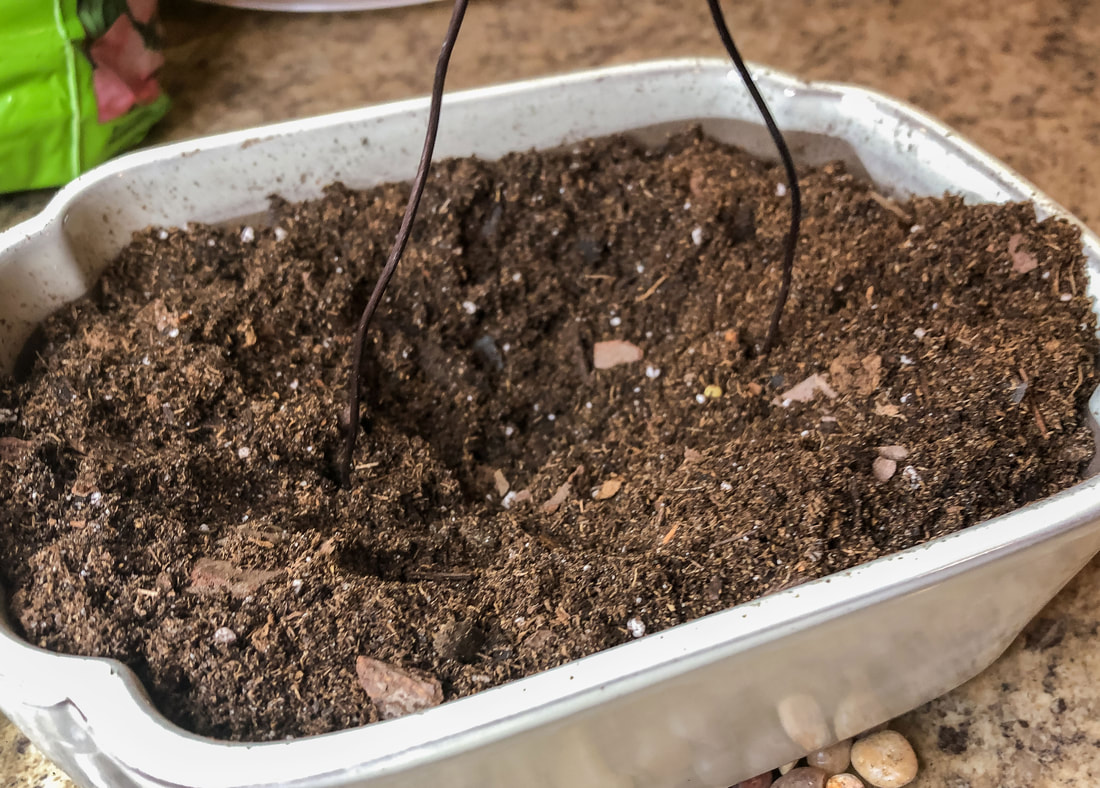 New pot filled partially with soil. Photo by Diane M. Lilly, 2022. Bonsai Empire recommends the following process for planting: wire the tree to the pot bottom to anchor it, create a layer for drainage topped with bonsai soil, and then add more bonsai soil. Carefully work the new soil between the roots to prevent air pockets (don’t tamp down too hard). 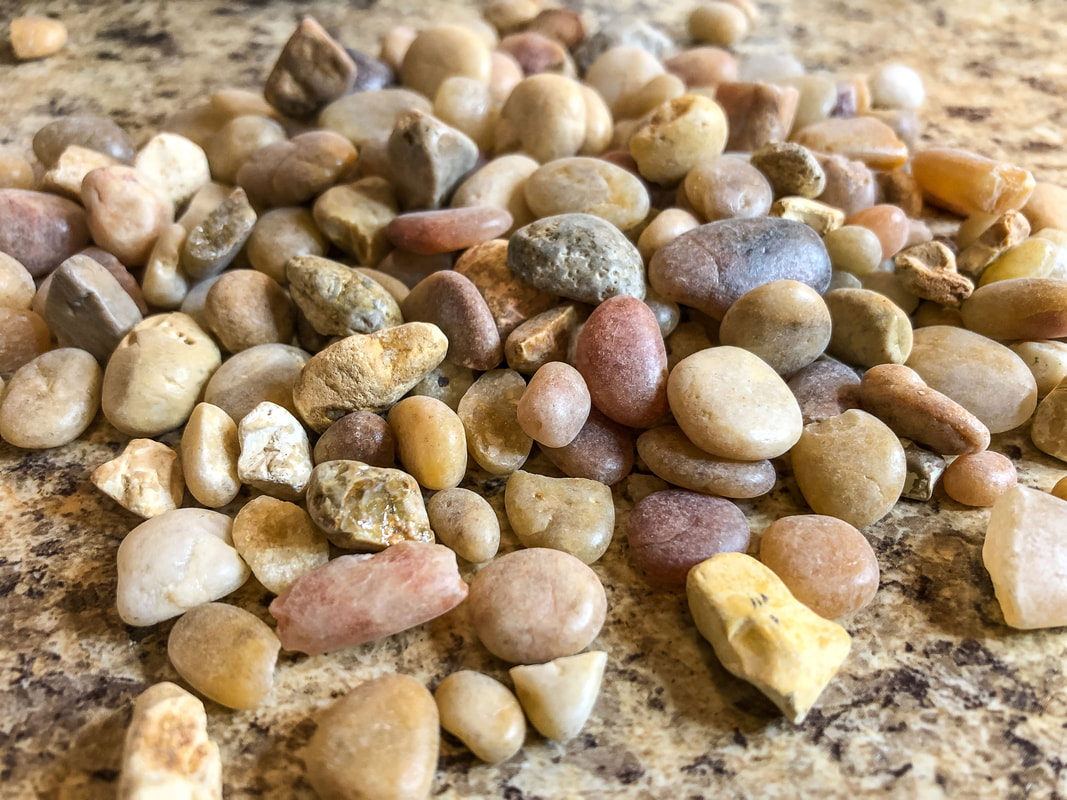 River rocks to be used on wet tray. Photo by Diane M. Lilly, 2022. Another source--Kaisen Bonsai—recommends just using well-balanced soil instead, tailored to the specific tree type, how much growth you want to encourage, how often you plan to water, the depth of the pot, and environmental conditions. You will need to water more often if using well-drained soil and may lose nutrients quickly. On the other hand, you do not want your bonsai sitting in wet soil, which causes root rot. Outdoor conditions (such as wind, humidity, and sunlight) affect how the plant retains water or dries out. Kaisen Bonsai recommends letting the soil dry out before repotting, as repotting with wet soil stresses the tree. The root ball of your bonsai tree will need to be carefully manipulated and unraveled during this process. Carefully unravel the root ball, and rake out the old soil using your fingers or a small rake so you can stretch out the roots for pruning (see the next section for trimming instructions). Once the roots are prepped, add a layer of soil or drainage rocks, feed in the wire that will hold the tree in place, place the tree in the soil, carefully work new soil between the roots, and then add soil to fill the pot. Wire the tree into place (we’ll discuss this later) and water thoroughly. 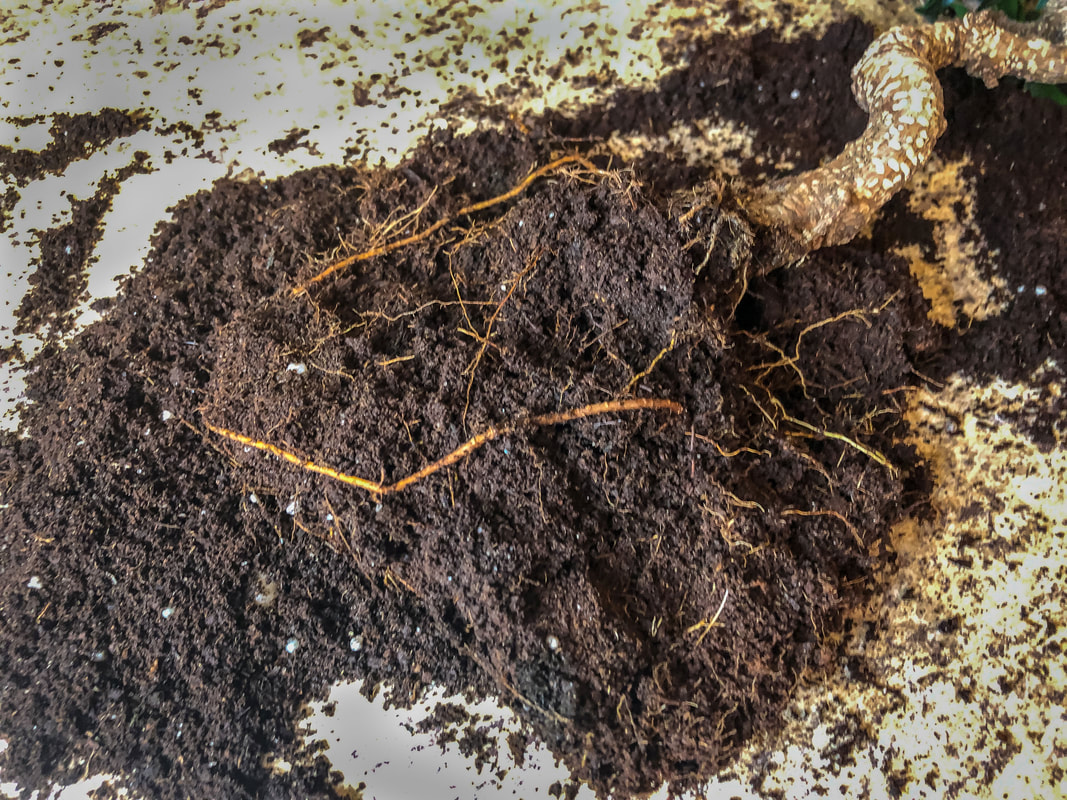 Root ball of the bonsai ficus plant. Photo by Diane M. Lilly, 2022. Trimming the roots of a bonsai ficus After the soil has been raked out and roots have been carefully loosened, it is time to assess how—and if—the roots get trimmed. Kaizen Bonsai recommends trimming the roots according to the tree species and the tree's condition and roots at the time. If in doubt--or if the tree is not doing well--err on the side of caution and leave the roots alone. Why trim the roots, you might ask? Giving the roots a haircut (root pruning) while replanting helps stimulate new growth. This process will help the tree get water and nutrients faster. Don’t get too carried away during this process—only cut up to 1/3 of the roots. 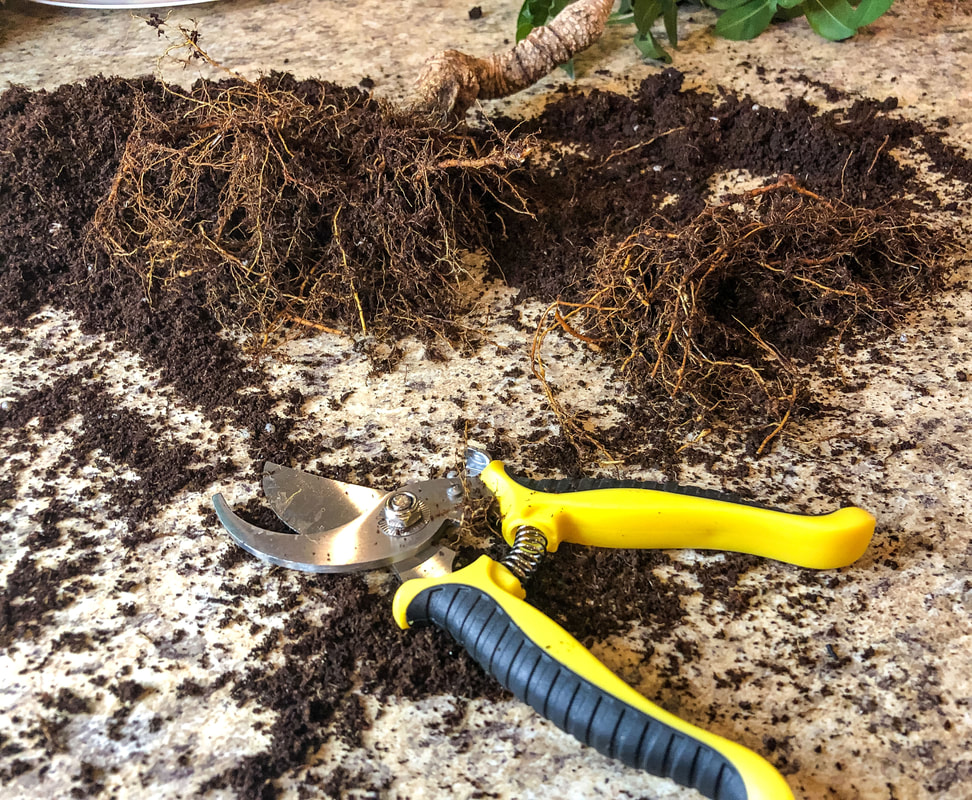 Roots trimmed off the bonsai ficus root ball. Photo by Diane M. Lilly, 2022. How to fertilize a bonsai ficus According to Kaizen Bonsai, only fertilize when the plant shows strong growth. Fertilization will also depend on your specific type of tree. Do not try to fertilize to fix “problems”; if there are plant health issues, try other options, such as adjusting the water schedule, pruning, loosening roots, or repotting. Another source says to fertilize once every two weeks during spring and summer, once a month in winter and fall, and dilute the fertilizer by half. How you fertilize will depend on your tree species and circumstances. I have not given my tree any fertilizer because it just didn’t need it! It had steady growth, with new shoots all the time, so I chose to forego the fertilizer. How to water a bonsai ficus Water the bonsai ficus when the soil feels almost dry. Do not let the soil become dry as a bone, but do not overwater either. Try to strike a nice balance with moist but not soggy soil. Soggy soil will cause catastrophic root rot. Bonsai trees usually sit in shallow pots, so keep an eye on the soil moisture to prevent damage from the soil drying out. When you water, water slowly and deeply, then let alone until almost dry before watering again. A tip I learned that has become invaluable to me for tracking the soil moisture in my plants is to use a water meter. I check all of my plants—plunging the water meter into the soil in several places to monitor the evenness of the soil moisture—before I pour water into the pot. A quick note about misting…The bonsai ficus does not need to be misted but could benefit from an occasional mist in dry environments. As this is a tropical plant, it does like some humidity, so an occasional mist and a wet tray can provide that little extra bit of moisture in the air. 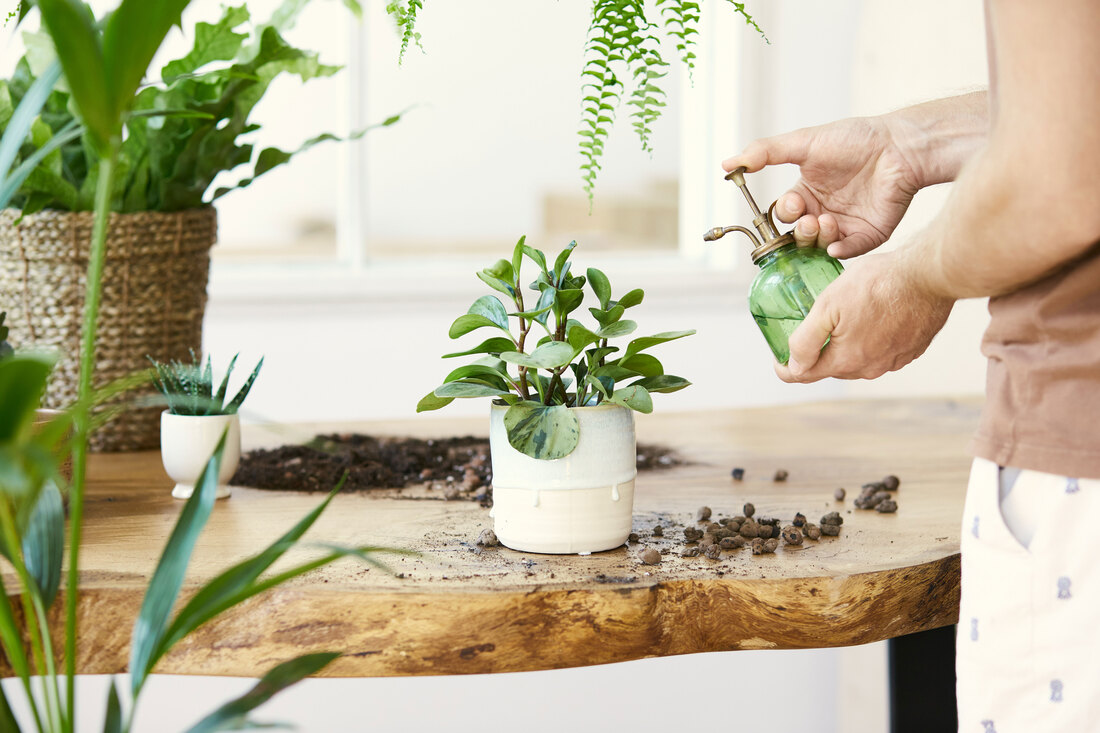 Image by FollowtheFlow from AdobeStock. Lighting needs for a bonsai ficus The bonsai ficus likes to be in full sun, but this tree can tolerate indirect light, as long as it gets a little bit of direct light on its leaves. The southern sun is perfect for this plant, but less direct light from the east or west will work. My plants sit in a southeast window of my house, and they all seem to love it! They get plenty of direct light until mid-afternoon, and they are happy. Do not leave this plant in the dark! It won’t tolerate dark corners or cold drafts (think tropical). 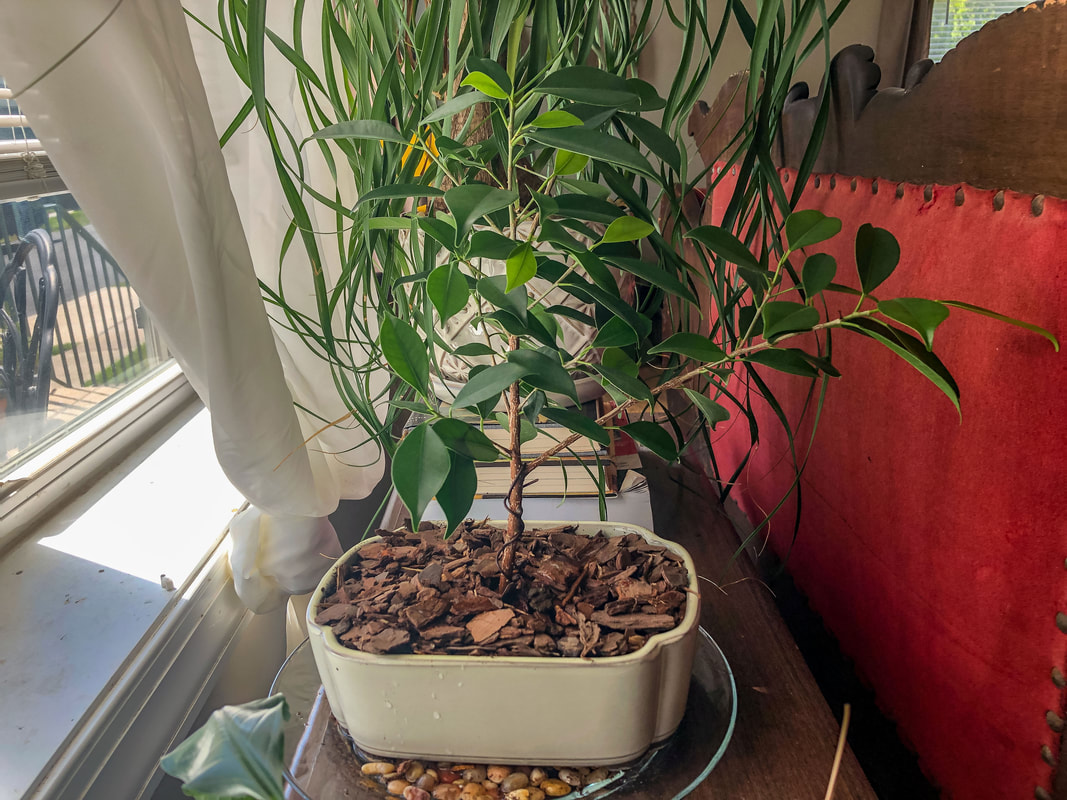 Newly planted bonsai ficus cutting in the front window. Photo by Diane M. Lilly, 2022. How to prune a bonsai ficus There are whole books and videos on this topic, and there’s no way I can do it justice in this short blog, but here are just a few tips to get you started… Manage the shape and size of the tree by trimming back new growth leaves to only a couple. For example, you can cut branches back to the first two or three leaves, promoting a bushier, less straggly growth. Pruning helps with apical dominance, or the tendency for the new growth to dominate, leaving older growth to wither and die. In simpler words, pruning helps control new growth to improve the tree’s overall look and health. Pruning is most effective in spring but can be done whenever the tree gets out of hand with growth. And don’t worry about the milky sap (latex) that will ooze out of the cuts. They are the tree’s way of creating a protective sealant to help heal the cut. 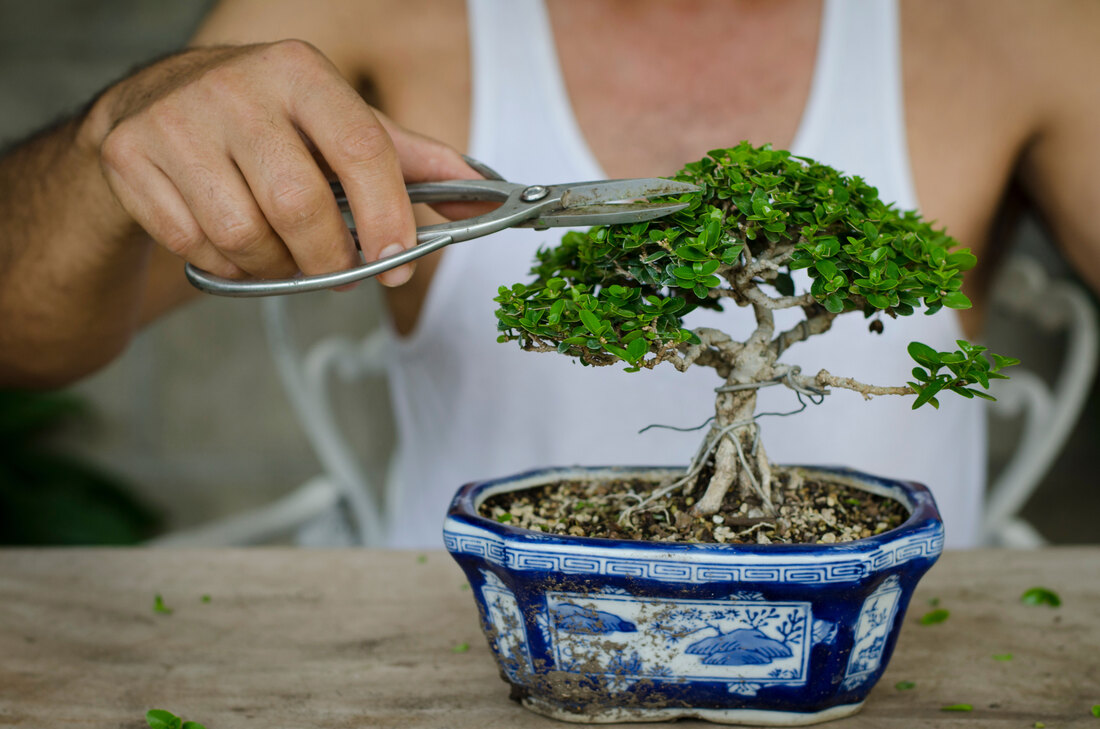 Image by Irene Marti from AdobeStock. How to propagate a bonsai cutting My bonsai tree developed a large branch off to one side of the tree, leading to leaning and tipping over from the weight. This was my fault for ignoring the pruning! The repotting process gave me the perfect excuse for pruning that branch, but I couldn’t bear to throw it away. The branch was the ideal size to propagate as a new tree! 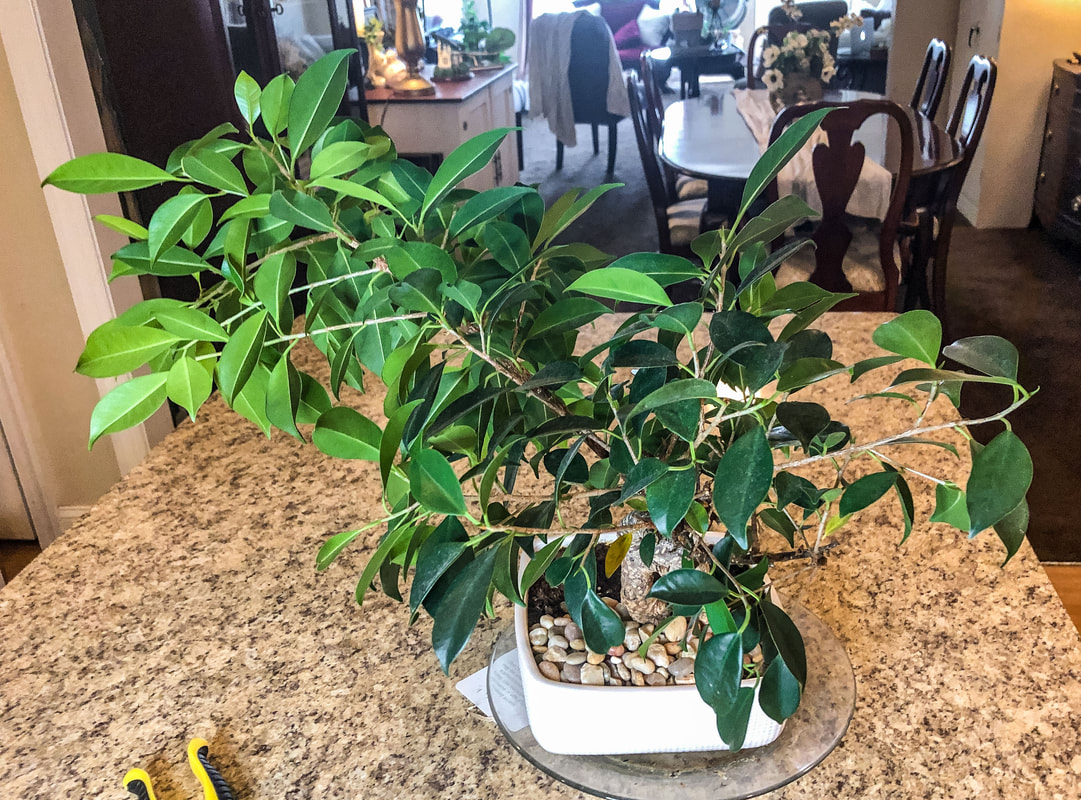 "Before" shot of large unruly branch on my bonsai ficus tree. Photo by Diane M. Lilly, 2022. So, how do you propagate a cutting from a bonsai tree? The bonsai is a tree, so it’s pretty resilient when chopping off bits here and there. The tricky bit is getting the cut piece to grow roots. To prune a branch for propagation, cut at a 45-degree angle like you would for fresh-cut flowers. This helps the cutting have more surface to soak up much-needed water. 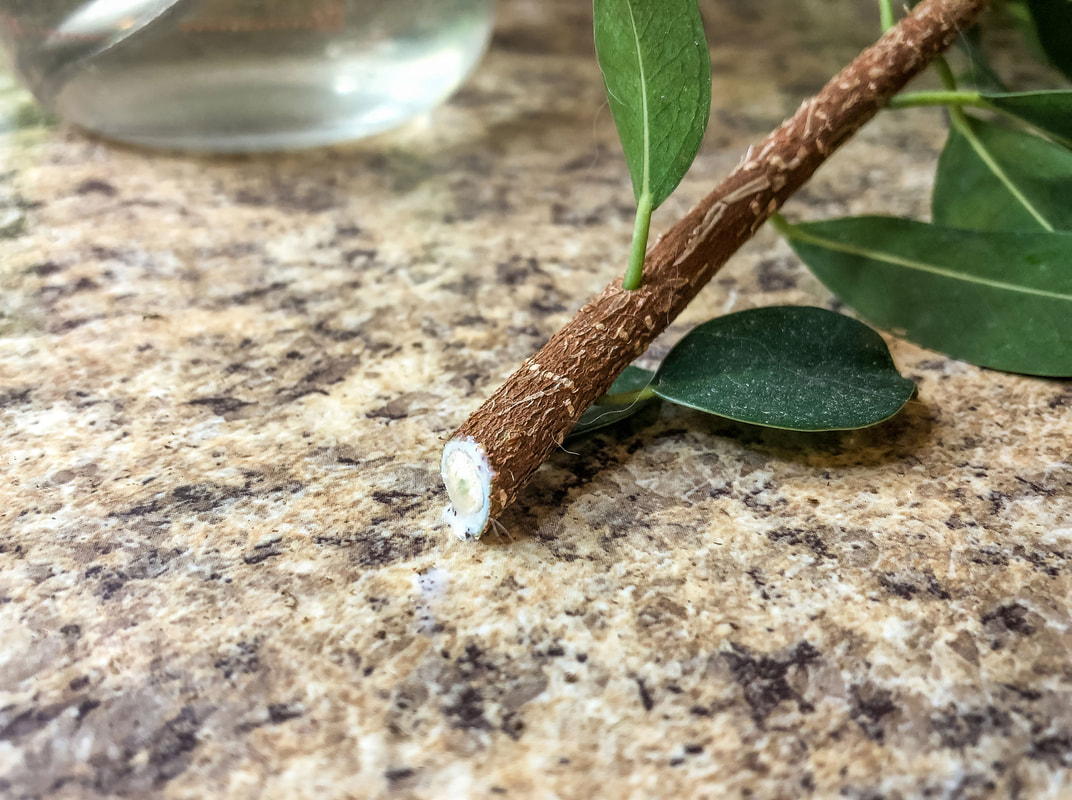 The large branch cut off the bonsai ficus tree at a 45 degree angle. Photo by Diane M. Lilly, 2022. There are two ways to get the piece to root—place it in a vase with water for a few weeks or plant it directly into another pot with soil. (I tried both techniques since I had a few extra pieces I didn’t want to throw away.) 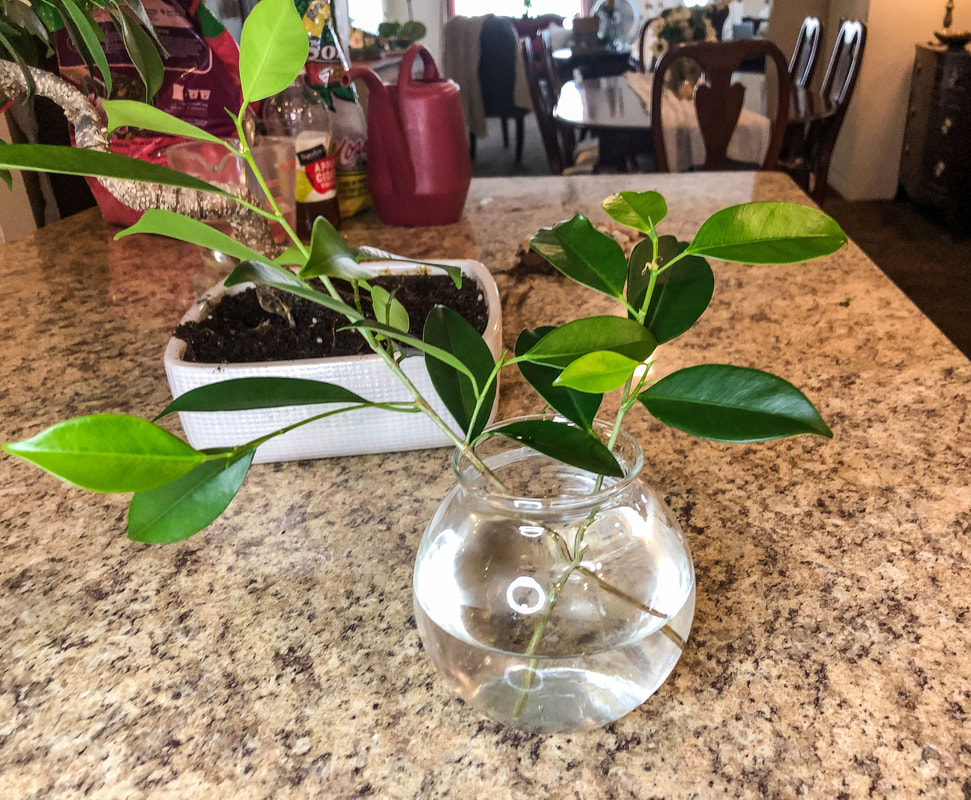 Two tiny branches from the bonsai ficus tree placed in water to root. Photo by Diane M. Lilly, 2022. According to Plantophiles, to propagate using the soil method, place the cutting in a pot with good soil for bonsai trees, using the same step-by-step method as when repotting a bonsai tree. The cut branch should start rooting within a couple of weeks. Keep the cutting watered, and carefully monitor the soil so it’s not soggy but has enough water for the new tree to grow. Place the newly potted branch in a spot with plenty of bright indirect light, like a south-facing window. (Just like with a newly repotted bonsai tree, avoid stressing the plant by putting it in direct sunlight.) 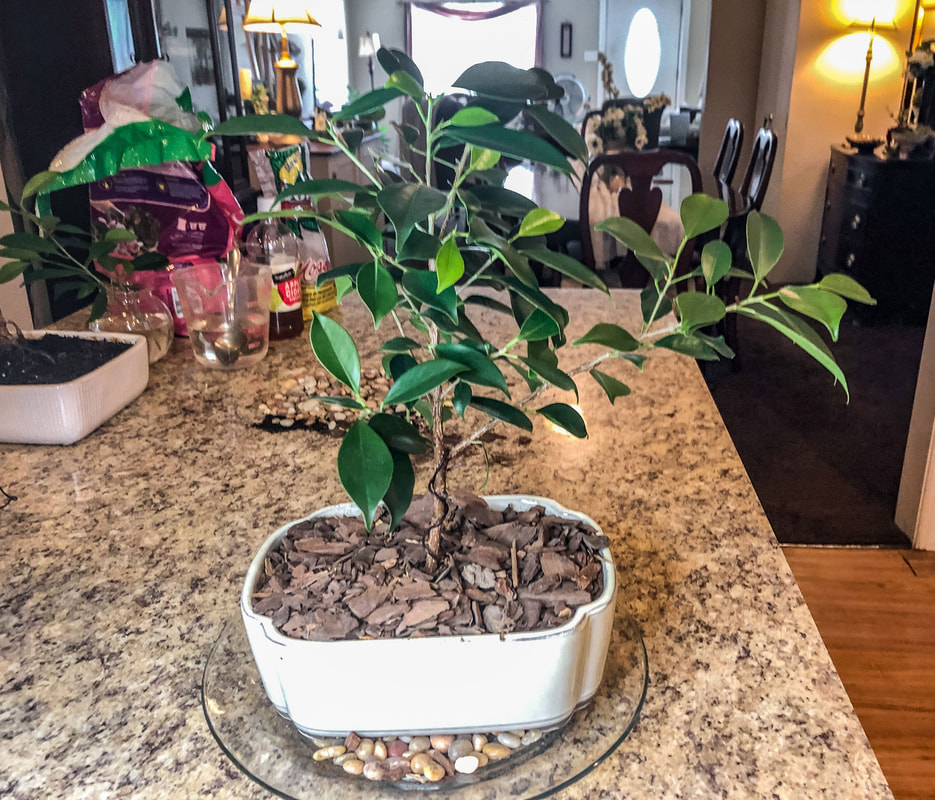 Newly potted cutting from the bonsai ficus plant. Photo by Diane M. Lilly, 2022. How to wire your bonsai ficus The trick to getting those fantastic shapes in professional bonsai trees is to use wires to help the malleable branches grow in the desired direction. Wires can be used to help manage shape, but use the thinnest wire possible (wire for bonsai comes in a range of thickness) depending on the thickness of the branches. Thin branches are more flexible and easy to train, requiring thinner wire, while thicker (less flexible) branches will need heavier wire and possibly a guy wire. Cut and remove the wire when the branch has grown in the desired direction and can hold its own (about six weeks). A few “don’ts” for wiring are: don’t wire up a bonsai just after the shock of repotting, don’t wire branches too tight, and don’t let the wire cut into the tree. The first thing to do when repotting is to wire and anchor the tree trunk. Wiring the plant from the base will help stabilize the bonsai tree, create balance for the desired shapes, and keep the tree from tipping. (My tree was never wired into the pot and is now toppling over!) The wire gets fed up through holes in the bottom of the pot, wound securely around the large roots (and tree base), and then secured to keep the tree stable. Try not to wrap too tightly and dig into the tree. 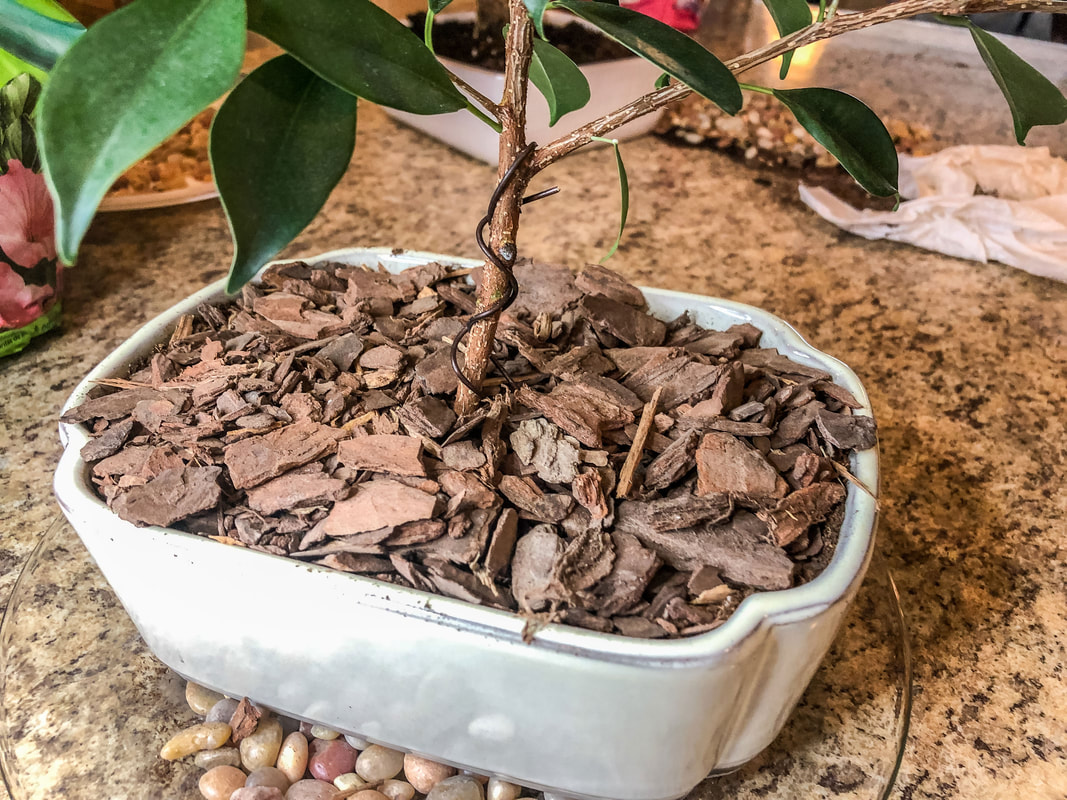 Bonsai ficus cutting wired into place in its new pot. Photo by Diane M. Lilly, 2022. 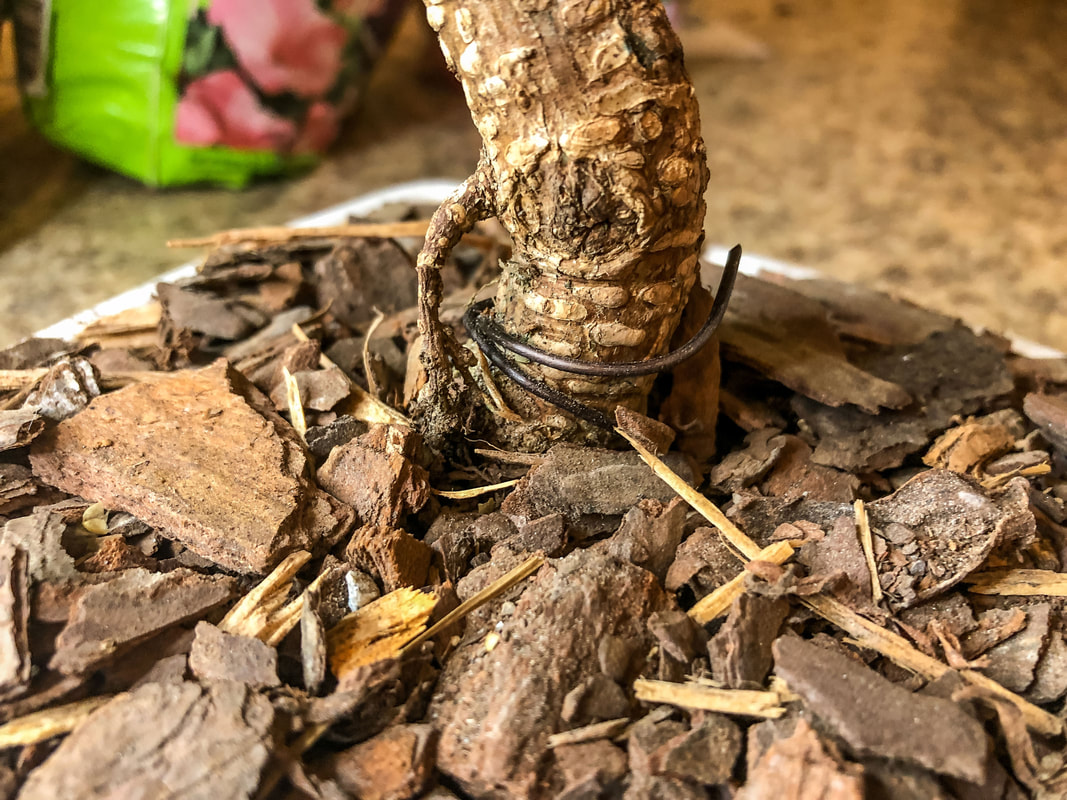 Main trunk of the newly potted bonsai ficus wired into its pot. Photo by Diane M. Lilly, 2022. So, in trying to help my bonsai plant, I learned a lot! Bonsai plants are trees and behave more like trees, just in miniature. There is no one-size-fits-all standard for repotting your bonsai, so it is essential to understand your tree type and specific needs. In the past, I have been afraid to touch this plant for fear of ruining it, but I am learning that it is more resilient than I previously thought. I’m sure this is just the beginning of an educational journey, especially since I have gone from one bonsai to two bonsai trees via propagation. (And I almost forgot two small cuttings sitting in the water trying to root!) This is a lot of information to digest, and I’ve only just scratched the surface, but I think this is the beginning of a beautiful friendship with my bonsai ficus trees! Stay tuned for updates! Please feel free to drop a line in the comments with any tips! 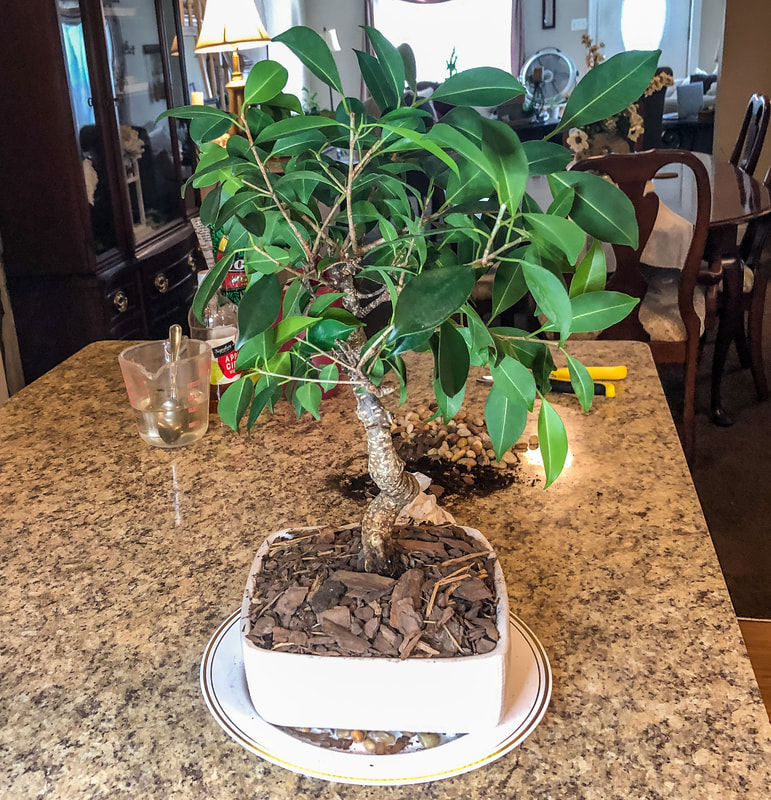 Newly potted bonsai ficus. Photo by Diane M. Lilly, 2022. Related blogs you may want to read: How to repot a pothos plant How to propagate bromeliad pups Small houseplants that love bathroom humidity Eight health benefits of decorating with plants How to harvest and use fresh mint from the garden Tips for harvesting chamomile for homemade tea Growing tomatoes and cucumbers How to care for 11 common herb seedlings Tips for planting seeds indoors Sources: https://www.bonsaiempire.com/basics/bonsai-care/repotting https://www.allthingsbonsai.co.uk/bonsai-tree-species-care-guides/ficus-indoor-bonsai-tree-care/ https://www.allthingsbonsai.co.uk/bonsai-tree-care/a-discussion-on-bonsai-soil/ https://www.bonsaioutlet.com/ficus-bonsai-care/ https://www.kaizenbonsai.com/bonsai-tree-care-information/graham-s-guide-to-repotting-bonsai https://shinnong.org/how-to-care-for-your-ficus-bonsai/ https://plantophiles.com/plant-care/how-to-grow-bonsai-from-cutting/ Affiliate Disclosure Some of the posts in this article contain affiliate links. This means if you click on the link and purchase the item, I will receive an affiliate commission at no extra cost to you. I will only recommend products or services I use personally and/or believe will add value to my readers, so there is no conflict of interest.  Peace lilies in my living room. Photo by Diane M. Lilly, 2021. This blog article has been a long time in the making. My whole business model is based on the notion of “nature-inspired”! But does having natural and organic elements in the home make a difference in how we feel? Does it improve our mood? And why do I have such a passion for creating nature-inspired home decor? I’m pondering this topic in a pragmatic rather than scientific sense. I’m a lifelong sufferer of anxiety and depression, and probably some form of PTSD born out of childhood trauma. I’ve tried medications, meditation, yoga, exercise, healthy eating, and positive affirmations, and they have each helped in their way but do not come close to how much better I feel when surrounded by trees. Unfortunately, I now live in a suburban hell, which is only slightly better than the urban hell of my youth...But I do live in this beautiful state of Pennsylvania—a state filled with natural beauty, trees, farms, mountains, and hiking trails. When we do finally decide to relocate, there are plenty of options! But, for now, I have to settle for making my home as comfortable and pleasant as possible using what I have.  Pennsylvania Grand Canyon, Wellsboro, PA. Photo by Diane M. Lilly, 2021. For many years, I have tried to keep small gardens, which keep me busy during the warmer months. Gardening gets me outside and out of my head and allows me to photograph beautiful things. Over the past couple of years, I started considering my indoor environment. Houseplants and indoor herbs have become a staple in my home, with varying degrees of survival. I don’t have the greenest thumb in the world, but I can grow a thing or two! 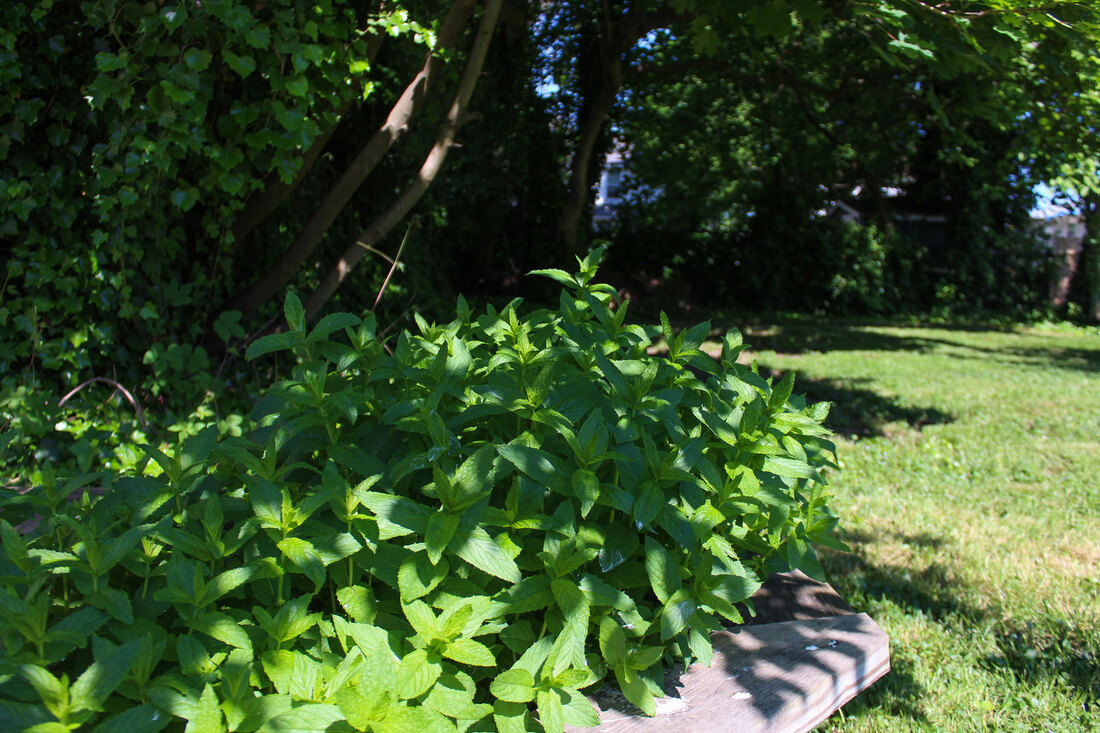 Summer garden in my yard with bushy mint plant. Photo by Diane M. Lilly, 2021.  Small haworthia plant. Photo by Diane M. Lilly, 2021. In addition to live plants, my interiors are filled with faux florals and faux floral decor that I designed and created. Blending real and faux florals seems perfectly natural to me. But I often wonder—is there a difference between the real and the faux? Can nature-inspired decor have the same or similar effect as the real thing? And does having houseplants have the same positive effect as an outdoor garden? That question has intrigued me since starting this nature-inspired decor “experiment” several years ago.  Faux hydrangea flowers. Photo by Diane M. Lilly, 2022. 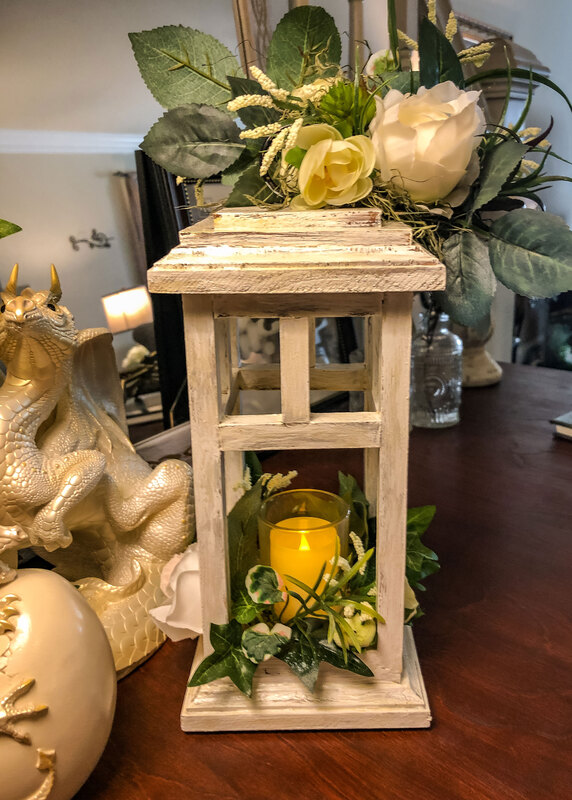 Septemeber Vibes handcrafted lantern candleholder by Di's Studio Designs. Photo by Diane M. Lilly, 2022. Our modern lives are toxic and artificial in almost every way, which has harmed our physical, mental, and spiritual health. I can personally vouch for that! That being said, the ability of humans to create our own built environment is fascinating to me. The crossroads between the natural world and the built environment is what holds the most interest to me. I love design. I love architecture, art, interior design, and decorating (I did go to school for interior design, after all!), all of which are artificial constructs. Creating nature-inspired home decor has been the ultimate exploration of how to bring balance to these two opposing worlds.  Fallingwater, Mill Run, PA. Photo by Diane M. Lilly, 2013. What I know is this… I love observing the beautiful flowers, plants, and trees when sitting in my garden. I am fascinated by nature’s creative shapes, hues, texture, and scale. Mother Nature really IS the ultimate designer and artist!  Summer vinca flower. Photo by Diane M. Lilly, 2021. Mimicking nature’s skilled hand is quite challenging, but the effort has been the backbone of my handcrafted floral designs for seven years. It’s always a challenge to strike the right balance between man-made elements and the natural world! Admittedly, there isn’t the same depth of experience with faux florals as with real flowers in a garden. The comparison is equivalent to actually taking a hike through the woods versus sitting on your couch watching a YouTube video of someone walking through the woods. When you hike, more of your senses are triggered, making it a totally immersive experience. But sometimes the visual representation—if that’s all that’s available to you—is all the reminder you need that we are creatures of nature under the skin.  Image by schepniy from AdobeStock. But does having plants, flower arrangements, and faux florals in the home have the same benefits as being in nature? Does surrounding yourself with representations and small samples of the real thing do anything to make you feel better in your interior spaces? My answer--Both my houseplants and my faux floral creations make me smile. The moment spent checking on the growth of one of my latest plant babies can bring me as much joy as admiring the beauty of my floral decor.  Ponytail palm. Photo by Diane M. Lilly, 2021. In the past, my home was not filled with anything resembling organic or natural elements, and I didn’t realize just how barren the space felt…until one day, I filled that space with plants and faux floral decor. All of a sudden, it was like somebody turned on the lights! The difference in the mood of the space was immediate. Suddenly—and dramatically—there was life where previously there was emptiness. 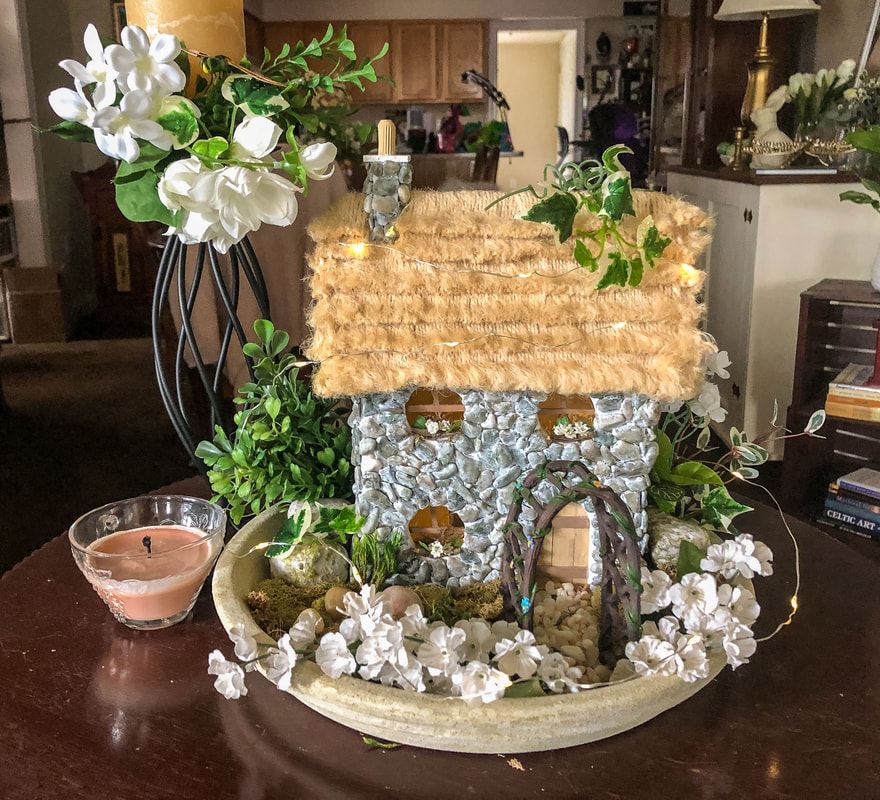 English Cottage handcrafted fairy house with faux florals. Photo by Diane M. Lilly, 2022. And the live plants in my home allowed me to be a caregiver, and that’s more powerful than people realize. When you care for another being (in this case, my houseplants), the experience takes you out of your head for a while and forces you to focus on the moment, to be present. Being present and engaging in activities that promote mindfulness are ancient ways of coping with stress, depression, and anxiety.  Money tree. Photo by Diane M. Lilly, 2021. So, in answer to my question, yes…In my experience, bringing a bit of nature into the home—whether real or faux, or even a mixture of both—goes a long way to helping us feel more relaxed, calm, and even energized. My home felt like a dark hole until I gave it “light” with plants and flowers. I do feel better in my surroundings. My creativity has also greatly benefited from having an interior that makes me feel calm and relaxed. My home is where I both live AND work. I no longer feel suffocated, empty, or claustrophobic. It’s been a game-changer! I know this is not a scientifically backed answer (although I have read many articles on the subject), but it IS my own experience, and I believe what I see. All I can provide is my own experience, and it has been a positive one! And so I think I leave this mental meandering on that note and leave you with a quote from one of our country’s greatest naturalists, John Muir: “Everybody needs beauty...places to play in and pray in where nature may heal and cheer and give strength to the body and soul alike.”  Leiper-Smedley Trail, Wallingford, PA. Photo by Diane M. Lilly, 2022. What are your thoughts on this topic? Do you have your own experiences to share? Drop a line in the comments, and let’s start a conversation! Sources: https://e360.yale.edu/features/ecopsychology-how-immersion-in-nature-benefits-your-health https://www.takingcharge.csh.umn.edu/how-does-nature-impact-our-wellbeing https://greatergood.berkeley.edu/article/item/how_nature_makes_you_kinder_happier_more_creative https://www.apa.org/monitor/2020/04/nurtured-nature https://selecthealth.org/blog/2019/07/10-reasons-why-being-in-nature-is-good-for-you https://www.webmd.com/balance/ss/slideshow-health-benefits-nature https://positivepsychology.com/positive-effects-of-nature/ Related blogs you may want to read: Let’s talk about houseplants Biophilia in interior design How to repot a bonsai ficus How to repot a pothos plant How to propagate bromeliad pups Small houseplants that love bathroom humidity Eight health benefits of decorating with plants Eight tips for creating spring vignettes My Spring 2022 indoor fairy gardens Spring makeover for my indoor fairy gardens  Homamde lavender, chamomile, and lemon potpourri. Photo by Diane M. Lilly, 2022. Nothing speaks to being calm and relaxed like the aromatic floral scent of lavender. Retail stores are filled with essential oils, incense, candles, and potpourri with the lavender scent.  Image by googlerankfaster from Pixabay. As an amateur gardener who has been growing a few select herbs for several years now, lavender has been one of those plants I’ve been chomping at the bit to get my hands on, and this year was finally the year I succeeded! I have my dad to thank for that…He gifted me a couple of plants for my deck, one of them being a small lavender plant that had yet to develop blooms. There was no label with identification of the specific plant type and care instructions, so I had to guess the exact type of lavender, but--now that small blooms are appearing--I’m pretty sure the plant is of the French or Spanish variety. 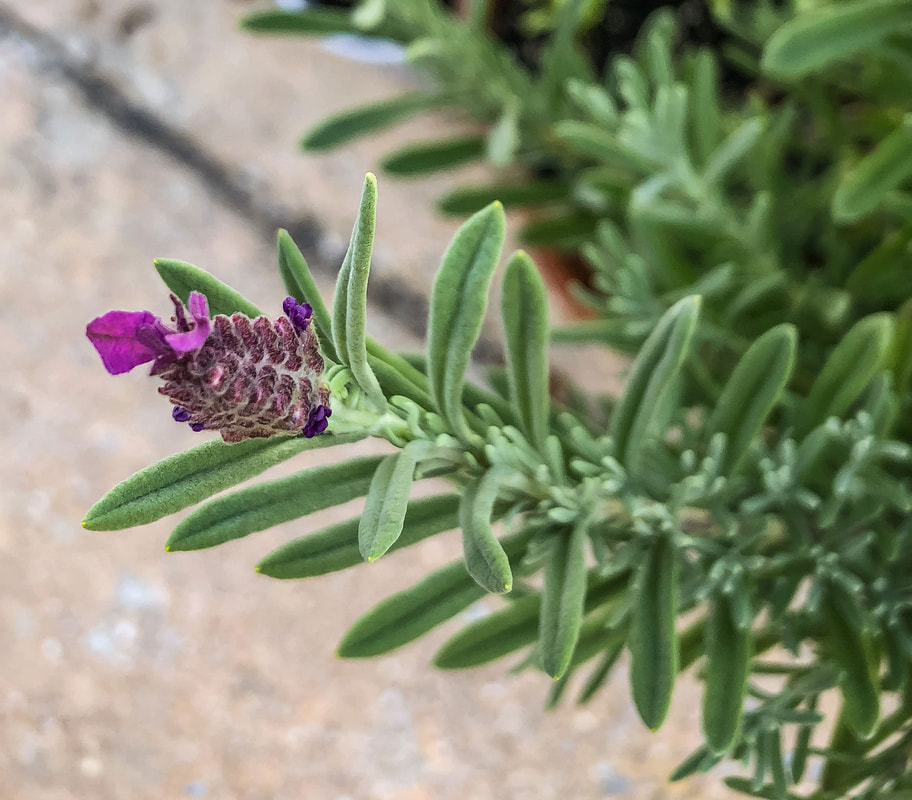 Lavender bloom from my potted plant. Photo by Diane M. Lilly, 2022. I’ll never understand why these garden stores don’t label the plants to let you know what plant you are buying! That information is crucial so you know how to care for your new plant, right? And here’s why it’s important: When it comes to growing lavender, there are many varieties from which to choose. I was astonished at just how many varieties of this purple beauty exist! Some lavender varieties thrive in drier climates, and some can tolerate colder temperatures over the winter months. So, it is critical to understand exactly which variety you are growing so you can enjoy your lavender and get the most use from it.  Image by Sabrina Wisian from Pixabay. 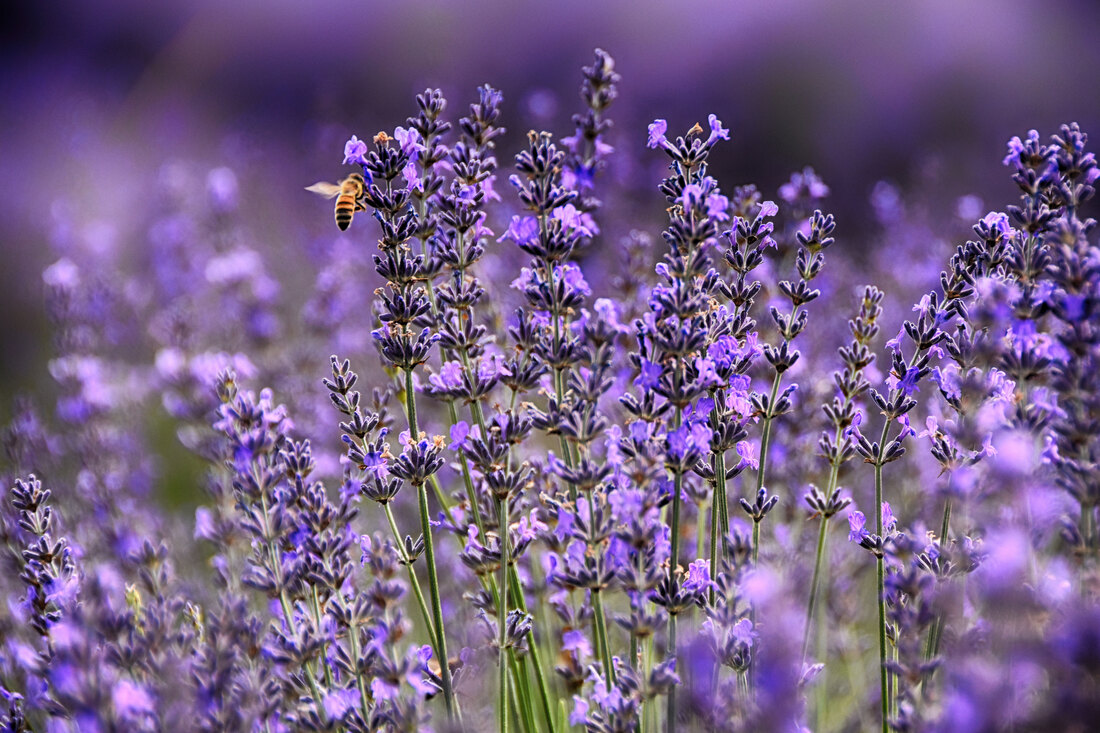 Image by gianniarmano from Adobe Stock. In addition to the French lavender plant my dad bought me, I have also decided to experiment and grow some Munstead English lavender from seed. The tiny plant is growing very slowly, but it is growing! It’s still tiny-- and probably won’t be of much use to me this year--but this plant (along with the other lavender plant) is sitting on my front porch just soaking up all of that warm southern sun, which lavender loves. 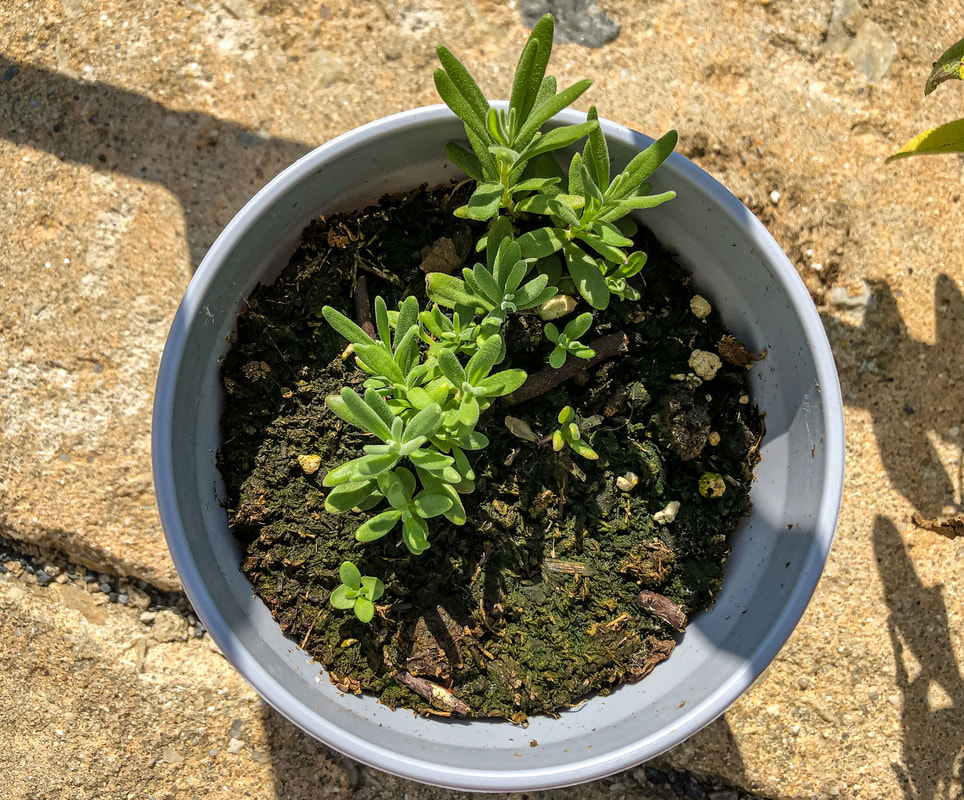 Munstead English lavender seedling in a pot on my porch. Photo by Diane M. Lilly, 2022. There are a couple of concerns with the climate in my area and whether or not it will be suitable for allowing these plants to thrive. The first concern is the high humidity in the summer months, and the second is the cold temperatures in the winter. I’ve decided to keep both lavender plants in pots so that they can either be moved to different spots or be brought indoors where I can better monitor their needs. Lavender does not require a lot of water, as it thrives in drier Mediterranean climates, so be careful not to overwater! That’s an issue for my lavender plants right now. The summer weather in my area has become humid and rainy, so I now have to decide to relocate my pots to a better-suited area or bring them inside. How to harvest and store At any rate, I am super excited to see how these two distinctly different lavender plants grow, and I’m on a mission to learn how to use clippings for scenting my home with potpourris and oils. My goal: learn as much as possible about growing, harvesting, storing, and ultimately using these aromatic herbs. I’ve been spending a lot of time researching, and below are a few tips I’ve uncovered…  Image by ExQuisine from Adobe Stock. Harvest below the flower, where the stem meets at the junction of another stem. Harvest lavender in early spring or summer or early in the bloom when the buds are just opening so you can get another crop later. The more you harvest or deadhead (remove old flower blossoms), the more new growth is encouraged. If you leave the flowers too long, they may lose their potency and therapeutic benefits, so keep that in mind when harvesting for these purposes. Always harvest in the morning to minimize the stress on the plant and preserve any oils in the blooms. You can prune up to a third of the plant to promote future growth (especially in the fall). If you prune heavily in early spring, you’ll get a lot of new growth during the spring and summer. You can prune in the fall to shape the plant for the next season. Prune only the top 1/3 of the plant, right above the woody growth, and only when the plant becomes too woody. Seeds from the lavender plant can be gathered by hanging stalks upside down with a bag underneath. Store clippings in a dry place and let hang dry for at least a week. Make the bundles small to reduce the chances of mold developing from trapped moisture. My quick and easy lavender chamomile citrus potpourri Now that I have my long-coveted lavender plants, I’ve been itching to create a potpourri mix using lavender clippings, so I looked around the internet for ideas. Many of the summer recipes I found included lavender, rosemary, chamomile, and some citrus scent, and they all sound so lovely! Many of these recipes also include essential oils, and I just so happen to have recently bought a box with several different scents that I would like to use in my home. So today, I decided to take this opportunity to create a dry potpourri using my homegrown chamomile and lavender, some slices of lemon, lemongrass essential oil, and lavender essential oil. This DIY project's goal was to create a quick potpourri that I could put out on a table to scent my living room for a few days, maybe a week. So here’s the recipe I tried… Lavender & chamomile potpourri fresh lavender clippings fresh chamomile clippings 2 small lemons, sliced thinly 3 or 4 drops lemon grass essential oil 3 or 4 drops lavender essential oil a decorative bowl The first things you’ll need are the lavender and chamomile stems. I went out to my yard and clipped chamomile flowers with stalks, choosing the ones where the flowers were open but not drooping. Next, I headed to my lavender plant and cut several stems with the blooms. You don’t necessarily need the lavender flower because the leaves are very fragrant, but I wanted to add some visual interest to my potpourri mix, so I cut the blooms as well. And it’s worth noting that French or Spanish lavender is perfect for use in potpourri. 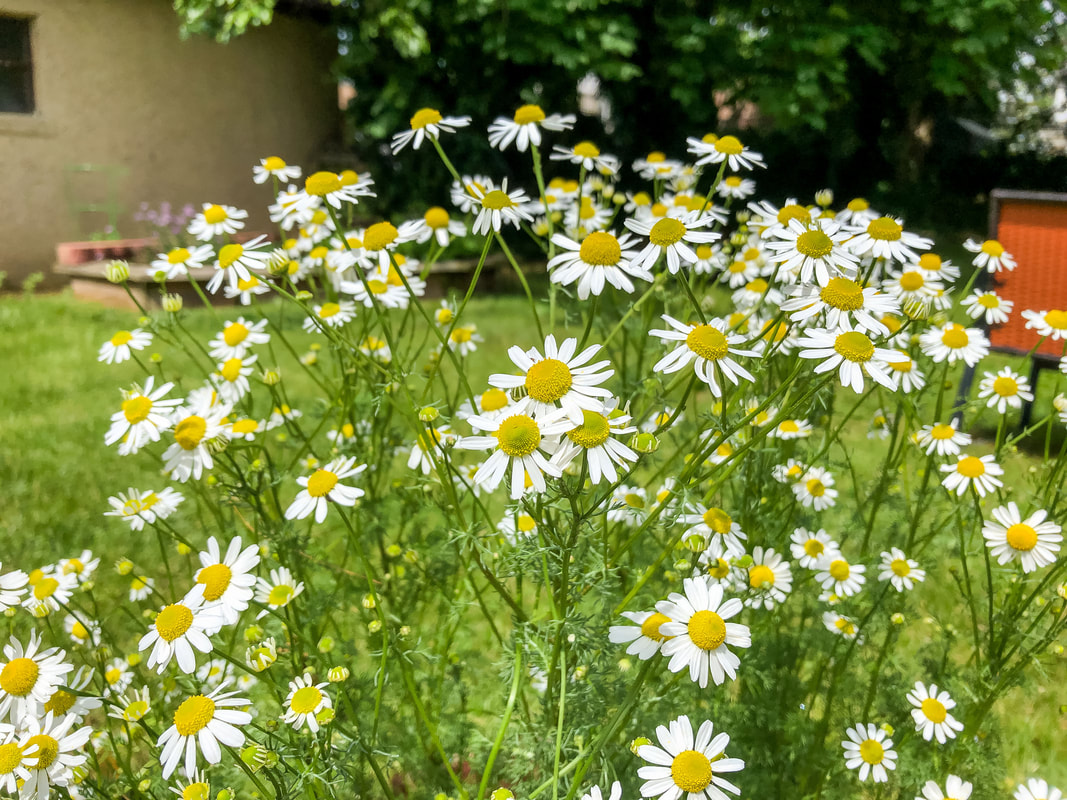 Chamomile growing in my garden. Photo by Diane M. Lilly, 2022. 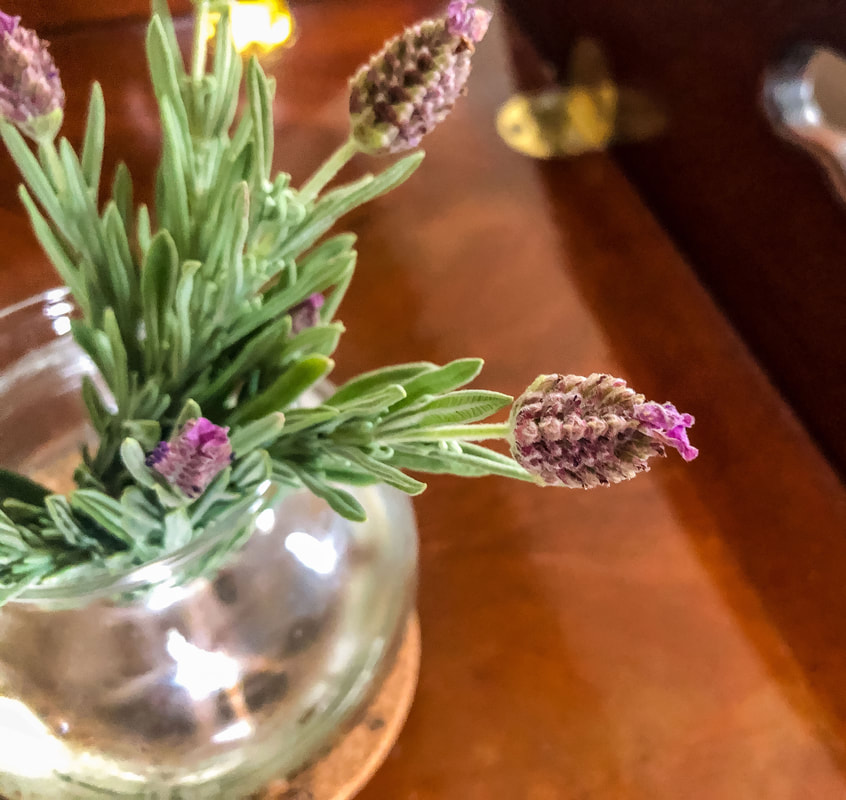 Lavender clippings from my plant, keeping fresh in a glass vase of water. Photo by Diane M. Lilly, 2022. The next step is to cut a couple of small lemons into thin slices. It is essential to keep the slices thin so they don’t take as long to dry out. To dry out my fresh lavender, chamomile, and lemon slices, I spread everything out on a baking pan and place it in the oven at 200˚ F for at least a couple of hours or until all the moisture is gone from the flowers and lemon slices. 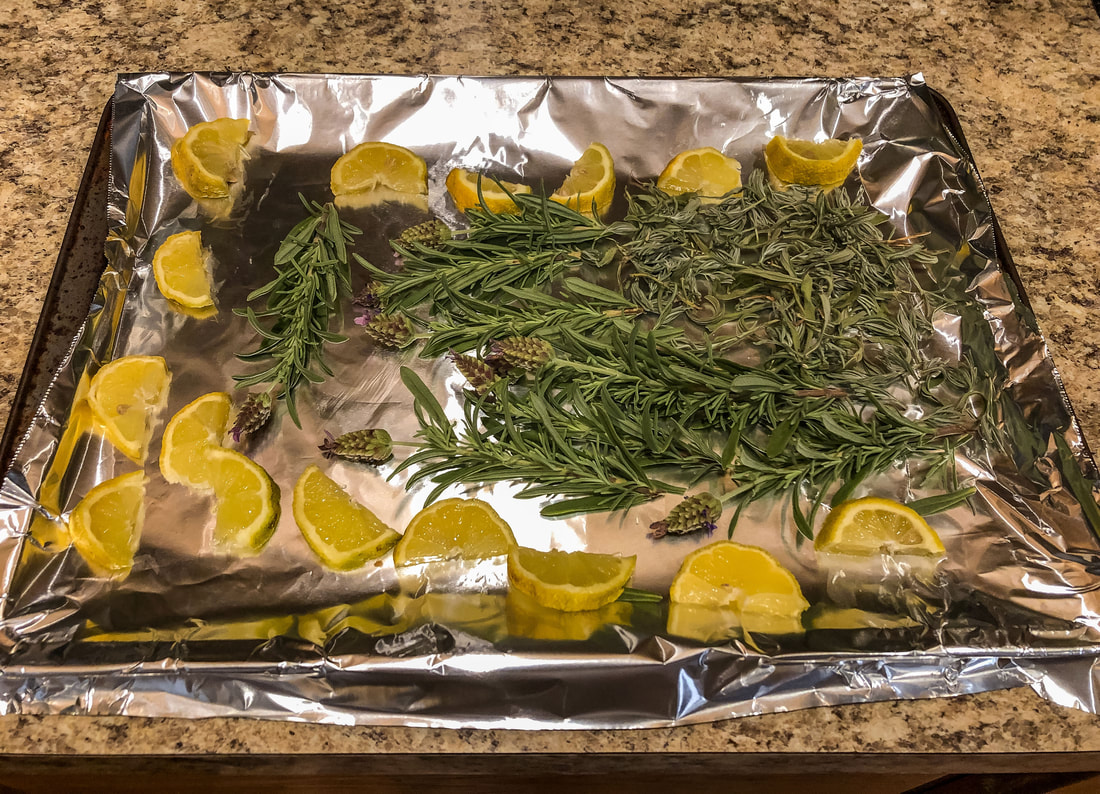 Lemon slices and lavender clippings on a tray, waiting to be put in the oven for drying. Photo by Diane M. Lilly, 2022. 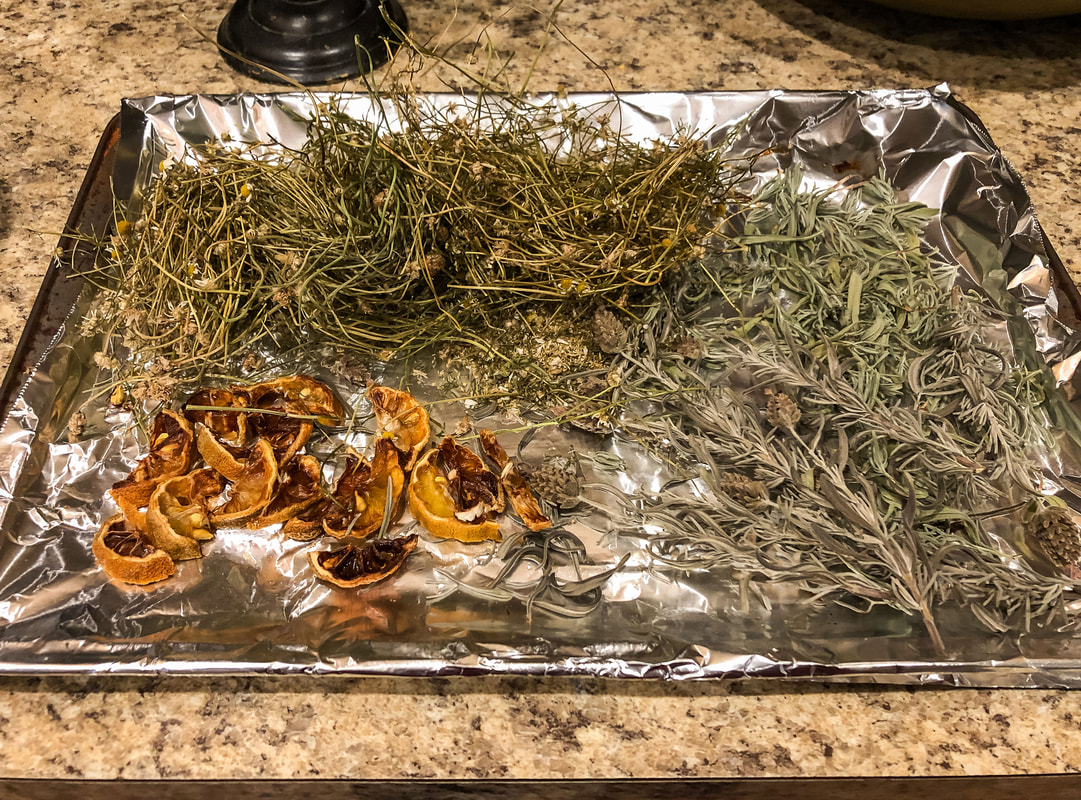 Dried chamomile, lavender, and lemon slices on a tray. Photo by Diane M. Lilly, 2022. At this point, you can decide what essential oils you want to use to enhance the fragrance. The reason I used essential oil is that--while the lavender, chamomile, and lemon are fragrant--the mixture isn’t potent enough to scent the room on its own. Essential oils infuse the dried flowers with a strong scent that lasts longer. For my mixture, I wanted to use essential oils that enhanced the citrus and lavender aroma, so I chose to use a few drops each of lemongrass and lavender…and it smelled AMAZING! 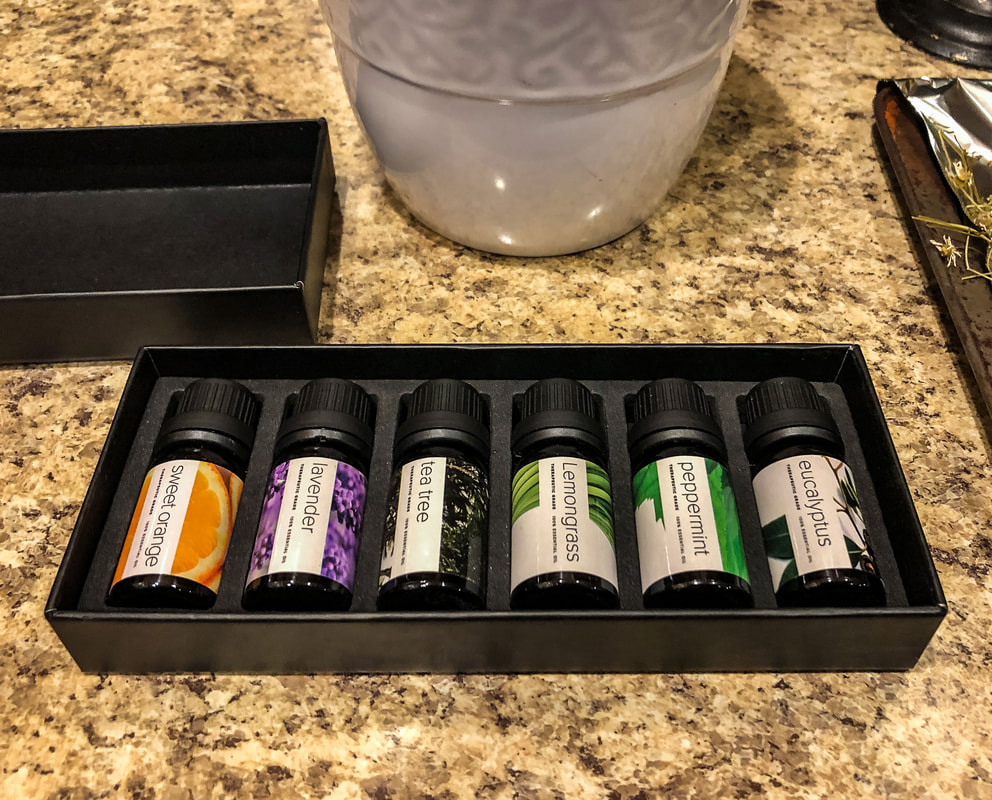 Newly purchased box of essential oils. Photo by Diane M. Lilly, 2022. 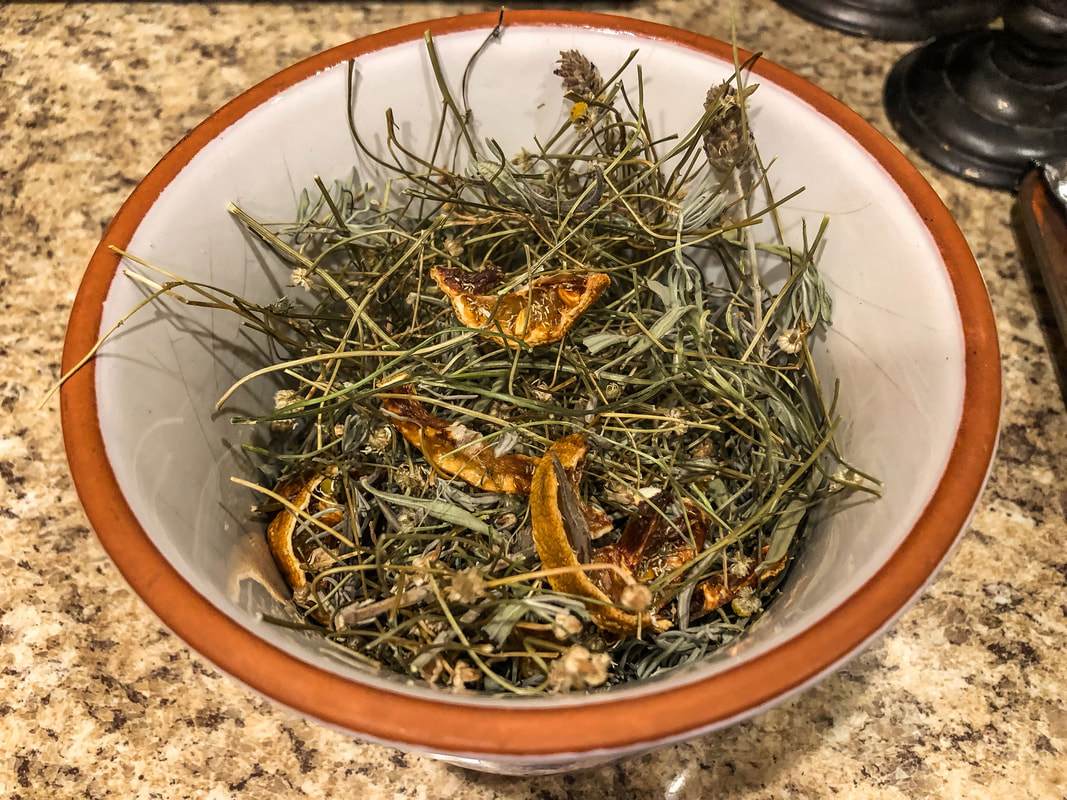 White ceramic vase filled with potpourri herbs and lemon slices. Photo by Diane M. Lilly, 2022. The only step left is to find a decorative bowl to put the potpourri in and a nice spot in your home where you would like to smell your new potpourri. I didn’t have a nice bowl, so I went to my nearest Hobby Lobby and bought this beautiful green ceramic bowl that perfectly fits my decor! It ended up being just perfect for my potpourri mix. 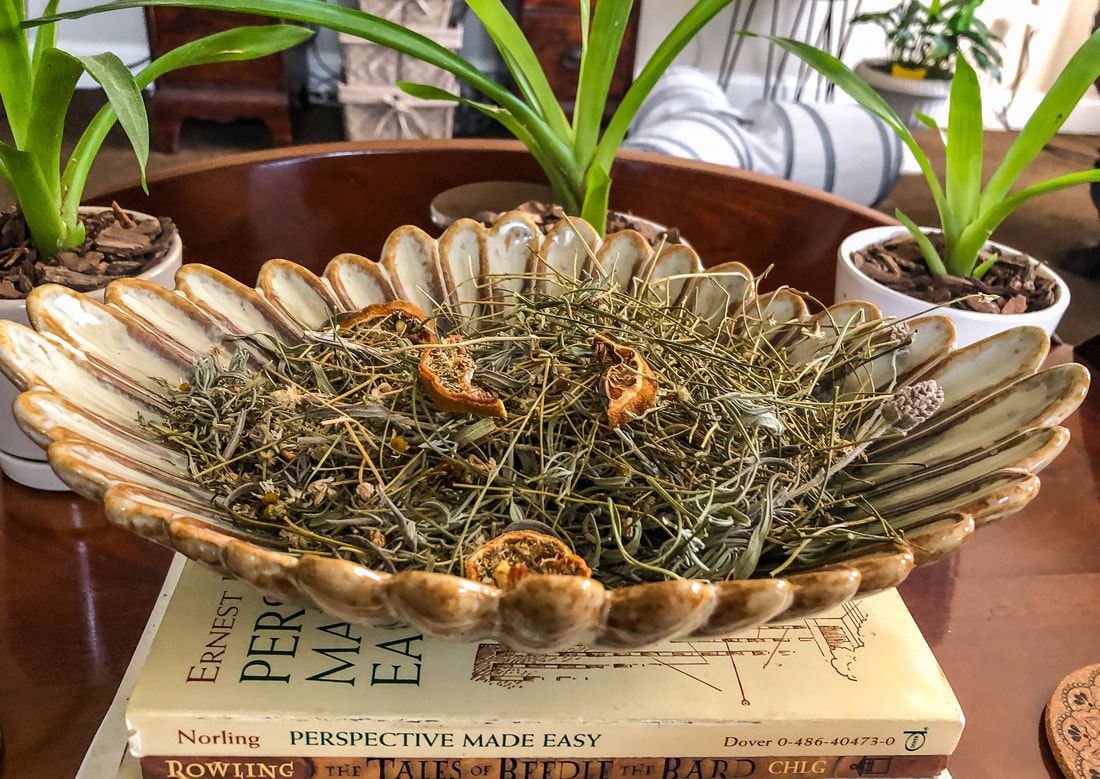 My freshly dried herbs and lemon in a newly purchased decorative bowl. Photo by Diane M. Lilly, 2022. Just a word of caution…If you have cats like I do (and this probably also goes for dogs), be aware that some essential oils and herbs can be toxic and even fatal if ingested. My cats don’t bother my plants or potpourri, but I am careful because lavender and chamomile are toxic to cats, and essential oils are toxic to pets. So please use these things with caution! So, I hope you found this article interesting and maybe learned something from it as I did, and I’d love to hear from you in the comments about your tips for growing lavender or potpourri recipes you love. And if you enjoyed this article or my blog, please share so we can expand and grow this community! Related blogs you may want to read: Tips for harvesting chamomile for homemade tea Learning how to harvest and use fresh mint from the garden How to care for 11 common herb seedlings Tips for planting seeds indoors Six herbs I planted indoors It’s planting season again Growing tomatoes and cucumbers for my garden How to repot a pothos plant How to propagate bromeliad pups Small houseplants that love bathroom humidity Sources: https://www.gardenloversclub.com/edible/herbs/lavender/types-of-lavender/ https://www.proflowers.com/blog/types-of-lavender https://www.gardeningchores.com/types-of-lavender/ https://homesteadandchill.com/how-to-harvest-dry-lavender/ https://preparednessmama.com/lavender-harvest/ https://bytherfarm.com/homemade-potpourri/ https://afternoonteareads.com/make-homemade-potpourri/ https://nwmaids.com/how-to-make-potpourri-2-methods-1-aromatic-result/ Affiliate Disclosure Some of the posts in this article contain affiliate links. This means if you click on the link and purchase the item, I will receive an affiliate commission at no extra cost to you. I will only recommend products or services I use personally and/or believe will add value to my readers, so there is no conflict of interest. 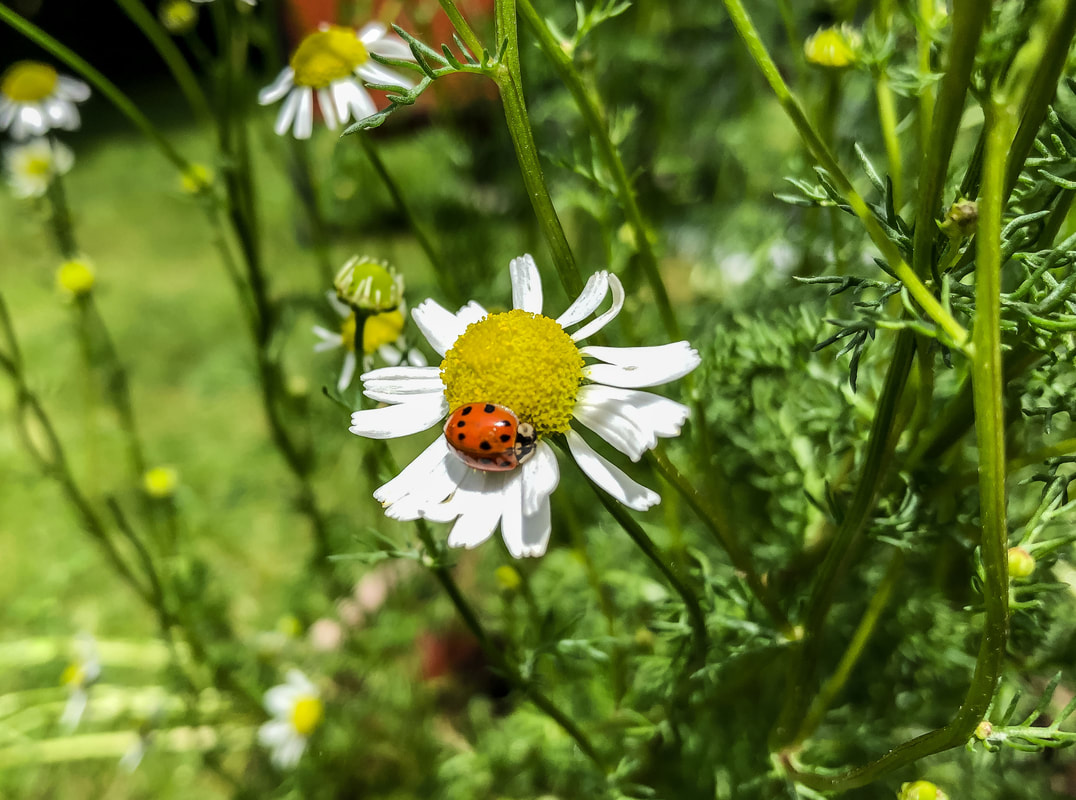 My chamomile has a ladybug visitor. Photo by Diane M. Lilly, 2022. I’ll let you in on a little secret—chamomile is my favorite herb! I have to tell you, I have developed quite an infatuation with this gorgeous little flower. Two years ago, I planted chamomile in pots that eventually ended up on my back patio. Chamomile is part of the daisy family, as evidenced by the slender white petals stretching out from knobby yellow buds…And this herb is so deliciously fragrant! Typically, chamomile is an annual—meaning it only blooms once and then dies—but this flowery herb is a prolific self-seeder, so it comes back for me every year just like a perennial. There are two main types of chamomile—German chamomile, which grows tall with tiny flowers, and the Roman variety, which grows shorter with slightly larger blooms. Either variety of chamomile will bloom through the entire warm season, which in these parts is from mid-spring to early fall.  Chamomile growing in my garden. Photo by Diane M. Lilly, 2022. So, my big idea was that I wanted to drink homemade tea with my fresh chamomile. (That’s been a mixed bag…but I’ll get to that later.) As I do more research into this aromatic herb, I am discovering more and more possibilities for uses in my home, from using it in recipes to essential oils and so much more. This journey of exploration should be educational! But first, a few tips on how to harvest and store chamomile, and at the end, I’ll discuss my attempts at making that homemade herbal tea… How and when to harvest chamomile… Generally speaking, I harvest throughout the summer, picking the blooms as needed. You do not harvest all the flowers at once, but instead harvest frequently by snipping off only the flower bud itself and only the flowers whose petals are fully open and not drooping. Harvest the chamomile in the morning for the best flavor and to lessen the stress on the plant. 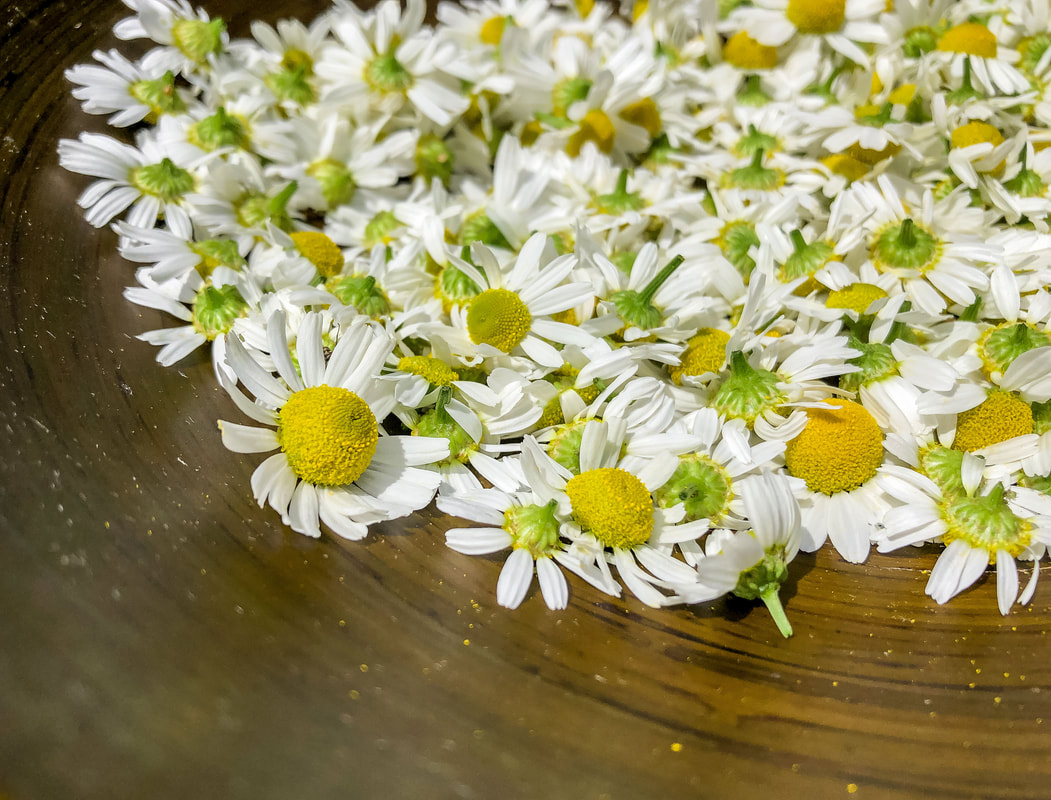 Freshly picked chamomile flowers. Photo by Diane M. Lilly, 2022. How to prep and store chamomile… Chamomile can be used fresh, but, in my experience, the flavor seems better when it is left to dry out first. Dried chamomile can become the seeds for next year’s crop (in case your plant does not self-seed) or can be used in amazing recipes. There are a couple of ways you can dry out the flowers. One way is to spread the flowers on a baking sheet and put them in the oven at a very low temperature (no more than 250˚) for a few minutes. Another way is to lay the buds on a tray and leave them in a dark, dry place for one to two weeks. Some people splurge and buy a dehydrator—which can be purchased for as little as $70—to speed up the drying process. After the chamomile is thoroughly dried out, it is ready to be stored in a glass container. Ensure there is no moisture before sealing in a container--otherwise, mold can develop, and we don’t want that! How to make homemade chamomile tea… According to my research, there are many benefits to drinking chamomile tea. The best option is always to use your homegrown process-free chamomile. Chamomile tea is said to be a calming beverage that can help you get to sleep. I have personally found that this tea relieves the menopausal bloating I’ve been experiencing lately. And it is said that drinking chamomile tea regularly significantly reduces anxiety. I am no doctor (do your own research and draw your own conclusions), but it sounds like this little daisy-like flower is more than just a pretty face! Oh, and did I mention that the same recipe you used for tea can be used as a hair rinse and lightener? The process of making chamomile tea is quite simple…You will need 2-3 tsp dried chamomile to one cup of boiling water for your tea. (If using fresh chamomile, you’ll need 6-8 tsp to one cup boiling water.) Steep the flowers for 3-5 minutes (you can steep for longer if you want a more potent brew), then pour the tea through a strainer to eliminate the heavy particles. So, for my first few attempts at making this herbal tea, I rinsed the flowers off, then spread them out to dry for slightly less than an hour before steeping them in boiling water. I used a coffee filter with a small sieve to separate the heavy particles, which worked well. One of the things I did notice—which I was not thrilled with—was that the tea seemed bitter. On subsequent attempts, I made sure to leave out any stems and leaves and lessened the time the brew steeped (from around ten minutes to more like 5 minutes), which seemed to help reduce the bitterness. 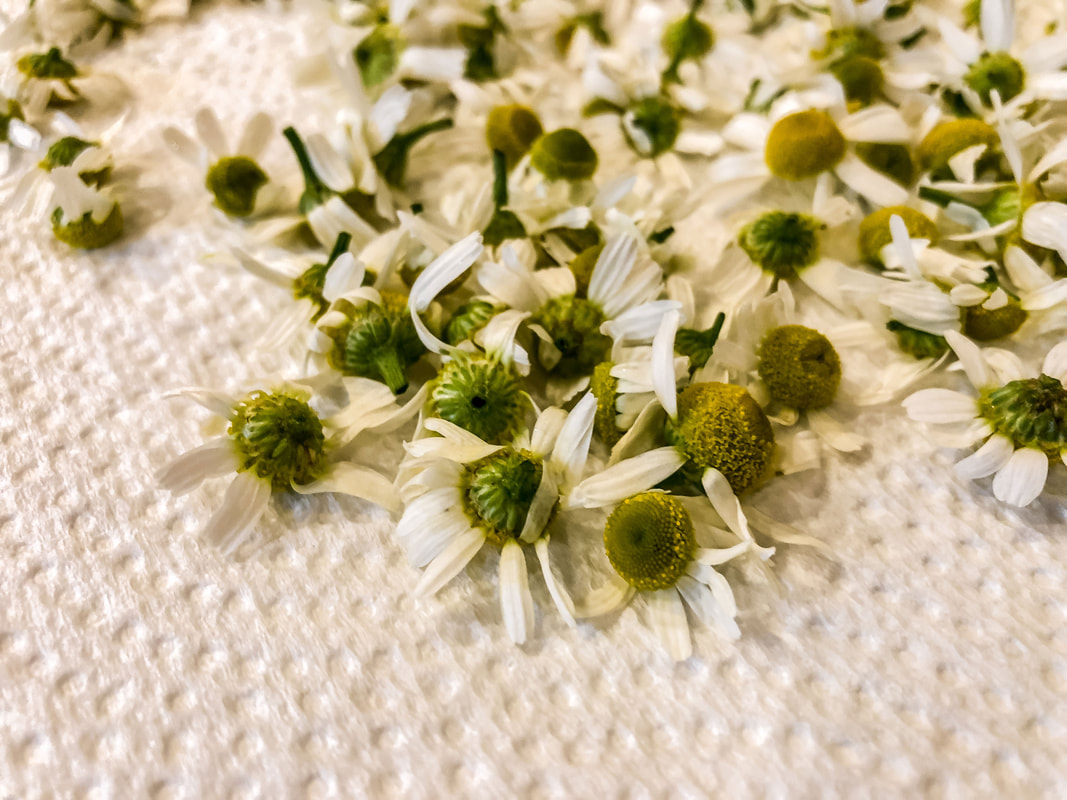 Chamomile flowers drying on a paper towel. Photo by Diane M. Lilly, 2022. 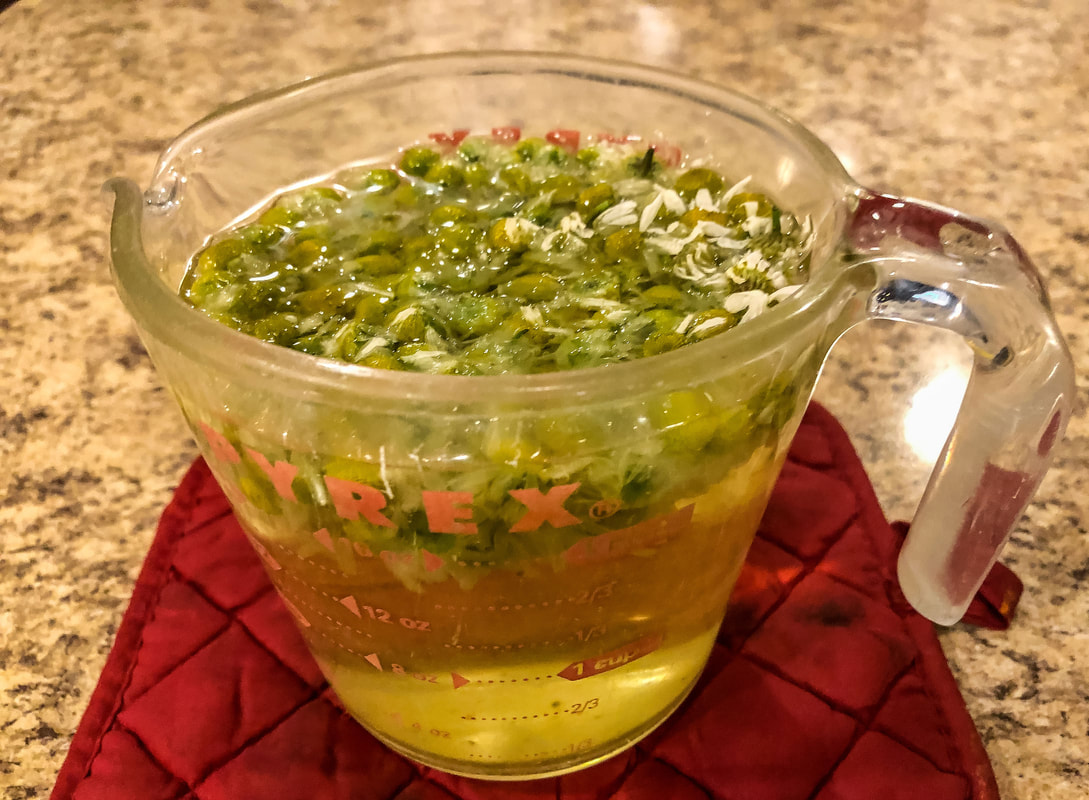 Chamomile seeping in hot water. Photo by Diane M. Lilly, 2022. Through my most recent attempts at making homemade chamomile tea, I have discovered that dried chamomile works much better in terms of taste. This time, the flowers were dried in the oven on low heat (which also helped kill tiny bugs) and left to sit out covered with a paper towel for a day before use. Once the flowers were dried, they were steeped for almost 5 minutes in hot water and then strained. I added a few spritzes of fresh lemon and store-bought honey for additional flavor. I’d say the third time was the charm! The tea tasted just right! The next time I make this homemade tea, I may let it steep for two extra minutes because I want just a smidgen more of the chamomile flavor. But, I must say, this last time, I got much closer to achieving a terrific-tasting homemade chamomile tea! Once I get my recipe down pat, I will share it as a separate blog post, so stay tuned! 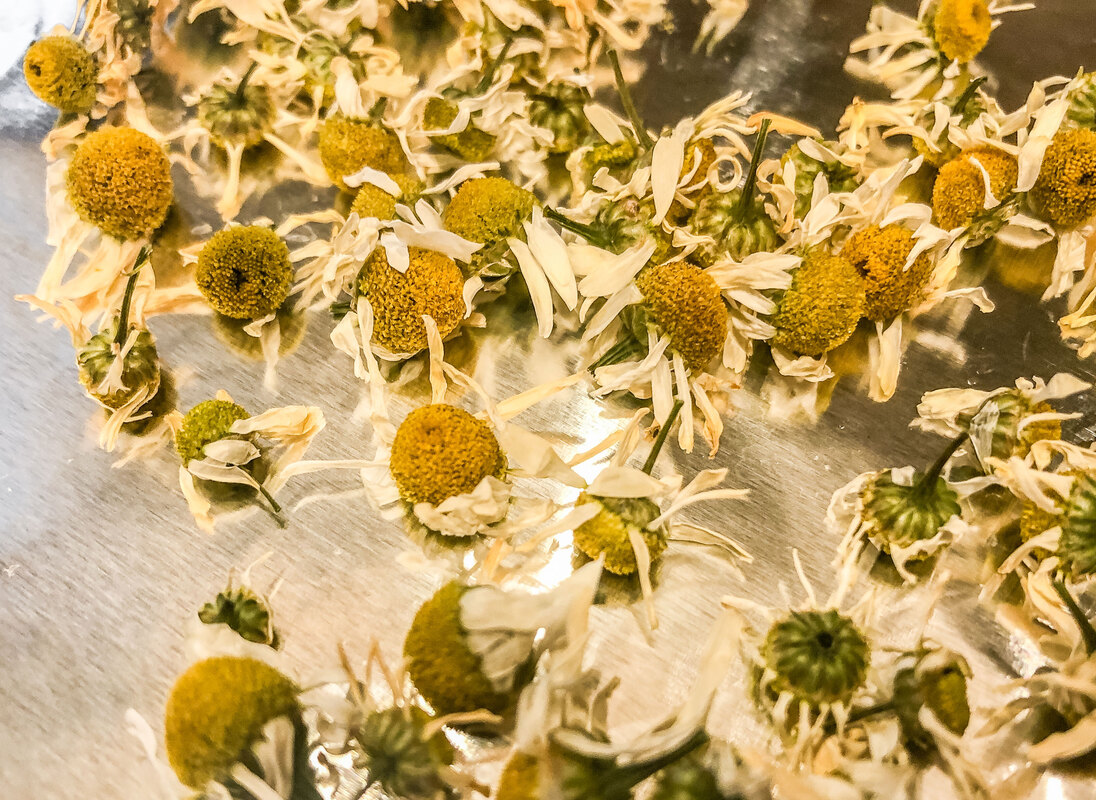 Chamomile on a baking sheet after drying in the oven. Photo by Diane M. Lilly, 2022. 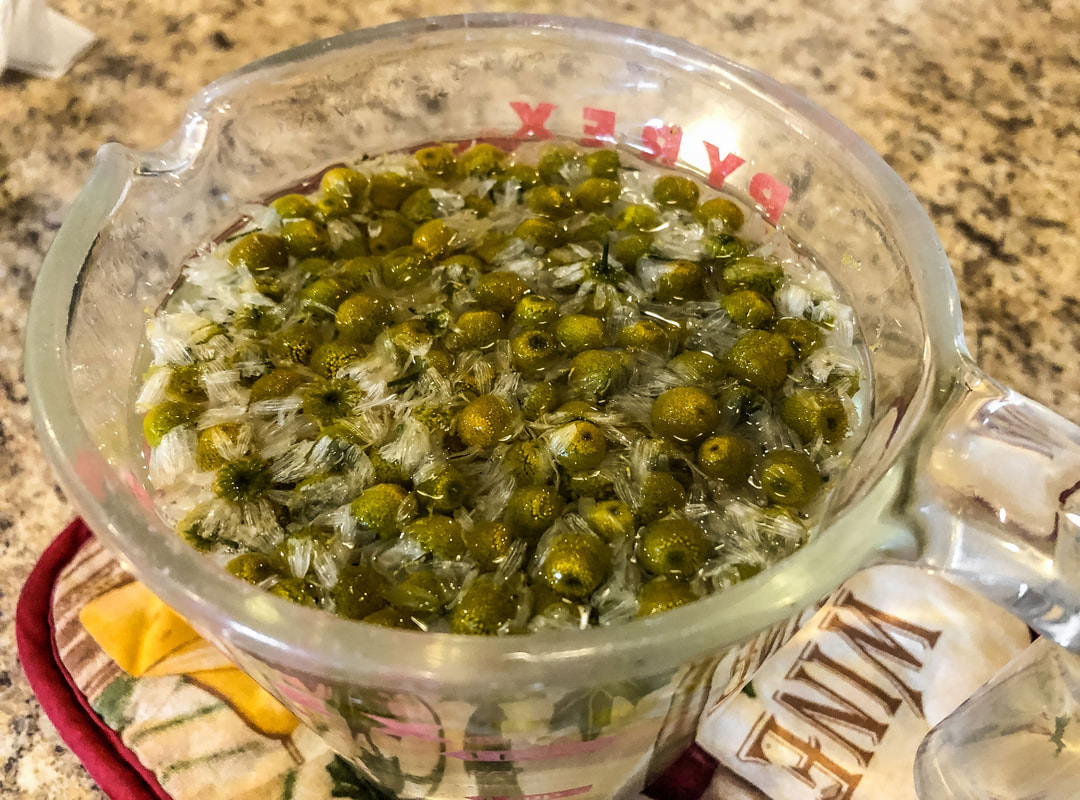 Another batch of chamomile seeping in hot water. Photo by Diane M. Lilly, 2022.  Lemon wedge for my freshly brewed chamomile tea. Photo by Diane M. Lilly, 2022.  Cup of freshly brewed chamolie tea with a lemon wedge. Photo by Diane M. Lilly, 2022. 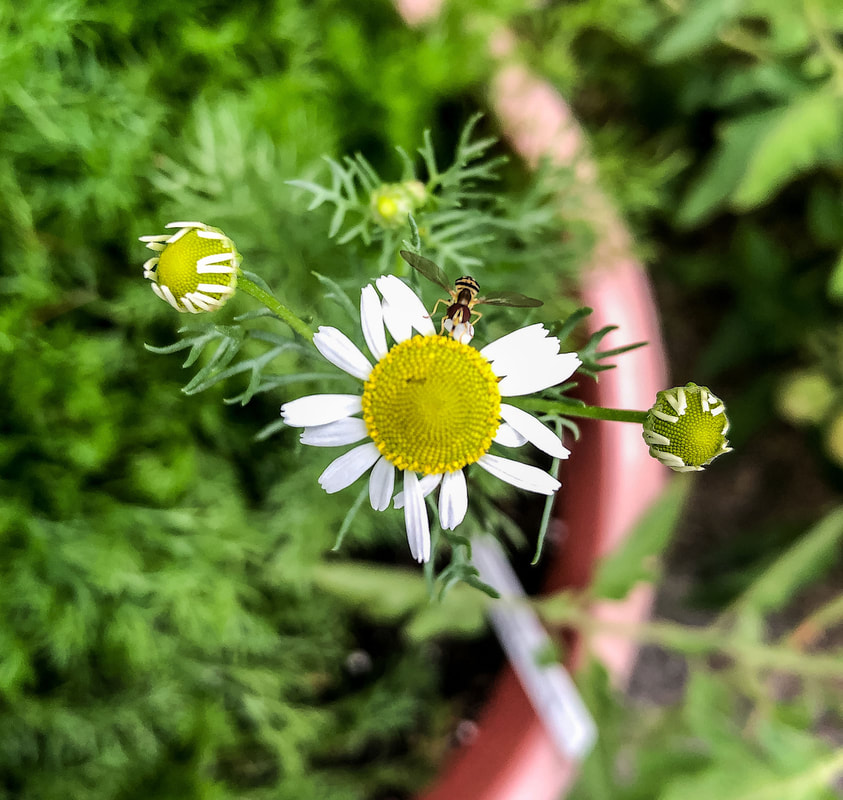 A visitor on my chamomile! Photo by Diane M. Lilly, 2020. Related blogs you may want to read: Learning how to harvest and use fresh mint from the garden Tips for planting seeds indoors How to repot a pothos plant How to propagate bromeliad pups Six herbs I planted indoors Growing tomatoes and cucumbers for my garden It’s planting season again This article may contain a few items or commercial mentions, but I only used them for demonstration purposes only. I am not endorsing any particular product or receiving any monetary gain for this blog.  Doorway of my fairy cottage. Photo by Diane M. Lilly, 2019. So, fairy gardens…Where did this charming gardening trend come from? I asked myself this very question as I worked on my annual spring gardening and faux floral projects. For the past few years, I’ve been experimenting with fairy houses and fairy gardens—both for indoor and outdoor use—but until now, it never occurred to me to consider the origins and the meaning behind the miniature garden trend. So I did a little digging (no pun intended), and here’s what I learned… 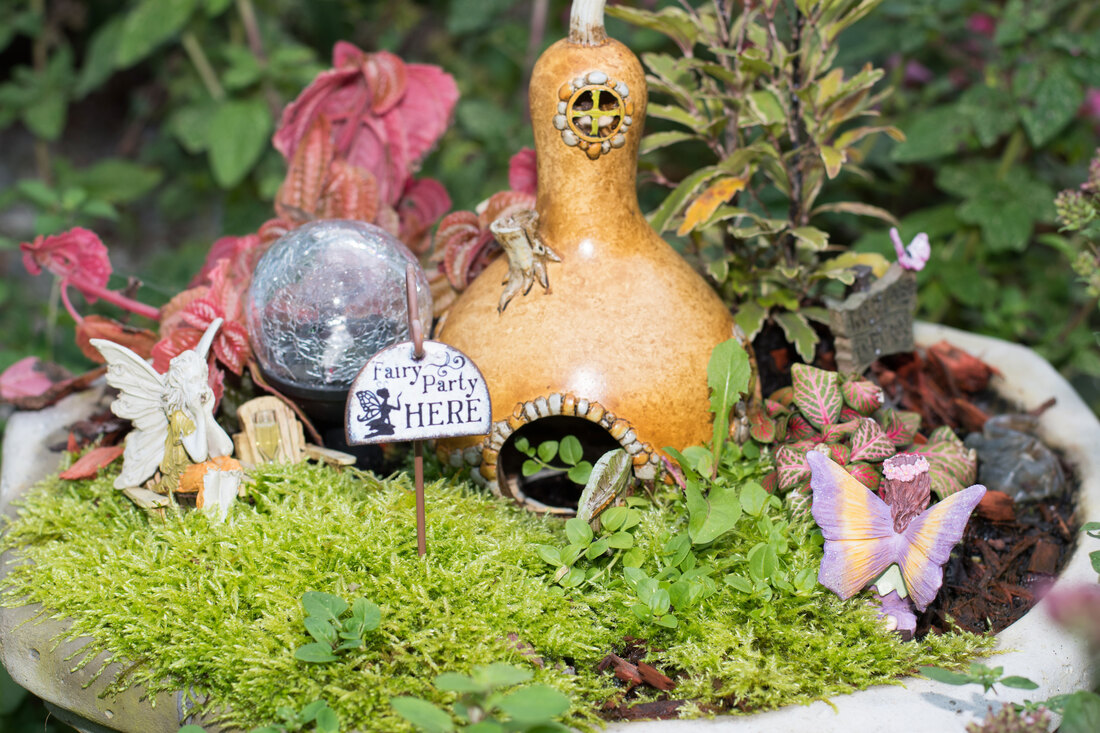 Image by Darwin Carozza from Adobe Stock. Late 19th century garden trends The seeds for the fairy garden idea—at least here in the US—seem to have started sometime in the late 1800s as an offshoot of the Japanese garden tradition of bonsai and miniature trees. The Victorians were fascinated with Japanese art, gardens, and culture and began using Japanese-influenced miniature trees in their garden landscapes. These were not yet what we would consider fairy gardens, but the notion of plants in miniature seems to have fascinated people from that time forward.  Image by josefklopacka from Adobe Stock. A new garden idea in the mid-20th century Fast forward to the mid-1900s, and a British nursery owner named Anne Ashberry and the fairy garden as we know it today start to take shape. Anne Ashberry’s idea was to create small gardens that could be easily looked after by people who lived in small spaces or by individuals with physical impairments. If you’ve never heard of Ms. Ashberry, read her inspirational story here. She became well known for her miniature gardens and window boxes with tiny landscaped worlds full of carefully researched flowers and soils. I don’t think they were considered fairy gardens just yet. These carefully manicured small-scale versions of our world—filled with miniature houses and formal gardens—were simply magical and sought after by the British royal family. 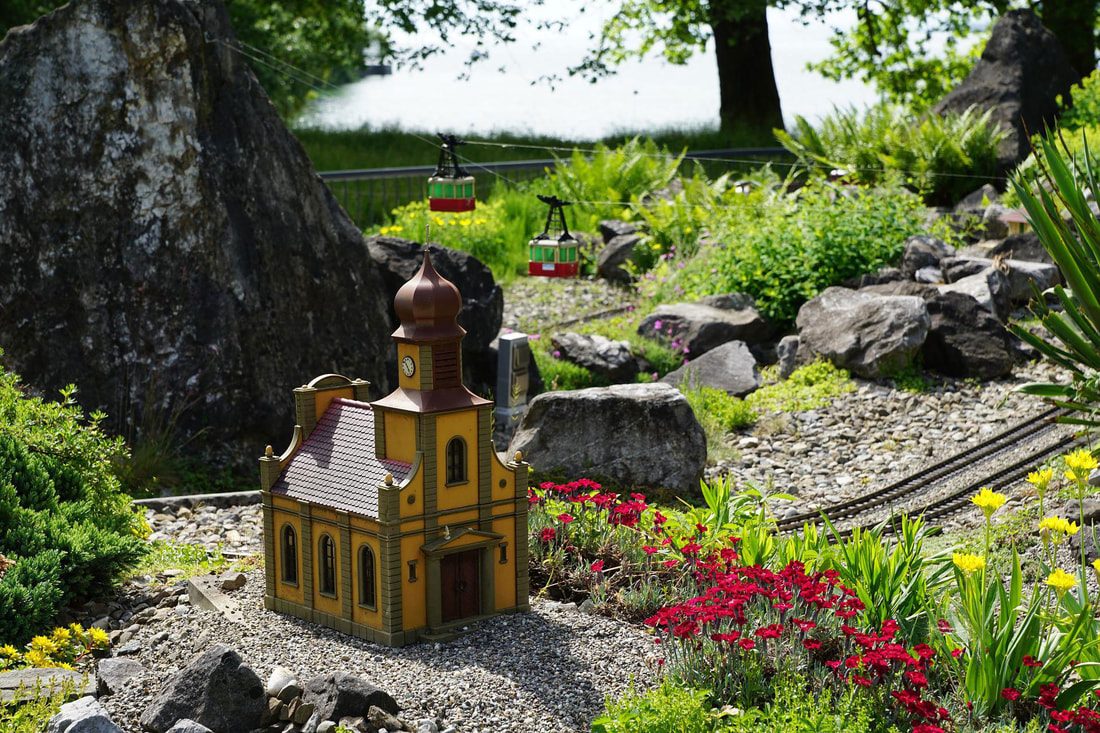 Image by photosforyou on Pixabay. Folkloric influences The current-day fairy theme has cultural ties to Germanic and Celtic (Irish) folklore. The underlying mythical belief is that fairies live in our gardens, and these fairies can either be mischievous or bring good luck, depending on how well they are respected and treated. According to popular belief, if you want to appeal to the fairies in your garden and get into their good graces, you must create an enticing world filled with flowers, comfortable places to live and shelter, and sparkly things. If you do this, fairies will move in, and your garden will thrive. There is also a tradition of placing fairy doors and tiny houses in the woods near trees. This attracts good fairies to the area and creates a sense of magic and wonders for the lucky person who happens to be passing by.  Image by jonnysek from Adobe Stock. 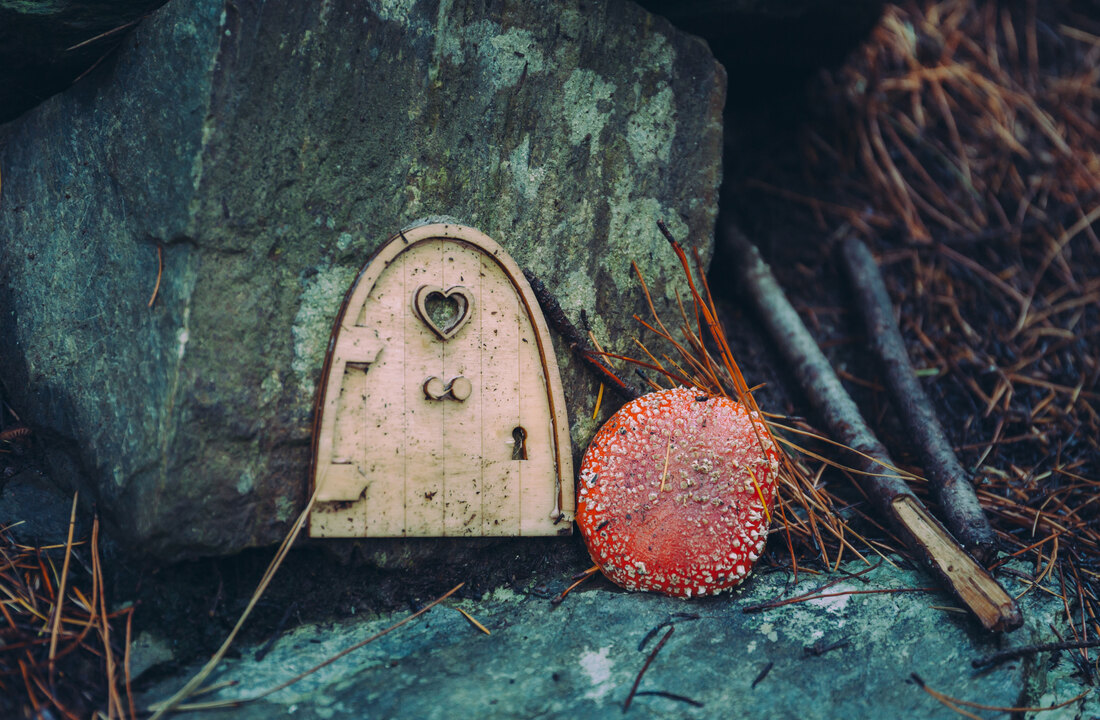 Image by joeycheung from Adobe Stock. Miniature vs fairy We should take a moment to understand the difference between “miniature” and “fairy” gardens. The terms “miniature garden” and “fairy garden” tend to be used interchangeably, and I guess there’s a logic to that, but I believe there is a distinct difference. Fairy gardens—to my way of thinking—are specifically about creating spaces for fairies and have their roots in folklore. Miniature gardens CAN be fairy gardens, but often they are just like model train landscaping—a mirror reflection of our world in miniature, which—in truth—can be just as enchanting!  My outdoor fairy garden featuring my handcrafted Fairy Cottage. Photo by Diane M. Lilly, 2020. 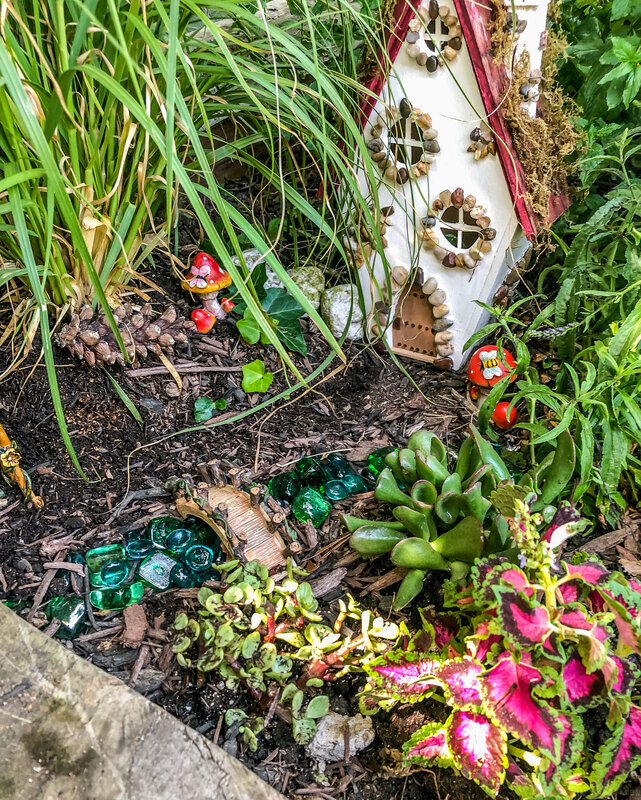 Outdoor fairy garden with bridge featuring my handcrafted Fairy Cottage. Photo by Diane M. Lilly, 2020. Fairy gardens today Today, miniature gardens (and fairy gardens) are often used to give children a place to stretch their imagination, but adults seem to be equally enthralled with them. (Take a look on Facebook if you don’t believe me!) It’s a fun hobby that some people take to incredible levels, creating miniature worlds full of minute details that capture your attention and make you smile. Creating an outdoor fairy garden is a fun way to “play” in the garden. It’s also a way to have a compact garden in small areas. (Remember Anne Ashberry?). You could even use faux plants for all-year use and less maintenance. I have been experimenting with indoor fairy gardens and faux florals to bring the outdoors inside. (I know...According to folklore, you are not supposed to invite fairies inside, but rules are meant to be broken, right?!) The most important thing when dealing with fairy gardens is creativity and imagination. Everything else is just confetti! I am developing some ideas for new handcrafted wooden fairy houses for indoor fairy gardens. For more on this exciting new project, check out my new page on Di’s Studio Design website… https://disstudiodesigns.com/fairy-houses.html 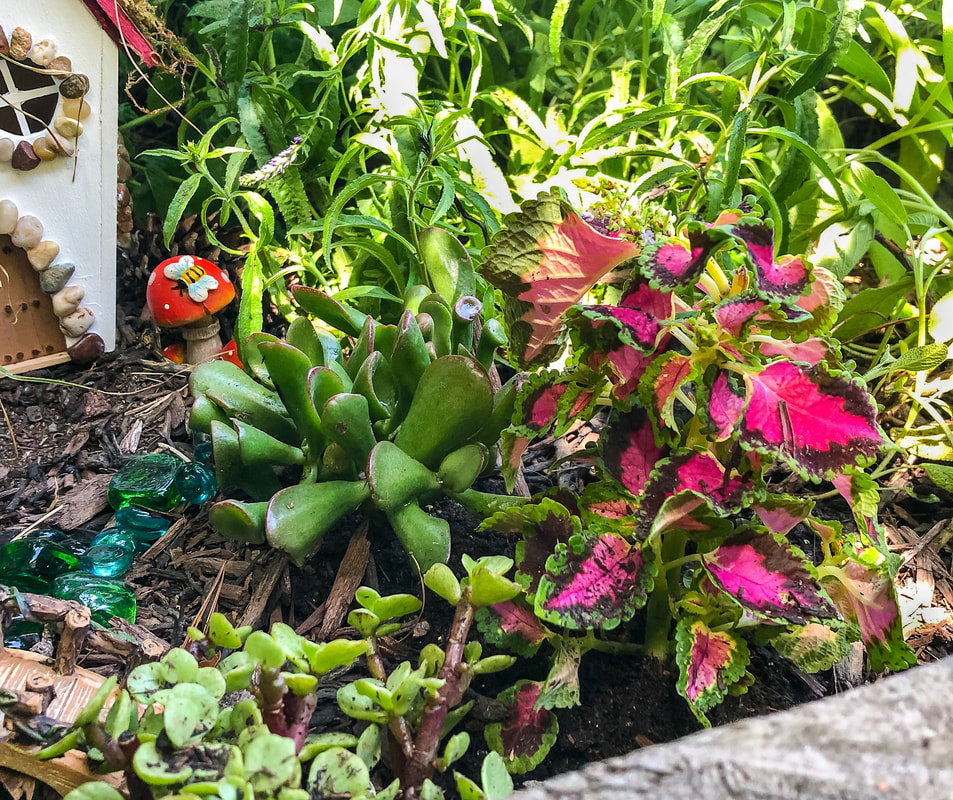 Plants in my outdoor fairy garden. Photo by Diane M. Lilly, 2020. 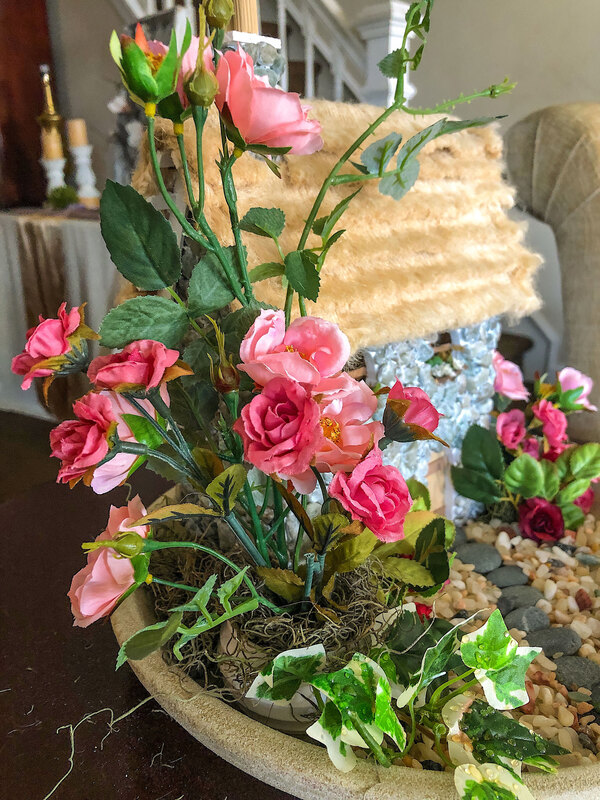 Faux roses in an indoor fairy garden with a handcrafted English Cottage. Photo by Diane M. Lilly, 2021. Related blogs you may want to read: My spring 2022 indoor fairy gardens Spring makeover for my indoor fairy gardens My outdoor fairy garden My fairy house project This article may contain a few items or commercial mentions, but I only used them for demonstration purposes only. I am not endorsing any particular product or receiving any monetary gain for this blog. 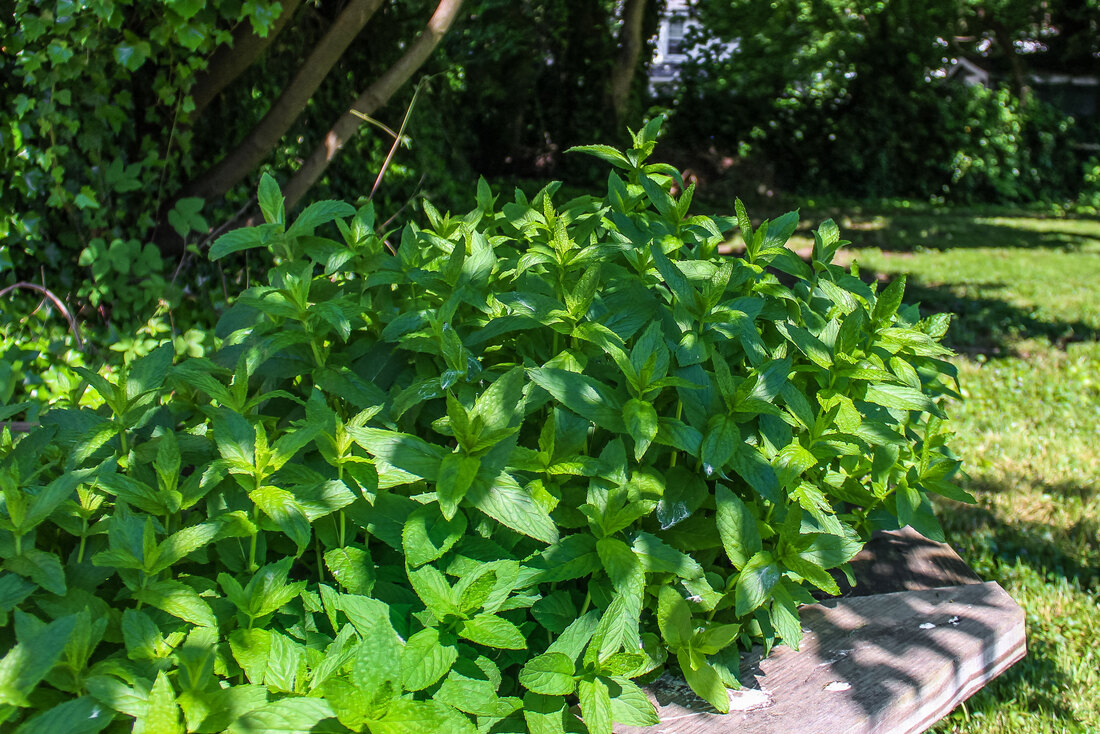 Mint growing in my garden. Photo by Diane M. Lilly, 2021. A few years back, I bought this packet of mint seeds to plant in my yard for fresh mint. Not only did I have no idea how to grow mint, but there was no thought given to how I would use the stuff when it started to grow…and grow it did! So, the first thing you should know is that mint is prolific! No, seriously, you'll have to keep on top of it so this plant doesn’t spread all over your yard. But it needs little care to keep it alive, and you get a lot of it for whatever uses you have in mind. Which brings me to my second point…What can you do with fresh mint? It’s been growing in my yard for a while now, and you’re probably like…how have you not yet figured out how to use this herb? It just comes down to time—as in not enough of it. So, this year, I am committed to learning how to use the plant for something other than pretty photos!  Mint leaves. Photo by Diane M. Lilly, 2021. I’m embarrassed to admit that I had allowed my mint to make itself at home in my yard for so long, not using it for anything, that I had forgotten exactly what type of mint I had grown. So the burning question became, how do I figure out what kind of mint I have? Well, a little research has turned up an answer—give it a taste. If it has a sharp, almost spicy taste, it’s probably peppermint. If the taste is more subtle and sweeter, it’s more likely to be spearmint. So I popped off a leaf and gave it a chew, and—sure enough—it had a sharp, almost peppery flavor! So, I can assume I am growing peppermint. Good to know! Now that I know what type of mint I have and how to grow it, it's time to learn how to harvest and use this leafy green herb. And so this will be the beginning of a continuing journey to delve deeper into how to grow, harvest, and use common herbs like mint. I’m no herbalist, but I like the idea of finding more natural ways of living, and growing herbs plays into that mode of thinking. So let's see if we can get our heads wrapped around a few beginner’s tips… How and when to harvest mint… While the mint plant benefits from frequent harvesting (increasing the yield of new growth), this is also an opportunity to keep the herb in check, pulling runners from spots where you don’t want the mint to grow. The actual act of harvesting is pretty simple—simply clip (with scissors, do not break) the top buds with the younger, more flavorful leaves (cut above the second set of leaves near the bottom), pluck a leaf at a time as needed, or cut large bunches just before the plant blooms (never harvest more than 2/3 of the plant). The mint plant can be harvested any time after maturity, but the best time is before it flowers. After the flowers bloom, the taste of the leaves gets more bitter. Also, as with most other herbs, harvest in the morning for the best concentration and flavor. 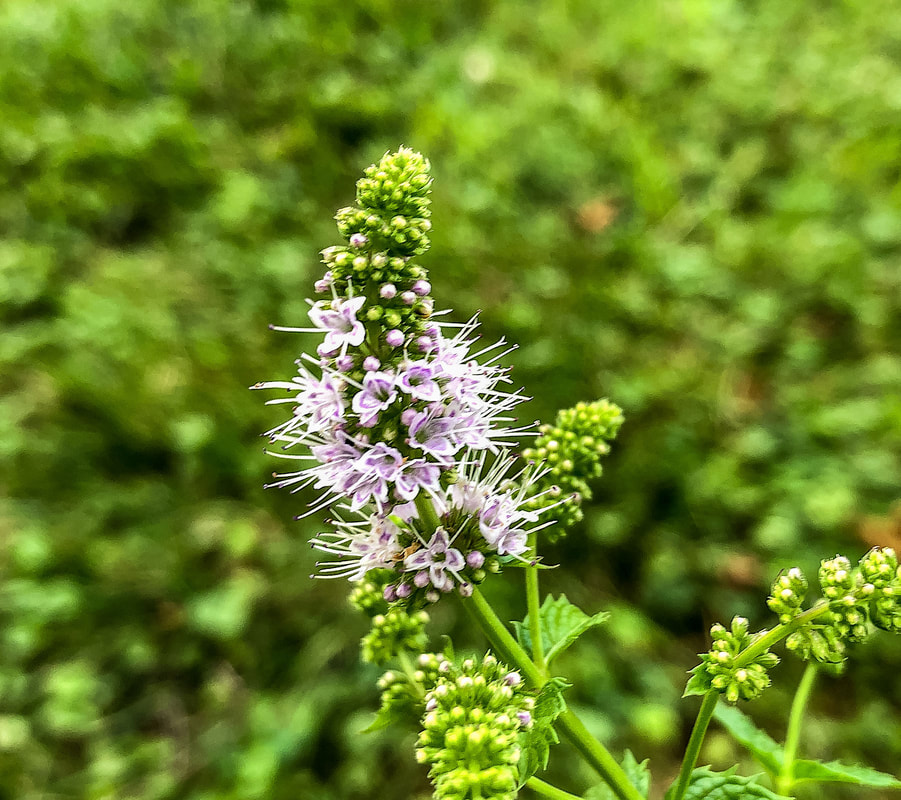 Mint flower. Photo by Diane M. Lilly, 2020. 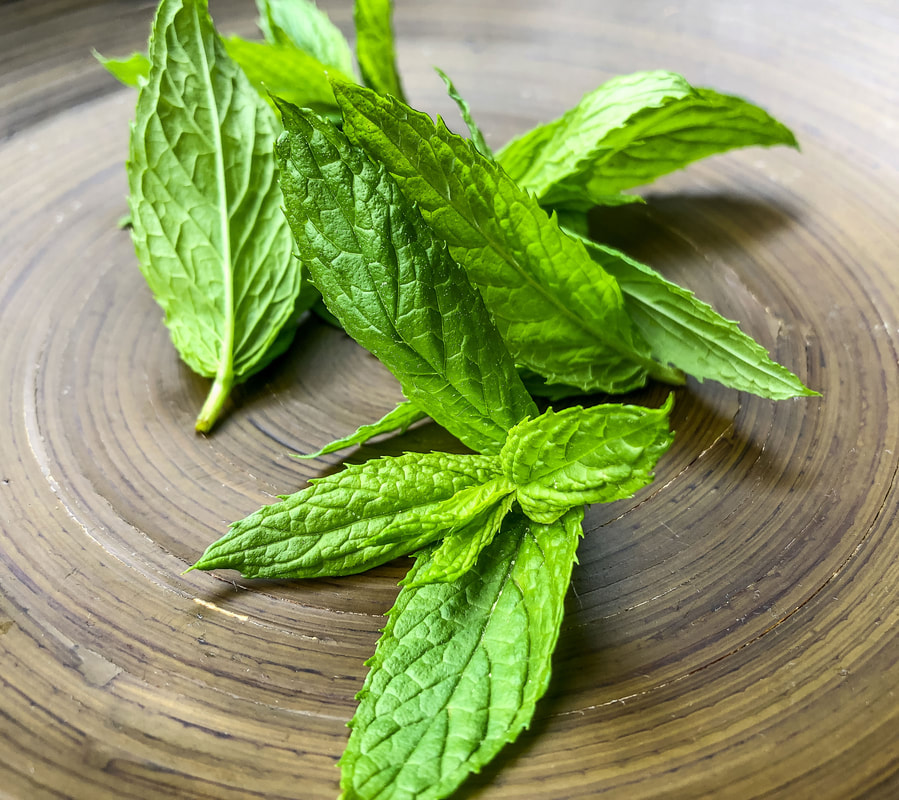 Mint leaves harvested from my garden. Photo by Diane M. Lilly, 2022. How to store mint… Dried mint loses some flavor, so using mint when fresh from the garden is the optimal way to get the most flavor. That being said, there are still benefits to using properly dried mint. The best way to dry out this herb is to tie your cuttings together and hang them in a cool, dry, dark place (do not dry with heat). Store dried mint in a glass container, and make sure no moisture is left that could create mold (you can use absorbing packets). Wrap them in a damp paper towel or place them in a container with water and place them in the fridge for a week to 10 days if using within a few days. Mint leaves can also be frozen in freezer bags (freeze on wax paper first) or chopped up and frozen in ice cubes, ready for your next delicious beverage! Your mint will be kept in the freezer for up to three months. 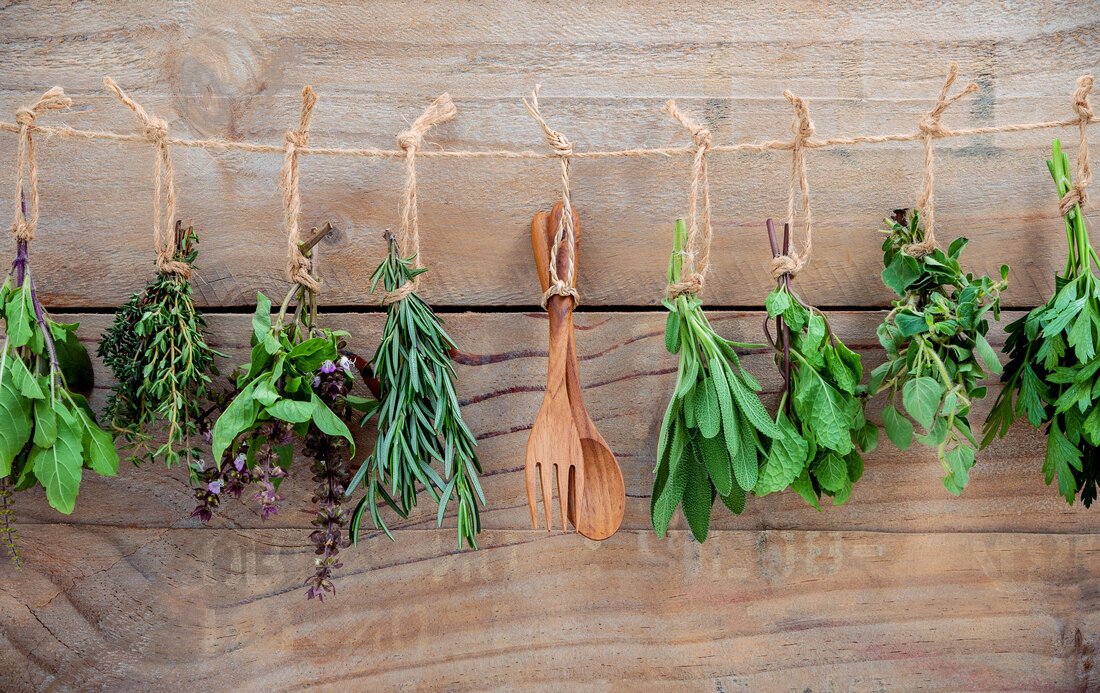 Image by kerdkanno from Adobe Stock. How to use mint… Last year, I decided to try making homemade mint tea with fresh clippings from my yard. The results were somewhat unsatisfactory, but it was--after all--my first attempt! At some point, I’d like to try making mint tea again…but maybe iced tea this time. Once I play around with it a little more, I’ll post another article with the recipe…but in the meantime, I have discovered lemon and mint leaves in water. I started drinking water with lemon slices and some freshly squeezed lemon juice. Then I remembered I have fresh mint in my yard…so, of course, I had to throw in some fresh mint leaves, right?! This is an incredibly refreshing drink that screams summer! I make mine by the glass, but you can find recipes for making a pitcher of this wonderfully light and refreshing beverage. I’ve become seriously addicted to this drink! It’s a perfect excuse to drink more water.  Water with fresh lemon and homegrown mint leaves. Photo by Diane M. Lilly, 2022.  Image by Africa Studio from Adobe Stock. Another delicious way to use fresh mint leaves is in a salad. Today’s lunch consisted of mixed salad greens, celery, cucumber, shredded cheese, fresh chive flowers and stems (from my garden), mint leaves (also from my garden), and balsamic vinaigrette. The peppermint has a sharp flavor that wakes up the rest of the greens and compliments the vinaigrette quite nicely. So that was a darn good lunch! And I will experiment with different kinds of salads during the summer months. If I stumble across something particularly delicious, I will post a blog about it so you can try it out yourself! In the meantime, you can check out this terrific blog post I uncovered during my research that is packed full of uses and benefits for using mint. Let me know if you have tried any recipes using fresh mint. And comment below with any recipe ideas or tips you have learned!  Mixed green salad with freshly picked mint leaves from my garden. Photo by Diane M. Lilly, 2022.  Same mixed salad with mint leaves...with more shredded cheese please! Photo by Diane M. Lilly, 2022. Related blogs you may want to read: Tips for planting seeds indoors How to repot a pothos plant How to propagate bromeliad pups Six herbs I planted indoors Growing tomatoes and cucumbers for my garden It’s planting season again This article may contain a few items or commercial mentions, but I only used them for demonstration purposes only. I am not endorsing any particular product or receiving any monetary gain for this blog.  My cherry tomatoes from last year. Photo by Diane M. Lilly, 2021. Last year, I grew tomato and cucumber seedlings in styrofoam cups on my kitchen's southwest windowsill. After a couple of weeks, they were a couple of inches tall! My cucumbers are once again rapidly growing. This year's cucumber and tomato seedlings (along with other herb seedlings) are sitting on my living room windowsill, which roughly faces southwest.  This year's seedlings growing on my windowsill. Photo by Diane M. Lilly, 2022. So this year, I'm sharing my gardening journey, pitfalls, mistakes, triumphs, and tips. This will probably be the first in a series of articles following my journey from planting the seeds to using my homegrown vegetables in recipes. Planting my tomato & cucumber seeds If you haven’t read it, you can read my blog on planting seeds, including tomatoes and cucumbers. The seeds are sown in small pots covered with plastic to help them sprout.  Pots and seeds for this year's tomato and cucumber plants. Photo by Diane M. Lilly, 2022. I tend to plant too many seeds in one pot, so now I’m stuck with the problem of which plants to cull or whether I can safely transplant some to other pots. Cucumber seeds are supposed to be planted no more than two per pot. Well, I planted probably 8-10 seeds in one six-inch pot! It’s a rookie mistake I make every year in my haste to plant seeds and get as many plants to grow as possible.  Cucumber seedlings after about two weeks. Photo by Diane M. Lilly, 2022. 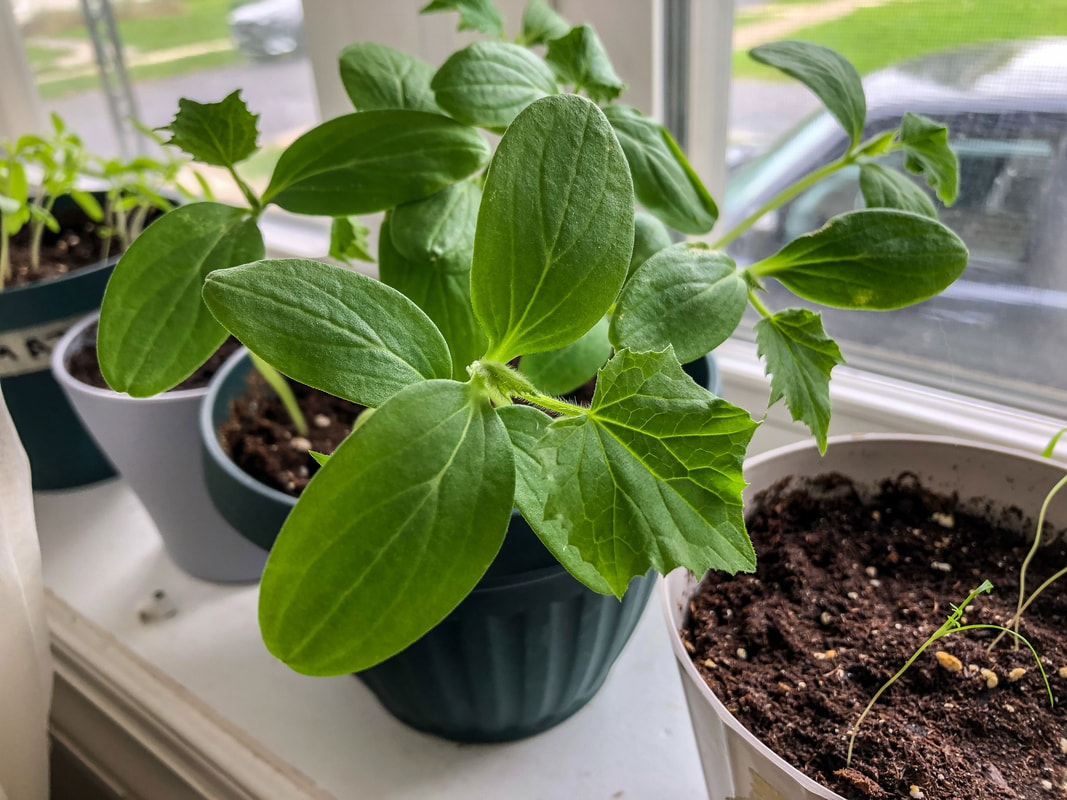 Cucumber plant getting its true leaves. Photo by Diane M. Lilly, 2022. So I called my dad—an avid gardener—for some advice. There’s good news, and there’s some bad news. The bad news is that cucumber plants don’t like to be transplanted or messed with, and I really shouldn’t have planted more than two in a pot anyway (so I could cull the weaker one). An even better option would’ve been to simply wait until the weather got warm enough to plant the seeds directly into the ground. The good news is that cucumbers sprout fast, and seeds are cheap! So if my little cucumber sprouts die, I can always purchase new seeds and replant. No harm done. As for the tomatoes, according to my dad, they are incredibly hardy and will most likely tolerate being separated and transplanted. He told me to plant two seeds per pot and only plant what I have room for in my garden. (As it is now, I have no idea what to do with the extra ten or eleven plants EACH of cucumbers and tomatoes! Maybe they'll be put in pots outside.) 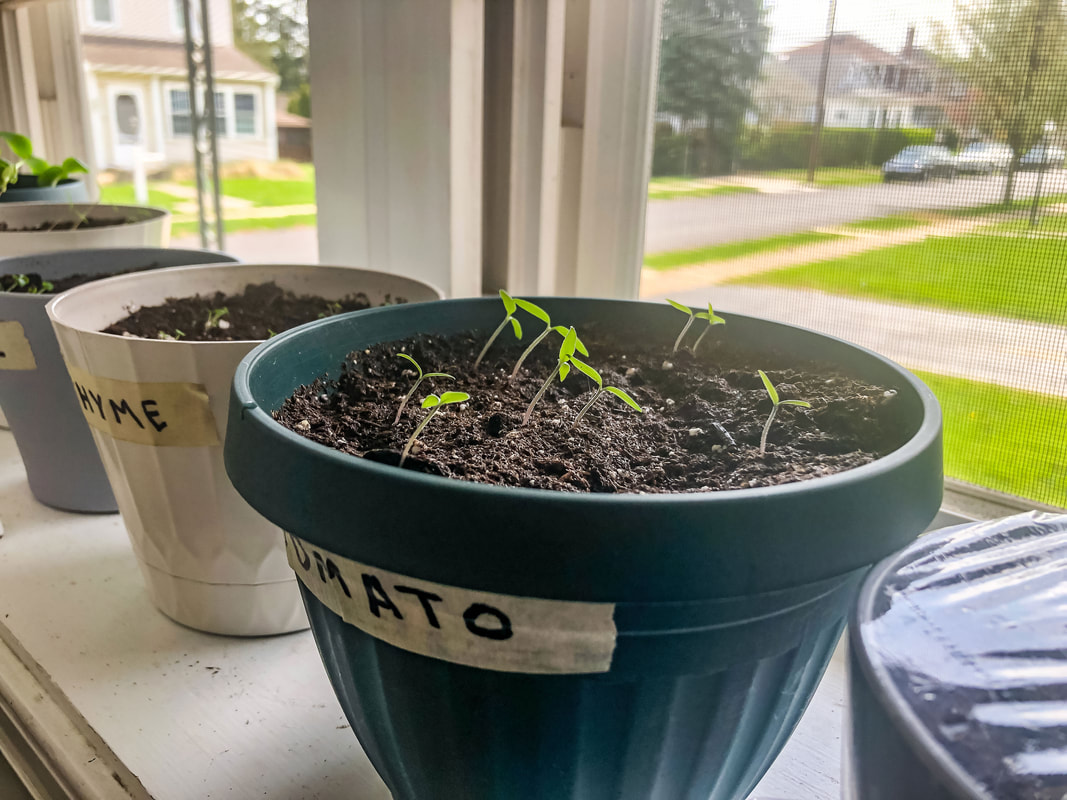 Tomato seedlings after about two weeks. Photo by Diane M. Lilly, 2022.  Tomato plants after about four weeks. Photo by Diane M. Lilly, 2022. How to separate the seedlings Which brings me to the next issue…How—and when—do I separate the tiny plants in the pots? Can I do that safely without damaging my fragile plants? Some sources say not to pull out the tiny plants but to cut them at the soil level so as not to disturb the roots of the other plants. So it may well be that I’ll have to cut at least half of my new seedlings. The newly sprouting seedlings will soon crowd each other, so there needs to be a plan to separate some or cut most of them down. But I should determine how many plants I can fit in my garden. It may well be that I don’t need all of the plants that came up. I still feel bad about killing off half (or more) of my new plants! And I may just pop some in pots, just so I don’t have to feel guilty about killing little plants. When to transplant outside Cucumbers can be planted outside when they have 3-4 leaves on them, and there is no danger of frost. The tomatoes should be about 4-6” tall before planting outside, with nighttime temps staying more or less above 50 degrees Fahrenheit. Small metal fence partitions (used as a lattice) are leaned against a wall in my garden so my tomatoes and cucumbers can climb. My dad helped me dig up the ground and add some better gardening soil in preparation for planting, so I’m hoping for better results this year. 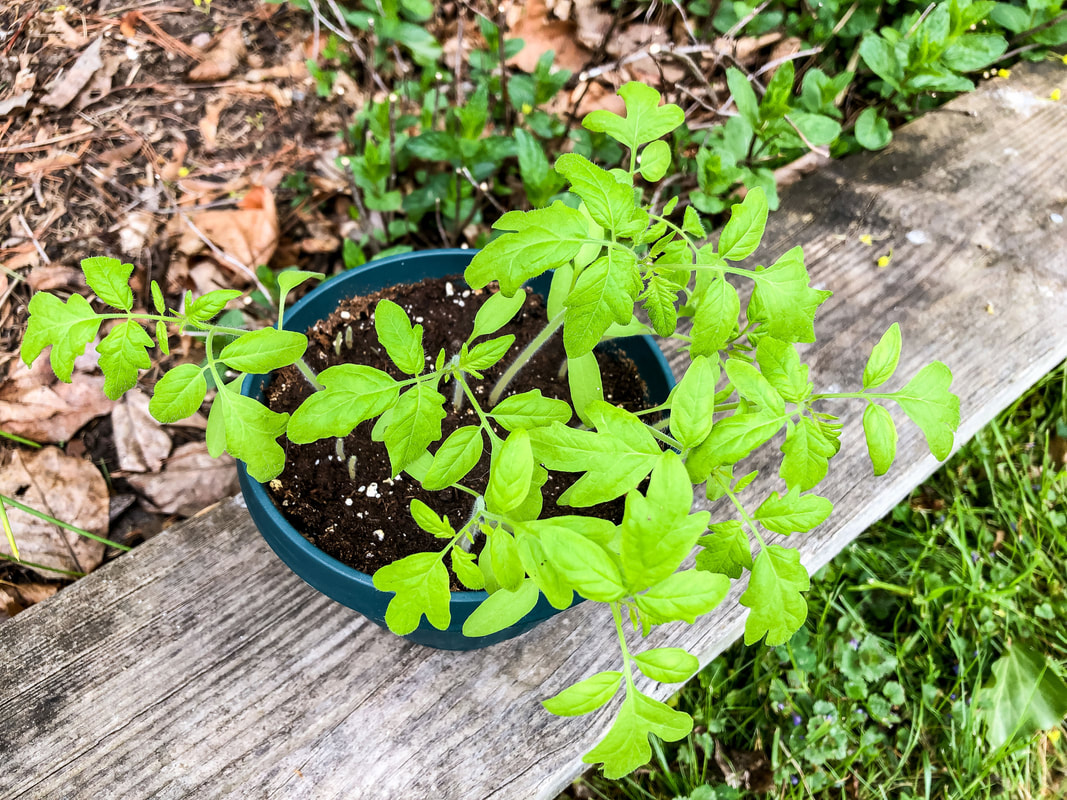 My tomato seedlings outside waiting to be planted. Photo by Diane M. Lilly, 2022. 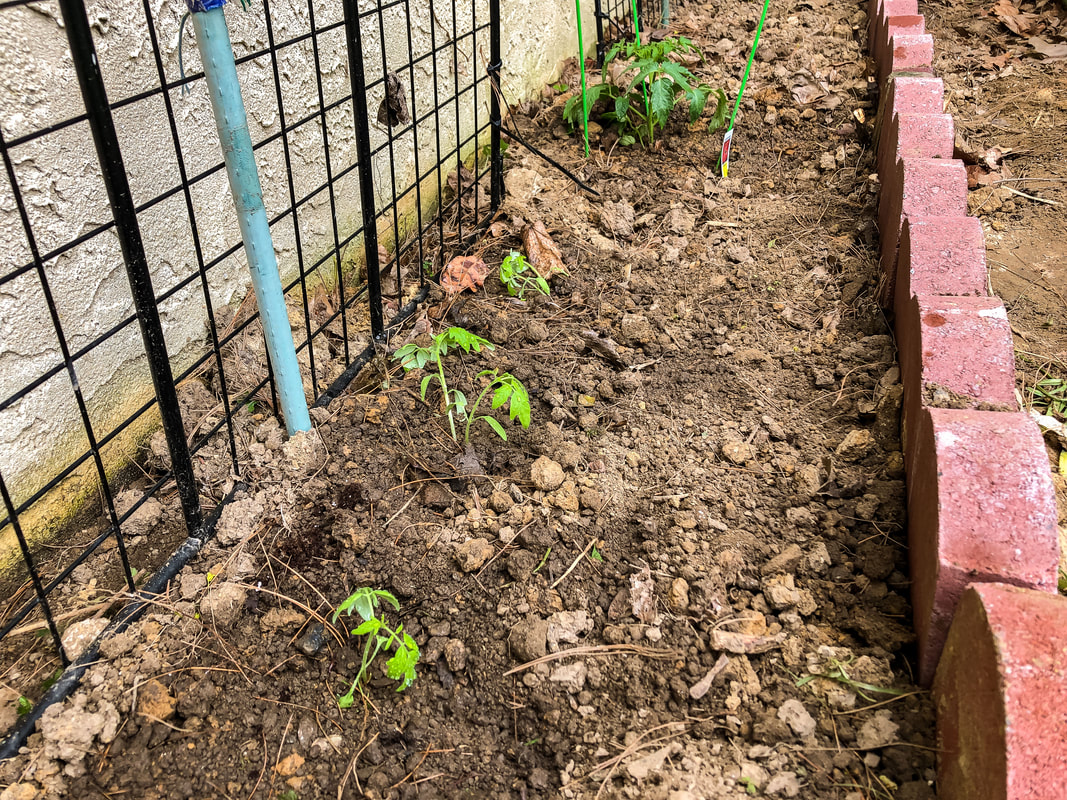 Tomato seedlings planted in the ground. Photo by Diane M. Lilly, 2022.  More tomato seedlings planted in a pot. Photo by Diane M. Lilly, 2022. Issues with growth from last year I have not gotten decent results the past couple of years growing cucumbers and tomatoes in pots. One of the things I will be on the lookout for this year is the blossom end rot on my tomatoes. There's been an issue with rot in the last couple of years. It’s an issue with the soil, the pH levels, and nitrogen. The soil needs less nitrogen and more phosphorous, and I need to regulate the water levels better. Also, growing these plants in pots is not optimal. Wherever possible, it’s better to grow them in the ground. I don’t have an issue with cucumbers, except that sometimes the fruit is small and gourd-like instead of oblong. This may also be a symptom of being grown in a pot with water level issues and insufficient nutrients. Changes will be made in the planting process (with help from my dad) to improve the soil, light, and watering needs. I would like to have a decent crop this year! I will try to provide updates, so keep checking back for more on this year’s garden projects!  Yellow cucumber flower. Photo by Diane M. Lilly, 2021.  Last year's cucumber growing on the vine. Photo by Diane M. Lilly, 2021.  Last year's grape tomatoes growing on the vine. Photo by Diane M. Lilly, 2021.  Last year's cherry tomatoes growing on the vine. Photo by Diane M. Lilly, 2021. Related blogs you may want to read: Tips for planting seeds indoors How to repot a pothos plant How to propagate bromeliad pups Six herbs I planted indoors It’s planting season again This article may contain a few items or commercial mentions, but I only used them for demonstration purposes only. I am not endorsing any particular product or receiving any monetary gain for this blog.  Mint in my back garden. Photo by Diane M. Lilly, 2021. Herbs…They are fun to grow AND useful for many things! This spring's goal is to increase the variety of my existing indoor and outdoor herbs. A second—but equally important—goal is to learn more about the care of these plants so I can get the most out of the growing experience. In my front window, there is a pot of leggy parsley. It had been growing outside last year quite beautifully, but I brought it indoors for the winter, and it’s become…well…a little spindly! It needs some TLC…  Parsley plant in the front window. Photo by Diane M. Lilly, 2021. This past fall, I also brought in a pot of thyme. The plant was lush and fragrant and doing quite well…and then it suddenly crashed! I have a couple of theories about that, mostly involving low light and forced dry heat. I guess that means I’ll have to plant more for this year’s crop and try again! There are a few herbs in the back garden from several years ago—chamomile, mint, chives, and sage. Everything has been growing incredibly well back there, but unfortunately, over-enthusiastic pruning may have accidentally killed the sage, so this year, I started some new plants from seeds. Lesson learned, I hope!  Summer herbs growing in my back garden. Photo by Diane M. Lilly, 2020. A few new additions are joining the garden—lavender, rosemary, basil, dill, and cilantro. All were planted from seed and are sprouting well so far. Today’s blog will discuss more efficient ways to grow these herbs, harvesting, storage, and how to use them for teas, cooking, and other household stuff. But--before we get ahead of ourselves--we have to help them to grow! My seedlings have begun to sprout, and it’s time to assess each plant's needs. So, let’s get on with it! Basil Basil is one of those herbs that is just so delightful, especially in tomato sauce. I planted basil for this purpose in my back garden a couple of years ago. It seemed to do well, but then it died off, and I never replanted it. I didn’t know then that basil is an annual (meaning it does not come back every year). This year, the pot on my windowsill with basil seedlings is destined to be an indoor herb plant. I’d like to see if I can keep it alive indoors (like I did with the parsley).  Basil sprouts on my windowsill. Photo by Diane M. Lilly, 2022. I’m getting off to a bit of a rocky start, though…I discovered (after the fact) that I planted too many seeds in the same pot, meaning I will need to cut back some of them to get one healthy plant. Basil doesn’t like to be transplanted, so it won’t do me much good to try to transplant the extra seedlings elsewhere…although it wouldn’t hurt to try! The worst that can happen is they die off. But I am worried I could accidentally damage the plant I want to keep, so culling the extras may be my only option. I just hate deliberately killing off perfectly good seedlings! 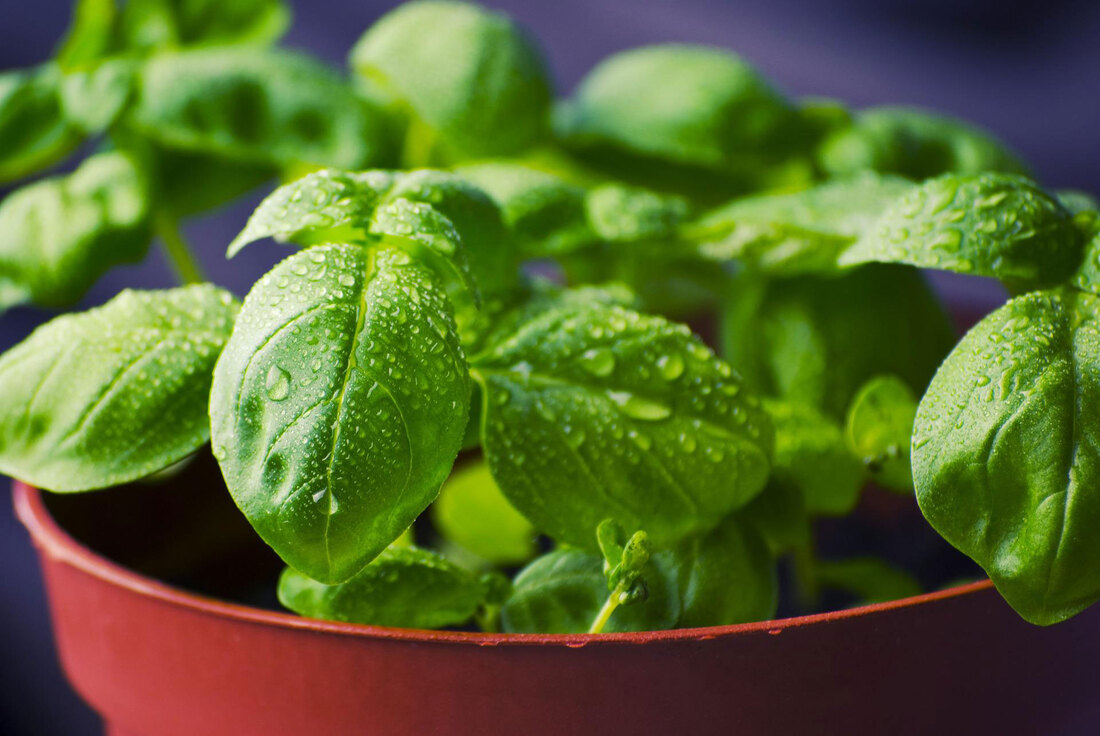 Image by tookapic from Pixabay. More growing tips for basil… Basil plants grow 12-24” tall, and basil seedlings need to be spaced 10-12” apart to give each plant space to bush out. The seeds for this plant will take 5-10 days to germinate. Basil needs a lot of sun and warmth—6-8 hours. This herb plant dislikes the cold (in nature, it grows in much warmer climates), so it will be essential to keep it out of drafts while in the house and bring it inside if outdoor temperatures get below 50˚F. This fragrant herb also needs plenty of water and nicely balanced soil levels to thrive. It likes moist, well-draining soil with pH levels between 6.0-7.5 (neutral to slightly acidic). Basil doesn’t need a lot of fertilizer, maybe a 5-10-5 plant fertilizer (a topic I’ll be covering in my next blog) every so often. You can begin pruning after about six weeks, clipping the center shoot to allow the plant to get bushy and produce more leaves. Pruning regularly—like with any herb—will force your plant to push out more leaves and keep it from flowering and going to seed too quickly. Essentially, pruning extends your harvesting season (another topic I will cover later in this series). You can start harvesting the leaves once the plant is 6-8” tall. Chamomile Chamomile is an incredible herb to plant in your garden, but you will need a lot of it--which won’t be a problem if it's outside because chamomile is one of those plants that like to self-seed. You could end up with a garden full of chamomile without even trying! I even found a chamomile plant growing out of a brick wall down the side of my driveway, far away from the original plant! So be aware that this plant spreads and could take over your garden eventually if you are not vigilant (unless that is your intention). 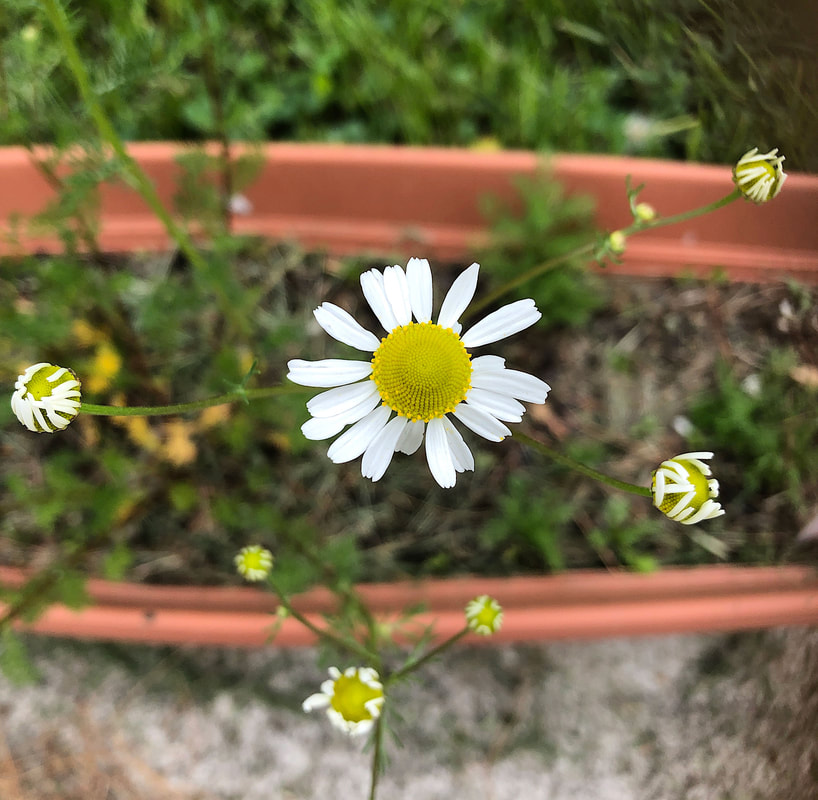 Chamomile growing in a planter in my yard. Photo by Diane M. Lilly, 2021. Last year’s chamomile plants were left outside all winter. They not only survived but kept green leaves through the entire wintry season. The foliage for this herb is quite feathery and dense, and the flowers for my variety grow tall (I may have planted the German variety), towering over the green foliage below. And let me tell you, this is the most aromatic plant in my garden! You get just a few feet away, and the gorgeous scent wafts your way, beckoning you to come closer! Bees and ants love it! Some general growing tips for chamomile… The chamomile plant is considered an annual—meaning it should only grow once a year and then die off. But if it is allowed to self-seed, more plants will come up the following year. Let me clarify…There are a couple of varieties of chamomile—a German annual variety and a Roman perennial variety. Both are hardy and aromatic plants that can potentially come back year after year.  Chamomile leaves from this spring's plant. Photo by Diane M. Lilly, 2022. This herb likes partial shade and just a little water. It’s drought resistant (but prefers cooler weather), so it’s not needy, like some other plants in your garden. This plant will grow wild (if conditions are right) and low maintenance. Don’t overwater it, and it doesn’t need fertilizer. Just give it the right spot and a little water, and let it do its thing! Chamomile blooms in the summer, and the flowers can be harvested for tea and other culinary uses. Picking the flowers regularly (plucking off the sweet flower tops, not the bitter leaves) will ensure more growth and more flowers to harvest. Pick the flowers in full bloom with no drooping petals. Chives Chives are another herb plant in my back garden, and so another plant I didn’t need to start from seed this year. The chives in my garden are still going strong, even after three years. The one thing I will need to do this year (sometime soon, as it is early spring) is to divide the clumps to get more yield from my plants. 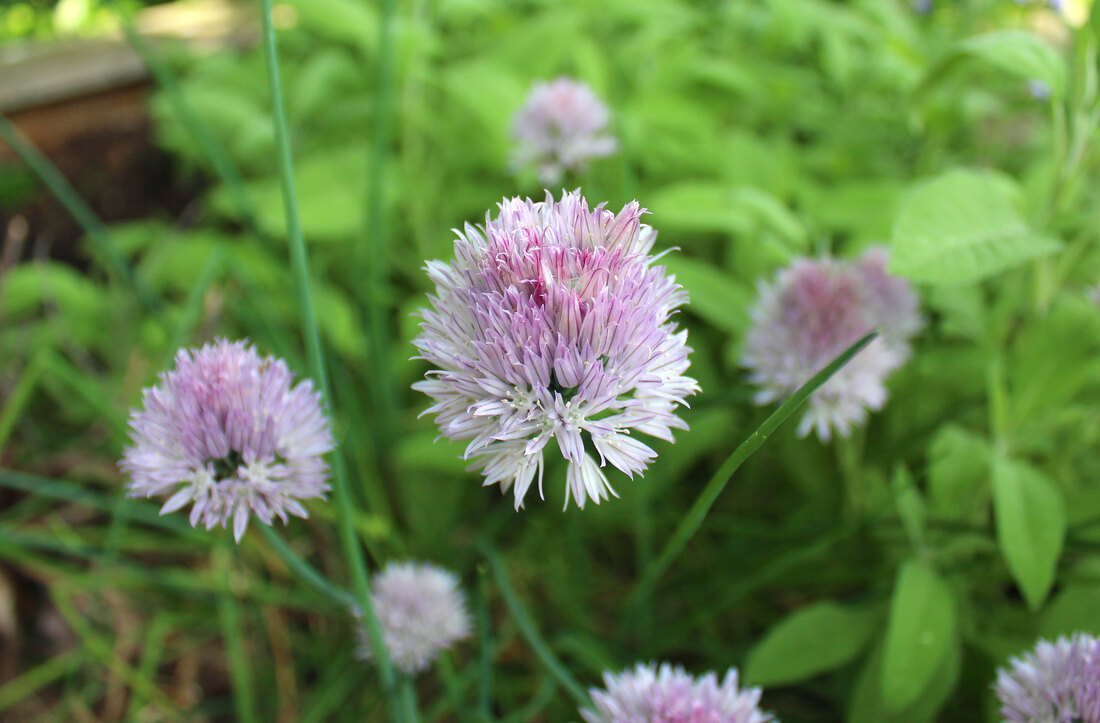 Purple chive flowers blooming in summer in my back yard. Photo by Diane M. Lilly, 2020. Some general growing tips for chives… My plant grows about 10-12 inches tall, but some varieties may grow taller. This plant is a perennial that is related to onions, garlic, and lilies. Plant the seeds 4-8” apart, and within six weeks, you’ll have new sprouting plants! This has proven to be a pretty hardy plant, surviving several heat waves with upwards of 100˚F for several days (with daily watering, of course), and it sits in full daytime sun in the summer. I water every day, either in the morning or in the evening. It likes well-draining soil with pH levels between 6.0-7.0. The plant produces purple flowers (though not in the first year) around early summer, which I tend to let go to seed so my little patch can spread. You can start harvesting chives 60 days after seeding by cutting small clumps a couple of inches from the ground. Cilantro I haven’t been entirely successful at growing cilantro. I planted coriander (cilantro seeds) two years in a row, and the plants looked promising at first. Unfortunately, though, the cilantro plants didn’t produce a lot of leaves, became leggy, and then just withered and died. So this year, I’m starting this herb from seeds again to learn what I’ve been doing wrong! I already discovered that cilantro does not like to be transplanted, which I did last year as I transitioned the new plants outside. I also just threw them outside, skipping the gradual process of “hardening” (or slowly acclimating) the plant. This year, I will probably keep this plant in a small pot inside, moving it outside now and then. 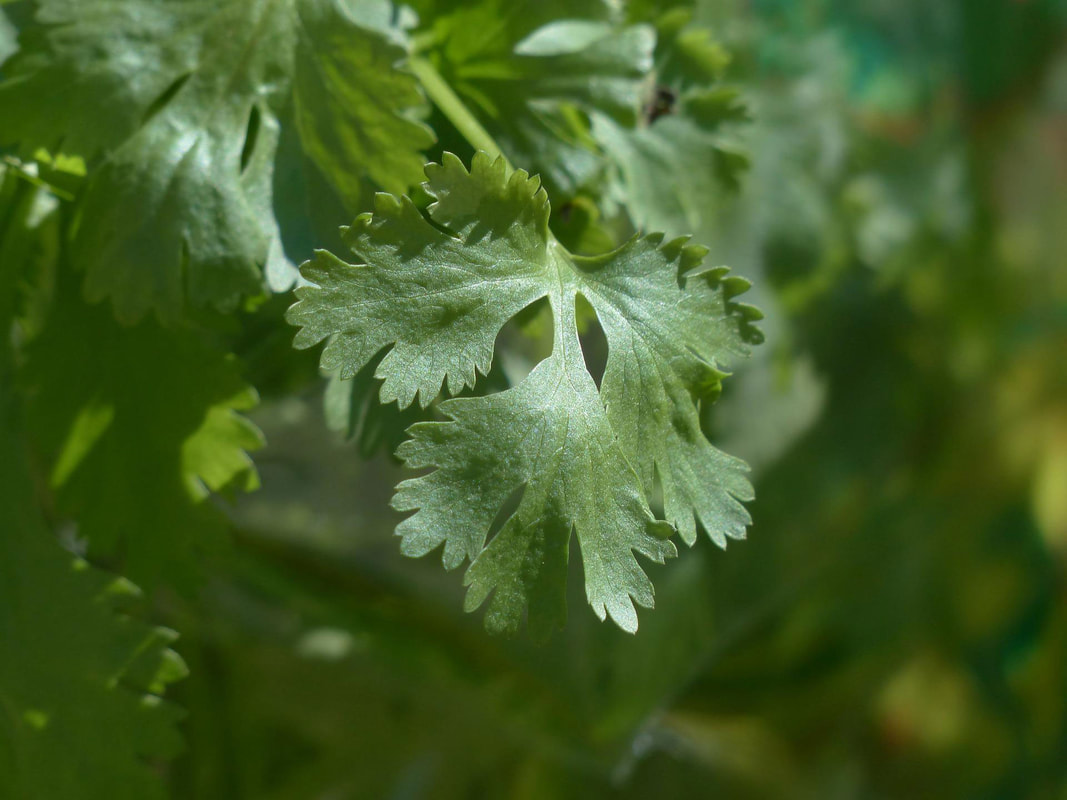 Image by Hans Braxmeier from Pixabay. Some more growing tips for cilantro… Cilantro is an annual (meaning you have to replant each year). It’s no accident that it looks like parsley, as it is in the same family. I often get my parsley and cilantro plants confused if I don’t mark them! It even has a taproot-like parsley, so it needs enough space underneath to accommodate that type of root system. (A taproot is a long, thin root that reaches several inches under the soil.) The seedlings for cilantro germinate in 7-10 days and reach maturity in 45-70 days. A healthy cilantro plant can grow 12-24” tall. New seeds can be replanted every 2-3 weeks in summer, the height of its growing season. This plant likes full sun but not too hot; you may have better luck with a spot in partial shade. It needs well-draining soil but does not like to dry out. To harvest, cut the outer stems when the plant is at least 10-12” tall. Harvesting regularly will extend the life of the plant. Dill This feathery herb has me a little perplexed. I planted it from seed last year, then transplanted it outside into a garden planter. The plant came up nicely but got very tall and leggy. (I’m noticing a trend here with my herbs growing long and leggy instead of bushy.) I have yet to grow a bushy dill plant, which I want. So, I planted dill seeds again this year, intending to grow this herb in a pot mostly inside.  Image by Hans Braxmeier from Pixabay. Some general growing tips for dill… Dill likes full sun and heat and should grow 2-3 ft tall, producing yellow flowers in summer. Grown from seed, it will take 7-10 days to germinate and about 90 days to mature. This herb doesn’t like to be transplanted, and when you plant the seeds, they should be spaced 12-15” apart. The dill plant develops a taproot-like parsley, so the pot has to be deep enough to allow for that long root column. This herb likes well-draining soil with a pH level of 5.5-6.7. Water well, and do not let dry out. Dill—like chamomile—can self-seed in the right conditions, providing you with new plants next year. (Technically, this is an annual plant.) Otherwise, you can harvest the leaves just before the plant flowers and go to seed. Lavender Okay, so who doesn’t love lavender plants?! I have tried (unsuccessfully) to grow lavender from seeds for the past two years. So, I’m trying again this year to figure out where I keep going wrong. It is said to be very difficult to grow lavender from seed, and most people buy a young plant to get them started. But I am nothing if not stubborn…and seeds are cheaper than buying a plant!  Image by Sabrina Wisian from Pixabay. General growing tips for lavender… Lavender is a perennial that likes full sun but low humidity. Soil quality isn’t an issue, but lavender does need soil with good drainage. Do not overwater! The seeds take 4-6 weeks to germinate and should be planted 18-24” apart. Lavender can be transplanted at about 3” high and will grow to 12-36” tall. This fragrant herb blooms between June and August, pushing out stalks of colorful purple flowers. Harvest lavender by cutting above the woody growth on the stems. Mint The one herb I have absolutely no problem growing is mint! I planted this in my garden a few years ago, and if I’m not careful, it will take over the whole yard! Growing this plant requires some diligence. If you don’t want it to end up all over the place, strangling other plants, you’ll need to take time out—frequently—to pull runners and cull back areas that are becoming invasive.  Mint taking over my summer garden. Photo by Diane M. Lilly, 2021. Some general growing tips for mint… Mint likes full sun—surprise, surprise—and makes good ground cover. The plant grows 1-3 ft tall and has beautiful purple flowers in the summer. Mint needs little to no maintenance except to keep it from growing too much. Just don’t overwater it, and it will take care of itself. Seedlings should be planted 18-24” apart. Harvest just before the plant flowers or when the leaves are at least 4” tall. Parsley As mentioned, I have a parsley plant from last year growing in a pot on my windowsill. It’s a bit leggy (there’s that word again), but otherwise, it’s growing well. I think it prefers being outside, so maybe once the weather warms, I’ll put it out in my garden so it can grow bushier again. As for the legginess, I found some interesting information on pruning and pH levels that might help me with this problem. (My next blog on herbs will deal with harvesting, so I’ll take that opportunity to cover this topic in more detail.) My research indicates that parsley is a biennial, so this might be its last year, and I should see it flower.  Leggy parsley growing in a pot by the window. Photo by Diane M. Lilly, 2022. Some general growing tips for parsley… Parsley will germinate between 21-28 days and mature in 70-90 days. Plant seeds 9-12” apart in soil with a pH level of 6.0-7.0. This herb can be transplanted 5-6 weeks after sprouting and grows to 12-18” tall. Parsley is a thirsty plant that requires a lot of watering, but just don’t let it sit in soggy soil. Harvest by cutting from the outer leaves to promote new growth and lessen the chance of bolting too early. Rosemary Rosemary (like lavender) is one of those herbs that I have been utterly unsuccessful at growing from seed…but I keep trying! I love the smell of rosemary, especially when cooking. They say it’s a simple plant to grow and harvest, but most people go the easier route and buy a plant because getting a seedling to grow successfully is very tricky.  Image by Hans Linde from Pixabay. Some general growing tips for rosemary… Rosemary takes 15-25 days to germinate and likes well-draining soil with a pH of 6.0-7.0. Plant 18-24” apart to give this plant the space it needs to grow. Rosemary is a perennial that can grow 3-4 ft tall. This herb is drought tolerant, likes Mediterranean-type conditions, is fragrant, and has blue flowers in summer. Rosemary (like sage, lavender, and thyme) draws moisture from the air; an indoor rosemary plant will need frequent misting. With that being said, don’t overwater the soil. But make sure it doesn’t get overly dry. In other words, only water when needed and don’t let the soil get soggy. Give it fresh soil once a year and fertilize it in spring. Sage The leaves of this plant are so aromatic! I love running my fingers over them to smell their gorgeous scent. I use sage in cooking, especially with chicken, and I’m experimenting with sage tea. Sage has been growing in my garden for three or four years, but I may have accidentally killed the plants last year by pruning back too much in early spring. Since I wasn’t sure if the plant would come back this year, I planted new seeds for an indoor pot and my outdoor herb garden.  Sage bud on last year's plant. Photo by Diane M. Lilly, 2021. Some general growing tips for sage… Sage is a perennial that can grow 2-3 feet tall, with gorgeous purple flowers in the summer. The seeds take 10-21 days to germinate. Give this herb plenty of spacing (24-36” apart) when planting because it spreads out and gets bushy!  Purple flowers blooming on my sage plants. Photo by Diane M. Lilly, 2020. This hardy herb is drought tolerant and can handle temperature extremes like in the Southwest desert (hot days and cold nights). Like rosemary, allow the plant to grow in the first year and then begin harvesting in the second year. Thyme I had this pot of gorgeous, fragrant bushy thyme last year growing quite hardily in my side yard. I wanted to preserve it over the winter, so I brought it inside in the fall. The plant grew fairly well…until about mid-winter, when it suddenly crashed and was dead. This spring, I planted more seeds…and we’ll see what happens. The plan is to have some plants inside and some outside, experimenting with both to see what this plant likes best. 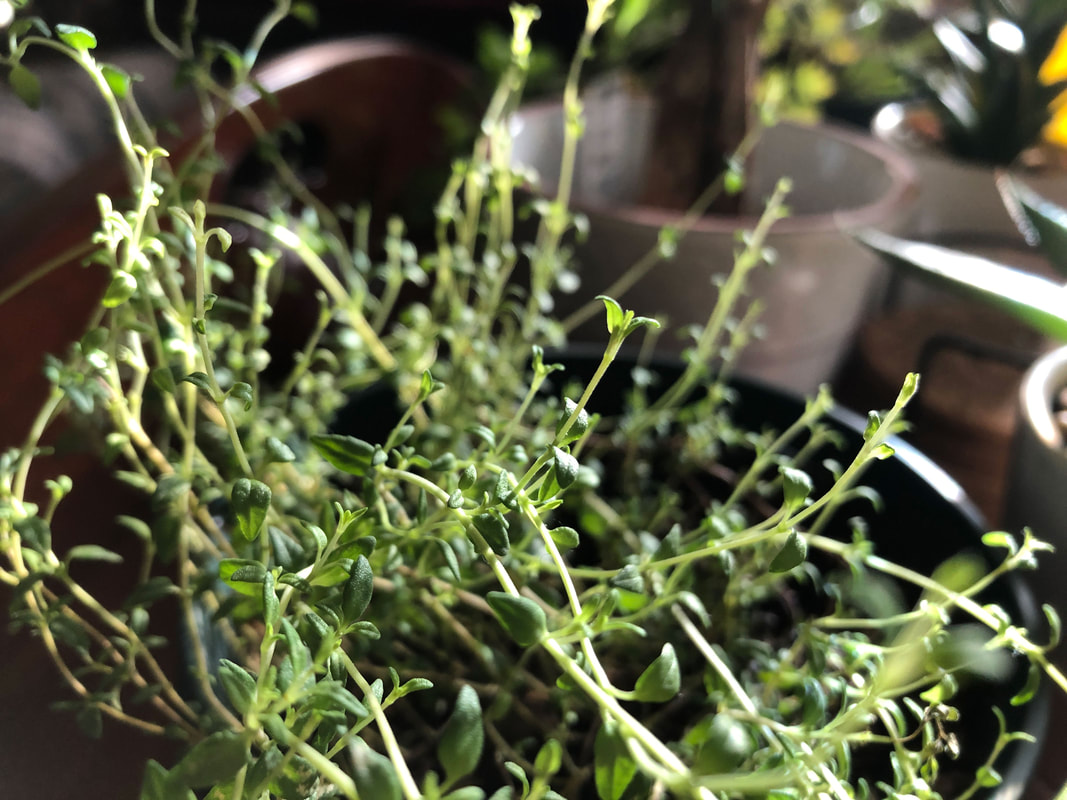 My thyme plant brought indoors fall 2021. Photo by Diane M. Lilly, 2021. Some general growing tips for thyme… Thyme can grow 8-12” tall and likes to spread out, making it a terrific aromatic ground cover. It takes 8-20 days to germinate, and you can transplant once the plant is 4” high and has four true leaves. Thyme spreads out, so plant 18-24” apart in the ground. Thyme plants are ready to harvest in 80-85 days. This herb likes full sun and well-drained soil. If growing indoors, it will need to be misted frequently and needs the bright sun of a windowsill. 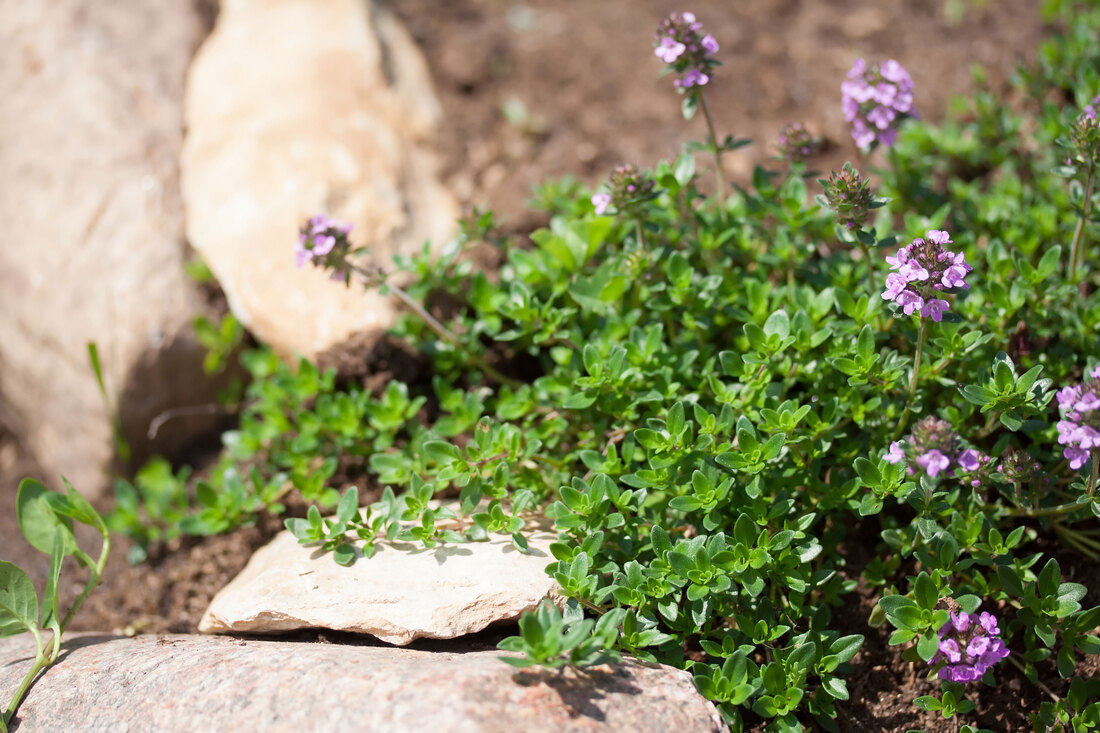 Image by Marta Jonina from AdobeStock. So, what are your thoughts about growing herbs? Have you grown herbs, and if so, what is your favorite? Share your tips and advice in the comments below! For my part, I look forward to watching these herbs sprout and grow, as well as learning how to care for and harvest these incredible plants. There’s something magical about witnessing new life! This will be a journey of exploration to learn about growing herbs and using these herbs for all sorts of household and culinary needs. As these plants grow, I will explore how and when to harvest them and how to use each in my home. I’ll explore uses for the home, ways to scent my home, ways to use them in arrangements, herbal teas, and healthy recipes. So, let’s see how this process plays out, and don’t forget to check back periodically to see my progress and get more tips and tricks for growing these herbs! Related blogs you may want to read: Tips for planting seeds indoors How to repot a pothos plant How to propagate bromeliad pups Six herbs I planted indoors It’s planting season again This article may contain a few items or commercial mentions, but I only used them for demonstration purposes only. I am not endorsing any particular product or receiving any monetary gain for this blog.  Finished upholstered dining room arm chair. Photo by Diane M. Lilly, 2022. It’s been a year since we bought our dining room set from an upscale consignment shop in our area. It’s a beautiful set, but the chair upholstery was not looking its best. I tried cleaning it (I even did a blog about it last year), but ultimately, I was unhappy with the fabric. Anyway, the padding is so worn it feels like you’re sitting on a board--time for a reupholstery project!  Dining room chair before reupholstering. Photo by Diane M. Lilly, 2022. Here’s where I put in a disclaimer--I am a complete upholstery novice! But I did a lot of research on upholstery methods and watched tons of videos on “YouTube University”! It’s not hard to do simple chair seats, but I did learn a few things by actually doing the project, things you can’t learn from simply watching a few videos. There’s nothing like real life to teach you…So today’s blog shows you my process and offers some tips I learned along the way… Tools needed for this project: electric screwdriver upholstery staple remover electric staple gun pliers scissors utility knife glue/adhesive (opt) marker/pencil foam batting duster (opt) fabric  Upholstery tools I will be using for this project. Photo by Diane M. Lilly, 2022. Before I get into the steps I took for this project, I'll say a few words about tools. Upholstery takes elbow grease! You will be working for your arms and hands intensely, and if you have any shoulder or back problems (like myself), be aware of that and work accordingly. A couple of tools that will help with this issue are an electric screwdriver and corded stapler. I started this project with all old-fashioned hand tools…and I was laid up for two days with pain in my spine from irritating an issue in my neck. So, be aware that upholstering is quite physical, so use power tools where you can because it is hard work! Step 1…removing the seat Removing the chair seat from the chair frame was easy. I turned the chair upside down and unscrewed the screws in each corner bracket that attaches the seat to the chair frame. 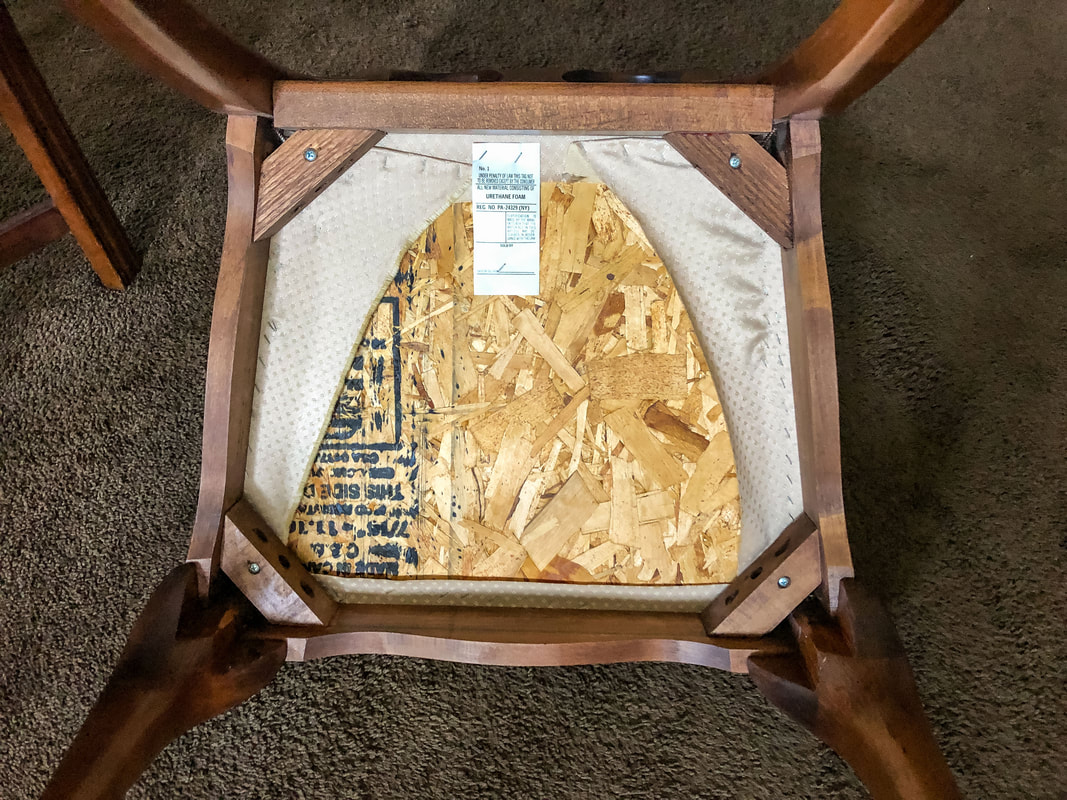 Underneaththe dining room chair where the seat is attached to the frame. Photo by Diane M. Lilly, 2022. 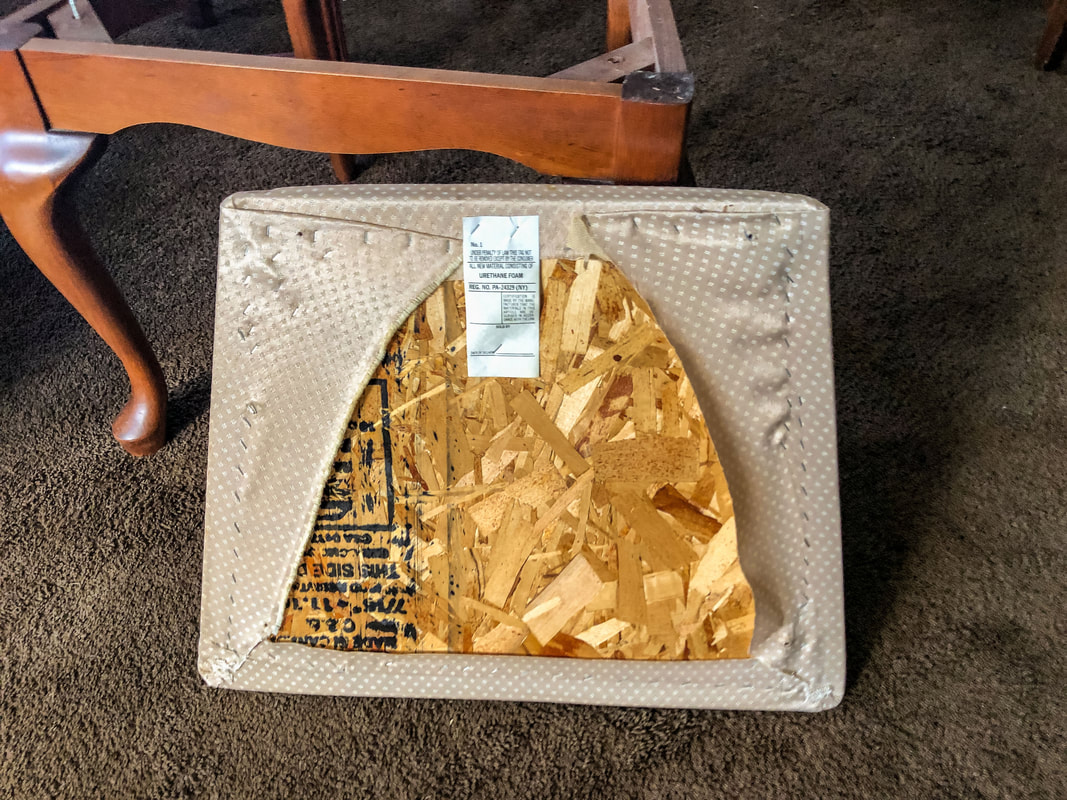 A view of the underneath of the chair seat before reupholstering. Photo by Diane M. Lilly, 2022. Step 2…remove all the existing staples This part can be tedious and a bit tough on the hands. But saying that, it’s not hard to do, depending on how your predecessor went about upholstering the seat. Turn the seat upside down and use a staple remover tool (you can find one cheap on Amazon) to remove as many old upholstery tacks or staples as possible. You will want to start your new project with a clean surface so your new staples go in easily. In my case, the old staples were thin and neatly done, so there wasn’t a huge mess to clean up. And that was a good thing because removing staples from fabric and wood is tedious work and hard on the hands! Just make sure you work in an area where you can easily collect the extracted staples so you or your pets don’t step on tacks or staples.  Removing the old fabric and staples from the seat board. Photo by Diane M. Lilly, 2022. Step 3…measuring and cutting the padding The existing padding for my chairs was worn, thin, and needed to be replaced. The chairs needed more lift, so I chose 2” thick padding for this project. I discarded the old padding, except for the small square piece for the center of the chair board. (There is sometimes a smaller piece of padding in the center to add extra support.) I made sure to cut the new padding just a touch larger on all sides of the board so that the new padding could sink and wrap around the edges of the hard board underneath.  A view of the old chair padding that will be replaced. Photo by Diane M. Lilly, 2022.  Tracing the old padding on the new padding. Photo by Diane M. Lilly, 2022.  A view of where the small chair pad will sit on the seat board under the new padding. Photo by Diane M. Lilly, 2022. Step 4…measuring and cutting the batting The next step is to measure out and cut the batting. My existing chairs didn’t have batting, but the seats needed that extra padding. You could probably skip this step depending on your chair type and preference. Anyway, measure enough batting that the fabric wraps around the entire seat (padding included) and can be easily attached underneath the board. You’ll want to cut it a few inches longer on each side (I think mine was about 4-5 inches because of the two-inch padding) to allow plenty of room for pulling taut and stapling to the underside of the board.  Using the old fabric to measure out the new batting (adding a few inches on each side). Photo by Diane M. Lilly, 2022. Step 5…attaching the batting When you start stapling the batting, place one staple in the center on each of the four sides, making sure to pull it as tight as you can without tearing the batting. Pull and secure it tight, for a properly supported and tailored-looking cushion. Once you have the batting attached with one staple, staple the rest of the fabric on each side, making sure to pull the fabric as taut as you can while you go. Stop a few inches from the corners--they will be dealt with last. 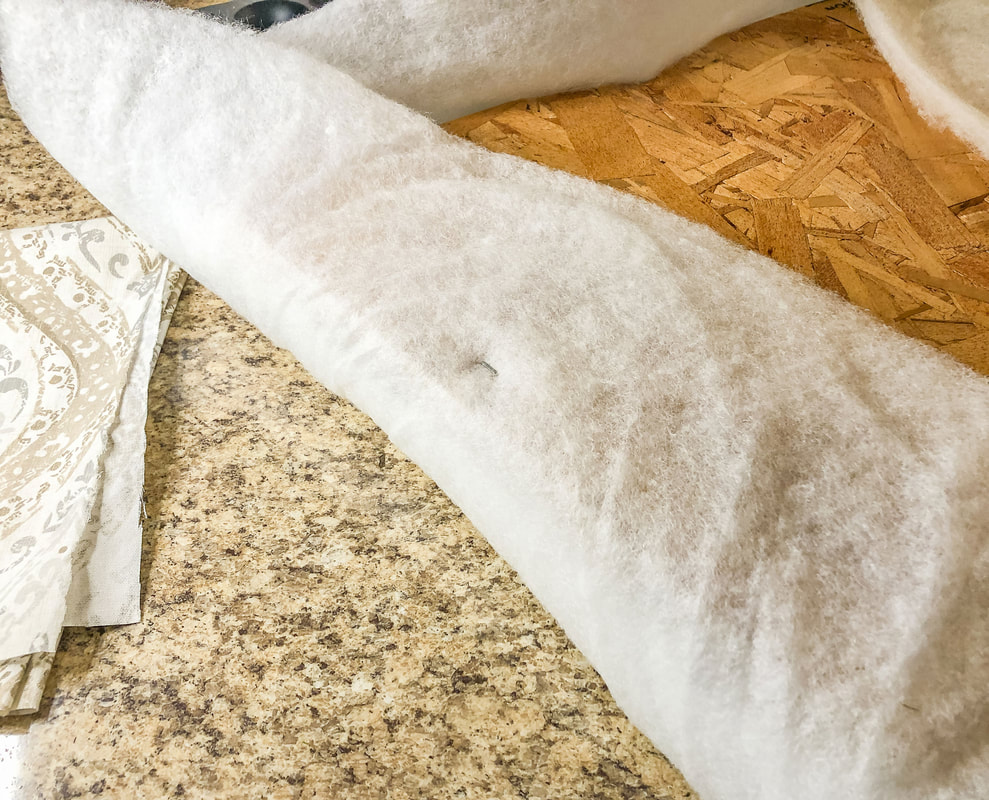 Placing one staple in the middle of each side to start attaching the batting. Photo by Diane M. Lilly, 2022. 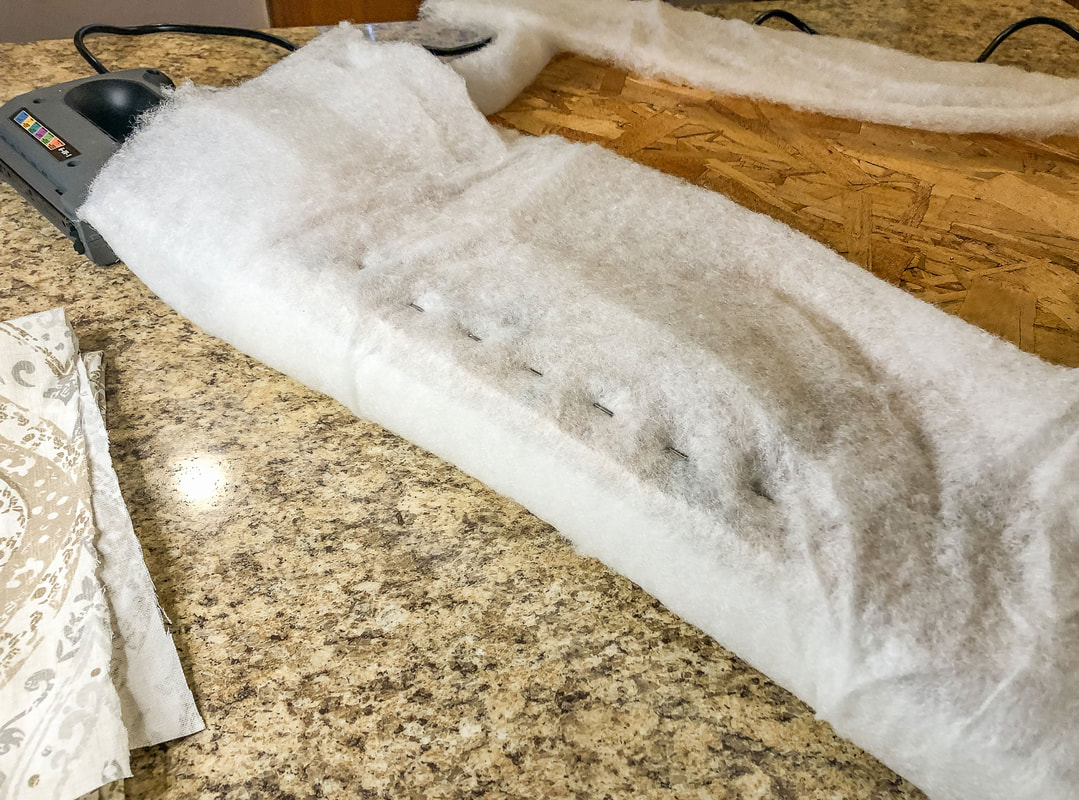 New staples along one side attaching the batting to the seat board. Photo by Diane M. Lilly, 2022. Once all the sides are stapled, you can staple the corners. See my images below for how to do that… 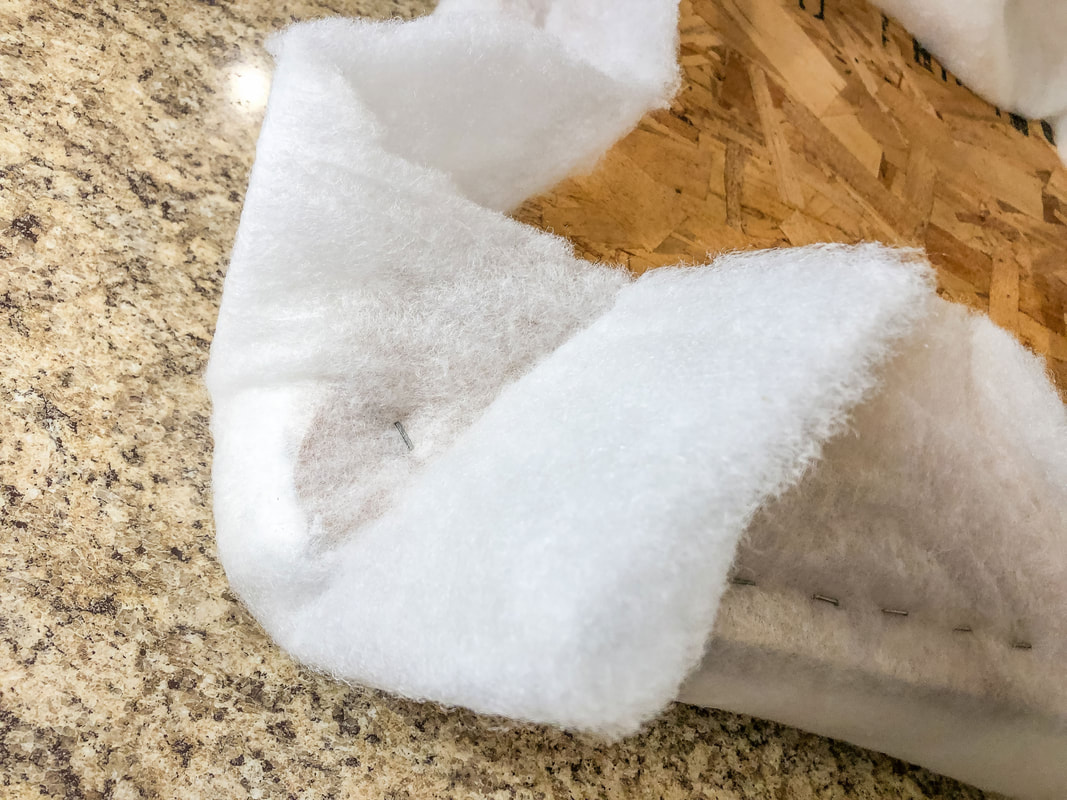 Start attaching the batting to the corner by folding the batting in and attaching with one staple, then making folds on either side of that staple to securely attach. Photo by Diane M. Lilly, 2022. 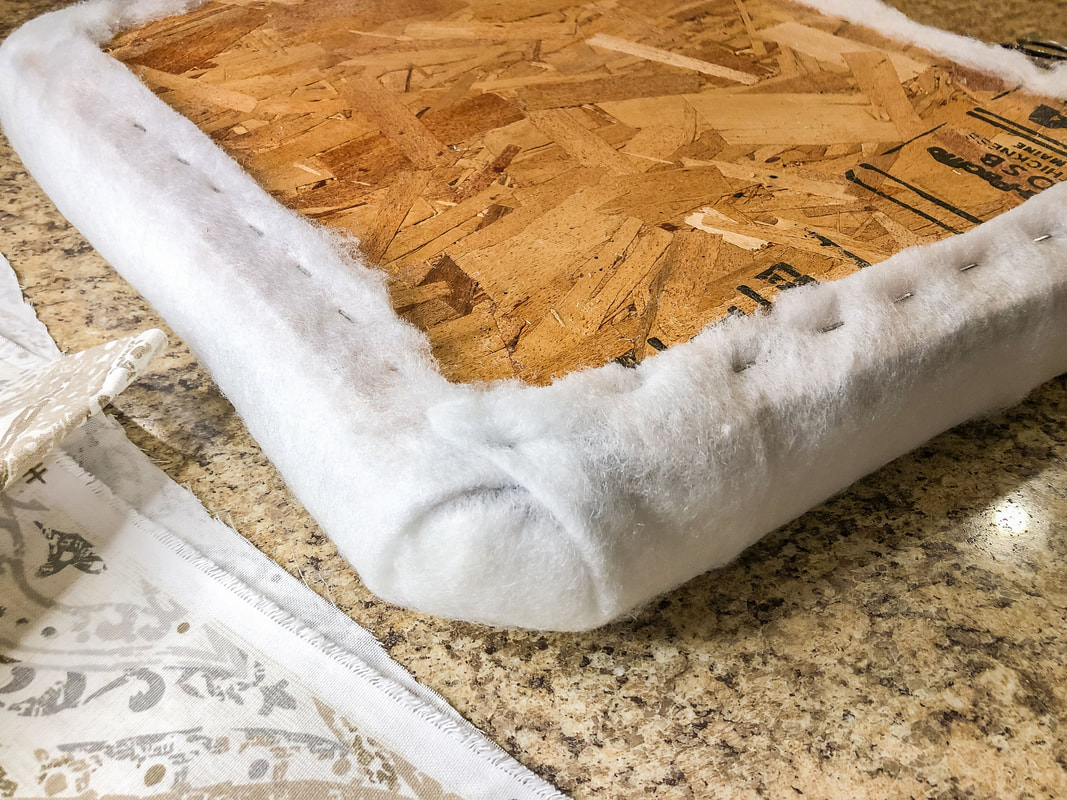 A view of the bottom of the seat board with batting securely stapled on all sides and corners, and excess batting material trimmed. Photo by Diane M. Lilly, 2022. 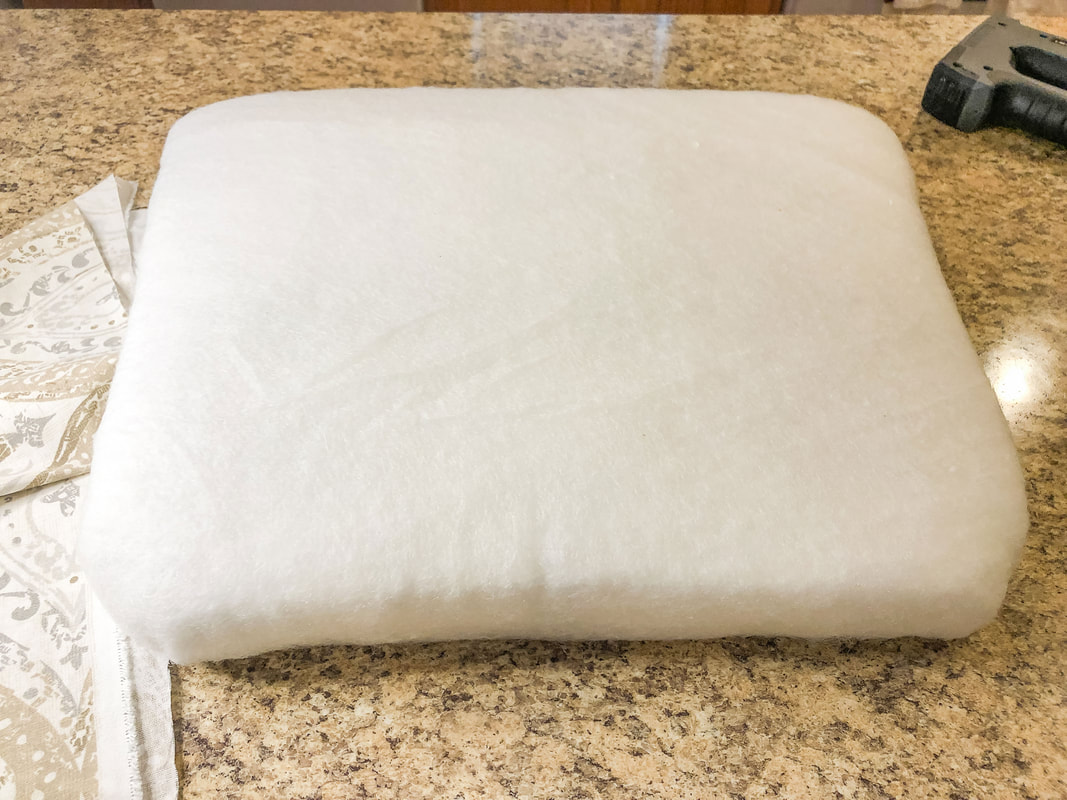 A view of the chair seat with finished padding and batting. Photo by Diane M. Lilly, 2022. Trim off all the excess batting to clean up the seat and prep for the upholstery fabric. Step 6…measuring and cutting the fabric For the fabric, use the same steps as the batting. The only difference in this step is to make sure your thread weave (called warp and weft) is straight (horizontally and vertically) across the chair seat. Center any pattern on your chair seat because an off-centered pattern will be very obvious in the finished piece. So, take your time to get this part right! 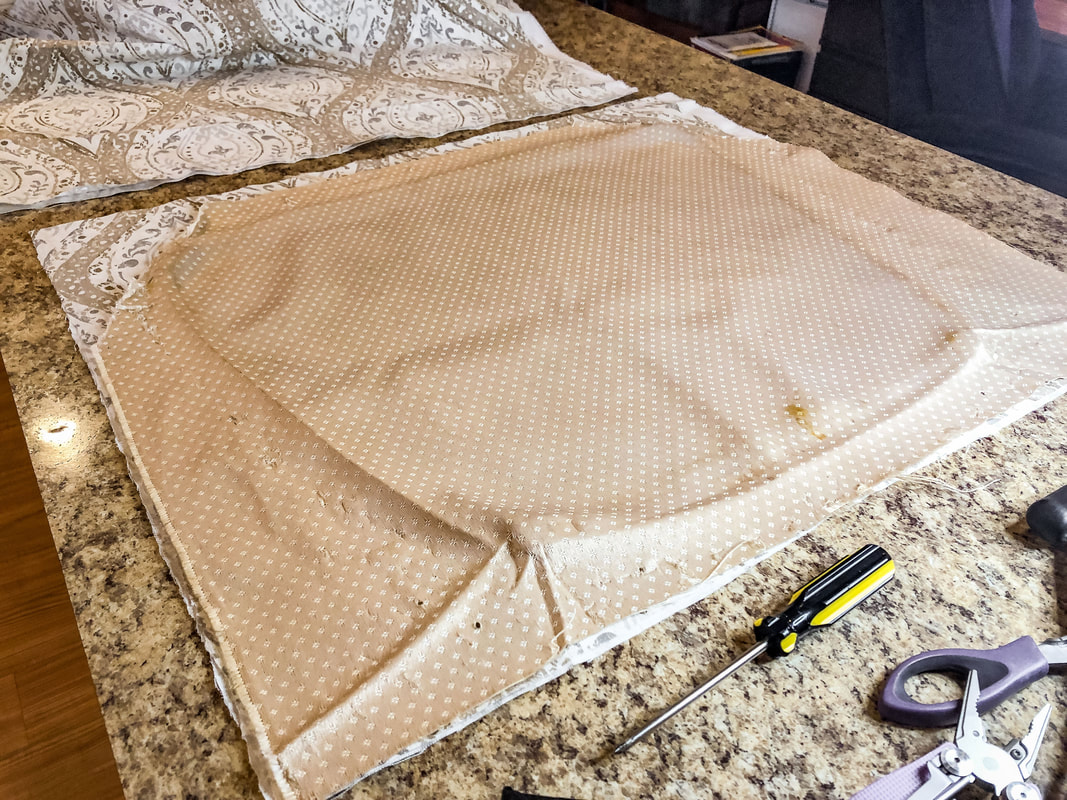 Using the old fabric to measure out the amount of new fabric needed, with a few extra inches on each side to accommodate the thicker padding. Photo by Diane M. Lilly, 2022.  Align the pattern on the fabric with the seat before attaching to the bottom of the seat board. Photo by Diane M. Lilly, 2022. Step 7…attaching the fabric The rest of the stapling process is the same as when we attached the batting, so follow those instructions to attach the new fabric. Trim excess fabric on the bottom of the board. 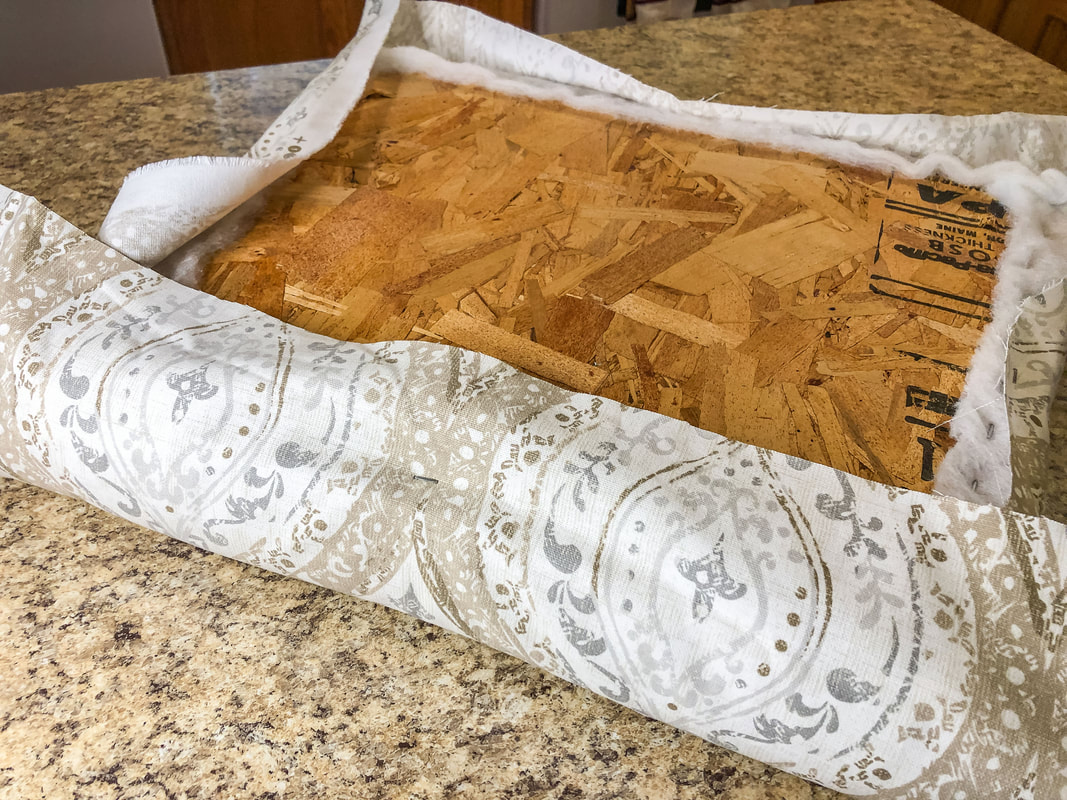 Place one staple in the center of each side (making sure to pull the fabric tight) to start attaching fabric to the seat board. Photo by Diane M. Lilly, 2022. 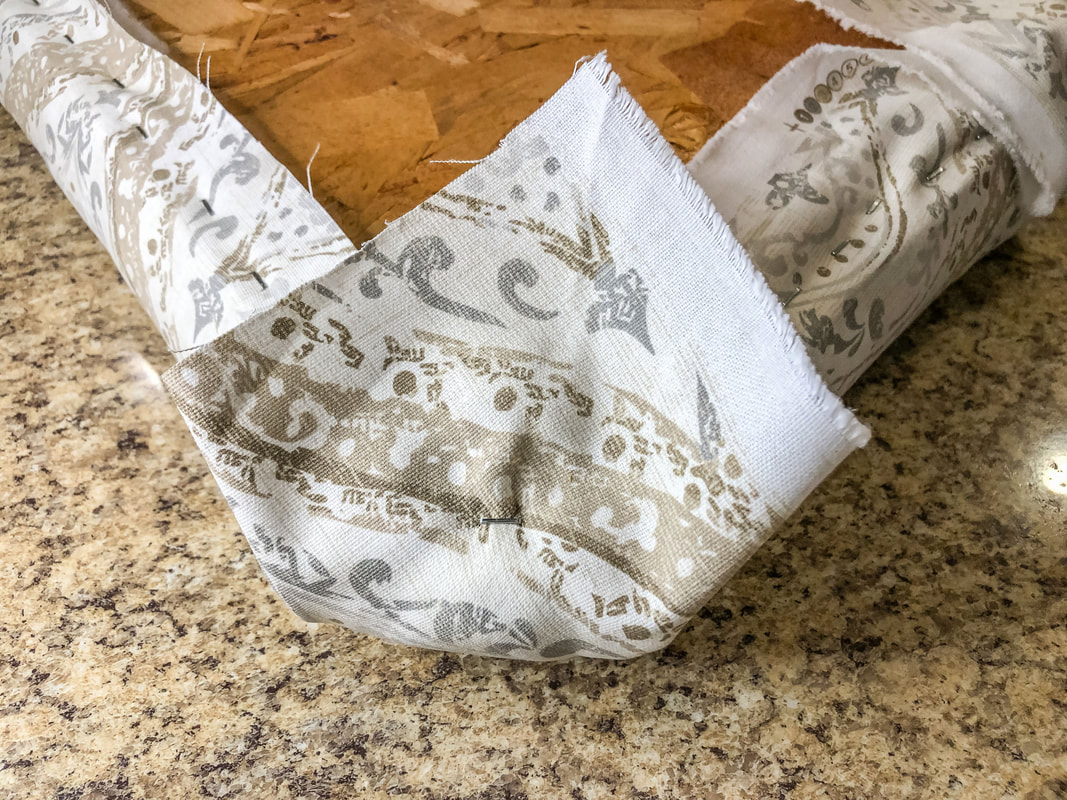 After the sides are stapled, start securing the corners by folding the fabric in and securing with a staple. Fold fabric down on either side, pulling taut to create a smooth corner and secure with staples. Photo by Diane M. Lilly, 2022. 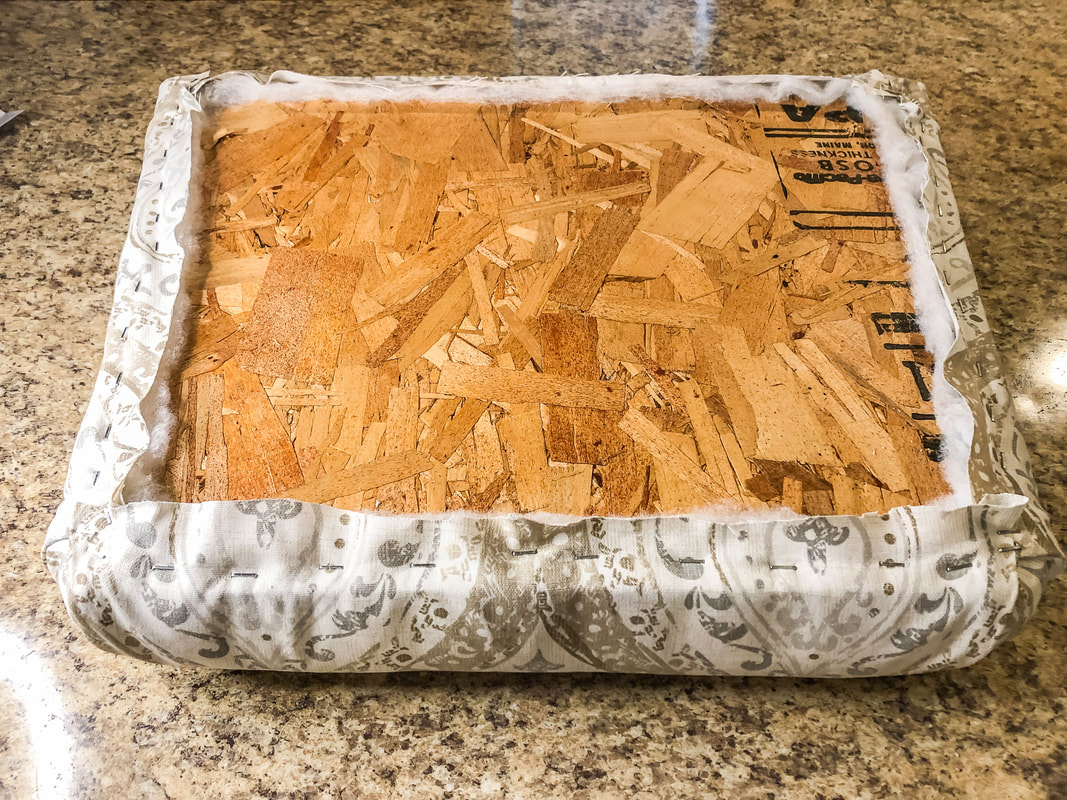 A view of the bottom of the cair seat after new padding, batting, and fabric have been attached and secured. Excess fabric has been trimmed for a clean look. Photo by Diane M. Lilly, 2022. At this point, I discovered a way to cut my stapling process in half. I found that it was possible—if I was careful—to staple both the batting and fabric at the same time. The only issue I had with that technique is that the corners must be done individually, meaning the batting needs to be secured first and then the fabric on top. (If you try to staple both the batting and fabric in the corners at the same time, you'll be fighting with too much material.) So, stapling both the batting and fabric at the same time is a convenient way to cut down time (and work) on a simple seat upholstery project like this one. Step 8…attaching the duster When I started this project, I decided I didn’t need a dust cover since the existing chairs did not have dust covers. That was a bit of a mistake on my part--as it helps cover all the stapled fabric and makes for a cleaner finished look--but it won’t be difficult to fix later. Being a novice at upholstery, the underneath of my chairs didn’t look quite as neat as the original upholstery and a duster would’ve finished it off and made it all look more professional…but I hadn’t purchased that material. Sometime in the future, I will have to unscrew the seats and staple on a dust cover. It’s a simple process of cutting material to just a bit smaller than the bottom of the chair board, using enough material to cover the upholstery edges and stapling. Make sure to fold over the edges—leaving no raw fabric edges showing—and the bottom of your chair will look finished and polished. Step 9…reattach the seat And the last part of the process is to reattach the seat and admire your handiwork! This part of the process is much easier with an electric screwdriver, by the way… Secure the chair frame and new chair seat with screws, making sure there are no gaps. This may take using clamps or another person to help you hold the two chair parts together tightly while you screw them back together. I had an issue with my first attempt; the screws would not hold, and there was a gap, so I needed my husband to help me hold things down while I screwed the seats back together. Other than that, you’re done!  Finished side chair, freshly reupholstered. Photo by Diane M. Lilly, 2022.  Dining room chair newly reupholstered. Photo by Diane M. Lilly, 2022.  My finished reupholstered dining room chairs. Photo by Diane M. Lilly, 2022. So, as I said, this is a relatively straightforward process, but it is very physically demanding, so be aware of that before you start. My advice is to practice on a few simple chair seats first if you have more complicated pieces to upholster (like I do). I have an antique settee that needs upholstering, but I wanted to do these dining room chairs first to get some experience before jumping into the deep end! And I’m glad I did because I now feel more prepared for the big project. But that’s a DIY for another day…so stay tuned! Related blogs you may want to read: Comparing DIY upholstery cleaning methods A little project with jute twine and an old foot stool DIY refurbishment of a dining room cabinet A fun DIY project with paint and a thrifted mirror part 1 A fun DIY project with paint and a thrifted mirror part 2 Creating a kitchen coffee bar How to replace a clock mechanism On a mission to recycle this neglected vintage stool The stain stripping stage of rescuing my vintage stool Staining my vintage stool with brewed tea My tattered vintage stool transformed into a beautiful plant stand Affiliate Disclosure Some of the posts in this article contain affiliate links. This means if you click on the link and purchase the item, I will receive an affiliate commission at no extra cost to you. I will only recommend products or services I use personally and/or believe will add value to my readers, so there is no conflict of interest. |
Author
Some of the posts on this site contain affiliate links. This means if you click on the link and purchase the item, I will receive an affiliate commission. 
Categories
All
Archives
April 2024
|