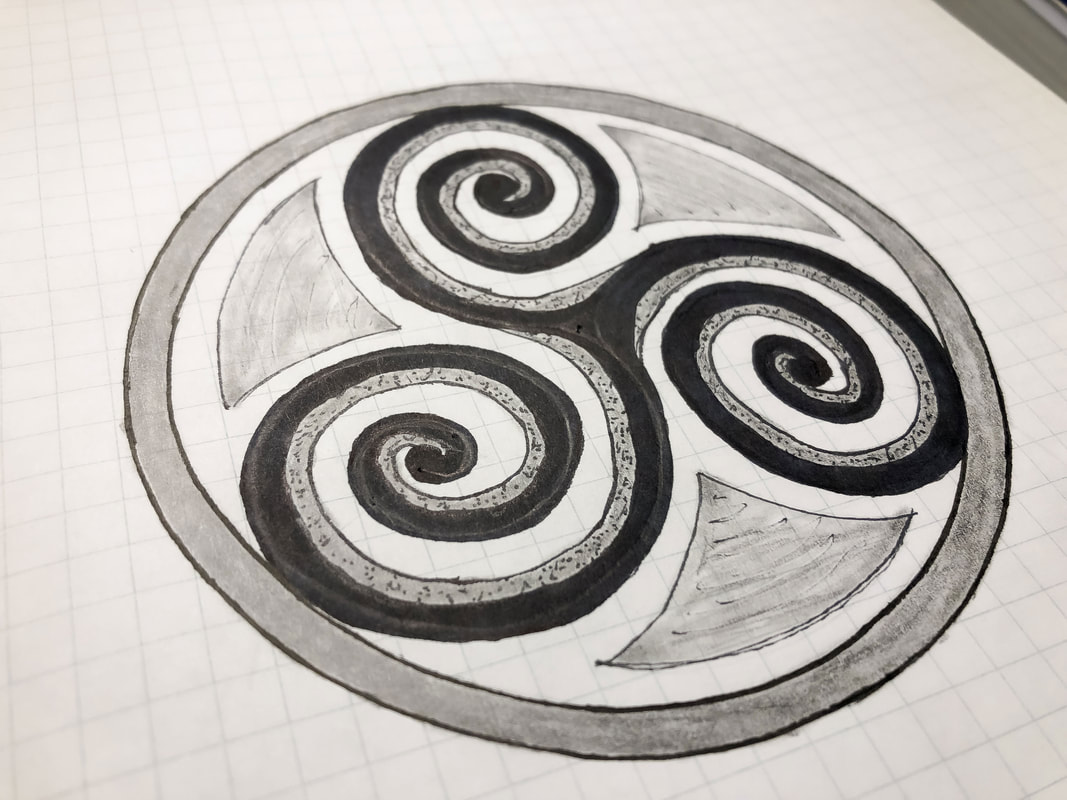
 If you want to learn how to draw a triskele—like those seen in Ireland—you’ve come to the right place! In today’s blog, I will take you through a step-by-step process for drawing a basic triskele design. You can then use this simple design as a base for a more complicated design. All you will need for this tutorial is a compass, eraser, ruler, and paper, but I have provided a list below of supplies you may want for this and other drawing projects. (Disclaimer: I am a Blick Art affiliate so this list contains affiliate links. If you click on the link and purchase the item, I will receive an affiliate commission at no extra cost to you. I will only recommend products or services I use personally and/or believe will add value to my readers, so there is no conflict of interest.) Gather your supplies: Drawing pencils Markers Blending stumps Eraser Click eraser Ruler Horse hair brush Grid paper Sketch pad Tracing paper Step 1: Draw a circle Draw a circle using a compass and mark the midpoint of that circle. Step 2: Divide the circle in half vertically Use a ruler to divide the circle in half vertically and mark the center. 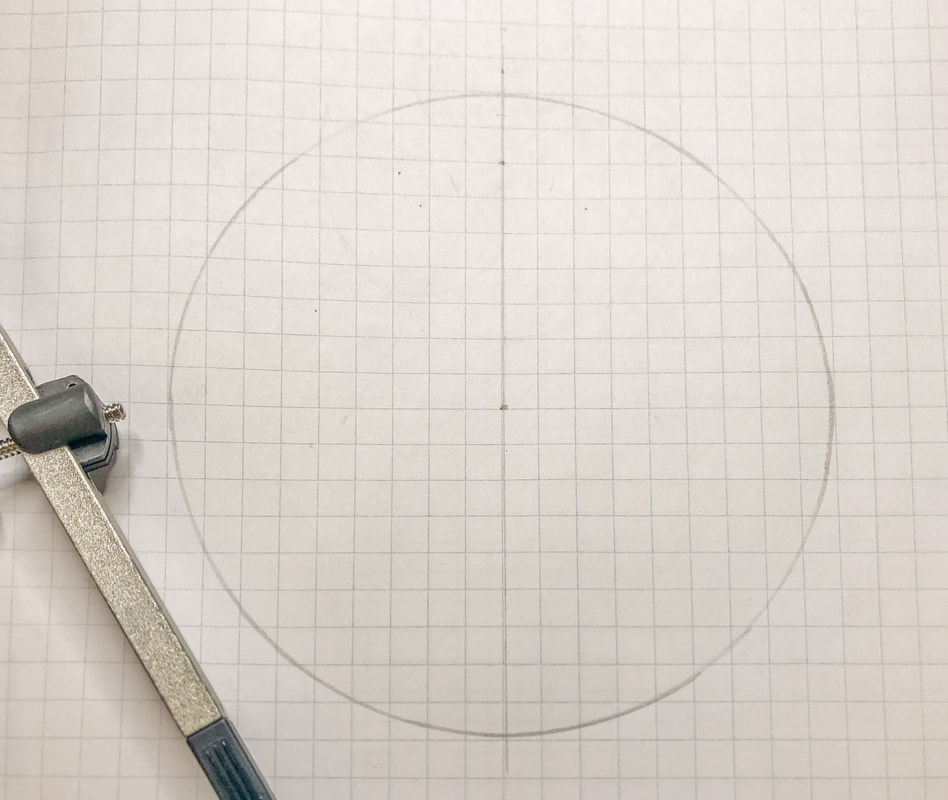 Step 3: Divide the circle into six sections For this step, you will use the same settings and radius on your compass as you used to draw the circle. Place the sharp point at the bottom of the vertical line and draw an arc on either side of the line on the circle’s circumference. Use a ruler to draw a line from the point where one arc intersects the line, through the circle’s center, to the opposite side of the circle. Do the same for the other arc. You should now have six equal triangular sections in your circle. 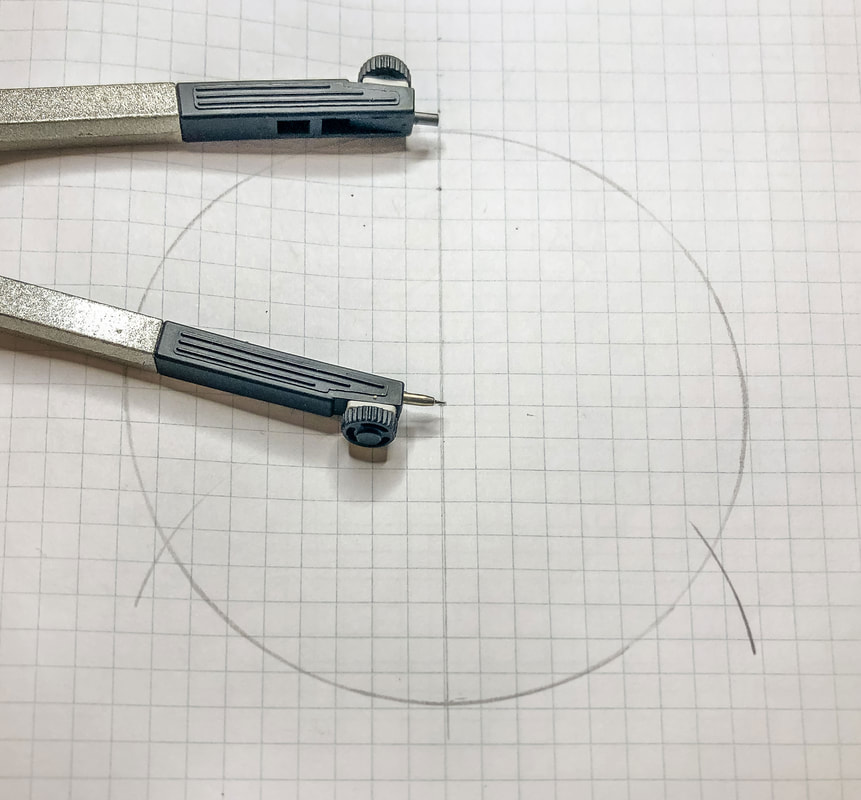 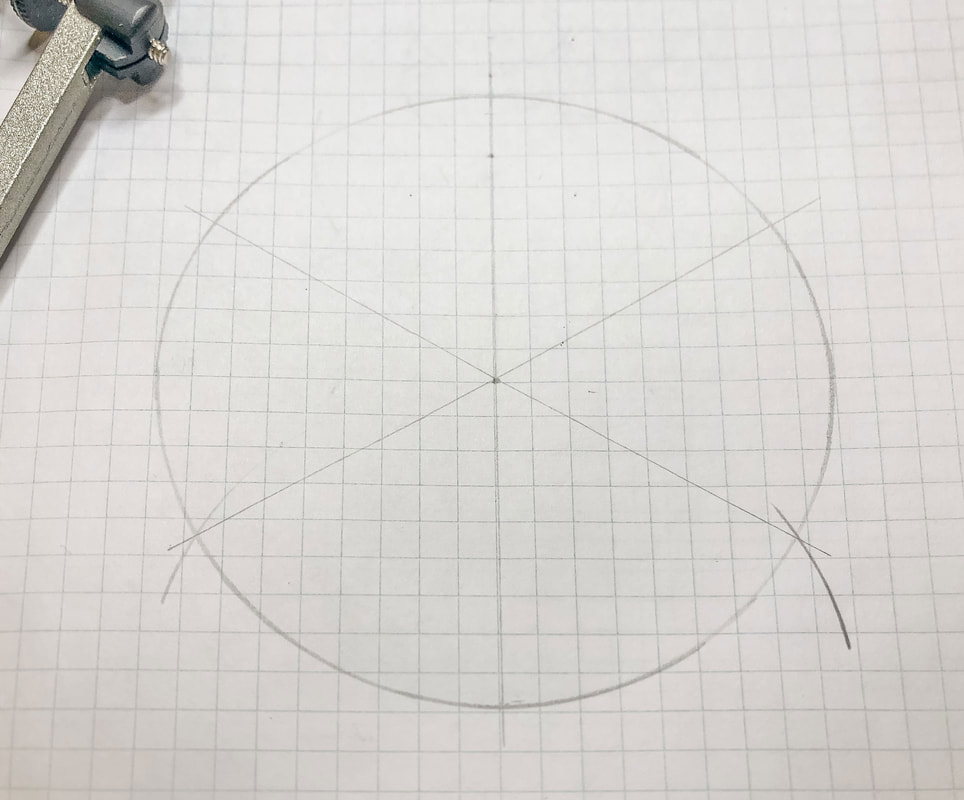 Step 4: Find the midpoint of three lines Take a look at the first image below. To draw a triskele, you will use the top half of the vertical line and the two lines that come off the center at an angle, forming an upside-down “Y”. In this step, you will find the midpoint of these three line segments. Set the compass a little wider than half the length of the line segment. Place the compass point at the circle’s center and draw an arc on either side of the line. Now, move the point to the opposite end of the line segment and draw an arc again on either side of the line segment. (If you need a tutorial for finding the midpoint of a line, you can click here for the blog or view the video tutorial here.) As you can see in the second image below, you end up with crossing arcs on either side of the line segment. Use a ruler to line the intersections of these arcs up, and where this line crosses your line segment is the middle of the line. Use this method to find the midpoint for the other two line segments in your upside-down “Y”. 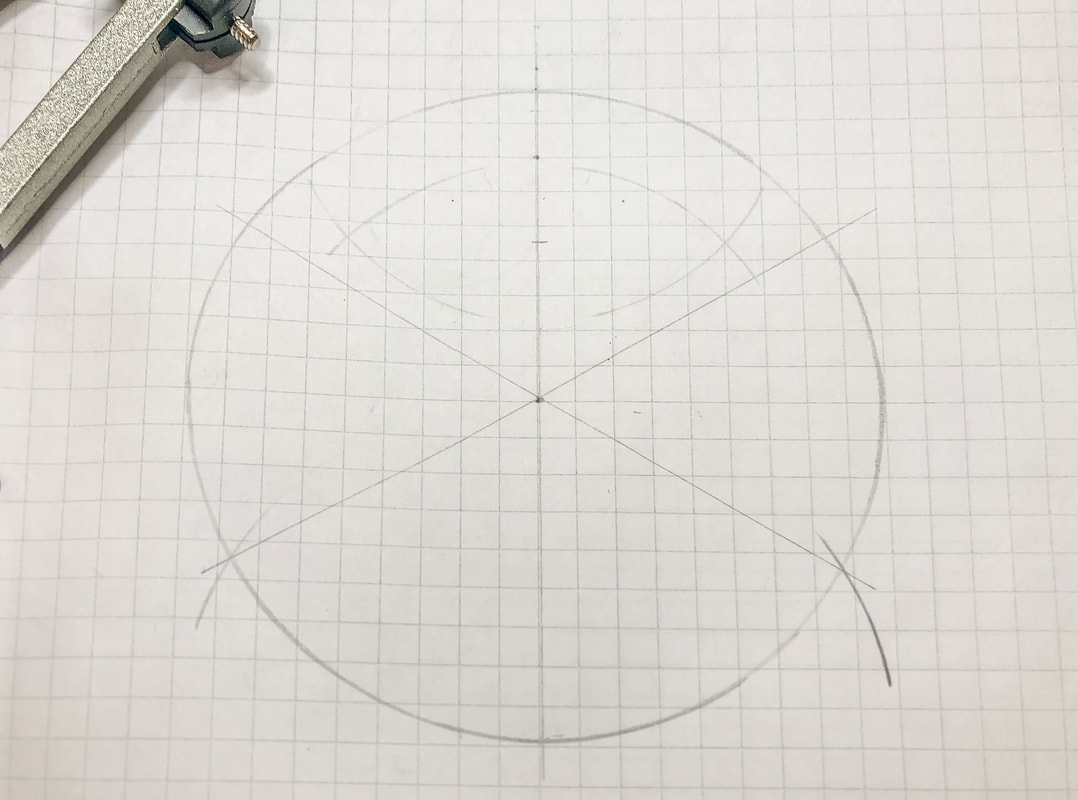 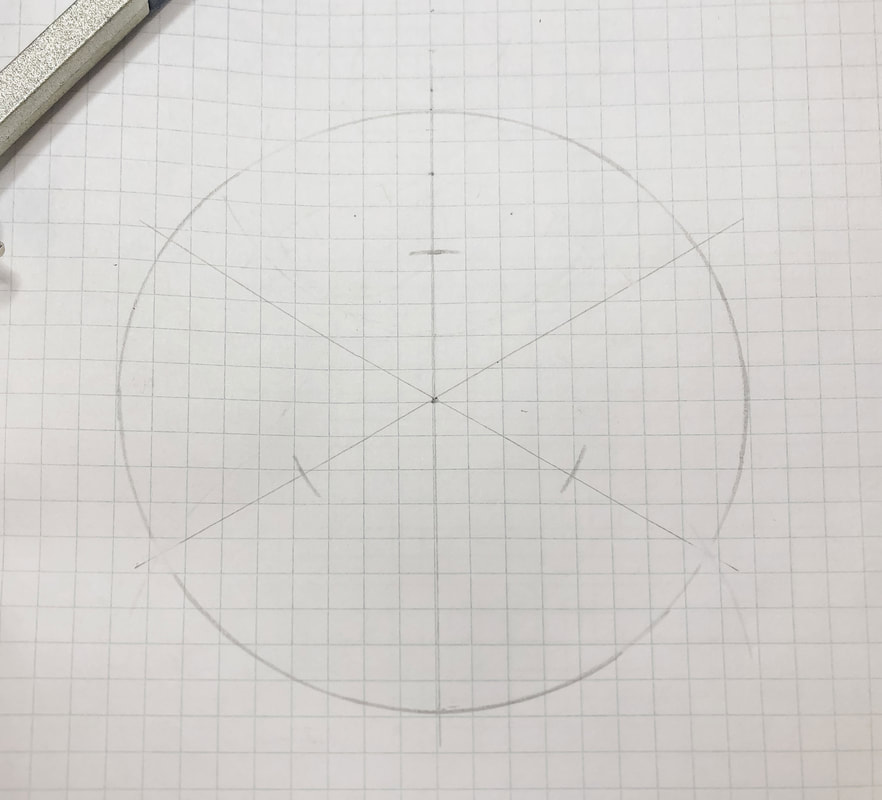 Step 5: Further divide the line segments in half Once those three line segments are divided in half, you will divide each of the resulting six line segments in half again using the same method as above. When you are finished, each line in your upside-down “Y” should have three tick marks. 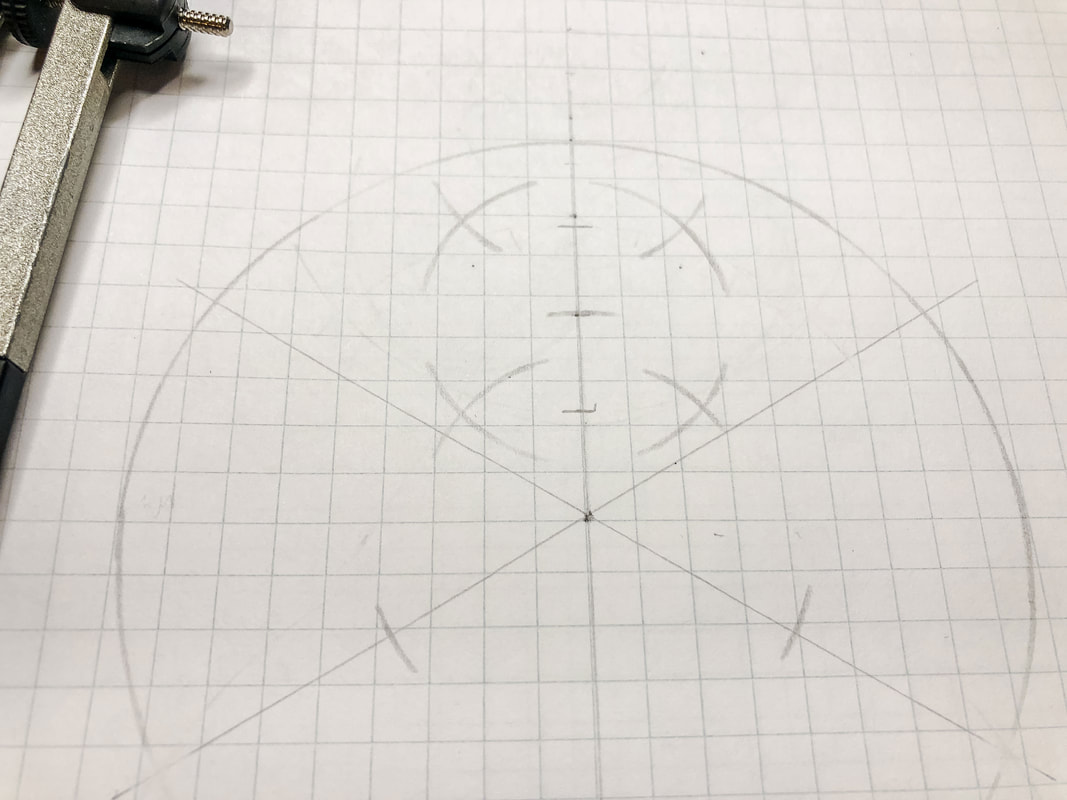 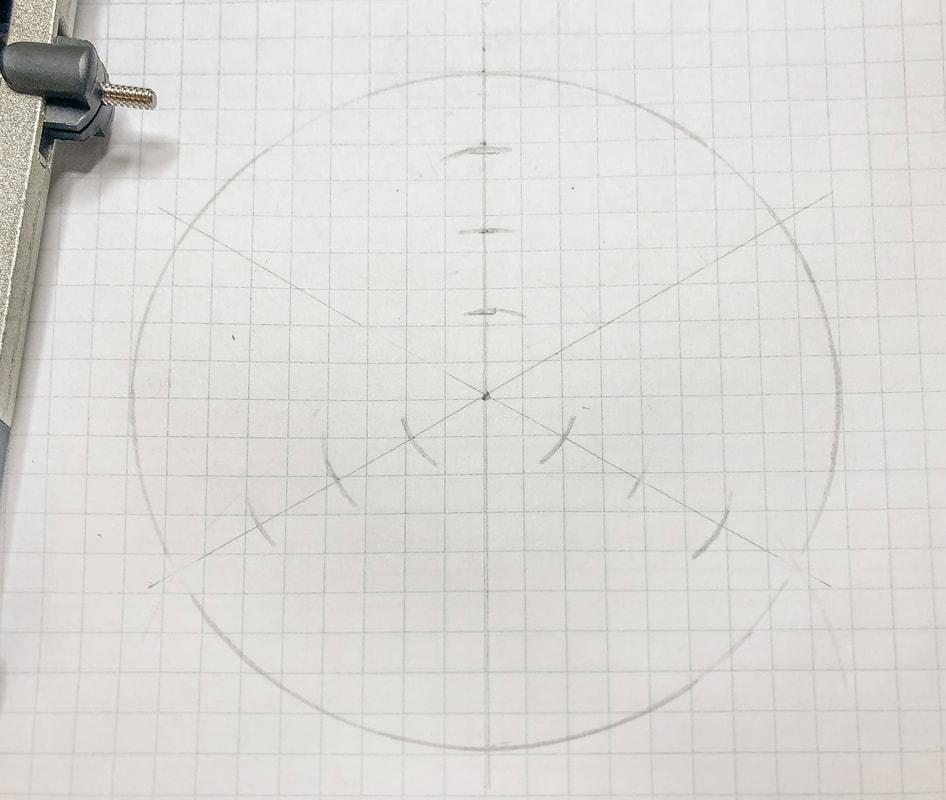 Step 6: Draw the first curves Starting with the top vertical line, place your compass point in the center of that line segment and draw a semi-circle from the circle’s center to the circumference (the top of the line). Do this for the other two lines with the tick marks. 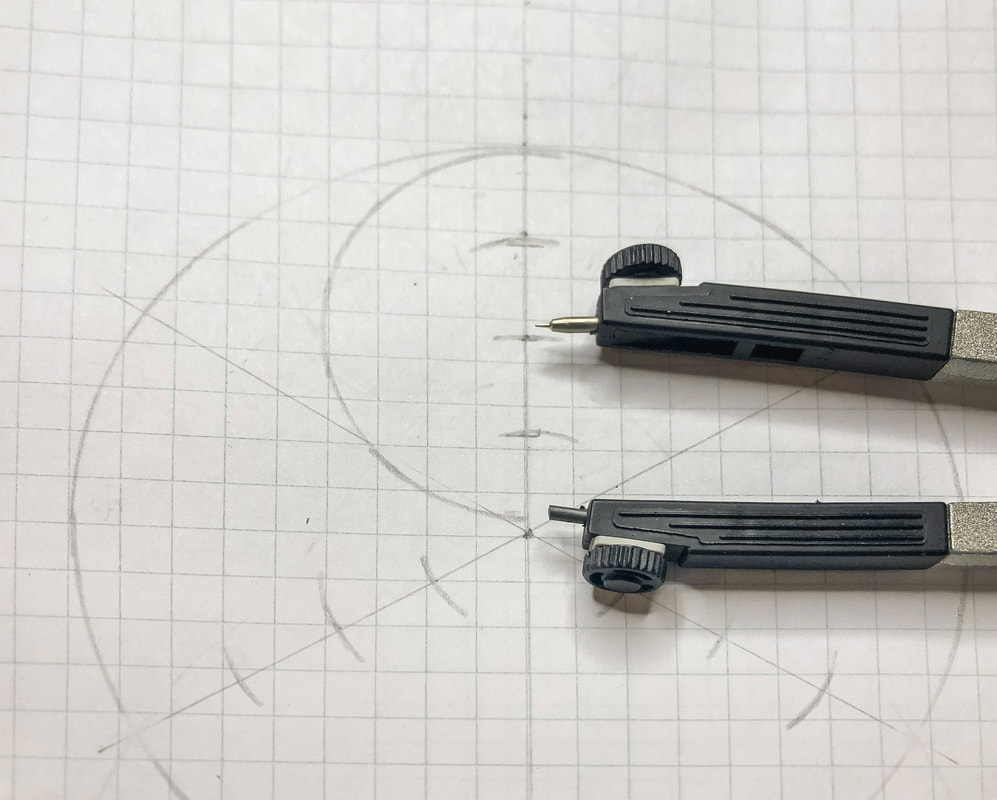 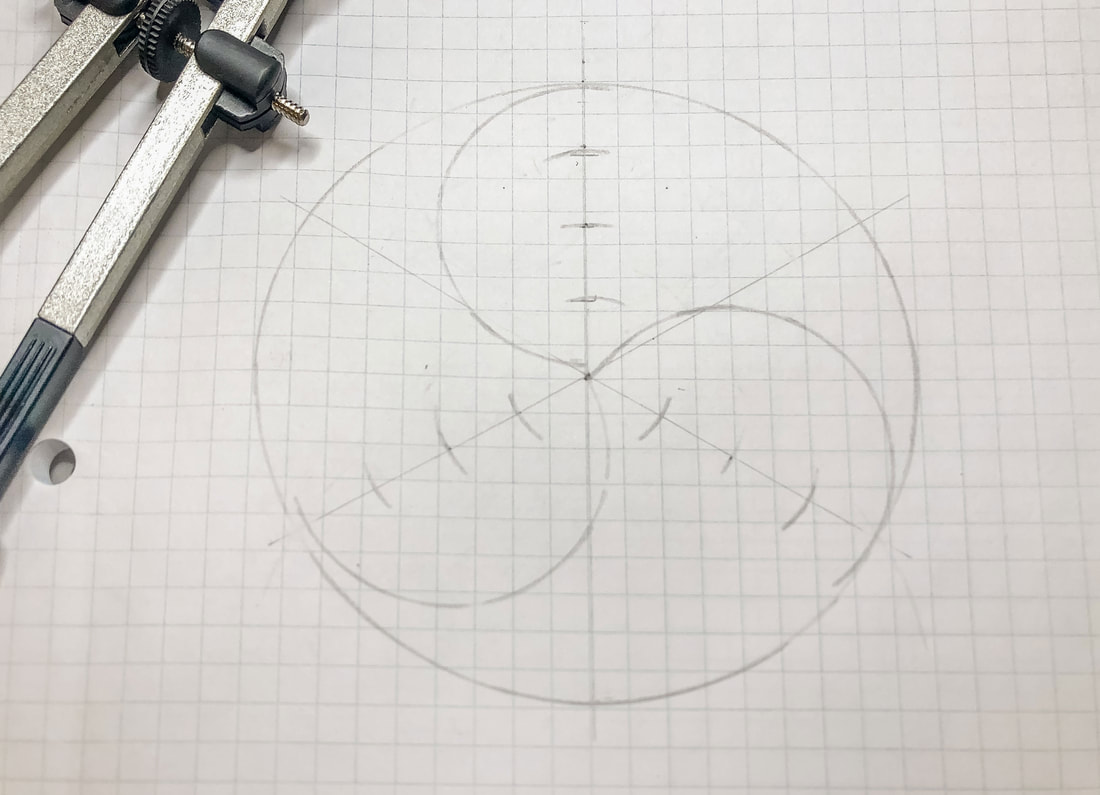 Step 7: Find the midpoint for the second curve Before you draw the second part of the curve, find the midpoint between the first and second tick marks (see the image below). 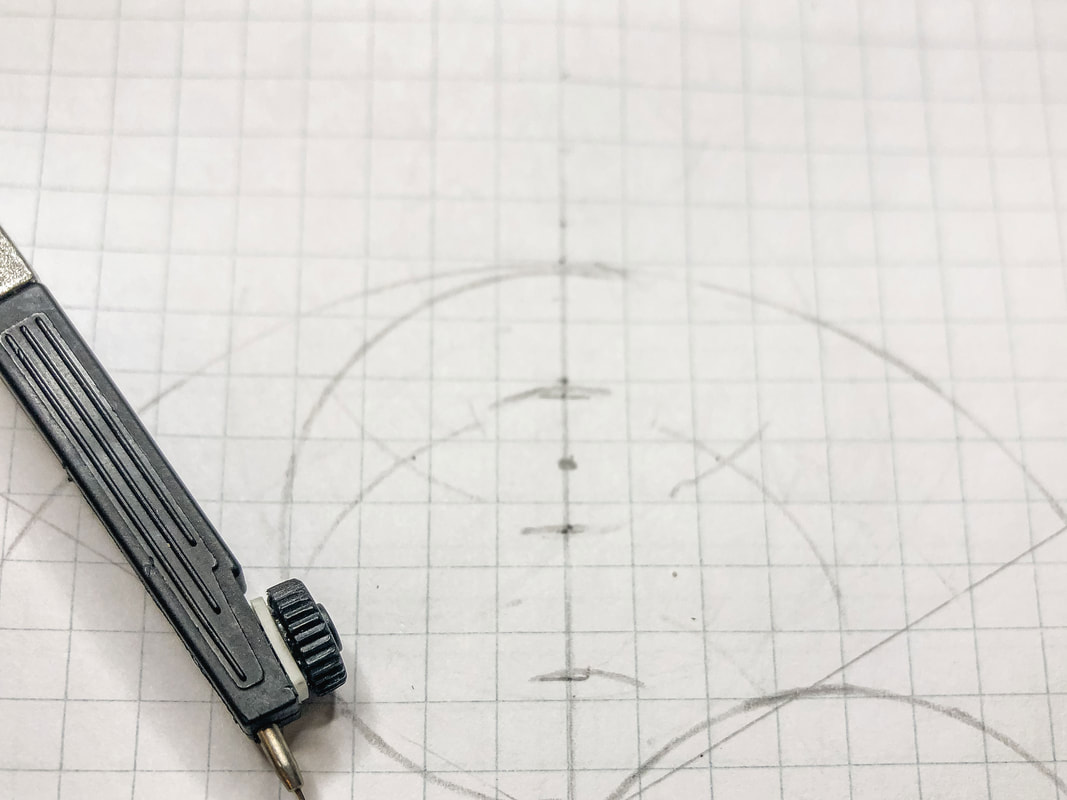 Step 8: Draw the second curves Now that you have the midpoint, place the compass point on it and draw a semi-circle from the top of the circle down to the third tick mark. Do the same thing for the other two “Y” lines. 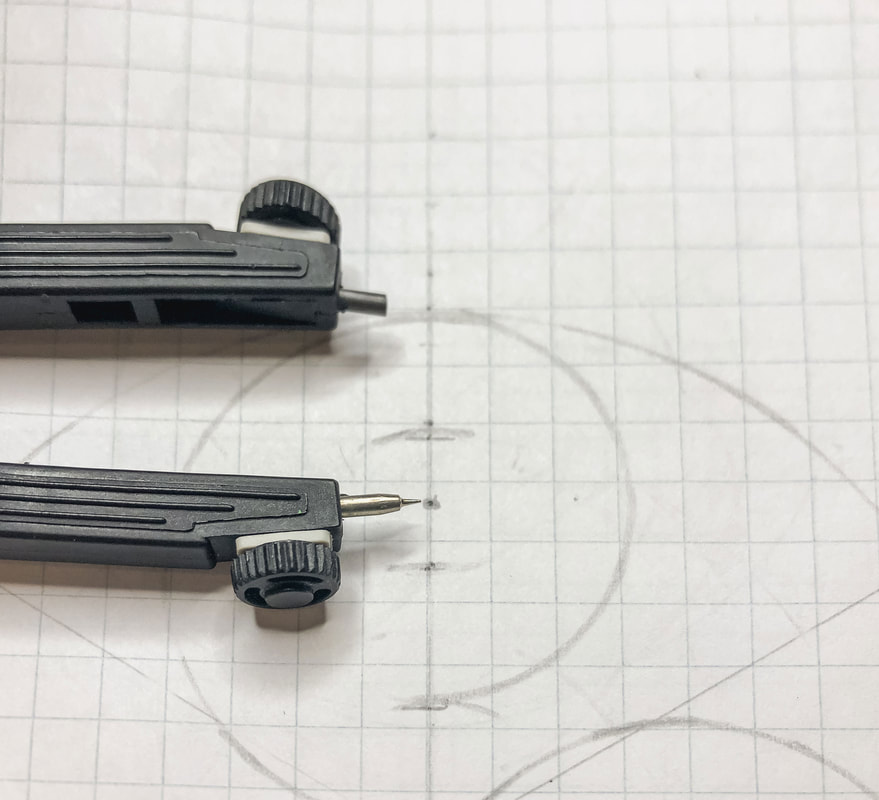 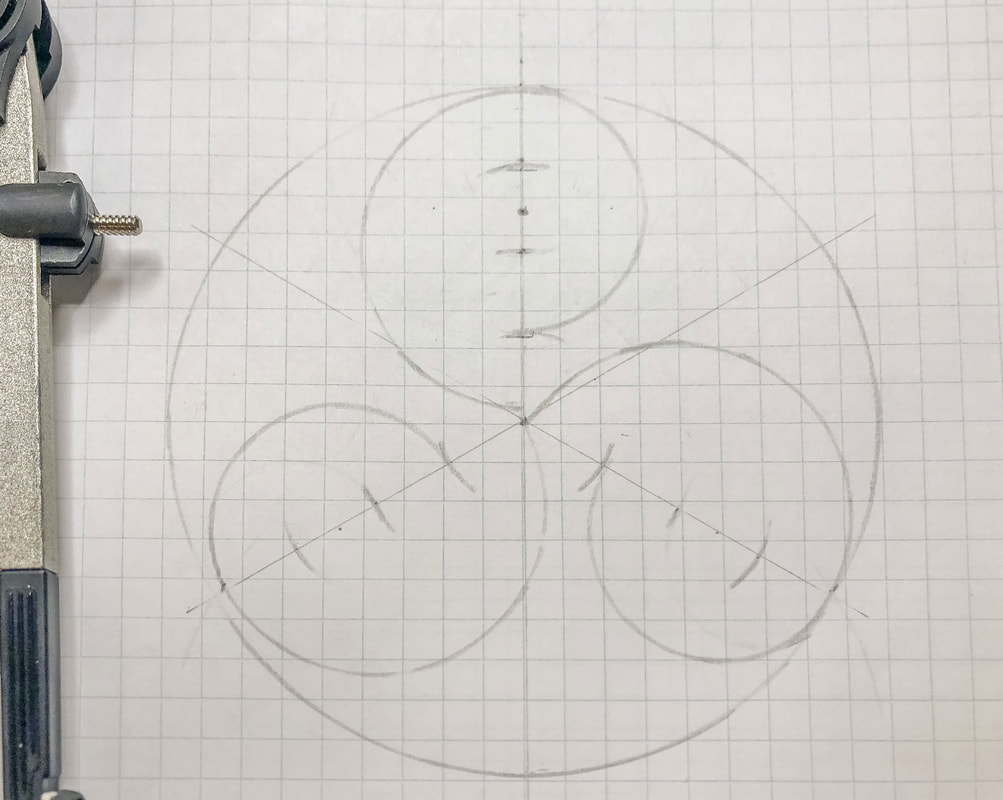 Step 9: Draw the third set of curves Go back to the top line and find the second tick mark. Place the point of the compass on that tick mark and draw a semi-circle from the first to the third tick mark. Do the same thing for the other two “Y” lines. 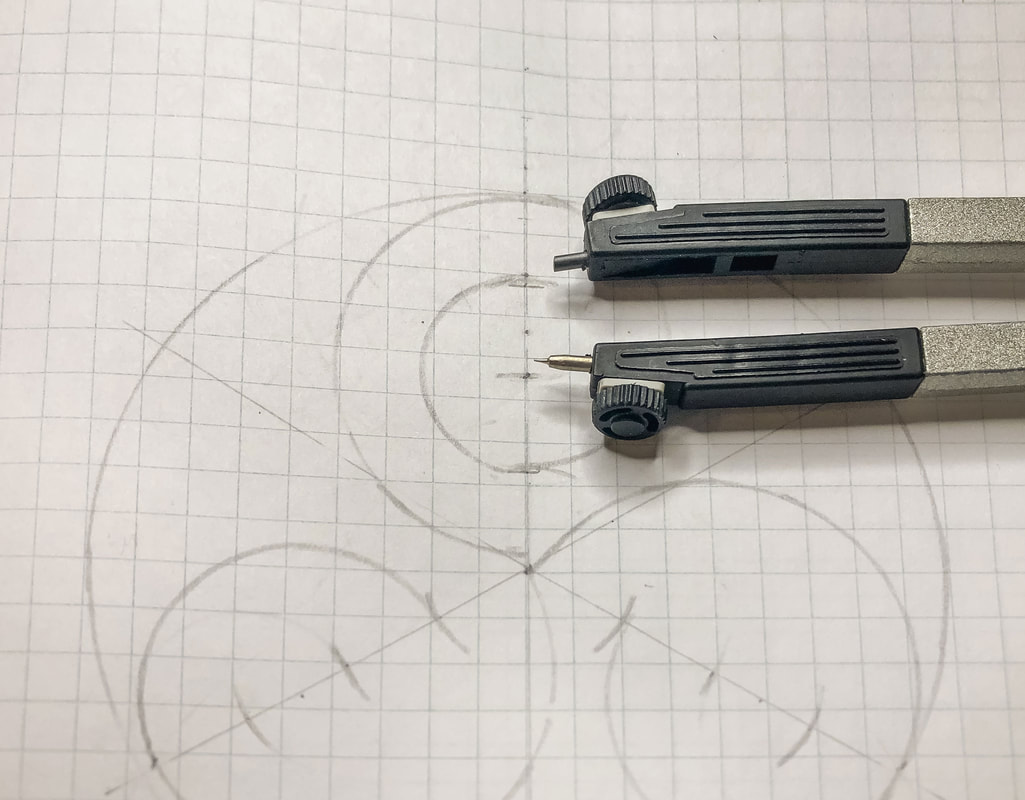 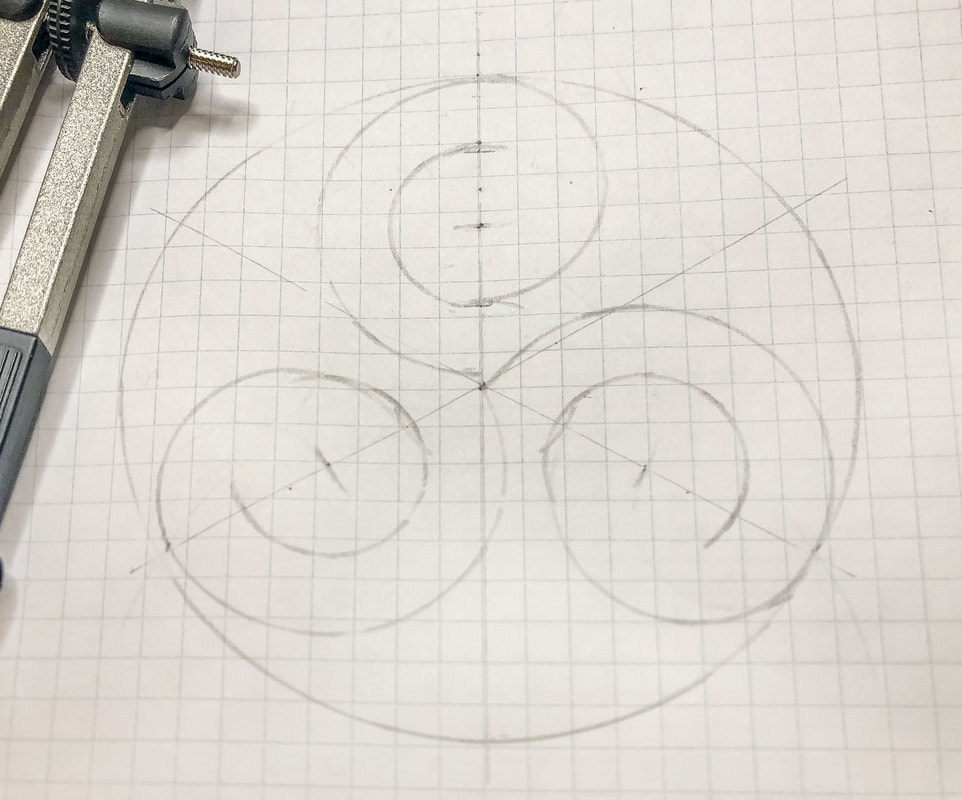 Step 10: Draw the fourth set of curves Go back to the top vertical line and find the center point between the first and second tick marks. Place the point of the compass on that mark and draw a semi-circle from the first to the second tick mark. Do the same thing for the other two “Y” lines. 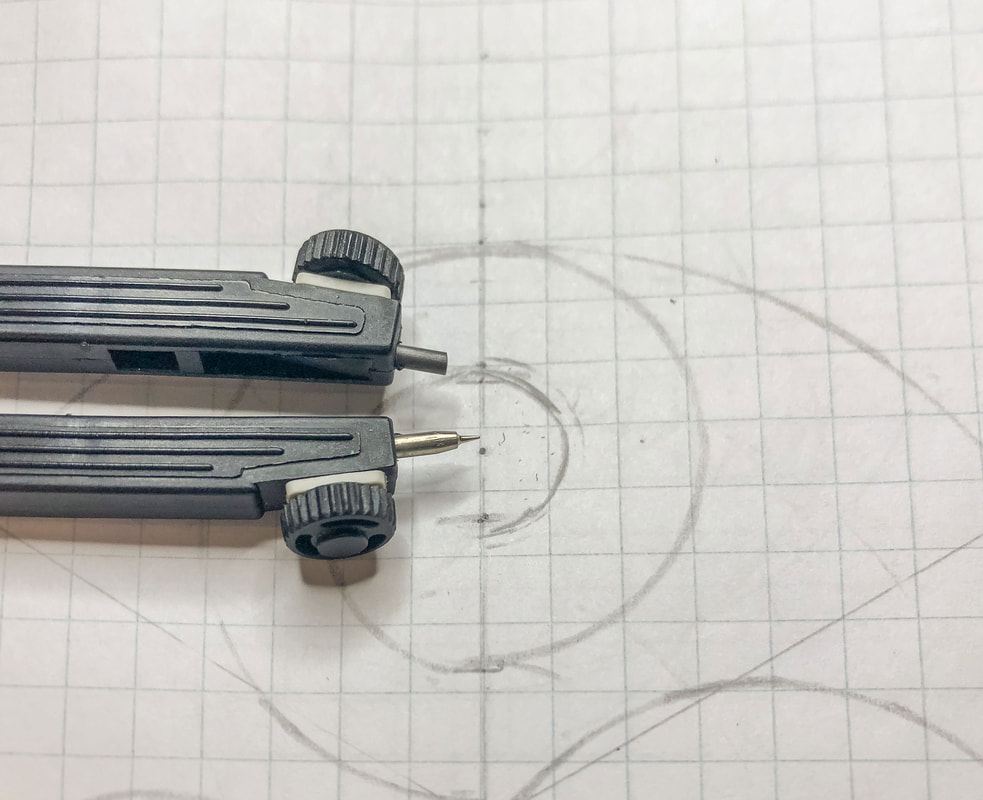 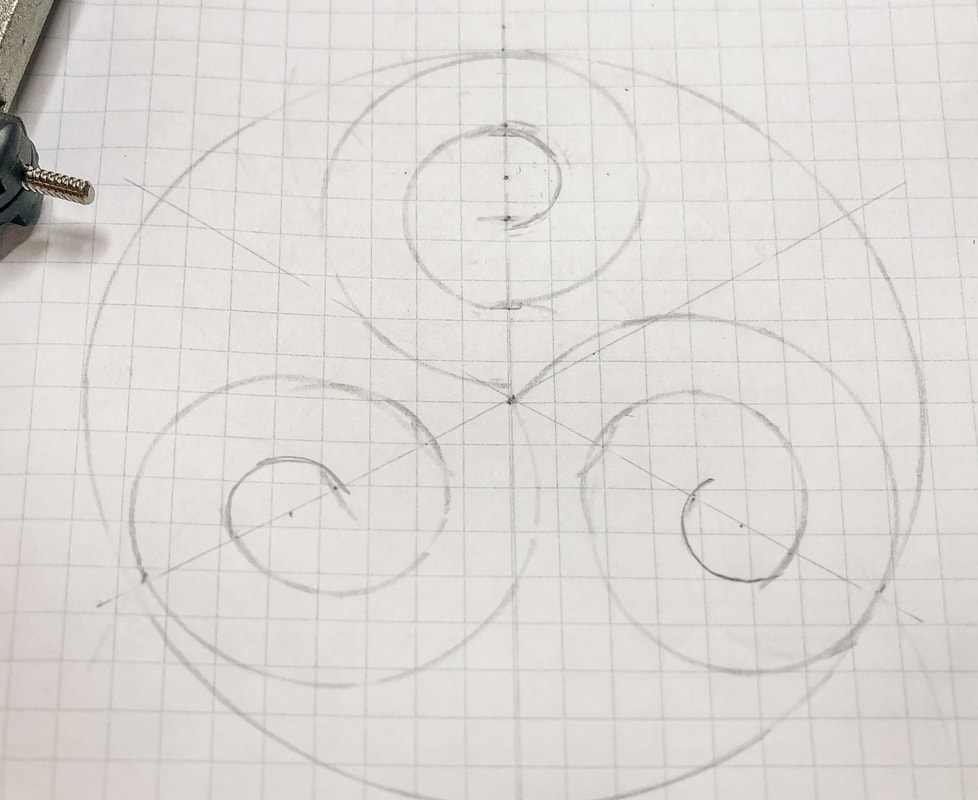 Step 11: Darken your lines and stylize And now you have the basic line drawing for a triskele. Create shading, texture, outlines, and finishing touches to give your triskele some style. 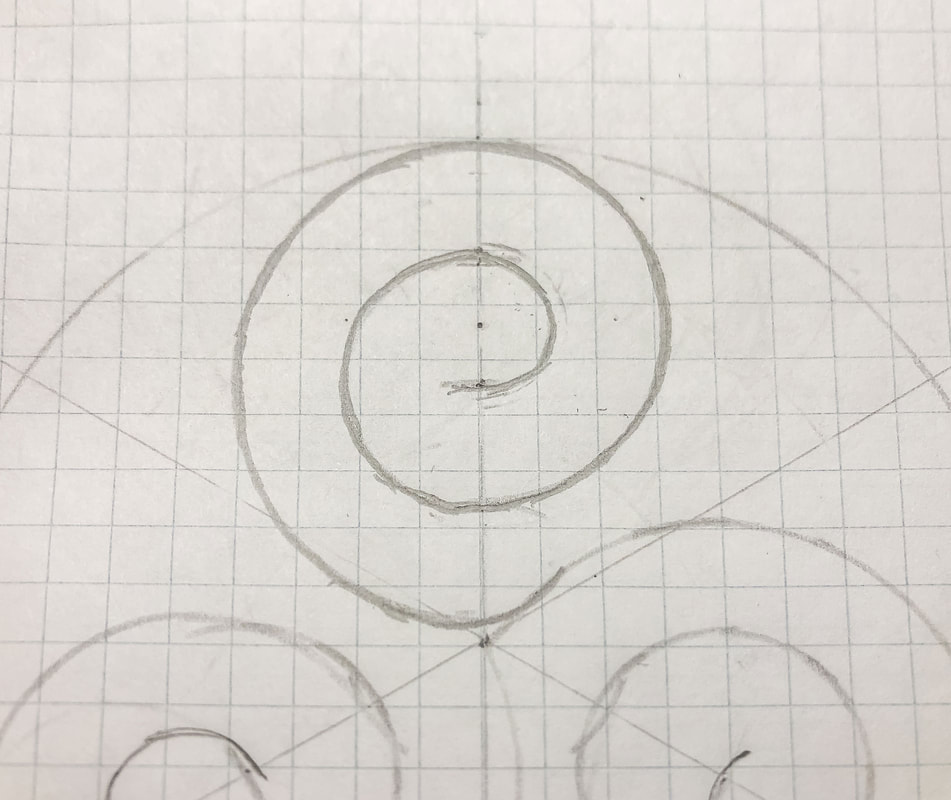  The number of tick marks you create with your “Y” segments will determine how loose or tight your spiral will be. One or two tick marks per line will result in a loose spiral. Four or more tick marks per line will result in a spiral with several tight loops. Also, you can draw your spiral facing either direction. It all depends on your preference. So, how did you do? Was this tutorial helpful? Let me know in the comments how it went! Related blogs you may want to read: How to draw a simple Celtic triquetra using three circles Circular Celtic border knot tutorial, basic braid Basic twist step-by-step drawing tutorial using grid paper Celtic braid step-by-step drawing tutorial Basic border knot with vertical breaks, step-by-step drawing tutorial Basic border knot with horizontal breaks, step-by-step drawing tutorial DIY chalk-painted tray with Celtic border A fun DIY project with paint and a thrifted mirror part 2 The Celtic Motherhood Knot, a symbol of love Celtic Tree of Life Basic Celtic Knot Tutorial Part 1 Celtic Knot Tutorial Part 2
0 Comments
 In today’s blog, I’d like to walk you through creating a panel with Celtic knotwork inspired by those seen on a Celtic Cross in Clonmacnoise, Ireland. We will draw four 4 x 4 grids that are interconnected using the same repeated design. So grab some grid paper, a ruler, and a pencil, and let’s get started! If you need drawing supplies, my recommended supply list is below. (Disclaimer: I am a Blick Art affiliate, so this list contains affiliate links. If you click on the link and purchase the item, I will receive an affiliate commission at no extra cost to you. I will only recommend products or services I use personally and/or believe will add value to my readers, so there is no conflict of interest.) Gather your supplies: Drawing pencils Markers Blending stumps Eraser Click eraser Ruler Horse hair brush Grid paper Sketch pad Tracing paper Draw any grid lines, dots, and guidelines lightly so they can be easily erased when you finalize your design. (I use a 2H pencil or light pressure.) Step 1: Create a 4 x 4 grid Draw a 4 x 4 grid on grid paper. Place dots in the center of each box and at each intersection.  Step 2: Draw the breaks Draw the breaks for the pattern as shown.  Step 3: Draw a diagonal grid Create a diagonal grid running between the dots as shown. 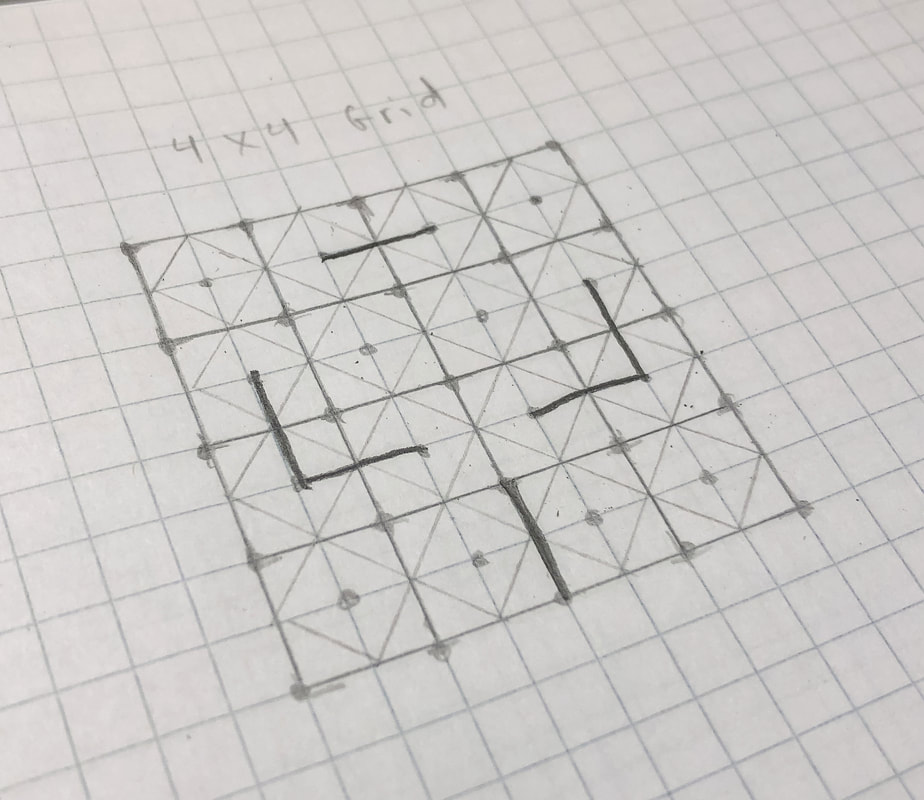 Step 4: Draw the spine for the thread Pick a corner and start drawing the spine for the thread following the diagonal grid. When you hit a break or wall the line should turn 90 degrees, except at the two sides (see the diagram). Follow this spine back to the point where you started. 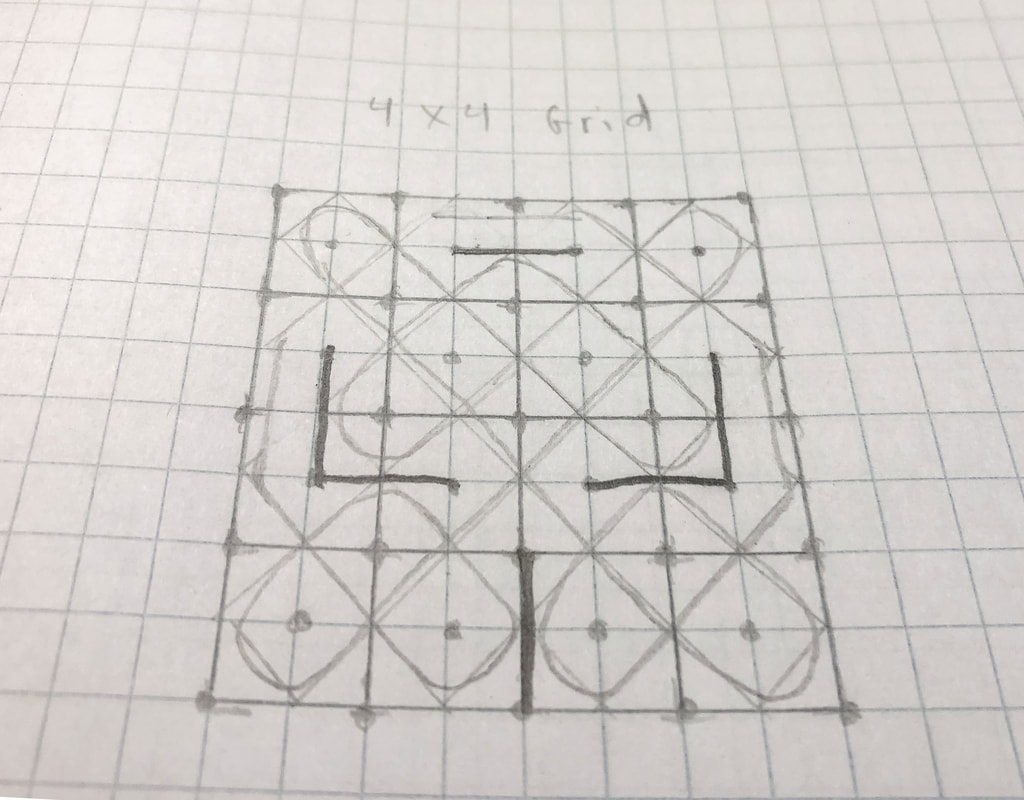 Step 5: Create the thread Draw parallel lines to the spine to create the thread for this pattern. Pick a starting intersection and create alternating overs and unders at each successive intersection. This is the basic knot pattern you will use for the rest of the panel. 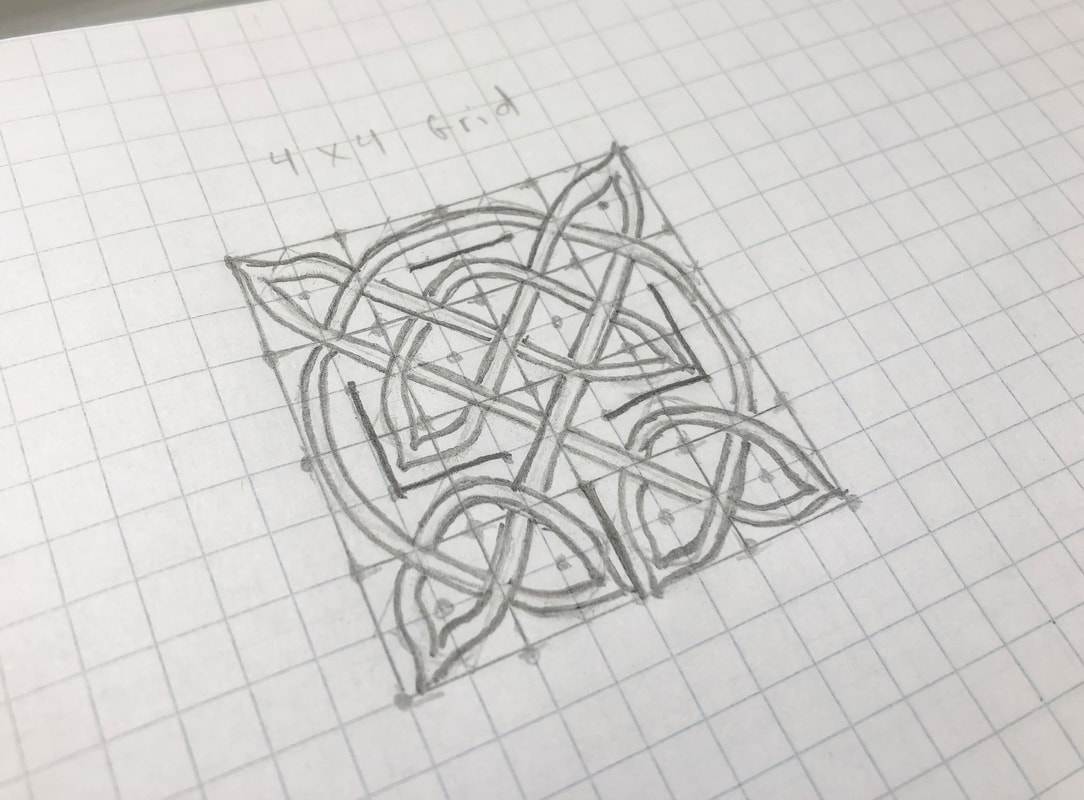 Step 6: Create a second grid below the first Repeat steps 1-5 to create a grid below the first one for the second part of the panel. Adjust the intersections so that the threads from the top grid intertwine with the bottom grid (as shown). 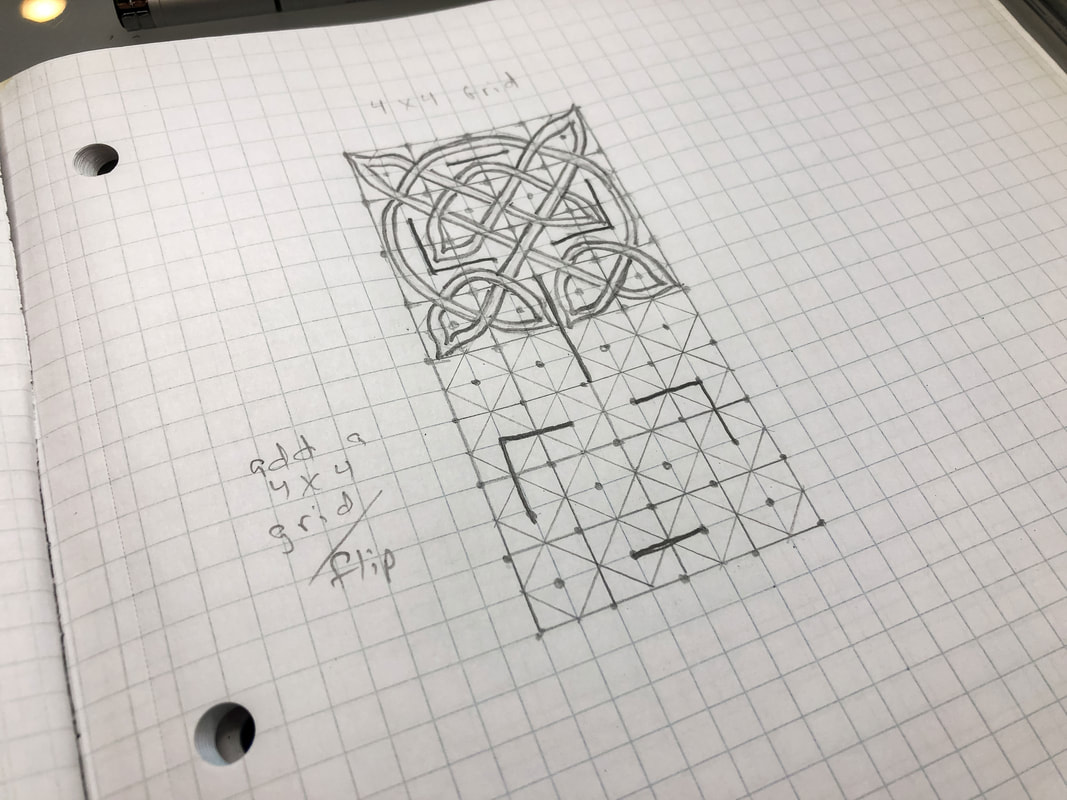 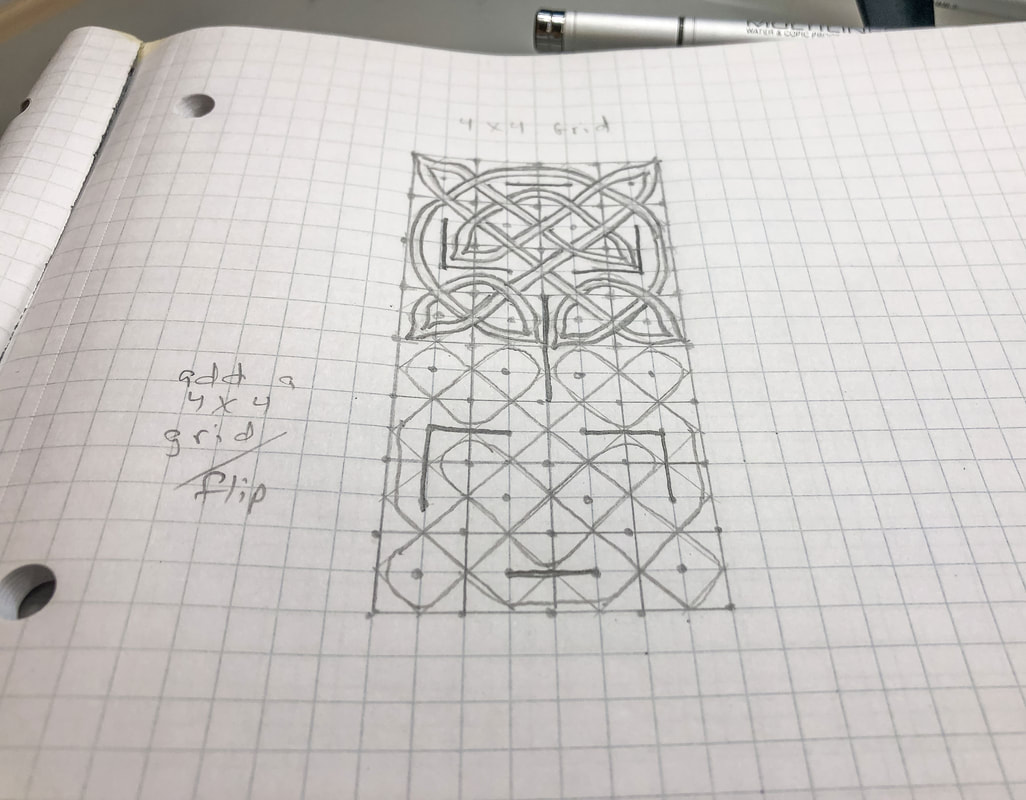 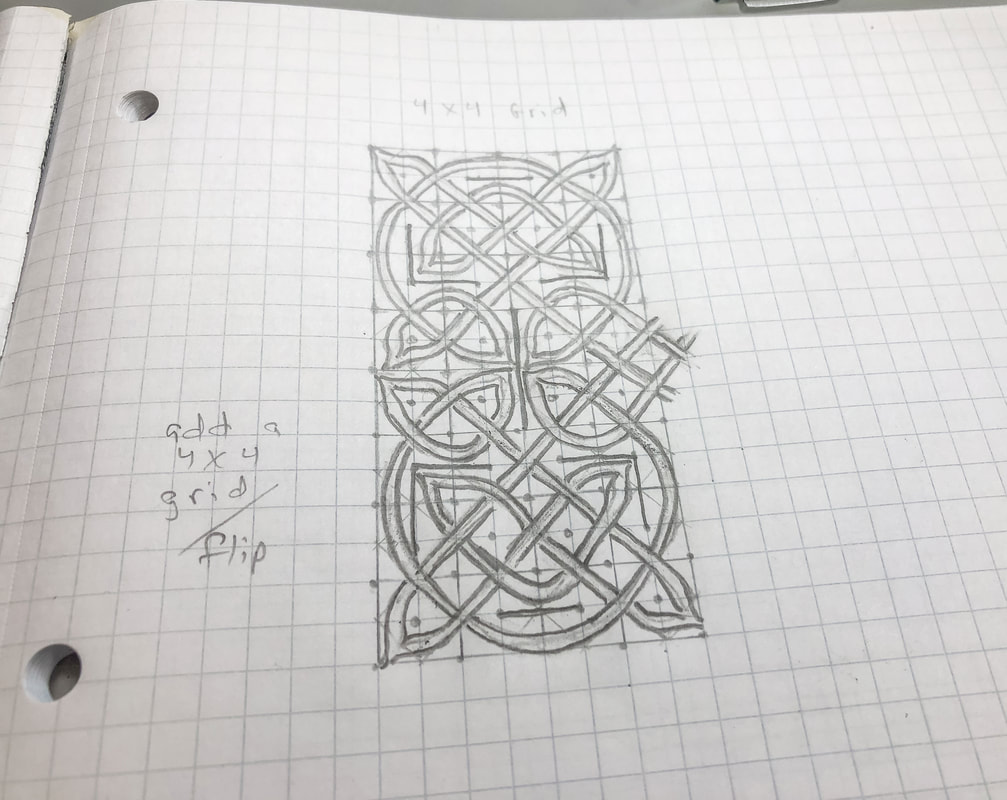 Step 7: Create a third grid next to the first Repeat steps 1-5 to create a grid next to the first one for the third part of the panel. Adjust the intersections so that the threads from the first two grids intertwine with the third grid (as shown). 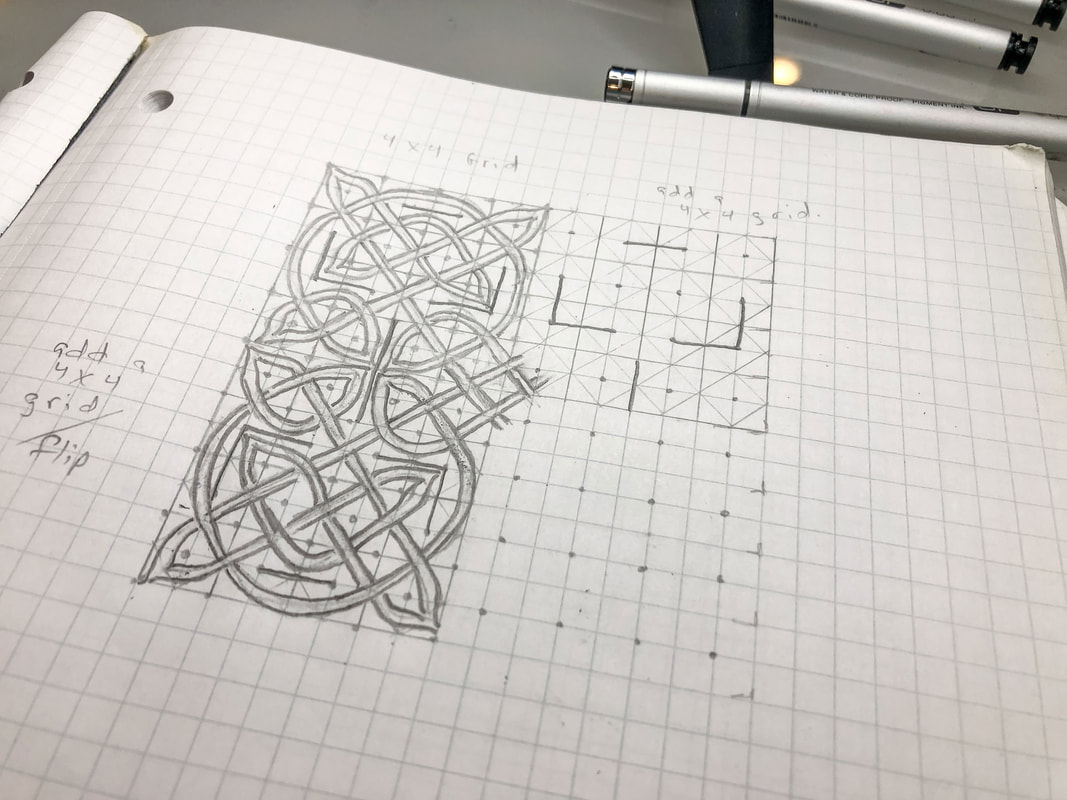 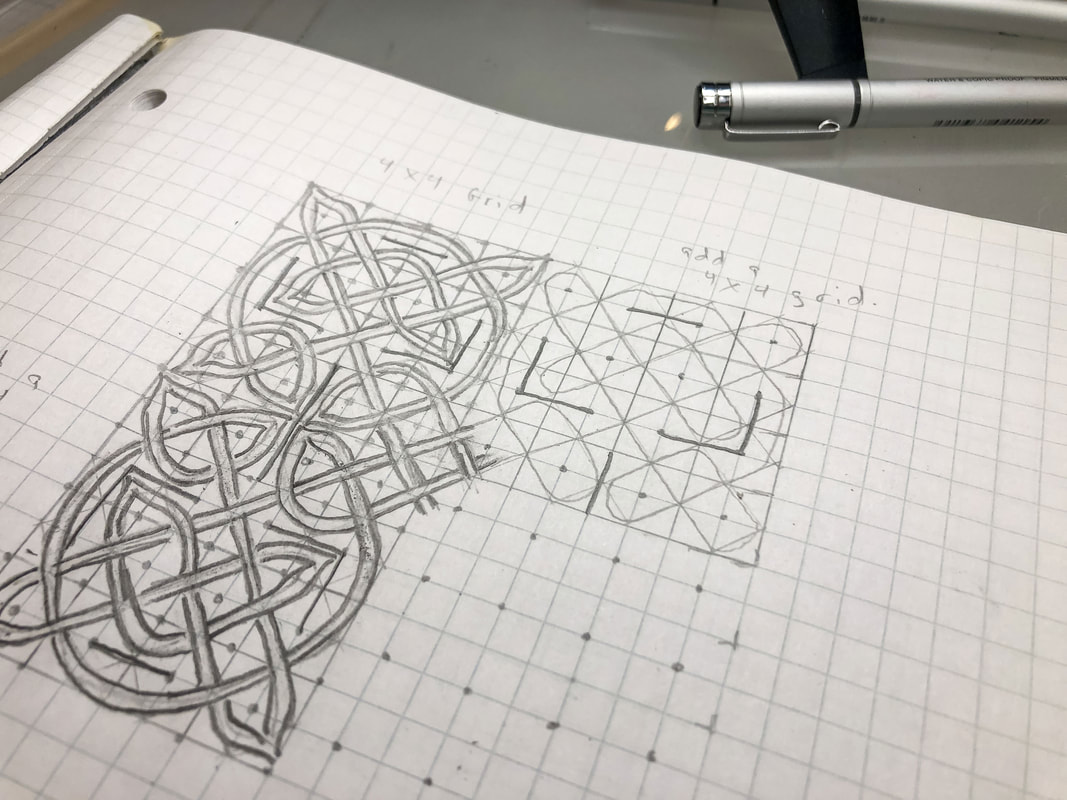 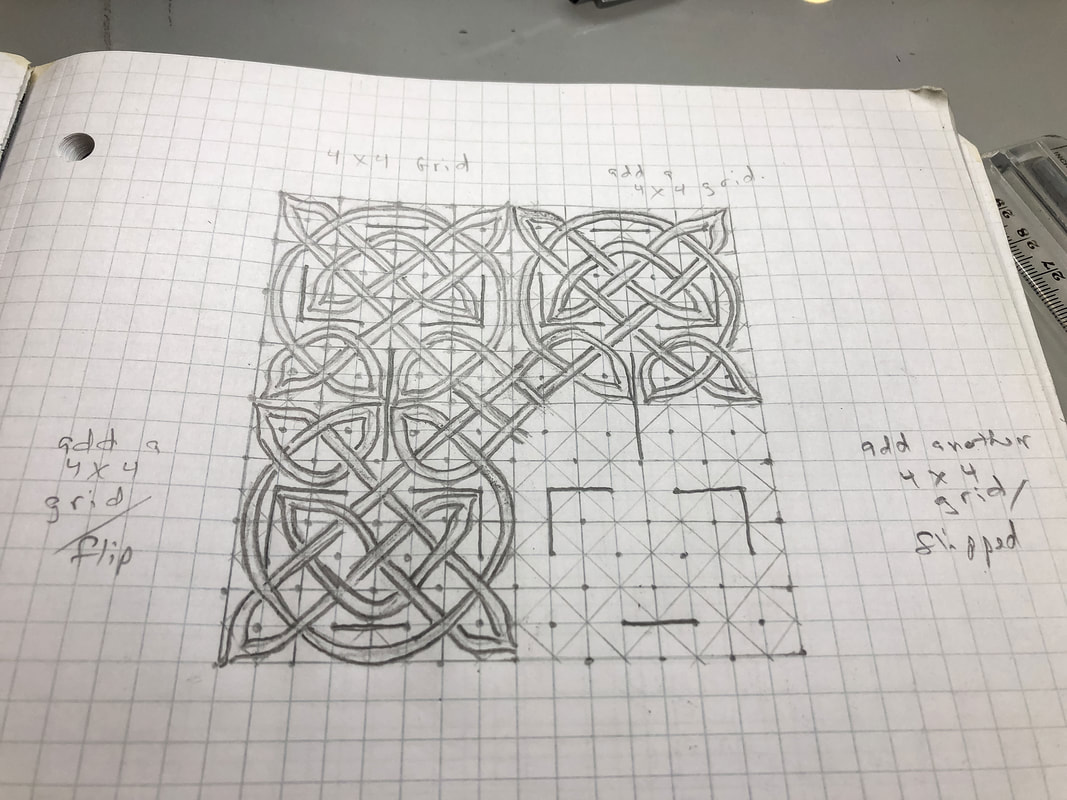 Step 8: Create the fourth grid Repeat steps 1-5 to create the fourth part of the panel in the bottom right corner. Adjust the intersections so that the threads from the first three grids intertwine with the fourth grid (as shown). 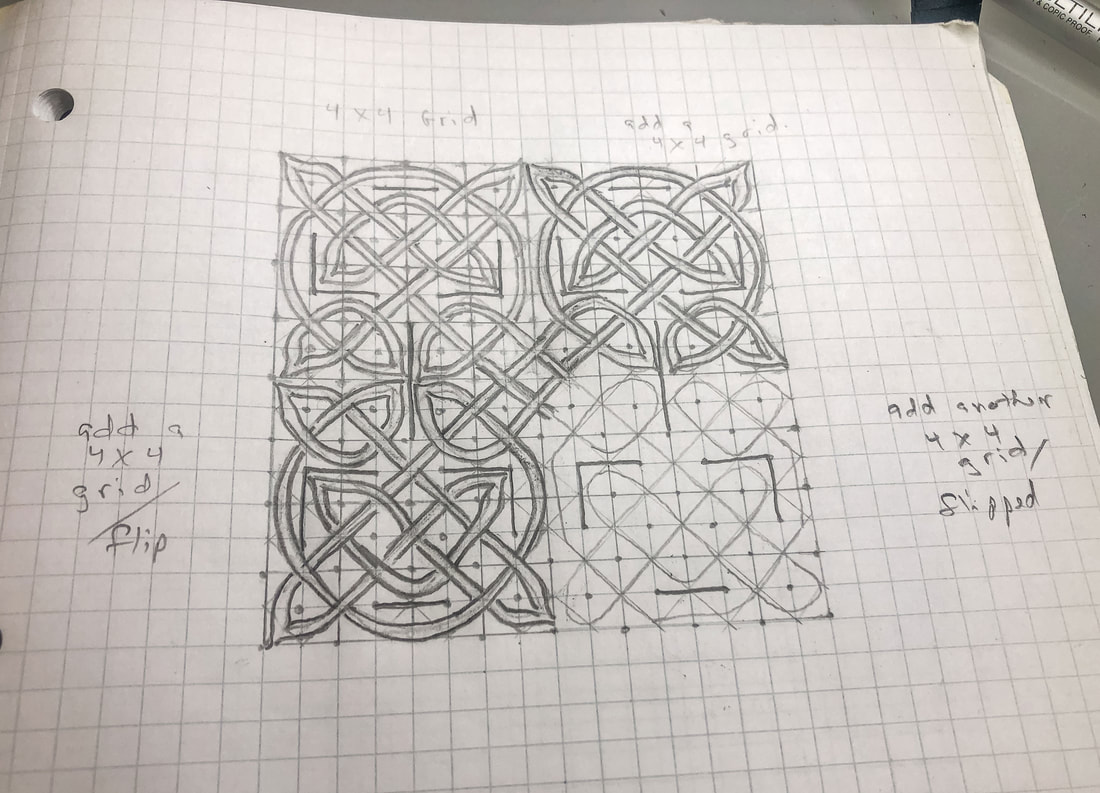 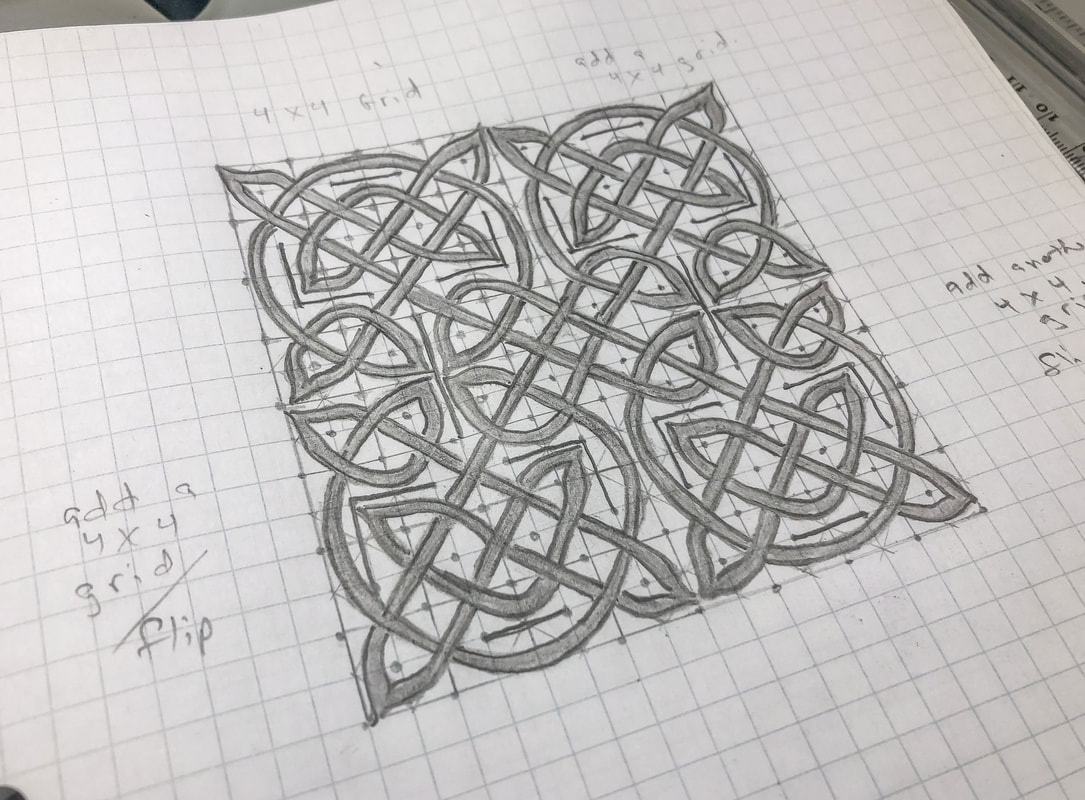 Step 9: Stylize Clean up the lines, and add shading, texture, and finishing touches to the final panel design. And you're done! How did you do? Let me know in the comments. If you'd like to follow along with me in my YouTube video tutorial you can find it here! Related blogs you may want to read: How to draw a simple Celtic triquetra using three circles Circular Celtic border knot tutorial, basic braid Basic twist step-by-step drawing tutorial using grid paper Celtic braid step-by-step drawing tutorial Basic border knot with vertical breaks, step-by-step drawing tutorial Basic border knot with horizontal breaks, step-by-step drawing tutorial DIY chalk-painted tray with Celtic border A fun DIY project with paint and a thrifted mirror part 2 The Celtic Motherhood Knot, a symbol of love Celtic Tree of Life Basic Celtic Knot Tutorial Part 1 Celtic Knot Tutorial Part 2 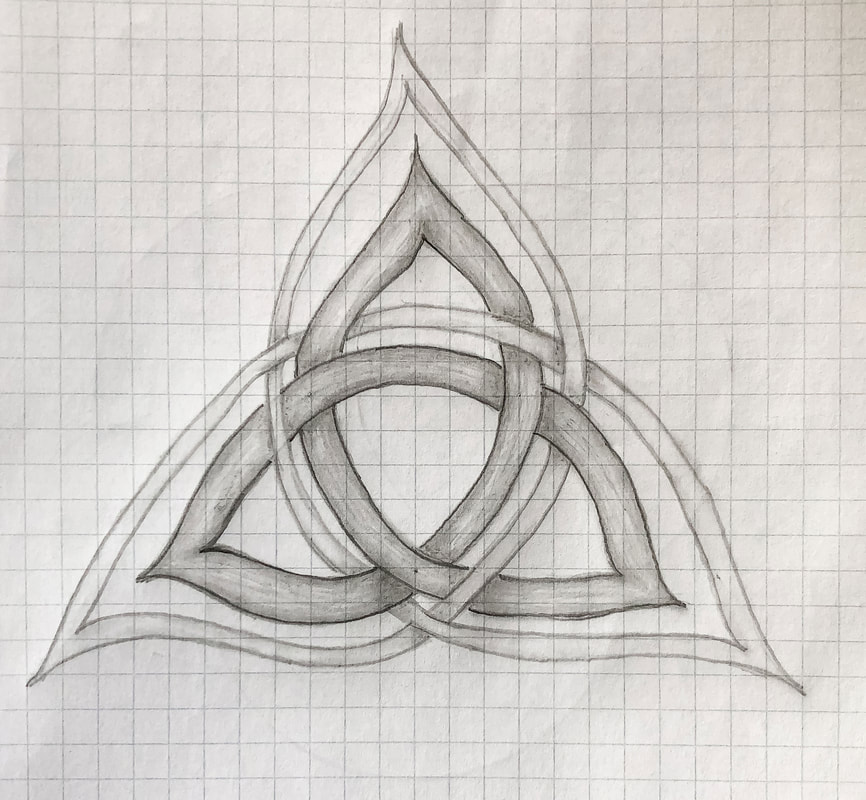 In today’s blog, I will walk you through the steps for drawing a simple triquetra using three circles to get an equilateral shape. There are other methods you can use, such as using a square to map out your angles and intersections, but whichever method you choose, you will end up with the equilateral triangle as the base for this style of triquetra. (There are other triangles and triquetra shapes, but this tutorial is for the triquetra that is even on all sides.) In my method, you won’t draw this triangle, but if you connect the intersections, you will see that they unveil an equilateral triangle. 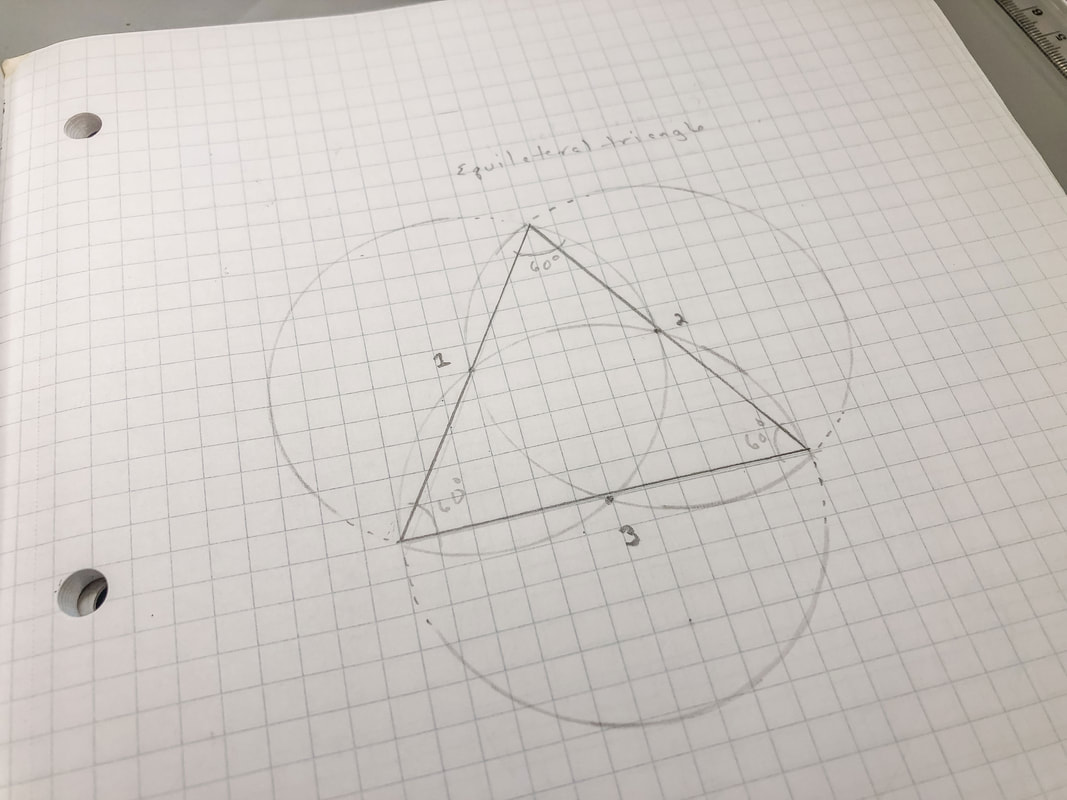 All you will need for this tutorial is a compass, eraser, and paper, but I have provided a list below of supplies you may want for this and other drawing projects. (Disclaimer: I am a Blick Art affiliate so this list contains affiliate links. If you click on the link and purchase the item, I will receive an affiliate commission at no extra cost to you. I will only recommend products or services I use personally and/or believe will add value to my readers, so there is no conflict of interest.) Gather your supplies: Drawing pencils Markers Blending stumps Eraser Click eraser Ruler Horse hair brush Grid paper Sketch pad Tracing paper Step 1: Draw a circle Draw a circle using a compass and mark the midpoint of that circle. 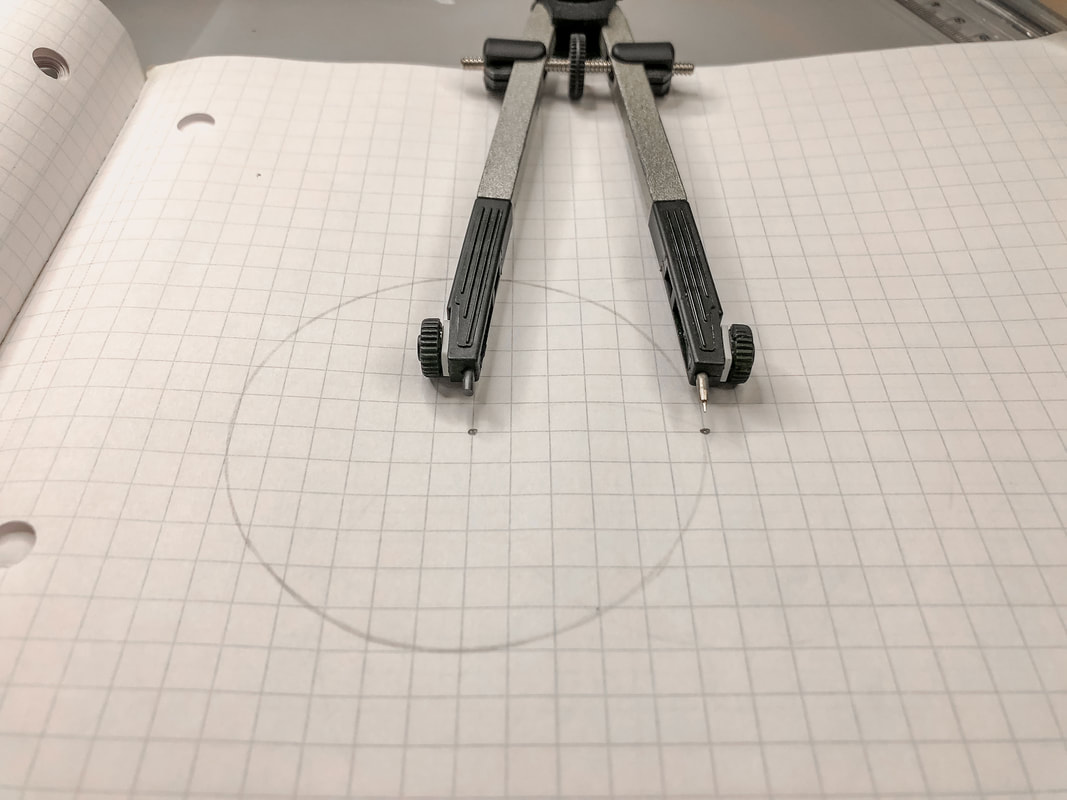 Step 2: Draw a second circle Mark a point on the circle’s circumference. This will be the center point of the second circle. Using the same settings on the compass draw a second circle. 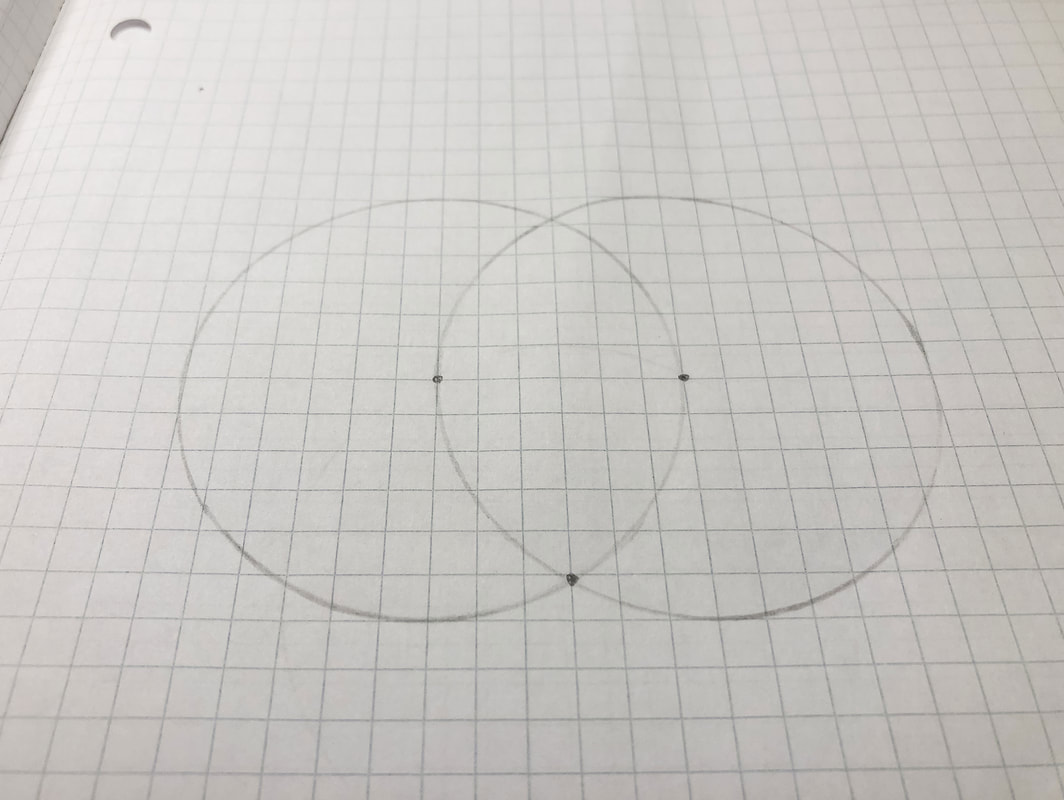 Step 3: Draw a third circle Mark the point where the two circles intercept at the bottom. Using the same compass setting, draw a third circle with that as the center point. Erase the parts of the circles outside the points of intersection. 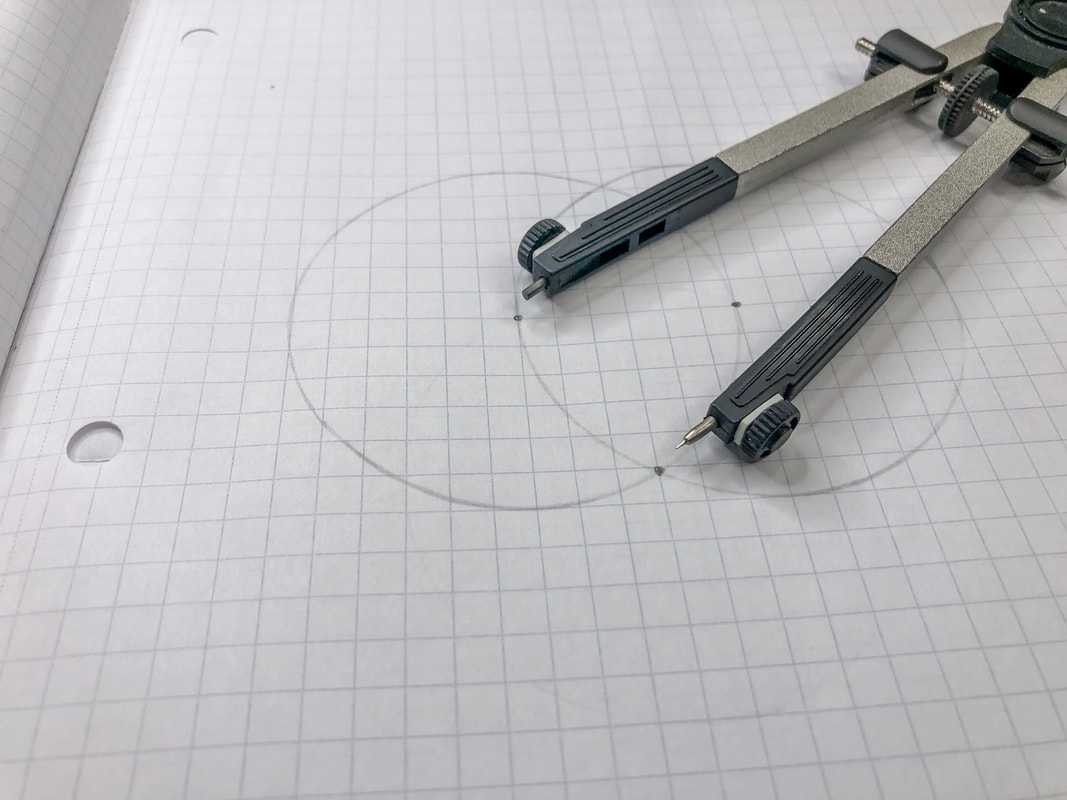 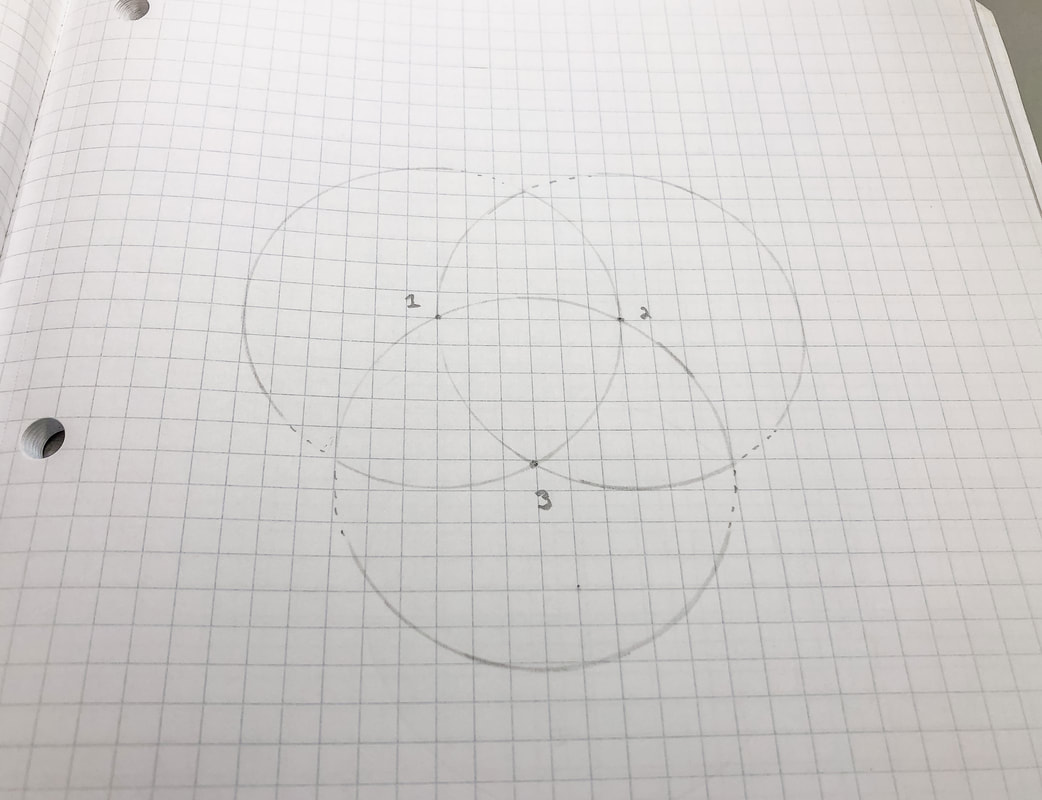 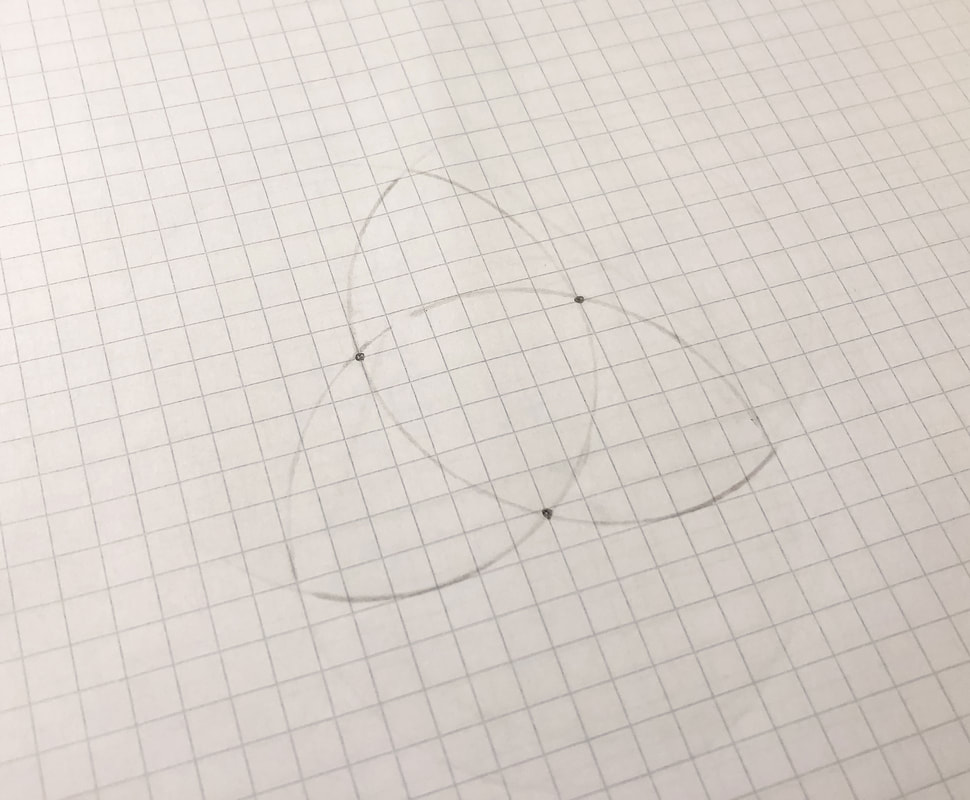 Step 4: Draw parallel lines Draw new lines parallel to the lines that are left. The parallel lines can be drawn inside or outside the triquetra shape, depending on your preference. 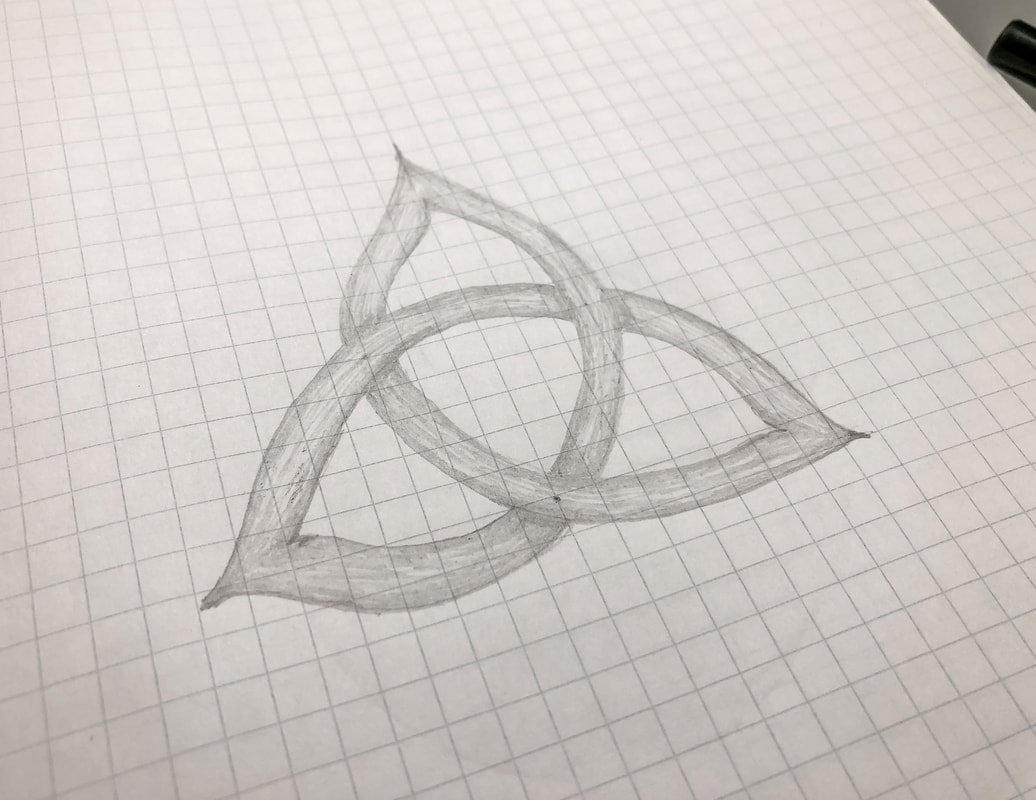 Step 5: Create the overs and unders Pick a point where the lines intersect and create an “over” thread. Go to the very next intersection and create an “under” thread. Follow this thread, creating alternating overs and unders until you arrive back at the beginning. Step 6: Stylize Create shading, texture, outlines, and finishing touches for the design. 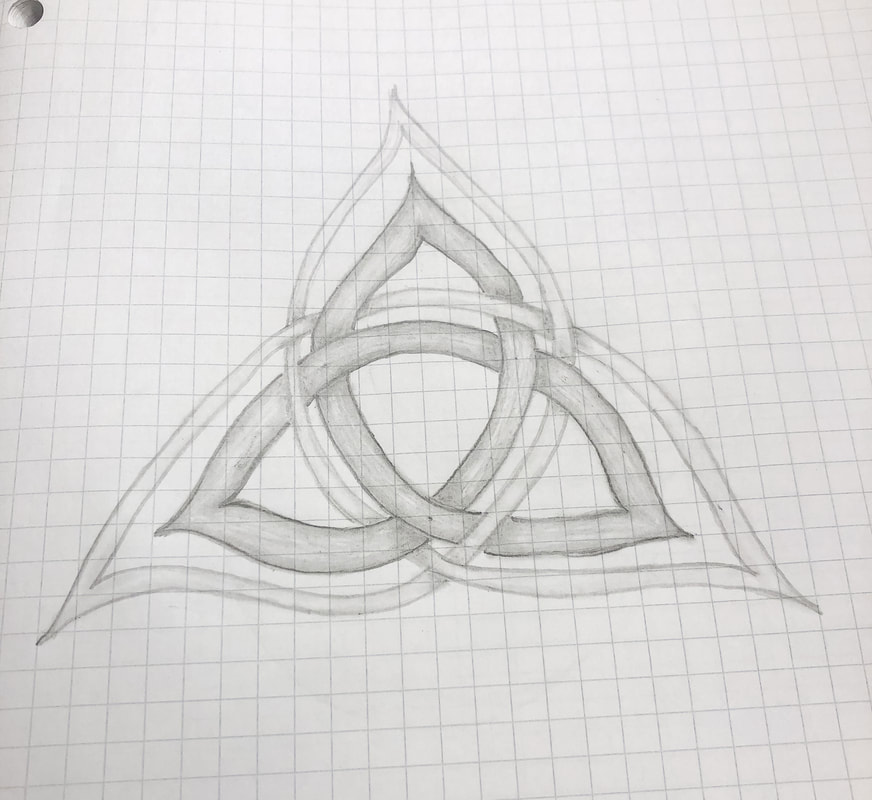 If you would like to see the video tutorial for this triquetra you can view it here. Please like, share, comment, and subscribe so we can grow our little community! Related blogs you may want to read: Creating a knotwork pattern inspired by the Clonmacnoise South Cross Circular Celtic border knot tutorial, basic braid Basic twist step-by-step drawing tutorial using grid paper Celtic braid step-by-step drawing tutorial Basic border knot with vertical breaks, step-by-step drawing tutorial Basic border knot with horizontal breaks, step-by-step drawing tutorial DIY chalk-painted tray with Celtic border A fun DIY project with paint and a thrifted mirror part 2 The Celtic Motherhood Knot, a symbol of love Celtic Tree of Life Basic Celtic Knot Tutorial Part 1 Celtic Knot Tutorial Part 2 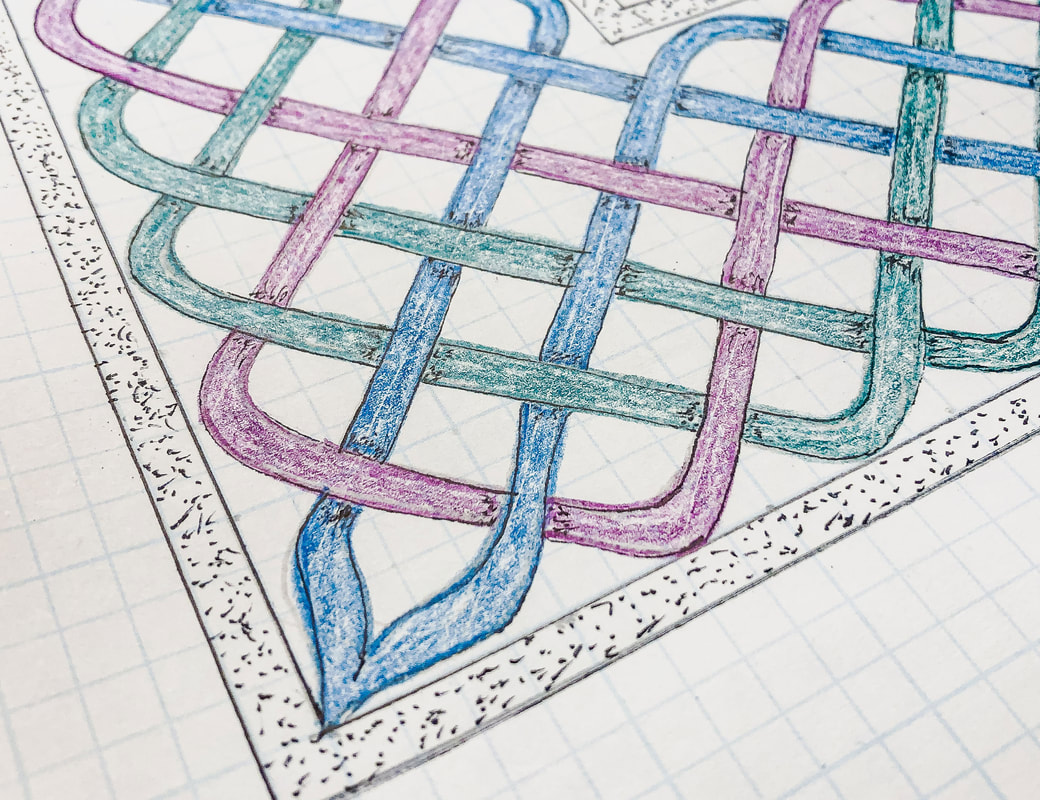 How to handle corners in Celtic knotwork Drawing borders with knotwork patterns can be a gratifying way to add drama to art pieces, picture frames, mirror frames, and trays. But what happens when you get to the corners? Dealing with corners can be tricky, but there are a few ways to handle this dilemma. One way to deal with the issue is to create a design or small piece of artwork specifically for the corners, separate from the border. This could be a stand-alone design or could be woven into the border in some creative way. You could even create a corner design that overlaps the borders. 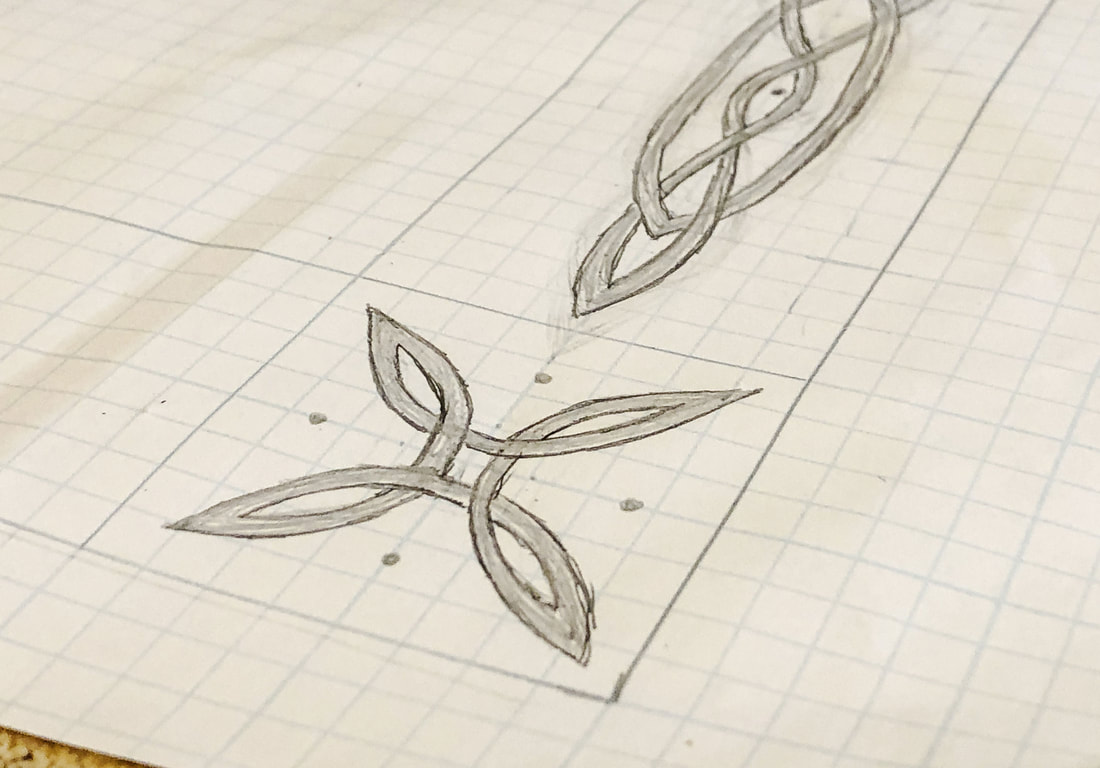 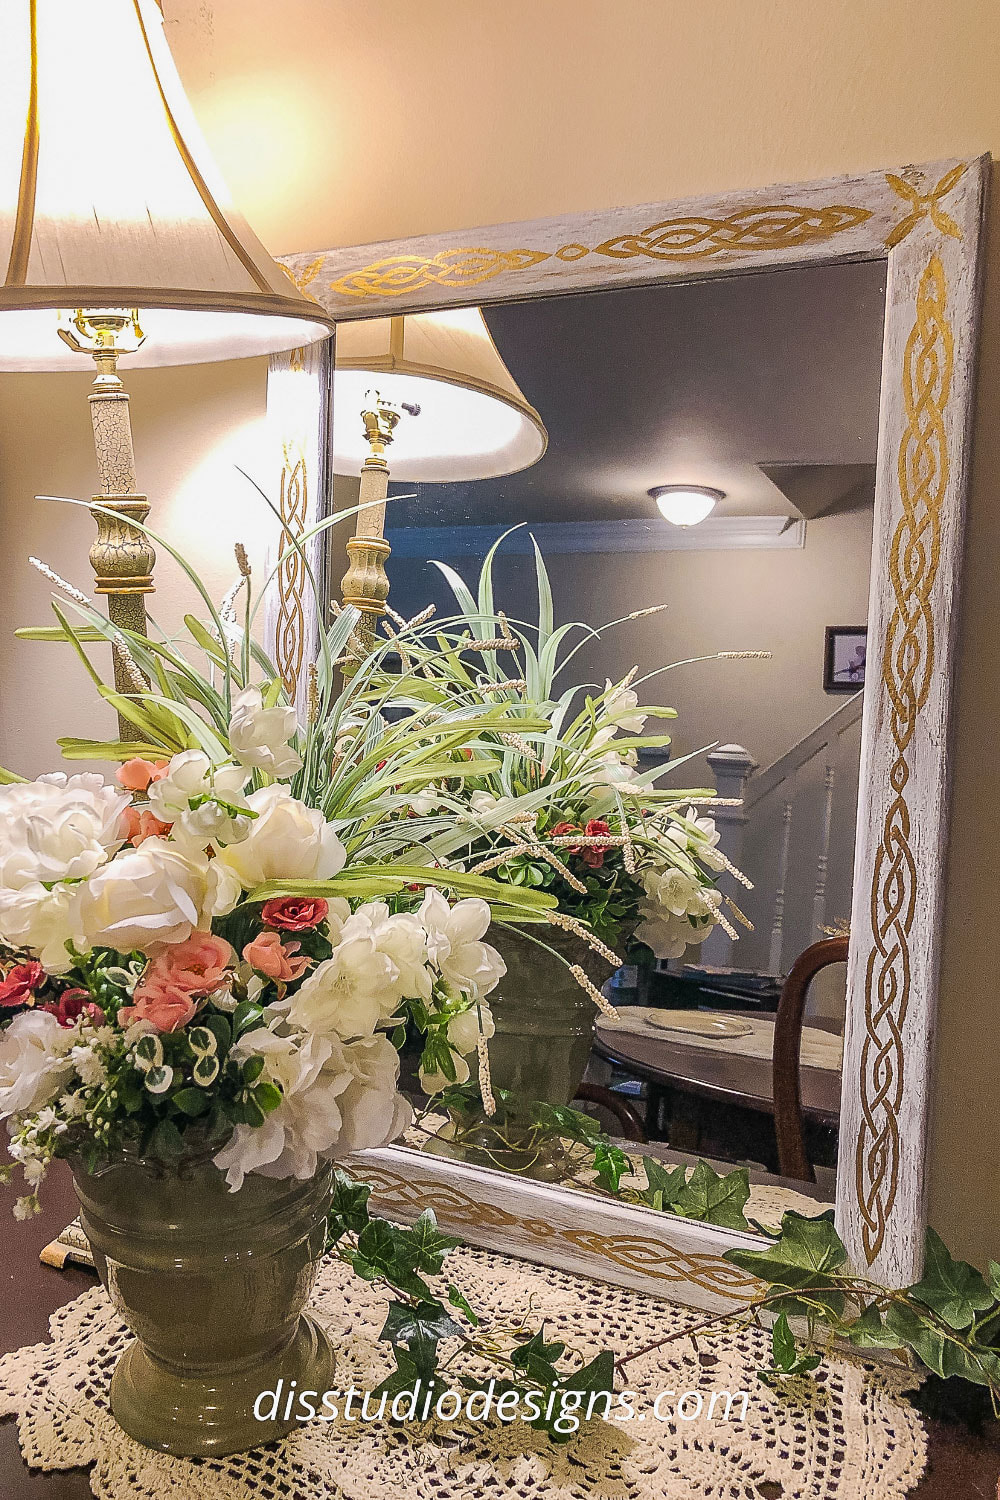 If you want a more consistent appearance for your border, a repetitive pattern created on a grid will help lay out your knot design. A simple repetitive square grid will allow you to produce a continuous border that handles that 90˚ turn with ease. This is the technique I will show you in the following two tutorial videos. A few basic knotwork border tutorial videos If you need a refresher on how to create simple Celtic knot borders—or are new to drawing knots—the following video tutorials will help you get a handle on the basics of drawing borders and using grids. How to Draw a Basic Celtic Knot Braid Tutorial How to draw a basic Celtic braid with a vertical break How to draw a basic Celtic braid with a horizontal break Recommended drawing supplies: A few of you have asked about supplies I use when drawing my Celtic knots, so here is a general supply list to get you started: (This supply list contains affiliate links, as I am an affiliate of Blick Art Materials. If you click on the link and purchase the item, I will receive an affiliate commission at no extra cost to you. I will only recommend products or services I use personally and/or believe will add value to my readers, so there is no conflict of interest.) Drawing pencils Markers Blending stumps Eraser Clic eraser Ruler Horse hair brush Grid paper Sketch pad Tracing paper Related blogs you may want to read: Circular twist border ring tutorial Circular Celtic border knot tutorial, basic braid Basic twist step-by-step drawing tutorial using grid paper Celtic braid step-by-step drawing tutorial Basic border knot with vertical breaks, step-by-step drawing tutorial Basic border knot with horizontal breaks, step-by-step drawing tutorial DIY chalk-painted tray with Celtic border A fun DIY project with paint and a thrifted mirror part 2 The Celtic Motherhood Knot, a symbol of love Celtic Tree of Life Basic Celtic Knot Tutorial Part 1 Celtic Knot Tutorial Part 2 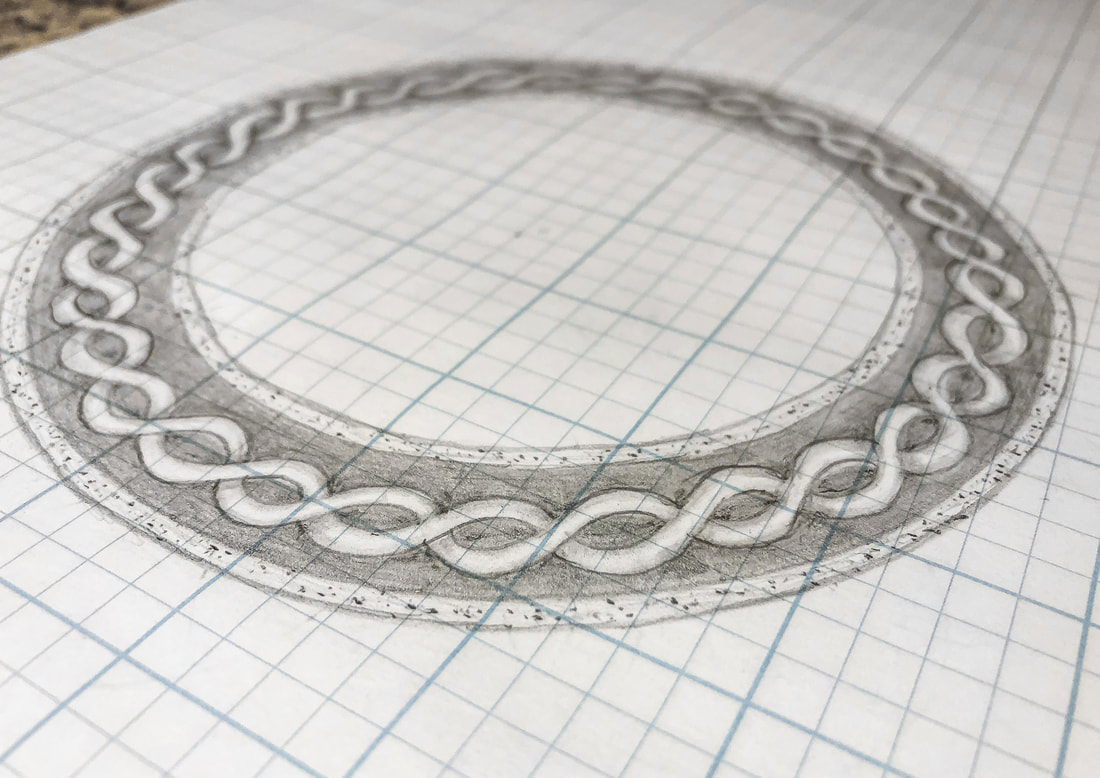 In a previous tutorial, we created a circular Celtic braid. This tutorial will be a simpler version of that design, just a basic twist that I will be using in a new piece of Celtic art—a High Cross. Gather your supplies: Drawing pencils Markers Blending stumps Eraser Clic eraser Ruler Horse hair brush Grid paper Sketch pad Tracing paper (This supply list contains affiliate links, as I am an affiliate of Blick Art Materials. If you click on the link and purchase the item, I will receive an affiliate commission at no extra cost to you. I will only recommend products or services I use personally and/or believe will add value to my readers, so there is no conflict of interest.) Before we start: Guidelines should be drawn using light pressure and/or a 2H drawing pencil so that they can be easily erased. Also, you may want to watch this YouTube tutorial, especially if you are only using a few basic tools: Now let’s get into the circular twist border tutorial! Step 1: Draw a circle 6.25” in diameter and a second inner circle 4.25” in diameter. 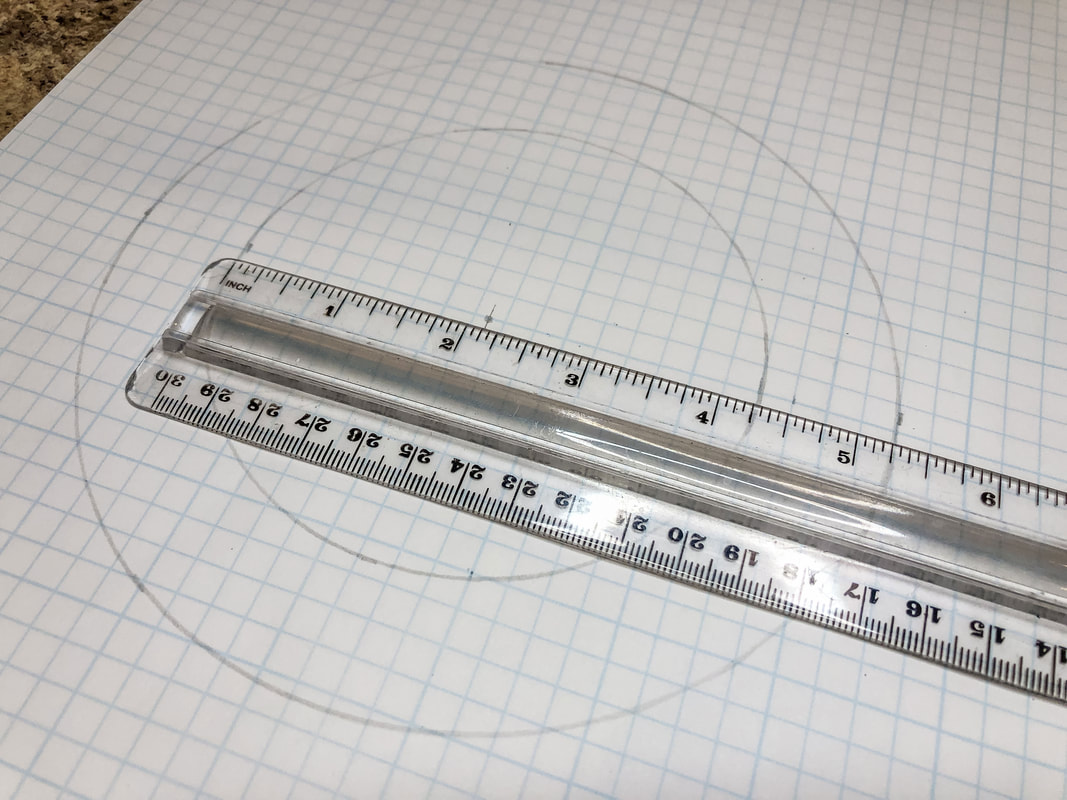 Step 2: Draw a circle 1/8” (or half a grid box if you are using grid paper) from each of these circles on the inside of the ring. This will be your decorative border. 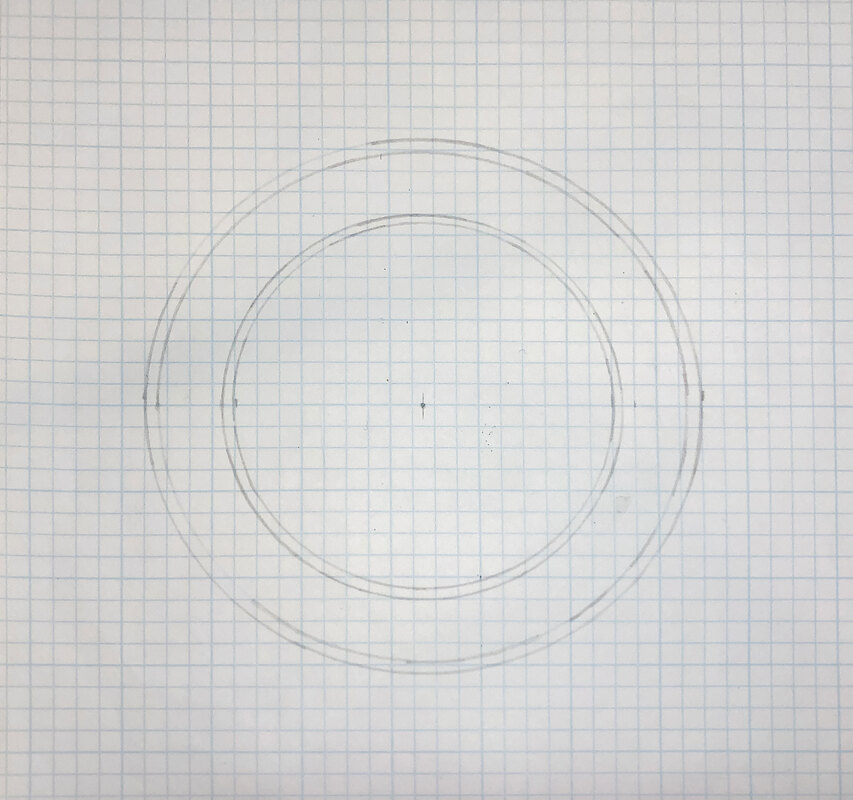 Step 3: Lightly draw a circle at the center point in between these two sets of border lines. This will be the first part of the grid to help you draw the twist. 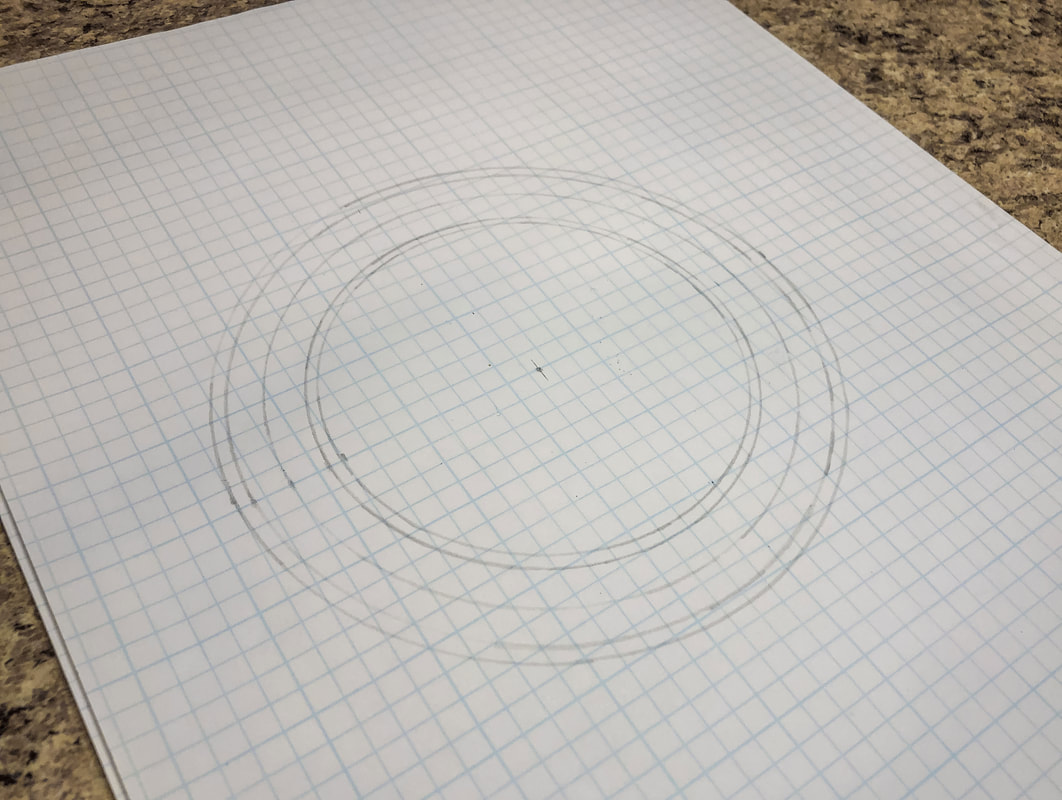 Step 4: Divide the ring into quarters using your ruler, or line up on grid paper. 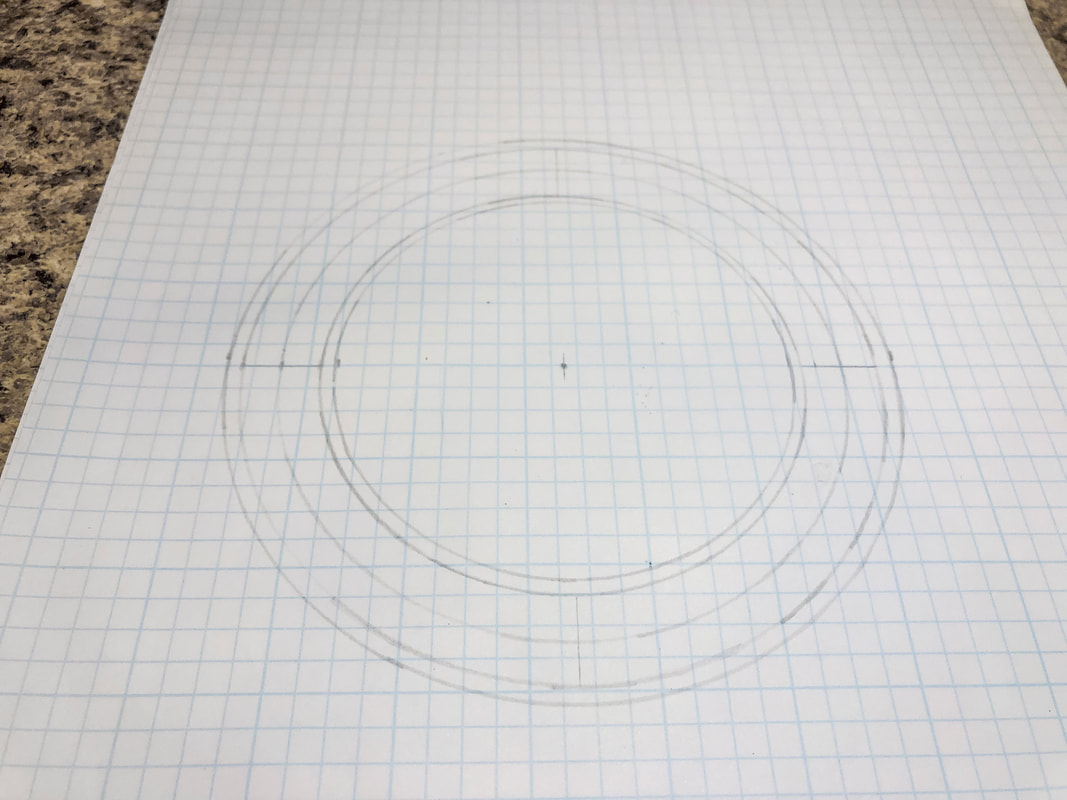 Step 5: Now divide the quarters in half, creating 8 sections. Use the technique from this tutorial to find the center of the arc by drawing overlapping circles and lining up the points where they intersect.  Step 6: Divide these sections in half to create 16 sections. 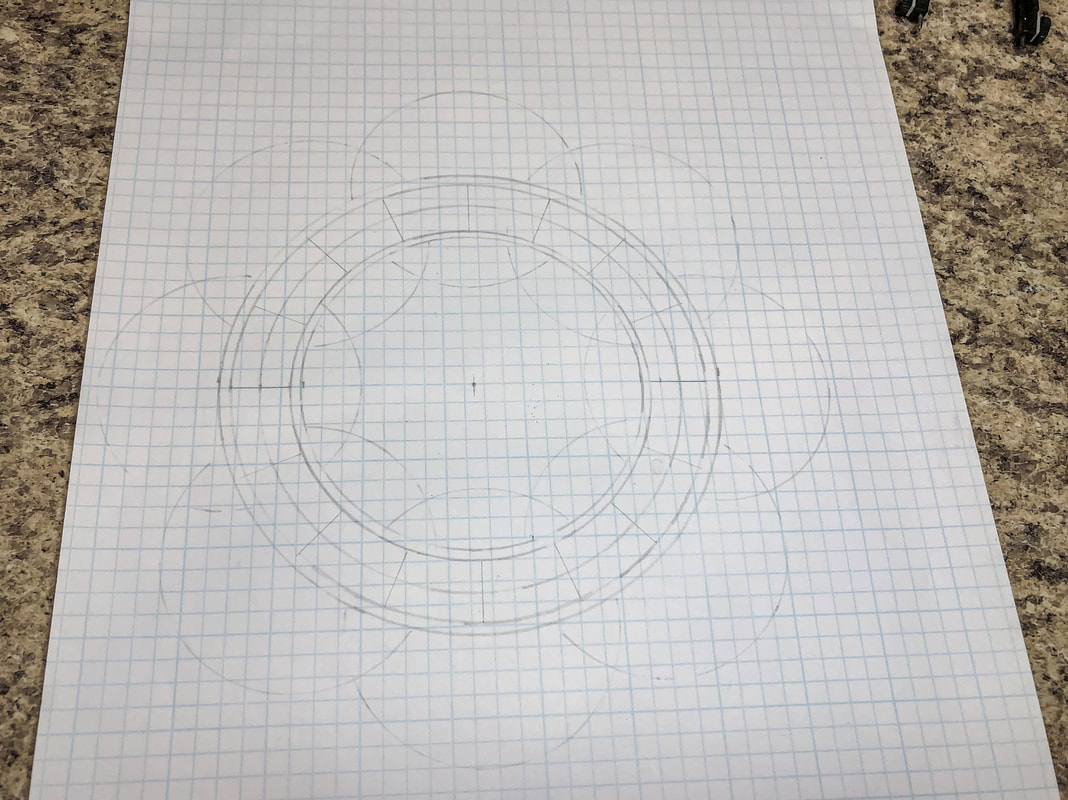 Step 7: And finally, divide those sections in half again to create 32 sections. 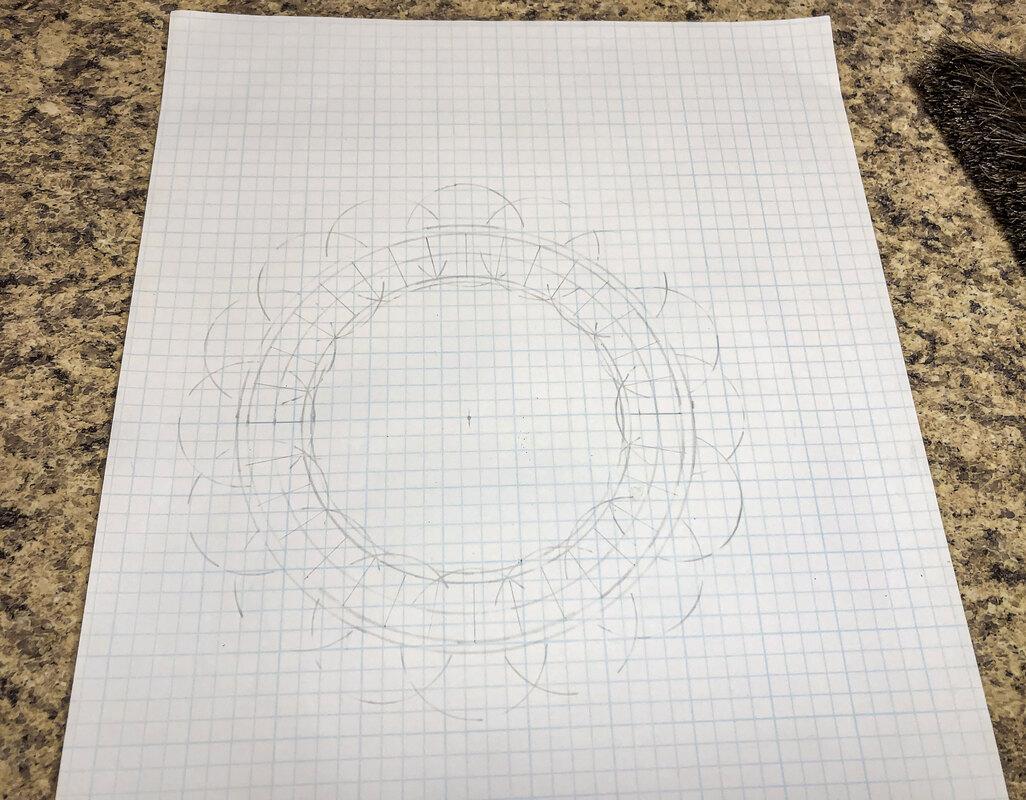 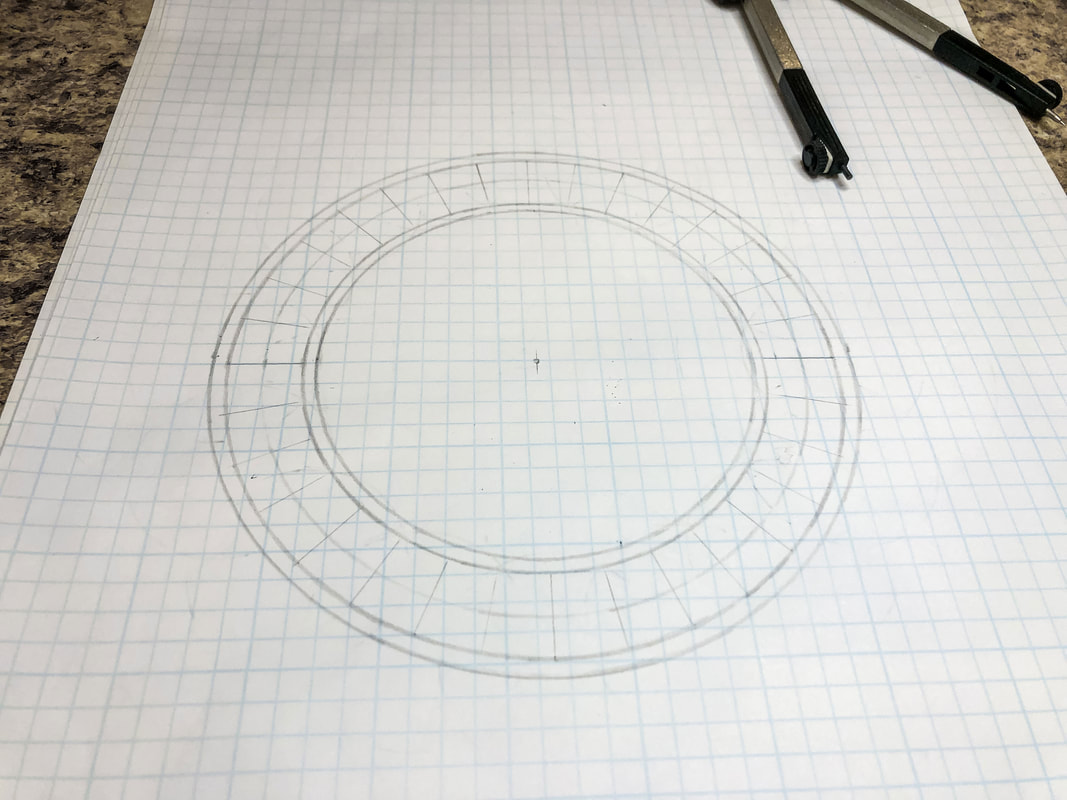 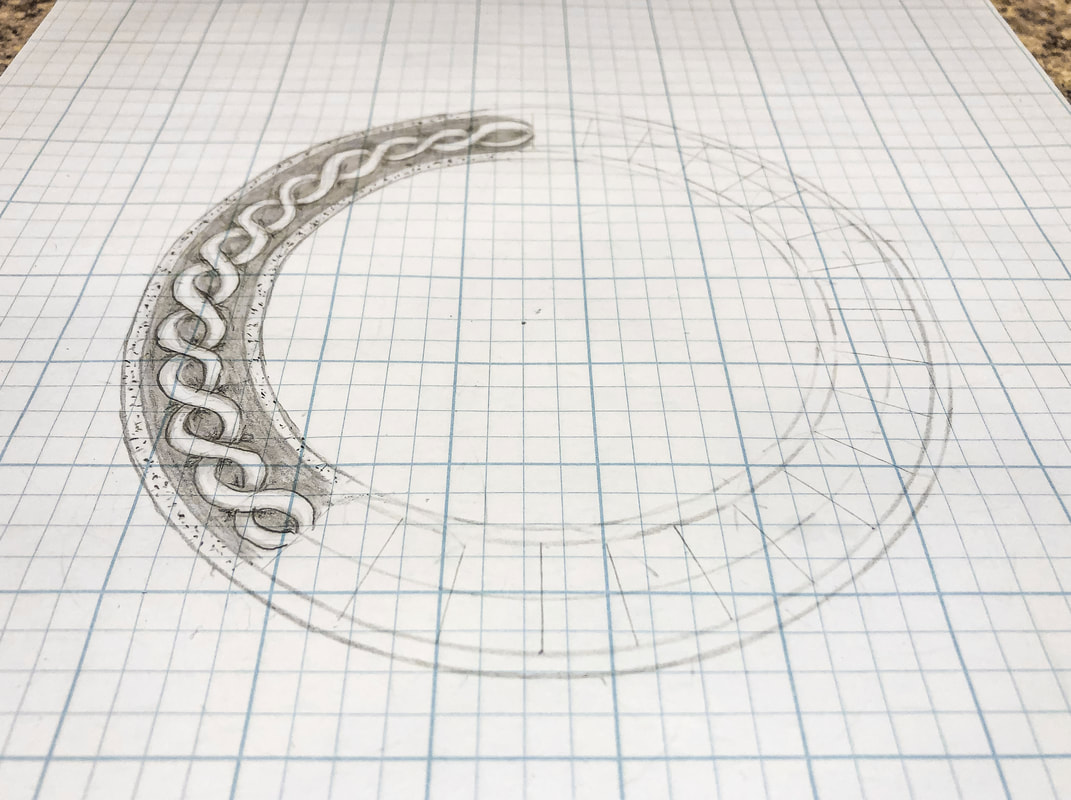 Step 8: Pick a square from this new grid to start. As shown below, draw a pair of “C”s from corner to corner. Think of this as the start of a thread, making your piece of thread as thin or as thick as you like, depending on how much space you want to take up and the style you want to create. 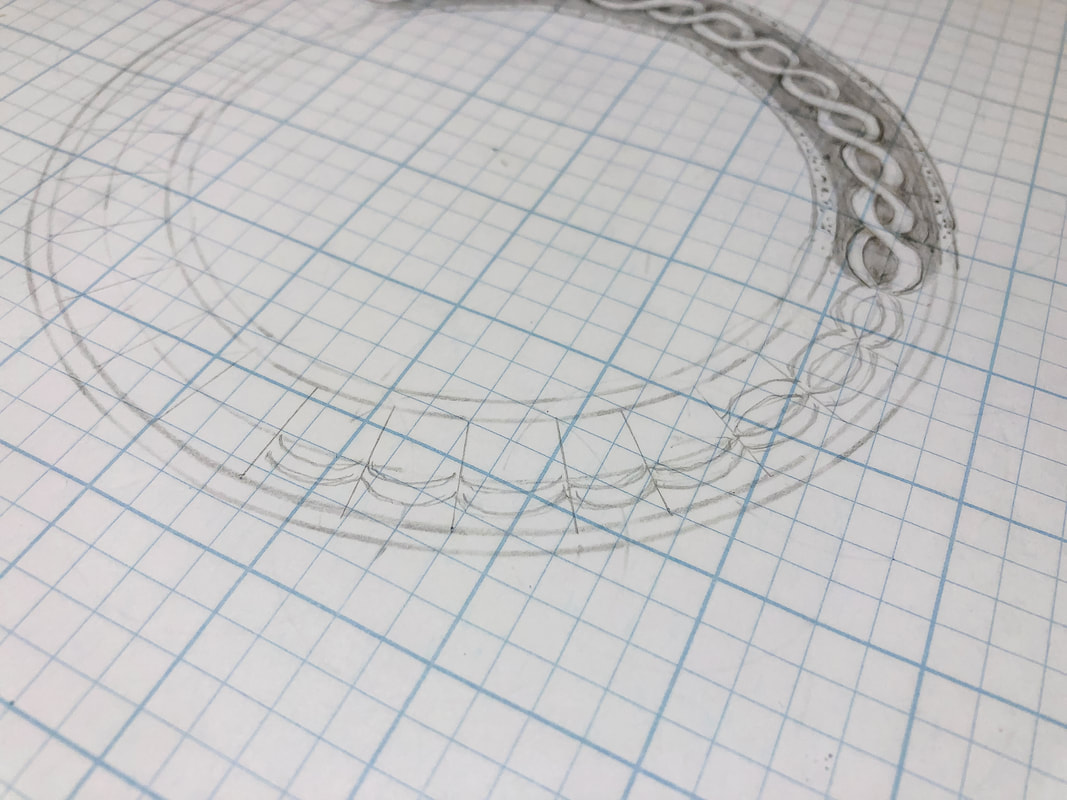 Step 9: Now fill the rest of the grid—top and bottom—with these same pairs of “C”s as shown. Try to keep your thread widths consistent. You will now have a circular grid full of links. 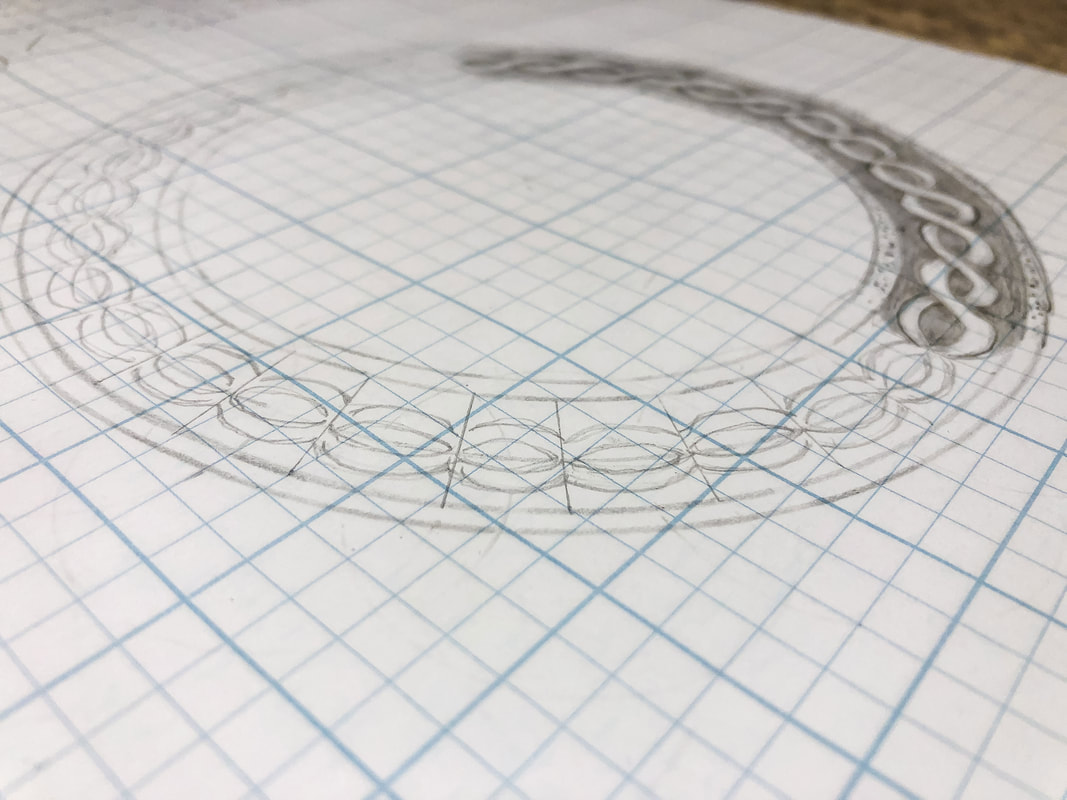 Step 10: Erase the intersections between the links to allow you to work more easily on the overs and unders. 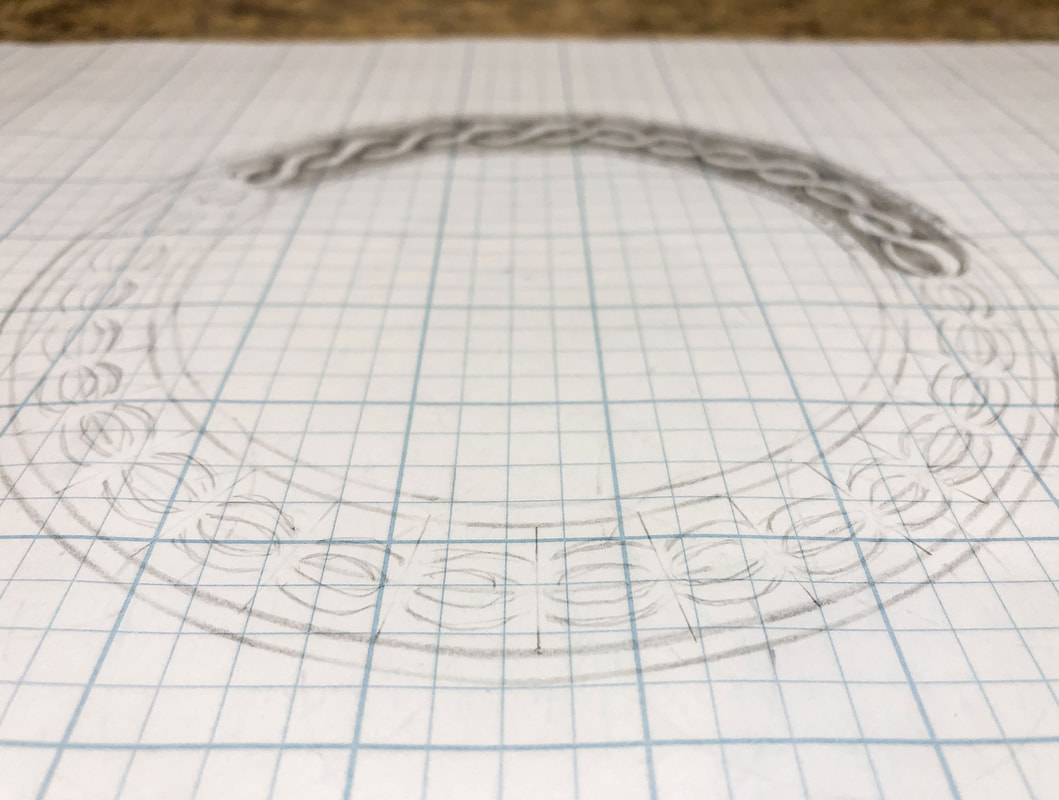 Step 11: Pick a place to start and create your first over-under intersection. Do not jump around. Work from this point and follow the pattern around the ring, making sure you end up with a thread that alternates over and under. 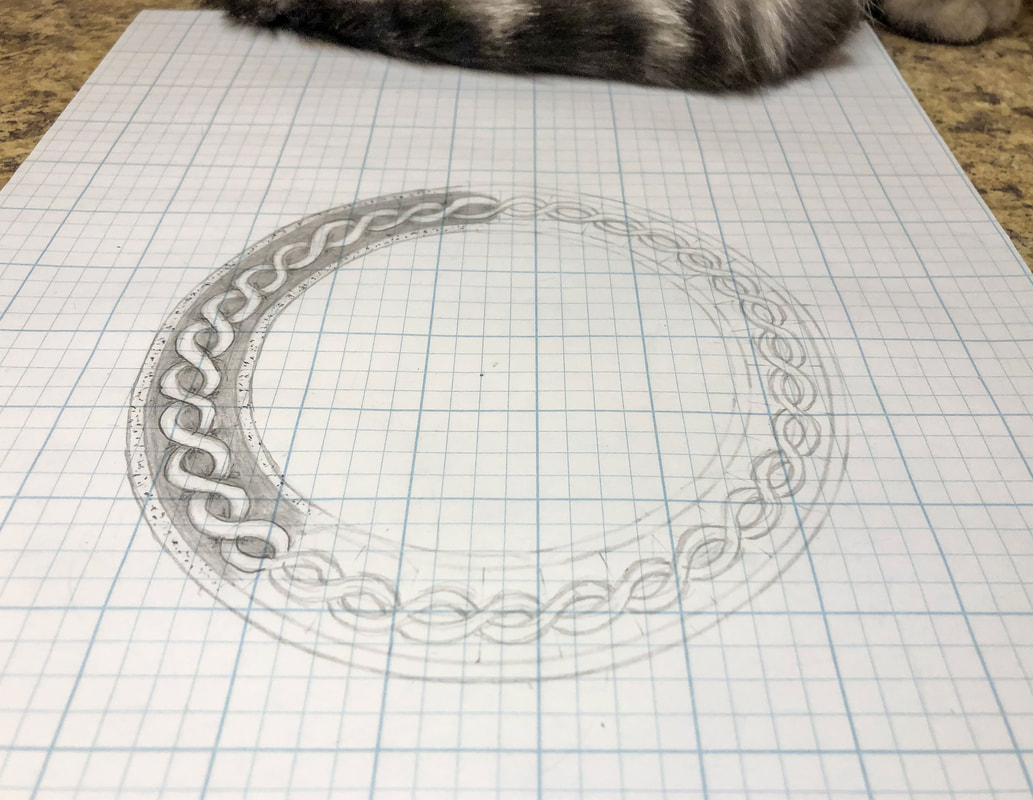 Step 12: Erase all the guidelines and clean up your lines as needed. Step 13: Add shading and stylize! 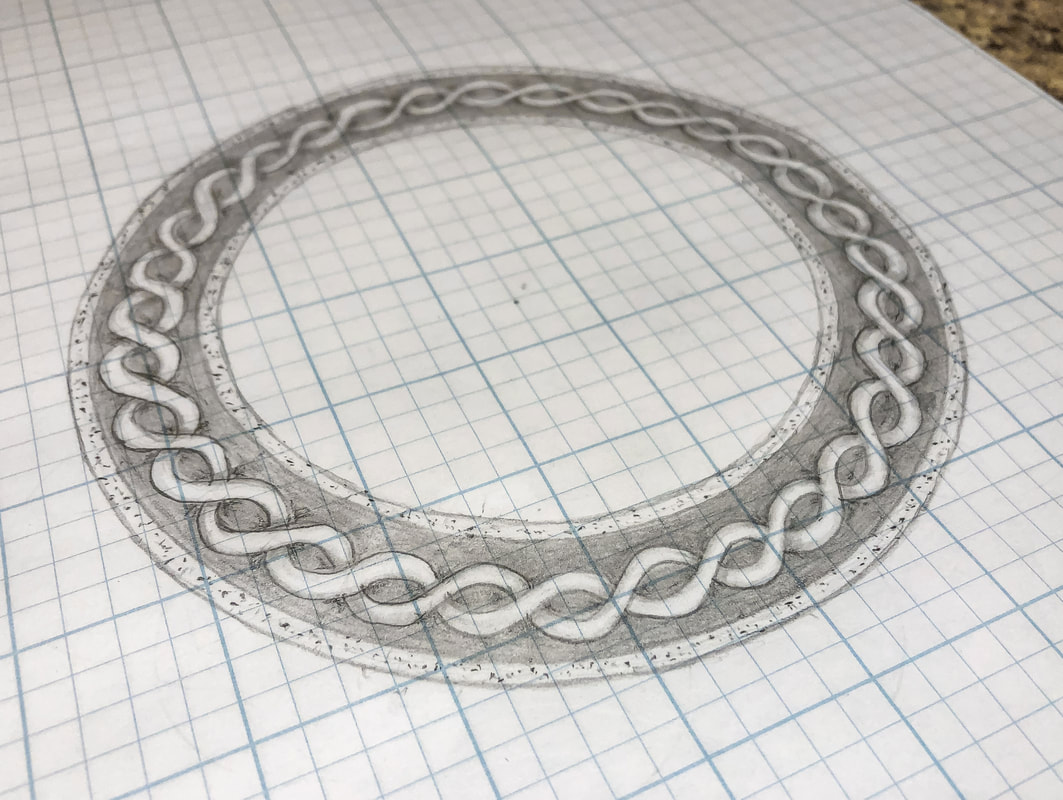 You’re finished! How did it go? Let me know in the comments below! I have created a YouTube tutorial to go with this blog for those of you who are visual learners like myself! You can view the full video tutorial on my YouTube channel here. Related blogs you may want to read: Circular Celtic border knot tutorial, basic braid Basic twist step-by-step drawing tutorial using grid paper Celtic braid step-by-step drawing tutorial Basic border knot with vertical breaks, step-by-step drawing tutorial Basic border knot with horizontal breaks, step-by-step drawing tutorial DIY chalk-painted tray with Celtic border A fun DIY project with paint and a thrifted mirror part 2 The Celtic Motherhood Knot, a symbol of love Celtic Tree of Life Basic Celtic Knot Tutorial Part 1 Celtic Knot Tutorial Part 2 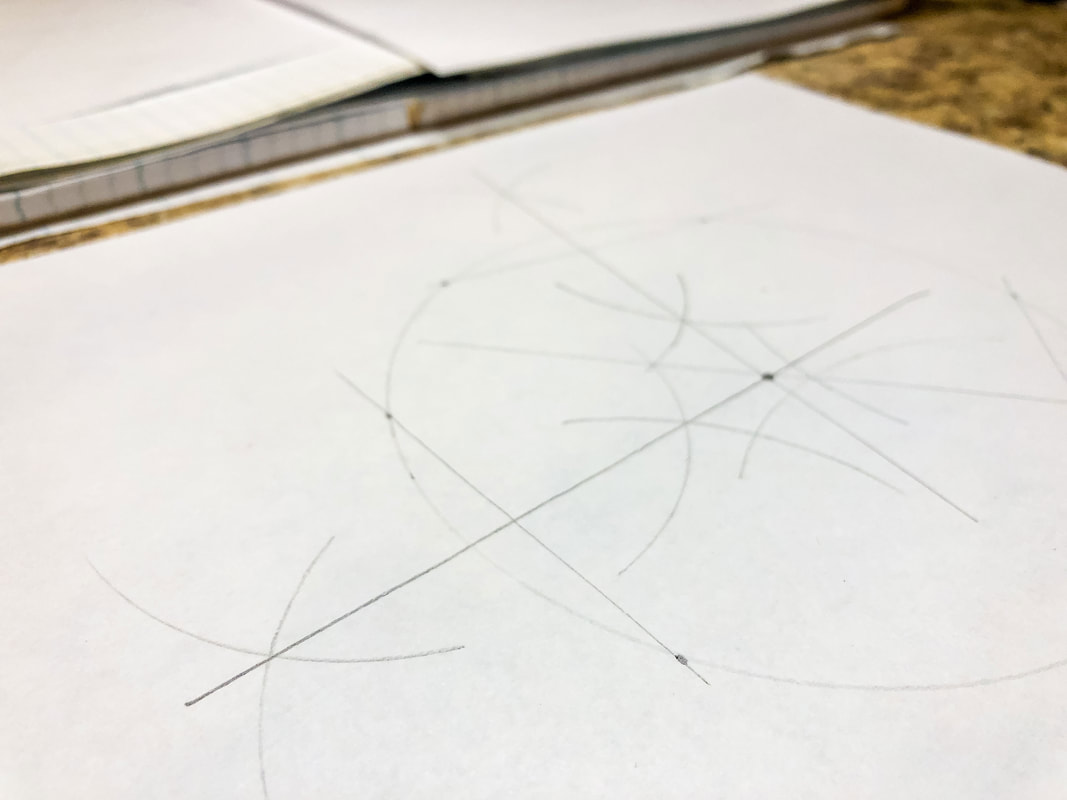 This week, I have started work on tutorials for drawing circular Celtic knot borders. Today’s blog post takes you through a couple of drawing tips that could be helpful for you as you follow along with these more complex Celtic design tutorials. Grab a pencil, a piece of paper, something with a straight edge, and a compass, and let’s get started! (Don’t have a compass? Use two pencils tied together with string at a length suitable for your project.) Find the midpoint of a line Draw a line and mark the endpoints. Open a compass to between 2/3 to 3/4 the length of the line. Create an arc above the line and another arc below the line. Do the same from the other endpoint of the line. Connect the points where the two sets of arcs intersect, and where the straight edge crosses the line is your midpoint. 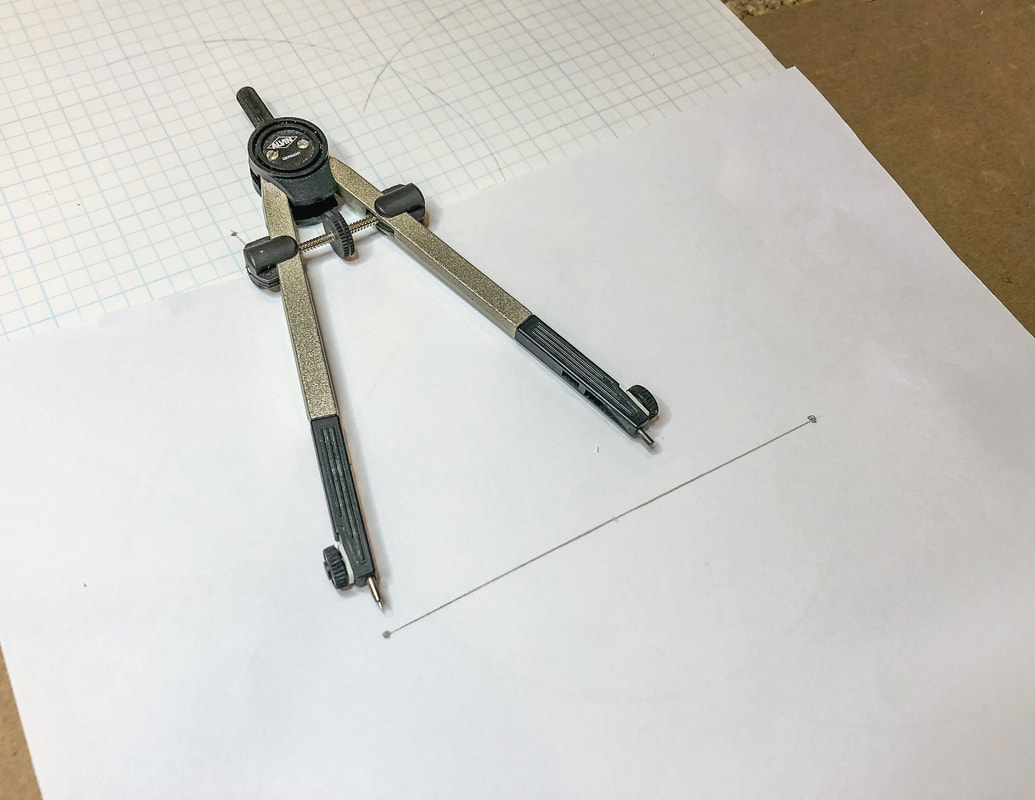  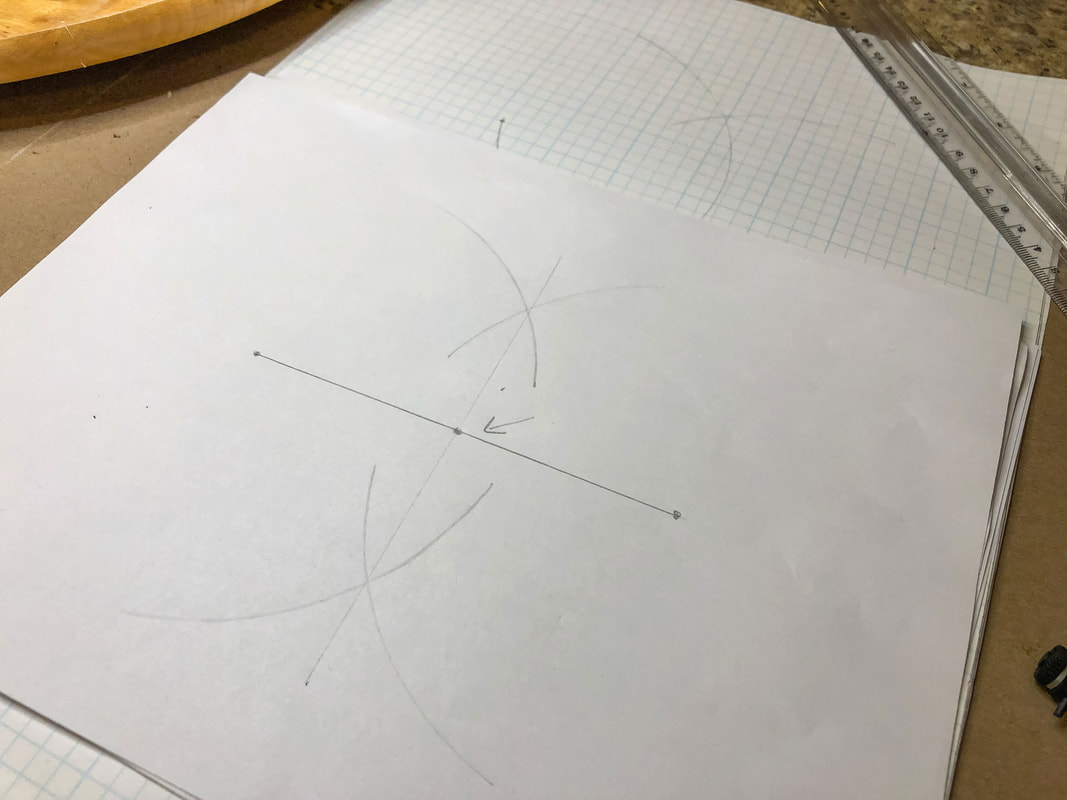 Find the midpoint of an arc Make a mark at either end of the arc for the endpoints. Open a compass to between 2/3 to 3/4 the length of the gap. Create a curved mark above the arc and another curved mark below the arc. Do the same from the other endpoint of the arc. Connect the points where the two sets of curved marks intersect. Where the straight edge crosses the arc’s line is the midpoint. 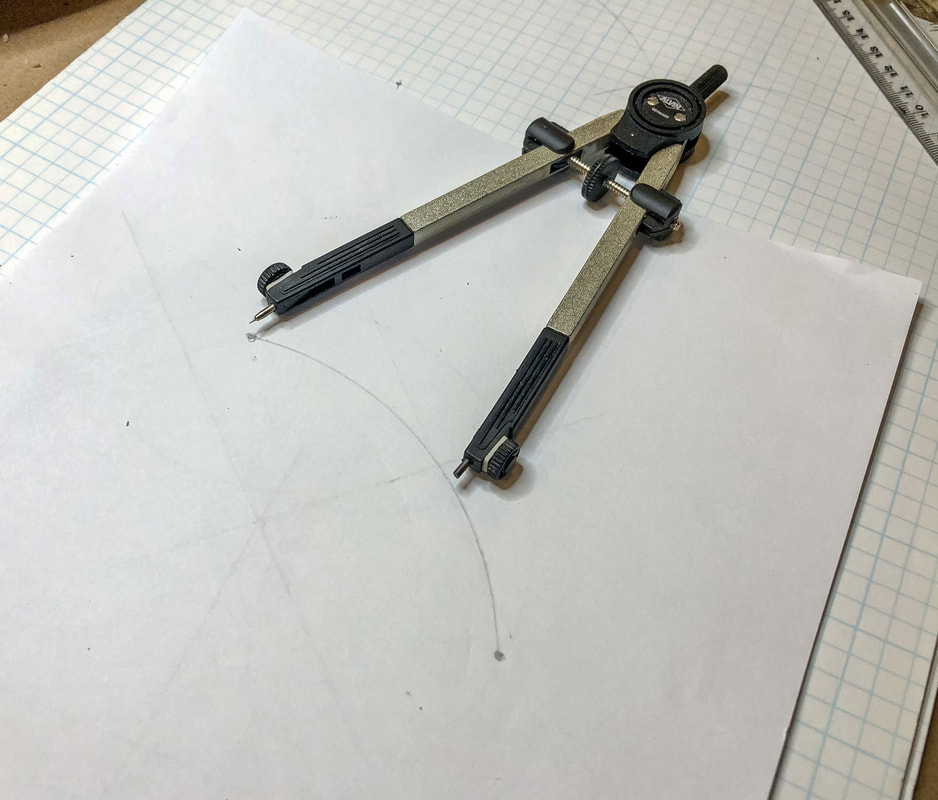 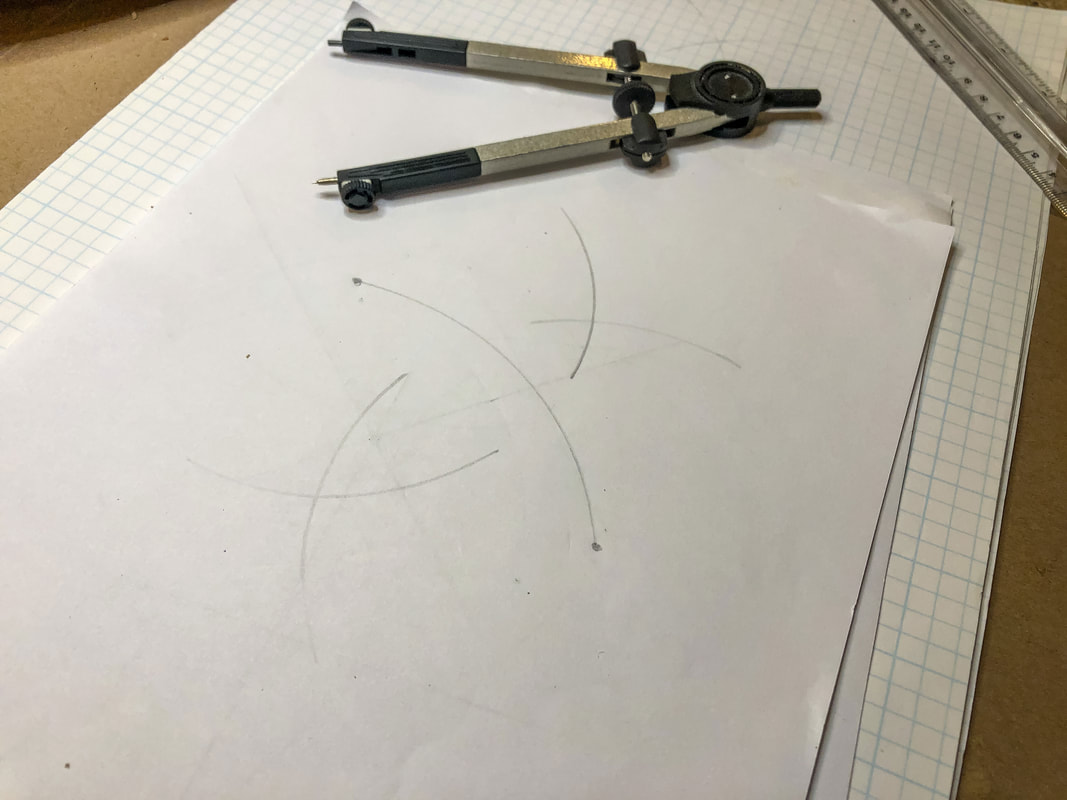 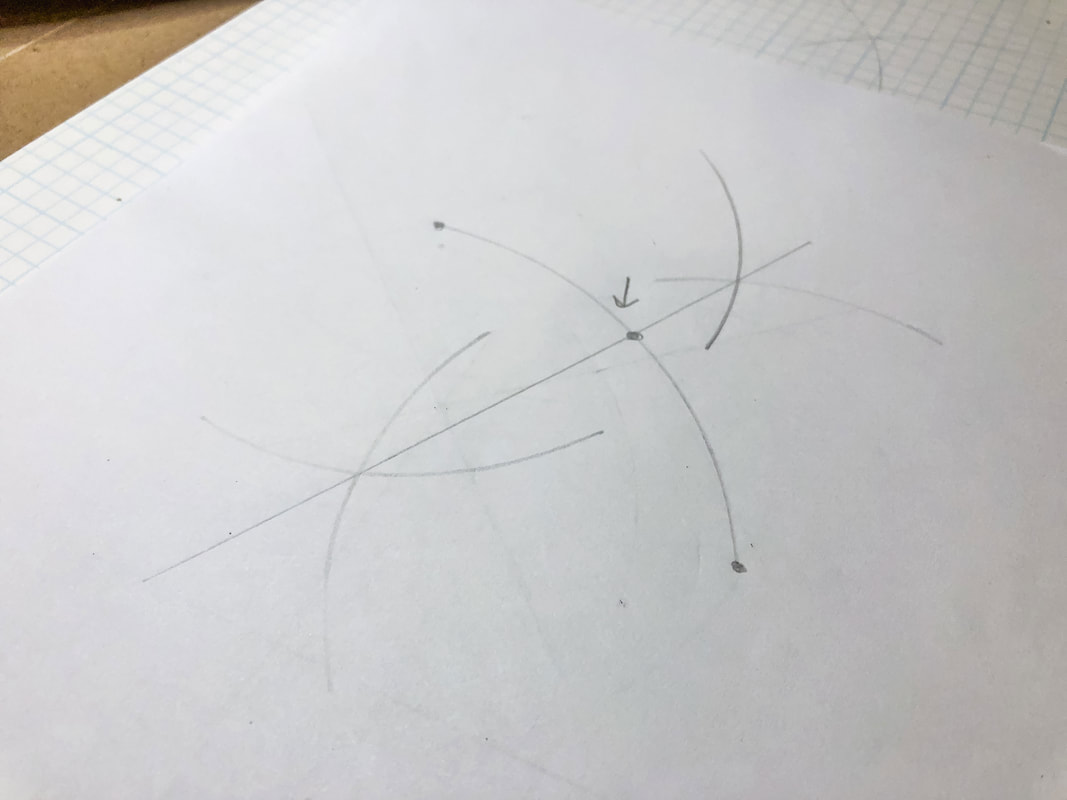 Find the center of a circle Draw a circle, or find one already drawn. Draw three random lines that cross the circle’s circumference at either end. Use the technique mentioned above to find the center of the line by drawing intersecting arcs above and below the line. Draw a line connecting the intersecting arcs that continue through the circle. Follow these same steps for the other two lines. You now have three new lines intersecting in your circle's center. This is the center of the circle. 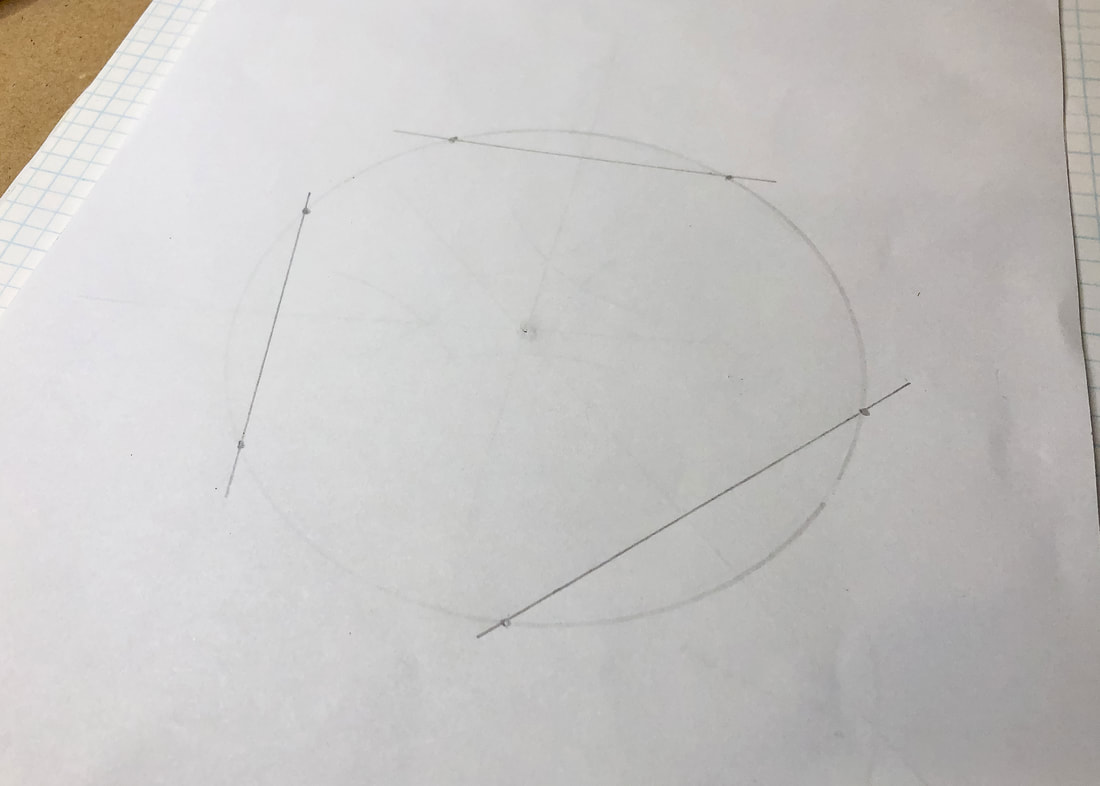 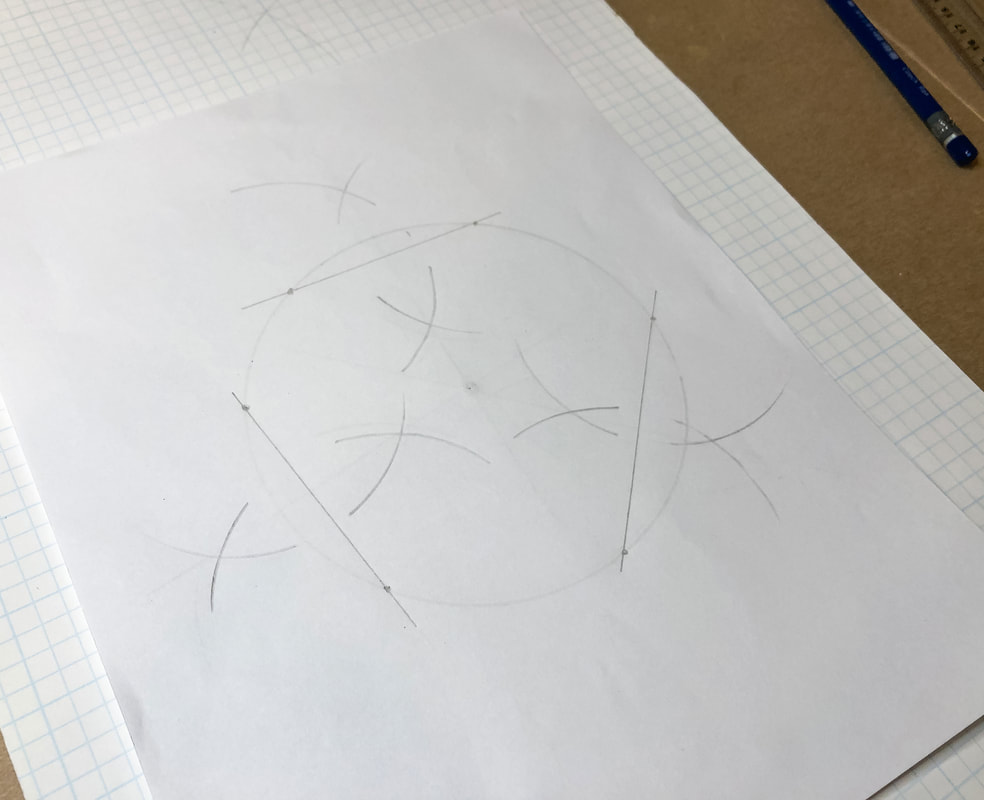 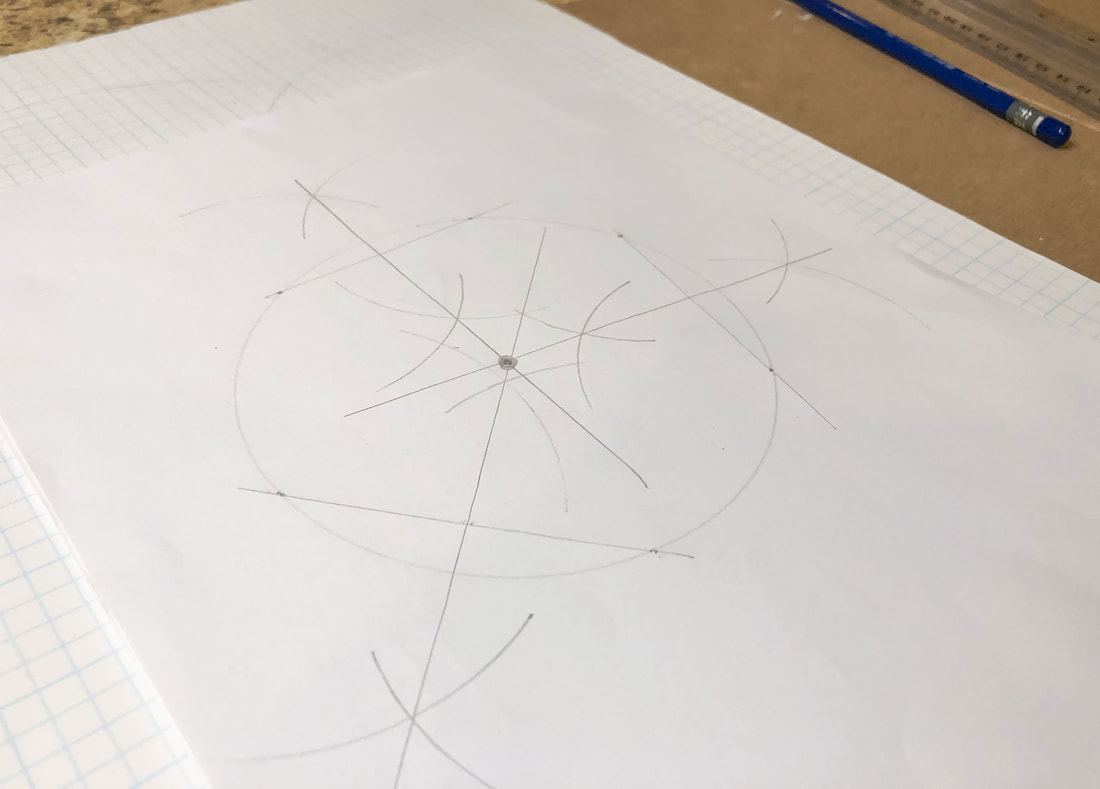 And that’s it! These simple tips are helpful when constructing designs that require precision but don’t have a ruler or protractor. For those of you who are visual learners—like me—I have a YouTube video link below that will take you through these same steps. Let me know in the comments if this was helpful or if you have other useful tips to share! Related blogs you may want to read: circular-celtic-border-knot-tutorial-basic-braid.html basic-twist-step-by-step-drawing-tutorial-using-grid-paper.html celtic-braid-step-by-step-drawing-tutorial.html basic-border-knot-with-vertical-breaks-step-by-step-drawing-tutorial.html basic-border-knot-with-horizontal-breaks-step-by-step-drawing-tutorial.html diy-chalk-painted-tray-with-celtic-border.html a-fun-diy-project-with-paint-and-a-thrifted-mirror-part-2.html the-celtic-motherhood-knot-a-symbol-of-love.html celtic-tree-of-life.html basic-celtic-knot-tutorial-pt-1.html celtic-knot-tutorial-part-2.html 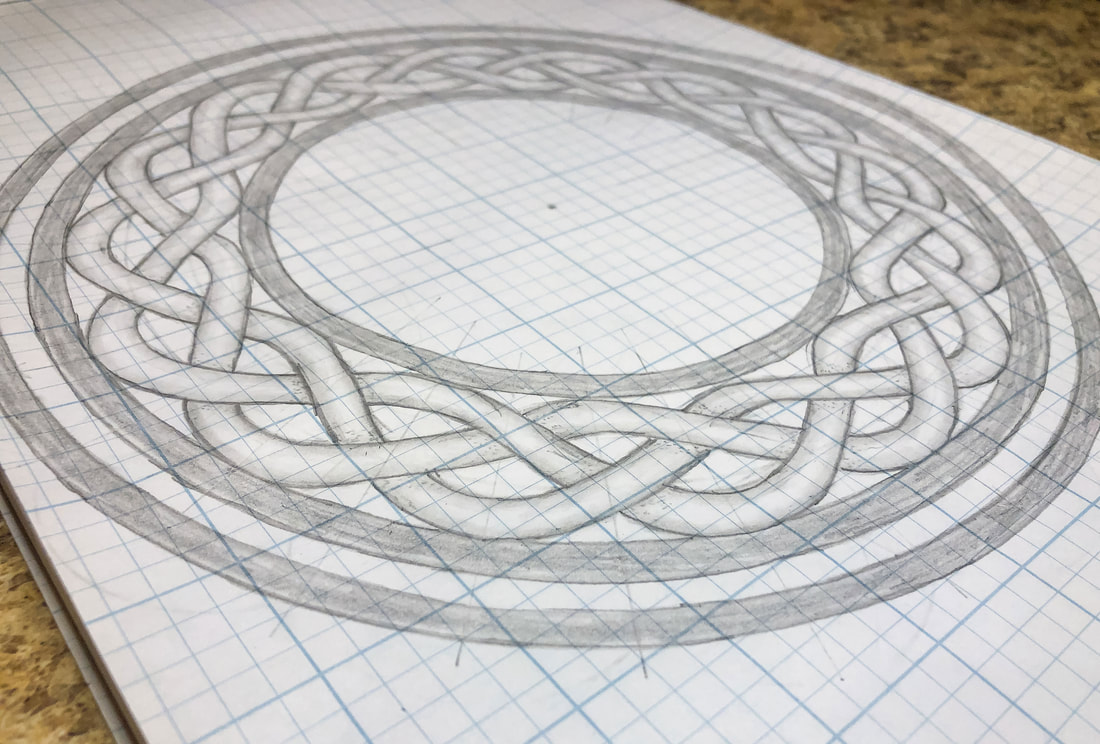 Hi again everyone! Are you ready for another Celtic drawing tutorial? This one is more complex than the border knots we’ve previously done. If you haven’t seen those tutorials, I suggest you click on the “Related blogs you may want to read” links at the end of this blog before attempting this circular Celtic knot tutorial. This tutorial is more advanced, and it will be beneficial to learn some basics first! Having said that, anyone can do this! I broke the process down into easy-to-digest bite-size snippets so that even a Celtic knot newbie can follow along! There are a lot of steps, so let’s jump right in… Below is a list of supplies you may want on hand (Blick Art affiliate links are included), but you certainly don’t have to have all of these supplies to do this tutorial. Just find yourself a piece of paper, a pencil, an eraser, and a ruler, and let’s get to drawing! Gather your supplies: Drawing pencils Markers Blending stumps Eraser Clic eraser Ruler Horse hair brush Grid paper Sketch pad Tracing paper Before you begin: Any lines and marks you make in steps 1 through 9 should be drawn using light pressure and/or a 2H drawing pencil. Most—if not all—of these lines will eventually be erased, as they are only guidelines for your final design. Also, you may want to watch this YouTube tutorial, especially if you are only using a few basic tools: How to find the center of a line, arc, and circle without a ruler Step 1: Place a dot in the middle of your paper. Make four marks 4.5” from that dot, above, below, and on either side. Using a compass, lightly draw an outer circle, which should be 9” in diameter. 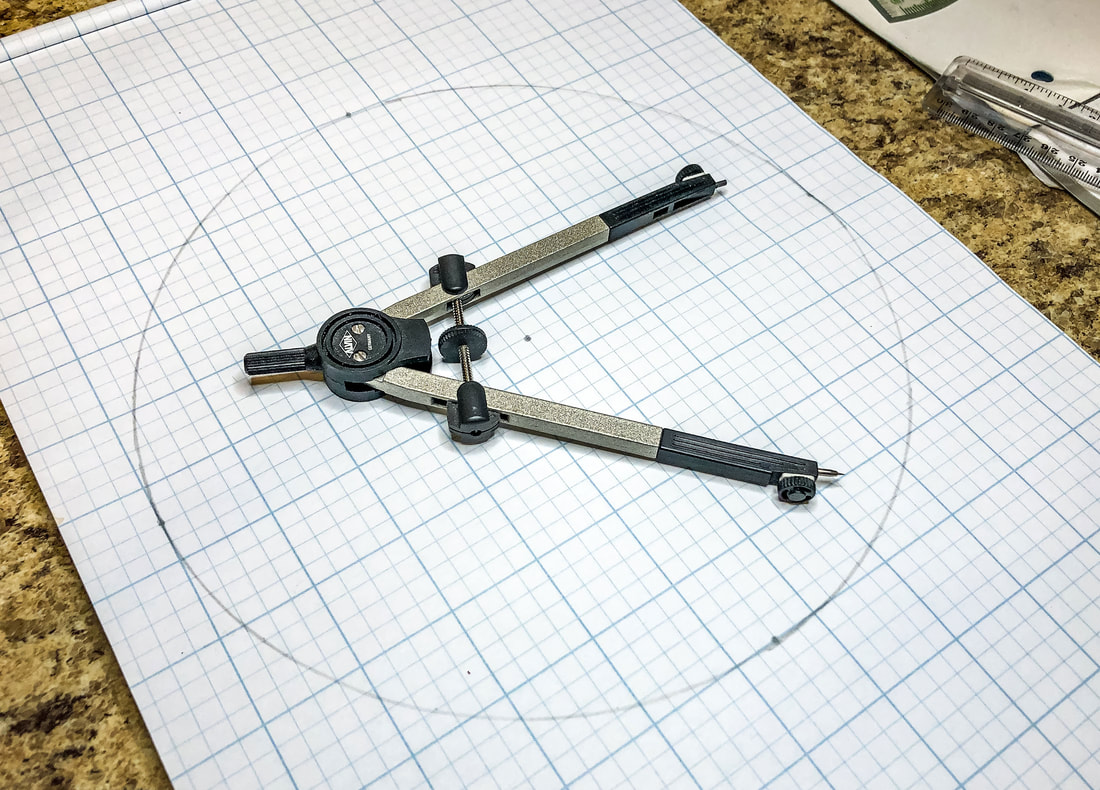 Step 2: Make marks 1/2” inside that circle. Using a compass, draw the first of three inner circles. Follow the same steps to create the next two inner circles. You should now have four concentric circles, 1/2” apart each. 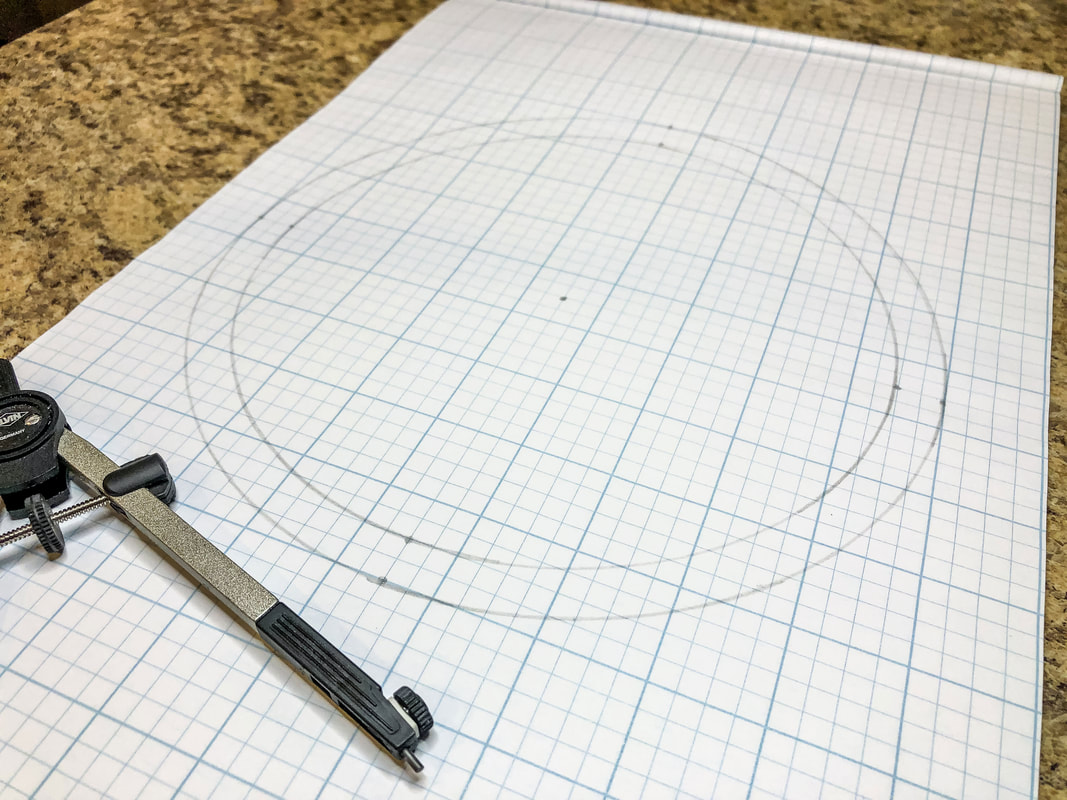 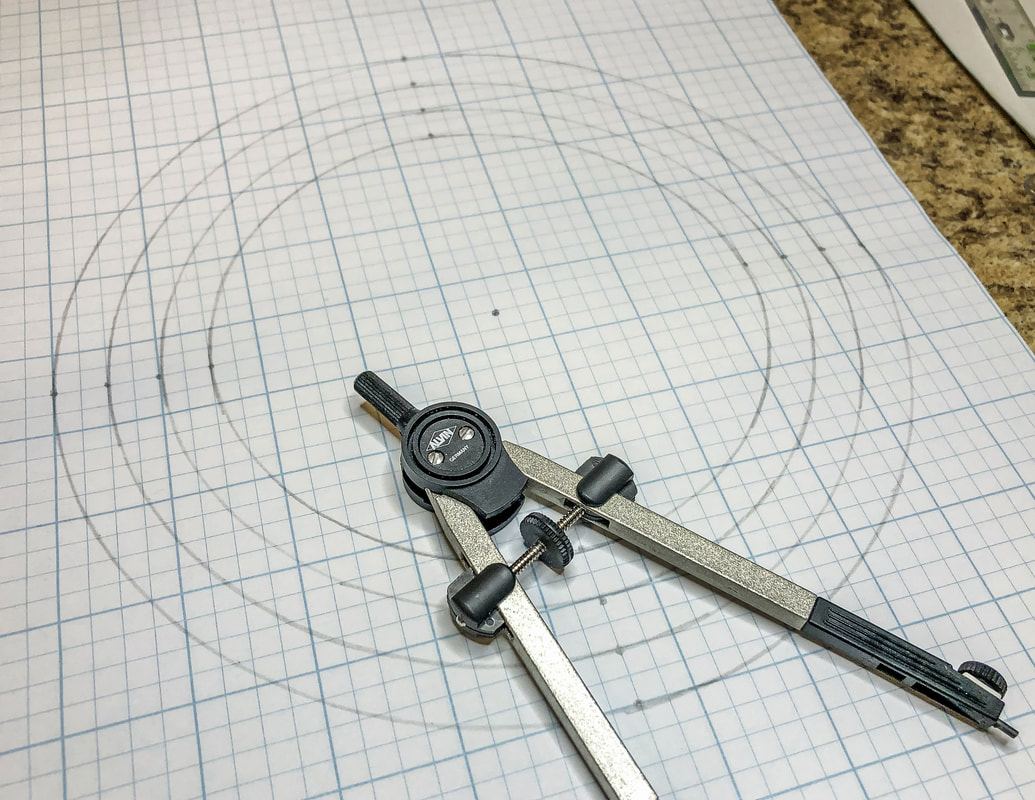 Step 3: Using a ruler, T-square, or grid as your guide, lightly divide the circles into halves horizontally and vertically, creating equal quadrants. 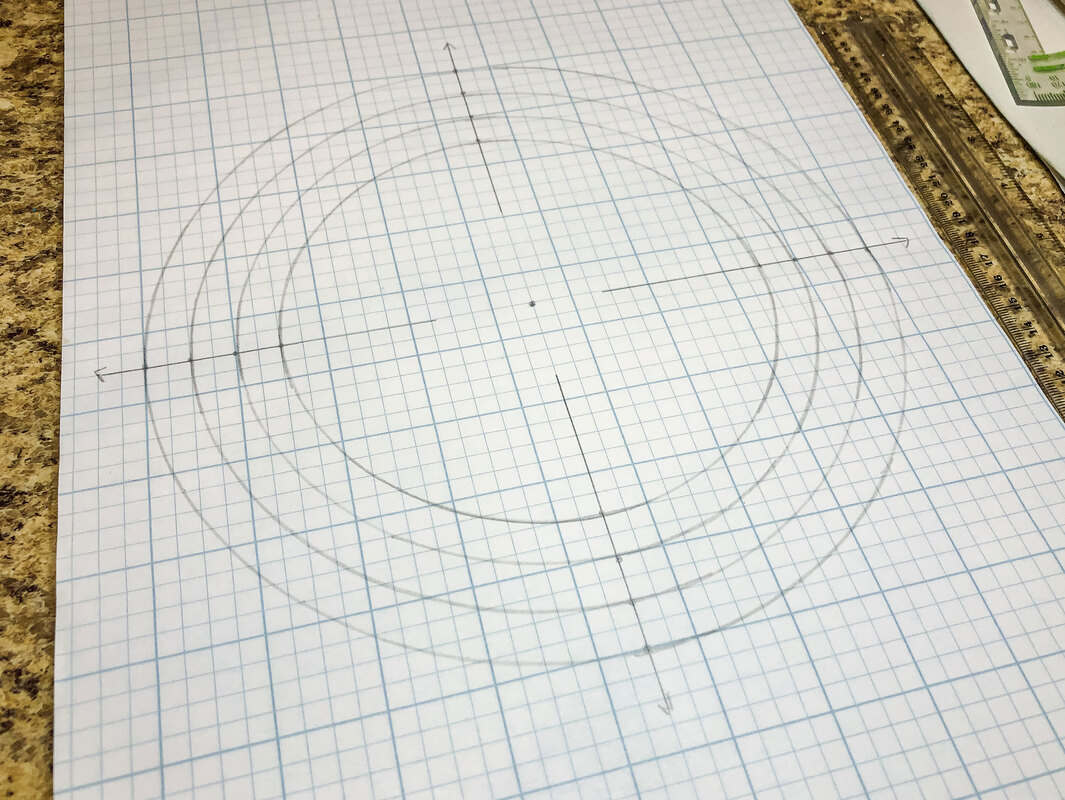 Step 4: Divide each quadrant into half using a protractor marking at 45˚. (If you don’t have a protractor watch the YouTube short previously listed to find the center of the arc.) You should now have eight sections. 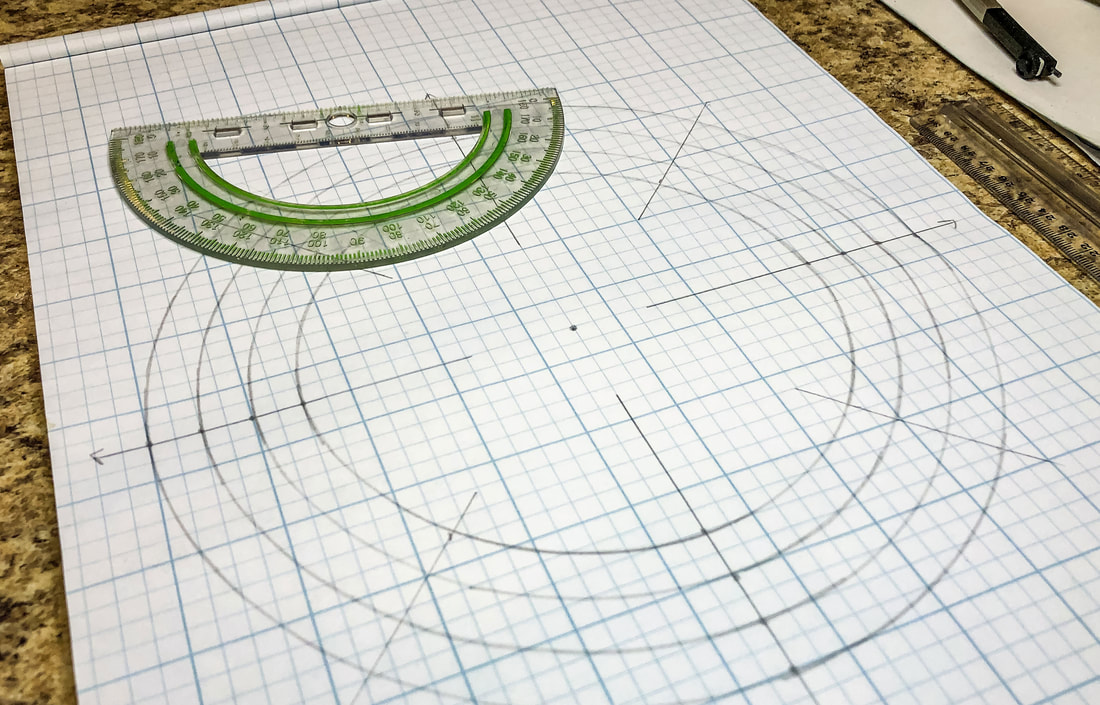 Step 5: Divide each of the eight sections in half again using a protractor marking at 22.5˚. (If you don’t have a protractor watch the YouTube short previously listed to find the center of the arc.) This will give you 16 sections. 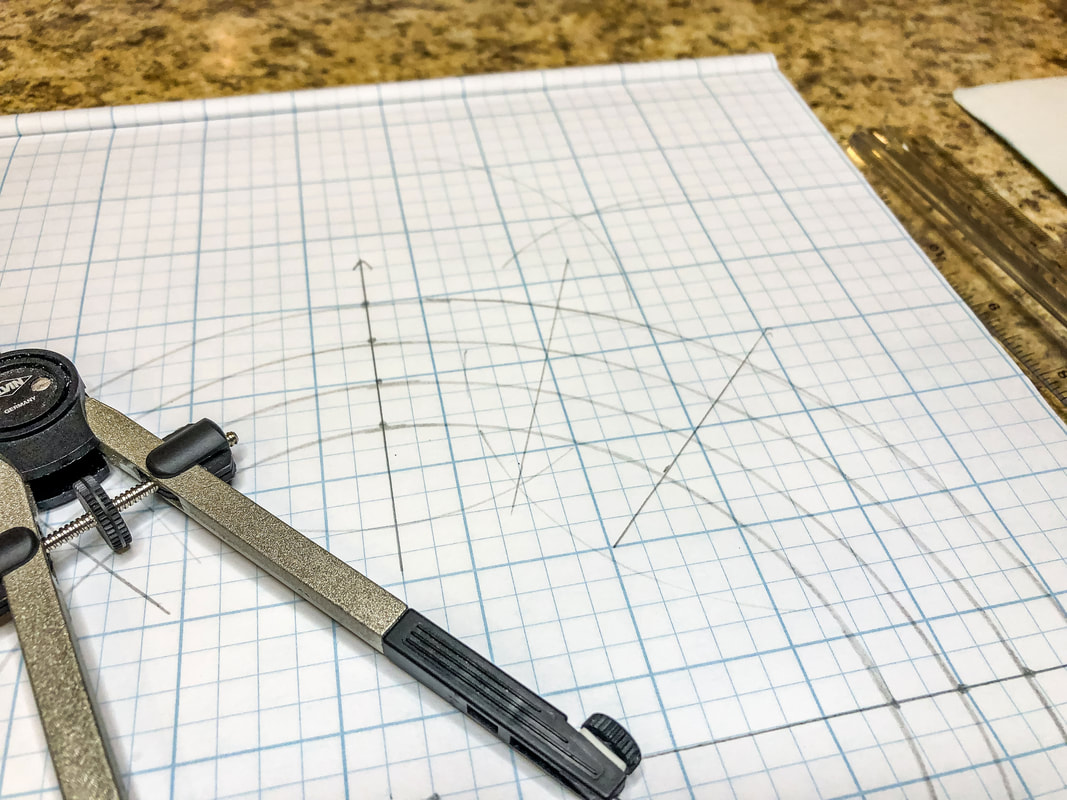 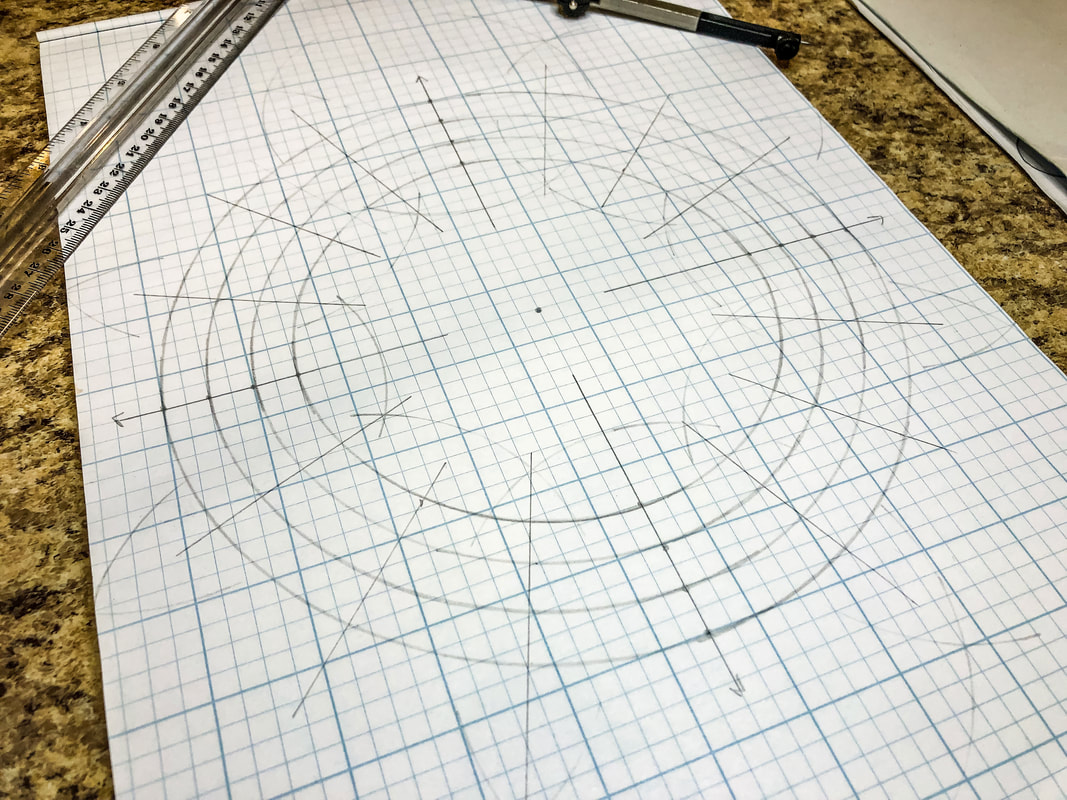 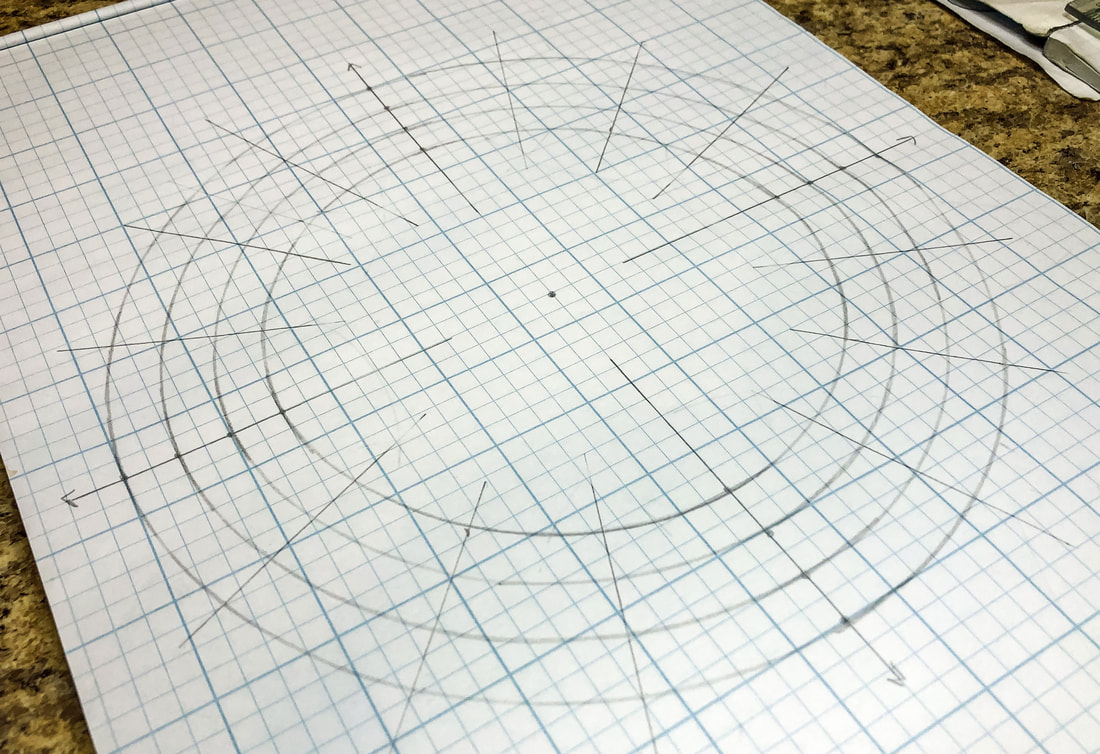 Step 6: Divide each of the 16 sections in half again using a protractor marking at 11.25˚. (If you don’t have a protractor watch the YouTube short previously listed to find the center of the arc.) This will give you 32 sections, creating your circle grid for your design. 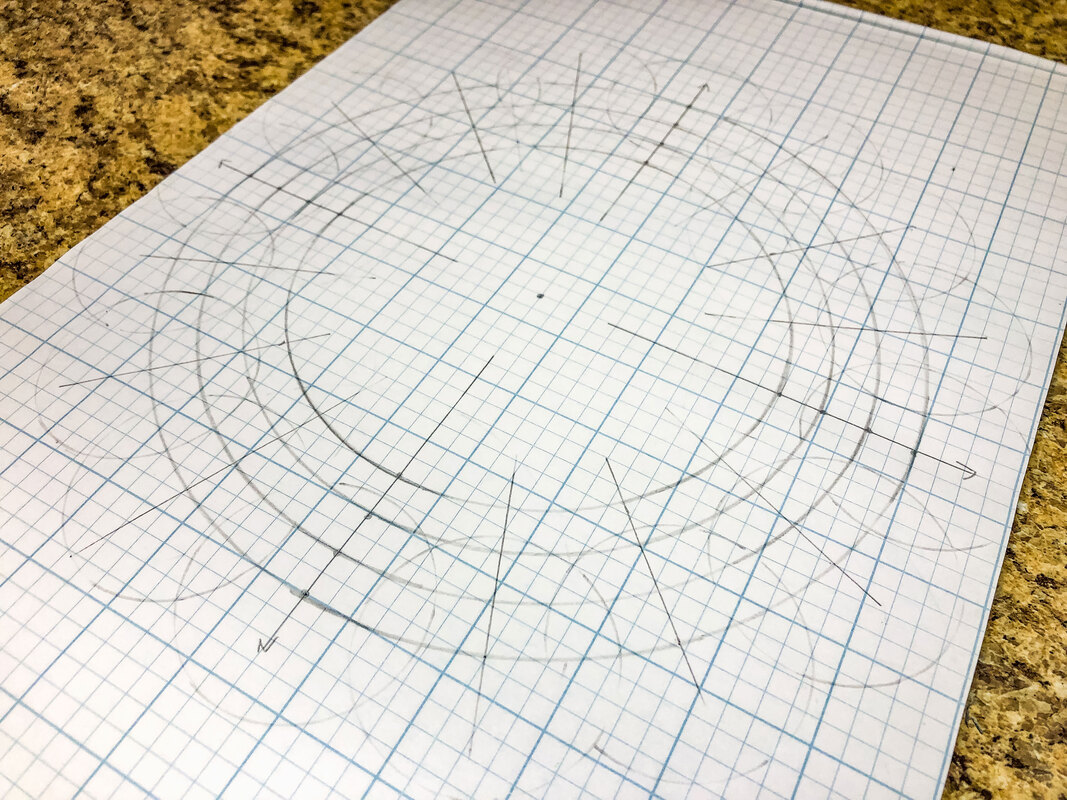 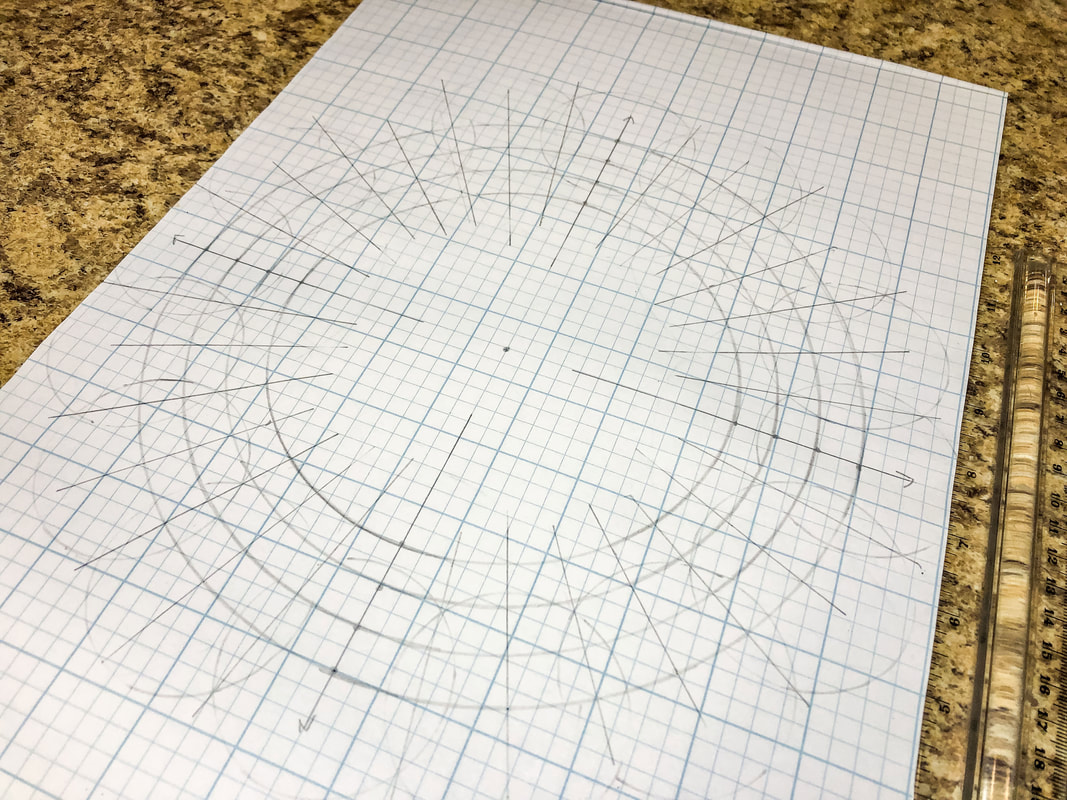 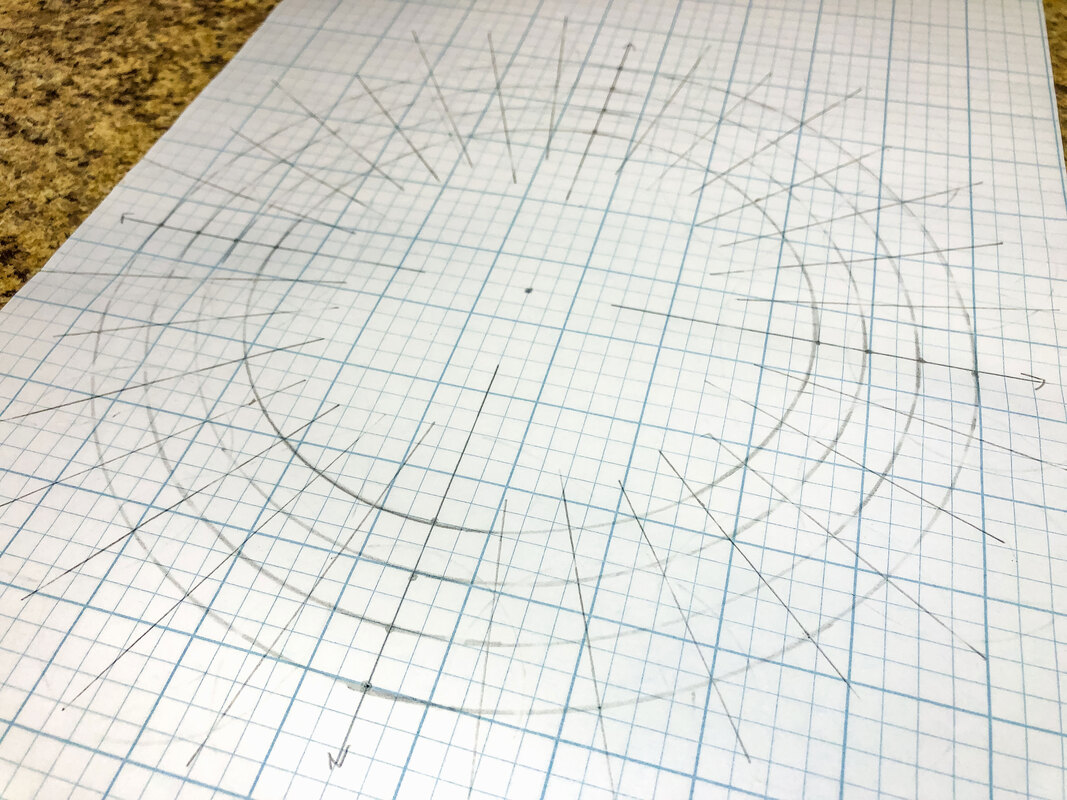 Step 7: Lightly draw a curved line spanning two outer blocks connecting the two intersections, as shown below. Do the same for the rest of the outer ring.  Step 8: Lightly draw a curved line spanning two inner blocks connecting the two intersections, as shown below. Do the same for the rest of the inner ring. 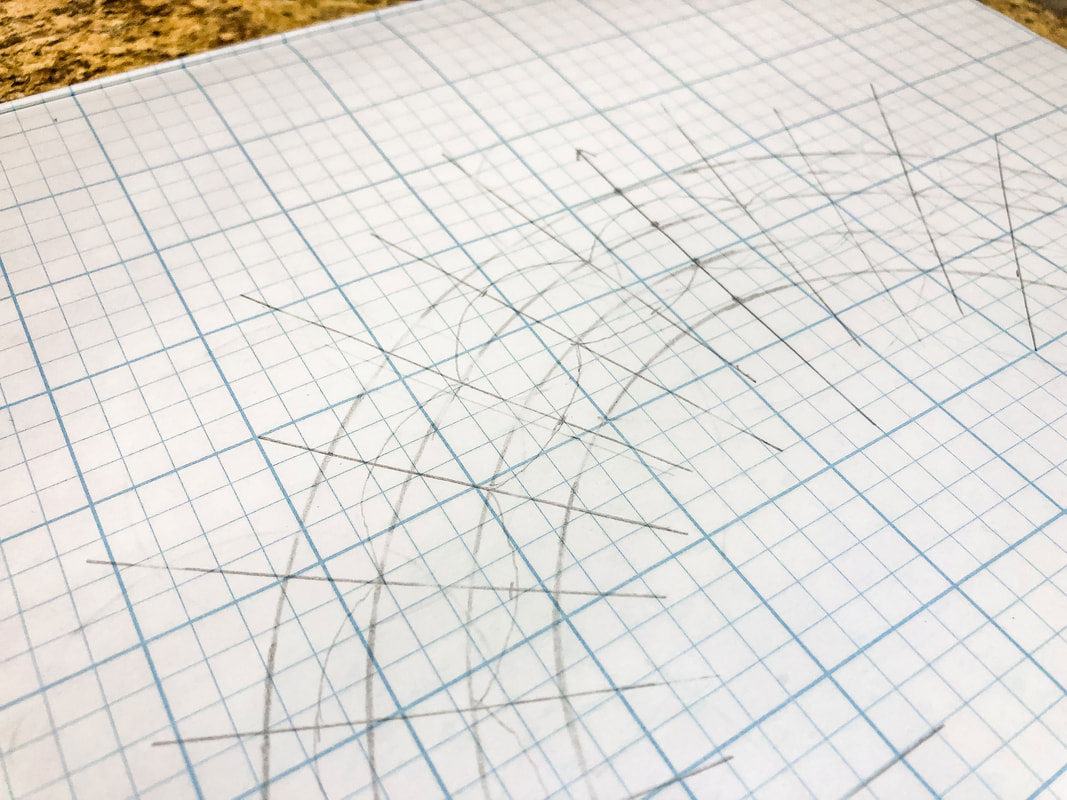 Step 9: Lightly connect the top and bottom arcs with diagonal lines. This gives you a pretzel shape and the spine of the braid. 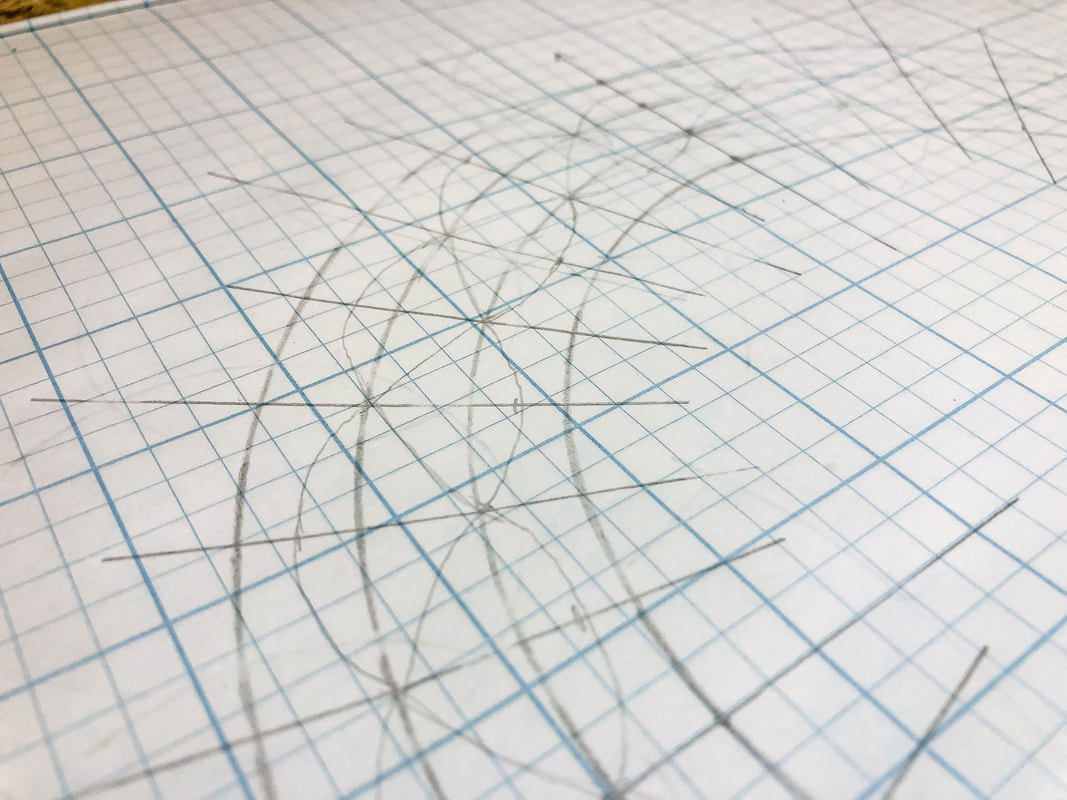 Step 10: Draw slightly darker lines on either side of this spine, parallel to each other, as seen below. Keep the distance between the lines consistent. 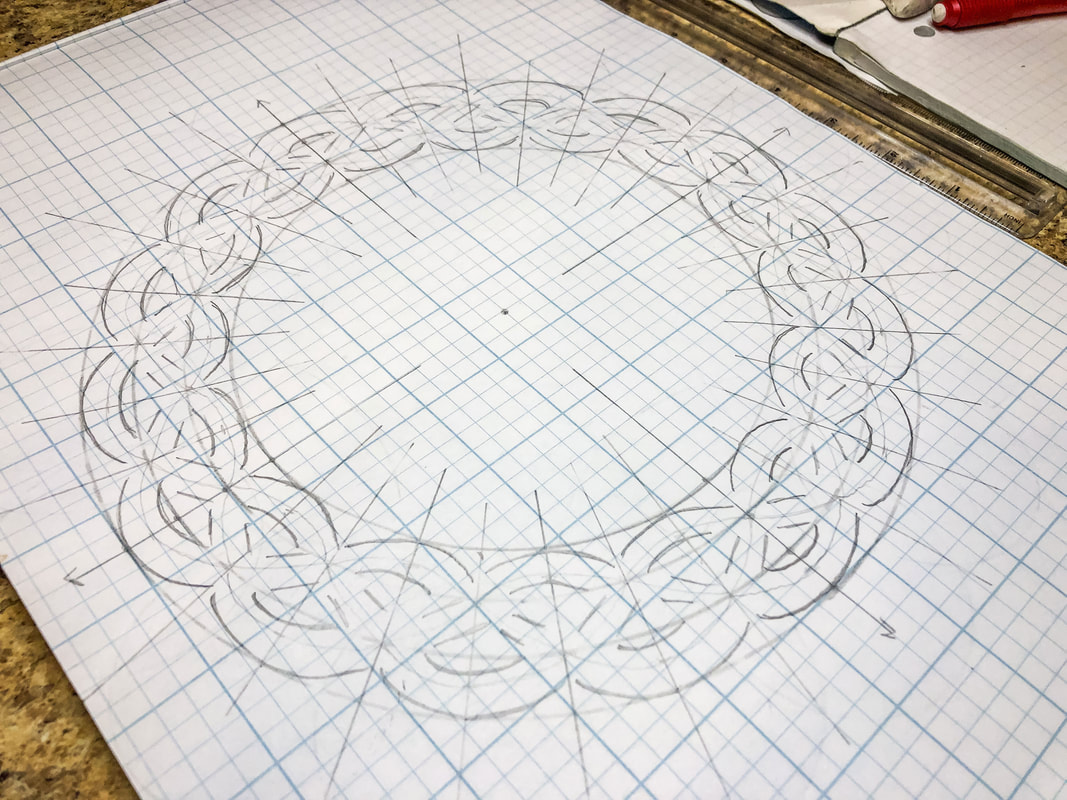 Step 11: Erase the inner line (the spine). 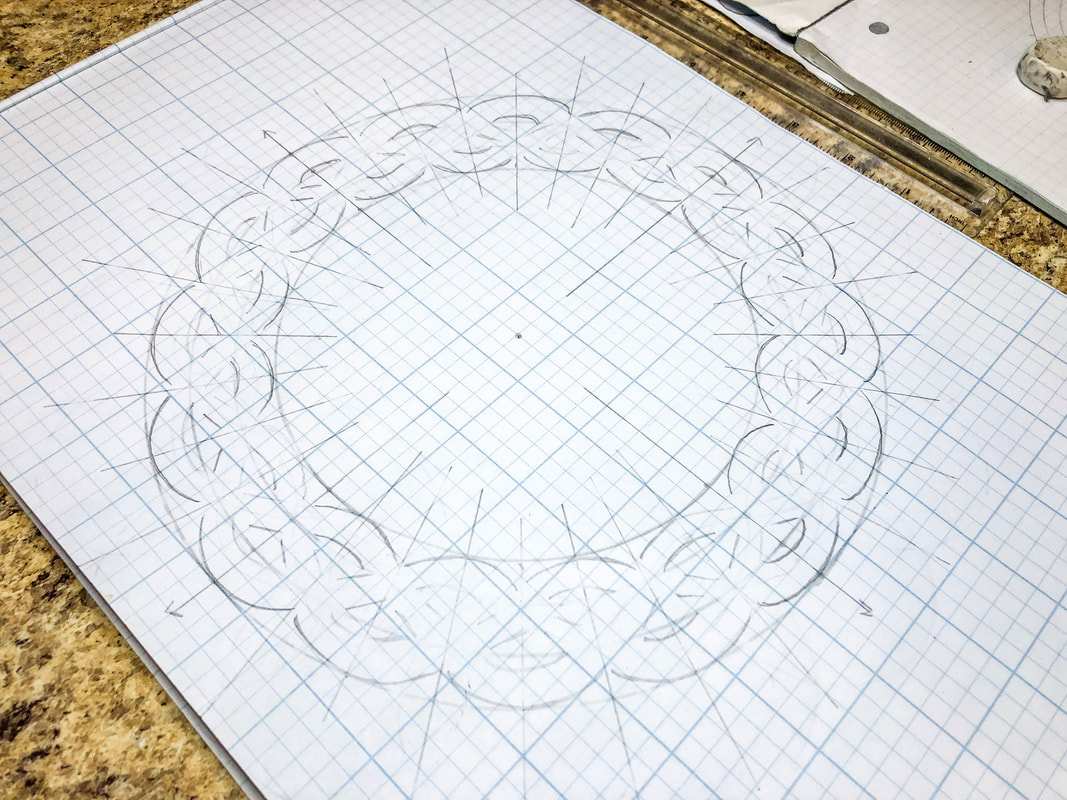 Step 12: Pick a place where two threads intersect. Start at this spot, drawing one thread crossing over another, erasing any unnecessary lines. 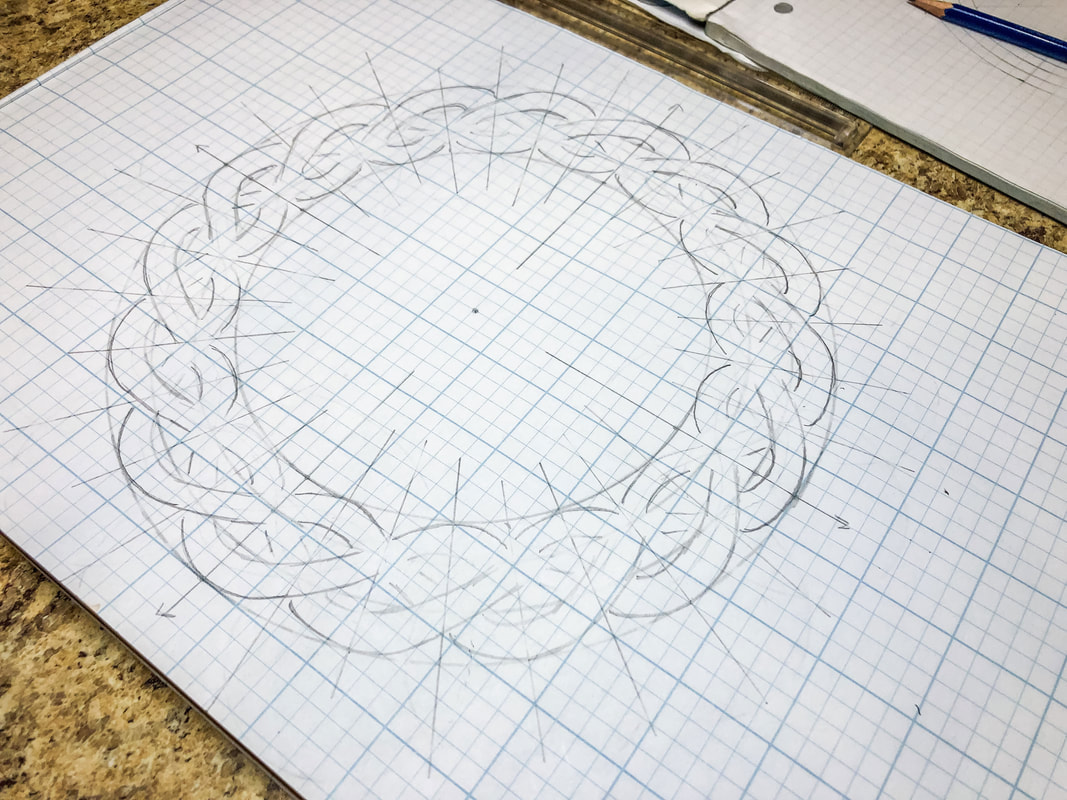 Step 13: Moving from this point, follow the thread that crossed OVER to the very next spot where there is an intersection and draw that thread crossing UNDER the next thread. Follow this pattern, working around the circle until you return to the beginning intersection. If you did it right, every intersection of your thread should alternate over-under, over-under, over-under, etc., creating a weave pattern. 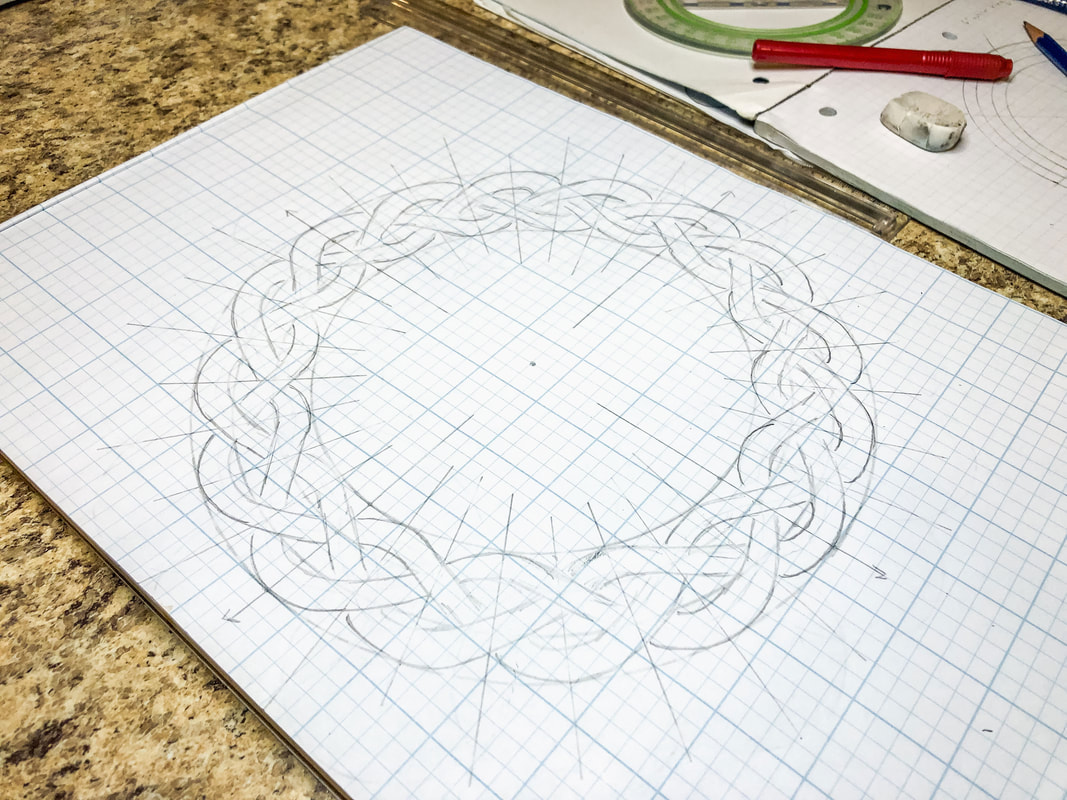 Step 14: Double-check your overs and unders, then erase any unnecessary guidelines and start adding shading where the threads intersect to add depth. 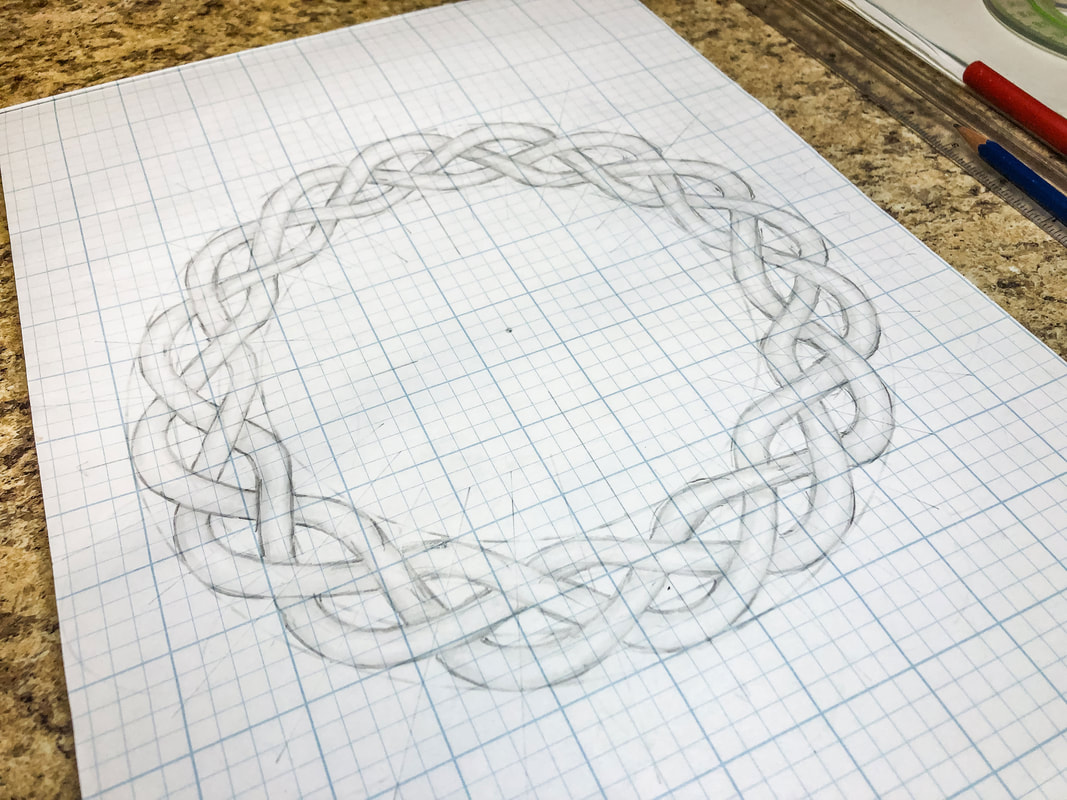 Step 15: Darken your lines using a pencil or marker and stylize as you wish. And you’re done! 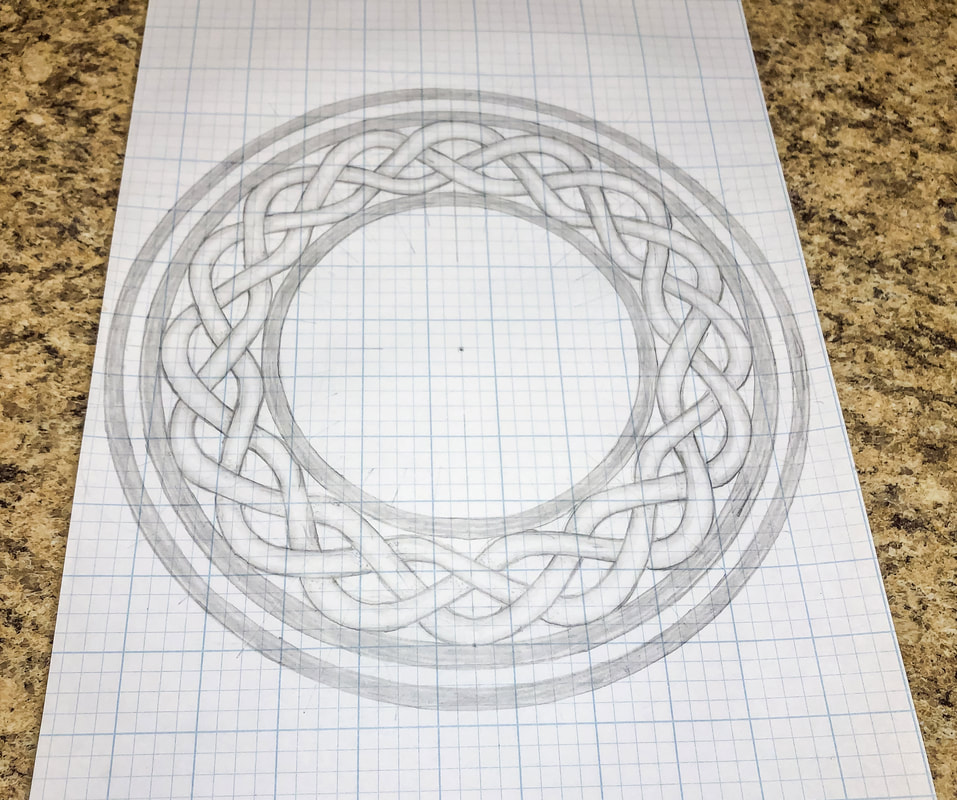 How did it go? I hope you enjoyed this project and are encouraged to try more designs of your own! I’ll be creating additional tutorials using this basic braid as a template for making more intricate designs, so stay tuned! I created a YouTube tutorial to go with this blog for those of you who are visual learners like myself! You can view the full video tutorials on my YouTube channel here! Related blogs you may want to read: Basic twist step-by-step drawing tutorial using grid paper Celtic braid step-by-step drawing tutorial Basic border knot with vertical breaks, step-by-step drawing tutorial Basic border knot with horizontal breaks, step-by-step drawing tutorial DIY chalk-painted tray with Celtic border A fun DIY project with paint and a thrifted mirror part 2 The Celtic Motherhood Knot, a symbol of love Celtic Tree of Life Basic Celtic Knot Tutorial Part 1 Celtic Knot Tutorial Part 2 Some of the posts in this article contain affiliate links. If you click on the link and purchase the item, I will receive an affiliate commission at no extra cost to you. I will only recommend products or services I use personally and/or believe will add value to my readers, so there is no conflict of interest. 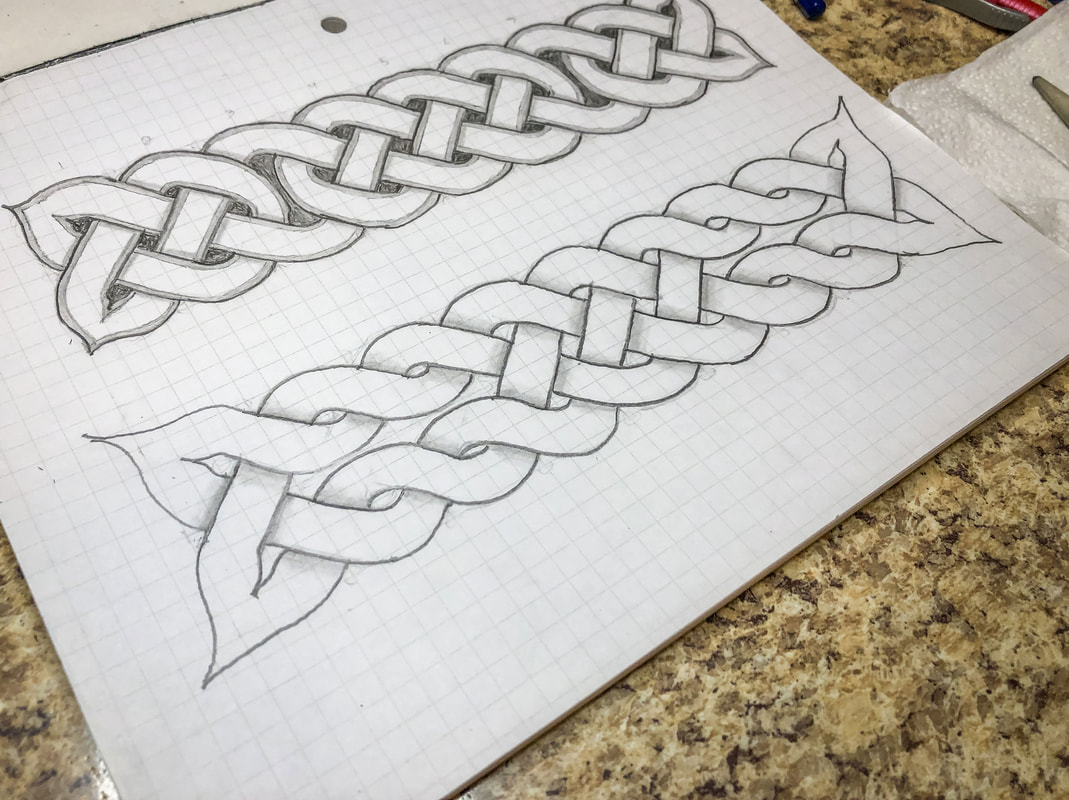 This drawing tutorial is the fourth in a short series of lessons to teach you how to draw a few variations of Celtic border knots. In the previous lesson, we added vertical breaks to a basic braid pattern to create a different knot style. In this tutorial, we will add horizontal breaks to the basic braid pattern to create yet another knot style with a different look. Below is a list of supplies you may want on hand (Amazon affiliate links are included), but you certainly don’t have to have all of these supplies to do this tutorial. Just find yourself a piece of paper, a pencil, and an eraser, and let’s get to drawing! Gather your supplies: Drawing pencils Markers Blending stumps Eraser Click eraser Ruler Horse hair brush Grid paper Sketch pad Step 1: Draw a grid of 9 squares across and 2 squares down. Use a ruler If drawing the grid by hand so all the squares end up the same size. 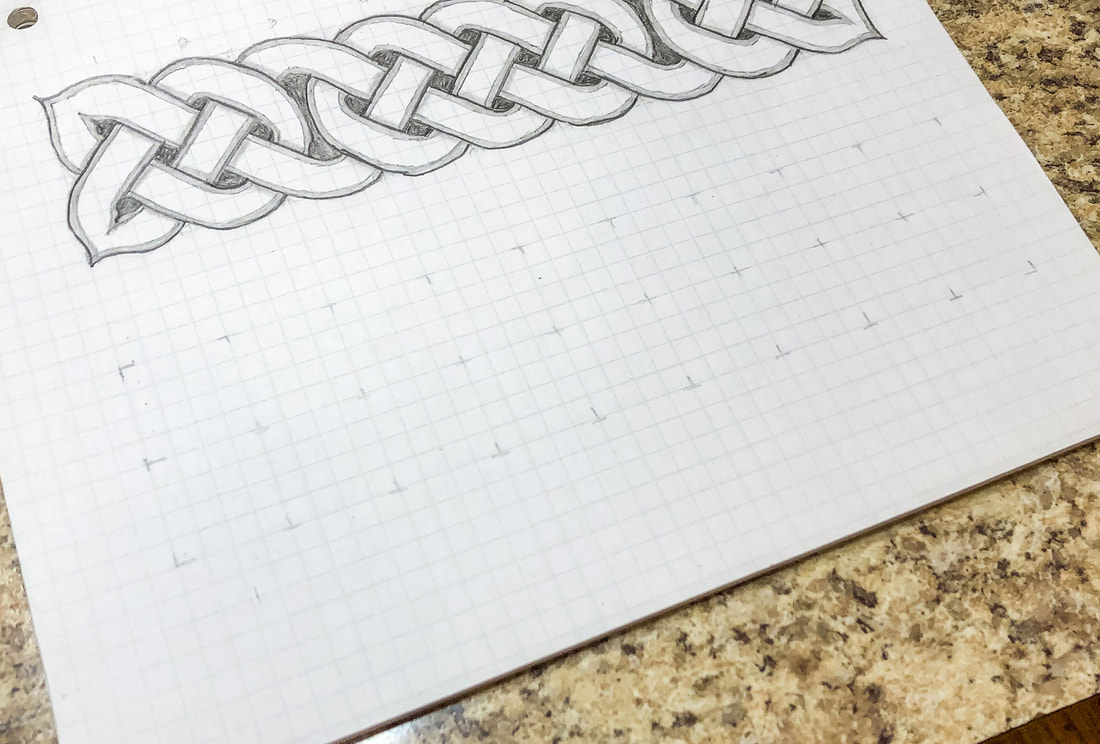 Step 2: Draw circles at the intersections of each corner and then in the middle of each square. Keep the circles the same size. Small circles will give you a thicker thread, while large circles will allow you to create a thinner thread. 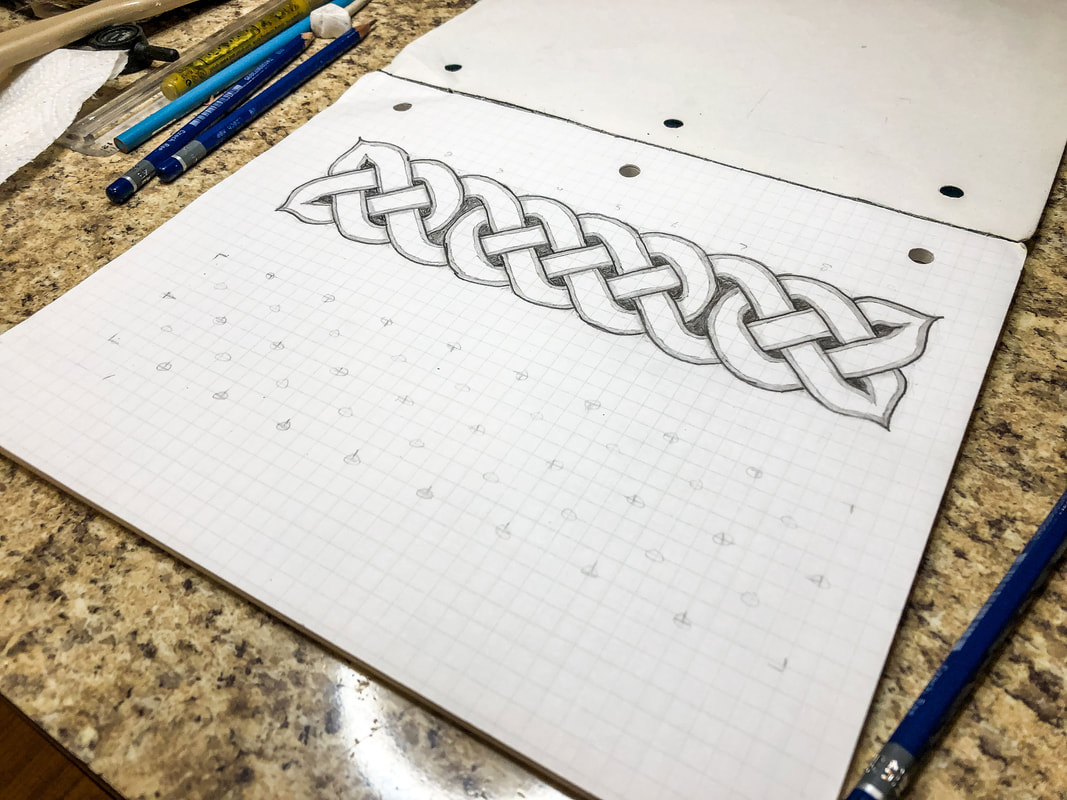 Step 3: Starting from the left, draw a pair of parallel lines touching the inside edges of the first four circles. Find the set of four circles above that first pair of lines, and draw a second set of perpendicular lines. Return to the first pair of lines and create another pair of perpendicular lines to the side, as shown. This sets up an alternating pattern of lines that you will continue across the grid to create a weave. Ignore any places where you only have three circles for now. 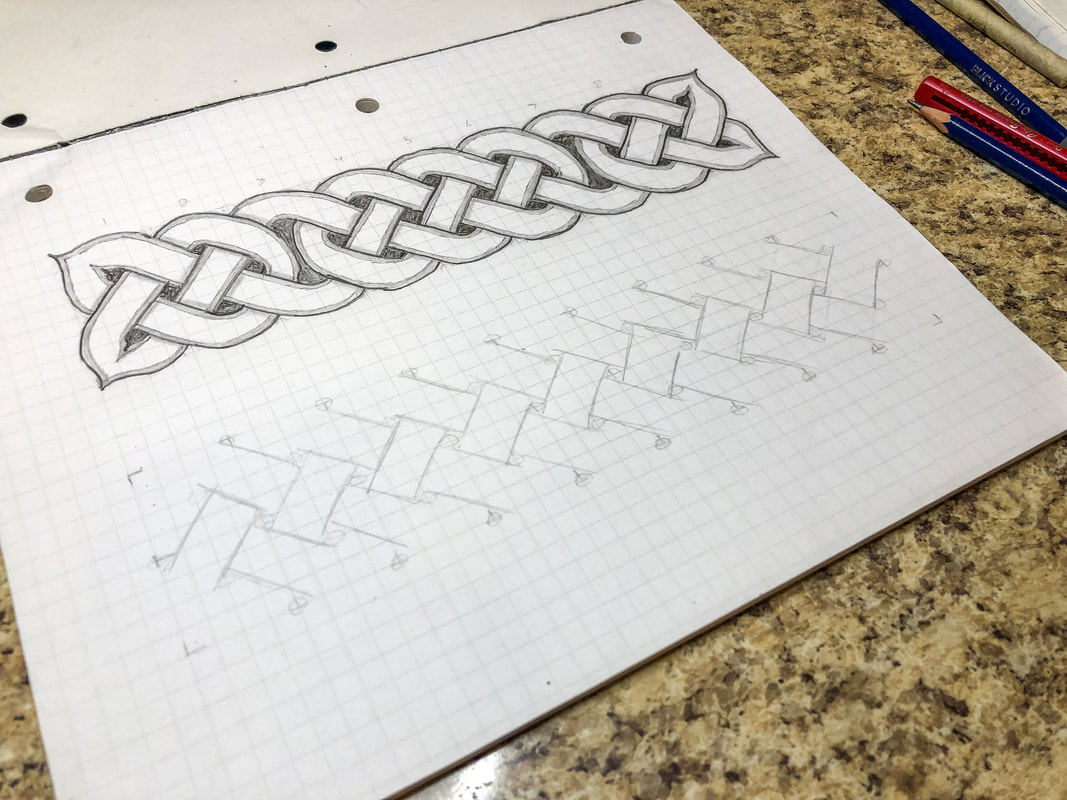 Step 4: Draw two horizontal lines across columns 2 & 3 and 7 & 8, as shown. 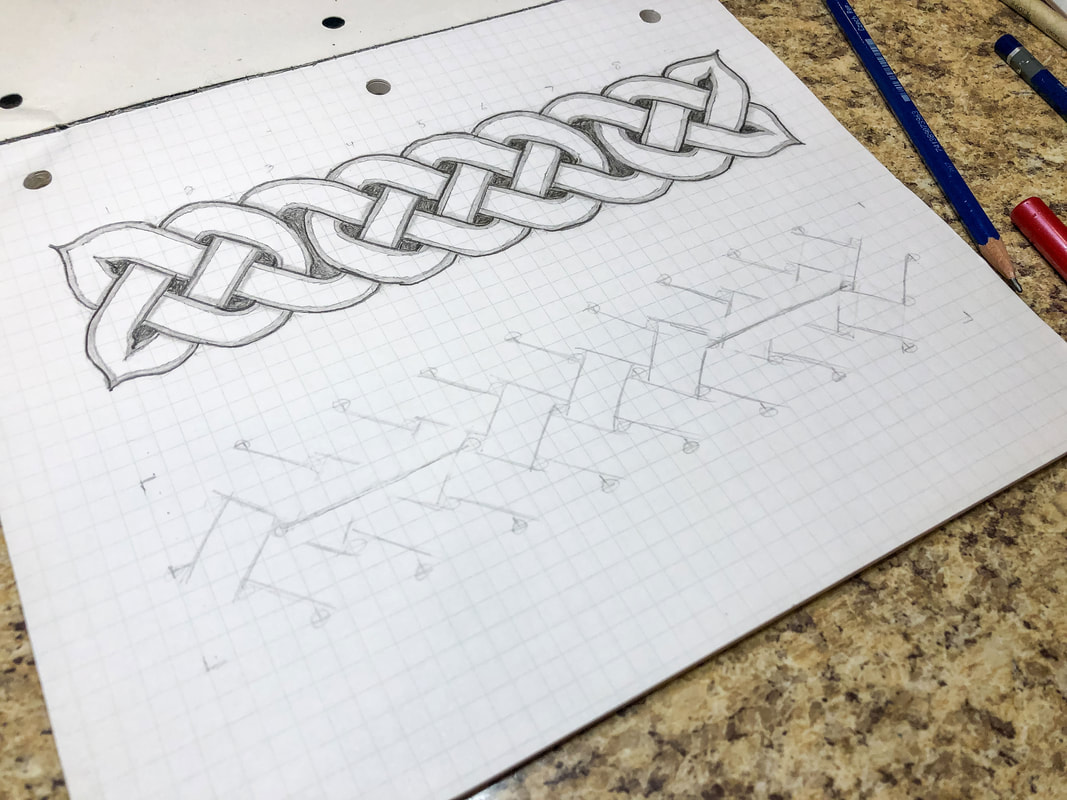 Step 5: Erase any lines that cross over those two new horizontal lines, looping them back around to link up with the threads as shown. 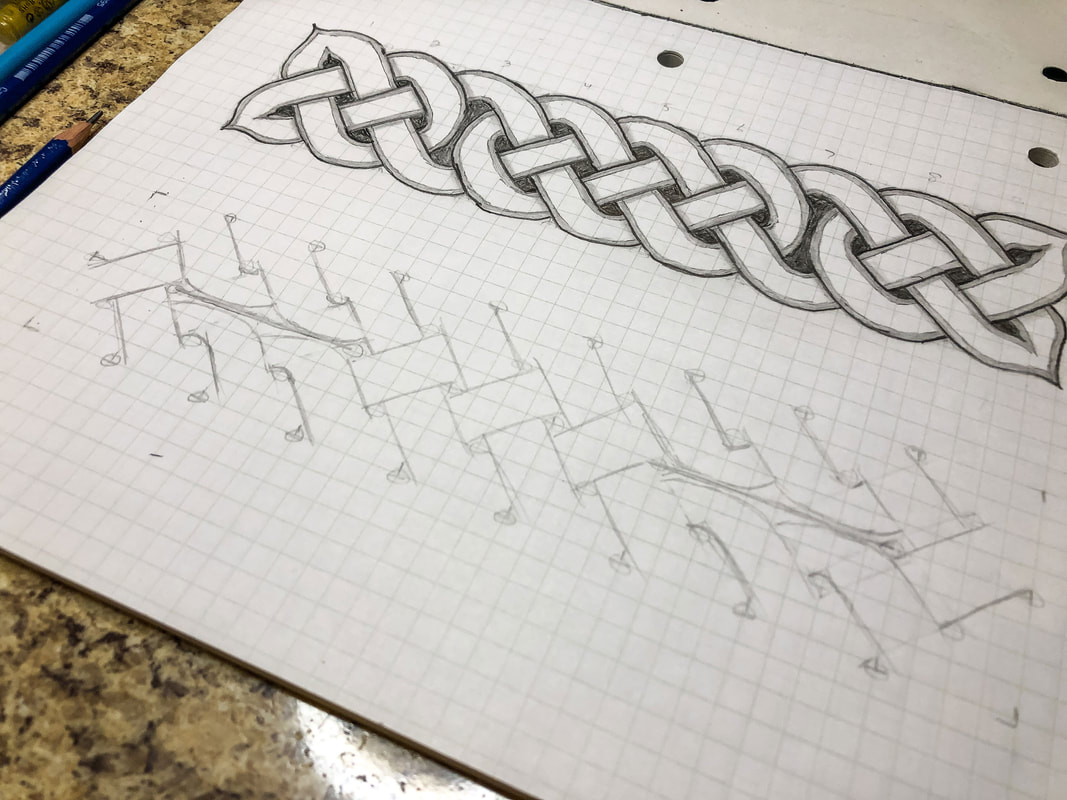 Step 6: Sketch in the top and bottom edges of the loops as shown. 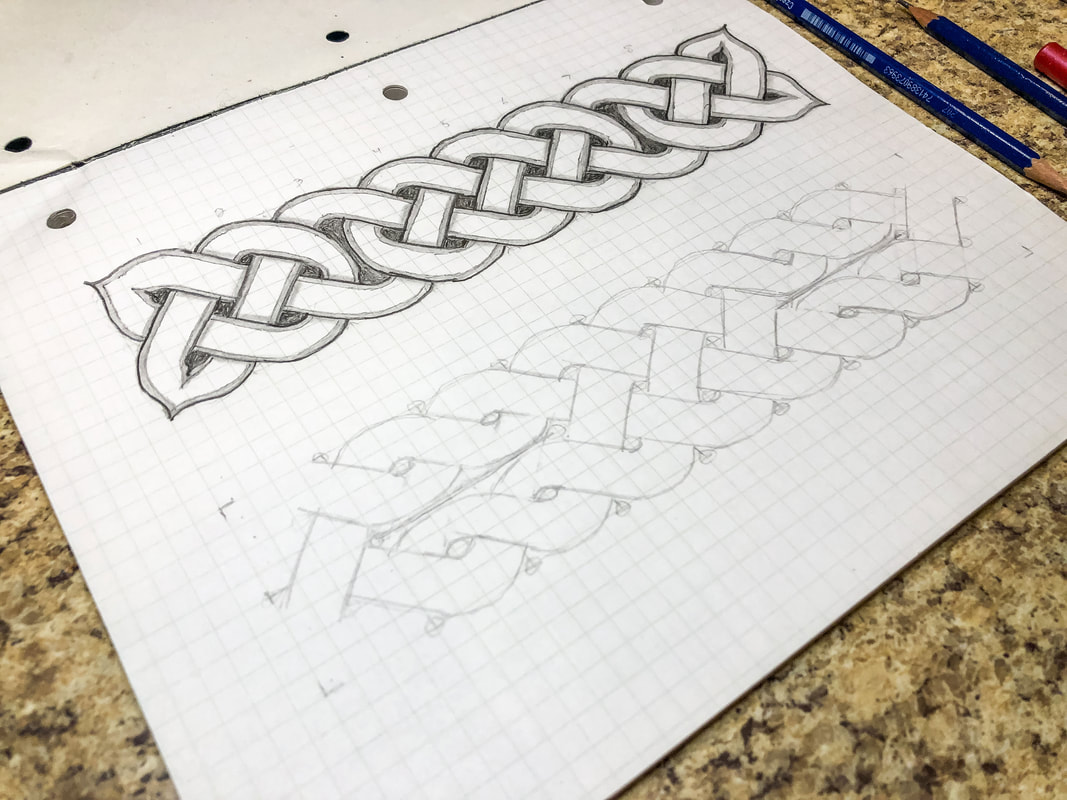 Step 7: Create the loops at each end of the grid. For this design, there will be a loop at each corner. 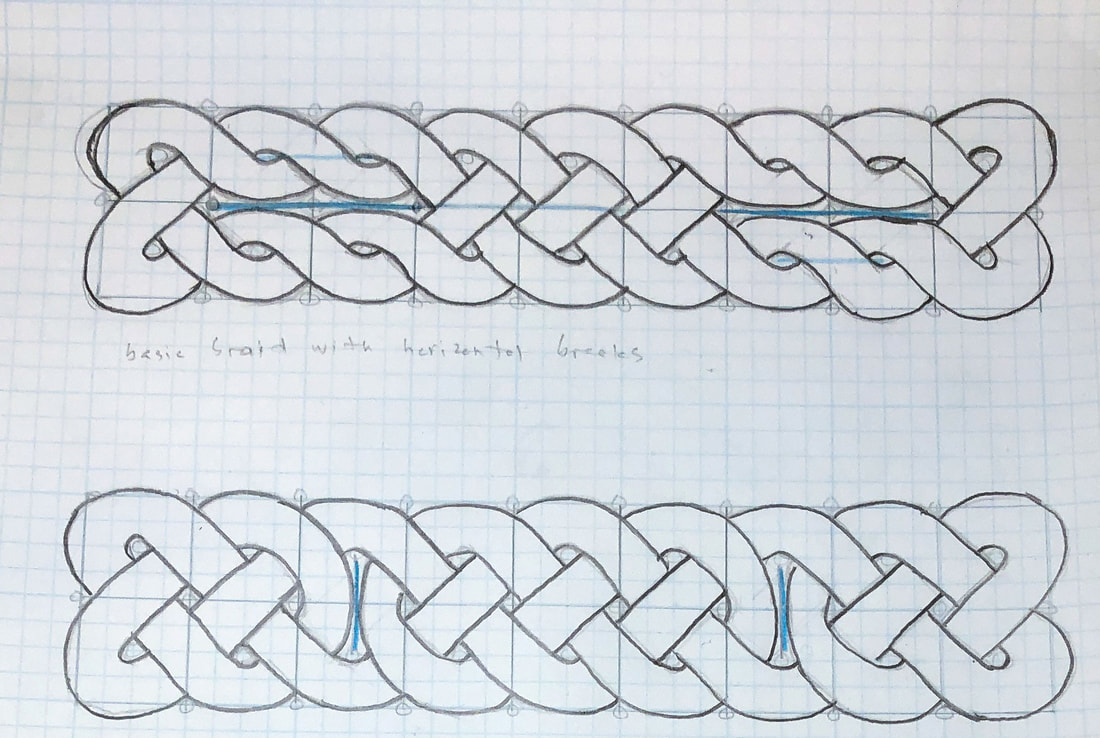 Step 8: Erase any guidelines and trace over the pattern with a darker pencil, creating any stylistic changes you may want. 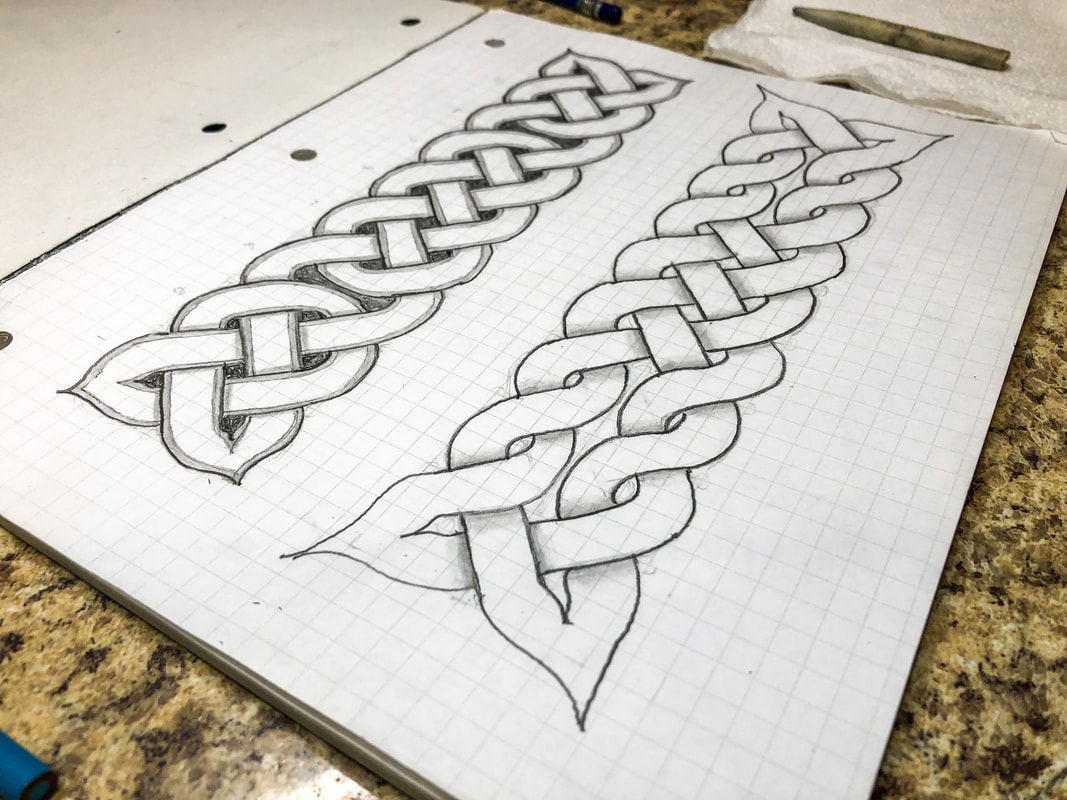 Step 9: Add in the shadows for a 3D effect, blend, and add final details. Go over your finished design with markers if desired. I hope you enjoyed this project and are encouraged to try more designs! I created a YouTube tutorial to go with this blog for those of you who are visual learners like myself! You can view the full video tutorial on my YouTube channel here! Related blogs you may want to read: Basic twist step-by-step drawing tutorial using grid paper Celtic braid step-by-step drawing tutorial Basic border knot with vertical breaks, step-by-step drawing tutorial DIY chalk-painted tray with Celtic border A fun DIY project with paint and a thrifted mirror part 2 The Celtic Motherhood Knot, a symbol of love Celtic Tree of Life Basic Celtic knot tutorial part 1 Celtic knot tutorial part 2 Some of the posts in this article contain affiliate links. If you click on the link and purchase the item, I will receive an affiliate commission at no extra cost to you. I will only recommend products or services I use personally and/or believe will add value to my readers, so there is no conflict of interest. 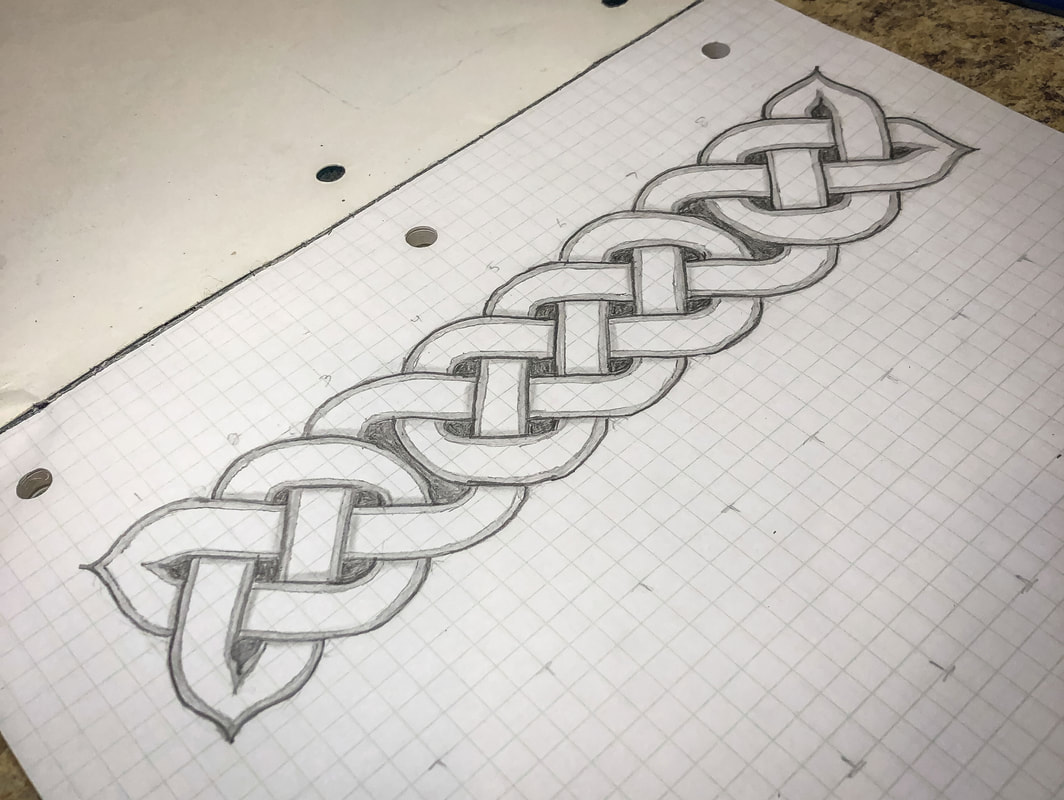 This drawing tutorial is the third in a short series of lessons to teach you how to draw a few variations of Celtic border knots. In lesson one, we learned how to draw a simple twist. In lesson two, we used a grid system to draw a basic braid pattern. In this third tutorial, we will build on what we have learned to create a variation using vertical breaks. Breaks introduce a level of complexity to the design that adds visual interest. There are many ways to add breaks to a border pattern, but today’s lesson will show you how to add two simple vertical breaks to the braid we have previously drawn. Below is a list of supplies you may want on hand (Amazon affiliate links are included), but you certainly don’t have to have all of these supplies to do this tutorial. Just find yourself a piece of paper, a pencil, and an eraser, and let’s get to drawing! Gather your supplies: Drawing pencils Markers Blending stumps Eraser Click eraser Ruler Horse hair brush Grid paper Sketch pad Step 1: Draw a grid of 9 squares across and 2 squares down. Use a ruler If drawing the grid by hand so all the squares end up the same size. 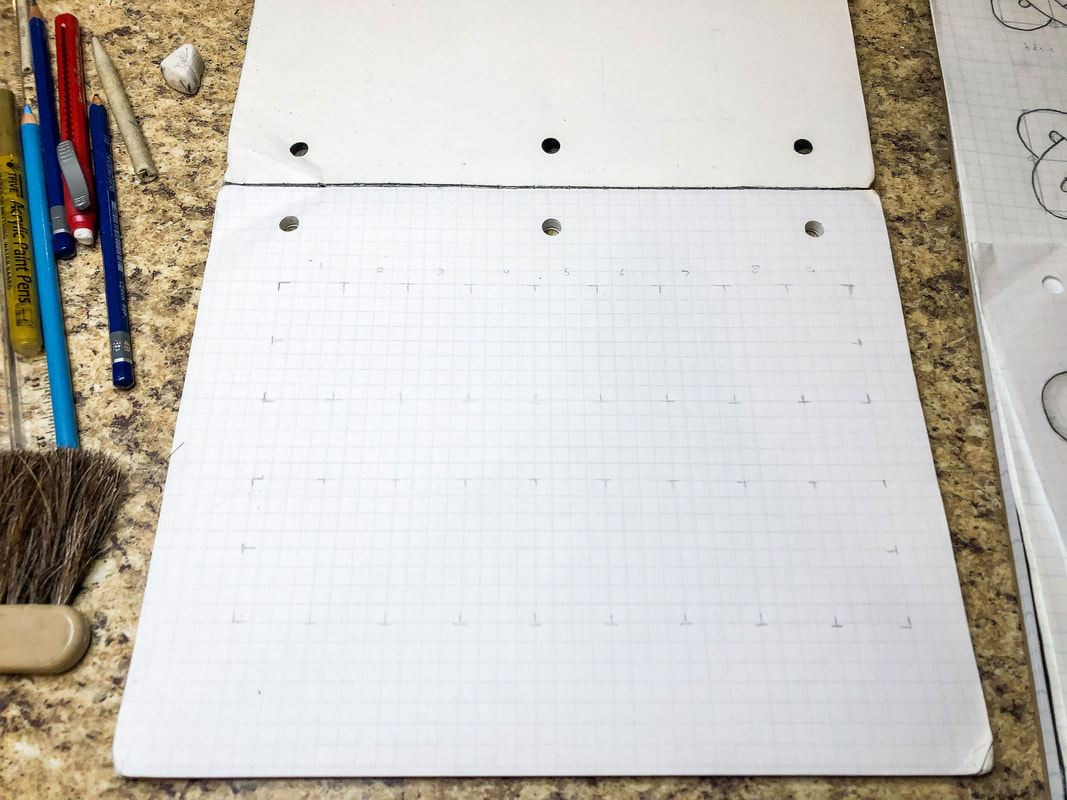 Step 2: Draw circles at the intersections of each corner and then in the middle of each square. Keep the circles the same size. Small circles will give you a thicker thread, while large circles will allow you to create a thinner thread. 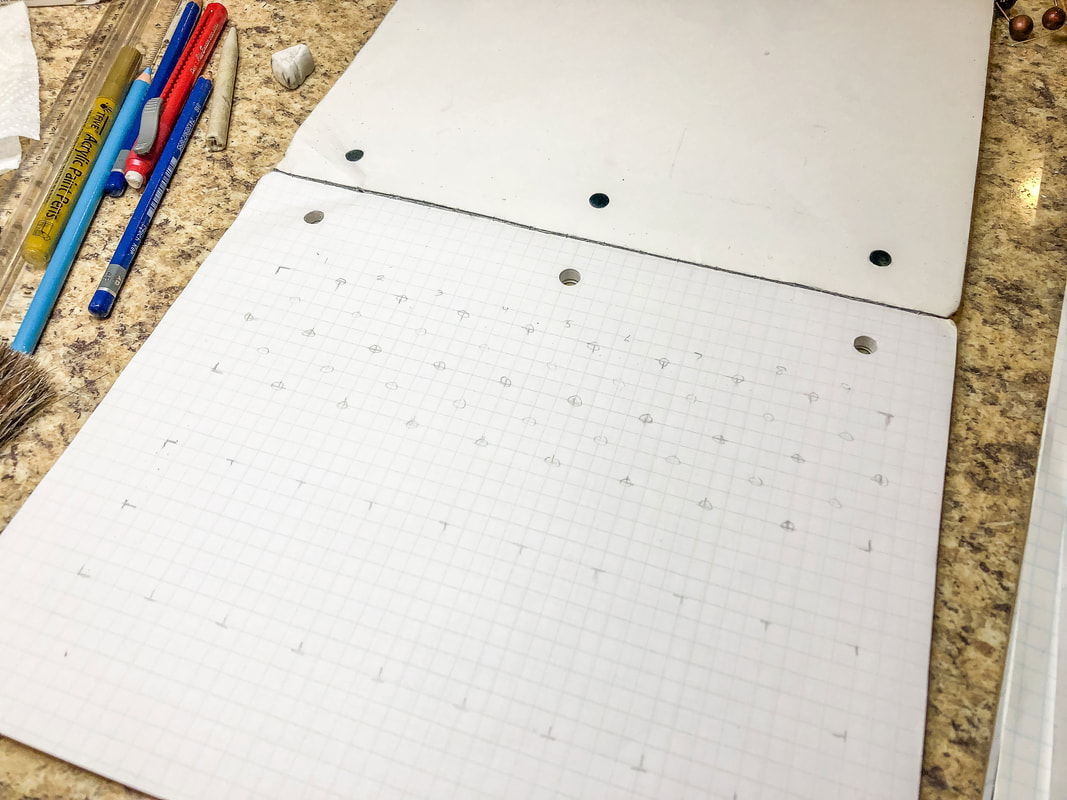 Step 3: Starting from the left, draw a pair of parallel lines touching the inside edges of the first four circles. Find the set of four circles above that first pair of lines, and draw a second set of perpendicular lines. Return to the first pair of lines and create another pair of perpendicular lines to the side, as shown. This sets up an alternating pattern of lines that you will continue across the grid to create a weave. Ignore any places where you only have three circles for now. 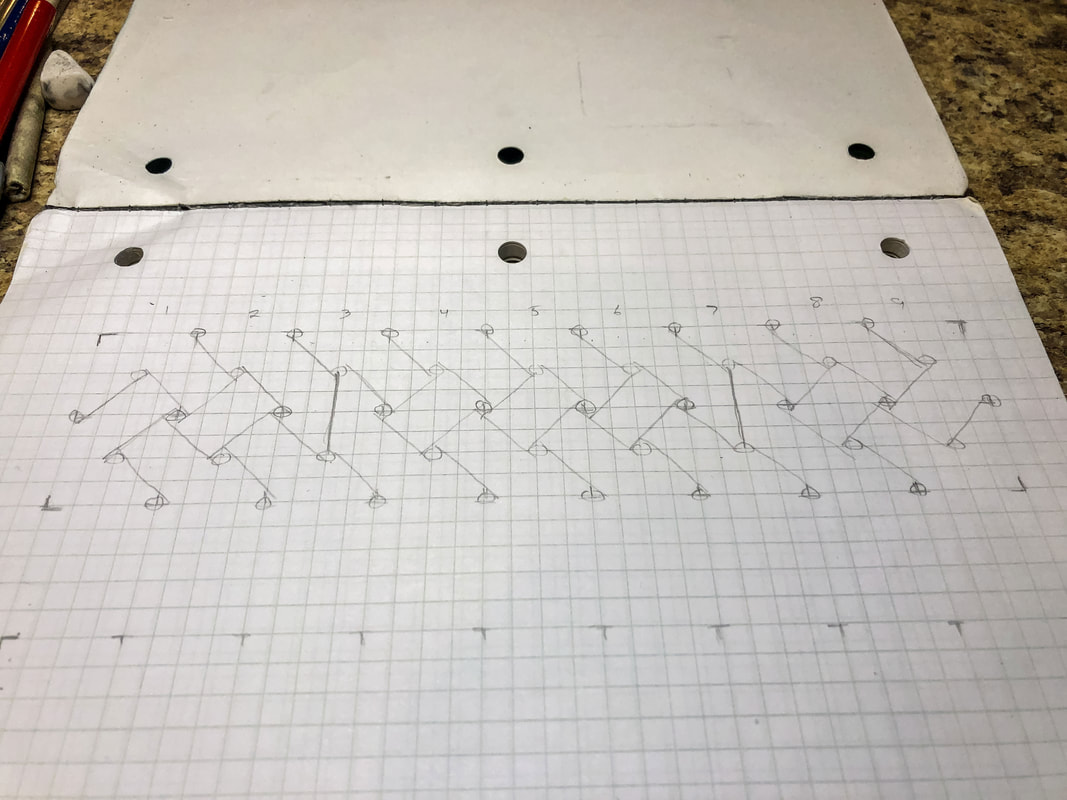 Step 4: Draw a vertical line connecting the two circles in columns 3 and 7, as shown. 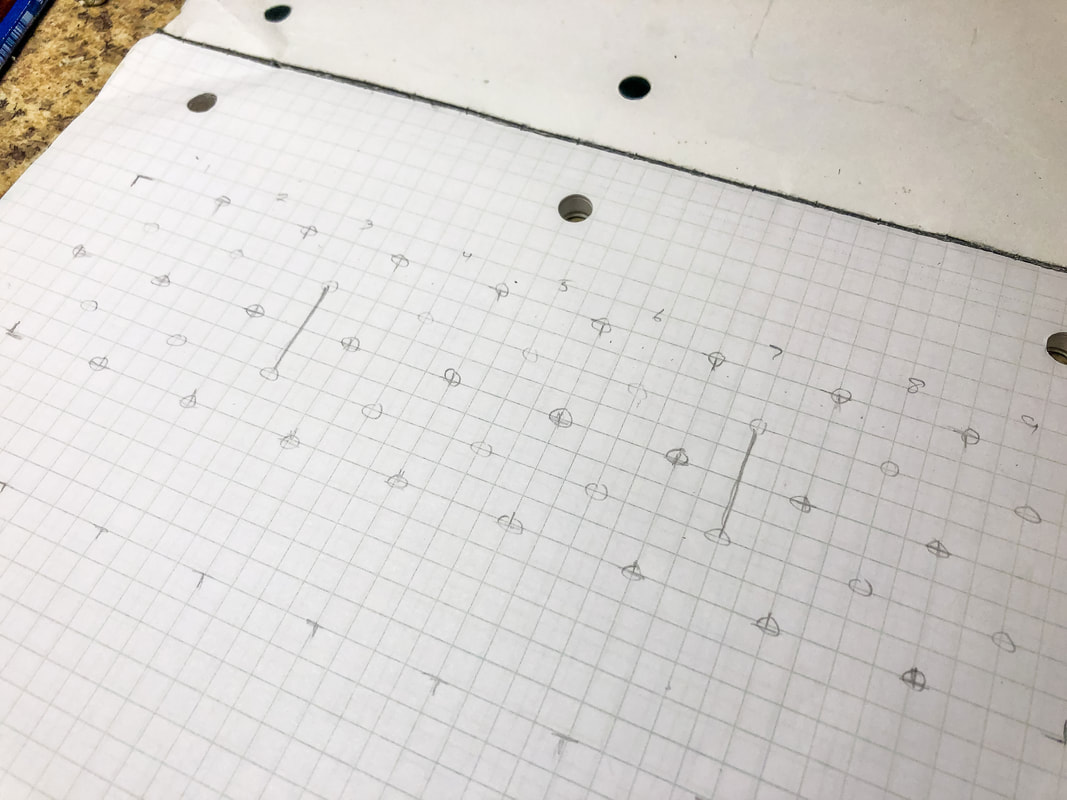 Step 5: Erase any lines that cross over those two new vertical lines, looping them back around to link up with the threads as shown. 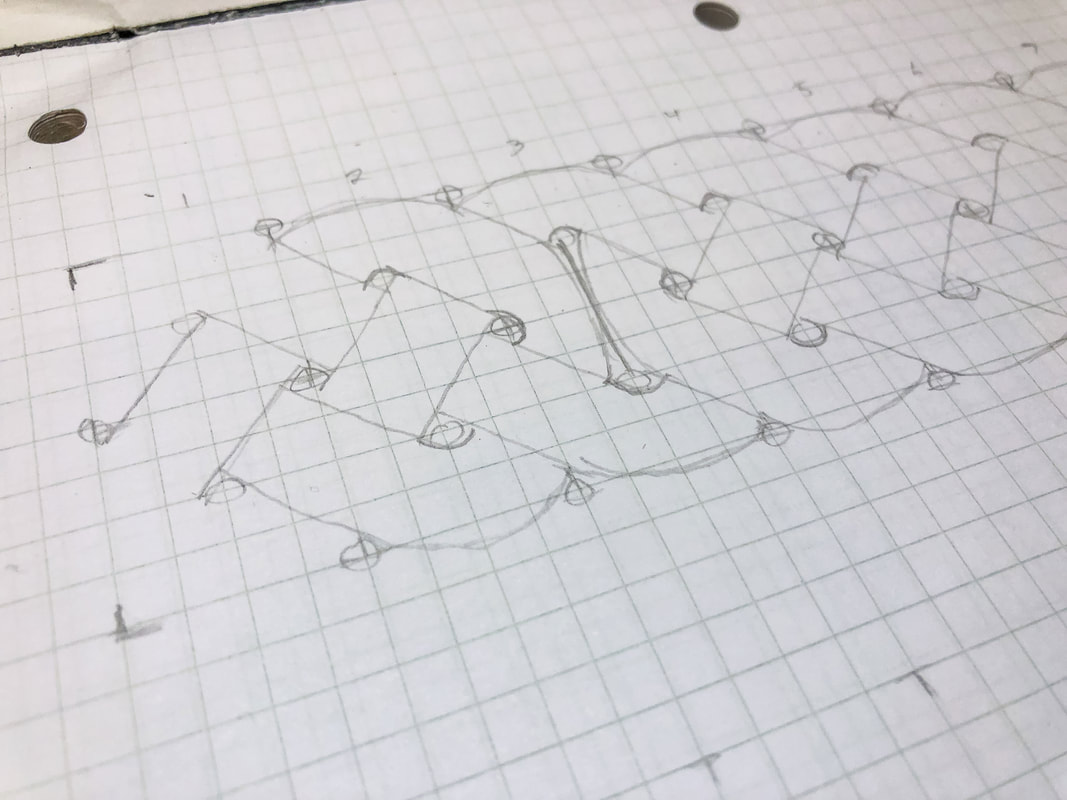 Step 6: Sketch in the top and bottom edges of the loops as shown. 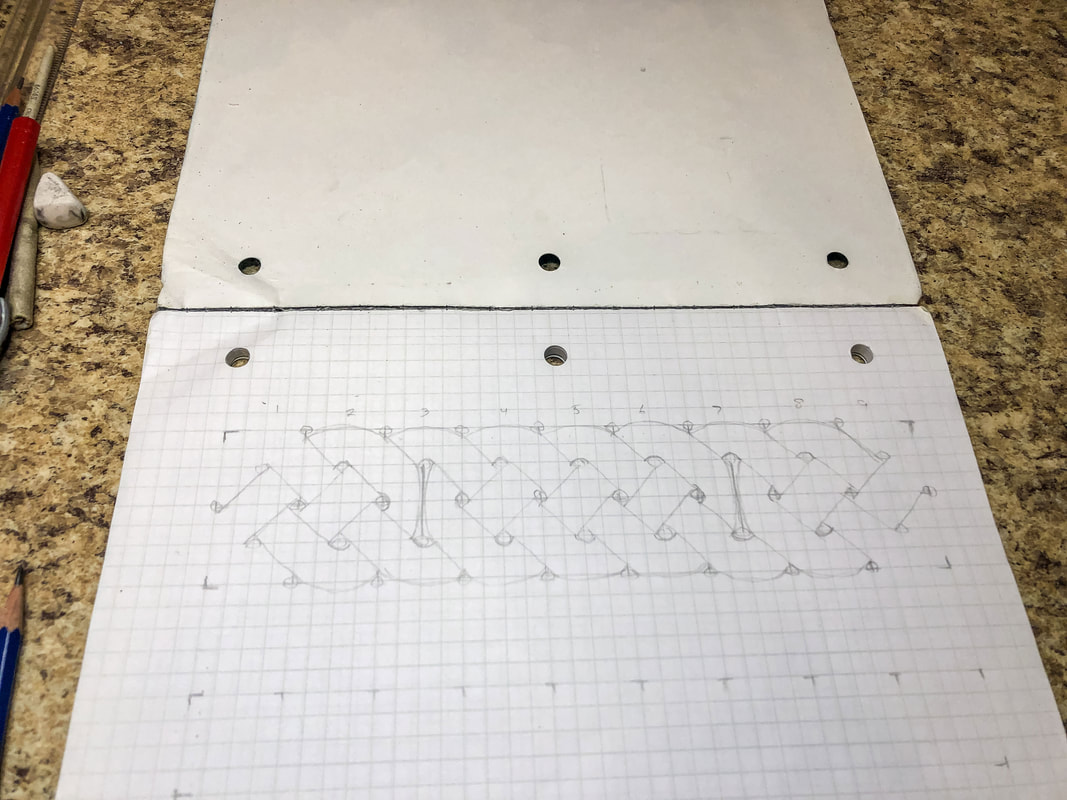 Step 7: Create the loops at each end of the grid. For this design, there will be a loop at each corner. 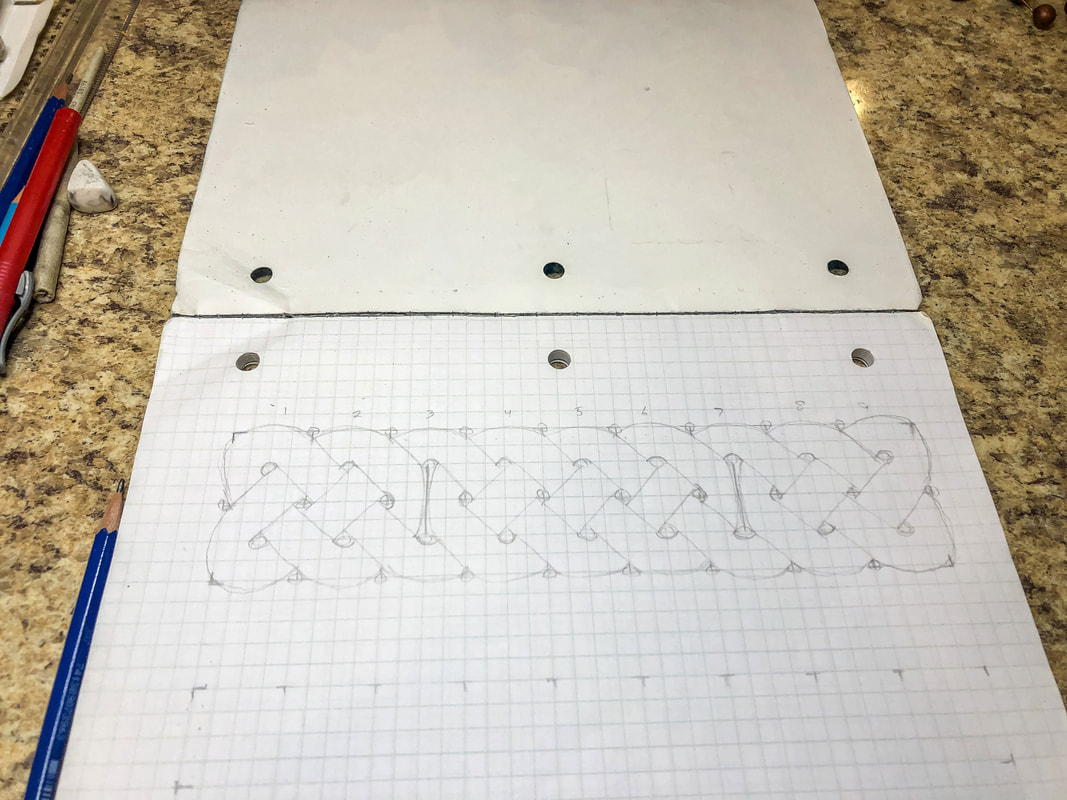 Step 8: Erase any guidelines and trace over the pattern with a darker pencil, creating any stylistic changes you may want. 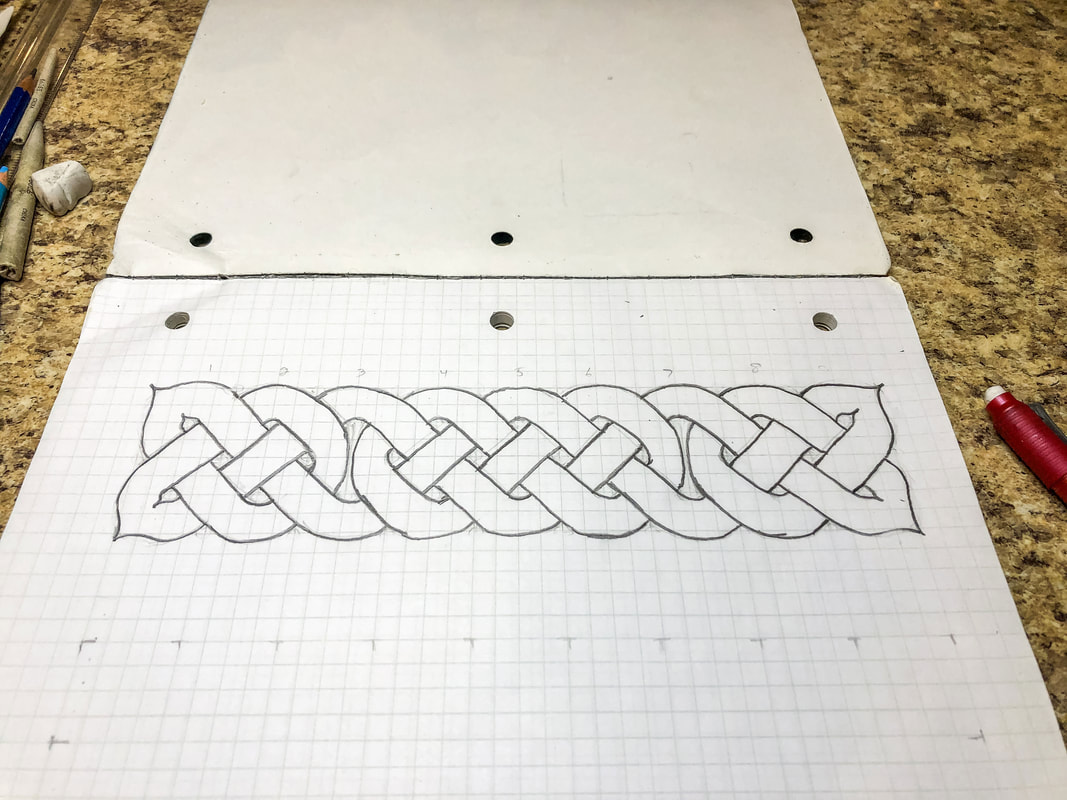 Step 9: Add in the shadows for a 3D effect, blend, and add final details. Go over your finished design with markers if desired. I hope you enjoyed this project and are encouraged to try more designs! I created a YouTube tutorial to go with this blog for those of you who are visual learners like myself! You can view the full video tutorial on my YouTube channel here! Related blogs you may want to read: Basic twist step-by-step drawing tutorial using grid paper Celtic braid step-by-step drawing tutorial Basic border knot with horizontal breaks, step-by-step drawing tutorial DIY chalk-painted tray with Celtic border A fun DIY project with paint and a thrifted mirror part 2 The Celtic Motherhood Knot, a symbol of love Celtic Tree of Life Basic Celtic knot tutorial part 1 Celtic knot tutorial part 2 Some of the posts in this article contain affiliate links. If you click on the link and purchase the item, I will receive an affiliate commission at no extra cost to you. I will only recommend products or services I use personally and/or believe will add value to my readers, so there is no conflict of interest. 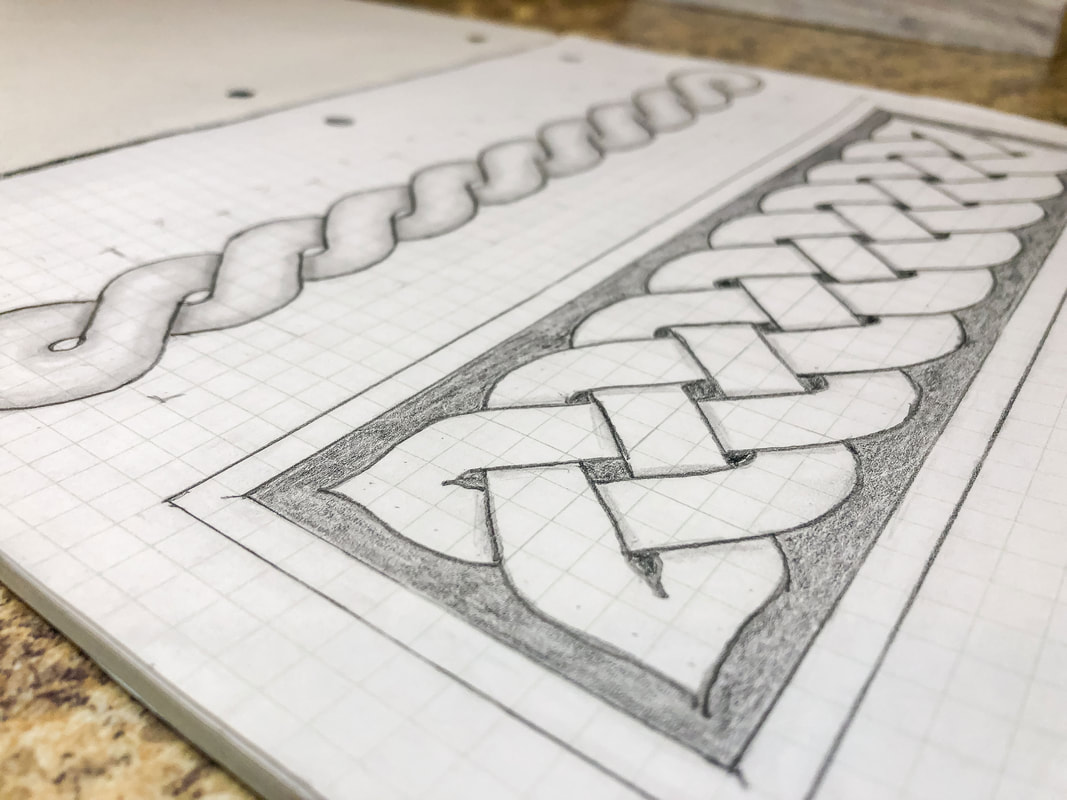 This drawing tutorial is the second in a short series of lessons to teach you how to draw a few variations of Celtic border knots. In the first tutorial, we used a grid system to draw a simple twist. In this blog, we will build on what we have learned in that lesson to create a braid pattern. The braid forms the building block for many Celtic-style borders. Below is a list of supplies you may want on hand (Amazon affiliate links are included), but you certainly don’t have to have all of these supplies to do this tutorial. Just find yourself a piece of paper, a pencil, and an eraser, and let’s get to drawing! Gather your supplies: Drawing pencils Markers Blending stumps Eraser Click eraser Ruler Horse hair brush Grid paper Sketch pad Step 1: Draw a grid of 9 squares across and 2 squares down. Use a ruler If drawing the grid by hand so all the squares end up the same size.  Step 2: Draw circles at the intersections of each corner and then in the middle of each square. Keep the circles the same size. Small circles will give you a thicker thread, while large circles will allow you to create a thinner thread. 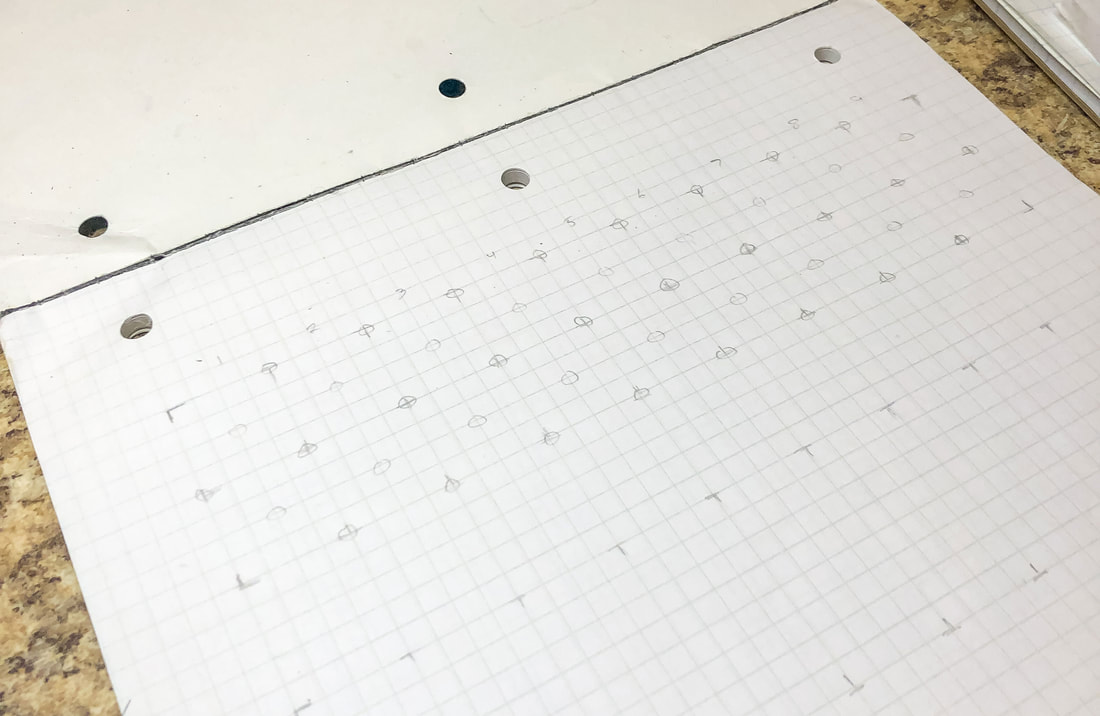 Step 3: Starting from the left, draw a pair of parallel lines touching the inside edges of the first four circles. Find the set of four circles above that first pair of lines, and draw a second set of perpendicular lines. Return to the first pair of lines and create another pair of perpendicular lines to the side, as shown. This sets up an alternating pattern of lines that you will continue across the grid to create a weave. Ignore any places where you only have three circles for now. 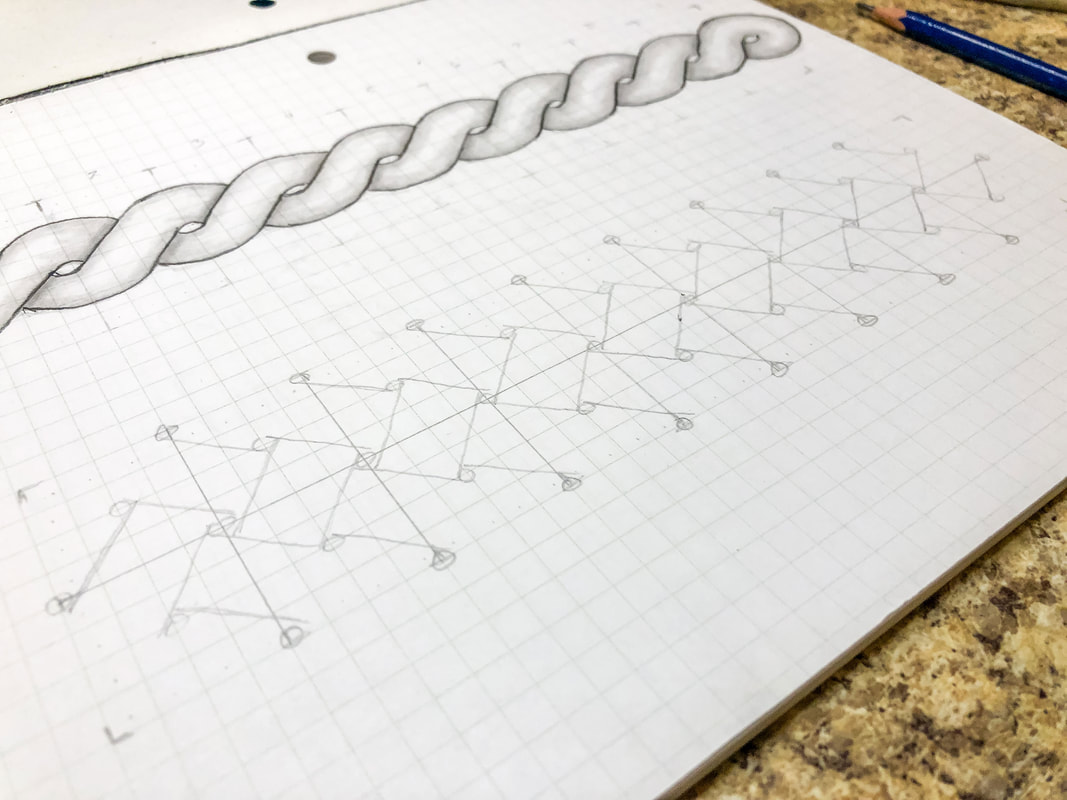 Step 4: Sketch in the top and bottom edges of the loops as shown. 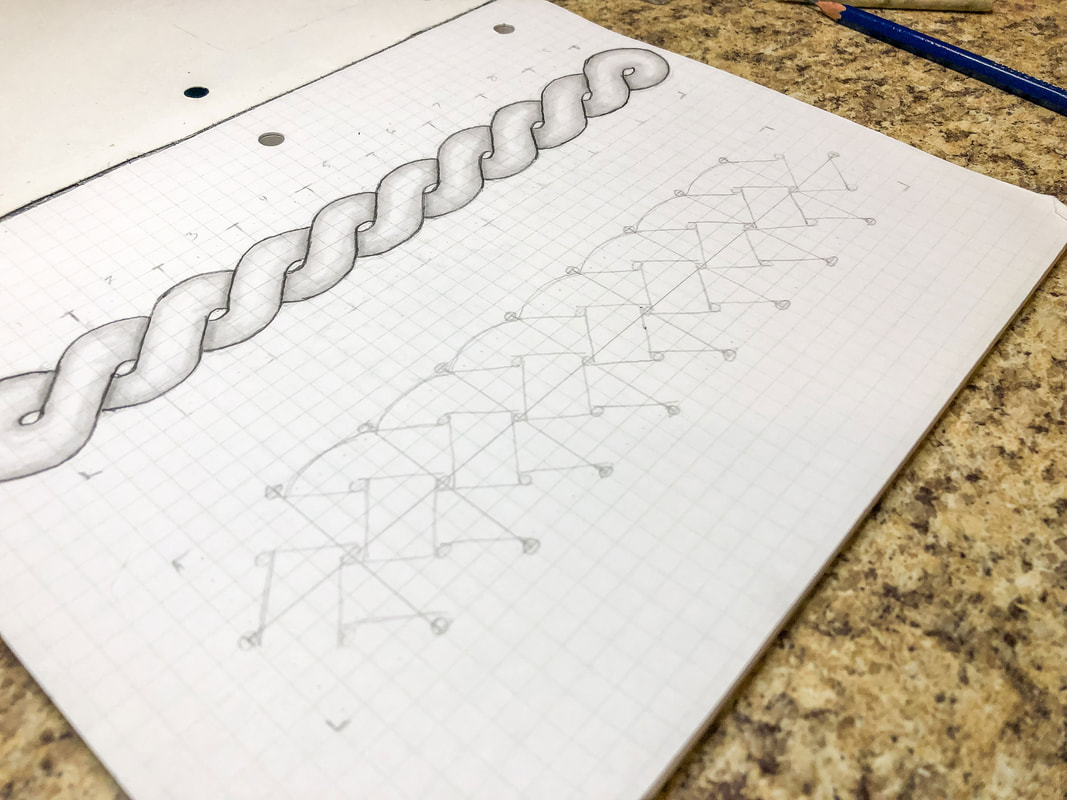 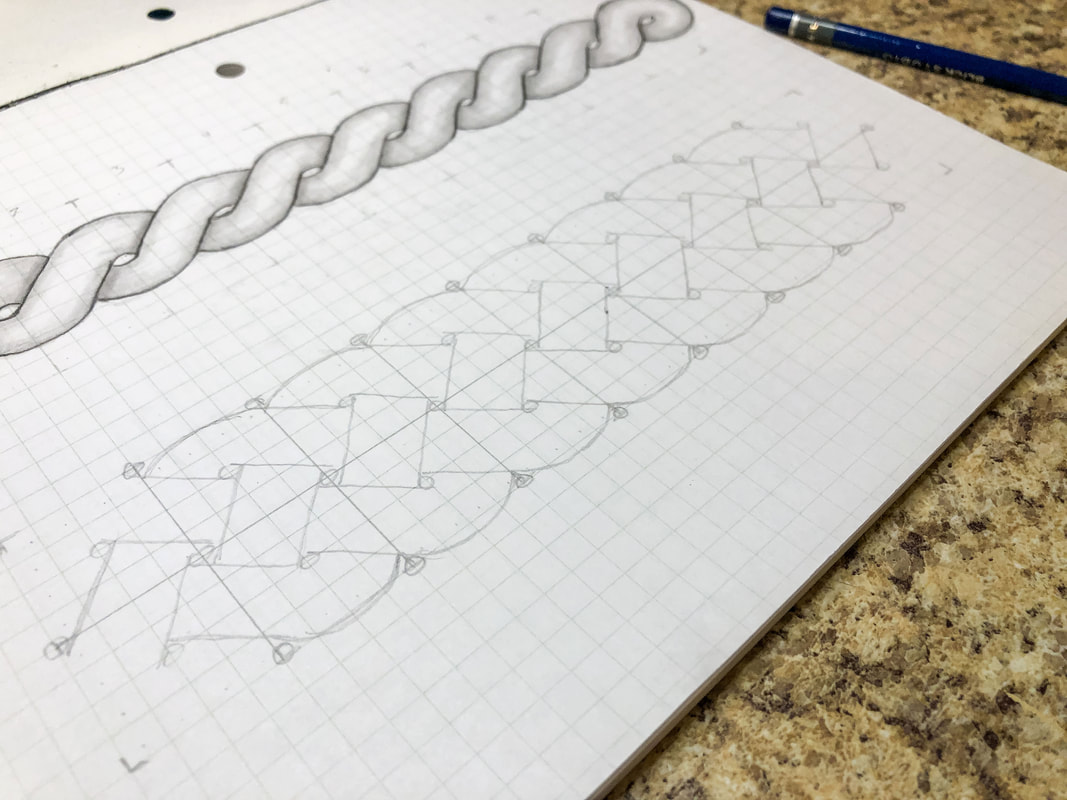 Step 5: Create the loops at each end of the grid. For this design, there will be a loop at each corner. 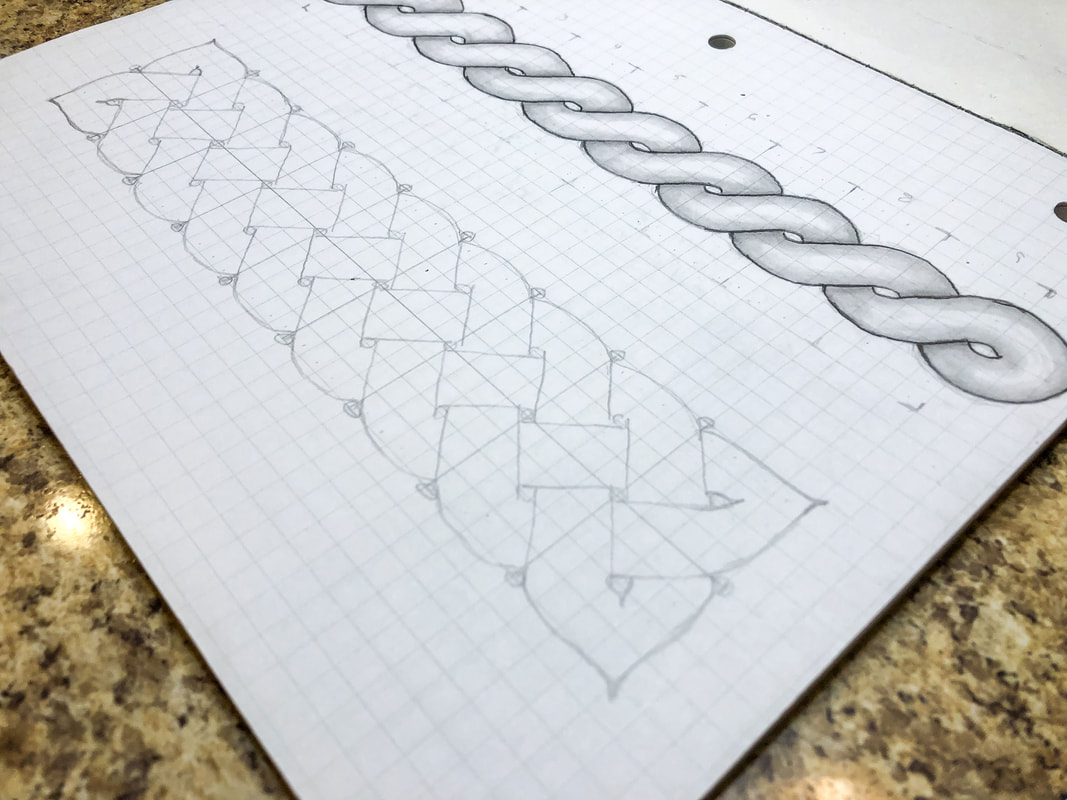 Step 6: Erase any guidelines and trace over the pattern with a darker pencil, creating any stylistic changes you may want. 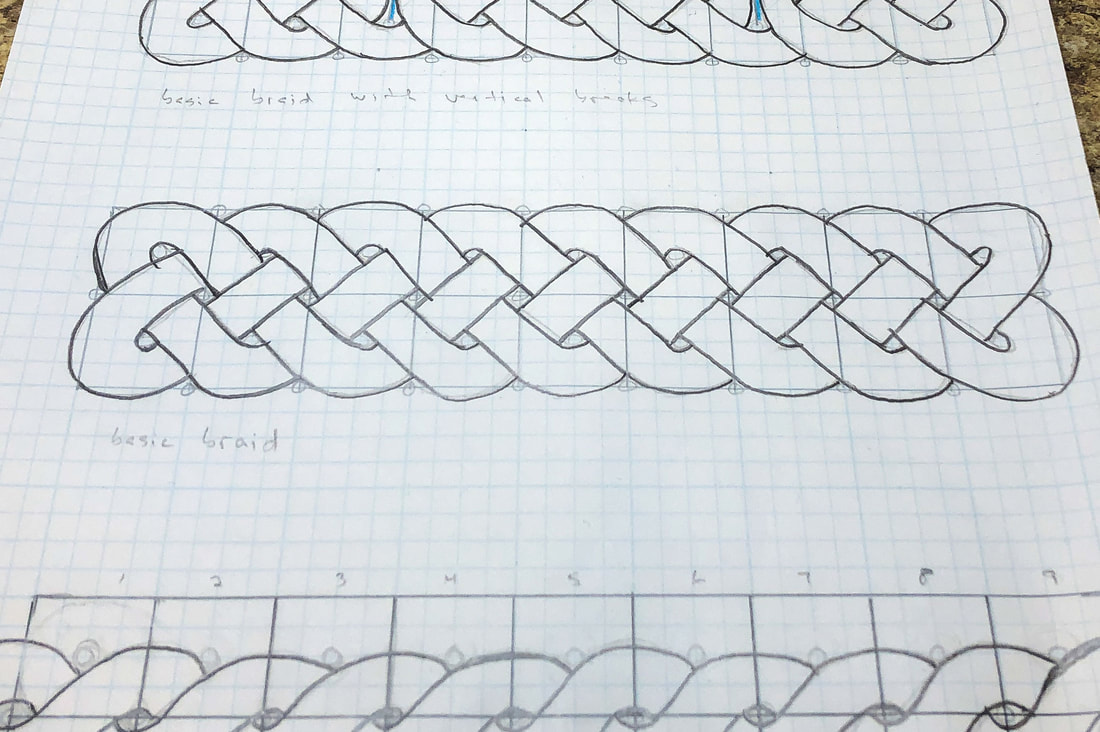 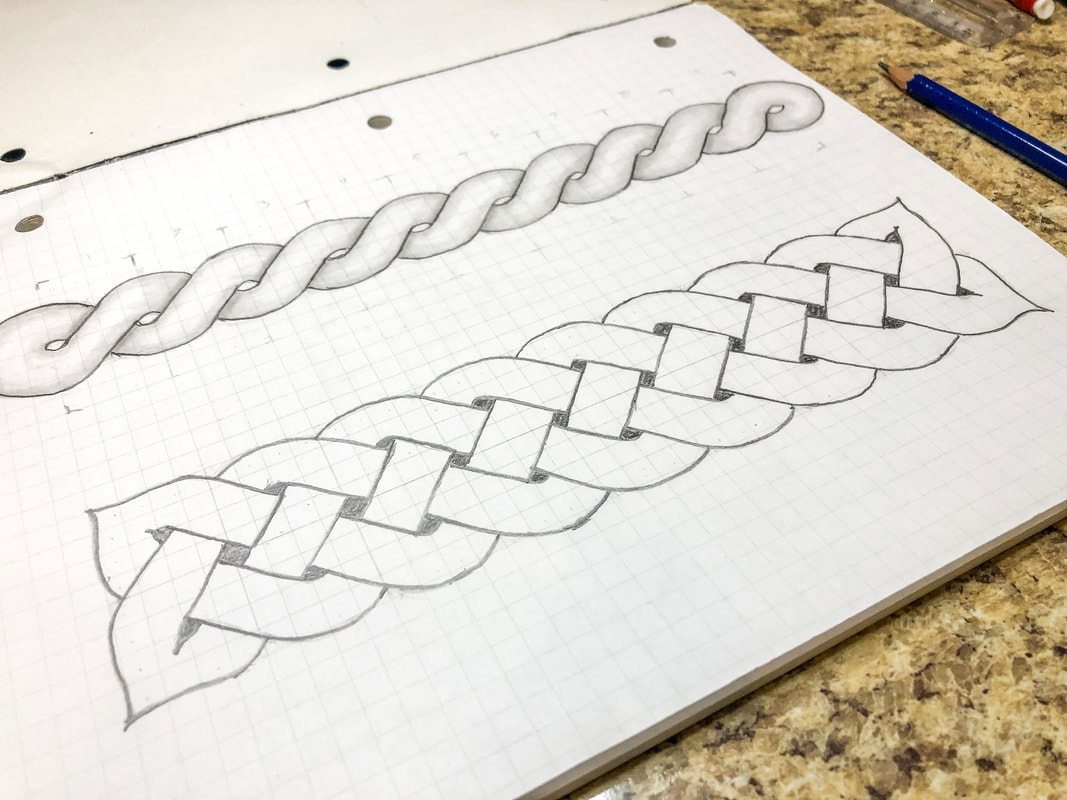 Step 7: Add in the shadows for a 3D effect, blend, and add final details. Go over your finished design with markers if desired. I hope you enjoyed this project and are encouraged to try more designs! I created a YouTube tutorial to go with this blog for those of you who are visual learners like myself! You can view the full video tutorial on my YouTube channel here! Related blogs you may want to read: Basic twist step-by-step drawing tutorial using grid paper Basic border knot with vertical breaks, step-by-step drawing tutorial Basic border knot with horizontal breaks, step-by-step drawing tutorial DIY chalk-painted tray with Celtic border A fun DIY project with paint and a thrifted mirror part 2 The Celtic Motherhood Knot, a symbol of love Celtic Tree of Life Basic Celtic knot tutorial part 1 Celtic knot tutorial part 2 Some of the posts in this article contain affiliate links. If you click on the link and purchase the item, I will receive an affiliate commission at no extra cost to you. I will only recommend products or services I use personally and/or believe will add value to my readers, so there is no conflict of interest. 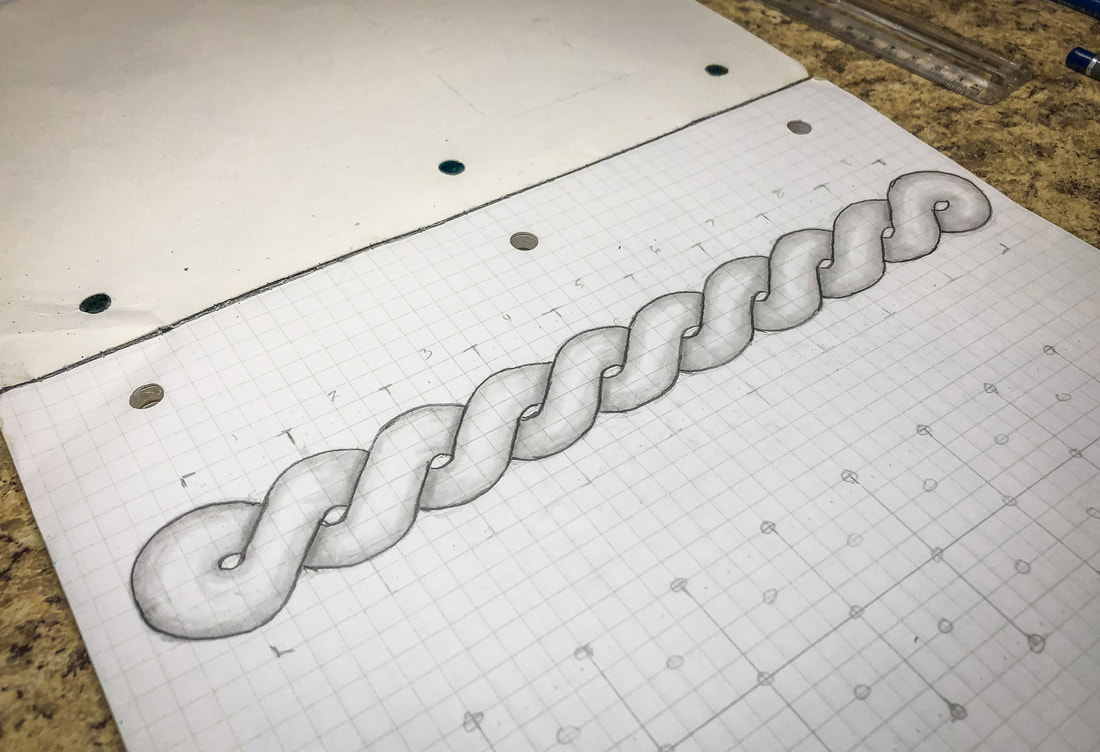 This drawing tutorial is the first in a short series of lessons to teach you how to draw a few variations of Celtic border knots. This first tutorial will show you how to draw a simple twist. The twist is not a Celtic style, but the tutorial series will build on this simple pattern, creating more complex weave patterns as we go. Twist borders can be found in many ancient art forms, such as Roman mosaics, and are easy to draw. If you use grid paper—or draw out a grid with guidelines—you will get a perfectly symmetrical twist every time! Below is a list of supplies you may want on hand (Amazon affiliate links are included), but you certainly don’t have to have all of these supplies to do this tutorial. Just find yourself a piece of paper, a pencil, and an eraser, and let’s get to drawing! Gather your supplies: Drawing pencils Markers Blending stumps Eraser Click eraser Ruler Horse hair brush Grid paper Sketch pad Step 1: Draw a grid of 9 squares across and 2 squares down. Use a ruler if drawing the grid by hand so all the squares end up the same size.  Step 2: Draw circles at the intersections of each corner and then in the middle of each square. Keep the circles the same size. Small circles will give you a thicker thread, while large circles will allow you to create a thinner thread. 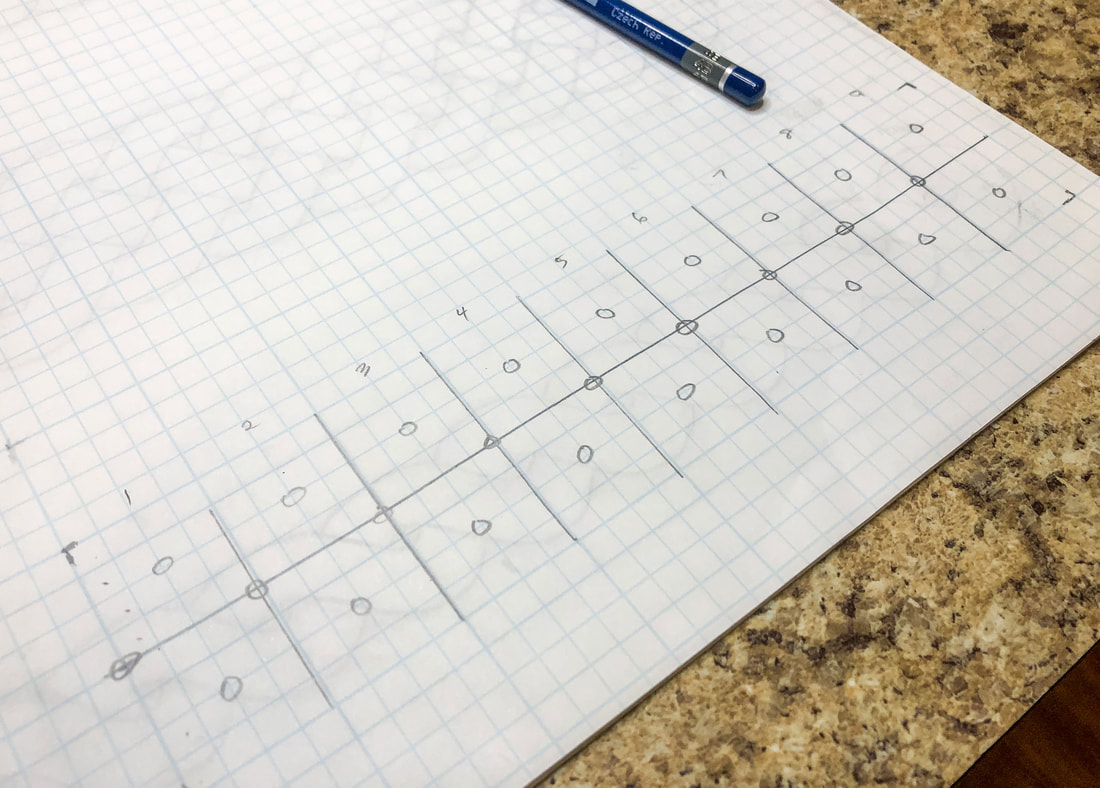 Step 3: Starting from the left, draw a pair of parallel lines touching the inside edges of the first four circles. Do this for each set of four circles across the grid. 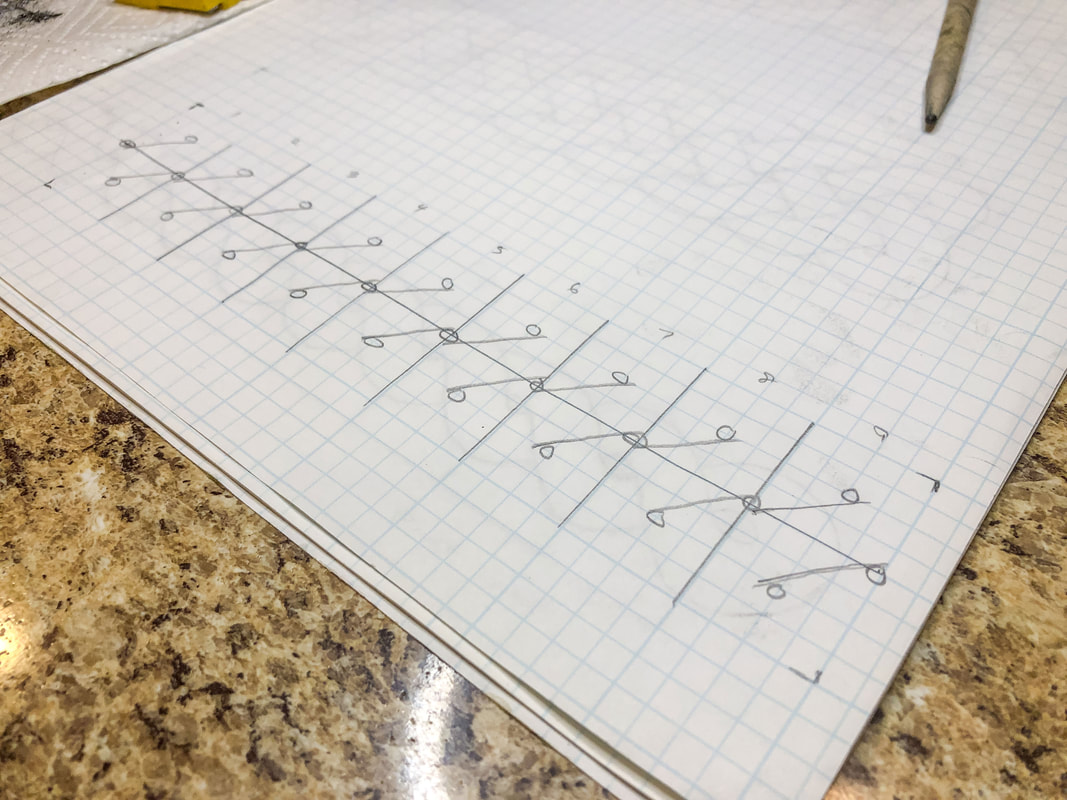 Step 4: Sketch in the top and bottom edges of the loops as shown. 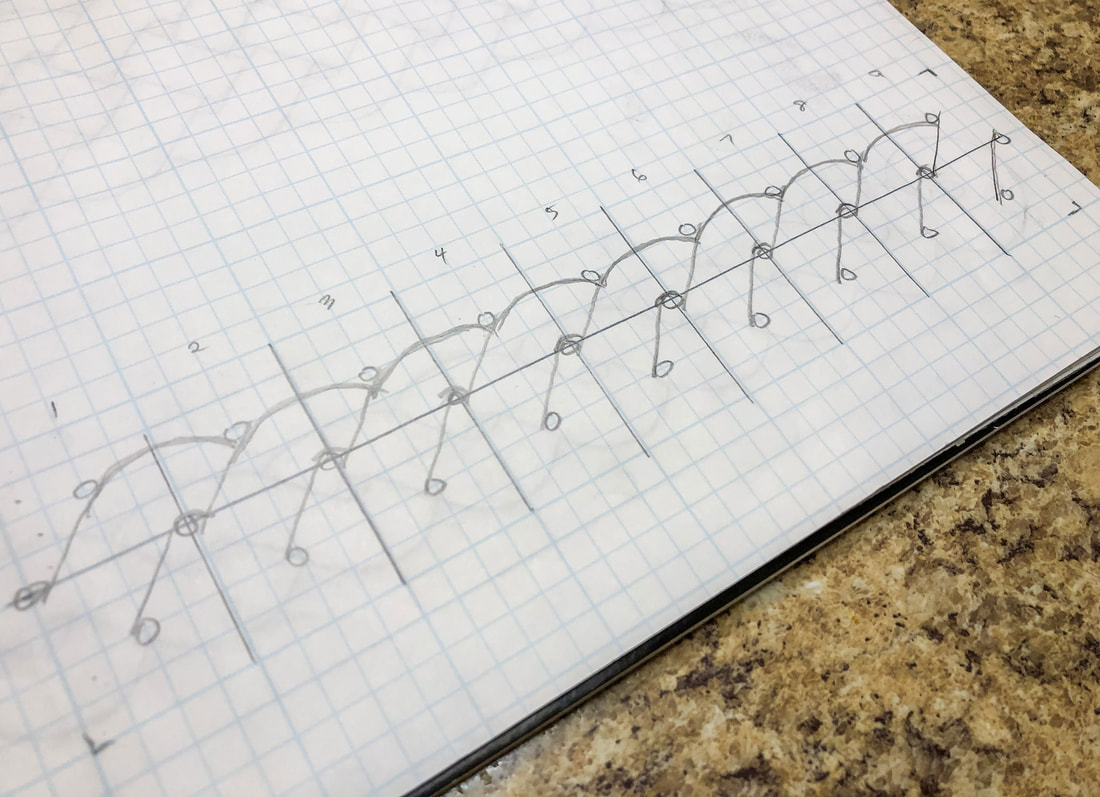 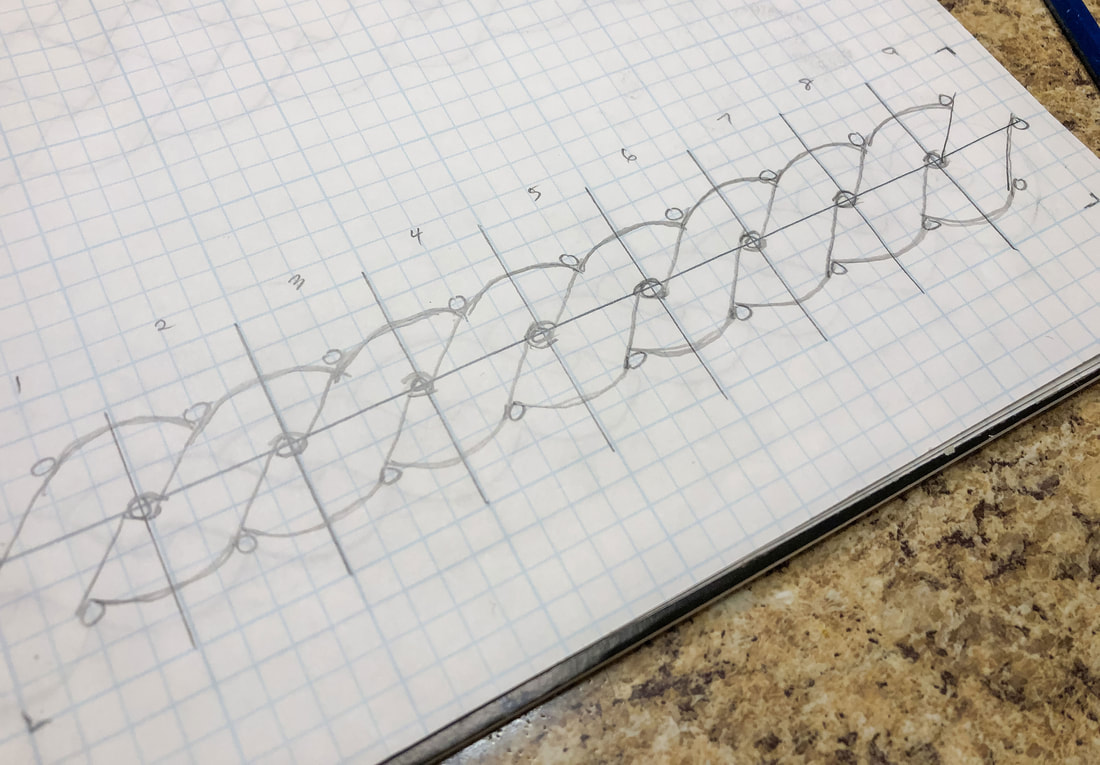 Step 5: Connect the loops at the two ends as shown. 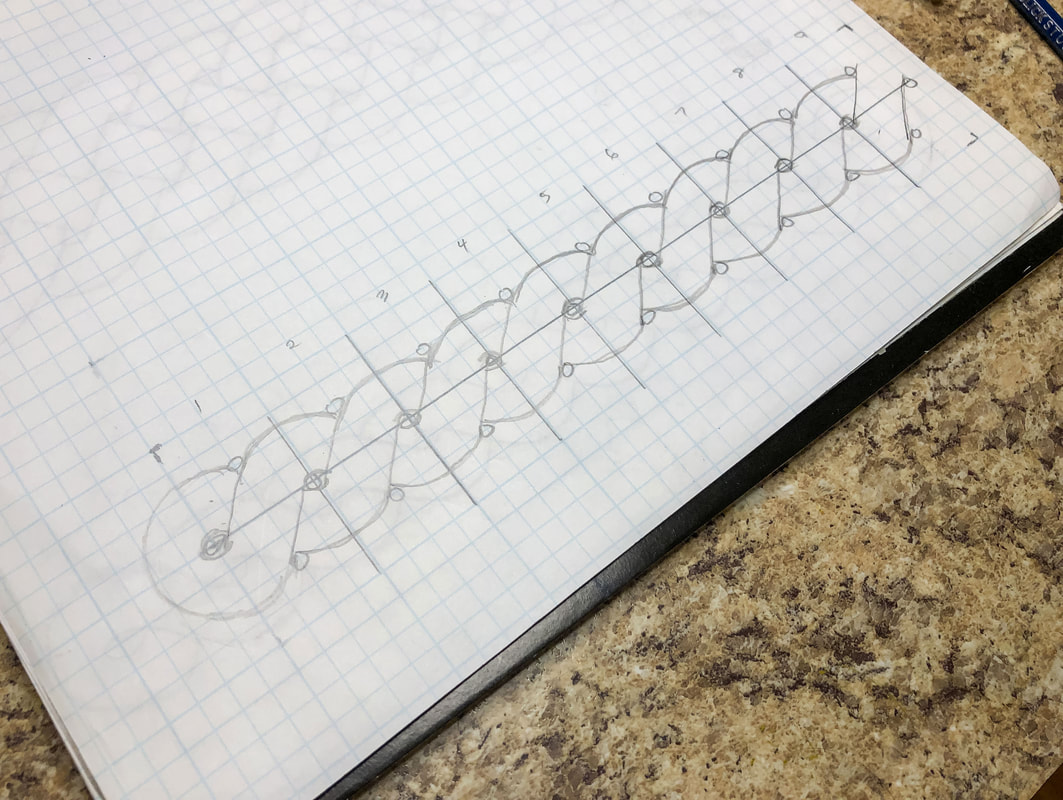 Step 6: Erase any guidelines and trace over the twist pattern with a darker pencil, creating any stylistic changes you may want. 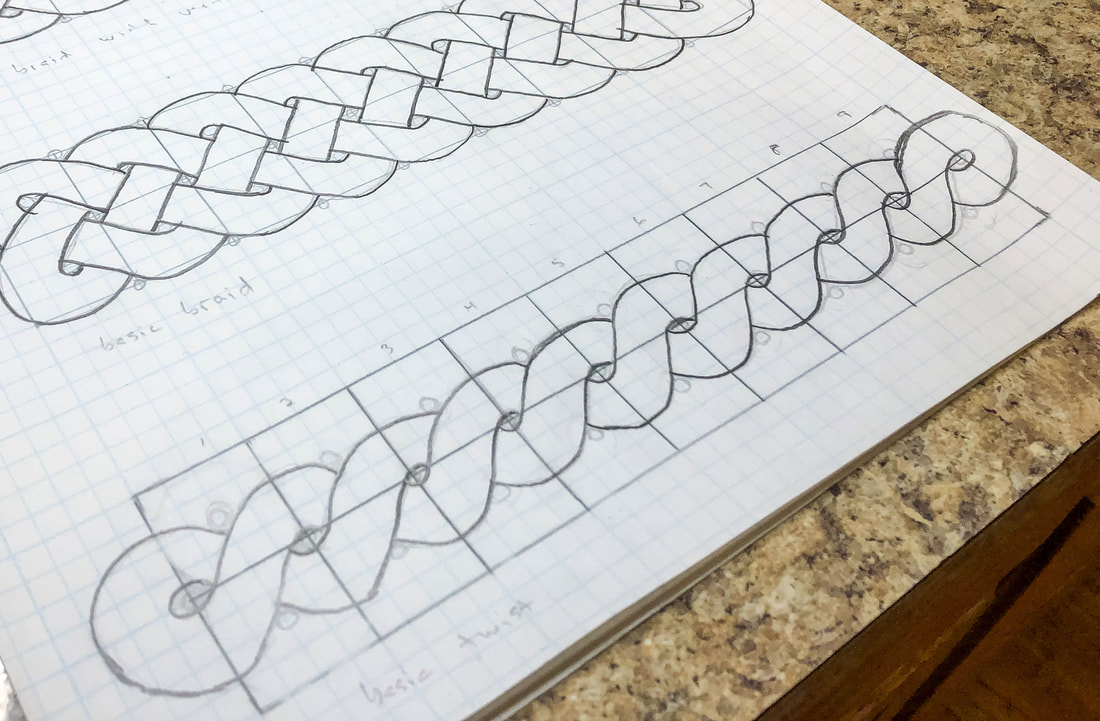 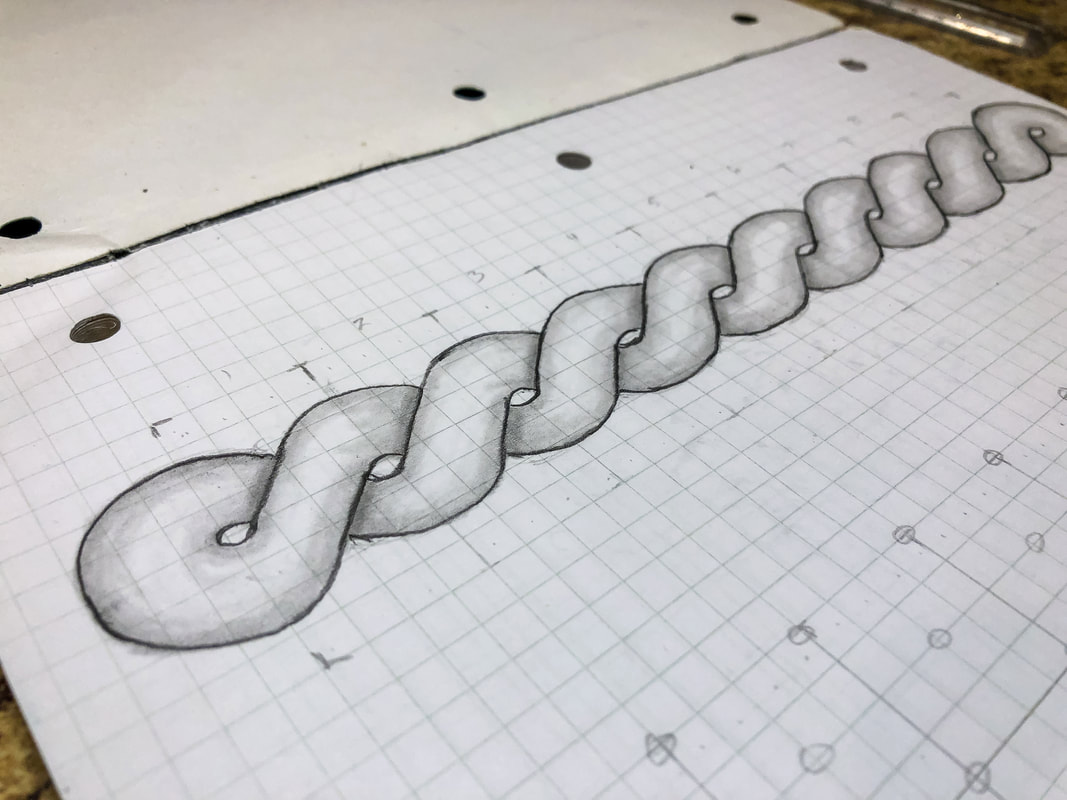 Step 7: Add in the shadows for a 3D effect, blend, and add final details. Go over your finished design with markers if desired. I hope you enjoyed this project and are encouraged to try more designs! I created a YouTube tutorial to go with this blog for those of you who are visual learners like myself! You can view the full video tutorial on my YouTube channel here! Related blogs you may want to read: Celtic braid step-by-step drawing tutorial Basic border knot with vertical breaks, step-by-step drawing tutorial Basic border knot with horizontal breaks, step-by-step drawing tutorial DIY chalk-painted tray with Celtic border A fun DIY project with paint and a thrifted mirror part 2 The Celtic Motherhood Knot, a symbol of love Celtic Tree of Life Basic Celtic knot tutorial part 1 Celtic knot tutorial part 2 Some of the posts in this article contain affiliate links. If you click on the link and purchase the item, I will receive an affiliate commission at no extra cost to you. I will only recommend products or services I use personally and/or believe will add value to my readers, so there is no conflict of interest.  Image by ajcabeza on Adobe Stock. What would you say if someone were to ask you to describe a fairy? Would you envision tiny winged humanlike beings small enough to fit in the palm of your hand? Sure...this is the image conjured up by the modern mainstream. If you look up the word fairy, you’ll find descriptive terms like diminutive, magical, feminine, imaginary, and supernatural.  Image by shaiith on Adobe Stock. But there are much older cultural ideas of the fairy not so benign and whimsical. Over the years, I’ve developed a particular fascination with the rather more ambiguous nature of Irish fairies. And that’s the topic I’d like to touch on today… The faerie folk To start with, those “diminutive” little fairies with wings are a recent phenomenon, more or less dating from the Victorian era. Before that, most European countries had a rich collection of fae, faerie, or fairy folk that took on many shapes and sizes. The more recognizable include magical beings like pixies, gnomes, trolls, elves, dwarfs, brownies, and giants.  Image by M W on Pixabay. Ireland's unique flavor of fairy folklore is blended with its rich historical mythology. This mystical green land is known for a mythical race of beings that are not spoken of by name but referred to in generic phrases, such as “the people of the mounds”, “the good people”, “the fair folk”, “them”—anything but “fairy”. These beings are also often referred to in ancient Gaelic terms as the “sidhe”, “daoine sidhe”, or “aes sidhe”. The term “sidhe” refers to the places where they dwell—typically natural or man-made mounds—but also represents the people as a way to name “them” without incurring their wrath.  Image by captblack76 on Adobe Stock. Just like in the rest of Europe, the Irish have specific names for each being belonging to the sidhe. The most recognizable is the leprechaun—a crafty little man who guards the treasure. The banshee (or ban sidhe, in Irish) is a wailing woman who predicts the death of a member of a particular clan. The Cailleach—possibly the predecessor to what we now know of as the witch—is an old woman who is said to have flown through the air and dropped large boulders from her apron to form some of the more dominant landscape features that play an important part in Irish mythology. The Irish also have their version of the mermaid called the Merrow. The female half woman half fish was attractive with a beautiful song that enticed young men, but the uglier male versions would pull sailors into the depths of the sea and enslave them. A rather terrifying creature in Irish fairy tales is the Pooka (Puca in Irish). The Pooka can take the shape of any animal but most often appears as a black horse with red eyes. This creature (like the banshee) is sometimes an omen of bad things to come but can be either helpful or destructive. These are just a few of the many types of sidhe in Ireland.  Image by Ed Smedley on Pixabay. Irish Mythology & the Sidhe So what are the origins of the sidhe? Let’s take a brief dive into Irish mythology for a moment… Most of the sidhe seem to represent old deities from ancient times, particularly from the mythical race of people called the Tuatha De Danann or the People of Danu. The origins of these people are shrouded in mystery and described as a group of invaders deep in antiquity that ruled over Ireland for a time, eventually being replaced by new invaders from Spain called Milesians, or sons of Mil. The mythology says the Milesians banished the Tuatha De Danann to the hills, and the mythical land they came to inhabit was called Tir na nOg, Land of Youth, or the Otherworld. Interestingly, the Greek word for the Iron Age Celts—Keltoi—means “the hidden ones”. It’s a curious coincidence, don’t you think?! 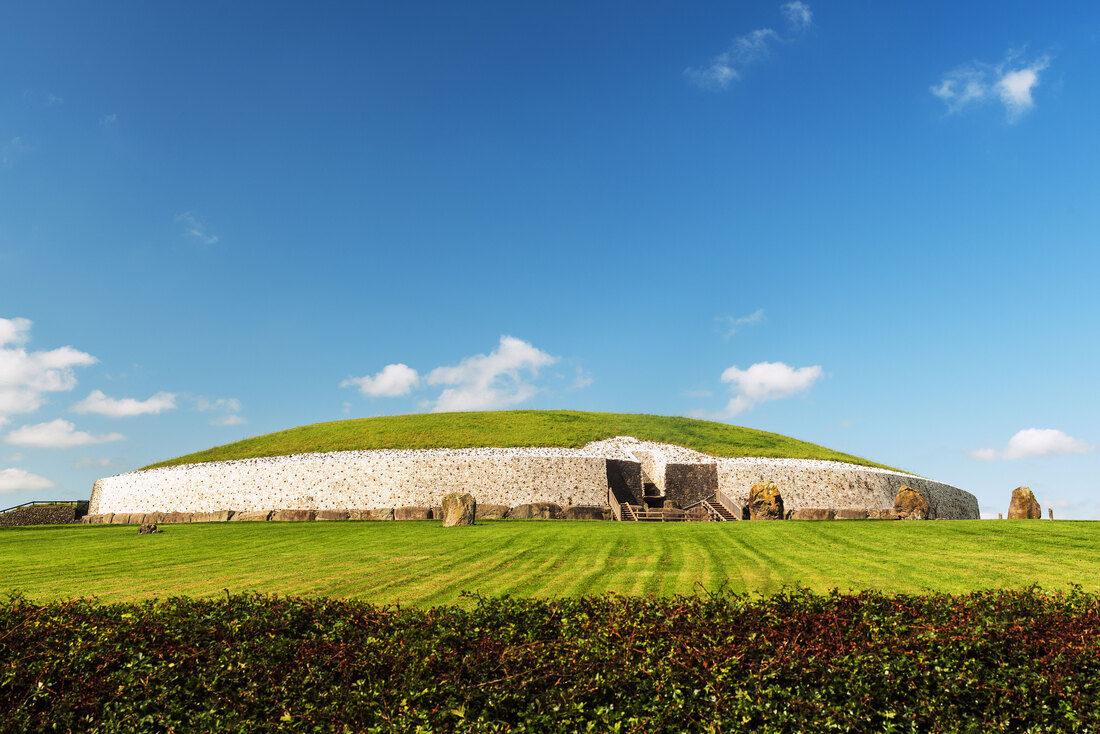 Image by Rubende Antonio on Adobe Stock. Irish mythology can be complex and contradictory, and there is so much more than I can discuss here. If you’d like to take a deep dive into this topic, check out mythicalireland.com, where Irish author, researcher, and photographer Anthony Murphy provides endless material about everything to do with Irish mythology. Another site--https://emeraldisle.ie/home--has a plethora of tales and legends you can read, but even this is just scratching the surface! The habitat of the sidhe The sidhe are said to live lives similar to our own but in a parallel world, if you will. A magical barrier keeps us from seeing them most of the time, but they are there just out of reach. The ethereal places of fairies or fairy magic are often described as “places where the veil between this world and the next is thin”. The old timers and true believers will tell you the sidhe can be found in many wild or hidden places across the land. The natural world and mythical heritage sites are full of fairy habitats, and these places are to be respected and left alone.  Image by Samantha Lachs on Pixabay.  Image by Overburn on Adobe Stock. Ireland is a land of mystical beauty, to be sure. Dotted all along its verdant landscape are thousands of ancient and prehistoric sites--ring forts or raths, burial mounds, stone circles, dolmen, and henges. These sites have significance in Irish history and folklore and make convenient dwelling places for the fairy folk.  Image by veneratio on Adobe Stock. Trees in Celtic lore are highly symbolic, and any solitary tree or cluster of trees with a unique presence in the landscape are identified as “fairy trees” and are said to be imbued with sacred or magical powers. One such tree is the hawthorn (aka, whitethorn), whose striking form with branches lopsidedly outstretched and seemingly reaching out can be seen dotted across the countryside. The rowan is another revered tree whose berries are associated with youthfulness and healing and are said to be the food of the Good People. Other trees with sacred significance include oak, blackthorn, holly, yew, and elder.  Image by Evgeni Tcherkasski on Pixabay.  Image by Thilo Wirestock on Adobe Stock. Water in Irish folklore—as in most cultures—plays a significant role in all things mystical and sacred. Many Irish wells and springs were usurped by Christian saints (such as St. Brigid) and the Virgin Mary, who act as guardians of the sacred water. Ancient peoples threw precious objects into some of these water sources as a sacrifice in reverence to the life-giving female aspect of existence or to the gods and goddesses of their time. The salmon of knowledge known in ancient Celtic mythology swims in a stream under a hazel tree. Not only is water symbolic of wisdom, but it can often be the gateway to the Otherworld.  Image by Eddie Cloud on Adobe Stock. The do’s and don’ts when dealing with the sidhe The sidhe are known for their enjoyment of music and dance, entrapping travelers who happen to wander into their magical spaces. On the surface, it may sound like quite an adventure to stumble upon such a place, but there are stories of people who spent time with the fairies, only to return to the land of the living to find many years have passed and everyone they once knew is long gone.  Image by FotoHelin on Adobe Stock. Reverence to the sidhe and their dwelling places remains embedded in Irish culture to this day. Trees and mounds are left alone, and construction projects have been forced to work around certain areas so as not to anger the sidhe. The retribution of these fairy folk when angered can be swift and vengeful. People are said to have been struck ill, plagued by bad luck, or even died because they dared mess with a fairy dwelling!  Image by Myri Roet on Pixabay. According to popular superstitions, you can repel a malicious fairy with salt or iron. There are tales of mothers placing something made of iron near a baby’s crib to prevent the sidhe from stealing their babies and replacing them with changelings. If you happen to be on foot traveling and are trying to avoid a pursuing fairy, you could try crossing a stream or other body of flowing water. Popular lore says most fairies do not cross running water. (Remember the Lord of the Rings with the Black Riders?) If you want to get on the good side of the fair folk, try appeasing them with gold trinkets, gemstones, shells, shiny jewelry, or shrines with offerings such as milk, candies, or sweet cakes. Ending thoughts… With all that being said, given the right circumstances, the sidhe can sometimes be helpful to humans, so they are not entirely malevolent creatures. Like many other supernatural creatures of the fairy world, they are neither good nor bad. Fairy folk in Ireland and Europe represent the duality of the good and the bad in humankind and life experiences. Ireland has a rich and colorful history, with a penchant for interweaving mythology, history, religion, and folklore. The fairy folklore of this land has been born out of this tradition and is just as rich and contradictory. There’s simply no way of telling where the ancient Celtic religion ends and the more modern fairy tales begin. It is all just one fantastically colorful tapestry that defines the very essence of what it is to be Irish.  Image by Dawid on Adobe Stock. Related blogs you may want to read: 10 Fun Facts About Leprechauns A brief history of the origins of fairy gardens A brief history of the Irish shamrock Celtic Tree of Life Celebrating Irish art for St. Patrick’s Day Sources: http://chalicecentre.net/blog/into-the-faery-woods/ https://thecelticjourney.wordpress.com/ https://www.irishcentral.com/roots/history/irish-legend-pooka https://www.teeliesfairygarden.com/blogs/ https://www.terriwindling.com/blog/ http://irishhedgerows.weebly.com/folklore.html https://britishfairies.wordpress.com/ https://donegalsquare.com/are-fairy-trees-a-fairy-tale/ https://irishfolklore.wordpress.com/ https://folklorethursday.com/folklife/the-fairy-trees-blackthorn-hawthorn-and-rowan/ https://www.irishcelticjewels.com/celtic-wedding/2010/09/irish-mythology-the-merrow-sea-fairies/ https://www.beachcombingmagazine.com/blogs/news/the-irish-folklore-of-the-celtic-merrow http://www.zeluna.net/list-fairy-english-celtic.html https://blogs.lib.ku.edu/spencer/how-well-do-you-know-your-irish-fairies/  Image by Yuliya on Adobe Stock I love the month of March for two reasons—spring and St. Paddy’s Day. Most years, I try to find some cerebral topic to write about for St. Paddy’s Day as a way to embrace my own Irish heritage respectfully…but this year, I thought we’d just have a little fun! No sense in taking ourselves too seriously, right? This year’s topic is fun facts about the little green men. No, not aliens…Leprechauns! What do you know about those little green goblins called leprechauns? Today, I thought I’d give you ten fun facts you can share at that St. Paddy’s Day party! Red leprechauns?? Believe it or not, leprechauns were not always dressed in green. A couple hundred years ago, leprechauns in traditional Irish folklore wore red jackets and knickers with a tri-cornered red hat. What we know as the jolly little man wearing green with a red beard is a fairly recent development.  Image by cynoclub on Adobe Stock Little dudes In Irish lore, leprechauns are almost always little men with withered faces. They are known for their diminutive size (in most cases), and there are no female leprechauns!  Image by Christina Saymanski on Adobe Stock Crafty little dudes! Many Irish folk stories depict leprechauns as craftsmen, usually shoemakers. They are very good at making and repairing things. These guys have no problem working with their hands!  Image by Lars Nissen on Pixabay Hidden homes According to popular lore, leprechauns like to live in dark, out-of-the-way places like caves, tree trunk hollows, or basements (especially wine cellars). Out of sight, out of mind!  Image by Mike Goad on Pixabay Treasure hoarding Leprechauns are only one of many fairy folk known to collect and guard coins and treasure. This is deeply rooted in the mythology and folk tales across Europe.  Image by aleksandra85foto on Pixabay Tricksters Leprechauns are known to be shrewd tricksters who use human greed to fool those who want their gold. Keep your eyes on this little man if you want his gold, but know he will trick you by any means necessary! This mischievous fairy has fun inflicting low-level harm and practical jokes, so beware! Three wishes! If you are lucky enough to catch a leprechaun, you’re mighty crafty yourself! Now, set him free so you get your three wishes!  Image by Johan Bolhuis on Pixabay Ancient gods Leprechauns are considered fairies or one of the many beings from the mythical people in Irish mythology called the Tuatha de Danann. These were said to have once been a real race of people conquered and banished to the ancient mounds to live for eternity. Leprechauns could be a modern relic of one of their important Celtic deities, the sun god Lugh. Water sprites?! Alternatively, leprechauns could be descended from the ancient water sprites. Many folk tales from various parts of Ireland mention names of fairy folk that seem similar in the ancient Irish language to various versions of the word leprechaun. Protected by EU law? Seriously! And I’ll leave you with the strangest one of all… There is actually a place in Ireland said to be inhabited by many leprechauns—the caverns of Carlington Mountain. And—believe it or not—this place is actually protected by EU law! The leprechauns are an important part of the local ecosystem! Yes, seriously! So that’s it! Ten fun facts about leprechauns. You’re welcome. Now, go enjoy that green beer!  Image by Grafvision on Adobe Stock Related blogs you may want to read: A brief history of the Irish shamrock Celebrating Irish Celtic art for St. Patrick’s Day Who are the Irish fairies? Sources: https://www.celtic-weddingrings.com/celtic-resources/myth-of-the-leprechaun https://www.worldhistory.org/Leprechaun/ https://www.connollycove.com/leprechauns/ https://www.trafalgar.com/real-word/history-of-leprechauns-trickster-fairies/ 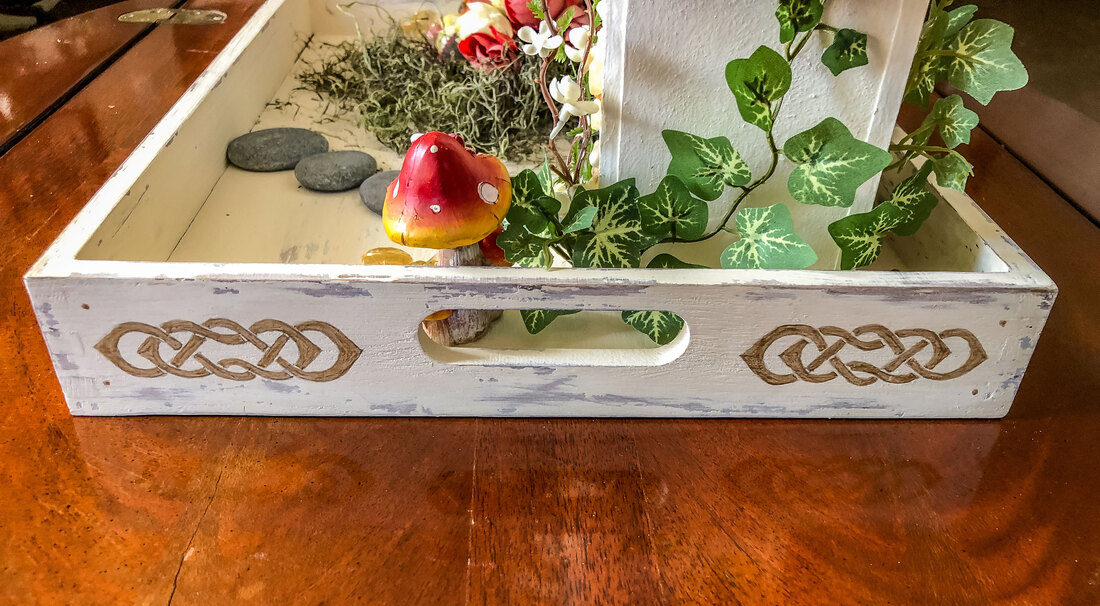 Celtic knot painted on a decorative tray. Photo by Diane M. Lilly, 2022. Welcome to part two of my DIY chalk-painted tray project! In part one, I chalk-painted a decorative tray using a “chippy” weathered effect. Now, let's go through the steps I took to design and paint a border around the vertical exterior sides of the tray. This will not be a tutorial on creating Celtic knots—that would turn this blog post into a book (which is in the works, by the way)! The goal is to help you create a simple design that can be traced onto the newly painted decorative tray for a bit more pizzazz. 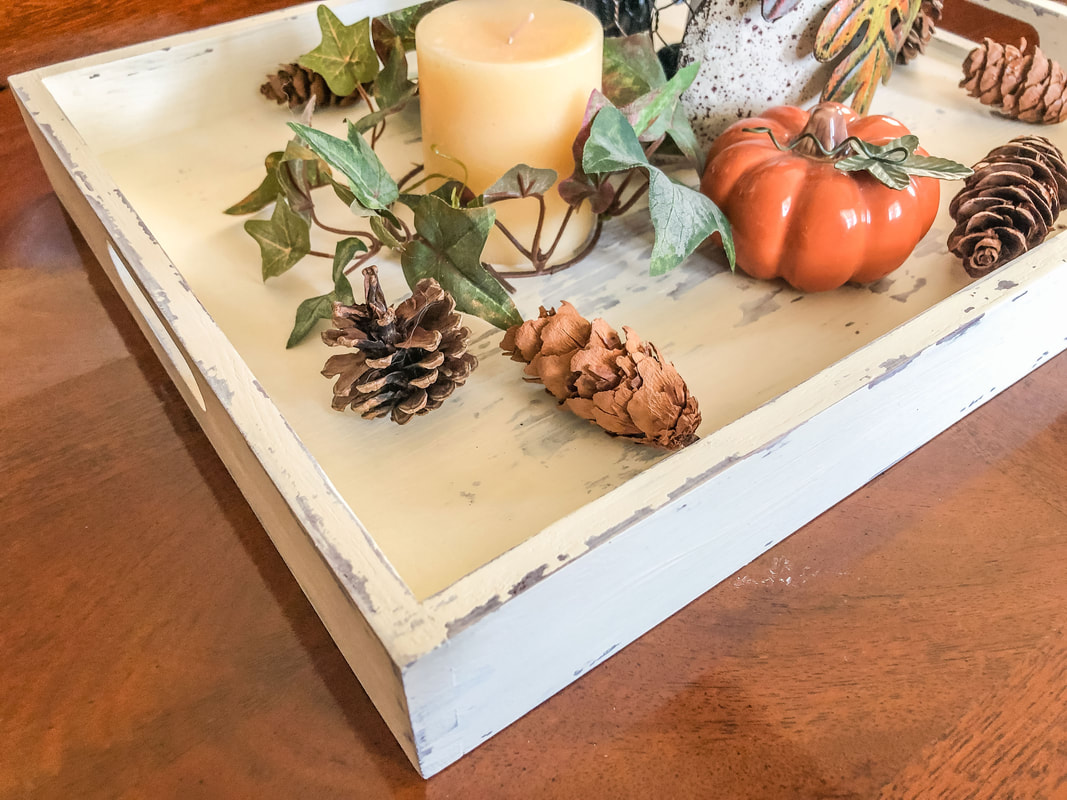 DIY chalk painted decorative tray before knotwork details were added. Photo by Diane M. Lilly, 2022. I love Celtic art and knotwork! I am always looking for ways to sneak some Celtic knots into my decor, so when I started painting a decorative wood tray for my living room, it was inevitable that it would end up adorned with a Celtic knot border! So here we are at part 2 of this project, where I walk you through how I drew and painted a beautiful knot border onto the sides of my newly painted tray. So let’s dive right in and go through this process step by step… Materials needed: pencil eraser ruler grid paper tracing paper tape scissors craft paint sandpaper (optional) varnish (optional) Step 1—Get measurements The first thing you need to do in a project like this is to get some basic measurements. My tray is 16” x 12” with 2” H sides. The long side of my tray is 16” L x 2” H. The short sides of the tray have holes for handles that split the empty areas into two parts that are 4 1/2” L x 2” H each. Step 2—Plot out measurements on grid paper If you’re creating a freehand design, you won’t need grid paper, but you’ll still need to measure the drawing area on your paper so your template will fit the area to be painted. Using grid paper may help keep your design symmetrical and more accurately aligned. For this project, I plotted out one section measuring 16”x 2” and another measuring 4 1/2” x 2” on my grid paper. Marking the edges, I then plotted out the ‘working” area, meaning I made decisions on how much space to leave between the design and the edges of the tray. I took this opportunity to mark the midpoints for each section on the paper and the tray. This helps tremendously later on when we have to align the template onto the tray to get the design perfectly level…so don’t skip this step!  Grid paper maps out the exact measurements for the tray sides and work areas for the knotwork border. Photo by Diane M. Lilly, 2022. Step 3—Create a simple line design I am in the process of putting together future tutorials on how to create Celtic knots, but for the sake of this project, I will share one of the simplest ways to draw a Celtic knotwork border—starting with drawing a single line. I found a Celtic-style border knot in a linked pattern and then reverse-engineered it to make it work for the dimensions of my tray. To speed up and simplify the process, I decided to work it out with a single line first. (My rough grid includes the “breaks”—I’ll go into more detail on how to do that in a future tutorial.)  The grid pattern with breaks planned out before the knot is drawn. Photo by Diane M. Lilly, 2022. 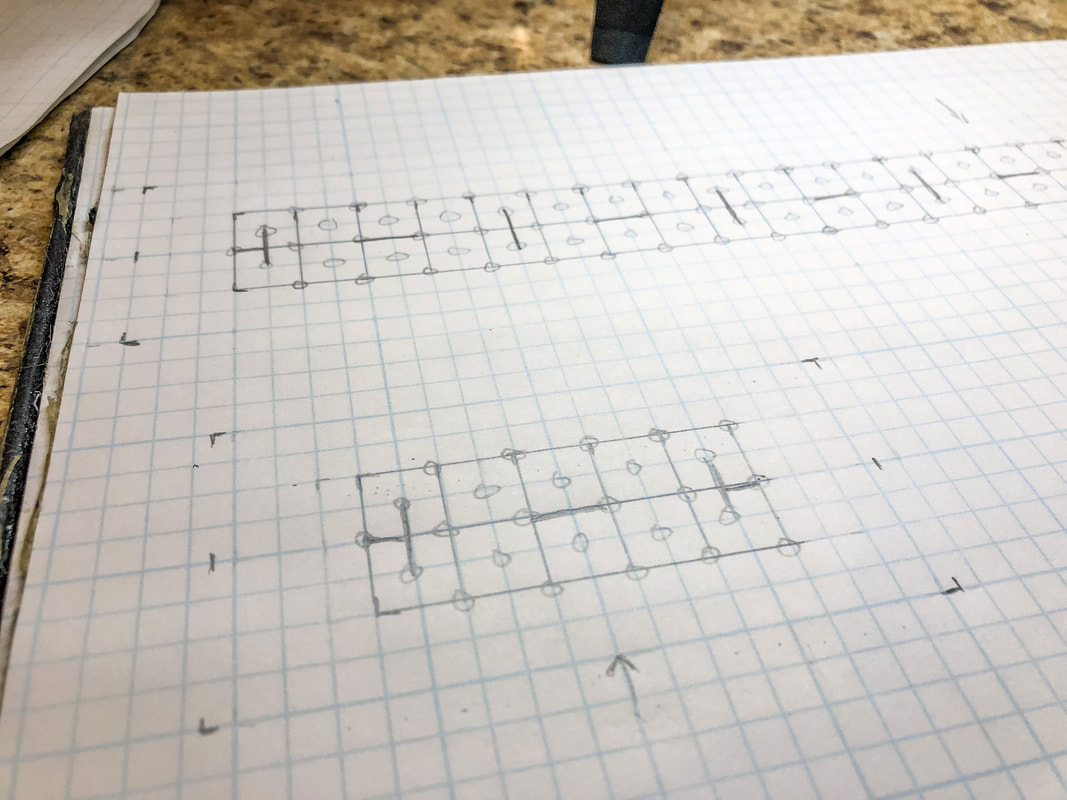 A section of the small knot mapped out on the grid with breaks. Photo by Diane M. Lilly, 2022. 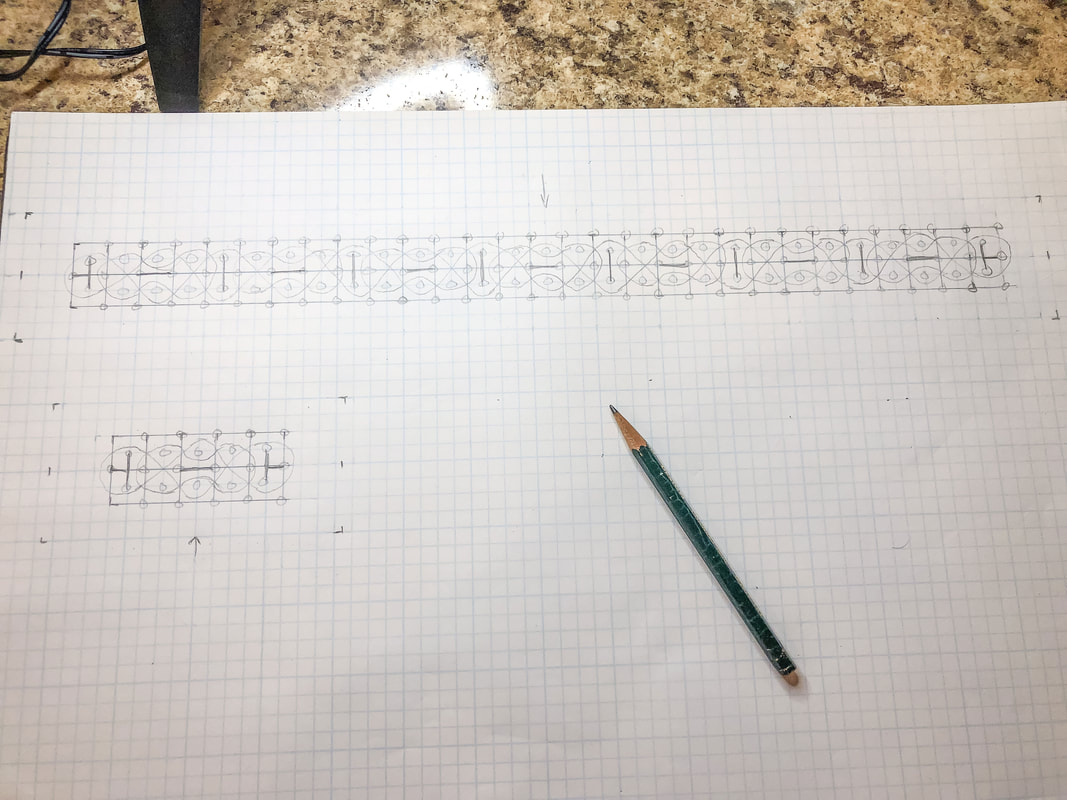 My basic line for my design drawn out on the plotted grid pattern. Photo by Diane M. Lilly, 2022. Step 4—Create the “thread” with “overs” and “unders” Now, it’s time to use the simple line as a guide to create the actual thread. Draw parallel lines on either side of your single line, working your way through your design. Don’t worry about drawing over other lines. All unnecessary lines will get erased when you start marking out the “overs” and “unders” (the weave pattern for your design). Once the “thread” has been established, erase that first single line. It’s done its job, and you don’t need it anymore! 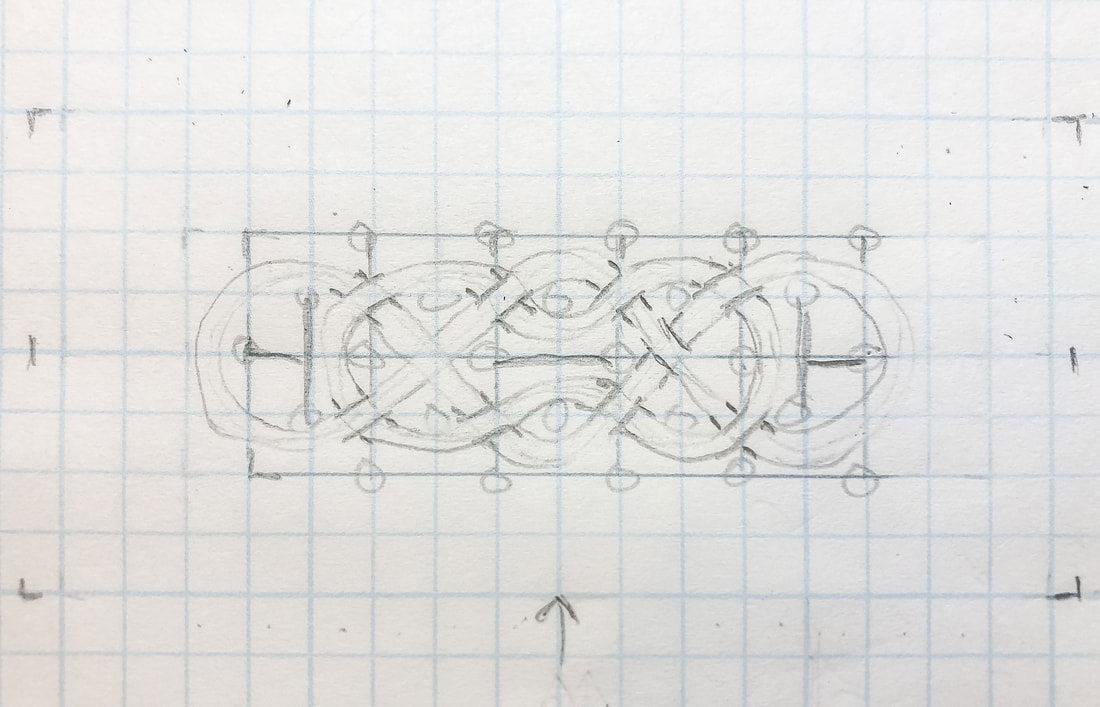 The double lines have been drawn and the single line erased to create the thread, overs, and unders. Photo by Diane M. Lilly, 2022. Now it is time to work through the “overs” and “unders”… Pick a starting junction and decide which thread will go under and which will go over, creating what some call a “bridge and tunnel” or the beginnings of a weave. Erase the lines accordingly and work through the design by following that thread, alternating over and under. DO NOT JUMP AROUND! Stay with that thread until you come back to your starting point. Work through any additional threads, double-checking that your overs and unders alternate. Once satisfied with your overs and unders, clean up the drawing and add stylistic details. 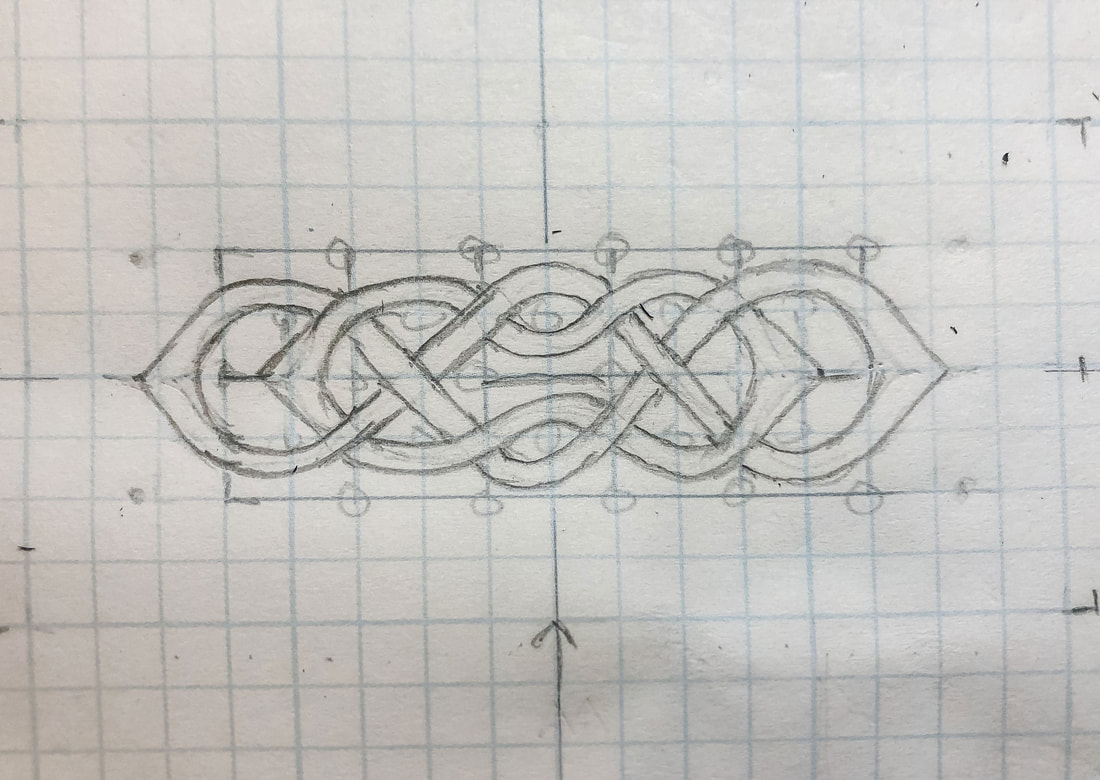 My basic thread knot has been stylized by adding points at the end. Photo by Diane M. Lilly, 2022. 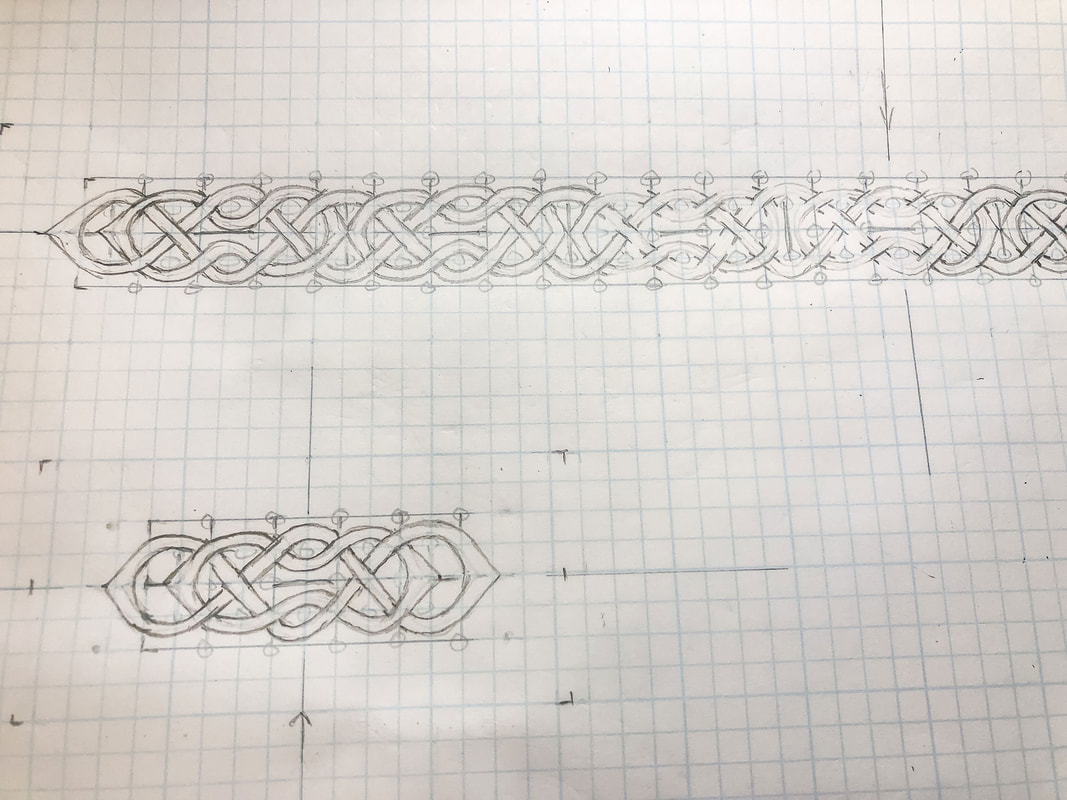 The small knot and a section of the large knot. Photo by Diane M. Lilly, 2022. Step 5—Create the template using tracing paper The new design can now be traced onto tracing paper to create the template. There are many techniques for creating templates--I am just sharing one that has worked well for me. Place a sheet of tracing paper over your drawing and securely tape it in place so it doesn’t move or bubble. Carefully trace your design lines with a pencil using fairly hard pressure. Mark the edges of your template (using a straight edge) and indicate the midlines on all four sides.  My knotwork redrawn on tracing paper for a template. Photo by Diane M. Lilly, 2022. Carefully cut out the templates along the edges. You should now have two templates with your new knotwork borders that perfectly fit your working space on your project. For my project, one template measured 16” x 2” and the other 4 1/2” x 2”. 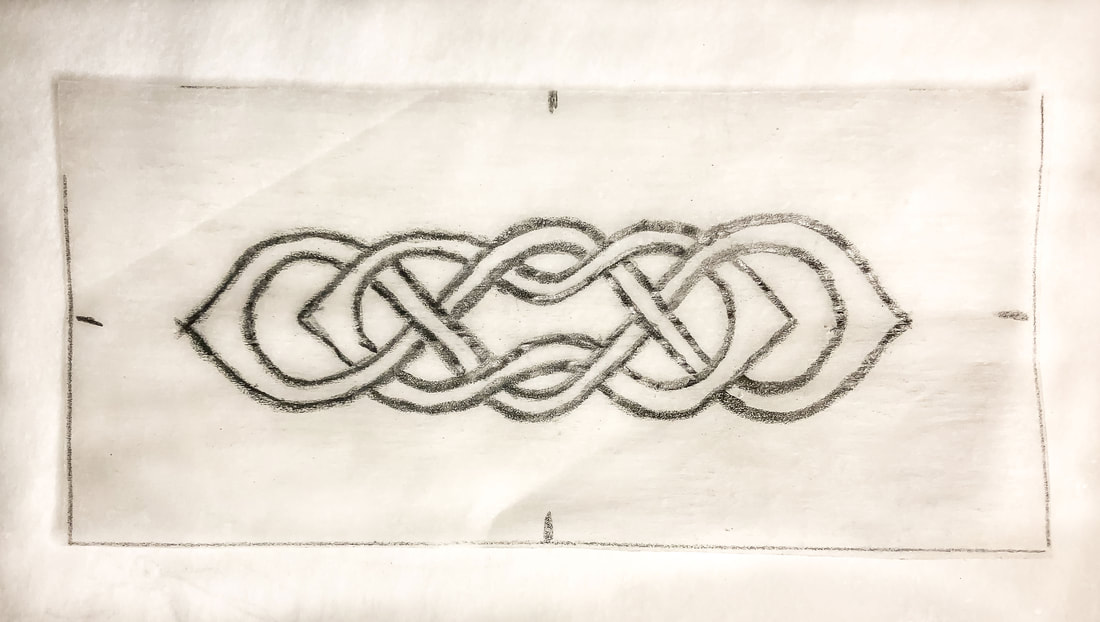 The small knot cut out as a template. Photo by Diane M. Lilly, 2022. Step 6—Trace the design onto the tray Turn the template pencil side down and securely tape it into a place where you want your design, carefully lining up the edges and midpoints for each of the four sides. Trace the lines with a pencil. Use enough pressure to transfer the pencil marks onto your workspace. If you’re unsure if you’re using enough pressure, remove a bit of tape (carefully) and check to see if you can see the design on the tray. Repeat this step on all four sides of the tray. 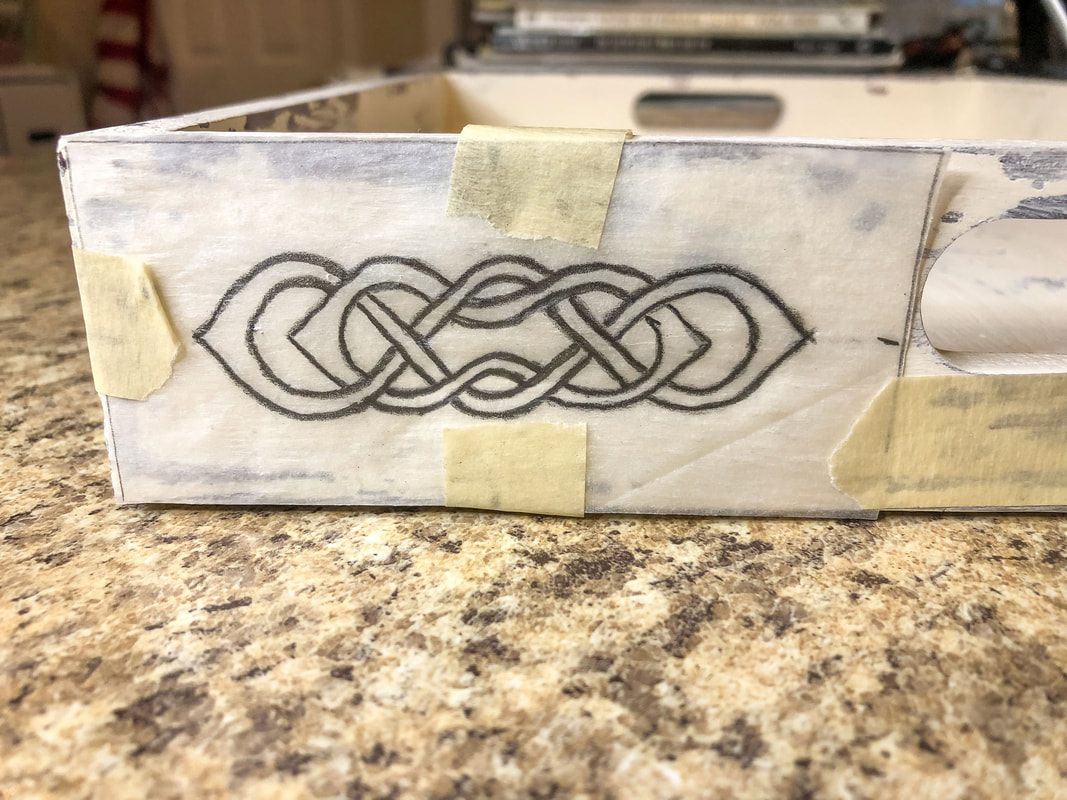 The small knot template taped onto the tray. Photo by Diane M. Lilly, 2022. 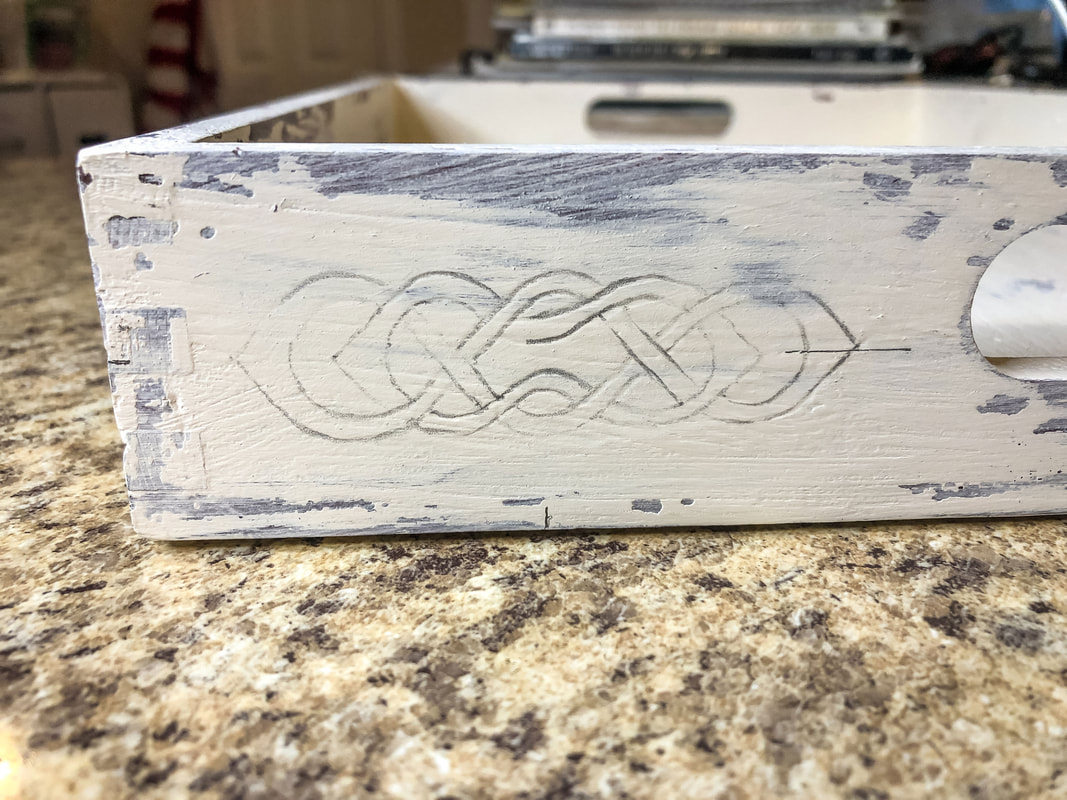 The small knot traced onto the tray. Photo by Diane M. Lilly, 2022. 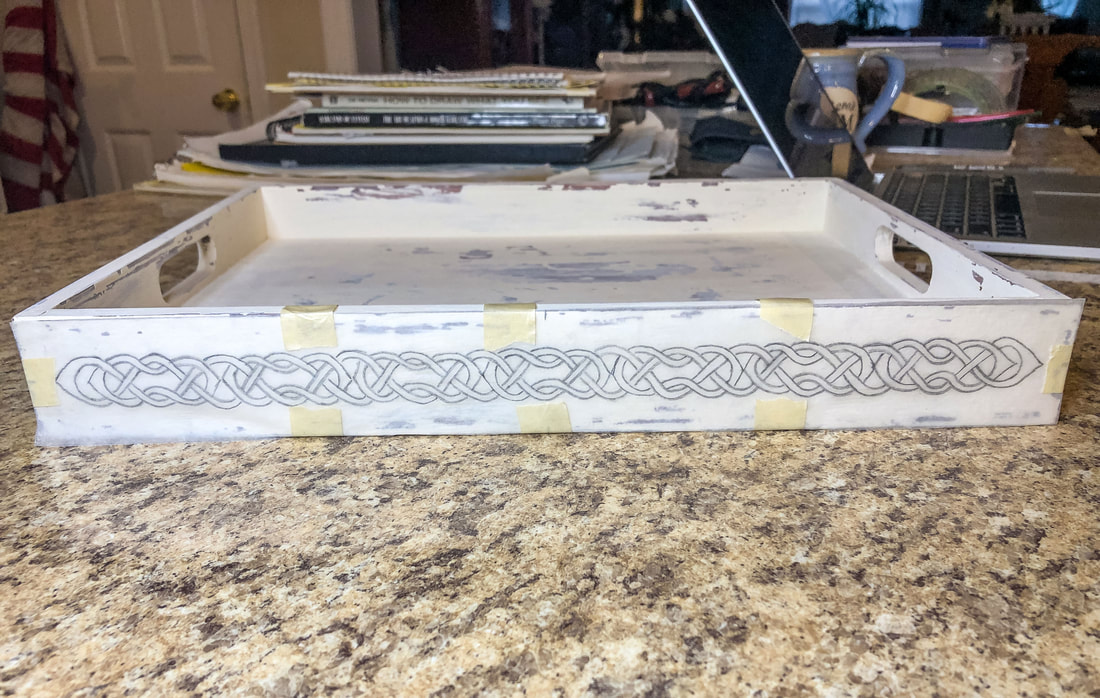 The large knotwork border template taped into place. Photo by Diane M. Lilly, 2022. 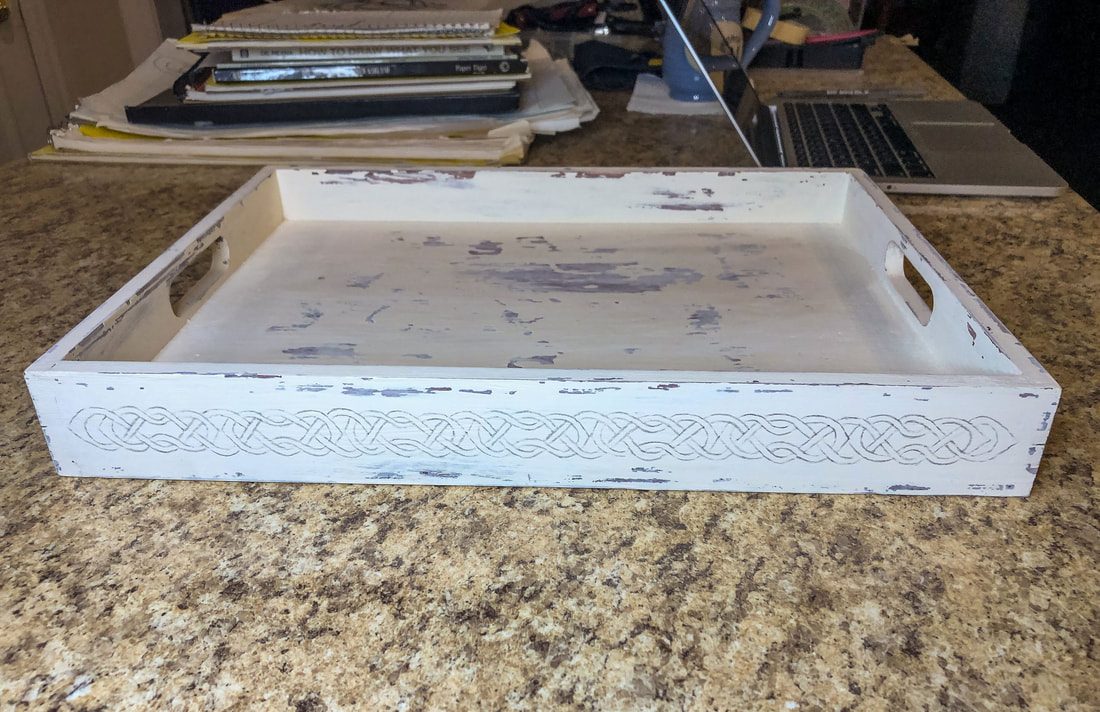 The large knotwork border traced onto the tray. Photo by Diane M. Lilly, 2022. Step 7—Paint the design Choose a paint color and a small paintbrush with pointy bristles, and start painting your design! This may require two to three coats, depending on the desired look.  Gold craft paint. Photo by Diane M. Lilly, 2022. If you do not have a steady hand--or do not have the patience for hand painting--try using paint pens instead. For this project, I suffered through it and used the paint and brush technique, but I also purchased some gold paint pens from Amazon for another project and found the process much easier. The technique you use for this project is completely up to you. In part one of this project, the tray was painted to look used and battered, and I was satisfied with the results. Once the knotwork was finished, however, I decided the tray still needed more work. So, I took some 220 grit sandpaper and did a bit more sanding to get the final weathered effect. 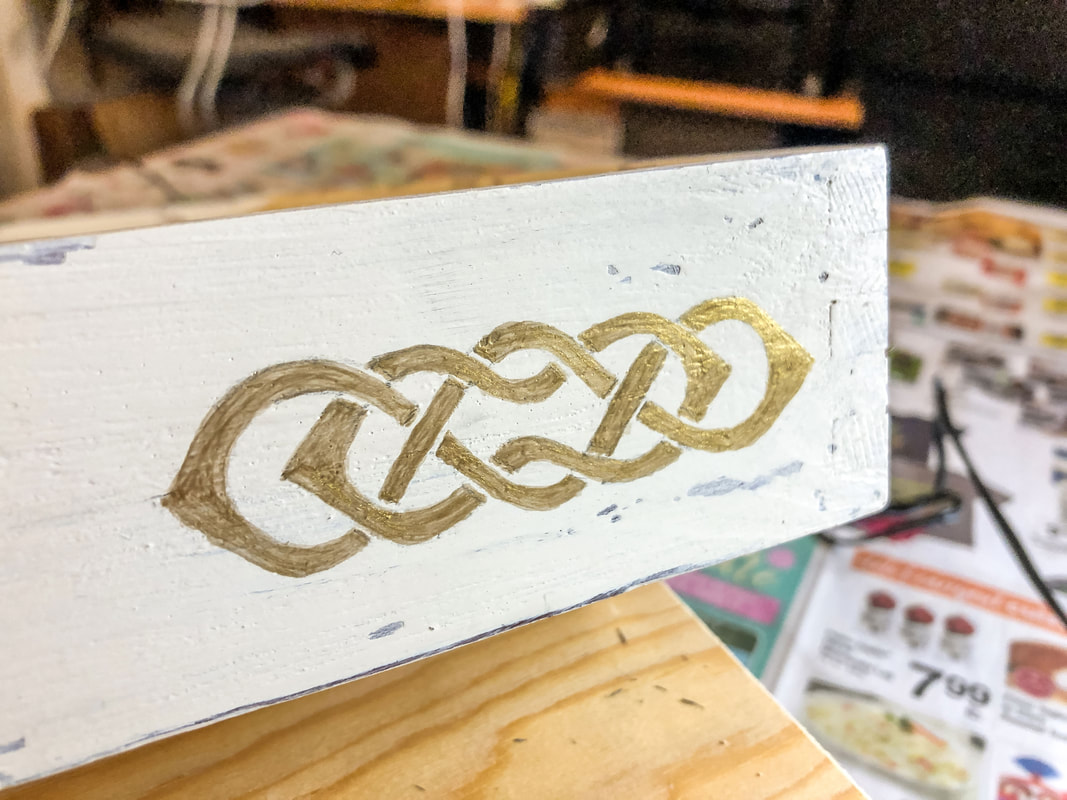 The small knot painted on tray in gold. Photo by Diane M. Lilly, 2022. 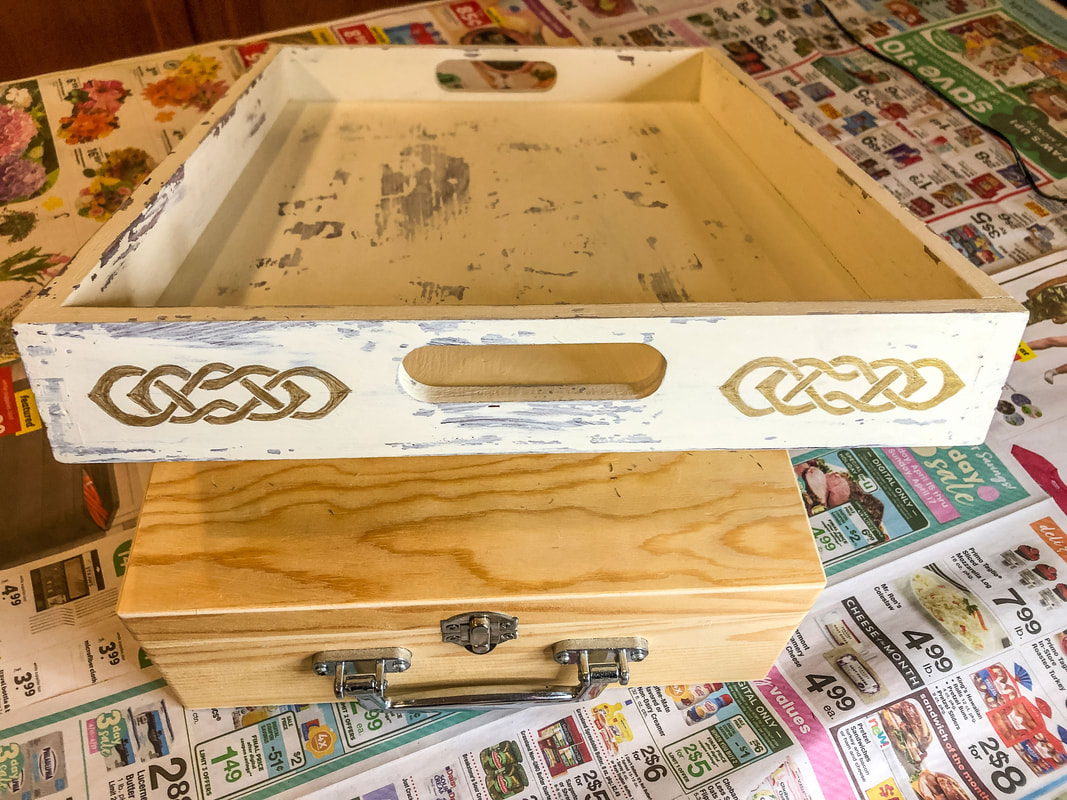 Knots painted on short end of tray. Photo by Diane M. Lilly, 2022.  The long end of the tray being painted with a gold knotwork pattern. Photo by Diane M. Lilly, 2022. 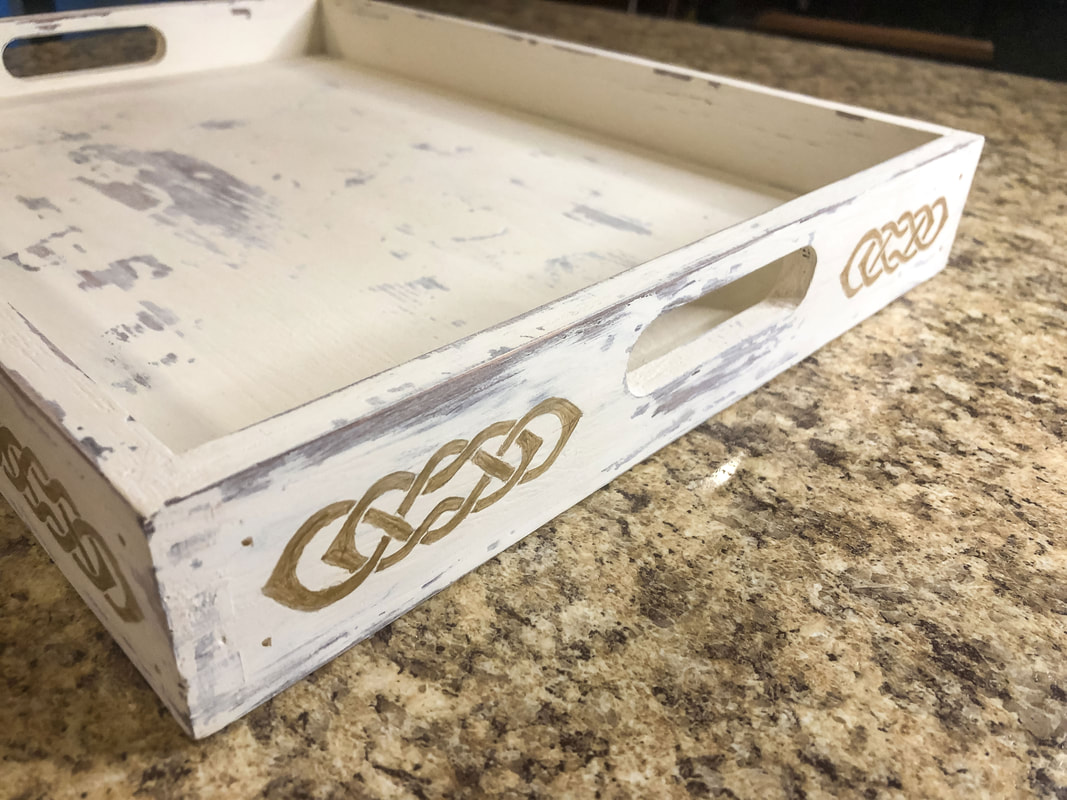 Celtic borders finished and more sanding done to tray. Photo by Diane M. Lilly, 2022. 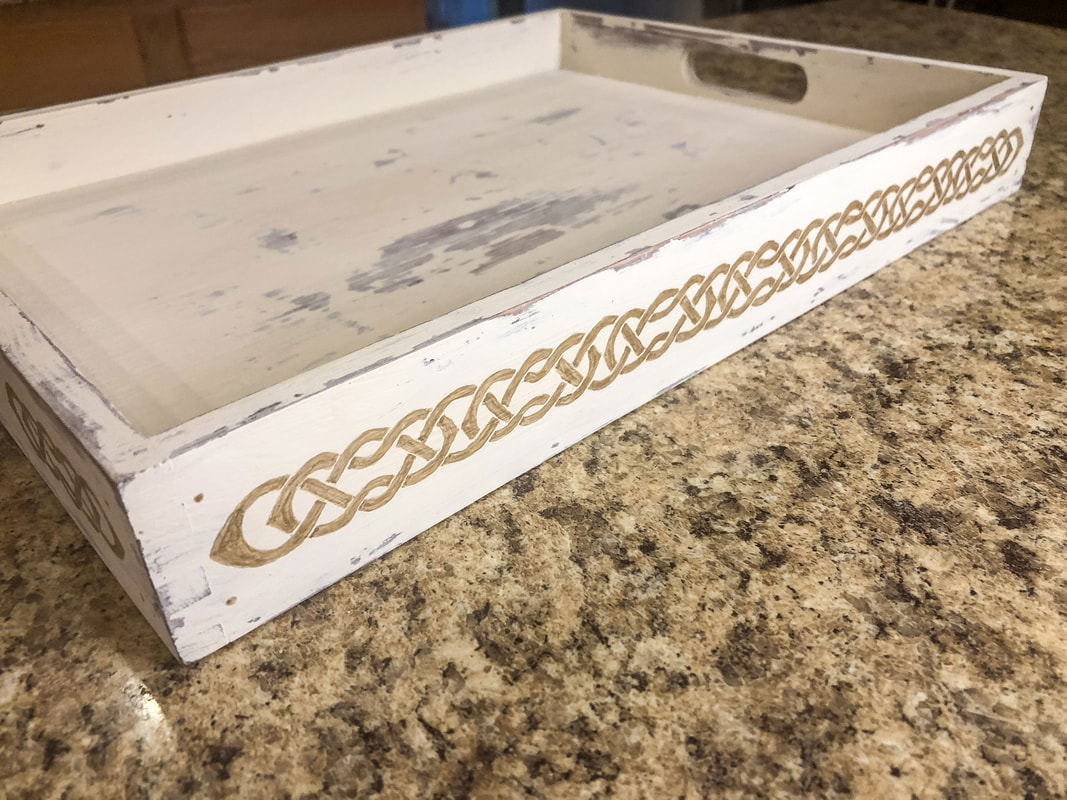 The long side of the tray with its new Celtic knotwork border. Photo by Diane M. Lilly, 2022. Step 8—Varnish to protect the paint (optional) This step is optional, but it can be a good way of protecting all your hard work! I’ve decided not to varnish my tray, at least for now. Usually, when I do a project like this, I add soft pads to the bottom to protect surfaces, but I may decide to make alterations or additions to this tray, so for now, I will forego the pads and varnish until later. So there you have it! The Celtic border knot was WAY more work than planned for this project, but I’m glad I did it. I love that I now have another decorative piece with beautiful Celtic art on it--Celtic art I drew and painted myself! This tray was a lot of work, but I love the rustic, charming look. 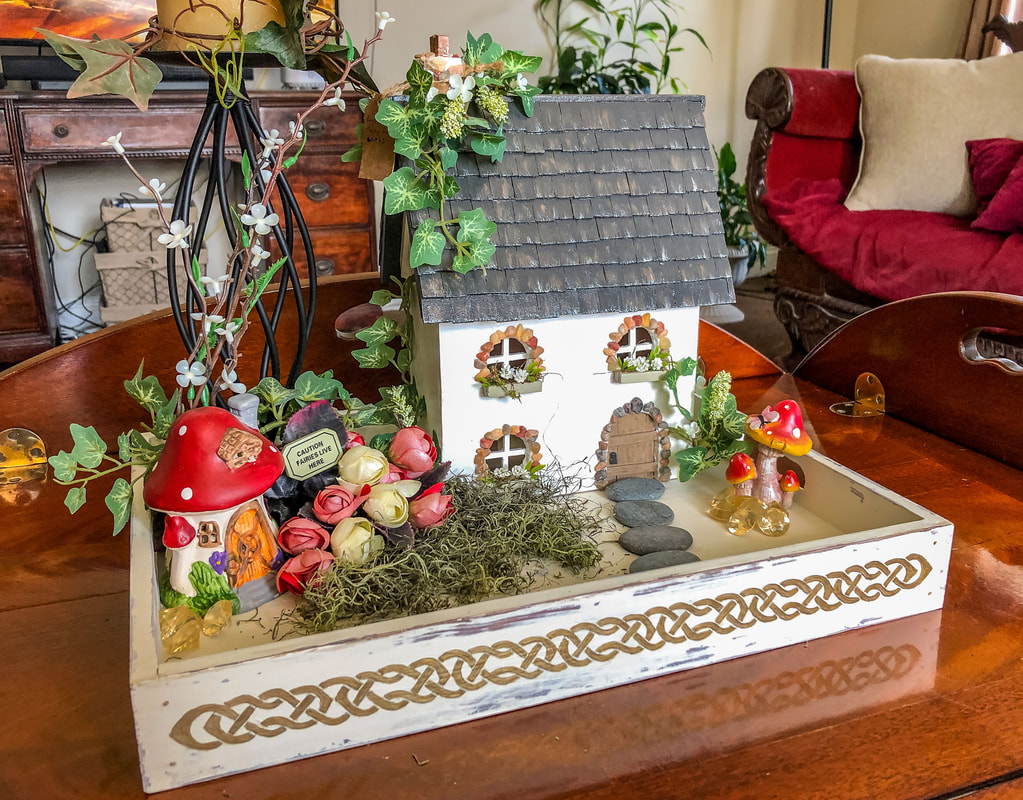 My tray is finished and staged with one of my new Celtic fairy houses. Photo by Diane M. Lilly, 2022. 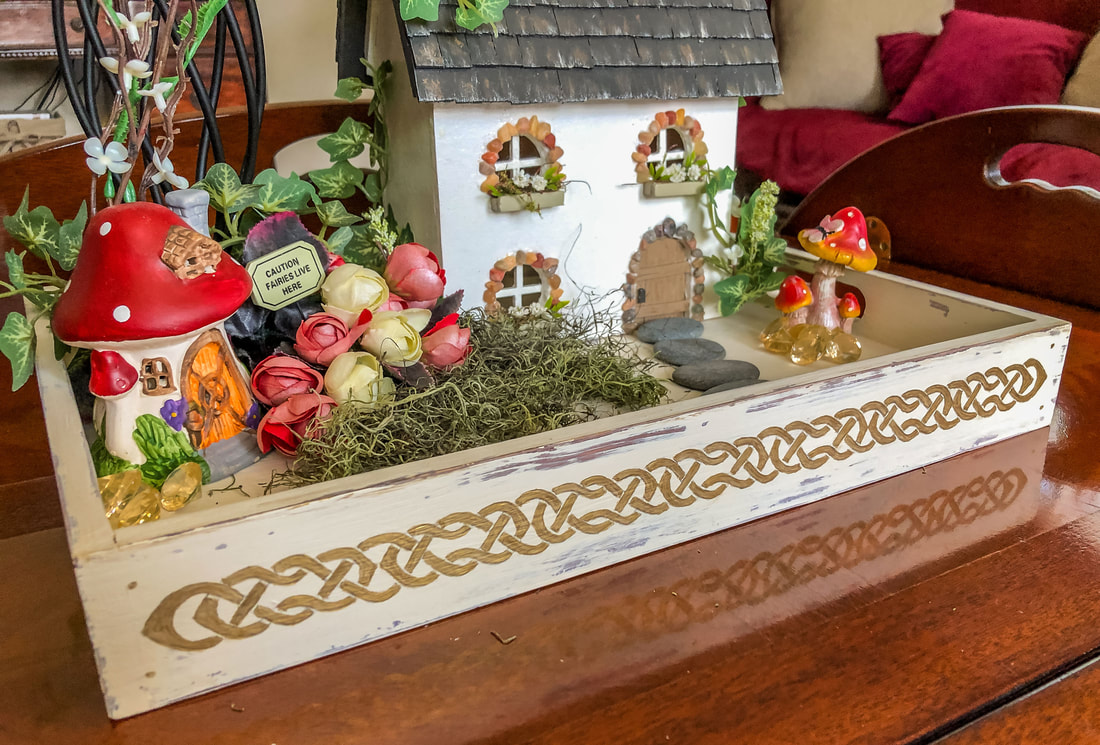 A look at the long side of the tray. Photo by Diane M. Lilly, 2022. 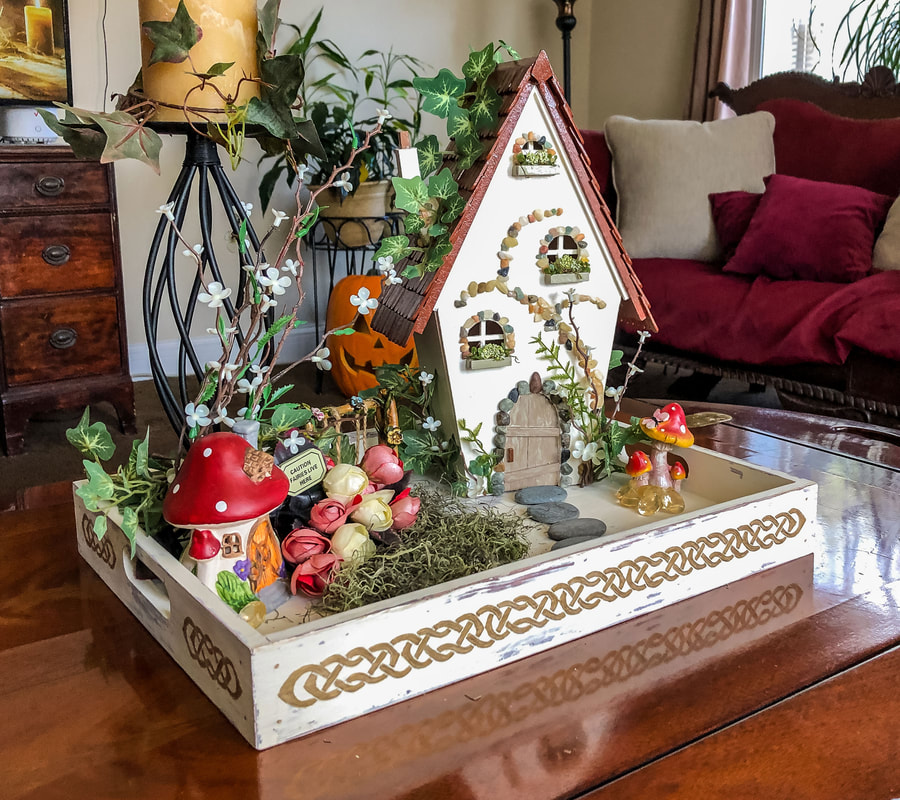 My Celtic inspired diy tray staged with the new Fairy House cottage. Photo by Diane M. Lilly, 2022. 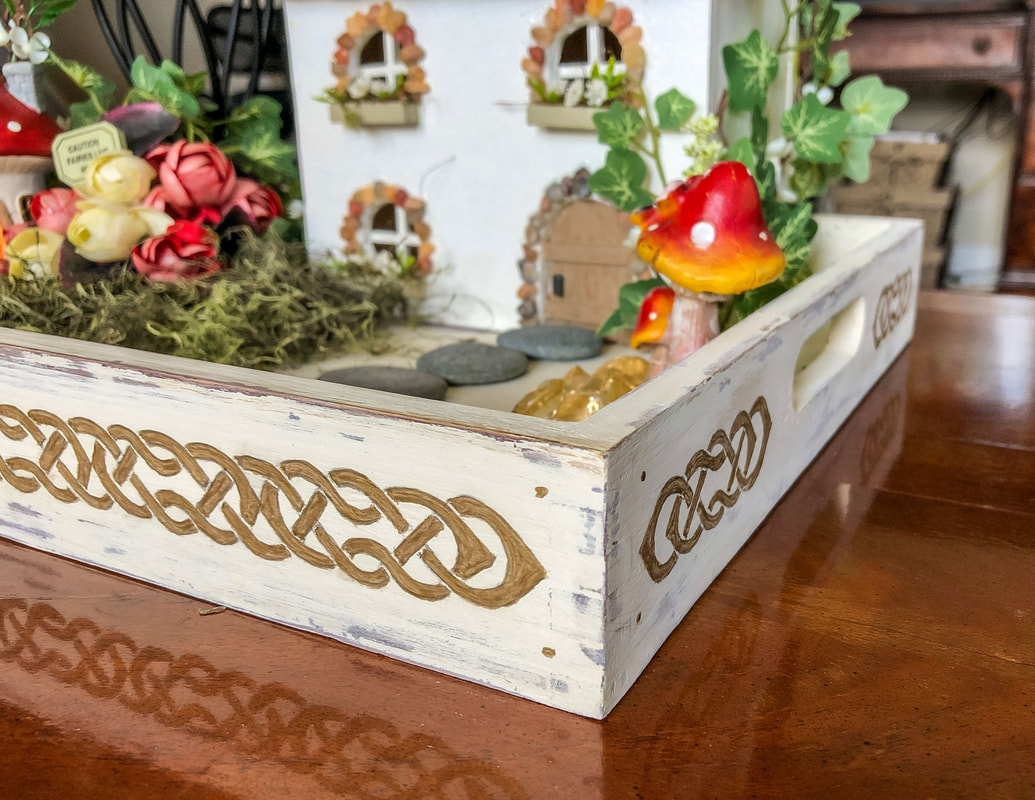 Closeup of the tray corner with views to both sides and Cletic knot borders. Photo by Diane M. Lilly, 2022. I know this was a complex project to throw out there, and the thought occurred to me that people might want to learn how to draw this kind of intricate artwork, so I have decided to start work creating and compiling downloadable ebooks with tutorials on how to construct Celtic knots. I’m unsure when they will be available, but sign up for periodic emails for updates on these ebooks and other projects. Let me know in the comments if you've done anything similar and what you think of this project! Related blogs you may want to read: DIY chalk painted tray with chippy effect A little project with jute twine and an old foot stool DIY refurbishment of a dining room cabinet A fun DIY project with paint and a thrifted mirror part 1 A fun DIY project with paint and a thrifted mirror part 2 Creating a kitchen coffee bar On a mission to recycle this neglected vintage stool The stain stripping stage of rescuing my vintage stool Staining my vintage stool with brewed tea My tattered vintage stool transformed into a beautiful plant stand Homemade candle recipe with a eucalyptus fragrance Homemade candle recipe with a hazelnut fragrance Affiliate Disclosure Some of the posts in this article contain affiliate links. This means if you click on the link and purchase the item, I will receive an affiliate commission at no extra cost to you. I will only recommend products or services I use personally and/or believe will add value to my readers, so there is no conflict of interest. 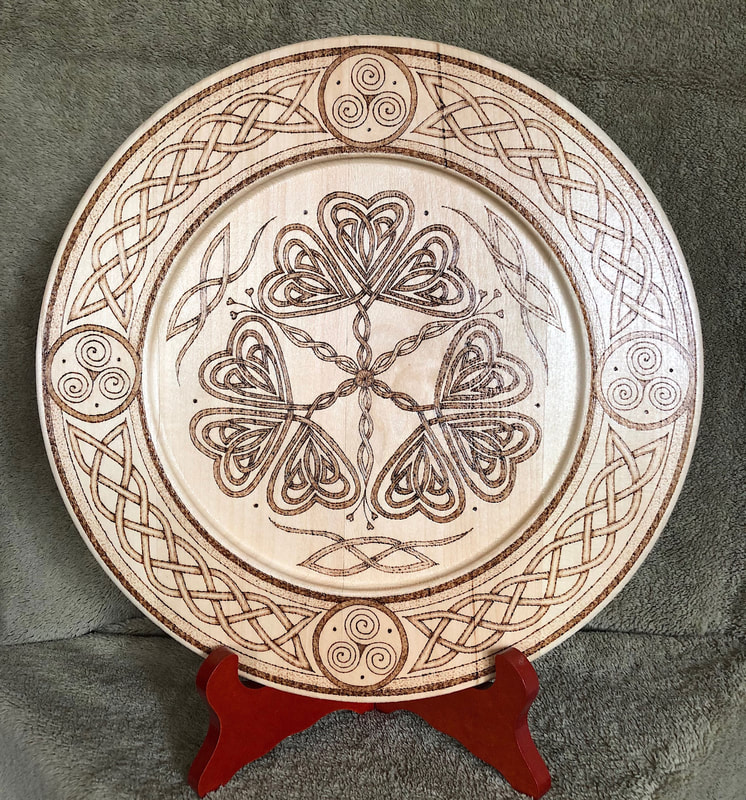 Celtic Shamrocks Wood Burned Decorative Plate by Di's Studio Designs. Photo by Diane M. Lilly, 2019. The legend of the shamrock is closely tied to St. Patrick—a man who was born in Roman Britain, lived as a slave in Ireland as a youth, escaped his bondage, and then spent some time back in England, where he seems to have become a Christian missionary or priest.  Image by GerDukes on Pixabay. St. Patrick—described by Irish Central as landing back in Ireland sometime around 431 AD—used the shamrock (the three-leaf clover) to teach the native Celtic peoples about the Holy Trinity (Catholics will know this as the Father, the Son, and the Holy Ghost). St. Patrick later became the patron saint of Ireland, and the shamrock became an emblem of the Irish and Ireland and a symbol of good luck.  Image by Leonid Adronov on Adobe Stock. Whether or not this legend is a true story is up for debate, but Irish “history” and myth often meld together, blurring the distinction between the two. The story of the shamrock doesn’t seem to have been widely recorded until the 1600s. St. Patrick was never formally canonized by the Roman Catholic Church, further complicating the story. But we celebrate his feast day on the day of his death, March 17th. Do not confuse the four-leaf clover with the shamrock! I have childhood memories of lying in the grass, combing through clover patches, looking for the rare four-leaf clover. And I did manage to find a couple! The three-leaf variety was sadly overlooked. Back then, I didn't appreciate the deeper meaning.  Image by Africa Studio on Adobe Stock. The traditional shamrock—seamrog in Irish Gaelic—is the three-leaf version. This may have to do with the fact that the number three has had special relevance in ancient Ireland and was important to the Celts, who were the native people of Ireland. According to Irish Around the World, the goddess Anu had a close association with the shamrock, with the three petals symbolizing the three stages of a woman—the maiden, the mother, and the crone. This is just one example of the strong association with the number three with sacred beliefs. 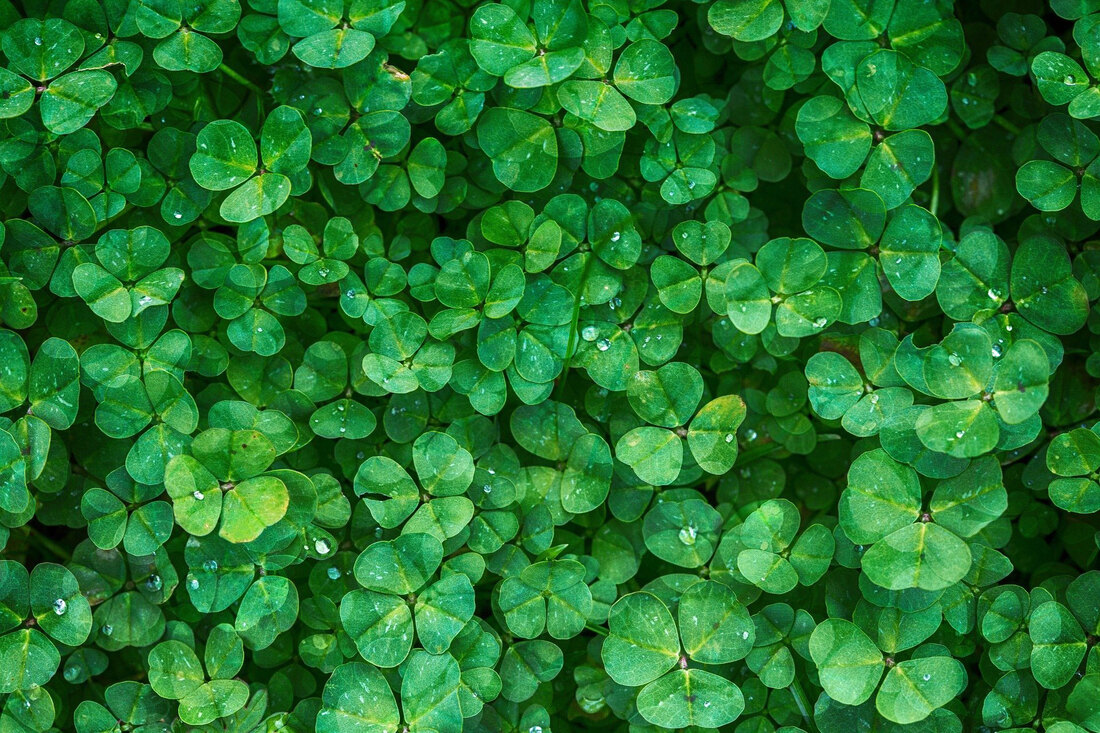 Image by damesophie on Pixabay. According to an article on shamrockgift.com (which takes a deep dive into this subject), during the 1500s and 1600s, the English used the shamrock as a derogatory way to symbolize the Irish, citing shamrocks as a popular food for which the Irish were said to forage. Even before the famines of the 1800s and the troubled relationship between the English and Irish during the twentieth century, the English regarded the Irish as backward, wild, and savage—uncivilized, one might say. And the shamrock became associated with them. 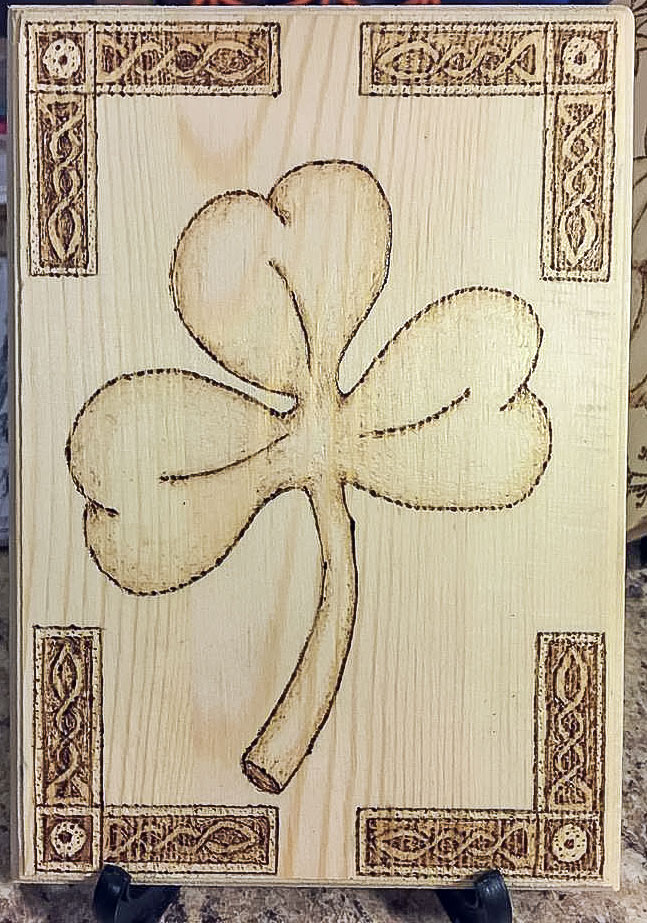 Shamrock wood burned on a small wood plaque with a Celtic knot border by Di's Studio Designs. Photo by Diane M. Lilly, 2018. In the coming centuries, the Irish took that negative connotation and made it their own by using it as emblems for various resistance groups. It came to symbolize the Irish fight against their oppressors and eventually became the national flower, if you will, of Ireland and the Irish people. It showed up in poetry and music, art and symbols. Its popularity in art and culture continues to grow.  Image by JillWellington on Pixabay. As the Irish emigrated to other countries in recent centuries, their beloved shamrock and collective memory of St. Patrick traveled with them. In their native land, the shamrock was formally recognized as the national flower of Ireland and trademarked in the 1980s (according to Irish Around the World). Along with the national symbol of the harp, the shamrock can be found on flags and art globally. image by Grafvision on Adobe Stock. And finally, the proper abbreviation for St. Patrick’s Day is St. Paddy’s Day…NOT St. Patty’s Day. Patrick in the Irish language is Padraig, hence the shortened version, Paddy. (Just a little tidbit of information for those who care!)  Graphic by Chorna L. on Adobe Stock. So Happy St. Paddy’s Day! Erin go Bragh! Related blogs you may want to read: Celtic Tree of life The Celtic Motherhood Knot, a symbol of love Basic Celtic knot tutorial Pt 1 Celtic knot tutorial part 2 Celebrating Irish Celtic art for St. Patrick’s Day A fun DIY project with paint and a thrifted mirror Part 2 In Part 1 of this project blog I repainted a frame from a mirror I bought at a local thrift shop for dirt cheap. My original intention was to paint a base coat for the reddish undertones I wanted to show through a crackled gold top coat. The end result looked ok…for a different room. The almost solid gold color just looked gaudy in my dining room, even though I have a lot of decorative things with gold accents. This mirror, unfortunately, was just too over-the-top gold. The end result was me painting over it with a new layer of crackle and white craft paint.  Painted frame from the previous DIY project. Photo by Diane M. Lilly, 2021. And this is where I left off in Part 1 of this project…My task now was to find a way to fix this mirror and make it work in my dining room. So I’m standing there—several hours of work and layers of paint later—wondering why this frame does not work. It just didn’t feel finished. I kept looking at it and trying to visualize how to get a more ornate look with gold accents. And then it hit me…This mirror needs a gold Celtic knot! I brainstormed and created templates of straight border knots that I would eventually trace onto the frame. I drew ideas on a sketchpad until I got a design I liked. This was a challenge—I knew I wanted to accentuate the corners and midpoints along the frame, so my border has broken to create visual interest, but I admit it took me some time to get the design right! Once I finally got the design I wanted, the pattern was redrawn at full scale on grid paper. The idea was to create a template that I would trace onto the frame so that it could be painted in…wait for it…GOLD! 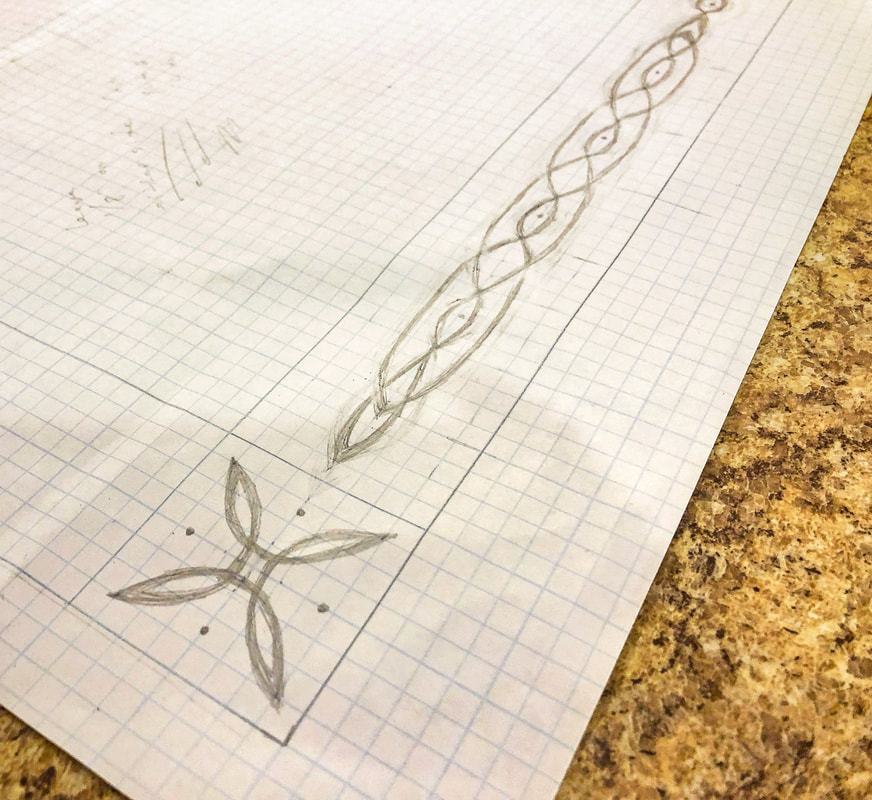 Basic lifework for my new Celtic border. Photo by Diane M. Lilly, 2021. 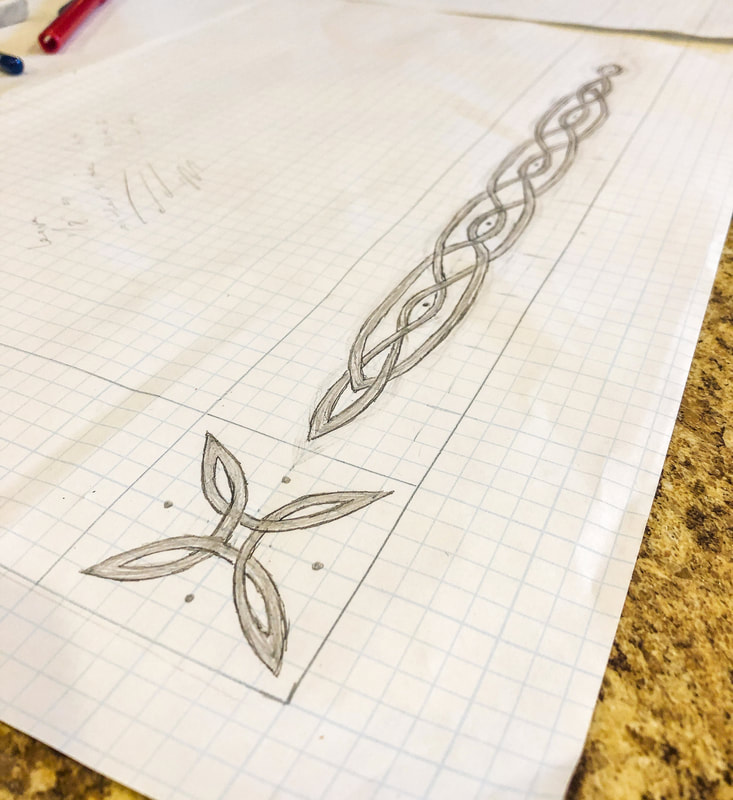 Finished knot work for template of the Celtic border. Photo by Diane M. Lilly, 2021. The template I made only needed the top and left sides with three corners, so some of the work could be simplified. Once the top and left side were traced, I could flip the paper over and retrace the design on the bottom and top. Using a very dark pencil, I traced the finished design on the back side of the paper, turned it over, and then lined it up on the frame. The paper was carefully taped down, and I painstakingly traced my knot design onto the two-inch wide wood frame. With the design template drawn onto the frame, it was time to paint! 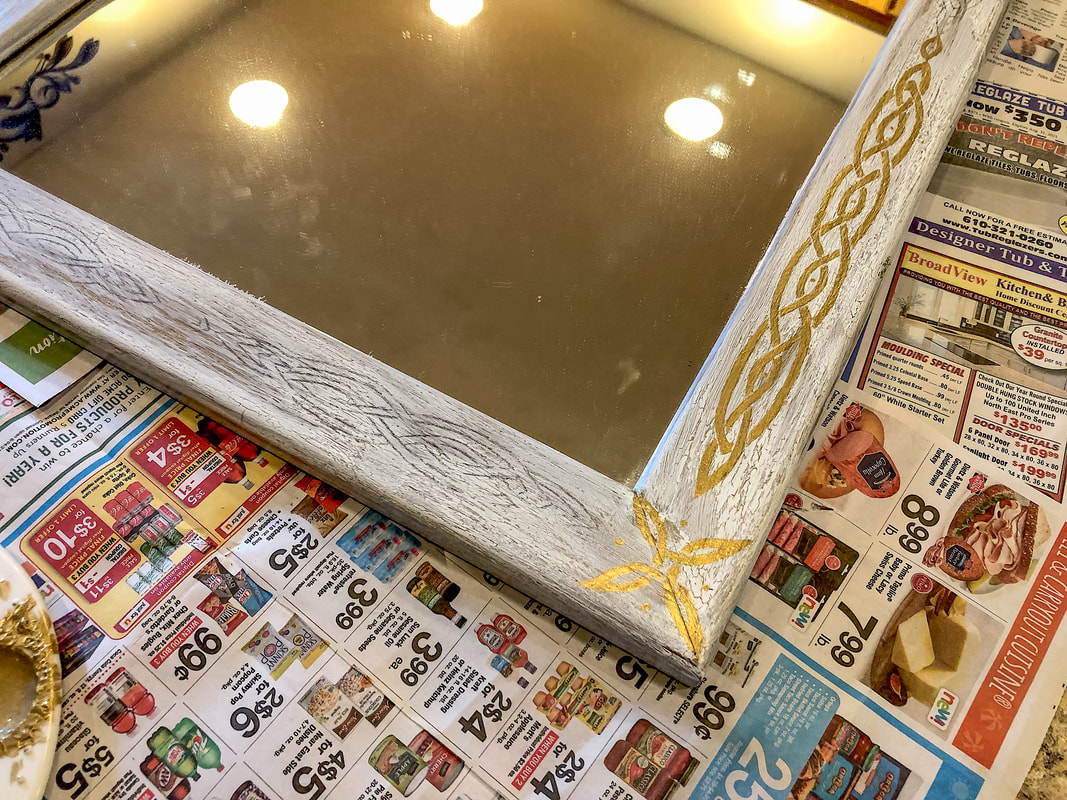 View of template on frame and some of it painted gold. Photo by Diane M. Lilly, 2021. The brush used was a very fine brush with bristles that came to a point, so that my very shaky hands could control the brush strokes! It took two very carefully applied paint layers to finish the gold knotwork, but this design element was the perfect touch and made all the difference in the world! I now have a work of art and a mirror that fits in well with all the other understatedly classy pieces of decor in that space. I love this piece, and it is versatile enough to use elsewhere should I decide to move it. But for now, it stands in pride of place above my new office drawers (which are in my dining room, but that’s another blog post!).  Finished painted knot work on frame corner. Photo by Diane M. Lilly, 2021. 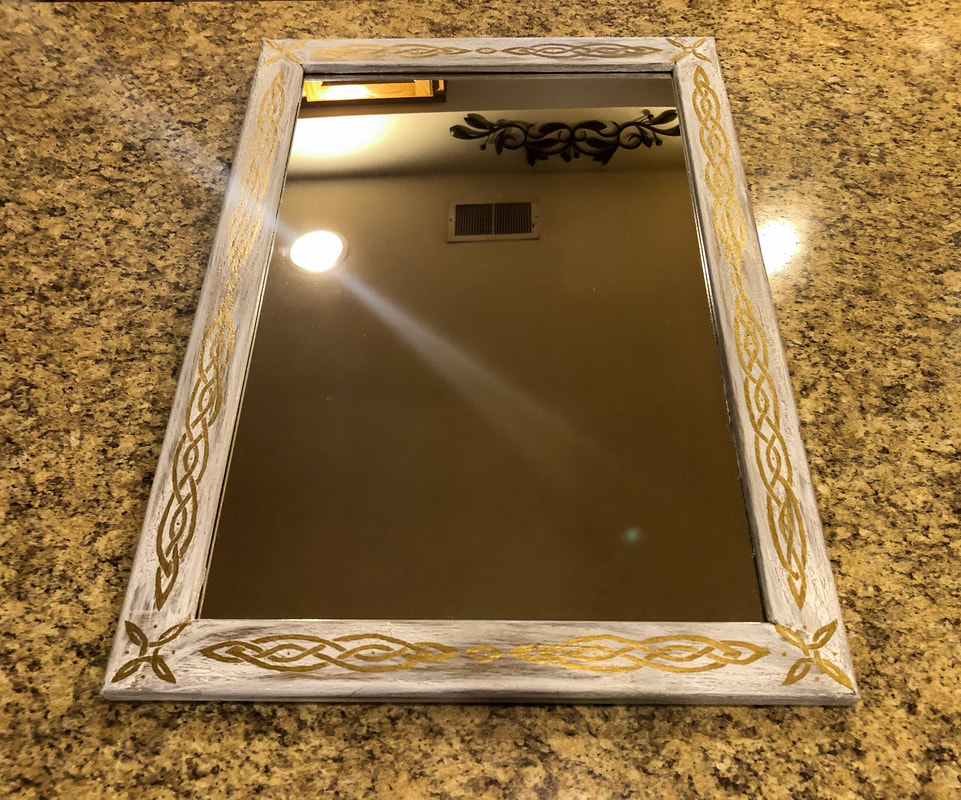 View of the frame and mirror with gold painted Celtic knot work border. Photo by Diane M. Lilly, 2021. 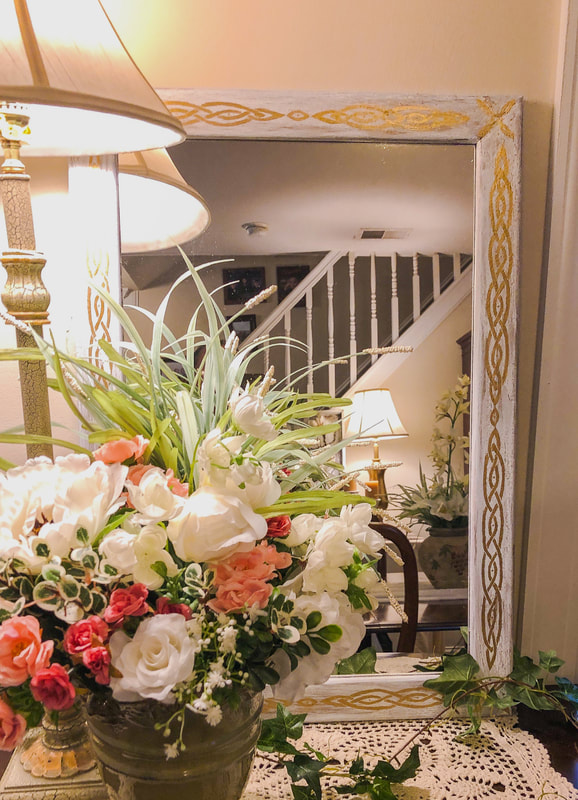 Finished mirror in a dining room vignette. Photo by Diane M. Lilly, 2021. 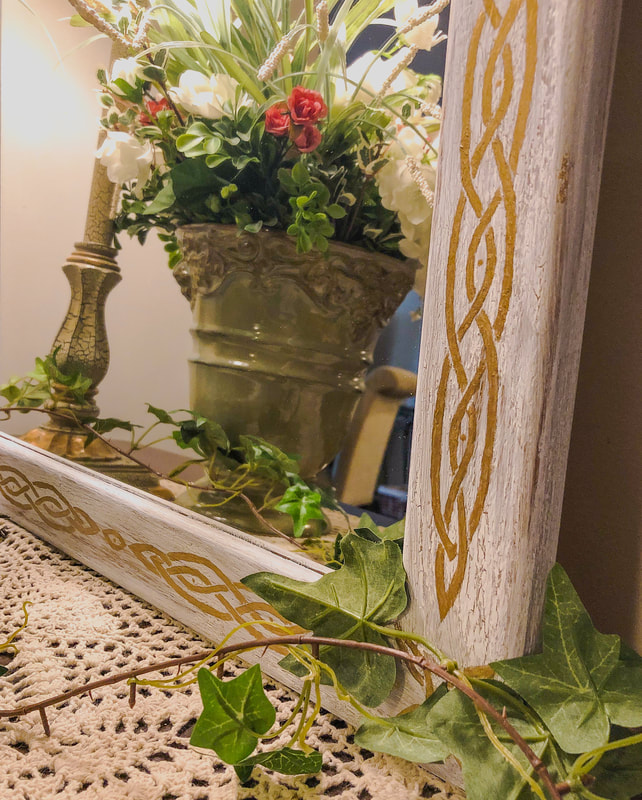 Closeup of finished gold painted Celtic knot work border. Photo by Diane M. Lilly, 2021. Let me know your thoughts on this project in the comments below, and don’t forget to read Part 1 to see how this whole thing started! Let me know if you’d like to see more of this type of project in the future. If you’d like to be notified of new blog posts or merchandise sales, you can sign up for my monthly newsletter (coming soon) on my contact page. And if you’d like to see what I’m up to on social media, click the links below! Related blogs you may want to read: Part 1 of this project My top thrift finds this year How to replace a clock mechanism How to frame small canvas art How to rewire thrift buy lamps DIY Fall/Winter decorative branch box Creating a kitchen coffee bar My dining room redesigned as a multi-functional space DIY refurbishment of a dining room cabinet 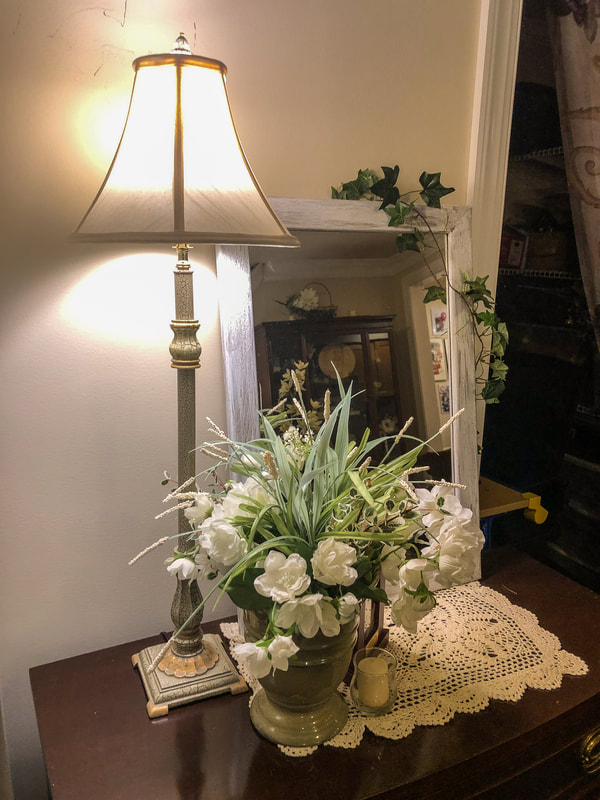 Finished painted mirror in dining room vignette. Photo by Diane M. Lilly, 2021. During a recent trip to my local Goodwill, I found this really sturdy second hand mirror with a nice wood frame. The mirror was marked 9.99, but I think I only paid 4.99 for it, which is quite a steal because mirrors this size (26” x 18”) go for close to $100 or more brand new. There was just one issue—it was the wrong color for my dining room! But no worries…That’s what paint is for!  Original frame before painting. Photo by Diane M. Lilly, 2021. I spent a few weeks thinking things over, trying to decide the right look for this mirror to help it blend into the decor style and color scheme of my space. Do I make it a white or cream? Would chalk paint work on this piece? Or do I paint it a dark reddish brown to match my furniture? Ultimately I thought that a cream would be too “samey” (since I’m already working on other pieces that are cream) and the dark brown would be too dark, so an aged gold look sounded perfect. 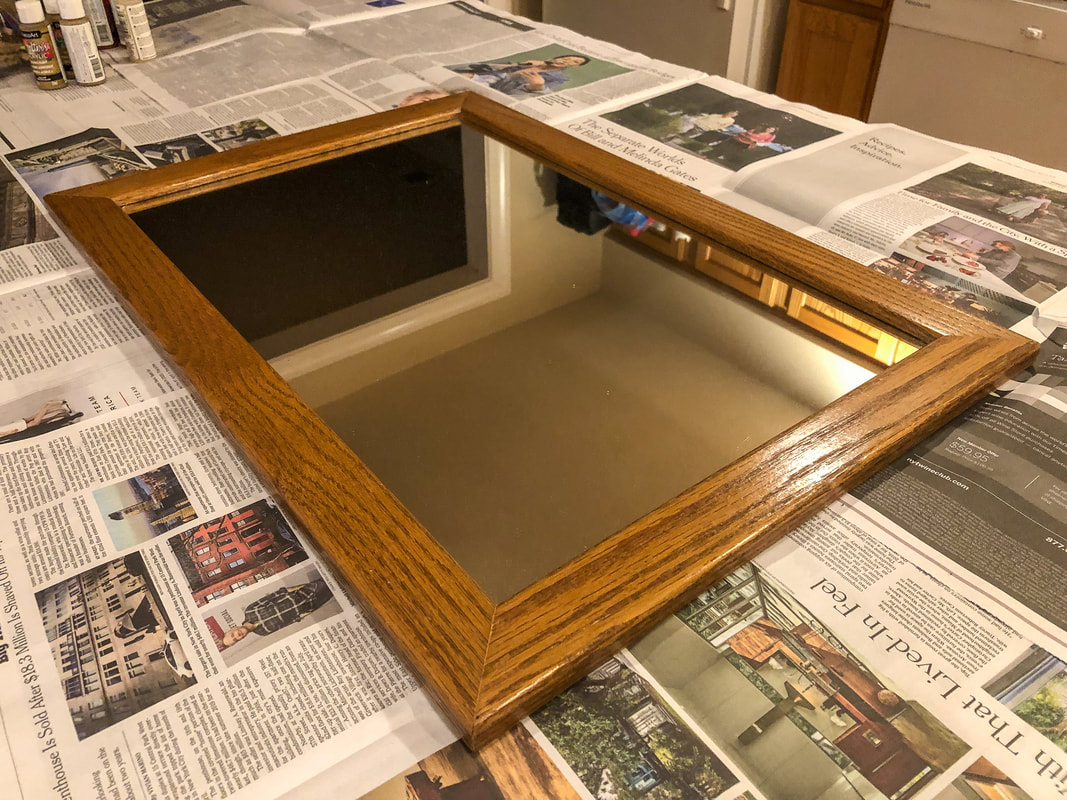 Frame ready to be prepped for painting. Photo by Diane M. Lilly, 2021. For this small project I experimented with a craft crackle medium called “Weathered Wood”—a medium I hadn’t used in (literally) years, so this project became a bit of a crap shoot, if you’ll excuse the expression. So let me walk you through my process… Step 1: Prep the frame for painting The screws, backboard, cardboard, and mirror were removed and put aside.  Removing the screws from the back to take out the mirror. Photo by Diane M. Lilly, 2021.  Mirror screws being stored in a plastic zip lock bag for safe keeping. Photo by Diane M. Lilly, 2021. I then lightly sanded the shiny finish with 100 grit sandpaper. (I didn’t need to sand off all the color because I didn’t necessarily mind if some of the darker aspects came through.) Step 2: Apply the base coat The first coat of paint was a reddish brown “primer” coat (it’s not technically a primer, but it’s more like the under color for the aged gold and copper effect I wanted to achieve.) One coat of that was sufficient. 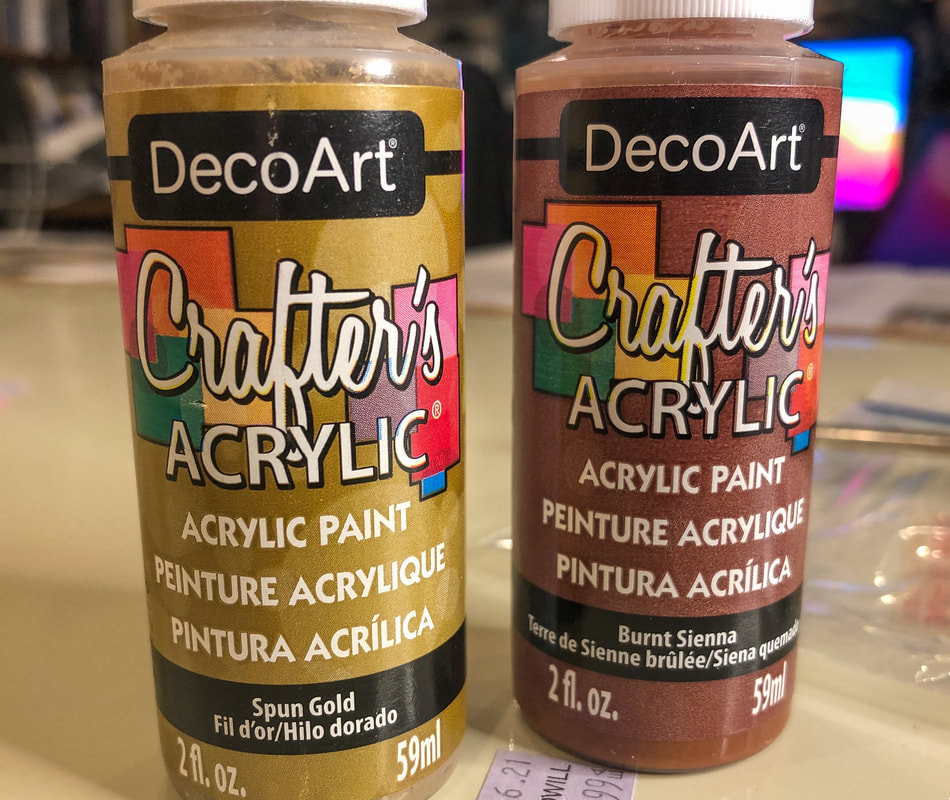 The base colors for my frame. Photo by Diane M. Lilly, 2021.  Frame with a base coat of reddish paint. Photo by Diane M. Lilly, 2021. Step 3: Apply the crackle medium The next step was to apply a thin layer of the weathered wood crackle glaze. I usually use Elmer’s glue to create a crackle effect in my painting projects, but I wanted to try something different this time, so I pulled out this crackle medium that’s been sitting in my closet. The crackle medium took about an hour and a half to dry.  Weathered Wood crackle medium. Photo by Diane M. Lilly, 2021. 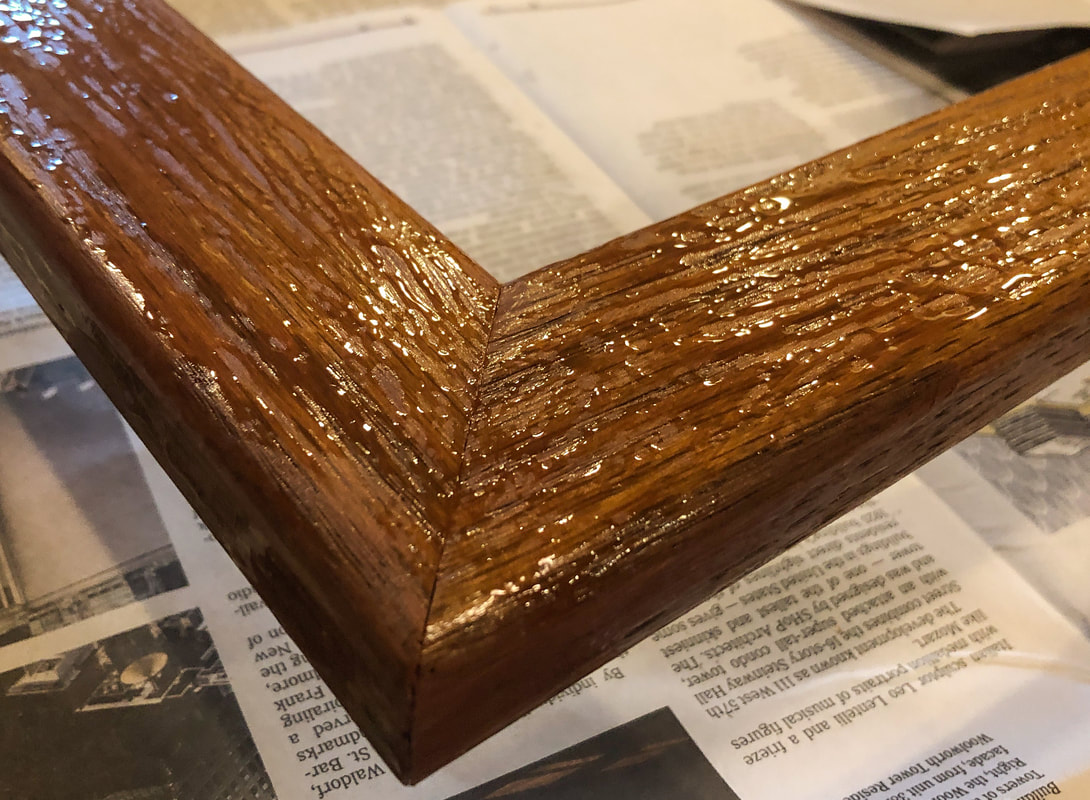 Crackle medium apply to frame. Photo by Diane M. Lilly, 2021. Step 4: Apply the gold paint I applied a “thin layer” of paint, as per the instructions on the bottle. As it was drying I really didn’t like the dark reddish color underneath that seemed to dominate the frame. I had been hoping for more of a gold hue, so I decided to apply a second coat of gold paint once the first coat had dried. 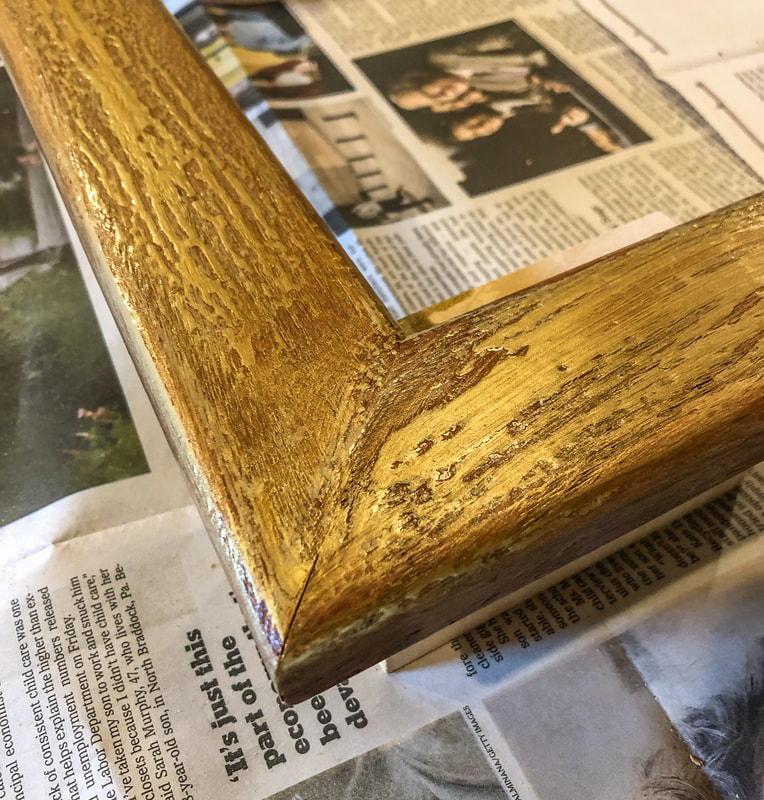 First coat of gold paint on frame. Photo by Diane M. Lilly, 2021. I like the crackle effect--and it is much easier (and more effective) than glue--but not the reddish-brown base color. In hindsight, I should’ve left the wood the original color and added crackle and gold paint. Thankfully, the second coat of gold paint did not ruin the crackle effect, and it did improve the color, but the reddish brown was still a bit too much for my liking. I applied a third—and last—coat of gold paint (sparingly) to bend out more of that copper color, and I did lose much of the crackle effect, but at that point it was more important to get the right color than to worry about the crackle effect. 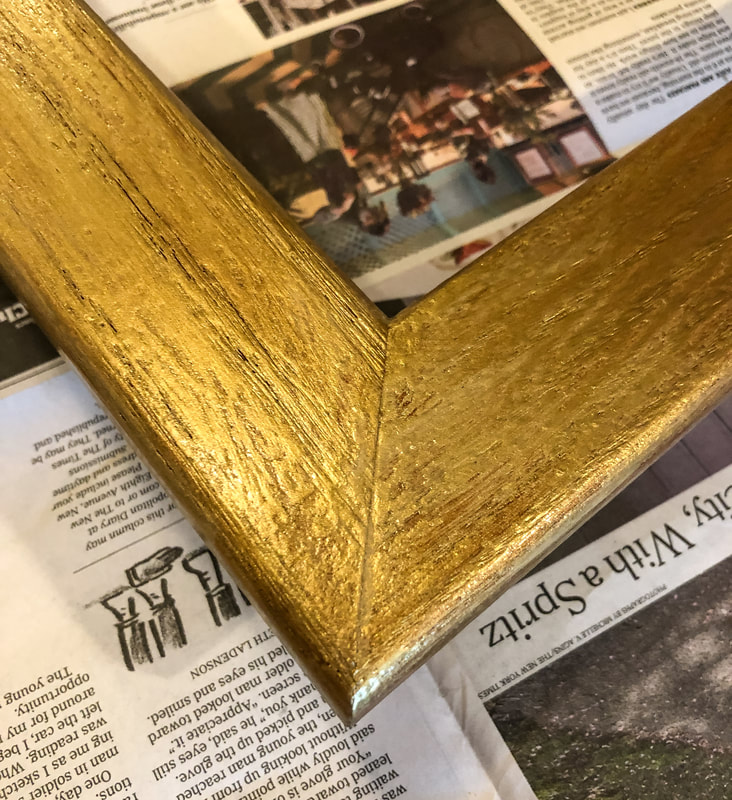 Second coat of gold paint. Photo by Diane M. Lilly, 2021. Step 5: Re-assemble the mirror The mirror, cardboard, and backboard were put back in place and screwed in. Gave the mirror a good clean…And decided I hated it! It looked way too gold and gaudy… I hated the look so much I couldn’t leave it a DAY in my dining room! So I slapped on another coat of crackle medium, let that dry, then used some white craft paint as the top coat. To be honest, I still don’t love it, but I think it looks way better than the gold color. 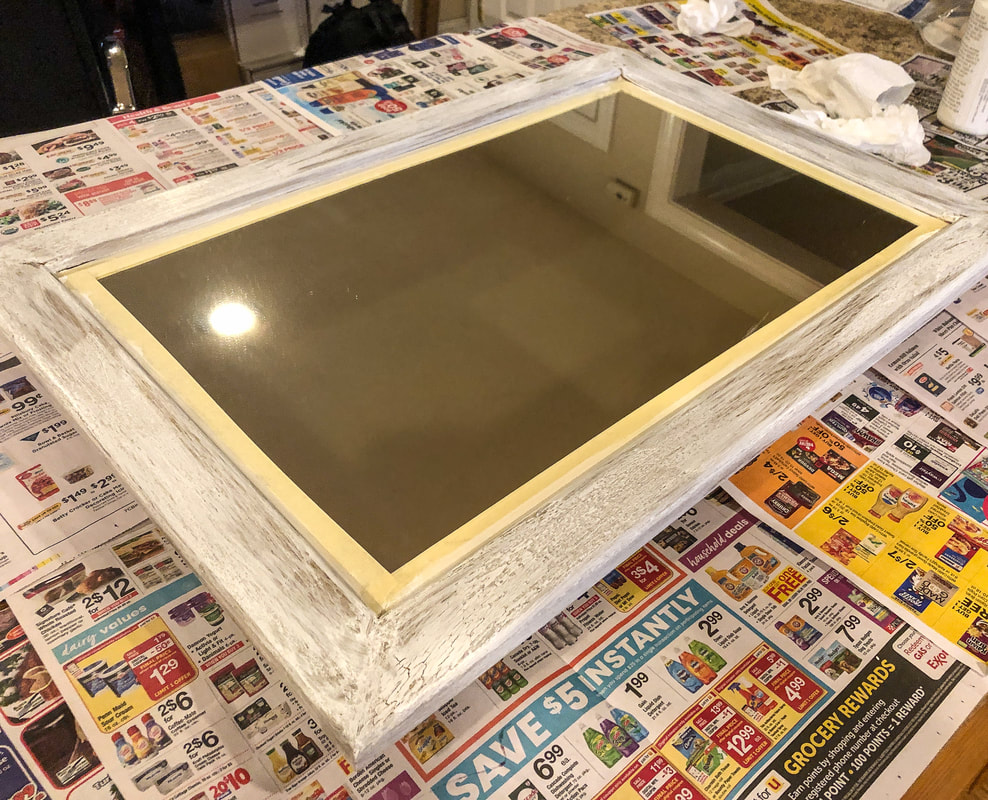 Final coat of white paint on mirror. Photo by Diane M. Lilly, 2021. 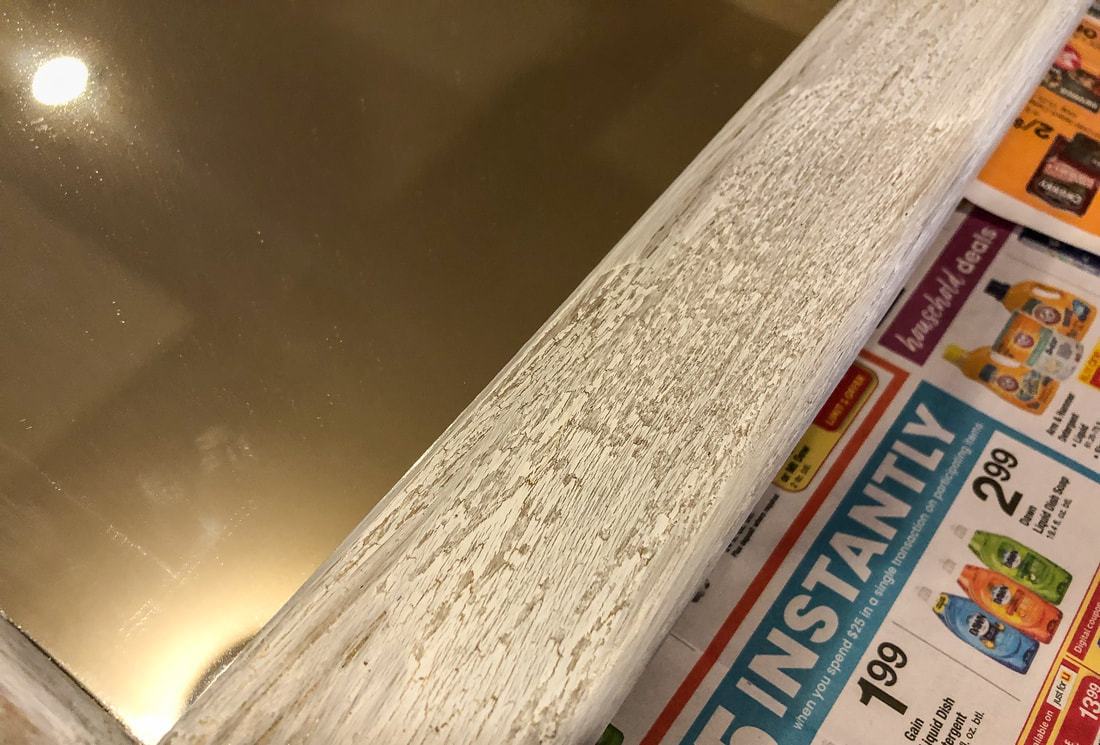 Closeup of white crackled paint on frame. Photo by Diane M. Lilly, 2021. 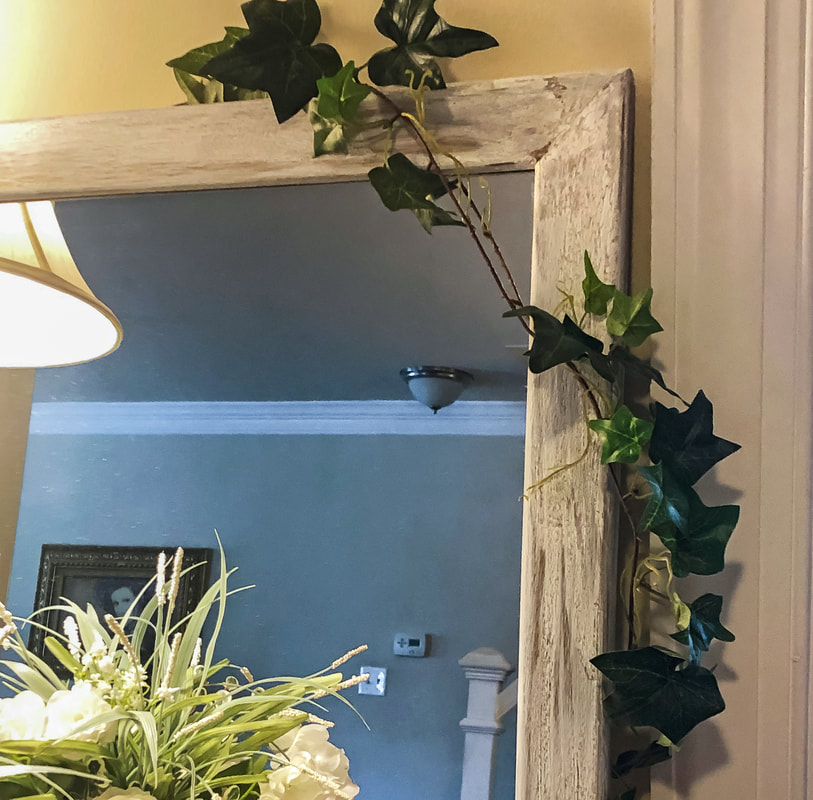 Mirror with newly painted frame. Photo by Diane M. Lilly, 2021. I think this project took about six hours fro beginning to end. If I had to do anything differently, I would’ve skipped the reddish brown base color and saved myself probably at least an hour. I wasn’t super precious about this project, because you can always paint over what you don’t like, right? It was a nice chance to experiment a little just to see what would happen. So what do you think about this project? Do you have any tips to share? Did you find this article useful? Let me know in the comments below and let’s see if we can get a conversation going! Just as an update…As it turned out, I had a Eureka moment a couple weeks later…What if I designed a Celtic knot border to paint on this frame? So I did! And what a difference that one idea made to this entire project! The end effect was beautiful and helped this mirror fit right in to the overall style of the room. You can read all about it in Part 2 of this project blog! If you’d like to be notified of new blog posts or merchandise sales, you can sign up for my monthly newsletter (coming soon) on my contact page. And if you’d like to see what I’m up to on social media, click the links below! There are some product images and links used in this blog article purely as examples. I am not being compensated for any particular products mentioned in this article. Related blogs you may want to read: Part 2 of this project with a Celtic knot border My top thrift shops finds this year How to replace a clock mechanism How to frame small canvas art How to rewire thrift buy lamps DIY Fall/Winter decorative branch box Creating a kitchen coffee bar My dining room redesigned as a multi-functional space DIY refurbishment of a dining room cabinet 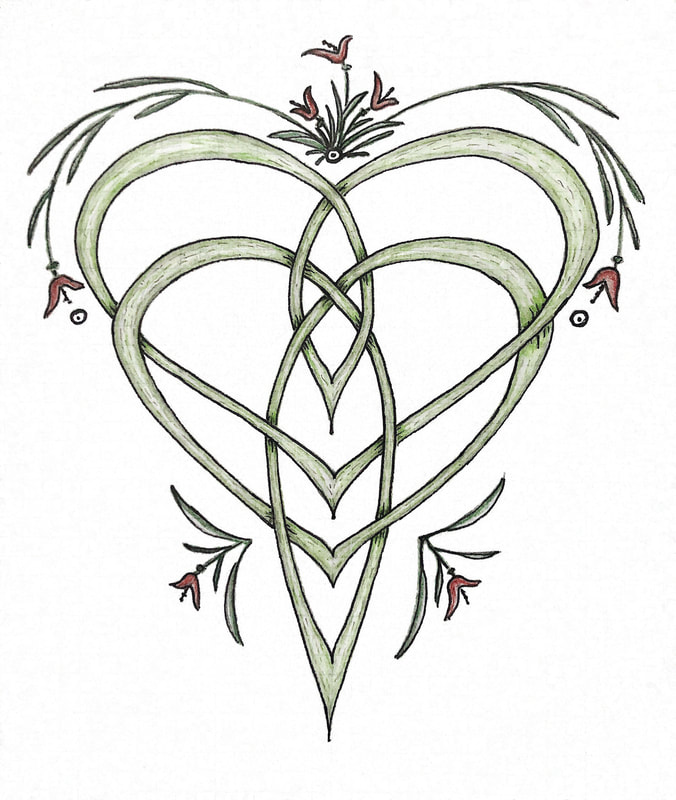 Celtic Motherhood Knot. Artwork done by Diane M. Lilly, 2021. So I Googled Celtic Mother’s Knot…thinking I would find THE Celtic symbol, break it down into its components, and do a quick sketch or two and explain my process…Not so easy! Turns out there are many variations of mother’s knots, some more modern than others. Some knots are more artistic expression than actual Celtic symbolism, but symbolism can be in the eye of the beholder anyway. So long as the symbol expresses the appropriate feeling and meaning, it’s all good. Anyway, I found myself having to make some tough decisions…Do I do quick sketches of a few of them? Or do I do one or two really good sketches? Do I do a really good rendering of just one style? And if so, which style? Ultimately, my decision came down to how much time I realistically had to devote to this project, which—unfortunately—is not enough to explore all of those options! So I’ve decided to talk about the symbolism of a Celtic Motherhood Knot, then break down one of the most “authentic” styles (if I can use that term), and finally show you a finished stylized rendering of one of these beautiful knot work patterns. The symbolism behind the Celtic Motherhood Knot To start with, there are a wide number designs that are called “mother’s knot”, “motherhood knot”, “mother and daughter knot”, and “mother and son knot”. They all involve a design that includes a heart, an embrace, or some combination of the two. At the core of their designs is the concept of the unbreakable and eternal bond and love between a mother and child. From a Christian standpoint, the knots could represent the Madonna and child, and many versions of the knot have a Trinity knot as the basis upon which the rest of the design is built. From an ancient Irish Celtic world view, the basic idea behind a mother’s knot (or motherhood knot) may represent the three cycles of a woman’s life—maiden, mother, and crone. It’s hard to really know for sure where the Celtic symbolism ends and the Christian symbolism begins, as these two beliefs became intertwined long ago and much of the original meanings have been lost. So for today’s design project, I have chosen what I think may be one of the more traditional Celtic Motherhood Knot styles, which consists of two hearts, stacked one atop the other, and three dots. Each dot represents one child, so I drew three dots, one for each of my boys. Let’s break it down… Start by drawing the basic lines for the design, either freehand or using guides. I chose to use a few guides because I was going for a cleaner look, but this design could just as easily be drawn completely freehand. A Motherhood Knot looks more complicated than it actually is…It really just consists of two hearts overlapping and each heart has an elliptical loop down its center. The loop from the bottom heart can be just a bit longer, if that’s the style you want. 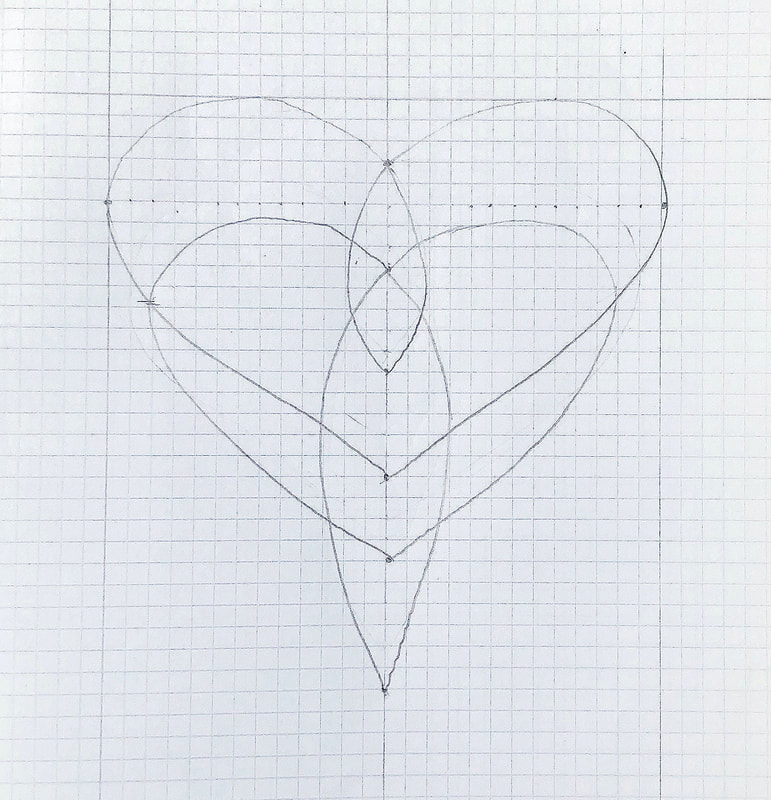 Basic line drawing for Motherhood knot. You then start to draw new lines on either side of the basic lines you’ve just drawn. Do this for all of the lines in the drawing, then go back and erase (yes, erase!) the original line. Now that your basic design is in place, you have to pick one spot where the lines of your thread would overlap and make a decision…Which line goes under and which goes over? Once you make a decision, erase the lines that don’t need to be there anymore so that your thread can overlap. Now follow that thread to the next intersection and do the opposite. In other words, if your thread went OVER the last line, it will go UNDER at this intersection. And you just follow the lines until every intersection has an over-under. Trace your design again with your finger to make sure that there are no mistakes. 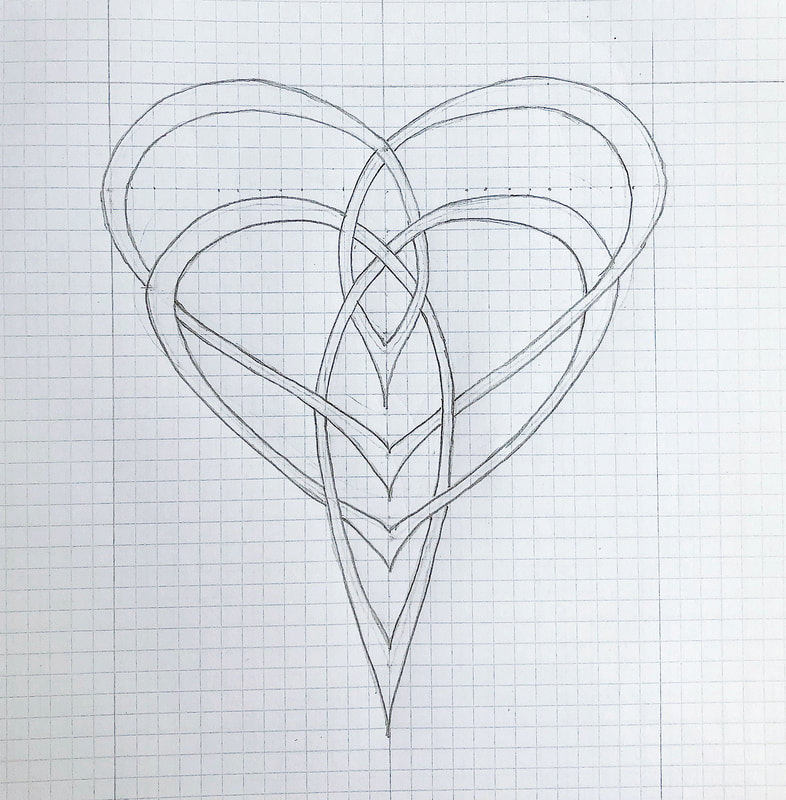 Under-over threads for Motherhood knot. The next step is where the fun begins! You can do anything you want from here on out to stylize this design the way you wish. You can change the thickness of the lines or add flair to certain sections of the threads (like I did with my elongated points). And this is also where you may want to start thinking about final details, like where to put dots and where to add other artistic details to your design. The sky is literally the limit! 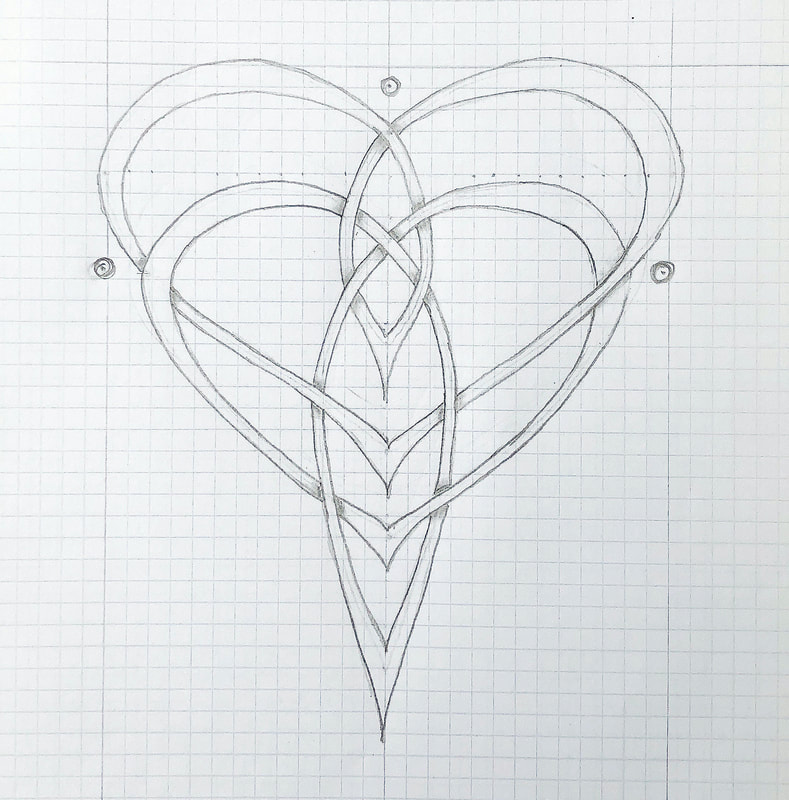 Dots added for children in Motherhood knot design. And the final piece… Add in all the final details and sharpen everything up where you think the lines need to be darker or crisper. You may want to bring in colored pencils or markers or paints to bring this design to life. In the sketch below, I decided to keep my design in pencil, but added shading and texture to give the knot a lift and a decorative vine to give a more finished look. I’m thinking I may revisit this drawing in the future as a focal point of a wood burning project, perhaps one of my decorative plates! 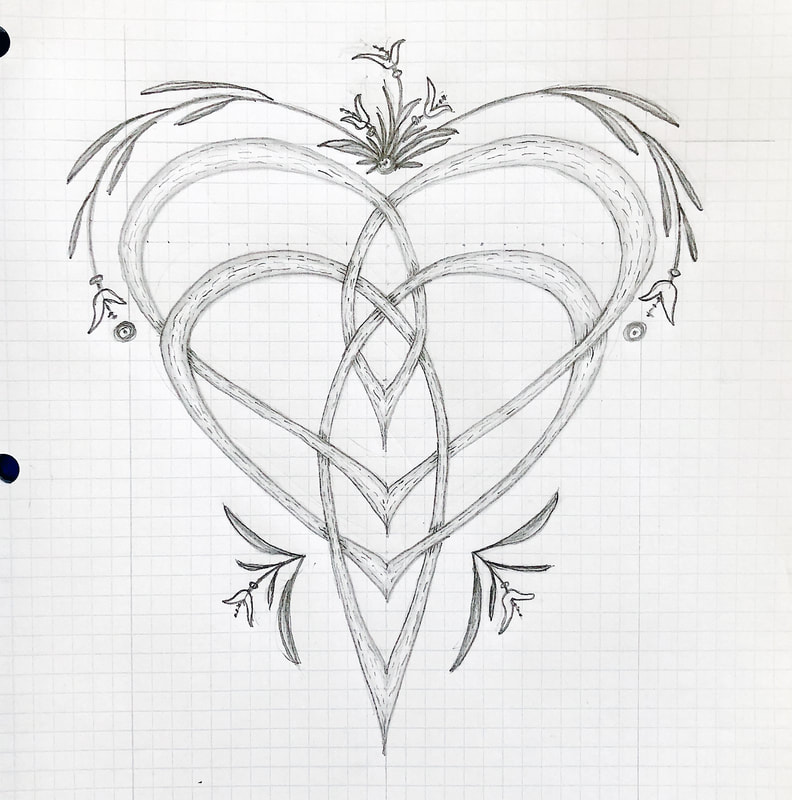 Finished pencil design of Celtic Motherhood Knot. Artwork done by Diane M. Lilly, 2021. So what do ya think? Do you have a favorite style of Celtic Mother’s Knot? Feel free to share in the comments below! And you can click here and here to go to previous blog posts with tutorials for a couple of different knots you can practice! If you’d like to subscribe to my email list you can get monthly newsletters (coming soon) alerting you to my new blog posts, special merchandise sales, ongoing DIY projects, and social media events. Related blog posts you may want to read: Celtic Tree of Life A foray into customizable artwork Celtic Knot tutorial, part 1 Celtic Knot tutorial, part 2 Celebrating Irish Celtic Art for St. Patrick's Day Getting out of my way  The Tree of Life…There are not too many symbolic icons that stretch so far back into the mists of time and mean so much to so many cultures. It’s a symbol that represents anything from the afterlife, the bond between heaven and earth, the connection to the earth, and the cycles of life (birth, life, death, and renewal). The trees were sacred to the Celts, and different trees held special meanings to the people of the time. So, of course, I had to create an art piece with the Tree of Life! My latest Tree of Life art piece is the third rendition—the first one I kept for myself, and the second one sold within a half hour of listing it for sale! So I decided to make another one… I already had the template from my previous versions, so this step in the process was already done. I needed to trace the design onto the blank plate and wood burn. (I say that like it was a quick and easy process. It was still a lot of work!) 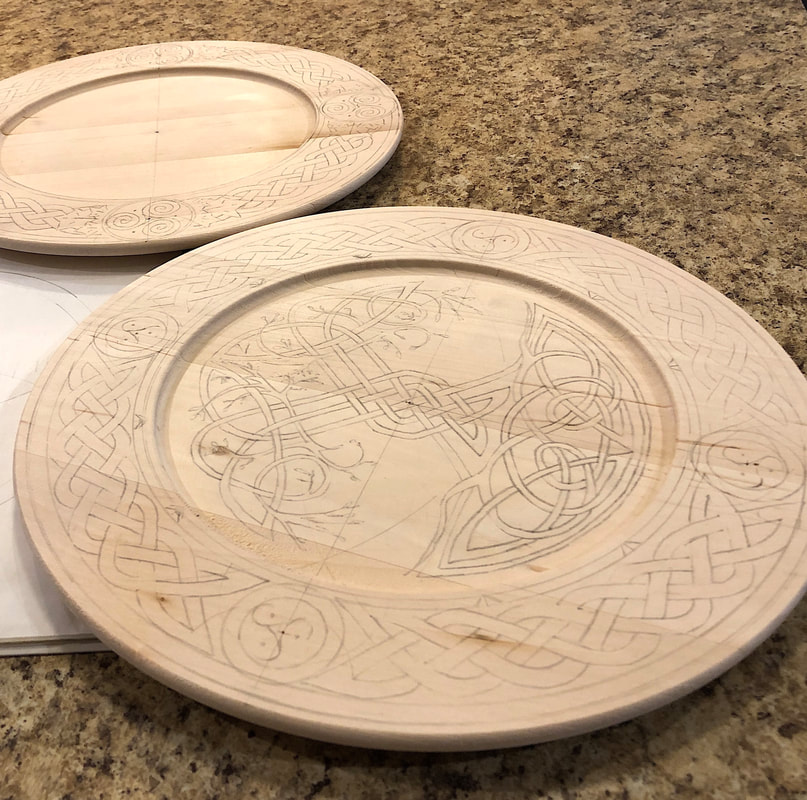 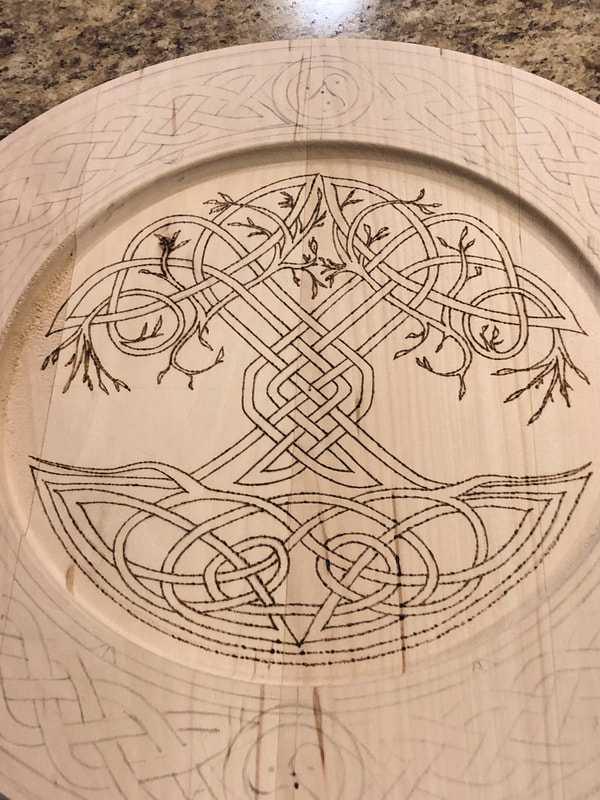  A project like this should only take me maybe a few weeks from start to finish—depending on how long it takes me to finish a final draft of a drawing. But coronavirus happened…Let’s just say I got sidetracked. I started this piece in late January or early February and was slated to be finished before mid-March, but it didn’t quite work out that way. We are now in mid-May, and I finally got around to putting on the varnish. The artwork was done by mid-March, but I couldn't find the time to apply the protective varnish coating. Then--when I finally thought I had found the time--my household came down with the virus…and, well, it just didn’t happen. But now it’s done…better late than never!  And, oh, by the way…This one is now for sale! 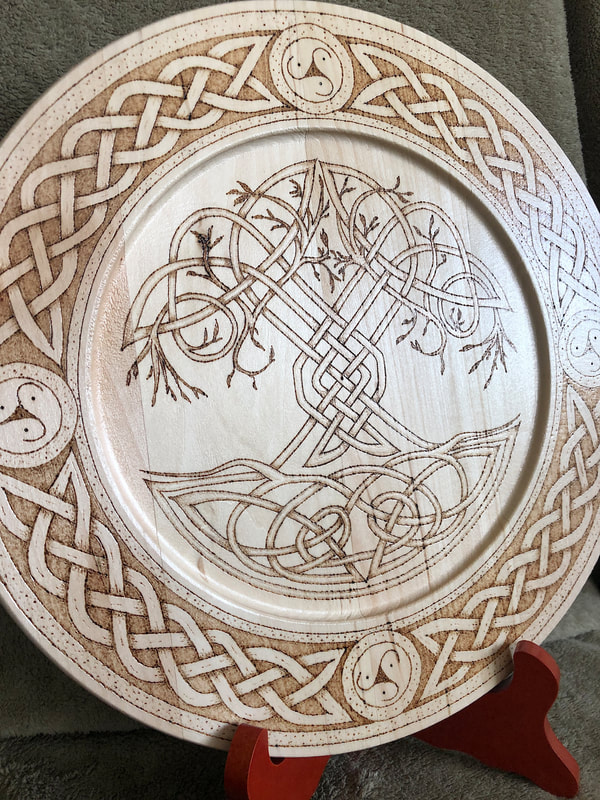 To view or purchase my latest decorative plate, visit Related blog posts you may want to read: Celebrating Irish Celtic Art for St. Patrick's Day Basic Celtic Knot tutorial part 1 Celtic Knot tutorial part 2 A foray into customizable artwork The Celtic Motherhood Knot, a symbol of love Getting out of my own way In this video, we will explore "breaks" in knotwork construction. This design starts like the last knotwork design, with a 4 x 4 grid and a diamond pattern with the circles. This modified design, however, will need to work around a break in the center of the grid. A break is a line that cannot be crossed by a thread, forcing the thread into a different direction than it would normally go. The break for this video is an X in the center of the grid, which will allow us to create a Celtic design called Four Linked Hearts. It's a beautiful design signifying love and is perfect for weddings or Valentine's Day. So, I hope you enjoy this video, and feel free to leave a comment, like, or share this video! (A special thanks to my son, Christian Lilly, for helping me with the video editing! Music from iMovie.) Related blog posts you may want to read: Basic Celtic Knot tutorial part 1 Celebrating Irish Celtic Art for St. Patrick's Day The Celtic Motherhood Knot, a symbol of love Celtic Tree of Life A foray into customizable artwork Getting out of my own way |
Author
Some of the posts on this site contain affiliate links. This means if you click on the link and purchase the item, I will receive an affiliate commission. 
Categories
All
Archives
April 2024
|