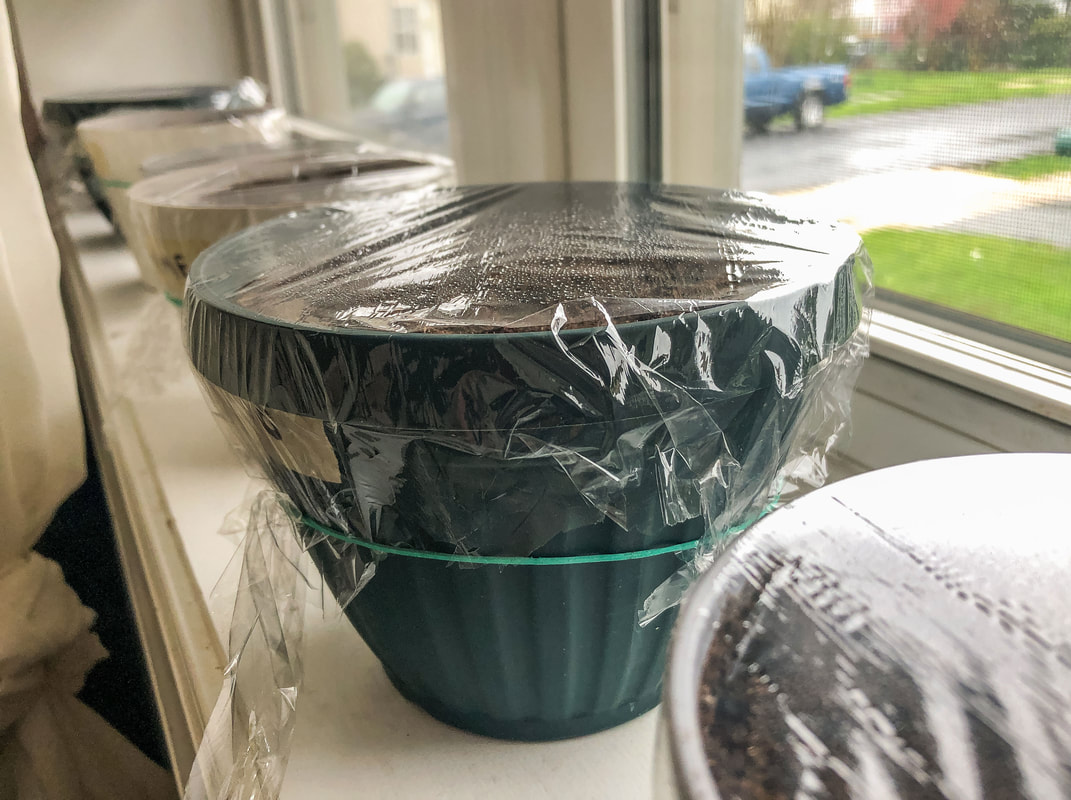
 Pots with planted seeds sitting on my windowsill facing southwest. Photo by Diane M. Lilly, 2022. Over the years, I have looked forward to planting seeds indoors. I love watching the fragile green seedlings push their way up through the moist soil and begin to sprout. We live in a rental home, so digging up the yard is not an option and limits my ability to grow vegetables and herbs. We have a small raised garden for growing mint, sage, and chives, and there are also usually a few containers on the back patio where herbs like cilantro, parsley, dill, and chamomile grow over the spring and summer. So this year, I wanted to plant more herbs in containers, with the idea that they can be placed outdoors on the patio or indoors on a windowsill, keeping my houseplants company. 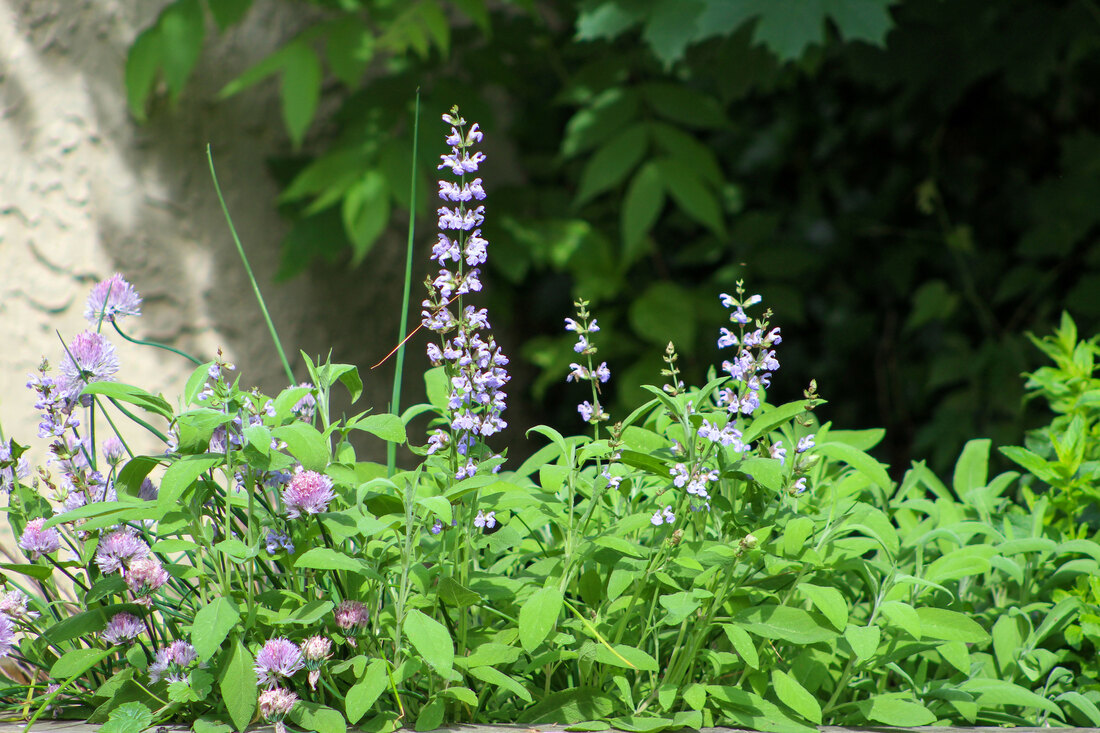 My raised garden from 2020 with sage, chives, and mint. Photo by Diane M. Lilly, 2020. What type of containers you will need In previous years, the seeds were planted in small grow pots or even styrofoam cups, then transplanted into larger containers once they were strong enough. This year, however, I’m going to try something a little different…I will plant them directly in the pots so I don’t have to worry about stressing them during the transplant process. It may become necessary to eventually transplant them anyway, but for now, that’s the plan! Honestly, I don’t do a lot of fancy stuff when I plant seeds. I’ll use any small pot or container on hand and cover it with plastic when the seeds are planted to keep in the moisture and warmth the seeds need to grow. When to plant seeds Generally speaking, early spring is a ideal time to start, anytime between March and May. Certain seeds—like tomatoes—need to be planted earlier, so that you get your fruit during the summer growing season. It’s a good idea to read all the information on the packet. This will provide information about when to plant, how deep to plant, how to space your plants, lighting and watering needs, etc. It’s also a good idea to do a little research first. Figure out what types of plants will work best for your own space, lighting, and experience, and start with just a few pots when you are first getting started. Each year you’ll learn more about planting and grow better plants! What I’m planting this year This year I have a wide range of seeds I’d like to try. For my vegetables I decided to plant cherry tomato and cucumber seeds—even though I am really planting them a bit late in the season, but better late than never! As for my herbs, this year’s seedlings will consist of cilantro, dill, basil, lavender, thyme, sage, and rosemary, all of which I’ve grown previously. The packet instructions for thyme, rosemary, and sage say to plant the seeds in May, but these will possibly end up as indoor herbs anyway, so I’m going ahead with planting them now along with everything else. I have to say, I’ve never had any luck with lavender and rosemary, but my stubborn streak won out and I’m trying again this year. If these herb plants don’t grow for me I can always buy a plant at my local home and garden store…but I am determined to have lavender and rosemary in my life! There is one last thing I want to plant—catgrass—but I need a special flat pot for that plant. It’s something special for my cats and they will want to eat it and roll in it…at least that’s the plan. You never know with cats! 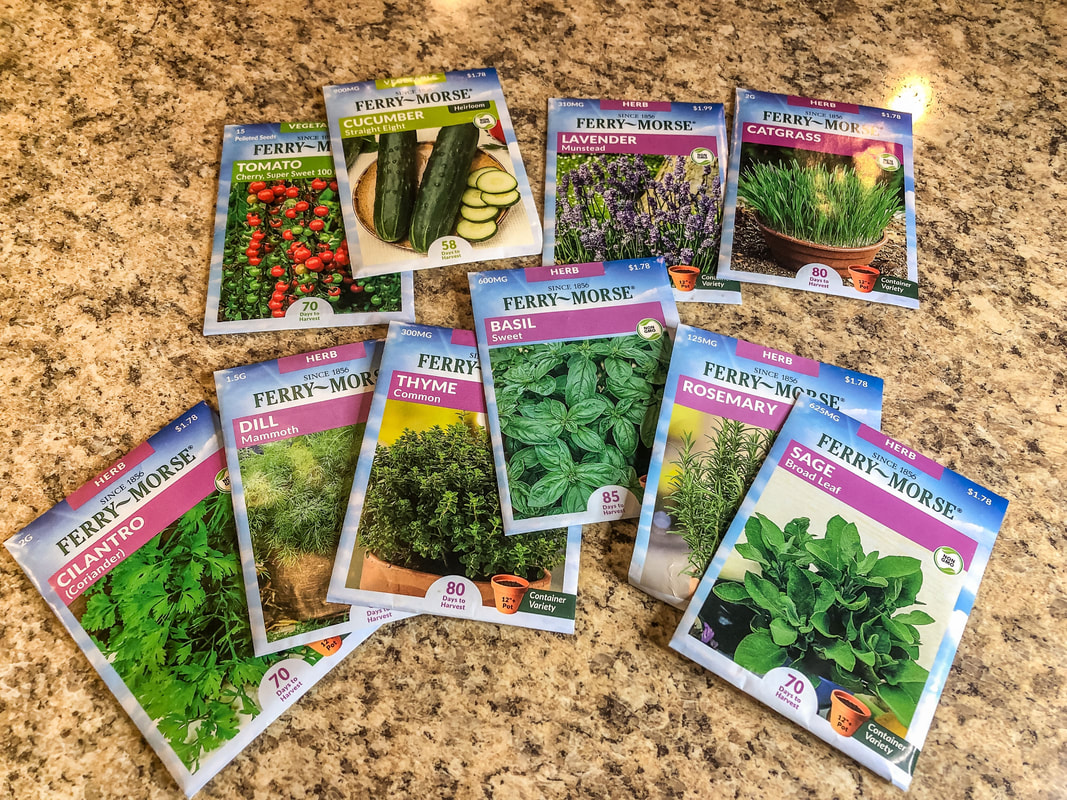 My seed packets for this year. Photo by Diane M. Lilly, 2022. What type of soil to use So this might be the most intimidating part of the process! Different gardeners have their own secrets for creating good soil for specific types of plants. There are many different ways to mix soils to get perfect balance of nutrients and drainage, and that becomes really important when the plant matures. But that’s a topic for another day! Today I simply want to plant my seeds in small pots with basic soil with little fuss. Basically you just need a good quality soil that drains well and has a good ph level (6.0-7.0). Important to note—read the descriptions on soil bags carefully. Some potting mix is specifically made for in-ground gardening, whereas some soils are used exclusively for growing in containers. For my needs, I am using MiracleGro Seed Starting Potting Mix (good for containers) to get my seedlings started, and I’ll mix up my own soil later when (and if) I transplant them. 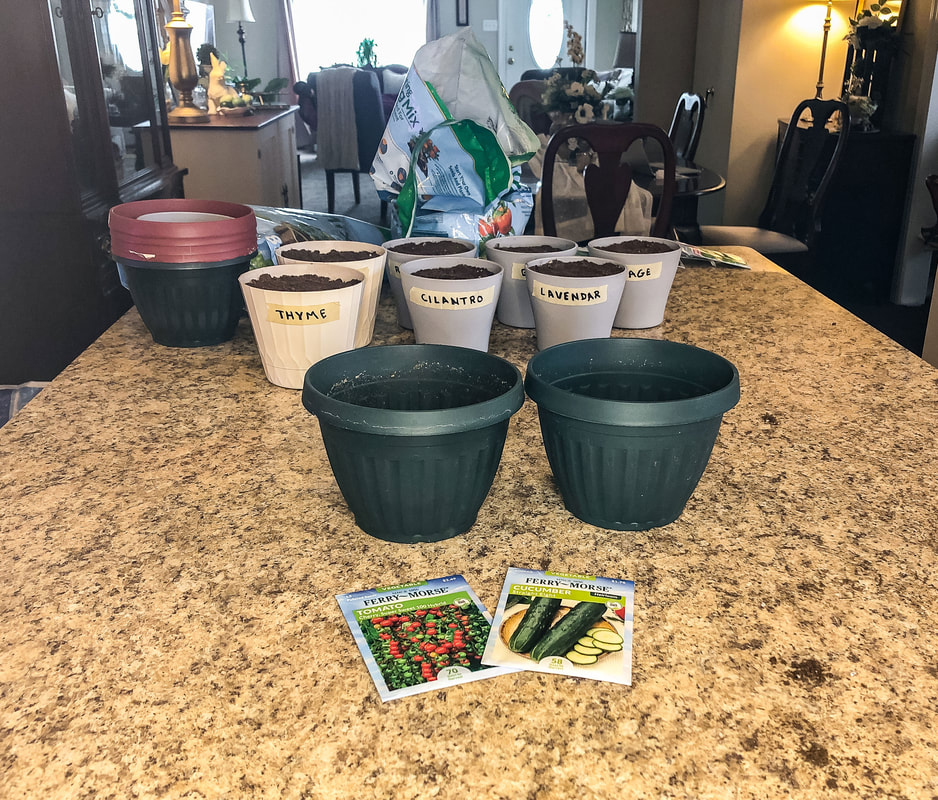 Slightly larger pots for tomato and cucumber seeds. Photo by Diane M. Lilly, 2022. 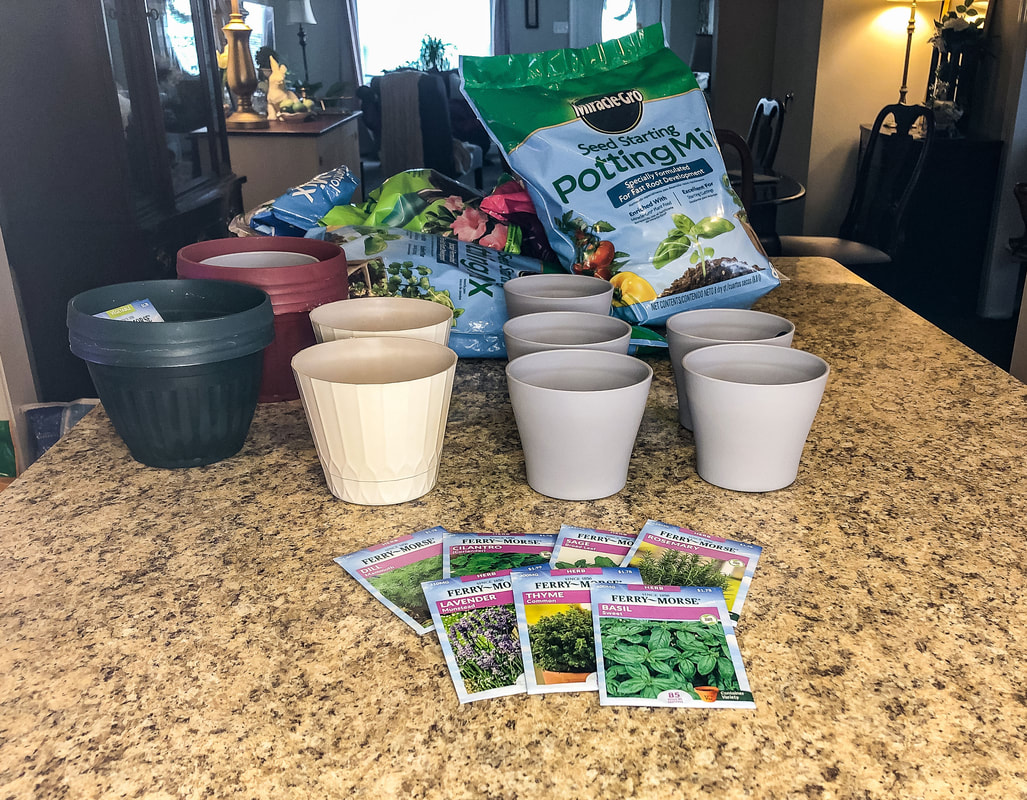 Smaller pots for herb seeds. Photo by Diane M. Lilly, 2022. 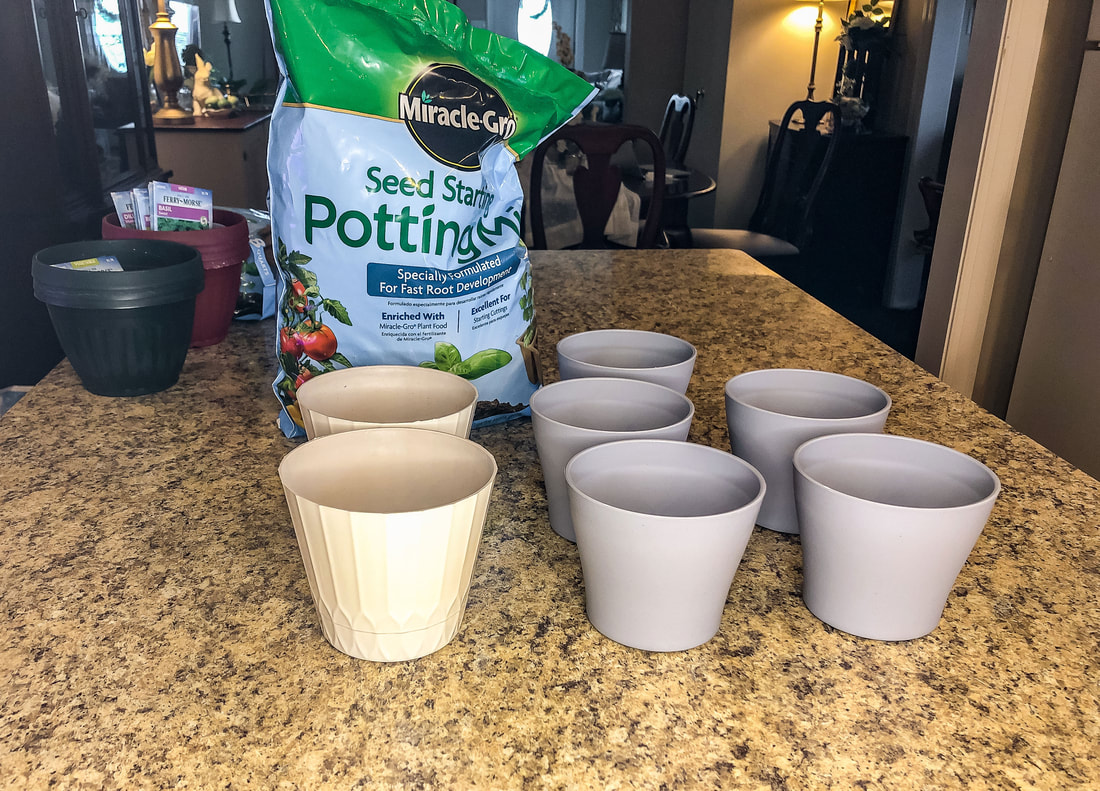 Empty pots ready for potting soil. Photo by Diane M. Lilly, 2022. How to plant the seeds Planting seeds really isn’t hard. Basically, you just put some soil in whatever starting pot you’d like, tap the bottom a few times to get rid of air pockets, then fill more soil if necessary. Then follow the planting instructions on the label for your particular seed. Pay attention to planting depth and spacing requirements. All of the seeds I planted this year required a depth of 1/4 inch, and this can be done in a couple ways. You can either poke small holes in the soil and drop the seeds in, covering up the holes afterwards, or you can place the seeds on top of the soil and cover with more soil. I’ve done it both ways. It really doesn’t matter, as long as the seedings are able to find their way to the surface when they begin to sprout. Once you have your seeds planted, it’s time for watering. 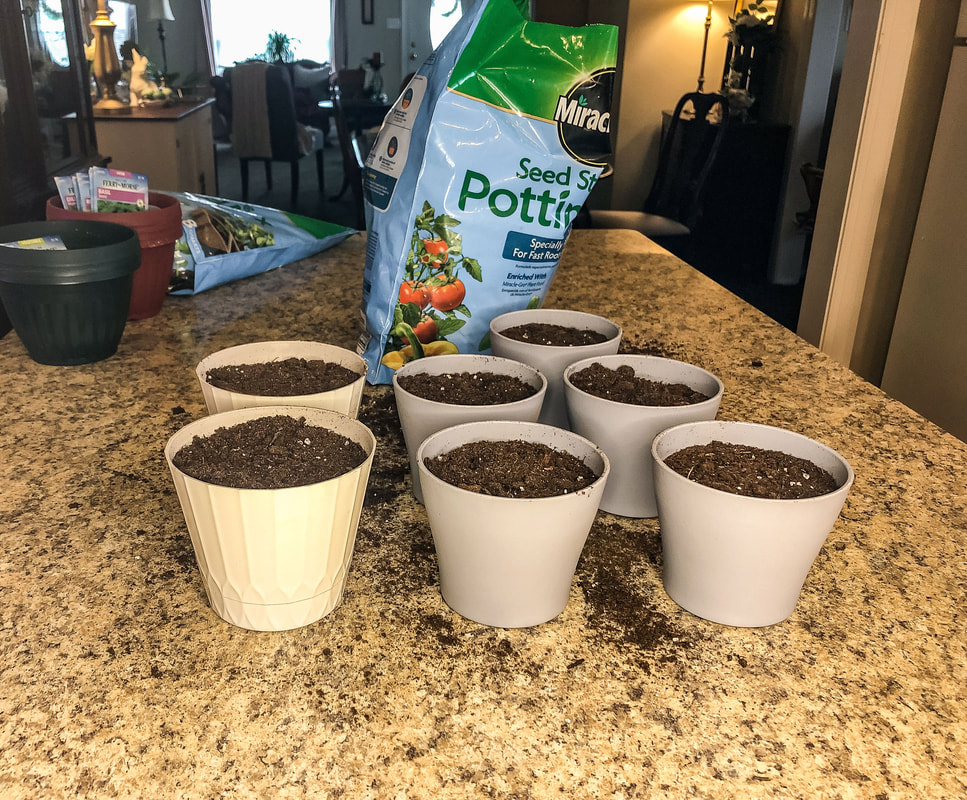 Pots filled with soil. Photo by Diane M. Lilly, 2022. 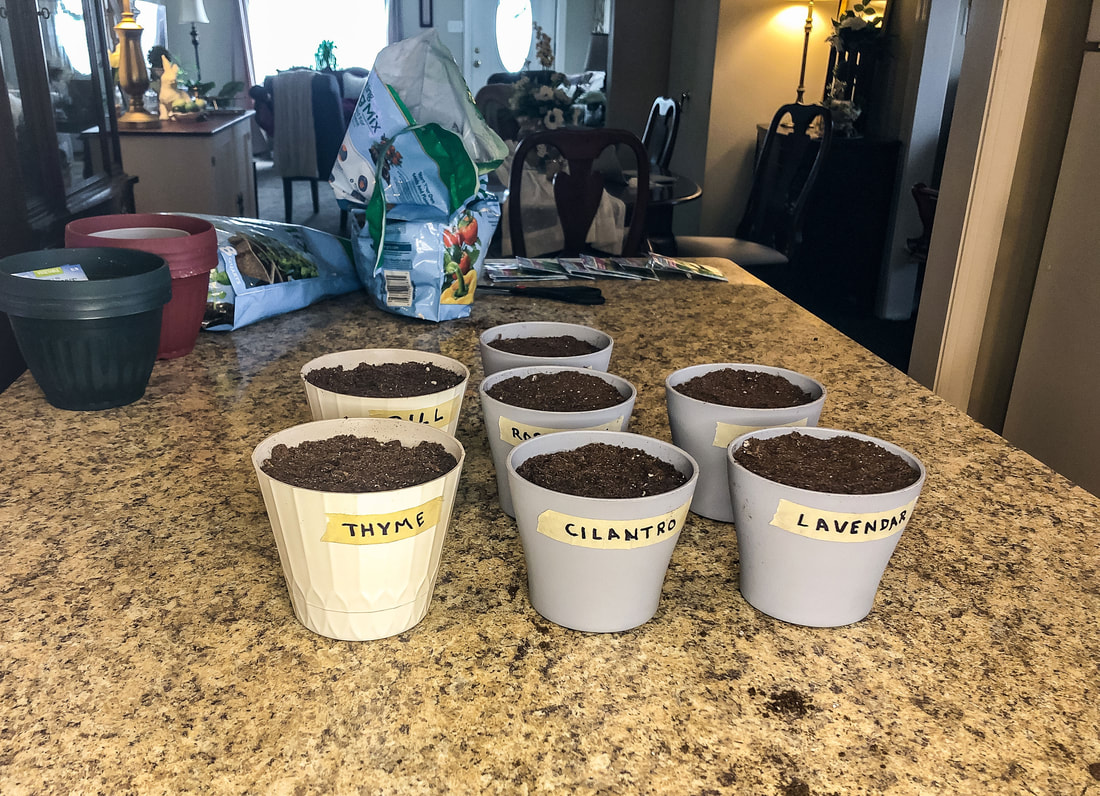 Pots for herbs, seeds planted and pots labeled. Photo by Diane M. Lilly, 2022.  Pots for tomaties and cucumbers filled with soil. Photo by Diane M. Lilly, 2022. 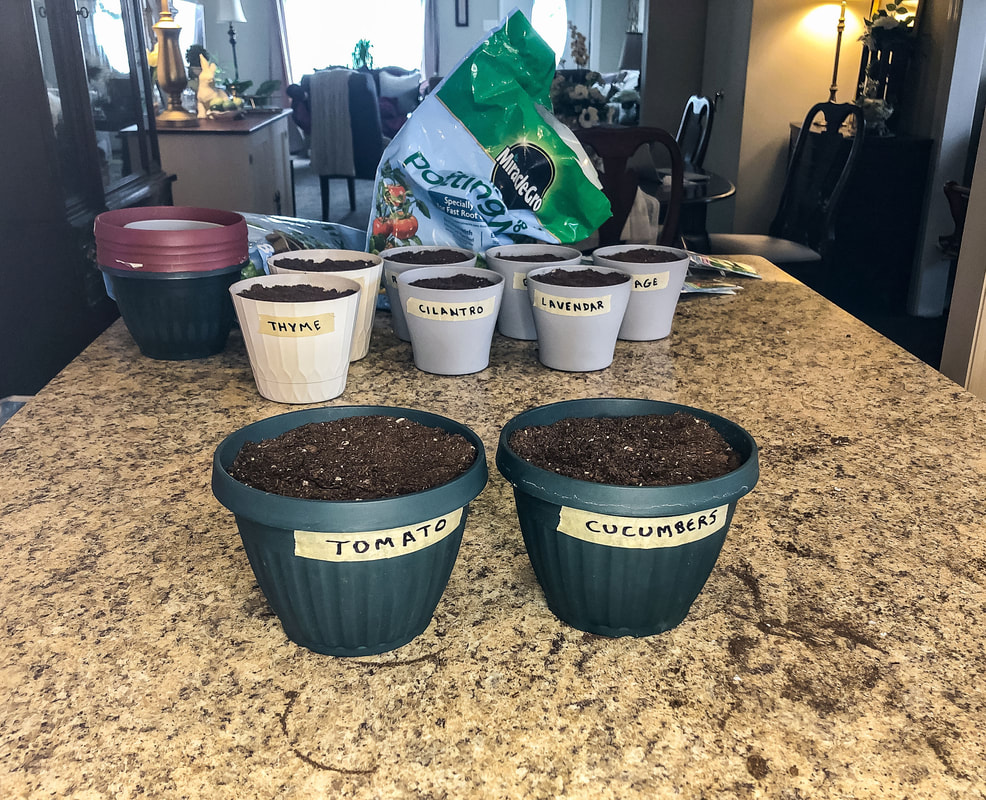 Tomato and cucumber seeds planted in pots and labeled. Photo by Diane M. Lilly, 2022. 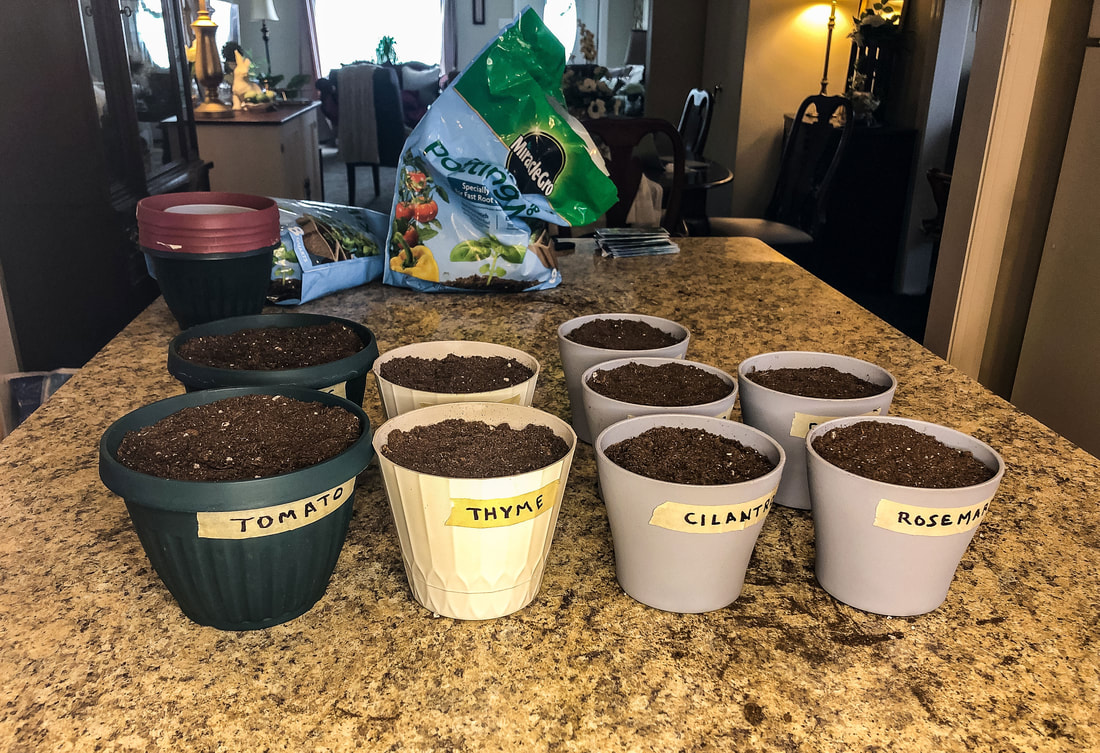 All of my newly planted seed pots ready for watering. Photo by Diane M. Lilly, 2022. Watering the seedlings Water enough that the surface of the soil down to the depth of the seeds is wet, but do not drown the seeds. If you water too much you’ll just end up with soggy soil that can rot your seeds before they get a chance to grow. My method has been to water, the cover the pots with plastic wrap to keep the plant moist and somewhat warm, then every couple of days I’ll check each plant to see if it needs more water. I’m just looking to keep the soil moist but not wet. This usually means I water carefully with a teaspoon or a spray bottle at first, a little at a time so I don’t accidentally overwater. Once the seedlings start to sprout enough that they almost touch the plastic, I remove it so they can grow free. The bigger the plants get, the more water they will eventually need. 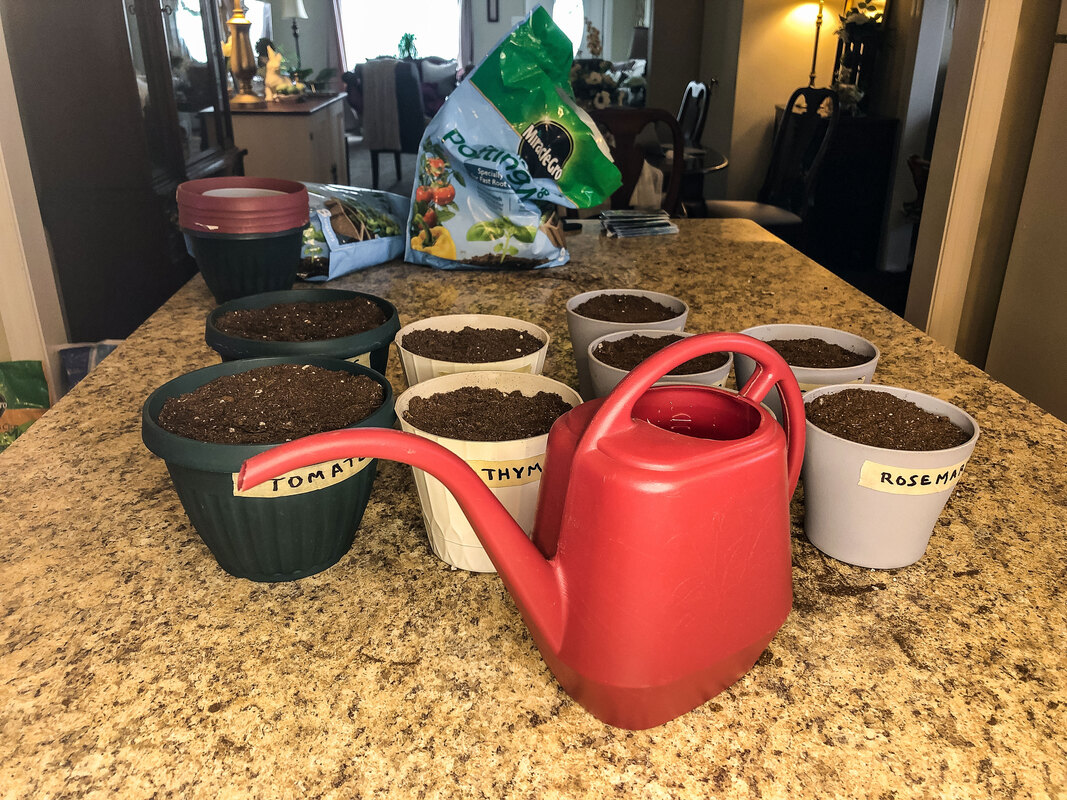 Seed pots and watering can. Photo by Diane M. Lilly, 2022. 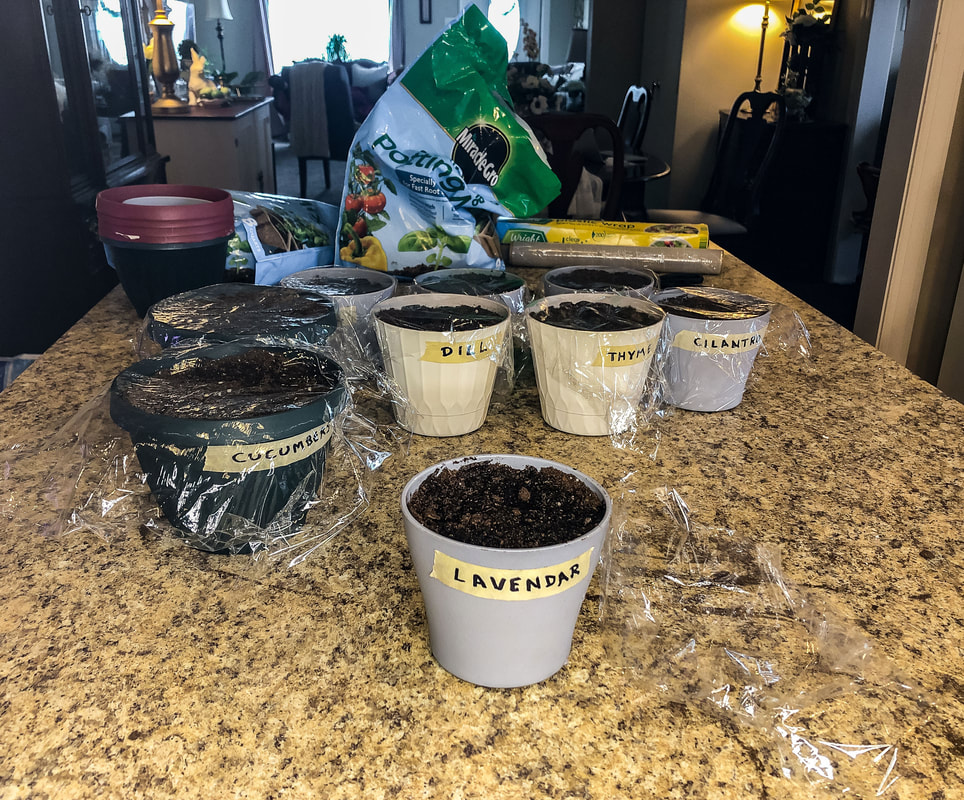 Pots watered and getting a plastic wrap covering. Photo by Diane M. Lilly, 2022. 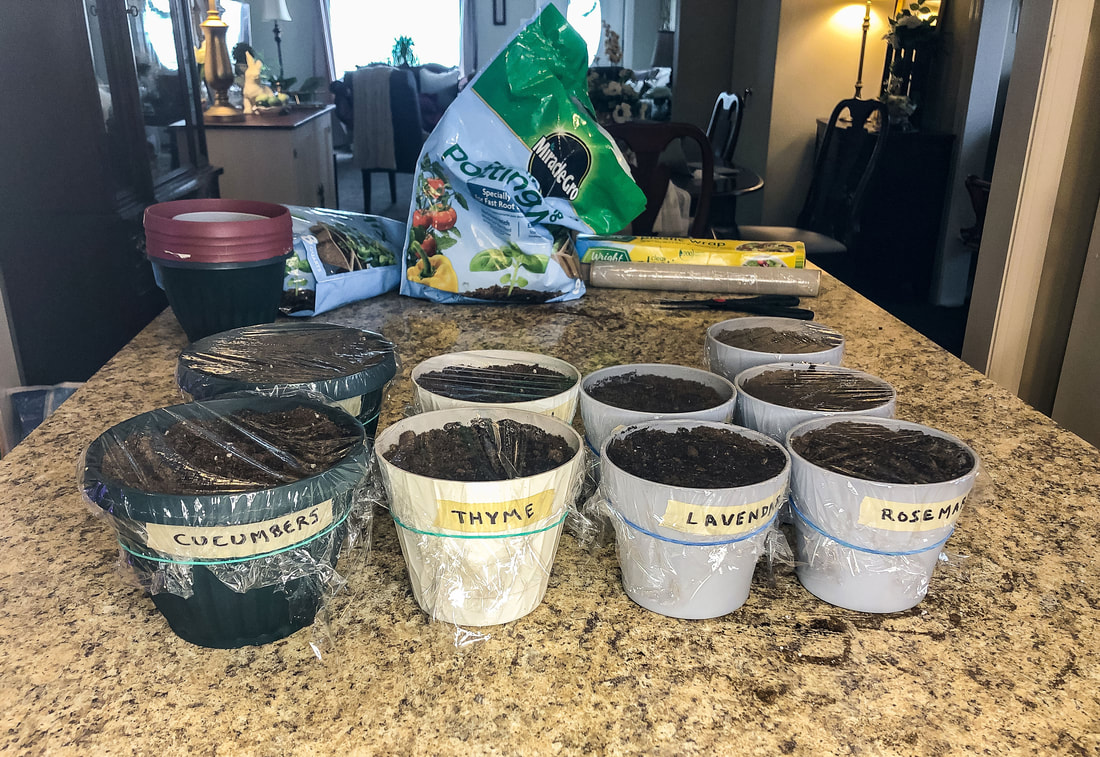 All my newly planted seed pots, watered and securely covered in plastic wrap. Photo by Diane M. Lilly, 2022. Finding the right light For most seedlings they really just need a lot of light to help them germinate and sprout. Plant specific light levels become more important once the plant matures a little, so when I first start my seeds I place the pots on a southern facing windowsill. (In my house, my windows face southeast and southwest.) This way the seedlings can make the most of the daylight and sun while they are trying to germinate. I don’t have fancy grow lights either. The plan is to buy a couple eventually (because they are a great investment for growing seeds indoors), but for now I just let the natural light on my windowsill do the job. When to transplant Transplanting can be a stressful time—for you and your plant! The key is to go slowly be careful, and read up ahead of time any instructions for separating and replanting your new plants. Doing research will result in better knowledge and answer questions like: What type of soil does this plant need? What are its lighting needs? Will it be too hot? Or too cold? Learning the basic needs of your new plant will give it the best shot possible to survive. And they don’t all survive! It’s just the way it is. Just keep trying and celebrate the ones that make it! (I will do a separate blog later on in the transplanting process.) 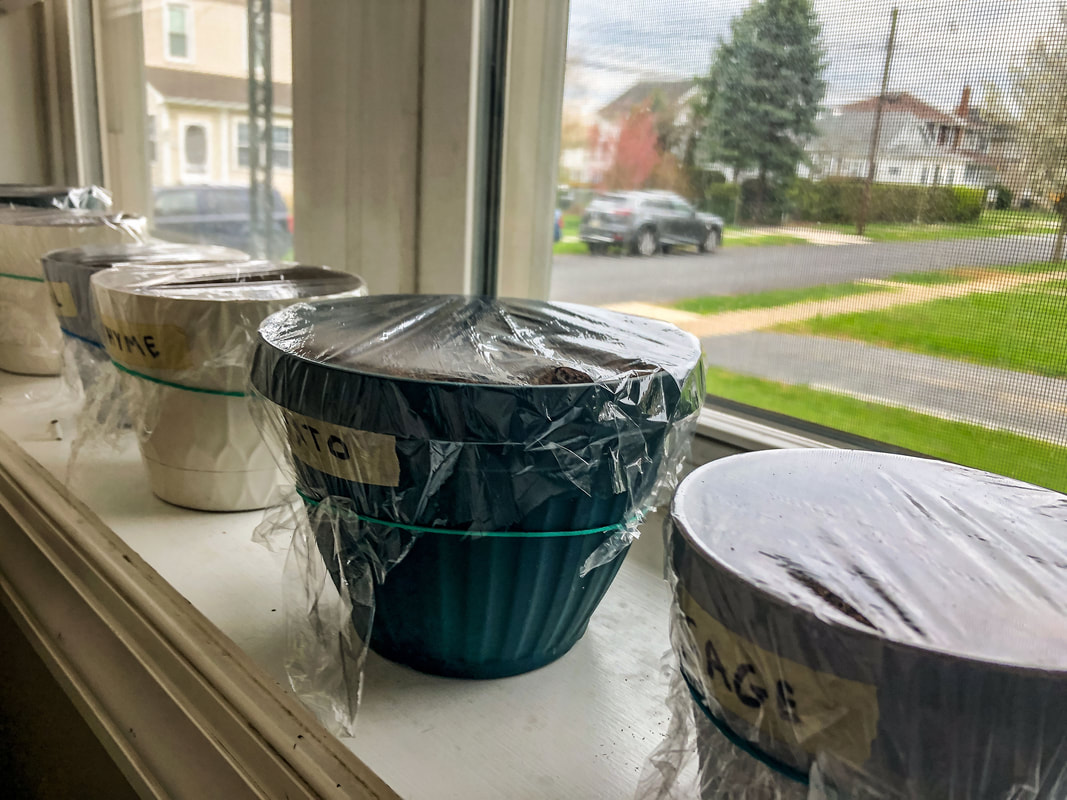 Another shot of my seed pots sitting on my living room windowsill. Photo by Diane M. Lilly, 2022. I’ll more than likely create another separate blog later for cucumbers and tomatoes, as they get big and will need bigger pots. A few of the herbs may get transplanted as well, depending on what they need later in the spring (and how much space I have). There is a lot to know about soil types and ph levels (and a lot I am still learning), but I think I will tackle that topic in a later blog as well. There are some common mistakes to avoid when starting seeds—such as over watering, seeds planted too deep, not enough light, wrong temperature, etc.—but it’s really not hard to plop a few seeds in some dirt and see what happens! Just remember this…There are people out there who have been doing this for years, and have every step of the process down to a science…but seeds and plants grow perfectly well on their own out in nature much of the time, without our interference! Just have fun planting and see what happens! Related blogs you may want to read: How to repot a pothos plant Small houseplants that love bathroom humidity A spring decor makeover for my small rental bathroom How to propagate bromeliad pups Eight health benefits of decorating with plants Six herbs I planted indoors Let’s talk about houseplants Biophilia in interior design This article may contain a few items or commercial mentions, but I only used them for demonstration purposes only. I am not endorsing any particular product or receiving any monetary gain for this blog.
0 Comments
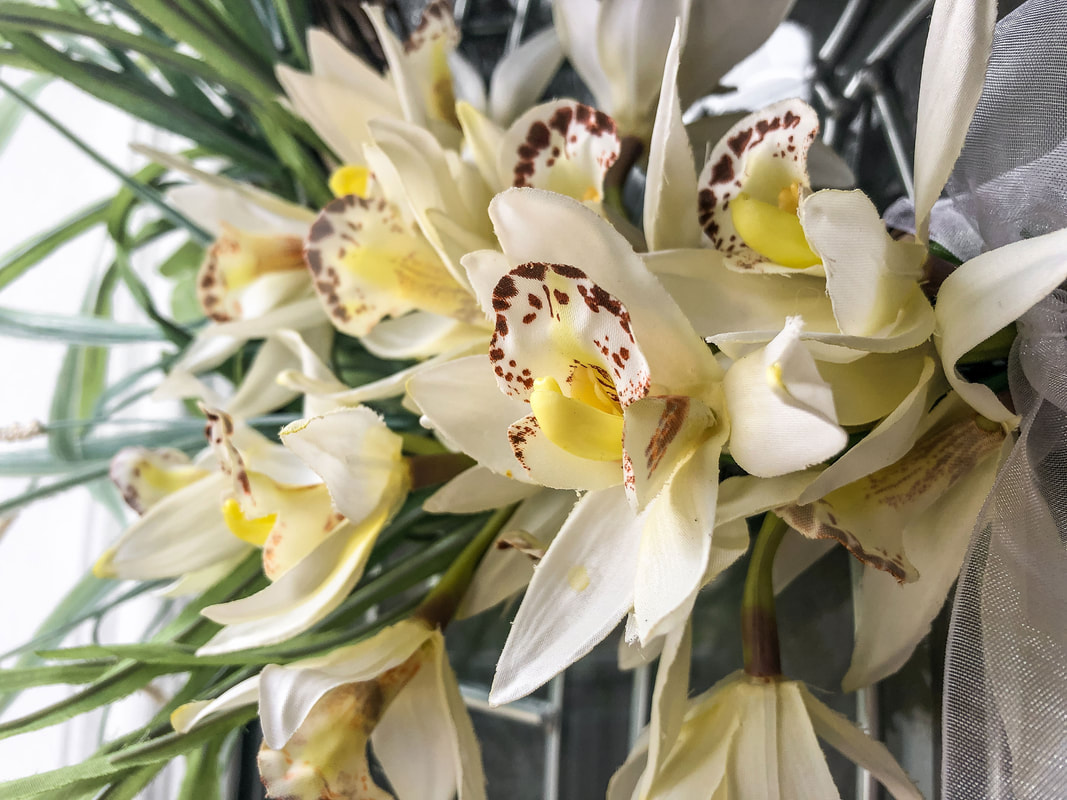 Upclose view of faux orchids. Photo by Diane M. Lilly, 2022. It's springtime! Time to make another faux floral design for my front door wreath. Every season, I re-use a pre-made wreath base, which serves as a template for whatever seasonal floral design I want. I couldn’t tell you where I got this old wreath from—I’ve had it so long now! The twisted vines conveniently allow me to insert stems into gaps between the entangled branches. Most of the time, the stems stay in place, but occasionally, floral wire is needed for extra stability. (Because I change out florals for this wreath, I never use glue.) 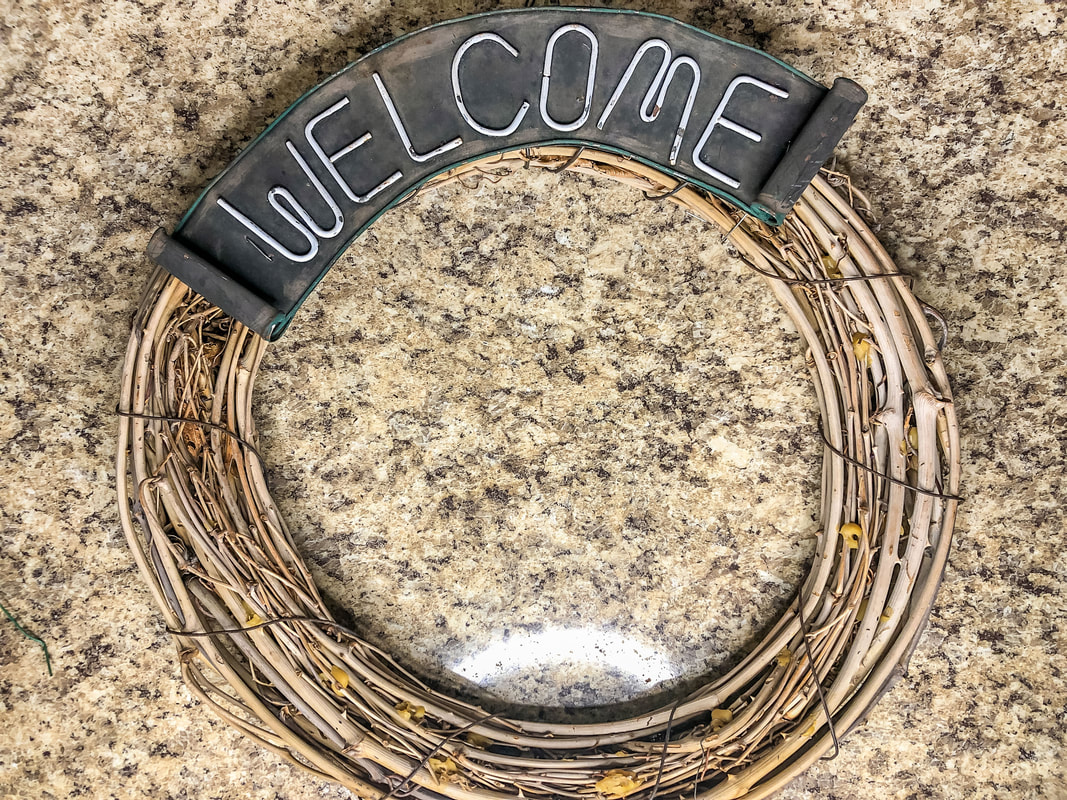 My pre-made vine wreath. Photo by Diane M. Lilly, 2022. If you don't have one of these grapevine wreaths, you can find whatever style and size you need on Amazon, Michaels, Hobby Lobby, or most craft stores. This spring season, I'll share my process and offer helpful tips for anyone who wants to create their own wreath design. To be sure, I’m no expert! There are floral designers out there who could run circles around me, but this is meant to be a fun project, and a simple design is something anyone can do. So here goes… Laying out the design So what about this spring’s floral design? Well, I originally intended to use a combination of white and yellow lilies, orchids, and ornamental grass--that is, until I realized that the lilies and orchids were competing. So, I made the decision to use only the orchids. The pros say to lay out your design before starting your project, but--for better or worse--sometimes, I skip this step and go with my gut instincts. Since I do not glue anything permanently into place, it’s easy to make adjustments. I started this project with a vision of an asymmetrical floral design, grass to the one side, and orchids layered on top as a focal flower, so I dug in and went with it. 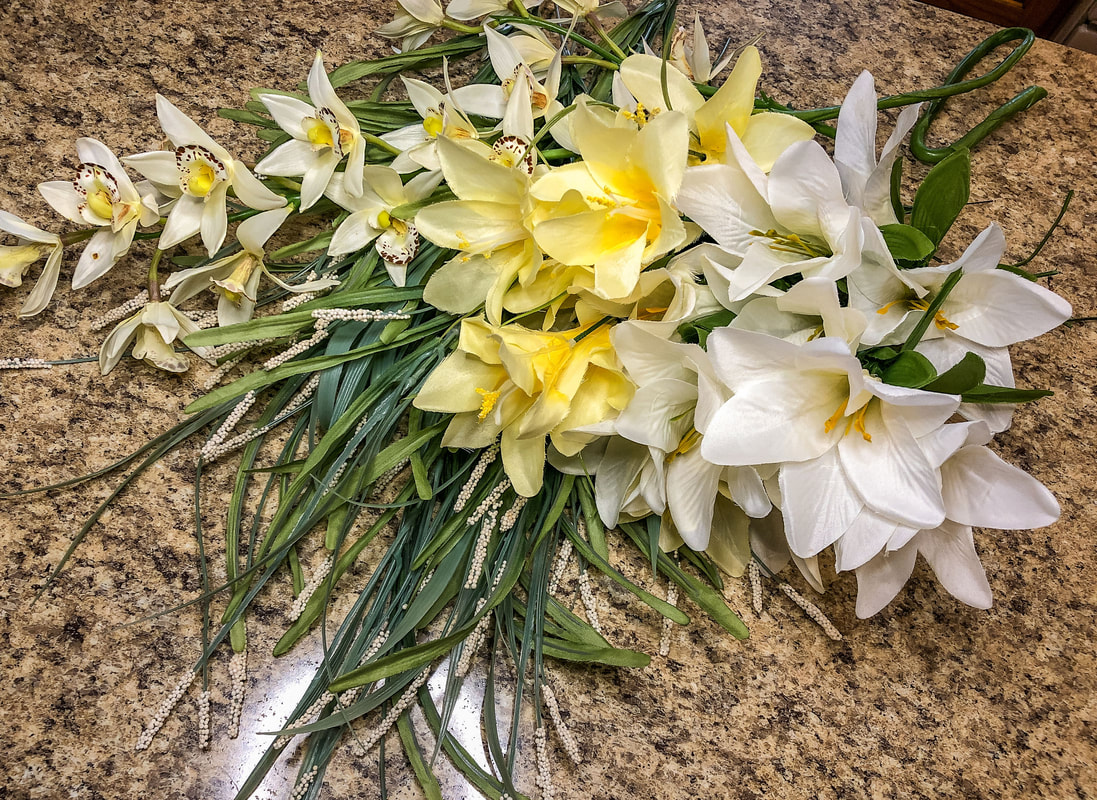 Spring faux floral ideas--orchids, lilies and grass. Photo by Diane M. Lilly, 2022. Materials I used The structure I will be using for this design is the pre-made twisted vine wreath base I spoke about earlier, which will be hung (when finished) with a gold metal door hanger. Since I didn’t need floral wire, the only tool used in this project was a pair of wire cutters. (I have an all-purpose tool with a wire cutter attachment.) The decorative bits will be the faux orchids, the ornamental grass, and the sheer white ribbon. So, this will be a simple design project this time around! 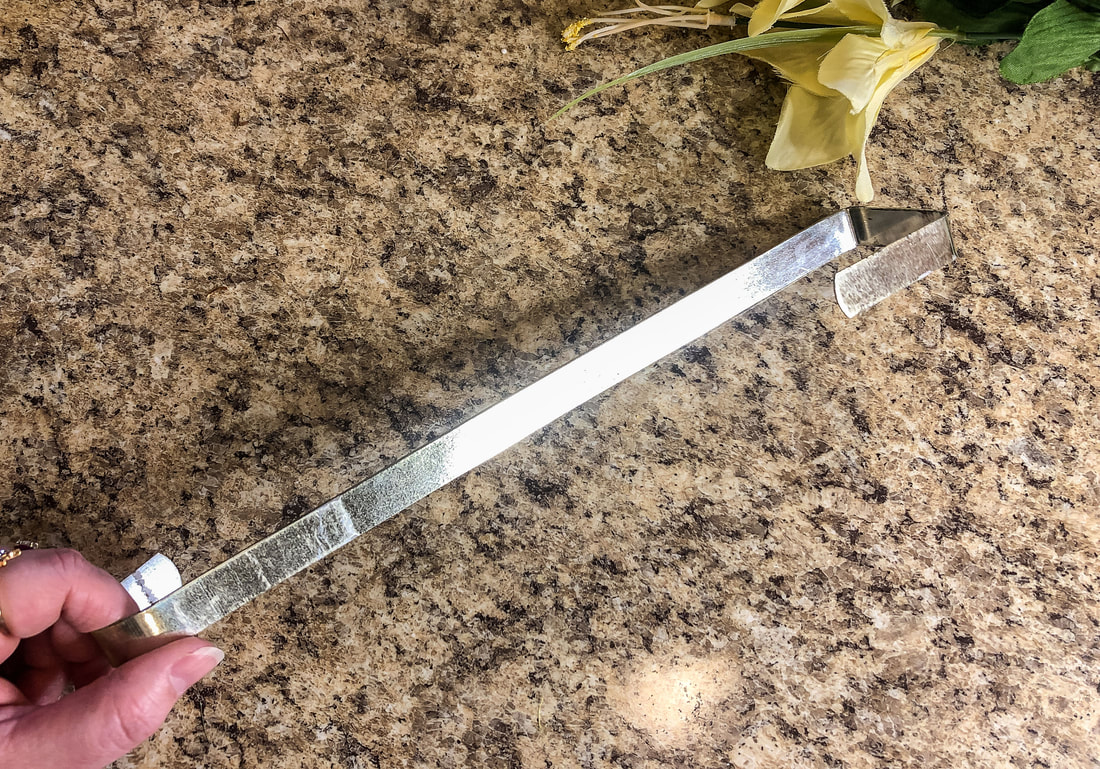 Gold metal door wreath hanger. Photo by Diane M. Lilly, 2022. 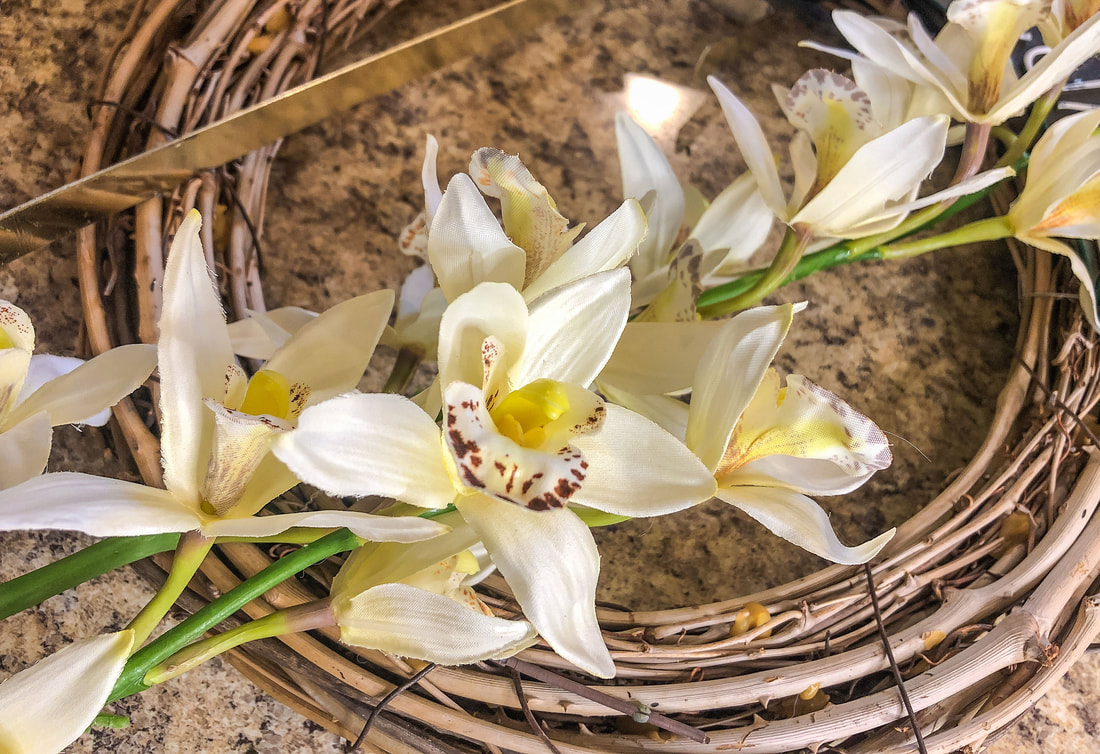 Faux orchid stem. Photo by Diane M. Lilly, 2022. 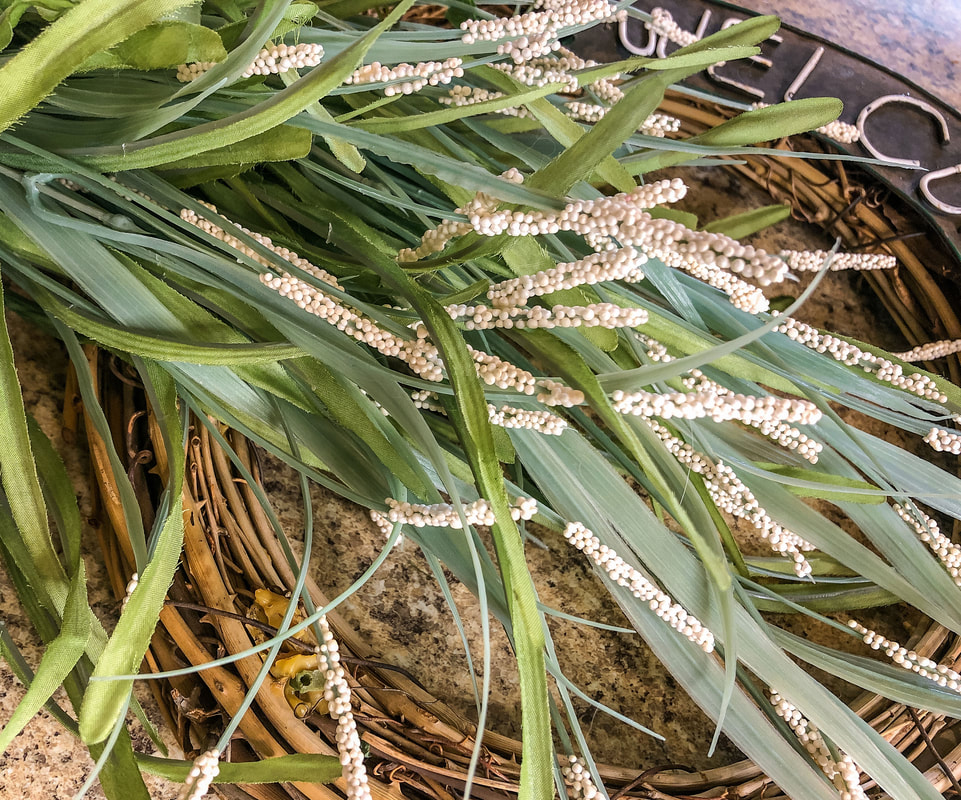 Faux ornamental grass with small white berries. Photo by Diane M. Lilly, 2022. Inserting the greenery You’ll often see floral designers start their arrangements with greenery first. This helps to establish some structure and texture and helps to make the arrangement fuller. The greens also provide a backdrop that allows the focal flowers to pop. For this design, I wanted the greens to create a sense of dynamic diagonal drama, onto which I could just “lay” my orchids. I worked my way down toward the bottom of the wreath, layering each stem and keeping them evenly spaced with no strange gaps. 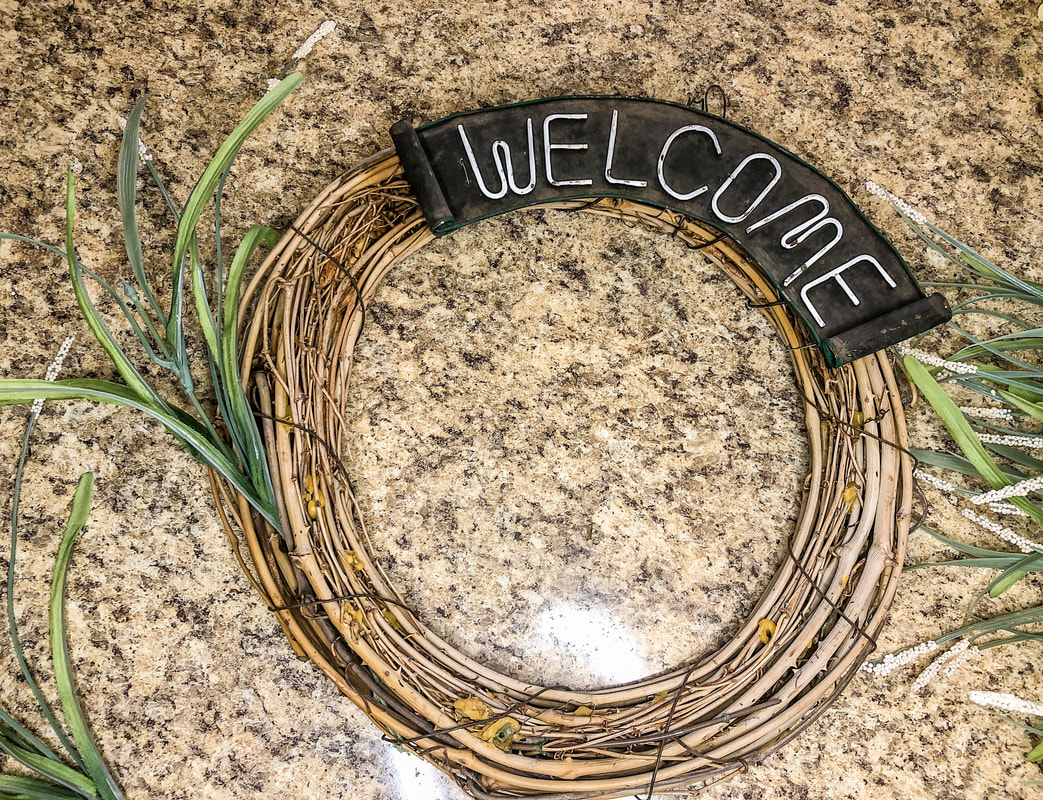 First stem of ornamnetal grass inserted. Photo by Diane M. Lilly, 2022.  A few more faux grass stems inserted into wreath. Photo by Diane M. Lilly, 2022. 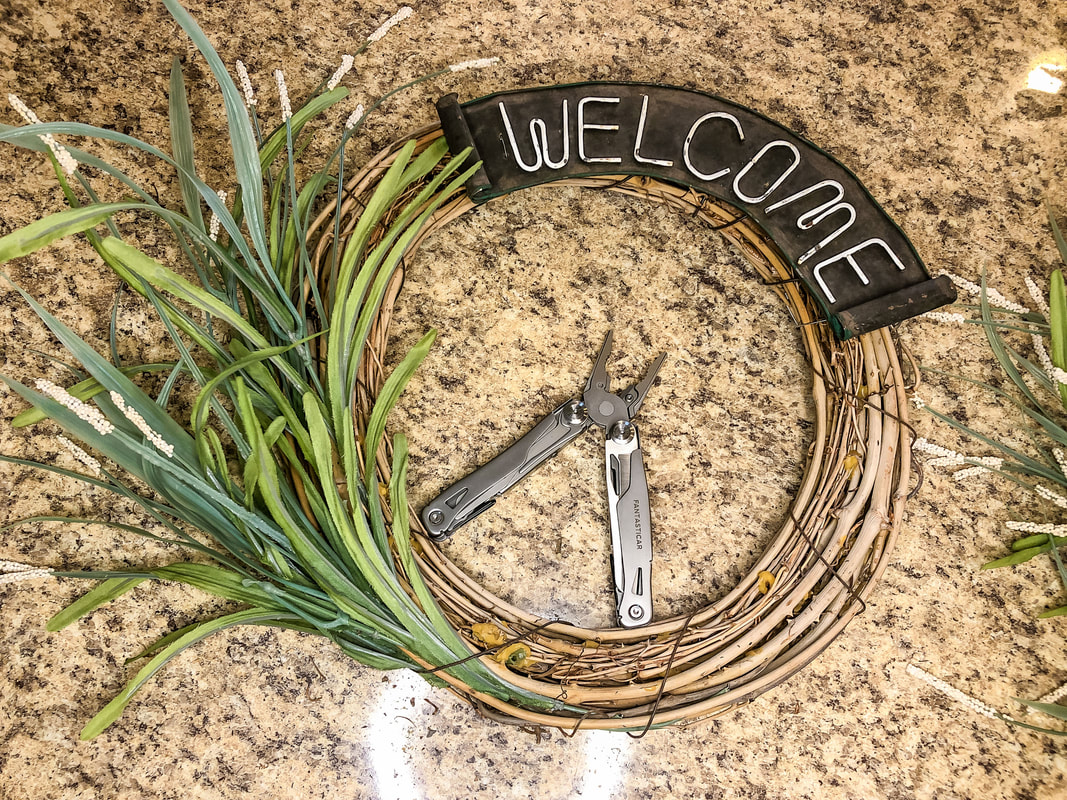 All of the faux ornamental grass inserted into wreath. Photo by Diane M. Lilly, 2022. Inserting the focal florals Finally, it’s time for the focal florals! These are the flowers that make the whole design pop! They should compliment the greenery and filler flowers but still visually jump out, as these are the flowers you want people to notice! They are your showcase flowers and generally should be larger than the fillers, and there should be a nice balance of contrast in color, shape, and size throughout the arrangement. When making your floral designs, experts say to use similar shades and tones or even complementary colors (colors across the color wheel from each other). In my case, I’m sticking with a white, pale yellow, and green palette. The greenery already had some small cream-colored berries mixed in. The focal florals were layered in, starting about mid-way through the greenery, working my way down towards the bottom of the wreath, avoiding unwanted gaps. 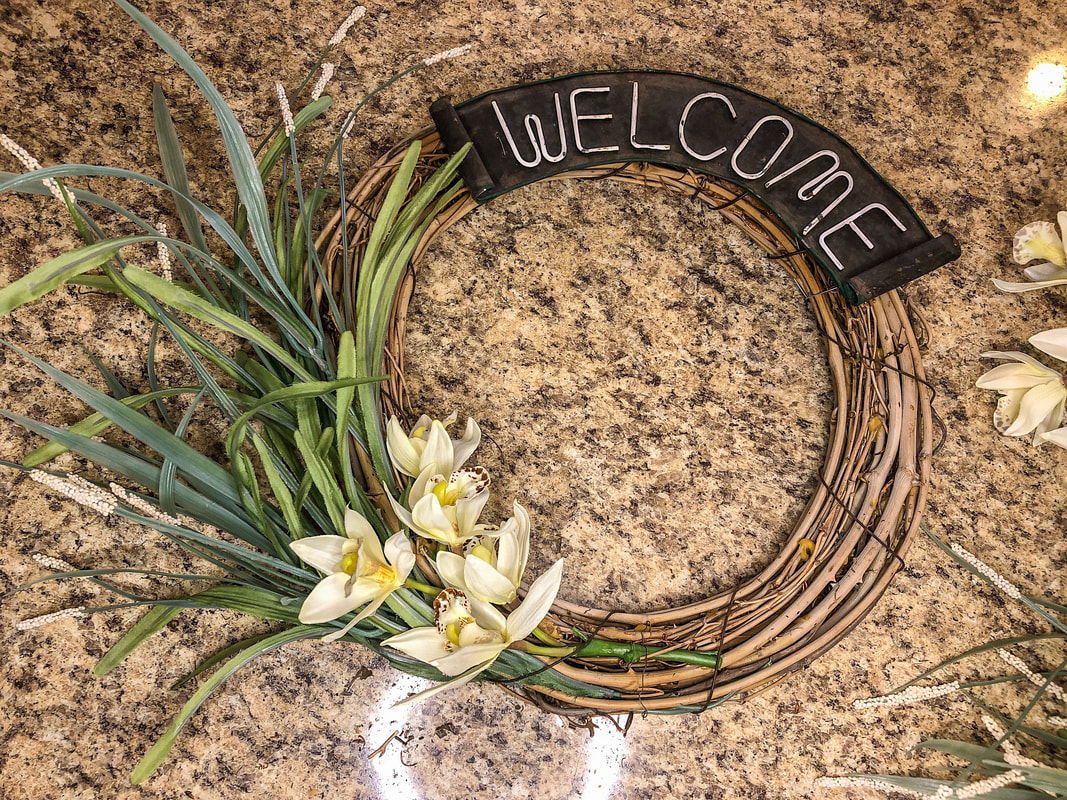 Faux orchids being layered into the wreath. Photo by Diane M. Lilly, 2022. 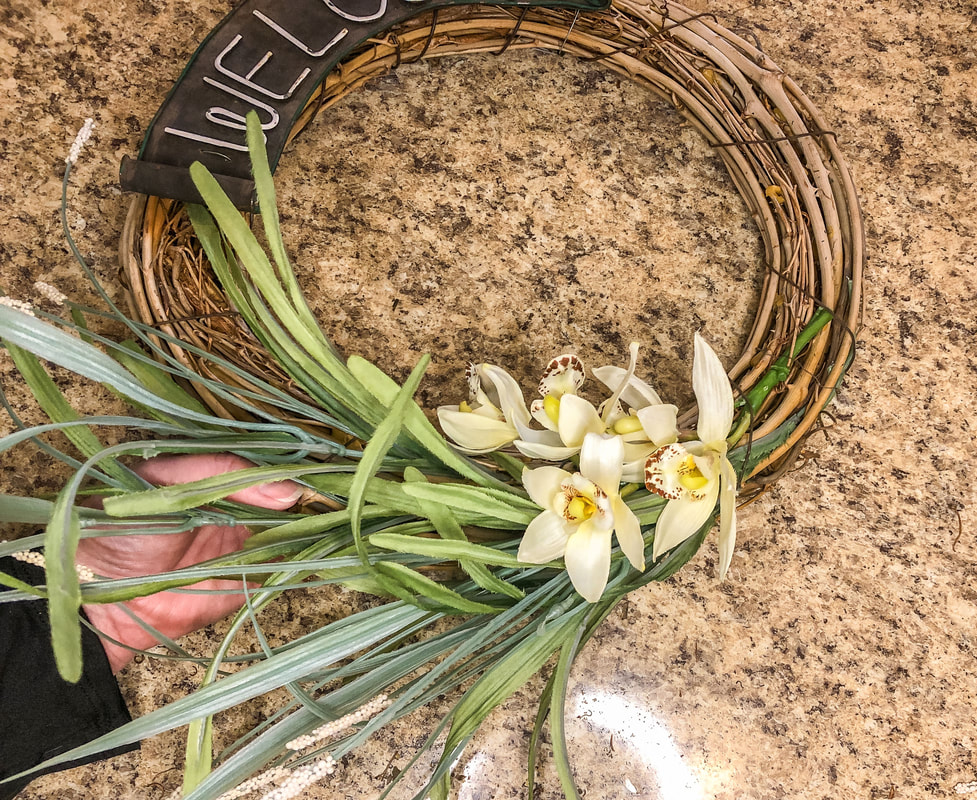 Another view of faux grass and orchids. Photo by Diane M. Lilly, 2022. 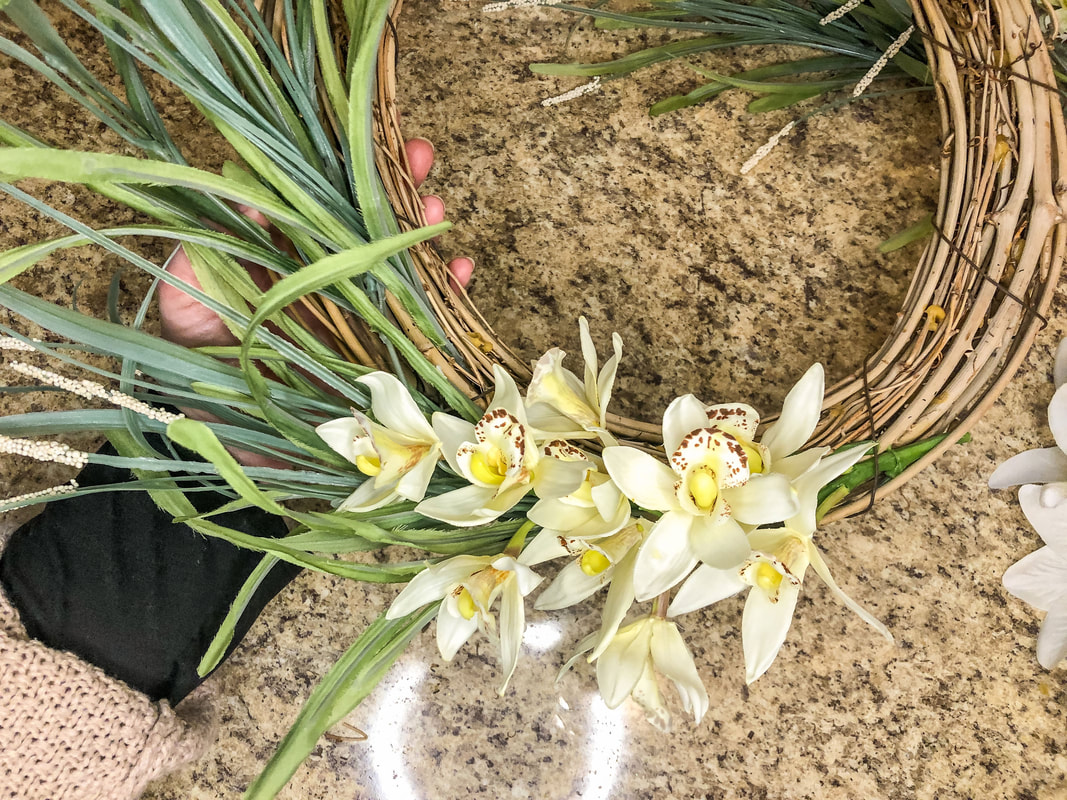 All of the faux orchids layered into the wreath. Photo by Diane M. Lilly, 2022. Wrapping the wreath with ribbon A beautiful sheer ribbon was used to cover the stems at the bottom of the wreath. I visualized a bouquet attached to the wreath with ribbon wrapped around the base of the flowers and gracefully hanging down. You can experiment with different types of bows or even wired-edge ribbons. For my design, however, I just wanted a simple sheer ribbon that does not take anything away from those gorgeous orchids! 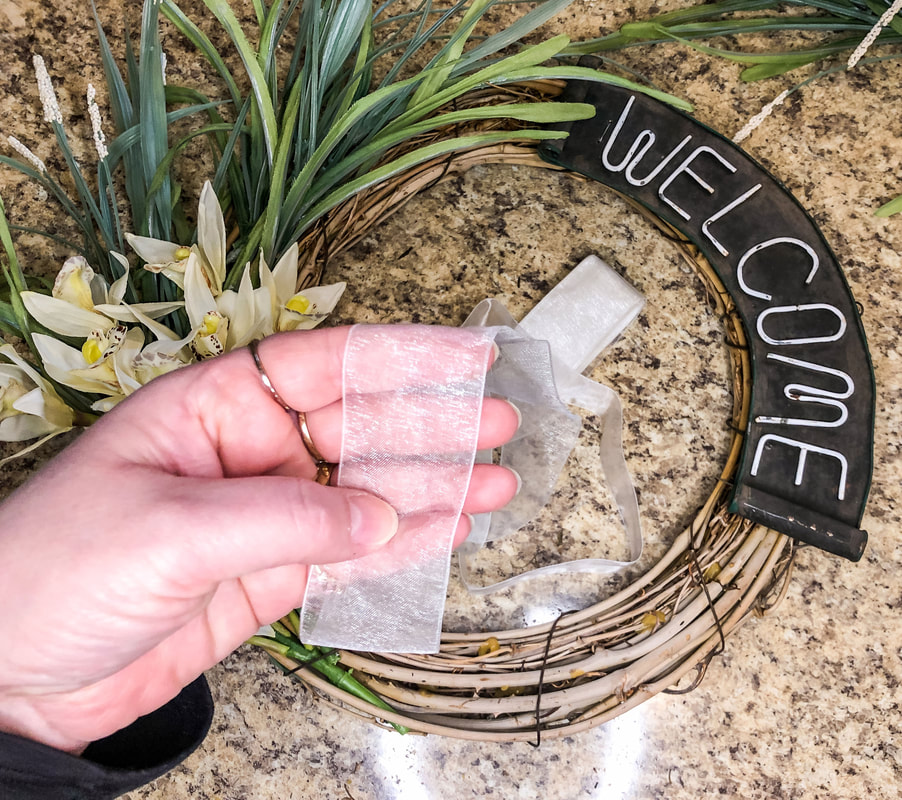 Sheer ribbon to be wrapped around the wreath. Photo by Diane M. Lilly, 2022. 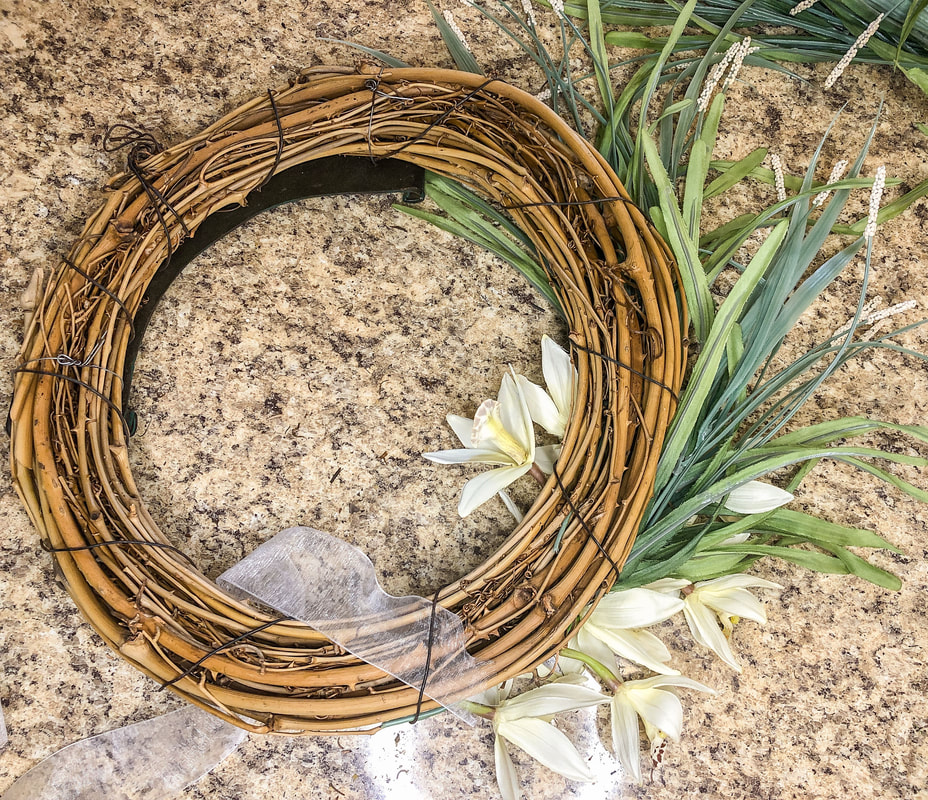 Ribbon gets tucked into a gap in the back of the wreath to hold it in place. Photo by Diane M. lilly, 2022. 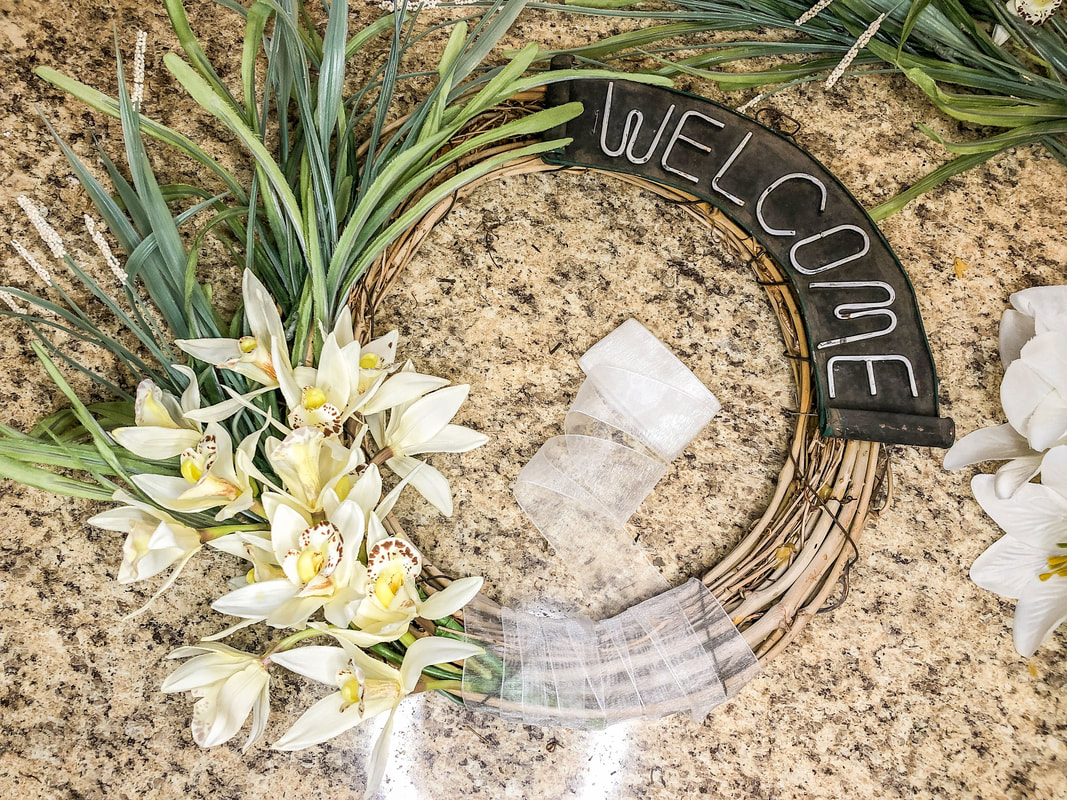 Wrapping the ribbon around the stems and wreath. Photo by Diane M. Lilly, 2022. 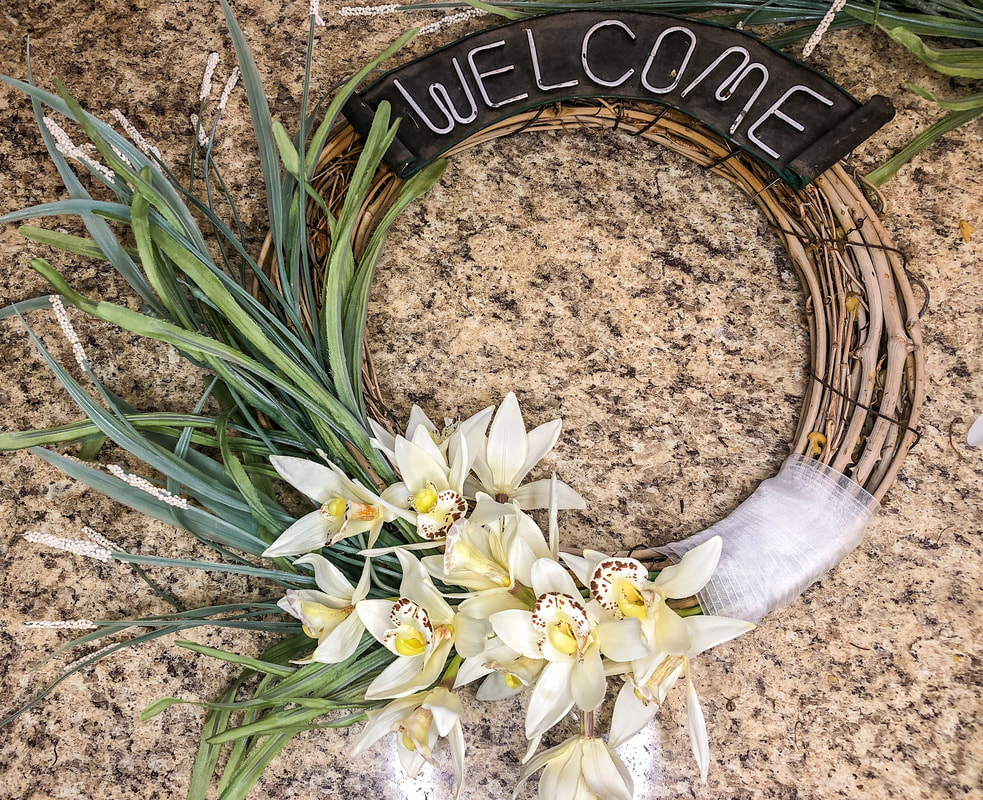 Ribbon wrapped around the wreath base. Photo by Diane M. Lilly, 2022. Hang the finished wreath on your front door! I’ve had these gold metal door hangers for a while—I honestly can’t remember where they were purchased! They were possibly bought at Kohl’s, but it could just as likely have been Michaels. Anyway, you can find inexpensive door hangers in many retail stores. There are a wide variety of styles, so make sure to choose one that suits the style of your home. The style on your front door should reflect what visitors will find inside! Depending on your style of wreath and door hanger, you may need a little wire or even a piece of ribbon to attach the wreath to the hanger. My wreath already has a bit of a wire loop at the top, so I can hook it onto my door hanger and hang the beautiful finished piece on my front door! And the project is done! 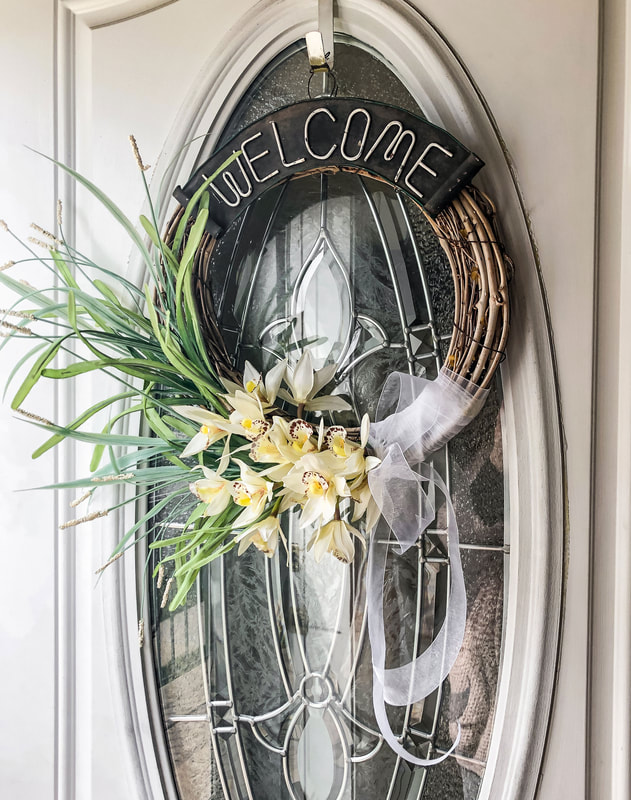 New faux orchid spring wreath with dangling ribbon on my front door. Photo by Diane M. Lilly, 2022. 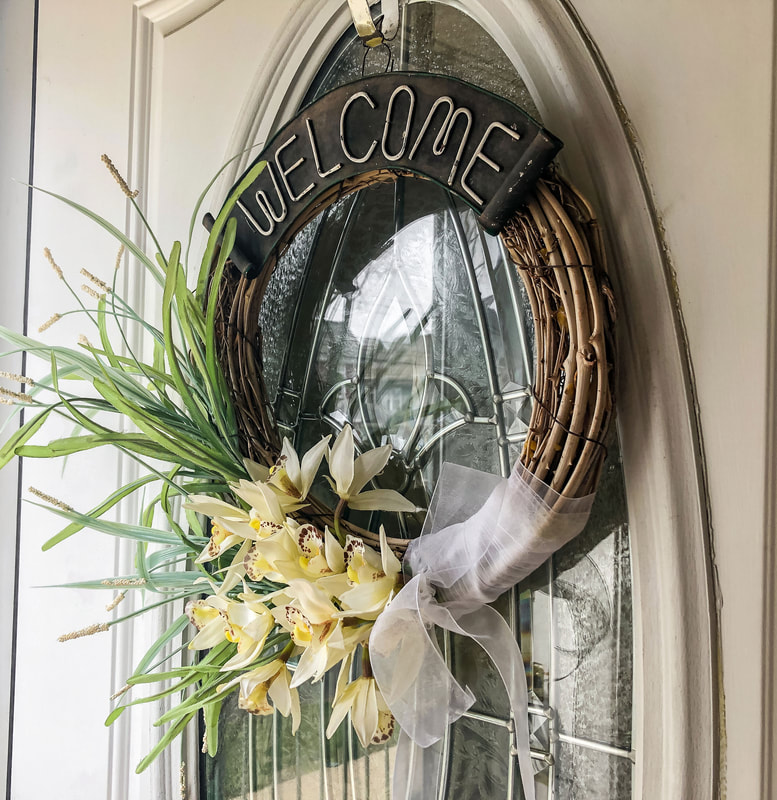 Another view of my new faux floral spring wreath hanging on the door. Photo by Diane M. Lilly, 2022. 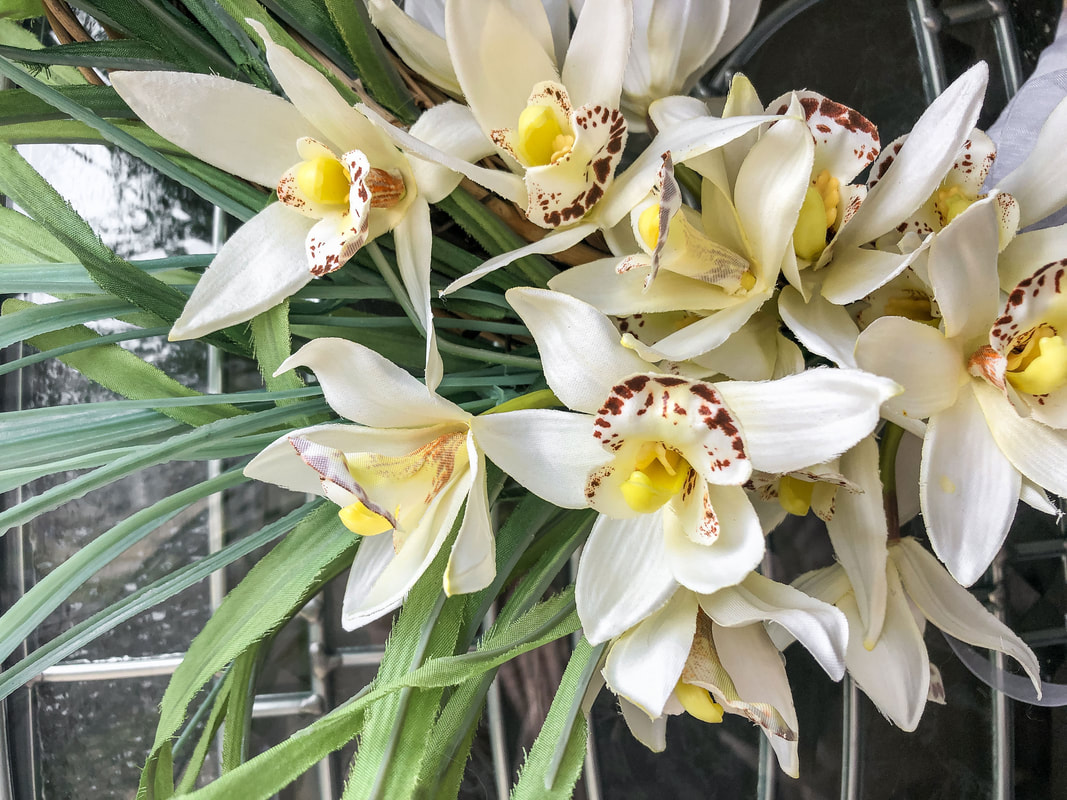 Another upclose view of my beautiful faux orchids. Photo by diane M. Lilly, 2022.  New Welcome door mat to compliment my new faux floral wreath! Photo by Diane M. Lilly, 2022. So have you created a door wreath of your own yet? Do you have any tips you’d like to share? Feel free to drop a comment below! Related blogs you may want to read: Spring indoor fairy gardens Eight tips for creating a spring vignette How to care for faux florals DIY with faux florals, birds, and repurposed thrift store finds Repurposed vintage candy dish and cocktail glasses Affiliate Disclosure Some of the posts in this article contain affiliate links. This means if you click on the link and purchase the item, I will receive an affiliate commission at no extra cost to you. I will only recommend products or services I use personally and/or believe will add value to my readers, so there is no conflict of interest.  Wrap with green pepper, onion, tomato, chicken, and shredded cheese. Photo by Diane M. Lilly, 2022. I’ve decided March will be the month I start thinking about a healthier me. Part of that equation means planning healthy meals that will help lower my cholesterol and help me lose weight. I remembered I used to make a lot of chicken with roasted veg. There are so many variations of this recipe that work well. You could add potatoes, carrots, broccoli, or any vegetable you prefer. 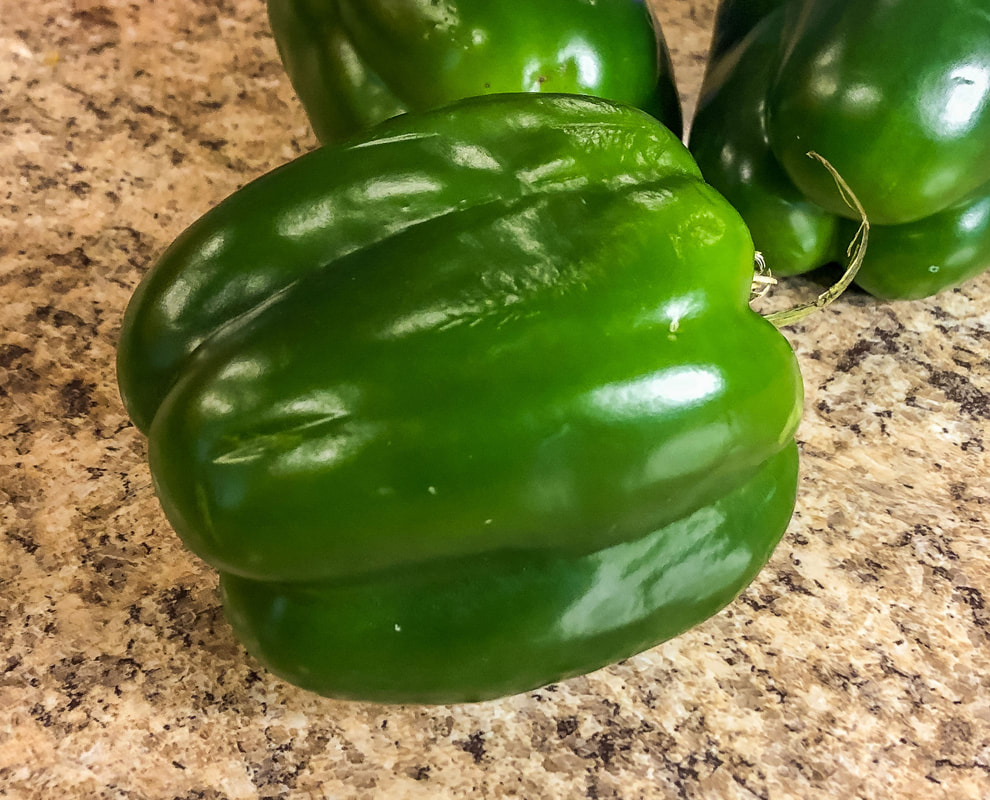 Green pepper. Photo by Diane M. Lilly, 2022. 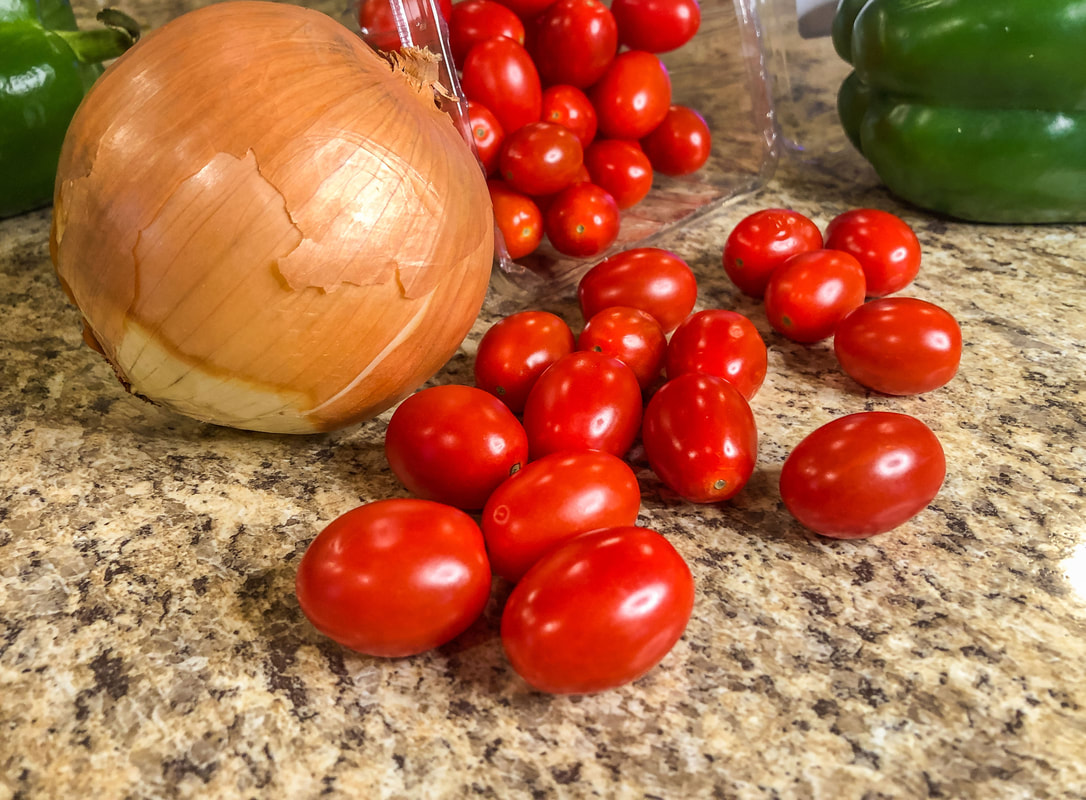 Onion and grape tomatoes. Photo by Diane M. Lilly, 2022. The key is to keep it as fresh as possible and use olive oil and seasonings to spice up the flavor. (Go easy on the salt. A little salt is necessary to bring out the flavors, but not too much.) Experiment with your seasonings to see which ones you like best! I happen to love Cayenne and paprika…I could eat just about anything with cayenne and paprika! And I’ve found that I love Italian seasoning and olive oil on my roasted veggies. 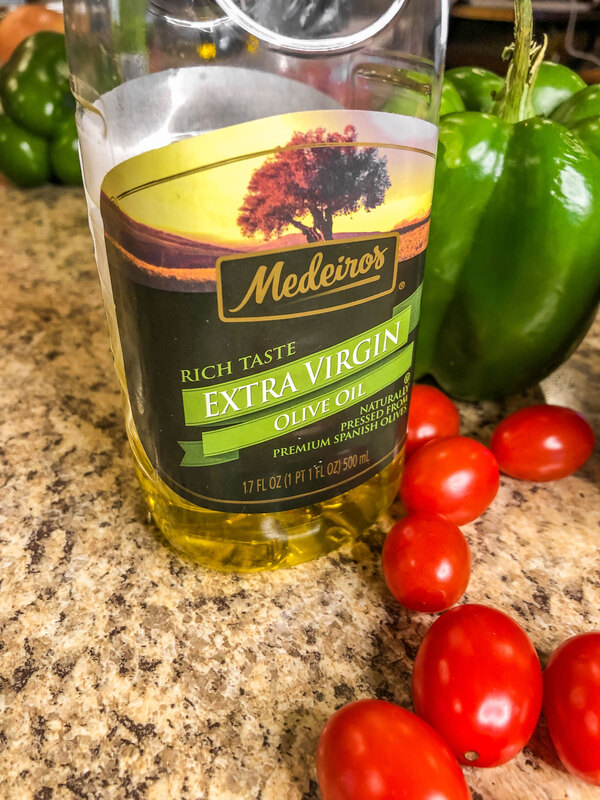 Olive oil. Photo by Diane M. lilly, 2022. 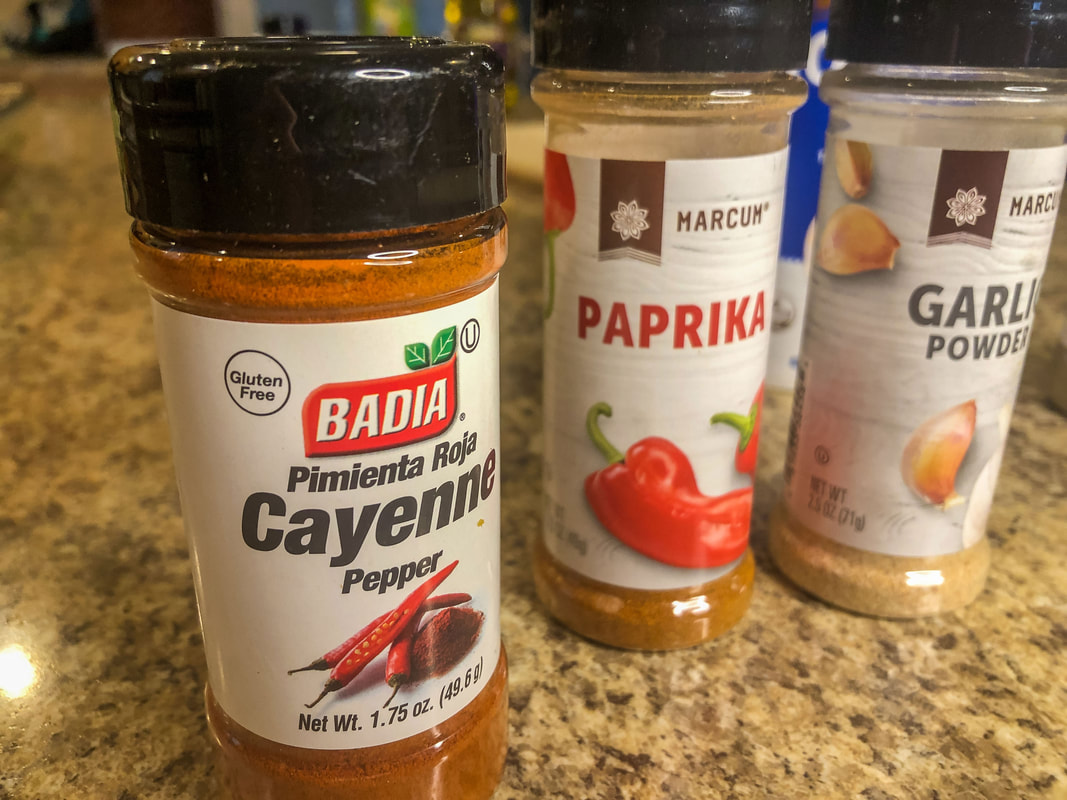 Seasonings. Photo by Diane M. lilly, 2022. 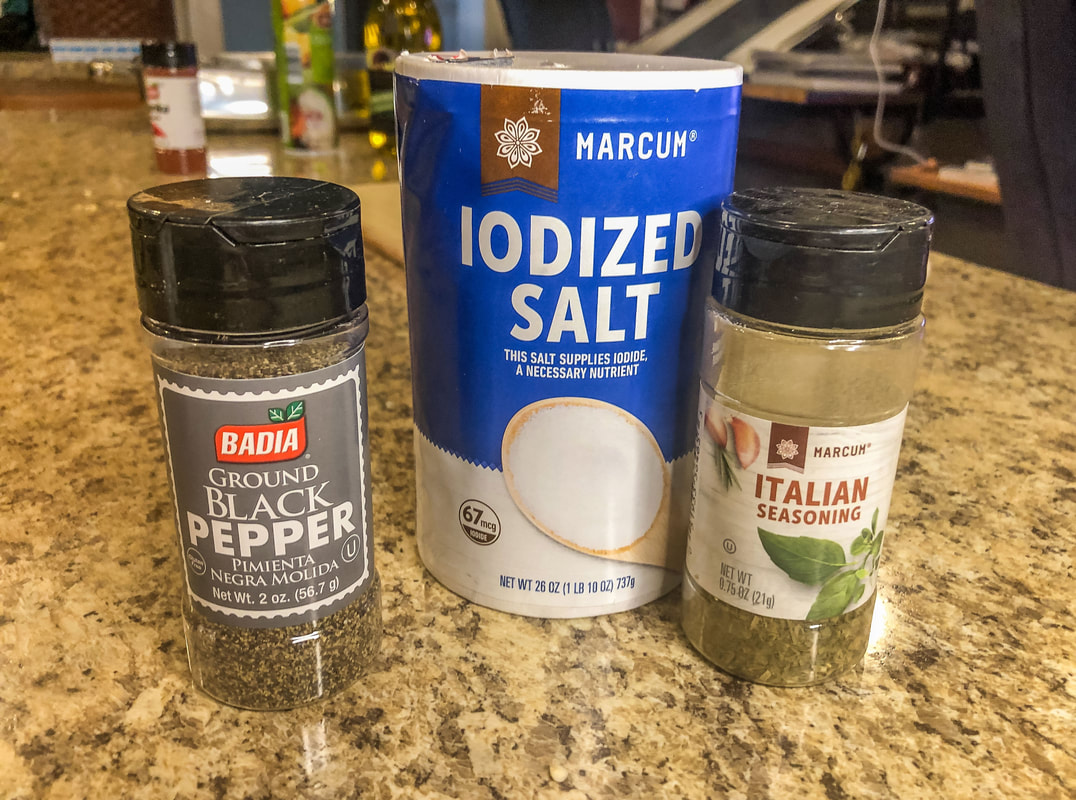 More seasonings. Photo by Diane M. Lilly, 2022. As for the toppings, anything goes. To keep it healthy, use low-fat sour cream, skip the shredded cheese and wraps, and use brown rice instead. This basic recipe is so versatile and can be made in so many ways, and—other than a little bit of fast chopping—it’s relatively quick and easy to make. Ingredients: 1 lb boneless chicken breasts, cut into cube size pieces 3-4 green, red, or yellow peppers 2-3 onions (yellow or red) Pint of cherry or grape tomatoes Olive oil Salt Pepper Italian seasonings Cayenne Paprika Salsa (optional) Shredded cheese (optional) Sour cream (optional) Wraps (optional) Brown rice (optional) Preheat oven to 375 degrees F. Cut chicken into cubes. Coat in olive oil, salt, pepper, cayenne, and paprika. Place in baking dish.  Raw cubed chicken. Photo by Diane M. Lilly, 2022.  Uncooked cubed chicken coated in seasonings. Photo by Diane M. Lilly, 2022. Cut peppers and onions into strips or chunks. Place on a baking sheet (or in a baking dish) with tomatoes. Coat in olive oil, salt, pepper, and Italian seasonings. 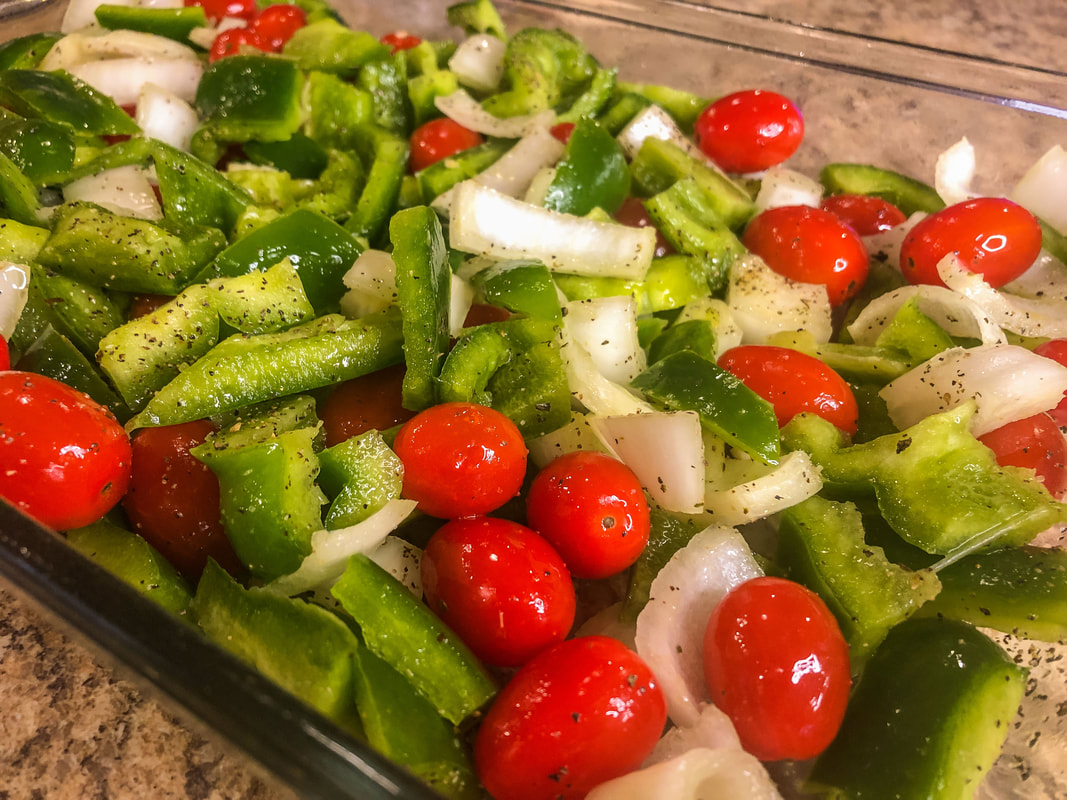 Green peppers, onion, grape tomatoes. Photo by Diane M. Lilly, 2022. Place chicken and vegetables in the oven for 30-40 minutes. Serve with rice or on wraps with toppings of choice (salsa, sour cream, shredded cheese). 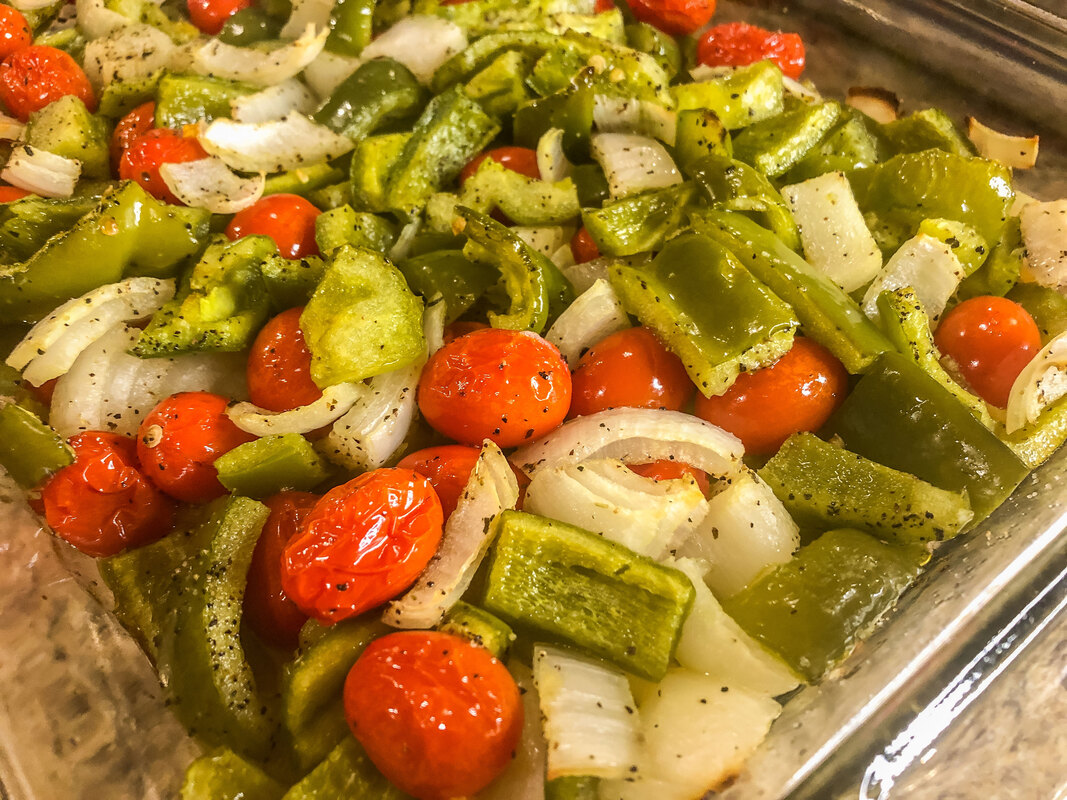 Cooked green peppers, onion, grape tomatoes. Photo by Diane M. Lilly, 2022.  Cooked chicken. Photo by Diane M. Lilly, 2022. 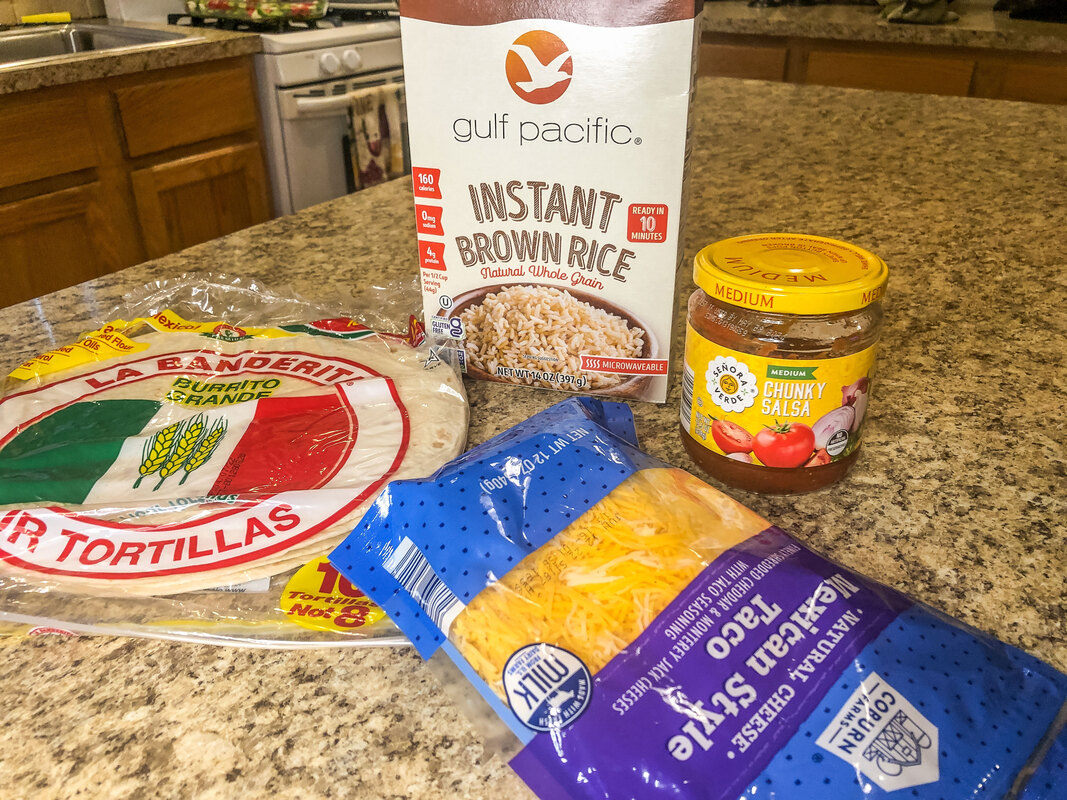 Optional extras that can be used with the chicken and roasted vegetables. Photo by Diane M. Lilly, 2022.  My dinner--chicken and roasted vegetables on a wrap with shredded cheese. Photo by Diane M. Lilly, 2022. Do you have a go-to variation of a chicken and roasted veg recipe? If so, drop a comment below! Related blogs you may want to read: Homemade chicken noodle soup recipe Potato soup recipe Tuna noodle casserole recipe Chicken vegetable pot pie recipe This article may contain a few items or commercial mentions, but I only used them for demonstration purposes only. I am not endorsing any particular product or receiving any monetary gain for this blog. 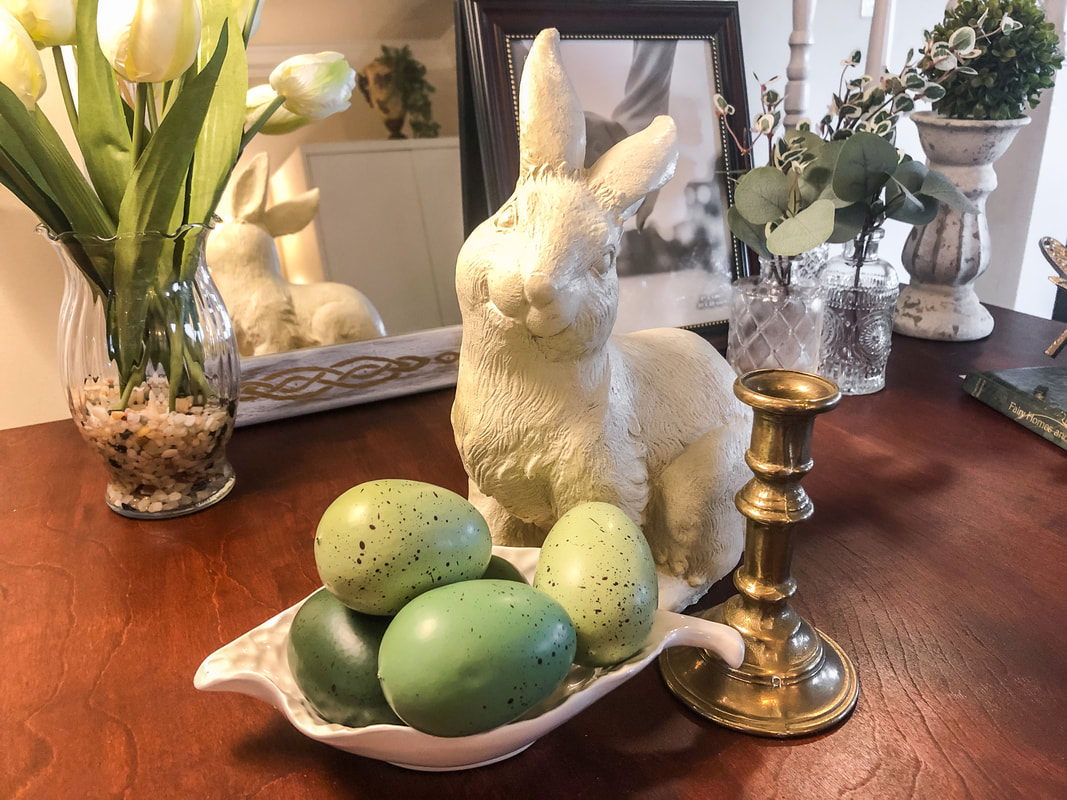 Easter Bunny and pastel eggs in my spring vignette. Photo by Diane M. Lilly, 2022. This spring season, I decided to take a different approach to decorating the two spaces in my dining room, where I generally create vignettes. I stripped everything decorative out of the room so I could start with a blank slate and a clear mind. I wanted my dining room decor to reflect my tastes and personality. I placed every item slowly and thoughtfully. As an artist and designer, I love intricate details, but I also like things minimal and streamlined. The two sides of my brain sometimes conflict! But this time, the compromise was sheer perfection! The balance is perfect and illustrates my style while showcasing things that are important to me. So, I thought I’d share my process and a few tips I learned along the way… There are a lot of blogs and vlogs out there demonstrating how to make a vignette. The term is so ubiquitous it’s almost a meme. So, what exactly IS a vignette? According to dictionary.com, a vignette is originally a French word meaning little vine. A vignette has come to mean something like a small design or illustration, sometimes a wood carving. In interior decorating, small areas of thoughtfully placed items create a three-dimensional picture, if you will. Vignettes are a great way to show off your personality…and make your space your own. No matter what trend or style you are following, this is a way to create little spaces that reflect who you are and an opportunity to display sentimental things. 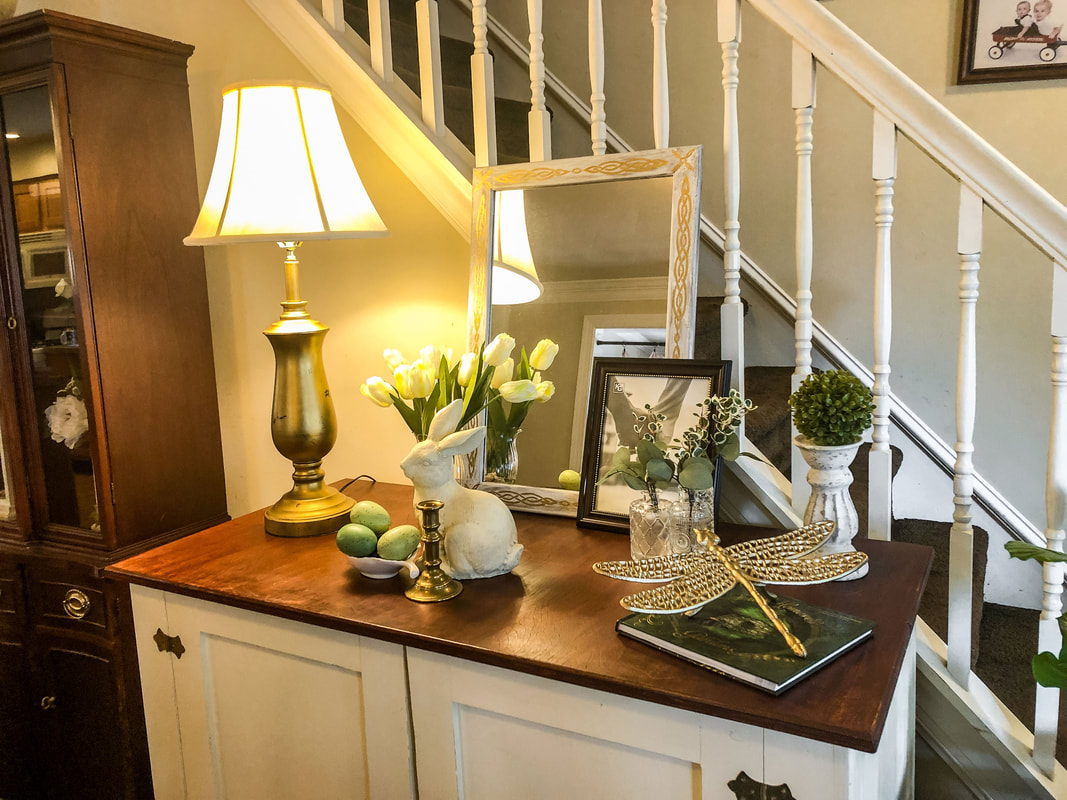 View of my dining room cabinet with spring decor on top. Photo by Diane M. Lilly, 2022. 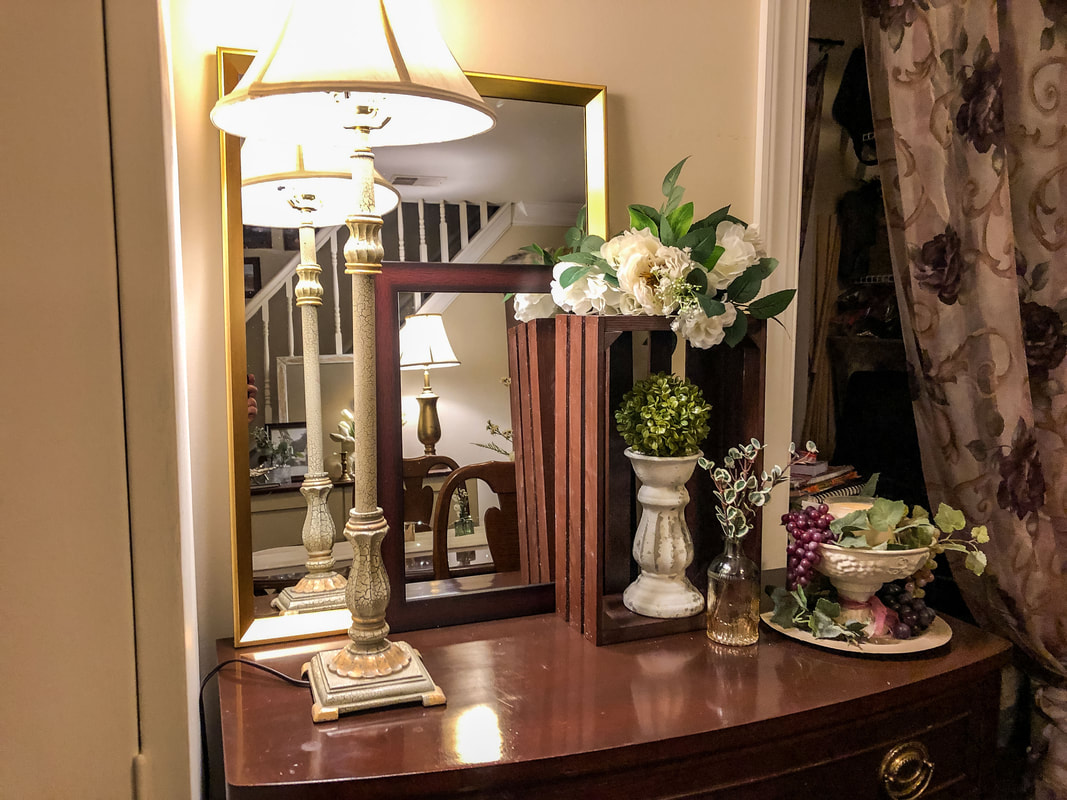 View of a second vignette area in my dining room with spring decor. Photo by Diane M. Lilly, 2022. Color scheme and continuity in decor When you create your vignettes, think of them as stand-alone pictures and small parts of the rest of the room. While they have their own story, that story should have a sense of continuity with the rest of your space and decor. In my case, I started off thinking I would be using yellow and white tulips and lilies but then decided against the tulips. Firstly, sometimes faux florals look good…and sometimes they don’t! The yellow tulips did not look realistic enough, so I chose only the white tulips…and the whole design plan changed! I reassessed my color scheme and realized I wanted to simplify my spring decor. My plan to use a white/yellow color scheme morphed into a palette of simple creams, whites, greenery, and gold…all of which perfectly complement my dark cherry-ish colored furniture pieces. This allowed me to create a better flow in my home, keeping the same color scheme and floral designs throughout all my spaces. It’s a personal preference, but I do love my continuity! 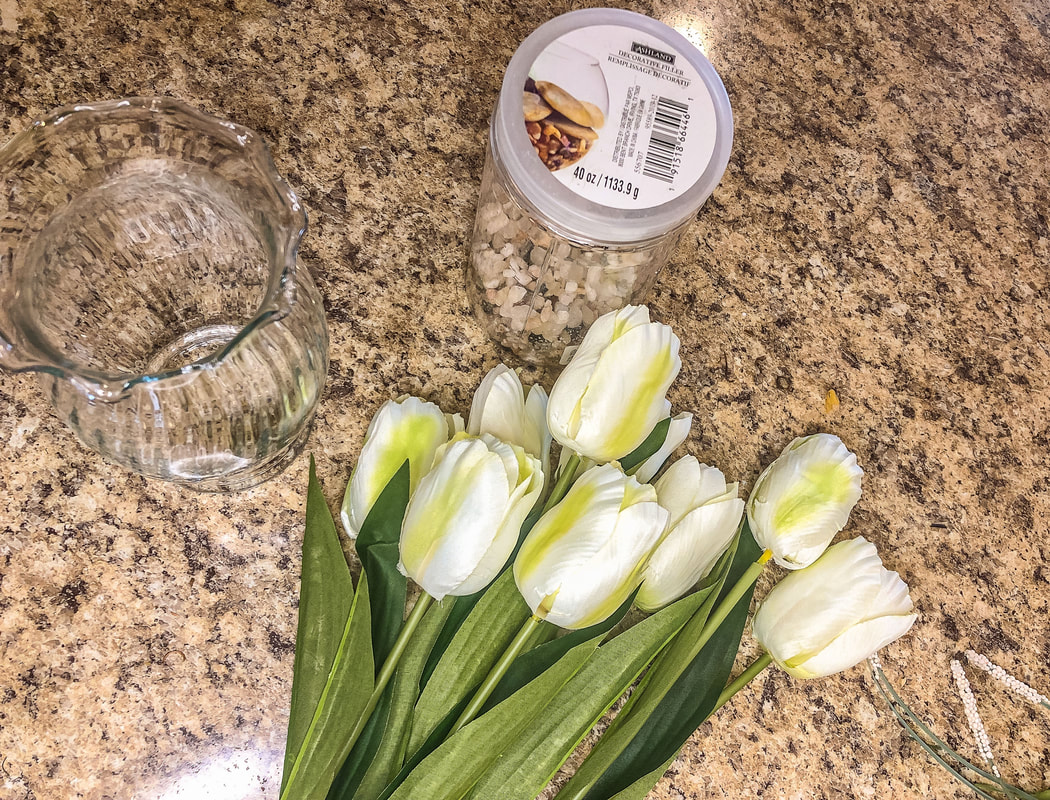 Faux white tulips. Photo by Diane M. Lilly, 2022.  Faux white flowers for my spring decor. Photo by Diane M. Lilly, 2022. 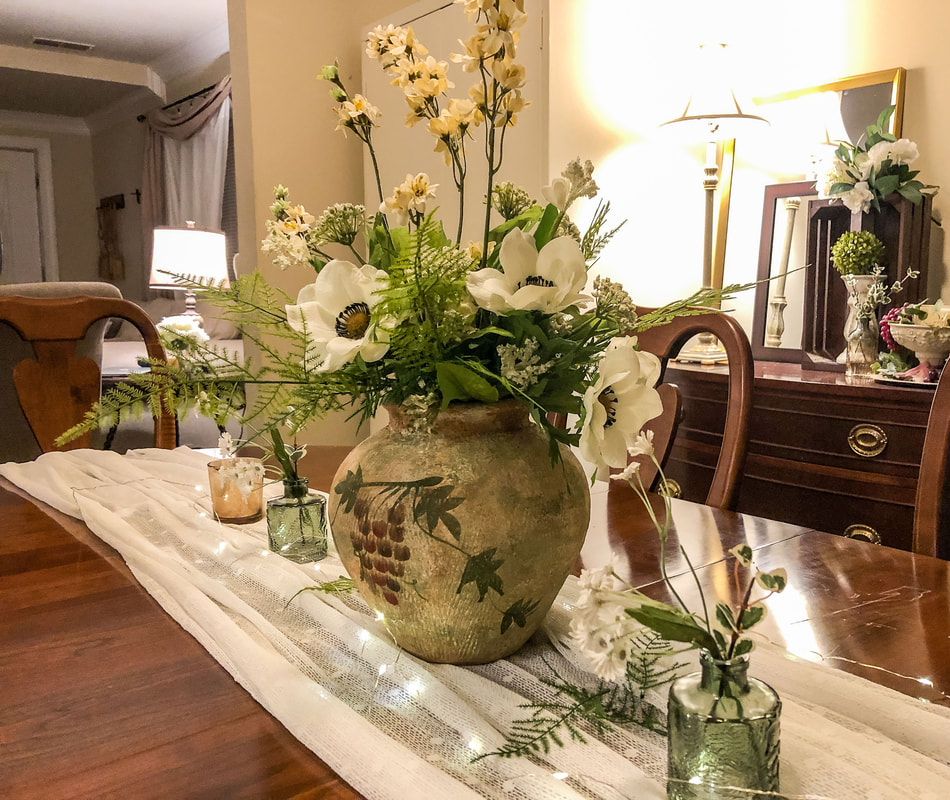 This spring's faux floral arrangement on my dining room table. Photo by Diane M. Lilly, 2022. Knowing your style When it comes to personal style, I’m a walking contradiction! I love the traditional style for its ornate details and curvilinear design but dislike clutter. So, I always blend the traditional elements with clean-lined decor to give the space room to breathe. I mix and match curvy ornate pieces with furniture with clean, straight lines. Repetitive colors, textures, shapes, and forms create a sense of balance. This seems to satisfy the two halves of my brain! The resulting space feels comfortable and functional. The moral of the story--take some time to get to know your style so that your vignettes reflect a true sense of personality that fits in well with the rest of your home.  View into my living room from the dining room. Photo by Diane M. Lilly, 2022. Using mirrors in a room Let me tell you, my dining room is the darkest, dingiest room in the house! Very little natural light gets into this space, so I rely heavily on artificial light to create a sense of warmth and light, but sometimes even that is not enough. Placing mirrors on opposite sides of the room creates a way to reflect more light while creating the illusion of a bigger space. (I bought the mirrors with the gold and brown frames from Amazon. The mirror with the white frame with the Celtic knotwork border was a DIY project using a thrifted mirror.) So, if you have a small, dark space, use mirrors and other reflective surfaces to create an illusion of a slightly brighter and larger area. 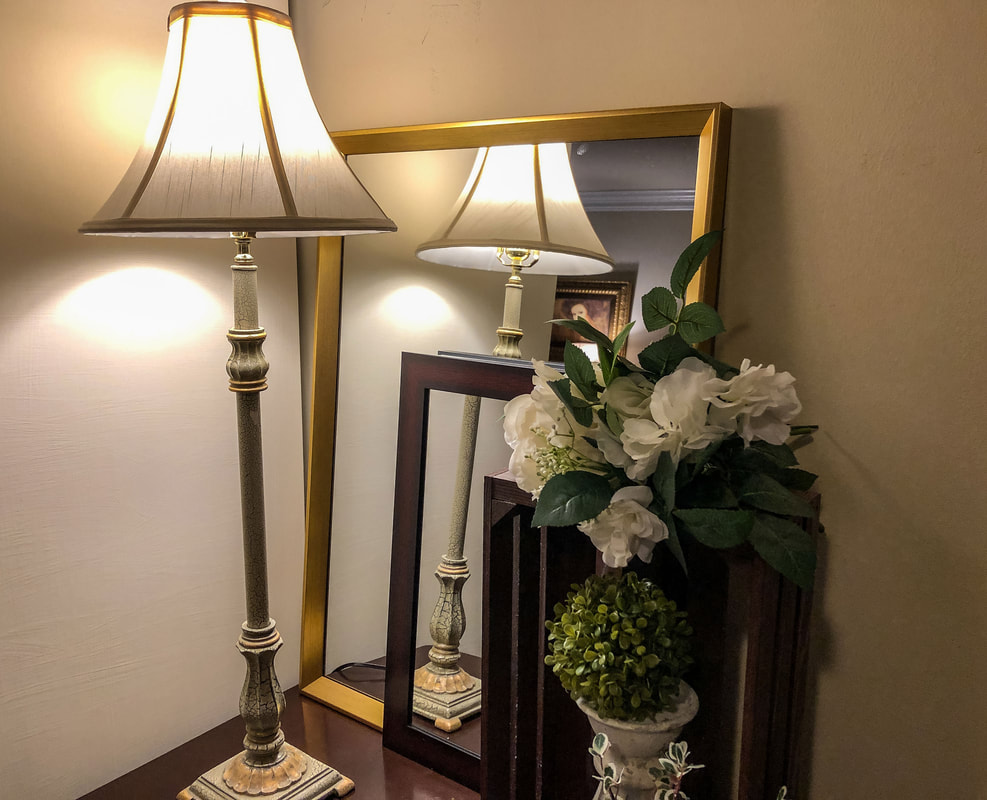 Stacked mirrors help better illuminate this rather dark area of my dining room. Photo by Diane M. Lilly, 2022. 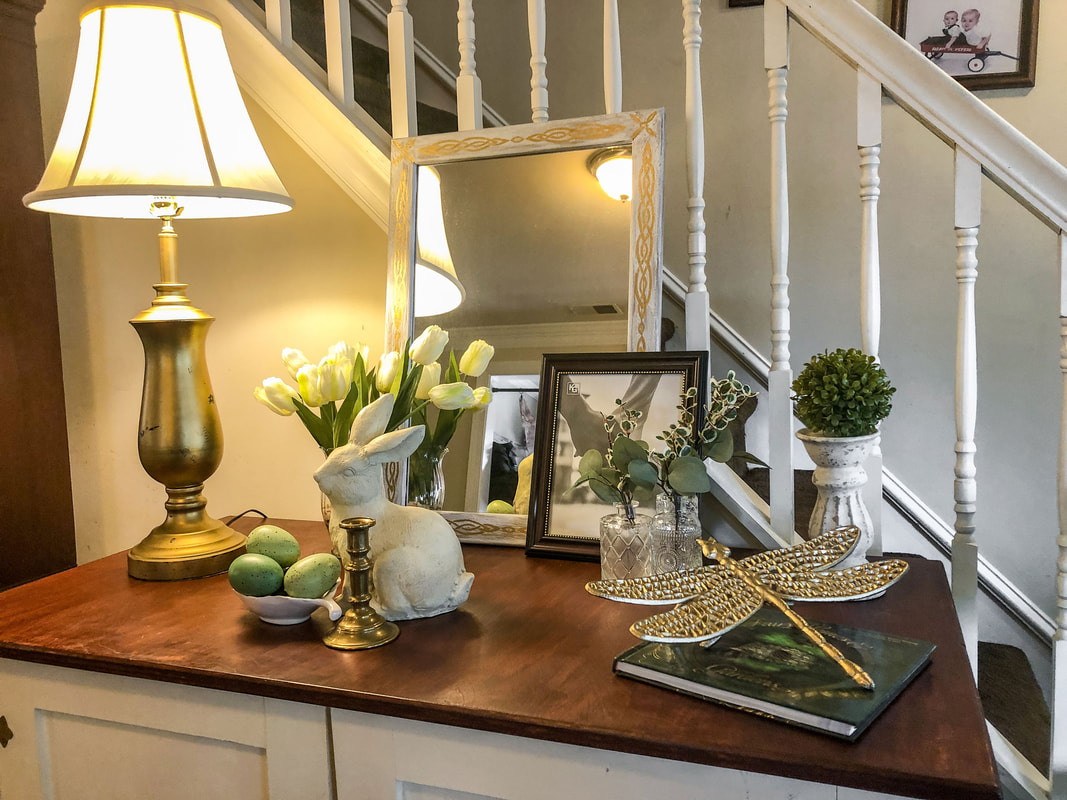 Another large mirror in my dining room helps reflect light. Photo by Diane M. Lilly, 2022. Using faux florals My dining room receives very little natural light, so having real plants in this space—as I have in my living room—was not happening. So, out came the spring faux florals! This year’s spring theme for my dining room started with white artificial flowers, faux greenery, and decorative glass jars. The glass jars were purchased on Amazon, and the florals and greenery were all purchased at varying times from Michaels or Factory Direct Craft. The white candlesticks (which hold the green moss balls) were bought from Ross or Marshalls last year. This year, I wanted to create a simple tulip arrangement in a glass vase for my dining room. The glass jar (which I have had for years) was filled with small stones and water to give the illusion that the tulips were real. For the rest of the faux florals, I created visual variety with multiple layers of varying shapes, sizes, coloration, and texture, making sure to make a statement but keep things as simple as possible. (Since I have a clutter issue!)  Faux tulip arrangement for my dining room spring decor. Photo by Diane M. Lilly, 2022. 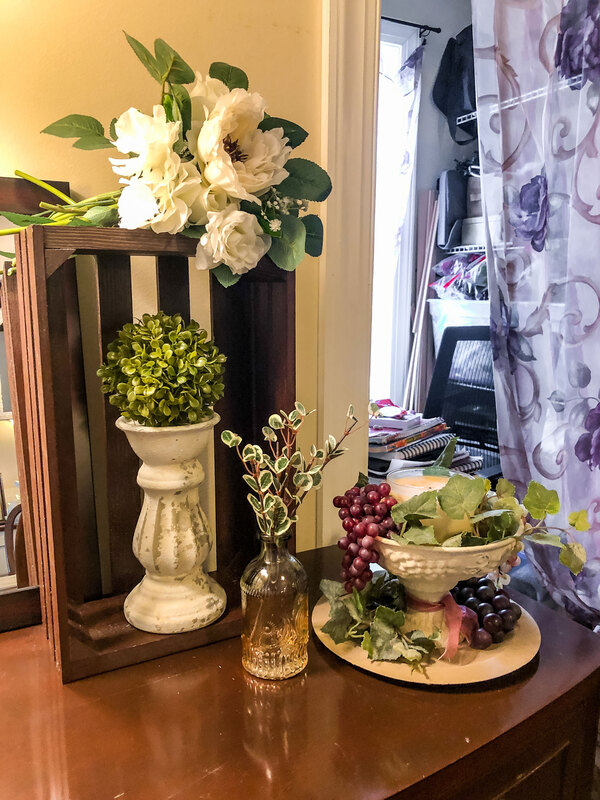 Faux florals and greenery on the other side of my dining room. Photo by Diane M. Lilly, 2022.  Variagated leaves create a nice visual contrast. Photo by Diane M. Lilly, 2022. Displaying seasonal holiday decor As I was decorating, I purposefully carved out a dedicated spot for an Easter statement. Now, I’m not one for cliche holiday decor. Outside of Christmas—and maybe Halloween—it’s not my thing. I prefer instead to mainly create a seasonal statement, with hints of “holiday” thrown in. I bought a lovely cream-colored rabbit, pastel-colored green eggs from Ross, and a ceramic leaf dish. A thrifted gold candleholder finished the grouping. And it works amazingly well with the rest of the decor! 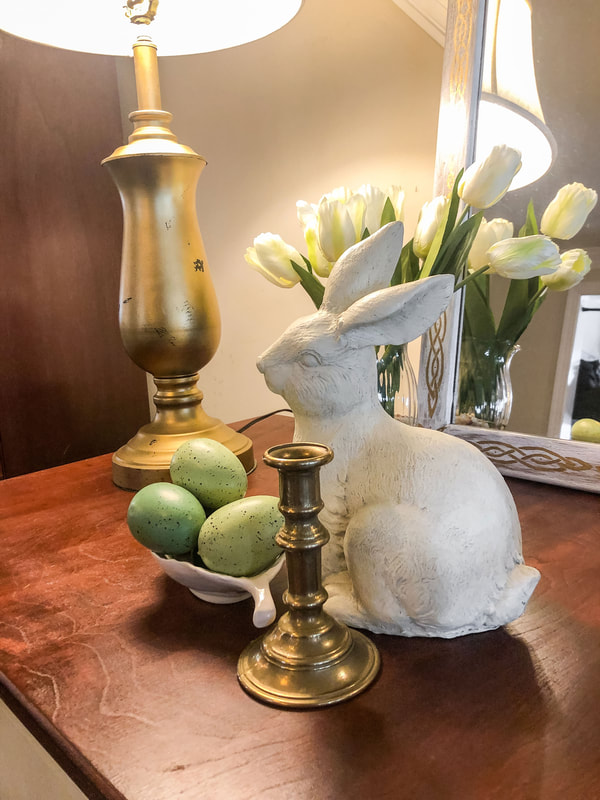 My Easter bunny with pastel green eggs and a gold thrifted candleholder. Photo by Diane M. Lilly, 2022. Make it meaningful One of the things I love about vignettes is that it is an opportunity to display meaningful items. For this season, I chose a book, a gold dragonfly (purchased from Ross or Marshalls last year), and a frame that will eventually hold a photo of a family member (I still need to dig through my photos to find the picture I want). The dragonfly represents transition and transformation, which perfectly describes my current journey. The book is by authors Barbara Purchia and Ashley Rooney called Fairy Homes & Gardens. This book inspired me to create new designs for my fairy houses and indoor fairy gardens. My current fairy houses will be featured in their next book, which will be out in Spring 2024! But I digress...Vignettes are a fun way to display meaningful items, items you find uplifting and positive. 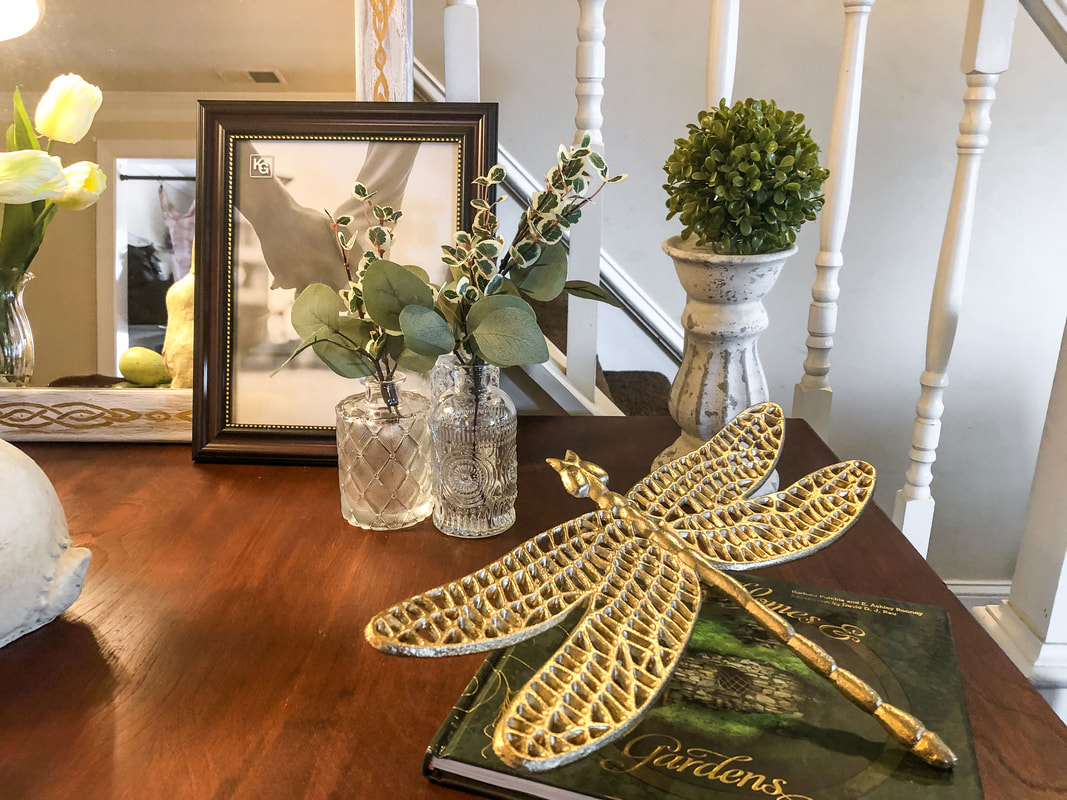 Meaningful objects include book, dragonfly, and picture frame. Photo by Diane M. Lilly, 2022. Decorating with thrifted items A popular trend this year is thrifting. This is nothing new to me--I've been thrifting for several years! This year’s spring vignettes include thrifted gold candlesticks and two thrifted lamps (the gold lamp and the French Country candlestick lamp with gold highlights). In addition, I did a couple of DIY projects using a frame from a thrifted mirror (the white with gold border design) and a grape-themed DIY candle I made several years ago using a thrifted urn and plate. So, yes, I LOVE thrifting and decorating with thrifted decor! Thrifted items have a history and fascinating stories to tell. And previously owned decor has an element of “wabi-sabi”—perfect imperfection--creating a lived-in feel. 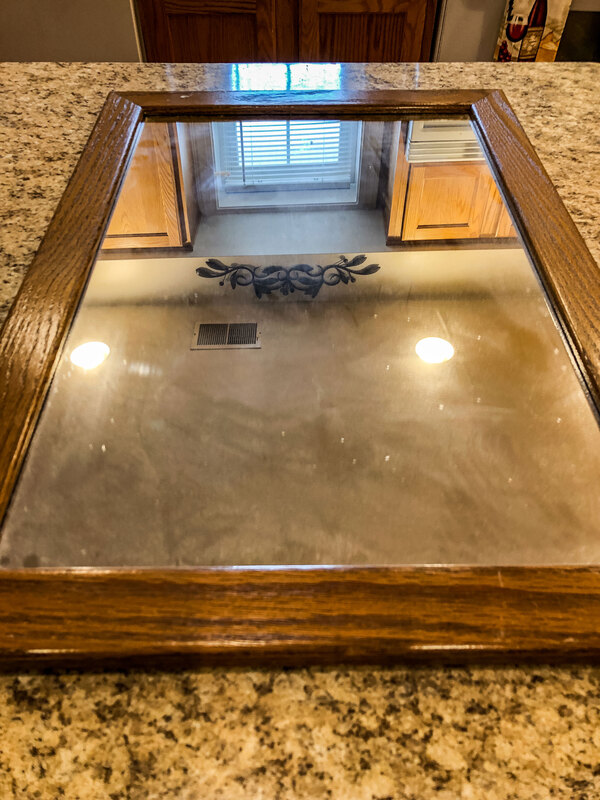 A mirror thrifted from Goodwill. Photo by Diane M. Lilly, 2021. 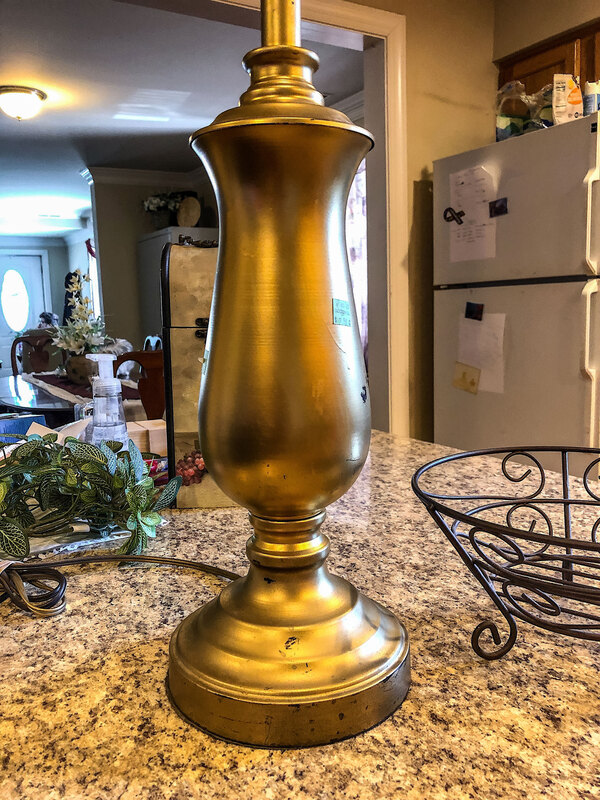 Gold lamp thrifted from Goodwill. Photo by Diane M. Lilly, 2021. 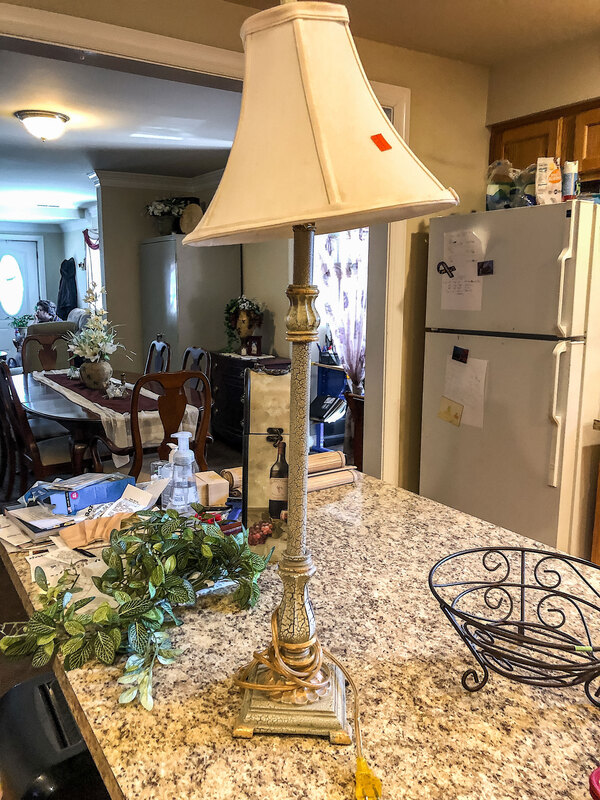 French Country candlestick lamp thrifted from Goodwill. Photo by Diane M. Lilly, 2021. 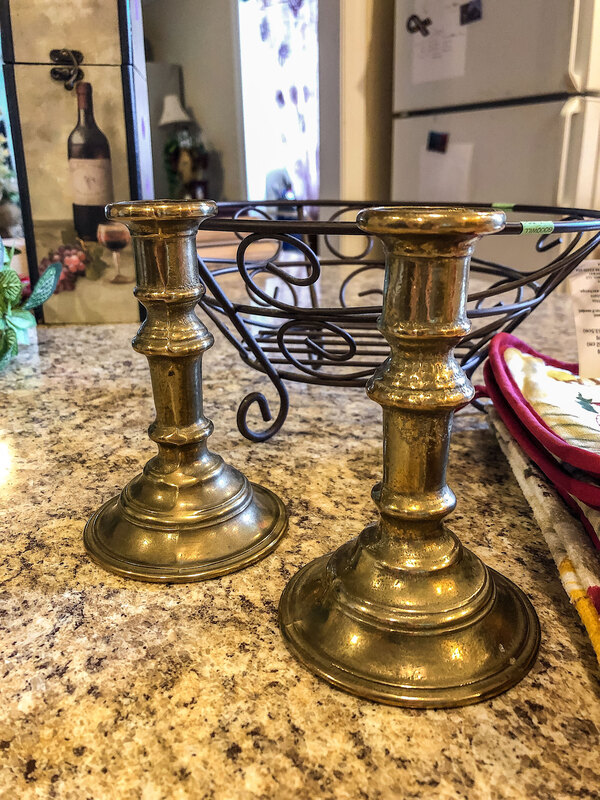 Gold metal candlesticks thrifted from Goodwill. Photo by Diane M. Lilly, 2021. Personalize with DIY decor A creative way to personalize your vignettes is to incorporate DIY projects. Not everyone is into DIY decor, but if you are one of those who are, try showcasing your handiwork! One of the things I like doing with thrifted decor is giving them my personality with creative DIY projects. The white picture frame with the gold Celtic knotwork border was originally a wood-framed mirror I got from Goodwill. The ordinary-looking wood frame was painted for a distressed look. Next, I hand-painted a hand-drawn Celtic knot pattern around the border. The white and cherry wood cabinet the mirror sits on is also a DIY project, the cabinet being a hand-built piece of furniture I purchased for $40 from someone trying to get rid of it. It now has a new base, top, and legs, all painted and stained to create this gorgeous piece of furniture displayed in my dining room! On the other side of the room sits a candlestick inside a crate I bought at Michaels and stained a cherry color to match my decor. Alongside it sits a DIY candle I made years ago from a metal plate and urn, some faux grapes, and a homemade candle. So, if DIY is your thing, here’s your chance to show off those skills!  Thrifted mirror frame repainted with a gold Celtic knot border. Photo by Diane M. Lilly, 2021. 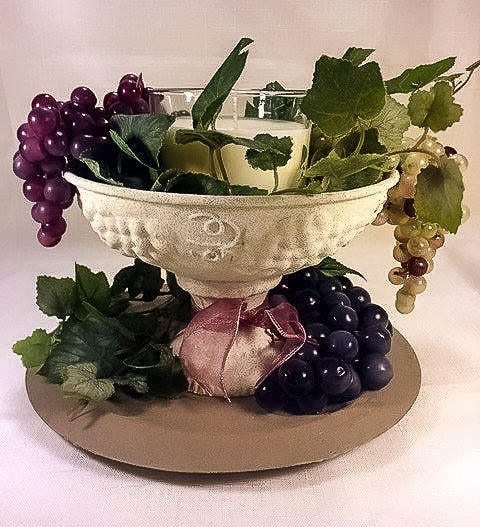 DIY grape themed candleholder. Photo by Diane M. Lilly, 2019. 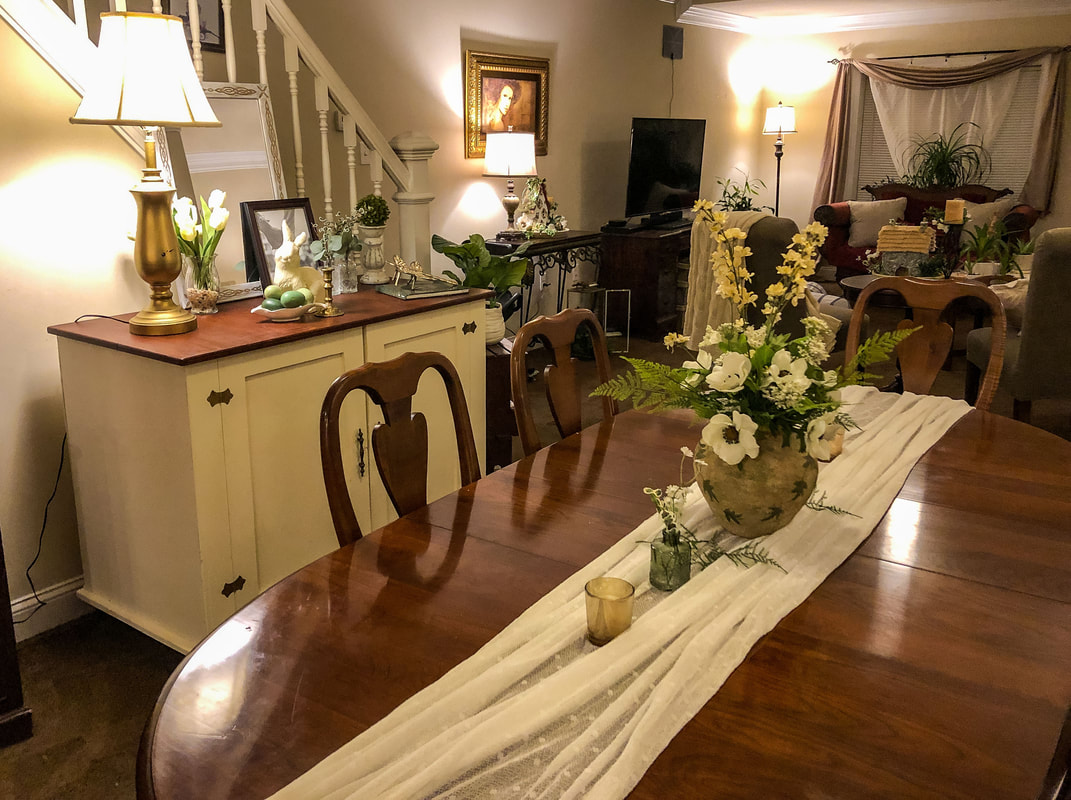 View of my dining room and DIY cabinet, all decorated for spring. Photo by Diane M. Lilly, 2022. So, I hope you liked my little walk through my process of creating spring vignettes this year. Share your thoughts or additional tips for making spring vignettes in the comments below! Related blogs you may want to read: A spring decor makeover for my small rental bathroom How to care for faux florals DIY refurbishment of a dining room cabinet A fun DIY project with paint and a thrifted mirror part 1 A fun DIY project with paint and a thrifted mirror part 2 How to rewire thrift buy lamps Design Trends for 2022 Decorating for anxiety and depression Hygge decor ideas My dining room redesigned as a multi-function space Affiliate Disclosure Some of the posts in this article contain affiliate links. This means if you click on the link and purchase the item, I will receive an affiliate commission at no extra cost to you. I will only recommend products or services I use personally and/or believe will add value to my readers, so there is no conflict of interest. 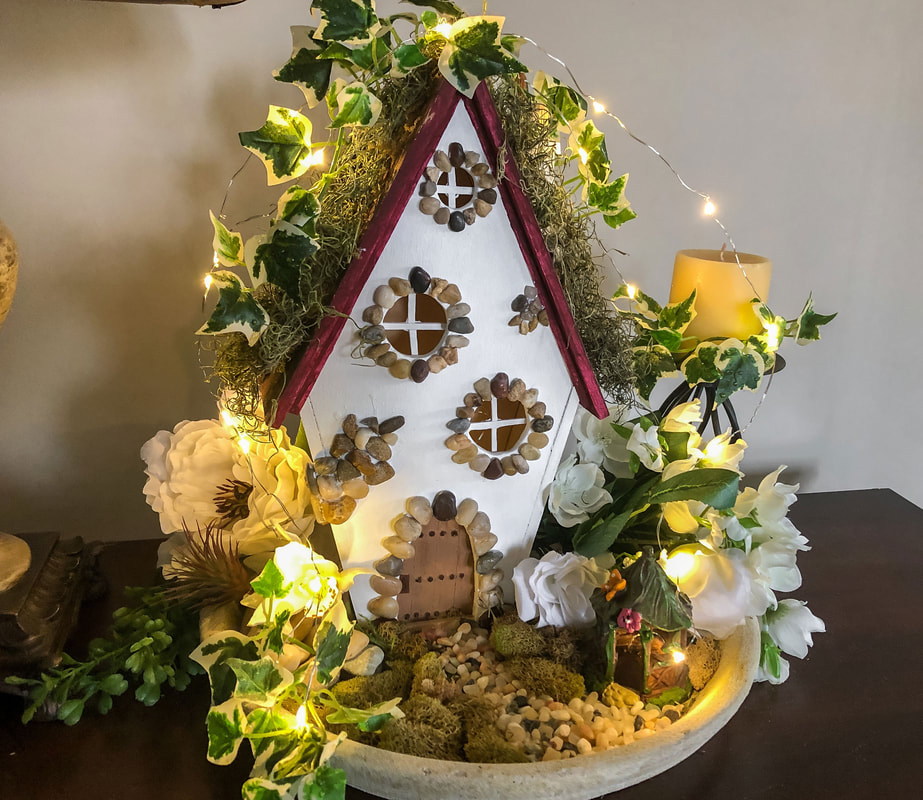 My spring Fairy Cottage and indoor garden with whitefaux florals and fairy lights. Photo by Diane M. Lilly, 2022. I’m officially obsessed with handcrafted fairy houses and indoor fairy gardens! They are now staples for my seasonal decor! I take advantage of every opportunity to switch out the miniature decor and faux florals to reflect the seasons and—sometimes—holidays. So far, I have two styles, but I have a few ideas for some new designs (finally), which I plan to work on in the next month or so, so stay tuned! Last spring, my indoor fairy gardens were decked out in ivy and enchanting miniature pink roses. I love how the roses swaddle the English Cottage and nestle against the stone walls. My decor last year was a bit more colorful and luscious with more fabrics. This year, my decor is more streamlined but no less elegant. But I am still fighting the urge to bring out those roses again! 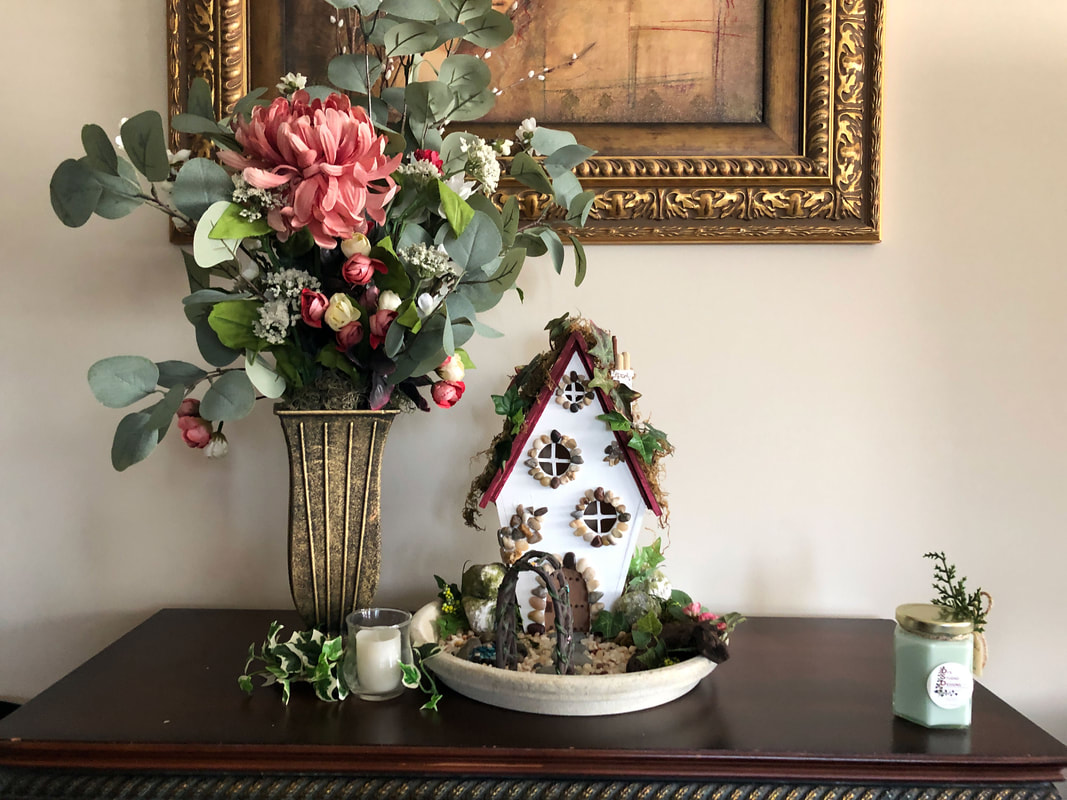 Indoor fairy cottage and garden from spring 2021. Photo by Diane M. Lilly, 2021. 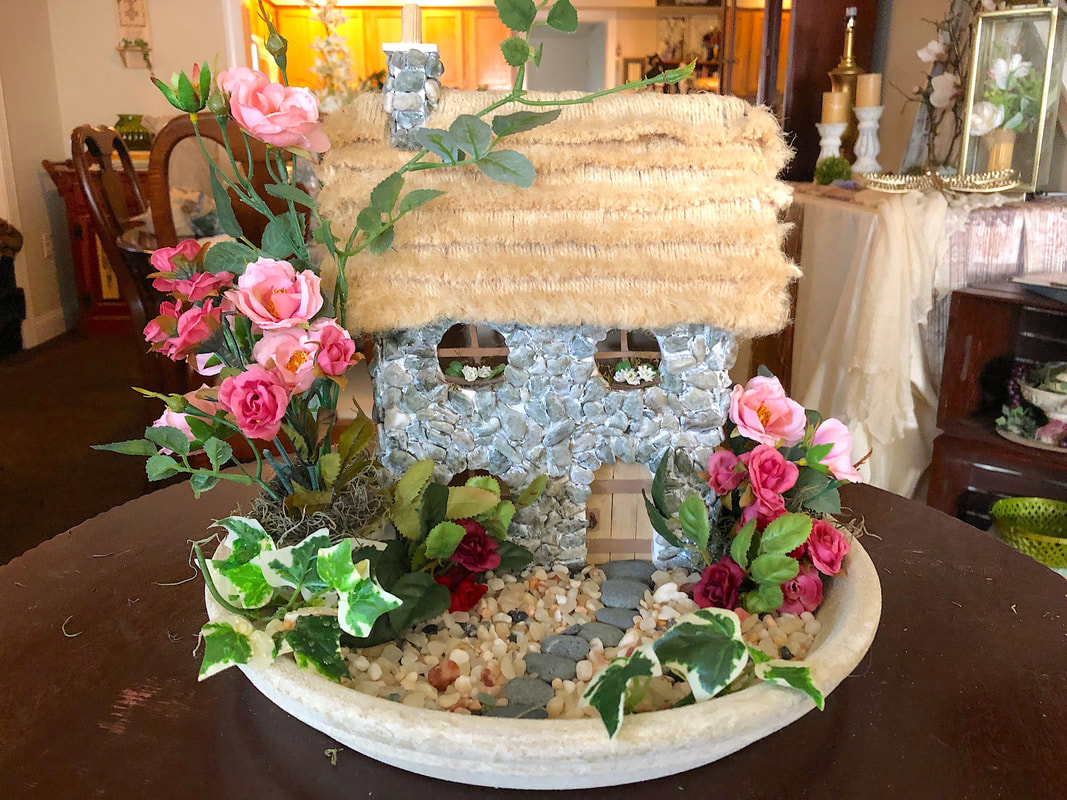 Spring 2021 English Cottage and indoor garden decor. Photo by Diane M. Lilly, 2021. Post-Christmas, my winter fairy gardens had a more toned-down, subdued look. I started experimenting with a lighter color palette and a less "busy" indoor garden design. I’m not a big fan of clutter, so this new seasonal decor was refreshing and calming after seeing nothing but the holiday decor for several months. 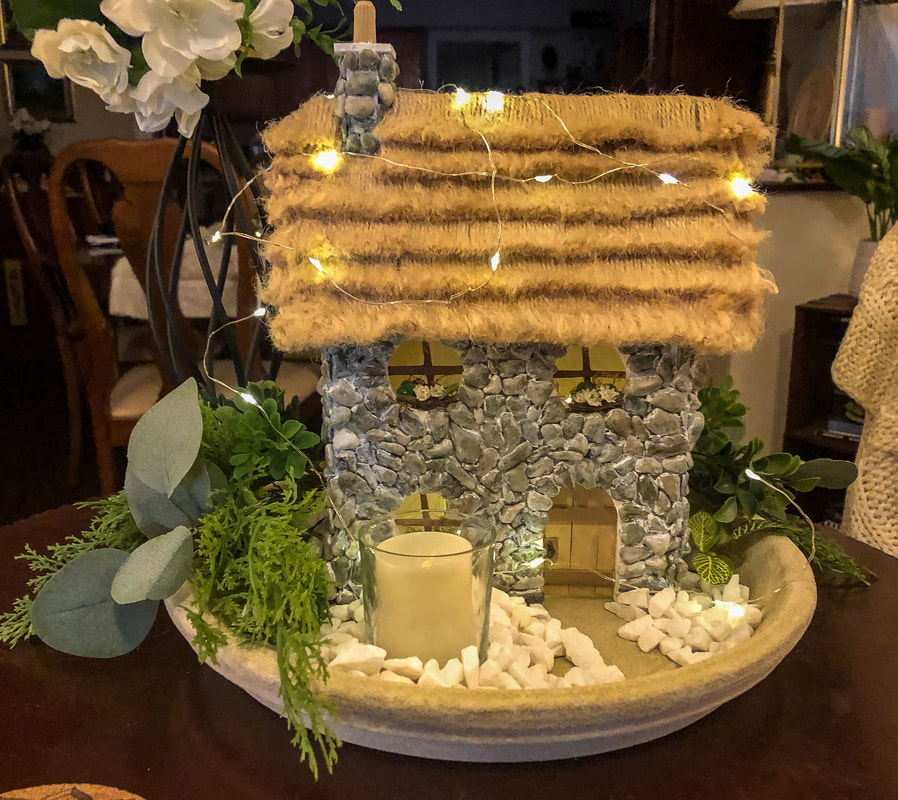 Winter 2022 English Cottage and indoor garden. Photo by Diane M. Lilly, 2022. 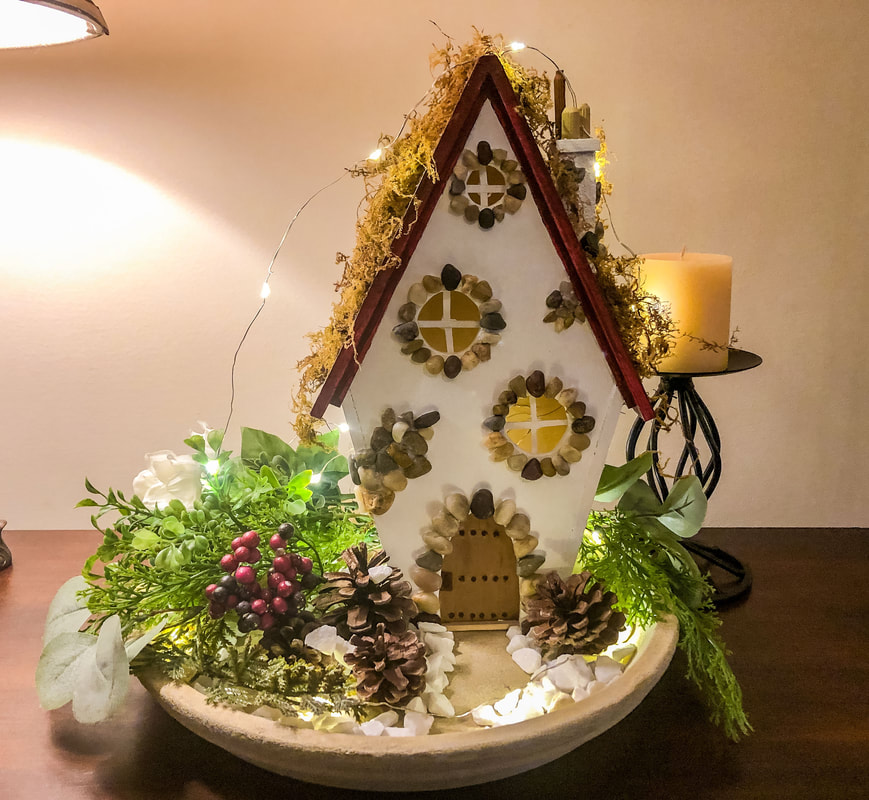 Winter 2022 Fairy Cottage and indoor garden. Photo by Diane M. Lilly, 2022. This spring, I wanted to continue with a simple color palette and fairy garden design, mirroring the decor scheme from the rest of my spaces. I didn’t want these fairy houses and gardens to be something I plunked down on a table, but I wanted them to be thoughtfully integrated into the overall living room space. The faux white florals and greenery are also used in my living and dining rooms. This allows for more continuity in my decor and makes my interior feel harmonious! 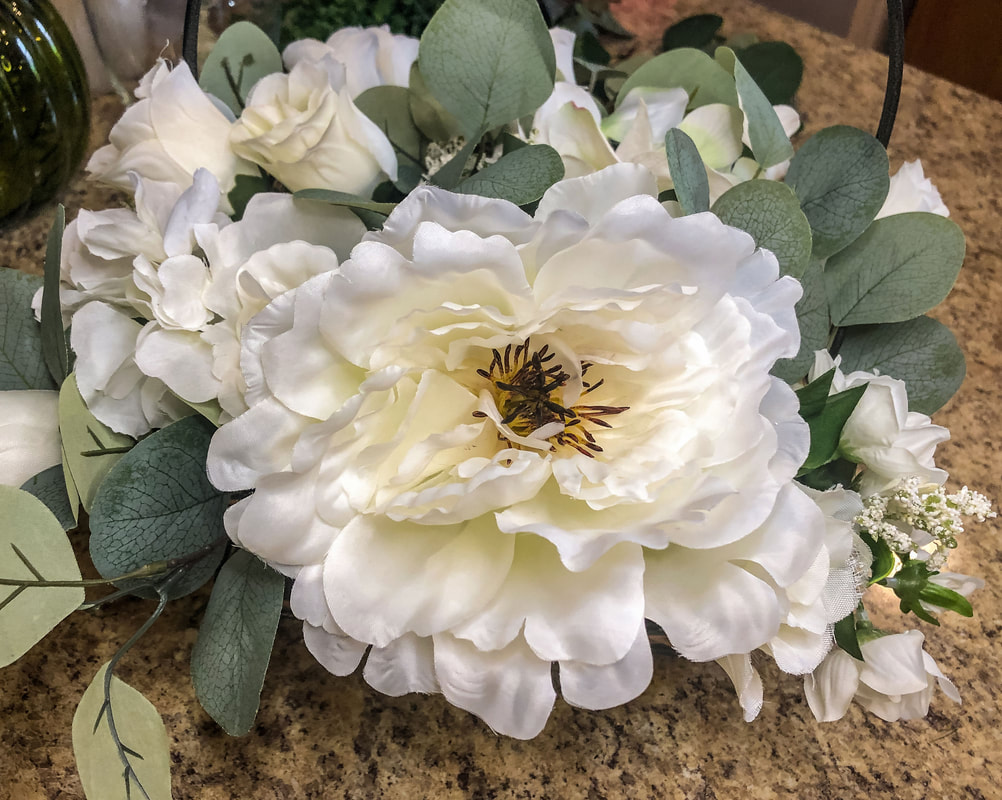 White faux florals with eucalyptus. Photo by Diane M. Lilly, 2022. 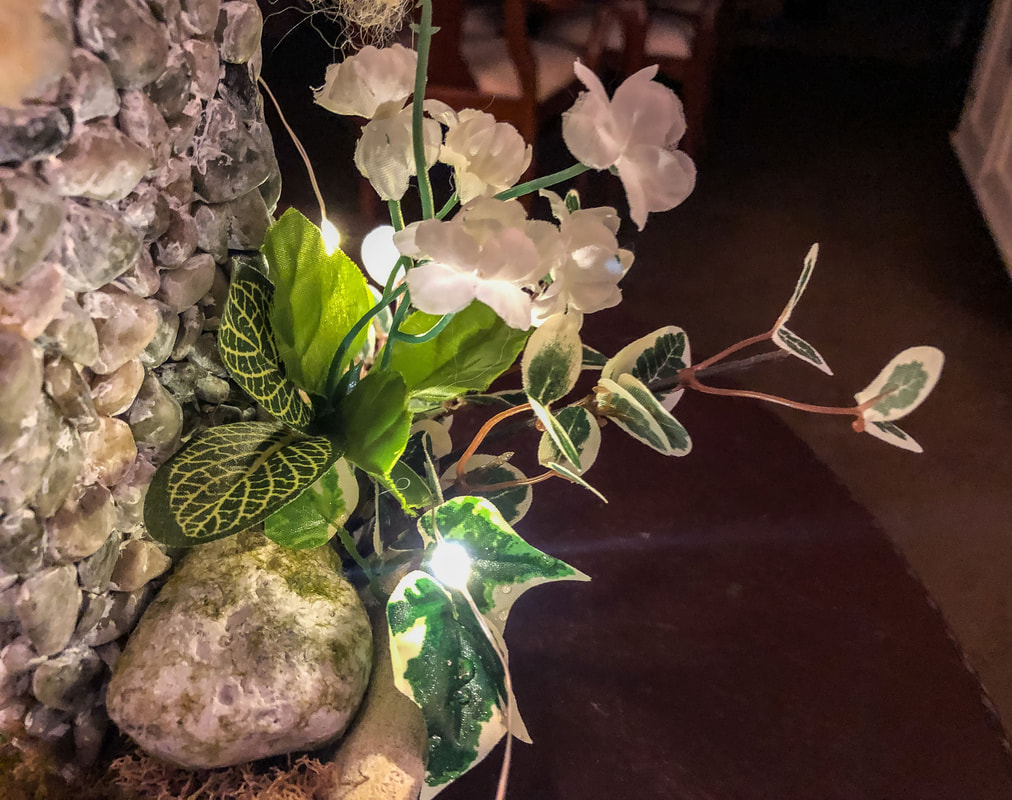 Faux florals and greenery on the side of the English Cottage. Photo by Diane M. Lilly, 2022. 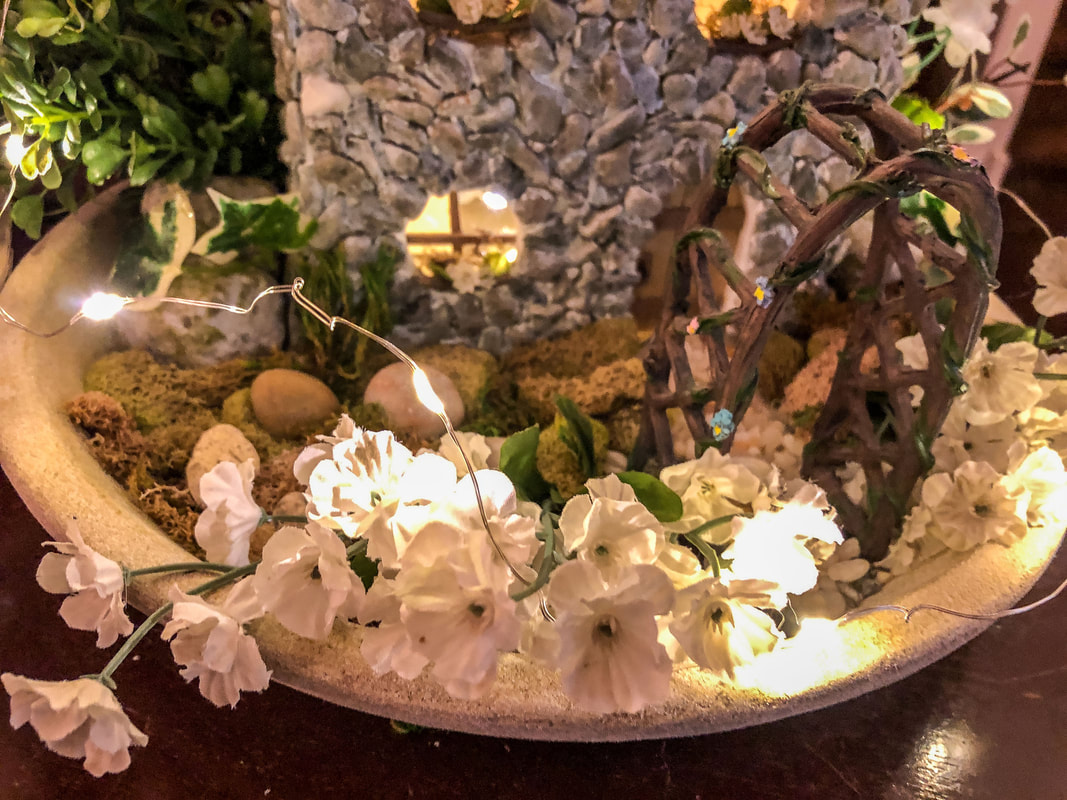 White faux florals in the indoor fairy garden. Photo by Diane M. Lilly, 2022. The English Cottage (lined with small stones and topped with a “thatched” roof made with twine) sits inside a terra cotta plate sprayed with cream stone textured paint. The house looks like it’s nestled into the large moss-covered boulders on either side. A rustic path of tiny stones leads away from the house, flowing under a resin arbor flanked on both sides with small white flowers. The lawn consists of patches of moss with a tiny embedded fairy circle made up of river rocks. Greenery and white flowers surround the house, with sporadic appearances of variegated English ivy. 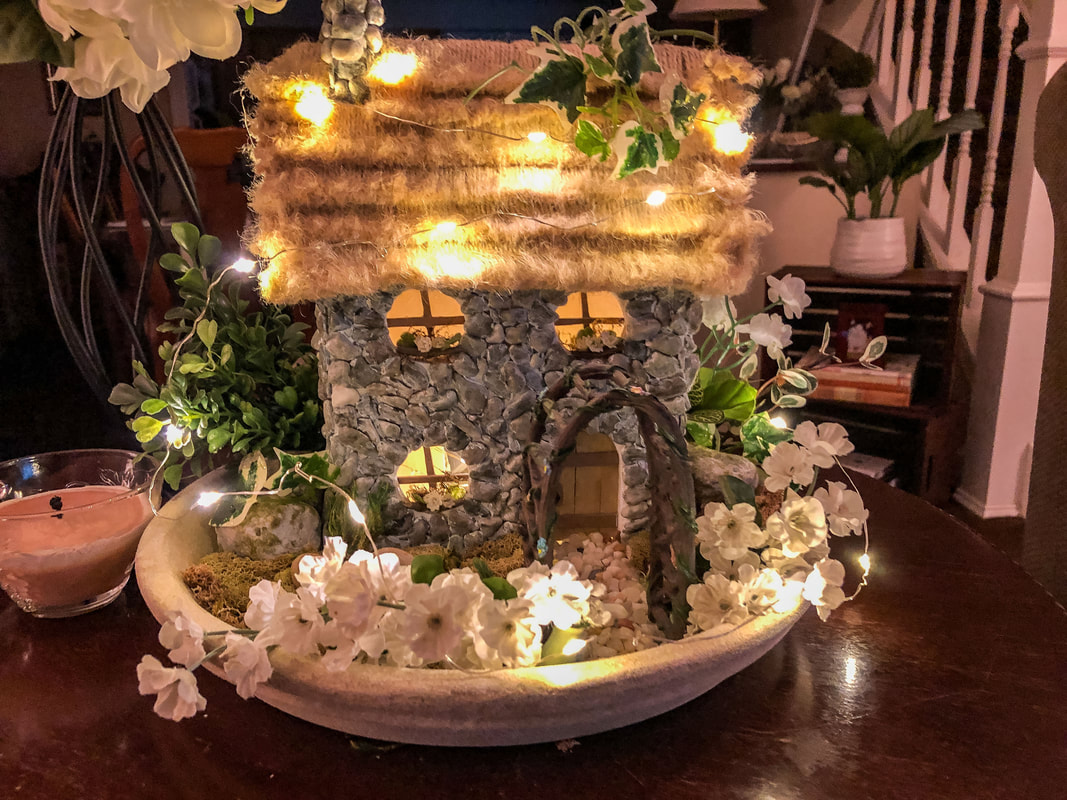 My spring English cottage for this year, lit with fairy lights. Photo by Diane M. Lilly, 2022. 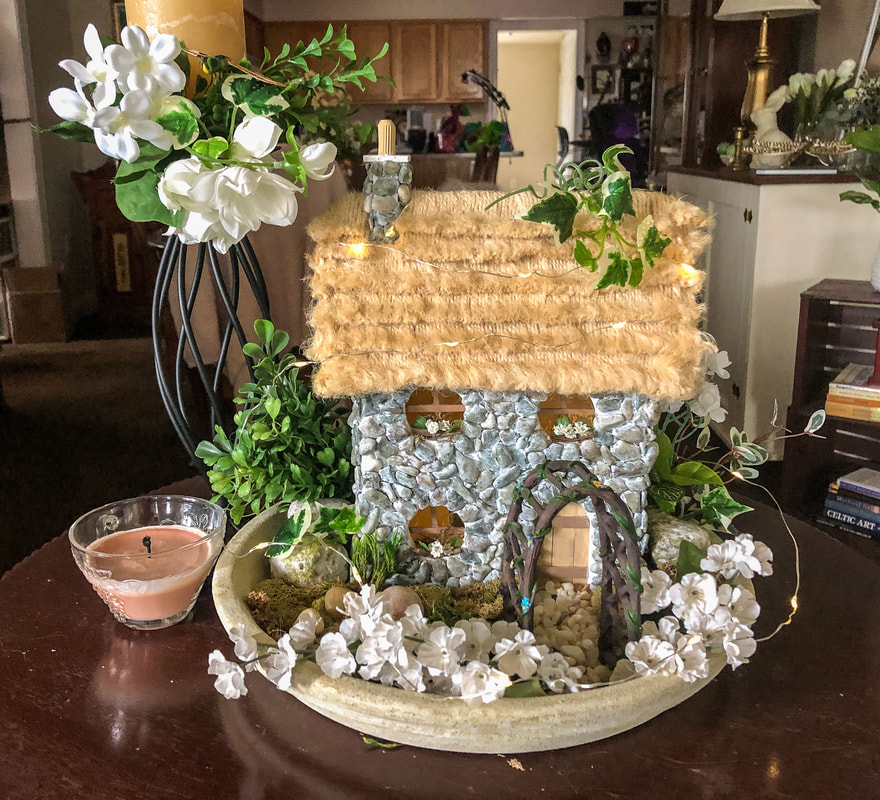 Finished spring decor for English Cottage and indoor fairy garden. Photo by Diane M. Lilly, 2022. 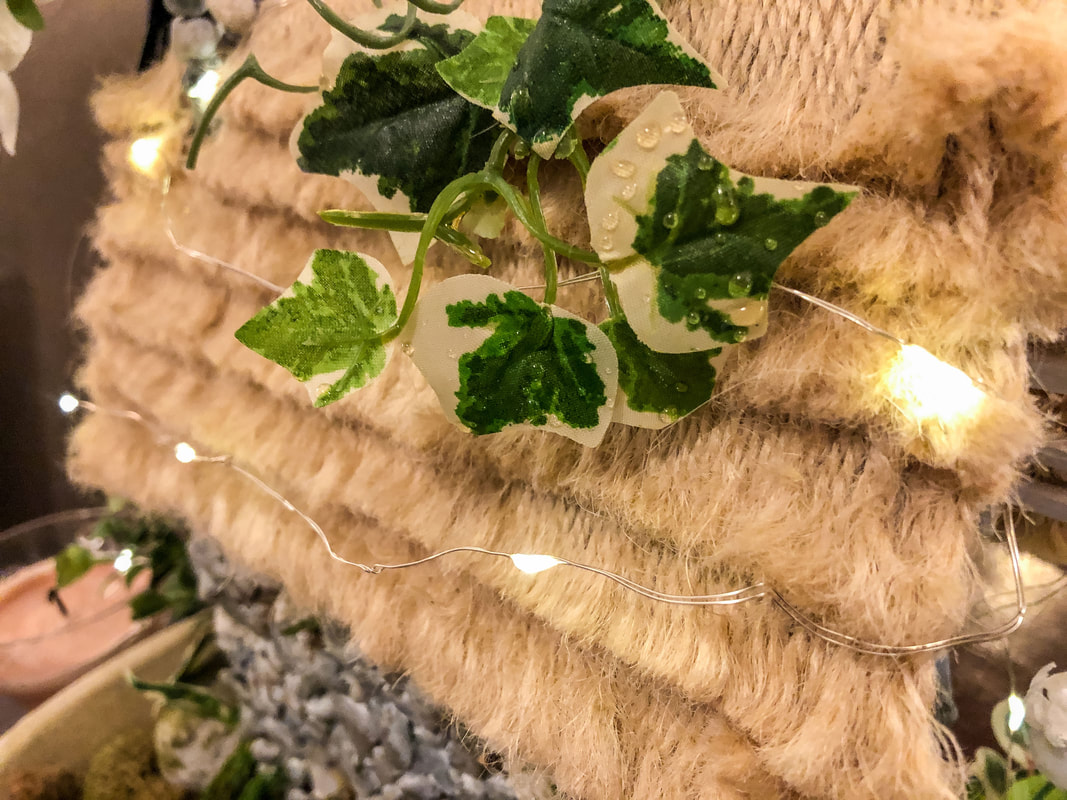 Realistic variegated ivy on the thatched roof of my English Cottage. Photo by Diane M. Lilly, 2022. 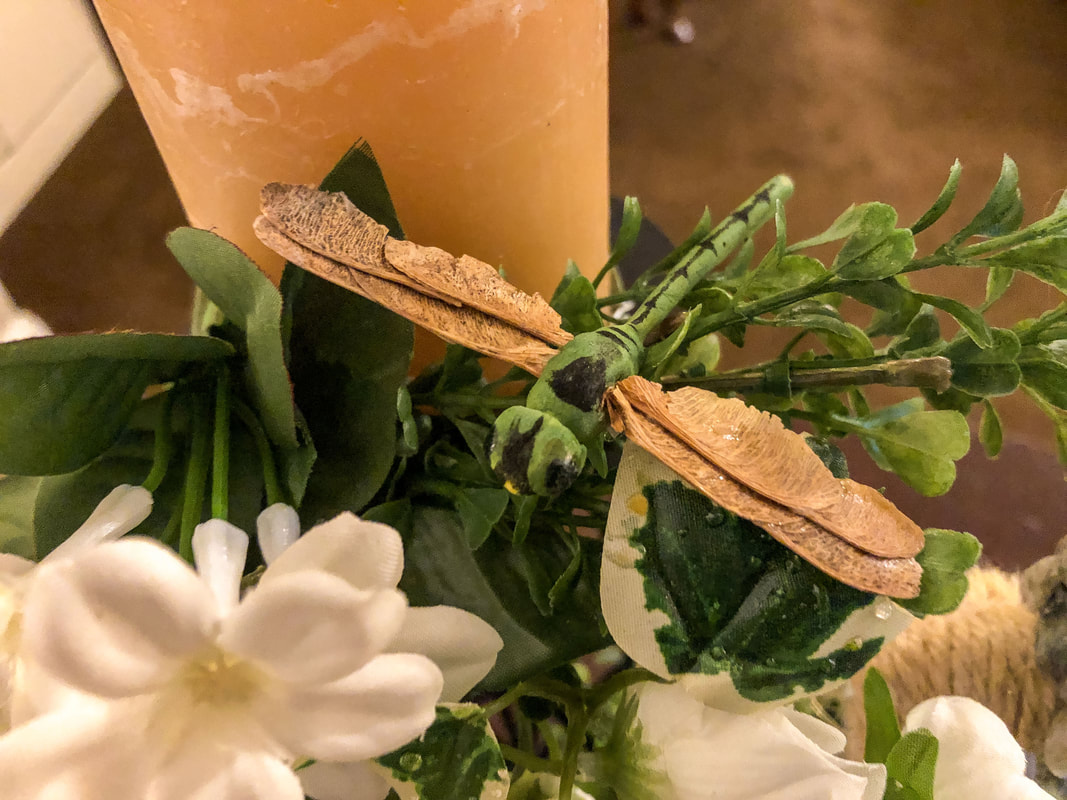 Dragonfly sleeping on a faux floral. Photo by Diane M. Lilly, 2022. The Fairy Cottage roof received a much-needed refresh of green Spanish moss, as the old stuff had turned a withered brown. Some variegated English ivy also creeps its way down the side of the roof. The garden itself is bursting with faux white flowers and ivy. A miniature gazebo I picked up from somewhere forgotten is nestled right on the edge of the flower garden at the end of a pebble-lined path. I can see my little fairy sitting in that gazebo, enjoying the sight and smell of that garden, can’t you? 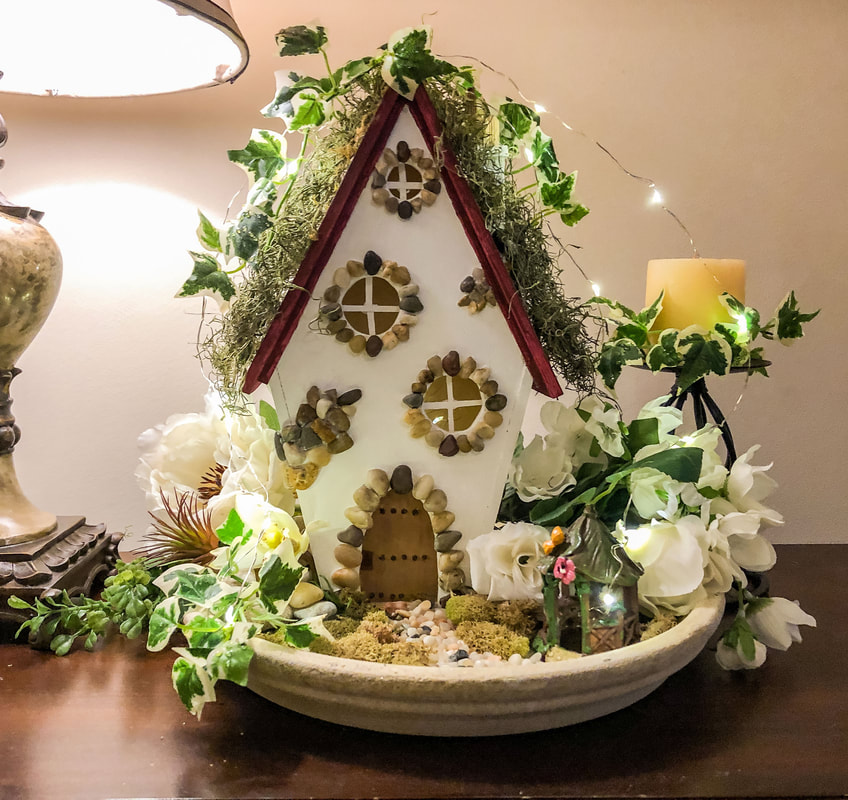 Spring Fairy Cottage and indoor garden lit up with fairy lights. Photo by Diane M. Lilly, 2022. 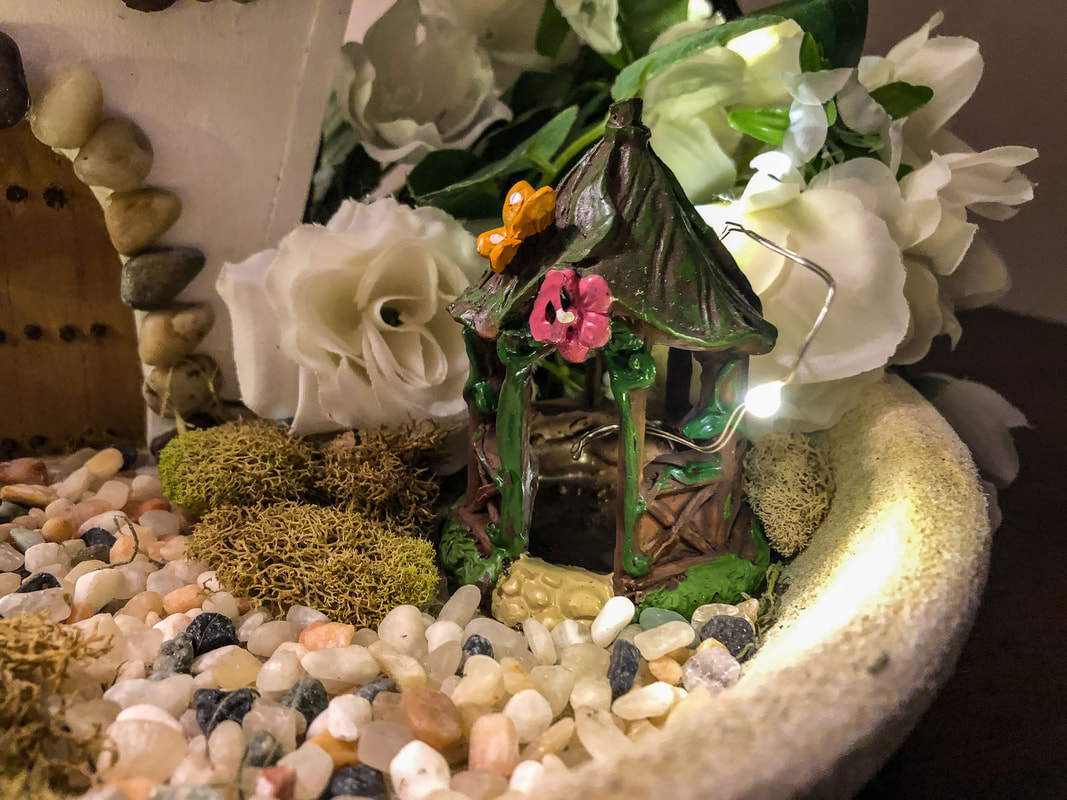 Miniature resin gazebo for my fairy to sit in her fairy garden. Photo by Diane M. Lilly, 2022. 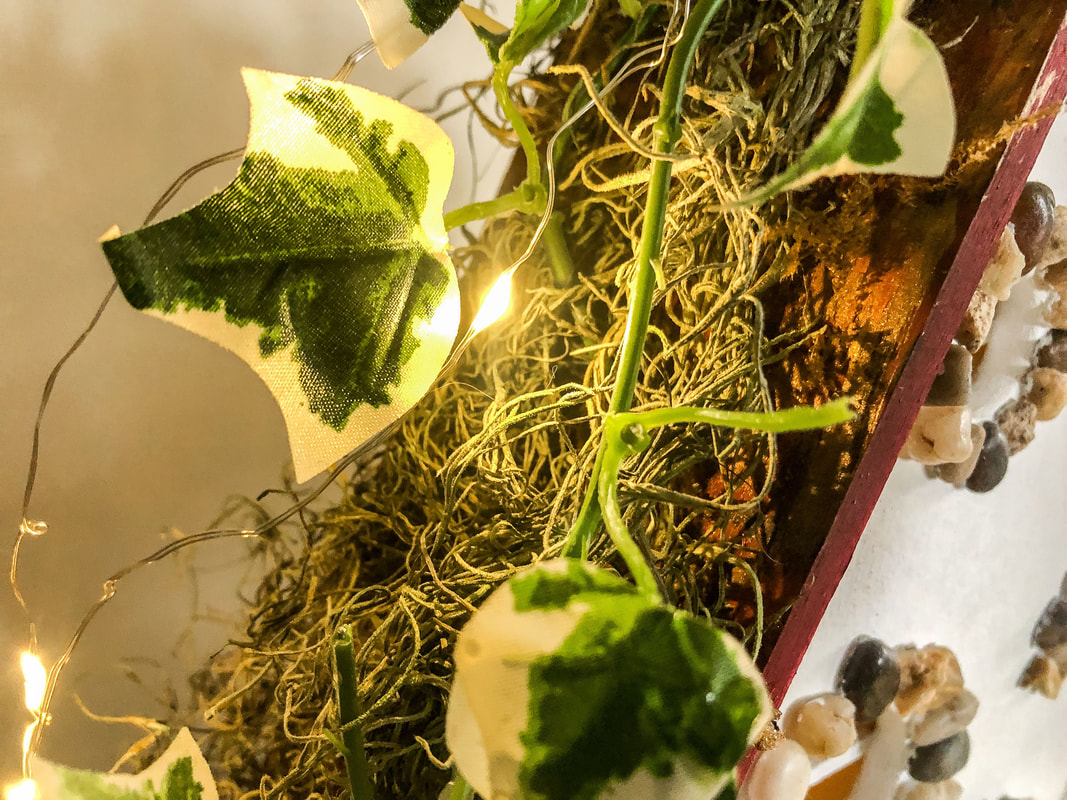 Fairy Cottage roof with fresh moss, variegated ivy, and fairy lights. Photo by Diane M. Lilly, 2022.  Variegated ivy and fairy lights in the indoor fairy garden. Photo by Diane M. Lilly, 2022. And, of course, I can’t forget the fairy lights! Two strands of fairy lights tangle their way around each house and garden, allowing occasional glimpses of the floral decor in the evenings when the lights are low…and even lighting up the interior of the fairy houses themselves, so my dear fairies don’t have to live in the dark! 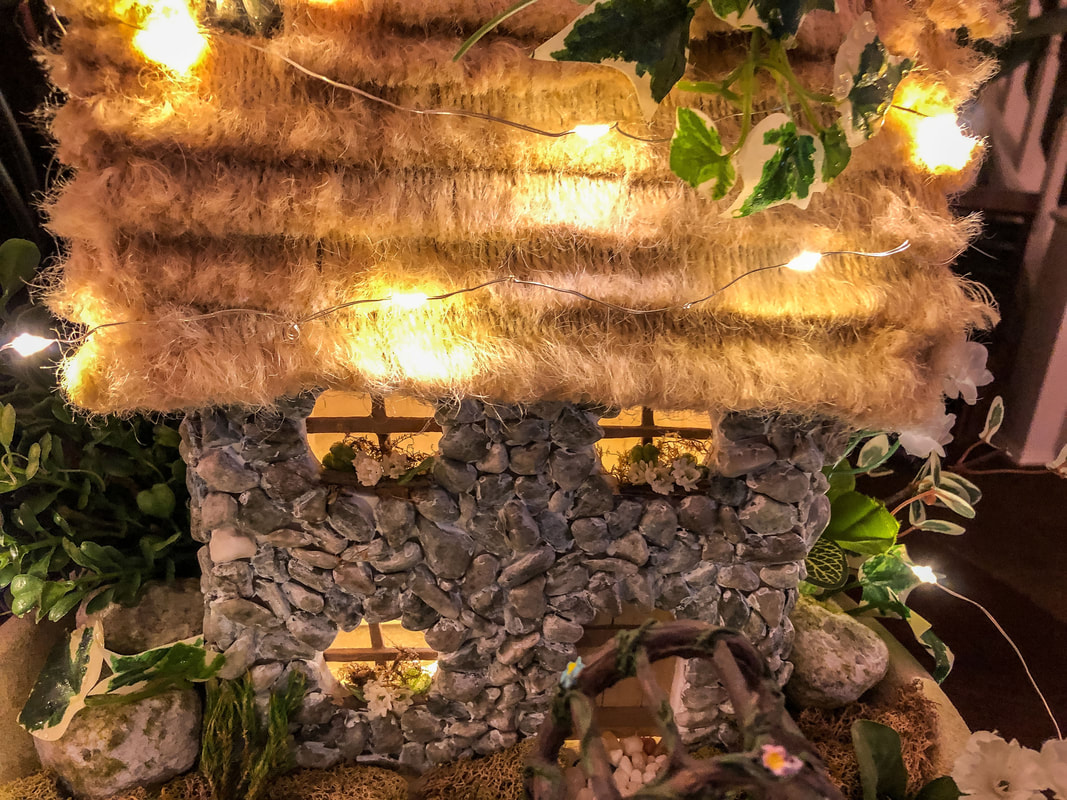 English Cottage thatched roof lit with fairy light strands. Photo by Diane M. Lilly, 2022. I am brainstorming ideas for two new designs and binge-watching travel videos on YouTube for inspiration. So far, I’ve considered a half-timber style hut, a cream stone covered house to resemble the buildings in the medieval villages in southern France or even a whimsical storybook A-frame cottage. I’ll also make more elaborate fairy gardens for indoor decorative use, experimenting with different types of bases large enough for use in a tablescape. The next several months should be interesting, and I will have new fairy houses and gardens to show you soon! Related blogs you may want to read: My fairy house project My outdoor fairy garden Spring makeover for my indoor fairy gardens Affiliate Disclosure Some of the posts in this article contain affiliate links. This means if you click on the link and purchase the item, I will receive an affiliate commission at no extra cost to you. I will only recommend products or services I use personally and/or believe will add value to my readers, so there is no conflict of interest. 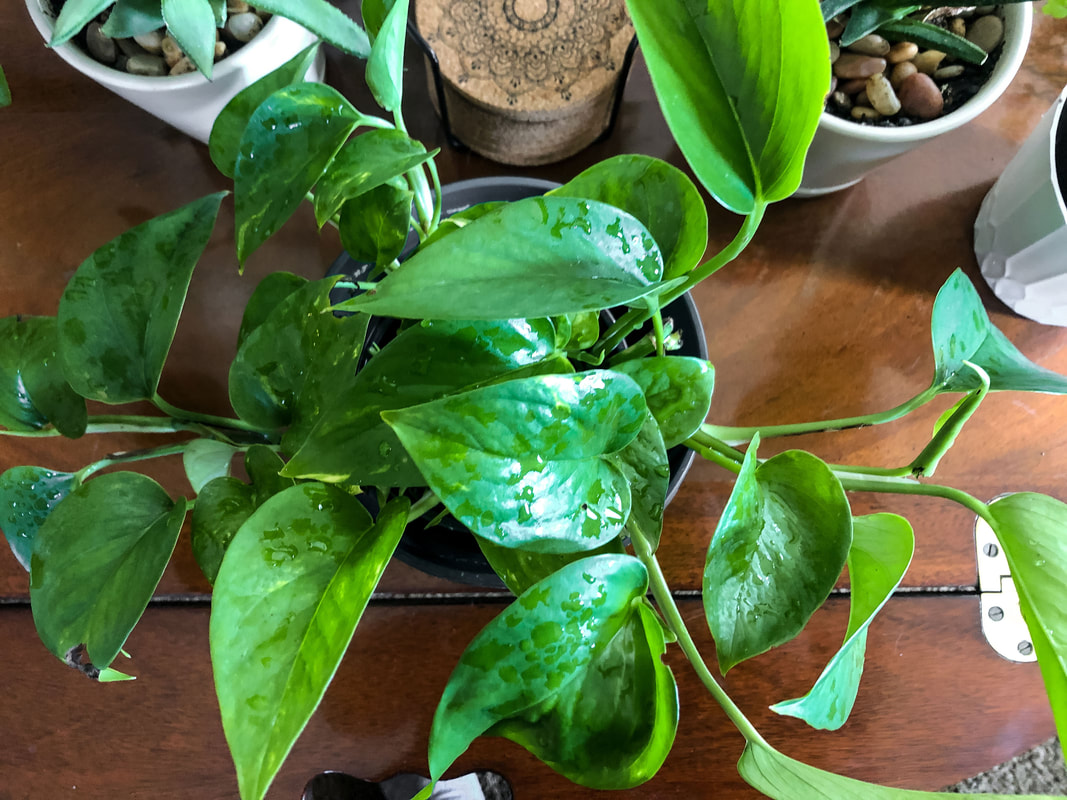 My new pothos plant recently misted. Photo by Diane M. Lilly, 2022. A couple of months ago, I bought this gorgeous little pothos plant from my local home and garden store that had too little soil in too small a pot. So I knew the poor thing would need to be repotted sooner rather than later. Now that the warmer weather has arrived, it’s time to give this struggling plant baby a better plot of earth. 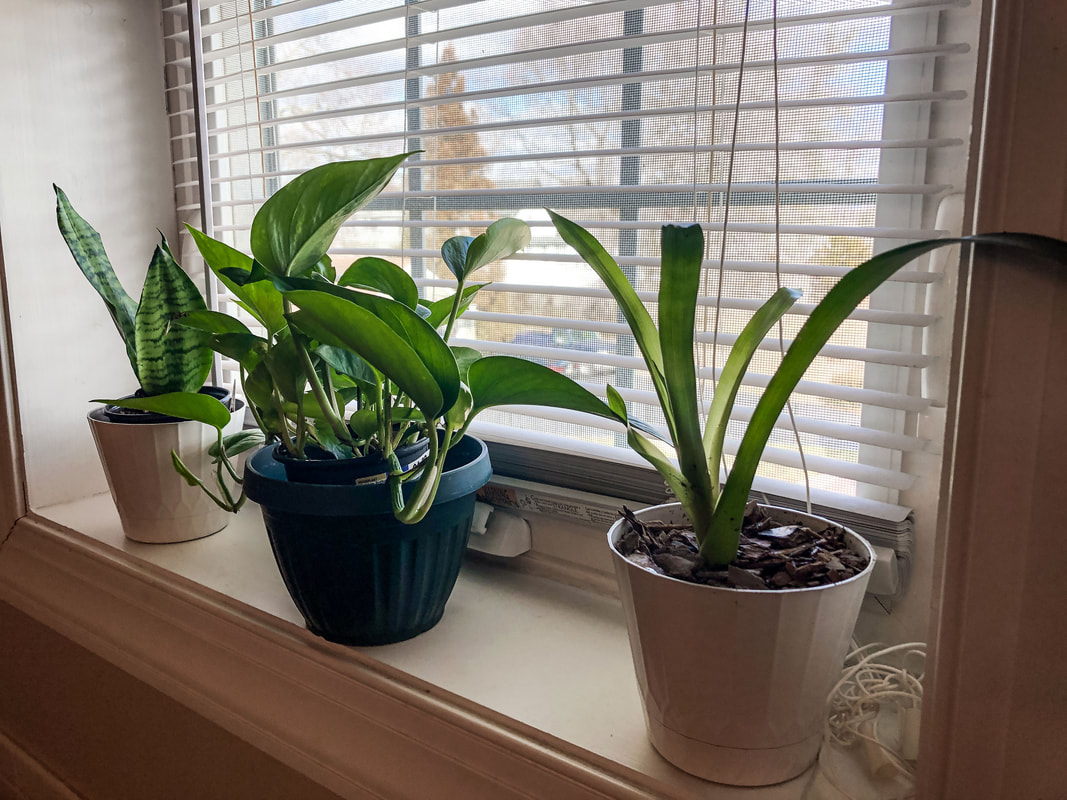 From left to right: snake plant, pothos plant, bromeliad. Photo by Diane M. Lilly, 2022. When to repot your pothos According to Joy Us Garden (check her out for houseplant care tips), the best time to replant a pothos is spring or summer. Pothos are resilient plants, so you may only need to repot once every 1-3 years, depending on growth. When the roots get dense and tangled, it leaves less than ample room for the soil that contains the necessary nutrients. If you see the plant roots getting dense and escaping the bottom of the pot, it’s time to transplant! How to remove the plant from the pot Following a tip from Joy Us Garden, I watered my pothos plant thoroughly before trying to remove it from the pot. Saturating the soil before transplanting reduces stress on the plant and increases root flexibility. This makes them pliable so they do not break during the transplanting process. Turn the plant on its side and gently squeeze around the sides to remove it from the existing pot. This loosens the soil’s grip so that the plant slides out. Use your fingers to massage around the plant to gently loosen the soil and roots if they are too tight. Be careful not to yank or dump the plant or break the roots. Gently slide the plant out of the pot and lay it on the counter. The key word to remember here is gentle. 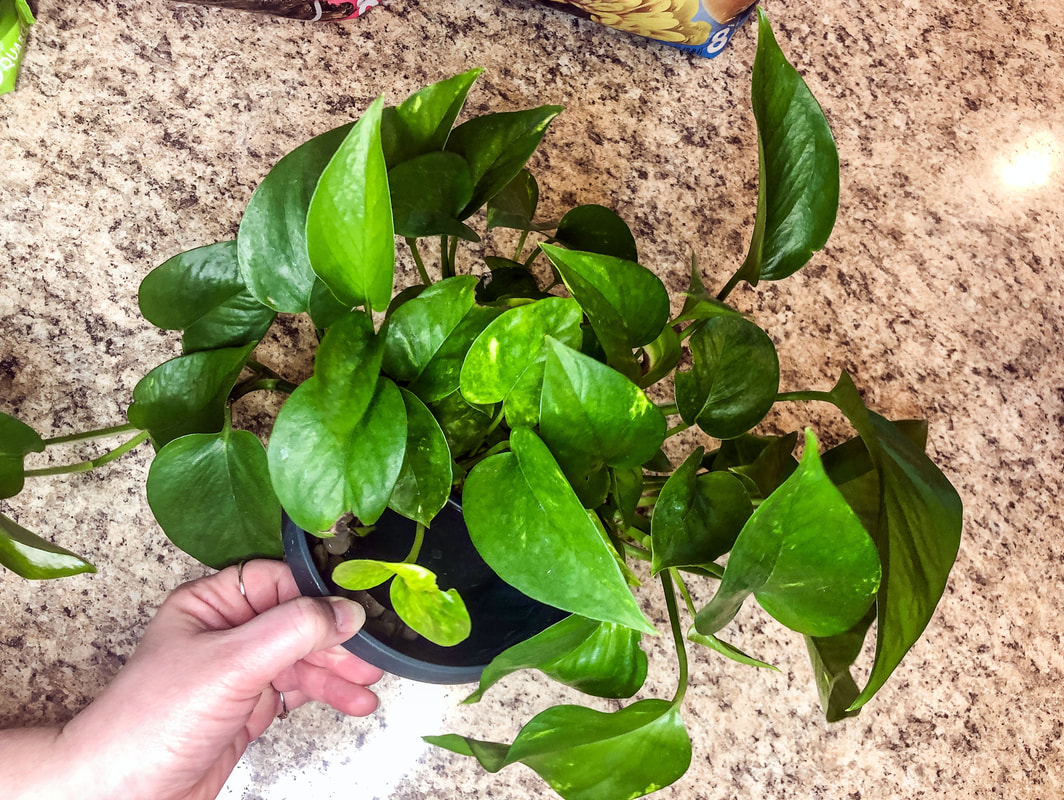 Pothos before replanting. Photo by Diane M. Lilly, 2022. 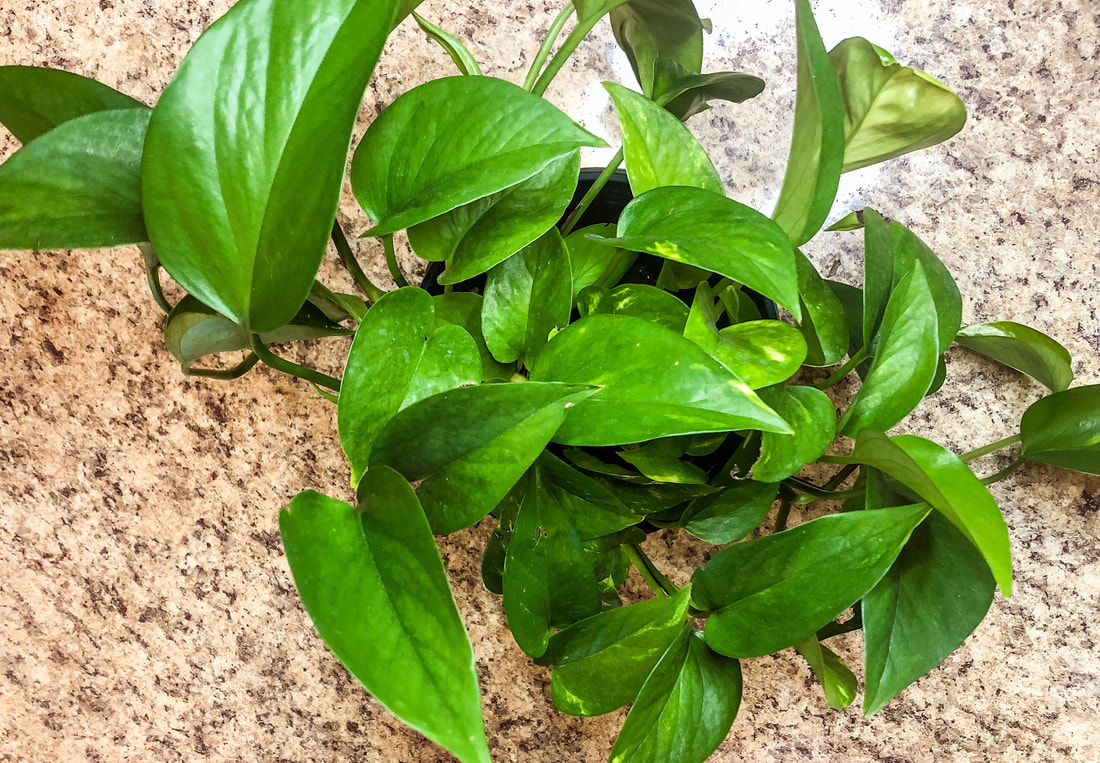 Pothos from above, waiting for transplant. Photo by Diane M. Lilly, 2022. Choosing the new soil Pothos plants are not picky but need well-draining soil (not garden soil). Lately, I’ve been experimenting with my mix—based on some research—and I came up with a soil mixture that seems to be helping a few of my other plants (my bromeliads and peace lilies), so I decided to give it a try for this plant as well. It’s a mixture of 1/2 good quality potting mix (well draining, moisture balancing), 1/4 sphagnum peat moss, and 1/4 orchid bark. 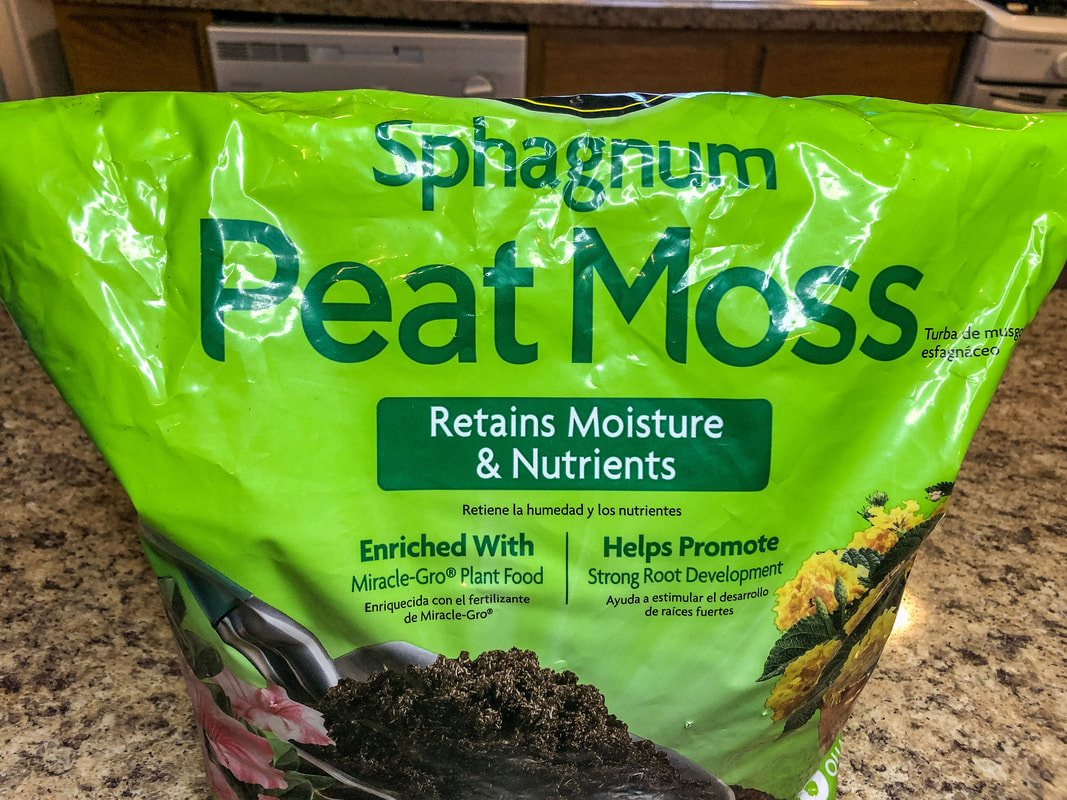 Sphagnum peat moss. Photo by Diane M. Lilly, 2022.  Orchid potting mix. Photo by Diane M. Lilly, 2022. 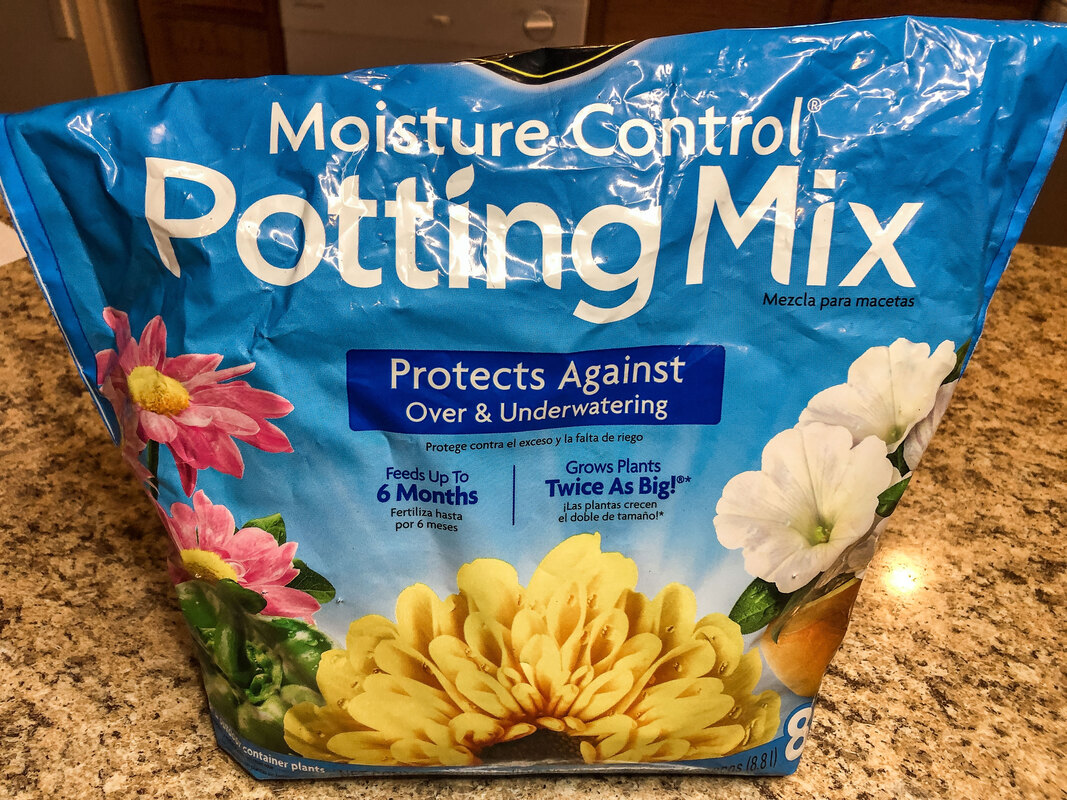 Potting soil. Photo by Diane M. Lilly, 2022. Choosing a new pot Choose a new pot that is a few inches larger to give the plant space to grow. As you see below, the first pot I chose was too small, so I had to find a slightly larger one that could accommodate the width and depth of the new plant. Also, the pot I chose first did not have the drainage holes essential for balancing moisture in houseplants. Pots with drainage holes tend to look utilitarian, which is a buzz kill for decorative style in a space, right? The simple solution to this problem is to buy a decorative pot (one that matches your style) and drop the newly repotted plant inside. Now you have the best of both worlds! 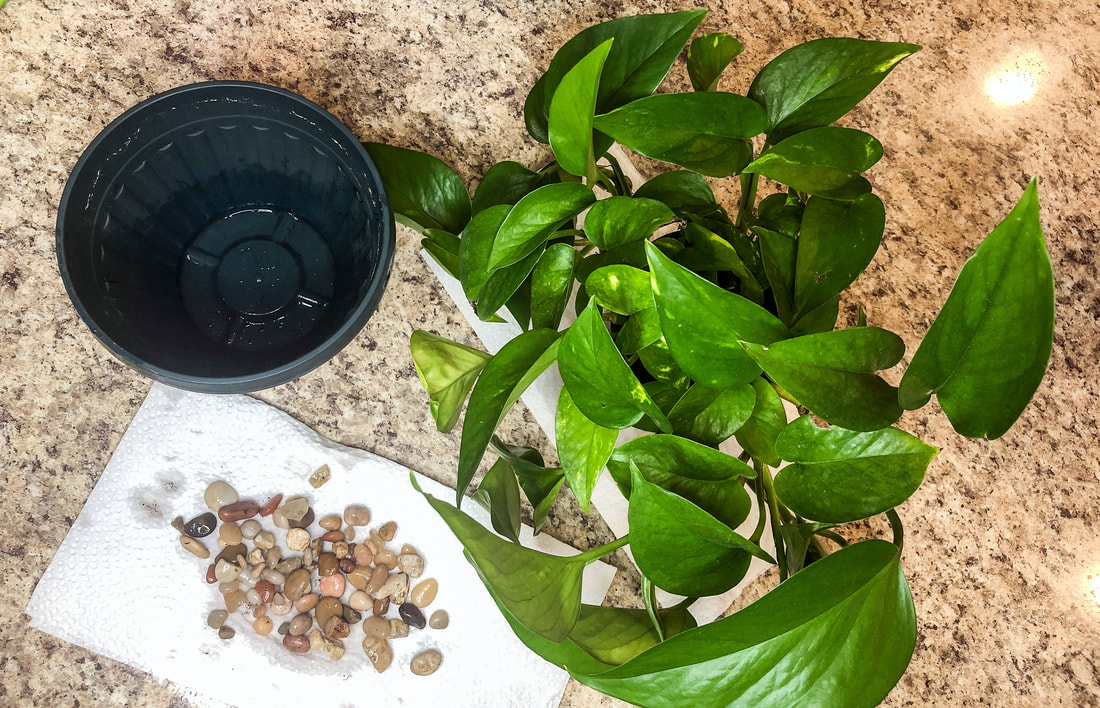 New pot is too small. Photo by Diane M. Lilly, 2022. You’re finally ready to plant! Now we get to the fun part—getting our hands dirty! Put some new soil mixture along the bottom of the pot, enough so that the new plant will sit more or less a little lower than the pot rim (about 1/2-1”). Hold the plant in place to judge how much soil to place at the bottom to get it to the right level at the top. Be careful not to plant too low or too high in the new pot. The idea is that you want to be able to water the plant without water and soil overflowing over the sides, but at the same time, you want the bottom leaves to get the proper light and air circulation. Once the plant is at the right height, you can fill the gaps around it with new soil. Once you’ve filled with the desired amount of soil, gently tap the pot a few times on the counter to help the soil settle into any air gaps. If the soil level has dropped, add more soil before watering. I use my fingers to gently tamp the dirt down, not to compact the soil but to secure the plant. 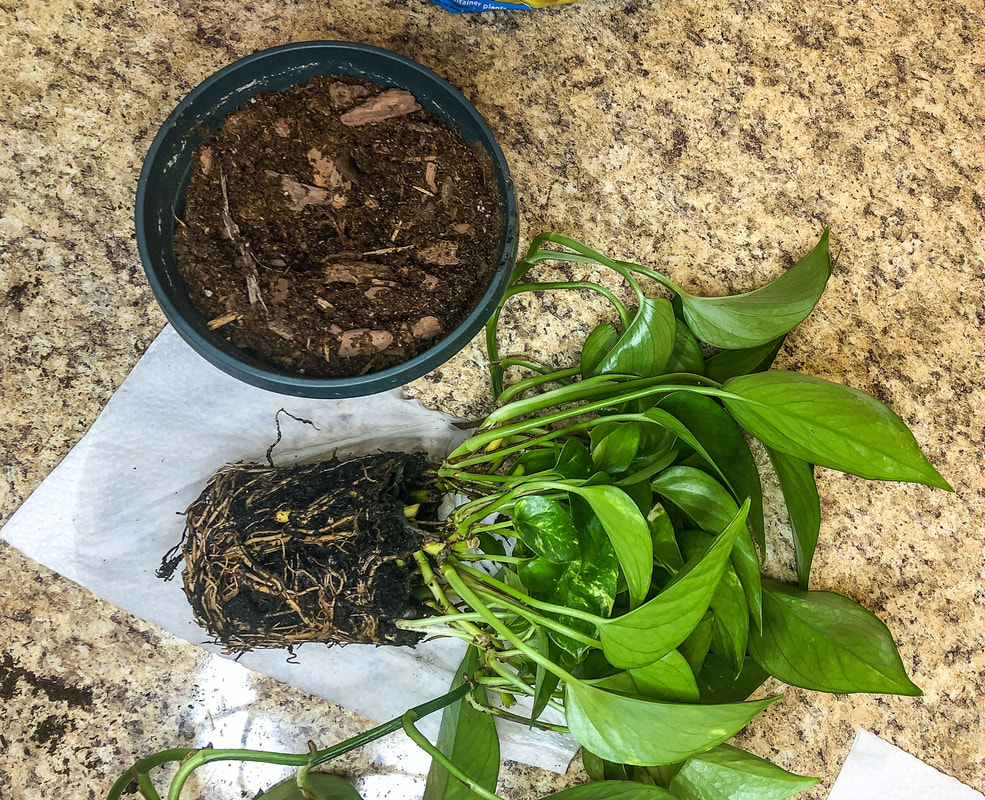 Pothos plant freshly watered with tangled roots sits next to a pot with its new soil mixture. Photo by Diane M. Lilly, 2022. 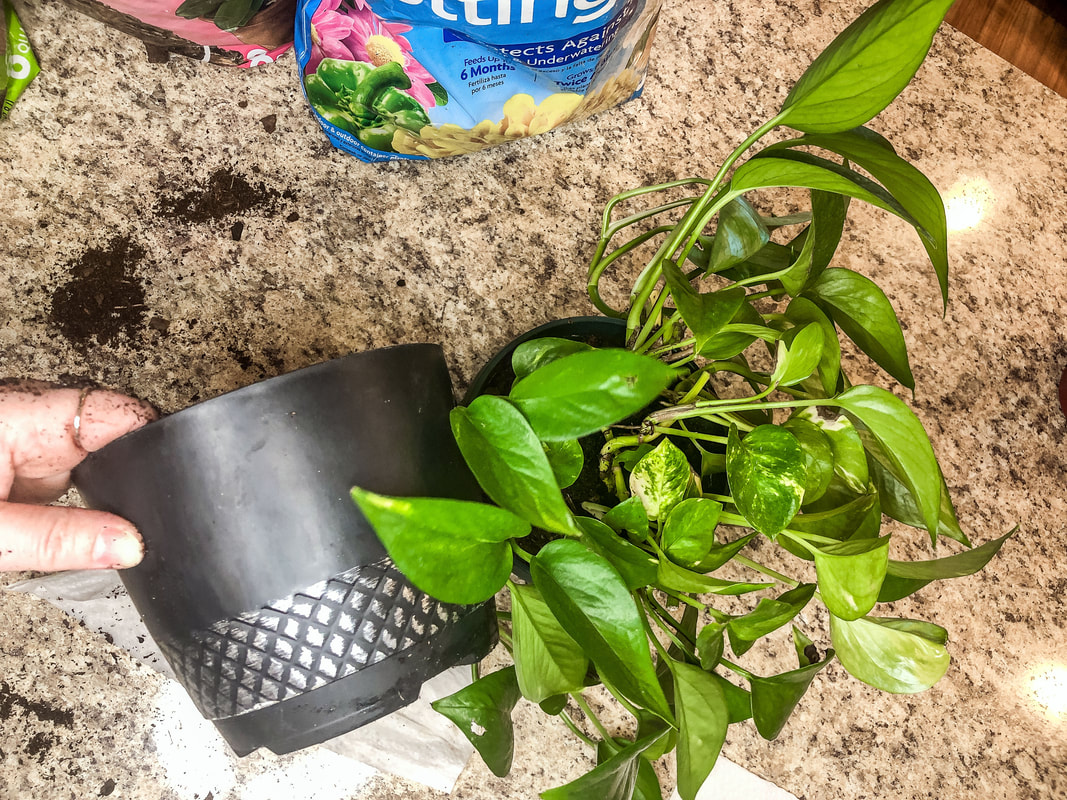 Bigger new pot for the pothos plant. Photo by Diane M. Lilly, 2022. 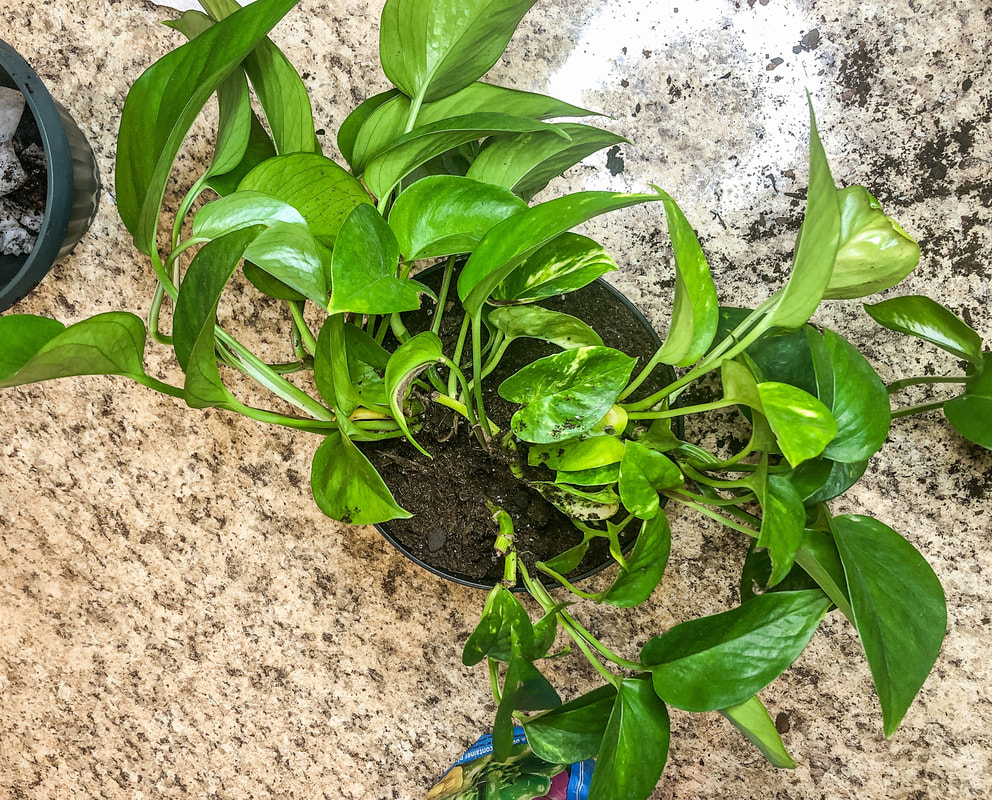 Pothos plant replanted in bigger pot. Photo by Diane M. Lilly, 2022. 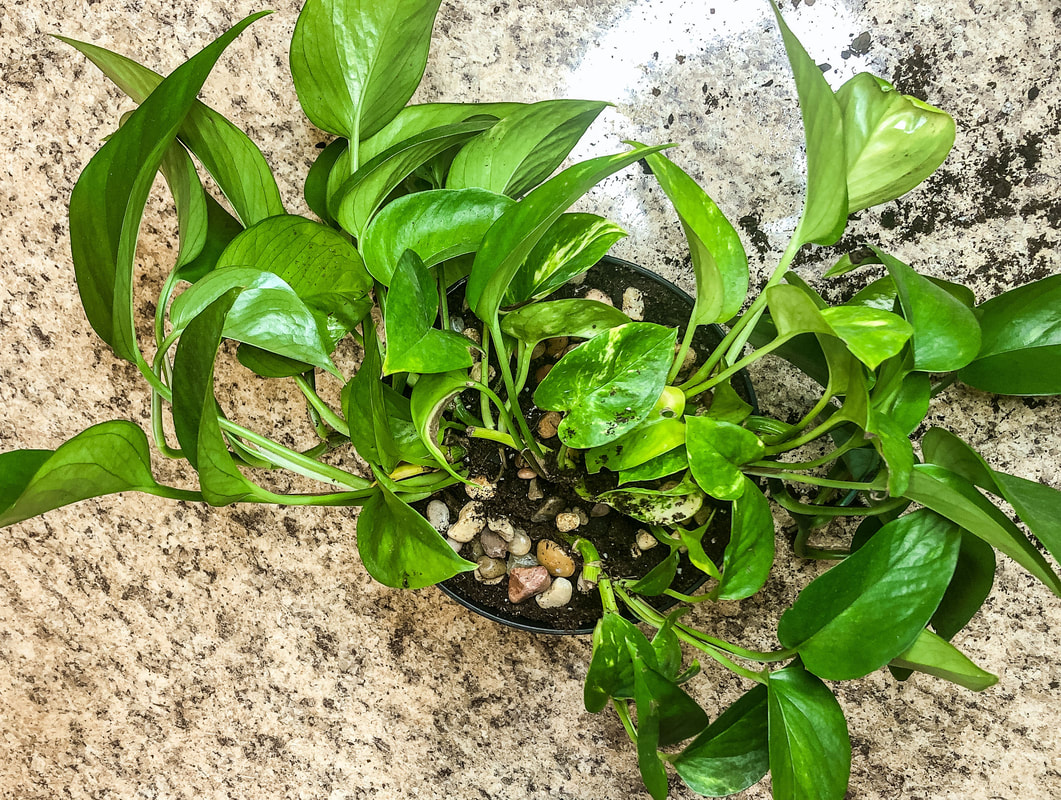 Newly planted pothos plant with decorative stones. Photo by Diane M. Lilly, 2022. How to water your pothos Most plants need to be watered after they are transplanted to settle them into the soil and help alleviate the stress of the transplanting process. Now that your pothos is in its new home, water deeply until the water runs out of the drainage holes in the bottom. If the soil settles too much, add more to top it off. And that’s it! Place your plant in a well-lit area (see the next section) and keep an eye on it. You can try a little fertilizer in a month if it needs a boost. Pothos (like most houseplants) will benefit from being in a humid space (like a bathroom). Light needs for pothos plants As I’ve mentioned before, pothos plants are resilient. They are said to be a pretty good plant for those who may not have the greenest thumb or the perfect environment. Pothos like moderate light but will tolerate low light. I placed my new plant on a northeast-facing bathroom window, so it does get a small amount of direct sun in the morning, but for most of the day, it gets bright indirect sunlight. And it seems to love its new home! It’s already stretching its limbs and getting viny, which I love! 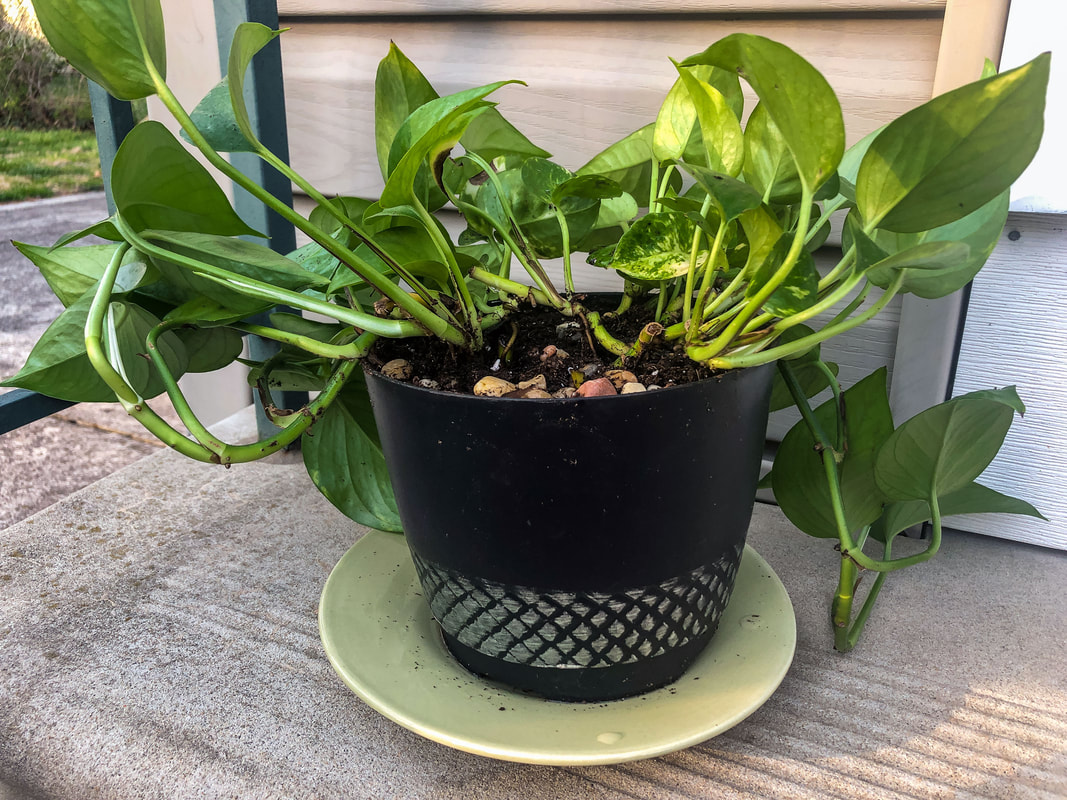 My newly planted pothos plant outside. Photo by Diane M. Lilly, 2022.  Another shot of my pothos plant outside. Photo by Diane M. Lilly, 2022. 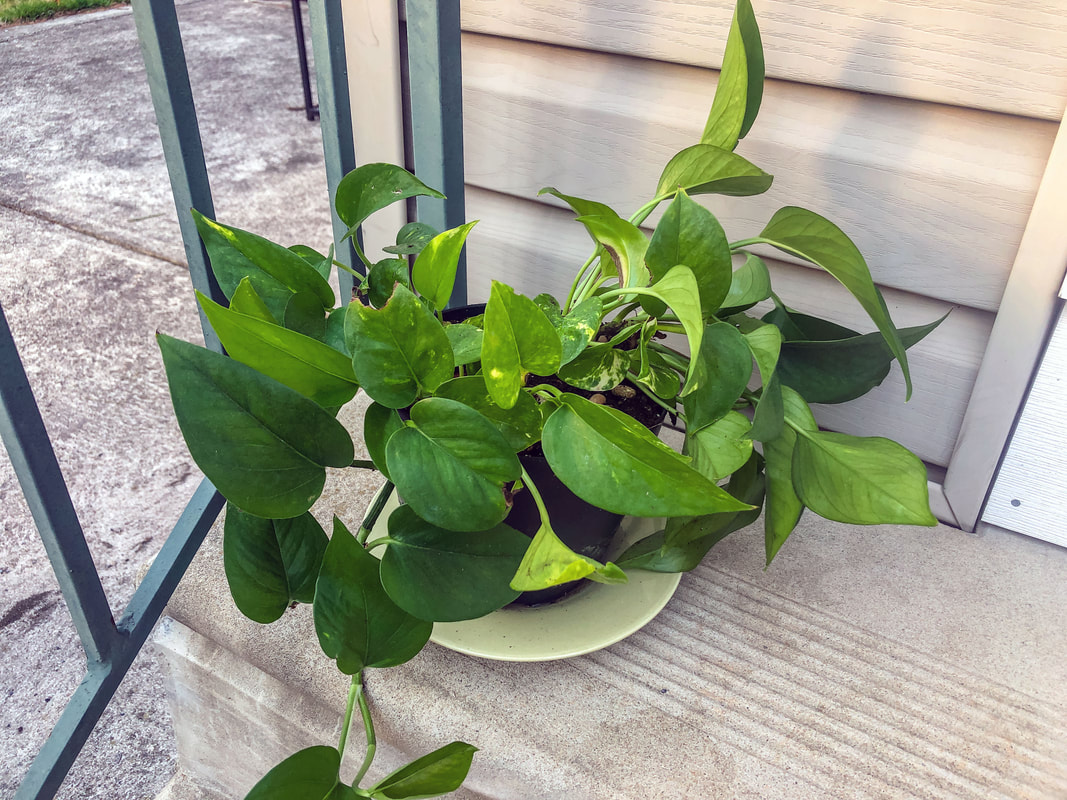 Pothos plant on my back door step. Photo by Diane M. Lilly, 2022. 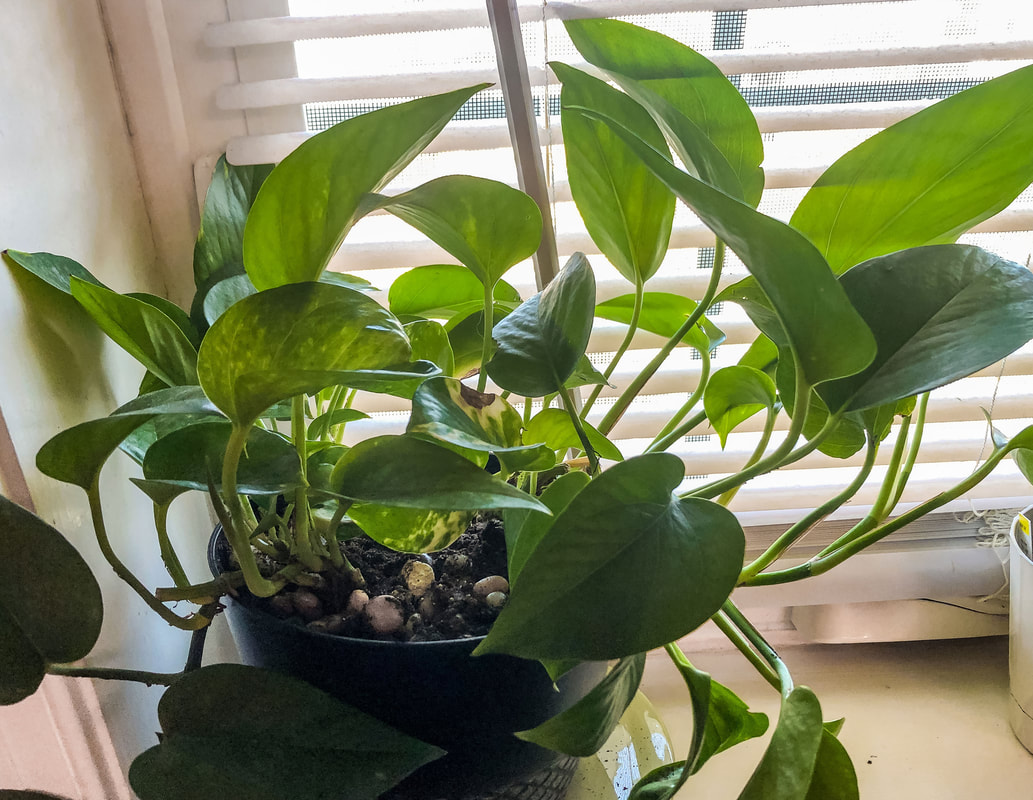 My pothos plant one week after replanting on bathroom windowsill. Photo by Diane M. Lilly, 2022. I’d love to hear in the comments if you have a pothos plant. Are any of you in the process of repotting your houseplants? Drop a line in the comments below if you have any tips for repotting houseplants to share! Related blogs you may want to read: Small houseplants that love bathroom humidity A spring decor makeover for my small rental bathroom How to propagate bromeliad pups Eight health benefits of decorating with plants Six herbs I planted indoors Let’s talk about houseplants Biophilia in interior design This article may contain a few items or commercial mentions, but I only used them for demonstration purposes only. I am not endorsing any particular product or receiving any monetary gain for this blog.  Salmon chowder cooking in a pot. Photo by Diane M. Lilly, 2022. I’ve wanted to make seafood chowder for a while now. I was planning on making clam chowder, but I came across this recipe for salmon chowder and thought I’d try it. This ended up being an easy meal, and the ingredients weren’t too expensive either, which is a major plus these days with the high cost of food. As usual, I roughly doubled the ingredients because I had to feed a family of five. This time around was a bit of an experiment, and—though this turned out delicious—I’m going to admit up front that I needed maybe one or two more cans of salmon to get the full flavor. So here goes… Ingredients: 2 tsp extra virgin olive oil 32 oz fat free chicken broth 12 oz evaporated milk (2) 14.75 oz cream style sweet corn (2) 5 oz cans skinless boneless pink salmon in water (I used 2 cans but this would’ve been better with another can or two.) 1 bag of frozen vegetable of choice (I used green beans, corn, and carrots this time around.) 4 cups of shredded hash browns 4 celery stalks, diced 1 green pepper julienned 1/2 onion, diced 2 garlic cloves, minced 1 tsp dill 1 tsp pepper 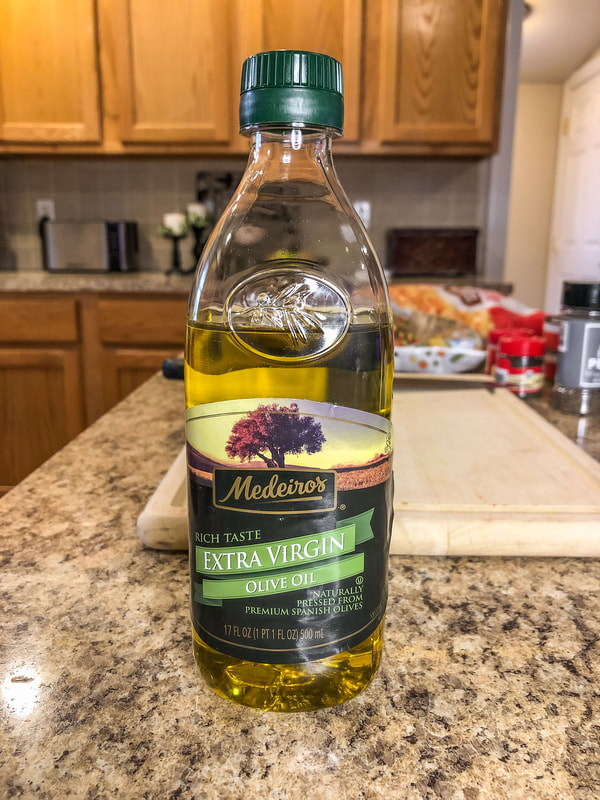 Olive oil. Photo by Diane M. Lilly, 2022.  Chicken broth. Photo by Diane M. Lilly, 2022. 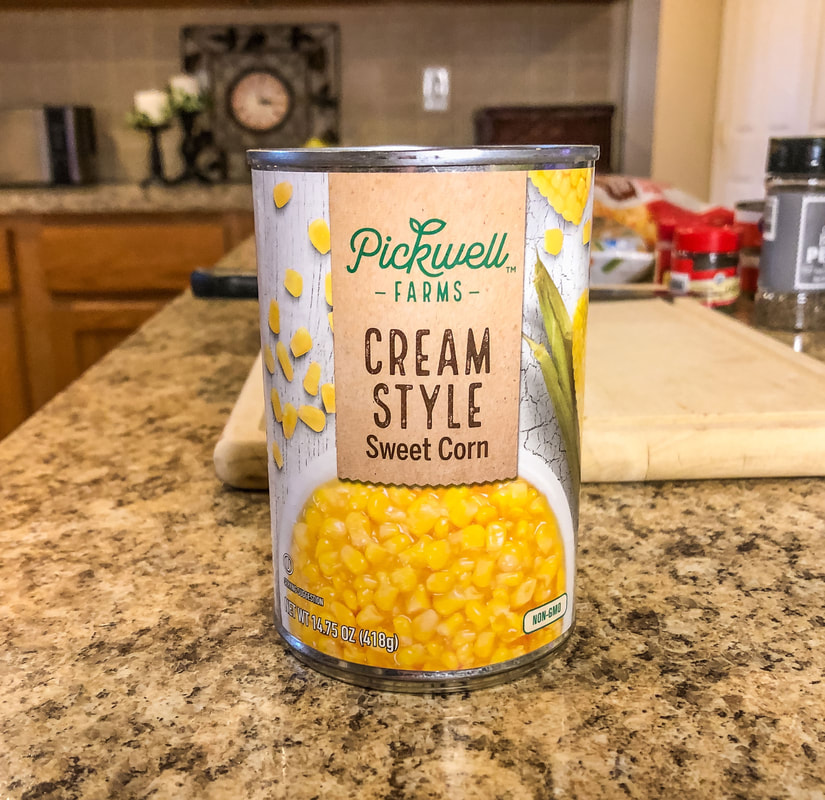 Cream style corn. Photo by Diane M. Lilly, 2022.  Evaporated milk. Photo by Diane M. Lilly, 2022.  Pink salmon. Photo by Diane M. Lilly, 2022.  Seasonings for the soup. Photo by Diane M. Lilly, 2022.  Frozen mixed vegetables. Photo by Diane M. Lilly, 2022.  Shredded hash browns. Photo by Diane M. Lilly, 2022. 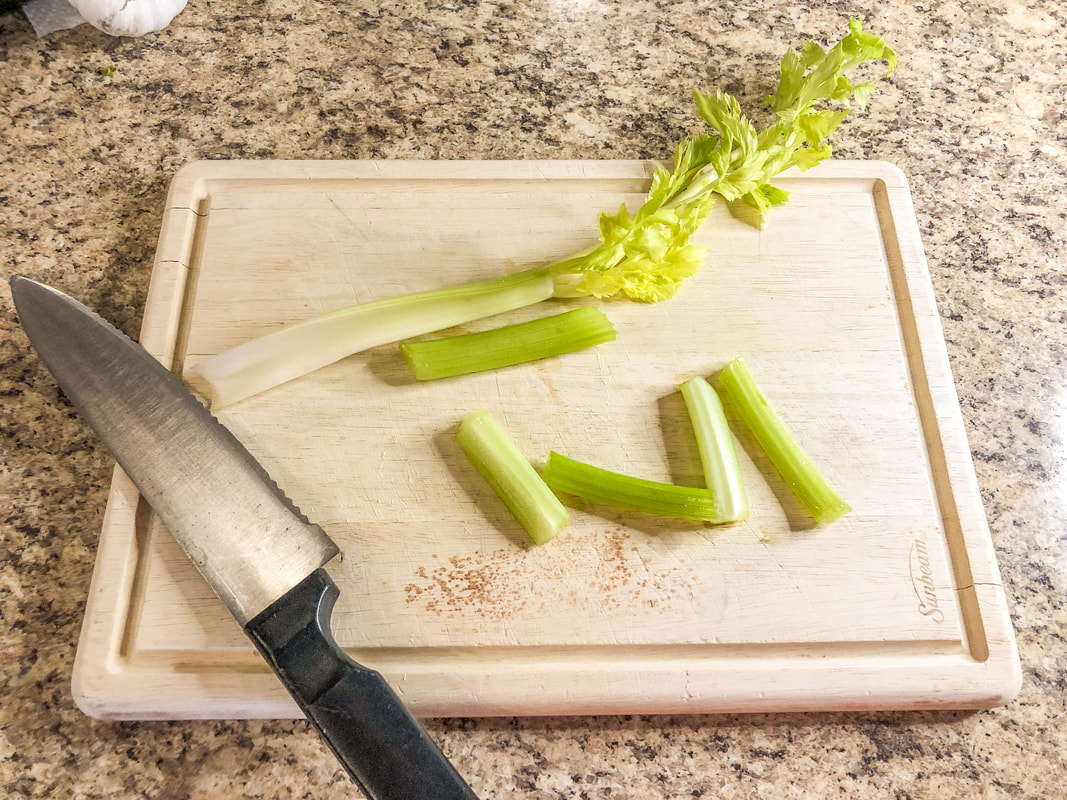 Chopped celery. Photo by Diane M. Lilly, 2022. 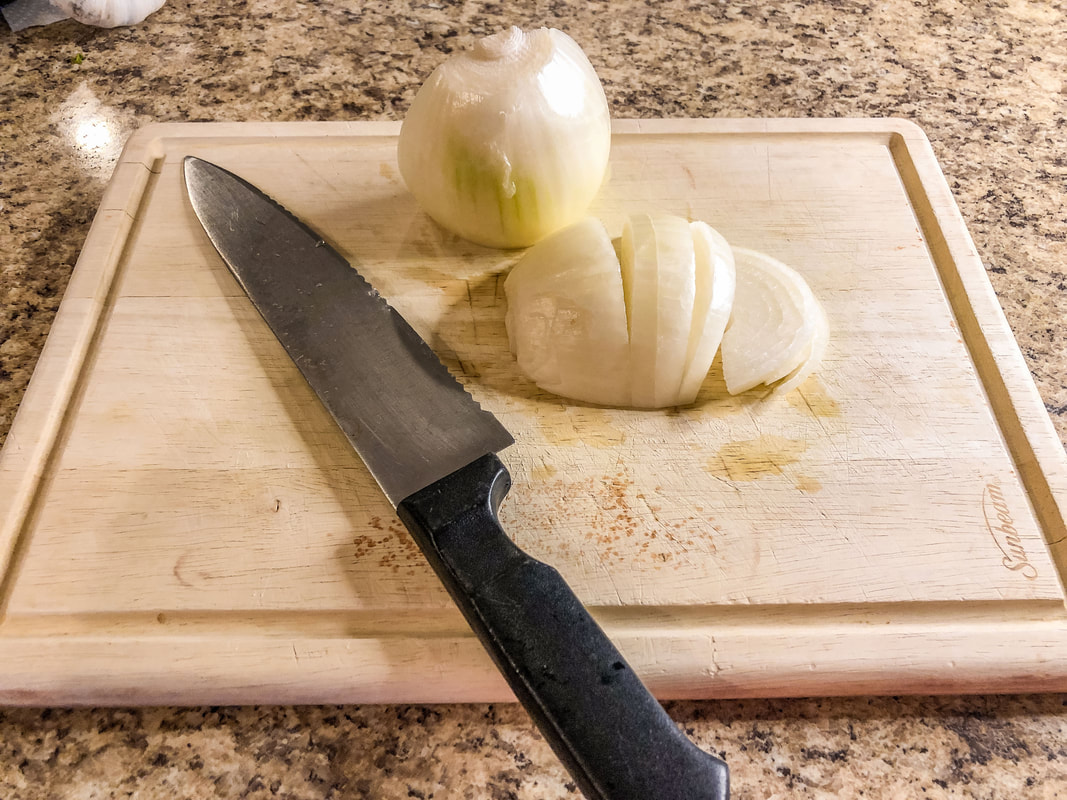 Chopped onion. Photo by Diane M. Lilly, 2022. 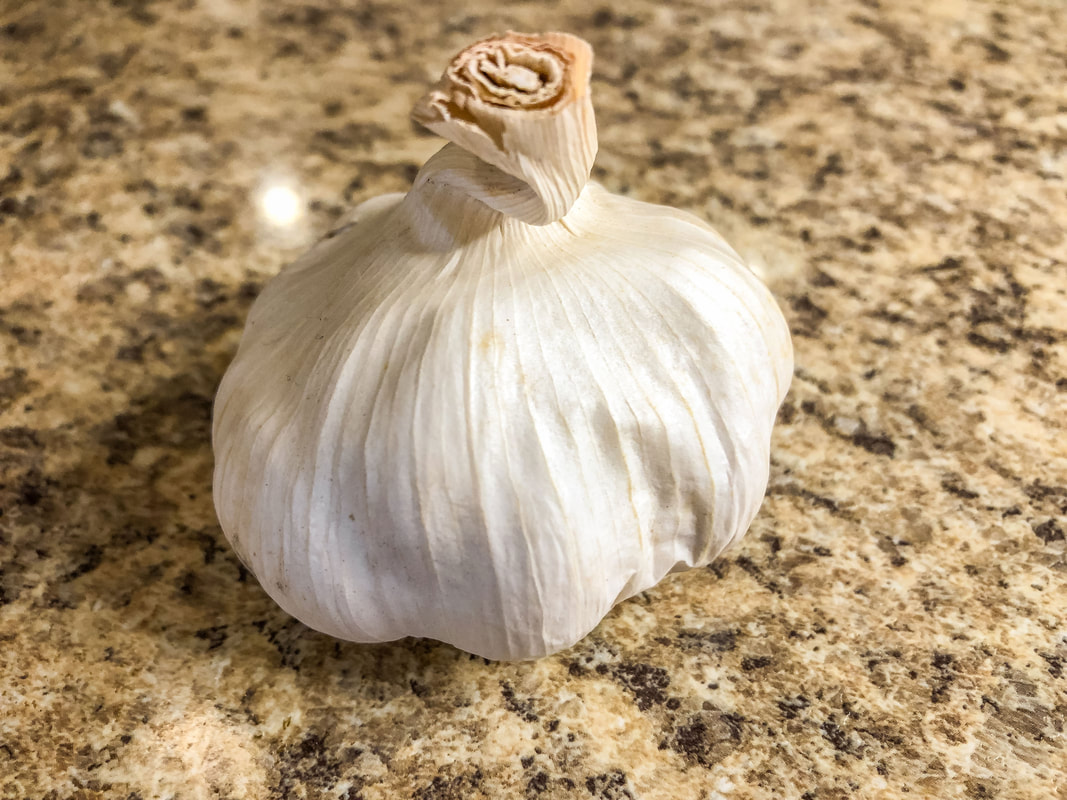 Garlic clove. Photo by Diane M. Lilly, 2022. 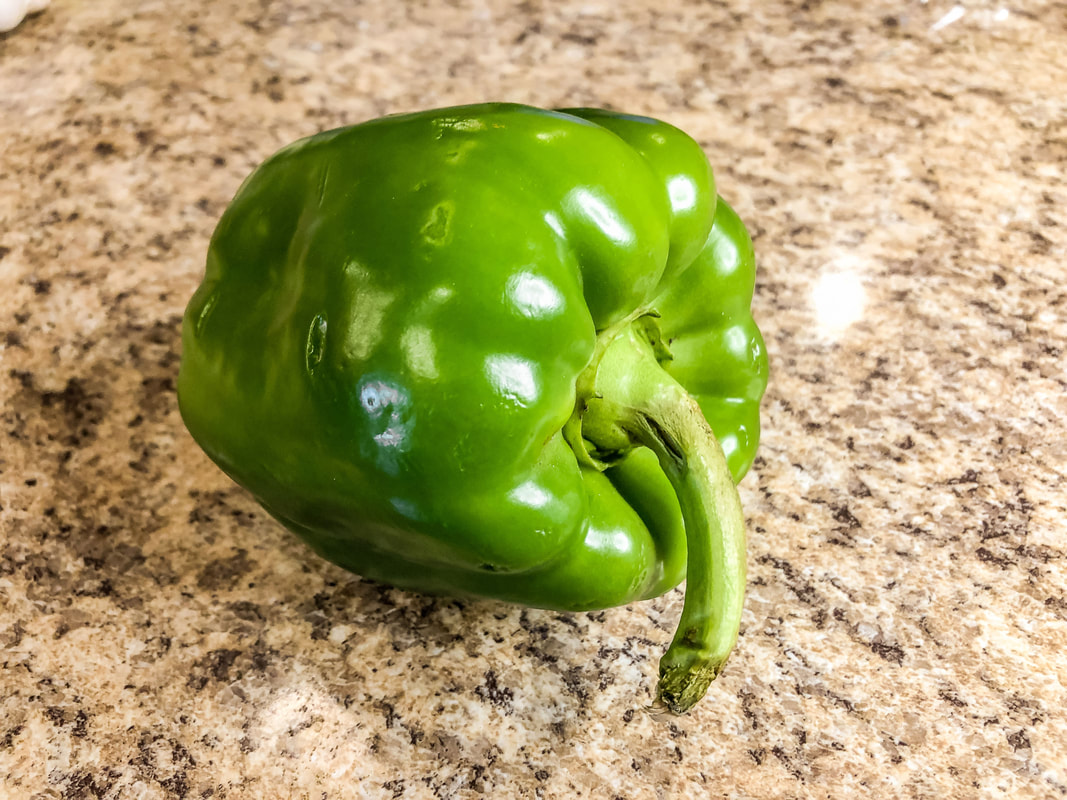 Green pepper. Photo by Diane M. Lilly, 2022. Heat olive oil in a large pot. Add in garlic, celery, onion, and green pepper. Saute until garlic is just getting slightly brown. 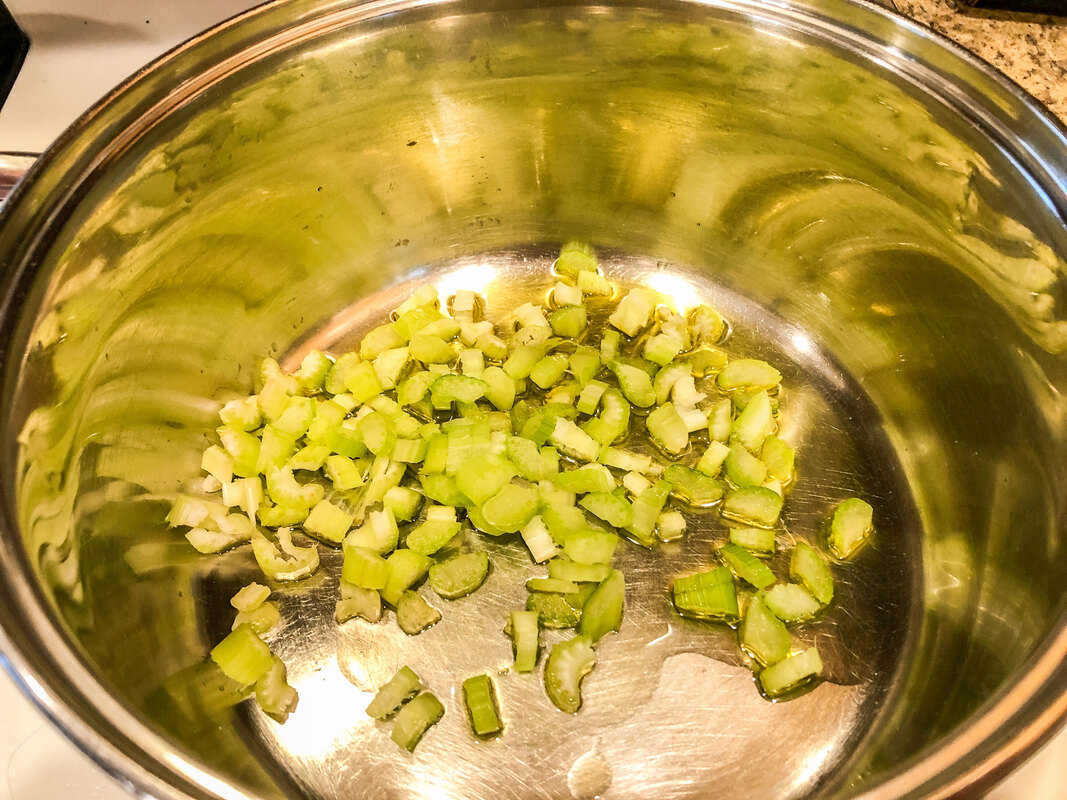 Garlic, celery, and onion with oil. Photo by Diane M. Lilly, 2022. 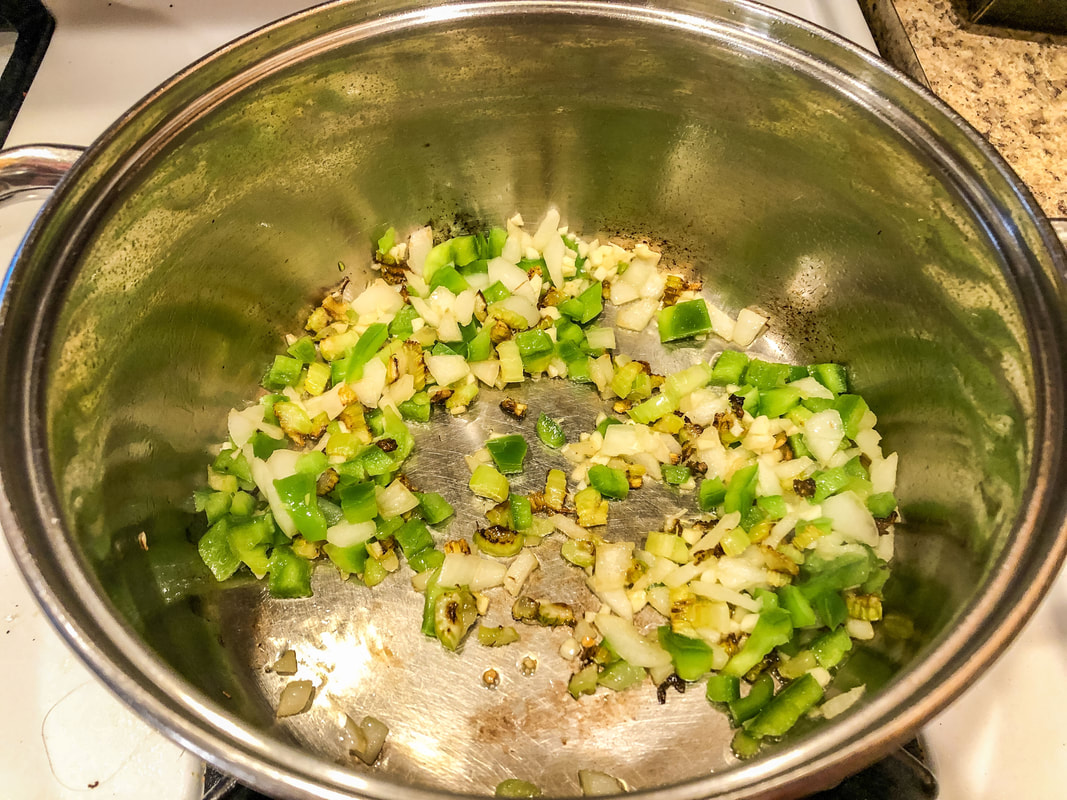 Green pepper added to celery, garlic, and onion. Photo by Diane M. Lilly, 2022. Add in chicken broth, frozen vegetables, and hash browns. Season with dill and pepper. Bring to a boil. Reduce the heat and let simmer for 10 minutes or until the vegetables are cooked. 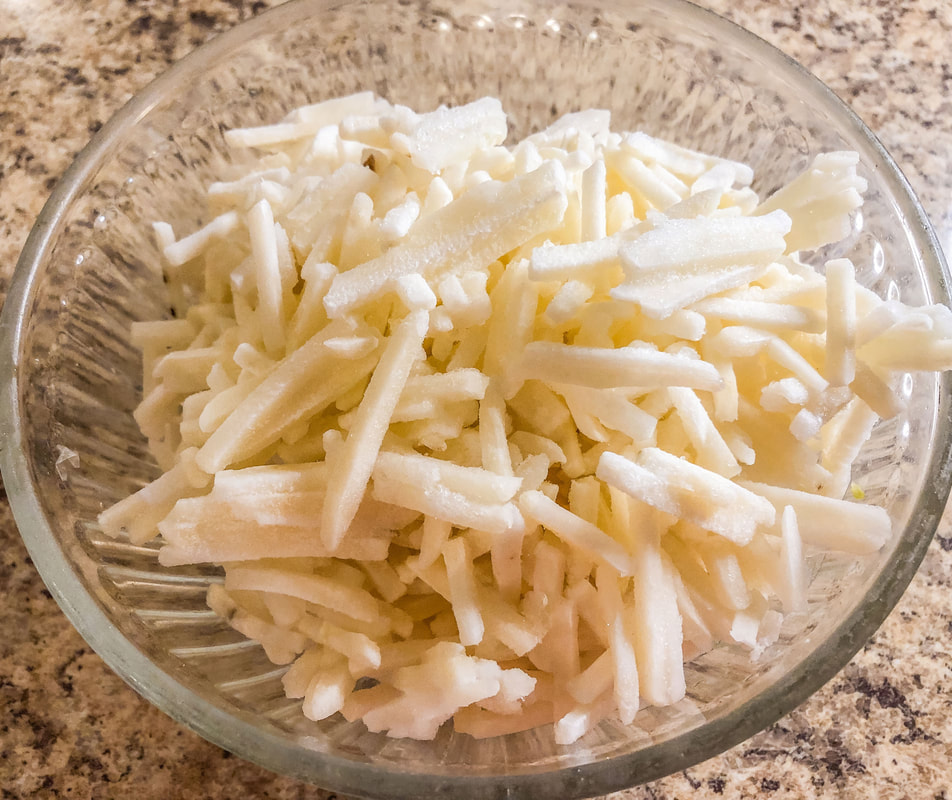 Shredded hashbrowns to add to the pot. Photo by Diane M. Lilly, 2022.  All ingredients added to the pot to cook. Photo by Diane M. Lilly, 2022. Drain water from salmon, flake, then add to soup mixture. Add in cream corn and heat through for a few minutes.  Bowl of salmon chowder soup. Photo by Diane M. Lilly, 2022. And it’s done! I made some dinner rolls to serve with this soup, which hit the spot. As I mentioned, the amount of salmon needed to be adjusted, but it’s always a gamble when you double a recipe! The soup was delicious anyway…And now I know how to make it better next time!  Dinner rolls freshly baked. Photo by Diane M. Lilly, 2022. Related blogs you may want to read: Homemade chicken noodle soup recipe Potato soup recipe Tuna noodle casserole recipe Chicken vegetable pot pie recipe Homemade chicken noodle soup This article may contain a few items or commercial mentions, but I only used them for demonstration purposes only. I am not endorsing any particular product or receiving any monetary gain for this blog. |
Author
Some of the posts on this site contain affiliate links. This means if you click on the link and purchase the item, I will receive an affiliate commission. 
Categories
All
Archives
April 2024
|