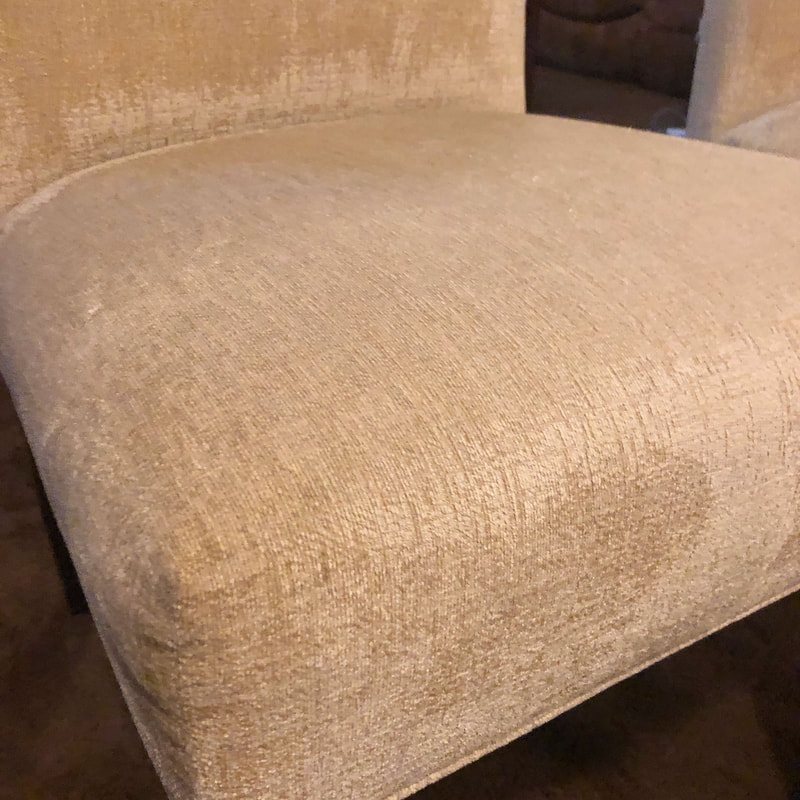
 Living room side chair closeup. Photo by Diane M. Lilly, 2021. Today I decided to tackle a project that’s been on my mind for a couple of months now—cleaning the upholstery on my dining room chairs and two living room side chairs. I’ve never done this before (disclaimer!) so I did a quick search of Youtube to see if I could find any tutorials that would help me gain some insight into a couple of techniques that can be used at home. My budget cannot accommodate a bill for a professional cleaner, but I do own a shampooer that can be used as a backup. What I will be sharing with you below are upholstery cleaning techniques that I wanted to try for each set of chairs. So let’s get into it! But first, a disclaimer… Ideally, you should follow the cleaning recommendations on your furniture labels (more recent upholstered furniture pieces may have codes that tell you how that fabric should be cleaned). In my situation, my second hand dining room chairs have no such code on the label. The living room chairs don’t even have a label, so no code there either. In situations where you don’t know how a particular upholstery fabric should be cleaned—and you want to do it yourself at home—there is a gentle method that is similar to cleaning a lamp shade. In this scenario, you would be careful not to soak the fabric with water, but use a water with lots of suds and the suds are mainly what cleans the fabric. You then rinse carefully with water. Always spot check in an inconspicuous place before trying to clean the entire piece of furniture. Now on to my project of the day… 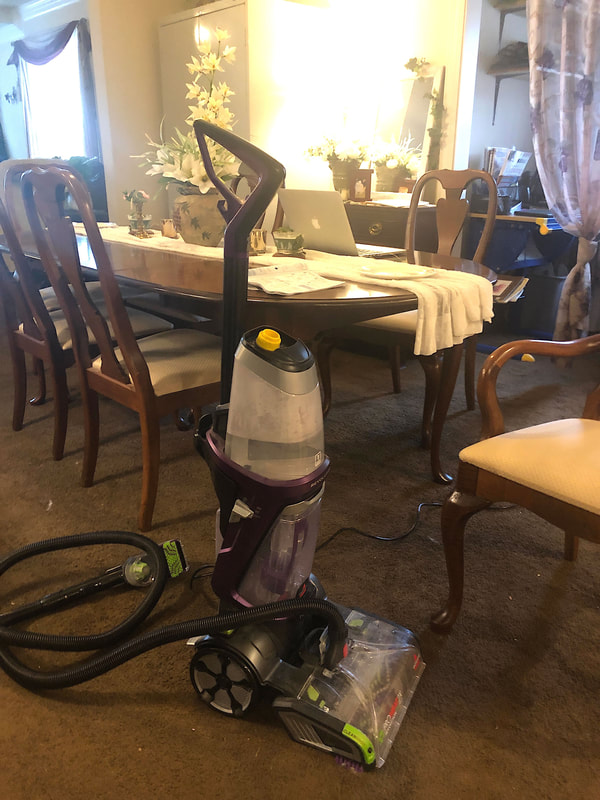 My wet vac/rug shampooer used for part of this project. Photo by Diane M. Lilly, 2021. 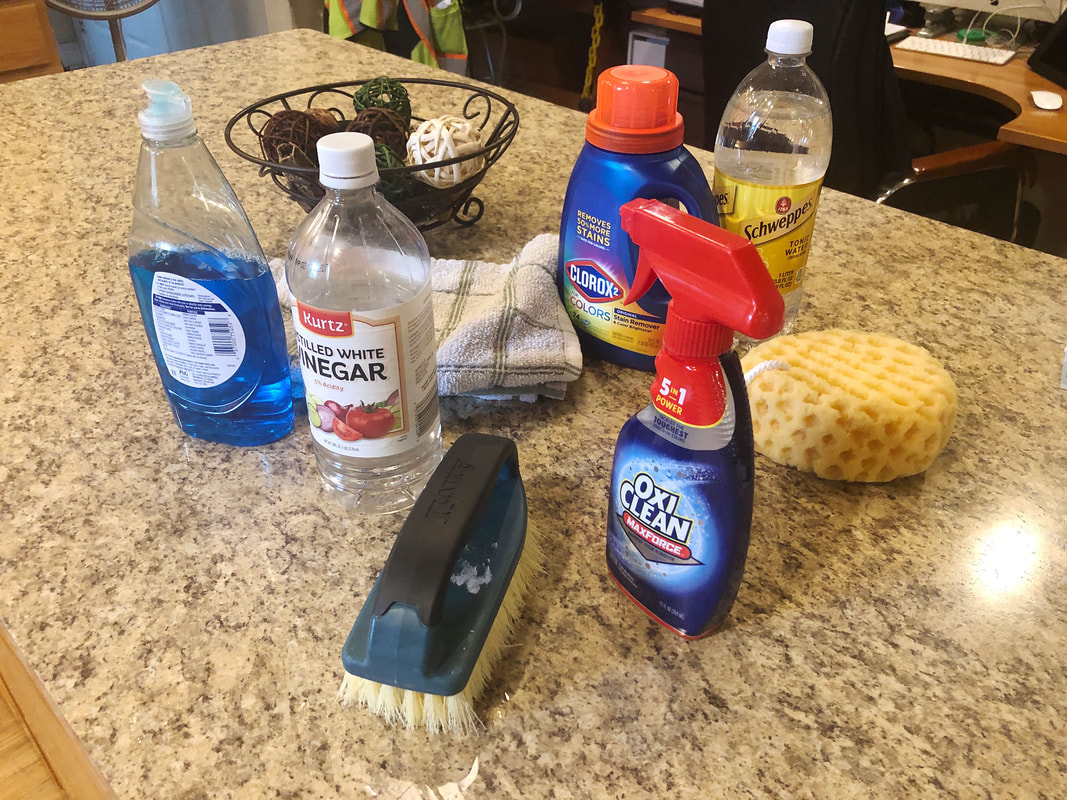 Some of the cleaning supplies needed for this project. Photo by Diane M. Lilly, 2021. Dining room chair pads For my dining room chair pads I wanted to try out an at-home upholstery cleaning technique that uses a spray on OxyClean. I went out to the local grocery store and bought a spray bottle of OxyClean, then came home and gathered up the rest of the materials and ingredients needed for this cleaning project—a scrub brush, a sponge, Dawn dishwashing liquid, white vinegar, and my shampooer. This could be done with a small compact shampooer, but I couldn’t find mine so I lugged the large shampooer out and assembled all the upholstery attachments for this project. 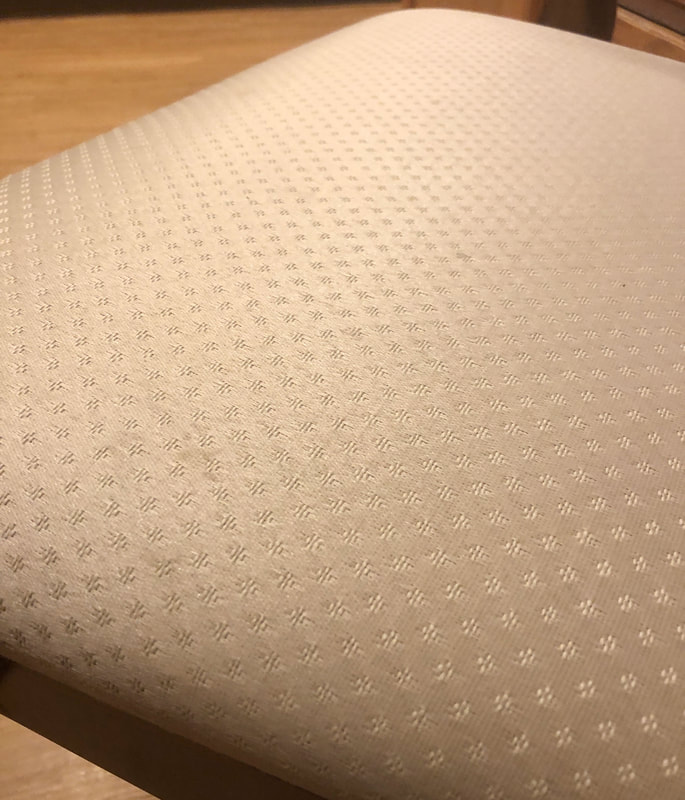 Light stain on dining room chair. Photo by Diane M. Lilly, 2021. 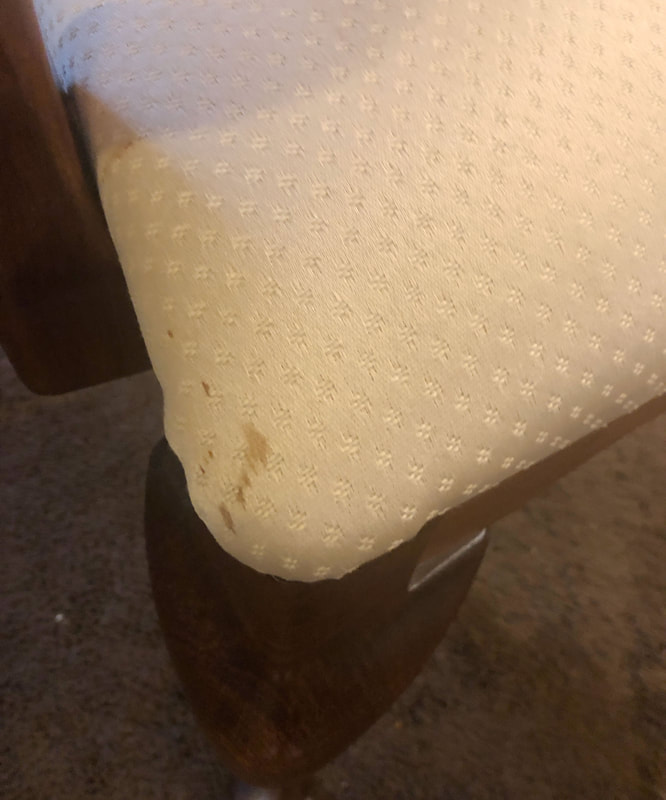 A darker stain on dining room chair. Photo by Diane M. Lilly, 2021. Steps for this method: Spray the fabric with OxyClean and let soak for a couple minutes. Using a hard bristle brush, scrub the fabric really well. (Note: I don’t know if this technique will work with more delicate fabrics, so try a test spot first.) Repeat these steps if needed until the stains in the fabric are gone. To get the cleaning solution and any remaining stains out of the fabric, use a shampooer with a couple ounces of white vinegar and a couple drops of liquid dish soap added to the clean water. Shampoo and suction until water runs clean and fabric looks to be free of stains and dirt. So how did this technique go? Well…the first chair went ok. It seemed like most of the dirt came out. A couple small spots remained stubborn, but overall that chair went well, so I moved on to the next chair. A couple stained spots remained, but the rest of the chair looked ok. But the third chair was a mess with a lot of staining, and this method just didn’t clean it. I’m sure if I kept spraying with OxyClean and scrubbing the stains would eventually come out or lighten, but I didn’t want to ruin the fabric or run out of spray cleaner, so I finished the remaining chairs with the second technique I wanted to try. The fourth chair was sprayed with hot water, then the water/stain remover mix (see below for my living room chairs) and scrubbed with a scrub brush. I hit stubborn spots a second time and scrubbed, then used a rag to scrub out the wetness…It was very dirty! I sprayed the cushion with the tonic/vinegar mix (also below for my living room chairs), scrubbed with a scrub brush, and blotted with a towel. I then used the suction-only function on my shampooer to finish it off. In the end I used a combination of two methods to get my dining room chairs bright and clean. Here are the after shots for my dining room chairs… 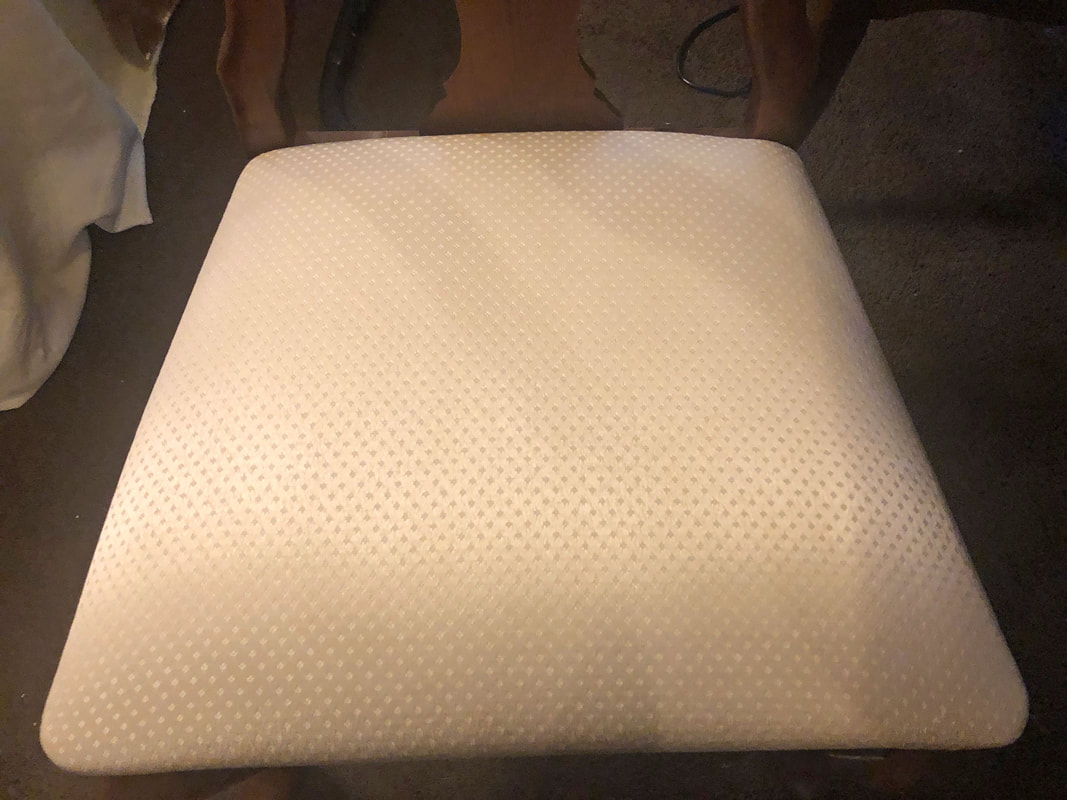 Dining room chair after cleaning. Photo by Diane M. Lilly, 2021. 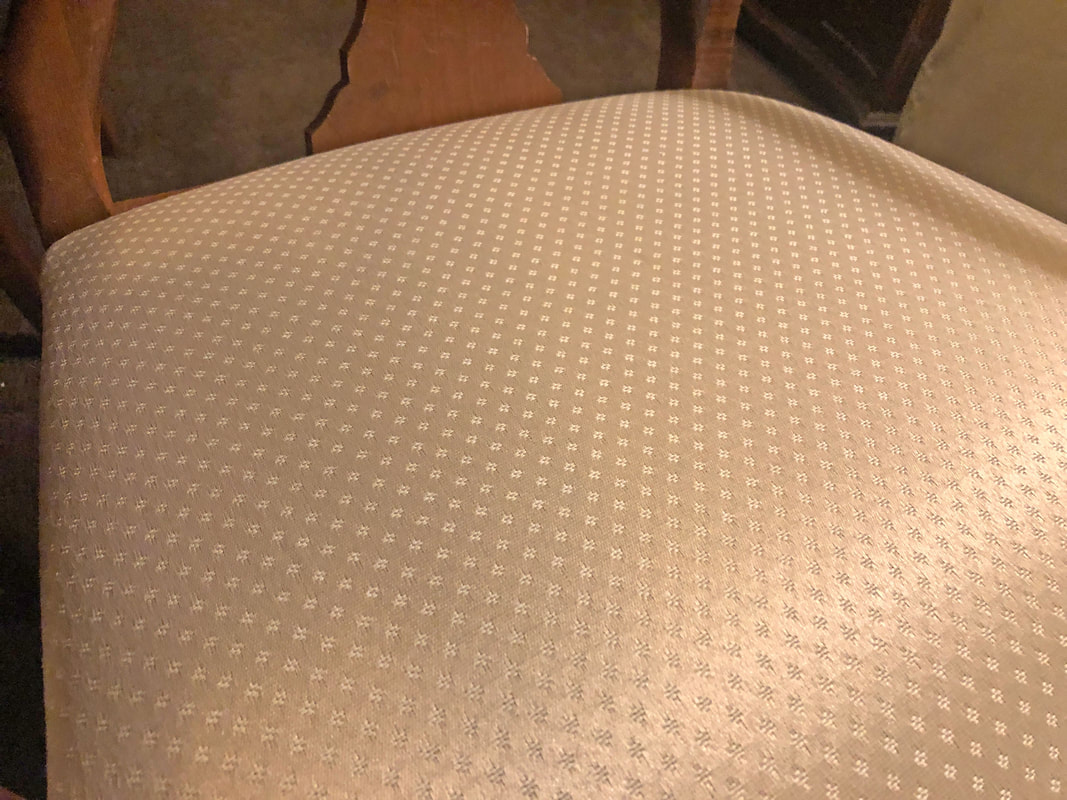 A closeup of the freshly cleaned chair pad. Photo by Diane M. Lilly, 2021. 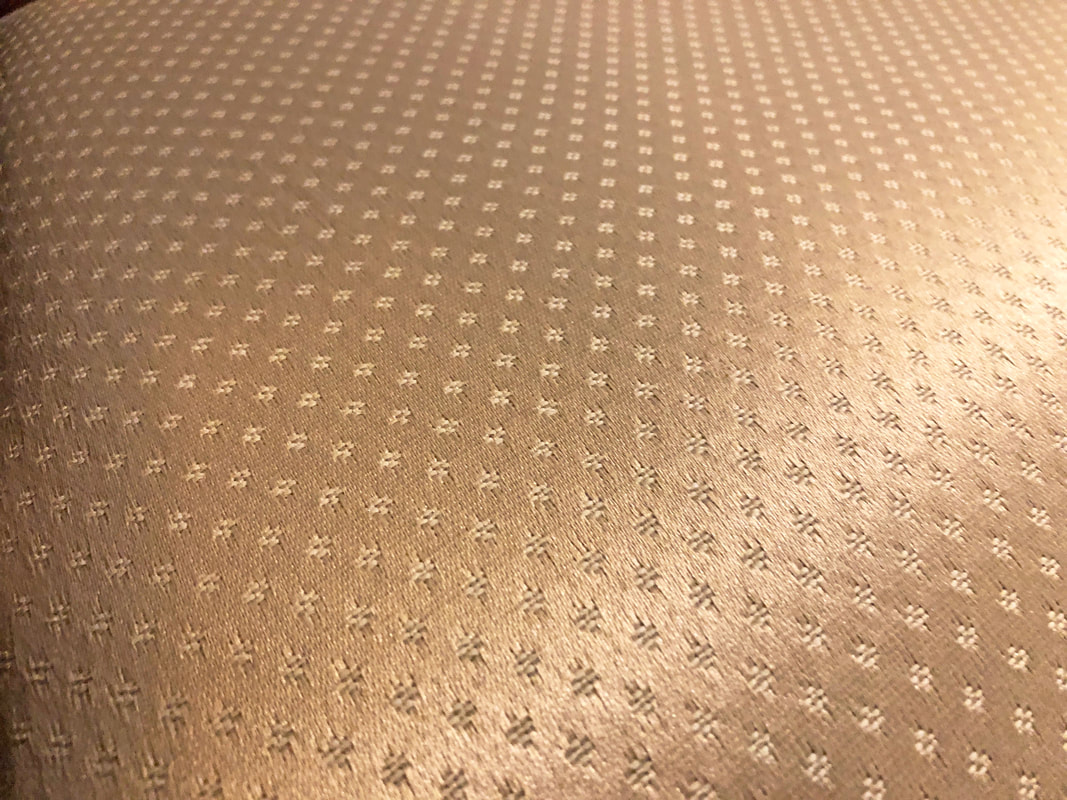 Another closeup shot of the freshly cleaned chair pad. Photo by Diane M. Lilly, 2021. Living room side chairs For this DIY project, I wanted to try using a technique for my living room chairs from one lady who has worked in the upholstery business for years, so I trust this source more than some other sources. The materials I used for this method were Clorox 2 laundry stain remover (the color safe version), tonic water (hopefully that’s a good substitute for the sparkling water mentioned in the video), and a few small spray bottles. Instead of the white painters rags suggested, I have light colored kitchen towels to use for scrubbing and blotting. There are two things mentioned in the video that I do not have—a contraption that shaves the pills (hopefully I won’t need one!) and Scotch Guard, which I will have to pick up later. 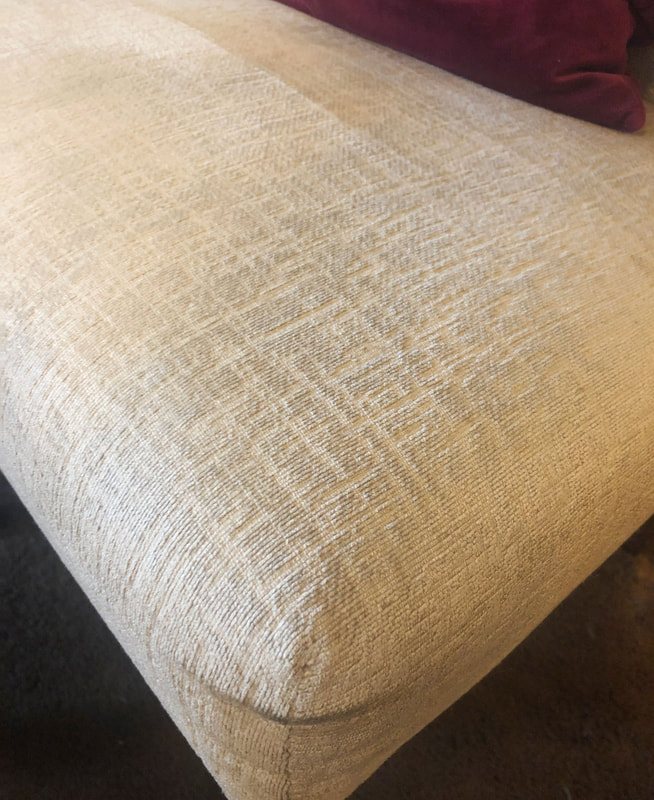 Living room side chair closeup of dirty fabric. Photo by Diane M. Lilly, 2021. 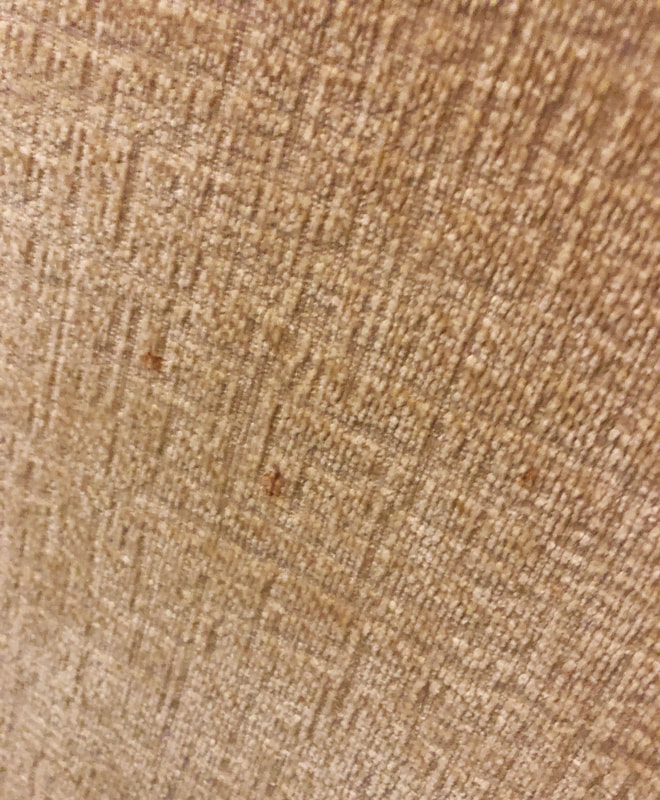 Closeup of dirt spots on living room side chair. Photo by Diane M. Lilly, 2021. 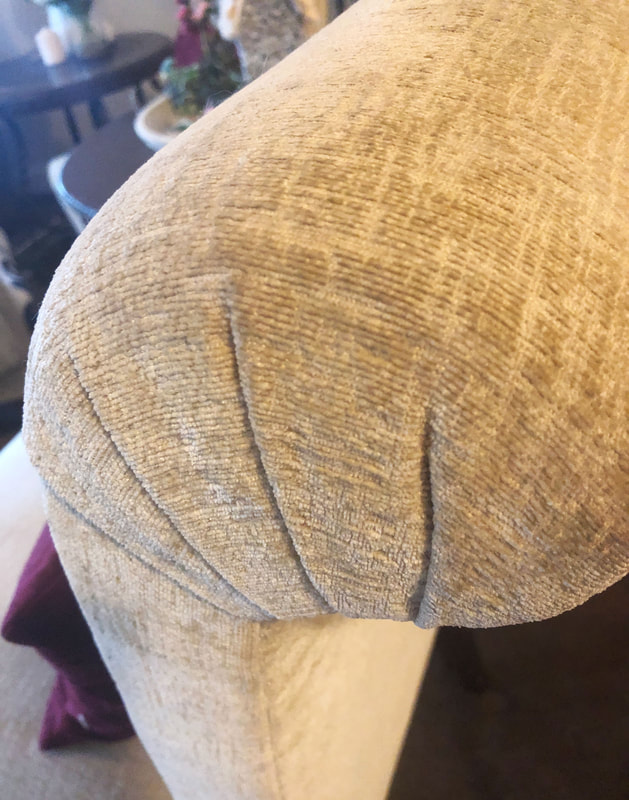 Closeup of the dirty roll top back on my living room side chair. Photo by Diane M. Lilly, 2021. So here are the steps I followed… Spray fabric with very hot tap water. Spray wet fabric with a solution of 1/3 laundry stain remover to 2/3 water. Use a lint free rag to scrub the fabric. Use another lint free rag (preferable a light color to see the dirt) to scrub the dirt and cleaning solution out of the fabric. Once all of the rags come up clean, spray with a solution of a cup of sparkling water (I have tonic water instead) to 1/2 cup white vinegar. Scrub fabric again to get out any leftover dirt, odors, and stain remover suds. Spray with two thin coats of Scotch Guard (which I have to buy later). So how did it go? 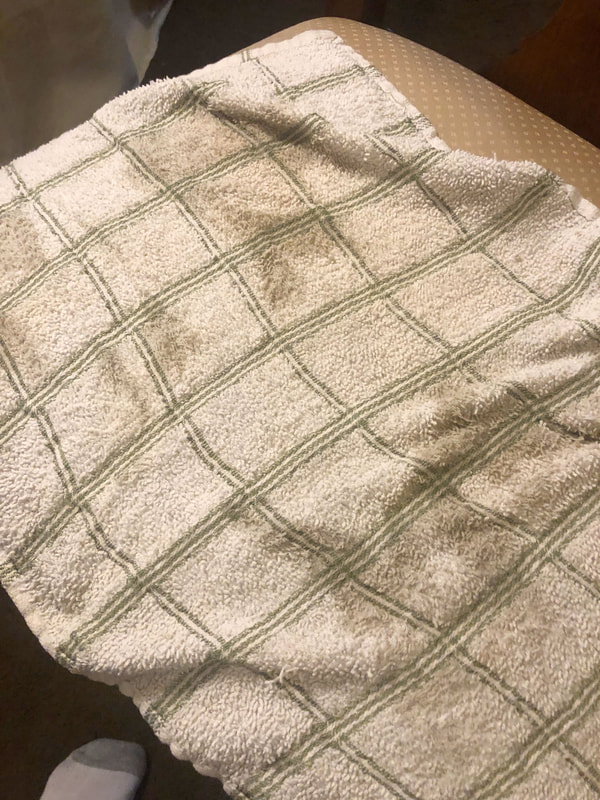 The dirt pulled out of the fabric with a dish towel. Photo by Diane M. Lilly, 2021. So after a long day of scrubbing dining room and living room chairs, I eventually decided instead to use a good cleaner in my shampooer (for pet stains and odor removal), and use the laundry stain remover solution to try to get out stubborn stains. I used a spritz of the tonic water and vinegar solution to help with heavy traffic areas, and then used the suction-only function on my shampooer to draw out excess water. This is what my side chairs looked like when I was done… 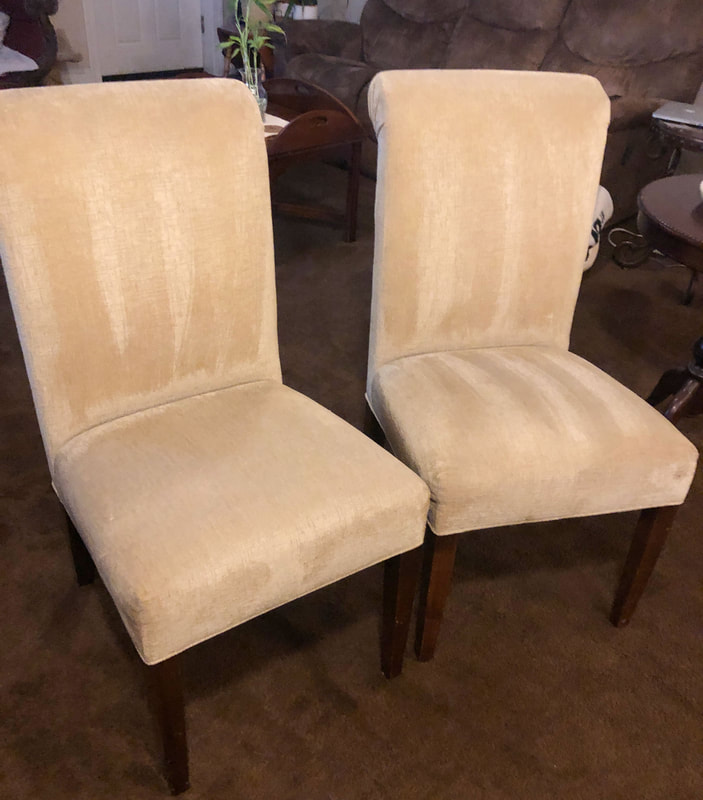 Both living room side chairs freshly cleaned. Photo by Diane M. Lilly, 2021. 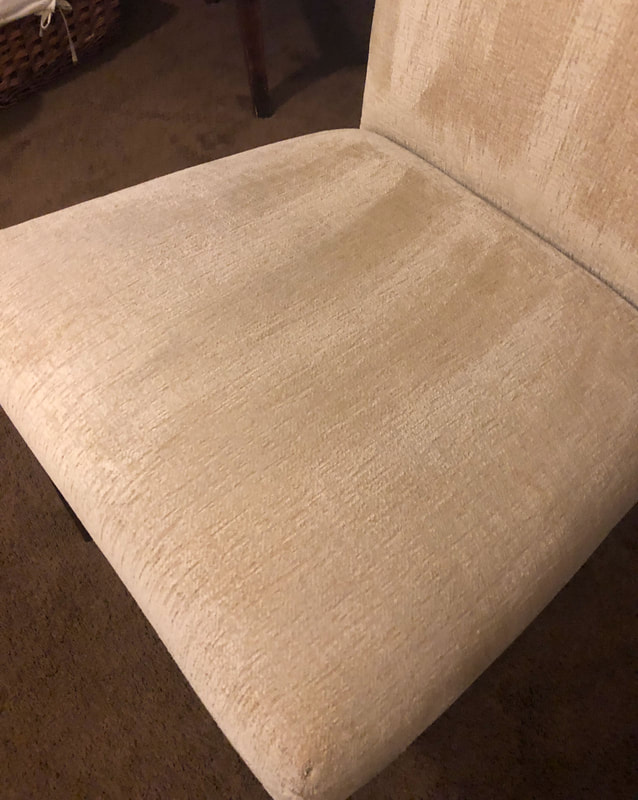 Closeup of side chair seat freshly cleaned. Photo by Diane M. Lilly, 2021. 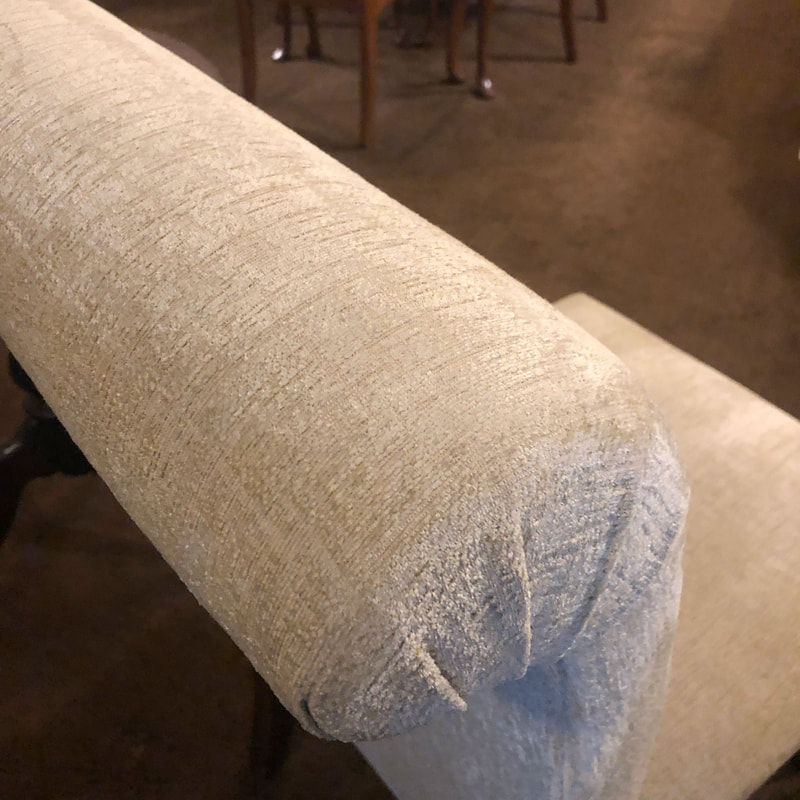 Photo of side chair roll top back freshly cleaned. Photo by Diane M. Lilly, 2021. Final thoughts… I have to say, it took quite a lot of elbow grease to do this DIY cleaning project, and I’m not entirely sure just using a good cleaning solution with a shampooer wouldn’t have been easier, using a stain remover to get out the stubborn spots. Between the two, I personally liked the Clorox2 method better. The cleaning solution went way further, making the laundry stain remover cleaner less expensive than the spray OxyClean, by far. What I will say about both of these techniques is that they worked wonders with small furniture pieces, but I can’t even imagine working that hard to clean a much larger piece of furniture with either of these techniques! Someone my age with back problems would have a tough time cleaning a sofa, for instance. What I do like is that these methods provide a way to clean small pieces without lugging out my very large and very heavy shampooer. I do like the sparkling water and vinegar application. I may do that more often when I clean other carpet and upholstery items so I can get rid of odors and help bring out the brightness. One more word of advice…There is no such thing as “spot cleaning” a piece of furniture. When a piece of fabric gets wet and then dries, usually there is a water stain left behind. So if you are cleaning a piece of upholstery, you must evenly wet it from seam to seam, evenly scrub it, then evenly remove the dampness. This way the entire section dries with no water marks. There is no sense going through back breaking work scrubbing only to be left with water marks! So that was my experiment in cleaning two different types of upholstery in what ended up being three different ways—or more accurately, a combination of three different cleaning methods, depending on what my fabric needed. What are your thoughts? Have you cleaned any of your own upholstery? Do you have any tips or tricks? Do you have a cautionary tale to tell based on your experiences? Feel free to leave your comments below! There are some product images and links used in this blog article purely as examples. I am not being compensated for any particular products mentioned in this article. Related blogs you may want to read: How to replace a clock mechanism How to frame small canvas art How to rewire thrift buy lamps Creating a kitchen coffee bar DIY refurbishment of a dining room cabinet
0 Comments
In Part 1 of this project blog I repainted a frame from a mirror I bought at a local thrift shop for dirt cheap. My original intention was to paint a base coat for the reddish undertones I wanted to show through a crackled gold top coat. The end result looked ok…for a different room. The almost solid gold color just looked gaudy in my dining room, even though I have a lot of decorative things with gold accents. This mirror, unfortunately, was just too over-the-top gold. The end result was me painting over it with a new layer of crackle and white craft paint.  Painted frame from the previous DIY project. Photo by Diane M. Lilly, 2021. And this is where I left off in Part 1 of this project…My task now was to find a way to fix this mirror and make it work in my dining room. So I’m standing there—several hours of work and layers of paint later—wondering why this frame does not work. It just didn’t feel finished. I kept looking at it and trying to visualize how to get a more ornate look with gold accents. And then it hit me…This mirror needs a gold Celtic knot! I brainstormed and created templates of straight border knots that I would eventually trace onto the frame. I drew ideas on a sketchpad until I got a design I liked. This was a challenge—I knew I wanted to accentuate the corners and midpoints along the frame, so my border has broken to create visual interest, but I admit it took me some time to get the design right! Once I finally got the design I wanted, the pattern was redrawn at full scale on grid paper. The idea was to create a template that I would trace onto the frame so that it could be painted in…wait for it…GOLD! 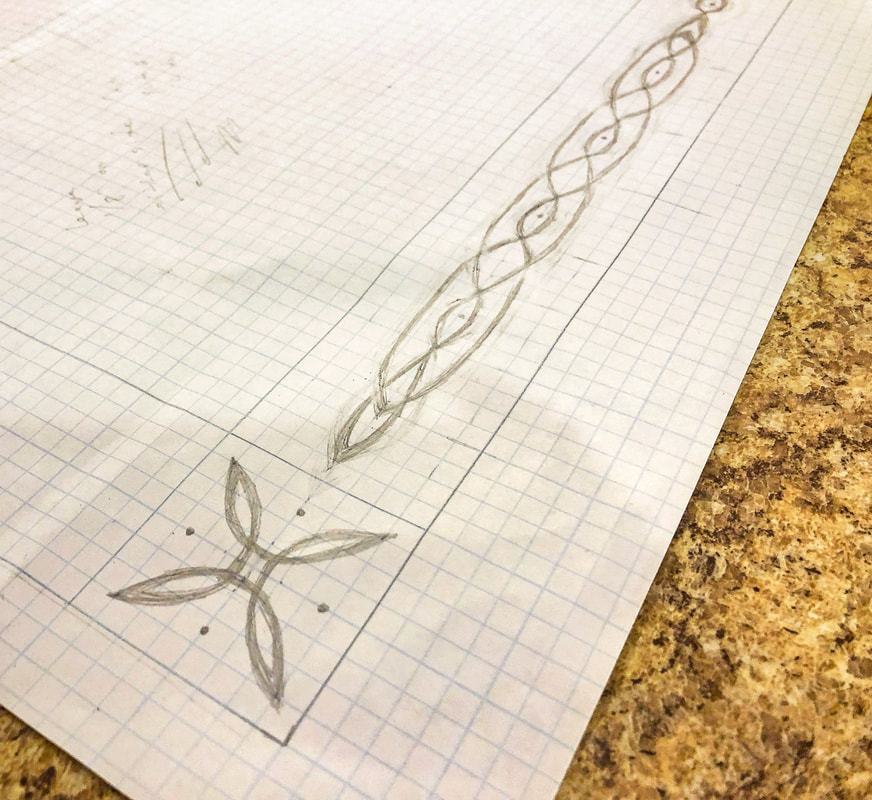 Basic lifework for my new Celtic border. Photo by Diane M. Lilly, 2021. 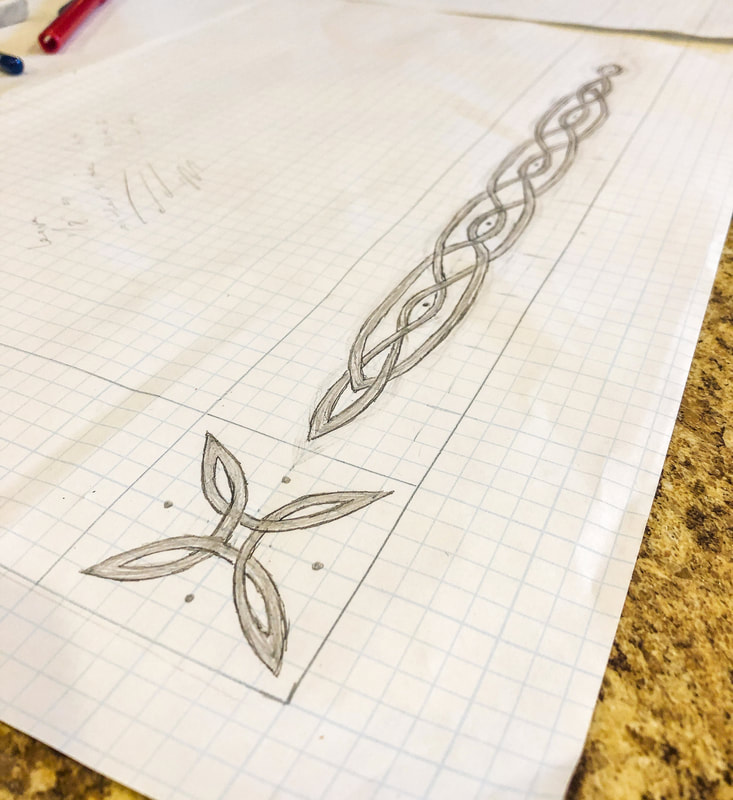 Finished knot work for template of the Celtic border. Photo by Diane M. Lilly, 2021. The template I made only needed the top and left sides with three corners, so some of the work could be simplified. Once the top and left side were traced, I could flip the paper over and retrace the design on the bottom and top. Using a very dark pencil, I traced the finished design on the back side of the paper, turned it over, and then lined it up on the frame. The paper was carefully taped down, and I painstakingly traced my knot design onto the two-inch wide wood frame. With the design template drawn onto the frame, it was time to paint! 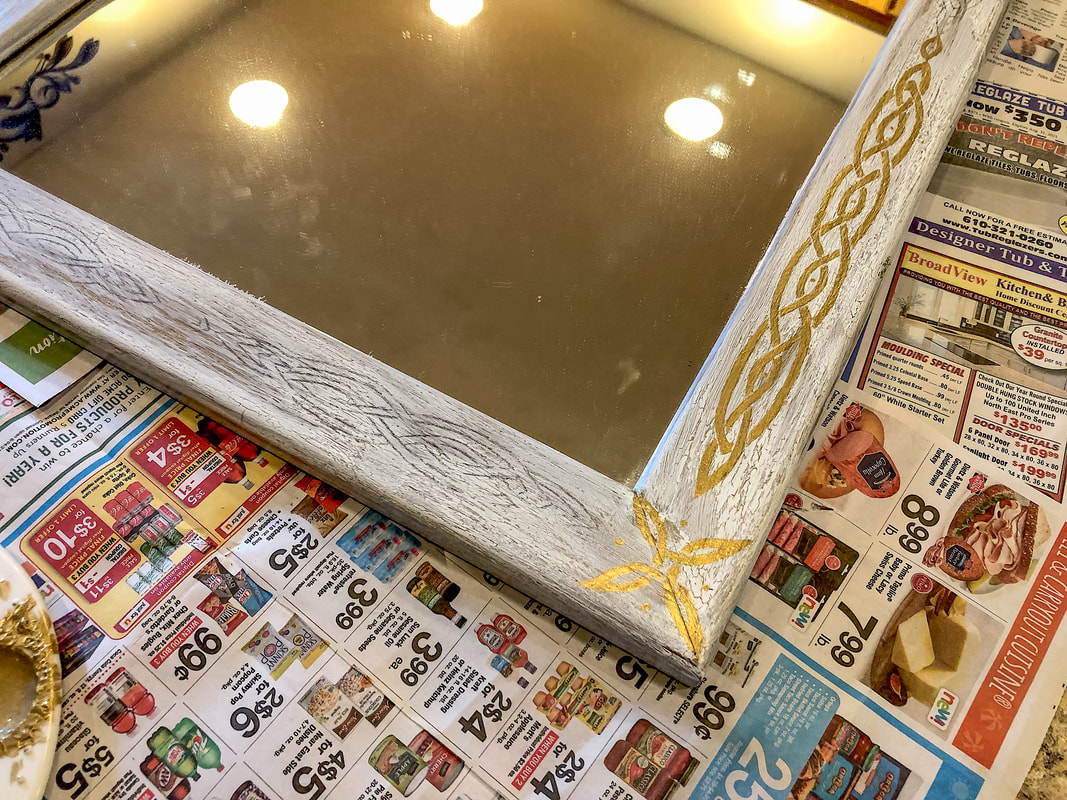 View of template on frame and some of it painted gold. Photo by Diane M. Lilly, 2021. The brush used was a very fine brush with bristles that came to a point, so that my very shaky hands could control the brush strokes! It took two very carefully applied paint layers to finish the gold knotwork, but this design element was the perfect touch and made all the difference in the world! I now have a work of art and a mirror that fits in well with all the other understatedly classy pieces of decor in that space. I love this piece, and it is versatile enough to use elsewhere should I decide to move it. But for now, it stands in pride of place above my new office drawers (which are in my dining room, but that’s another blog post!).  Finished painted knot work on frame corner. Photo by Diane M. Lilly, 2021. 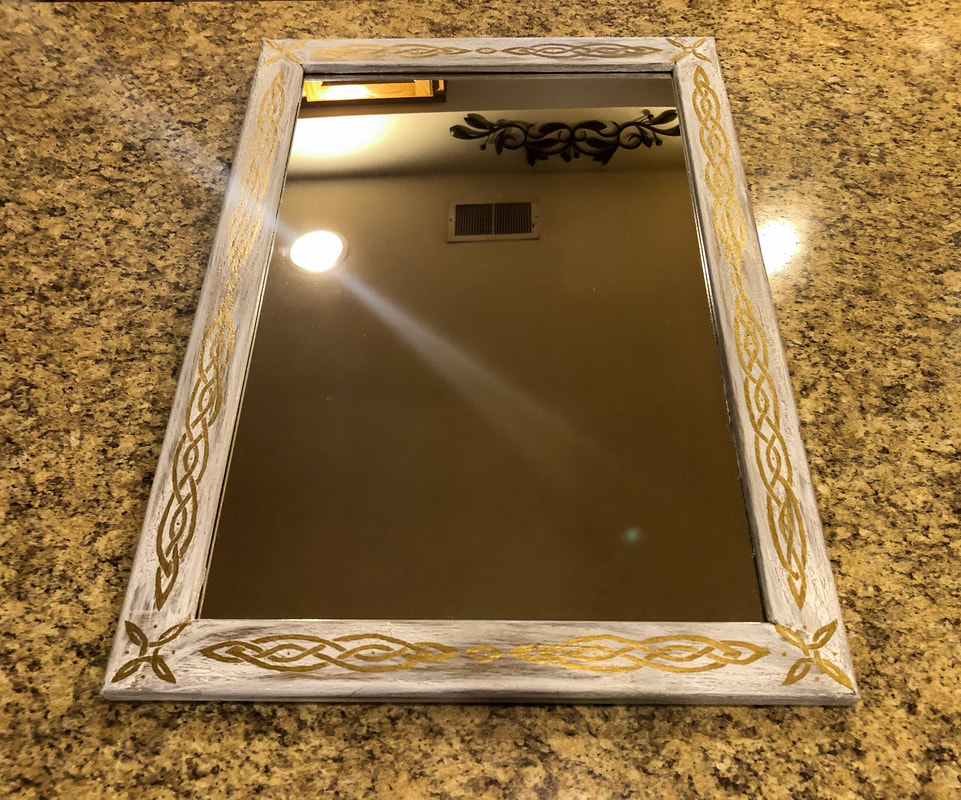 View of the frame and mirror with gold painted Celtic knot work border. Photo by Diane M. Lilly, 2021. 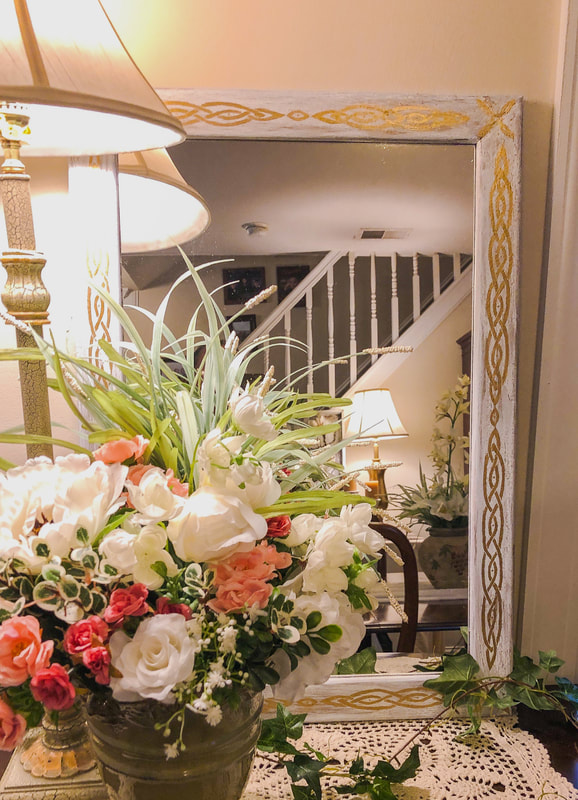 Finished mirror in a dining room vignette. Photo by Diane M. Lilly, 2021. 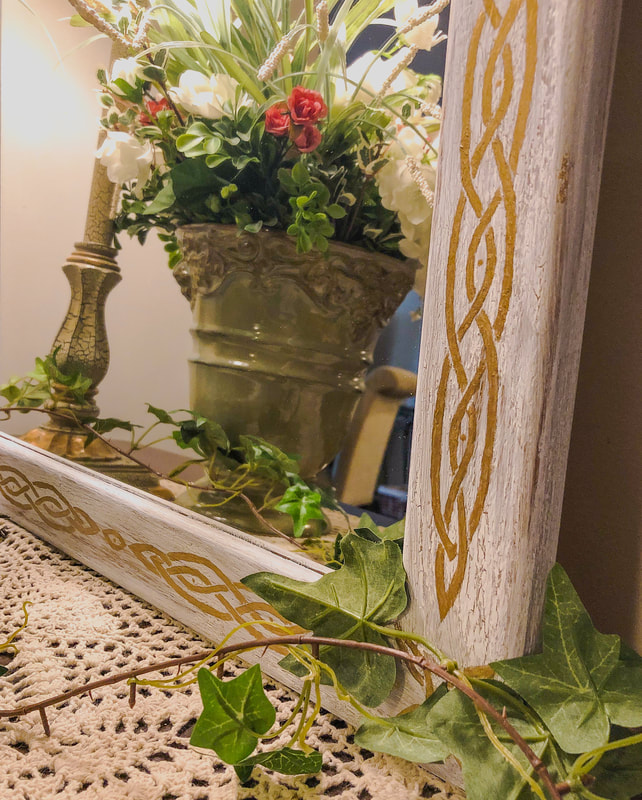 Closeup of finished gold painted Celtic knot work border. Photo by Diane M. Lilly, 2021. Let me know your thoughts on this project in the comments below, and don’t forget to read Part 1 to see how this whole thing started! Let me know if you’d like to see more of this type of project in the future. If you’d like to be notified of new blog posts or merchandise sales, you can sign up for my monthly newsletter (coming soon) on my contact page. And if you’d like to see what I’m up to on social media, click the links below! Related blogs you may want to read: Part 1 of this project My top thrift finds this year How to replace a clock mechanism How to frame small canvas art How to rewire thrift buy lamps DIY Fall/Winter decorative branch box Creating a kitchen coffee bar My dining room redesigned as a multi-functional space DIY refurbishment of a dining room cabinet 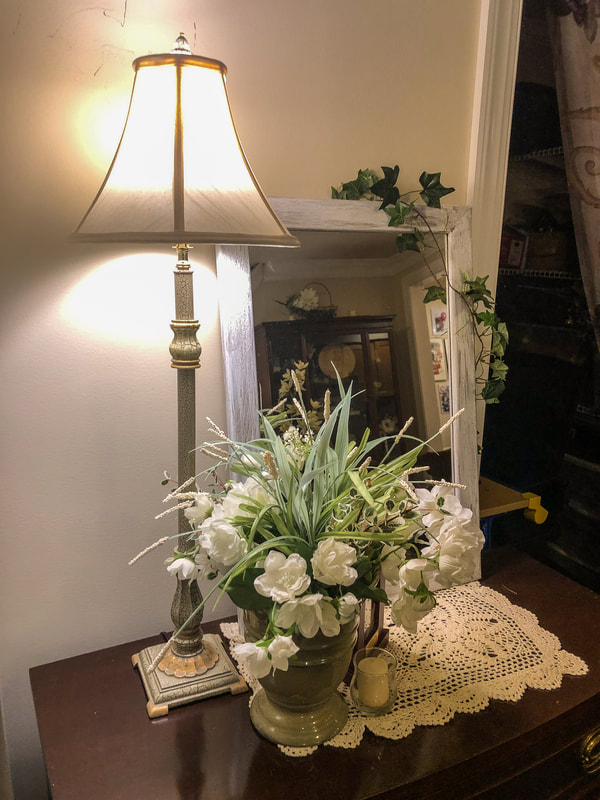 Finished painted mirror in dining room vignette. Photo by Diane M. Lilly, 2021. During a recent trip to my local Goodwill, I found this really sturdy second hand mirror with a nice wood frame. The mirror was marked 9.99, but I think I only paid 4.99 for it, which is quite a steal because mirrors this size (26” x 18”) go for close to $100 or more brand new. There was just one issue—it was the wrong color for my dining room! But no worries…That’s what paint is for!  Original frame before painting. Photo by Diane M. Lilly, 2021. I spent a few weeks thinking things over, trying to decide the right look for this mirror to help it blend into the decor style and color scheme of my space. Do I make it a white or cream? Would chalk paint work on this piece? Or do I paint it a dark reddish brown to match my furniture? Ultimately I thought that a cream would be too “samey” (since I’m already working on other pieces that are cream) and the dark brown would be too dark, so an aged gold look sounded perfect. 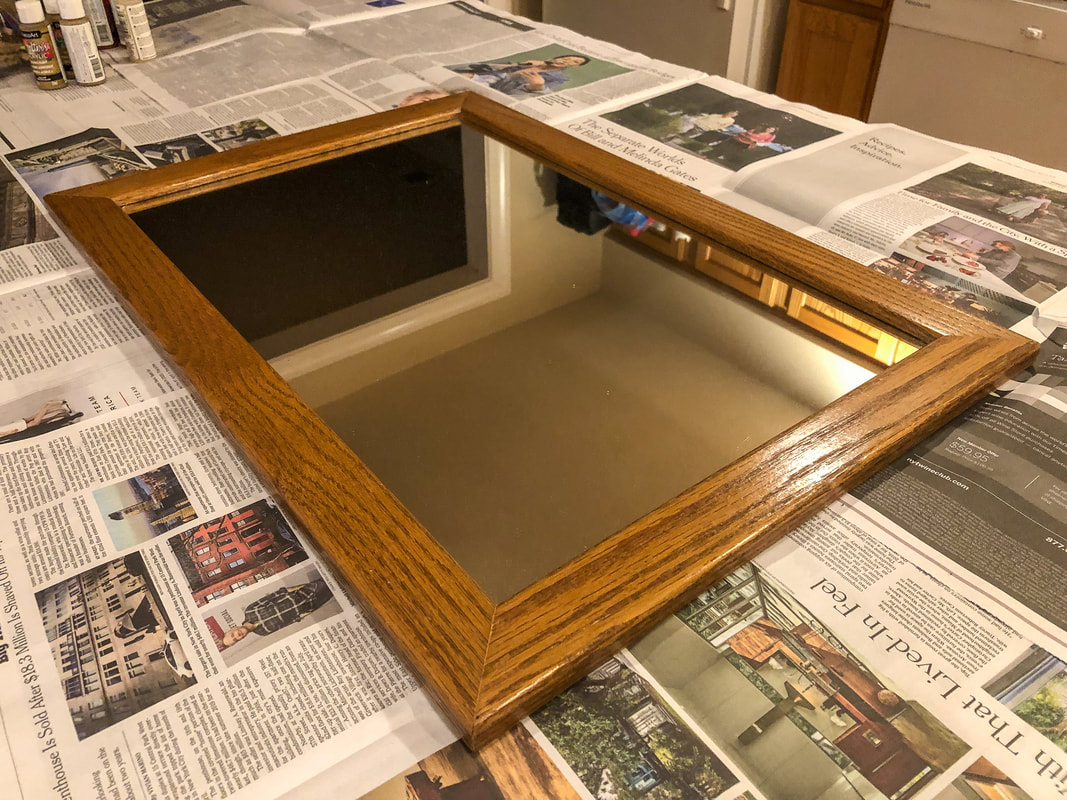 Frame ready to be prepped for painting. Photo by Diane M. Lilly, 2021. For this small project I experimented with a craft crackle medium called “Weathered Wood”—a medium I hadn’t used in (literally) years, so this project became a bit of a crap shoot, if you’ll excuse the expression. So let me walk you through my process… Step 1: Prep the frame for painting The screws, backboard, cardboard, and mirror were removed and put aside.  Removing the screws from the back to take out the mirror. Photo by Diane M. Lilly, 2021.  Mirror screws being stored in a plastic zip lock bag for safe keeping. Photo by Diane M. Lilly, 2021. I then lightly sanded the shiny finish with 100 grit sandpaper. (I didn’t need to sand off all the color because I didn’t necessarily mind if some of the darker aspects came through.) Step 2: Apply the base coat The first coat of paint was a reddish brown “primer” coat (it’s not technically a primer, but it’s more like the under color for the aged gold and copper effect I wanted to achieve.) One coat of that was sufficient. 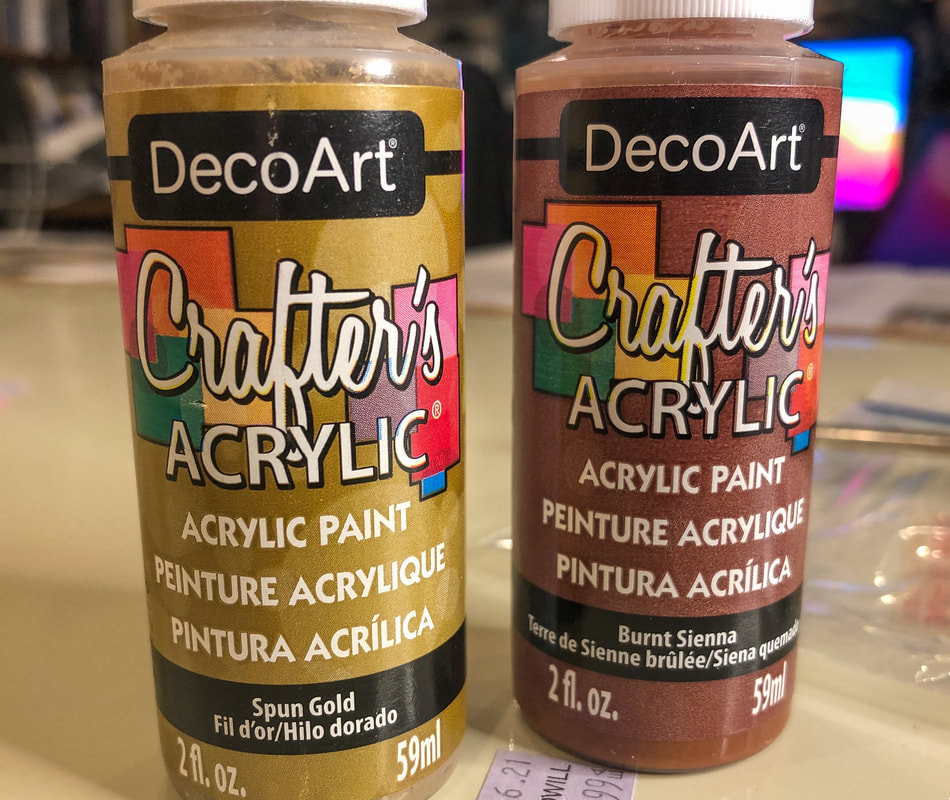 The base colors for my frame. Photo by Diane M. Lilly, 2021. 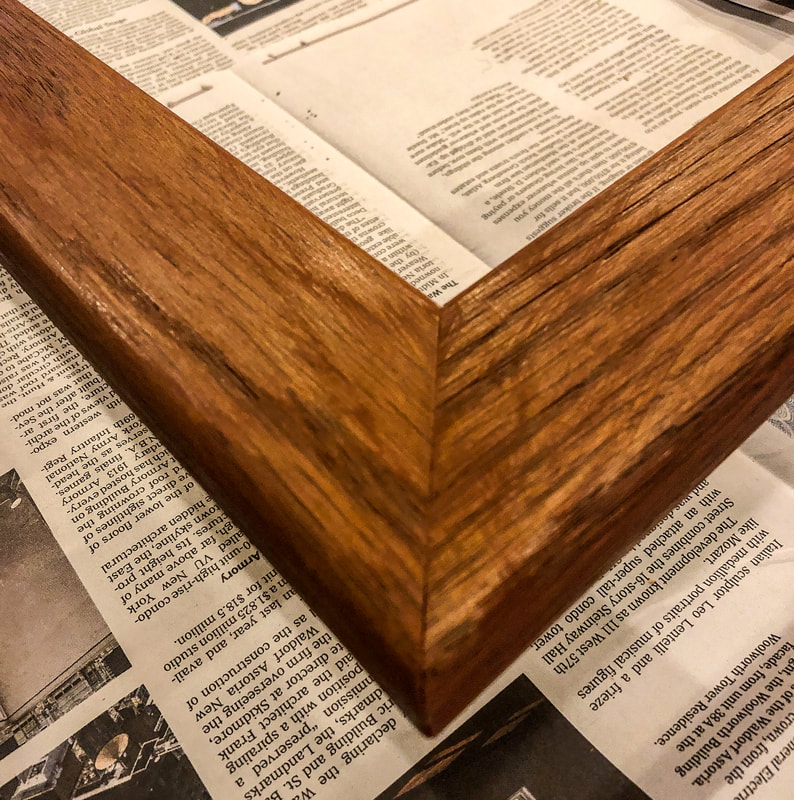 Frame with a base coat of reddish paint. Photo by Diane M. Lilly, 2021. Step 3: Apply the crackle medium The next step was to apply a thin layer of the weathered wood crackle glaze. I usually use Elmer’s glue to create a crackle effect in my painting projects, but I wanted to try something different this time, so I pulled out this crackle medium that’s been sitting in my closet. The crackle medium took about an hour and a half to dry. 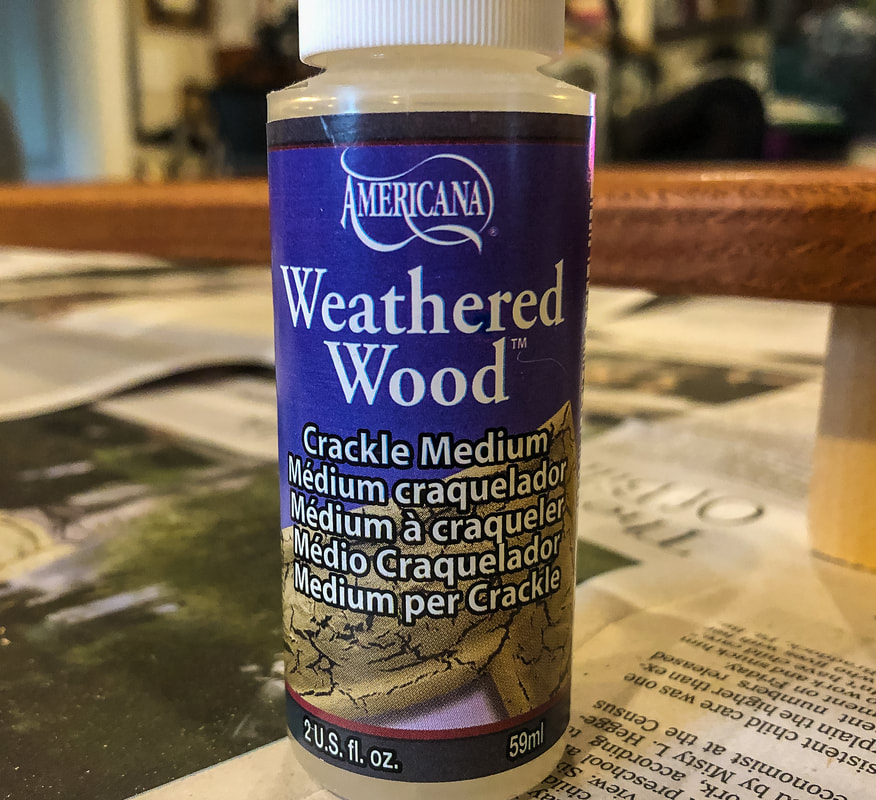 Weathered Wood crackle medium. Photo by Diane M. Lilly, 2021. 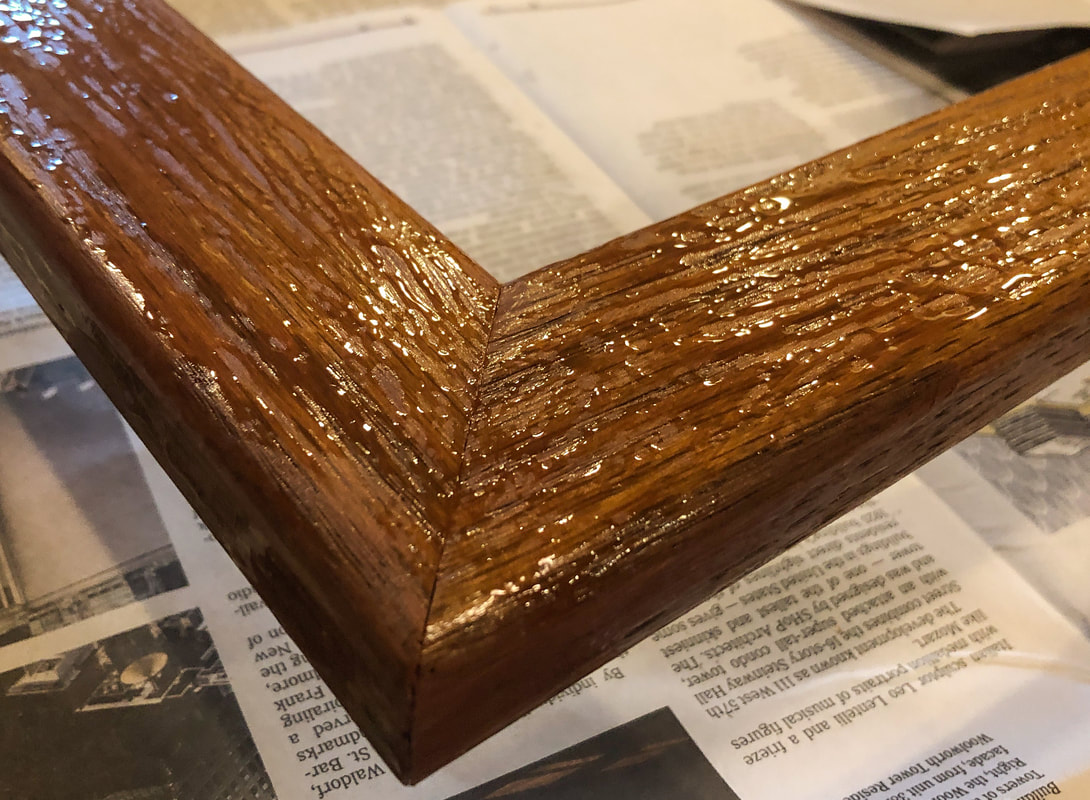 Crackle medium apply to frame. Photo by Diane M. Lilly, 2021. Step 4: Apply the gold paint I applied a “thin layer” of paint, as per the instructions on the bottle. As it was drying I really didn’t like the dark reddish color underneath that seemed to dominate the frame. I had been hoping for more of a gold hue, so I decided to apply a second coat of gold paint once the first coat had dried. 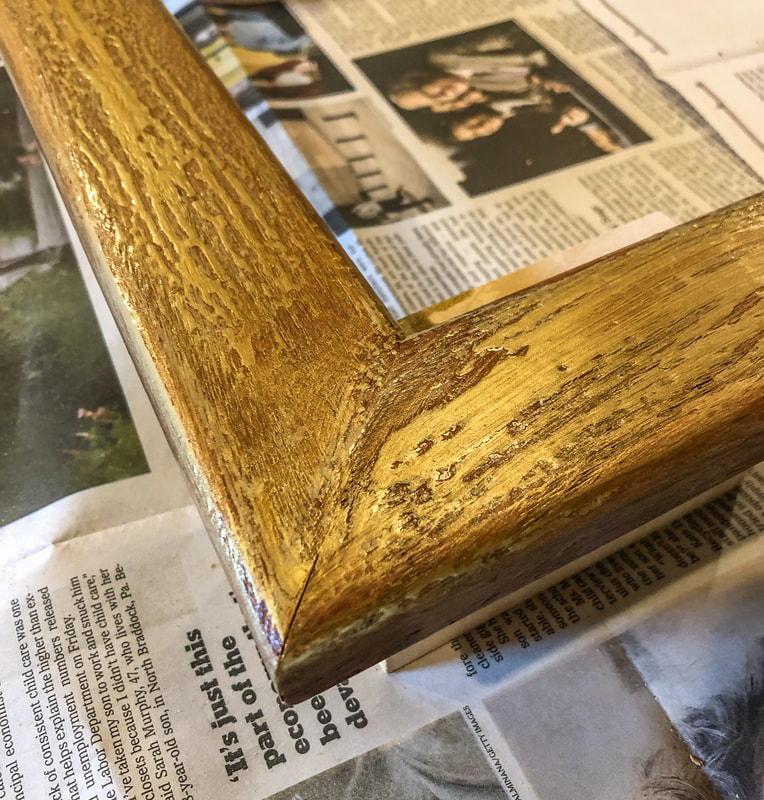 First coat of gold paint on frame. Photo by Diane M. Lilly, 2021. I like the crackle effect--and it is much easier (and more effective) than glue--but not the reddish-brown base color. In hindsight, I should’ve left the wood the original color and added crackle and gold paint. Thankfully, the second coat of gold paint did not ruin the crackle effect, and it did improve the color, but the reddish brown was still a bit too much for my liking. I applied a third—and last—coat of gold paint (sparingly) to bend out more of that copper color, and I did lose much of the crackle effect, but at that point it was more important to get the right color than to worry about the crackle effect. 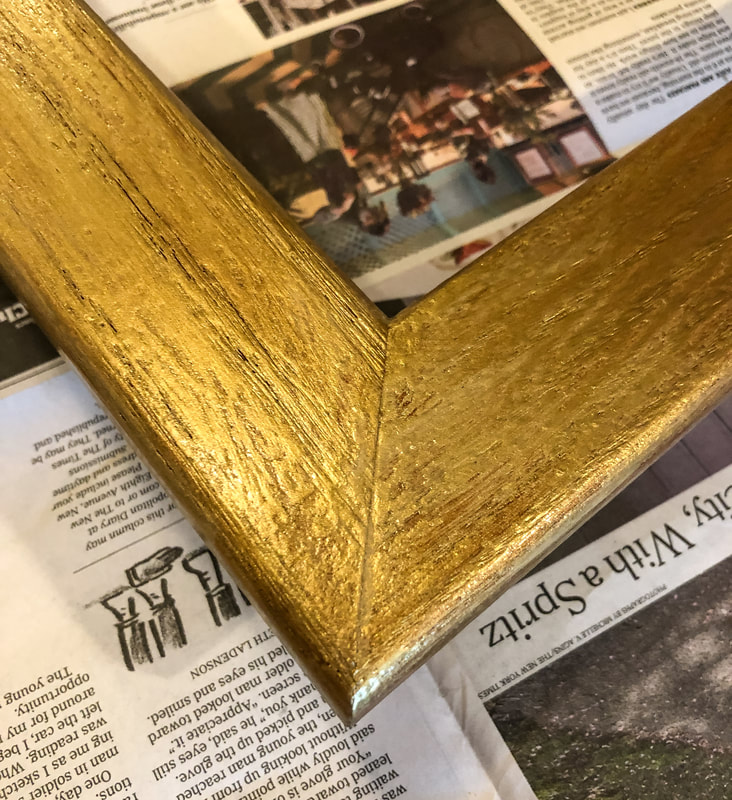 Second coat of gold paint. Photo by Diane M. Lilly, 2021. Step 5: Re-assemble the mirror The mirror, cardboard, and backboard were put back in place and screwed in. Gave the mirror a good clean…And decided I hated it! It looked way too gold and gaudy… I hated the look so much I couldn’t leave it a DAY in my dining room! So I slapped on another coat of crackle medium, let that dry, then used some white craft paint as the top coat. To be honest, I still don’t love it, but I think it looks way better than the gold color. 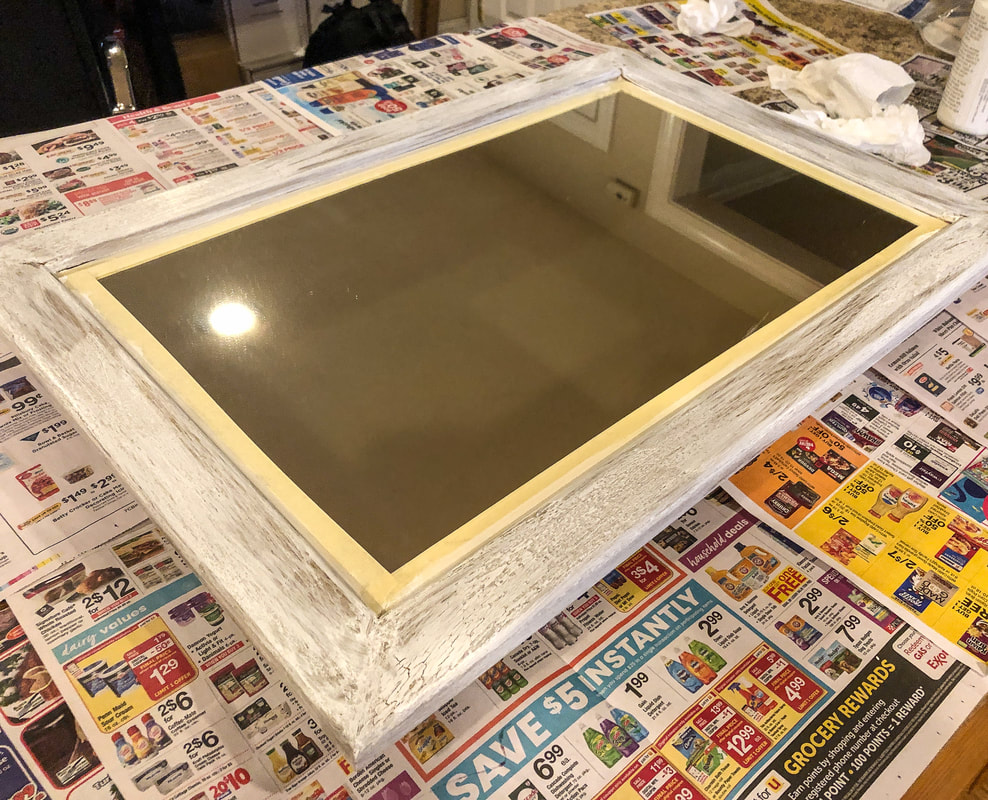 Final coat of white paint on mirror. Photo by Diane M. Lilly, 2021. 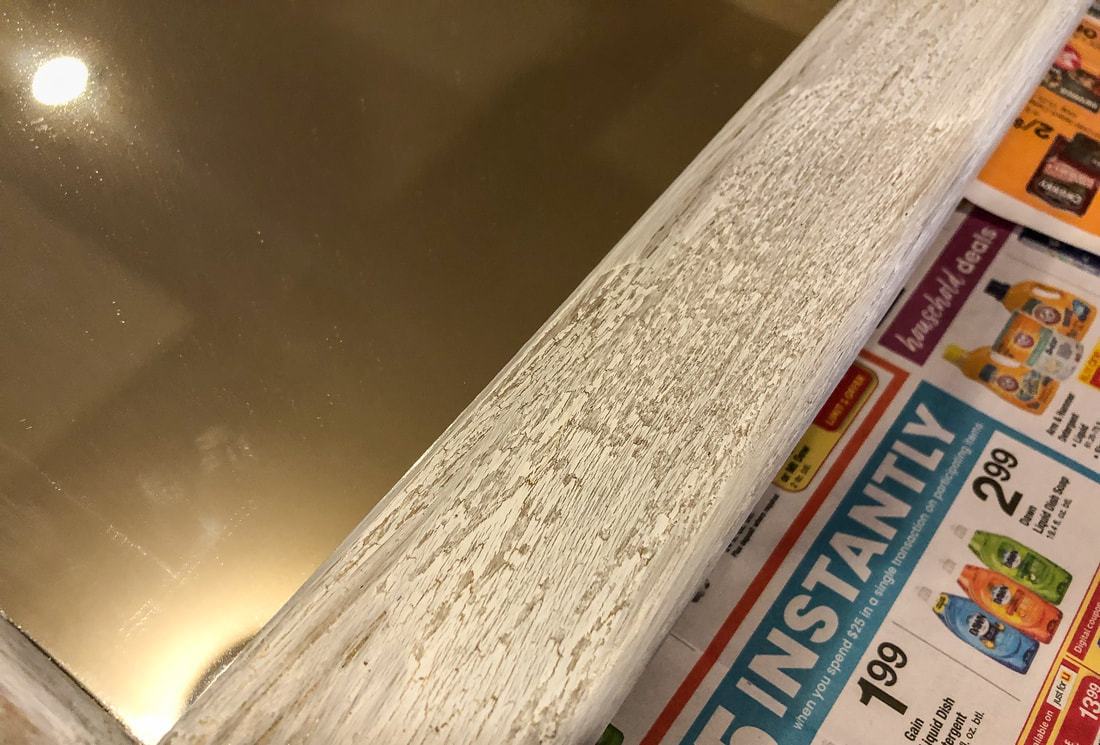 Closeup of white crackled paint on frame. Photo by Diane M. Lilly, 2021. 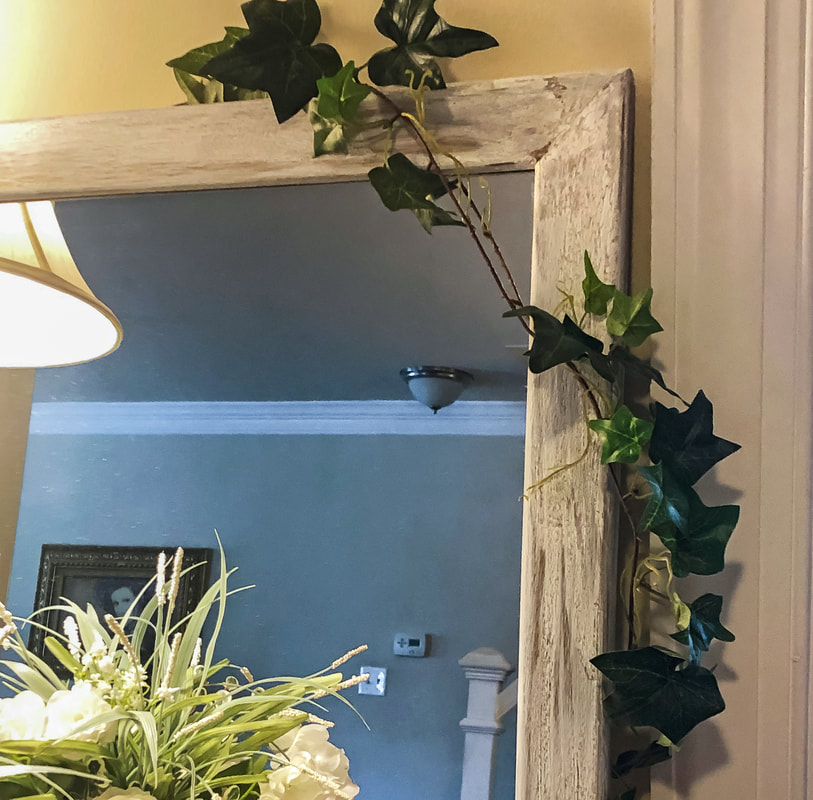 Mirror with newly painted frame. Photo by Diane M. Lilly, 2021. I think this project took about six hours fro beginning to end. If I had to do anything differently, I would’ve skipped the reddish brown base color and saved myself probably at least an hour. I wasn’t super precious about this project, because you can always paint over what you don’t like, right? It was a nice chance to experiment a little just to see what would happen. So what do you think about this project? Do you have any tips to share? Did you find this article useful? Let me know in the comments below and let’s see if we can get a conversation going! Just as an update…As it turned out, I had a Eureka moment a couple weeks later…What if I designed a Celtic knot border to paint on this frame? So I did! And what a difference that one idea made to this entire project! The end effect was beautiful and helped this mirror fit right in to the overall style of the room. You can read all about it in Part 2 of this project blog! If you’d like to be notified of new blog posts or merchandise sales, you can sign up for my monthly newsletter (coming soon) on my contact page. And if you’d like to see what I’m up to on social media, click the links below! There are some product images and links used in this blog article purely as examples. I am not being compensated for any particular products mentioned in this article. Related blogs you may want to read: Part 2 of this project with a Celtic knot border My top thrift shops finds this year How to replace a clock mechanism How to frame small canvas art How to rewire thrift buy lamps DIY Fall/Winter decorative branch box Creating a kitchen coffee bar My dining room redesigned as a multi-functional space DIY refurbishment of a dining room cabinet |
Author
Some of the posts on this site contain affiliate links. This means if you click on the link and purchase the item, I will receive an affiliate commission. 
Categories
All
Archives
April 2024
|