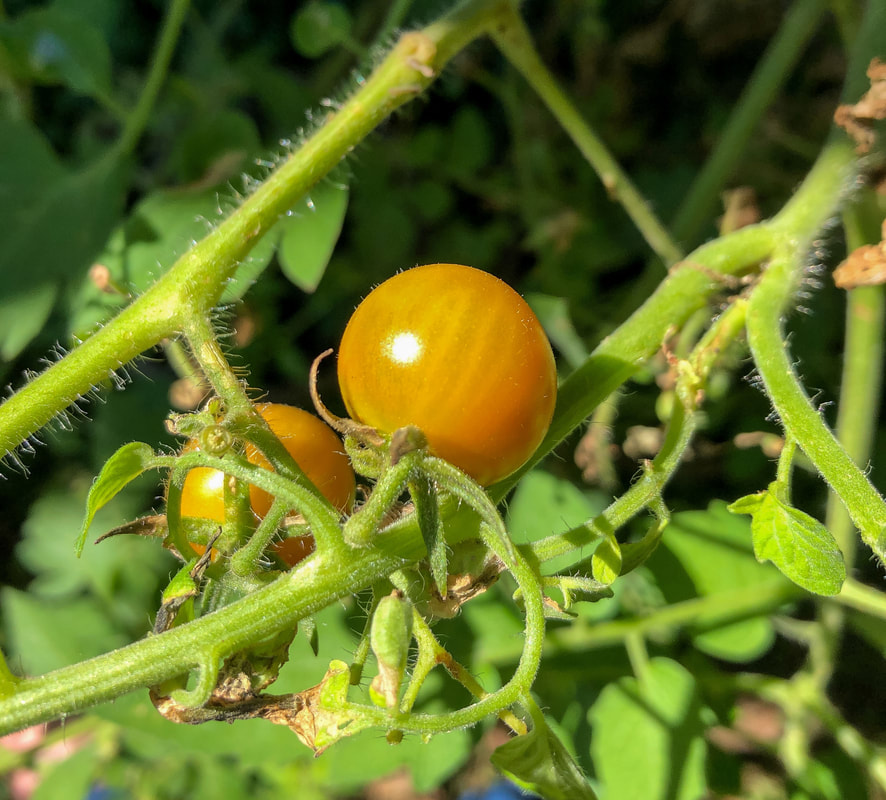
 My cherry tomatoes from last year. Photo by Diane M. Lilly, 2021. Last year, I grew tomato and cucumber seedlings in styrofoam cups on my kitchen's southwest windowsill. After a couple of weeks, they were a couple of inches tall! My cucumbers are once again rapidly growing. This year's cucumber and tomato seedlings (along with other herb seedlings) are sitting on my living room windowsill, which roughly faces southwest. 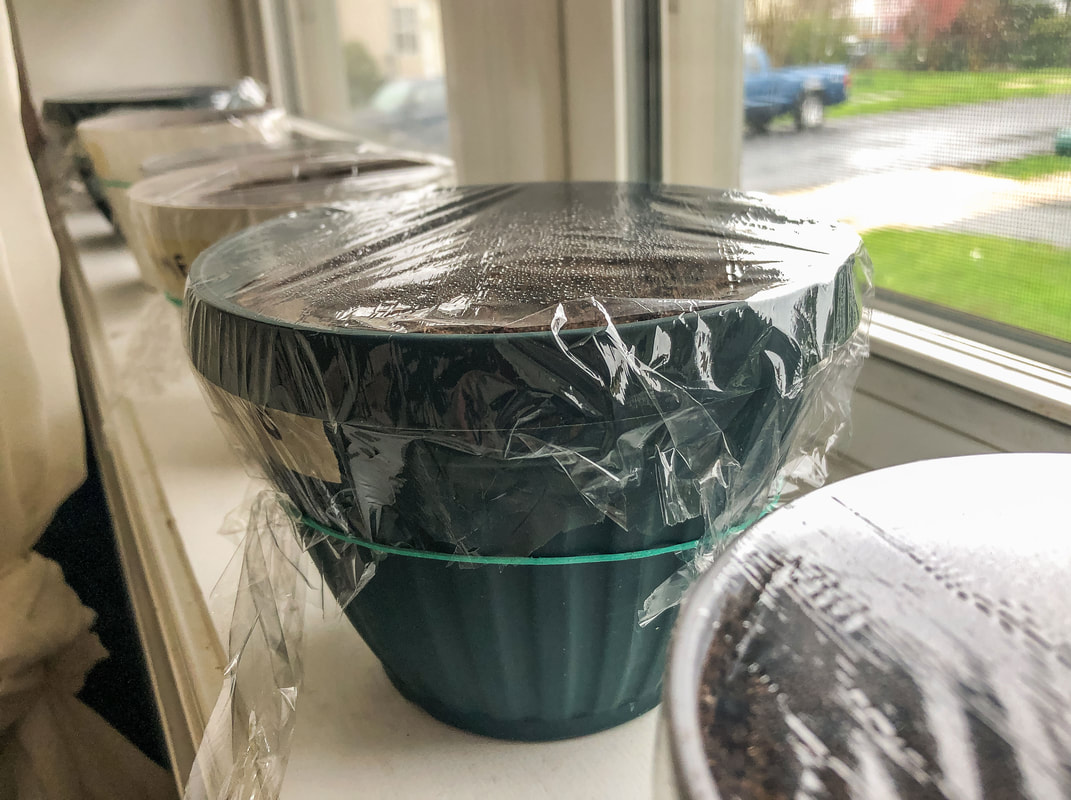 This year's seedlings growing on my windowsill. Photo by Diane M. Lilly, 2022. So this year, I'm sharing my gardening journey, pitfalls, mistakes, triumphs, and tips. This will probably be the first in a series of articles following my journey from planting the seeds to using my homegrown vegetables in recipes. Planting my tomato & cucumber seeds If you haven’t read it, you can read my blog on planting seeds, including tomatoes and cucumbers. The seeds are sown in small pots covered with plastic to help them sprout. 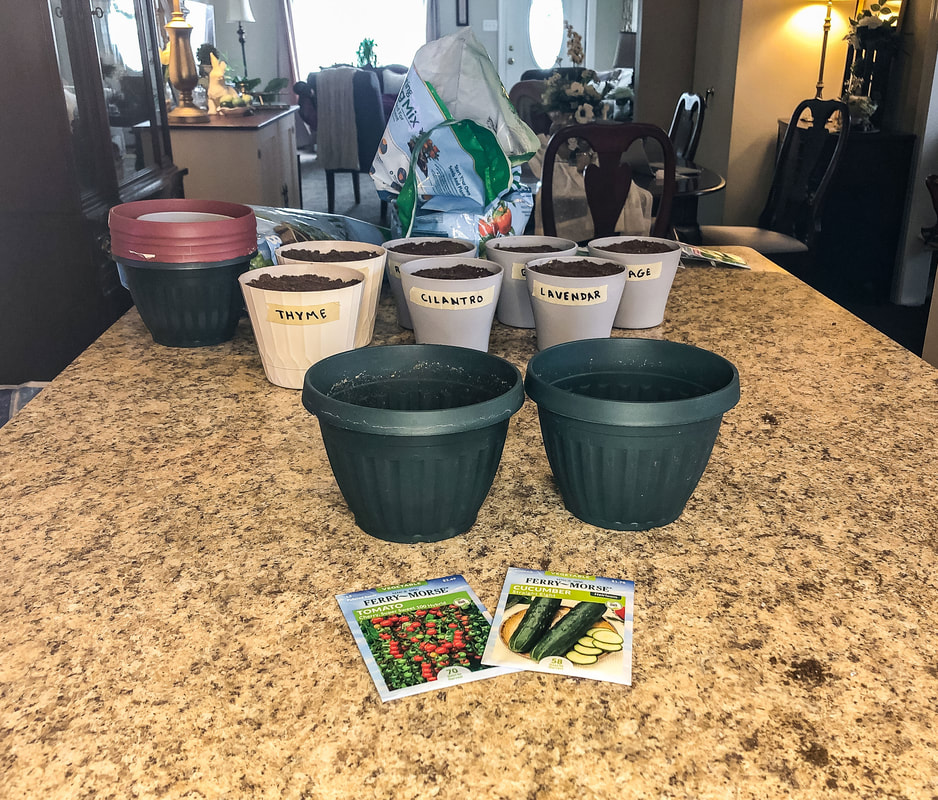 Pots and seeds for this year's tomato and cucumber plants. Photo by Diane M. Lilly, 2022. I tend to plant too many seeds in one pot, so now I’m stuck with the problem of which plants to cull or whether I can safely transplant some to other pots. Cucumber seeds are supposed to be planted no more than two per pot. Well, I planted probably 8-10 seeds in one six-inch pot! It’s a rookie mistake I make every year in my haste to plant seeds and get as many plants to grow as possible. 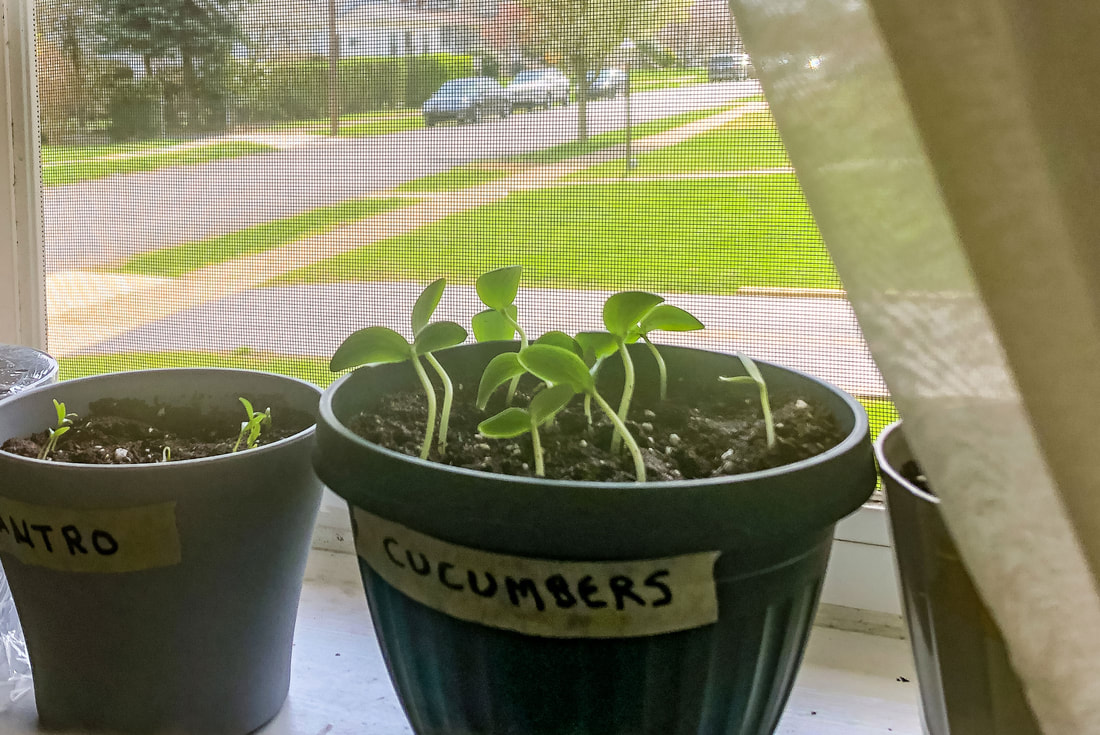 Cucumber seedlings after about two weeks. Photo by Diane M. Lilly, 2022. 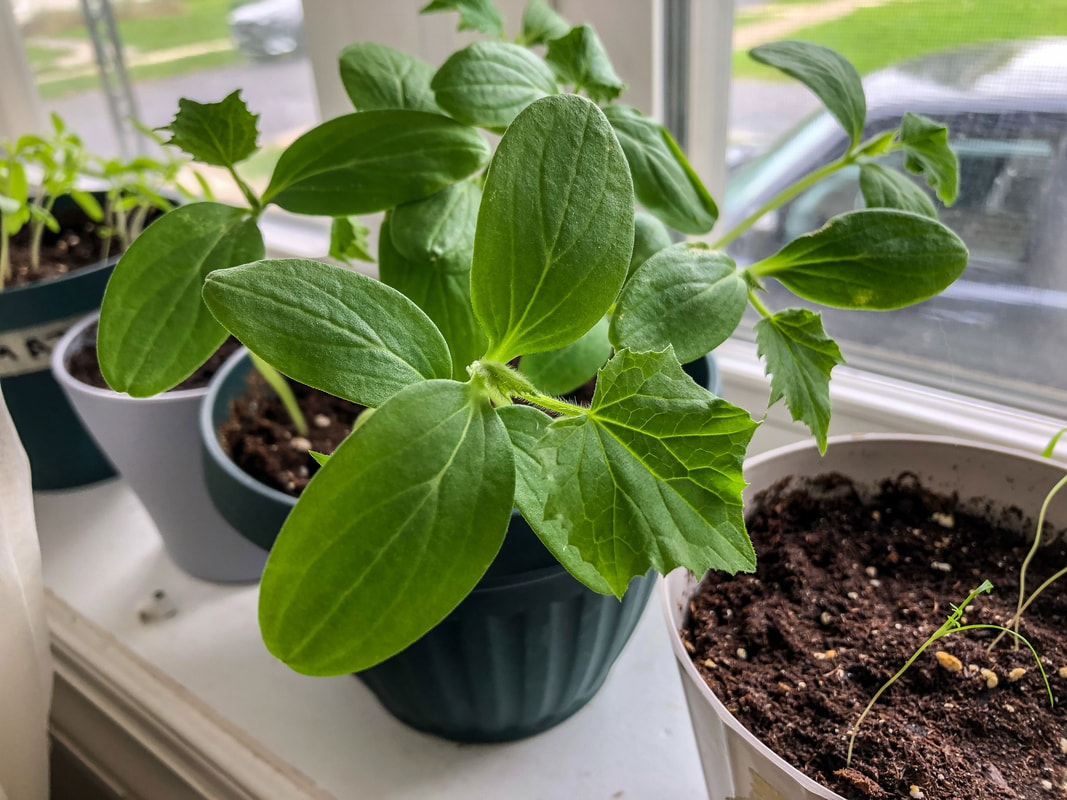 Cucumber plant getting its true leaves. Photo by Diane M. Lilly, 2022. So I called my dad—an avid gardener—for some advice. There’s good news, and there’s some bad news. The bad news is that cucumber plants don’t like to be transplanted or messed with, and I really shouldn’t have planted more than two in a pot anyway (so I could cull the weaker one). An even better option would’ve been to simply wait until the weather got warm enough to plant the seeds directly into the ground. The good news is that cucumbers sprout fast, and seeds are cheap! So if my little cucumber sprouts die, I can always purchase new seeds and replant. No harm done. As for the tomatoes, according to my dad, they are incredibly hardy and will most likely tolerate being separated and transplanted. He told me to plant two seeds per pot and only plant what I have room for in my garden. (As it is now, I have no idea what to do with the extra ten or eleven plants EACH of cucumbers and tomatoes! Maybe they'll be put in pots outside.) 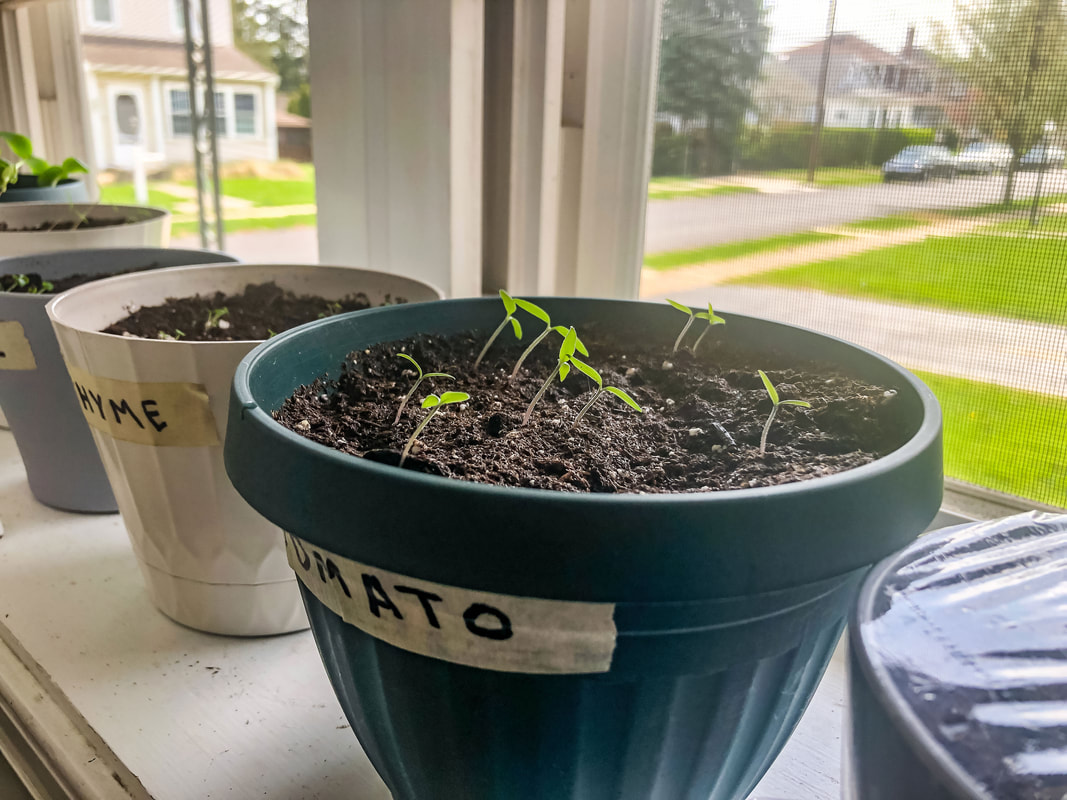 Tomato seedlings after about two weeks. Photo by Diane M. Lilly, 2022.  Tomato plants after about four weeks. Photo by Diane M. Lilly, 2022. How to separate the seedlings Which brings me to the next issue…How—and when—do I separate the tiny plants in the pots? Can I do that safely without damaging my fragile plants? Some sources say not to pull out the tiny plants but to cut them at the soil level so as not to disturb the roots of the other plants. So it may well be that I’ll have to cut at least half of my new seedlings. The newly sprouting seedlings will soon crowd each other, so there needs to be a plan to separate some or cut most of them down. But I should determine how many plants I can fit in my garden. It may well be that I don’t need all of the plants that came up. I still feel bad about killing off half (or more) of my new plants! And I may just pop some in pots, just so I don’t have to feel guilty about killing little plants. When to transplant outside Cucumbers can be planted outside when they have 3-4 leaves on them, and there is no danger of frost. The tomatoes should be about 4-6” tall before planting outside, with nighttime temps staying more or less above 50 degrees Fahrenheit. Small metal fence partitions (used as a lattice) are leaned against a wall in my garden so my tomatoes and cucumbers can climb. My dad helped me dig up the ground and add some better gardening soil in preparation for planting, so I’m hoping for better results this year. 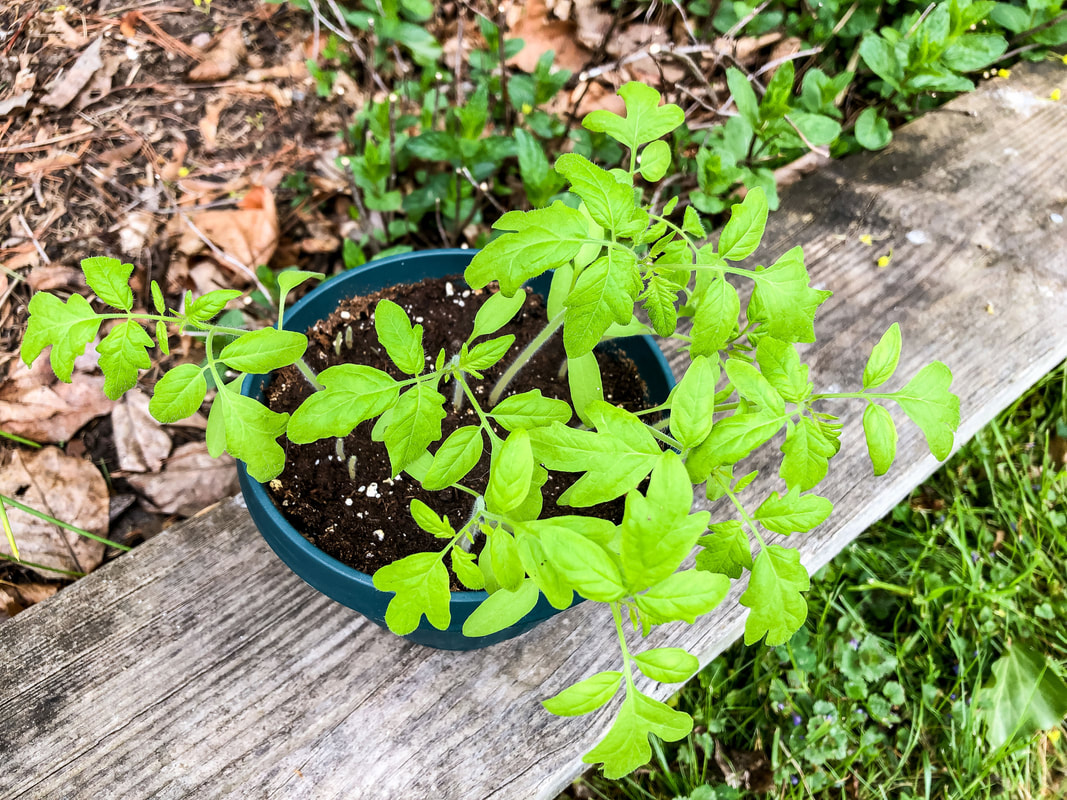 My tomato seedlings outside waiting to be planted. Photo by Diane M. Lilly, 2022. 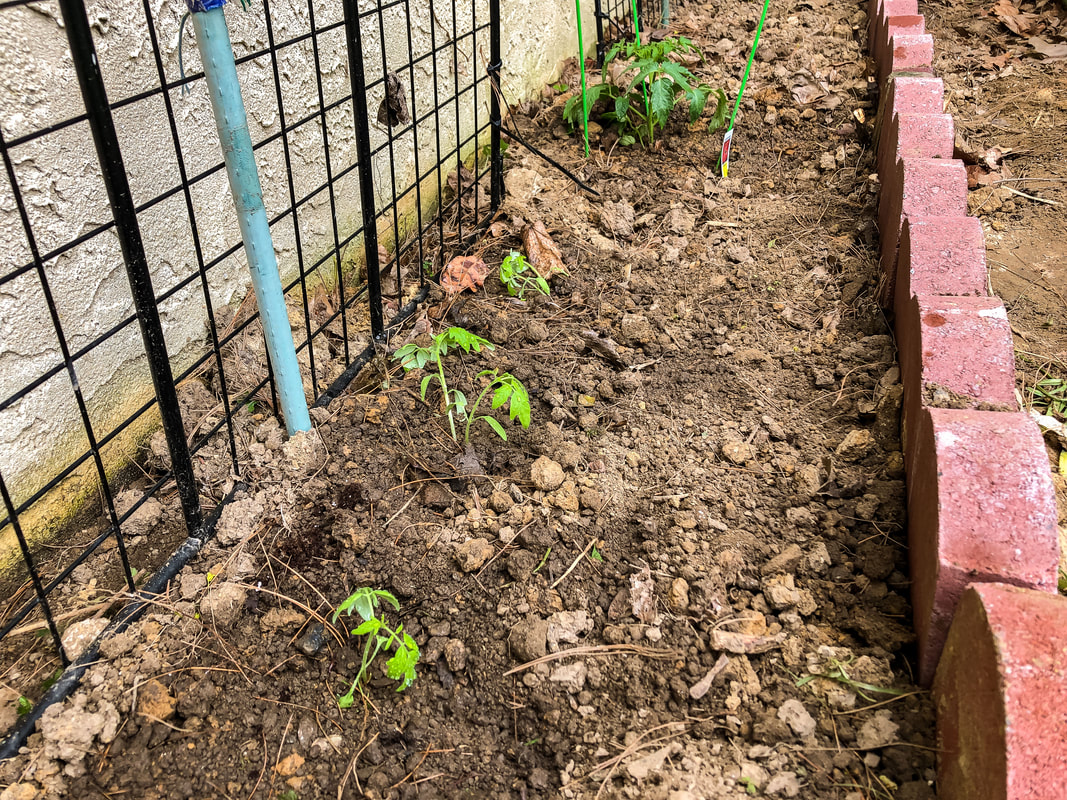 Tomato seedlings planted in the ground. Photo by Diane M. Lilly, 2022.  More tomato seedlings planted in a pot. Photo by Diane M. Lilly, 2022. Issues with growth from last year I have not gotten decent results the past couple of years growing cucumbers and tomatoes in pots. One of the things I will be on the lookout for this year is the blossom end rot on my tomatoes. There's been an issue with rot in the last couple of years. It’s an issue with the soil, the pH levels, and nitrogen. The soil needs less nitrogen and more phosphorous, and I need to regulate the water levels better. Also, growing these plants in pots is not optimal. Wherever possible, it’s better to grow them in the ground. I don’t have an issue with cucumbers, except that sometimes the fruit is small and gourd-like instead of oblong. This may also be a symptom of being grown in a pot with water level issues and insufficient nutrients. Changes will be made in the planting process (with help from my dad) to improve the soil, light, and watering needs. I would like to have a decent crop this year! I will try to provide updates, so keep checking back for more on this year’s garden projects! 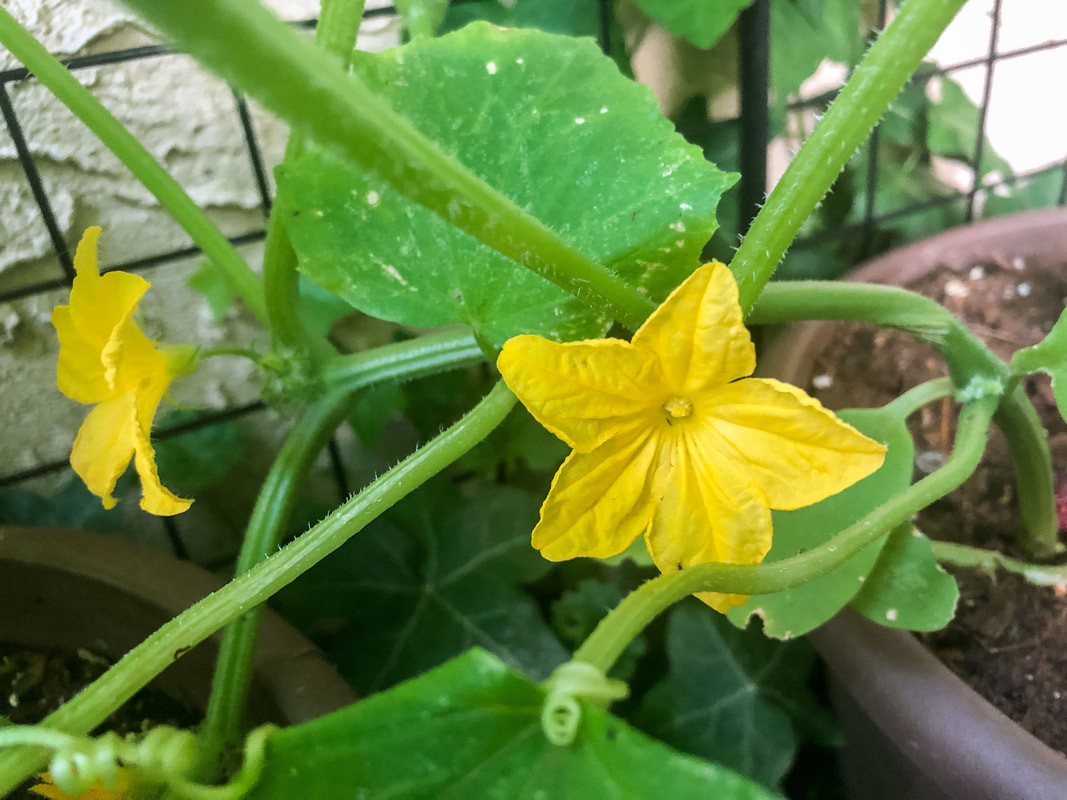 Yellow cucumber flower. Photo by Diane M. Lilly, 2021. 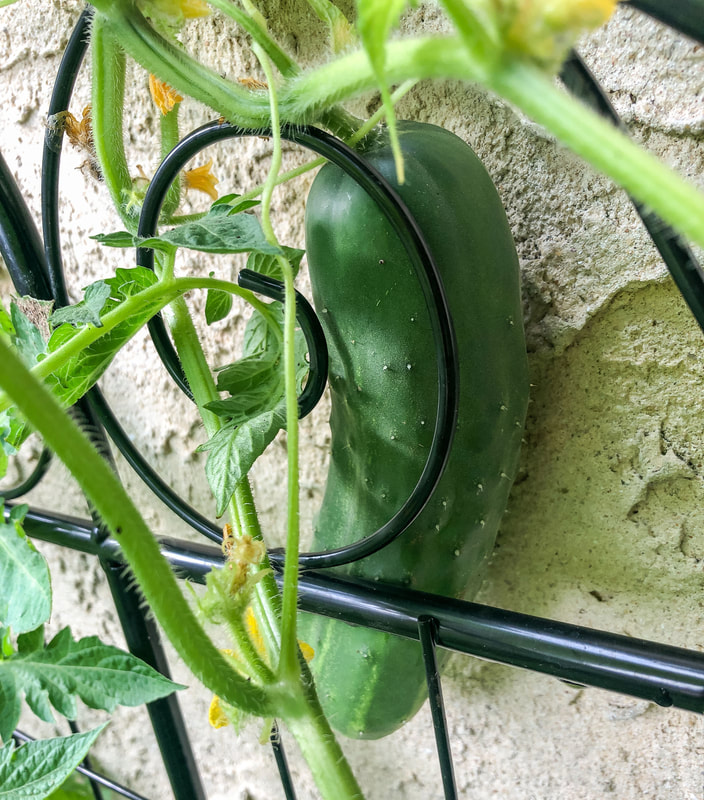 Last year's cucumber growing on the vine. Photo by Diane M. Lilly, 2021. 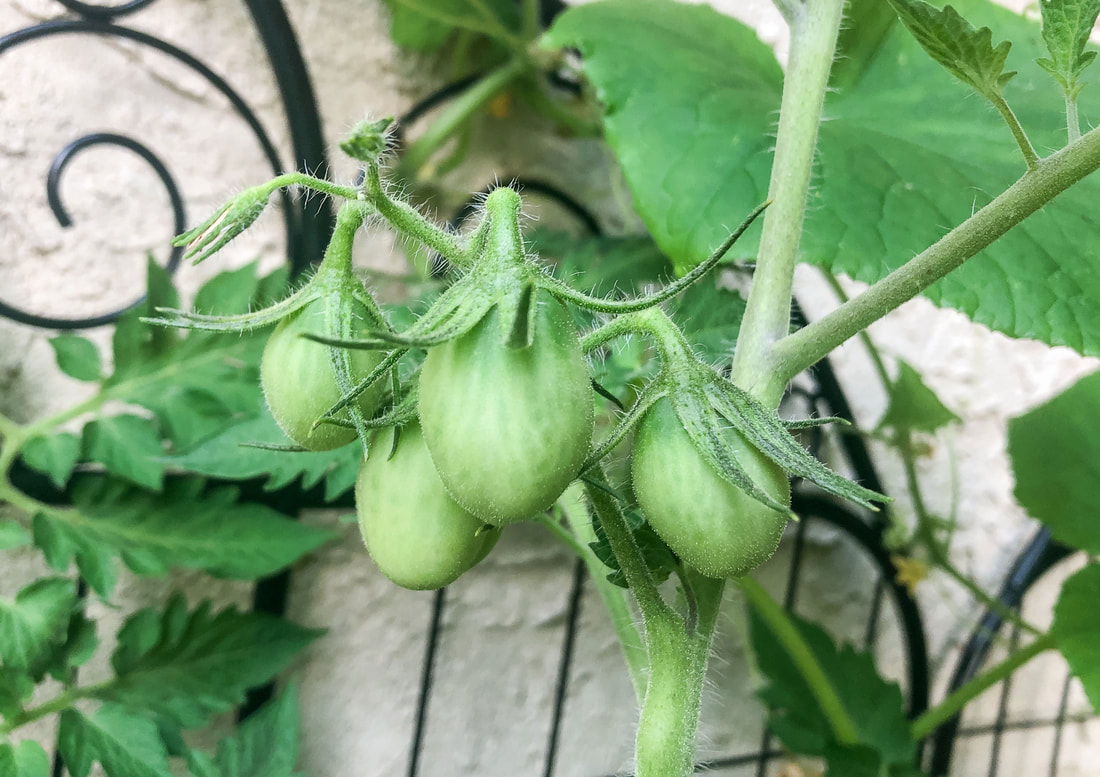 Last year's grape tomatoes growing on the vine. Photo by Diane M. Lilly, 2021. 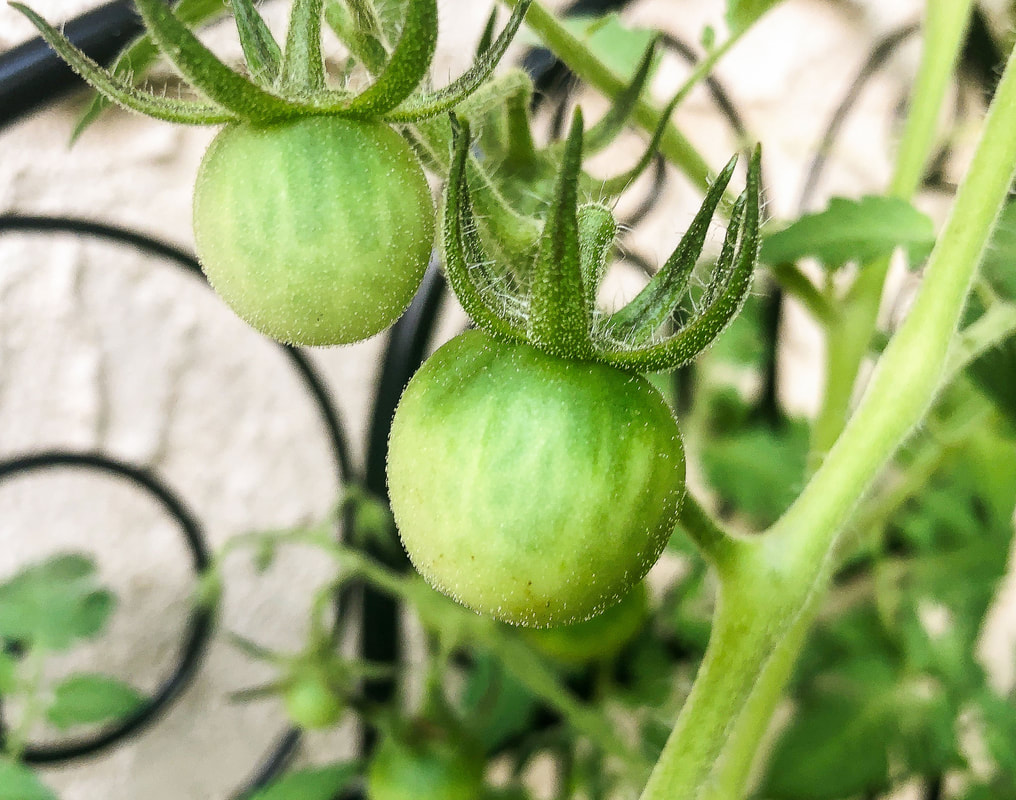 Last year's cherry tomatoes growing on the vine. Photo by Diane M. Lilly, 2021. Related blogs you may want to read: Tips for planting seeds indoors How to repot a pothos plant How to propagate bromeliad pups Six herbs I planted indoors It’s planting season again This article may contain a few items or commercial mentions, but I only used them for demonstration purposes only. I am not endorsing any particular product or receiving any monetary gain for this blog.
0 Comments
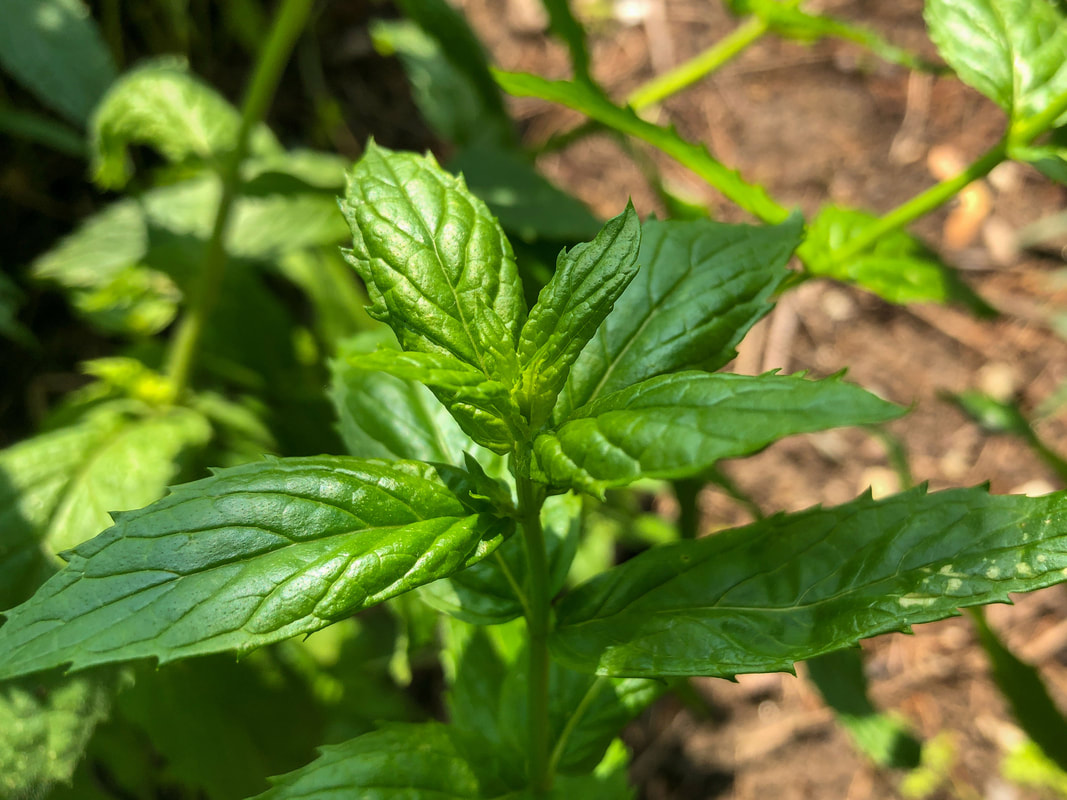 Mint in my back garden. Photo by Diane M. Lilly, 2021. Herbs…They are fun to grow AND useful for many things! This spring's goal is to increase the variety of my existing indoor and outdoor herbs. A second—but equally important—goal is to learn more about the care of these plants so I can get the most out of the growing experience. In my front window, there is a pot of leggy parsley. It had been growing outside last year quite beautifully, but I brought it indoors for the winter, and it’s become…well…a little spindly! It needs some TLC… 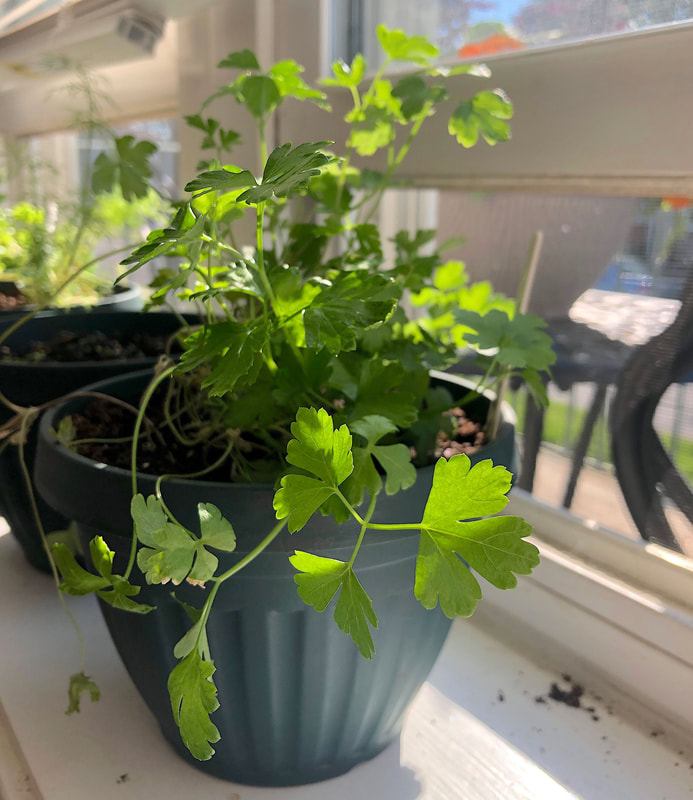 Parsley plant in the front window. Photo by Diane M. Lilly, 2021. This past fall, I also brought in a pot of thyme. The plant was lush and fragrant and doing quite well…and then it suddenly crashed! I have a couple of theories about that, mostly involving low light and forced dry heat. I guess that means I’ll have to plant more for this year’s crop and try again! There are a few herbs in the back garden from several years ago—chamomile, mint, chives, and sage. Everything has been growing incredibly well back there, but unfortunately, over-enthusiastic pruning may have accidentally killed the sage, so this year, I started some new plants from seeds. Lesson learned, I hope! 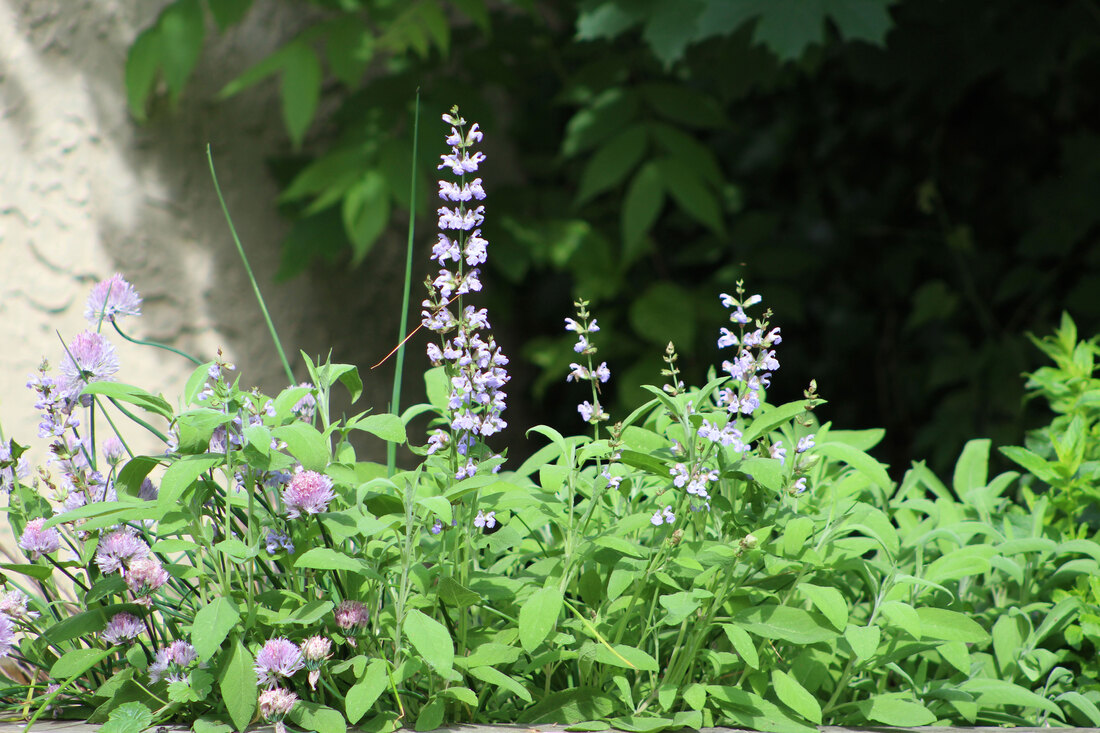 Summer herbs growing in my back garden. Photo by Diane M. Lilly, 2020. A few new additions are joining the garden—lavender, rosemary, basil, dill, and cilantro. All were planted from seed and are sprouting well so far. Today’s blog will discuss more efficient ways to grow these herbs, harvesting, storage, and how to use them for teas, cooking, and other household stuff. But--before we get ahead of ourselves--we have to help them to grow! My seedlings have begun to sprout, and it’s time to assess each plant's needs. So, let’s get on with it! Basil Basil is one of those herbs that is just so delightful, especially in tomato sauce. I planted basil for this purpose in my back garden a couple of years ago. It seemed to do well, but then it died off, and I never replanted it. I didn’t know then that basil is an annual (meaning it does not come back every year). This year, the pot on my windowsill with basil seedlings is destined to be an indoor herb plant. I’d like to see if I can keep it alive indoors (like I did with the parsley). 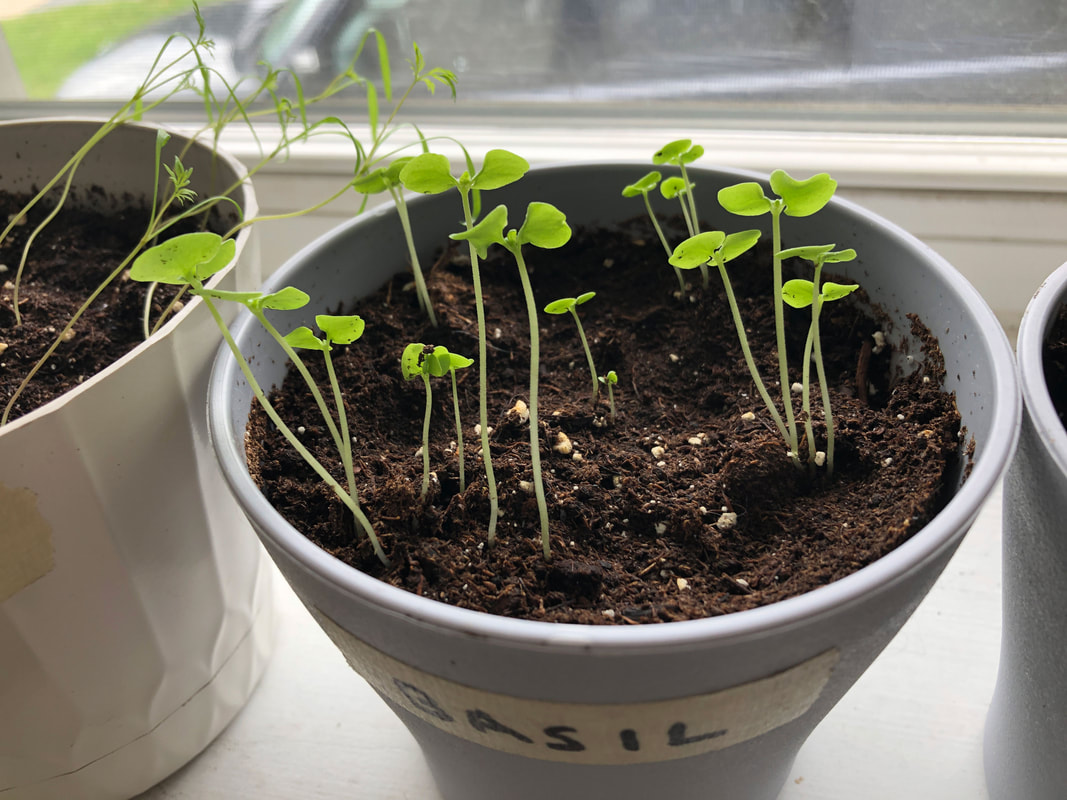 Basil sprouts on my windowsill. Photo by Diane M. Lilly, 2022. I’m getting off to a bit of a rocky start, though…I discovered (after the fact) that I planted too many seeds in the same pot, meaning I will need to cut back some of them to get one healthy plant. Basil doesn’t like to be transplanted, so it won’t do me much good to try to transplant the extra seedlings elsewhere…although it wouldn’t hurt to try! The worst that can happen is they die off. But I am worried I could accidentally damage the plant I want to keep, so culling the extras may be my only option. I just hate deliberately killing off perfectly good seedlings! 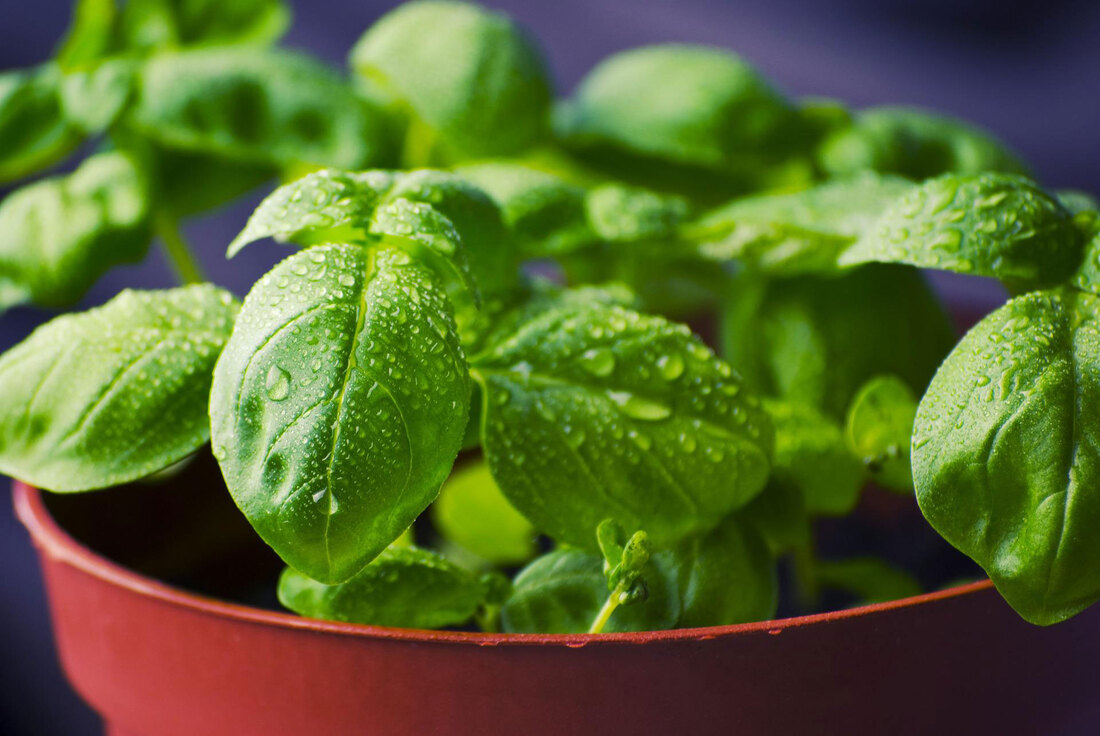 Image by tookapic from Pixabay. More growing tips for basil… Basil plants grow 12-24” tall, and basil seedlings need to be spaced 10-12” apart to give each plant space to bush out. The seeds for this plant will take 5-10 days to germinate. Basil needs a lot of sun and warmth—6-8 hours. This herb plant dislikes the cold (in nature, it grows in much warmer climates), so it will be essential to keep it out of drafts while in the house and bring it inside if outdoor temperatures get below 50˚F. This fragrant herb also needs plenty of water and nicely balanced soil levels to thrive. It likes moist, well-draining soil with pH levels between 6.0-7.5 (neutral to slightly acidic). Basil doesn’t need a lot of fertilizer, maybe a 5-10-5 plant fertilizer (a topic I’ll be covering in my next blog) every so often. You can begin pruning after about six weeks, clipping the center shoot to allow the plant to get bushy and produce more leaves. Pruning regularly—like with any herb—will force your plant to push out more leaves and keep it from flowering and going to seed too quickly. Essentially, pruning extends your harvesting season (another topic I will cover later in this series). You can start harvesting the leaves once the plant is 6-8” tall. Chamomile Chamomile is an incredible herb to plant in your garden, but you will need a lot of it--which won’t be a problem if it's outside because chamomile is one of those plants that like to self-seed. You could end up with a garden full of chamomile without even trying! I even found a chamomile plant growing out of a brick wall down the side of my driveway, far away from the original plant! So be aware that this plant spreads and could take over your garden eventually if you are not vigilant (unless that is your intention). 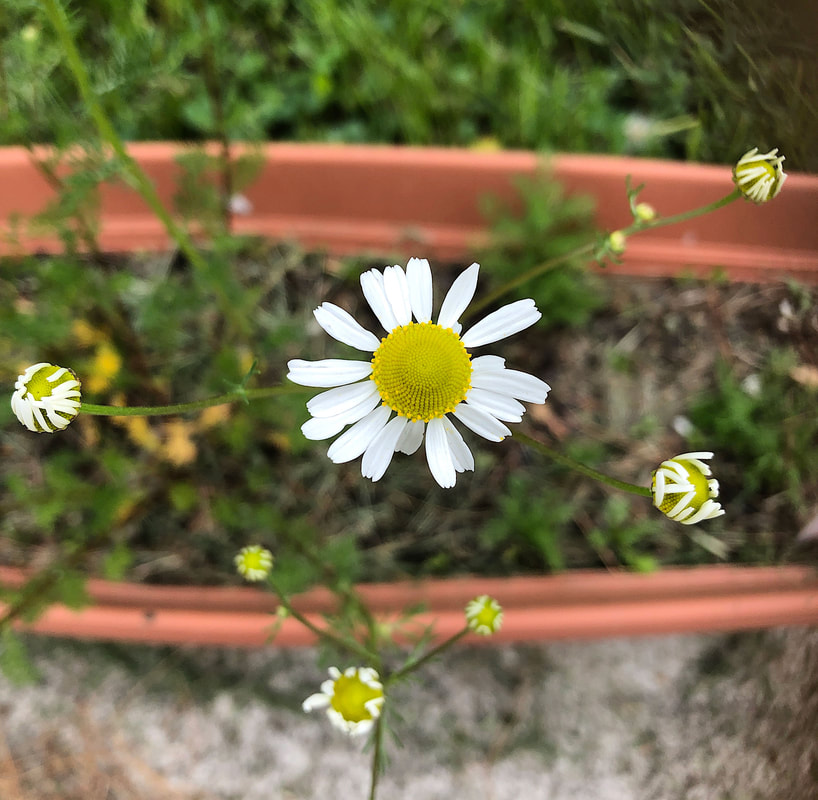 Chamomile growing in a planter in my yard. Photo by Diane M. Lilly, 2021. Last year’s chamomile plants were left outside all winter. They not only survived but kept green leaves through the entire wintry season. The foliage for this herb is quite feathery and dense, and the flowers for my variety grow tall (I may have planted the German variety), towering over the green foliage below. And let me tell you, this is the most aromatic plant in my garden! You get just a few feet away, and the gorgeous scent wafts your way, beckoning you to come closer! Bees and ants love it! Some general growing tips for chamomile… The chamomile plant is considered an annual—meaning it should only grow once a year and then die off. But if it is allowed to self-seed, more plants will come up the following year. Let me clarify…There are a couple of varieties of chamomile—a German annual variety and a Roman perennial variety. Both are hardy and aromatic plants that can potentially come back year after year.  Chamomile leaves from this spring's plant. Photo by Diane M. Lilly, 2022. This herb likes partial shade and just a little water. It’s drought resistant (but prefers cooler weather), so it’s not needy, like some other plants in your garden. This plant will grow wild (if conditions are right) and low maintenance. Don’t overwater it, and it doesn’t need fertilizer. Just give it the right spot and a little water, and let it do its thing! Chamomile blooms in the summer, and the flowers can be harvested for tea and other culinary uses. Picking the flowers regularly (plucking off the sweet flower tops, not the bitter leaves) will ensure more growth and more flowers to harvest. Pick the flowers in full bloom with no drooping petals. Chives Chives are another herb plant in my back garden, and so another plant I didn’t need to start from seed this year. The chives in my garden are still going strong, even after three years. The one thing I will need to do this year (sometime soon, as it is early spring) is to divide the clumps to get more yield from my plants. 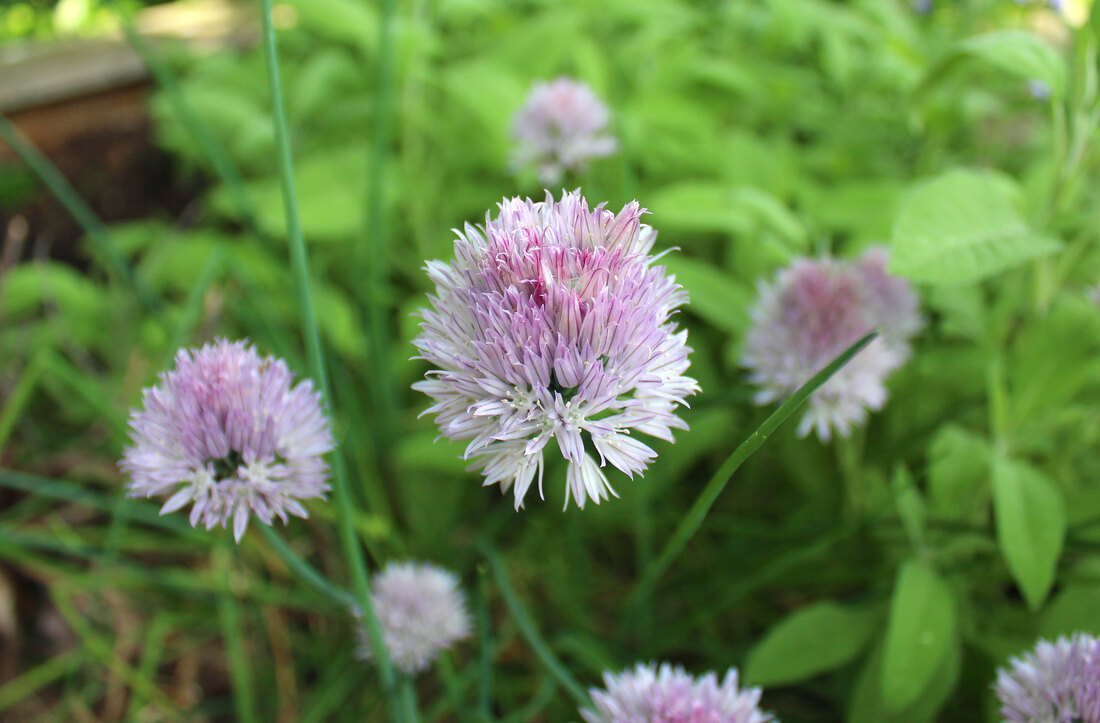 Purple chive flowers blooming in summer in my back yard. Photo by Diane M. Lilly, 2020. Some general growing tips for chives… My plant grows about 10-12 inches tall, but some varieties may grow taller. This plant is a perennial that is related to onions, garlic, and lilies. Plant the seeds 4-8” apart, and within six weeks, you’ll have new sprouting plants! This has proven to be a pretty hardy plant, surviving several heat waves with upwards of 100˚F for several days (with daily watering, of course), and it sits in full daytime sun in the summer. I water every day, either in the morning or in the evening. It likes well-draining soil with pH levels between 6.0-7.0. The plant produces purple flowers (though not in the first year) around early summer, which I tend to let go to seed so my little patch can spread. You can start harvesting chives 60 days after seeding by cutting small clumps a couple of inches from the ground. Cilantro I haven’t been entirely successful at growing cilantro. I planted coriander (cilantro seeds) two years in a row, and the plants looked promising at first. Unfortunately, though, the cilantro plants didn’t produce a lot of leaves, became leggy, and then just withered and died. So this year, I’m starting this herb from seeds again to learn what I’ve been doing wrong! I already discovered that cilantro does not like to be transplanted, which I did last year as I transitioned the new plants outside. I also just threw them outside, skipping the gradual process of “hardening” (or slowly acclimating) the plant. This year, I will probably keep this plant in a small pot inside, moving it outside now and then. 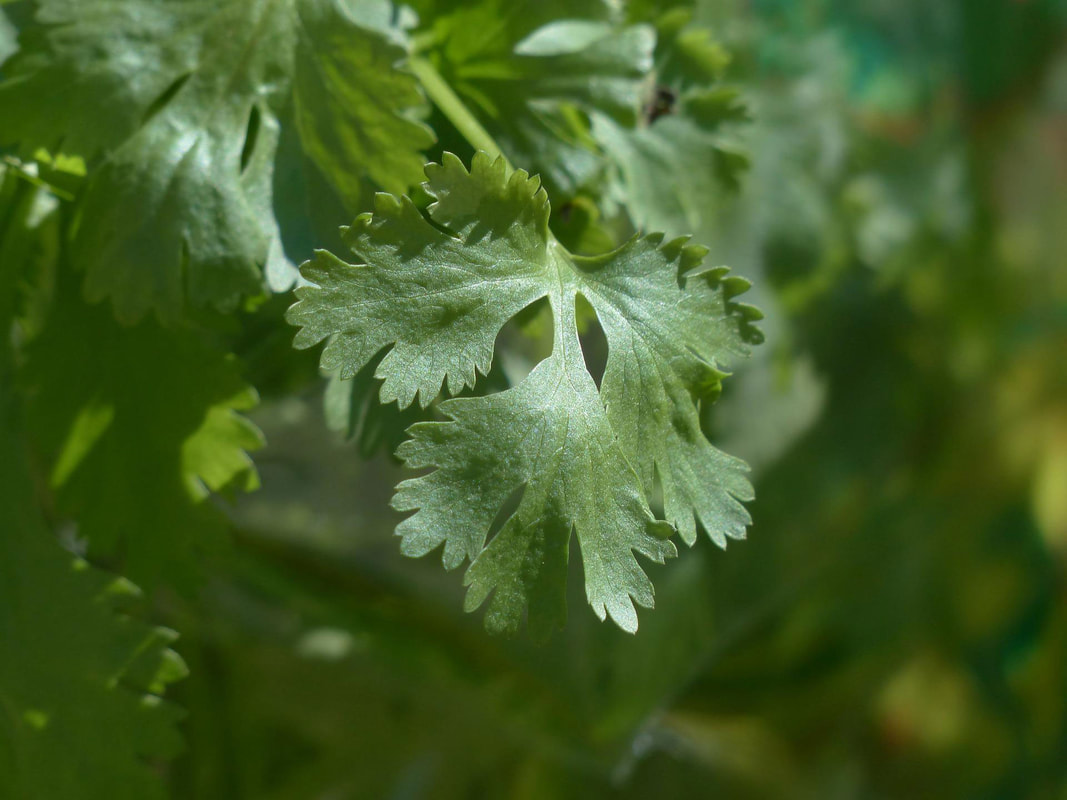 Image by Hans Braxmeier from Pixabay. Some more growing tips for cilantro… Cilantro is an annual (meaning you have to replant each year). It’s no accident that it looks like parsley, as it is in the same family. I often get my parsley and cilantro plants confused if I don’t mark them! It even has a taproot-like parsley, so it needs enough space underneath to accommodate that type of root system. (A taproot is a long, thin root that reaches several inches under the soil.) The seedlings for cilantro germinate in 7-10 days and reach maturity in 45-70 days. A healthy cilantro plant can grow 12-24” tall. New seeds can be replanted every 2-3 weeks in summer, the height of its growing season. This plant likes full sun but not too hot; you may have better luck with a spot in partial shade. It needs well-draining soil but does not like to dry out. To harvest, cut the outer stems when the plant is at least 10-12” tall. Harvesting regularly will extend the life of the plant. Dill This feathery herb has me a little perplexed. I planted it from seed last year, then transplanted it outside into a garden planter. The plant came up nicely but got very tall and leggy. (I’m noticing a trend here with my herbs growing long and leggy instead of bushy.) I have yet to grow a bushy dill plant, which I want. So, I planted dill seeds again this year, intending to grow this herb in a pot mostly inside. 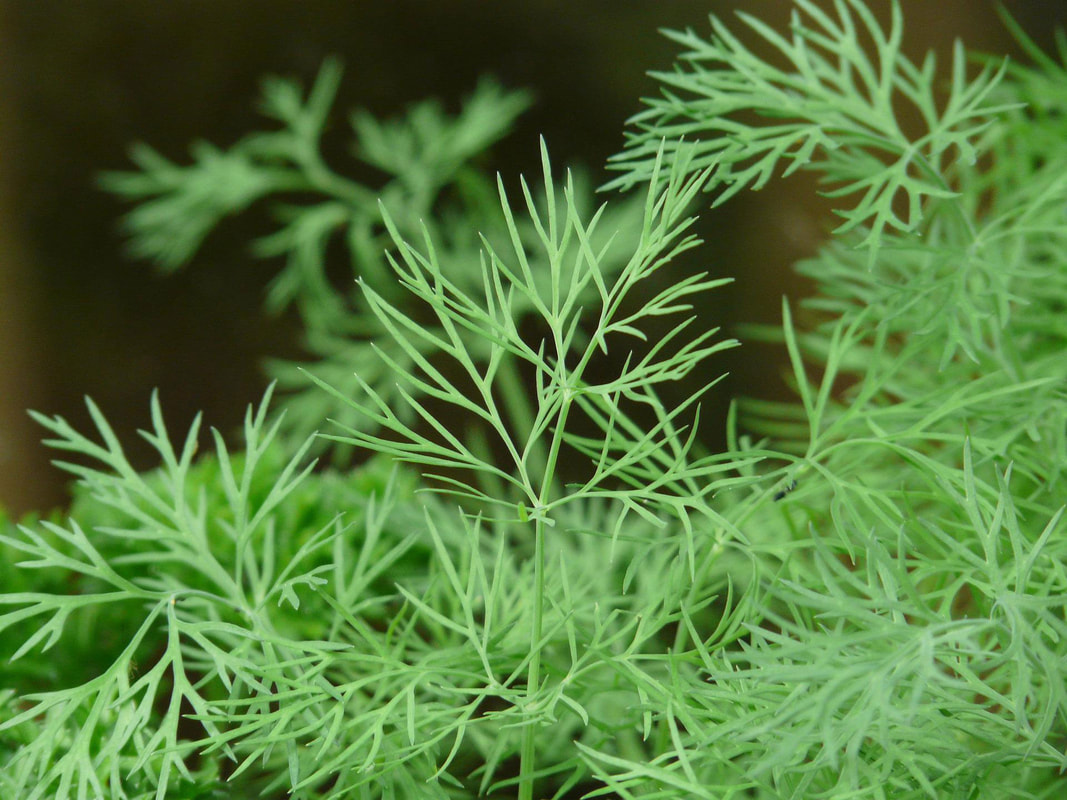 Image by Hans Braxmeier from Pixabay. Some general growing tips for dill… Dill likes full sun and heat and should grow 2-3 ft tall, producing yellow flowers in summer. Grown from seed, it will take 7-10 days to germinate and about 90 days to mature. This herb doesn’t like to be transplanted, and when you plant the seeds, they should be spaced 12-15” apart. The dill plant develops a taproot-like parsley, so the pot has to be deep enough to allow for that long root column. This herb likes well-draining soil with a pH level of 5.5-6.7. Water well, and do not let dry out. Dill—like chamomile—can self-seed in the right conditions, providing you with new plants next year. (Technically, this is an annual plant.) Otherwise, you can harvest the leaves just before the plant flowers and go to seed. Lavender Okay, so who doesn’t love lavender plants?! I have tried (unsuccessfully) to grow lavender from seeds for the past two years. So, I’m trying again this year to figure out where I keep going wrong. It is said to be very difficult to grow lavender from seed, and most people buy a young plant to get them started. But I am nothing if not stubborn…and seeds are cheaper than buying a plant! 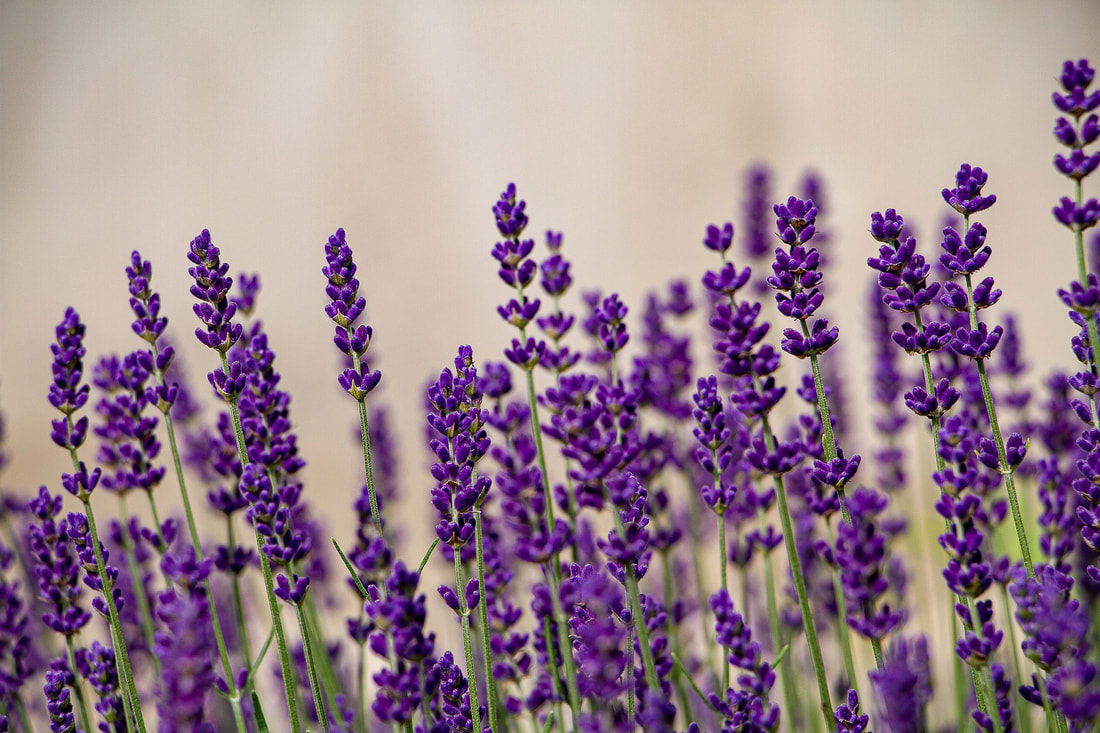 Image by Sabrina Wisian from Pixabay. General growing tips for lavender… Lavender is a perennial that likes full sun but low humidity. Soil quality isn’t an issue, but lavender does need soil with good drainage. Do not overwater! The seeds take 4-6 weeks to germinate and should be planted 18-24” apart. Lavender can be transplanted at about 3” high and will grow to 12-36” tall. This fragrant herb blooms between June and August, pushing out stalks of colorful purple flowers. Harvest lavender by cutting above the woody growth on the stems. Mint The one herb I have absolutely no problem growing is mint! I planted this in my garden a few years ago, and if I’m not careful, it will take over the whole yard! Growing this plant requires some diligence. If you don’t want it to end up all over the place, strangling other plants, you’ll need to take time out—frequently—to pull runners and cull back areas that are becoming invasive. 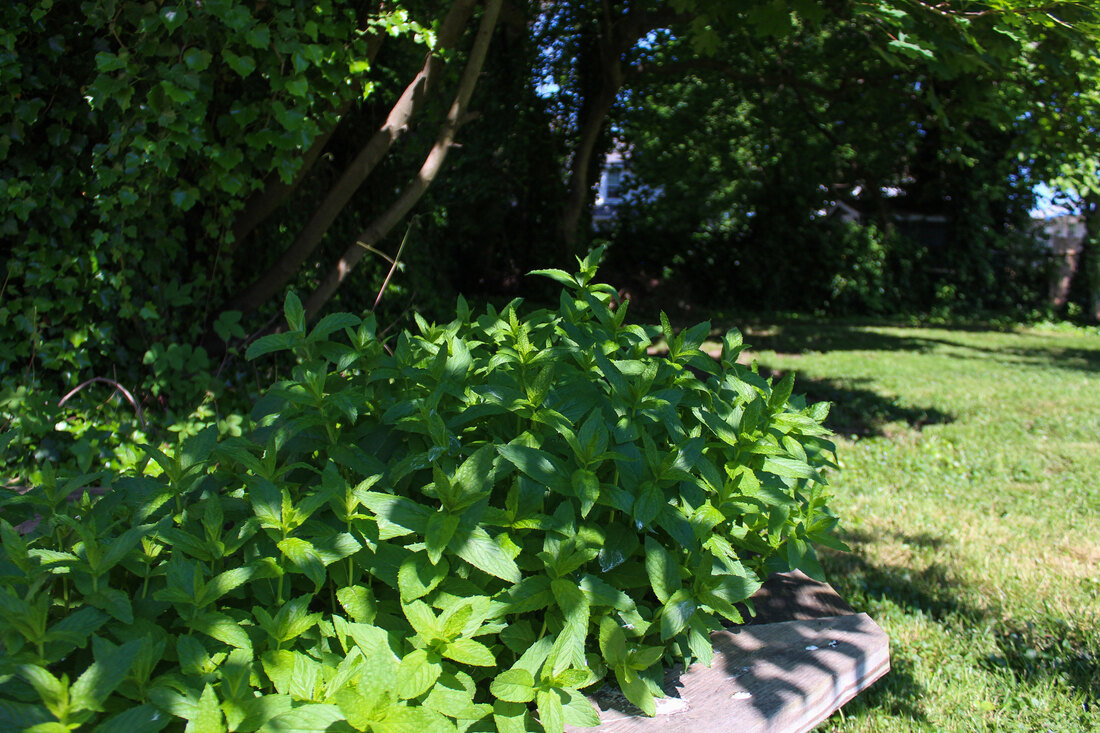 Mint taking over my summer garden. Photo by Diane M. Lilly, 2021. Some general growing tips for mint… Mint likes full sun—surprise, surprise—and makes good ground cover. The plant grows 1-3 ft tall and has beautiful purple flowers in the summer. Mint needs little to no maintenance except to keep it from growing too much. Just don’t overwater it, and it will take care of itself. Seedlings should be planted 18-24” apart. Harvest just before the plant flowers or when the leaves are at least 4” tall. Parsley As mentioned, I have a parsley plant from last year growing in a pot on my windowsill. It’s a bit leggy (there’s that word again), but otherwise, it’s growing well. I think it prefers being outside, so maybe once the weather warms, I’ll put it out in my garden so it can grow bushier again. As for the legginess, I found some interesting information on pruning and pH levels that might help me with this problem. (My next blog on herbs will deal with harvesting, so I’ll take that opportunity to cover this topic in more detail.) My research indicates that parsley is a biennial, so this might be its last year, and I should see it flower. 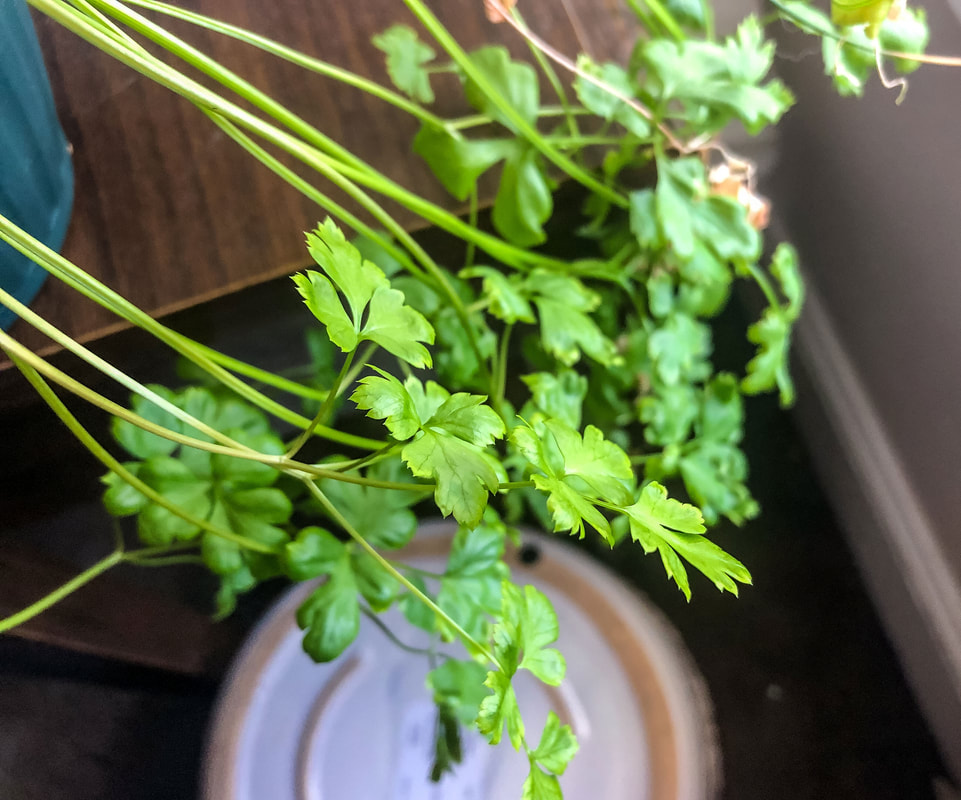 Leggy parsley growing in a pot by the window. Photo by Diane M. Lilly, 2022. Some general growing tips for parsley… Parsley will germinate between 21-28 days and mature in 70-90 days. Plant seeds 9-12” apart in soil with a pH level of 6.0-7.0. This herb can be transplanted 5-6 weeks after sprouting and grows to 12-18” tall. Parsley is a thirsty plant that requires a lot of watering, but just don’t let it sit in soggy soil. Harvest by cutting from the outer leaves to promote new growth and lessen the chance of bolting too early. Rosemary Rosemary (like lavender) is one of those herbs that I have been utterly unsuccessful at growing from seed…but I keep trying! I love the smell of rosemary, especially when cooking. They say it’s a simple plant to grow and harvest, but most people go the easier route and buy a plant because getting a seedling to grow successfully is very tricky. 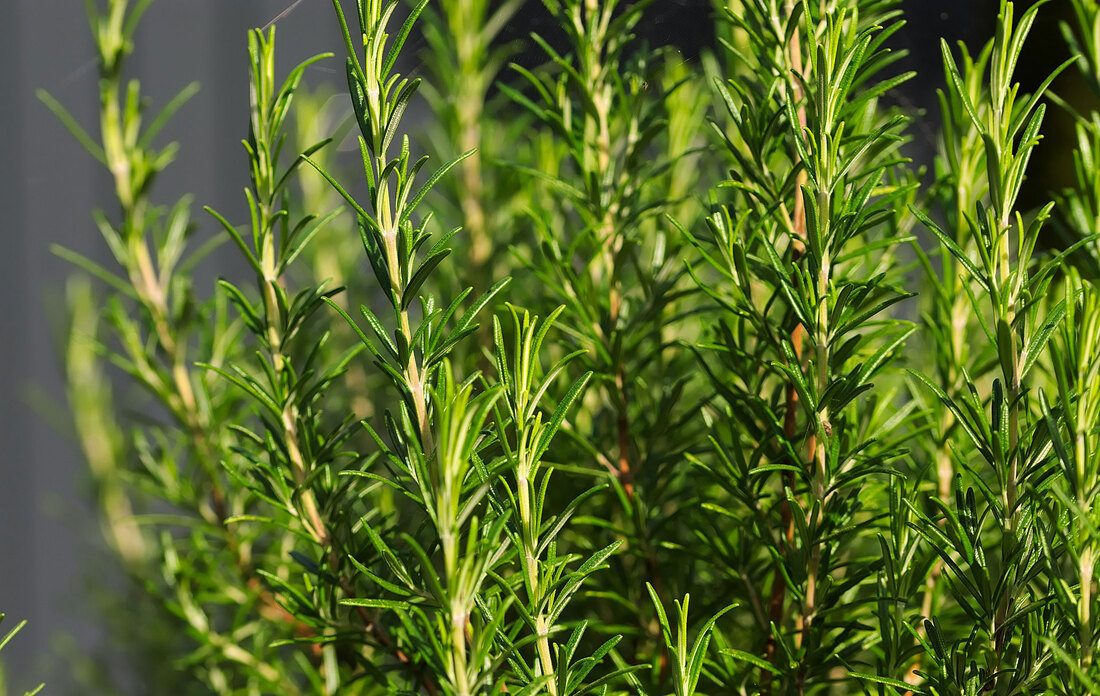 Image by Hans Linde from Pixabay. Some general growing tips for rosemary… Rosemary takes 15-25 days to germinate and likes well-draining soil with a pH of 6.0-7.0. Plant 18-24” apart to give this plant the space it needs to grow. Rosemary is a perennial that can grow 3-4 ft tall. This herb is drought tolerant, likes Mediterranean-type conditions, is fragrant, and has blue flowers in summer. Rosemary (like sage, lavender, and thyme) draws moisture from the air; an indoor rosemary plant will need frequent misting. With that being said, don’t overwater the soil. But make sure it doesn’t get overly dry. In other words, only water when needed and don’t let the soil get soggy. Give it fresh soil once a year and fertilize it in spring. Sage The leaves of this plant are so aromatic! I love running my fingers over them to smell their gorgeous scent. I use sage in cooking, especially with chicken, and I’m experimenting with sage tea. Sage has been growing in my garden for three or four years, but I may have accidentally killed the plants last year by pruning back too much in early spring. Since I wasn’t sure if the plant would come back this year, I planted new seeds for an indoor pot and my outdoor herb garden. 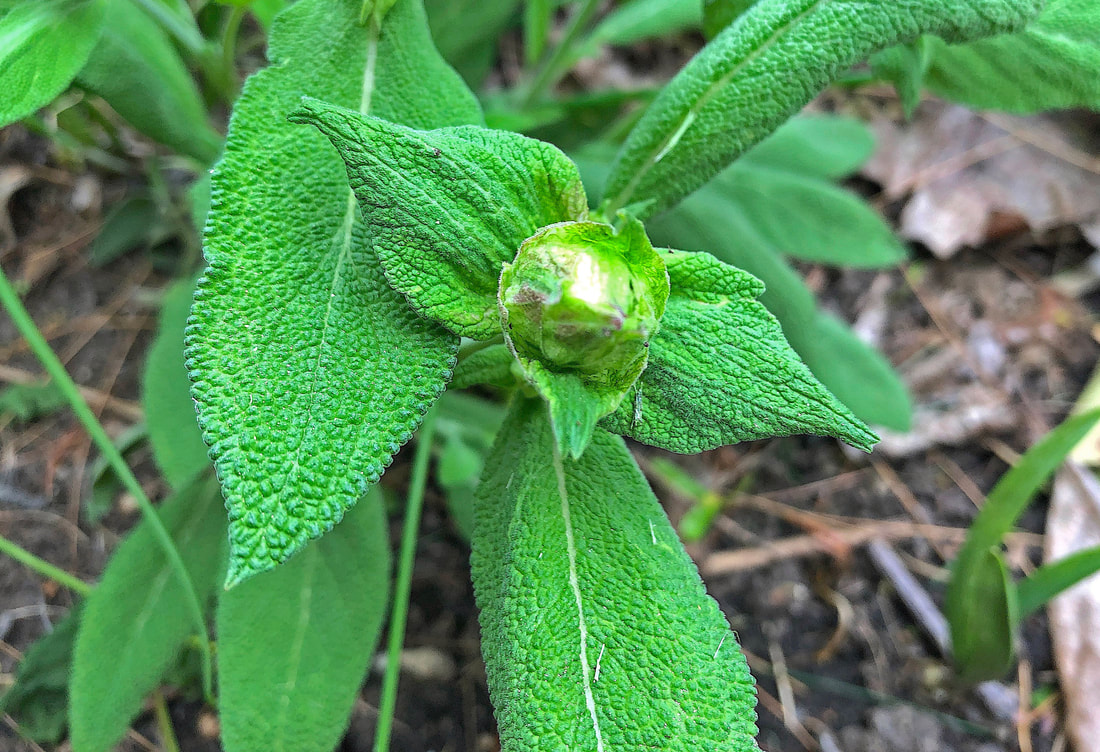 Sage bud on last year's plant. Photo by Diane M. Lilly, 2021. Some general growing tips for sage… Sage is a perennial that can grow 2-3 feet tall, with gorgeous purple flowers in the summer. The seeds take 10-21 days to germinate. Give this herb plenty of spacing (24-36” apart) when planting because it spreads out and gets bushy! 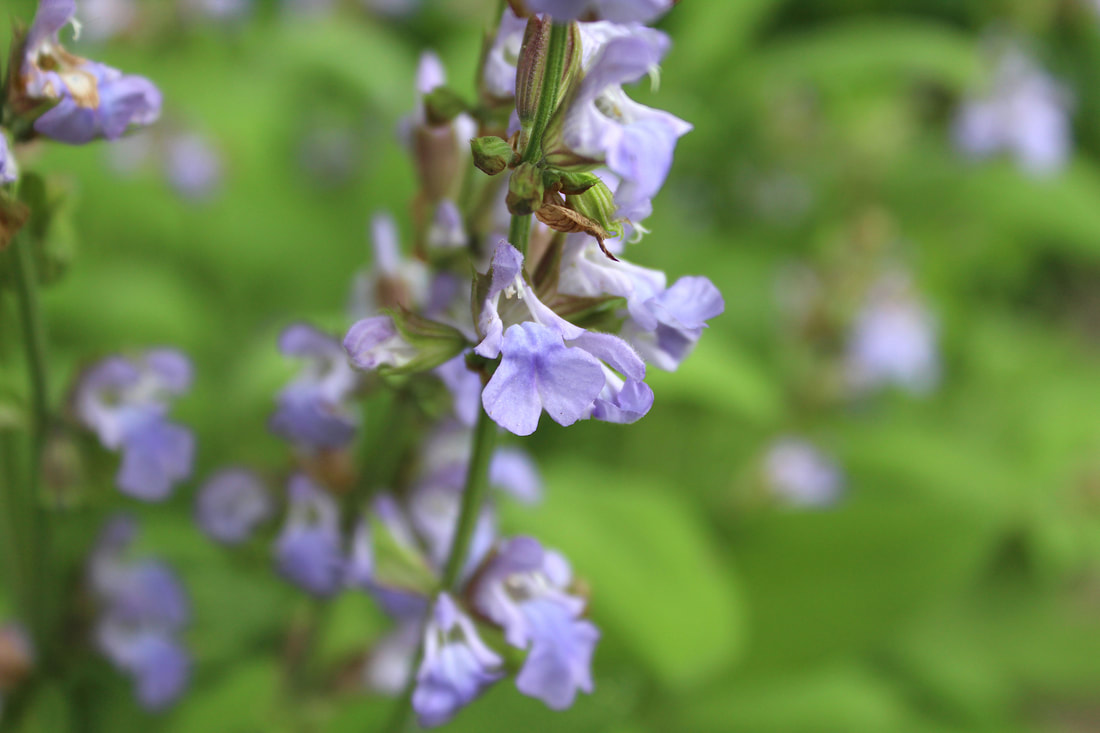 Purple flowers blooming on my sage plants. Photo by Diane M. Lilly, 2020. This hardy herb is drought tolerant and can handle temperature extremes like in the Southwest desert (hot days and cold nights). Like rosemary, allow the plant to grow in the first year and then begin harvesting in the second year. Thyme I had this pot of gorgeous, fragrant bushy thyme last year growing quite hardily in my side yard. I wanted to preserve it over the winter, so I brought it inside in the fall. The plant grew fairly well…until about mid-winter, when it suddenly crashed and was dead. This spring, I planted more seeds…and we’ll see what happens. The plan is to have some plants inside and some outside, experimenting with both to see what this plant likes best. 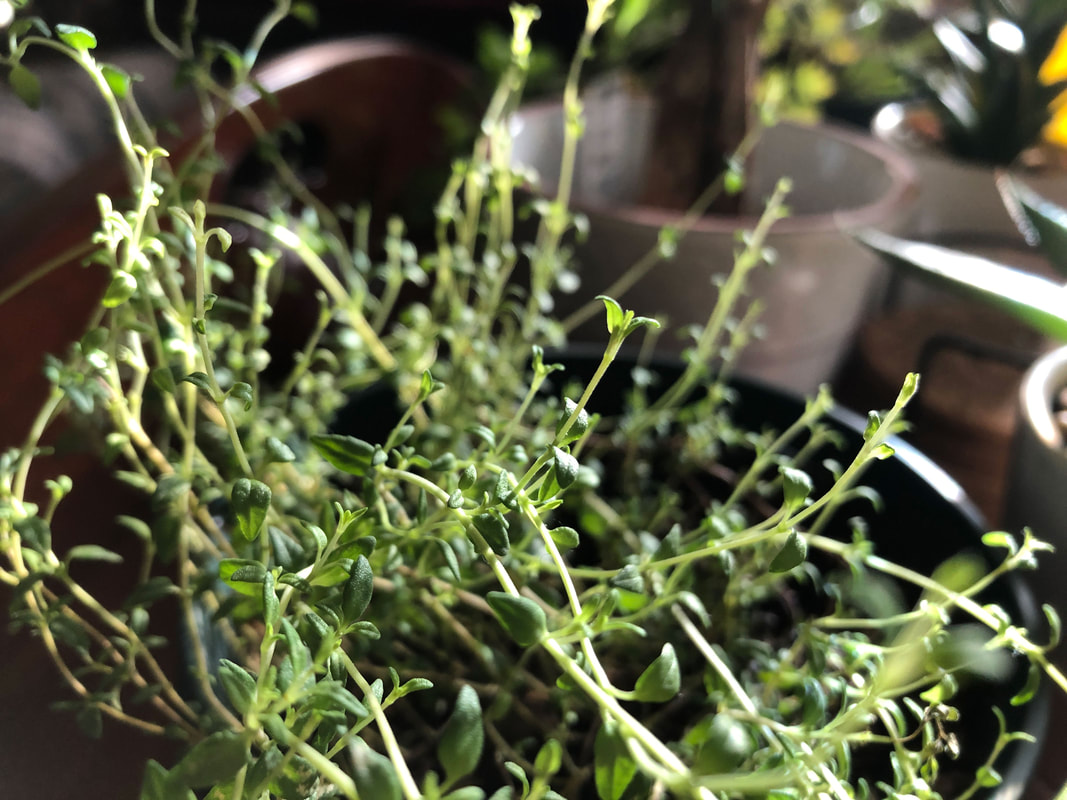 My thyme plant brought indoors fall 2021. Photo by Diane M. Lilly, 2021. Some general growing tips for thyme… Thyme can grow 8-12” tall and likes to spread out, making it a terrific aromatic ground cover. It takes 8-20 days to germinate, and you can transplant once the plant is 4” high and has four true leaves. Thyme spreads out, so plant 18-24” apart in the ground. Thyme plants are ready to harvest in 80-85 days. This herb likes full sun and well-drained soil. If growing indoors, it will need to be misted frequently and needs the bright sun of a windowsill. 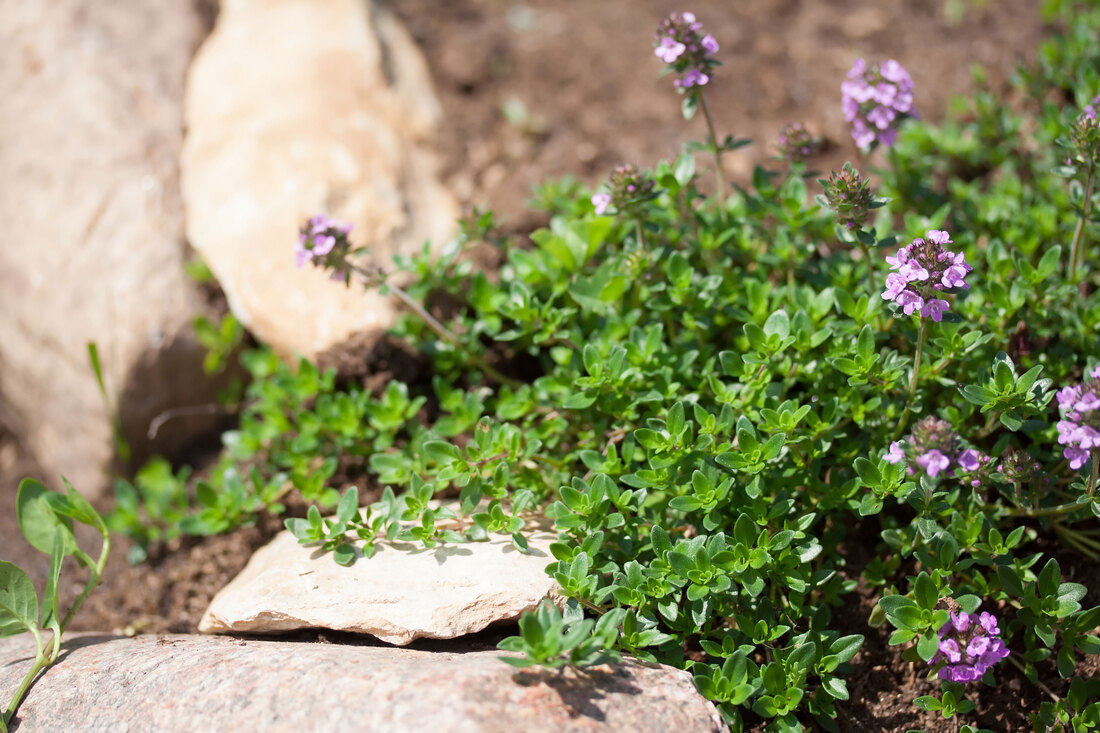 Image by Marta Jonina from AdobeStock. So, what are your thoughts about growing herbs? Have you grown herbs, and if so, what is your favorite? Share your tips and advice in the comments below! For my part, I look forward to watching these herbs sprout and grow, as well as learning how to care for and harvest these incredible plants. There’s something magical about witnessing new life! This will be a journey of exploration to learn about growing herbs and using these herbs for all sorts of household and culinary needs. As these plants grow, I will explore how and when to harvest them and how to use each in my home. I’ll explore uses for the home, ways to scent my home, ways to use them in arrangements, herbal teas, and healthy recipes. So, let’s see how this process plays out, and don’t forget to check back periodically to see my progress and get more tips and tricks for growing these herbs! Related blogs you may want to read: Tips for planting seeds indoors How to repot a pothos plant How to propagate bromeliad pups Six herbs I planted indoors It’s planting season again This article may contain a few items or commercial mentions, but I only used them for demonstration purposes only. I am not endorsing any particular product or receiving any monetary gain for this blog. 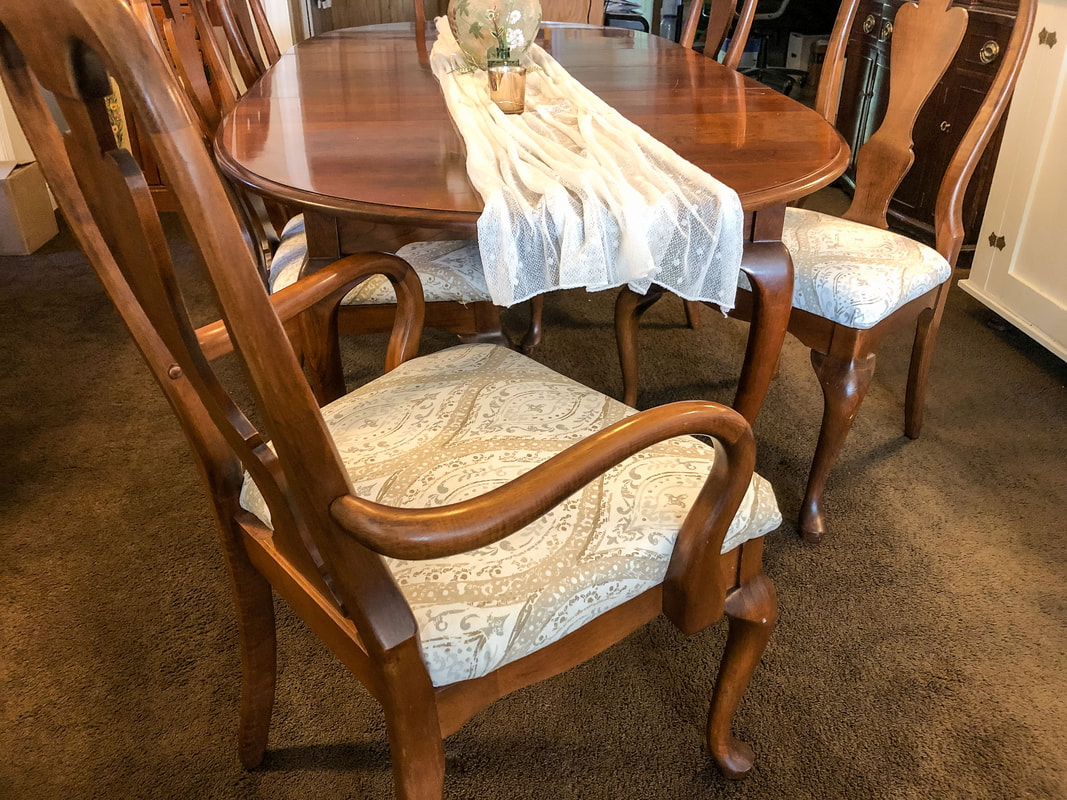 Finished upholstered dining room arm chair. Photo by Diane M. Lilly, 2022. It’s been a year since we bought our dining room set from an upscale consignment shop in our area. It’s a beautiful set, but the chair upholstery was not looking its best. I tried cleaning it (I even did a blog about it last year), but ultimately, I was unhappy with the fabric. Anyway, the padding is so worn it feels like you’re sitting on a board--time for a reupholstery project! 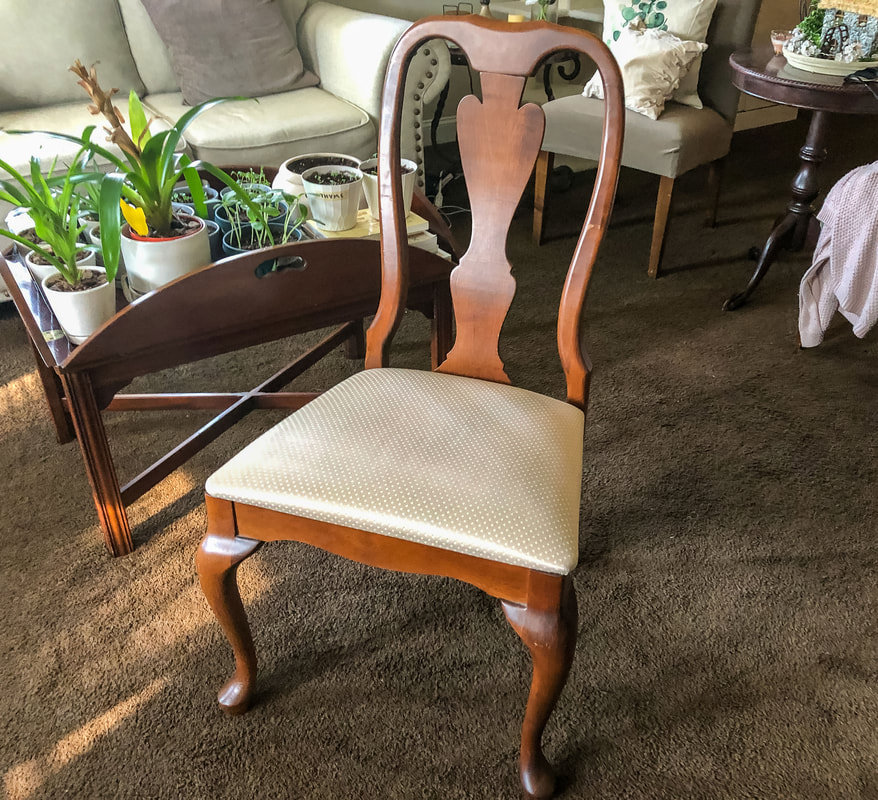 Dining room chair before reupholstering. Photo by Diane M. Lilly, 2022. Here’s where I put in a disclaimer--I am a complete upholstery novice! But I did a lot of research on upholstery methods and watched tons of videos on “YouTube University”! It’s not hard to do simple chair seats, but I did learn a few things by actually doing the project, things you can’t learn from simply watching a few videos. There’s nothing like real life to teach you…So today’s blog shows you my process and offers some tips I learned along the way… Tools needed for this project: electric screwdriver upholstery staple remover electric staple gun pliers scissors utility knife glue/adhesive (opt) marker/pencil foam batting duster (opt) fabric 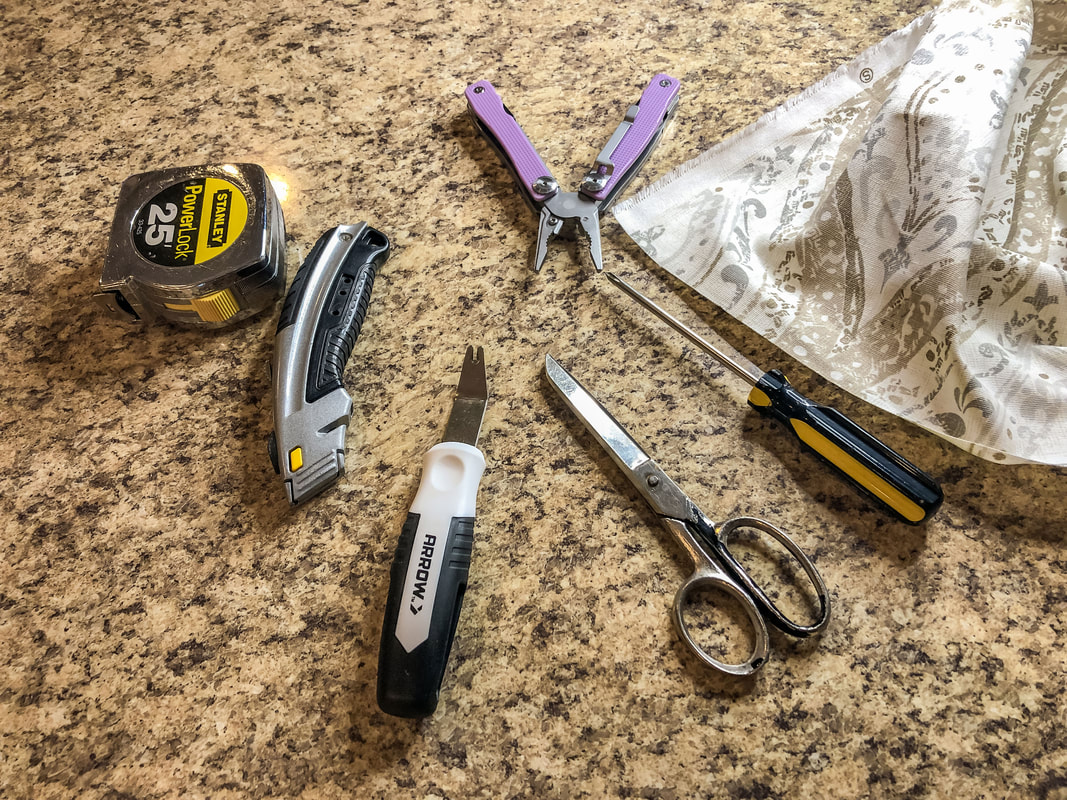 Upholstery tools I will be using for this project. Photo by Diane M. Lilly, 2022. Before I get into the steps I took for this project, I'll say a few words about tools. Upholstery takes elbow grease! You will be working for your arms and hands intensely, and if you have any shoulder or back problems (like myself), be aware of that and work accordingly. A couple of tools that will help with this issue are an electric screwdriver and corded stapler. I started this project with all old-fashioned hand tools…and I was laid up for two days with pain in my spine from irritating an issue in my neck. So, be aware that upholstering is quite physical, so use power tools where you can because it is hard work! Step 1…removing the seat Removing the chair seat from the chair frame was easy. I turned the chair upside down and unscrewed the screws in each corner bracket that attaches the seat to the chair frame. 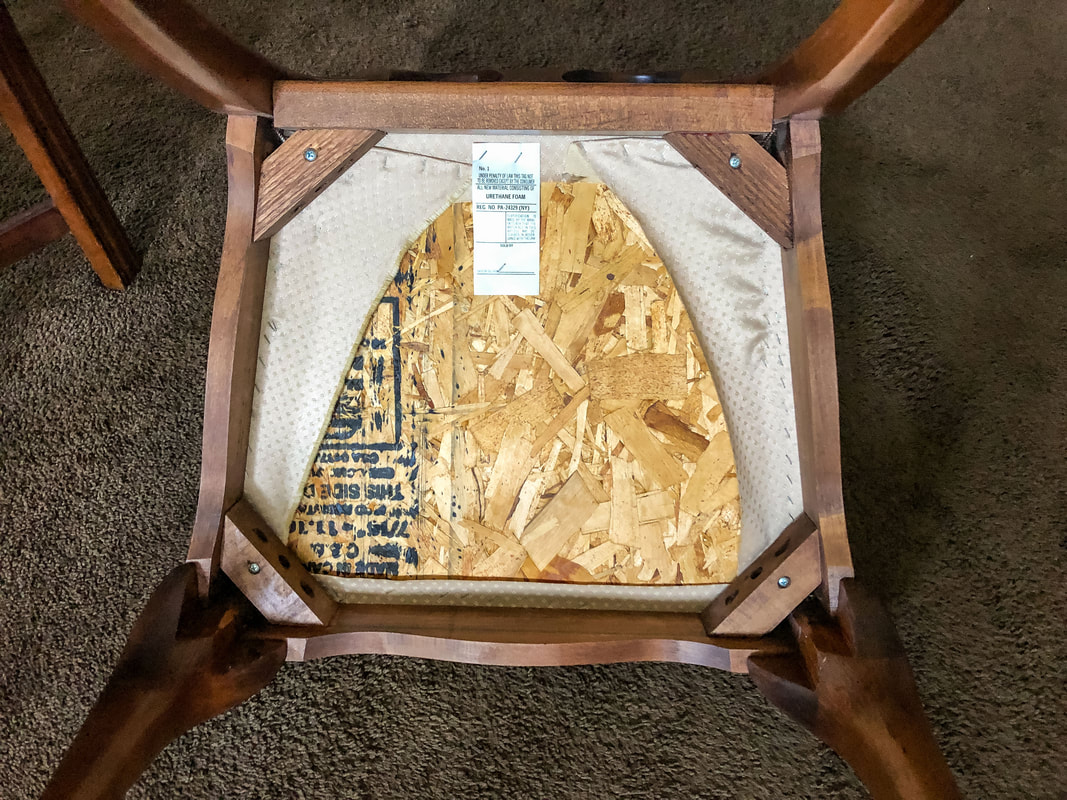 Underneaththe dining room chair where the seat is attached to the frame. Photo by Diane M. Lilly, 2022. 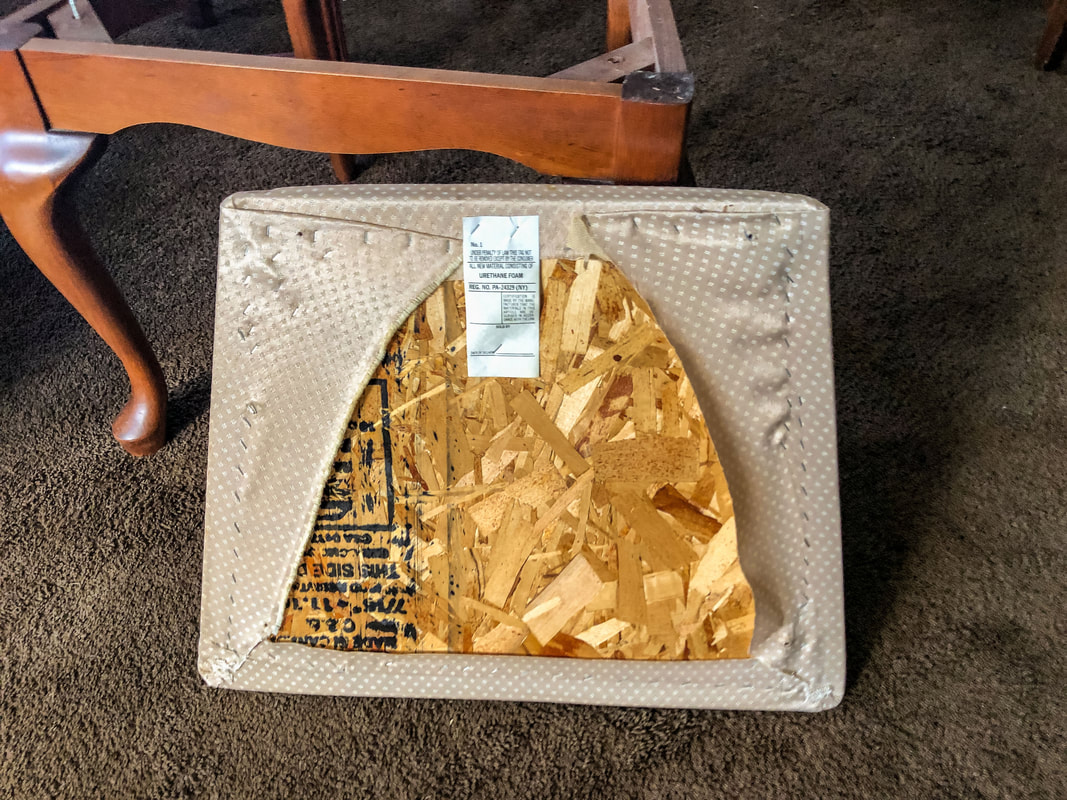 A view of the underneath of the chair seat before reupholstering. Photo by Diane M. Lilly, 2022. Step 2…remove all the existing staples This part can be tedious and a bit tough on the hands. But saying that, it’s not hard to do, depending on how your predecessor went about upholstering the seat. Turn the seat upside down and use a staple remover tool (you can find one cheap on Amazon) to remove as many old upholstery tacks or staples as possible. You will want to start your new project with a clean surface so your new staples go in easily. In my case, the old staples were thin and neatly done, so there wasn’t a huge mess to clean up. And that was a good thing because removing staples from fabric and wood is tedious work and hard on the hands! Just make sure you work in an area where you can easily collect the extracted staples so you or your pets don’t step on tacks or staples. 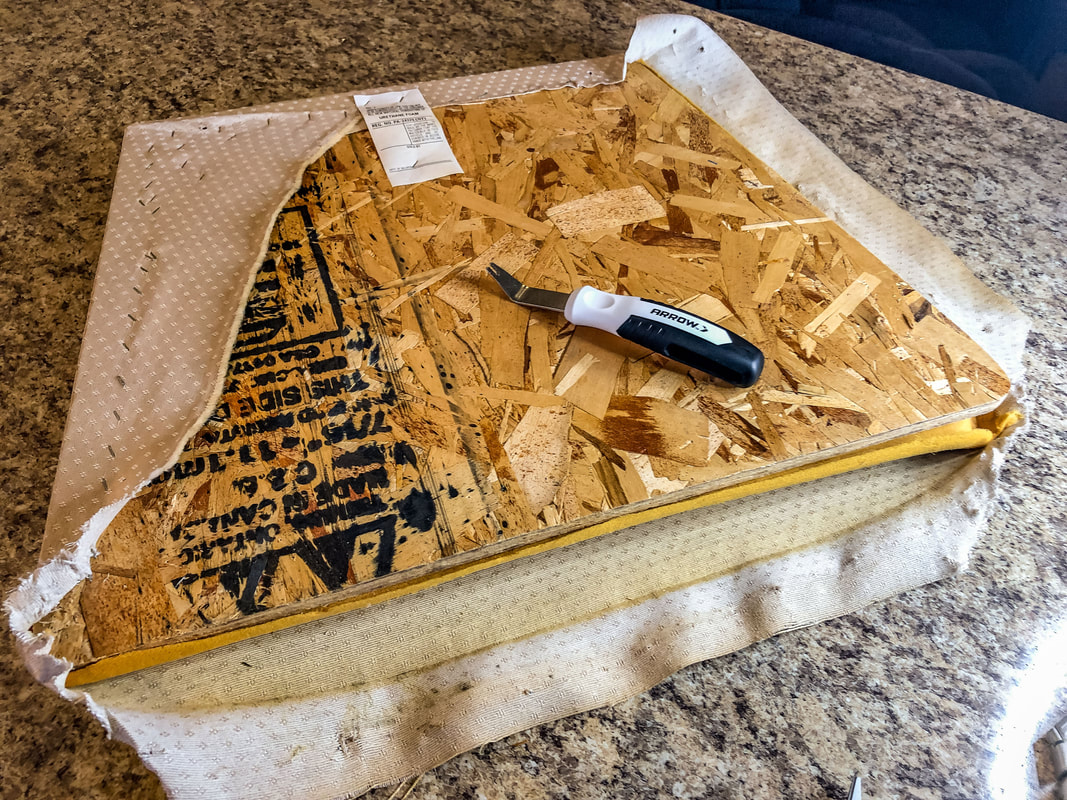 Removing the old fabric and staples from the seat board. Photo by Diane M. Lilly, 2022. Step 3…measuring and cutting the padding The existing padding for my chairs was worn, thin, and needed to be replaced. The chairs needed more lift, so I chose 2” thick padding for this project. I discarded the old padding, except for the small square piece for the center of the chair board. (There is sometimes a smaller piece of padding in the center to add extra support.) I made sure to cut the new padding just a touch larger on all sides of the board so that the new padding could sink and wrap around the edges of the hard board underneath. 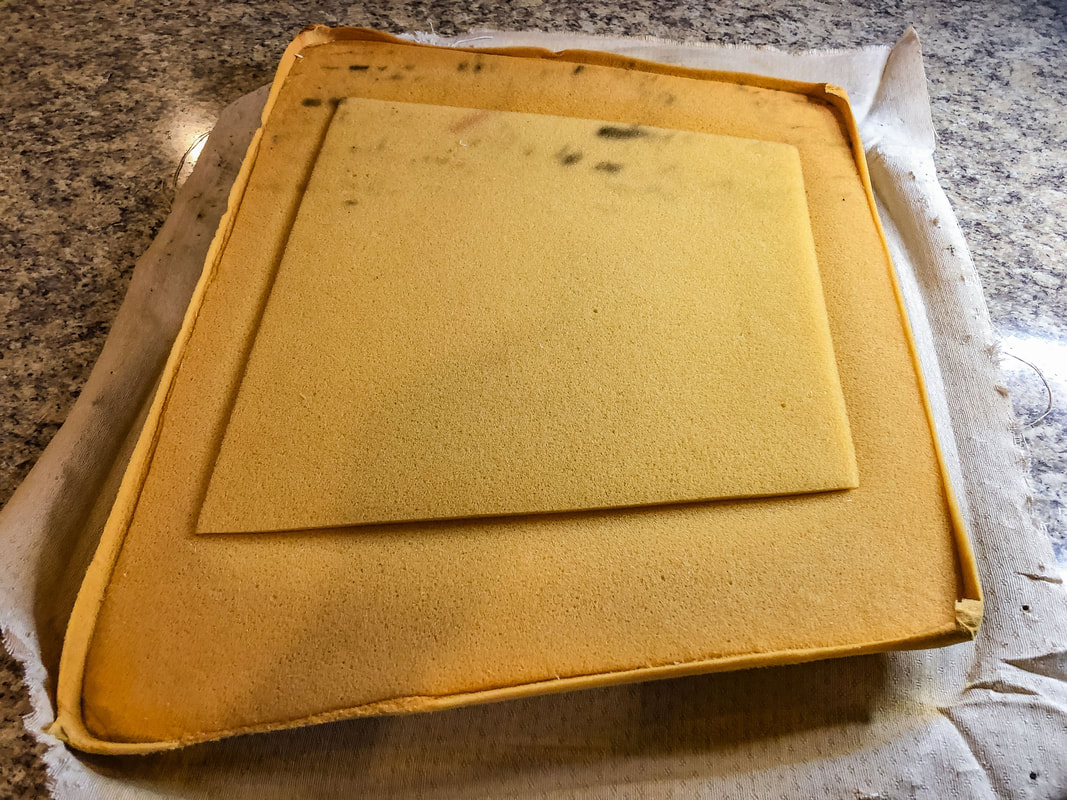 A view of the old chair padding that will be replaced. Photo by Diane M. Lilly, 2022.  Tracing the old padding on the new padding. Photo by Diane M. Lilly, 2022. 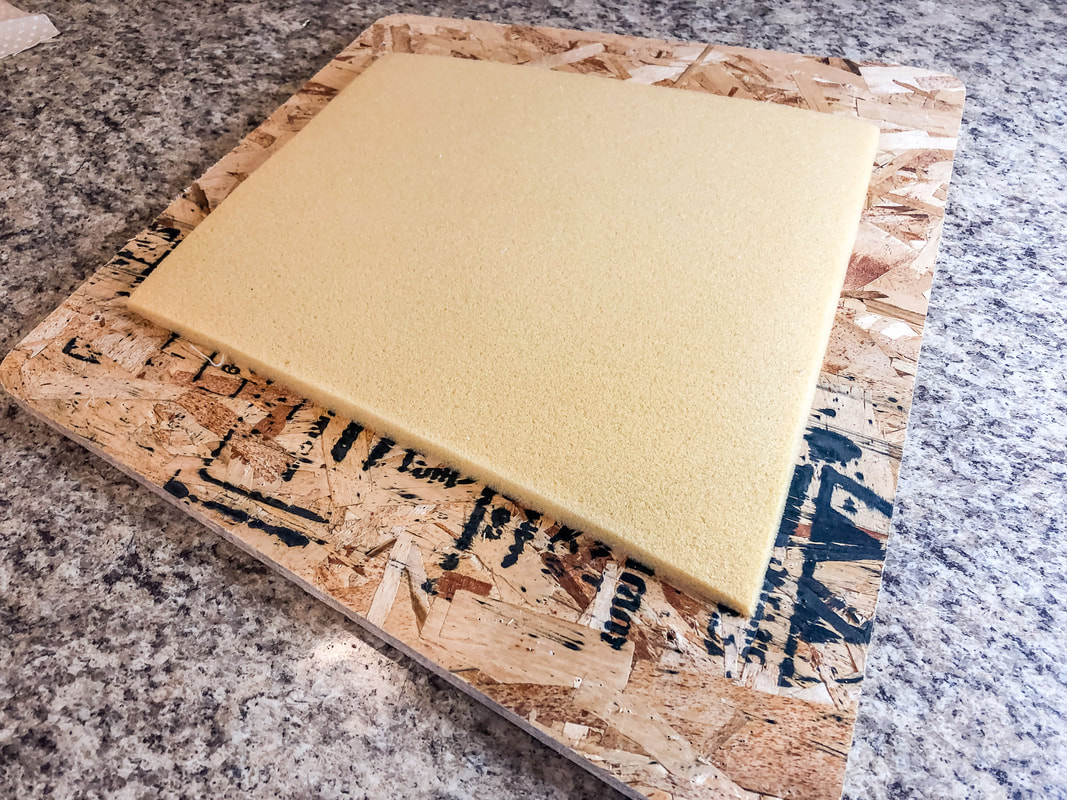 A view of where the small chair pad will sit on the seat board under the new padding. Photo by Diane M. Lilly, 2022. Step 4…measuring and cutting the batting The next step is to measure out and cut the batting. My existing chairs didn’t have batting, but the seats needed that extra padding. You could probably skip this step depending on your chair type and preference. Anyway, measure enough batting that the fabric wraps around the entire seat (padding included) and can be easily attached underneath the board. You’ll want to cut it a few inches longer on each side (I think mine was about 4-5 inches because of the two-inch padding) to allow plenty of room for pulling taut and stapling to the underside of the board. 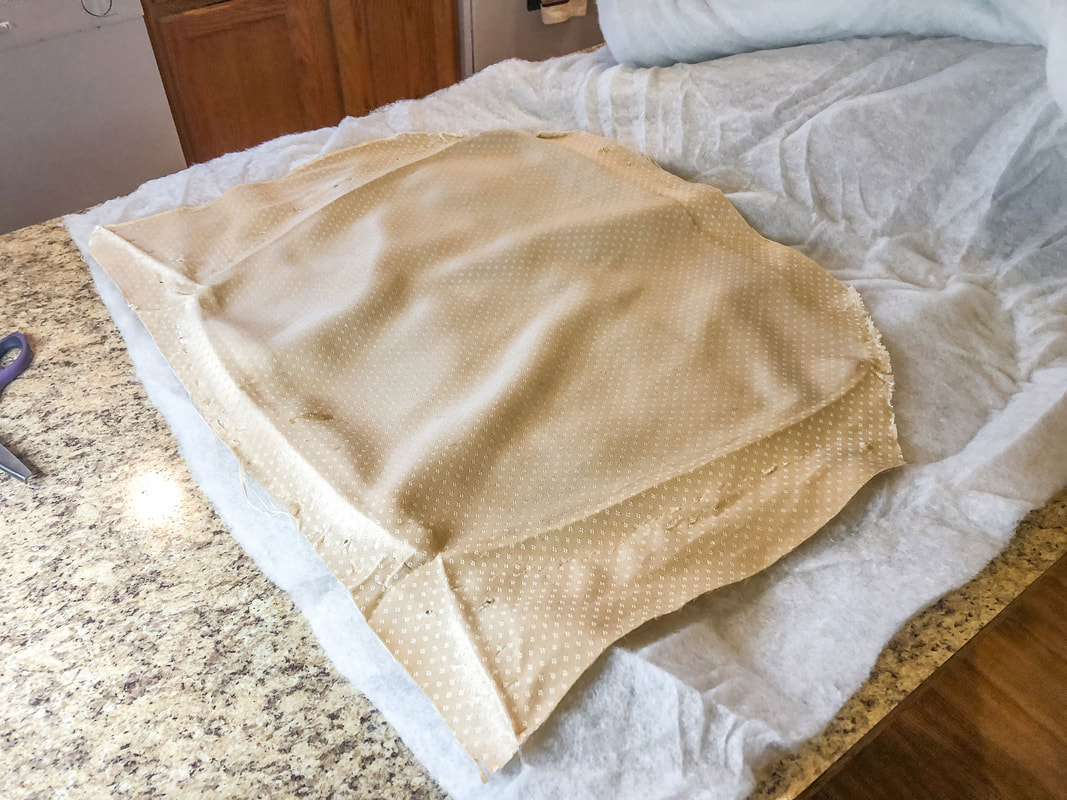 Using the old fabric to measure out the new batting (adding a few inches on each side). Photo by Diane M. Lilly, 2022. Step 5…attaching the batting When you start stapling the batting, place one staple in the center on each of the four sides, making sure to pull it as tight as you can without tearing the batting. Pull and secure it tight, for a properly supported and tailored-looking cushion. Once you have the batting attached with one staple, staple the rest of the fabric on each side, making sure to pull the fabric as taut as you can while you go. Stop a few inches from the corners--they will be dealt with last. 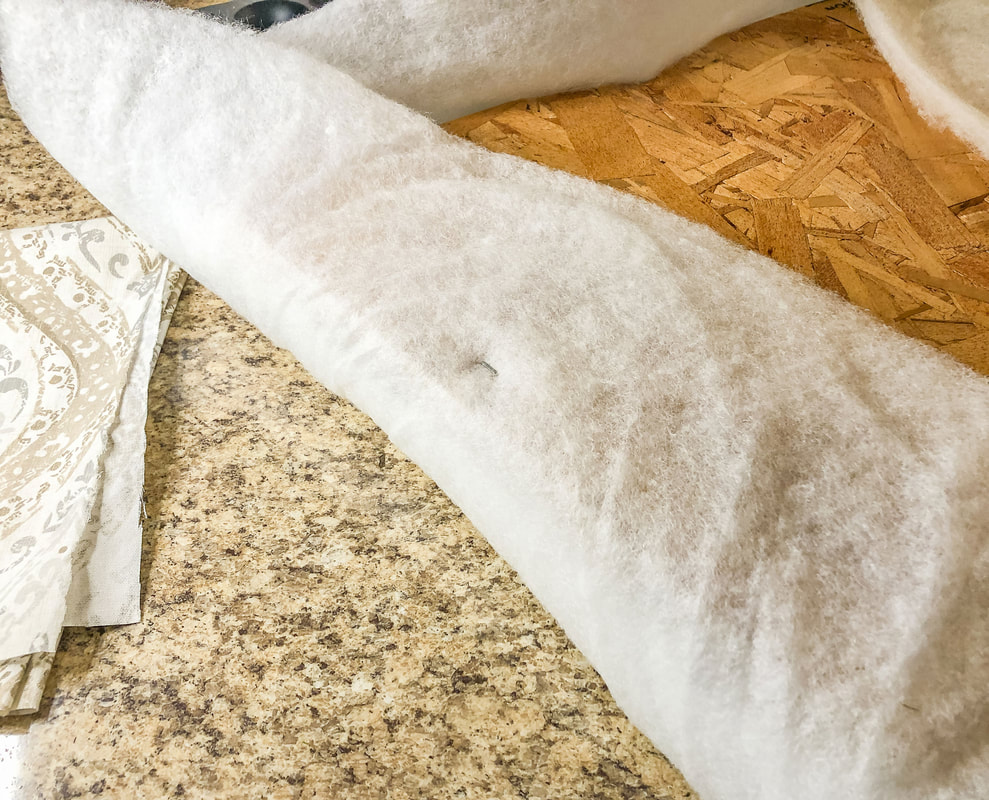 Placing one staple in the middle of each side to start attaching the batting. Photo by Diane M. Lilly, 2022. 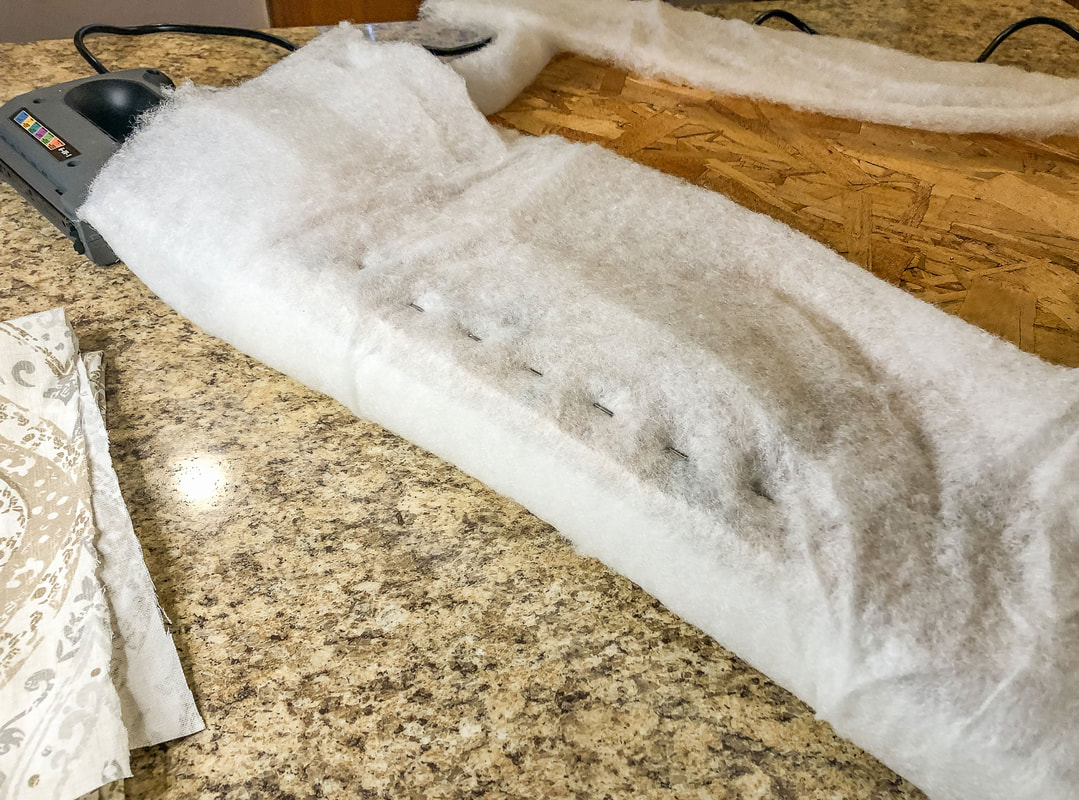 New staples along one side attaching the batting to the seat board. Photo by Diane M. Lilly, 2022. Once all the sides are stapled, you can staple the corners. See my images below for how to do that… 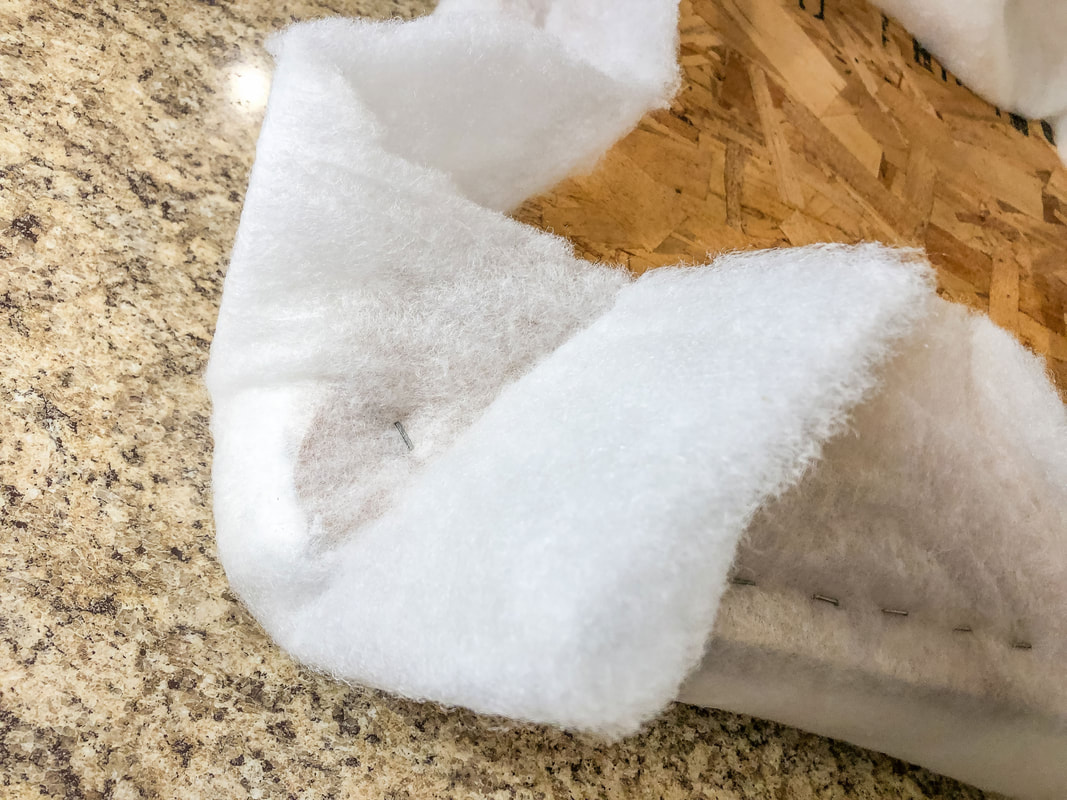 Start attaching the batting to the corner by folding the batting in and attaching with one staple, then making folds on either side of that staple to securely attach. Photo by Diane M. Lilly, 2022. 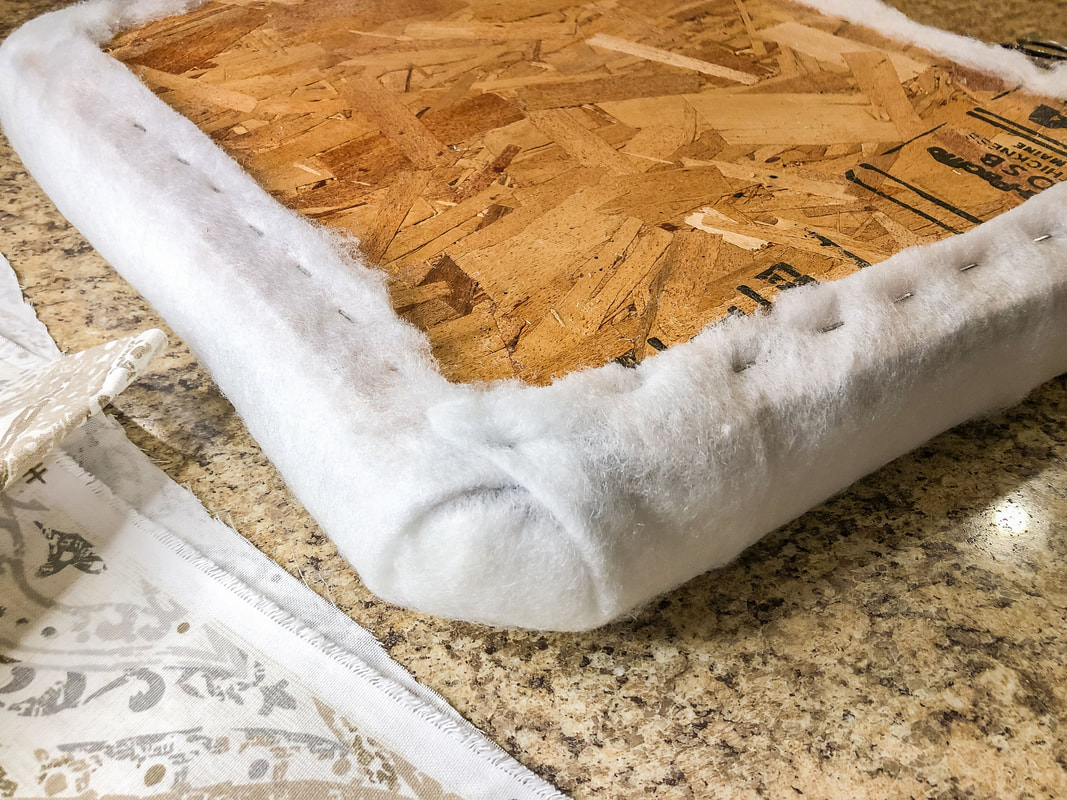 A view of the bottom of the seat board with batting securely stapled on all sides and corners, and excess batting material trimmed. Photo by Diane M. Lilly, 2022. 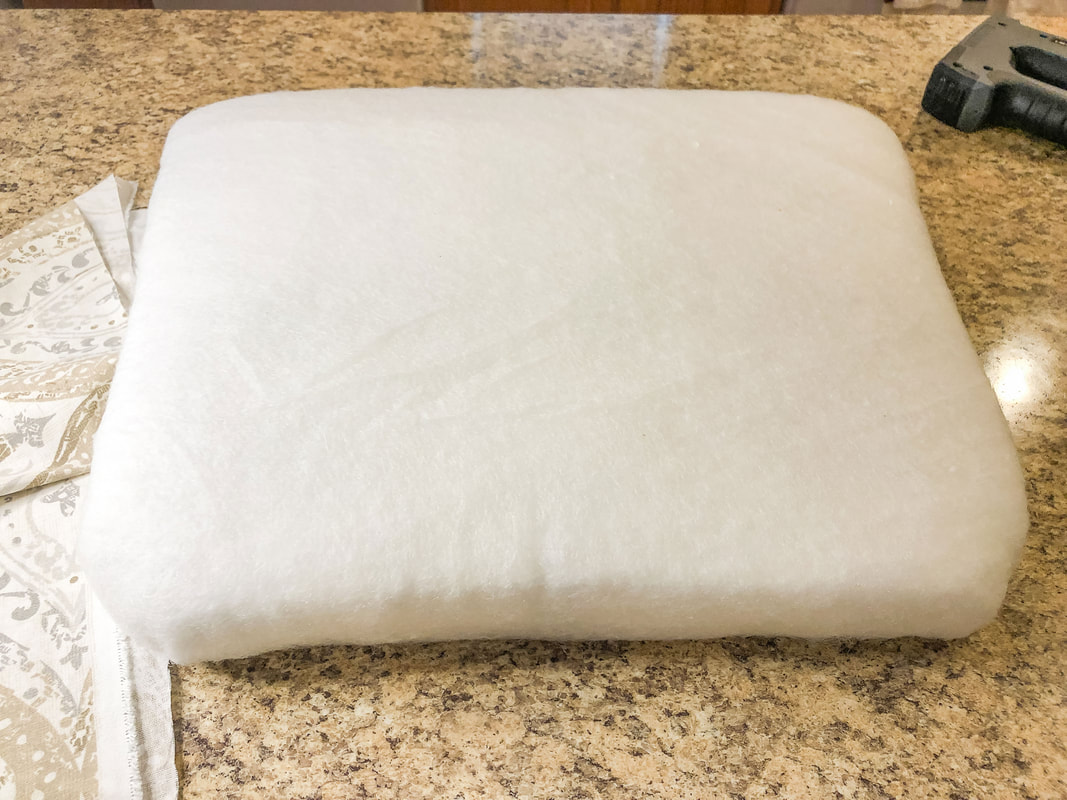 A view of the chair seat with finished padding and batting. Photo by Diane M. Lilly, 2022. Trim off all the excess batting to clean up the seat and prep for the upholstery fabric. Step 6…measuring and cutting the fabric For the fabric, use the same steps as the batting. The only difference in this step is to make sure your thread weave (called warp and weft) is straight (horizontally and vertically) across the chair seat. Center any pattern on your chair seat because an off-centered pattern will be very obvious in the finished piece. So, take your time to get this part right! 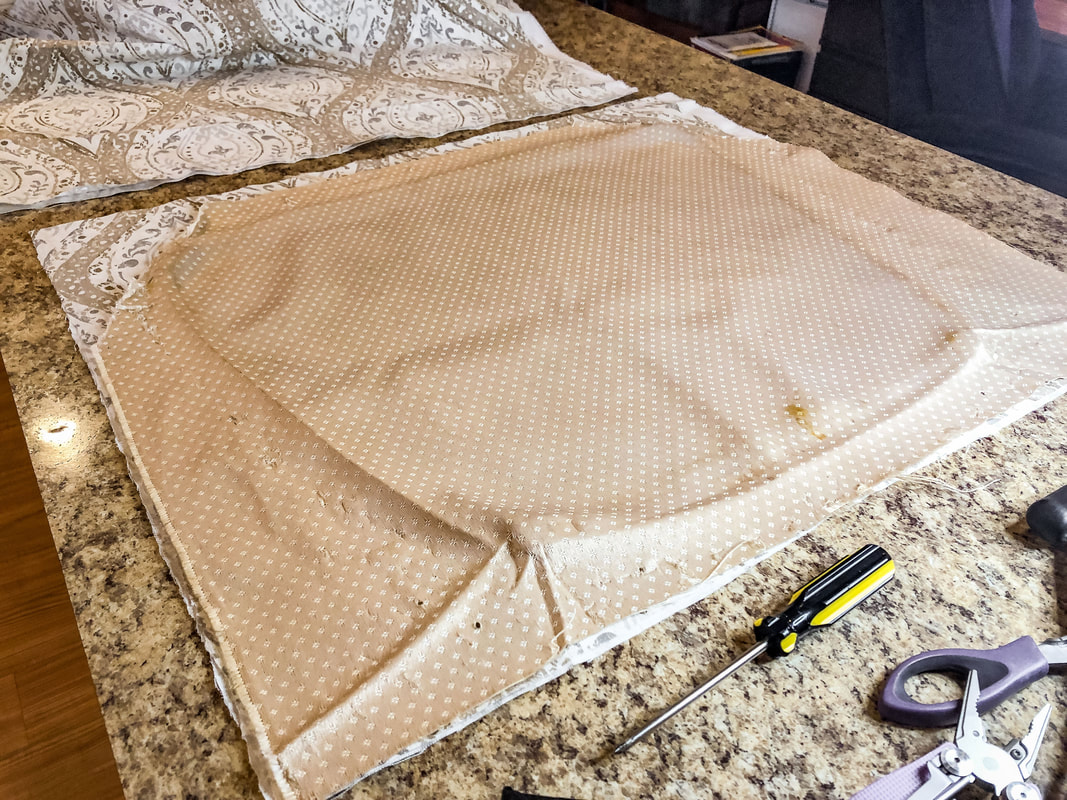 Using the old fabric to measure out the amount of new fabric needed, with a few extra inches on each side to accommodate the thicker padding. Photo by Diane M. Lilly, 2022. 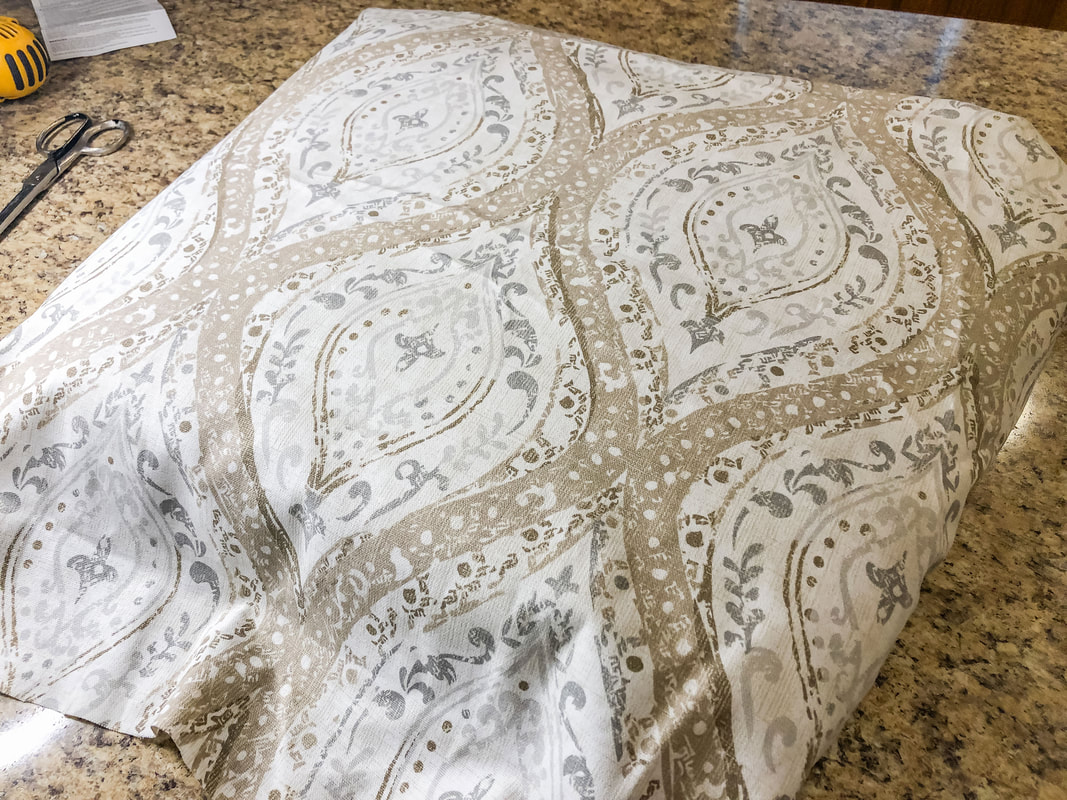 Align the pattern on the fabric with the seat before attaching to the bottom of the seat board. Photo by Diane M. Lilly, 2022. Step 7…attaching the fabric The rest of the stapling process is the same as when we attached the batting, so follow those instructions to attach the new fabric. Trim excess fabric on the bottom of the board. 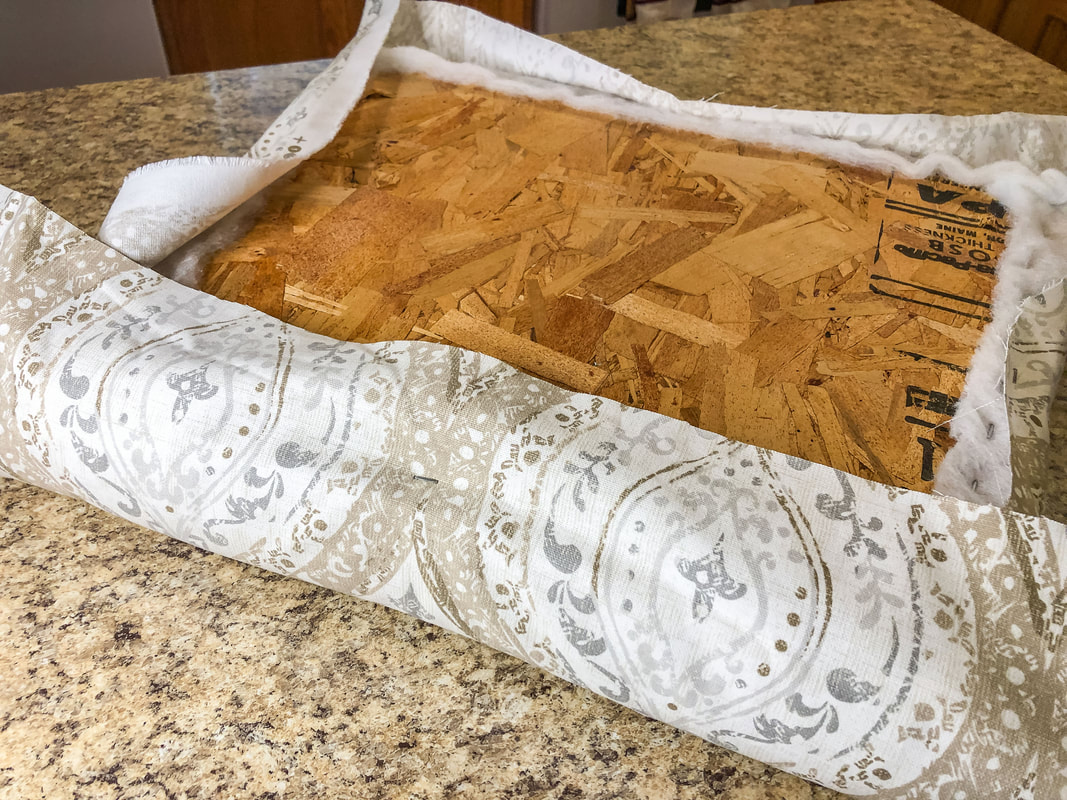 Place one staple in the center of each side (making sure to pull the fabric tight) to start attaching fabric to the seat board. Photo by Diane M. Lilly, 2022. 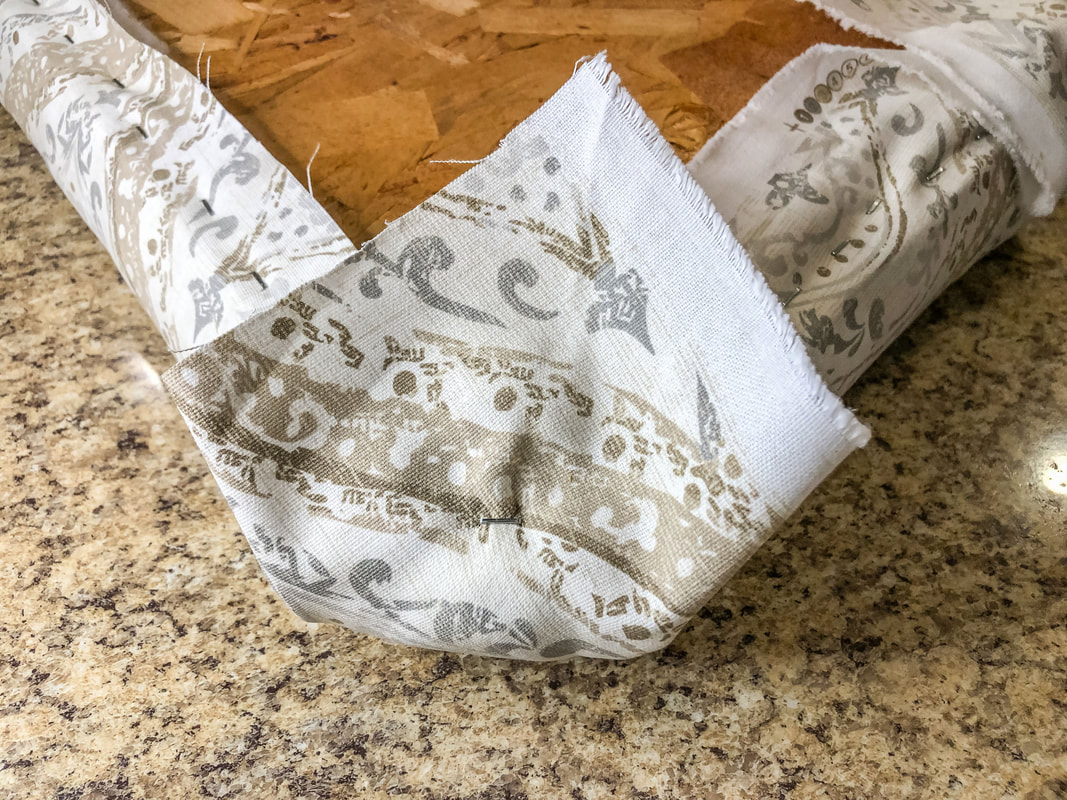 After the sides are stapled, start securing the corners by folding the fabric in and securing with a staple. Fold fabric down on either side, pulling taut to create a smooth corner and secure with staples. Photo by Diane M. Lilly, 2022. 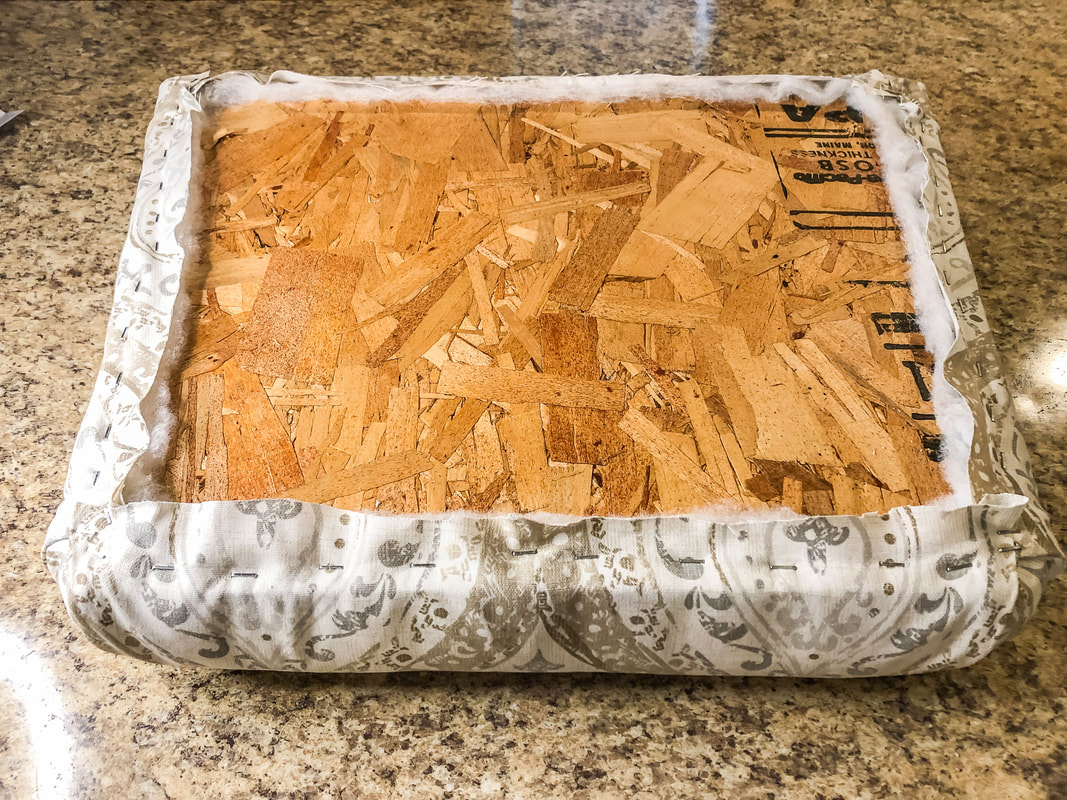 A view of the bottom of the cair seat after new padding, batting, and fabric have been attached and secured. Excess fabric has been trimmed for a clean look. Photo by Diane M. Lilly, 2022. At this point, I discovered a way to cut my stapling process in half. I found that it was possible—if I was careful—to staple both the batting and fabric at the same time. The only issue I had with that technique is that the corners must be done individually, meaning the batting needs to be secured first and then the fabric on top. (If you try to staple both the batting and fabric in the corners at the same time, you'll be fighting with too much material.) So, stapling both the batting and fabric at the same time is a convenient way to cut down time (and work) on a simple seat upholstery project like this one. Step 8…attaching the duster When I started this project, I decided I didn’t need a dust cover since the existing chairs did not have dust covers. That was a bit of a mistake on my part--as it helps cover all the stapled fabric and makes for a cleaner finished look--but it won’t be difficult to fix later. Being a novice at upholstery, the underneath of my chairs didn’t look quite as neat as the original upholstery and a duster would’ve finished it off and made it all look more professional…but I hadn’t purchased that material. Sometime in the future, I will have to unscrew the seats and staple on a dust cover. It’s a simple process of cutting material to just a bit smaller than the bottom of the chair board, using enough material to cover the upholstery edges and stapling. Make sure to fold over the edges—leaving no raw fabric edges showing—and the bottom of your chair will look finished and polished. Step 9…reattach the seat And the last part of the process is to reattach the seat and admire your handiwork! This part of the process is much easier with an electric screwdriver, by the way… Secure the chair frame and new chair seat with screws, making sure there are no gaps. This may take using clamps or another person to help you hold the two chair parts together tightly while you screw them back together. I had an issue with my first attempt; the screws would not hold, and there was a gap, so I needed my husband to help me hold things down while I screwed the seats back together. Other than that, you’re done! 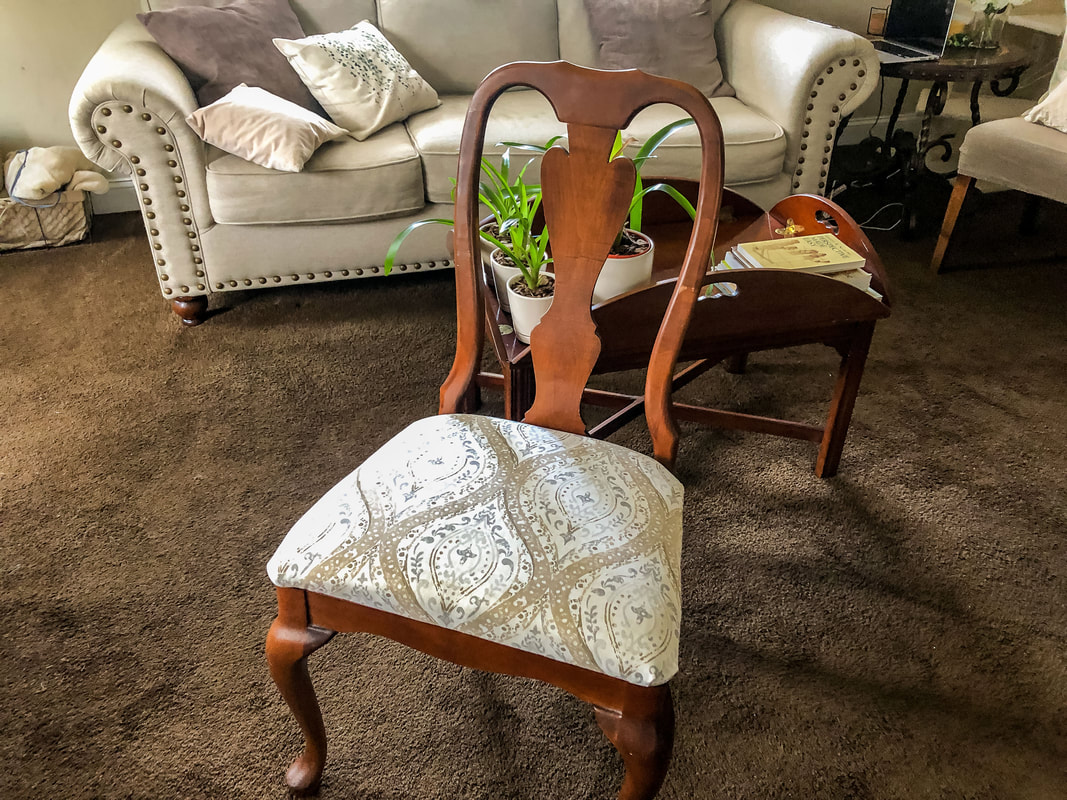 Finished side chair, freshly reupholstered. Photo by Diane M. Lilly, 2022. 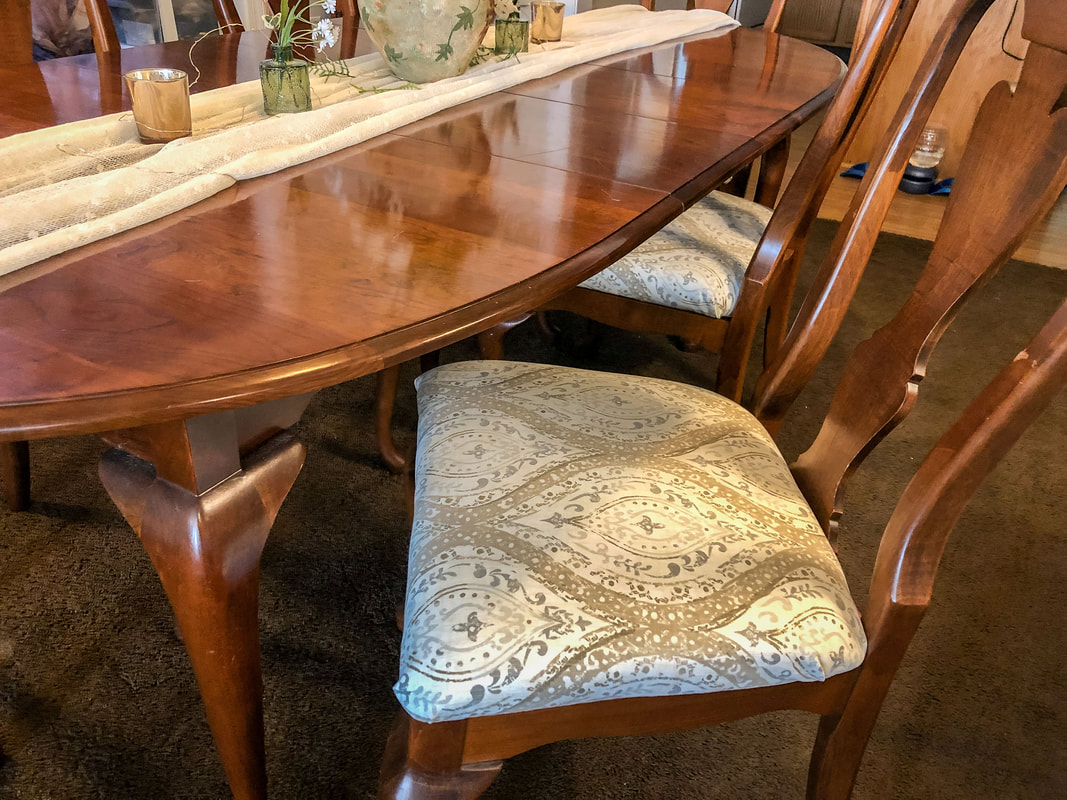 Dining room chair newly reupholstered. Photo by Diane M. Lilly, 2022. 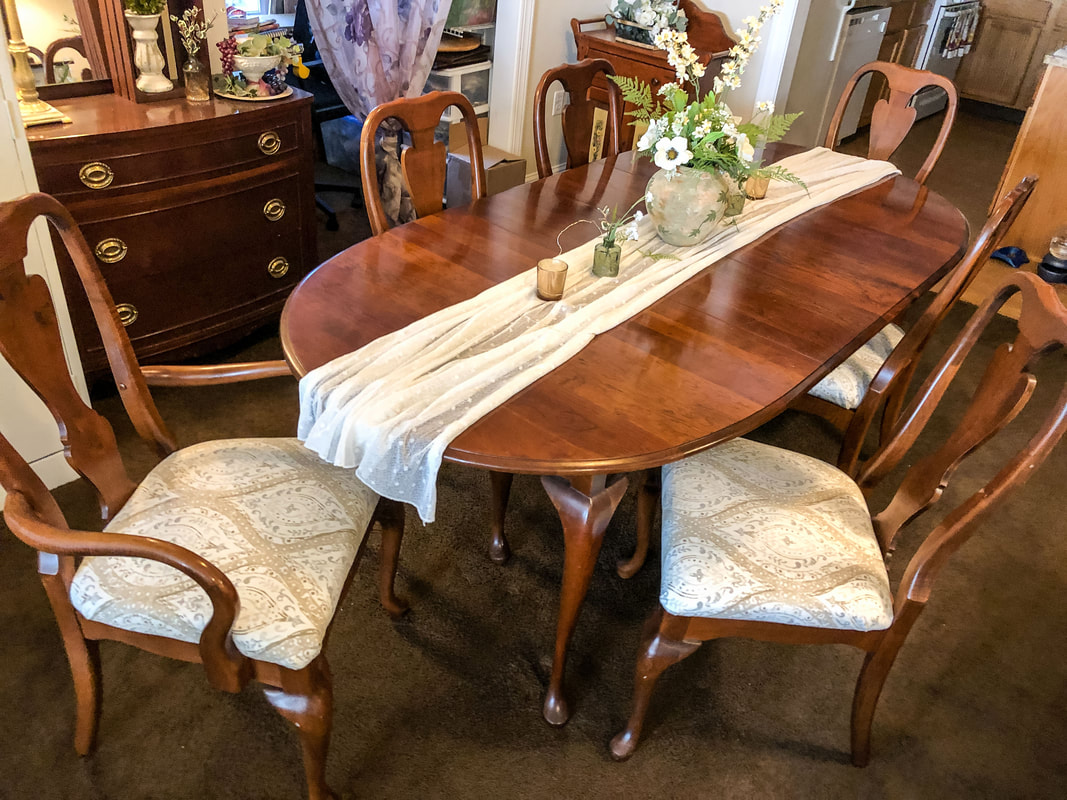 My finished reupholstered dining room chairs. Photo by Diane M. Lilly, 2022. So, as I said, this is a relatively straightforward process, but it is very physically demanding, so be aware of that before you start. My advice is to practice on a few simple chair seats first if you have more complicated pieces to upholster (like I do). I have an antique settee that needs upholstering, but I wanted to do these dining room chairs first to get some experience before jumping into the deep end! And I’m glad I did because I now feel more prepared for the big project. But that’s a DIY for another day…so stay tuned! Related blogs you may want to read: Comparing DIY upholstery cleaning methods A little project with jute twine and an old foot stool DIY refurbishment of a dining room cabinet A fun DIY project with paint and a thrifted mirror part 1 A fun DIY project with paint and a thrifted mirror part 2 Creating a kitchen coffee bar How to replace a clock mechanism On a mission to recycle this neglected vintage stool The stain stripping stage of rescuing my vintage stool Staining my vintage stool with brewed tea My tattered vintage stool transformed into a beautiful plant stand Affiliate Disclosure Some of the posts in this article contain affiliate links. This means if you click on the link and purchase the item, I will receive an affiliate commission at no extra cost to you. I will only recommend products or services I use personally and/or believe will add value to my readers, so there is no conflict of interest. |
Author
Some of the posts on this site contain affiliate links. This means if you click on the link and purchase the item, I will receive an affiliate commission. 
Categories
All
Archives
April 2024
|