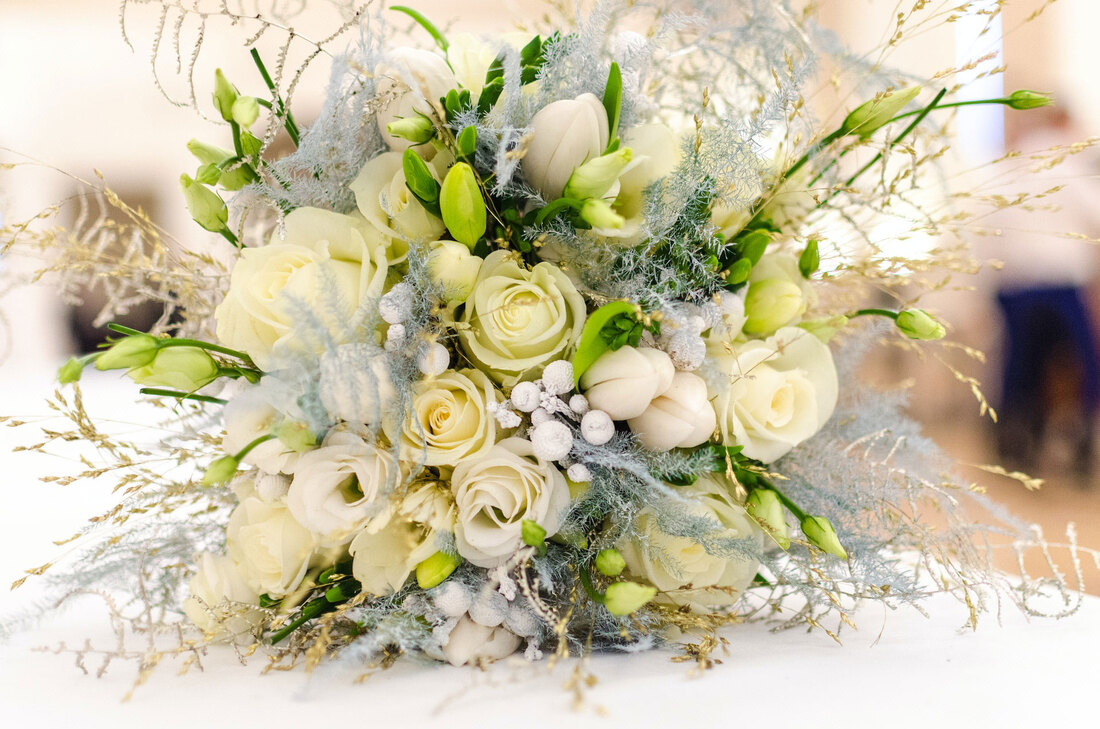
 Image by Lukas on Pexels. Floral arrangements uplift our spirits, brighten a room, and create a touch of natural beauty in our interior spaces. Flowers come in a wide range of shapes, sizes, colors, and textures, each with its unique character. Some popular flowers used in arrangements include roses, lilies, tulips, daisies, sunflowers, and orchids, but don't be afraid to play with any of your favorite flowers and greenery. Creating a balanced floral arrangement is all about channeling your creativity while following (more or less) the principles of floral design. In this blog post, we'll explore the art of floral design and share some valuable tips on creating balanced and visually appealing flower arrangements for your home. So let's get started! Choose a Focal Point Every floral arrangement needs a focal point that grabs attention. Select a standout flower or an interesting element like a unique branch or ornamental grass to act as the centerpiece. This will serve as the anchor for your composition. 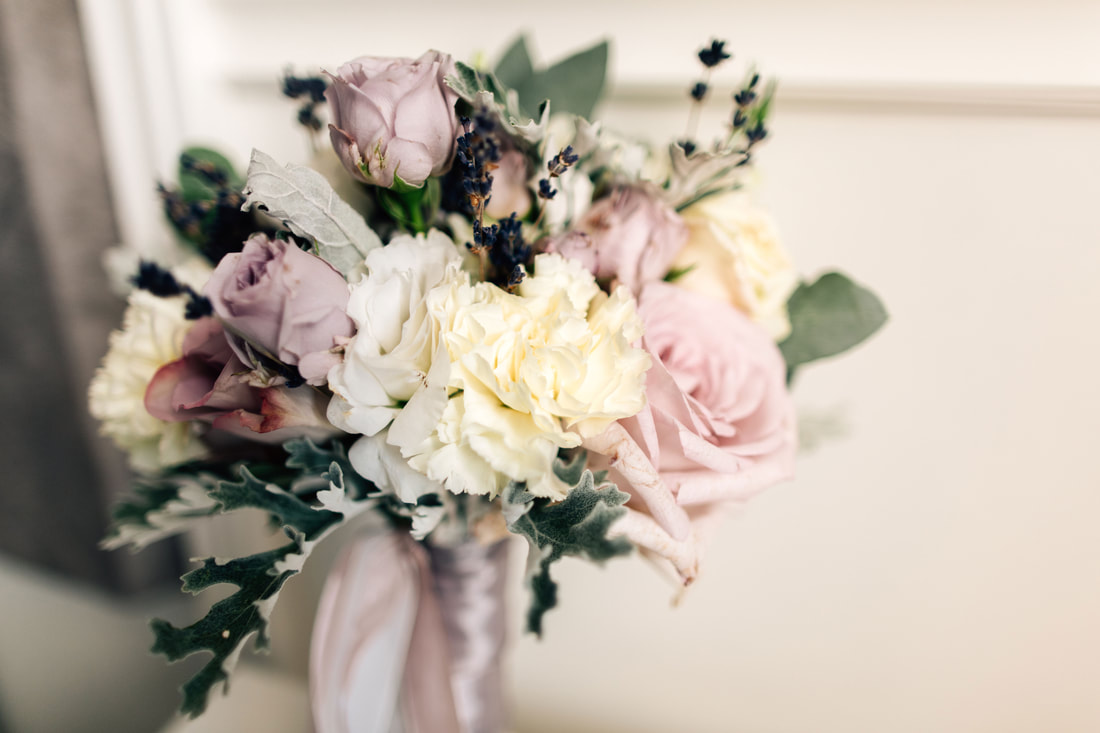 Image by Oleksandr Blishch on Adobe Stock. Consider Height and Proportion It's crucial to play with varying heights and proportions to achieve balance. Combine tall flowers or branches with medium-sized and shorter blooms. This creates depth and visual interest within your arrangement. However, the height differences should not overpower or overshadow the other flowers. 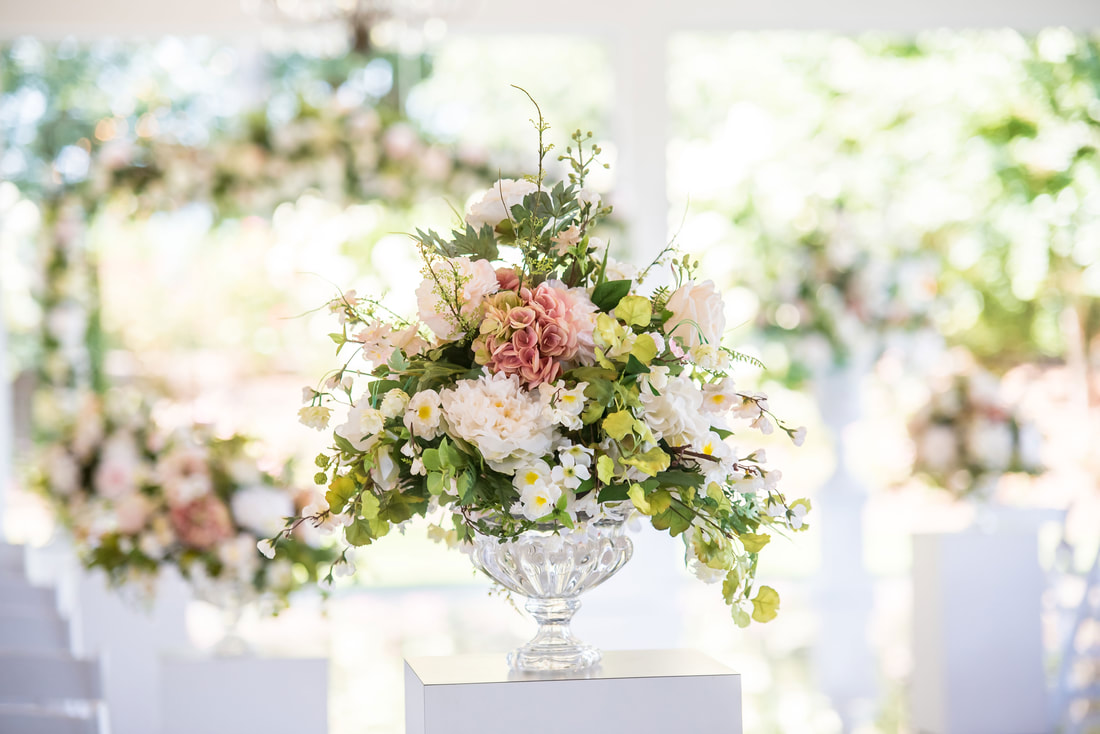 Image by Jaimie McGowan/Wirestock on Adobe Stock. Balance Colors and Textures When selecting flowers for your arrangement, consider using colors and textures that complement each other. Choose a color palette that harmonizes with the room or environment in which the arrangement will be displayed. Pair delicate, airy flowers with more robust blooms to create a balanced contrast of textures. 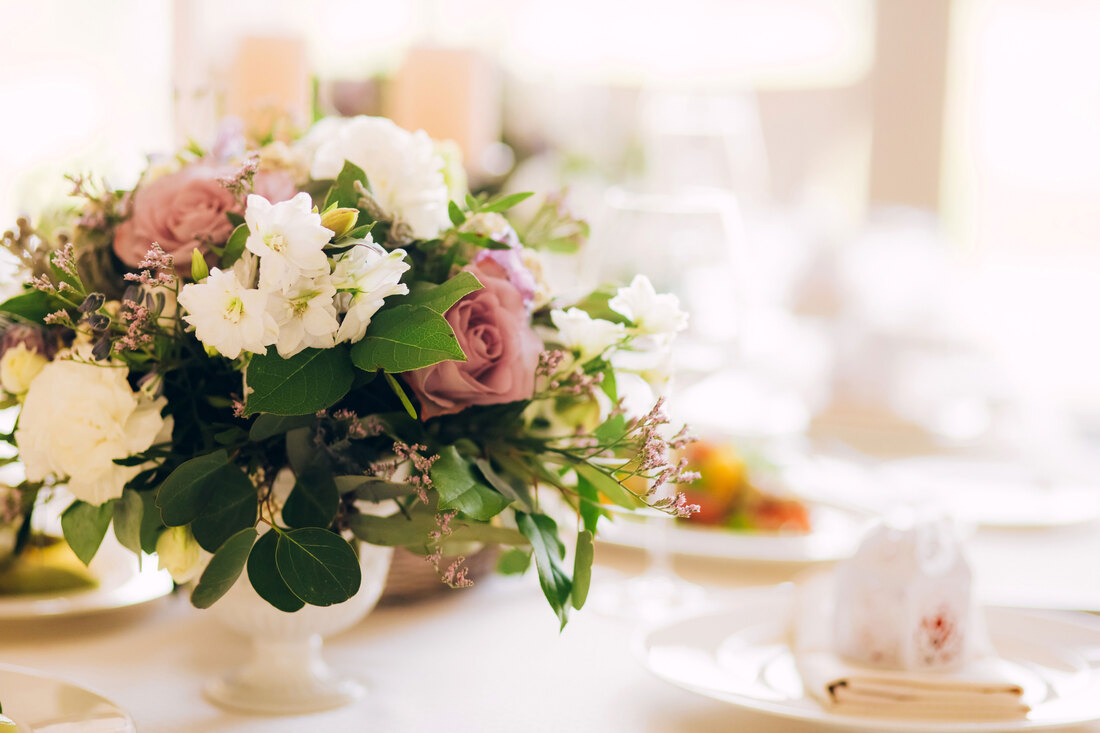 Image by Stanislav on Adobe Stock. Embrace Odd Numbers Odd-numbered groupings of flowers tend to create a more aesthetically pleasing arrangement. Create flower groupings of threes or fives for visual appeal and unity. Odd numbers are more captivating to the eye than even numbers, which can sometimes appear too symmetrical and static. 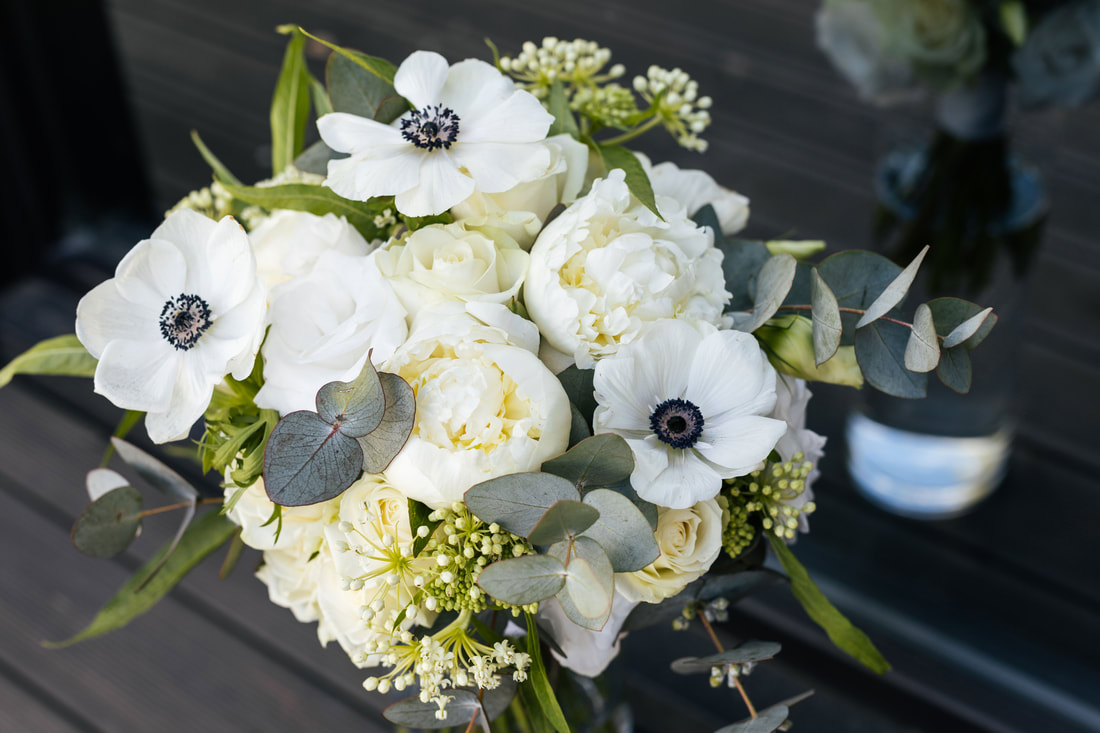 Image by Olga Pulchina on Adobe Stock. Pay Attention to Vessel Selection The vessel you choose for your arrangement is just as essential as the flowers. A tall vase pairs well with long-stemmed flowers, while a shallow dish is perfect for a low and compact arrangement. Use the rule of thirds when selecting your containers to make the overall floral arrangement visually pleasing. This means your flowers should be either one-third or two-thirds the height of your container. (A composition that is too equal in size will not feel natural.) Experiment with various containers like mason jars, vintage pitchers, or elegant glass vases to find the perfect complement to your chosen flowers. Image by Rawpixel.com on Adobe Stock. Creating a balanced floral arrangement is an art form that allows you to showcase your creativity and infuse spaces with natural beauty. By keeping the principles of floral design in mind, playing with height, proportion, colors, and textures, and embracing odd numbers, you can create stunning arrangements that breathe life into any room. Remember, practice makes perfect, so don't be afraid to experiment and even break the rules if it makes your arrangement look better! In time, you’ll learn to trust your eye and creative instincts, and those floral designs will look gorgeous! So, grab your favorite flowers and get creative! Happy arranging! If you'd like to watch me do an arrangement and learn how to do a simple floral design watch my videos on my new Youtube channel! There is a Part 1 and Part 2 tutorial video for this project! Related blogs you may want to read: 10 non-flowering houseplants that are toxic to cats 8 flowering houseplants that are toxic to cats 6 more flowers that attract fairies to your fairy garden 8 flowers that attract fairies to your fairy garden 7 houseplants you can't kill 7 more houseplants you can't kill 7 ways to kill a succulent How to repot a bonsai ficus How to repot a pothos plant
0 Comments
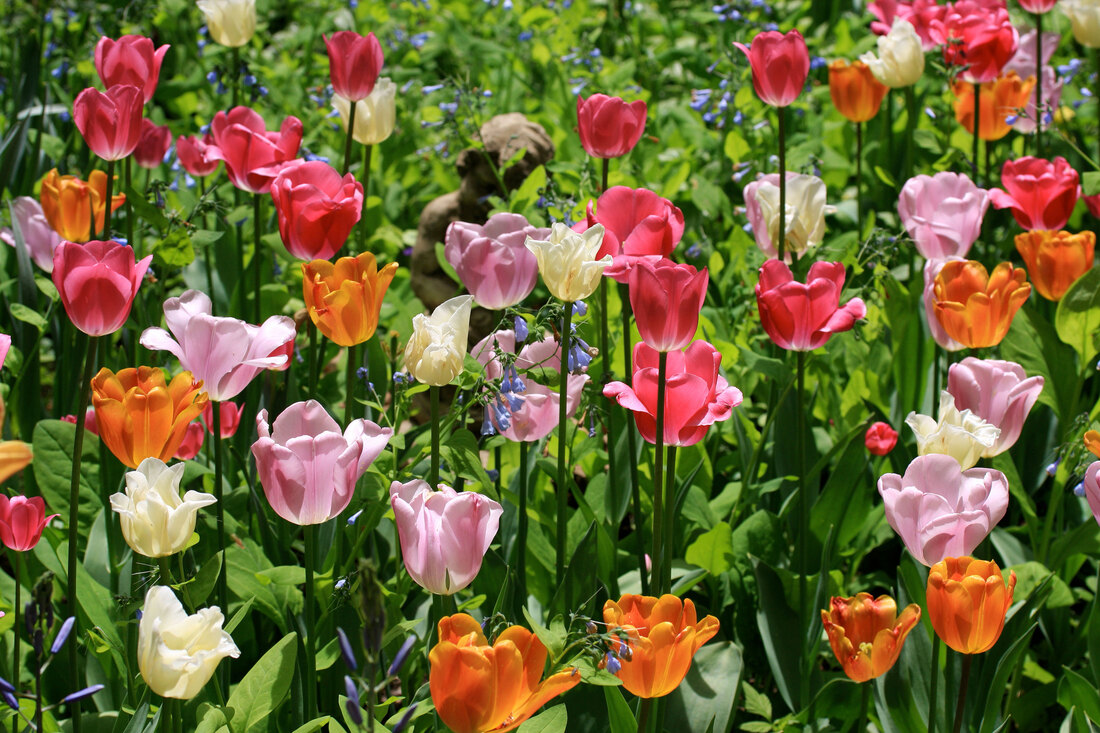 Image by Maryna on Adobe Stock. If you enjoyed one of my latest articles, “8 Flowers that Attract Fairies to Your Fairy Garden”, here are six more fairy flowers for your garden! Interest in fairy gardens has been growing for quite a while now, and the trend shows no sign of stopping any time soon! The act of creating a fairy garden awakens the inner child, providing an escape from the problems of the mundane and sometimes stressful world around us. And it’s a gift that keeps on giving! Once you create the garden, it becomes a refuge where you can escape from it all and let your imagination out of the box. I have been experimenting with my fairy gardens, and—being a lifelong lover of fairy tales—it got me thinking about the types of flowers fairies might like in their garden. I’m sharing some of my research with you to help you on your way to creating a fairy-friendly garden! Columbine Columbine is a beautiful, graceful flower that reminds me of the layers on a fairy dress! The flower is closely associated with women and sensuality and symbolizes the balance between fragility and strength. The word Columbine has a Latin root that means “dove” which symbolizes peace, but the flower also has associations with the eagle and war. This duality in meaning is also reflected in other names for this flower, such as Granny’s Bonnet and Lion’s Herb. Plant this stunning flower in your garden to attract butterflies, hummingbirds, bees…and fairies! 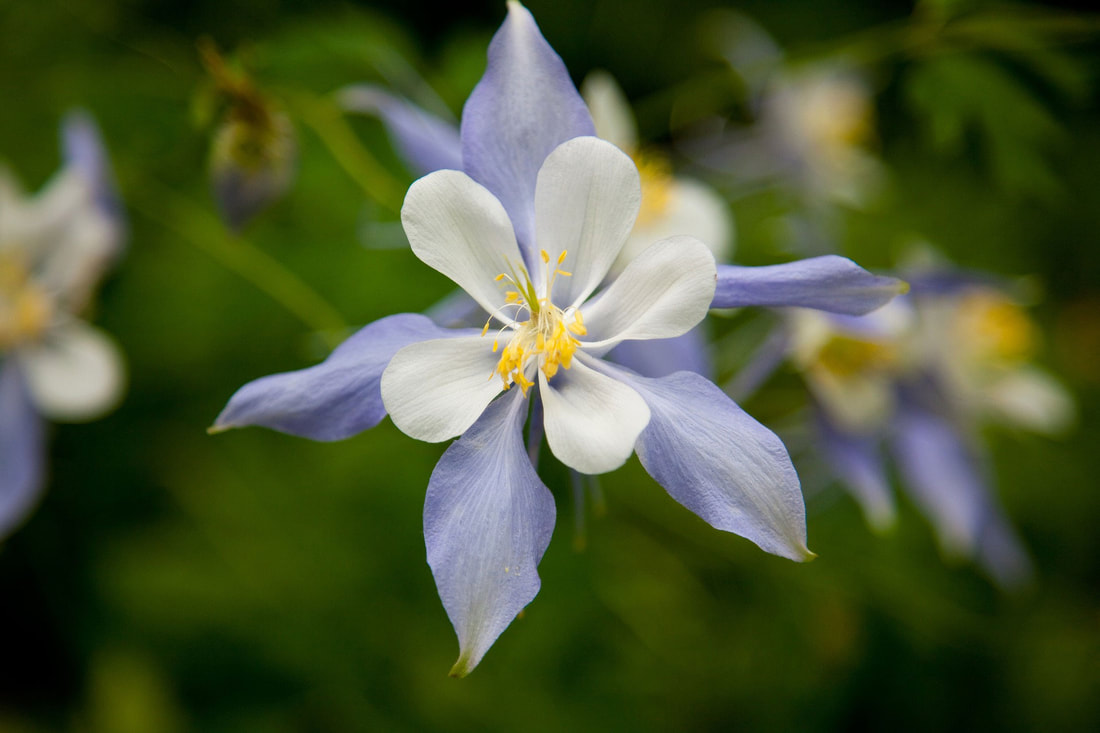 Image by Paul McGowan on Pixabay. Pansies Pansies are such sweet, colorful flowers! You can often find them growing wild just about anywhere, especially in shady or tucked-away places where the fairy folk like to hide. Other names this flower may go by are Johnny Jump-ups or Viola. Symbolically, the flower represents the act of reflection or remembrance, keeping someone in your thoughts. In folklore, pansies can attract love or make someone fall in love with you and are known to ward off bad spirits and evil spells. Look at the flower petals from a certain angle and see a fairy face staring back at you! This is a must-have flower for your fairy garden! 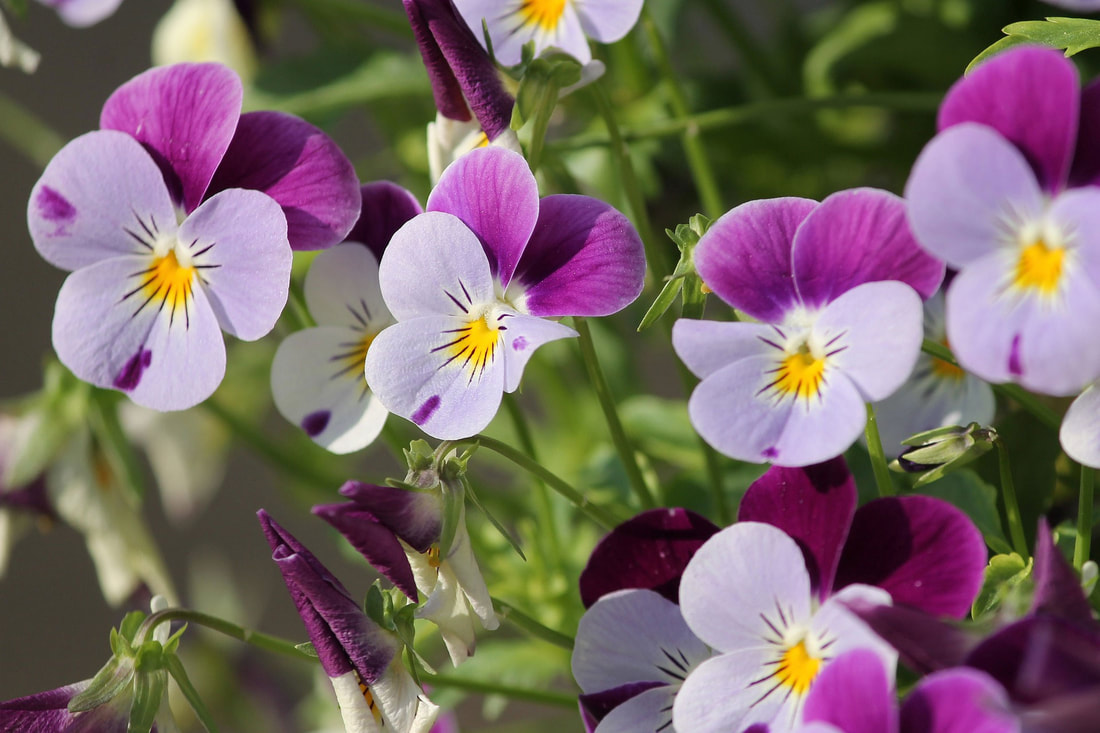 Image by Manfred-Richter on Pixabay. Petunias Petunias (with their velvety petals) are a visually stunning and aromatic addition to any fairy garden! This flower symbolizes positive vibes of well-being and friendship, and is thought to repel negative energy and evil spirits. A garden filled with petunias will invite wonder, inspiration, and creative ideas. These beautiful flowers also attract hummingbirds, butterflies, and bees. Any fairy would feel quite at home surrounded by a patch of petunias!  Purple and white petunia. Photo by Diane M. Lilly, 2022. Snapdragons Snapdragons (also known as dog flower, dragon flower, or lion’s mouth) symbolize peace, grace, and inner strength. In folklore, this flower wards off spells and evil spirits, attracts positive vibes, and provides magical protection. The curly petals of the snapdragon attract bees…and—of course—fairies! 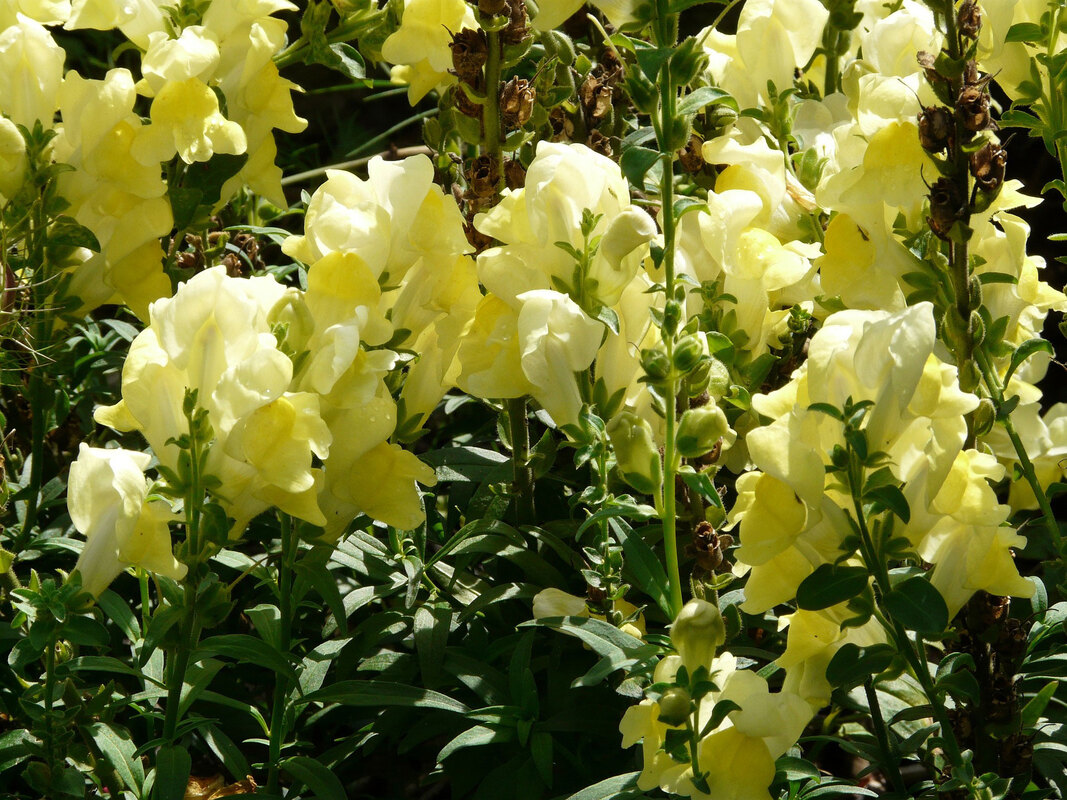 Image by Hans on Pixabay. Tulips What would be a fairy garden without tulips?! Fairies have been known to hide or sleep inside the tulip flowers, away from the prying eyes of us humans. They even use these flowery havens as cribs for their infants. But the tulip is not just significant to fairies…According to old superstitions, tulips symbolize luck, abundance, love, and declaring new love. So plant a few in or near your fairy garden for your special guest! 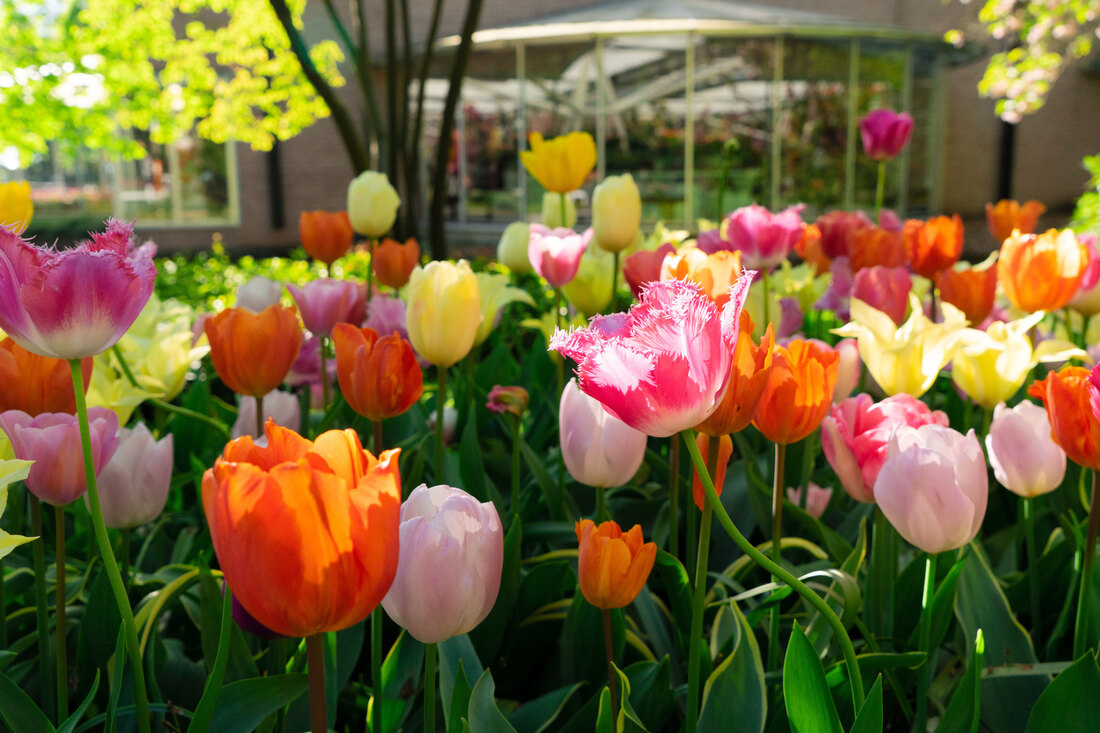 Image by neirfy on Pixabay. Violets Violets have powerful symbolism, and any garden would be bare without them! In many traditions, violets are associated with transformation and the cycles of life, birth, and rebirth. This flower can also represent new love. The magical and mystical time of twilight--when the veil between worlds is thin, as they say—is also closely associated with violets. This is the perfect flower for your resident fairy for easy travel between here and the Otherworld, and a must-have plant for a magical fairy garden!  Image by perlphoto on Adobe Stock. So there are six more flowers that you can plant in your fairy garden to attract the fae folk. If you haven’t had a chance to read the first article with eight flowers that attract fairies, the link is down below! Happy planting! (And say hi to the fairies for me!) Related blogs you may want to read: 8 flowers that attract fairies to your fairy garden Who are the Irish fairies? 10 essential elements for a magical outdoor fairy garden A brief history of the origins of fairy gardens My spring 2022 indoor fairy gardens Spring makeover for my indoor fairy gardens My outdoor fairy garden Sources: https://www.terriwindling.com/blog/2019/05/wildflower-season.html https://www.terriwindling.com/blog/2019/05/wildflower-lore.html https://theforestfairy.com/flowers-that-attract-and-welcome-the-fairies-into-your-garden/ https://www.llewellyn.com/journal/article/3028 https://greenwitchfarm.com/all-you-need-to-know-about-columbine/ https://amovitam.ca/the-fairy-in-the-pansy-flower/ https://hive.blog/hive-148441/@yidneth/violas-and-pansies-folklore-mythology-legends-and-properties-of-these-beautiful-flowers https://www.petalrepublic.com/petunia-meaning/ https://a-z-animals.com/blog/snapdragon-meaning-symbolism-and-proper-occasions/ 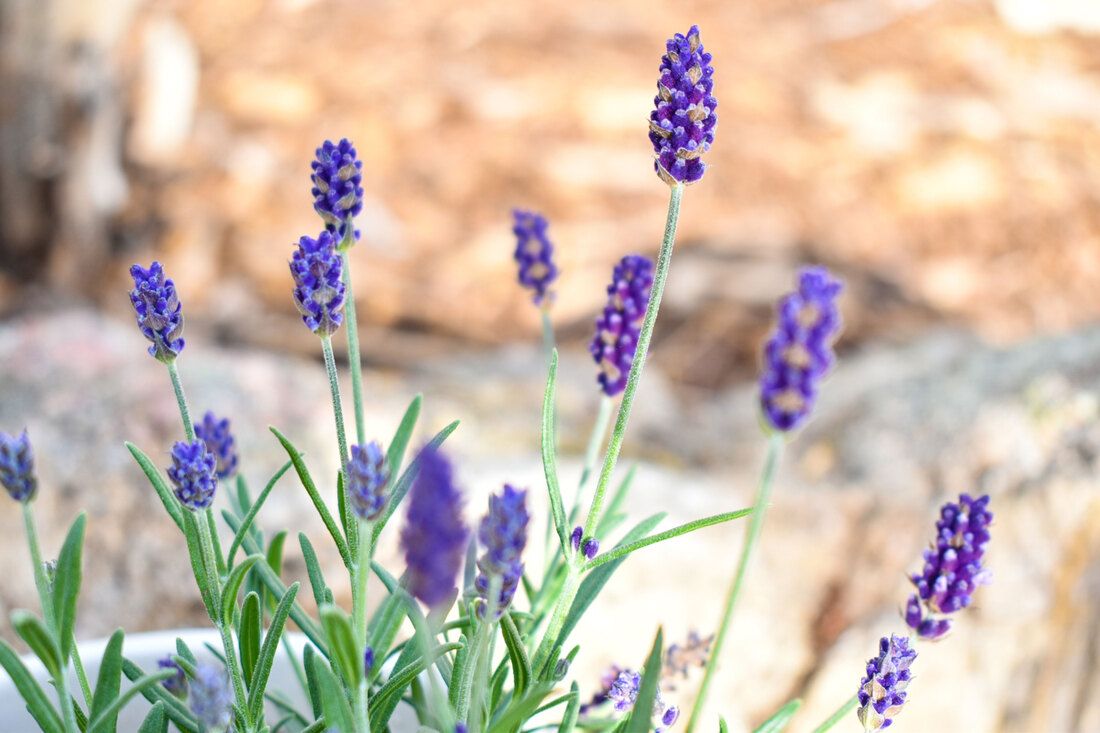 Image by Lauriekay Wirestock on Adobe Stock. Bringing flowers into your home is one of the easiest ways to add beauty, color, and texture to an interior space. Flowers can make a statement all their own or complement existing decor, and many have an amazing fragrance that can be a natural room deodorizer. But if you have cats (or other pets) or even small children in your home, you must be selective about which flowers you use and purposeful about where those plants are placed. In some cases, it could mean the difference between life and death!  My Persian cat Smokey. Photo by Diane M. Lilly, 2020.  My munchkin cat Bandit. Photo by Diane M. Lilly, 2021. I have two beautiful cats in my home that share a space with my plants, so I’ve embarked on a journey to discover which plants and flowers might be toxic to my fur babies. Today’s blog is part of a series of articles on this subject, where I pick a few of the most popular houseplants and flowers that pose a threat to cats. The focus will be on cats, but this information could pertain to other pets and small children. So here are a few flowering plants you should avoid (or monitor) if you have cats… Amaryllis The entire amaryllis plant is toxic, but the bulb is the most toxic, containing raphide oxalate crystals. The rest of the plant contains phenanthridine alkaloid and lycorine. Symptoms of toxic poisoning from this plant may be breathing problems, drop in blood pressure, vomiting, irritation of the mouth, drooling, pawing at the face, diarrhea, and tremors. It’s best to keep this plant out of the reach of your cats!  Image by wjarek on Adobe Stock. Azalea The azalea is not typically an indoor plant, but it's worth noting due to its popularity and use in some floral arrangements. Azaleas contain grayanotoxin, which affects the heart and can cause diarrhea and vomiting. The whole plant is toxic to cats, so watch your outdoor cats! Image by Pixel Shot on Adobe Stock. Begonia Begonias are one of the most popular potted plants but are not the safest flowering plant for cats. The whole plant is toxic, but the roots contain soluble calcium oxalates, which can cause vomiting, drooling, and kidney failure. This one may be better off as a hanging plant!  Image by detailfoto on Adobe Stock. Carnation Carnations--while not as bad for your cat as some other flowering plants--are still mildly toxic. Signs that your cat has ingested this plant might be upset stomach and dermatitis. So be careful with those flower arrangements! Image by Pixel Shot on Adobe Stock. Chrysanthemum Commonly known as mum, this pretty but hazardous plant contains pyrethrins, sesquiterpene, and lactones--toxins found in pesticides and certain flea and tick meds and can be very bad if ingested by your cat. Some toxic symptoms might include drooling, vomiting, diarrhea, and skin issues.  Image by Maryia on Adobe Stock. Cyclamen This is a whimsical plant with colorful pinwheel petals reaching toward the sky, but make no mistake, Cyclamen is extremely toxic--if not deadly--to your cats! The toxins it contains include Terpenoid saponins, also known as triterpene glycosides. The entire plant, including the tubers, is toxic, and ingesting any part of the plant can cause vomiting, diarrhea, drooling, heart problems, seizures, and possibly death for your cat.  Image by womue on Adobe Stock. Daffodils Also called Narcissus, the whole plant is toxic—flowers, leaves, and especially the bulbs. Daffodils contain lycorine, phenanthridine alkaloids, and calcium oxalate crystals, which even in small quantities can result in diarrhea, stomach upset, vomiting, tremors, drooling, drop in blood pressure, and cardiac issues. Be very careful with this flower around your cats! 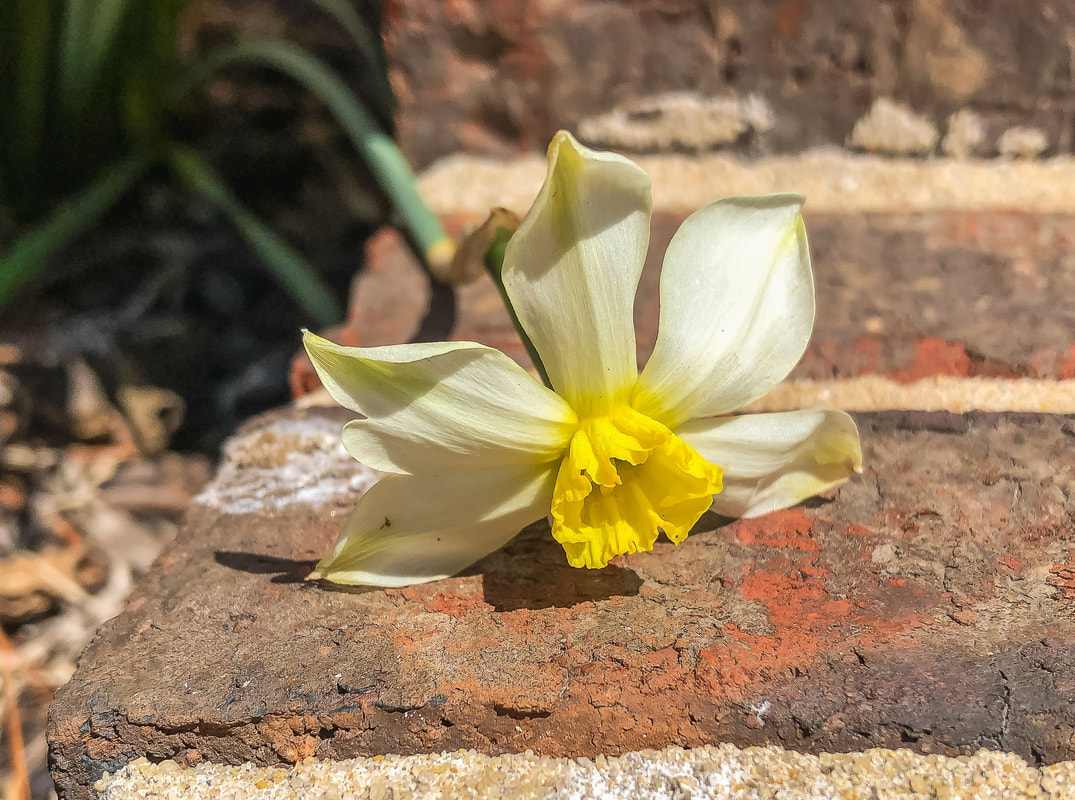 Lazy Daffodil. Photo by Diane M. Lilly, 2022. Hyacinth Like most bulb plants, hyacinths are dangerous for cats. The hyacinth plant contains alkaloids like lycorine and calcium oxalate raphides, which can cause diarrhea, vomiting, dermatitis, and tremors. So, if you receive one of these aromatic flowering plants for Easter or Mother’s Day, it may be best to keep it outside, away from your indoor cats! 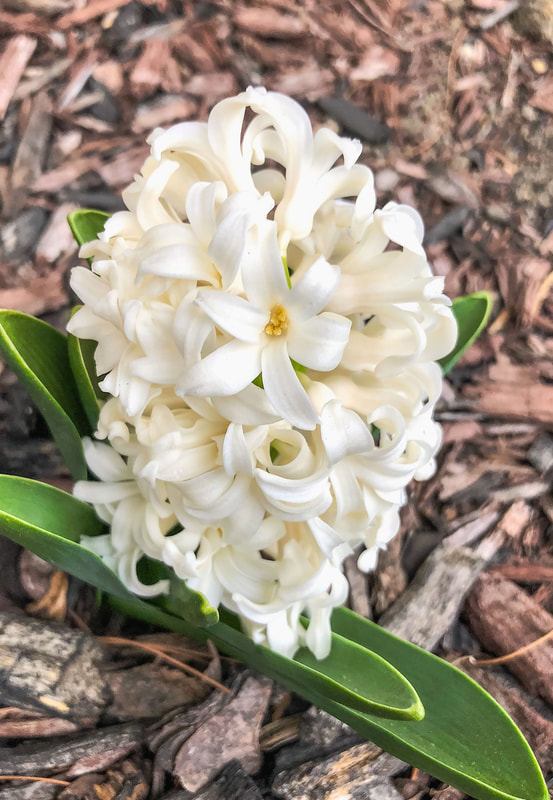 White hyacinth. Photo by Diane M. Lilly, 2019. So, there are a few flowering plants to monitor if you have cats. There are many more, and I’ll add more articles with additional plants as I do more research. Please remember I am NOT a vet, so if you are at all concerned that your cat has ingested part of your plants, please consult a veterinarian immediately. Also, remember to do your own research so you can properly care for your plants while keeping your pets and small children safe. Related blogs you may want to read: 10 non flowering houseplants that are toxic to cats Eight tips for assessing natural light in your home How to repot a bonsai ficus How to repot a pothos plant How to propagate bromeliad pups Small houseplants that love bathroom humidity Eight health benefits of decorating with plants Let’s talk about houseplants Sources: https://www.hillspet.com/cat-care/routine-care/house-plants-toxic-to-cats?lightboxfired=true# https://www.thespruce.com/houseplants-toxic-to-cats-4775359 https://www.preventivevet.com/cats/common-household-plants-toxic-to-cats https://www.aspca.org/pet-care/animal-poison-control/toxic-and-non-toxic-plants?field_toxicity_value[]=02 https://www.marthastewart.com/8376743/houseplants-toxic-to-cats https://www.farmersalmanac.com/toxic-houseplants-30149 https://pethelpful.com/cats/Houseplants-Poisonous-to-your-Cats https://www.dailypaws.com/cats-kittens/health-care/cat-poisoning-toxins/plants-toxic-to-cats https://pets.webmd.com/ss/slideshow-pets-poisonous-plants https://www.sleepyhollowanimalhospital.com/the-houseplants-that-could-poison-your-cat/ 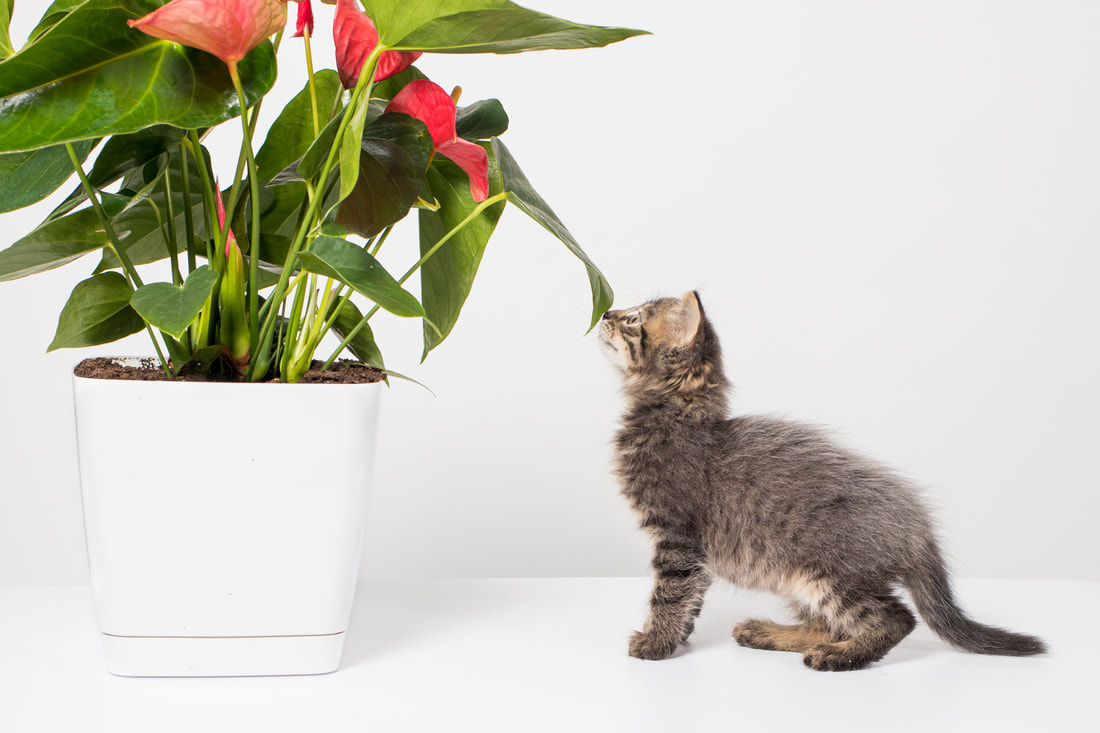 Image by Zarina Lukash on Adobe Stock. If you have houseplants AND pets, this information is for you! For most of my life, there has always been a cat or two in the home, and I can’t imagine life without them! Houseplants, on the other hand, are a far more recent phenomenon. A few years back (after our 14-year-old fur baby passed away), our household was blessed with two beautiful munchkin kittens. It’s been five years, and they have grown into such sweet cats! Suddenly, I’ve become aware that the house is full of luscious green plant babies that may not get along with my fur babies.  Smokey and the Bandit as kittens. Photo by Diane M. Lilly, 2017. I’m only just learning the ins and outs of plant care, and one of the topics on my mind is plant toxicity. I finally carved out time to do some much-needed research on the subject. This would be an actual book if I tried to list ALL the plants and flowers that could be toxic, so I decided to break up the list into several blogs featuring the most common houseplants. Today we will look at ten houseplants that are (more or less) NON-flowering that could be problematic for your cats. So, let’s get to it! Aloe vera Who doesn’t love an aloe plant? They are easy to maintain and look good in just about any pot. Their simplicity and good looks, however, hide the fact that these plants can be harmful to your kitty if it should happen to take a nibble. Aloe plants contain toxins known as saponins (anthraquinone glycosides), so this plant is harmful if ingested, although on the more moderate end of the toxin spectrum. If your cat eats this plant, it may show symptoms such as diarrhea, vomiting, and lethargy. 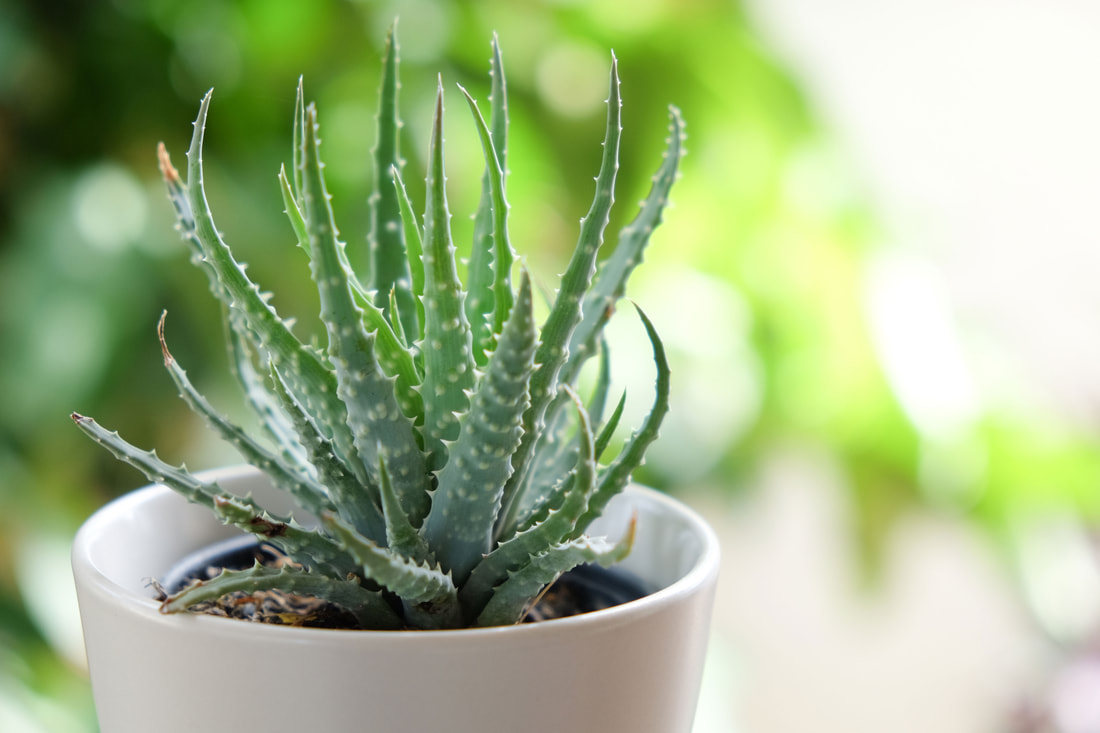 Image by Nattapol_Sritongcom on Adobe Stock. Asparagus fern Another mildly toxic plant that contains sapogenins is the wispy asparagus fern. This green plant looks like something out of a fairy forest, but what appeals to the fairies can make cats sick! Cats ingesting this plant may develop skin allergies, dermatitis, diarrhea, vomiting, and upset stomach. 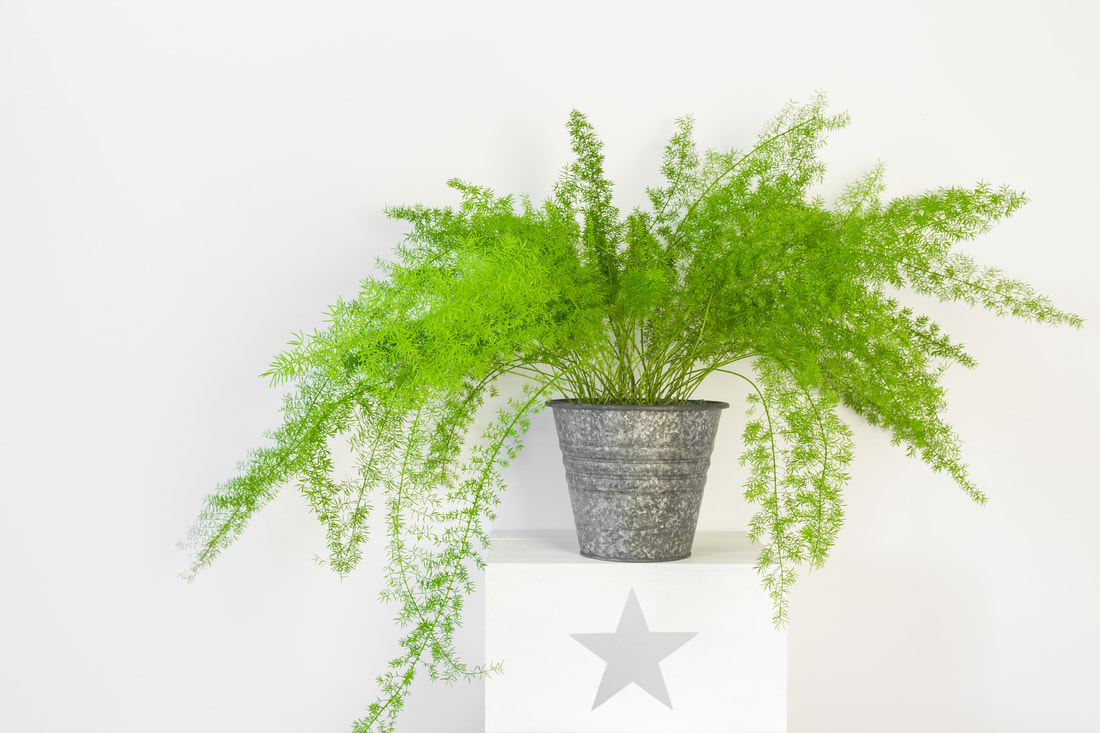 Image by Studio Light & Shade on Adobe Stock. Caladium The caladium plant is a bit more serious when it comes to toxicity. This plant with incredibly striking leaves contains Insoluble calcium oxalates, and these toxins can be quite bad for cats. The toxic symptoms could include vomiting, swelling of the mouth, excessive drooling, and difficulty swallowing and will require--at the very least--an immediate call to your vet. 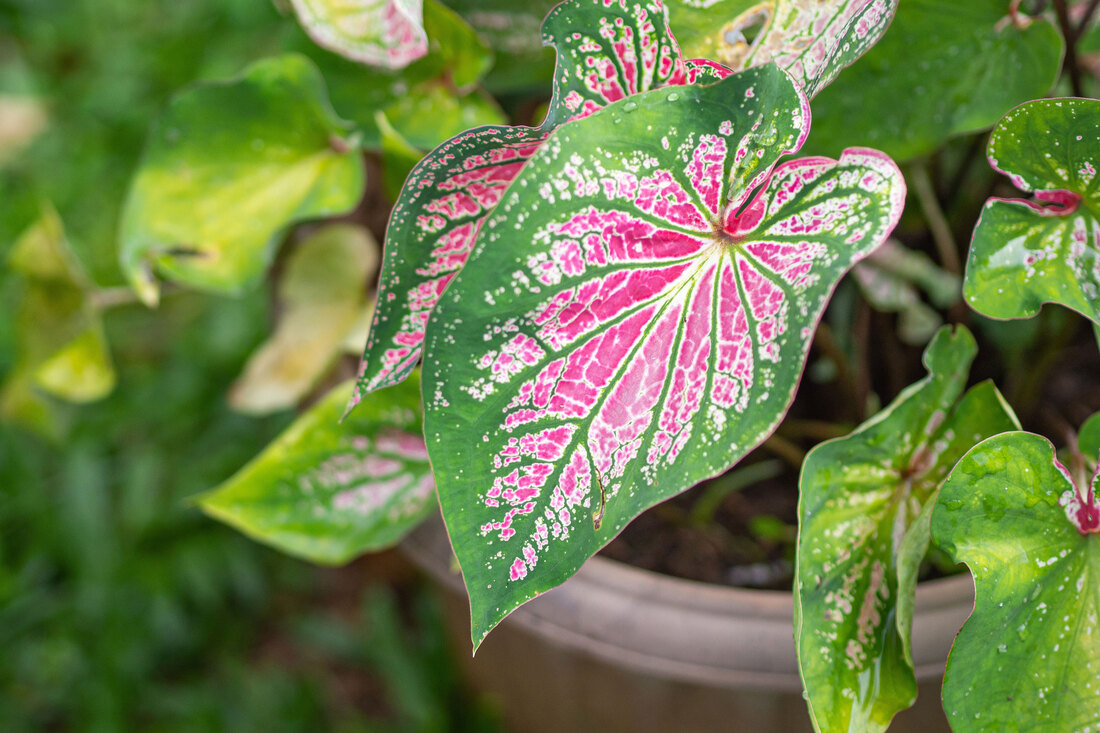 Image by meeboonstudio on Adobe Stock. Castor bean The castor bean is a plant that you should cross off your list. This is a very toxic plant containing ricin, and anyone who ingests this plant is in very real danger from the effects of the toxins. In cats, the toxins of the castor bean plant can cause damage to the nervous system, kidney failure, diarrhea, vomiting, loss of appetite, weakness, convulsions, and even death. 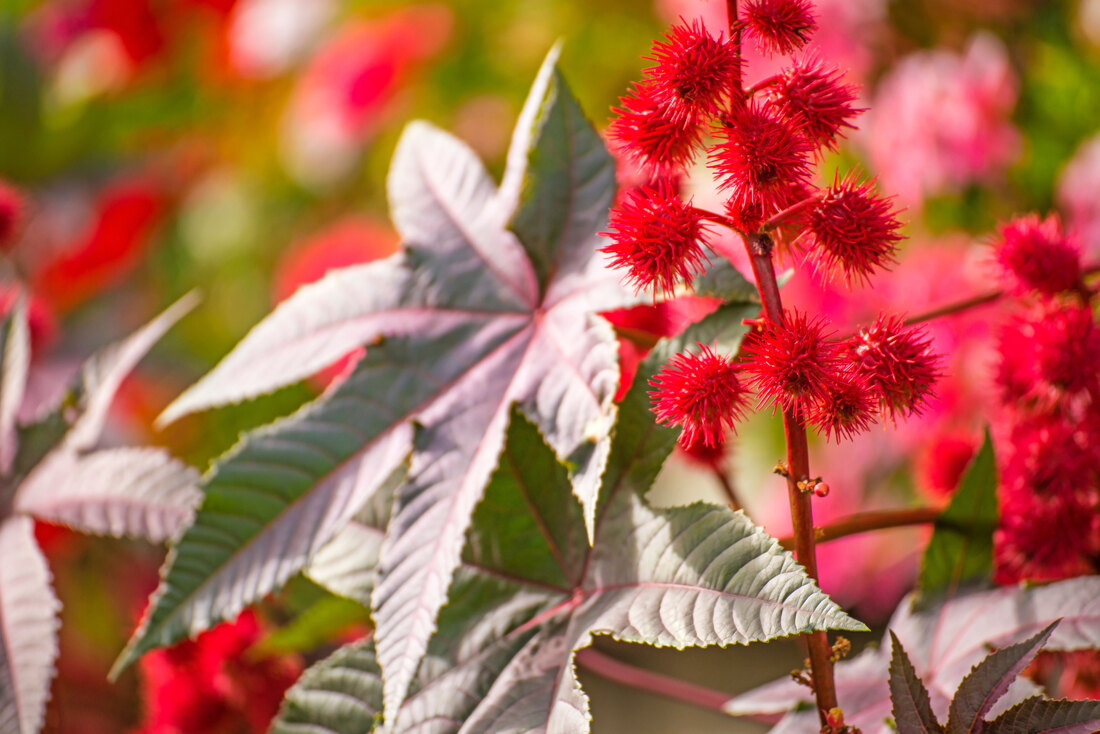 Image by hjschneider on Adobe Stock. Coleus Coleus is another houseplant that flaunts striking leaves but contains toxins that are very harmful to pets and small children. If you have this plant, look for symptoms such as diarrhea, vomiting, and changes in your cat’s mood. 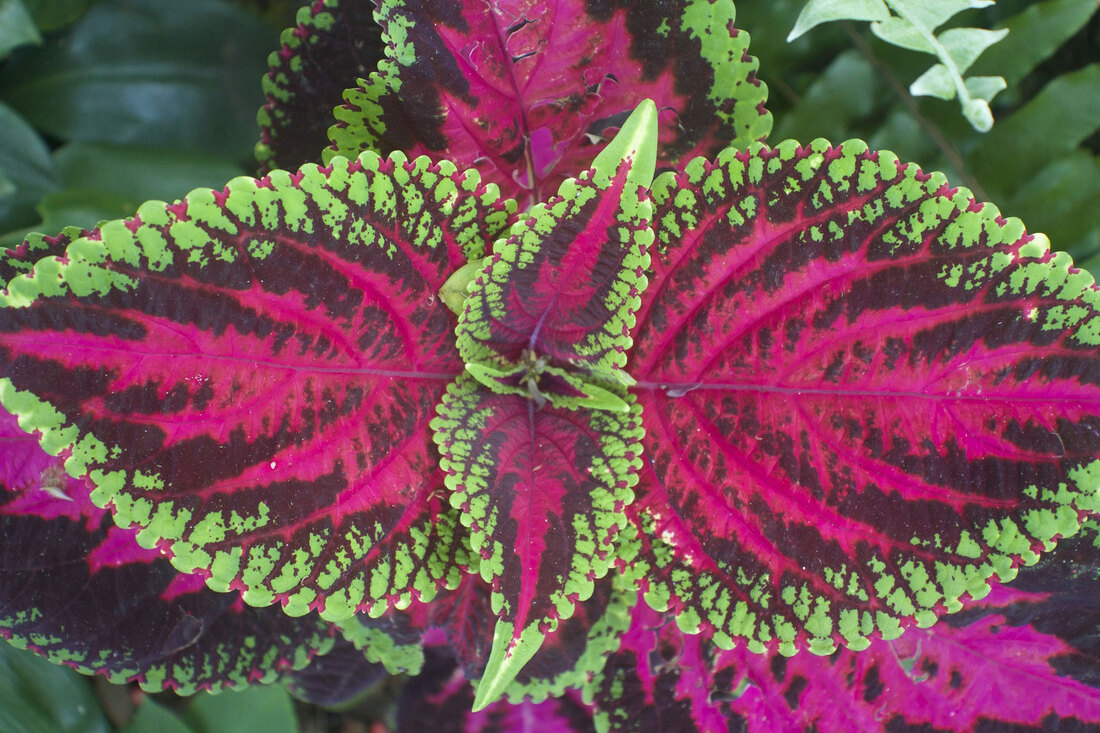 Image by yvonneboylan on Pixabay. Cutleaf philodendron Also known as Monstera, Ceriman, split leaf philodendron, or Swiss Cheese plant, this popular plant contains Insoluble calcium oxalates, which—just as with the caladium—means they are toxic to cats. If one of these large trendy plants has found a home in a cozy corner of your living room, keep an eye on your kitty and look for symptoms such as mouth and tongue swelling, excessive drooling, difficulty swallowing, and vomiting.  Image by ArtBackground on Adobe Stock. Dieffenbachia This plant contains insoluble calcium oxalates that, as previously mentioned, can have terrible effects if ingested by your pets or small children. Also known as Dumb Cane or Charming Dieffenbachia, a proteolytic enzyme makes this plant a very toxic choice for a houseplant. The toxins negatively affect the gastrointestinal tract. These poisons also cause difficulty swallowing and swelling of the lips, tongue, and face. 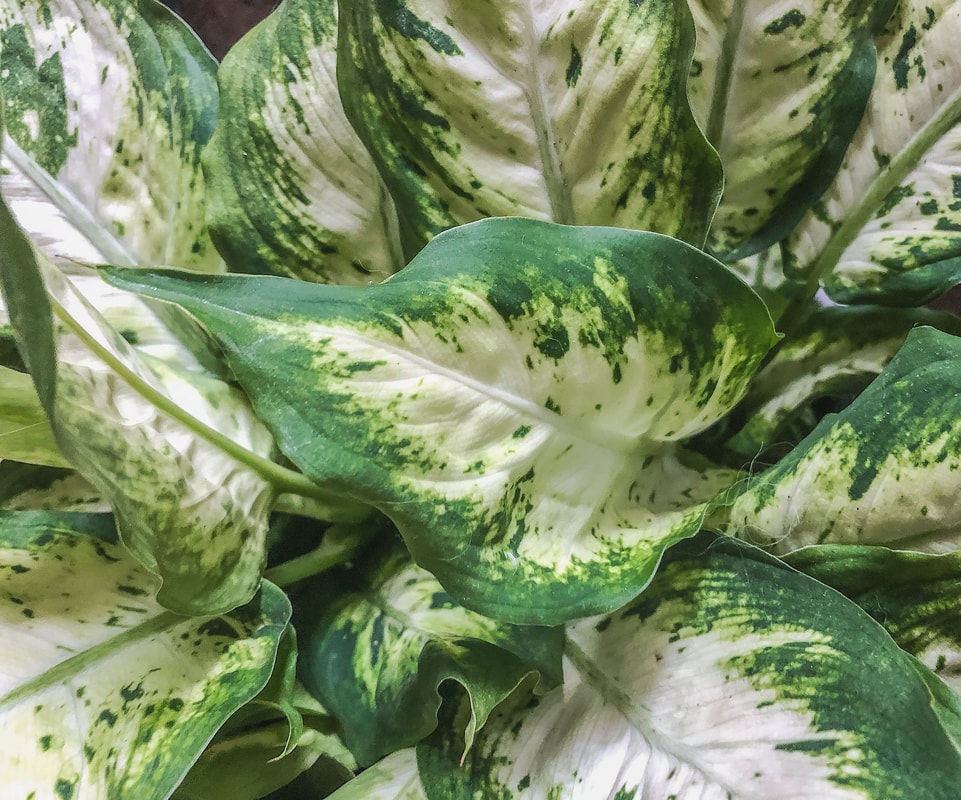 Dieffenbachia leaves. Photo by Diane M. Lilly, 2021. Dracaena Also known as the Corn Plant, the dracaena contains saponins, which can cause vomiting, lack of appetite, drooling, and lethargy in your cat if ingested. Many different plants fall under the category of dracaena, so do your homework before bringing unknown plants home!  Image by Gabriele Lasser on Pixabay. English ivy One of my all-time favorite plants is English ivy, but unfortunately, this can never have a place inside my home. Ivy contains Triterpenoid saponins, making it very toxic and dangerous to animals, causing excessive drooling, diarrhea, and vomiting. And this may be the case for many types of ivy, so do your research!  Image by Dimitris Vetsikas on Pixabay. Eucalyptus The trendy eucalyptus plant—unfortunately—contains eucalyptol and harmful essential oils. Contact with this plant (or the essential oil) can cause excessive drooling, oral irritation, airway swelling, weakness, vomiting, diarrhea, and low mood in your cat. This may look gorgeous in wedding bouquets and on Instagram, but keep it away from your pets! I recently found out that essential oils can be harmful to pets, so use these oils wisely. It's best to keep them away from your dogs and cats. 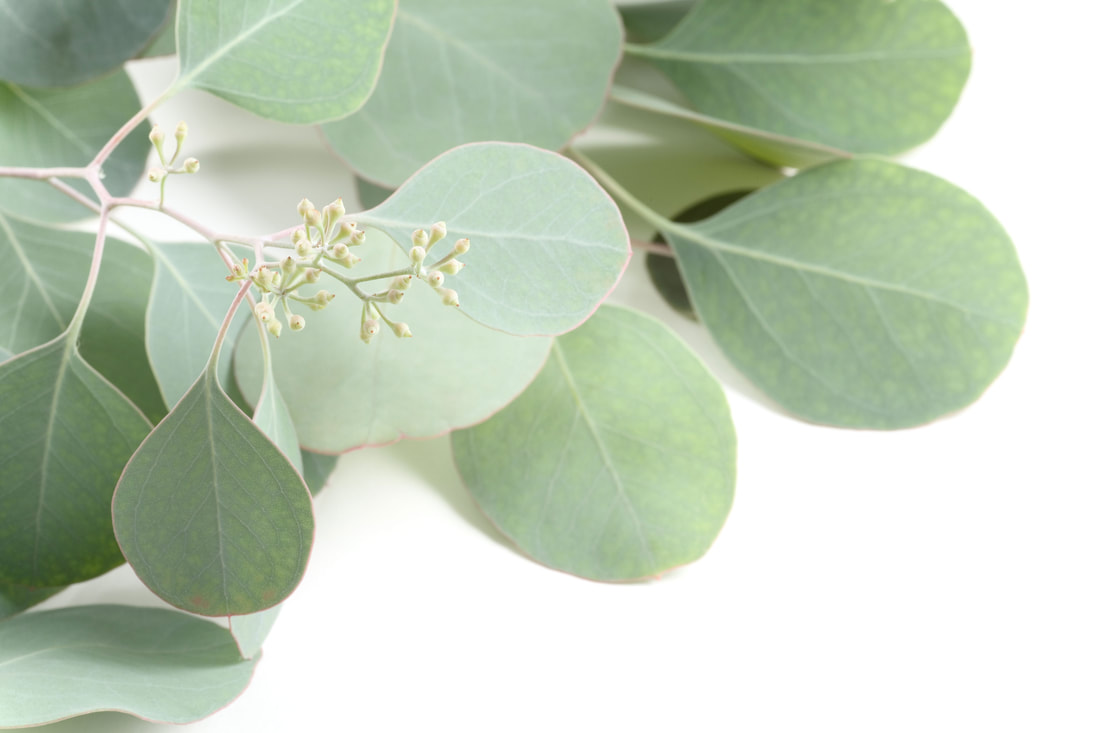 Image by Denise Torres on Adobe Stock. It’s important to point out that certain plants only require minimum exposure to bring on symptoms, but others need quite a bit more ingestion. Your kitty's response to the toxicity also depends on their size and constitution, so this list is only meant to be a guide. I am also NOT a veterinarian, so please consult a vet if you believe your cat is reacting to any plant in your house. This article is meant to raise cat owners' awareness of hidden dangers in common houseplants. That doesn’t necessarily mean you can’t have your favorite plant baby, but maybe place it somewhere out of reach of your other precious babies of the furry variety! Related blogs you may want to read: 8 flowering houseplants that are toxic to cats Eight tips for assessing natural light in your home How to repot a bonsai ficus How to repot a pothos plant How to propagate bromeliad pups Small houseplants that love bathroom humidity Eight health benefits of decorating with plants Let’s talk about houseplants Sources: https://www.hillspet.com/cat-care/routine-care/house-plants-toxic-to-cats?lightboxfired=true# https://www.thespruce.com/houseplants-toxic-to-cats-4775359 https://www.preventivevet.com/cats/common-household-plants-toxic-to-cats https://www.aspca.org/pet-care/animal-poison-control/toxic-and-non-toxic-plants?field_toxicity_value[]=02 https://www.marthastewart.com/8376743/houseplants-toxic-to-cats https://www.farmersalmanac.com/toxic-houseplants-30149 https://pethelpful.com/cats/Houseplants-Poisonous-to-your-Cats https://www.dailypaws.com/cats-kittens/health-care/cat-poisoning-toxins/plants-toxic-to-cats https://pets.webmd.com/ss/slideshow-pets-poisonous-plants https://www.sleepyhollowanimalhospital.com/the-houseplants-that-could-poison-your-cat/ https://www.aspcapro.org/resource/17-plants-poisonous-pets  Bluebells image by Andy Evans on Adobe Stock. Even if you don’t believe in fairies, a beautiful garden full of fragrant flowers bursting with vibrant blooms feels enchanting--don’t you think? To my mind, fairies are more than tiny winged or magical creatures. They represent the idea that the natural world is brimming with wonders, wonders we miss while living our busy lives. But take the time to go deeper, and you'll find magic all around you. Fairies and flowers have long had a close association, as this poem by Robert Louis Stevenson beautifully illustrates: The Flowers “All the names I know from nurse: Gardener's garters, Shepherd's purse, Bachelor's buttons, Lady's smock, And the Lady Hollyhock. Fairy places, fairy things, Fairy woods where the wild bee wings, Tiny trees for tiny dames-- These must all be fairy names! Tiny woods below whose boughs Shady fairies weave a house; Tiny tree-tops, rose or thyme, Where the braver fairies climb! Fair are grown-up people's trees, But the fairest woods are these; Where, if I were not so tall, I should live for good and all” Robert Louis Stevenson When we were children, our imagination allowed us to escape this world into someplace ethereal and mystical...and then we grew up. But, let’s say, for the sake of argument, fairies DO exist…How would you go about creating a natural haven for your magical guests? My quest is to find the perfect flowers to attract fairies to my garden, and it’s been a fascinating journey! In today's blog, I'd like to share a few flowers that may help you create your magical fairy world! Bluebells Out of all the flowers, bluebells may be one of the most closely associated with fairies. Carpets of bluebells can be found on many forest floors, rippling like water in the breeze. It may look beautiful, but enter that field of blue at your own risk! Fields of bluebells represent places of the other realm where the fairy folk meet, dance, and feast. Stroll into this field, and you may disappear into the realm of the fairies! This realm is a place of enchantment where time moves much slower. If you manage to escape and return to reality, you may find significant time has elapsed. It is also said that stepping on bluebells or hearing them ring can mean impending death for you or someone close to you. But don’t let any of that scare you! Planting bluebells in your garden, nurturing them, and respecting the space is a surefire way to entice fairies to your garden! 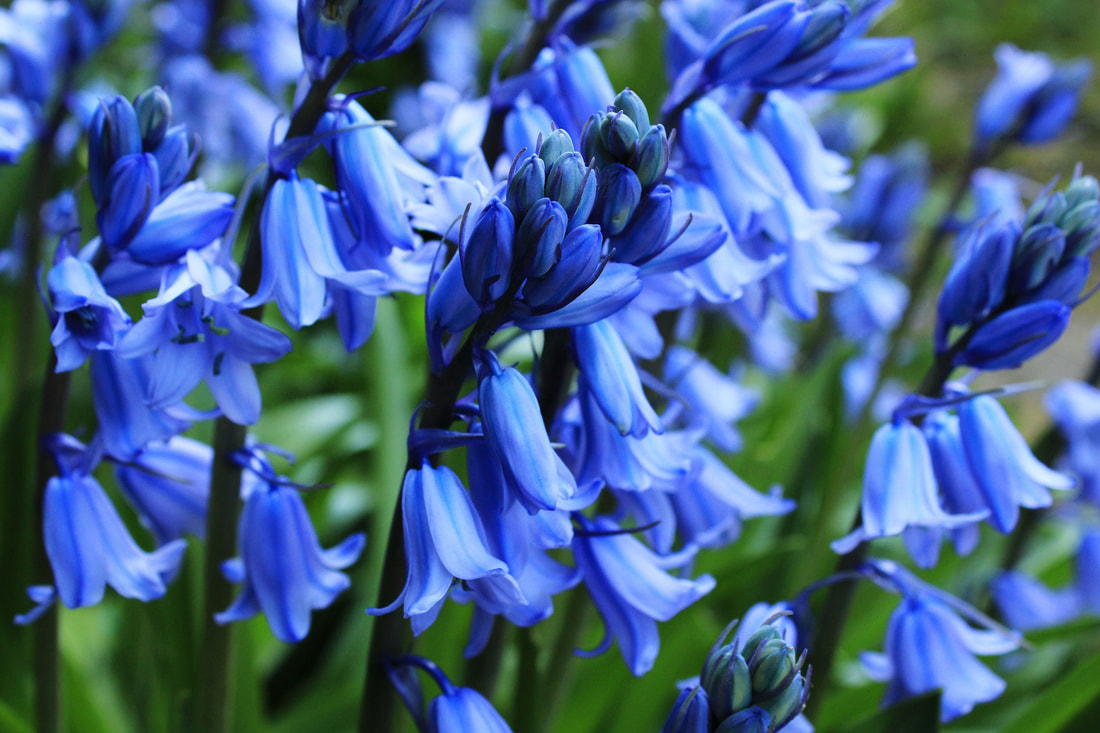 Bluebells image by armennano on Pixabay. Clover We’re all familiar with the iconic clover! How many of you spent hours as a child lying in the grass searching for the elusive four-leaf clover? So it should come as no surprise that clover leaves symbolize luck, particularly the four-leaf variety. Four-leaf clovers not only attract but allow you to see the fairies! Clover leaves in fairy lore are said to offer magical protection and fairy glamour, but the clover flowers have a symbolism of their own--they aid in matters of the heart. And bees love clover too, so clover just might be a handy plant to have in your garden!  Red clover image by Couleur on Pixabay. Cowslips Cowslips are related to primrose and are one of the first flowers of spring. The flowers resemble keys and are said to be the keys to the fairy realm. Another common name for cowslips is "fairy cup" because it is said that fairies take shelter in these during times of danger. Fairy folklore says a patch of cowslips is a sign that fairy gold or treasure is hidden nearby! This flower is a must-have if you want some powerful fairy magic in your garden! 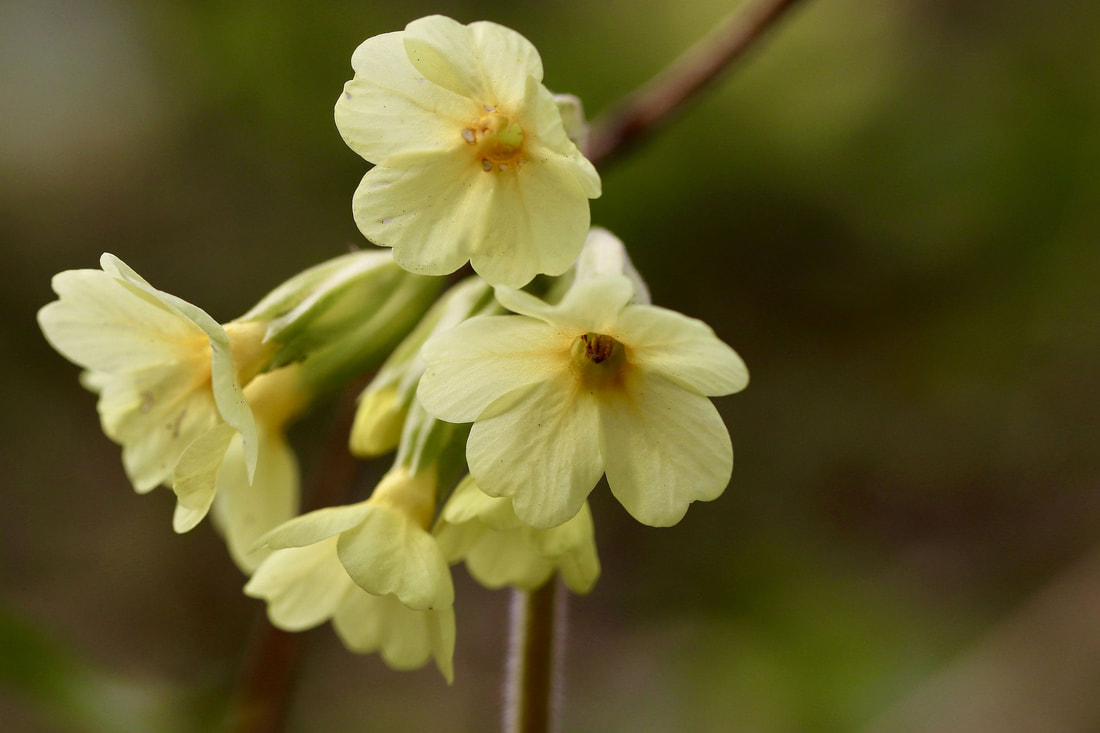 Cowslips image by Annette Meter on Pixabay. Foxglove Foxglove is another flower that has traditionally been very closely associated with the fairies and is said to be a flower in which fairies like to sleep. Other names used to refer to foxgloves are fairy thimbles, folk gloves, or fairy gloves. The name means gloves of the Good Folk (Fairy Folk) because, in fairy lore, magical creatures were said to wear foxgloves on their feet or as gloves. Like the bluebells, foxgloves have contradictory symbolism. These flowers can be used for healing but can equally be associated with death or witches, but as long as you treat foxgloves and the fairies with respect, you have nothing to worry about! So plant a few of these blue beauties to attract fairies—and bees—to your garden! 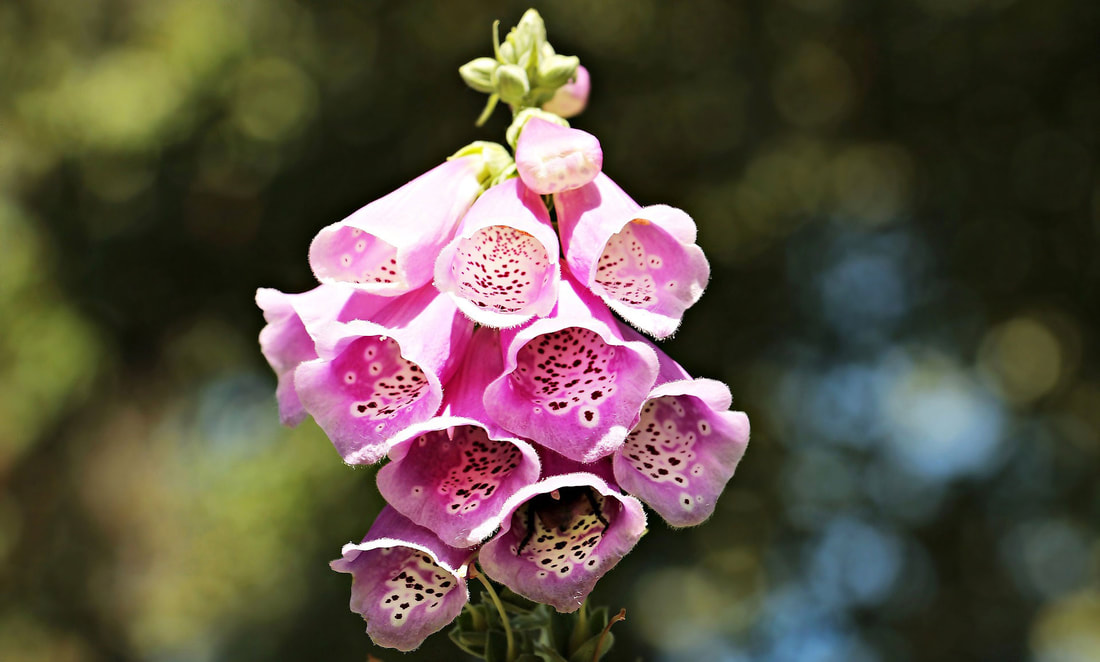 Foxglove image by NoName 13 on Pixabay. Lavender Lavender is such an aromatic and beautiful flower to have in your garden! Another common name for lavender is elf leaf, as this plant is thought to gift the ability to see the fairies when they are near. It is also a powerful defender, warding off negative energy or evil fairy folk. Lavender also has practical benefits--a beautiful scent and medicinal properties. This gorgeous and fragrant flower is known to attract fairies and—of course—bees.  Lavender image by Sabrina Wisian on Pixabay. Primrose The primrose plant symbolizes the gateway to the fairy realm and offers protection from dark fairy magic or witchcraft. But it’s worth noting that, as much as primrose grants you the ability to peer into the enchanting realm of the fairies, this flower also allows fairies to use it to become invisible! It’s worth noting that fairies love primrose, so neglecting this flower could cause you to lose favor, but nurturing the plant and helping it grow will encourage fairy blessings. This is a potent fairy flower, so use it wisely!  Primrose image by Peggychoucair on Pixabay. Rosemary Another name for rosemary—just like lavender—is elf leaf. Rosemary is a powerful herb that is said to ward off wicked fairies and their spells and attract only the good fairies to your garden. Rosemary is incredibly aromatic and handy in a wide variety of recipes. It’s one of my favorite herbs--and the fairies love it as well! 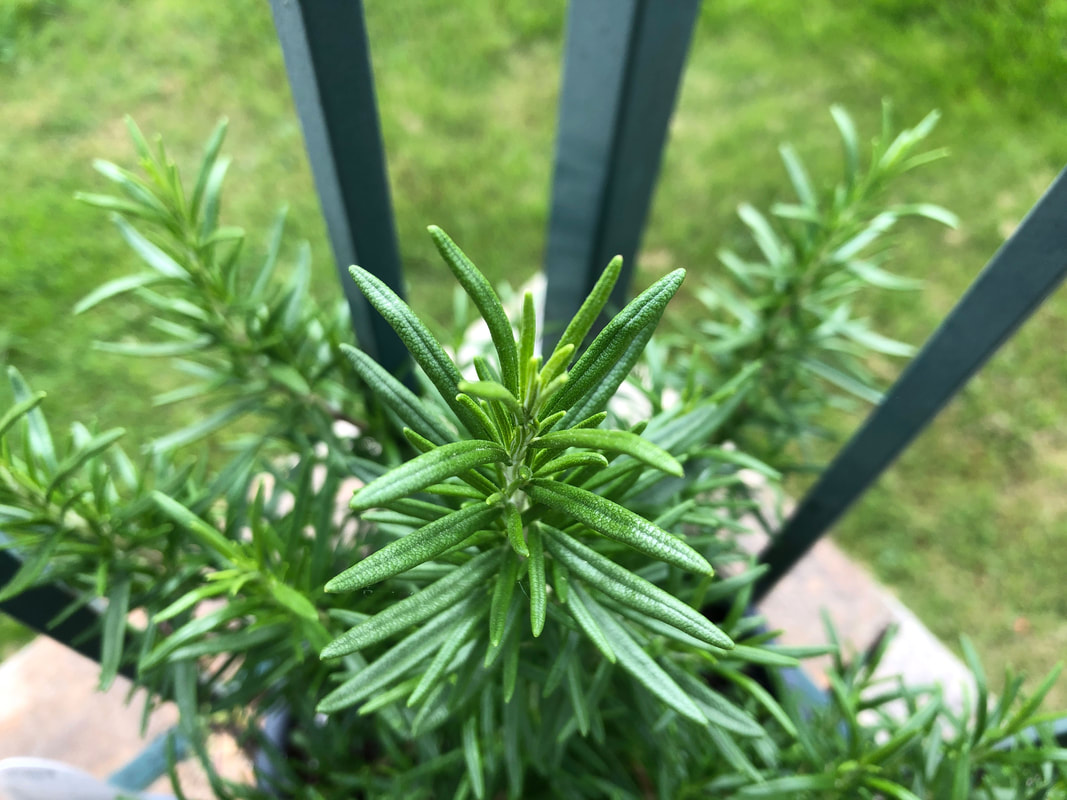 Rosemary. Photo by Diane M. Lilly, 2022. Thyme Planting thyme can help ward off harmful fairies while enticing the good ones to stay and make their homes in your charming garden. Thyme is one of the plants—along with primrose and lavender—that is thought to help you spot the fairies when they are nearby. Maybe you’ll even be lucky enough to glimpse the fairy queen asleep in her bed of thyme! This herb is so aromatic and can be a beautiful ground cover in a fairy patch. 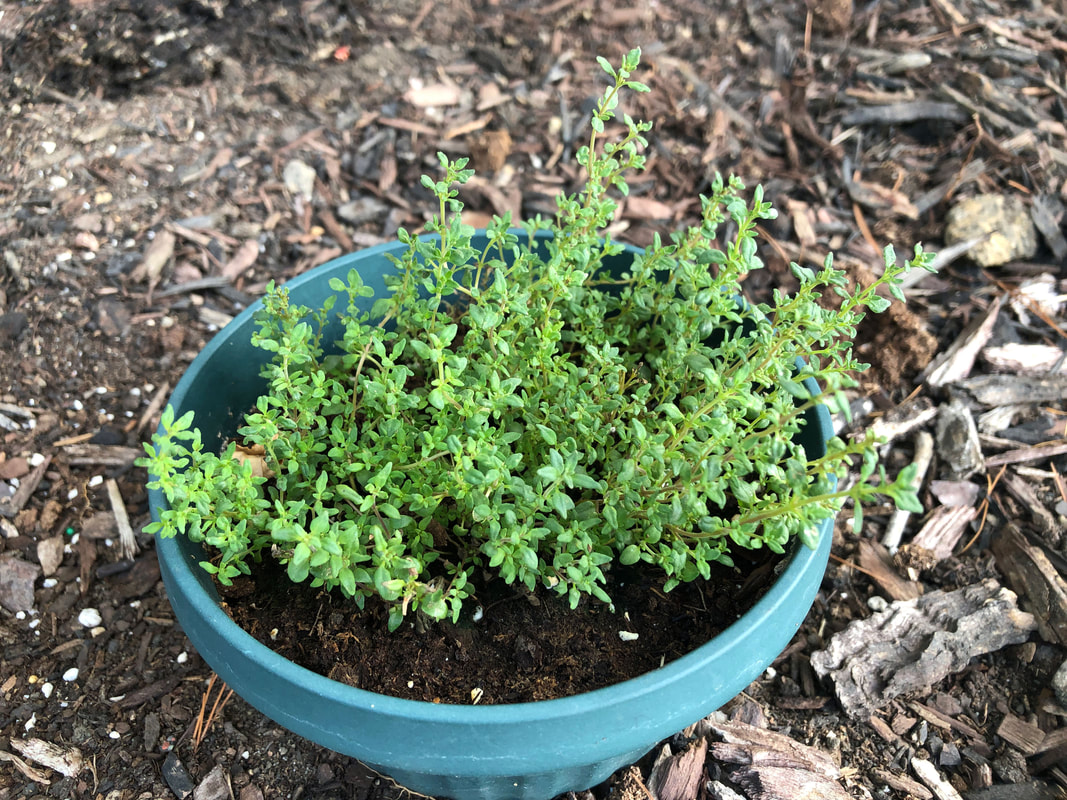 Thyme. Photo by Diane M. Lilly, 2022. This journey of learning about flowers and their relation to the fairy folk has been fascinating! The ones covered today are just a sample of the wide variety of flowers associated with the mystical world of the fae. My research is ongoing, and more articles covering fairy flowers are in the works. But hopefully, this will inspire you to get started with your fairy garden…and drop a line in the comments below to let me know how it goes! Related blogs you may want to read: Who are the Irish fairies? 10 essential elements for a magical outdoor fairy garden A brief history of the origins of fairy gardens My spring 2022 indoor fairy gardens Spring makeover for my indoor fairy gardens My outdoor fairy garden Sources: https://www.groveandgrotto.com/blogs/articles/the-faery-dozen https://bethtrissel.wordpress.com/2014/06/01/plants-the-fairies-like-and-dislike/ https://talesfromthefairies.wordpress.com/tag/flowers/ https://solsticesisters.co/blogs/post/5-plants-to-please-the-fae https://sarah-liz1976.tripod.com/id28.html https://www.llewellyn.com/journal/article/3028 https://www.icysedgwick.com/fairy-friendly-garden/ https://theforestfairy.com/flowers-that-attract-and-welcome-the-fairies-into-your-garden/ http://chalicecentre.net/blog/the-faery-lore-of-foxgloves/ https://www.terriwindling.com/blog/2019/05/wildflower-season.html https://annafranklinhearthwitch.wordpress.com/2022/04/16/the-lore-magic-of-clover/ https://www.pansymaiden.com/flowers/meaning/clover/ https://greenwitchfarm.com/all-you-need-to-know-about-columbine/ https://www.terriwindling.com/blog/2019/05/wildflower-lore.html https://www.luminescents.net/shop/herbal/botanicals/flowers-and-petals/cowslip-flowers-primula-veris/ https://gardenandhappy.com/fairy-garden-ideas/ https://www.moonfishwriting.com/post/a-celtic-spring-of-flowers-folklore-and-food https://www.moonfishwriting.com/post/chamomile-and-lavender-in-medicine-celtic-folklore-and-magic  Image by Nattapol Sritongcom on Adobe Stock. Succulents are generally some of the most hardy houseplants you can have in your home, but that doesn’t mean they are indestructible! Succulents are known for storing water in their leaves, allowing them to survive dry spells in their native habitat. That said, succulents can come from many natural habitats, and each plant might have slightly different needs. There are a few general rules to follow when caring for succulents to keep them alive and thriving. Below are a few ways you could potentially damage or even kill your precious plants! Stick them in the dark Succulents need several hours (about 6) daily of bright indirect light. Don’t put them in dark corners—they will not thrive there! Remember to rotate the plant periodically. This assures each side of the plant gets even light and prevents reaching or leaning. Place the succulent near south or west-facing windows just out of the direct light.  Haworthia. Photo by Diane M. Lilly, 2021. Leave the plant in direct sunlight for too long While it is true cacti come from a desert habitat where they sit out in the scorching sun all day, many other succulents will burn when left in direct sunlight for too long, causing permanent damage. If the sunburned leaves become too damaged, the plant will suffer and possibly die. Image by Nattapol Sritongcom on Adobe Stock. Overwater or leave the plant in soggy soil Succulents store water in their fleshy parts and leaves, so there is no need to overwater. This may be the quickest way to kill a succulent! Give succulents a thorough watering and let them dry out before watering again. (Suggestion--Use a water meter to test the soil between waterings.)  Elephant tears. Photo by Diane M. Lilly, 2021. Plant in soil and pot with poor drainage If the soil and pot don’t have proper drainage, your succulent may end up sitting in soggy soil, which causes rot. And rot is the arch nemesis of plants! Soil with some sand works well, or you could use cactus soil or anything coarse with sand and pumice. Also, soggy soil can attract gnats and other pests that can harm the plant.  Image by tynza on Adobe Stock. Wet the plant leaves Pouring water on the leaves or misting can cause mold, rot, or burn on the succulent leaves. It’s better to water the soil directly. (Note: Certain tropical varieties actually like an occasional mist, so check your plant label for care instructions.)  Image by hossein1351 on Adobe Stock. Place outside in the extreme cold or heat Some succulents—like cacti—can handle extremes of hot or cold, but many succulents come from milder habitats. When in doubt, it’s better to err on the side of caution and avoid placing the plant in very hot or cold environments.  Image by SewcreamStudio on Adobe Stock. Not knowing the specific needs of the plant It’s vital to know what type of plant you have and learn a bit about its native habitat so you can mimic (as best you can) the environment. Knowing the proper care for your specific type of succulent will help your plant thrive and stay alive! For example, Snake plants, Haworthias, and other variegated succulents don’t like full sun. Succulent plants with bright colors like red or orange, on the other hand, may enjoy a bit of time in the sun. So read those labels! Just like other types of plants, there are a lot of variables to consider when caring for succulents…if you want to keep them alive, that is! Soil, pot size, environment, lighting, humidity, watering needs, season, and location determine how you care for your succulents. But keeping your stunning succulents alive starts with the basics…Give them appropriate lighting for their variety, well-draining soil, an environment tailored to their specific needs, and don’t overwater for a happy, thriving plant! Image by Rawpixel.com on Adobe Stock. Related blogs you may want to read: 7 houseplants you can’t kill! 7 MORE houseplants you can’t kill! Eight tips for assessing natural light in your home How to repot a bonsai ficus How to repot a pothos plant How to propagate bromeliad pups Small houseplants that love bathroom humidity Eight health benefits of decorating with plants Let’s talk about houseplants Sources: https://www.architecturaldigest.com/story/how-to-care-for-succulents https://www.gardendesign.com/succulents/care.html https://www.succulentsandsunshine.com/guide-growing-succulents-indoor-house-plants/ https://www.joyusgarden.com/how-often-should-you-water-succulents/?utm_source=Flodesk&utm_medium=newsletter&utm_campaign=Garden_Gazette https://www.joyusgarden.com/how-much-sun-do-succulents-need/?utm_source=Flodesk&utm_medium=newsletter&utm_campaign=Garden_Gazette This article may contain a few items or commercial mentions, but I only used them for demonstration purposes only. I am not endorsing any particular product or receiving any monetary gain for this blog. In a previous blog, I introduced you to seven houseplants that can tolerate a bit of neglect. In today’s blog, I will share seven MORE houseplants that can take a little abuse from an absent-minded or inexperienced plant parent. Ready for more? Here we go… Philodendron There is a wide variety of philodendrons, from the large monstera to the cut-leaf philodendron to smaller plants with heart-shaped leaves that grow in vines. Your options depend on the space available for your new plant babies. These easy-to-care-for plants do very well in humid conditions like bathrooms, but they don’t like to sit in wet soil, so don’t overwater. Just water the soil evenly, then let dry out before watering again. Philodendrons don’t love direct sun but will thrive in bright indirect light and tolerate dimly lit spaces. 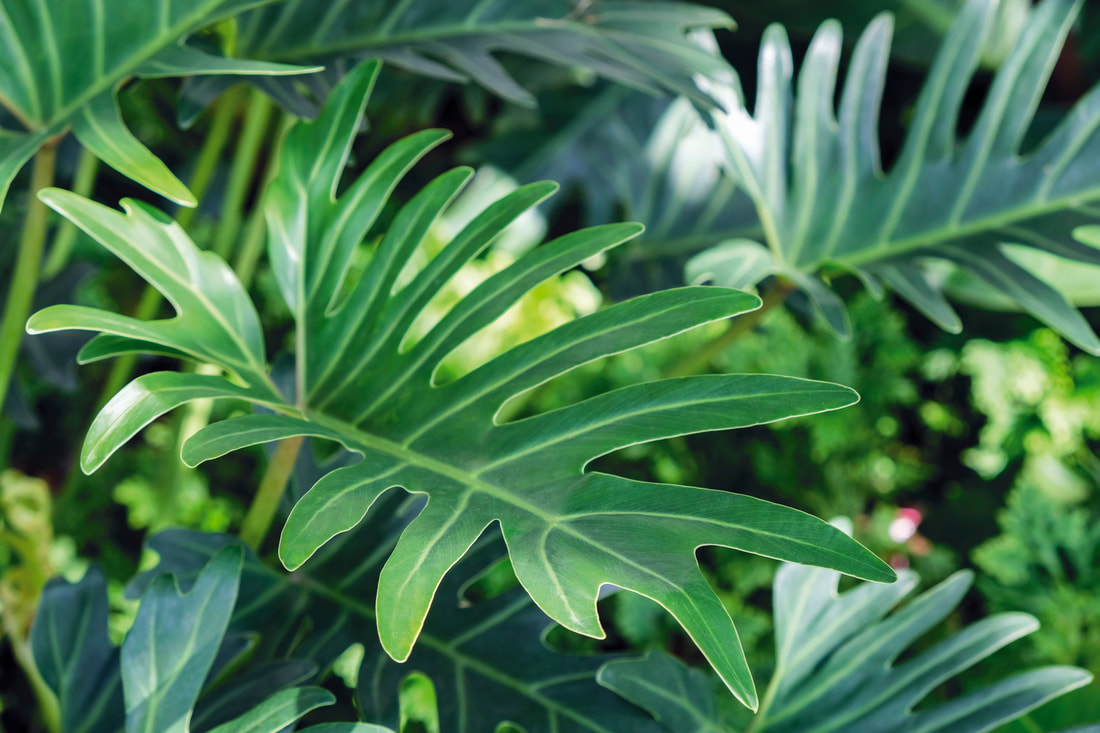 Image by ArtBackground on Adobe Stock. Ponytail Palm (a.k.a. Beaucarnea recurvata) I call this the Dr. Seuss plant. I bought a ponytail palm two years ago and stuck it in my southwestern-facing window, and it has doubled—if not tripled—in size! For me, it was love at first sight! These plants can get very large and heavy over time, so they are not your typical windowsill plant. How fast and large they grow will depend on the size pot, so the larger the pot, the larger the plant will grow! 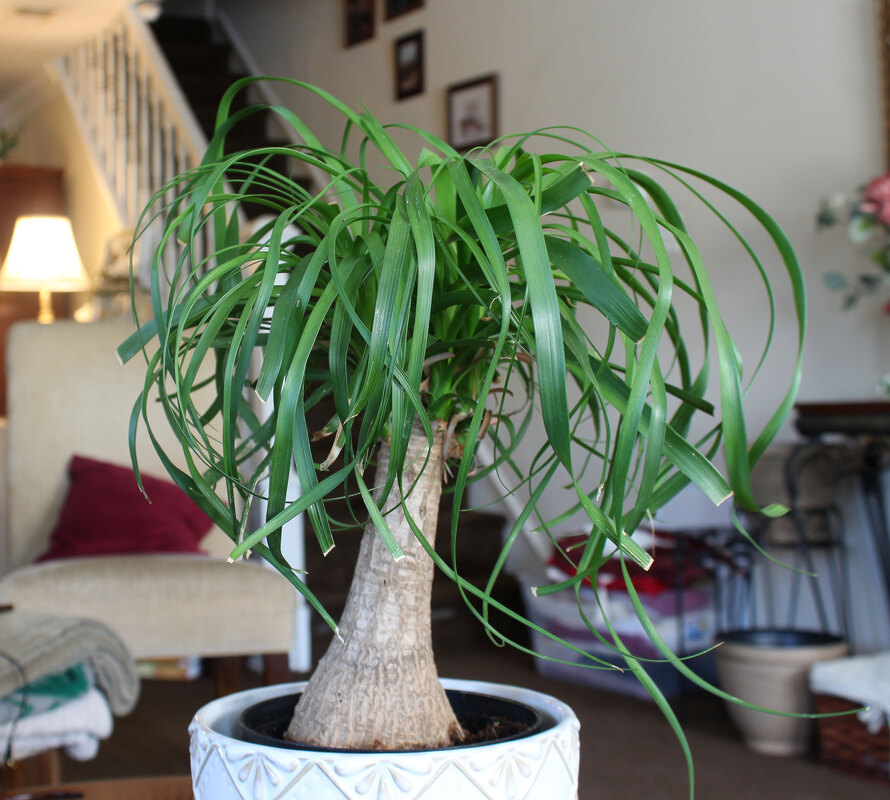 Ponytail palm. Photo by Diane M. Lilly, 2021. The name implies it’s a palm, but it’s actually a succulent related to the yucca or agave. Ponytail palms store water in the trunk, so they don’t need watering as much as other plants. Don’t overwater this plant. Water it thoroughly and evenly, then let the soil dry out completely before watering again. For a happy plant, use succulent or cactus soil and place in a spot with bright indirect light but not direct sun. Pothos (a.k.a. Epipremnum aureum or Devil’s Ivy or Golden Pothos) Pothos is a vine plant that will thrive under the right conditions. If you want to keep it more bushy, you can trim it back. Or, if you like the long trailing vines, you can place your pothos in a spot where the leaves can dangle. My pothos is currently sitting on the window ledge in my bathroom—where it gets easterly sun, mostly indirect except for first thing in the morning—and it is starting to take over!  Pothos. Photo by Diane M. Lilly, 2022. This vine plant likes humidity but can tolerate dry conditions as well. Give this plant well-draining potting soil some bright indirect light, and don’t overwater it, and you’ll have a happy pothos! It will even tolerate lower light levels if that’s the best you can do. Rubber Plant (a.k.a. Ficus elastica) Like the ponytail palm, this drought-resistant plant can grow tall and heavy, so put your rubber plant in a sturdy pot. This is a good plant for a well-lit corner, as it prefers bright indirect light. Use well-draining soil and keep it slightly moist but never soggy.  Image by LIGHTFIELD STUDIOS on Adobe Stock. Snake Plant (a.k.a. Sansevieria, or Mother-in-Law’s Tongue) The snake plant—commonly known as sansevieria or Mother-In-Law’s Tongue—thrives in humid conditions. My snake plant temporarily had its home in my bathroom until my pothos and haworthia crowded it out! The plant now looks quite happy living in my front window with my other plants. Image by Pixel-Shot on Adobe Stock. The snake plant is another type of succulent that stores water in its leaves, so water thoroughly and then let the soil dry out. Use well-draining soil for best results. Sansevierias will tolerate a range of lighting conditions but thrive in medium to bright light levels, just not direct sun. Spider Plant (a.k.a. Chlorophytum comosum or Airplane Plant. not to be confused with Air Plant) Spider plants are one of the most well-known houseplants and seem to thrive in a variety of conditions. This dangly plant produces tons of plantlets or spiderettes that you can clip and propagate to get new plants! Other than that, spider plants don’t need frequent repotting. As for watering, wet the soil thoroughly and evenly, and don’t water again until the soil is just dry. The plant will wilt to let you know when you need to give it water ASAP. Hang this houseplant in a window with bright indirect sun if you want a happy plant with tons of new babies! 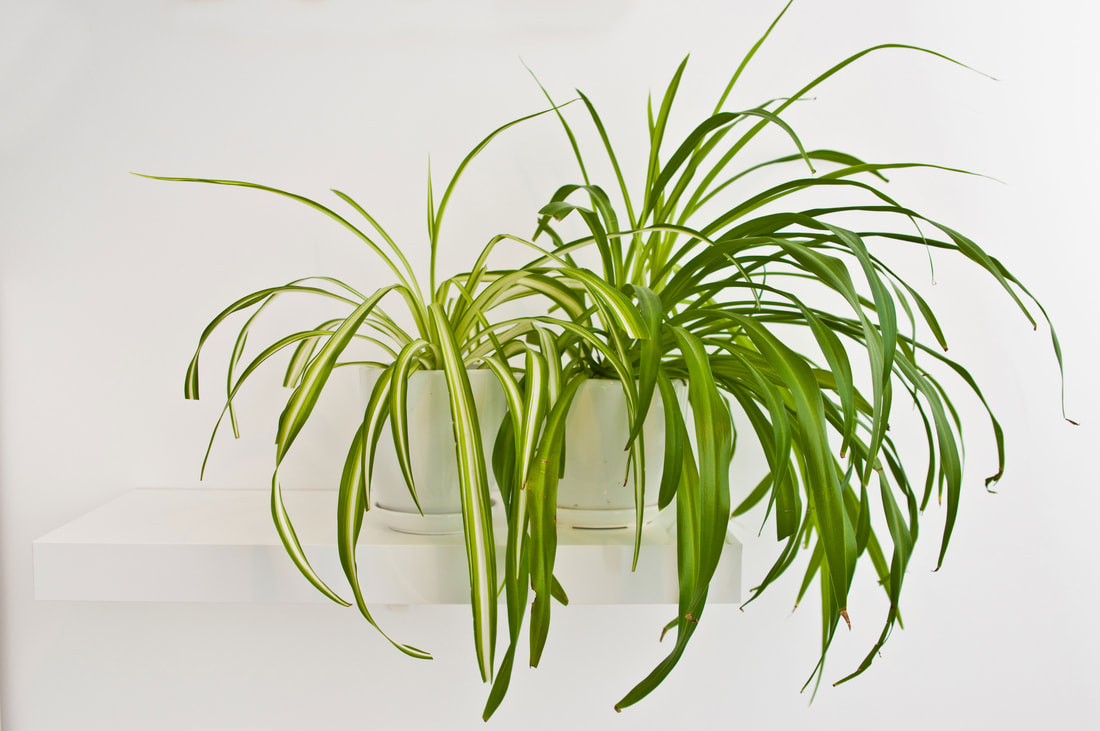 Image by AHatmaker on Adobe Stock. ZZ Plant (a.k.a. Zamioculcas Zamiifolia, Zanzibar Gem, or Eternity Plant) And finally, yet another plant that stores water in its leaves! ZZ plants can survive neglect and low light and are drought tolerant. If you want your plant to be its best, put it in bright indirect light, give it decent potting soil, and water only when the soil is dry. 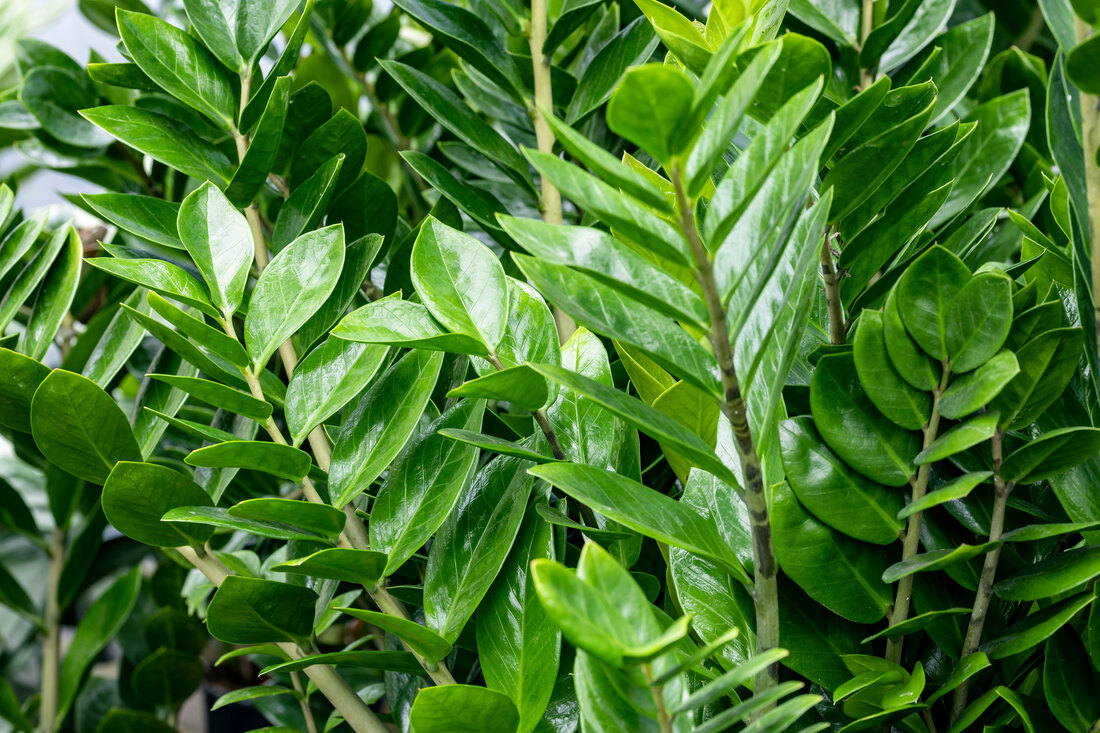 Image by fabrizio on Adobe Stock. Make sure you go back and read “7 Houseplants You Can’t Kill!”! Let me know in the comments if you have a favorite plant baby that has been super simple to maintain. Do you have a neglected plant that still keeps going? Drop it in the comments below! Related blogs you may want to read: 7 ways to kill a succulent 7 houseplants you can’t kill! Eight tips for assessing natural light in your home How to repot a bonsai ficus How to repot a pothos plant How to propagate bromeliad pups Small houseplants that love bathroom humidity Eight health benefits of decorating with plants Let’s talk about houseplants This article may contain a few items or commercial mentions, but I only used them for demonstration purposes only. I am not endorsing any particular product or receiving any monetary gain for this blog. Sources: https://www.guide-to-houseplants.com/10-house-plants-you-cant-kill.html https://www.bhg.com/gardening/houseplants/projects/houseplants-you-cant-kill/ https://balconygardenweb.com/houseplants-you-cant-kill-even-if-you-want/ https://smartgardenguide.com/hard-to-kill-houseplants/ https://youhadmeatgardening.com/best-hard-to-kill-houseplants/ https://blog.mytastefulspace.com/2021/07/24/impossible-to-kill-houseplant/ https://www.thespruce.com/easy-houseplants-hard-to-kill-4141665 https://www.gardeningknowhow.com/houseplants/hpgen/hard-to-kill-houseplants.htm https://www.treehugger.com/houseplants-are-almost-impossible-kill-4863173 If you have a black thumb—or are just starting to wrap your head around buying houseplants for the first time—this blog is for you! Houseplants can be tricky, right? There’s a lot to take in—proper light, water needs, soil types, fertilizing, best trimming practices, propagating, pest control—but some plants are less fussy than others. Today, we’ll look at seven plant babies for beginners or people who want easy houseplants. Air Plant (a.k.a. Tillandsia app.) This first plant is as easy as it gets! Air plants are epiphytes or plants that attach to trees and other natural elements in shaded spots and collect necessary nutrients through trichomes in their leaves. No soil is needed, hence the name Air Plant. This biological wonder takes much of what it needs from the air, and its needs are minimal.  Air plant. Photo by Diane M. Lilly, 2021. Many varieties only need to soak in water once a week (15-30 minutes) and maybe occasional misting to keep them from drying out. One piece of advice is to know which variety you have because the furry ones don’t like to be soaked in water. I made that mistake with one of my plants, causing the poor thing to rot and die. Place the air plant in bright light but not directly in the sun to prevent burning of the leaves. And that’s it! Air plants are resilient and self-sufficient with minimal care. Hang them up or stick them in with other plants and let them do their thing! Aloe Vera Aloe vera is a type of succulent, meaning it stores water in its leaves. This ability to store water means that aloe—like many succulents—tends to be drought-resistant, and that’s good news for forgetful plant parents. 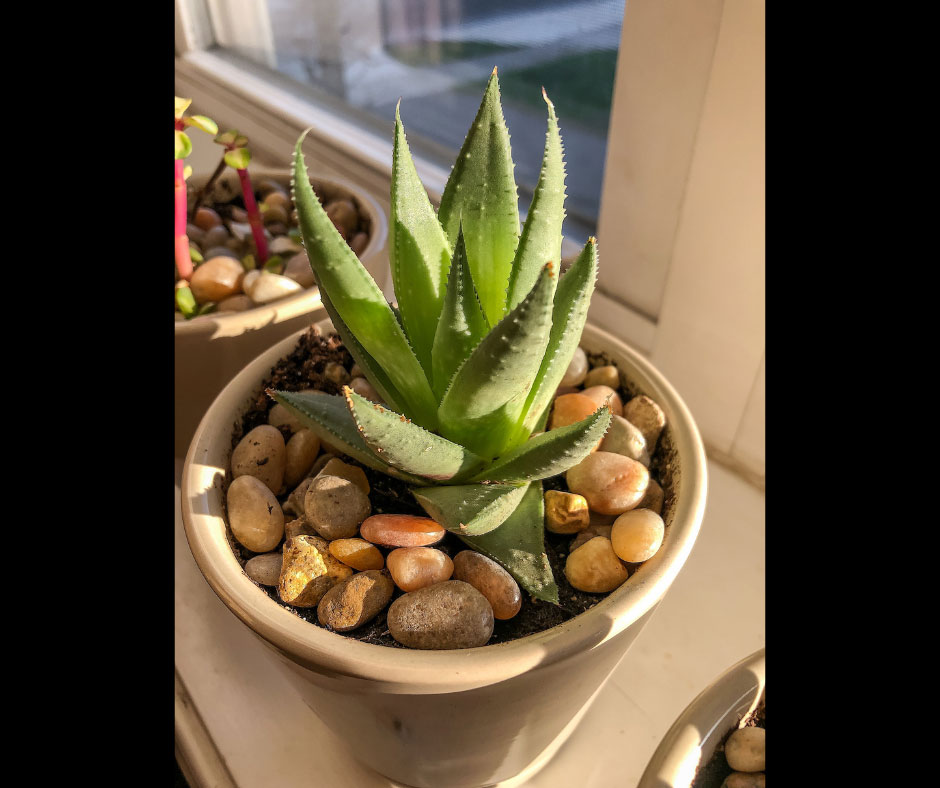 Aloe vera. Photo by Diane M. Lilly, 2021. This plant thrives better when ignored--making it an easy plant for beginners. The one nemesis for aloe, though, is overwatering. Overwatering can lead to rot, which kills the plant, so the best practice is to wet thoroughly and then let the plant dry out in between waterings. As for other care, give your aloe well-draining soil and bright indirect light (direct light may burn the leaves). There’s no need to repot the plant until it gets too crowded in the pot. Cactus Like the aloe, cacti are succulents, which means they are drought tolerant and store water. These adaptable plants need water only when the soil is dry, so if you get a bit forgetful it’s okay!  Image by apimook on Adobe Stock. Cacti are incredibly versatile as houseplants. They only need well-draining soil, bright indirect or direct sun (depending on the variety), and occasional watering. Cast Iron Plant (a.k.a. Aspidistra spp.) The hint is in the name! The Cast Iron Plant is very forgiving, even when neglected. Give this plant well-draining soil and bright light, and it will thrive. But this hardy houseplant also manages to live in low-light places as well…Just keep it out of direct light to prevent burned leaves.  Image by K.A. on Adobe Stock. Chinese Evergreen (a.k.a. Aglaonema sp.) Sometimes called the “Ag” plant, the Chinese Evergreen is a versatile and easy-to-maintain houseplant. I’ve even seen them happily existing in the corners of doctor’s offices with no windows. This slow-growing plant thrives better in bright indirect light, but low-light conditions will suit it just fine if that’s your only option. As for care, keep it out of direct light and drafts and let it dry out between waterings.  Image by Firn on Adobe Stock. Jade Plant (a.k.a. Crassula ovata) This plant might be a little tricky because it can get bulky, but having said that, you don’t need to re-pot your jade plant very often unless you want it to grow in size.  image by MindestensM on Adobe Stock. Like all succulents, this plant stores water in its leaves, which means you can let the soil dry out between waterings. Just use well-draining soil and place the plant in bright, indirect light. Some varieties can withstand a few hours of direct sunlight. This is one of those plants that can tell you what it needs just by looking at its foliage. If the leaves become shriveled, it's time to give the poor thing some water. If the leaves are dropping off, you may need to up the water intake. Peace Lily (a.k.a. Spathiphyllum sp.) The peace lily is an incredibly hardy plant! I know from experience! My peace lilies have been through the wars! I have forgotten to water them for long periods, stuck them in drafty windows or gloomy spots, and over-watered them out of guilt (causing gnats)…And they still live! These hardy plants will survive a lot. Granted the poor things may not look the greatest, but they survive!  Image by Christine on Adobe Stock. If you want your peace lily to look its best, water the plant thoroughly and evenly, then leave it until the soil becomes somewhat dry. This plant literally tells you when it needs a drink because you’ll see the leaves begin to droop. The drooping leaves are the plant telling you to grab that watering can and give it a drink! Peace lilies like well-draining soil and bright indirect light (not direct sun) but can tolerate low light conditions. If the plant gets the optimal amount of light it needs, it will reward you with elegant white flowers. Next time you are in a doctor’s office or any office space with little to no natural light, look around and see what plants have made their home there. Chances are you will see one of these plants! Be sure to read part 2--“7 More Houseplants You Can’t Kill!”--for even more easy-to-care-for houseplants! Related blogs you may want to read: 7 ways to kill a succulent 7 more houseplants you can’t kill! Eight tips for assessing natural light in your home How to repot a bonsai ficus How to repot a pothos plant How to propagate bromeliad pups Small houseplants that love bathroom humidity Eight health benefits of decorating with plants Let’s talk about houseplants This article may contain a few items or commercial mentions, but I only used them for demonstration purposes only. I am not endorsing any particular product or receiving any monetary gain for this blog. Sources: https://www.guide-to-houseplants.com/10-house-plants-you-cant-kill.html https://www.bhg.com/gardening/houseplants/projects/houseplants-you-cant-kill/ https://balconygardenweb.com/houseplants-you-cant-kill-even-if-you-want/ https://smartgardenguide.com/hard-to-kill-houseplants/ https://youhadmeatgardening.com/best-hard-to-kill-houseplants/ https://blog.mytastefulspace.com/2021/07/24/impossible-to-kill-houseplant/ https://www.thespruce.com/easy-houseplants-hard-to-kill-4141665 https://www.gardeningknowhow.com/houseplants/hpgen/hard-to-kill-houseplants.htm https://www.treehugger.com/houseplants-are-almost-impossible-kill-4863173 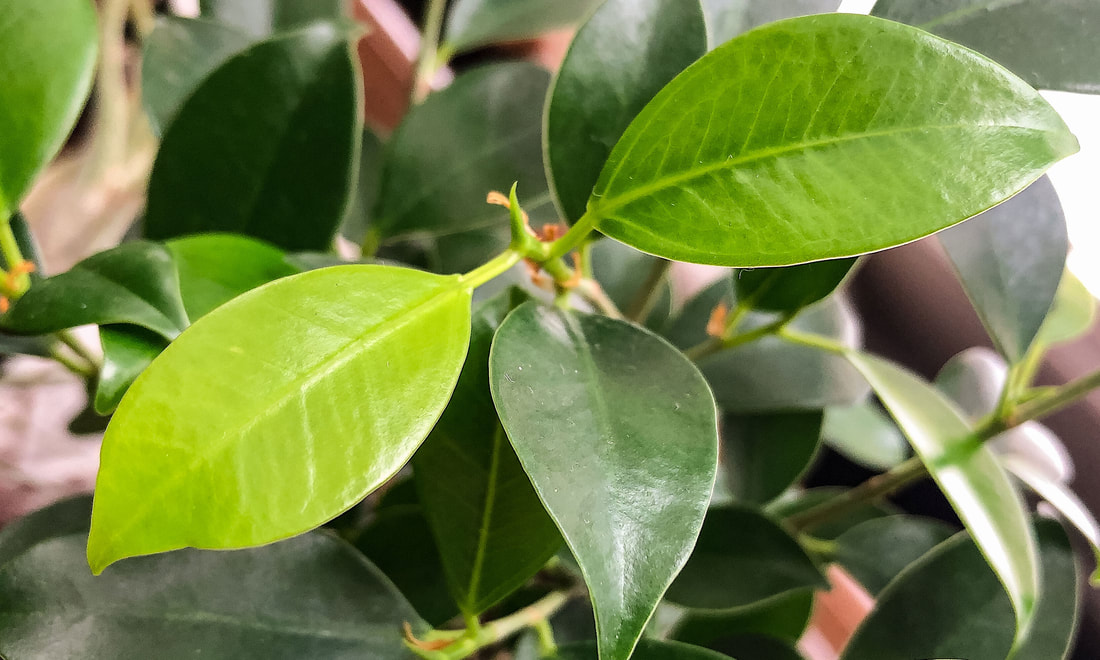 Closeup of bonsai ficus leaves. Photo by Diane M. Lilly, 2022. If you have a small bonsai ficus that has become a little unruly or has over grown its pot, today’s blog has a few tips that may help you repot that burgeoning bonsai tree! Last year I purchased a bonsai ficus retusa and over the past year it has become side heavy, leaning to one side and pulling itself out of the soil. The tree leaves themselves are flourishing and look amazing, drinking in the warm sunlight from its tranquil spot in front of my south facing window. The severe lean that is causing the roots to be exposed, however, has me concerned that this tree may soon find itself in distress. An intervention is needed! 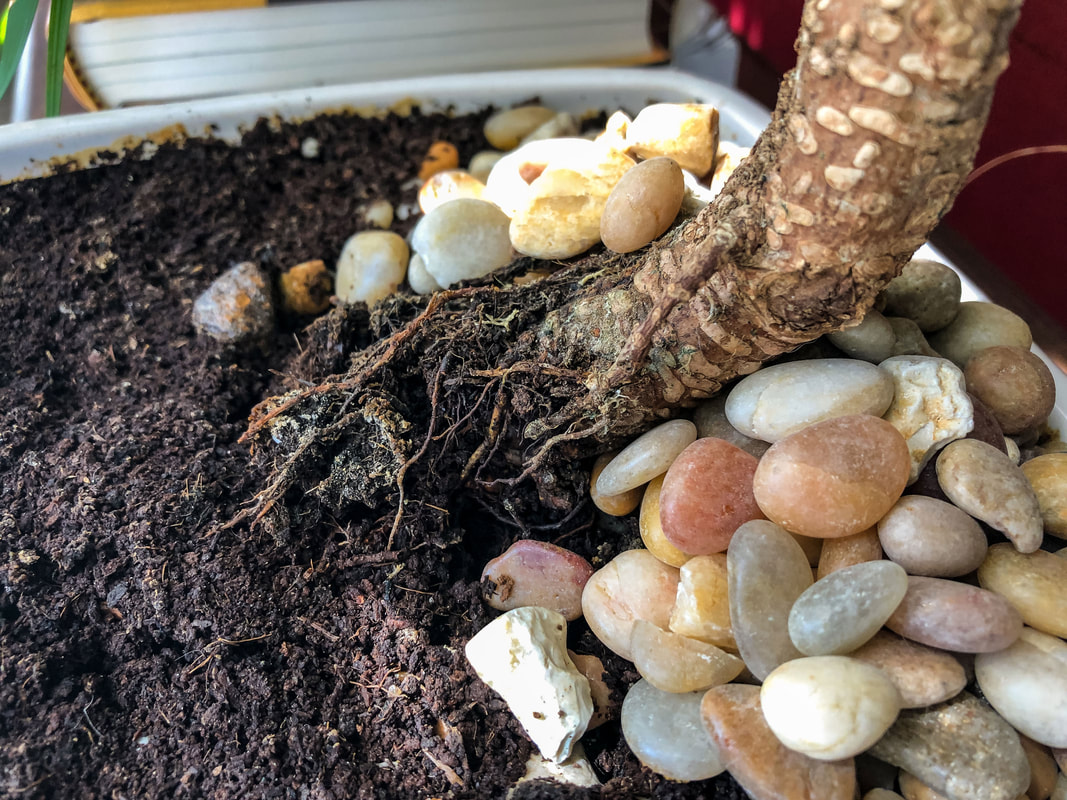 My bonsai ficus plant pulling itself out of the soil. Photo by Diane M. Lilly, 2022. Originally from Asia, this type of tree loves humid environments, but does not like to be soggy, so keep that in mind when choosing pots and soil. The bonsai ficus retusa is said to be a very forgiving, undemanding plant for beginners and I can certainly vouch for that!  Image by Samudra Dirgantara from Pixabay. Having said that, the thought of transplanting this tree was just a wee bit intimidating to me. But, like anything else, you have a to do a little research and then just dive in, right? So, I’m going to share with you the things I learned and my process for transplanting my latest plant baby... 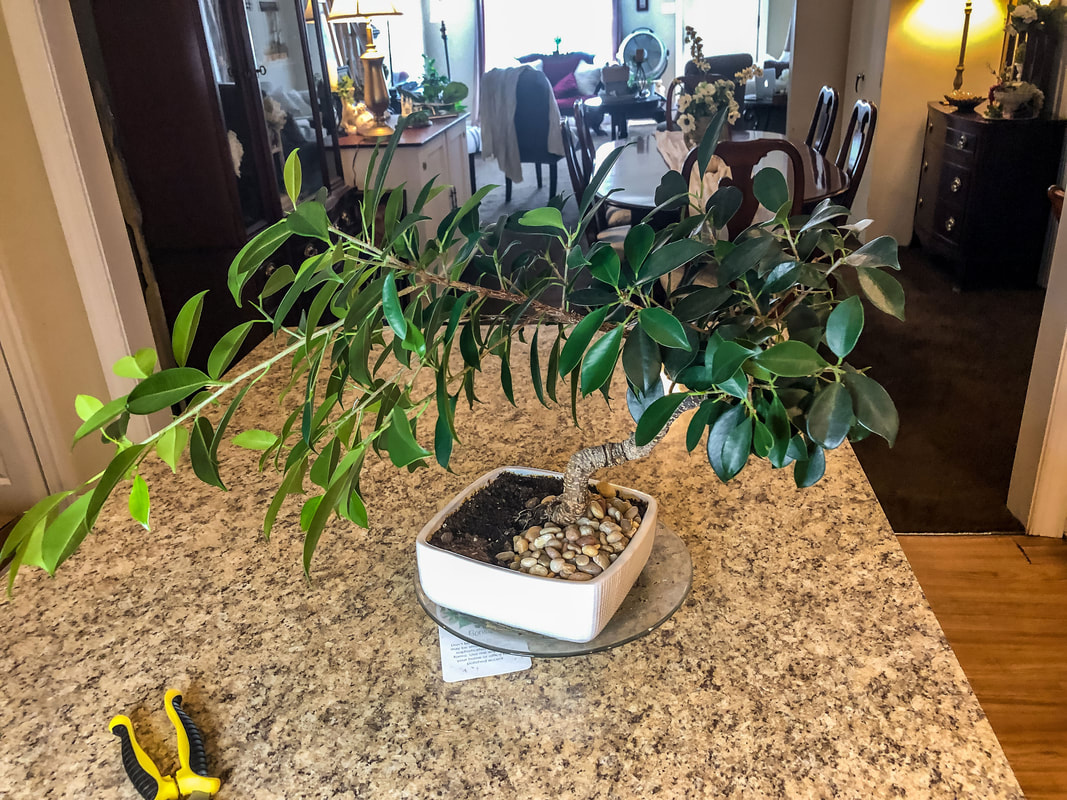 The "before" shot of my overgrown bonsai ficus. Photo by Diane M. Lilly, 2022. When to repot a bonsai ficus For most houseplants, the going wisdom is to repot in early spring, but the timing for repotting a bonsai tree depends quite a lot on the specific type of tree. (And it’s important to note that bonsai plants are miniature trees, not a typical houseplant.) My specific tree (as mentioned previously) is a bonsai ficus retusa, so my timing for repotting this plant is not in early spring but in mid to late summer. This may be an oversimplified overview of repotting the bonsai ficus, and it’s only fair to share a little of the abundance of information I have found on the topic. I have discovered (frustratingly) that there are different opinions on the topic, but much of how you care for your bonsai ficus will depend on a few key points:
According to one source--Bonsai Empire—you should avoid replanting bonsai trees in summer or winter, but other sources indicate that indoor plants are less vulnerable to the changes in the season and will tolerate repotting at other, less ideal, times of year.  Image by StockSnap from Pixabay.  Image by teerapon from AdobeStock. Kaizen Bonsai (a source that I found invaluable as I was researching the topic) recommends repotting according to your tree’s species, and for my tropical ficus, that means repotting the plant in summer when its growth has slowed. You can repot your bonsai ficus every other year or as needed, such as if the tree has rapid growth or has become root-bound. Type of pot for a bonsai ficus Most times, when you see a bonsai tree, it will be in a low flat pot. The art of caring for bonsai trees is an ancient one steeped in tradition that has a very distinctive visual style. The design aspect of bonsai leans on a basic design theory of the rule of thirds. The pot of the bonsai should be 1/3 the height of the tree, just like with vases for floral arrangements. You may need a pot 2/3 the width of the tree to create the right balance, forming a triangular shape for your display. When choosing a pot, remember you will be shaping your bonsai using triangular geometry in your design.  Image by teerawit from AdobeStock. Having said that, Kaizen Bonsai says that you can use any pot that works well with the size and shape of the tree, so don’t get too stuck on the idea of using traditional shallow pots. Just focus on finding a well-balanced container size with good drainage that highlights the tree's beauty and form. I purchased the perfect pot with two drainage holes, mesh, and wire from Amazon. 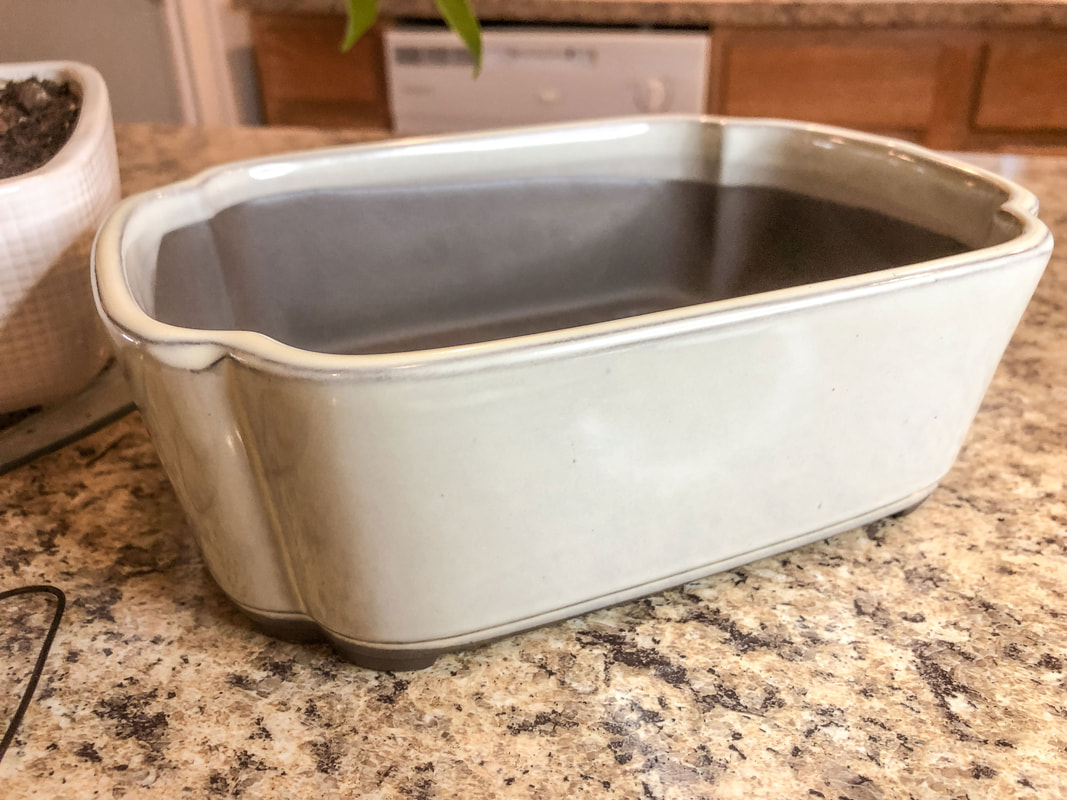 New pot for my bonsai focus. Photo by Diane M. Lilly, 2022. Cover the holes in the pot base with mesh to limit soil loss and allow good drainage. Also, there is usually a type of floral wire that is fed up from the bottom holes of the pot and wrapped around the tree to anchor it so it doesn’t tip over. (During the repotting process, I discovered that my plant was never properly anchored in, making the plant top-heavy and tippy.) 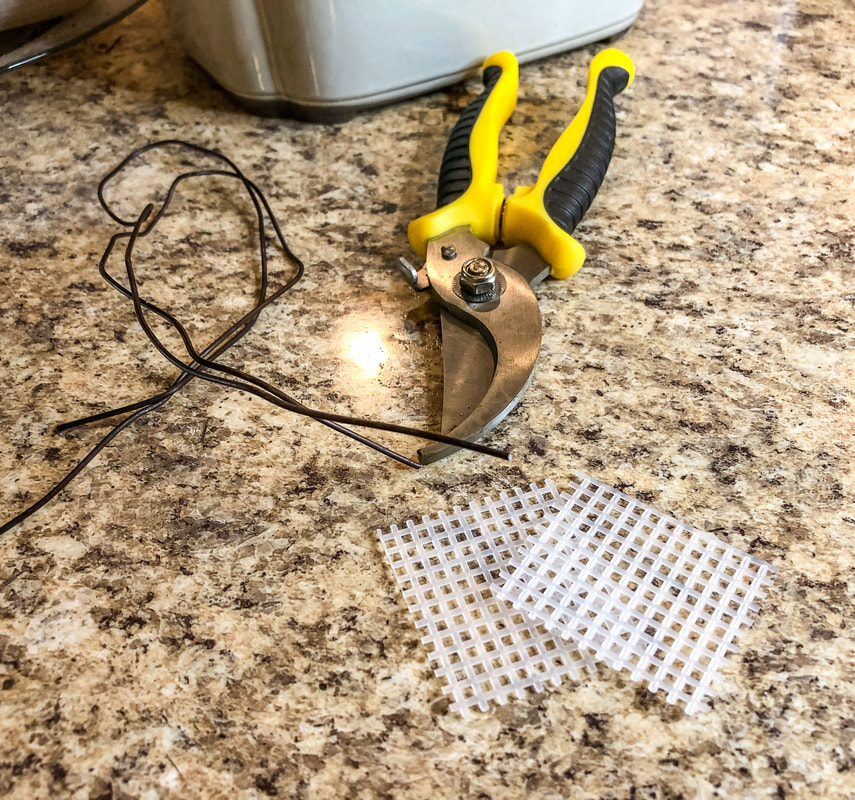 Wire, cutters, and mesh for the repot project. Photo by Diane M. Lilly, 2022. 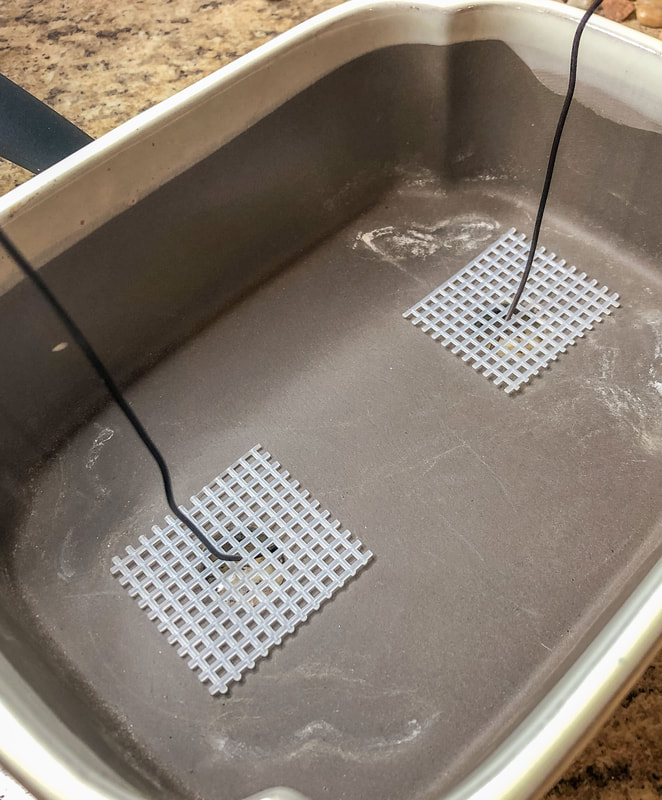 Mesh and wire prepped at the bottom of the new pot. Photo by Diane M. Lilly, 2022. Best soil for a bonsai ficus Now that we’ve addressed the pot for the bonsai, let’s talk about soil. What type of soil will you need for your bonsai ficus? Just like I mentioned before, there are different schools of thought depending on who you ask, but Below are a few suggestions from my research:
I have also been told that cactus soil is good to use in a bonsai soil mixture for its drainage properties. It’s a good idea to tailor the soil mixture to the type of tree and the humidity in the environment. You want an overall well-draining soil. You want your soil to hold just enough moisture for the tree to thrive without sitting in soggy soil. For my mix, I used a mixture of what I had on hand—cactus mix, sphagnum peat, potting mix, and orchid bark. For the fungicide (for the branch I cut off and potted), I used a TBS of apple cider vinegar in 1 cup of water. 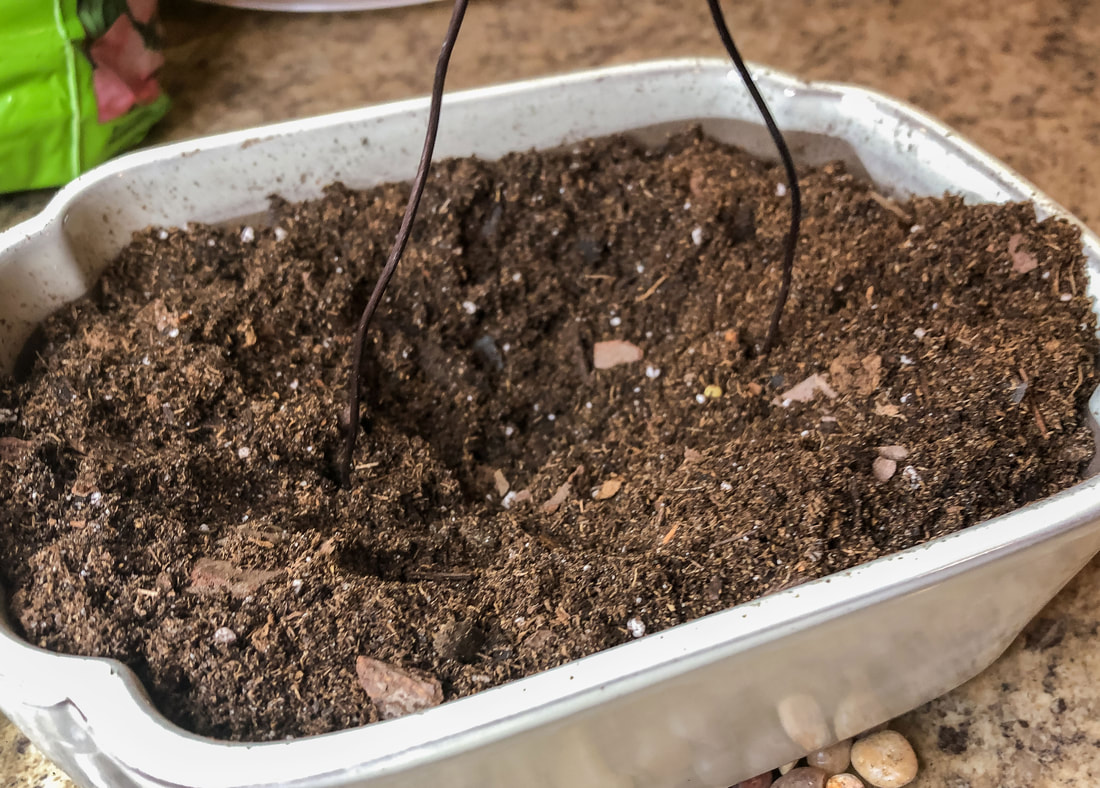 New pot filled partially with soil. Photo by Diane M. Lilly, 2022. Bonsai Empire recommends the following process for planting: wire the tree to the pot bottom to anchor it, create a layer for drainage topped with bonsai soil, and then add more bonsai soil. Carefully work the new soil between the roots to prevent air pockets (don’t tamp down too hard). 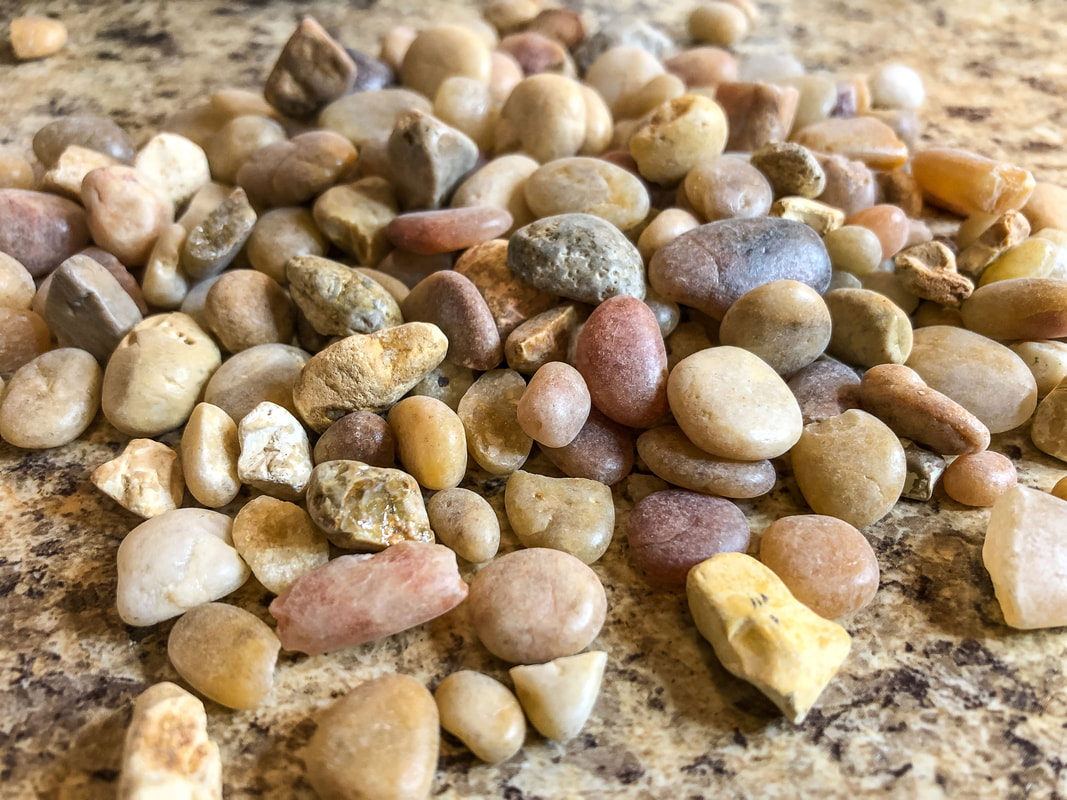 River rocks to be used on wet tray. Photo by Diane M. Lilly, 2022. Another source--Kaisen Bonsai—recommends just using well-balanced soil instead, tailored to the specific tree type, how much growth you want to encourage, how often you plan to water, the depth of the pot, and environmental conditions. You will need to water more often if using well-drained soil and may lose nutrients quickly. On the other hand, you do not want your bonsai sitting in wet soil, which causes root rot. Outdoor conditions (such as wind, humidity, and sunlight) affect how the plant retains water or dries out. Kaisen Bonsai recommends letting the soil dry out before repotting, as repotting with wet soil stresses the tree. The root ball of your bonsai tree will need to be carefully manipulated and unraveled during this process. Carefully unravel the root ball, and rake out the old soil using your fingers or a small rake so you can stretch out the roots for pruning (see the next section for trimming instructions). Once the roots are prepped, add a layer of soil or drainage rocks, feed in the wire that will hold the tree in place, place the tree in the soil, carefully work new soil between the roots, and then add soil to fill the pot. Wire the tree into place (we’ll discuss this later) and water thoroughly. 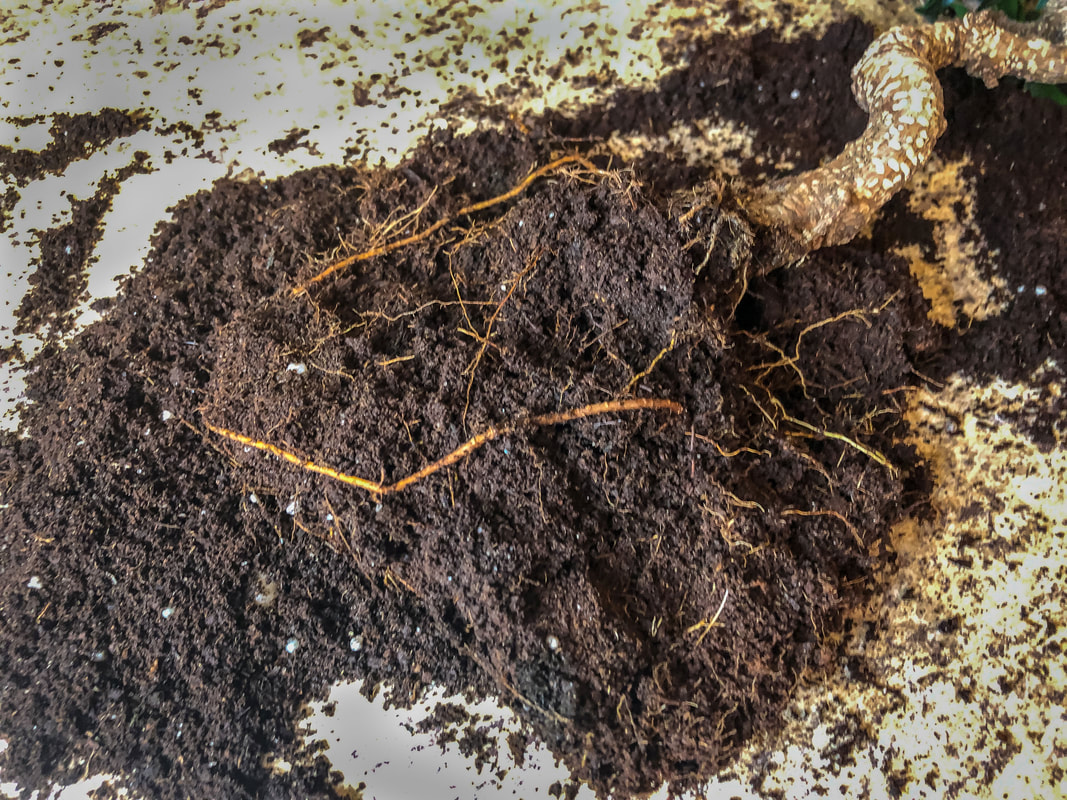 Root ball of the bonsai ficus plant. Photo by Diane M. Lilly, 2022. Trimming the roots of a bonsai ficus After the soil has been raked out and roots have been carefully loosened, it is time to assess how—and if—the roots get trimmed. Kaizen Bonsai recommends trimming the roots according to the tree species and the tree's condition and roots at the time. If in doubt--or if the tree is not doing well--err on the side of caution and leave the roots alone. Why trim the roots, you might ask? Giving the roots a haircut (root pruning) while replanting helps stimulate new growth. This process will help the tree get water and nutrients faster. Don’t get too carried away during this process—only cut up to 1/3 of the roots. 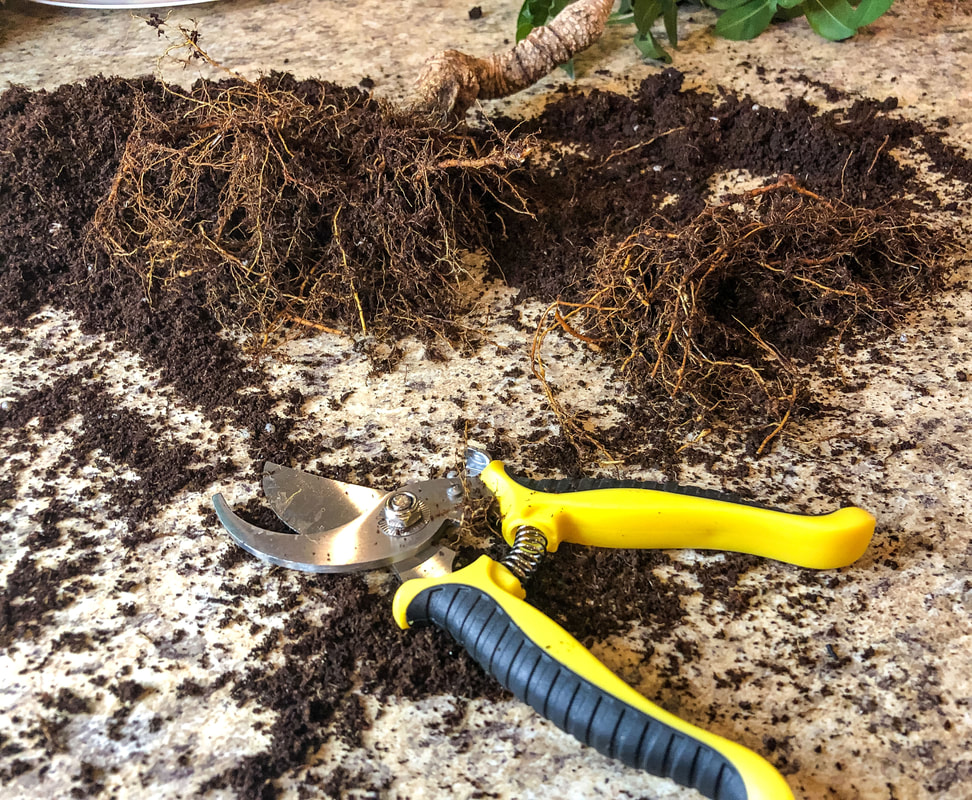 Roots trimmed off the bonsai ficus root ball. Photo by Diane M. Lilly, 2022. How to fertilize a bonsai ficus According to Kaizen Bonsai, only fertilize when the plant shows strong growth. Fertilization will also depend on your specific type of tree. Do not try to fertilize to fix “problems”; if there are plant health issues, try other options, such as adjusting the water schedule, pruning, loosening roots, or repotting. Another source says to fertilize once every two weeks during spring and summer, once a month in winter and fall, and dilute the fertilizer by half. How you fertilize will depend on your tree species and circumstances. I have not given my tree any fertilizer because it just didn’t need it! It had steady growth, with new shoots all the time, so I chose to forego the fertilizer. How to water a bonsai ficus Water the bonsai ficus when the soil feels almost dry. Do not let the soil become dry as a bone, but do not overwater either. Try to strike a nice balance with moist but not soggy soil. Soggy soil will cause catastrophic root rot. Bonsai trees usually sit in shallow pots, so keep an eye on the soil moisture to prevent damage from the soil drying out. When you water, water slowly and deeply, then let alone until almost dry before watering again. A tip I learned that has become invaluable to me for tracking the soil moisture in my plants is to use a water meter. I check all of my plants—plunging the water meter into the soil in several places to monitor the evenness of the soil moisture—before I pour water into the pot. A quick note about misting…The bonsai ficus does not need to be misted but could benefit from an occasional mist in dry environments. As this is a tropical plant, it does like some humidity, so an occasional mist and a wet tray can provide that little extra bit of moisture in the air. 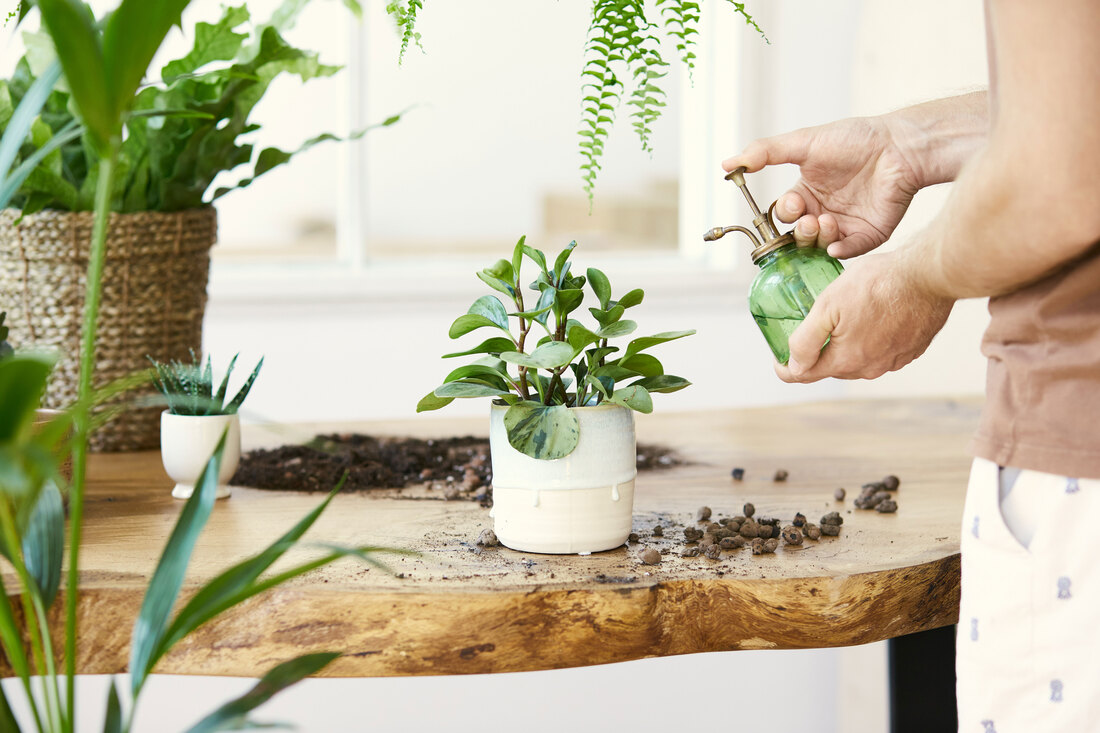 Image by FollowtheFlow from AdobeStock. Lighting needs for a bonsai ficus The bonsai ficus likes to be in full sun, but this tree can tolerate indirect light, as long as it gets a little bit of direct light on its leaves. The southern sun is perfect for this plant, but less direct light from the east or west will work. My plants sit in a southeast window of my house, and they all seem to love it! They get plenty of direct light until mid-afternoon, and they are happy. Do not leave this plant in the dark! It won’t tolerate dark corners or cold drafts (think tropical). 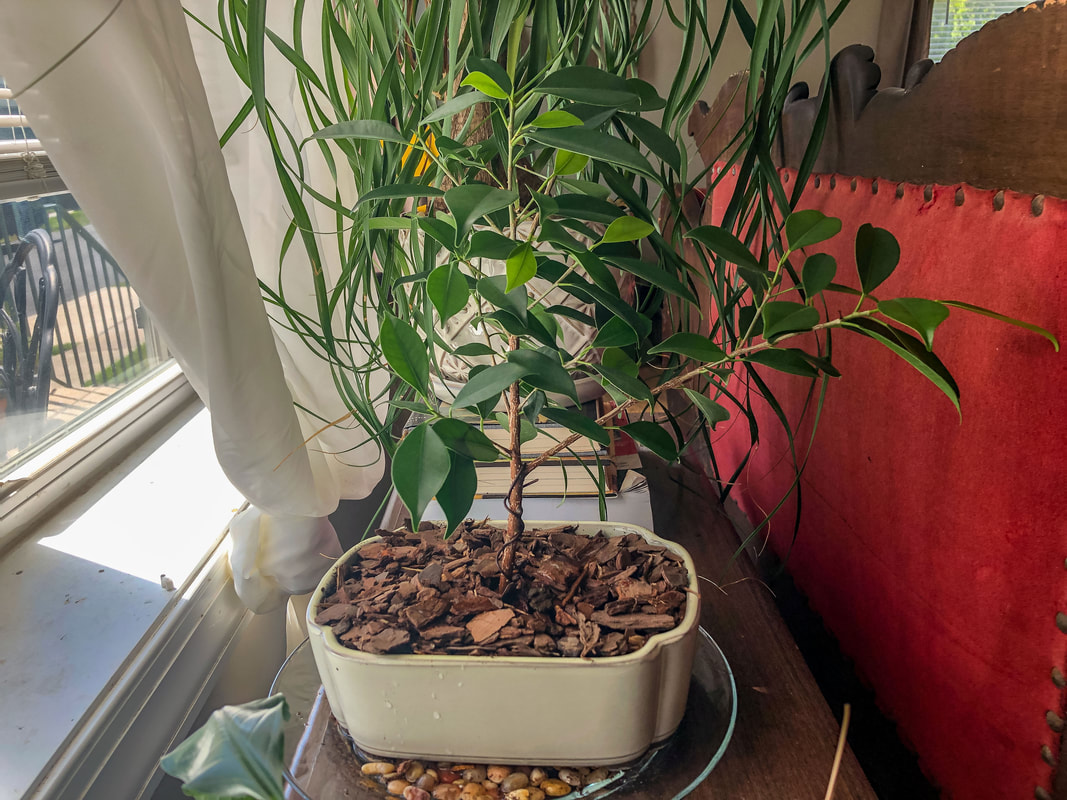 Newly planted bonsai ficus cutting in the front window. Photo by Diane M. Lilly, 2022. How to prune a bonsai ficus There are whole books and videos on this topic, and there’s no way I can do it justice in this short blog, but here are just a few tips to get you started… Manage the shape and size of the tree by trimming back new growth leaves to only a couple. For example, you can cut branches back to the first two or three leaves, promoting a bushier, less straggly growth. Pruning helps with apical dominance, or the tendency for the new growth to dominate, leaving older growth to wither and die. In simpler words, pruning helps control new growth to improve the tree’s overall look and health. Pruning is most effective in spring but can be done whenever the tree gets out of hand with growth. And don’t worry about the milky sap (latex) that will ooze out of the cuts. They are the tree’s way of creating a protective sealant to help heal the cut. 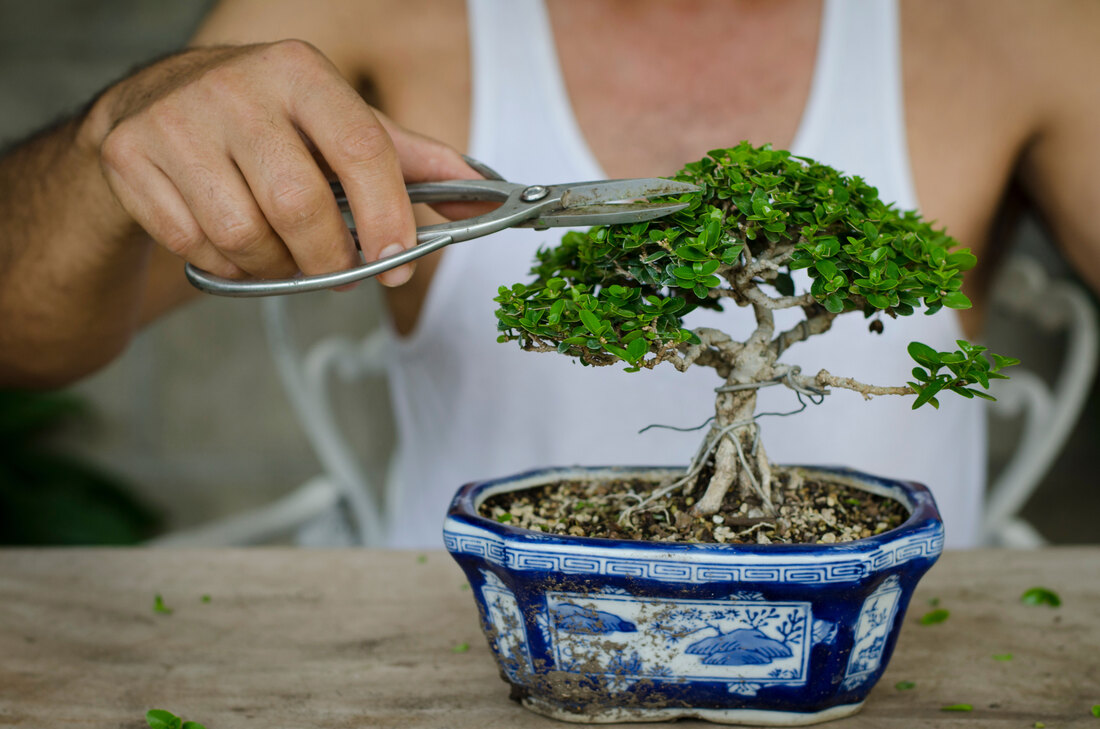 Image by Irene Marti from AdobeStock. How to propagate a bonsai cutting My bonsai tree developed a large branch off to one side of the tree, leading to leaning and tipping over from the weight. This was my fault for ignoring the pruning! The repotting process gave me the perfect excuse for pruning that branch, but I couldn’t bear to throw it away. The branch was the ideal size to propagate as a new tree! 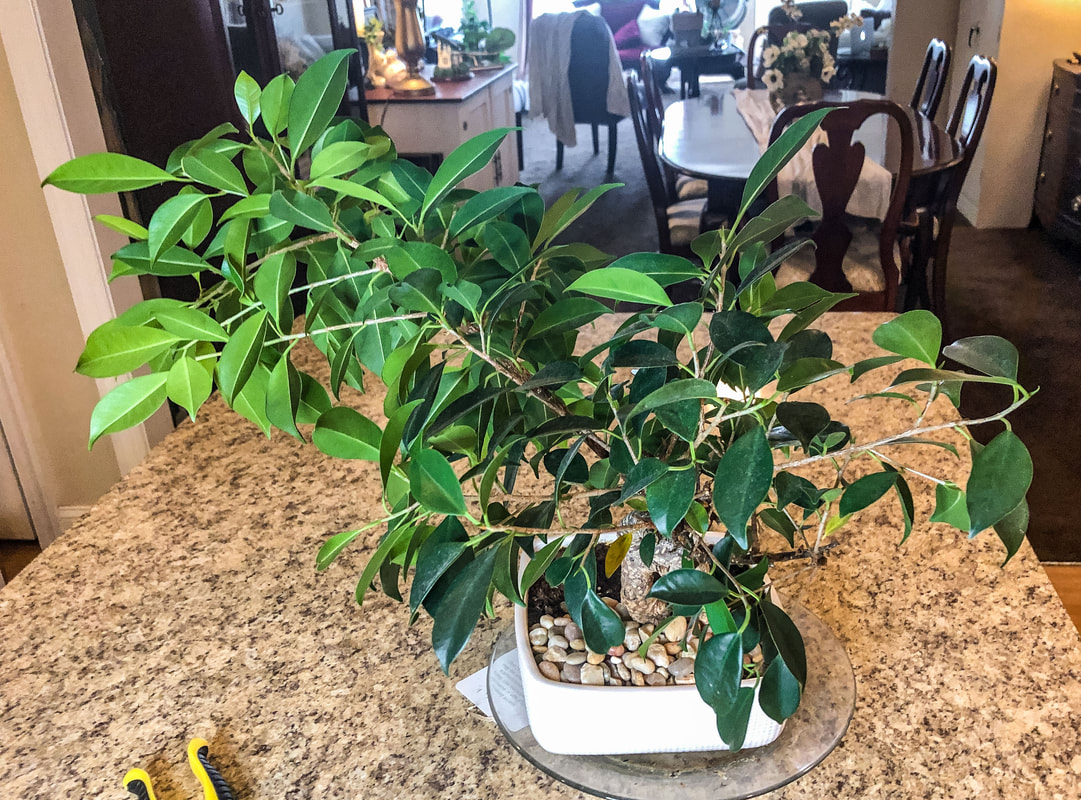 "Before" shot of large unruly branch on my bonsai ficus tree. Photo by Diane M. Lilly, 2022. So, how do you propagate a cutting from a bonsai tree? The bonsai is a tree, so it’s pretty resilient when chopping off bits here and there. The tricky bit is getting the cut piece to grow roots. To prune a branch for propagation, cut at a 45-degree angle like you would for fresh-cut flowers. This helps the cutting have more surface to soak up much-needed water. 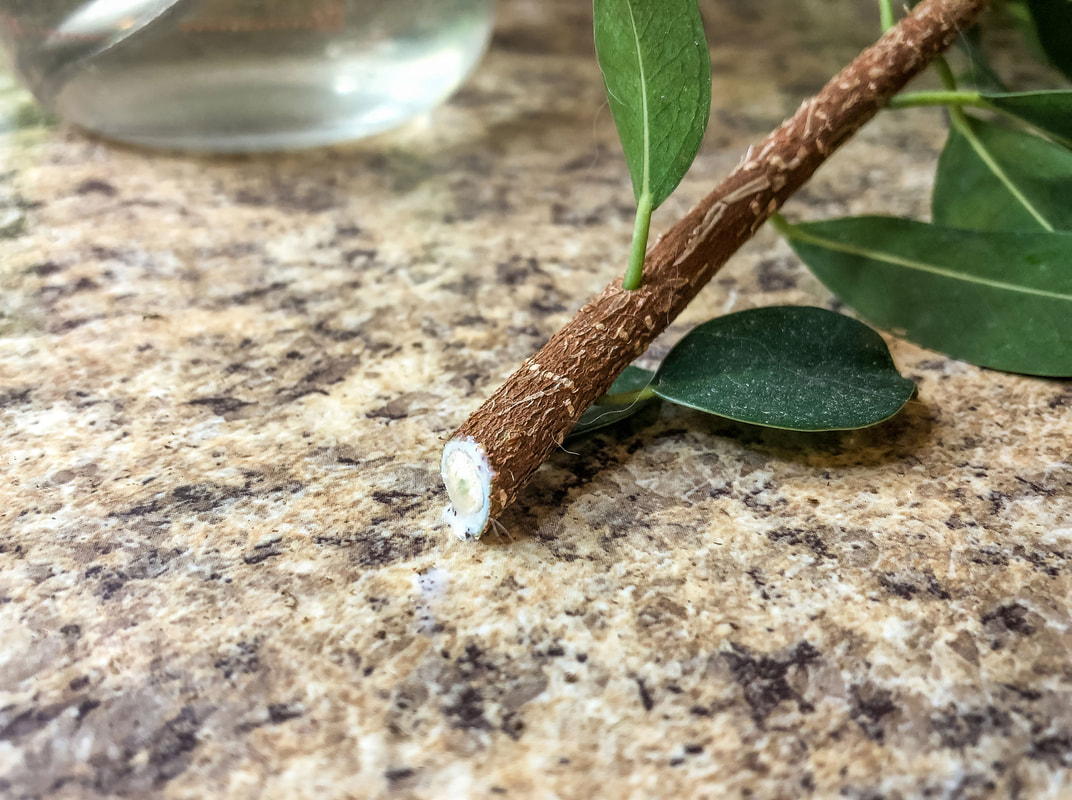 The large branch cut off the bonsai ficus tree at a 45 degree angle. Photo by Diane M. Lilly, 2022. There are two ways to get the piece to root—place it in a vase with water for a few weeks or plant it directly into another pot with soil. (I tried both techniques since I had a few extra pieces I didn’t want to throw away.) 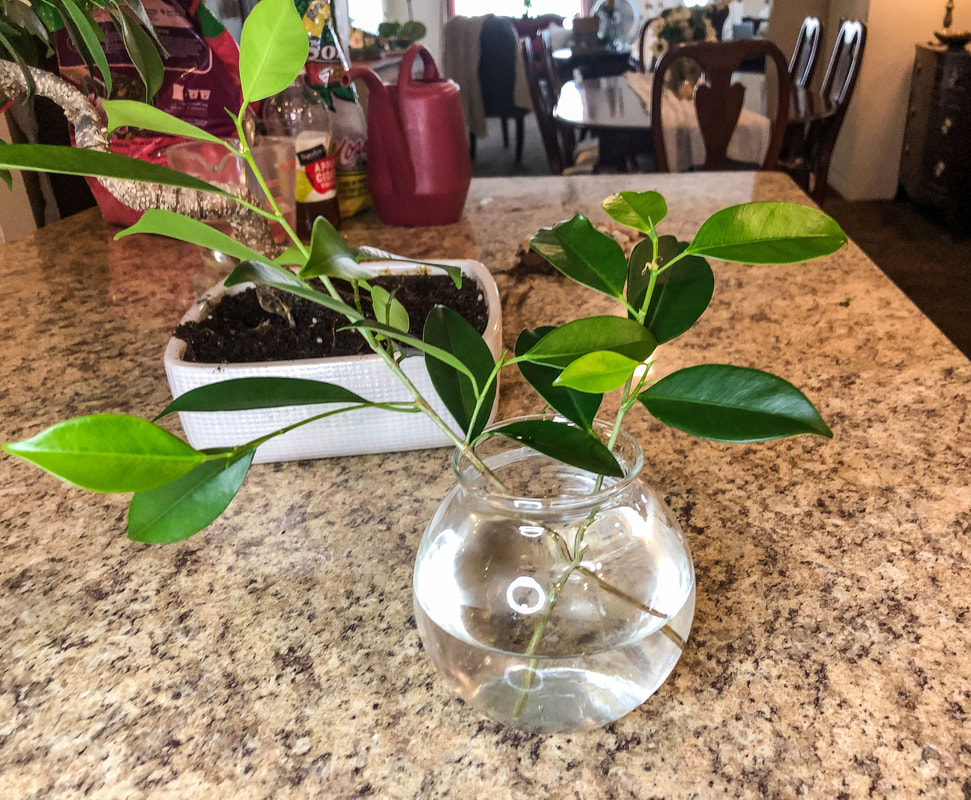 Two tiny branches from the bonsai ficus tree placed in water to root. Photo by Diane M. Lilly, 2022. According to Plantophiles, to propagate using the soil method, place the cutting in a pot with good soil for bonsai trees, using the same step-by-step method as when repotting a bonsai tree. The cut branch should start rooting within a couple of weeks. Keep the cutting watered, and carefully monitor the soil so it’s not soggy but has enough water for the new tree to grow. Place the newly potted branch in a spot with plenty of bright indirect light, like a south-facing window. (Just like with a newly repotted bonsai tree, avoid stressing the plant by putting it in direct sunlight.) 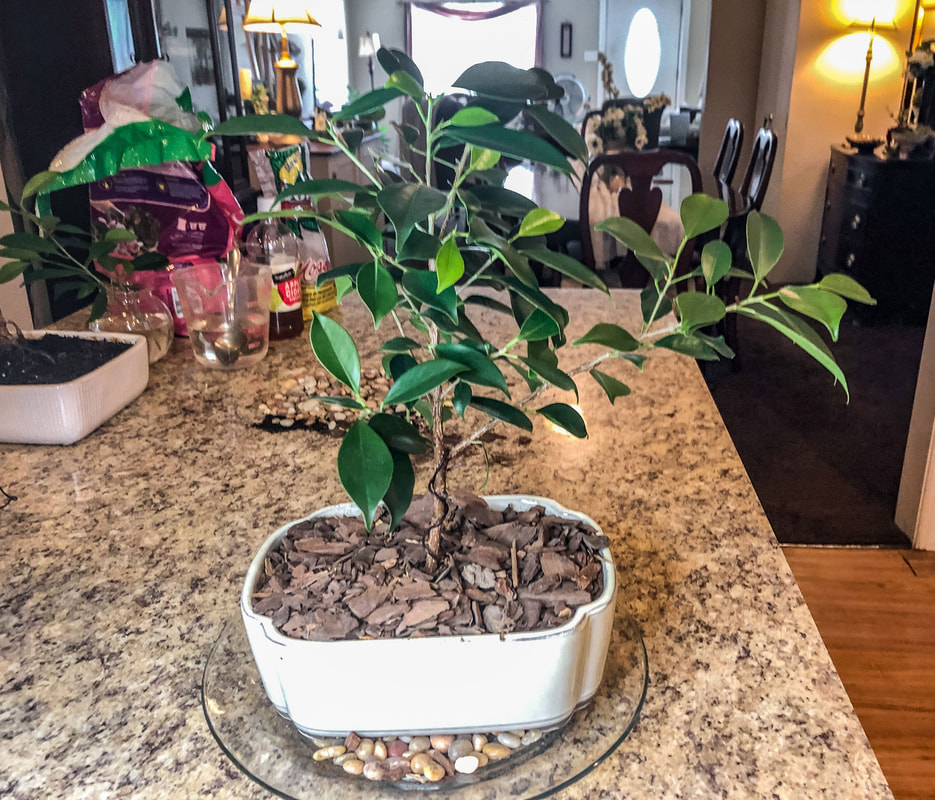 Newly potted cutting from the bonsai ficus plant. Photo by Diane M. Lilly, 2022. How to wire your bonsai ficus The trick to getting those fantastic shapes in professional bonsai trees is to use wires to help the malleable branches grow in the desired direction. Wires can be used to help manage shape, but use the thinnest wire possible (wire for bonsai comes in a range of thickness) depending on the thickness of the branches. Thin branches are more flexible and easy to train, requiring thinner wire, while thicker (less flexible) branches will need heavier wire and possibly a guy wire. Cut and remove the wire when the branch has grown in the desired direction and can hold its own (about six weeks). A few “don’ts” for wiring are: don’t wire up a bonsai just after the shock of repotting, don’t wire branches too tight, and don’t let the wire cut into the tree. The first thing to do when repotting is to wire and anchor the tree trunk. Wiring the plant from the base will help stabilize the bonsai tree, create balance for the desired shapes, and keep the tree from tipping. (My tree was never wired into the pot and is now toppling over!) The wire gets fed up through holes in the bottom of the pot, wound securely around the large roots (and tree base), and then secured to keep the tree stable. Try not to wrap too tightly and dig into the tree. 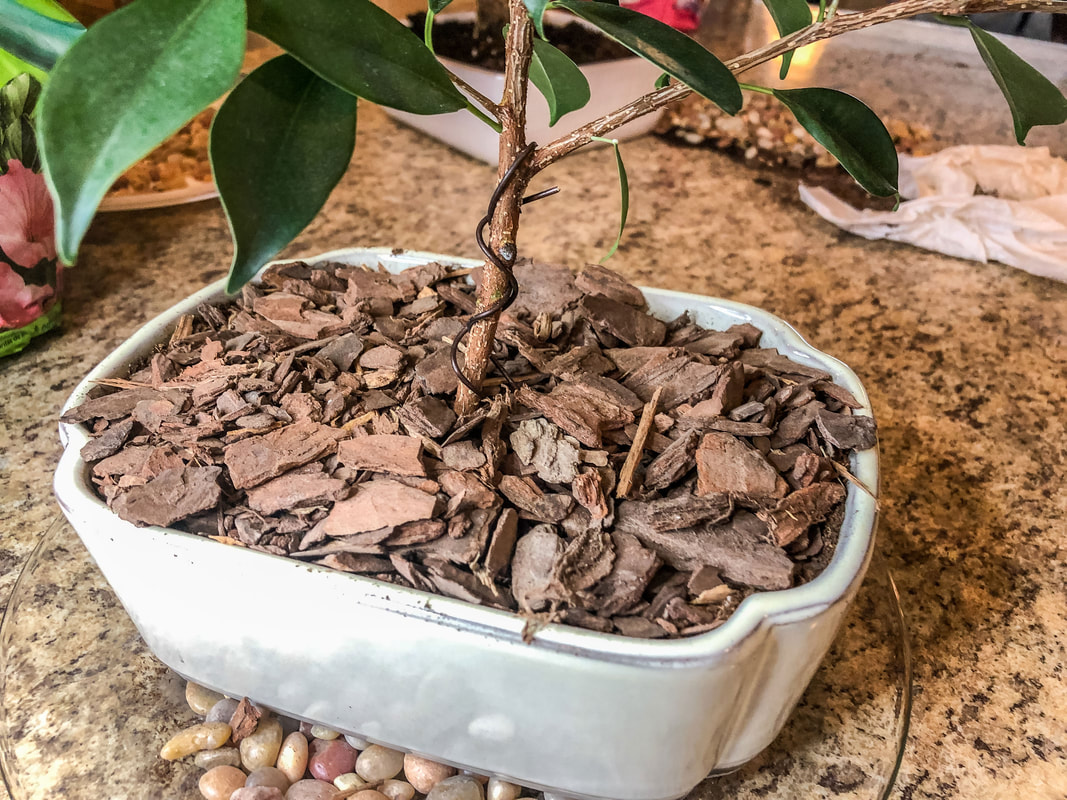 Bonsai ficus cutting wired into place in its new pot. Photo by Diane M. Lilly, 2022. 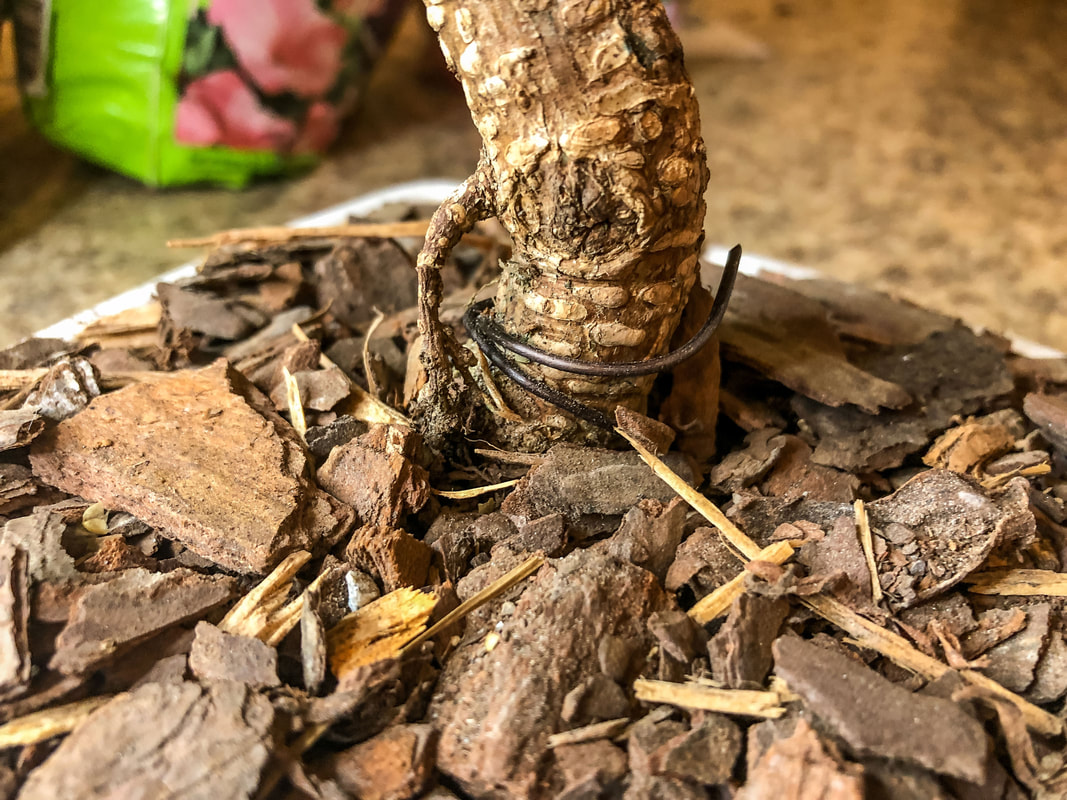 Main trunk of the newly potted bonsai ficus wired into its pot. Photo by Diane M. Lilly, 2022. So, in trying to help my bonsai plant, I learned a lot! Bonsai plants are trees and behave more like trees, just in miniature. There is no one-size-fits-all standard for repotting your bonsai, so it is essential to understand your tree type and specific needs. In the past, I have been afraid to touch this plant for fear of ruining it, but I am learning that it is more resilient than I previously thought. I’m sure this is just the beginning of an educational journey, especially since I have gone from one bonsai to two bonsai trees via propagation. (And I almost forgot two small cuttings sitting in the water trying to root!) This is a lot of information to digest, and I’ve only just scratched the surface, but I think this is the beginning of a beautiful friendship with my bonsai ficus trees! Stay tuned for updates! Please feel free to drop a line in the comments with any tips! 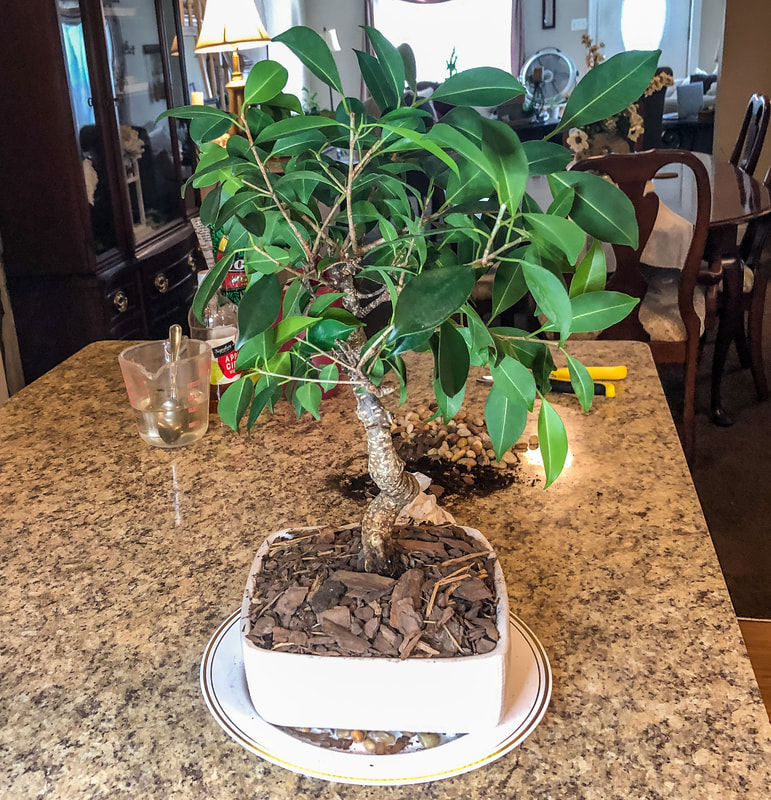 Newly potted bonsai ficus. Photo by Diane M. Lilly, 2022. Related blogs you may want to read: How to repot a pothos plant How to propagate bromeliad pups Small houseplants that love bathroom humidity Eight health benefits of decorating with plants How to harvest and use fresh mint from the garden Tips for harvesting chamomile for homemade tea Growing tomatoes and cucumbers How to care for 11 common herb seedlings Tips for planting seeds indoors Sources: https://www.bonsaiempire.com/basics/bonsai-care/repotting https://www.allthingsbonsai.co.uk/bonsai-tree-species-care-guides/ficus-indoor-bonsai-tree-care/ https://www.allthingsbonsai.co.uk/bonsai-tree-care/a-discussion-on-bonsai-soil/ https://www.bonsaioutlet.com/ficus-bonsai-care/ https://www.kaizenbonsai.com/bonsai-tree-care-information/graham-s-guide-to-repotting-bonsai https://shinnong.org/how-to-care-for-your-ficus-bonsai/ https://plantophiles.com/plant-care/how-to-grow-bonsai-from-cutting/ Affiliate Disclosure Some of the posts in this article contain affiliate links. This means if you click on the link and purchase the item, I will receive an affiliate commission at no extra cost to you. I will only recommend products or services I use personally and/or believe will add value to my readers, so there is no conflict of interest.  Peace lilies in my living room. Photo by Diane M. Lilly, 2021. This blog article has been a long time in the making. My whole business model is based on the notion of “nature-inspired”! But does having natural and organic elements in the home make a difference in how we feel? Does it improve our mood? And why do I have such a passion for creating nature-inspired home decor? I’m pondering this topic in a pragmatic rather than scientific sense. I’m a lifelong sufferer of anxiety and depression, and probably some form of PTSD born out of childhood trauma. I’ve tried medications, meditation, yoga, exercise, healthy eating, and positive affirmations, and they have each helped in their way but do not come close to how much better I feel when surrounded by trees. Unfortunately, I now live in a suburban hell, which is only slightly better than the urban hell of my youth...But I do live in this beautiful state of Pennsylvania—a state filled with natural beauty, trees, farms, mountains, and hiking trails. When we do finally decide to relocate, there are plenty of options! But, for now, I have to settle for making my home as comfortable and pleasant as possible using what I have.  Pennsylvania Grand Canyon, Wellsboro, PA. Photo by Diane M. Lilly, 2021. For many years, I have tried to keep small gardens, which keep me busy during the warmer months. Gardening gets me outside and out of my head and allows me to photograph beautiful things. Over the past couple of years, I started considering my indoor environment. Houseplants and indoor herbs have become a staple in my home, with varying degrees of survival. I don’t have the greenest thumb in the world, but I can grow a thing or two!  Summer garden in my yard with bushy mint plant. Photo by Diane M. Lilly, 2021.  Small haworthia plant. Photo by Diane M. Lilly, 2021. In addition to live plants, my interiors are filled with faux florals and faux floral decor that I designed and created. Blending real and faux florals seems perfectly natural to me. But I often wonder—is there a difference between the real and the faux? Can nature-inspired decor have the same or similar effect as the real thing? And does having houseplants have the same positive effect as an outdoor garden? That question has intrigued me since starting this nature-inspired decor “experiment” several years ago. 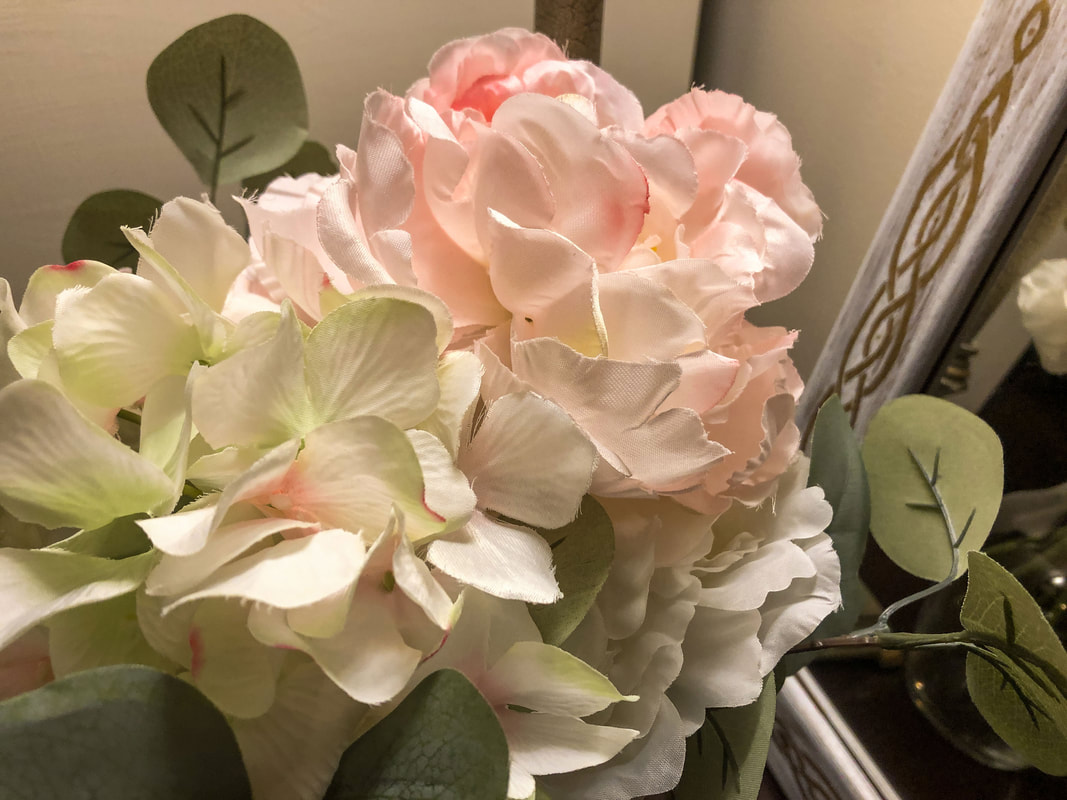 Faux hydrangea flowers. Photo by Diane M. Lilly, 2022. 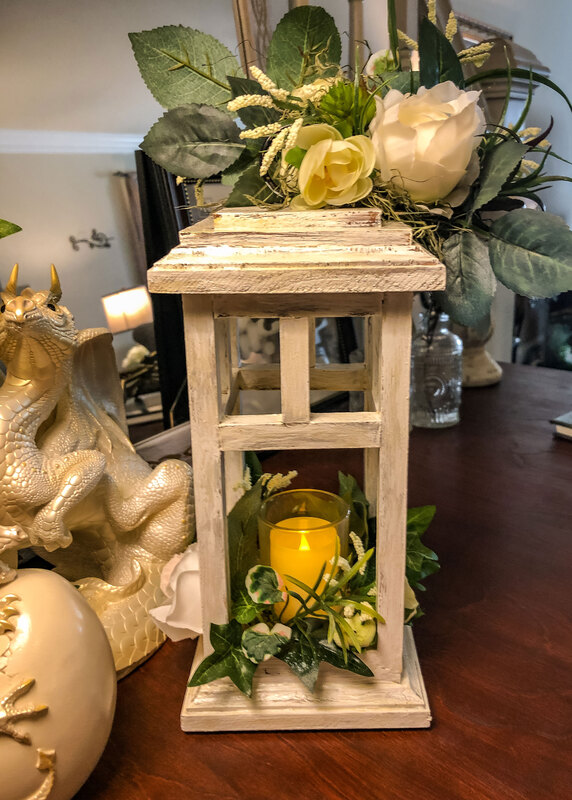 Septemeber Vibes handcrafted lantern candleholder by Di's Studio Designs. Photo by Diane M. Lilly, 2022. Our modern lives are toxic and artificial in almost every way, which has harmed our physical, mental, and spiritual health. I can personally vouch for that! That being said, the ability of humans to create our own built environment is fascinating to me. The crossroads between the natural world and the built environment is what holds the most interest to me. I love design. I love architecture, art, interior design, and decorating (I did go to school for interior design, after all!), all of which are artificial constructs. Creating nature-inspired home decor has been the ultimate exploration of how to bring balance to these two opposing worlds.  Fallingwater, Mill Run, PA. Photo by Diane M. Lilly, 2013. What I know is this… I love observing the beautiful flowers, plants, and trees when sitting in my garden. I am fascinated by nature’s creative shapes, hues, texture, and scale. Mother Nature really IS the ultimate designer and artist!  Summer vinca flower. Photo by Diane M. Lilly, 2021. Mimicking nature’s skilled hand is quite challenging, but the effort has been the backbone of my handcrafted floral designs for seven years. It’s always a challenge to strike the right balance between man-made elements and the natural world! Admittedly, there isn’t the same depth of experience with faux florals as with real flowers in a garden. The comparison is equivalent to actually taking a hike through the woods versus sitting on your couch watching a YouTube video of someone walking through the woods. When you hike, more of your senses are triggered, making it a totally immersive experience. But sometimes the visual representation—if that’s all that’s available to you—is all the reminder you need that we are creatures of nature under the skin.  Image by schepniy from AdobeStock. But does having plants, flower arrangements, and faux florals in the home have the same benefits as being in nature? Does surrounding yourself with representations and small samples of the real thing do anything to make you feel better in your interior spaces? My answer--Both my houseplants and my faux floral creations make me smile. The moment spent checking on the growth of one of my latest plant babies can bring me as much joy as admiring the beauty of my floral decor.  Ponytail palm. Photo by Diane M. Lilly, 2021. In the past, my home was not filled with anything resembling organic or natural elements, and I didn’t realize just how barren the space felt…until one day, I filled that space with plants and faux floral decor. All of a sudden, it was like somebody turned on the lights! The difference in the mood of the space was immediate. Suddenly—and dramatically—there was life where previously there was emptiness.  English Cottage handcrafted fairy house with faux florals. Photo by Diane M. Lilly, 2022. And the live plants in my home allowed me to be a caregiver, and that’s more powerful than people realize. When you care for another being (in this case, my houseplants), the experience takes you out of your head for a while and forces you to focus on the moment, to be present. Being present and engaging in activities that promote mindfulness are ancient ways of coping with stress, depression, and anxiety.  Money tree. Photo by Diane M. Lilly, 2021. So, in answer to my question, yes…In my experience, bringing a bit of nature into the home—whether real or faux, or even a mixture of both—goes a long way to helping us feel more relaxed, calm, and even energized. My home felt like a dark hole until I gave it “light” with plants and flowers. I do feel better in my surroundings. My creativity has also greatly benefited from having an interior that makes me feel calm and relaxed. My home is where I both live AND work. I no longer feel suffocated, empty, or claustrophobic. It’s been a game-changer! I know this is not a scientifically backed answer (although I have read many articles on the subject), but it IS my own experience, and I believe what I see. All I can provide is my own experience, and it has been a positive one! And so I think I leave this mental meandering on that note and leave you with a quote from one of our country’s greatest naturalists, John Muir: “Everybody needs beauty...places to play in and pray in where nature may heal and cheer and give strength to the body and soul alike.”  Leiper-Smedley Trail, Wallingford, PA. Photo by Diane M. Lilly, 2022. What are your thoughts on this topic? Do you have your own experiences to share? Drop a line in the comments, and let’s start a conversation! Sources: https://e360.yale.edu/features/ecopsychology-how-immersion-in-nature-benefits-your-health https://www.takingcharge.csh.umn.edu/how-does-nature-impact-our-wellbeing https://greatergood.berkeley.edu/article/item/how_nature_makes_you_kinder_happier_more_creative https://www.apa.org/monitor/2020/04/nurtured-nature https://selecthealth.org/blog/2019/07/10-reasons-why-being-in-nature-is-good-for-you https://www.webmd.com/balance/ss/slideshow-health-benefits-nature https://positivepsychology.com/positive-effects-of-nature/ Related blogs you may want to read: Let’s talk about houseplants Biophilia in interior design How to repot a bonsai ficus How to repot a pothos plant How to propagate bromeliad pups Small houseplants that love bathroom humidity Eight health benefits of decorating with plants Eight tips for creating spring vignettes My Spring 2022 indoor fairy gardens Spring makeover for my indoor fairy gardens 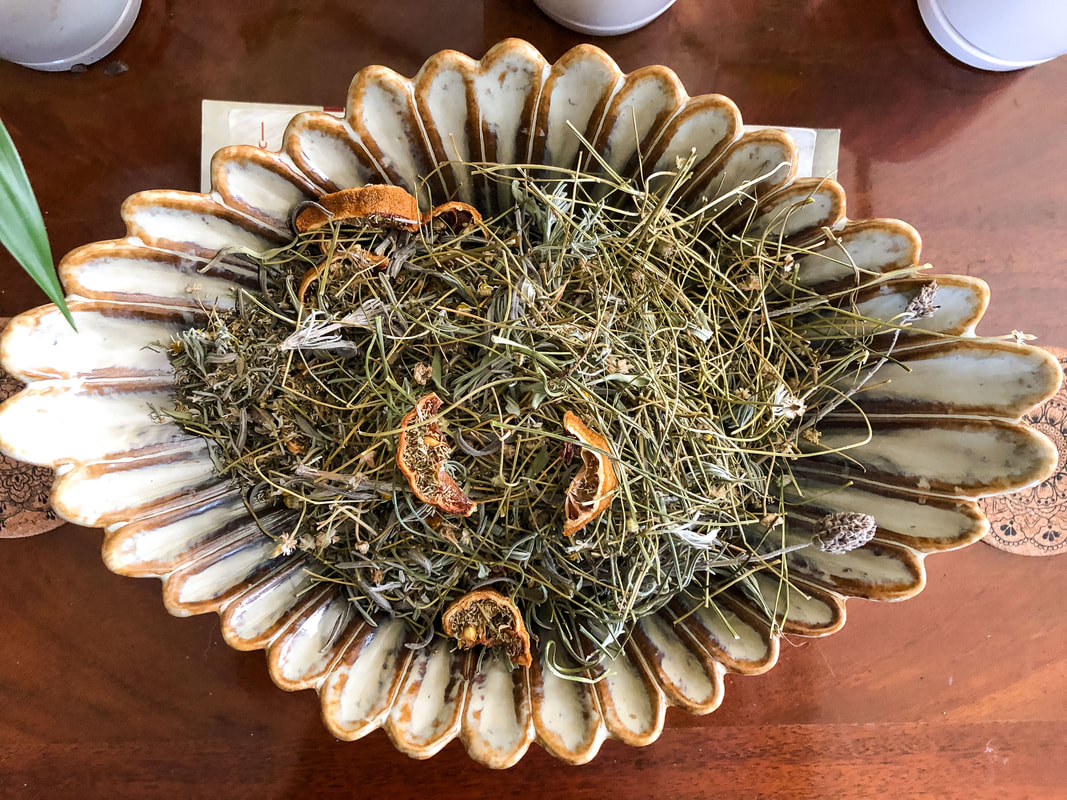 Homamde lavender, chamomile, and lemon potpourri. Photo by Diane M. Lilly, 2022. Nothing speaks to being calm and relaxed like the aromatic floral scent of lavender. Retail stores are filled with essential oils, incense, candles, and potpourri with the lavender scent. 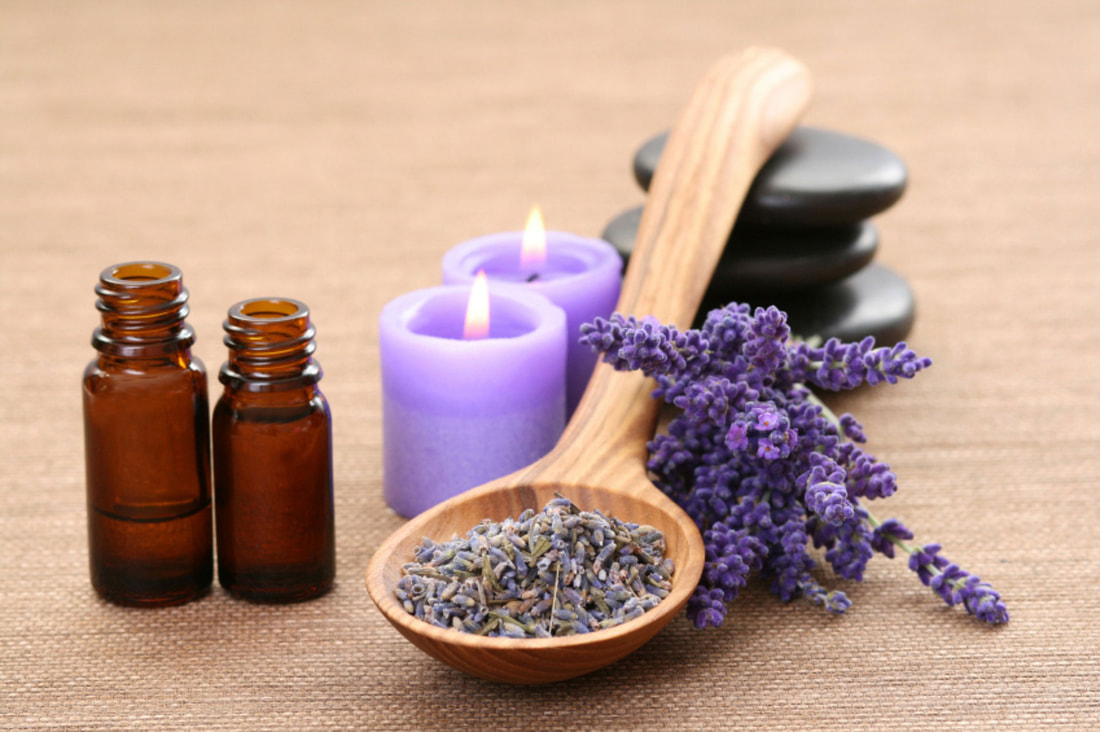 Image by googlerankfaster from Pixabay. As an amateur gardener who has been growing a few select herbs for several years now, lavender has been one of those plants I’ve been chomping at the bit to get my hands on, and this year was finally the year I succeeded! I have my dad to thank for that…He gifted me a couple of plants for my deck, one of them being a small lavender plant that had yet to develop blooms. There was no label with identification of the specific plant type and care instructions, so I had to guess the exact type of lavender, but--now that small blooms are appearing--I’m pretty sure the plant is of the French or Spanish variety. 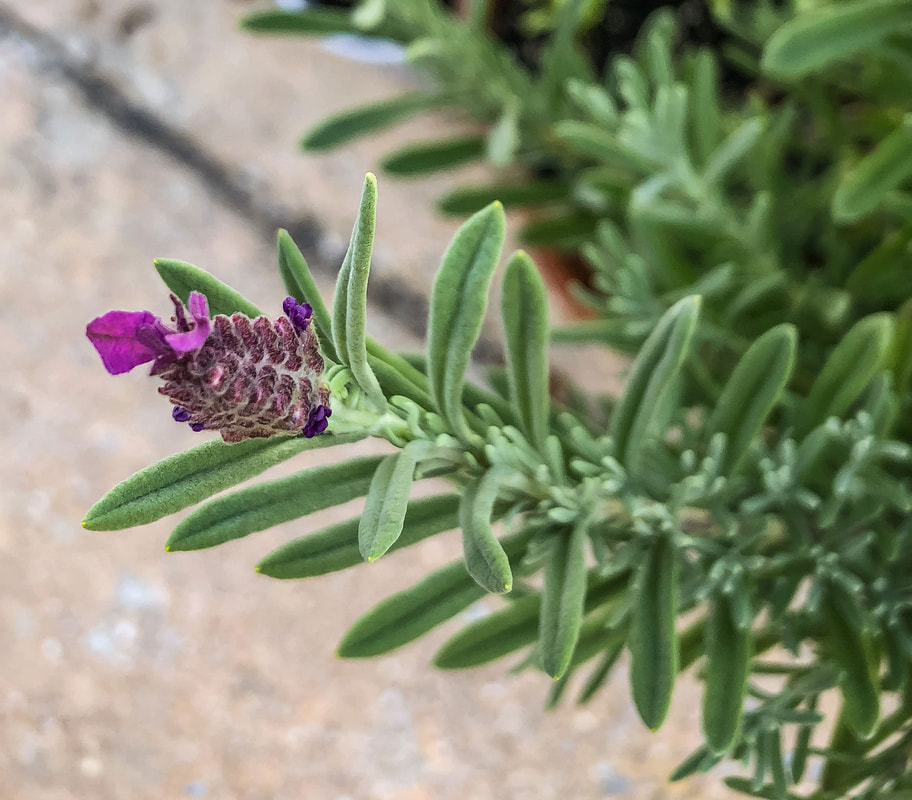 Lavender bloom from my potted plant. Photo by Diane M. Lilly, 2022. I’ll never understand why these garden stores don’t label the plants to let you know what plant you are buying! That information is crucial so you know how to care for your new plant, right? And here’s why it’s important: When it comes to growing lavender, there are many varieties from which to choose. I was astonished at just how many varieties of this purple beauty exist! Some lavender varieties thrive in drier climates, and some can tolerate colder temperatures over the winter months. So, it is critical to understand exactly which variety you are growing so you can enjoy your lavender and get the most use from it. 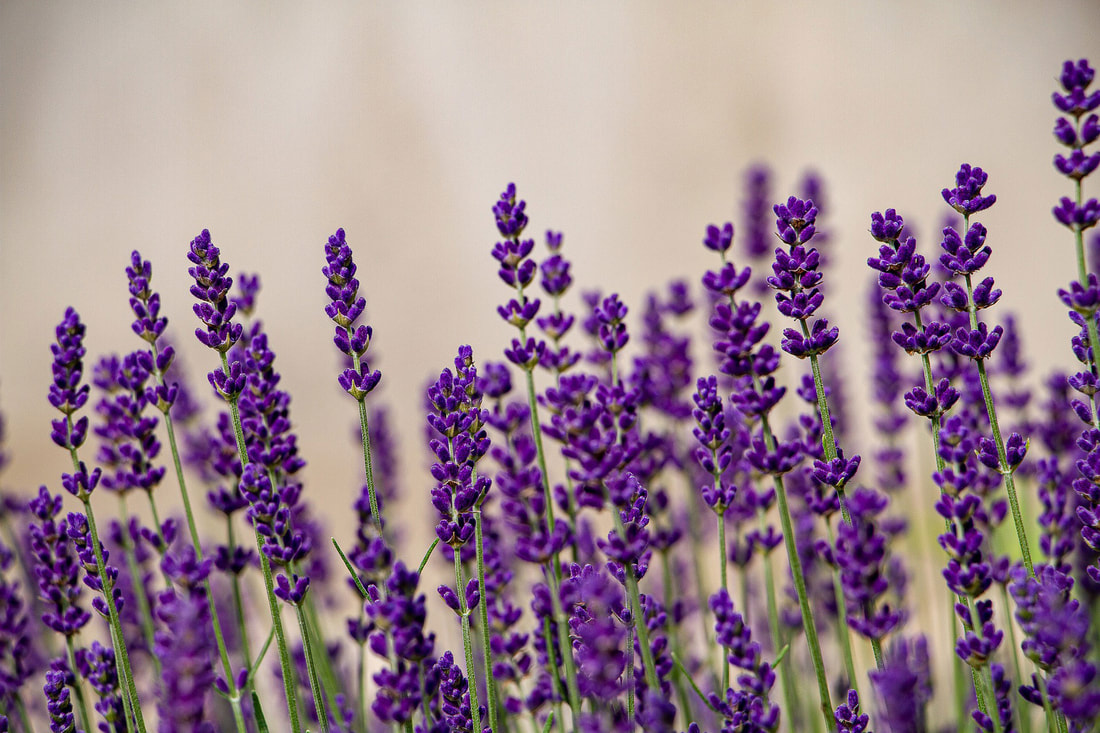 Image by Sabrina Wisian from Pixabay. 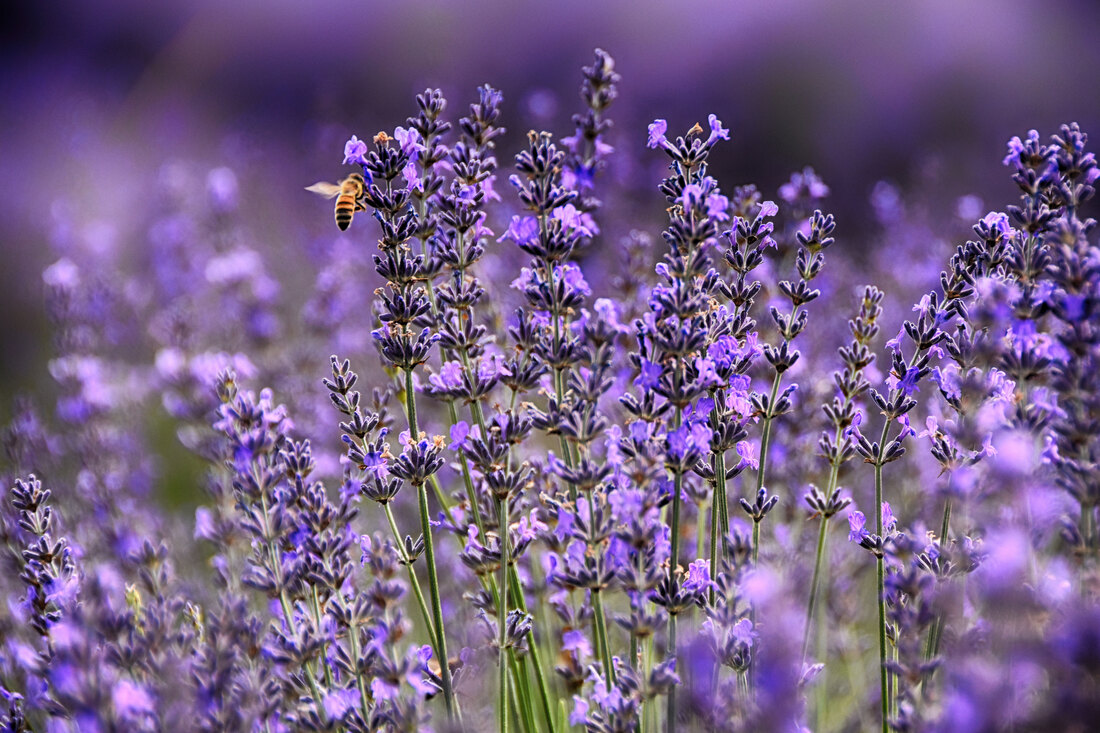 Image by gianniarmano from Adobe Stock. In addition to the French lavender plant my dad bought me, I have also decided to experiment and grow some Munstead English lavender from seed. The tiny plant is growing very slowly, but it is growing! It’s still tiny-- and probably won’t be of much use to me this year--but this plant (along with the other lavender plant) is sitting on my front porch just soaking up all of that warm southern sun, which lavender loves.  Munstead English lavender seedling in a pot on my porch. Photo by Diane M. Lilly, 2022. There are a couple of concerns with the climate in my area and whether or not it will be suitable for allowing these plants to thrive. The first concern is the high humidity in the summer months, and the second is the cold temperatures in the winter. I’ve decided to keep both lavender plants in pots so that they can either be moved to different spots or be brought indoors where I can better monitor their needs. Lavender does not require a lot of water, as it thrives in drier Mediterranean climates, so be careful not to overwater! That’s an issue for my lavender plants right now. The summer weather in my area has become humid and rainy, so I now have to decide to relocate my pots to a better-suited area or bring them inside. How to harvest and store At any rate, I am super excited to see how these two distinctly different lavender plants grow, and I’m on a mission to learn how to use clippings for scenting my home with potpourris and oils. My goal: learn as much as possible about growing, harvesting, storing, and ultimately using these aromatic herbs. I’ve been spending a lot of time researching, and below are a few tips I’ve uncovered… 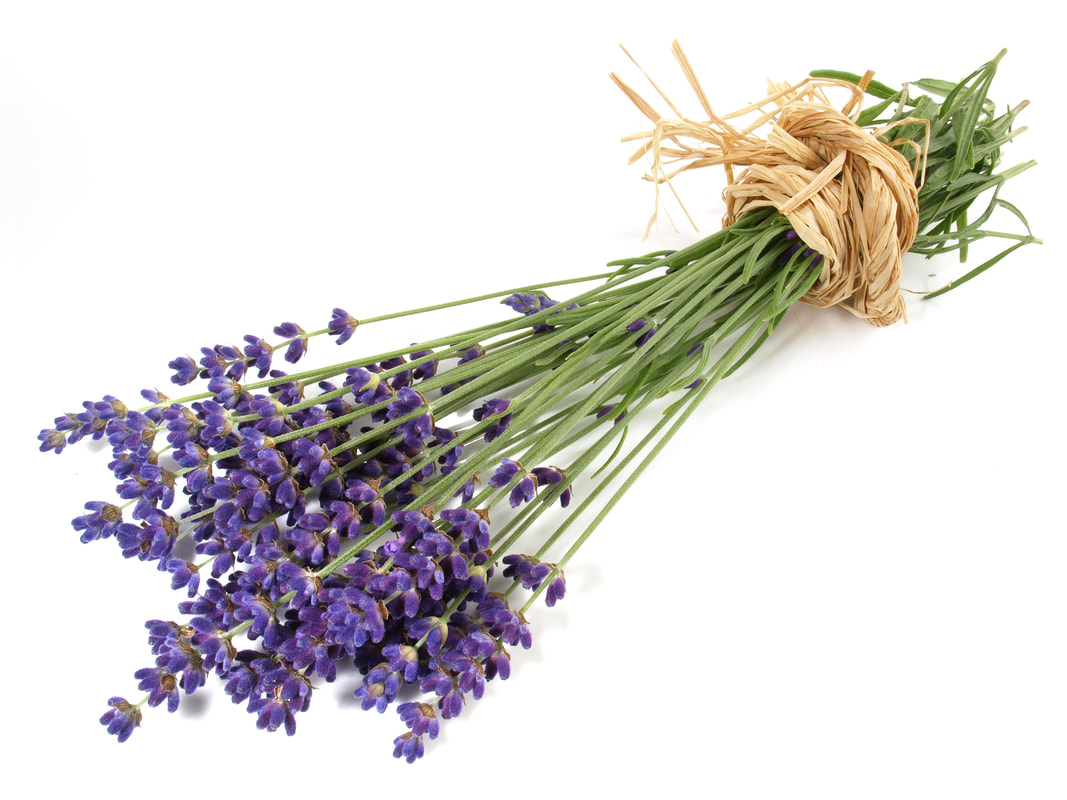 Image by ExQuisine from Adobe Stock. Harvest below the flower, where the stem meets at the junction of another stem. Harvest lavender in early spring or summer or early in the bloom when the buds are just opening so you can get another crop later. The more you harvest or deadhead (remove old flower blossoms), the more new growth is encouraged. If you leave the flowers too long, they may lose their potency and therapeutic benefits, so keep that in mind when harvesting for these purposes. Always harvest in the morning to minimize the stress on the plant and preserve any oils in the blooms. You can prune up to a third of the plant to promote future growth (especially in the fall). If you prune heavily in early spring, you’ll get a lot of new growth during the spring and summer. You can prune in the fall to shape the plant for the next season. Prune only the top 1/3 of the plant, right above the woody growth, and only when the plant becomes too woody. Seeds from the lavender plant can be gathered by hanging stalks upside down with a bag underneath. Store clippings in a dry place and let hang dry for at least a week. Make the bundles small to reduce the chances of mold developing from trapped moisture. My quick and easy lavender chamomile citrus potpourri Now that I have my long-coveted lavender plants, I’ve been itching to create a potpourri mix using lavender clippings, so I looked around the internet for ideas. Many of the summer recipes I found included lavender, rosemary, chamomile, and some citrus scent, and they all sound so lovely! Many of these recipes also include essential oils, and I just so happen to have recently bought a box with several different scents that I would like to use in my home. So today, I decided to take this opportunity to create a dry potpourri using my homegrown chamomile and lavender, some slices of lemon, lemongrass essential oil, and lavender essential oil. This DIY project's goal was to create a quick potpourri that I could put out on a table to scent my living room for a few days, maybe a week. So here’s the recipe I tried… Lavender & chamomile potpourri fresh lavender clippings fresh chamomile clippings 2 small lemons, sliced thinly 3 or 4 drops lemon grass essential oil 3 or 4 drops lavender essential oil a decorative bowl The first things you’ll need are the lavender and chamomile stems. I went out to my yard and clipped chamomile flowers with stalks, choosing the ones where the flowers were open but not drooping. Next, I headed to my lavender plant and cut several stems with the blooms. You don’t necessarily need the lavender flower because the leaves are very fragrant, but I wanted to add some visual interest to my potpourri mix, so I cut the blooms as well. And it’s worth noting that French or Spanish lavender is perfect for use in potpourri.  Chamomile growing in my garden. Photo by Diane M. Lilly, 2022. 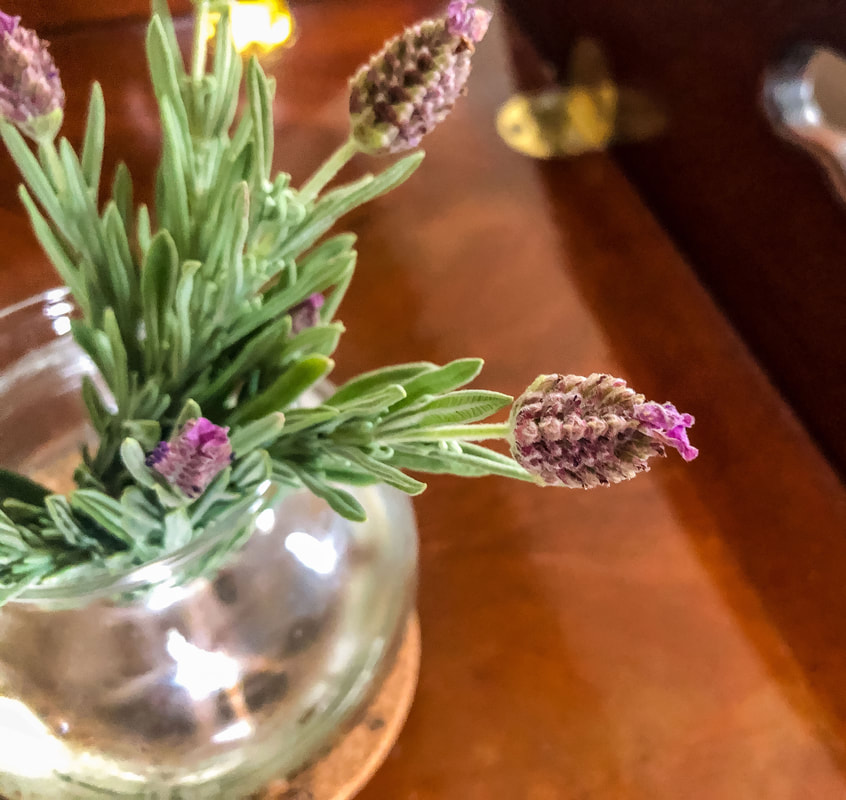 Lavender clippings from my plant, keeping fresh in a glass vase of water. Photo by Diane M. Lilly, 2022. The next step is to cut a couple of small lemons into thin slices. It is essential to keep the slices thin so they don’t take as long to dry out. To dry out my fresh lavender, chamomile, and lemon slices, I spread everything out on a baking pan and place it in the oven at 200˚ F for at least a couple of hours or until all the moisture is gone from the flowers and lemon slices.  Lemon slices and lavender clippings on a tray, waiting to be put in the oven for drying. Photo by Diane M. Lilly, 2022.  Dried chamomile, lavender, and lemon slices on a tray. Photo by Diane M. Lilly, 2022. At this point, you can decide what essential oils you want to use to enhance the fragrance. The reason I used essential oil is that--while the lavender, chamomile, and lemon are fragrant--the mixture isn’t potent enough to scent the room on its own. Essential oils infuse the dried flowers with a strong scent that lasts longer. For my mixture, I wanted to use essential oils that enhanced the citrus and lavender aroma, so I chose to use a few drops each of lemongrass and lavender…and it smelled AMAZING!  Newly purchased box of essential oils. Photo by Diane M. Lilly, 2022. 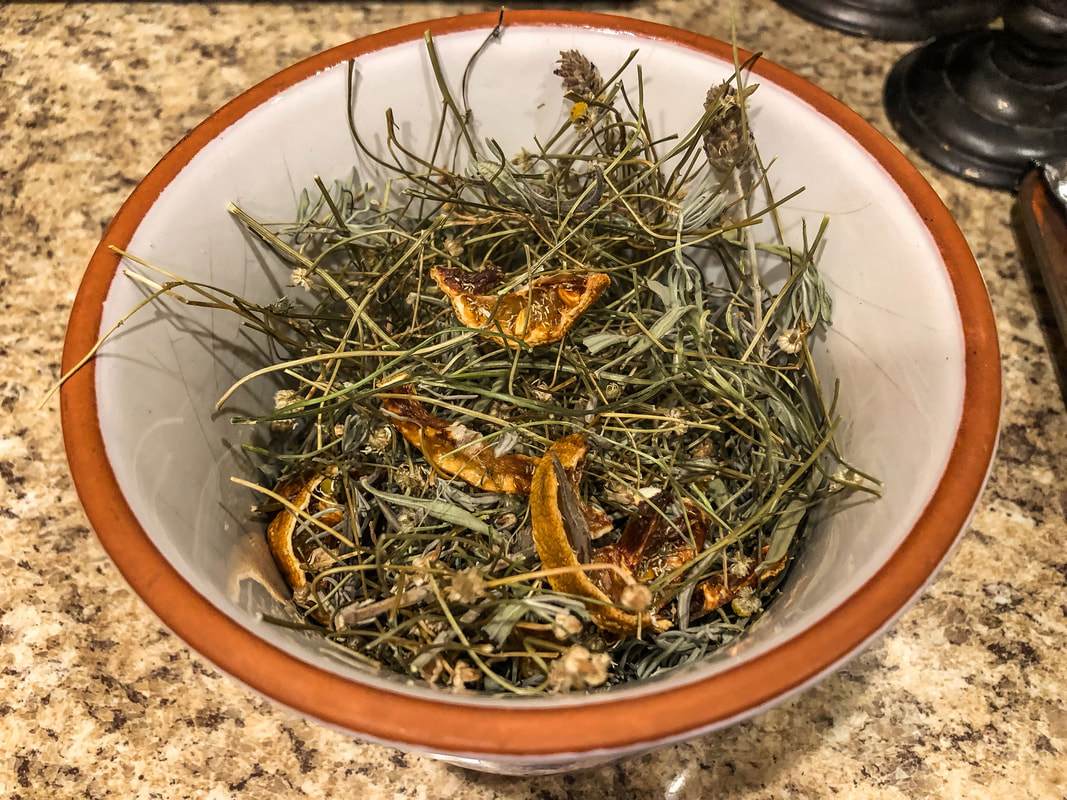 White ceramic vase filled with potpourri herbs and lemon slices. Photo by Diane M. Lilly, 2022. The only step left is to find a decorative bowl to put the potpourri in and a nice spot in your home where you would like to smell your new potpourri. I didn’t have a nice bowl, so I went to my nearest Hobby Lobby and bought this beautiful green ceramic bowl that perfectly fits my decor! It ended up being just perfect for my potpourri mix. 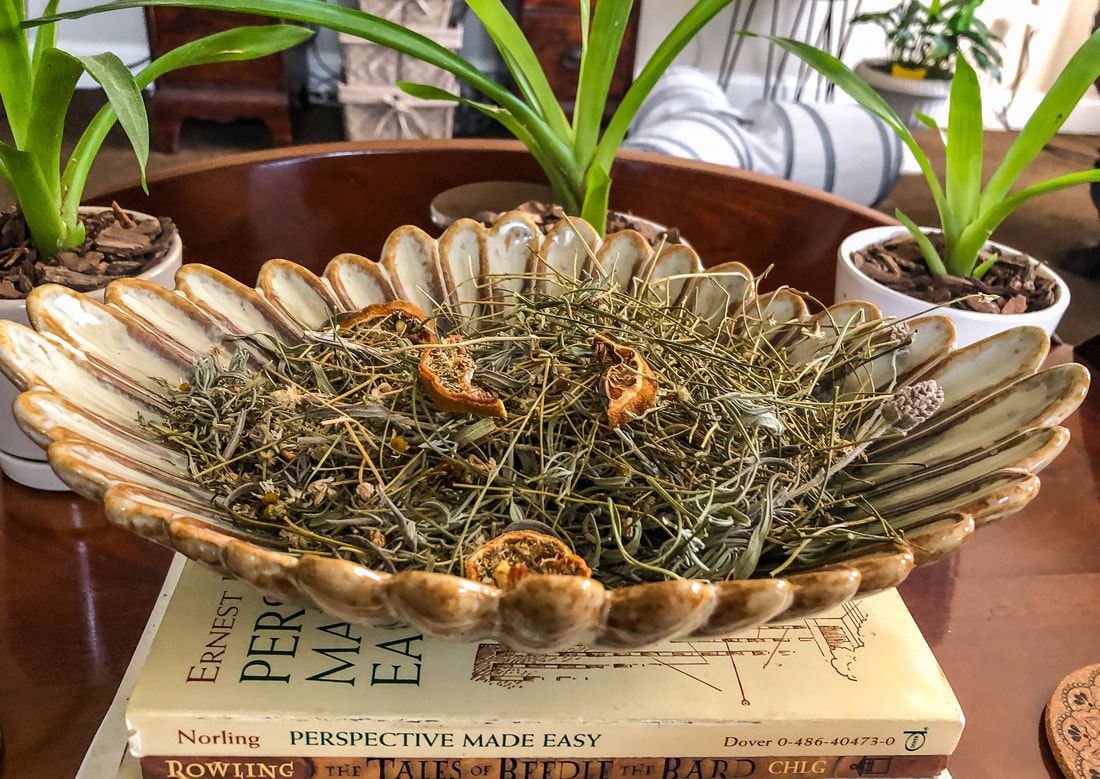 My freshly dried herbs and lemon in a newly purchased decorative bowl. Photo by Diane M. Lilly, 2022. Just a word of caution…If you have cats like I do (and this probably also goes for dogs), be aware that some essential oils and herbs can be toxic and even fatal if ingested. My cats don’t bother my plants or potpourri, but I am careful because lavender and chamomile are toxic to cats, and essential oils are toxic to pets. So please use these things with caution! So, I hope you found this article interesting and maybe learned something from it as I did, and I’d love to hear from you in the comments about your tips for growing lavender or potpourri recipes you love. And if you enjoyed this article or my blog, please share so we can expand and grow this community! Related blogs you may want to read: Tips for harvesting chamomile for homemade tea Learning how to harvest and use fresh mint from the garden How to care for 11 common herb seedlings Tips for planting seeds indoors Six herbs I planted indoors It’s planting season again Growing tomatoes and cucumbers for my garden How to repot a pothos plant How to propagate bromeliad pups Small houseplants that love bathroom humidity Sources: https://www.gardenloversclub.com/edible/herbs/lavender/types-of-lavender/ https://www.proflowers.com/blog/types-of-lavender https://www.gardeningchores.com/types-of-lavender/ https://homesteadandchill.com/how-to-harvest-dry-lavender/ https://preparednessmama.com/lavender-harvest/ https://bytherfarm.com/homemade-potpourri/ https://afternoonteareads.com/make-homemade-potpourri/ https://nwmaids.com/how-to-make-potpourri-2-methods-1-aromatic-result/ Affiliate Disclosure Some of the posts in this article contain affiliate links. This means if you click on the link and purchase the item, I will receive an affiliate commission at no extra cost to you. I will only recommend products or services I use personally and/or believe will add value to my readers, so there is no conflict of interest. 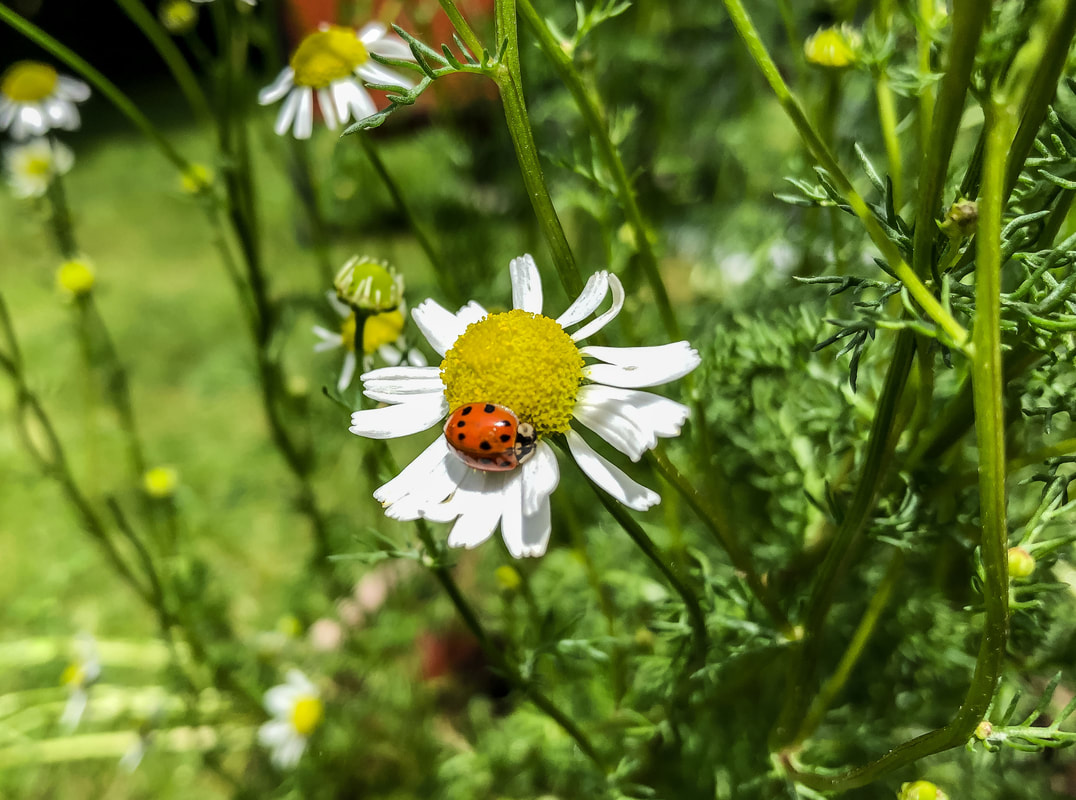 My chamomile has a ladybug visitor. Photo by Diane M. Lilly, 2022. I’ll let you in on a little secret—chamomile is my favorite herb! I have to tell you, I have developed quite an infatuation with this gorgeous little flower. Two years ago, I planted chamomile in pots that eventually ended up on my back patio. Chamomile is part of the daisy family, as evidenced by the slender white petals stretching out from knobby yellow buds…And this herb is so deliciously fragrant! Typically, chamomile is an annual—meaning it only blooms once and then dies—but this flowery herb is a prolific self-seeder, so it comes back for me every year just like a perennial. There are two main types of chamomile—German chamomile, which grows tall with tiny flowers, and the Roman variety, which grows shorter with slightly larger blooms. Either variety of chamomile will bloom through the entire warm season, which in these parts is from mid-spring to early fall.  Chamomile growing in my garden. Photo by Diane M. Lilly, 2022. So, my big idea was that I wanted to drink homemade tea with my fresh chamomile. (That’s been a mixed bag…but I’ll get to that later.) As I do more research into this aromatic herb, I am discovering more and more possibilities for uses in my home, from using it in recipes to essential oils and so much more. This journey of exploration should be educational! But first, a few tips on how to harvest and store chamomile, and at the end, I’ll discuss my attempts at making that homemade herbal tea… How and when to harvest chamomile… Generally speaking, I harvest throughout the summer, picking the blooms as needed. You do not harvest all the flowers at once, but instead harvest frequently by snipping off only the flower bud itself and only the flowers whose petals are fully open and not drooping. Harvest the chamomile in the morning for the best flavor and to lessen the stress on the plant. 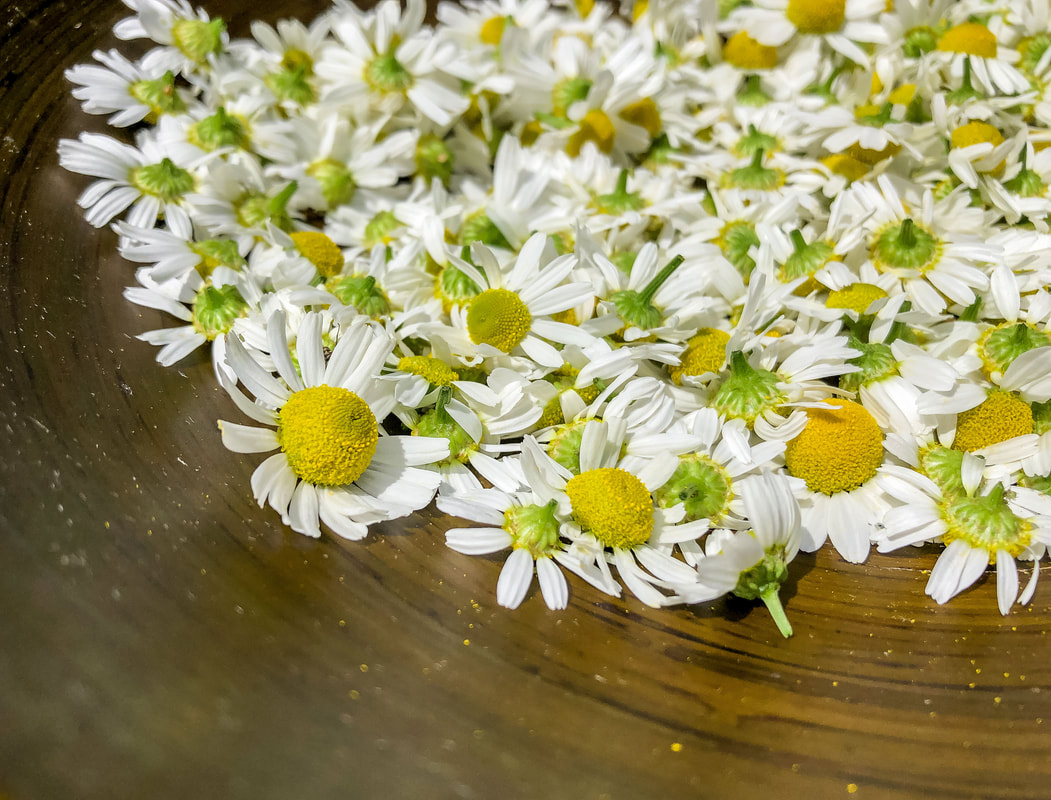 Freshly picked chamomile flowers. Photo by Diane M. Lilly, 2022. How to prep and store chamomile… Chamomile can be used fresh, but, in my experience, the flavor seems better when it is left to dry out first. Dried chamomile can become the seeds for next year’s crop (in case your plant does not self-seed) or can be used in amazing recipes. There are a couple of ways you can dry out the flowers. One way is to spread the flowers on a baking sheet and put them in the oven at a very low temperature (no more than 250˚) for a few minutes. Another way is to lay the buds on a tray and leave them in a dark, dry place for one to two weeks. Some people splurge and buy a dehydrator—which can be purchased for as little as $70—to speed up the drying process. After the chamomile is thoroughly dried out, it is ready to be stored in a glass container. Ensure there is no moisture before sealing in a container--otherwise, mold can develop, and we don’t want that! How to make homemade chamomile tea… According to my research, there are many benefits to drinking chamomile tea. The best option is always to use your homegrown process-free chamomile. Chamomile tea is said to be a calming beverage that can help you get to sleep. I have personally found that this tea relieves the menopausal bloating I’ve been experiencing lately. And it is said that drinking chamomile tea regularly significantly reduces anxiety. I am no doctor (do your own research and draw your own conclusions), but it sounds like this little daisy-like flower is more than just a pretty face! Oh, and did I mention that the same recipe you used for tea can be used as a hair rinse and lightener? The process of making chamomile tea is quite simple…You will need 2-3 tsp dried chamomile to one cup of boiling water for your tea. (If using fresh chamomile, you’ll need 6-8 tsp to one cup boiling water.) Steep the flowers for 3-5 minutes (you can steep for longer if you want a more potent brew), then pour the tea through a strainer to eliminate the heavy particles. So, for my first few attempts at making this herbal tea, I rinsed the flowers off, then spread them out to dry for slightly less than an hour before steeping them in boiling water. I used a coffee filter with a small sieve to separate the heavy particles, which worked well. One of the things I did notice—which I was not thrilled with—was that the tea seemed bitter. On subsequent attempts, I made sure to leave out any stems and leaves and lessened the time the brew steeped (from around ten minutes to more like 5 minutes), which seemed to help reduce the bitterness. 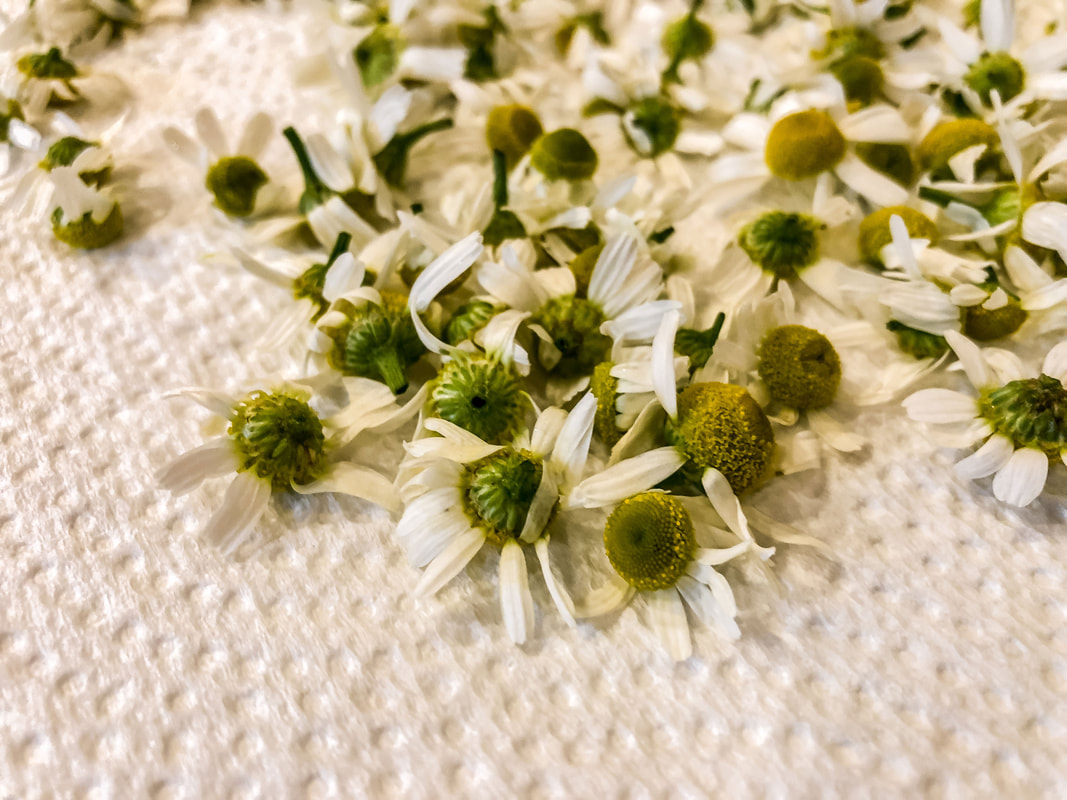 Chamomile flowers drying on a paper towel. Photo by Diane M. Lilly, 2022. 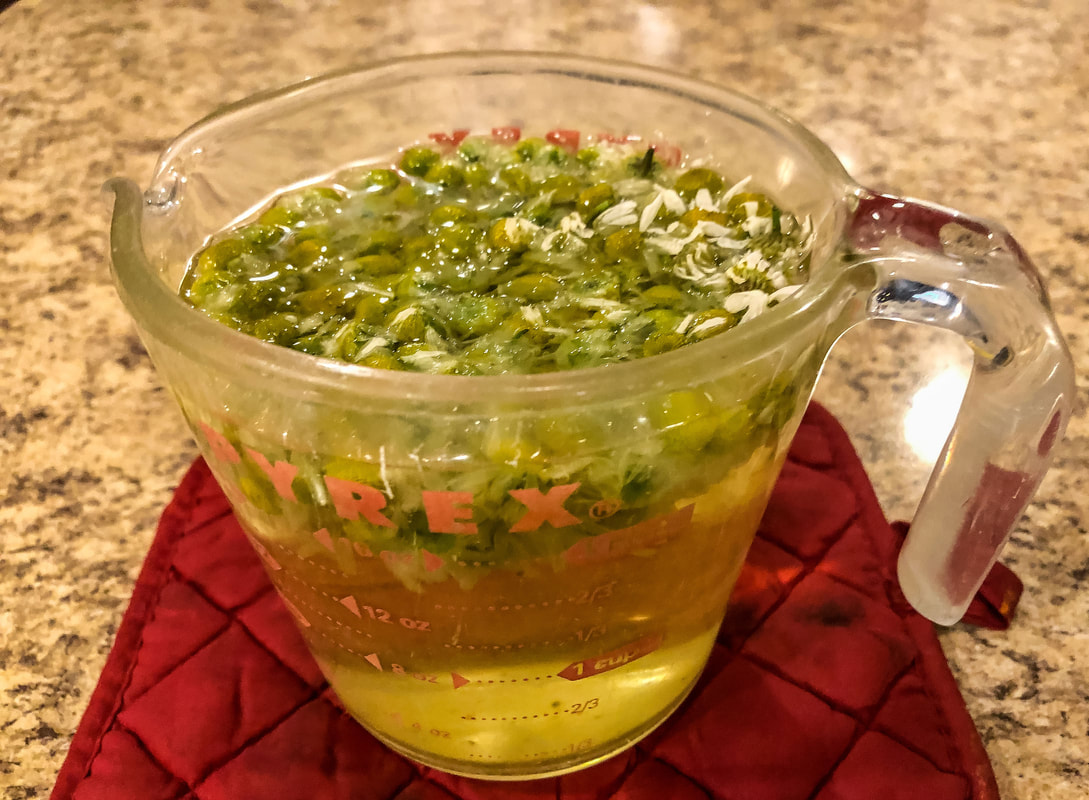 Chamomile seeping in hot water. Photo by Diane M. Lilly, 2022. Through my most recent attempts at making homemade chamomile tea, I have discovered that dried chamomile works much better in terms of taste. This time, the flowers were dried in the oven on low heat (which also helped kill tiny bugs) and left to sit out covered with a paper towel for a day before use. Once the flowers were dried, they were steeped for almost 5 minutes in hot water and then strained. I added a few spritzes of fresh lemon and store-bought honey for additional flavor. I’d say the third time was the charm! The tea tasted just right! The next time I make this homemade tea, I may let it steep for two extra minutes because I want just a smidgen more of the chamomile flavor. But, I must say, this last time, I got much closer to achieving a terrific-tasting homemade chamomile tea! Once I get my recipe down pat, I will share it as a separate blog post, so stay tuned! 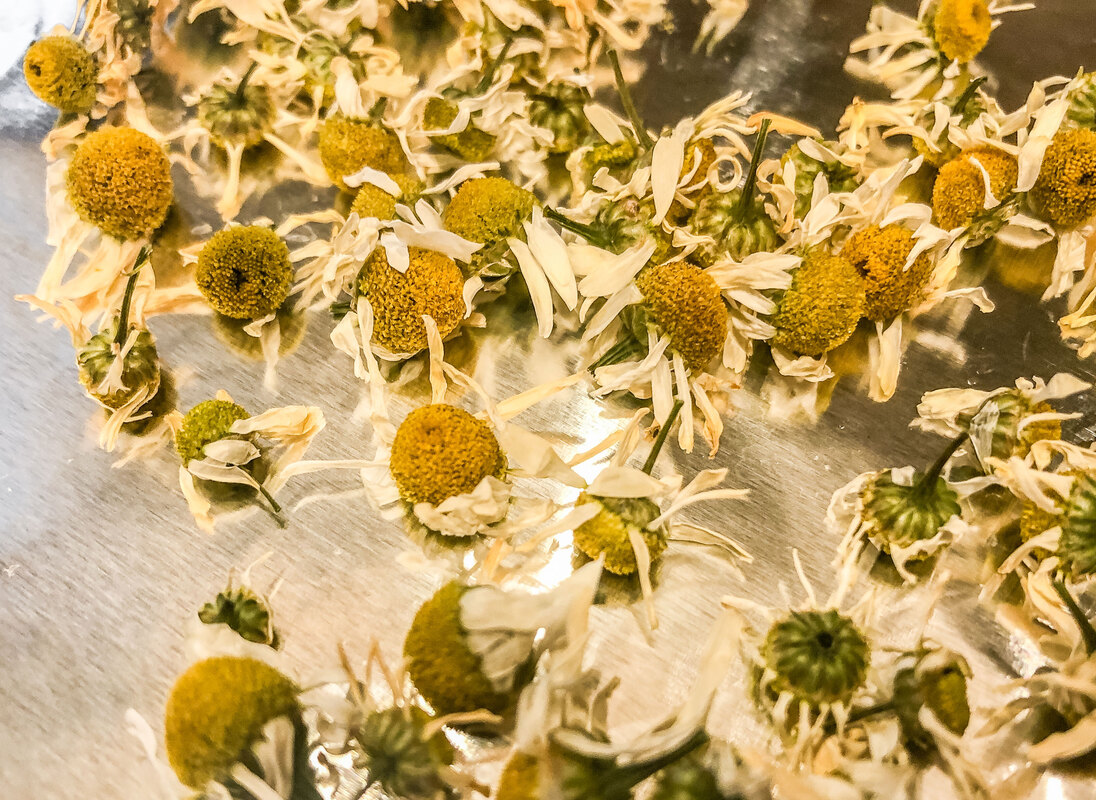 Chamomile on a baking sheet after drying in the oven. Photo by Diane M. Lilly, 2022. 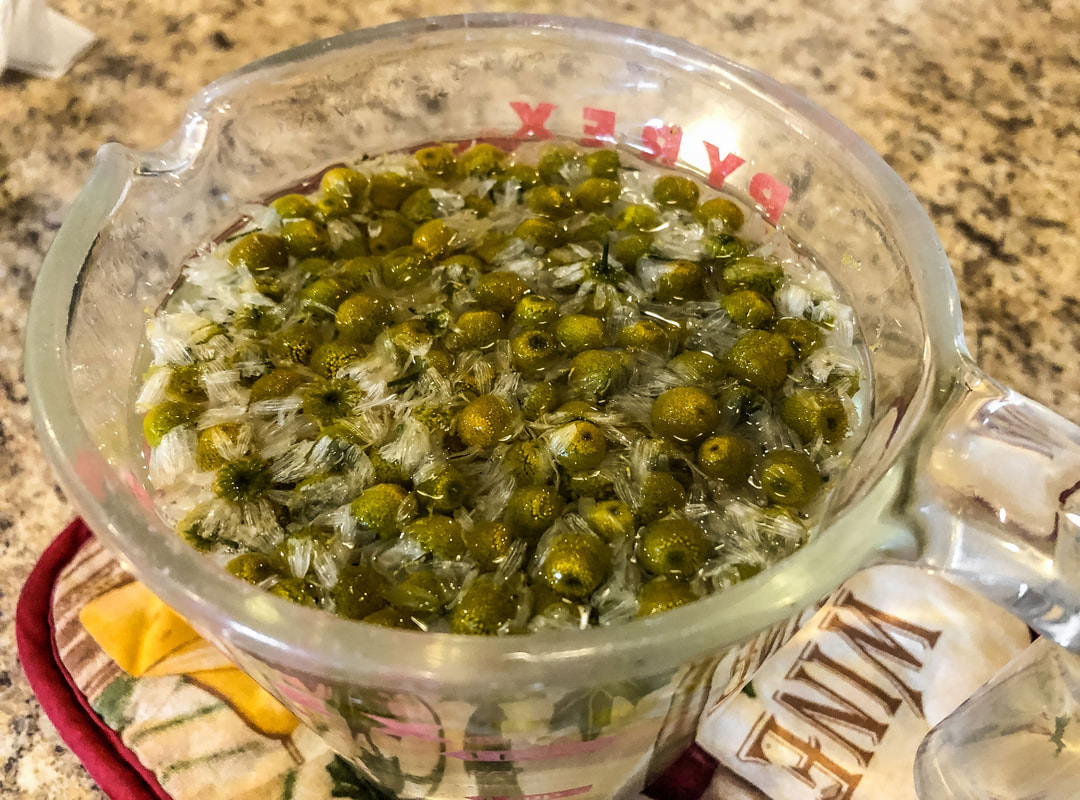 Another batch of chamomile seeping in hot water. Photo by Diane M. Lilly, 2022.  Lemon wedge for my freshly brewed chamomile tea. Photo by Diane M. Lilly, 2022.  Cup of freshly brewed chamolie tea with a lemon wedge. Photo by Diane M. Lilly, 2022.  A visitor on my chamomile! Photo by Diane M. Lilly, 2020. Related blogs you may want to read: Learning how to harvest and use fresh mint from the garden Tips for planting seeds indoors How to repot a pothos plant How to propagate bromeliad pups Six herbs I planted indoors Growing tomatoes and cucumbers for my garden It’s planting season again This article may contain a few items or commercial mentions, but I only used them for demonstration purposes only. I am not endorsing any particular product or receiving any monetary gain for this blog.  Mint growing in my garden. Photo by Diane M. Lilly, 2021. A few years back, I bought this packet of mint seeds to plant in my yard for fresh mint. Not only did I have no idea how to grow mint, but there was no thought given to how I would use the stuff when it started to grow…and grow it did! So, the first thing you should know is that mint is prolific! No, seriously, you'll have to keep on top of it so this plant doesn’t spread all over your yard. But it needs little care to keep it alive, and you get a lot of it for whatever uses you have in mind. Which brings me to my second point…What can you do with fresh mint? It’s been growing in my yard for a while now, and you’re probably like…how have you not yet figured out how to use this herb? It just comes down to time—as in not enough of it. So, this year, I am committed to learning how to use the plant for something other than pretty photos!  Mint leaves. Photo by Diane M. Lilly, 2021. I’m embarrassed to admit that I had allowed my mint to make itself at home in my yard for so long, not using it for anything, that I had forgotten exactly what type of mint I had grown. So the burning question became, how do I figure out what kind of mint I have? Well, a little research has turned up an answer—give it a taste. If it has a sharp, almost spicy taste, it’s probably peppermint. If the taste is more subtle and sweeter, it’s more likely to be spearmint. So I popped off a leaf and gave it a chew, and—sure enough—it had a sharp, almost peppery flavor! So, I can assume I am growing peppermint. Good to know! Now that I know what type of mint I have and how to grow it, it's time to learn how to harvest and use this leafy green herb. And so this will be the beginning of a continuing journey to delve deeper into how to grow, harvest, and use common herbs like mint. I’m no herbalist, but I like the idea of finding more natural ways of living, and growing herbs plays into that mode of thinking. So let's see if we can get our heads wrapped around a few beginner’s tips… How and when to harvest mint… While the mint plant benefits from frequent harvesting (increasing the yield of new growth), this is also an opportunity to keep the herb in check, pulling runners from spots where you don’t want the mint to grow. The actual act of harvesting is pretty simple—simply clip (with scissors, do not break) the top buds with the younger, more flavorful leaves (cut above the second set of leaves near the bottom), pluck a leaf at a time as needed, or cut large bunches just before the plant blooms (never harvest more than 2/3 of the plant). The mint plant can be harvested any time after maturity, but the best time is before it flowers. After the flowers bloom, the taste of the leaves gets more bitter. Also, as with most other herbs, harvest in the morning for the best concentration and flavor. 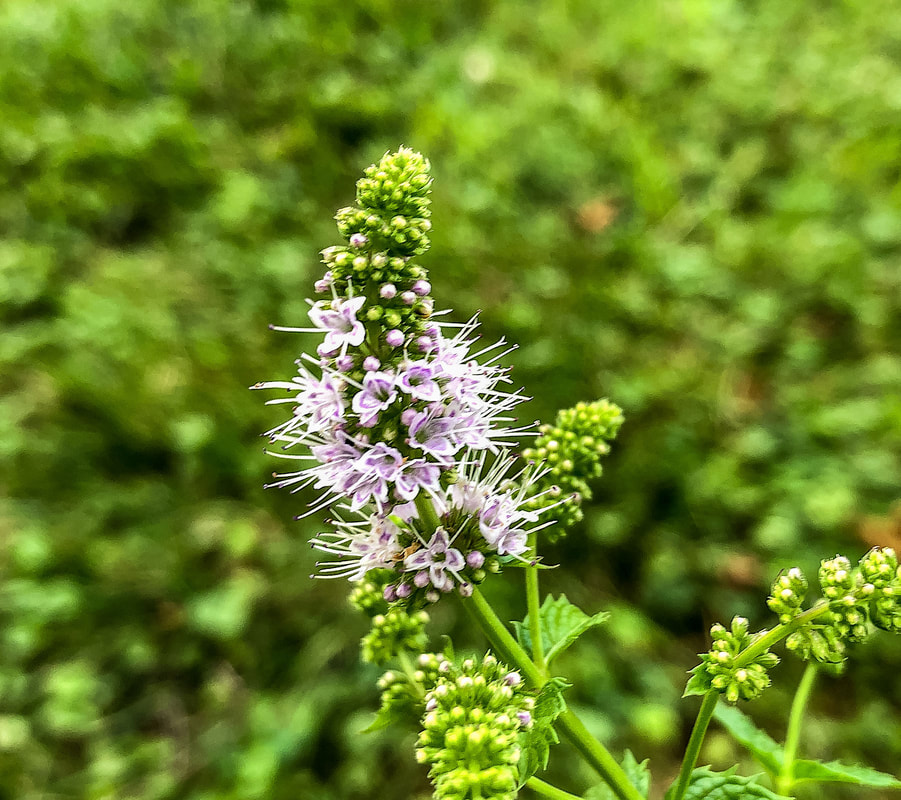 Mint flower. Photo by Diane M. Lilly, 2020. 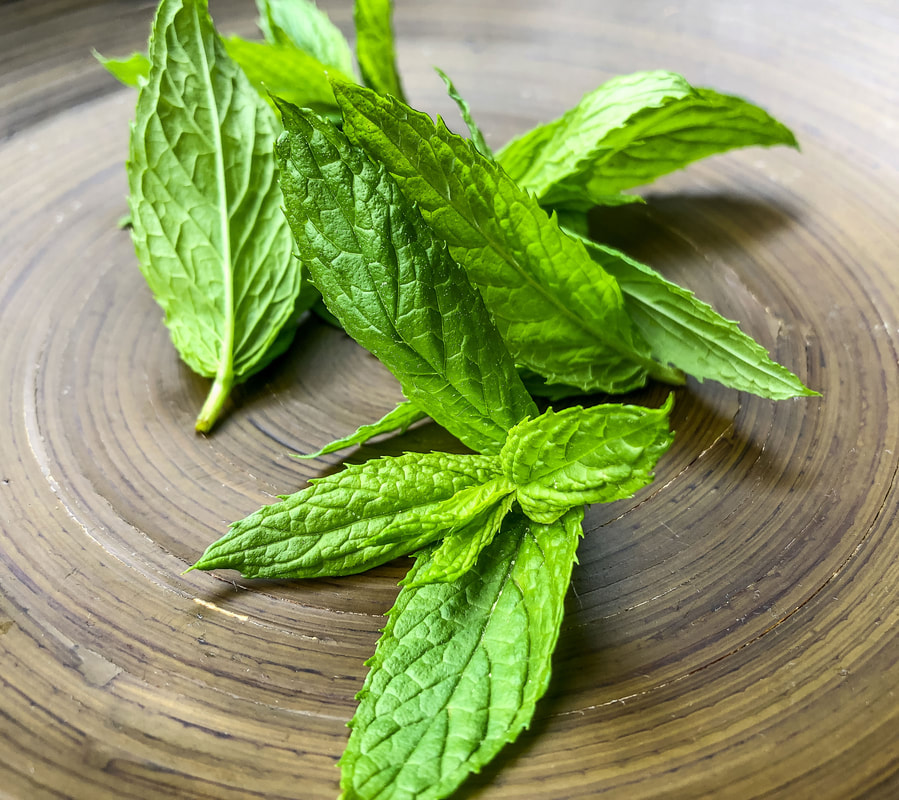 Mint leaves harvested from my garden. Photo by Diane M. Lilly, 2022. How to store mint… Dried mint loses some flavor, so using mint when fresh from the garden is the optimal way to get the most flavor. That being said, there are still benefits to using properly dried mint. The best way to dry out this herb is to tie your cuttings together and hang them in a cool, dry, dark place (do not dry with heat). Store dried mint in a glass container, and make sure no moisture is left that could create mold (you can use absorbing packets). Wrap them in a damp paper towel or place them in a container with water and place them in the fridge for a week to 10 days if using within a few days. Mint leaves can also be frozen in freezer bags (freeze on wax paper first) or chopped up and frozen in ice cubes, ready for your next delicious beverage! Your mint will be kept in the freezer for up to three months. 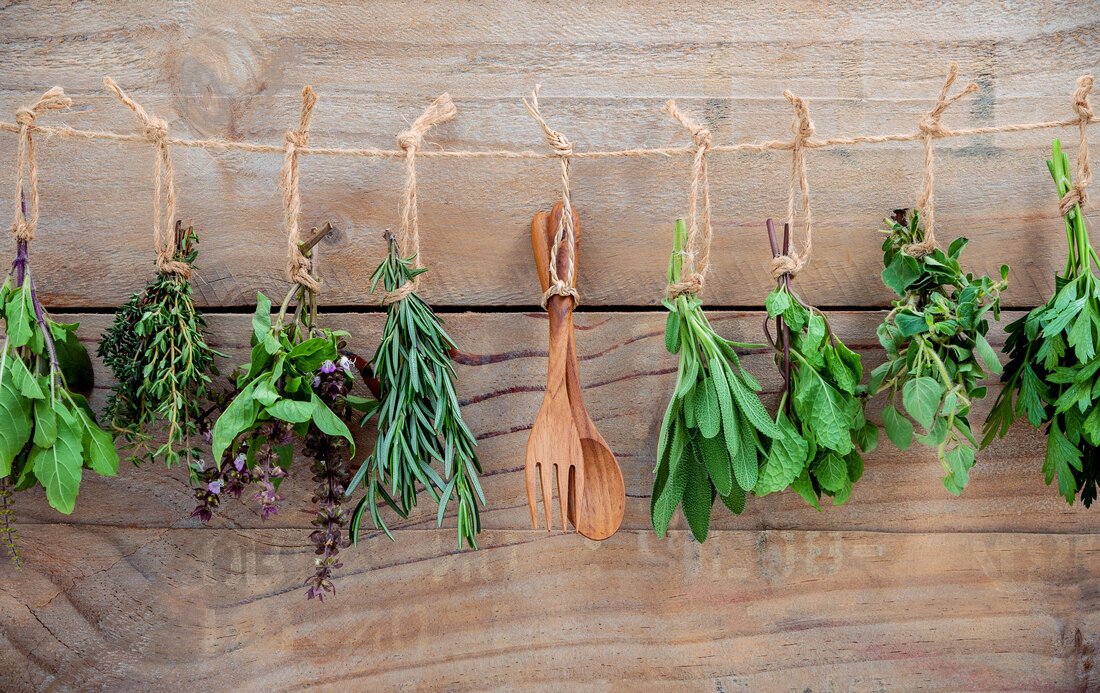 Image by kerdkanno from Adobe Stock. How to use mint… Last year, I decided to try making homemade mint tea with fresh clippings from my yard. The results were somewhat unsatisfactory, but it was--after all--my first attempt! At some point, I’d like to try making mint tea again…but maybe iced tea this time. Once I play around with it a little more, I’ll post another article with the recipe…but in the meantime, I have discovered lemon and mint leaves in water. I started drinking water with lemon slices and some freshly squeezed lemon juice. Then I remembered I have fresh mint in my yard…so, of course, I had to throw in some fresh mint leaves, right?! This is an incredibly refreshing drink that screams summer! I make mine by the glass, but you can find recipes for making a pitcher of this wonderfully light and refreshing beverage. I’ve become seriously addicted to this drink! It’s a perfect excuse to drink more water. 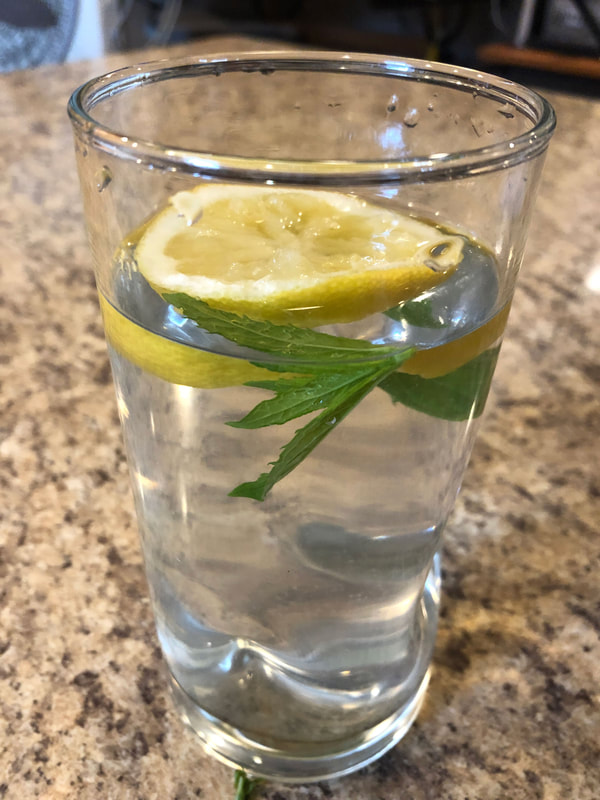 Water with fresh lemon and homegrown mint leaves. Photo by Diane M. Lilly, 2022.  Image by Africa Studio from Adobe Stock. Another delicious way to use fresh mint leaves is in a salad. Today’s lunch consisted of mixed salad greens, celery, cucumber, shredded cheese, fresh chive flowers and stems (from my garden), mint leaves (also from my garden), and balsamic vinaigrette. The peppermint has a sharp flavor that wakes up the rest of the greens and compliments the vinaigrette quite nicely. So that was a darn good lunch! And I will experiment with different kinds of salads during the summer months. If I stumble across something particularly delicious, I will post a blog about it so you can try it out yourself! In the meantime, you can check out this terrific blog post I uncovered during my research that is packed full of uses and benefits for using mint. Let me know if you have tried any recipes using fresh mint. And comment below with any recipe ideas or tips you have learned!  Mixed green salad with freshly picked mint leaves from my garden. Photo by Diane M. Lilly, 2022.  Same mixed salad with mint leaves...with more shredded cheese please! Photo by Diane M. Lilly, 2022. Related blogs you may want to read: Tips for planting seeds indoors How to repot a pothos plant How to propagate bromeliad pups Six herbs I planted indoors Growing tomatoes and cucumbers for my garden It’s planting season again This article may contain a few items or commercial mentions, but I only used them for demonstration purposes only. I am not endorsing any particular product or receiving any monetary gain for this blog. 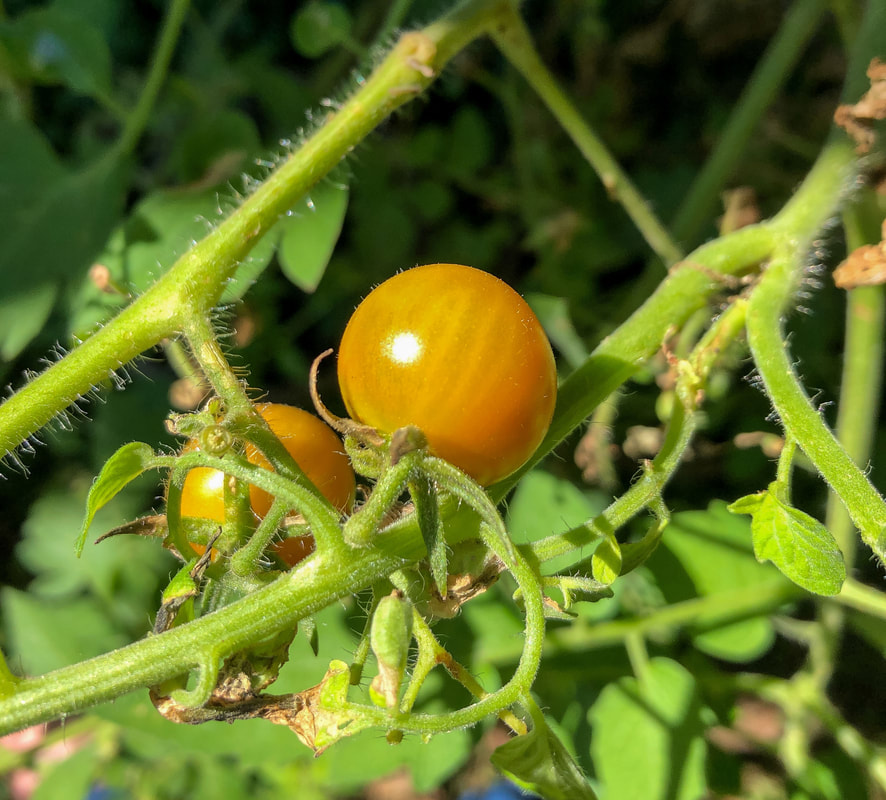 My cherry tomatoes from last year. Photo by Diane M. Lilly, 2021. Last year, I grew tomato and cucumber seedlings in styrofoam cups on my kitchen's southwest windowsill. After a couple of weeks, they were a couple of inches tall! My cucumbers are once again rapidly growing. This year's cucumber and tomato seedlings (along with other herb seedlings) are sitting on my living room windowsill, which roughly faces southwest.  This year's seedlings growing on my windowsill. Photo by Diane M. Lilly, 2022. So this year, I'm sharing my gardening journey, pitfalls, mistakes, triumphs, and tips. This will probably be the first in a series of articles following my journey from planting the seeds to using my homegrown vegetables in recipes. Planting my tomato & cucumber seeds If you haven’t read it, you can read my blog on planting seeds, including tomatoes and cucumbers. The seeds are sown in small pots covered with plastic to help them sprout. 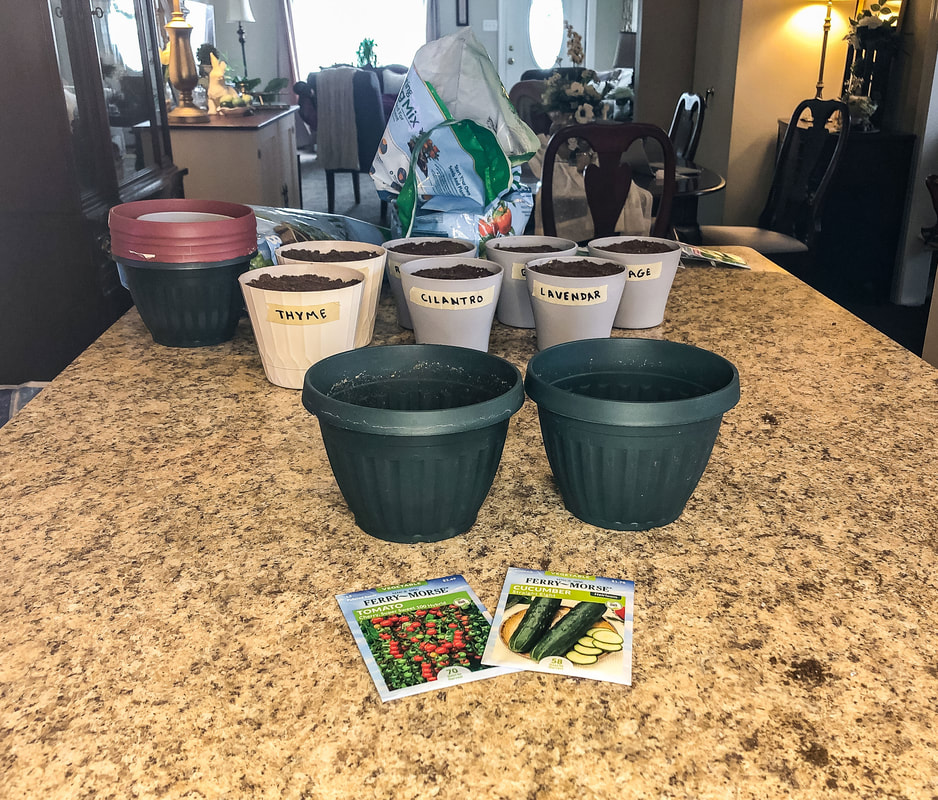 Pots and seeds for this year's tomato and cucumber plants. Photo by Diane M. Lilly, 2022. I tend to plant too many seeds in one pot, so now I’m stuck with the problem of which plants to cull or whether I can safely transplant some to other pots. Cucumber seeds are supposed to be planted no more than two per pot. Well, I planted probably 8-10 seeds in one six-inch pot! It’s a rookie mistake I make every year in my haste to plant seeds and get as many plants to grow as possible. 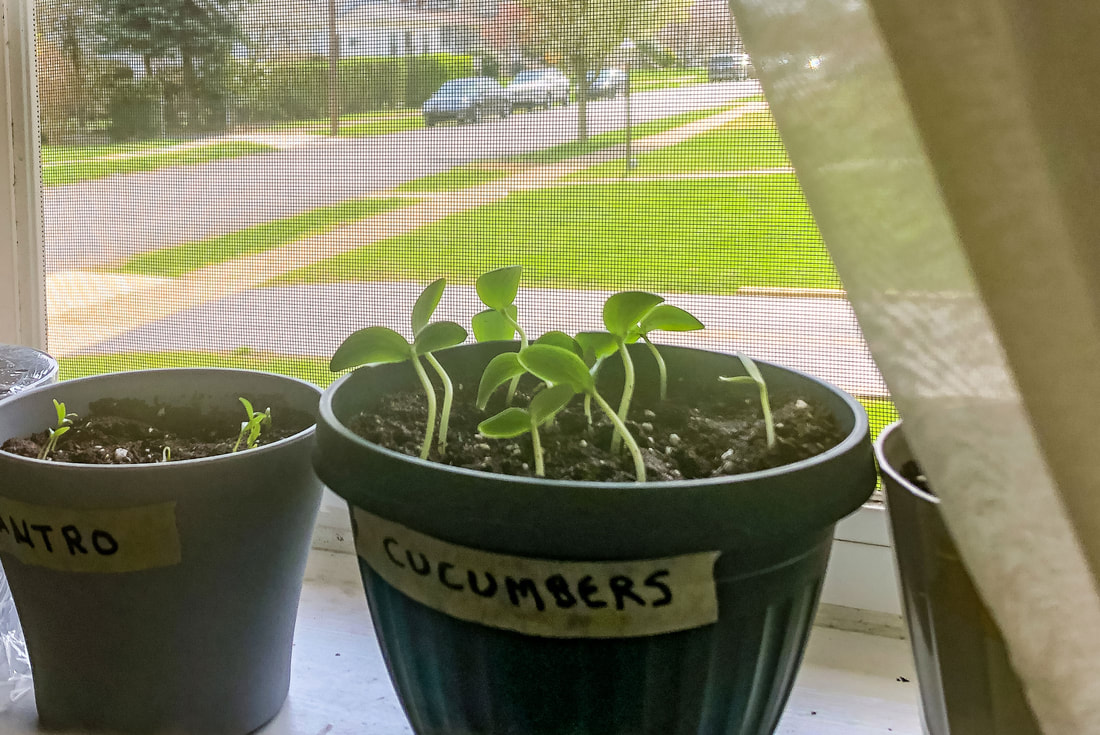 Cucumber seedlings after about two weeks. Photo by Diane M. Lilly, 2022. 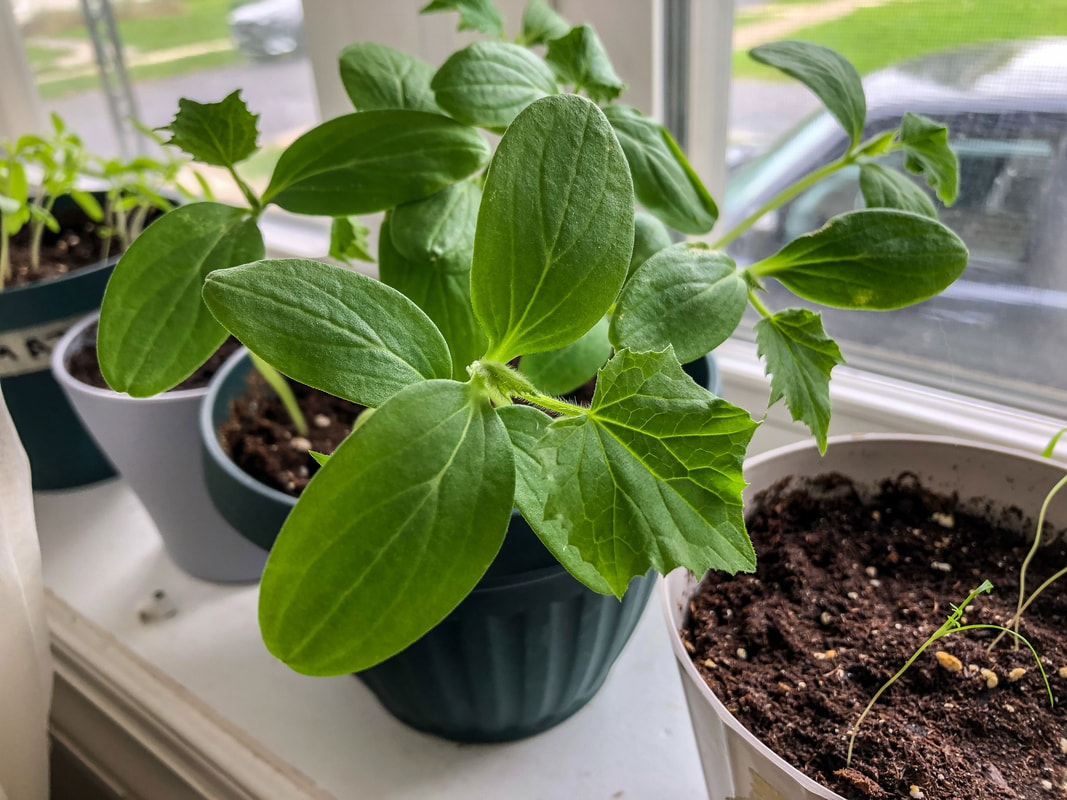 Cucumber plant getting its true leaves. Photo by Diane M. Lilly, 2022. So I called my dad—an avid gardener—for some advice. There’s good news, and there’s some bad news. The bad news is that cucumber plants don’t like to be transplanted or messed with, and I really shouldn’t have planted more than two in a pot anyway (so I could cull the weaker one). An even better option would’ve been to simply wait until the weather got warm enough to plant the seeds directly into the ground. The good news is that cucumbers sprout fast, and seeds are cheap! So if my little cucumber sprouts die, I can always purchase new seeds and replant. No harm done. As for the tomatoes, according to my dad, they are incredibly hardy and will most likely tolerate being separated and transplanted. He told me to plant two seeds per pot and only plant what I have room for in my garden. (As it is now, I have no idea what to do with the extra ten or eleven plants EACH of cucumbers and tomatoes! Maybe they'll be put in pots outside.) 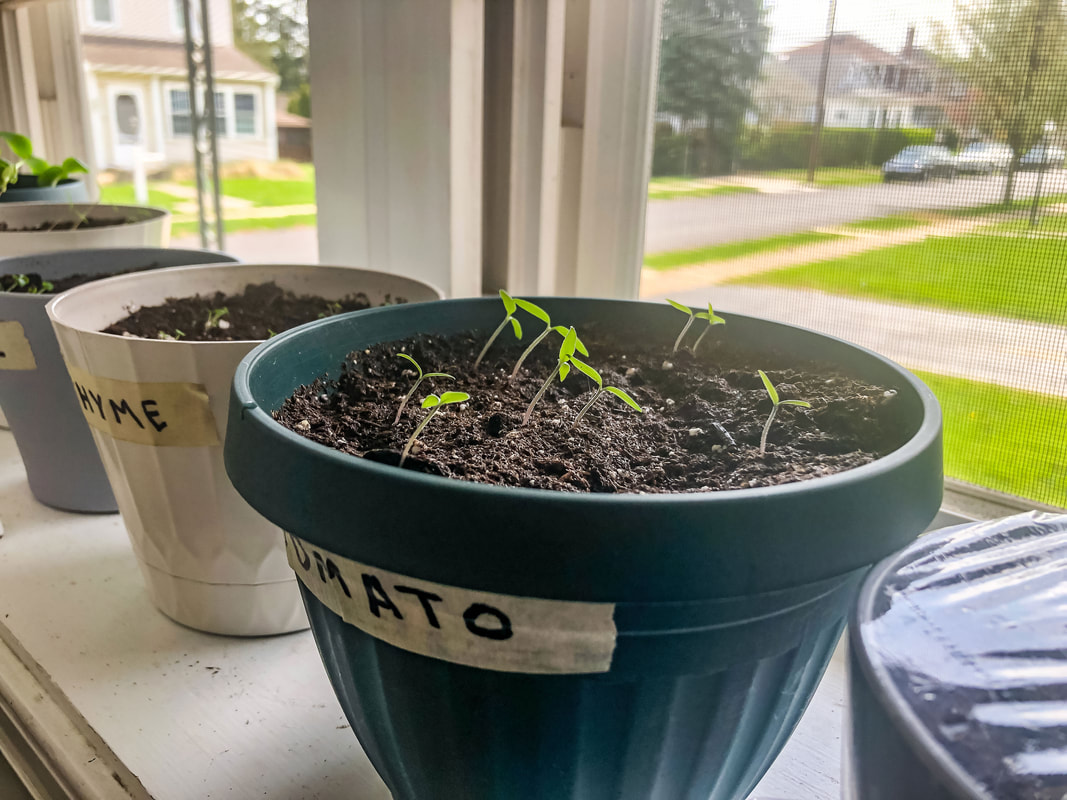 Tomato seedlings after about two weeks. Photo by Diane M. Lilly, 2022.  Tomato plants after about four weeks. Photo by Diane M. Lilly, 2022. How to separate the seedlings Which brings me to the next issue…How—and when—do I separate the tiny plants in the pots? Can I do that safely without damaging my fragile plants? Some sources say not to pull out the tiny plants but to cut them at the soil level so as not to disturb the roots of the other plants. So it may well be that I’ll have to cut at least half of my new seedlings. The newly sprouting seedlings will soon crowd each other, so there needs to be a plan to separate some or cut most of them down. But I should determine how many plants I can fit in my garden. It may well be that I don’t need all of the plants that came up. I still feel bad about killing off half (or more) of my new plants! And I may just pop some in pots, just so I don’t have to feel guilty about killing little plants. When to transplant outside Cucumbers can be planted outside when they have 3-4 leaves on them, and there is no danger of frost. The tomatoes should be about 4-6” tall before planting outside, with nighttime temps staying more or less above 50 degrees Fahrenheit. Small metal fence partitions (used as a lattice) are leaned against a wall in my garden so my tomatoes and cucumbers can climb. My dad helped me dig up the ground and add some better gardening soil in preparation for planting, so I’m hoping for better results this year. 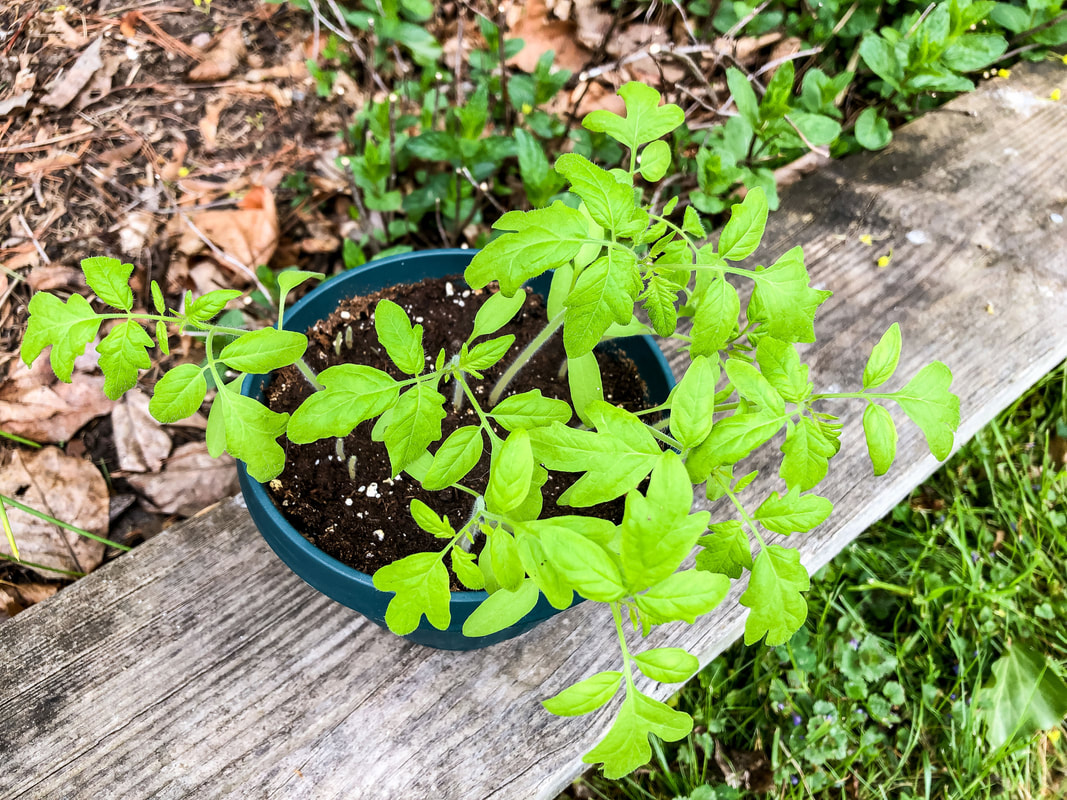 My tomato seedlings outside waiting to be planted. Photo by Diane M. Lilly, 2022. 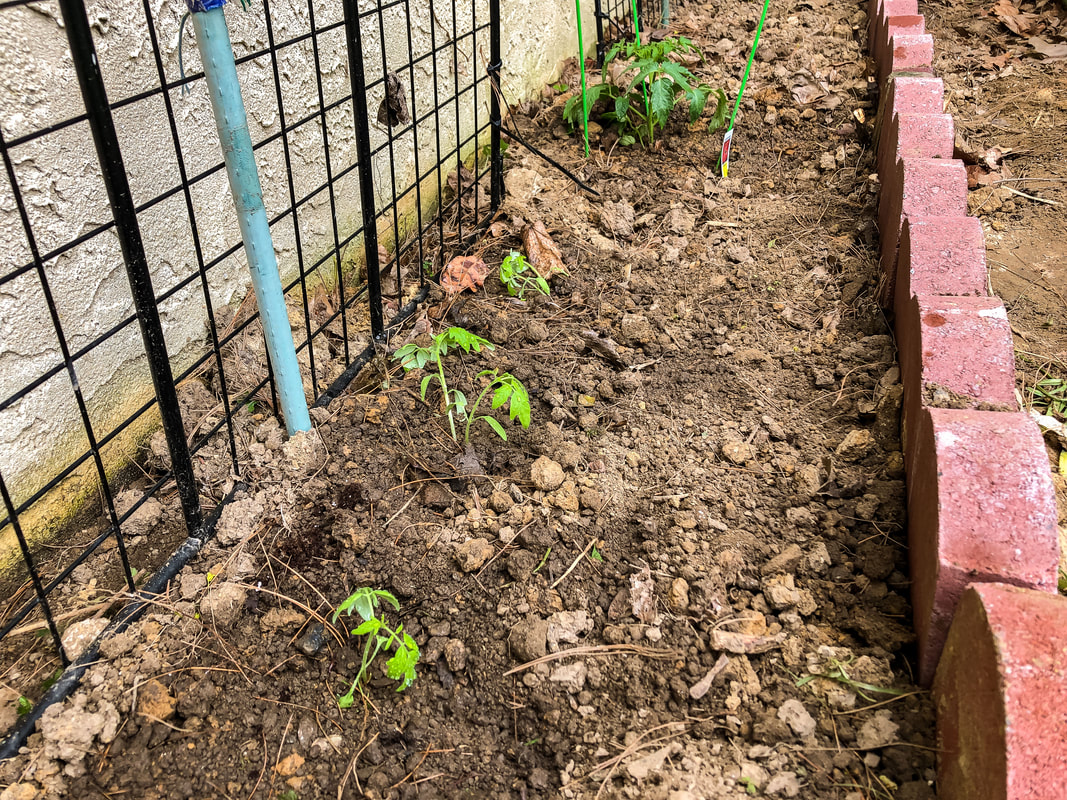 Tomato seedlings planted in the ground. Photo by Diane M. Lilly, 2022.  More tomato seedlings planted in a pot. Photo by Diane M. Lilly, 2022. Issues with growth from last year I have not gotten decent results the past couple of years growing cucumbers and tomatoes in pots. One of the things I will be on the lookout for this year is the blossom end rot on my tomatoes. There's been an issue with rot in the last couple of years. It’s an issue with the soil, the pH levels, and nitrogen. The soil needs less nitrogen and more phosphorous, and I need to regulate the water levels better. Also, growing these plants in pots is not optimal. Wherever possible, it’s better to grow them in the ground. I don’t have an issue with cucumbers, except that sometimes the fruit is small and gourd-like instead of oblong. This may also be a symptom of being grown in a pot with water level issues and insufficient nutrients. Changes will be made in the planting process (with help from my dad) to improve the soil, light, and watering needs. I would like to have a decent crop this year! I will try to provide updates, so keep checking back for more on this year’s garden projects! 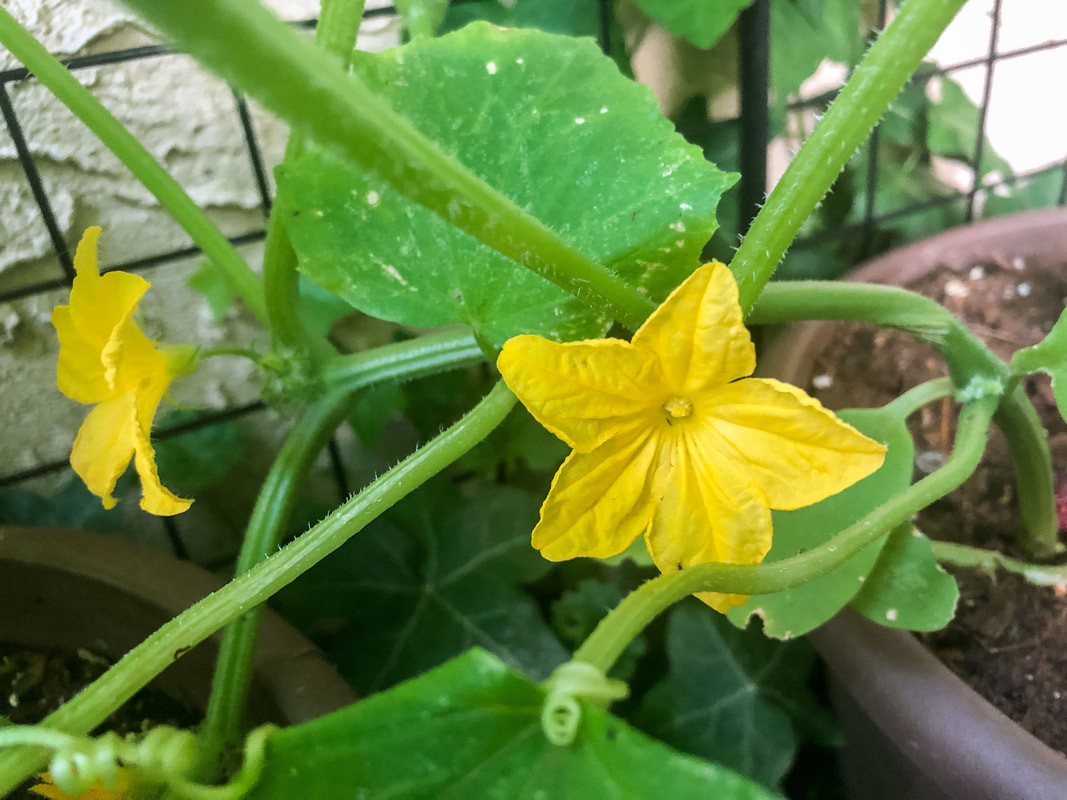 Yellow cucumber flower. Photo by Diane M. Lilly, 2021. 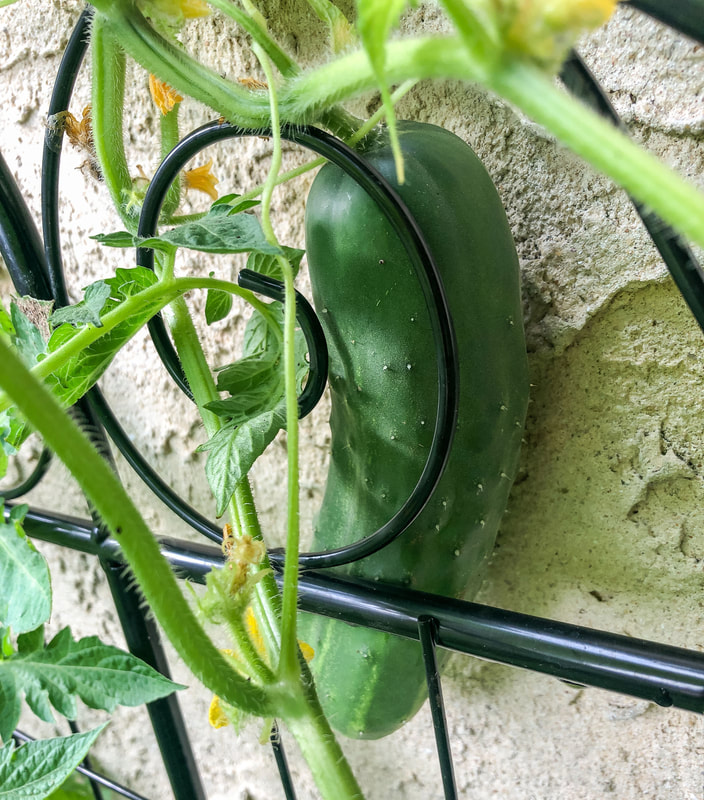 Last year's cucumber growing on the vine. Photo by Diane M. Lilly, 2021. 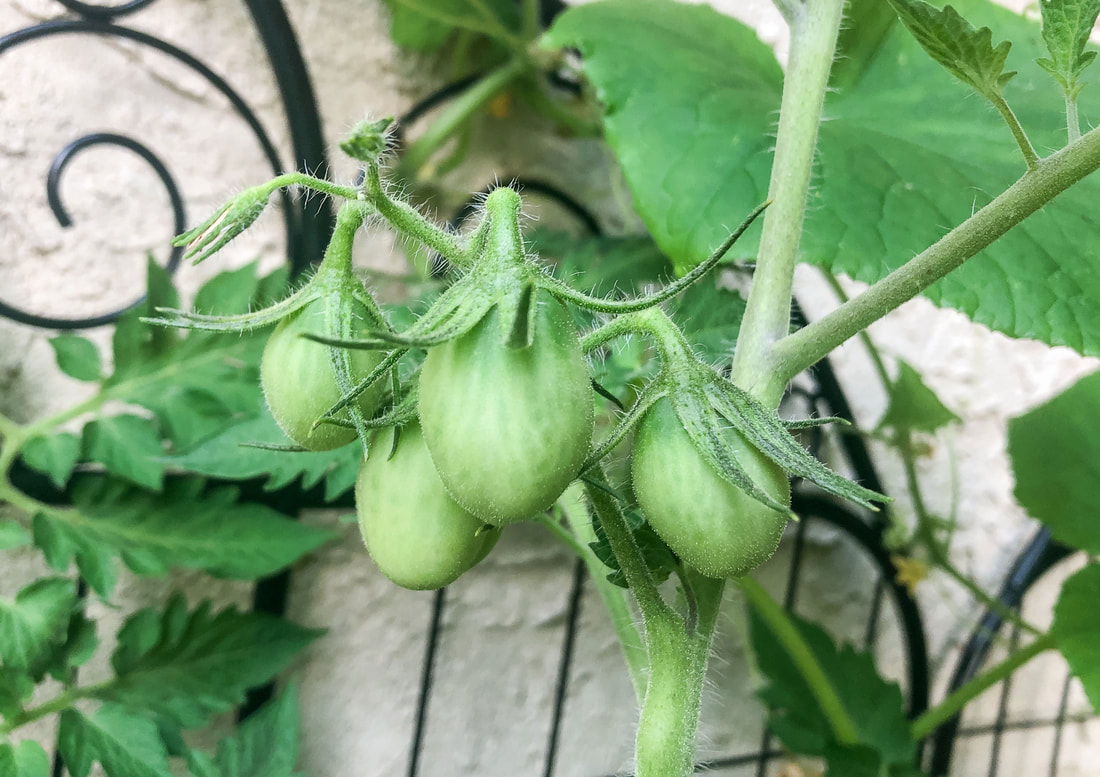 Last year's grape tomatoes growing on the vine. Photo by Diane M. Lilly, 2021. 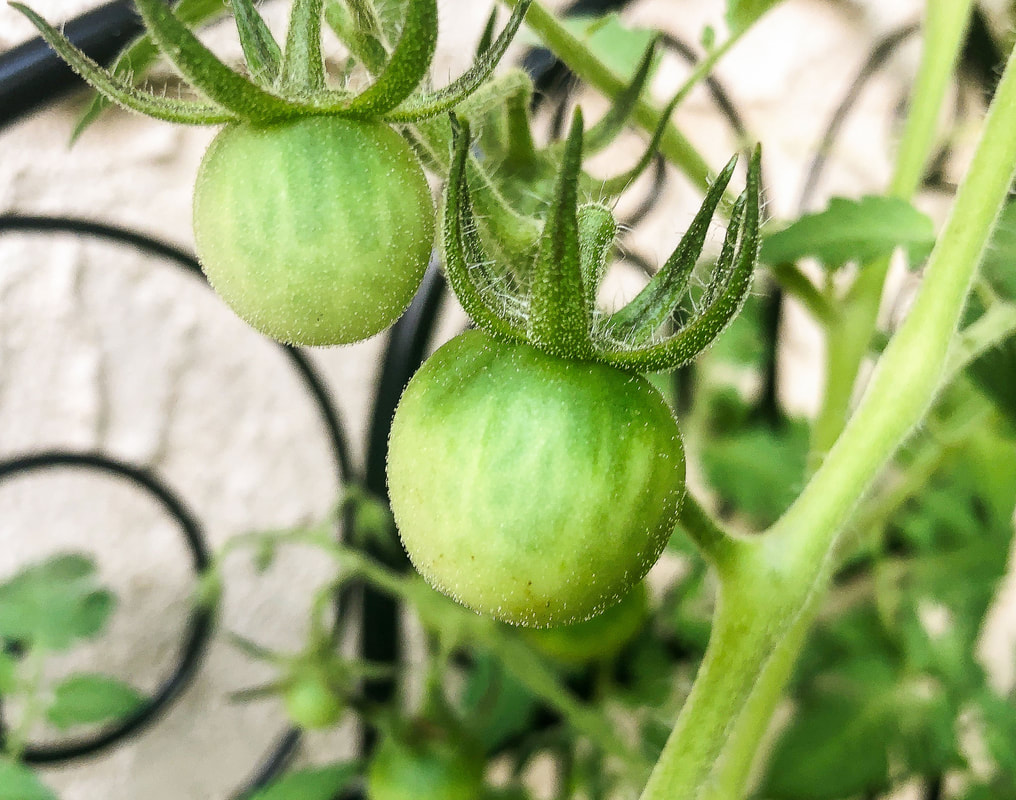 Last year's cherry tomatoes growing on the vine. Photo by Diane M. Lilly, 2021. Related blogs you may want to read: Tips for planting seeds indoors How to repot a pothos plant How to propagate bromeliad pups Six herbs I planted indoors It’s planting season again This article may contain a few items or commercial mentions, but I only used them for demonstration purposes only. I am not endorsing any particular product or receiving any monetary gain for this blog. 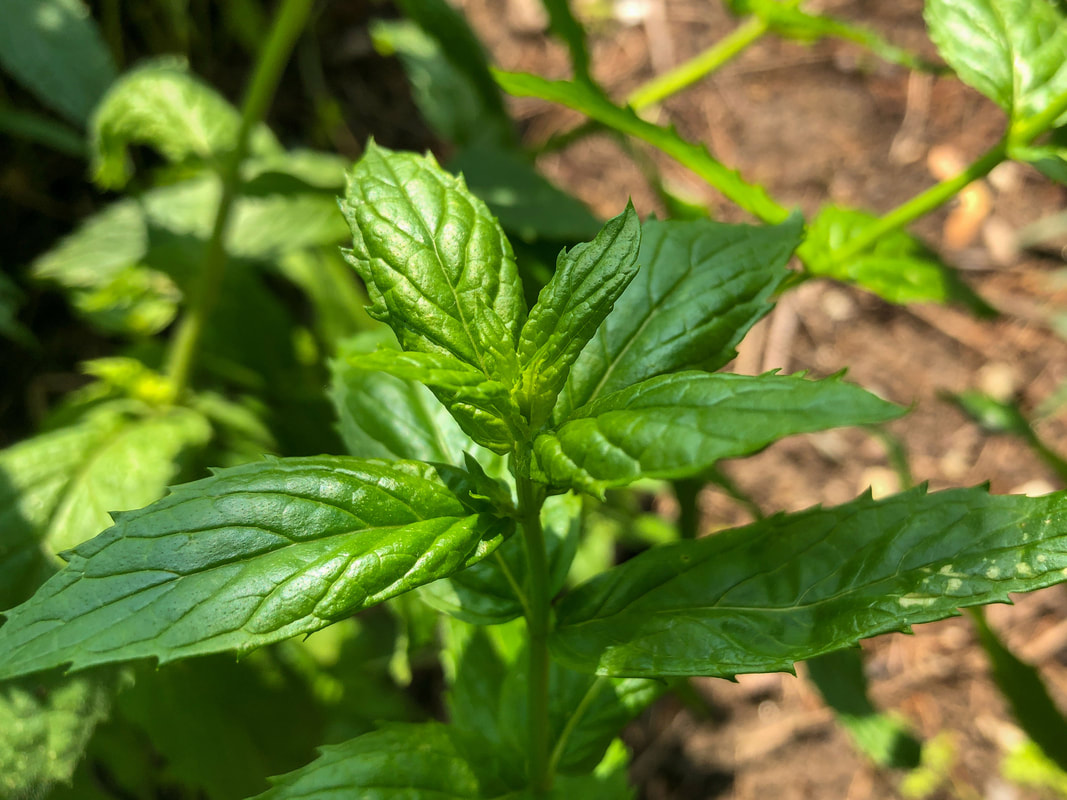 Mint in my back garden. Photo by Diane M. Lilly, 2021. Herbs…They are fun to grow AND useful for many things! This spring's goal is to increase the variety of my existing indoor and outdoor herbs. A second—but equally important—goal is to learn more about the care of these plants so I can get the most out of the growing experience. In my front window, there is a pot of leggy parsley. It had been growing outside last year quite beautifully, but I brought it indoors for the winter, and it’s become…well…a little spindly! It needs some TLC… 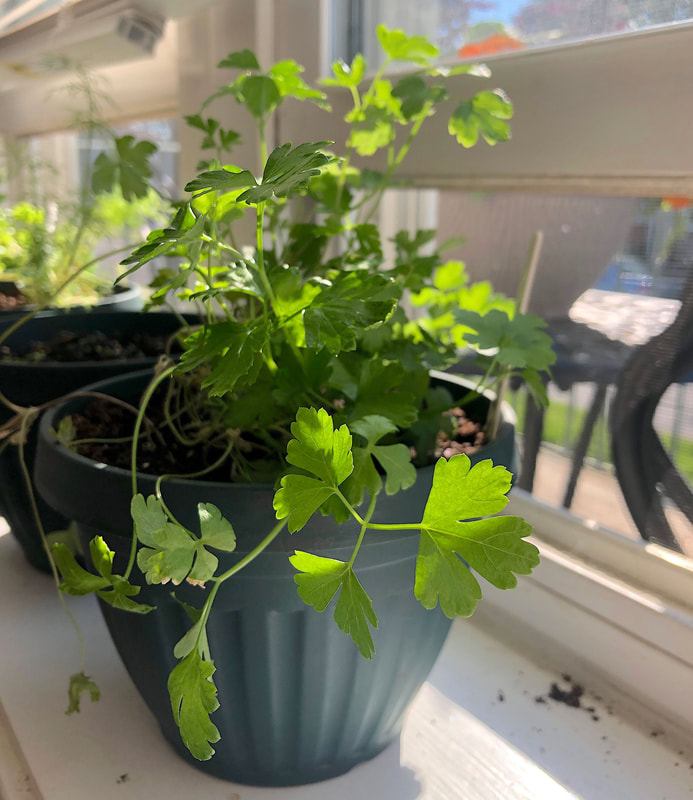 Parsley plant in the front window. Photo by Diane M. Lilly, 2021. This past fall, I also brought in a pot of thyme. The plant was lush and fragrant and doing quite well…and then it suddenly crashed! I have a couple of theories about that, mostly involving low light and forced dry heat. I guess that means I’ll have to plant more for this year’s crop and try again! There are a few herbs in the back garden from several years ago—chamomile, mint, chives, and sage. Everything has been growing incredibly well back there, but unfortunately, over-enthusiastic pruning may have accidentally killed the sage, so this year, I started some new plants from seeds. Lesson learned, I hope! 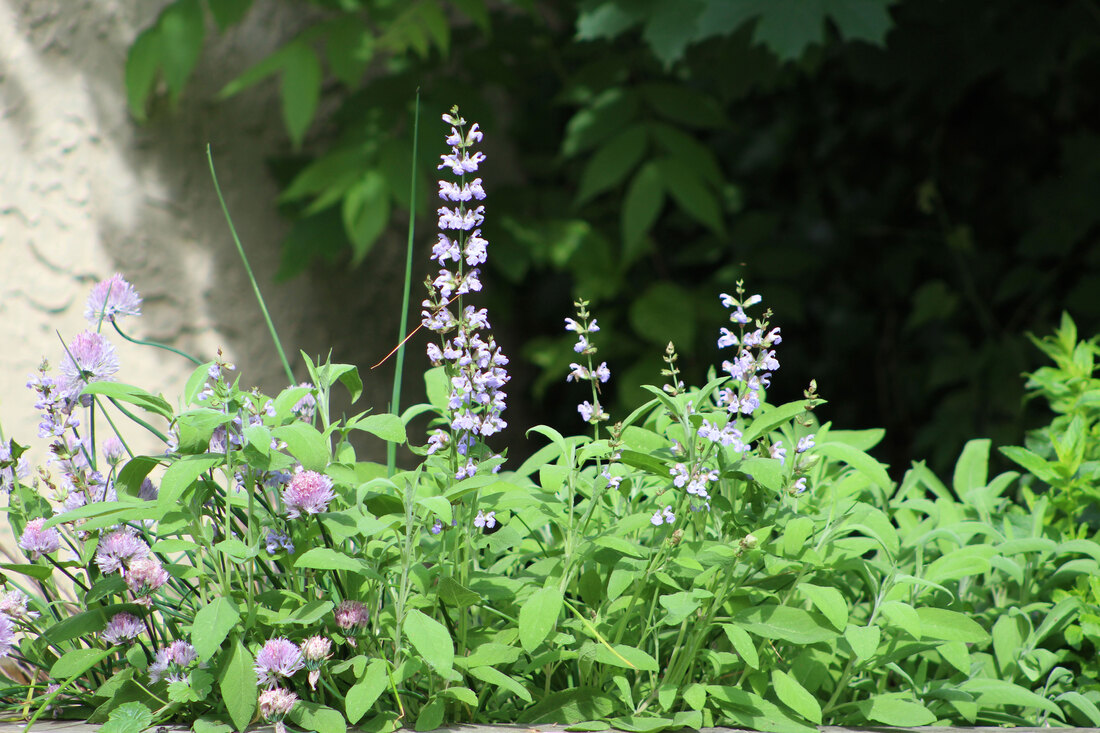 Summer herbs growing in my back garden. Photo by Diane M. Lilly, 2020. A few new additions are joining the garden—lavender, rosemary, basil, dill, and cilantro. All were planted from seed and are sprouting well so far. Today’s blog will discuss more efficient ways to grow these herbs, harvesting, storage, and how to use them for teas, cooking, and other household stuff. But--before we get ahead of ourselves--we have to help them to grow! My seedlings have begun to sprout, and it’s time to assess each plant's needs. So, let’s get on with it! Basil Basil is one of those herbs that is just so delightful, especially in tomato sauce. I planted basil for this purpose in my back garden a couple of years ago. It seemed to do well, but then it died off, and I never replanted it. I didn’t know then that basil is an annual (meaning it does not come back every year). This year, the pot on my windowsill with basil seedlings is destined to be an indoor herb plant. I’d like to see if I can keep it alive indoors (like I did with the parsley). 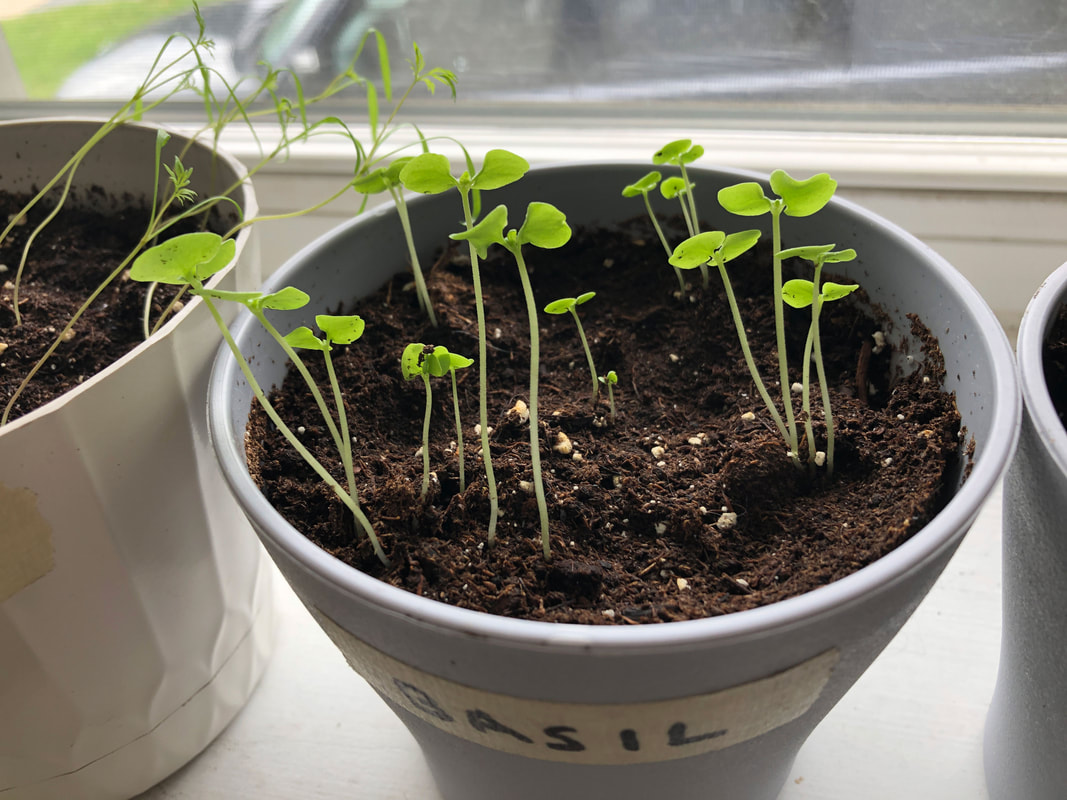 Basil sprouts on my windowsill. Photo by Diane M. Lilly, 2022. I’m getting off to a bit of a rocky start, though…I discovered (after the fact) that I planted too many seeds in the same pot, meaning I will need to cut back some of them to get one healthy plant. Basil doesn’t like to be transplanted, so it won’t do me much good to try to transplant the extra seedlings elsewhere…although it wouldn’t hurt to try! The worst that can happen is they die off. But I am worried I could accidentally damage the plant I want to keep, so culling the extras may be my only option. I just hate deliberately killing off perfectly good seedlings! 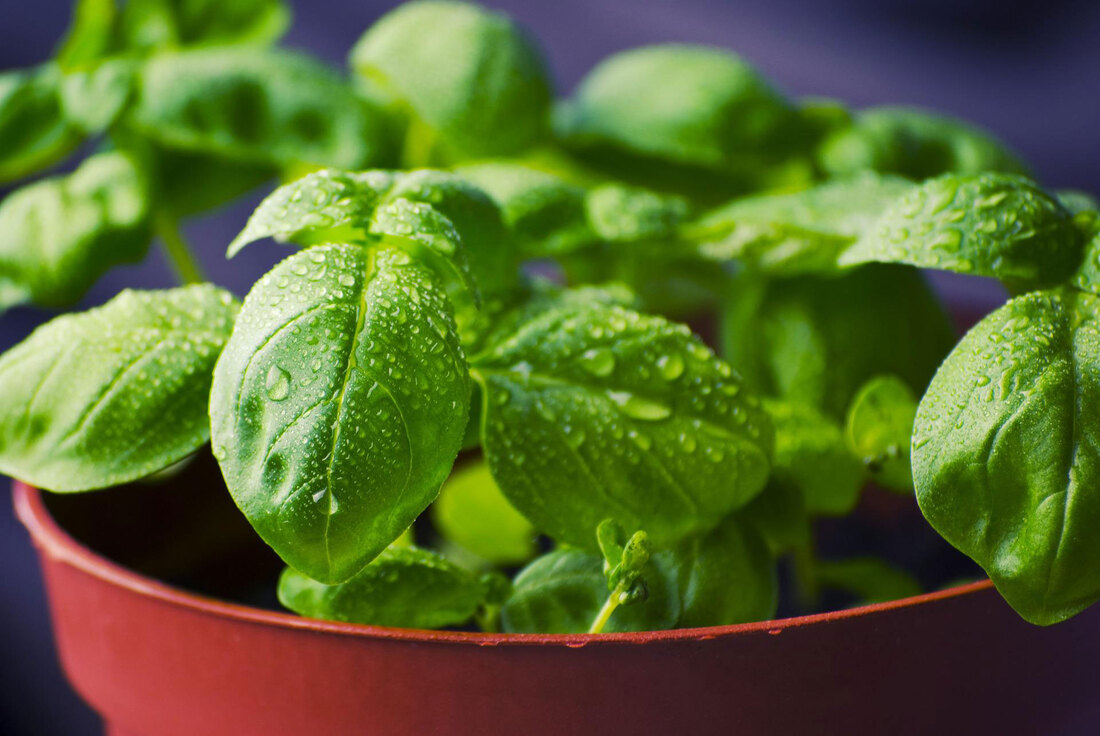 Image by tookapic from Pixabay. More growing tips for basil… Basil plants grow 12-24” tall, and basil seedlings need to be spaced 10-12” apart to give each plant space to bush out. The seeds for this plant will take 5-10 days to germinate. Basil needs a lot of sun and warmth—6-8 hours. This herb plant dislikes the cold (in nature, it grows in much warmer climates), so it will be essential to keep it out of drafts while in the house and bring it inside if outdoor temperatures get below 50˚F. This fragrant herb also needs plenty of water and nicely balanced soil levels to thrive. It likes moist, well-draining soil with pH levels between 6.0-7.5 (neutral to slightly acidic). Basil doesn’t need a lot of fertilizer, maybe a 5-10-5 plant fertilizer (a topic I’ll be covering in my next blog) every so often. You can begin pruning after about six weeks, clipping the center shoot to allow the plant to get bushy and produce more leaves. Pruning regularly—like with any herb—will force your plant to push out more leaves and keep it from flowering and going to seed too quickly. Essentially, pruning extends your harvesting season (another topic I will cover later in this series). You can start harvesting the leaves once the plant is 6-8” tall. Chamomile Chamomile is an incredible herb to plant in your garden, but you will need a lot of it--which won’t be a problem if it's outside because chamomile is one of those plants that like to self-seed. You could end up with a garden full of chamomile without even trying! I even found a chamomile plant growing out of a brick wall down the side of my driveway, far away from the original plant! So be aware that this plant spreads and could take over your garden eventually if you are not vigilant (unless that is your intention). 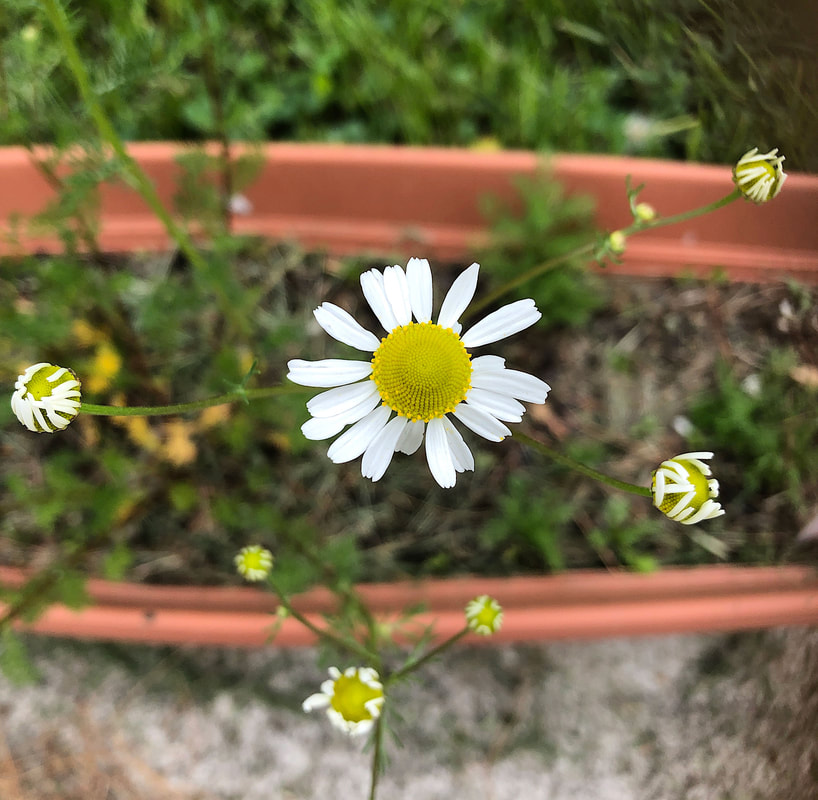 Chamomile growing in a planter in my yard. Photo by Diane M. Lilly, 2021. Last year’s chamomile plants were left outside all winter. They not only survived but kept green leaves through the entire wintry season. The foliage for this herb is quite feathery and dense, and the flowers for my variety grow tall (I may have planted the German variety), towering over the green foliage below. And let me tell you, this is the most aromatic plant in my garden! You get just a few feet away, and the gorgeous scent wafts your way, beckoning you to come closer! Bees and ants love it! Some general growing tips for chamomile… The chamomile plant is considered an annual—meaning it should only grow once a year and then die off. But if it is allowed to self-seed, more plants will come up the following year. Let me clarify…There are a couple of varieties of chamomile—a German annual variety and a Roman perennial variety. Both are hardy and aromatic plants that can potentially come back year after year.  Chamomile leaves from this spring's plant. Photo by Diane M. Lilly, 2022. This herb likes partial shade and just a little water. It’s drought resistant (but prefers cooler weather), so it’s not needy, like some other plants in your garden. This plant will grow wild (if conditions are right) and low maintenance. Don’t overwater it, and it doesn’t need fertilizer. Just give it the right spot and a little water, and let it do its thing! Chamomile blooms in the summer, and the flowers can be harvested for tea and other culinary uses. Picking the flowers regularly (plucking off the sweet flower tops, not the bitter leaves) will ensure more growth and more flowers to harvest. Pick the flowers in full bloom with no drooping petals. Chives Chives are another herb plant in my back garden, and so another plant I didn’t need to start from seed this year. The chives in my garden are still going strong, even after three years. The one thing I will need to do this year (sometime soon, as it is early spring) is to divide the clumps to get more yield from my plants. 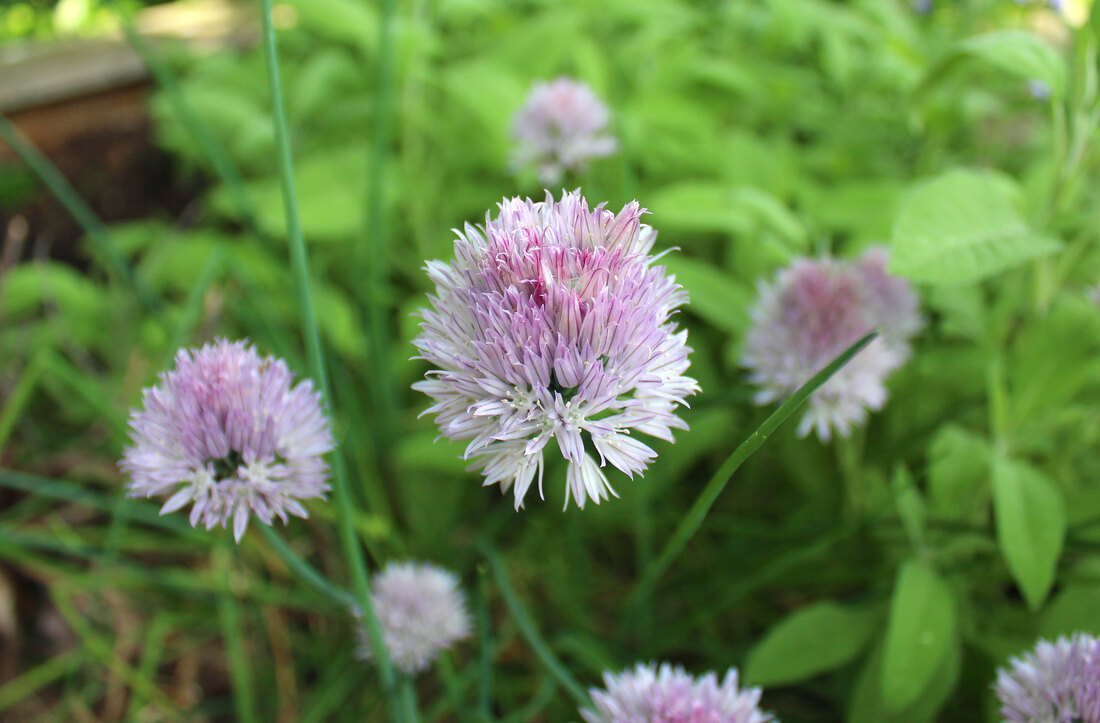 Purple chive flowers blooming in summer in my back yard. Photo by Diane M. Lilly, 2020. Some general growing tips for chives… My plant grows about 10-12 inches tall, but some varieties may grow taller. This plant is a perennial that is related to onions, garlic, and lilies. Plant the seeds 4-8” apart, and within six weeks, you’ll have new sprouting plants! This has proven to be a pretty hardy plant, surviving several heat waves with upwards of 100˚F for several days (with daily watering, of course), and it sits in full daytime sun in the summer. I water every day, either in the morning or in the evening. It likes well-draining soil with pH levels between 6.0-7.0. The plant produces purple flowers (though not in the first year) around early summer, which I tend to let go to seed so my little patch can spread. You can start harvesting chives 60 days after seeding by cutting small clumps a couple of inches from the ground. Cilantro I haven’t been entirely successful at growing cilantro. I planted coriander (cilantro seeds) two years in a row, and the plants looked promising at first. Unfortunately, though, the cilantro plants didn’t produce a lot of leaves, became leggy, and then just withered and died. So this year, I’m starting this herb from seeds again to learn what I’ve been doing wrong! I already discovered that cilantro does not like to be transplanted, which I did last year as I transitioned the new plants outside. I also just threw them outside, skipping the gradual process of “hardening” (or slowly acclimating) the plant. This year, I will probably keep this plant in a small pot inside, moving it outside now and then. 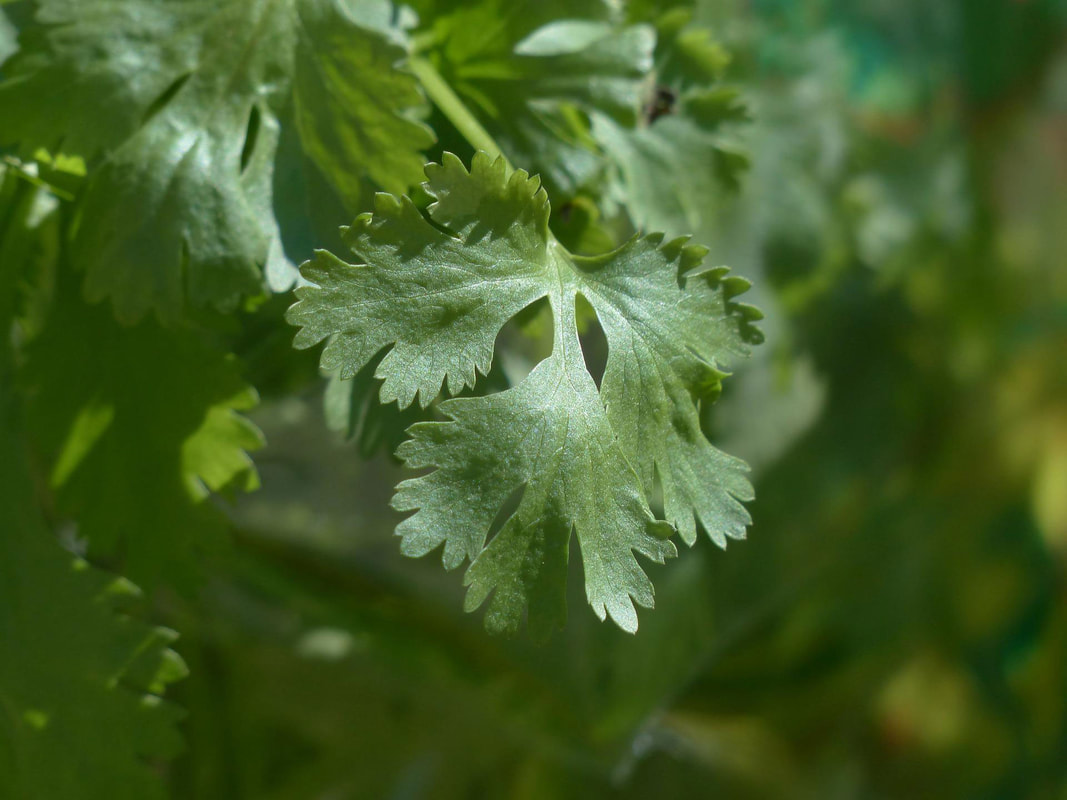 Image by Hans Braxmeier from Pixabay. Some more growing tips for cilantro… Cilantro is an annual (meaning you have to replant each year). It’s no accident that it looks like parsley, as it is in the same family. I often get my parsley and cilantro plants confused if I don’t mark them! It even has a taproot-like parsley, so it needs enough space underneath to accommodate that type of root system. (A taproot is a long, thin root that reaches several inches under the soil.) The seedlings for cilantro germinate in 7-10 days and reach maturity in 45-70 days. A healthy cilantro plant can grow 12-24” tall. New seeds can be replanted every 2-3 weeks in summer, the height of its growing season. This plant likes full sun but not too hot; you may have better luck with a spot in partial shade. It needs well-draining soil but does not like to dry out. To harvest, cut the outer stems when the plant is at least 10-12” tall. Harvesting regularly will extend the life of the plant. Dill This feathery herb has me a little perplexed. I planted it from seed last year, then transplanted it outside into a garden planter. The plant came up nicely but got very tall and leggy. (I’m noticing a trend here with my herbs growing long and leggy instead of bushy.) I have yet to grow a bushy dill plant, which I want. So, I planted dill seeds again this year, intending to grow this herb in a pot mostly inside. 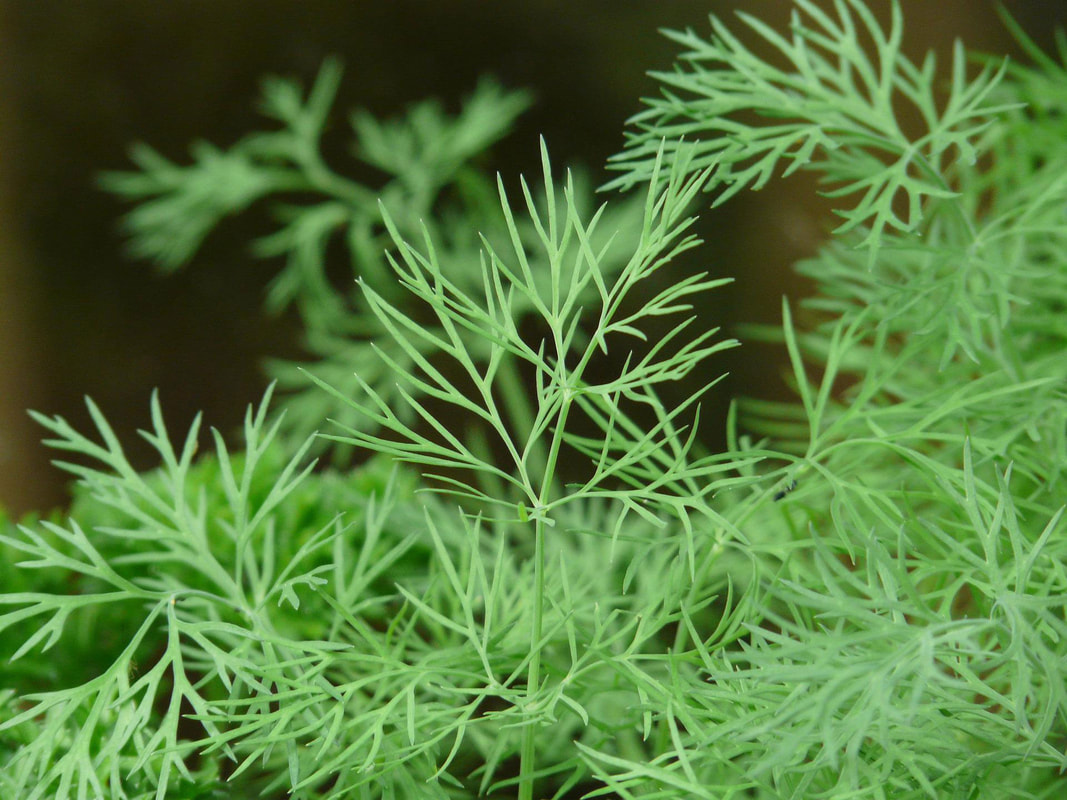 Image by Hans Braxmeier from Pixabay. Some general growing tips for dill… Dill likes full sun and heat and should grow 2-3 ft tall, producing yellow flowers in summer. Grown from seed, it will take 7-10 days to germinate and about 90 days to mature. This herb doesn’t like to be transplanted, and when you plant the seeds, they should be spaced 12-15” apart. The dill plant develops a taproot-like parsley, so the pot has to be deep enough to allow for that long root column. This herb likes well-draining soil with a pH level of 5.5-6.7. Water well, and do not let dry out. Dill—like chamomile—can self-seed in the right conditions, providing you with new plants next year. (Technically, this is an annual plant.) Otherwise, you can harvest the leaves just before the plant flowers and go to seed. Lavender Okay, so who doesn’t love lavender plants?! I have tried (unsuccessfully) to grow lavender from seeds for the past two years. So, I’m trying again this year to figure out where I keep going wrong. It is said to be very difficult to grow lavender from seed, and most people buy a young plant to get them started. But I am nothing if not stubborn…and seeds are cheaper than buying a plant!  Image by Sabrina Wisian from Pixabay. General growing tips for lavender… Lavender is a perennial that likes full sun but low humidity. Soil quality isn’t an issue, but lavender does need soil with good drainage. Do not overwater! The seeds take 4-6 weeks to germinate and should be planted 18-24” apart. Lavender can be transplanted at about 3” high and will grow to 12-36” tall. This fragrant herb blooms between June and August, pushing out stalks of colorful purple flowers. Harvest lavender by cutting above the woody growth on the stems. Mint The one herb I have absolutely no problem growing is mint! I planted this in my garden a few years ago, and if I’m not careful, it will take over the whole yard! Growing this plant requires some diligence. If you don’t want it to end up all over the place, strangling other plants, you’ll need to take time out—frequently—to pull runners and cull back areas that are becoming invasive.  Mint taking over my summer garden. Photo by Diane M. Lilly, 2021. Some general growing tips for mint… Mint likes full sun—surprise, surprise—and makes good ground cover. The plant grows 1-3 ft tall and has beautiful purple flowers in the summer. Mint needs little to no maintenance except to keep it from growing too much. Just don’t overwater it, and it will take care of itself. Seedlings should be planted 18-24” apart. Harvest just before the plant flowers or when the leaves are at least 4” tall. Parsley As mentioned, I have a parsley plant from last year growing in a pot on my windowsill. It’s a bit leggy (there’s that word again), but otherwise, it’s growing well. I think it prefers being outside, so maybe once the weather warms, I’ll put it out in my garden so it can grow bushier again. As for the legginess, I found some interesting information on pruning and pH levels that might help me with this problem. (My next blog on herbs will deal with harvesting, so I’ll take that opportunity to cover this topic in more detail.) My research indicates that parsley is a biennial, so this might be its last year, and I should see it flower. 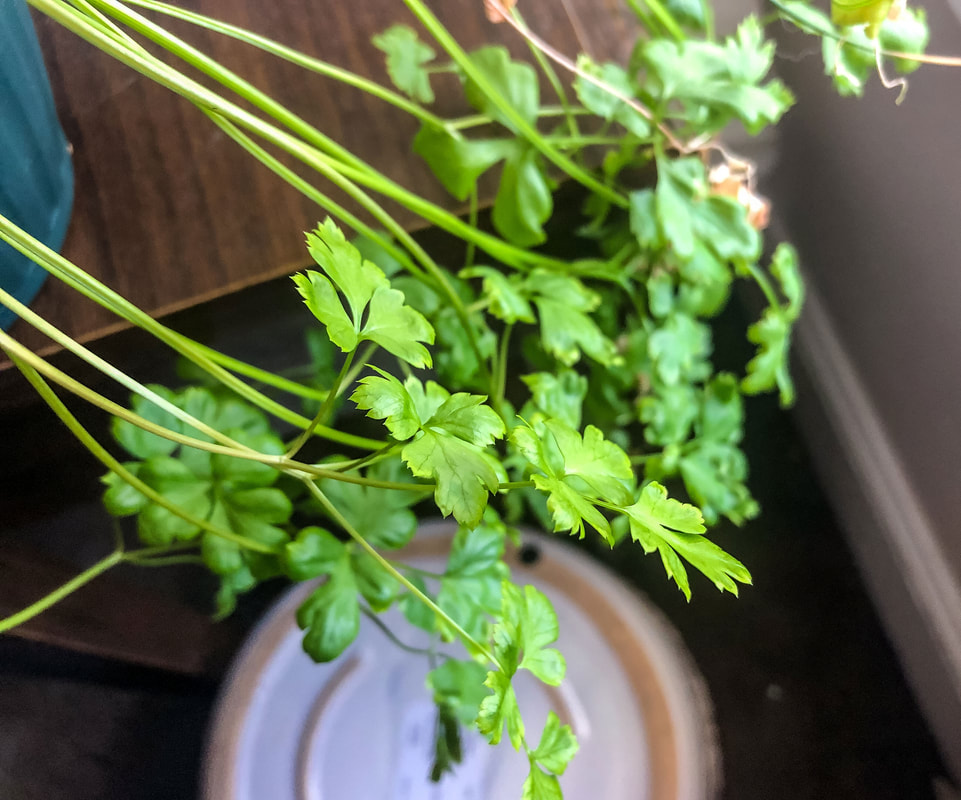 Leggy parsley growing in a pot by the window. Photo by Diane M. Lilly, 2022. Some general growing tips for parsley… Parsley will germinate between 21-28 days and mature in 70-90 days. Plant seeds 9-12” apart in soil with a pH level of 6.0-7.0. This herb can be transplanted 5-6 weeks after sprouting and grows to 12-18” tall. Parsley is a thirsty plant that requires a lot of watering, but just don’t let it sit in soggy soil. Harvest by cutting from the outer leaves to promote new growth and lessen the chance of bolting too early. Rosemary Rosemary (like lavender) is one of those herbs that I have been utterly unsuccessful at growing from seed…but I keep trying! I love the smell of rosemary, especially when cooking. They say it’s a simple plant to grow and harvest, but most people go the easier route and buy a plant because getting a seedling to grow successfully is very tricky. 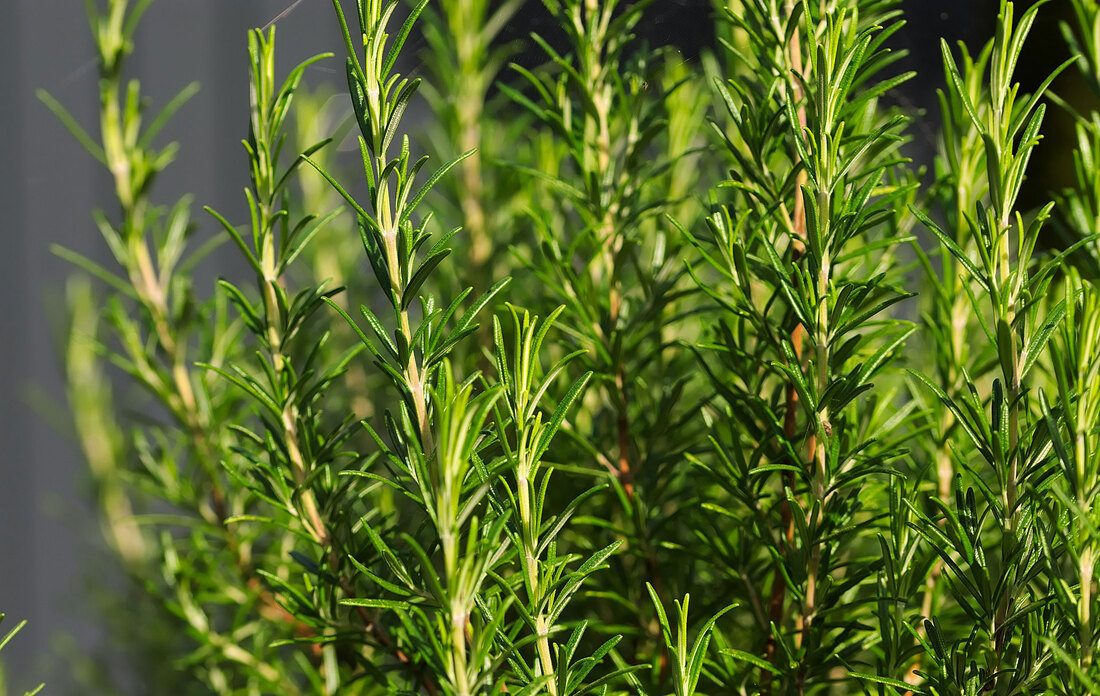 Image by Hans Linde from Pixabay. Some general growing tips for rosemary… Rosemary takes 15-25 days to germinate and likes well-draining soil with a pH of 6.0-7.0. Plant 18-24” apart to give this plant the space it needs to grow. Rosemary is a perennial that can grow 3-4 ft tall. This herb is drought tolerant, likes Mediterranean-type conditions, is fragrant, and has blue flowers in summer. Rosemary (like sage, lavender, and thyme) draws moisture from the air; an indoor rosemary plant will need frequent misting. With that being said, don’t overwater the soil. But make sure it doesn’t get overly dry. In other words, only water when needed and don’t let the soil get soggy. Give it fresh soil once a year and fertilize it in spring. Sage The leaves of this plant are so aromatic! I love running my fingers over them to smell their gorgeous scent. I use sage in cooking, especially with chicken, and I’m experimenting with sage tea. Sage has been growing in my garden for three or four years, but I may have accidentally killed the plants last year by pruning back too much in early spring. Since I wasn’t sure if the plant would come back this year, I planted new seeds for an indoor pot and my outdoor herb garden. 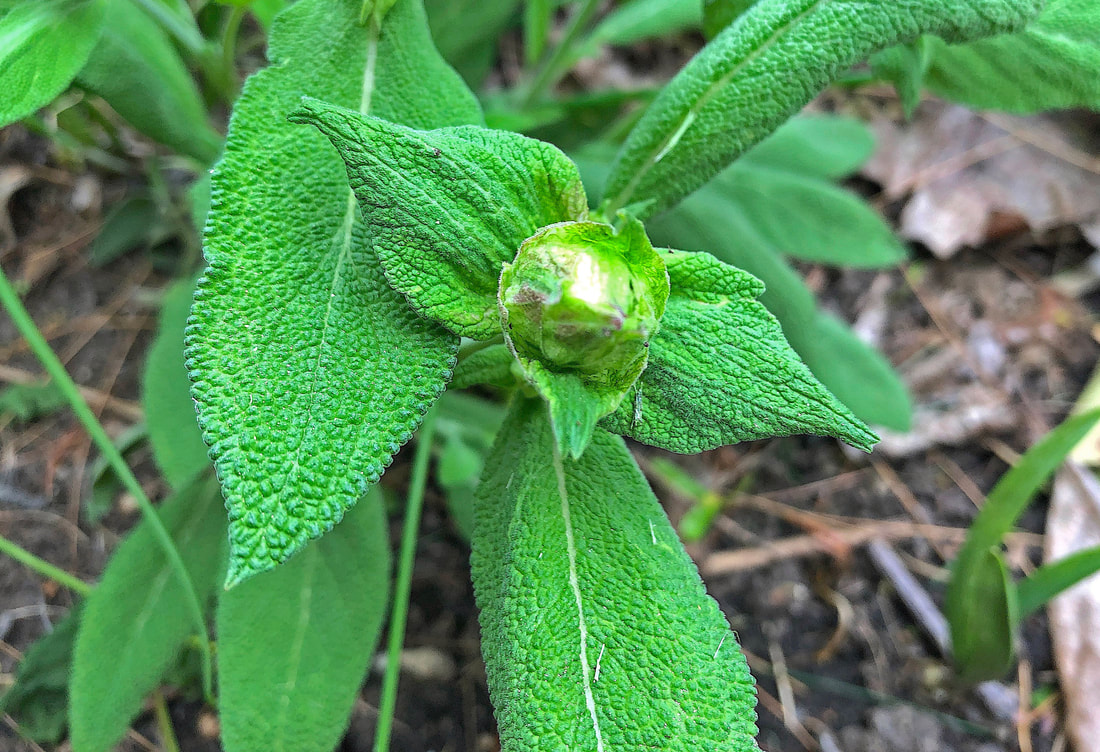 Sage bud on last year's plant. Photo by Diane M. Lilly, 2021. Some general growing tips for sage… Sage is a perennial that can grow 2-3 feet tall, with gorgeous purple flowers in the summer. The seeds take 10-21 days to germinate. Give this herb plenty of spacing (24-36” apart) when planting because it spreads out and gets bushy! 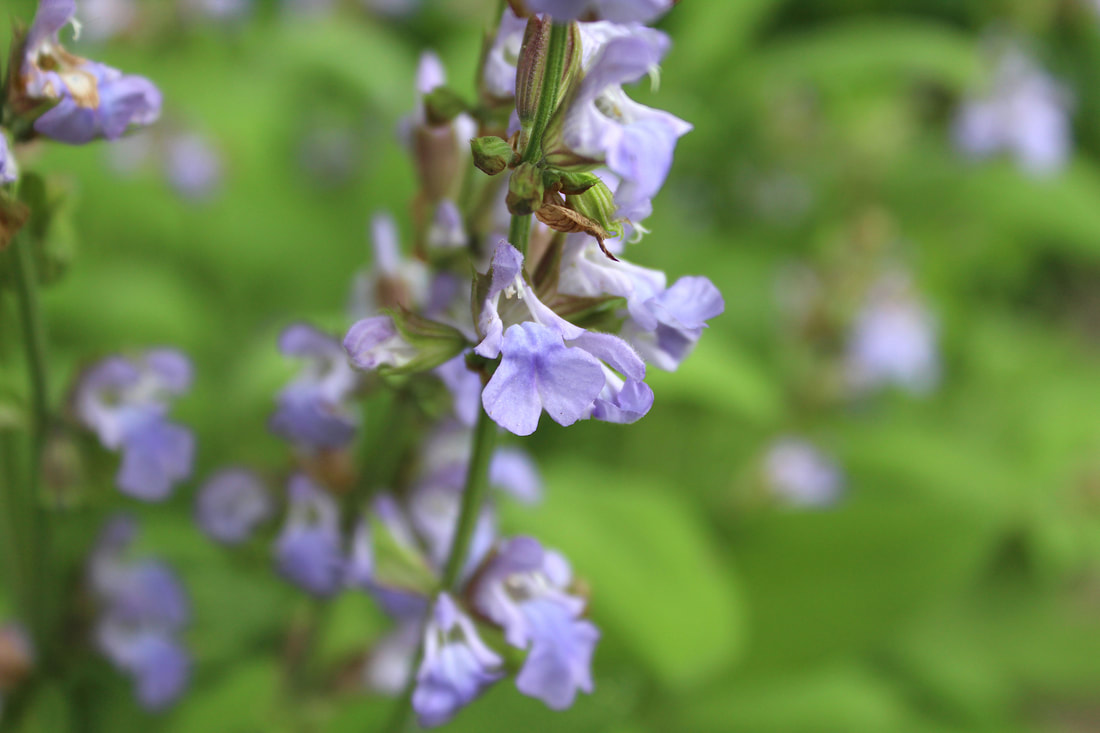 Purple flowers blooming on my sage plants. Photo by Diane M. Lilly, 2020. This hardy herb is drought tolerant and can handle temperature extremes like in the Southwest desert (hot days and cold nights). Like rosemary, allow the plant to grow in the first year and then begin harvesting in the second year. Thyme I had this pot of gorgeous, fragrant bushy thyme last year growing quite hardily in my side yard. I wanted to preserve it over the winter, so I brought it inside in the fall. The plant grew fairly well…until about mid-winter, when it suddenly crashed and was dead. This spring, I planted more seeds…and we’ll see what happens. The plan is to have some plants inside and some outside, experimenting with both to see what this plant likes best. 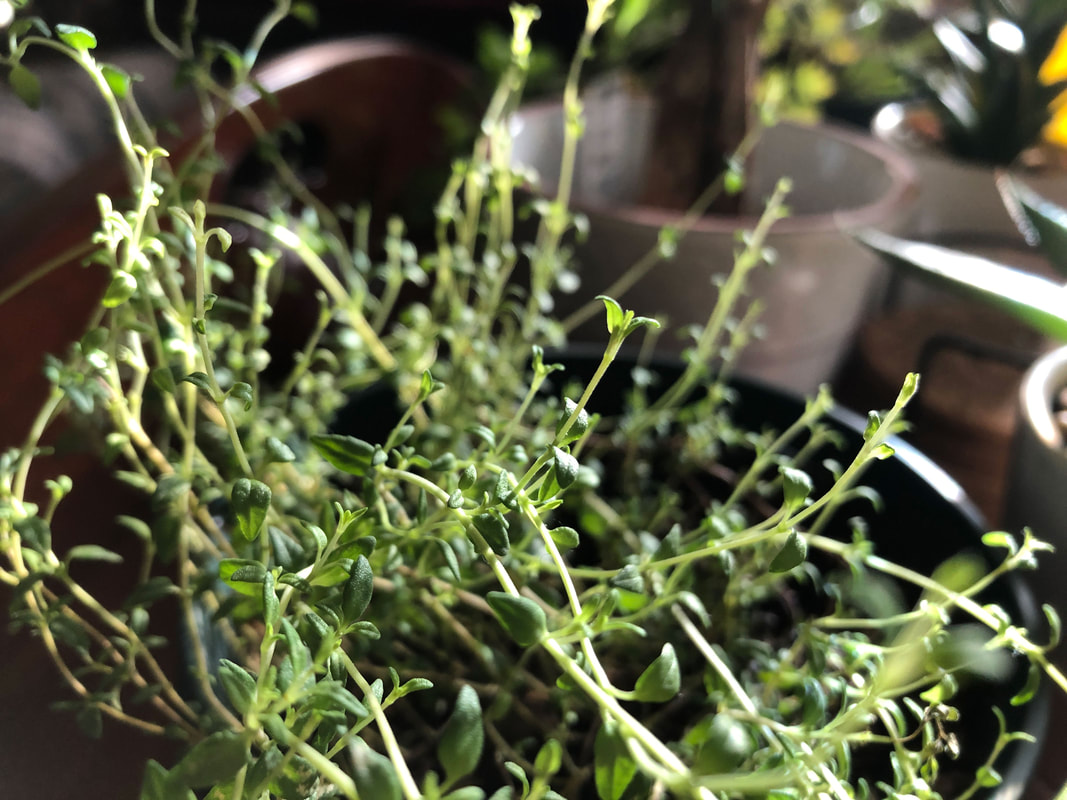 My thyme plant brought indoors fall 2021. Photo by Diane M. Lilly, 2021. Some general growing tips for thyme… Thyme can grow 8-12” tall and likes to spread out, making it a terrific aromatic ground cover. It takes 8-20 days to germinate, and you can transplant once the plant is 4” high and has four true leaves. Thyme spreads out, so plant 18-24” apart in the ground. Thyme plants are ready to harvest in 80-85 days. This herb likes full sun and well-drained soil. If growing indoors, it will need to be misted frequently and needs the bright sun of a windowsill. 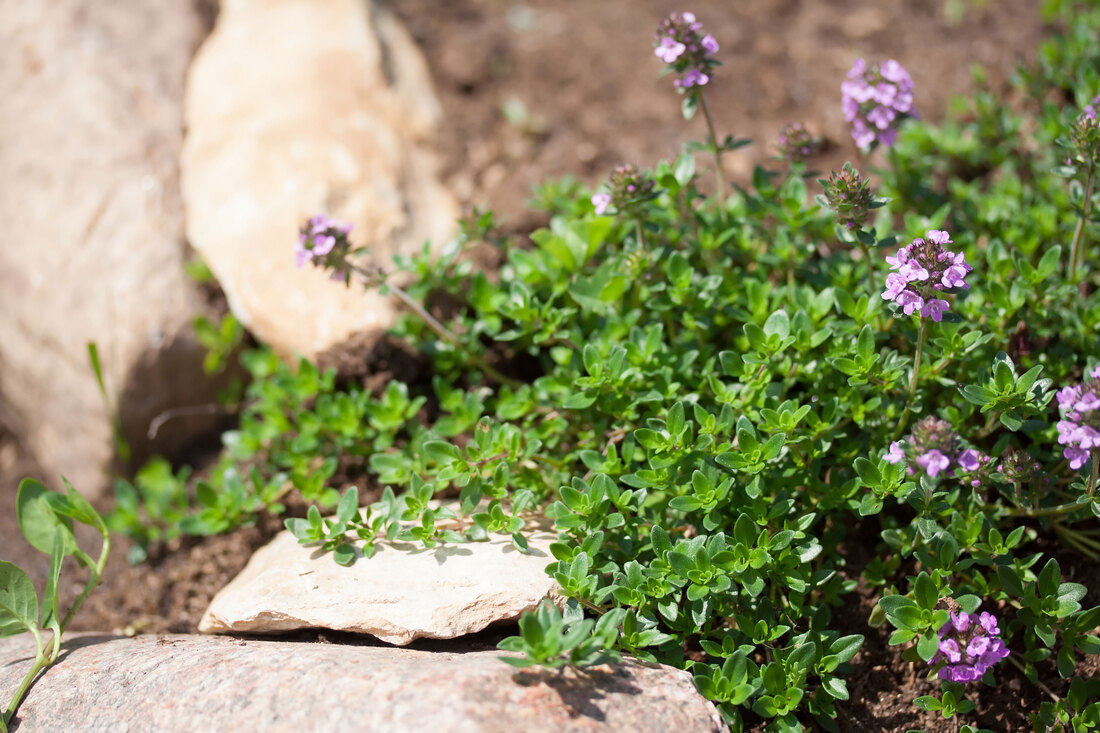 Image by Marta Jonina from AdobeStock. So, what are your thoughts about growing herbs? Have you grown herbs, and if so, what is your favorite? Share your tips and advice in the comments below! For my part, I look forward to watching these herbs sprout and grow, as well as learning how to care for and harvest these incredible plants. There’s something magical about witnessing new life! This will be a journey of exploration to learn about growing herbs and using these herbs for all sorts of household and culinary needs. As these plants grow, I will explore how and when to harvest them and how to use each in my home. I’ll explore uses for the home, ways to scent my home, ways to use them in arrangements, herbal teas, and healthy recipes. So, let’s see how this process plays out, and don’t forget to check back periodically to see my progress and get more tips and tricks for growing these herbs! Related blogs you may want to read: Tips for planting seeds indoors How to repot a pothos plant How to propagate bromeliad pups Six herbs I planted indoors It’s planting season again This article may contain a few items or commercial mentions, but I only used them for demonstration purposes only. I am not endorsing any particular product or receiving any monetary gain for this blog.  Pots with planted seeds sitting on my windowsill facing southwest. Photo by Diane M. Lilly, 2022. Over the years, I have looked forward to planting seeds indoors. I love watching the fragile green seedlings push their way up through the moist soil and begin to sprout. We live in a rental home, so digging up the yard is not an option and limits my ability to grow vegetables and herbs. We have a small raised garden for growing mint, sage, and chives, and there are also usually a few containers on the back patio where herbs like cilantro, parsley, dill, and chamomile grow over the spring and summer. So this year, I wanted to plant more herbs in containers, with the idea that they can be placed outdoors on the patio or indoors on a windowsill, keeping my houseplants company.  My raised garden from 2020 with sage, chives, and mint. Photo by Diane M. Lilly, 2020. What type of containers you will need In previous years, the seeds were planted in small grow pots or even styrofoam cups, then transplanted into larger containers once they were strong enough. This year, however, I’m going to try something a little different…I will plant them directly in the pots so I don’t have to worry about stressing them during the transplant process. It may become necessary to eventually transplant them anyway, but for now, that’s the plan! Honestly, I don’t do a lot of fancy stuff when I plant seeds. I’ll use any small pot or container on hand and cover it with plastic when the seeds are planted to keep in the moisture and warmth the seeds need to grow. When to plant seeds Generally speaking, early spring is a ideal time to start, anytime between March and May. Certain seeds—like tomatoes—need to be planted earlier, so that you get your fruit during the summer growing season. It’s a good idea to read all the information on the packet. This will provide information about when to plant, how deep to plant, how to space your plants, lighting and watering needs, etc. It’s also a good idea to do a little research first. Figure out what types of plants will work best for your own space, lighting, and experience, and start with just a few pots when you are first getting started. Each year you’ll learn more about planting and grow better plants! What I’m planting this year This year I have a wide range of seeds I’d like to try. For my vegetables I decided to plant cherry tomato and cucumber seeds—even though I am really planting them a bit late in the season, but better late than never! As for my herbs, this year’s seedlings will consist of cilantro, dill, basil, lavender, thyme, sage, and rosemary, all of which I’ve grown previously. The packet instructions for thyme, rosemary, and sage say to plant the seeds in May, but these will possibly end up as indoor herbs anyway, so I’m going ahead with planting them now along with everything else. I have to say, I’ve never had any luck with lavender and rosemary, but my stubborn streak won out and I’m trying again this year. If these herb plants don’t grow for me I can always buy a plant at my local home and garden store…but I am determined to have lavender and rosemary in my life! There is one last thing I want to plant—catgrass—but I need a special flat pot for that plant. It’s something special for my cats and they will want to eat it and roll in it…at least that’s the plan. You never know with cats! 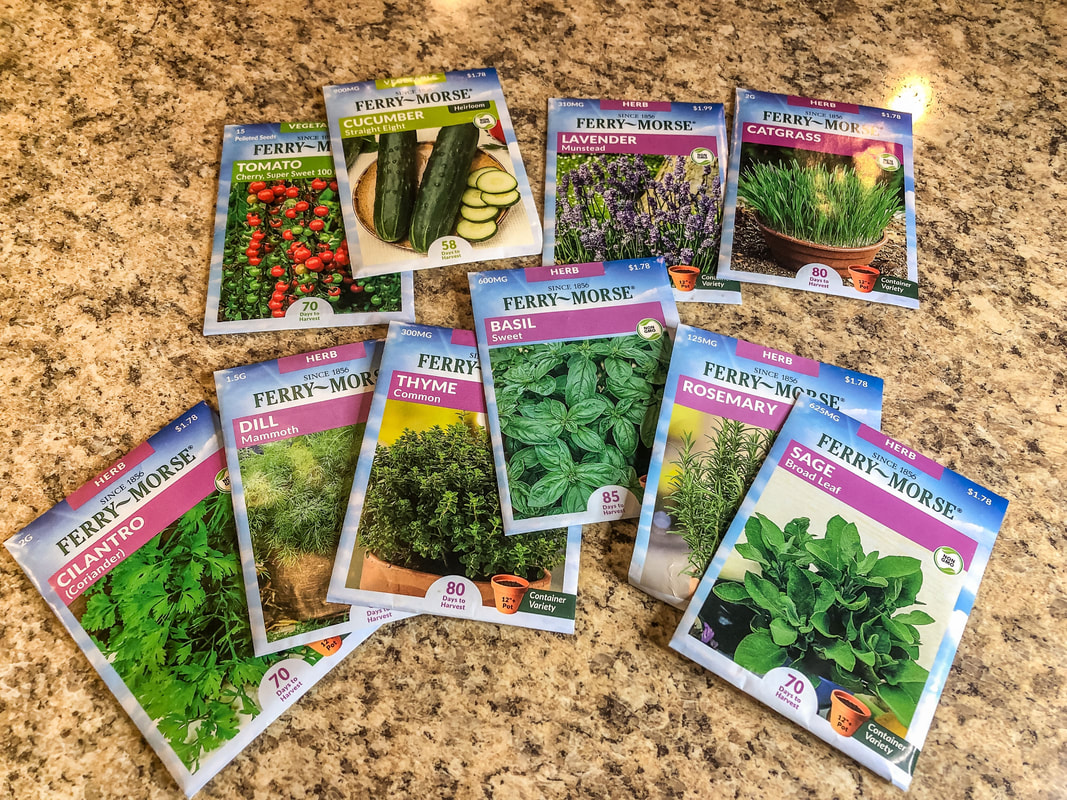 My seed packets for this year. Photo by Diane M. Lilly, 2022. What type of soil to use So this might be the most intimidating part of the process! Different gardeners have their own secrets for creating good soil for specific types of plants. There are many different ways to mix soils to get perfect balance of nutrients and drainage, and that becomes really important when the plant matures. But that’s a topic for another day! Today I simply want to plant my seeds in small pots with basic soil with little fuss. Basically you just need a good quality soil that drains well and has a good ph level (6.0-7.0). Important to note—read the descriptions on soil bags carefully. Some potting mix is specifically made for in-ground gardening, whereas some soils are used exclusively for growing in containers. For my needs, I am using MiracleGro Seed Starting Potting Mix (good for containers) to get my seedlings started, and I’ll mix up my own soil later when (and if) I transplant them.  Slightly larger pots for tomato and cucumber seeds. Photo by Diane M. Lilly, 2022. 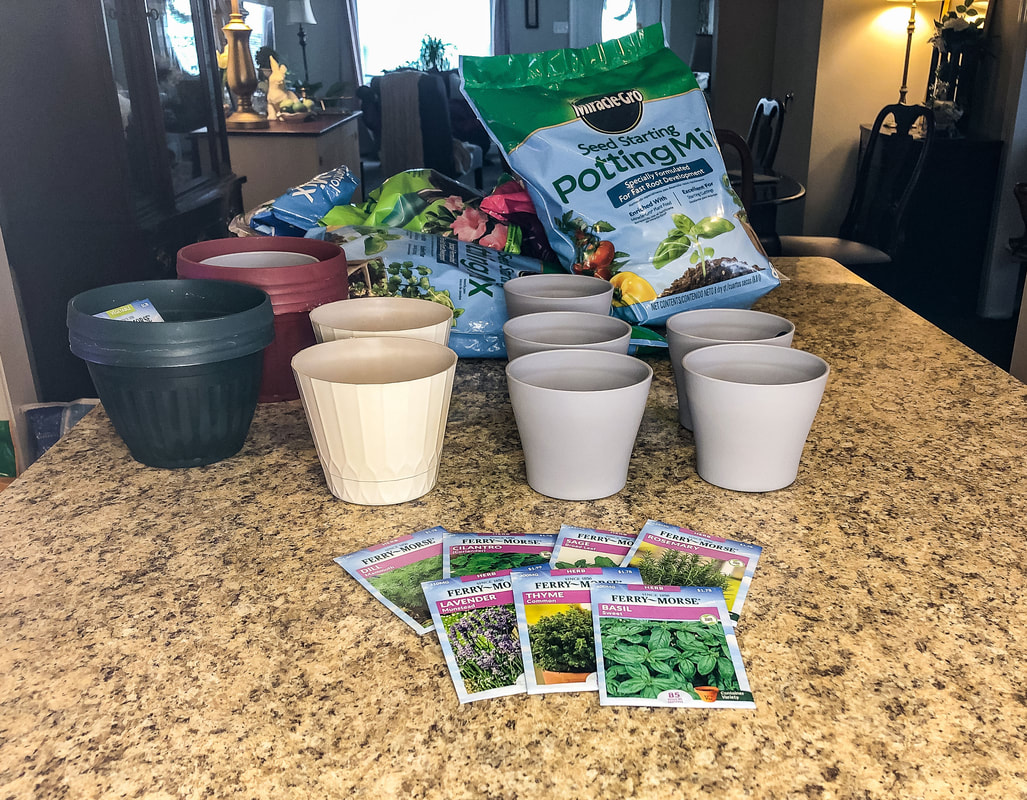 Smaller pots for herb seeds. Photo by Diane M. Lilly, 2022. 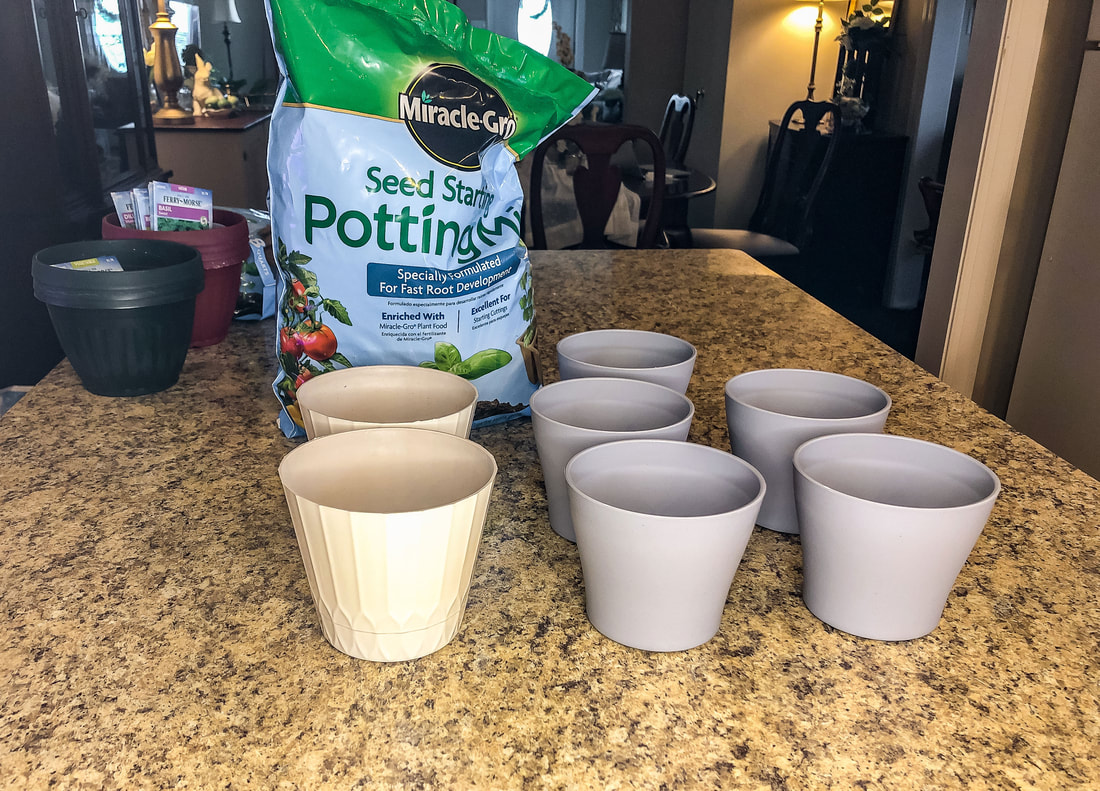 Empty pots ready for potting soil. Photo by Diane M. Lilly, 2022. How to plant the seeds Planting seeds really isn’t hard. Basically, you just put some soil in whatever starting pot you’d like, tap the bottom a few times to get rid of air pockets, then fill more soil if necessary. Then follow the planting instructions on the label for your particular seed. Pay attention to planting depth and spacing requirements. All of the seeds I planted this year required a depth of 1/4 inch, and this can be done in a couple ways. You can either poke small holes in the soil and drop the seeds in, covering up the holes afterwards, or you can place the seeds on top of the soil and cover with more soil. I’ve done it both ways. It really doesn’t matter, as long as the seedings are able to find their way to the surface when they begin to sprout. Once you have your seeds planted, it’s time for watering. 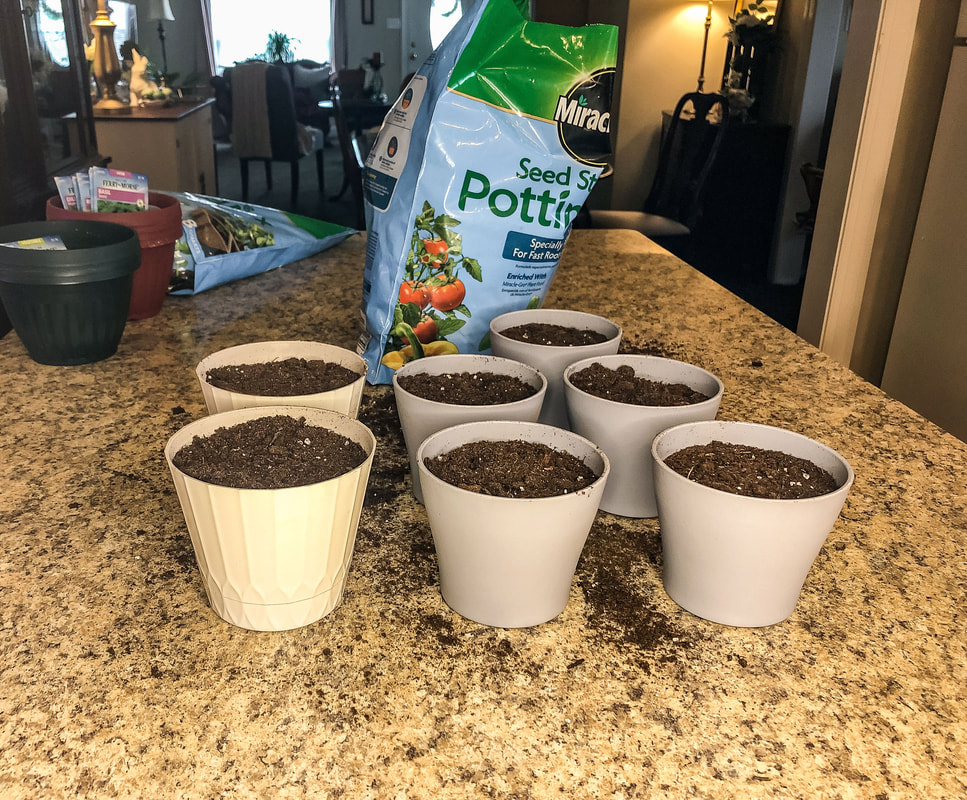 Pots filled with soil. Photo by Diane M. Lilly, 2022. 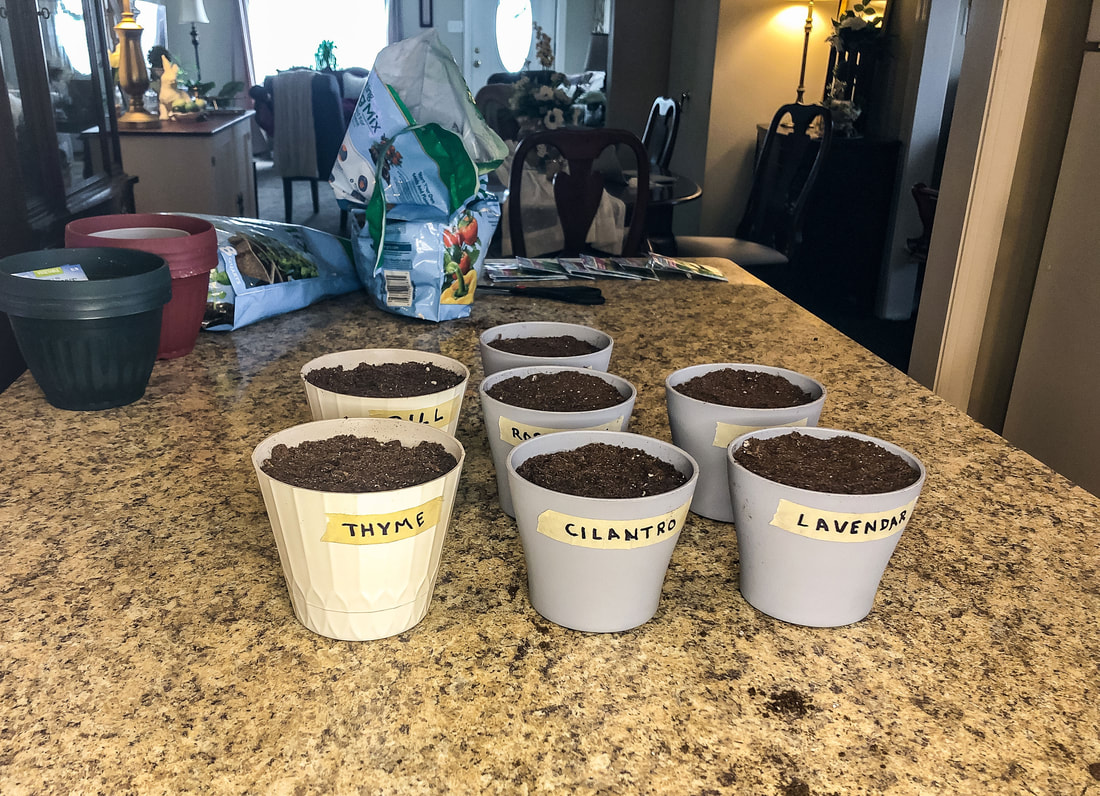 Pots for herbs, seeds planted and pots labeled. Photo by Diane M. Lilly, 2022.  Pots for tomaties and cucumbers filled with soil. Photo by Diane M. Lilly, 2022. 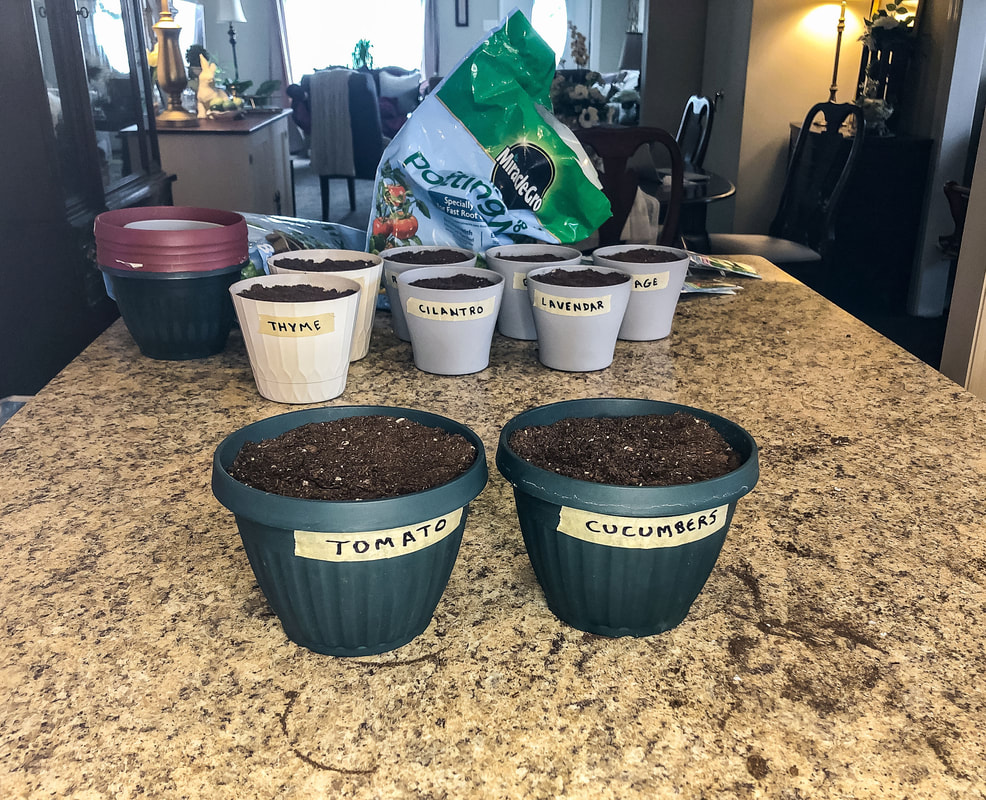 Tomato and cucumber seeds planted in pots and labeled. Photo by Diane M. Lilly, 2022. 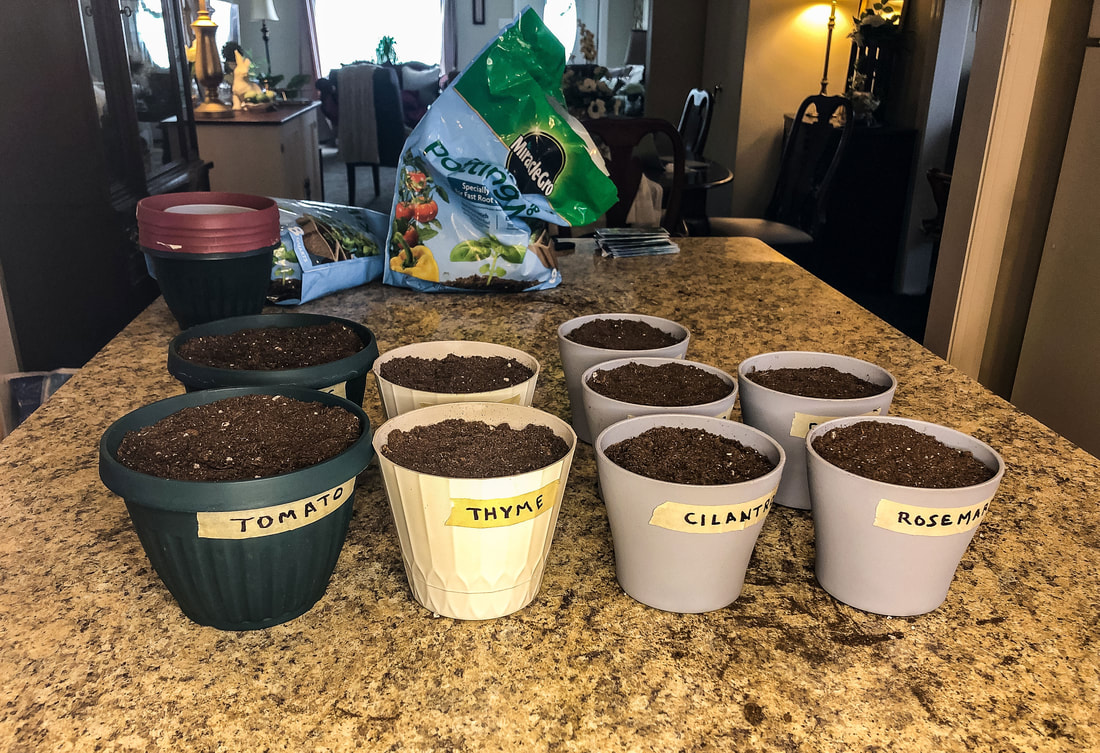 All of my newly planted seed pots ready for watering. Photo by Diane M. Lilly, 2022. Watering the seedlings Water enough that the surface of the soil down to the depth of the seeds is wet, but do not drown the seeds. If you water too much you’ll just end up with soggy soil that can rot your seeds before they get a chance to grow. My method has been to water, the cover the pots with plastic wrap to keep the plant moist and somewhat warm, then every couple of days I’ll check each plant to see if it needs more water. I’m just looking to keep the soil moist but not wet. This usually means I water carefully with a teaspoon or a spray bottle at first, a little at a time so I don’t accidentally overwater. Once the seedlings start to sprout enough that they almost touch the plastic, I remove it so they can grow free. The bigger the plants get, the more water they will eventually need. 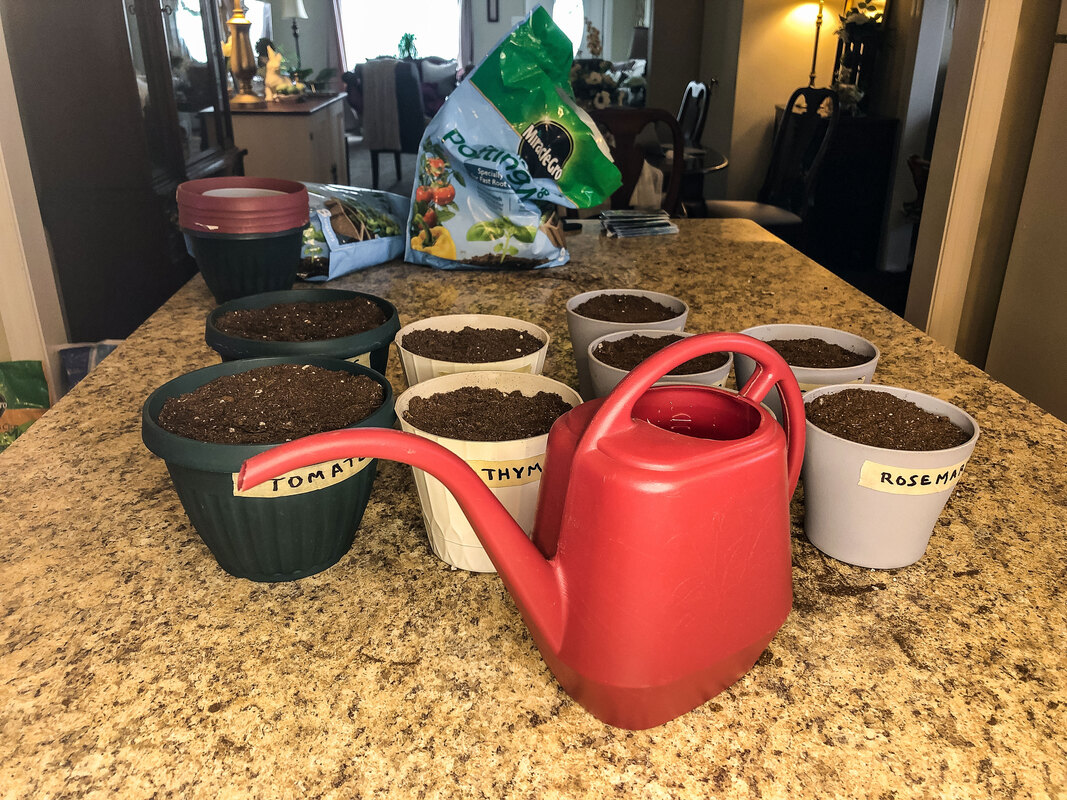 Seed pots and watering can. Photo by Diane M. Lilly, 2022. 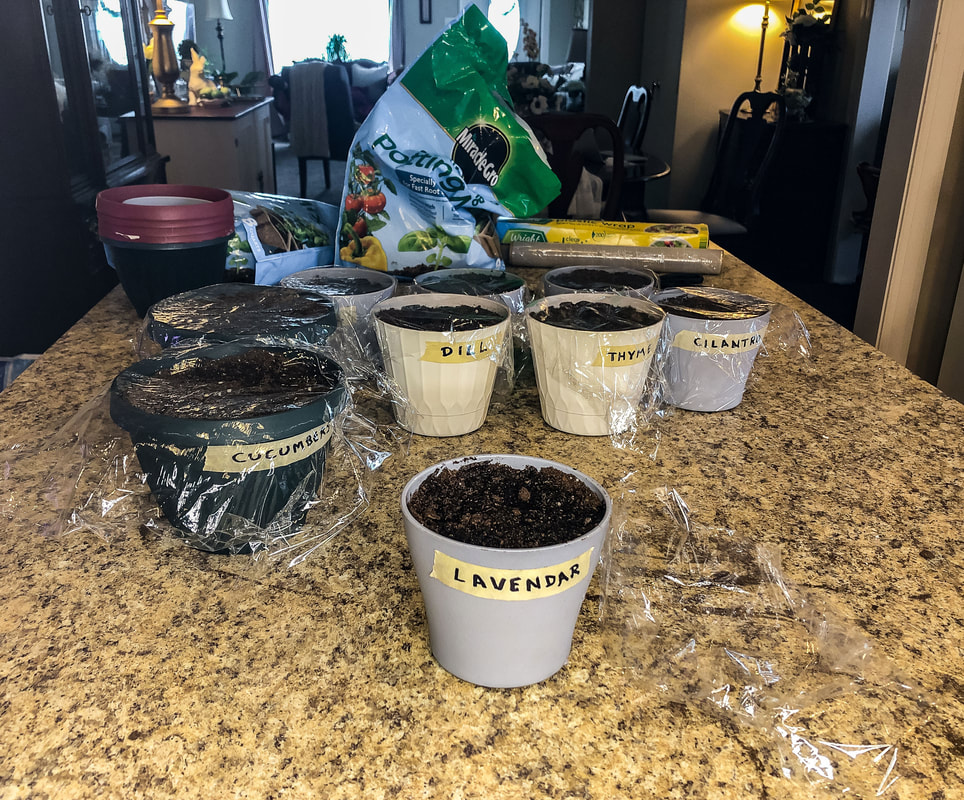 Pots watered and getting a plastic wrap covering. Photo by Diane M. Lilly, 2022. 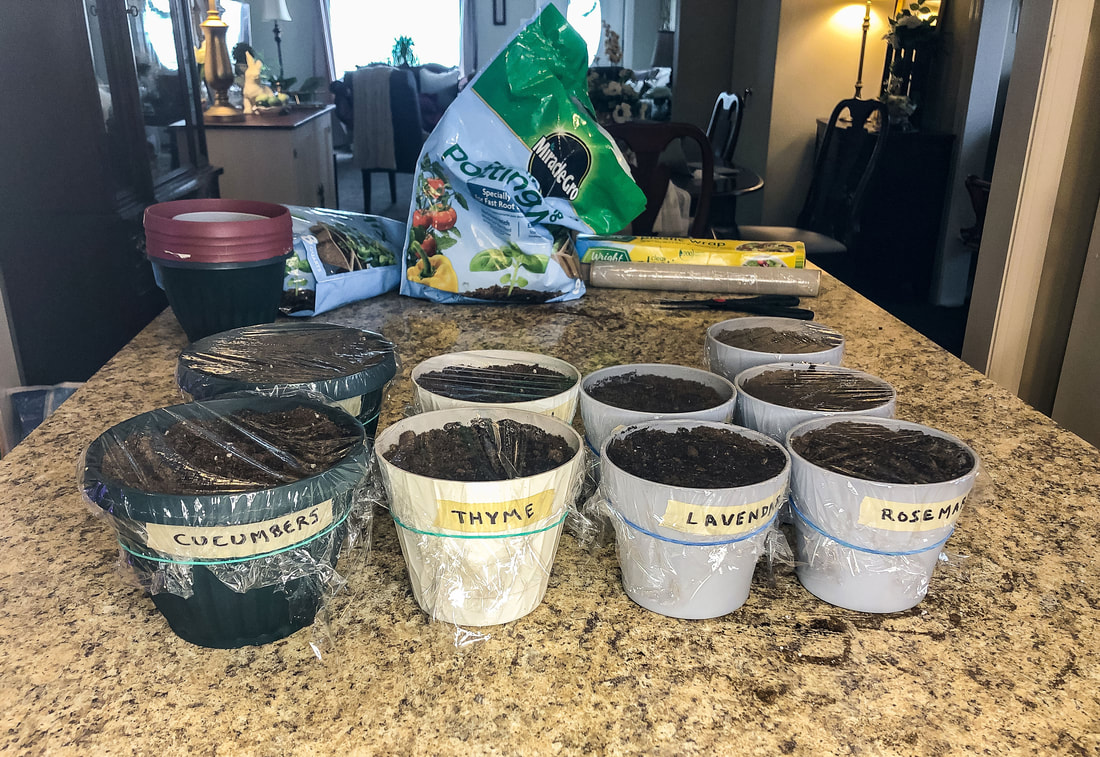 All my newly planted seed pots, watered and securely covered in plastic wrap. Photo by Diane M. Lilly, 2022. Finding the right light For most seedlings they really just need a lot of light to help them germinate and sprout. Plant specific light levels become more important once the plant matures a little, so when I first start my seeds I place the pots on a southern facing windowsill. (In my house, my windows face southeast and southwest.) This way the seedlings can make the most of the daylight and sun while they are trying to germinate. I don’t have fancy grow lights either. The plan is to buy a couple eventually (because they are a great investment for growing seeds indoors), but for now I just let the natural light on my windowsill do the job. When to transplant Transplanting can be a stressful time—for you and your plant! The key is to go slowly be careful, and read up ahead of time any instructions for separating and replanting your new plants. Doing research will result in better knowledge and answer questions like: What type of soil does this plant need? What are its lighting needs? Will it be too hot? Or too cold? Learning the basic needs of your new plant will give it the best shot possible to survive. And they don’t all survive! It’s just the way it is. Just keep trying and celebrate the ones that make it! (I will do a separate blog later on in the transplanting process.) 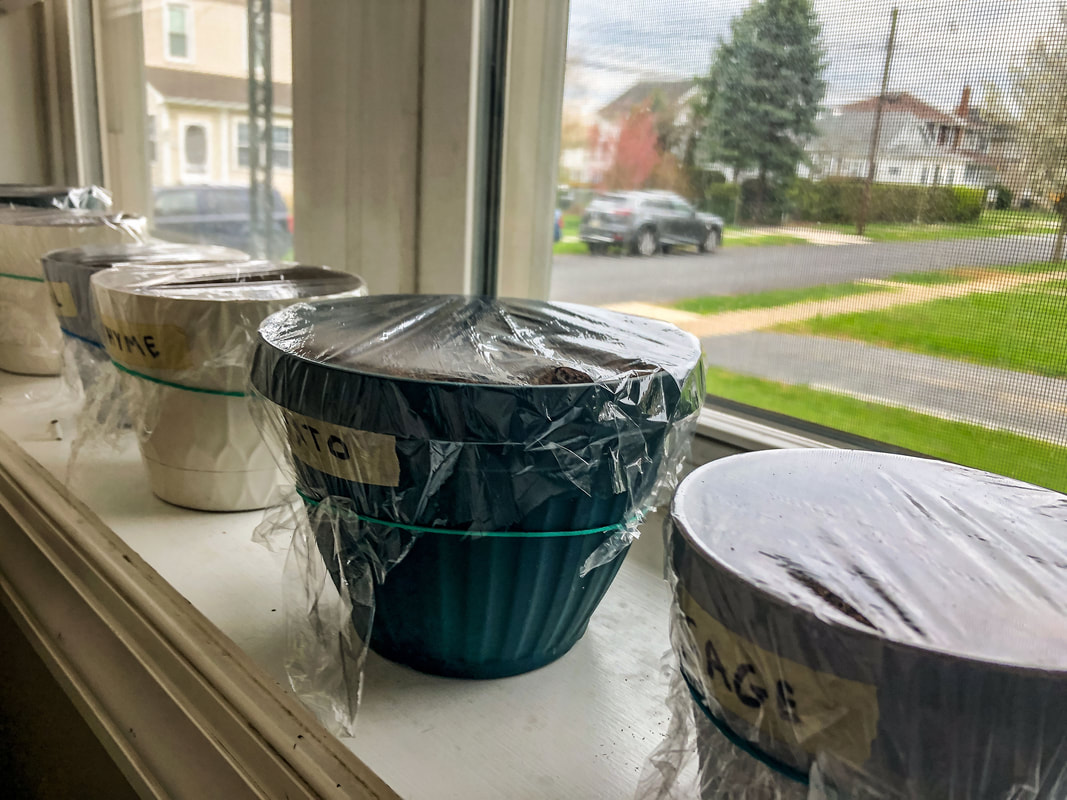 Another shot of my seed pots sitting on my living room windowsill. Photo by Diane M. Lilly, 2022. I’ll more than likely create another separate blog later for cucumbers and tomatoes, as they get big and will need bigger pots. A few of the herbs may get transplanted as well, depending on what they need later in the spring (and how much space I have). There is a lot to know about soil types and ph levels (and a lot I am still learning), but I think I will tackle that topic in a later blog as well. There are some common mistakes to avoid when starting seeds—such as over watering, seeds planted too deep, not enough light, wrong temperature, etc.—but it’s really not hard to plop a few seeds in some dirt and see what happens! Just remember this…There are people out there who have been doing this for years, and have every step of the process down to a science…but seeds and plants grow perfectly well on their own out in nature much of the time, without our interference! Just have fun planting and see what happens! Related blogs you may want to read: How to repot a pothos plant Small houseplants that love bathroom humidity A spring decor makeover for my small rental bathroom How to propagate bromeliad pups Eight health benefits of decorating with plants Six herbs I planted indoors Let’s talk about houseplants Biophilia in interior design This article may contain a few items or commercial mentions, but I only used them for demonstration purposes only. I am not endorsing any particular product or receiving any monetary gain for this blog.  My new pothos plant recently misted. Photo by Diane M. Lilly, 2022. A couple of months ago, I bought this gorgeous little pothos plant from my local home and garden store that had too little soil in too small a pot. So I knew the poor thing would need to be repotted sooner rather than later. Now that the warmer weather has arrived, it’s time to give this struggling plant baby a better plot of earth.  From left to right: snake plant, pothos plant, bromeliad. Photo by Diane M. Lilly, 2022. When to repot your pothos According to Joy Us Garden (check her out for houseplant care tips), the best time to replant a pothos is spring or summer. Pothos are resilient plants, so you may only need to repot once every 1-3 years, depending on growth. When the roots get dense and tangled, it leaves less than ample room for the soil that contains the necessary nutrients. If you see the plant roots getting dense and escaping the bottom of the pot, it’s time to transplant! How to remove the plant from the pot Following a tip from Joy Us Garden, I watered my pothos plant thoroughly before trying to remove it from the pot. Saturating the soil before transplanting reduces stress on the plant and increases root flexibility. This makes them pliable so they do not break during the transplanting process. Turn the plant on its side and gently squeeze around the sides to remove it from the existing pot. This loosens the soil’s grip so that the plant slides out. Use your fingers to massage around the plant to gently loosen the soil and roots if they are too tight. Be careful not to yank or dump the plant or break the roots. Gently slide the plant out of the pot and lay it on the counter. The key word to remember here is gentle. 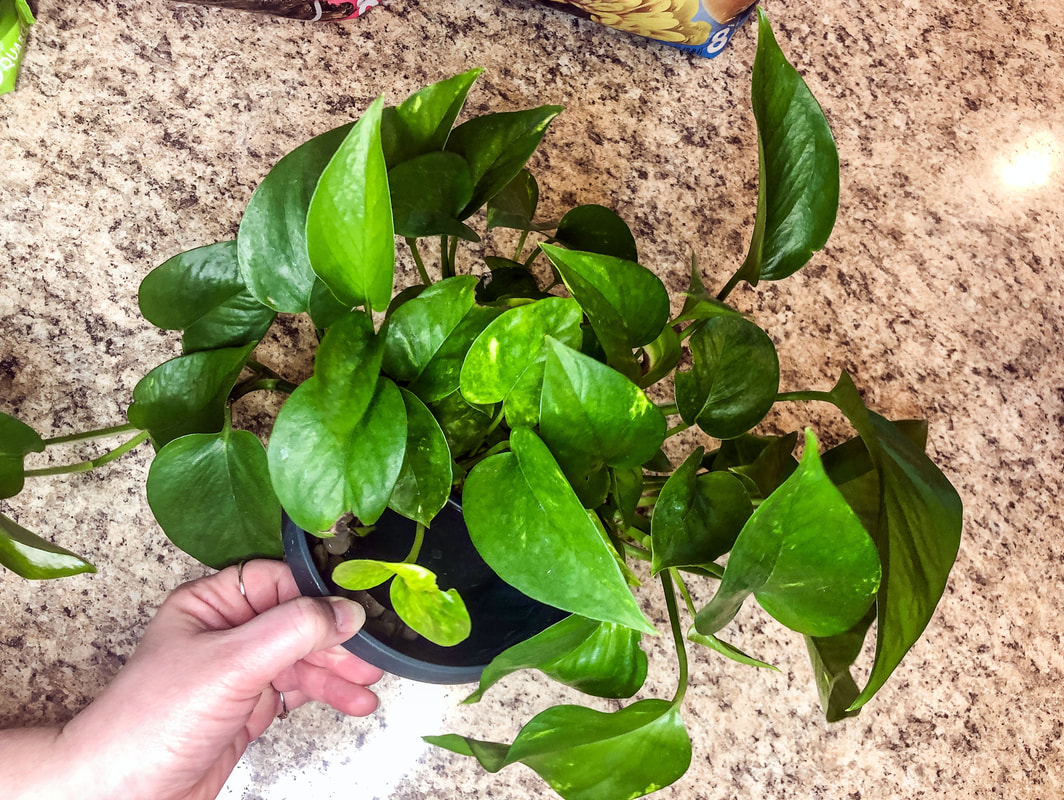 Pothos before replanting. Photo by Diane M. Lilly, 2022. 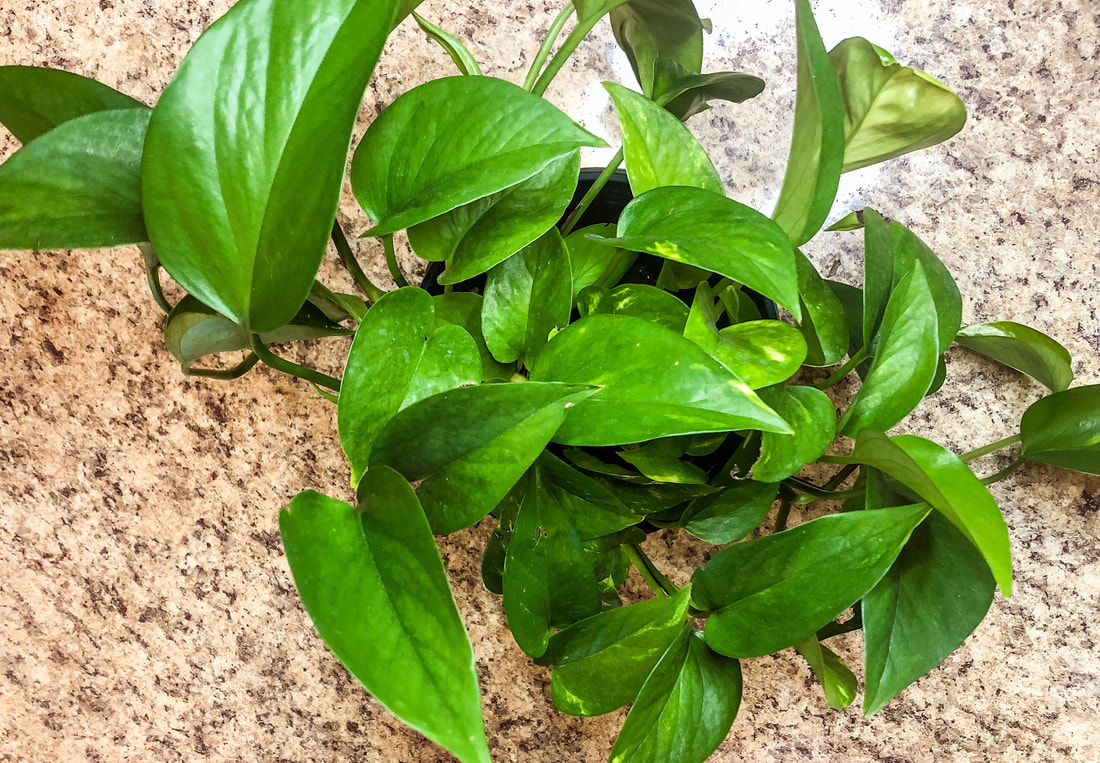 Pothos from above, waiting for transplant. Photo by Diane M. Lilly, 2022. Choosing the new soil Pothos plants are not picky but need well-draining soil (not garden soil). Lately, I’ve been experimenting with my mix—based on some research—and I came up with a soil mixture that seems to be helping a few of my other plants (my bromeliads and peace lilies), so I decided to give it a try for this plant as well. It’s a mixture of 1/2 good quality potting mix (well draining, moisture balancing), 1/4 sphagnum peat moss, and 1/4 orchid bark. 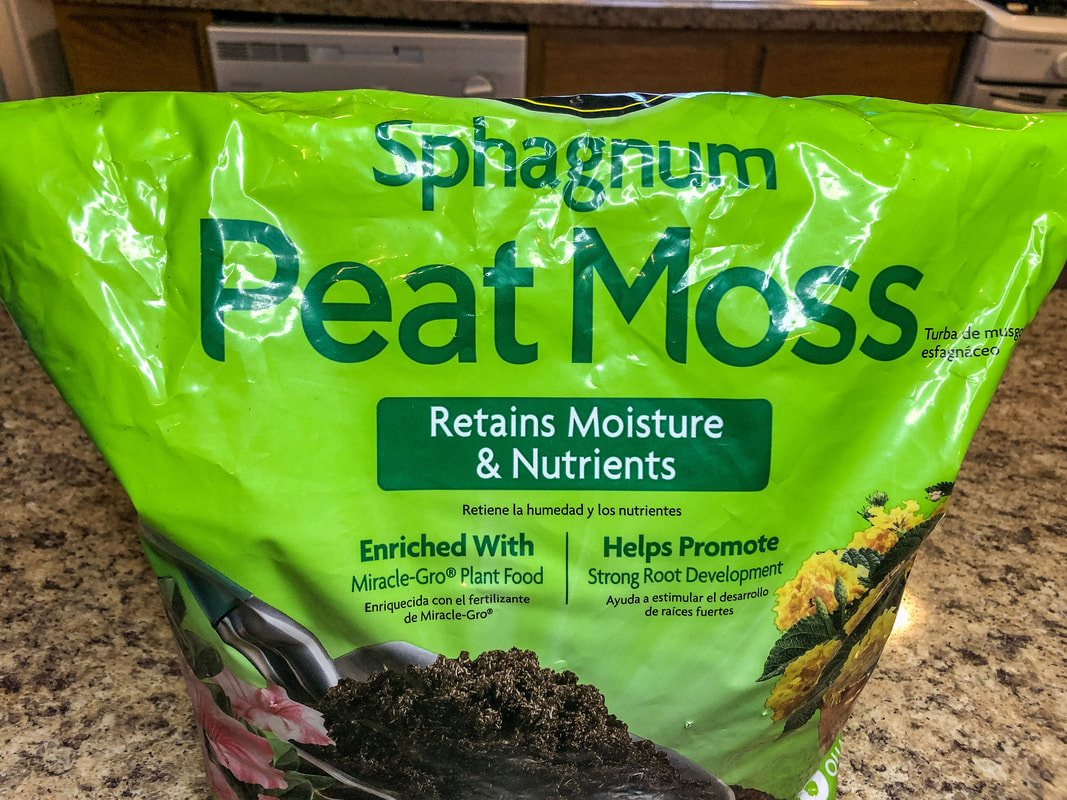 Sphagnum peat moss. Photo by Diane M. Lilly, 2022.  Orchid potting mix. Photo by Diane M. Lilly, 2022. 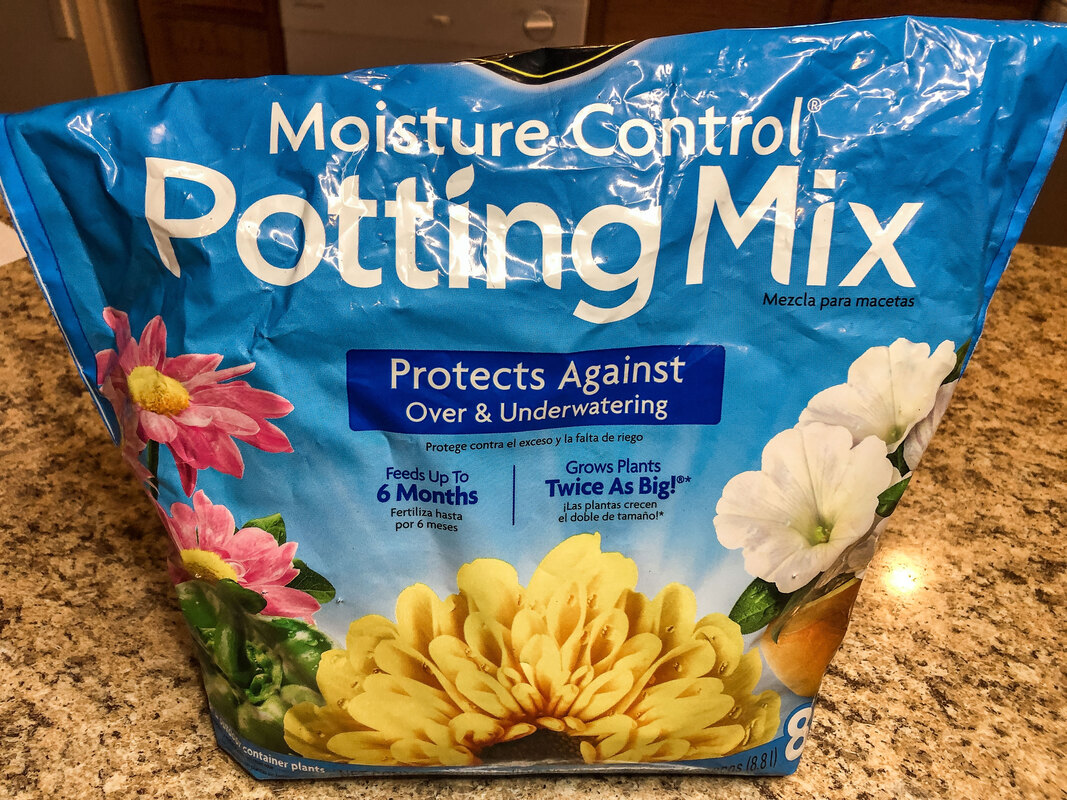 Potting soil. Photo by Diane M. Lilly, 2022. Choosing a new pot Choose a new pot that is a few inches larger to give the plant space to grow. As you see below, the first pot I chose was too small, so I had to find a slightly larger one that could accommodate the width and depth of the new plant. Also, the pot I chose first did not have the drainage holes essential for balancing moisture in houseplants. Pots with drainage holes tend to look utilitarian, which is a buzz kill for decorative style in a space, right? The simple solution to this problem is to buy a decorative pot (one that matches your style) and drop the newly repotted plant inside. Now you have the best of both worlds! 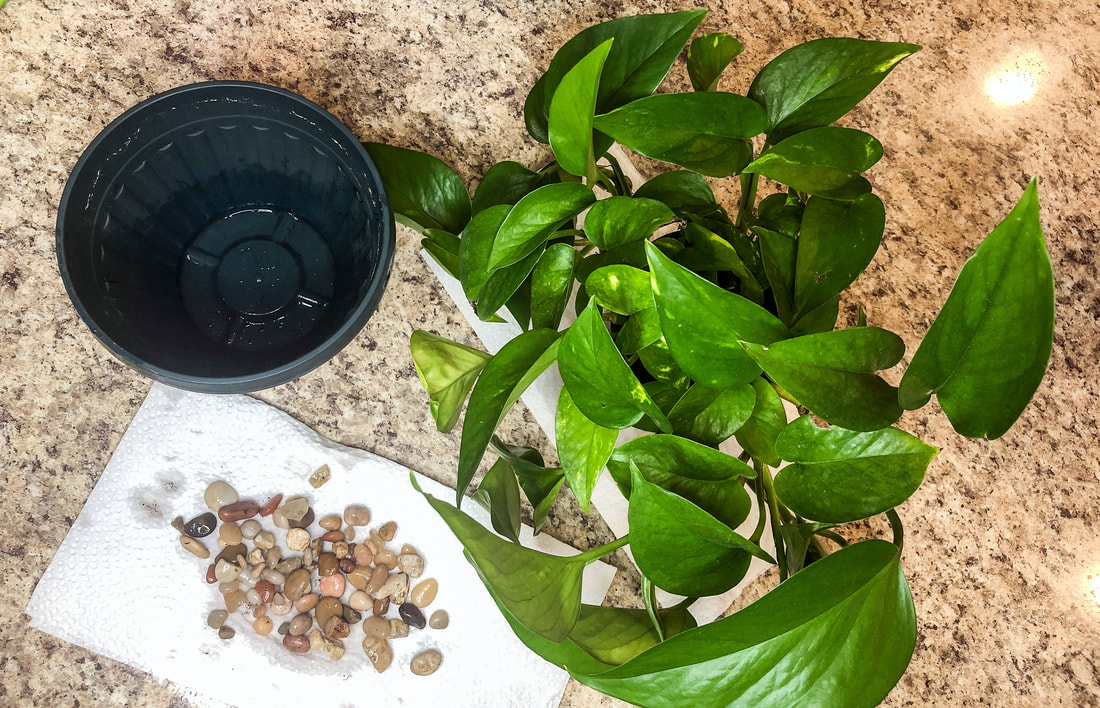 New pot is too small. Photo by Diane M. Lilly, 2022. You’re finally ready to plant! Now we get to the fun part—getting our hands dirty! Put some new soil mixture along the bottom of the pot, enough so that the new plant will sit more or less a little lower than the pot rim (about 1/2-1”). Hold the plant in place to judge how much soil to place at the bottom to get it to the right level at the top. Be careful not to plant too low or too high in the new pot. The idea is that you want to be able to water the plant without water and soil overflowing over the sides, but at the same time, you want the bottom leaves to get the proper light and air circulation. Once the plant is at the right height, you can fill the gaps around it with new soil. Once you’ve filled with the desired amount of soil, gently tap the pot a few times on the counter to help the soil settle into any air gaps. If the soil level has dropped, add more soil before watering. I use my fingers to gently tamp the dirt down, not to compact the soil but to secure the plant. 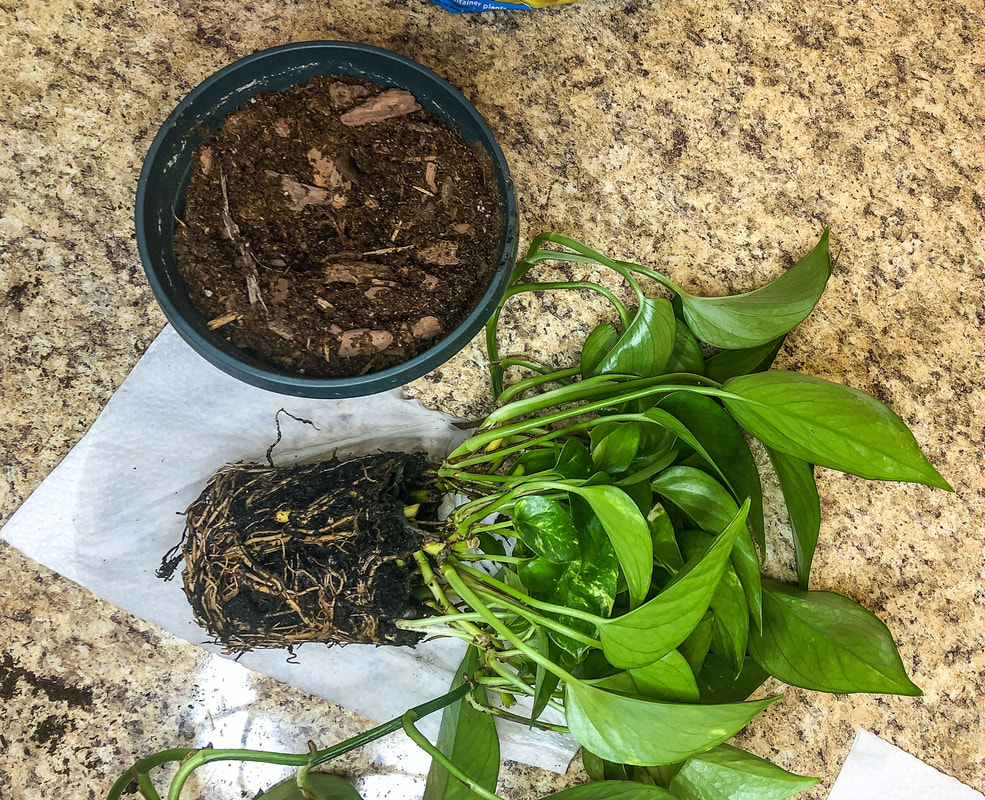 Pothos plant freshly watered with tangled roots sits next to a pot with its new soil mixture. Photo by Diane M. Lilly, 2022. 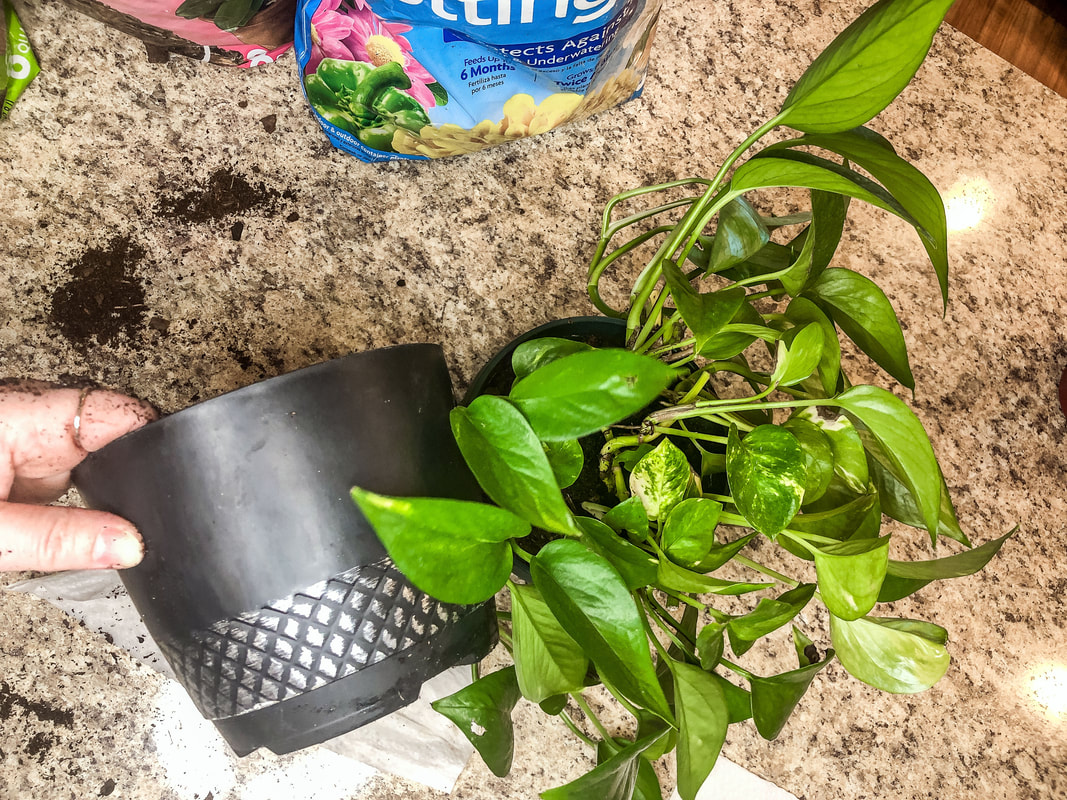 Bigger new pot for the pothos plant. Photo by Diane M. Lilly, 2022. 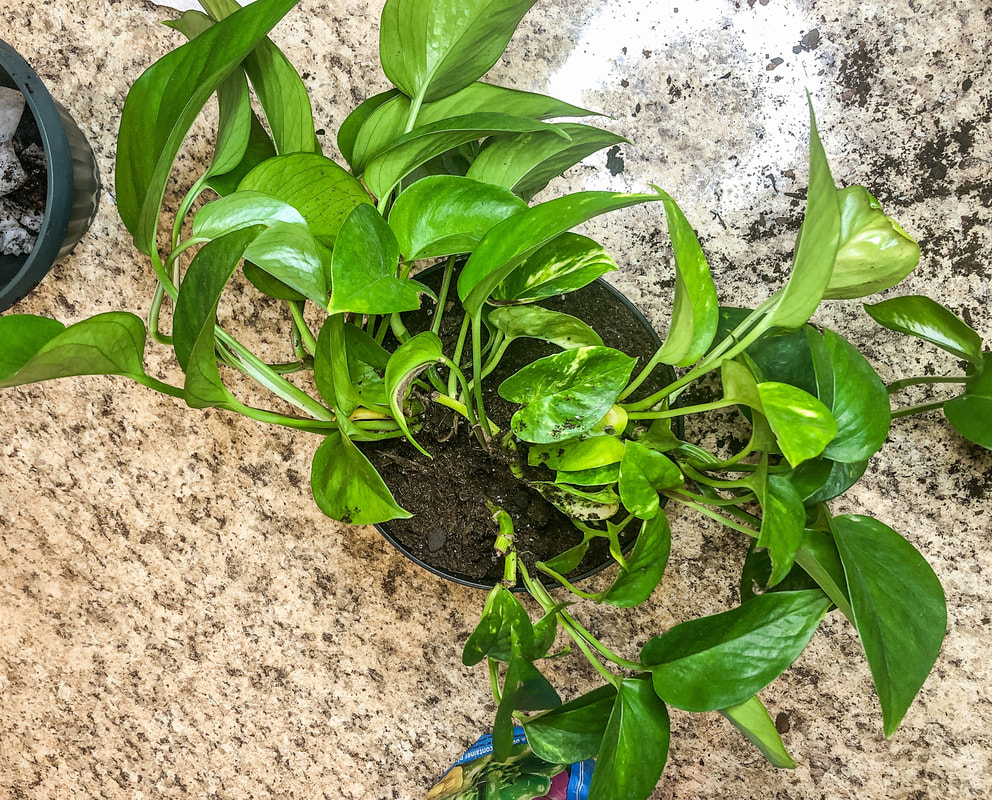 Pothos plant replanted in bigger pot. Photo by Diane M. Lilly, 2022. 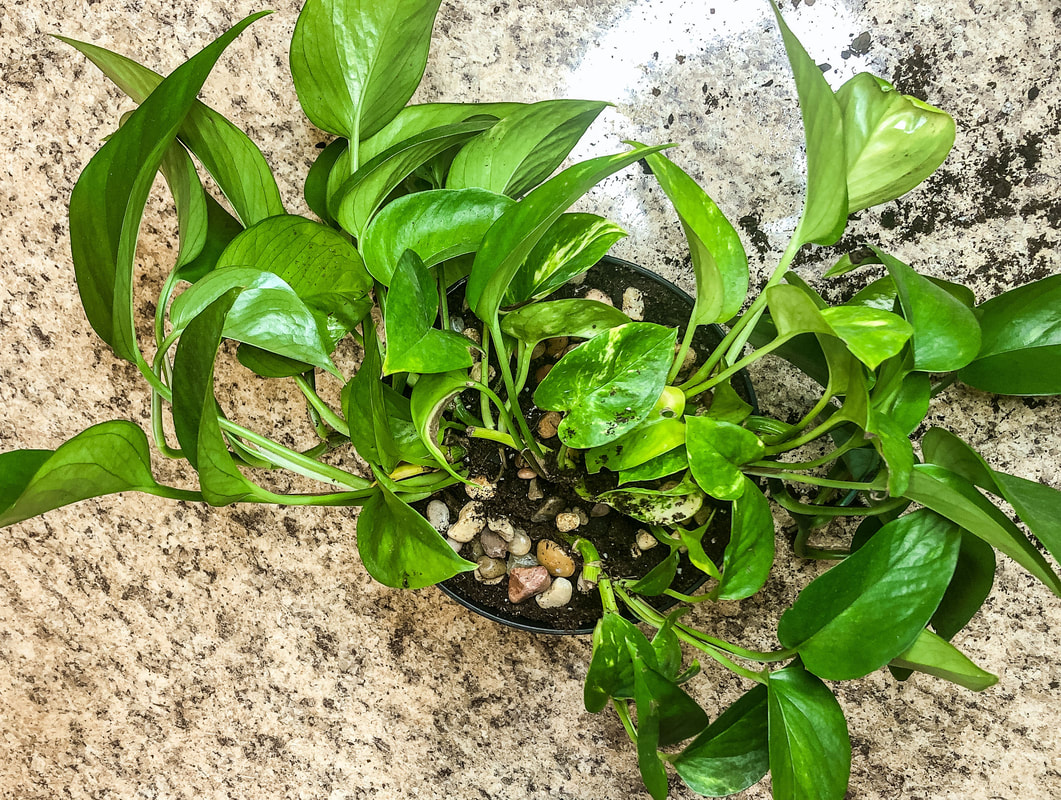 Newly planted pothos plant with decorative stones. Photo by Diane M. Lilly, 2022. How to water your pothos Most plants need to be watered after they are transplanted to settle them into the soil and help alleviate the stress of the transplanting process. Now that your pothos is in its new home, water deeply until the water runs out of the drainage holes in the bottom. If the soil settles too much, add more to top it off. And that’s it! Place your plant in a well-lit area (see the next section) and keep an eye on it. You can try a little fertilizer in a month if it needs a boost. Pothos (like most houseplants) will benefit from being in a humid space (like a bathroom). Light needs for pothos plants As I’ve mentioned before, pothos plants are resilient. They are said to be a pretty good plant for those who may not have the greenest thumb or the perfect environment. Pothos like moderate light but will tolerate low light. I placed my new plant on a northeast-facing bathroom window, so it does get a small amount of direct sun in the morning, but for most of the day, it gets bright indirect sunlight. And it seems to love its new home! It’s already stretching its limbs and getting viny, which I love! 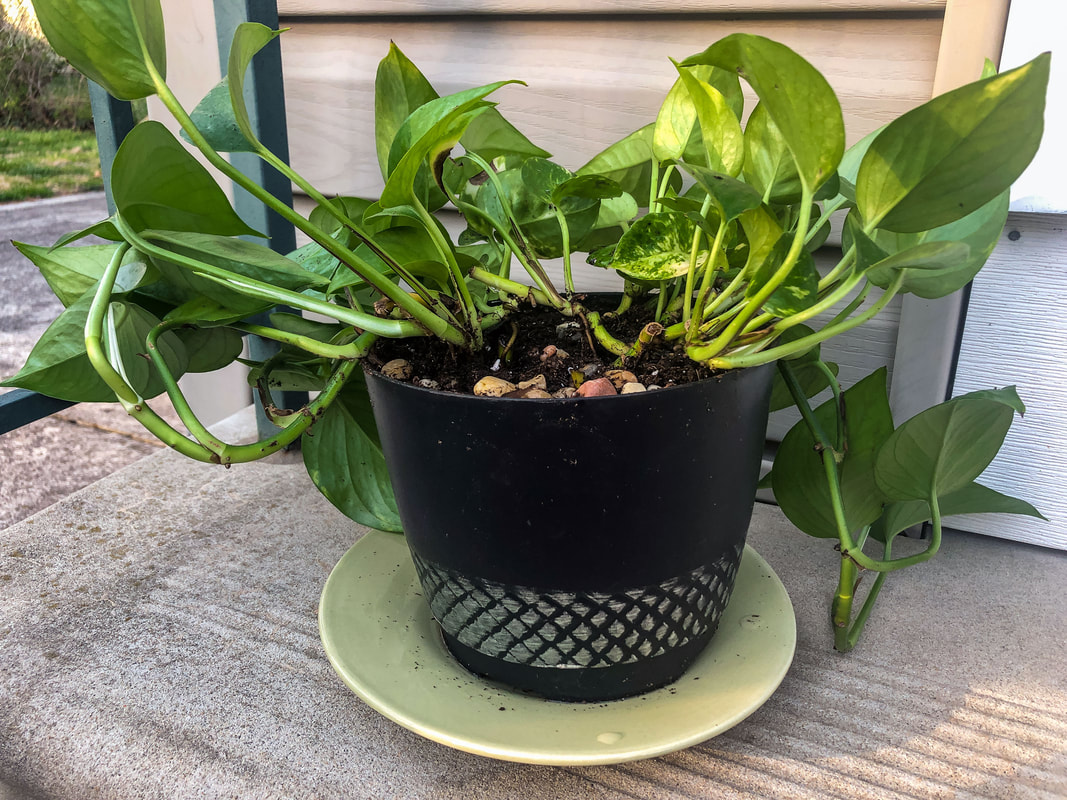 My newly planted pothos plant outside. Photo by Diane M. Lilly, 2022.  Another shot of my pothos plant outside. Photo by Diane M. Lilly, 2022. 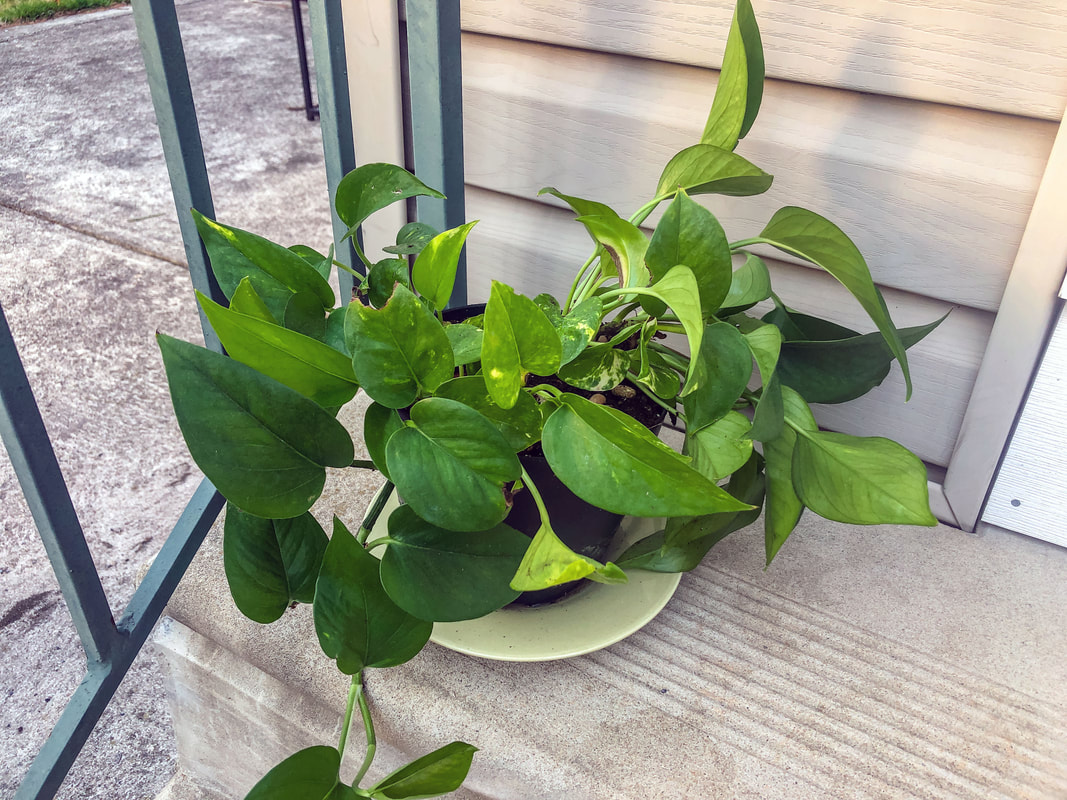 Pothos plant on my back door step. Photo by Diane M. Lilly, 2022. 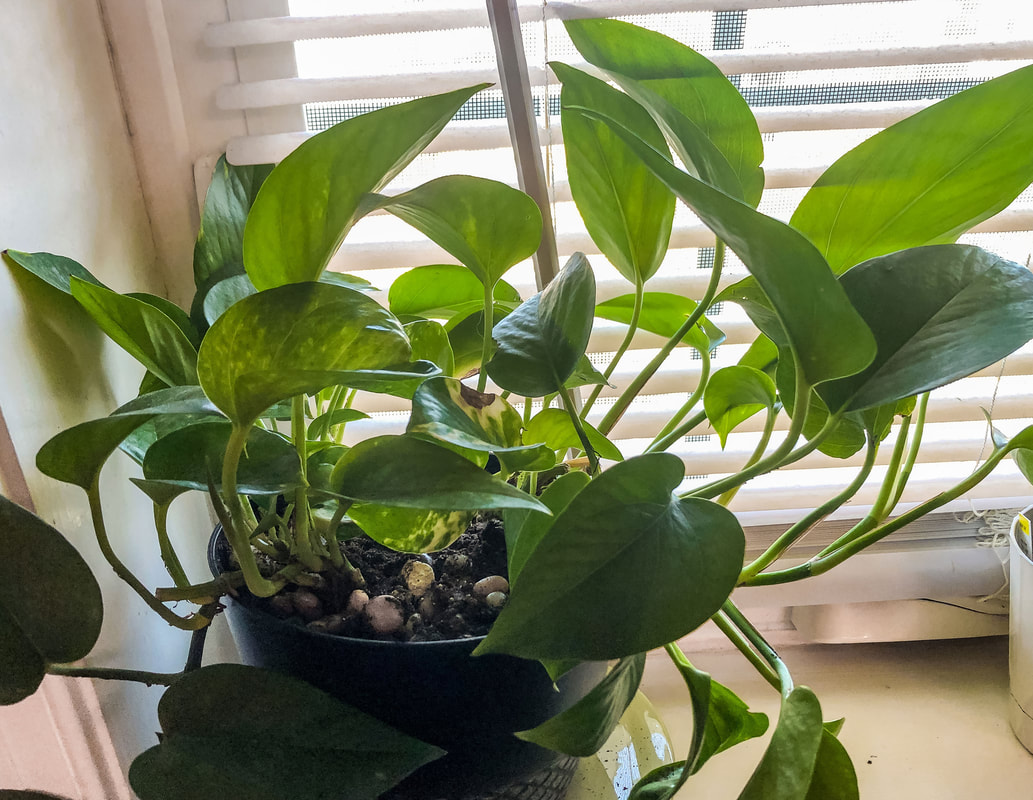 My pothos plant one week after replanting on bathroom windowsill. Photo by Diane M. Lilly, 2022. I’d love to hear in the comments if you have a pothos plant. Are any of you in the process of repotting your houseplants? Drop a line in the comments below if you have any tips for repotting houseplants to share! Related blogs you may want to read: Small houseplants that love bathroom humidity A spring decor makeover for my small rental bathroom How to propagate bromeliad pups Eight health benefits of decorating with plants Six herbs I planted indoors Let’s talk about houseplants Biophilia in interior design This article may contain a few items or commercial mentions, but I only used them for demonstration purposes only. I am not endorsing any particular product or receiving any monetary gain for this blog. 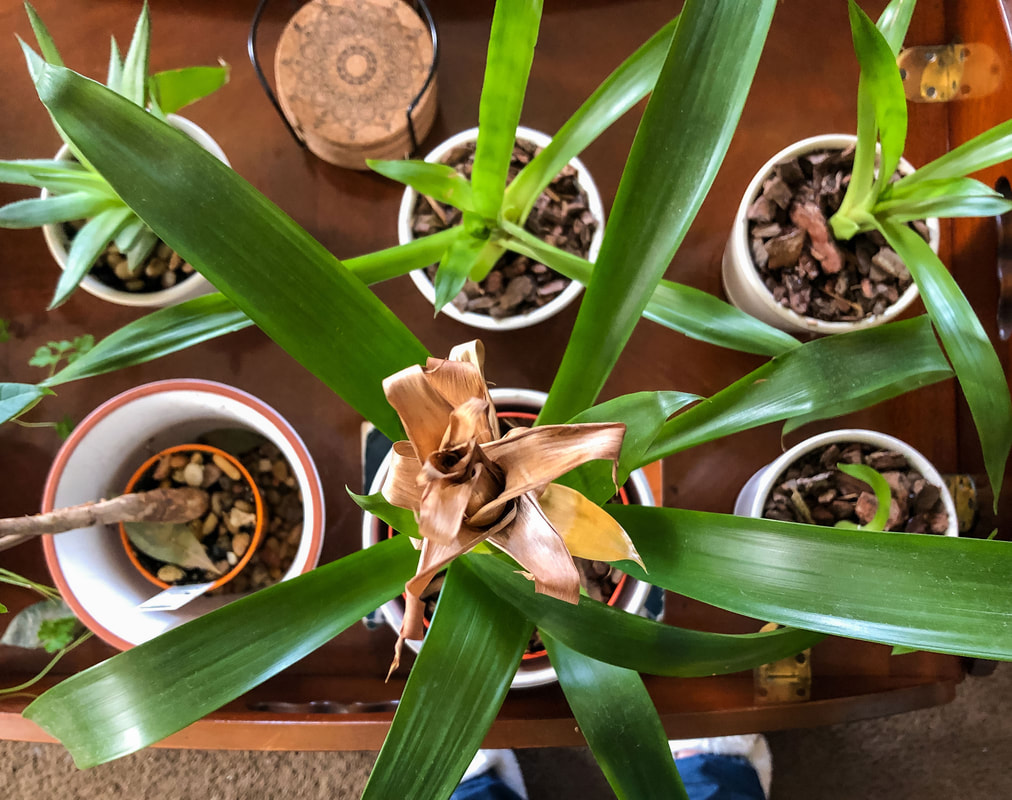 Top down view of my bromeliad mother plant and her newly planted pups. Photo by Diane M. Lilly, 2022. About bromeliads… Without getting too technical, bromeliads are a type of air plant or epiphyte, meaning the plant draws what it needs from the humidity in the air. This plant doesn’t technically need soil, but the soil does provide a way to anchor the plant into a pot and provide an extra boost of nutrients and water. In nature, an epiphyte’s roots attach to trees or other plants, anchoring them to a good place where they catch the best nutrients and humidity from the surrounding air. 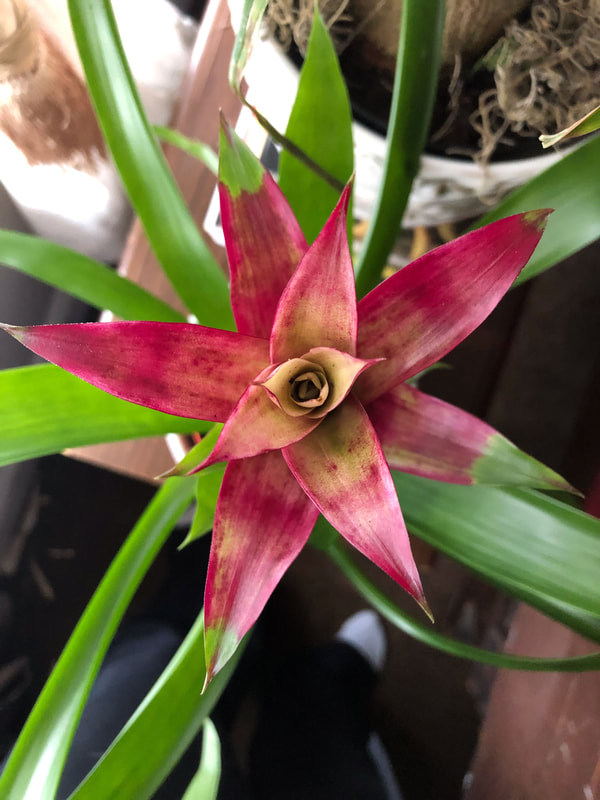 Top down view of bromeliad plant in bloom with its vivid fuchsia leaves. Photo by Diane M. Lilly, 2021. 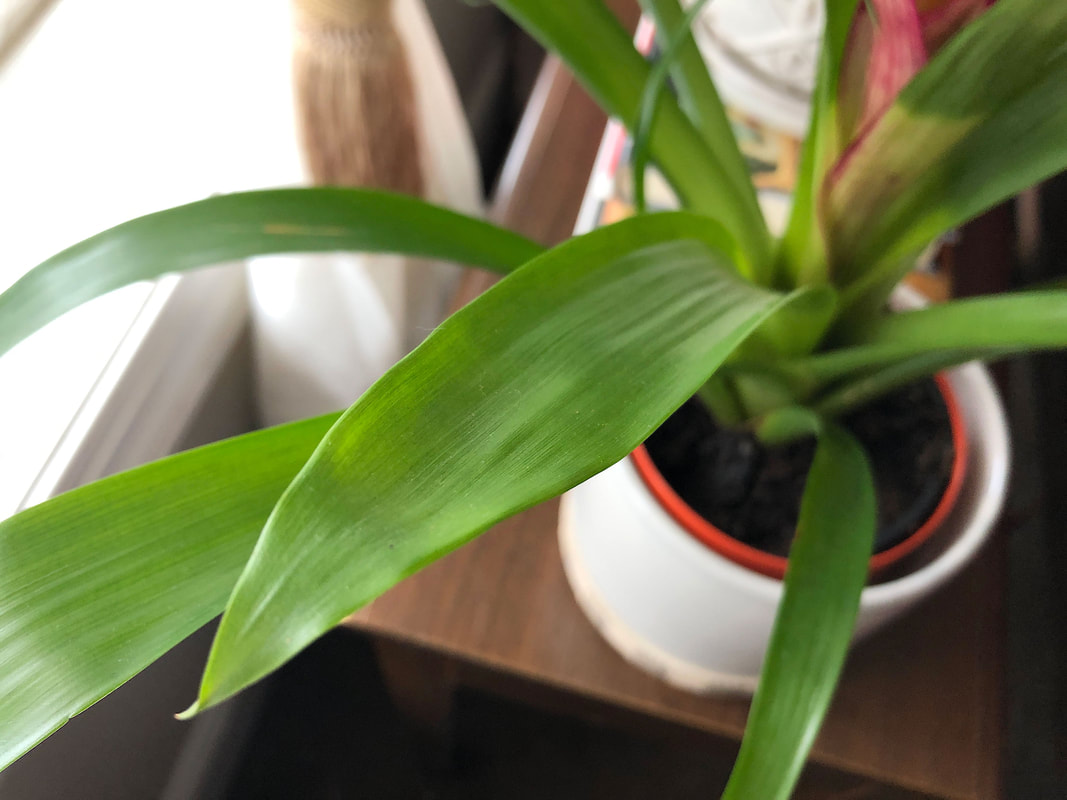 Bromeliad leaves. Photo by Diane M. Lilly, 2021. 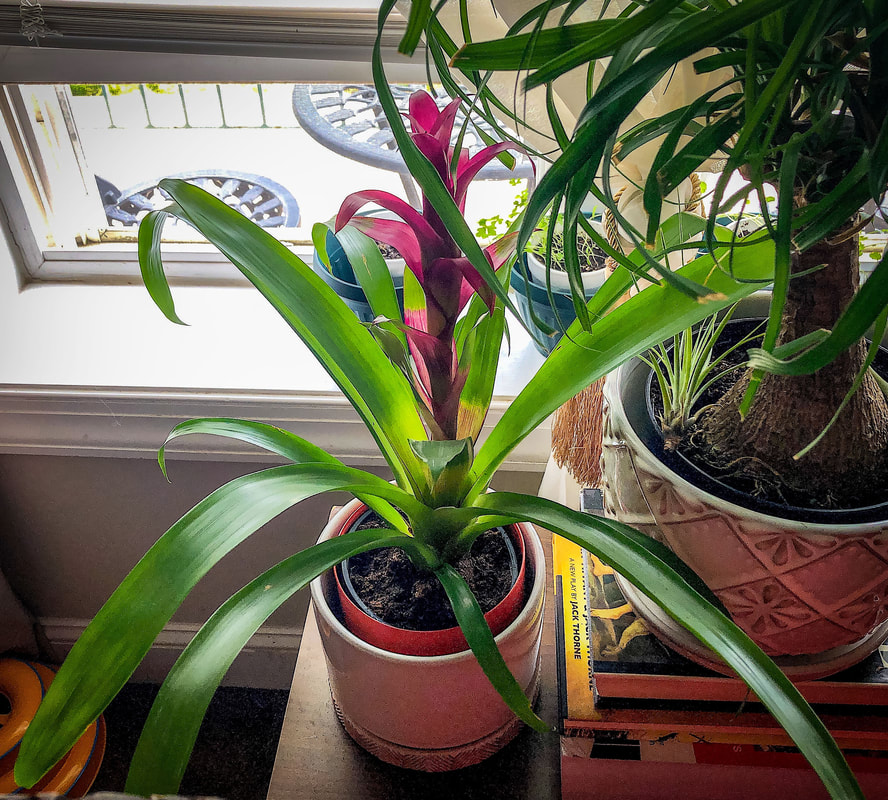 Bromeliad plant in my front window. Photo by Diane M. Lilly, 2021. Some bromeliads are green and leafy plants that will begin to develop vividly colored leaves in the central part of the plant when the plant matures (which takes at least a couple of years). The plant will retain its vibrant color until it gets ready to fade and die. Once that time comes close, the mother plant will shoot out pups from the base of her bottom leaves. These pups will grow and draw nutrients from the mother plant, becoming the next generation of plants. The pups need to be at least a third of the size of the mother plant before they can be pulled apart and transplanted on their own. The longer they stay attached to the mother plant, the stronger they will be, and the sooner they will flower and develop roots. If they are removed when smaller, however, the mother plant will have enough time to put out more pups before she inevitably dies. Last year, I bought a gorgeous bromeliad with vibrant fuchsia leaves in the center. Sadly, she is now faded and dying, but before she goes, she has gifted me with four pups, which will become new plants for my home. And it is now time to transplant each pup into its own pot! 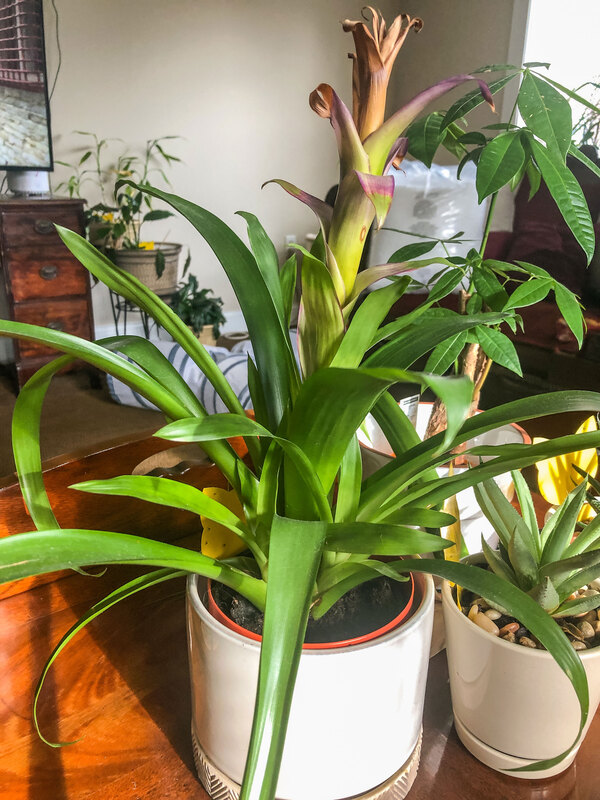 Bromelaid mother plant starting to fade. Photo by Diane M. Lilly, 2022. 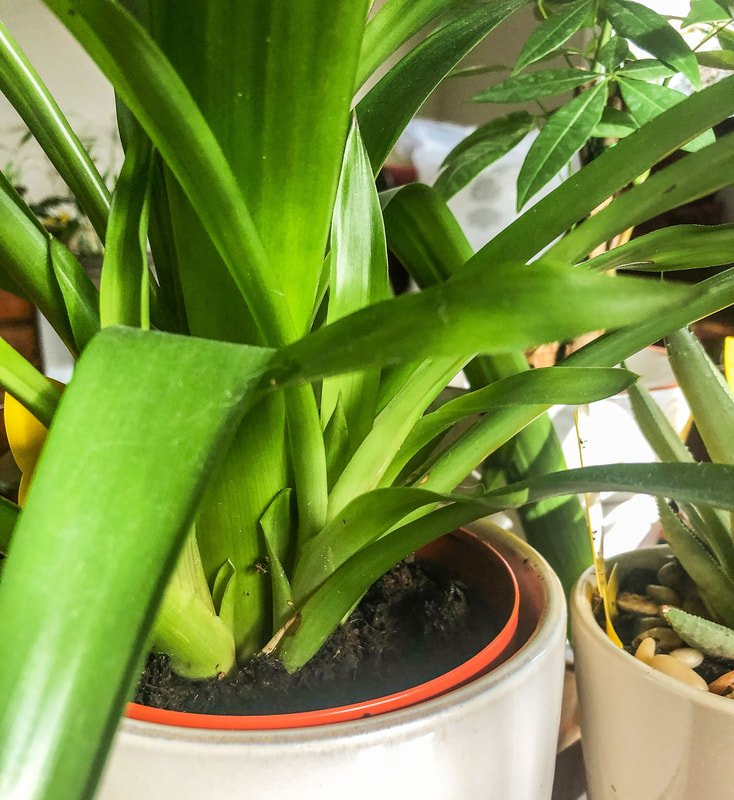 Closeup of pups growing from the base of the bromeliad mother plant. Photo by Diane M. Lilly, 2022. Materials needed for this project: 4 small pots (about 3-4” in diameter) fungicide/rooting hormone sterile knife potting mix peat moss bark bin or container to mix soils 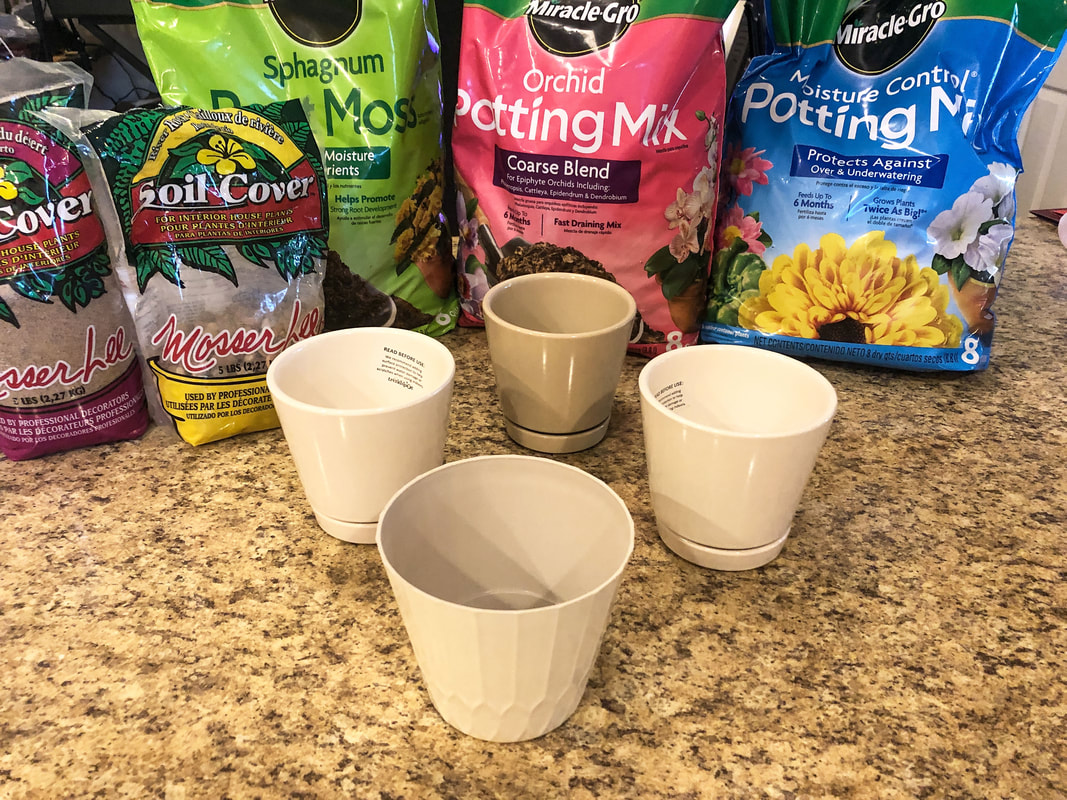 Pots and potting mix. Photo by Diane M. Lilly, 2022. Let’s talk about soil for bromeliads… Choose well-draining soil for bromeliads, as these plants—like most plants—don’t like sitting in soggy soil. Soil mediums like sphagnum peat moss, sand, and orchid bark may work well. Good potting soil with a mixture of bark and sand can also work well with bromeliads. Once your bromeliad is in the proper soil, the plant will not typically need repotting unless you propagate pups. Some soil mixtures suggested by the pros: Simple moist peat mix soil Sand mixed with a good draining potting soil Mix of 1/2 potting soil and 1/2 orchid bark Mix of 1/3 sand and 2/3 peat Soil mix in equal parts of perlite, peat moss, and bark Soil mix of 1/2 potting soil, 1/4 perlite, 1/4 bark The mixture I decided to use was based on what I had on hand. I used 1/2 potting mix, 1/4 sphagnum peat moss, and 1/4 orchid bark. I feel like this mixture will give my pups a good draining soil with just a little boost of nutrients to help them survive the trauma of separation. 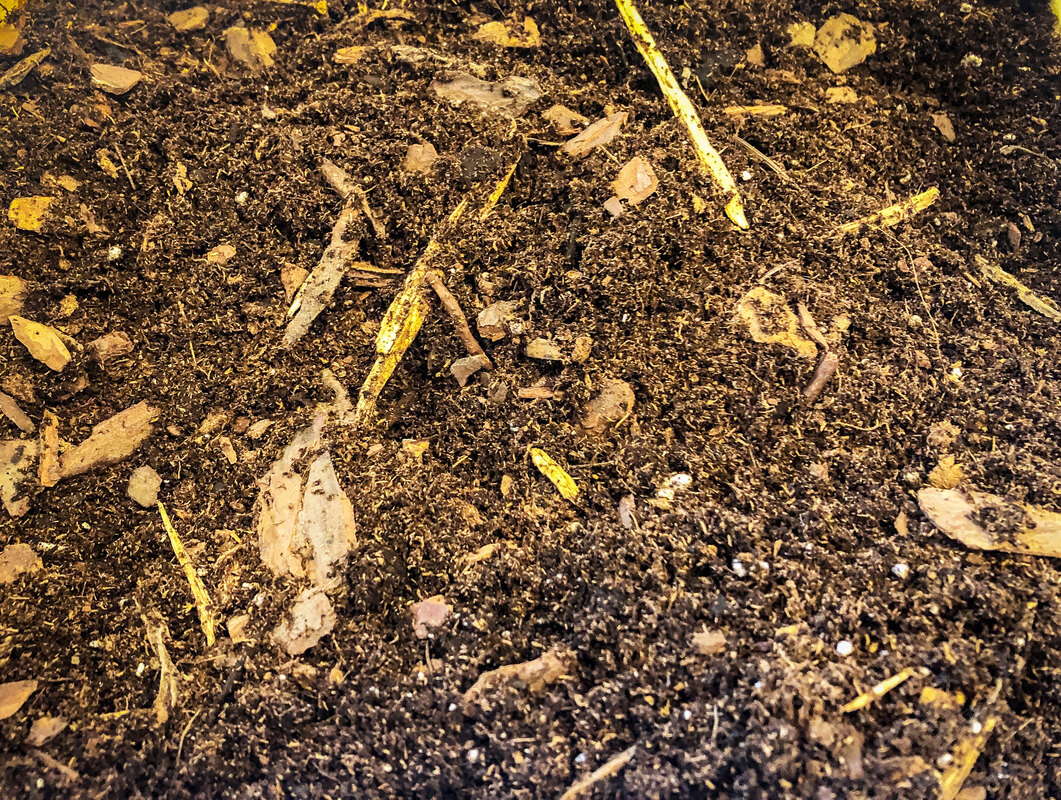 My potting mix--potting soil, sphagnum peat moss, and orchid bark. Photo by Diane M. Lilly, 2022. Removing the pups from the mother plant… Before you start, you may want a sterilized knife for cutting the small plants away from the mother. (Make sure it’s sterilized--you don’t want to introduce any bacteria that could make the fragile plant sick.) First, gently coax the plant out of its pot by turning and squeezing the pot to loosen the soil from the sides. Once the plant is free of the pot, start to loosen the soil a bit by gently massaging around the base of the plant. This will help you find the roots better, see where the plants are connected, and find the shield leaves between the mother plant and pup. I do not cut into the plants unless necessary, so I use my fingers to continue to loosen the soil and gently—and slowly—nudge the pup away from its mother. If you really must, you can use the sterilized knife to cut the two apart, keeping a piece of the mother plant attached to the pup.  Bromeliad plant removed front its pot. Photo by Diane M. Lilly, 2022. The pup may have roots by now, but it may not, and that’s okay. (Only one of three of my pups had a root of its own.) The plant will grow roots once planted in its pot. You should dip the base of the pup in a fungicide and rooting hormone before placing it in the soil to get this process moving. (See below for notes on rooting hormones.) Do not plant the pups deep; prop up top heavy plants with sticks. If the mother plant is not too far gone, she can be placed back in the soil in a pot, and she might grow more pups. Water the plants well and wet the leaves. 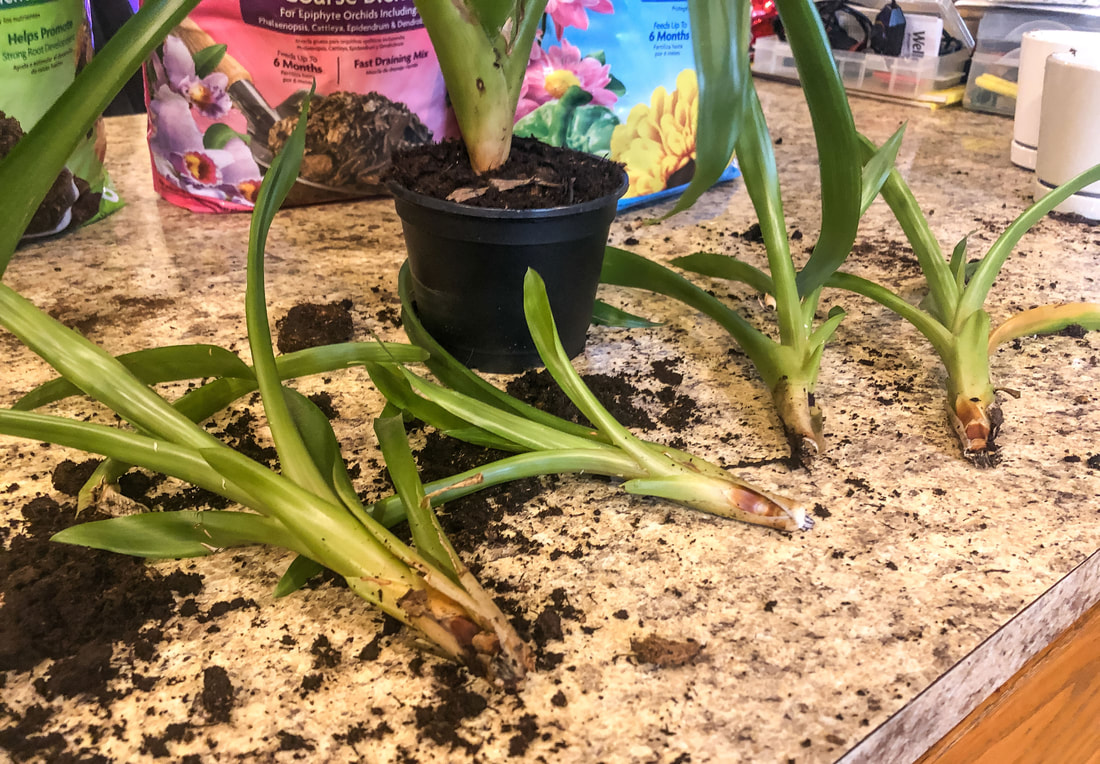 Four bromelaid pups separated from the mother plant. Photo by Diane M. lilly, 2022. Rooting hormone conundrum… So, in my haste, I forgot to buy rooting hormone and fungicide! Many plants need this step to help kill any fungus or bacteria from the cutting/separation process and to help them grow roots. So…I had to do a little quick research on how to make my homemade rooting hormone. Some ideas I found on Gardening Know How for homemade rooting hormone: Apple cider vinegar and water used sparingly. (Apple cider vinegar is used to kill weeds in the garden, so you don’t want to use too much.) Human spit…Ewww! Sounds a little disgusting, but apparently it works! Natural honey, not store-bought. Honey has anti-bacterial benefits, which is good for the new plants. Aspirin dissolved in water. Willow water or willow tea. Cinnamon in powder form to form a coating on the root area. It is an anti-fungal, antibacterial agent, and an insect repellent. Pulp from an aloe vera plant. I used apple cider vinegar and water as a rooting hormone and fungicide for this project, applying a thin coating to the plant base. Then, I popped the pups into the soil mixture and watered all the plants. The rooting hormone problem is solved!  Apple cider vinegar and water, homemade rooting hormone. Photo by Diane M. Lilly, 2022.  Newly planted bromeliad pup. Photo by Diane M. Lilly, 2022.  Newly planted bromeliad pup with mother plant. Photo by Diane M. Lilly, 2022. Water & light needs for bromeliads… The bromeliads are watered by pouring water into the cups or spaces between the bottom leaves rather than in the soil. They can be misted as well to create a little more humidity. Water the plants infrequently and only when needed in the winter. This plant does not like sitting in wet soil. It will rot and die! Distilled or purified water is best, but I use tap water that sits for a day or two to let harmful sediments settle to the bottom of the watering can. Bromeliads don’t necessarily need fertilizer, but you can mist the plant with orchid fertilizer in the warmer months (diluted by half). Your new bromeliad plants need bright indirect light and keep newly planted pups out of direct sunlight for a while.  Watering can and newly planted bromeliad pups. Photo by Diane M. lilly, 2022. 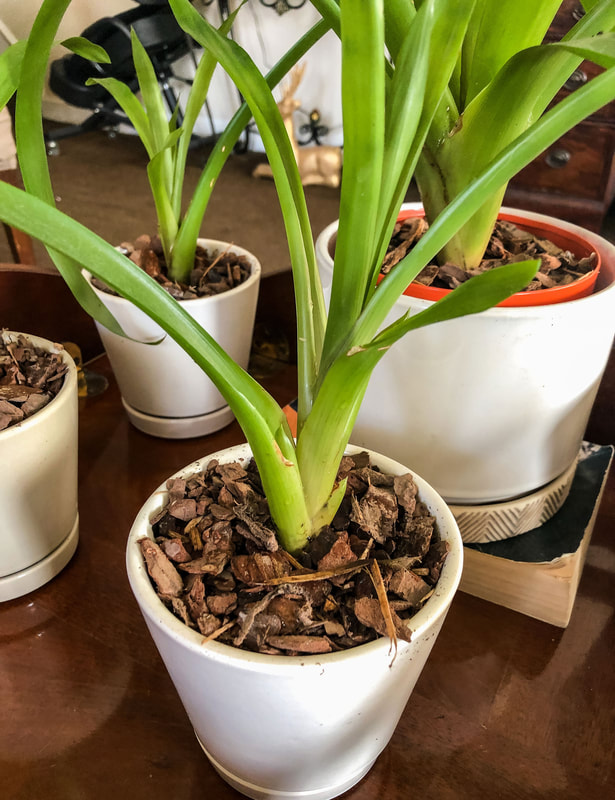 Closeup of newly planted bromeliad pup. Photo by Diane M. Lilly, 2022. 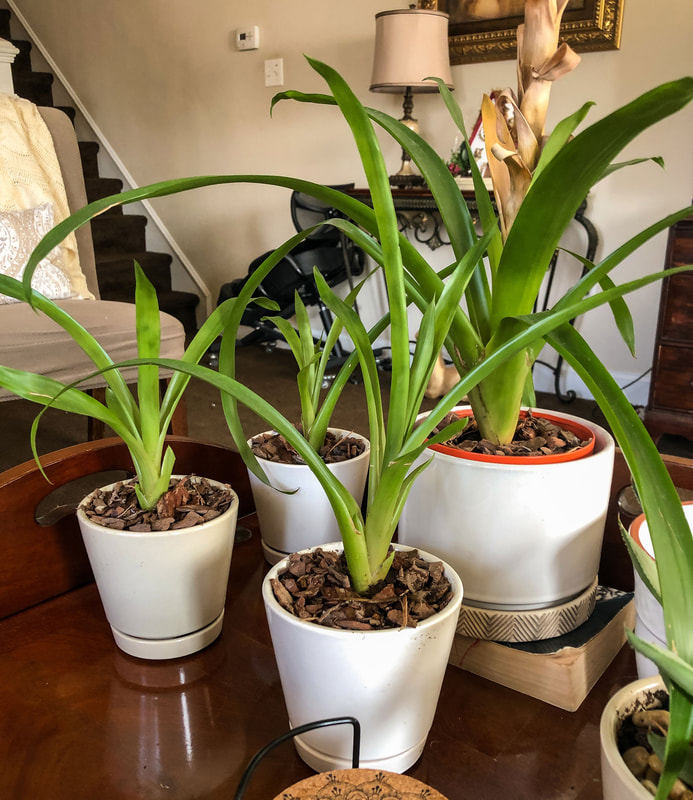 My new bromeliad family--mother plant and her four newly planted pups. Photo by Diane M. Lilly, 2022. Was this helpful to some of you? Drop a comment below with any more tips for handling these gorgeous plants! Related blogs you may want to read: Small houseplants that love bathroom humidity Eight health benefits of decorating with plants Six herbs I planted indoors Let’s talk about houseplants Biophilia in interior design A spring decor makeover for my small rental bathroom This article may contain a few items or commercial mentions, but I only used them for demonstration purposes only. I am not endorsing any particular product or receiving any monetary gain for this blog.  Pothos plant just misted. Photo by Diane M. Lilly, 2022. I have been refreshing the decor in my master bathroom and decided to add some greenery to the mix. Adding plants in a bathroom is a win-win for everybody. The plant gets plenty of humidity (which many tropical plants love), and we get a sense of healing and calm. If you’re using your shower regularly (which I hope you are!), your plants will benefit from the humidity in the air. If you have a window for natural light, that’s even better. Typically, tropical plants are the best for bathrooms or areas with high humidity. So, while redecorating my bathroom, I explored options for houseplants in that space. This is a small space that cannot accommodate large plants. The goal was to find two or three “smallish” plants that could sit on a small windowsill and possibly on the counter. I wanted one of those plants to be a vine. This bathroom gets some light but nothing direct. It is on a northeast axis, so the brightest light is in the morning hours. 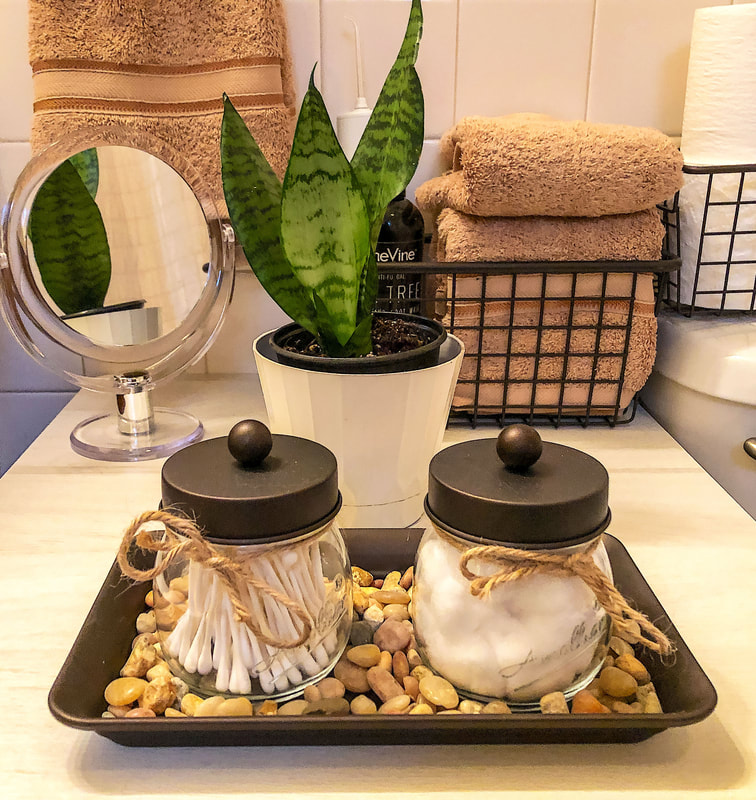 Snake plant in my bathroom. Photo by Diane M. Lilly, 2022. Do your homework before incorporating plants into your space. Take the time to learn what type of plants will thrive in the intended environment. A happy, healthy plant should occupy a space that is more or less suited to the environment they might find in their native environment. This means you will need to learn a thing or two about plant care to help your plant babies thrive! Below are 15 humidity-loving plants I considered for use in my bathroom, and I’ll tell you at the end which ones I chose… Air Plant (Tillandsia, aka Tilly)—This plant is an epiphyte, or air plant, that pulls its moisture from the air (they don’t need soil). These little plants need to be soaked in water once a week so they don’t dry out. This plant likes bright indirect light.  Air plant on coffee table. Photo by Diane M. Lilly, 2021. Aloe Vera—Aloe is a type of succulent that thrives in bright light. It may even flower if in direct light. This plant does not need a lot of water. It tolerates a little neglect but will appreciate the humidity just the same. As a bonus, the extract from leaves heals sunburn and other skin issues! 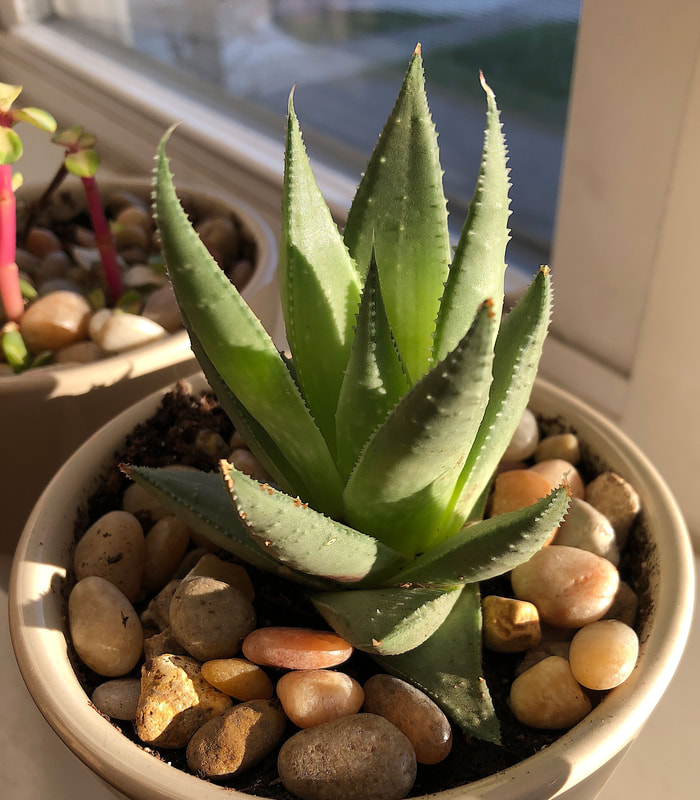 Aloe vera plant on my windowsill. Photo by Diane M. Lilly, 2021. Bromeliad—This very tropical-looking plant is related to pineapples and likes medium to bright indirect light. It’s perfect for the bathroom because it likes humidity, so don’t let it dry out. It’s not a plant that needs a lot of care or watering. To water it, fill the cups formed at the leaf base. (The soil does not need water, as the plant is an air plant and does not need soil to survive.) 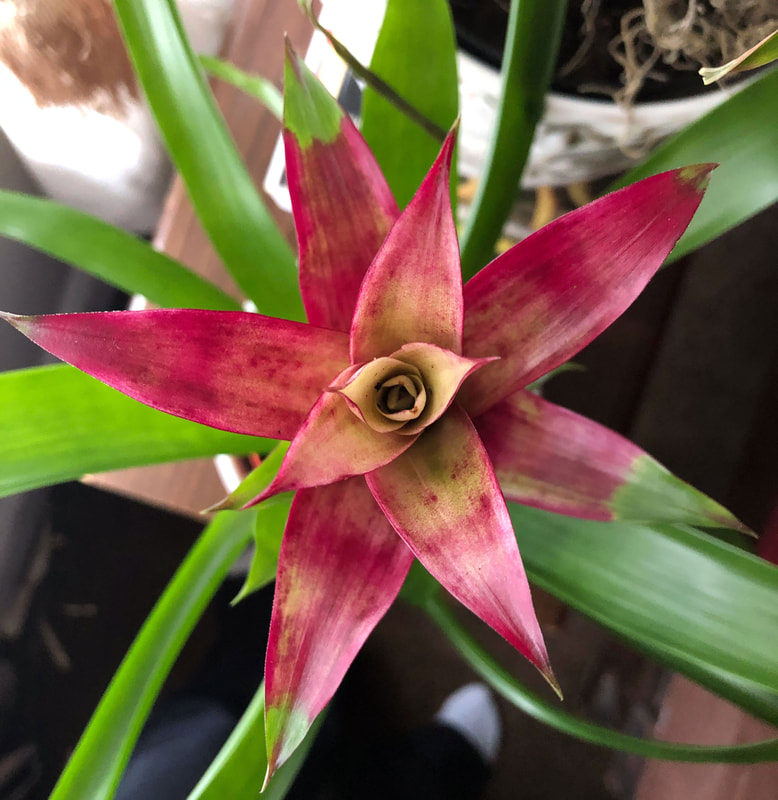 Bromeliad bloom in vivid fuchsia. Photo by Diane M. Lilly, 2021. Calathea—This leafy plant needs a lot of humidity and likes moderate indirect light, making it a good option for most bathrooms.  Image by Christina Dahl on Pixabay. English Ivy—Ivy is such a dangly, viny plant! It is a resilient plant that can grow in many environments but prefers medium light and humidity.  Image by veera on Adobe Stock. Eternity Plant (aka ZZ Plant)—This plant is easy to care for and can tolerate a little neglect. It is ok in low light, prefers bright indirect light, but leaves curl if it gets too much light. Don’t overwater, just water when the soil dries out. Be aware this plant is toxic for pets. 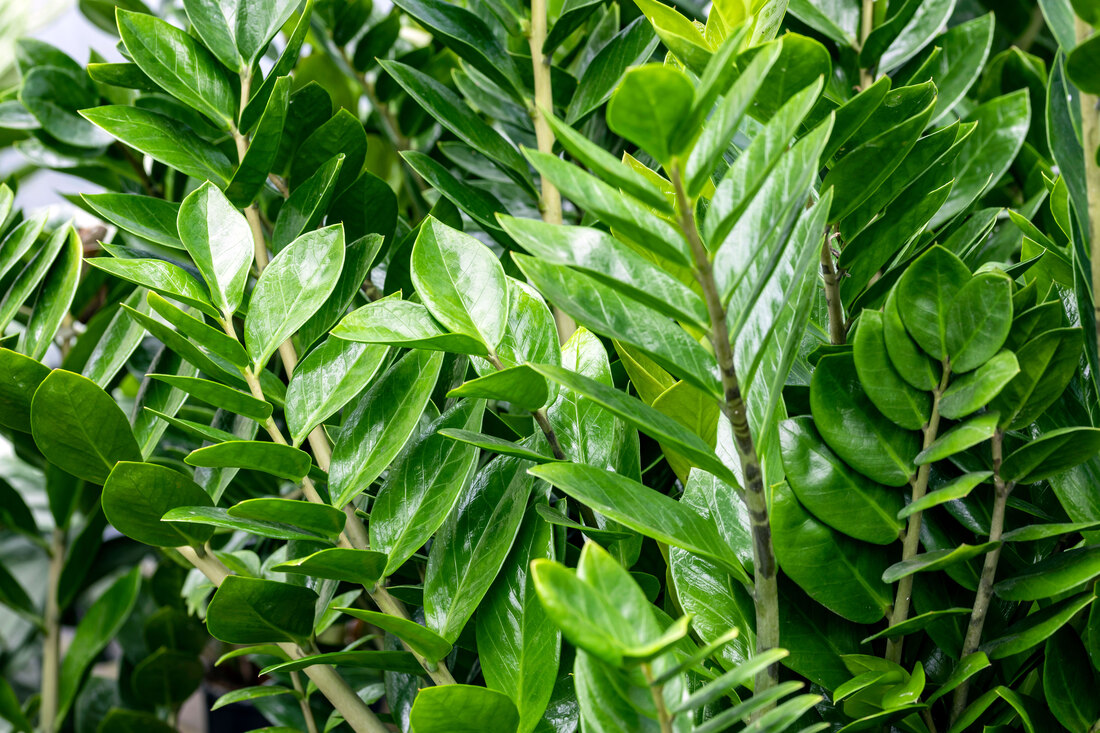 Image by fabrizio on Adobe Stock. Fern—Ferns love humidity and indirect light. They are an easy plant to care for and will thrive in many environments. Mist them and keep them in moist loamy soil. They are also nontoxic to cats. 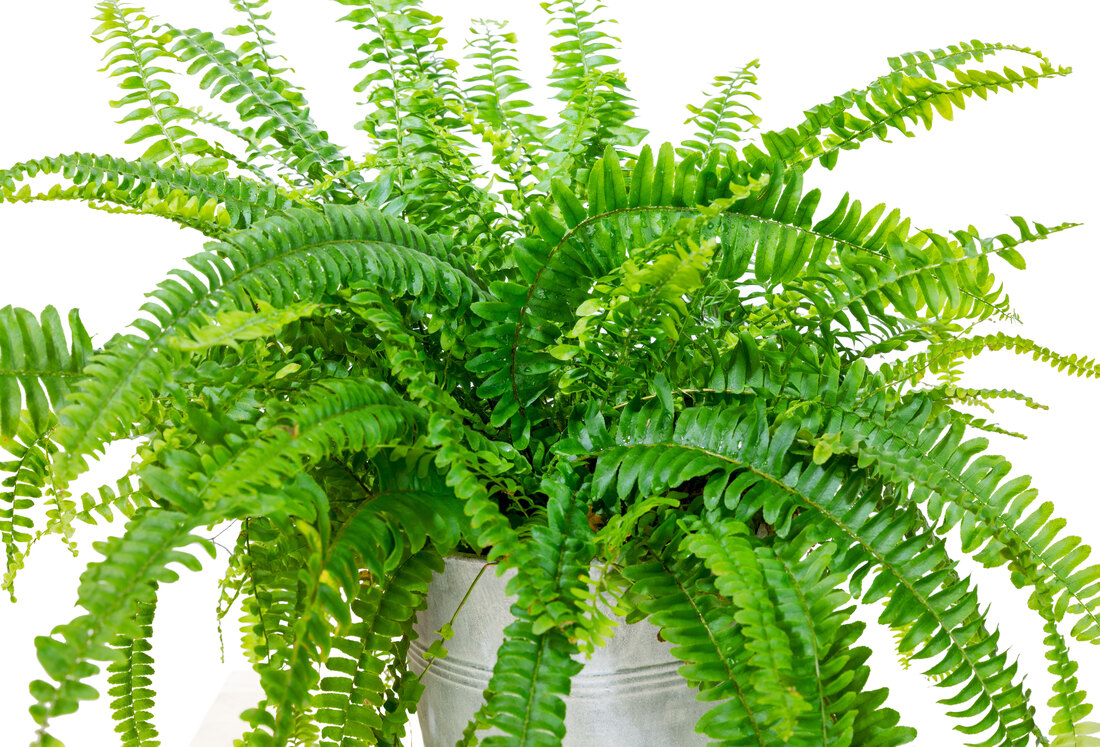 Image by Bruchex Benoit on Adobe Stock. Haworthia—Like the aloe, this is a type of succulent. It needs bright light and can tolerate humidity in the bathroom. 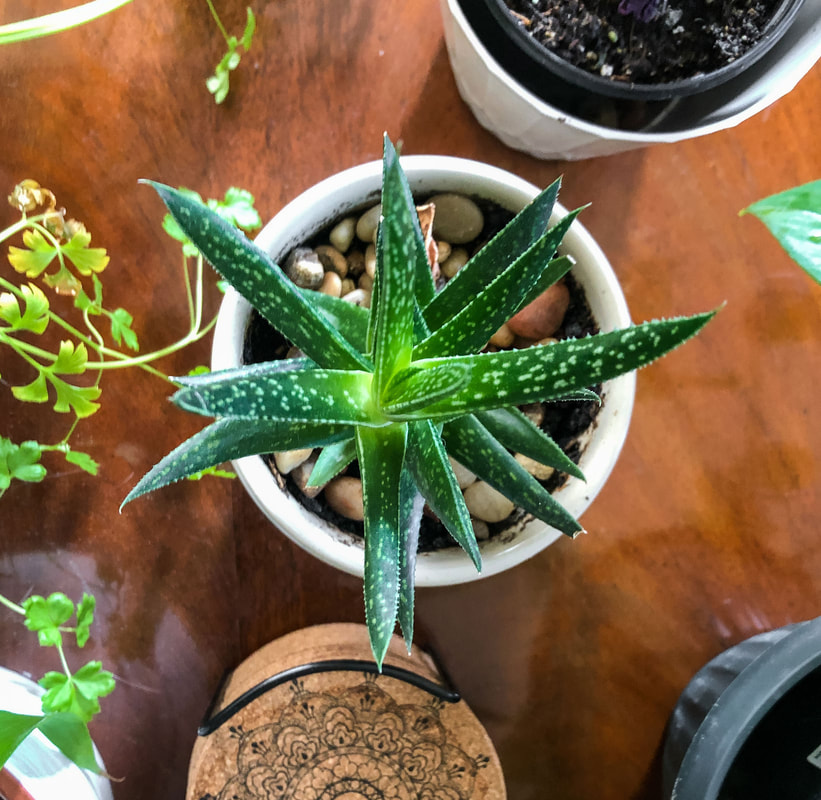 Top down view of my Haworthia plant. Photo by Diane M. Lilly, 2022. Lucky Bamboo—This plant is not bamboo but a type of dracaena. It can grow in soil or water and is a very low-maintenance plant. It can grow in low light, but like any plant, it will do better in medium to bright indirect light (although not direct sunlight). This plant does like a little humidity, and the leaves will brown when not consistently watered. Lucky Bamboo is toxic to pets and children. (Ferns N Petals has an interesting article on the symbolism and history of this tall leafy plant.) 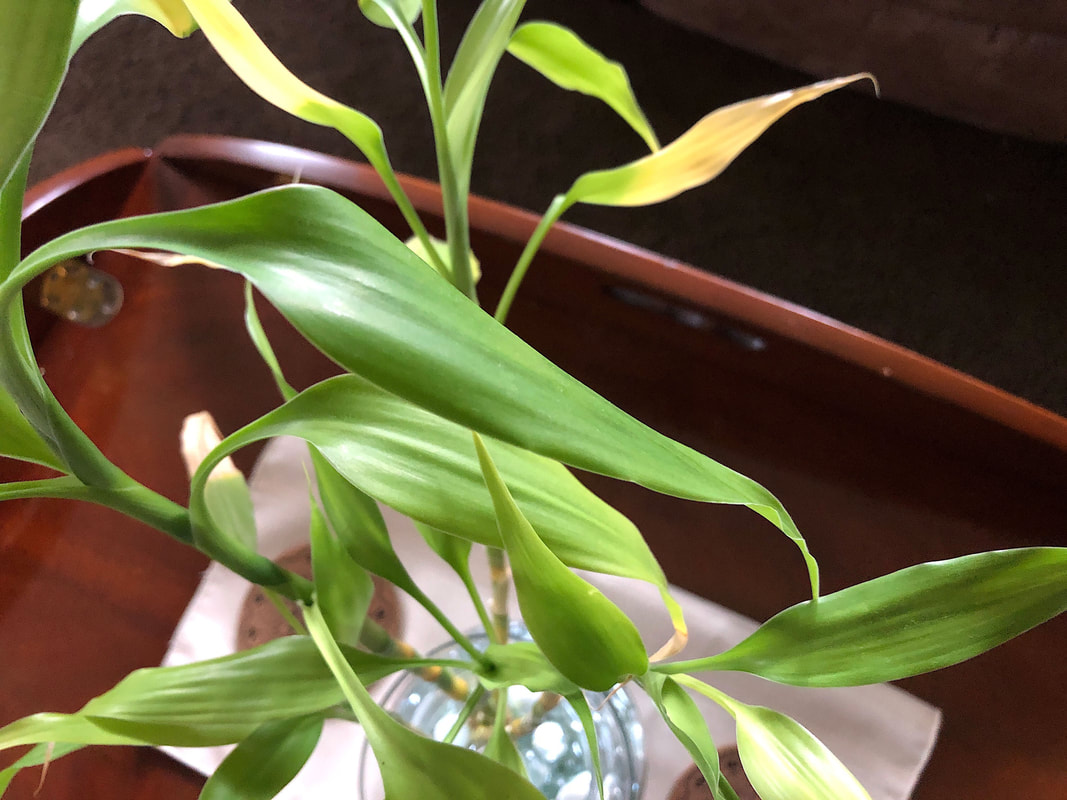 Leaves on the Lucky Bamboo plant sitting on my coffee table. Photo by Diane M. Lilly, 2021. Peace Lily—This leafy dark green plant flowers when healthy (about two times a year) and has good bright indirect light. It is a tropical evergreen plant that likes humidity and being in moist—but not soaked—soil. This plant will tell you when it wants water—its leaves droop when the soil is too dry. Just give it a deep watering, then let the soil dry out before watering again. Peace lilies like shade and indirect light, and the leaves curl when exposed to too much direct light. This is another plant that is toxic to pets and children. 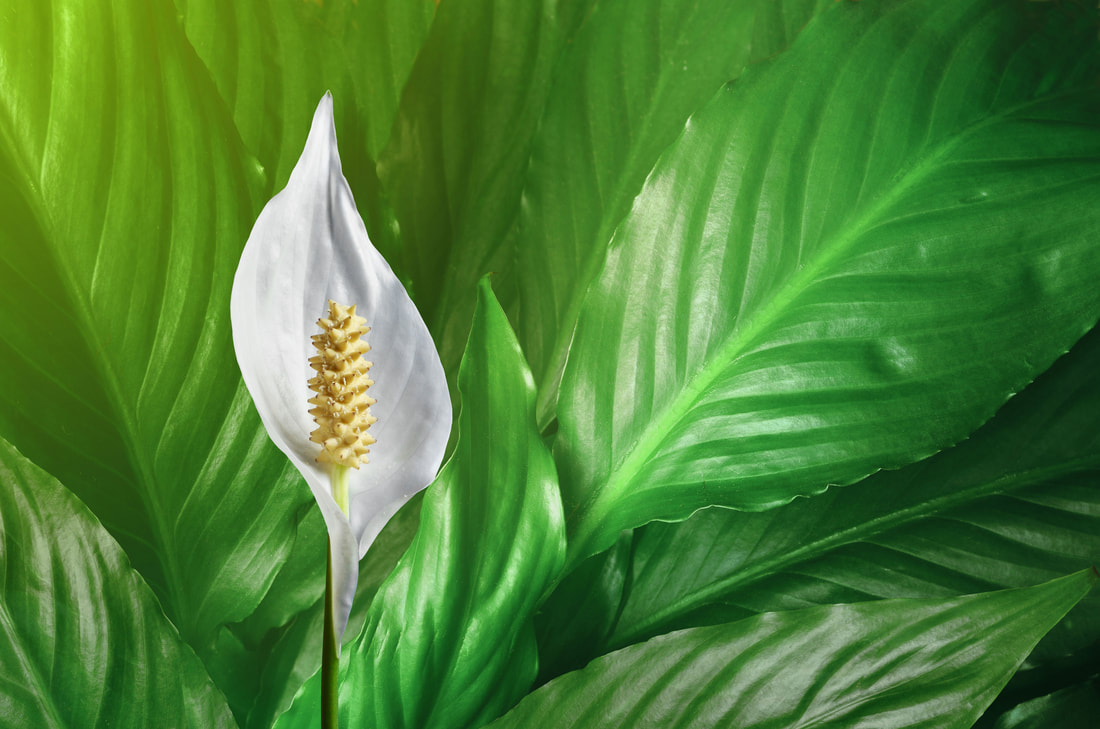 Image by Belight on Adobe Stock. Peperomia—This is a tropical plant that likes bright to indirect light. The humidity in the bathroom will appeal to it for sure. 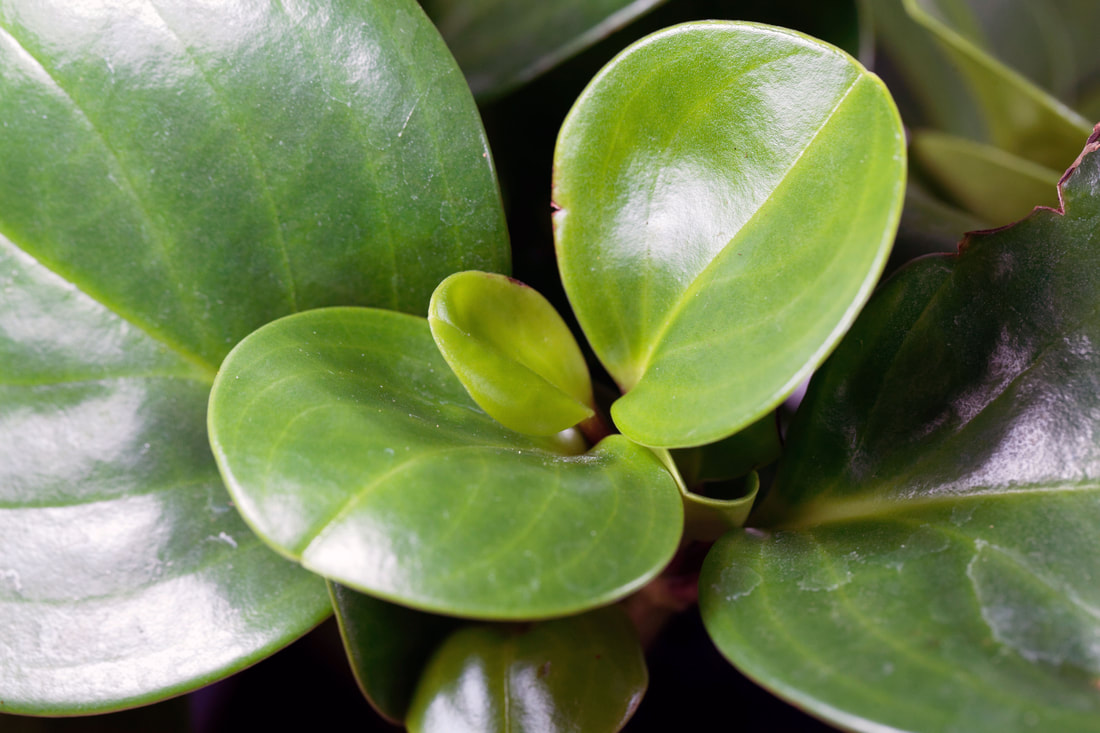 Image by ChrWeiss on Adobe Stock. Philodendron—This vine plant is easy to care for, likes humidity, and will tolerate neglect and sporadic watering. 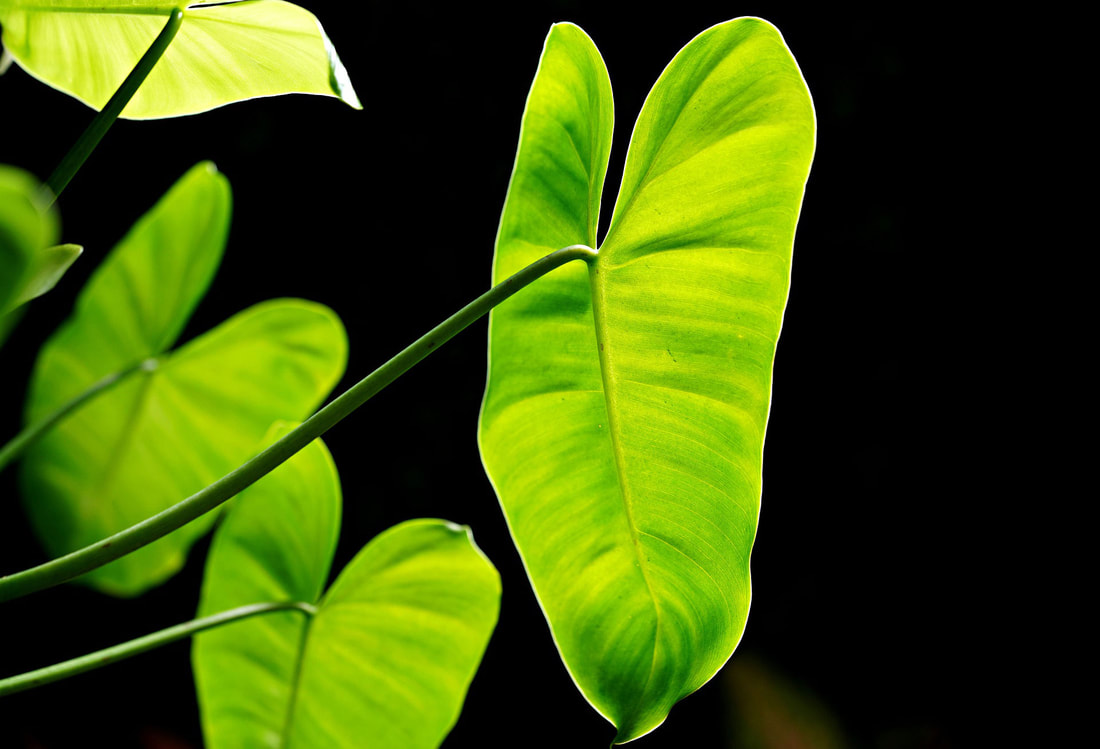 Image by hartono subagio on Pixabay. Pothos (aka Devil’s Ivy)—Another vine plant, this green tropical baby is easy to care for and does well in low to bright indirect sunlight. It needs humidity to keep the tips of its leaves from drying out, so a bathroom is a good home for it. Just water when the plant dries out (when the plant leaves droop). This one is also toxic to pets and children. 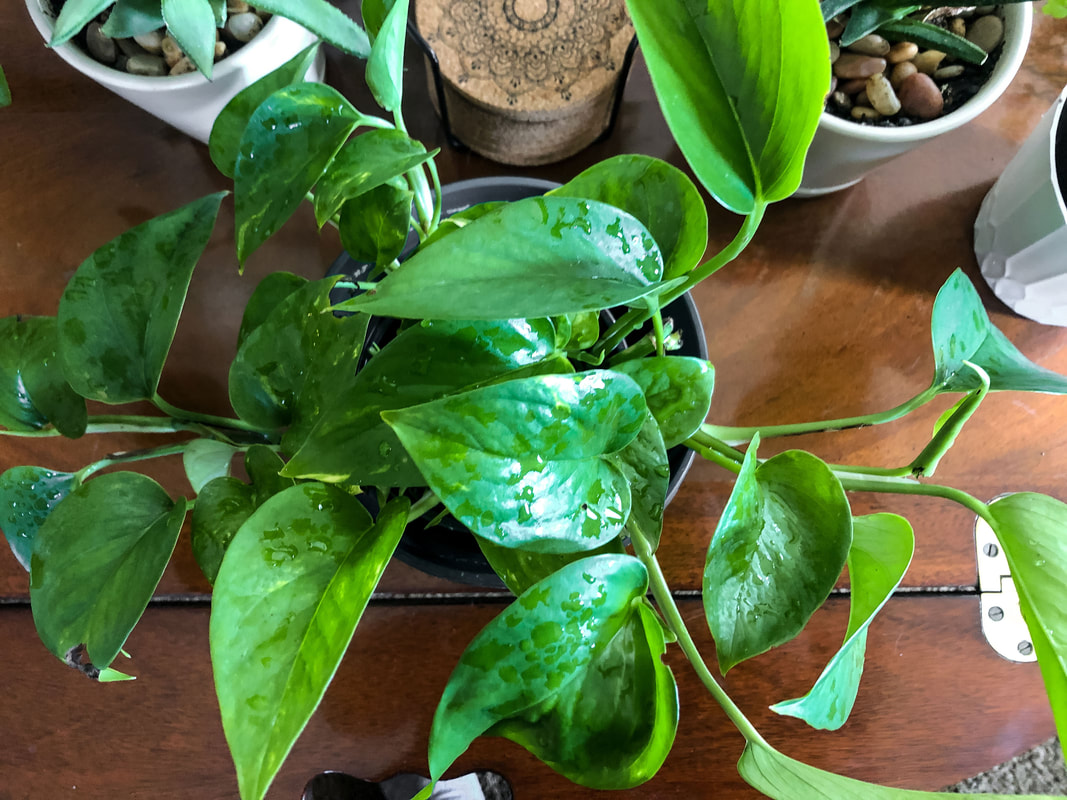 Pothos plant on my coffee table. Photo by Diane M. Lilly, 2022. Snake Plant (aka mother-in-law’s tongue)—A succulent that stores water in its leaves. It is a very hardy plant and easy to care for, good in most environments, and will thrive in a bathroom with humidity. Water once every couple of weeks when the plant dries out. Snake plants like low to bright indirect light and will flower if the conditions are right. Toxic to pets and children.  My new snake plant at home in my bathroom. Photo by Diane M. Lilly, 2022. Spider Plant—These fun plants can grow in low light but thrive more in bright light, although they burn in direct light. Spider plants are versatile and can grow in any environment but will thrive with humidity. This plant will put out babies—or spiderettes. Water well when dry. Spider plants are also non-toxic to pets. 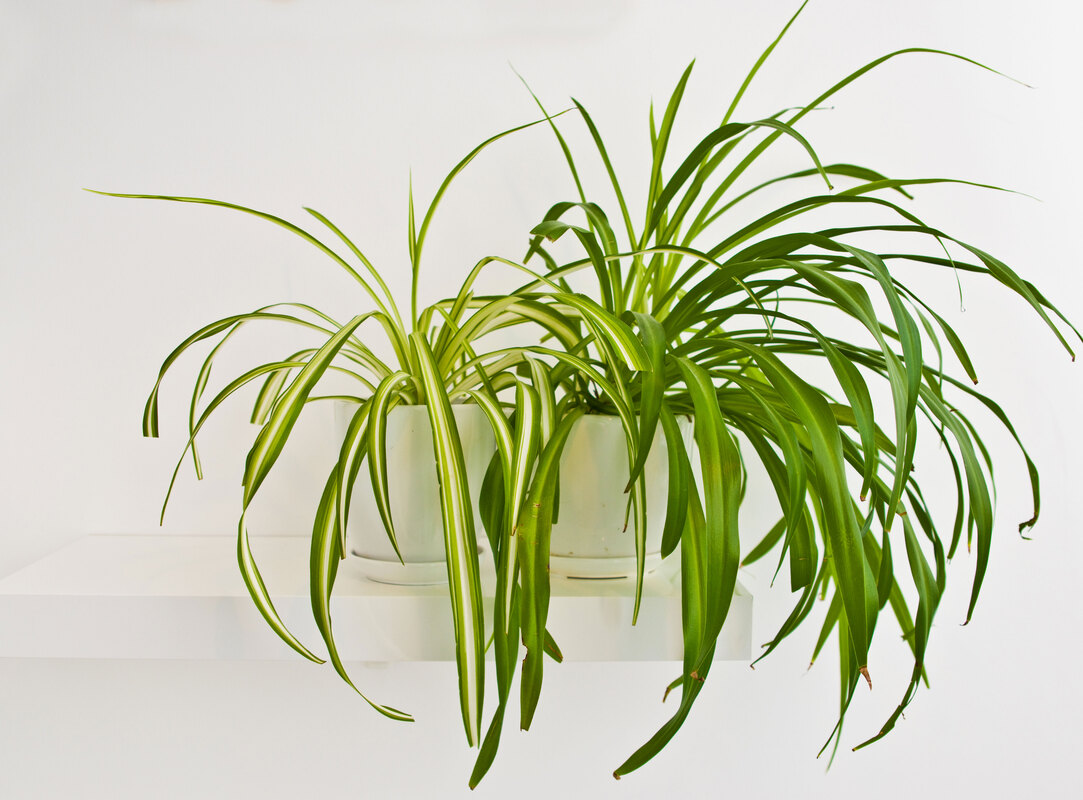 Image by AHatmaker on Adobe Stock. So, which ones did I choose for my project? I wanted to use as many plants already in my possession as possible for this project to save money. I already had a Bromeliad, a Tillandsia, peace lilies, Lucky Bamboo, a Haworthia plant, and an aloe plant. I decided the Peace Lilies and Lucky Bamboo were too big for the space and were not a good option for my bathroom needs. I did have a Bromeliad plant with four “pups” to be propagated, so I decided one of those pups would go in the bathroom. And the little Tillandsia plant—which struggles in my living room—will love sitting with its plant buddies on my windowsill, soaking up the humidity!  Top down view of bromeliad plant that has lost its bloom. Photo by Diane M. Lilly, 2022. I found a snake plant at my local garden store that perfectly fit my windowsill. And while I was there, I discovered my vine plant—a pothos. I’ve heard pothos are easy for even the blackest thumb, but this plant is supposed to love the humid conditions in bathrooms, so it checked off two boxes for me. And that’s my bathroom redecorating project done! 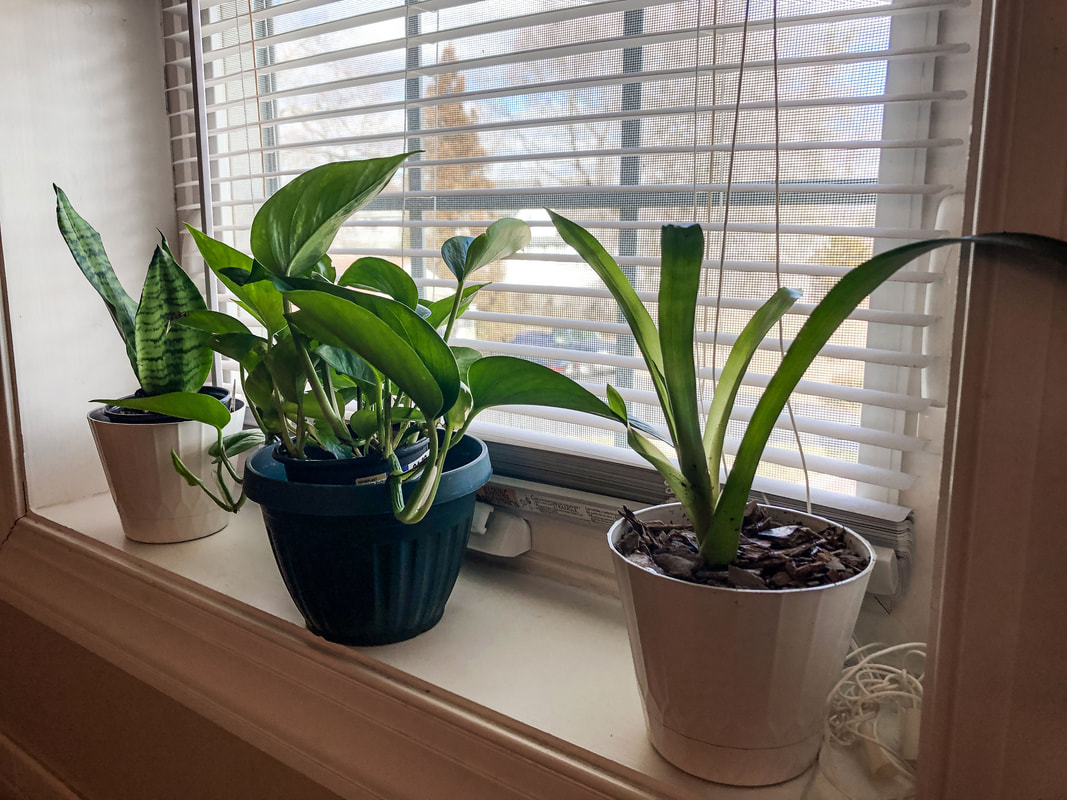 Snake plant, pothos, and bromeliad sitting on my bathroom windowsill. Photo by Diane M. Lilly, 2022. Are you thinking of incorporating plants into your bathroom decor? Or do you already enjoy plants in that space? Leave a comment below and let me know… Related blogs you may want to read: How to propagate bromeliad pups A spring decor makeover for my small rental bathroom Eight health benefits of decorating with plants Six herbs I planted indoors Let’s talk about houseplants Biophilia in interior design This article may contain a few items or commercial mentions, but I only used them for demonstration purposes only. I am not endorsing any particular product or receiving any monetary gain for this blog.  Bromeliad plant. Photo by Diane M. Lilly, 2021. Plants can add beauty and a depth of color and texture to a space, but there are also health benefits to having plants around. There is a houseplant for you, even if you don't have a green thumb! Just do some research for low-maintenance houseplants…and buy just one plant. Keep one plant alive, and you’ll soon catch the houseplant bug…I know from experience! (Plants are the new candy for me now!) If you are interested in houseplants and would like to know some of the benefits, read on to learn how adding live plants in your space can benefit your health. Plants and indoor air So, I’ll start with a controversial “benefit” to having houseplants. It has been said that houseplants help clean the air, thus improving indoor air quality in your home. The idea is that plants absorb CO2 and harmful VOCs from the air while at the same time producing oxygen. Some plants—like peace lilies and Gerbera daisies—are thought to help with sleep. According to some of the latest research, however, it may not be accurate that houseplants have much in the way of air-purifying properties. (You can read an article by Inverse that discusses this topic.) So it may or may not be true that houseplants clean indoor air, but how can you pass up the opportunity to have a beautiful plant in your bedroom?! 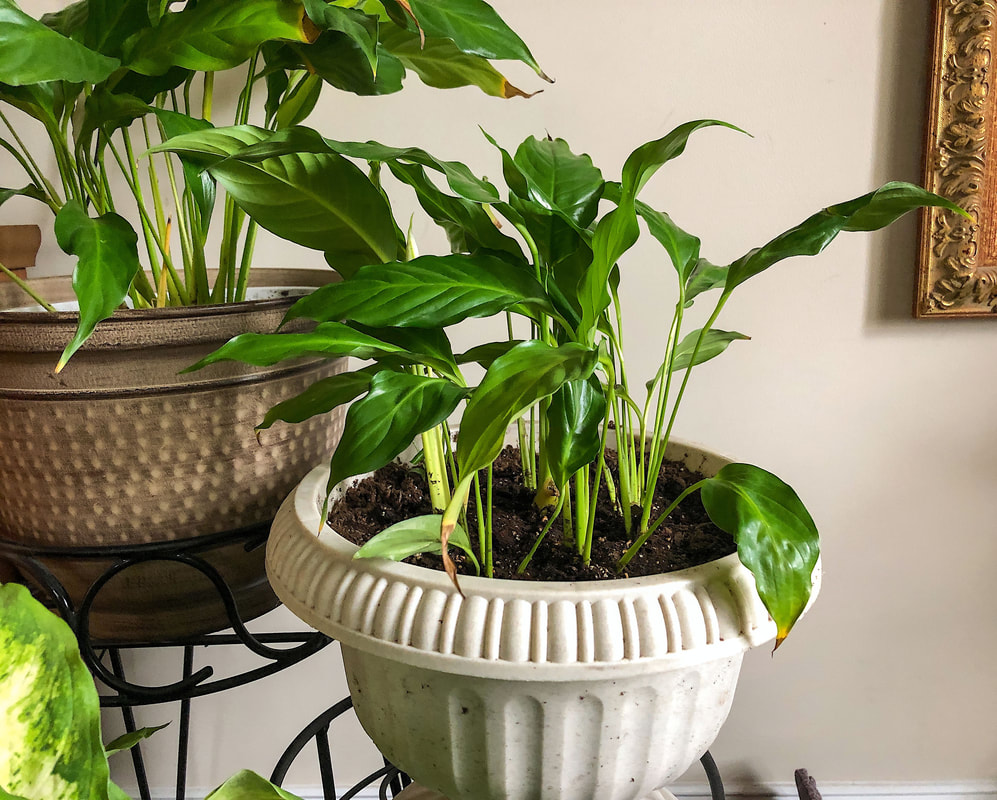 Peace lilies in my living room. Photo by Diane M. Lilly, 2021. It’s worth talking about indoor air quality, though…Indoor air quality can be filled with more toxins and pollutants than the air outside, with some research showing levels 2-5 times higher due to the types of products we use in a sealed space. An article by the EPA discusses just how bad the air inside our homes can be and the causes of poor indoor air quality, and it’s worth a read for anyone who spends a lot of time at home. There are sources out there that claim houseplants can act as indoor air purifiers, naturally performing the task of removing at least some of the harmful VOCs (indoor air pollutants) in our homes. I can’t personally speak to whether or not this is true, but I’d like to think plants at least have some effect on indoor air quality, just as plants and trees affect the air outside. It probably takes many plants in a space to make a dent in removing VOCs…All the more reason to fill your home with lots of plants! Some plants are naturally aromatic/aromatherapy Let’s not forget that some plants can be quite fragrant! Many artificially scented apparatuses—like candles, aerosol sprays, etc—pump potentially toxic aerosols into the air (i.e., VOCs) that build up over time and can cause breathing issues or other health problems. Choosing aromatic plants that give off a natural scent eliminates the need to buy harmful products. Lavender, for instance, is well known for its incredible fragrance. For anyone interested, Healthline has a great article on the many benefits of lavender. 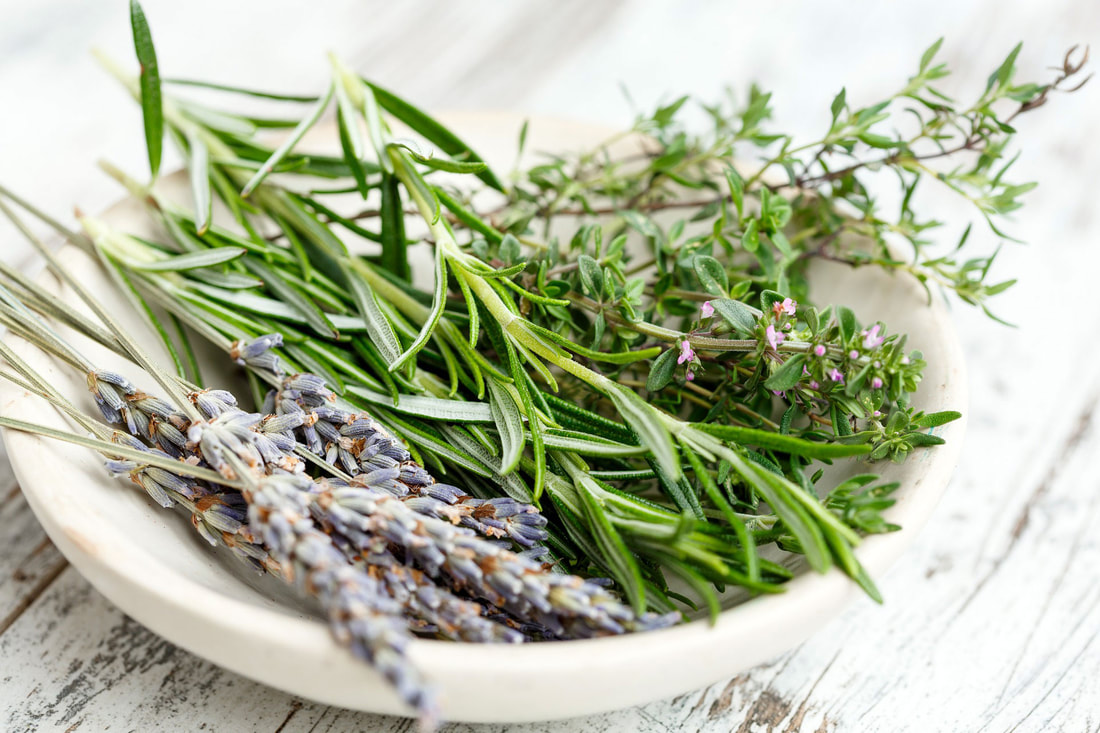 Image by gate74 from Pixabay. Plants reduce stress and fatigue Plants in your living space have been shown to create a sense of calm, which lowers blood pressure, heart rate, cortisol, and stress levels. Just having plants around awakens the natural healing in the brain, which boosts mood and helps with mental health. There’s a reason why “forest bathing” is a thing! Being out in nature is calming and makes us feel more at ease, so bringing plants into our home taps into that experience. Lavender, for instance, is known for its calming properties that reduce stress and help with sleep. (If I keep mentioning lavender, it’s because it’s such an incredible plant!) Reduces pain and helps with healing Being near plants can also help speed the healing process, which may lead to a faster recovery. Studies have shown that just having plants nearby can lead to better tolerance for pain and the need for fewer medications for pain. Some plants (like aloe vera) have more direct medicinal properties. If you’re into using plants for medicinal purposes, you’ll love having an indoor garden! 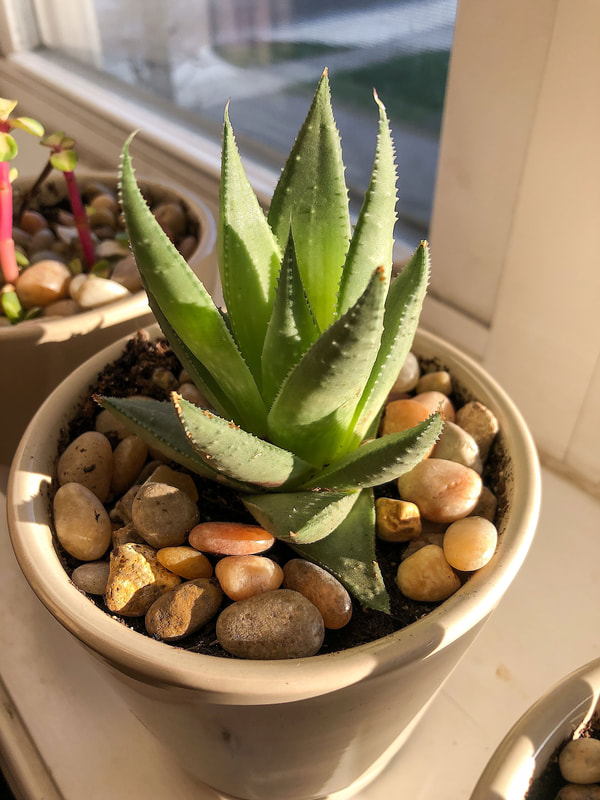 Aloe plant on my windowsill. Photo by Diane M. Lilly, 2021. Improve mood If you’ve ever spent time in a garden, you’ll agree that plants help make you feel calmer and more at ease, promoting a sense of well-being. Often, being around plants or working with indoor gardens helps alleviate mental health issues like anxiety and depression. But studies also suggest that being around plants can also alleviate some of the symptoms related to trauma and dementia, especially if you are involved with actually handling the plants and soil. The act of nurturing another living thing can be quite healing! It’s not just actual plants that can help improve mood. Sometimes, all it takes is to have the color green in your space. The color green (which, by the way, is trending for 2022) boosts mood through the psychological connection with nature. This makes green a very soothing color for your space. 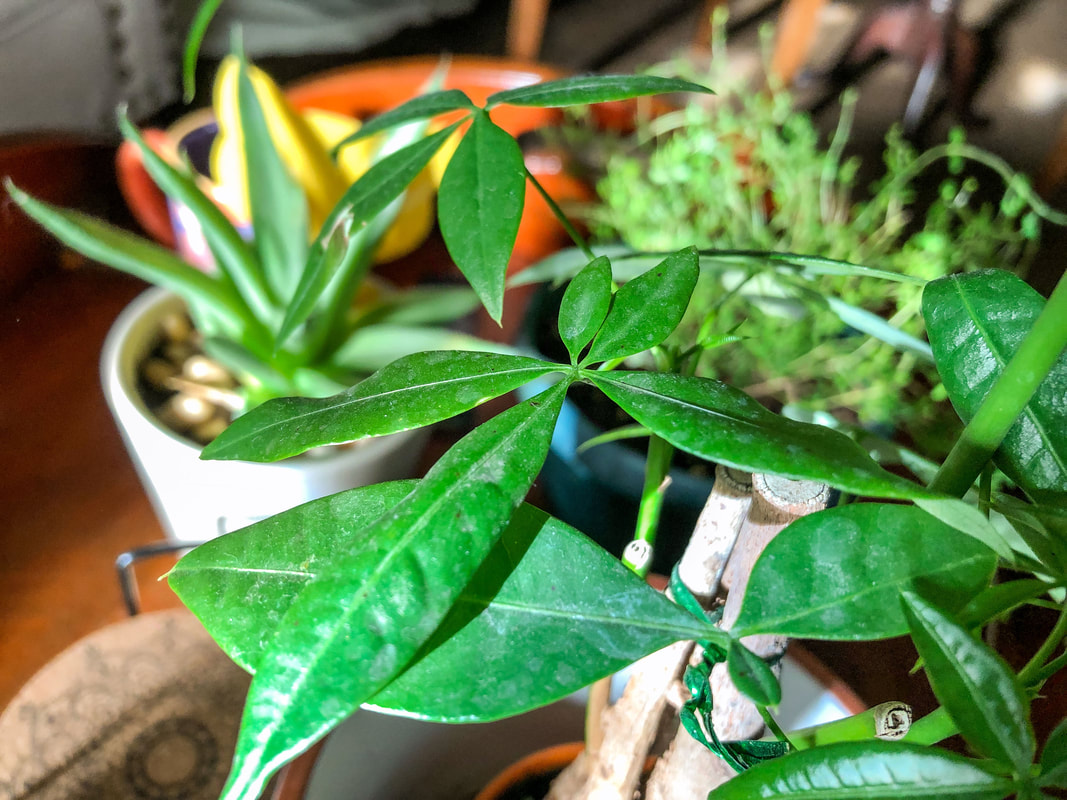 Money Tree and other plants in my living room. Photo by Diane M. Lilly, 2021. Improve performance The topic of improved performance is very timely, especially with many of us working from home. Believe it or not, according to some studies, a plant sitting on your desk or other workspace has so many benefits when it comes to work performance. Benefits can include sharpened attention, improved focus and productivity, increased creativity, and better concentration and memory. A plant (or plants, even better) provides a visual reminder of nature and maybe even a beautiful fragrance. Plants also increase the oxygen levels in a space. These benefits help with thinking, focus, and mood, improving performance and job satisfaction.  Image by kieutruongphoto from Pixabay. Edible plants promote healthy eating & aid digestion Did you know you can grow herbs indoors as houseplants? Well, now you do! Herb plants are great to grow indoors! I love using my fresh herbs (I currently have parsley and thyme) for cooking. When you use fresh herbs in your cooking, you think more about healthy eating. Herbs are not only aromatic, but you can use them in healthy dishes. Grow your herbs indoors, and you'll have access to fresh herbs all year round. Plants like peppermint, spearmint, and basil aid digestion and calm the stomach. Many herbs also have medicinal purposes, so it’s worth researching what your favorite herb can do for you! 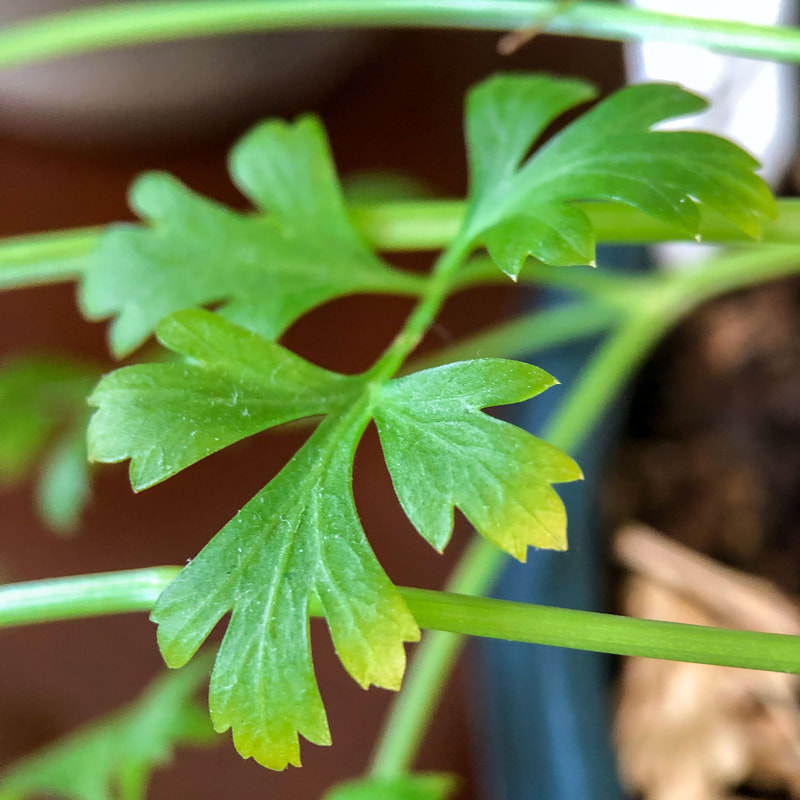 Parsley plant. Photo by Diane M. Lilly, 2021. Noise absorption properties And I’ll end this article the way I started it, with another controversial property that some plants are said to have—noise absorption. I’ve never even heard about plants and noise absorption until recently. According to an article I recently found by Access Plants, the idea is that large leafy plants—like Monstera deliciosa, or perhaps many plants grouped—can absorb some of the noise levels in the room. I haven’t noticed this effect in my home, but I also don’t have large leafy houseplants…yet! But I thought I would throw it in there to wrap up this list of possible benefits for houseplants. 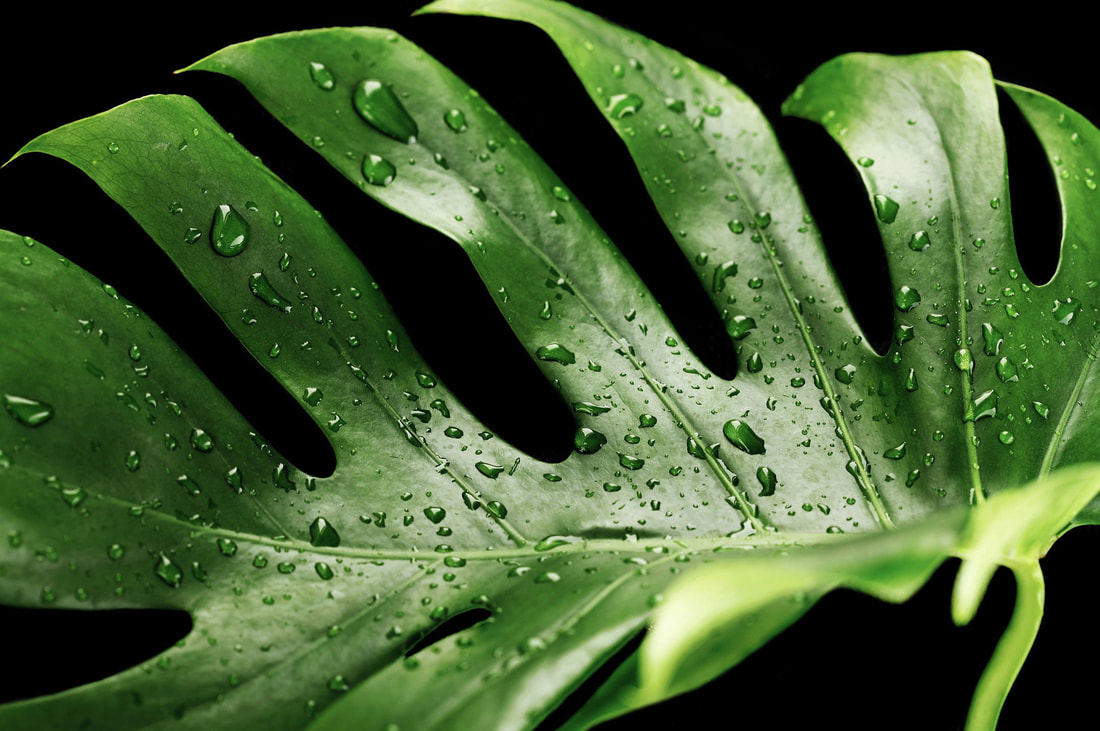 Image by Nika_Akin from Pixabay. So, are you convinced yet that you need a plant in your life? Or are you already a proud plant parent? Feel free to share your thoughts about houseplants below, and let’s keep the conversation going! Related blogs you may want to read: Small houseplants that love bathroom humidity How to propagate bromeliad pups Winter color palette ideas for your home decor Nine design trends for 2022 11 Interior decorating tips that help reduce anxiety and depression Nine hygge decor ideas Eight ways to create cozy winter interiors after the holiday decor comes down Five things to consider when choosing houseplants Let’s talk about houseplants This article may contain a few items or commercial mentions, but I only used them for demonstration purposes only. I am not endorsing any particular product or receiving any monetary gain for this blog. |
Author
Some of the posts on this site contain affiliate links. This means if you click on the link and purchase the item, I will receive an affiliate commission. 
Categories
All
Archives
April 2024
|