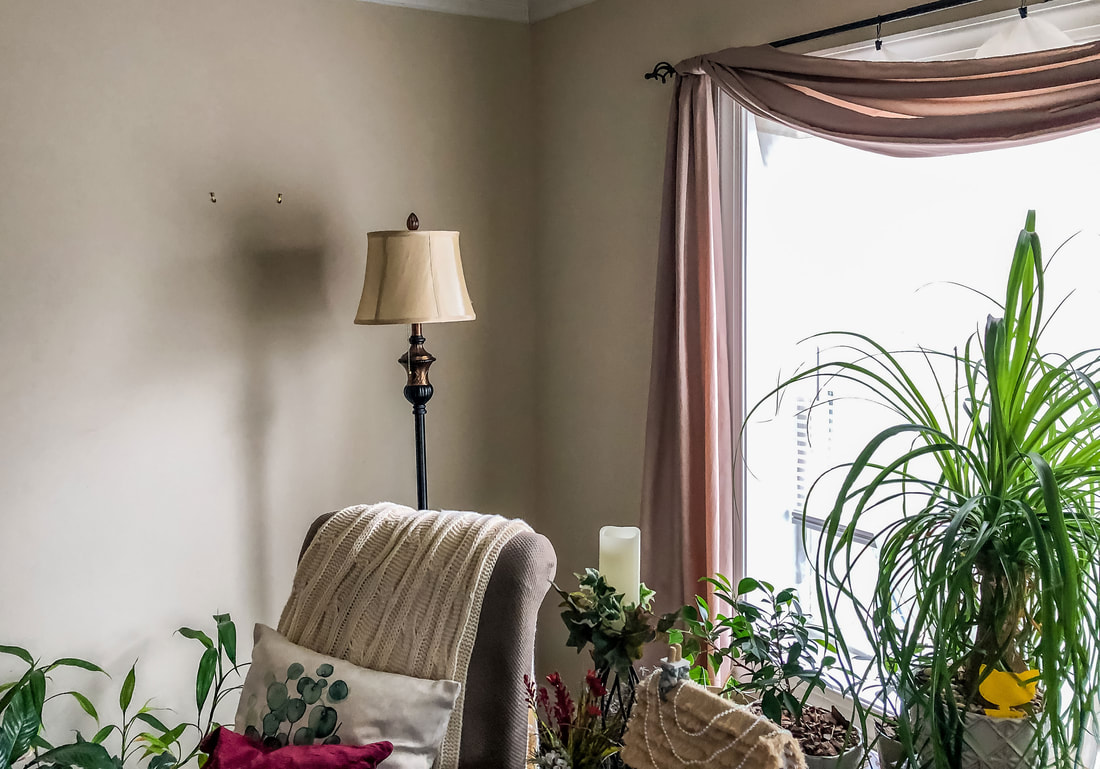
 Early spring vignette free from clutter. Photo by Diane M. Lilly, 2022. Let me ask you a question…What is your favorite room in your home? Why do you love that space so much? Well, okay, that was two questions! But bear with me… Chances are you don’t even realize the effect lighting has on how you react to—and interact with—your favorite room. Is it a warm, cozy room with soft lighting? Is it a light and airy space with banks of windows that let in all that precious life-giving natural light? Light—or lack thereof—creates a mood in a space. It can make you feel content, invigorated, romantic, charged…or depressed. While exploring the natural lighting in my living spaces, I addressed the black hole called my dining room. This space receives so little direct natural light that growing live houseplants is impossible, and it occurred to me that spending time in this room made me feel depressed. A makeover was overdue, and lighting would be pivotal in bringing the space back to life. But that—as I found out—was only part of the equation. 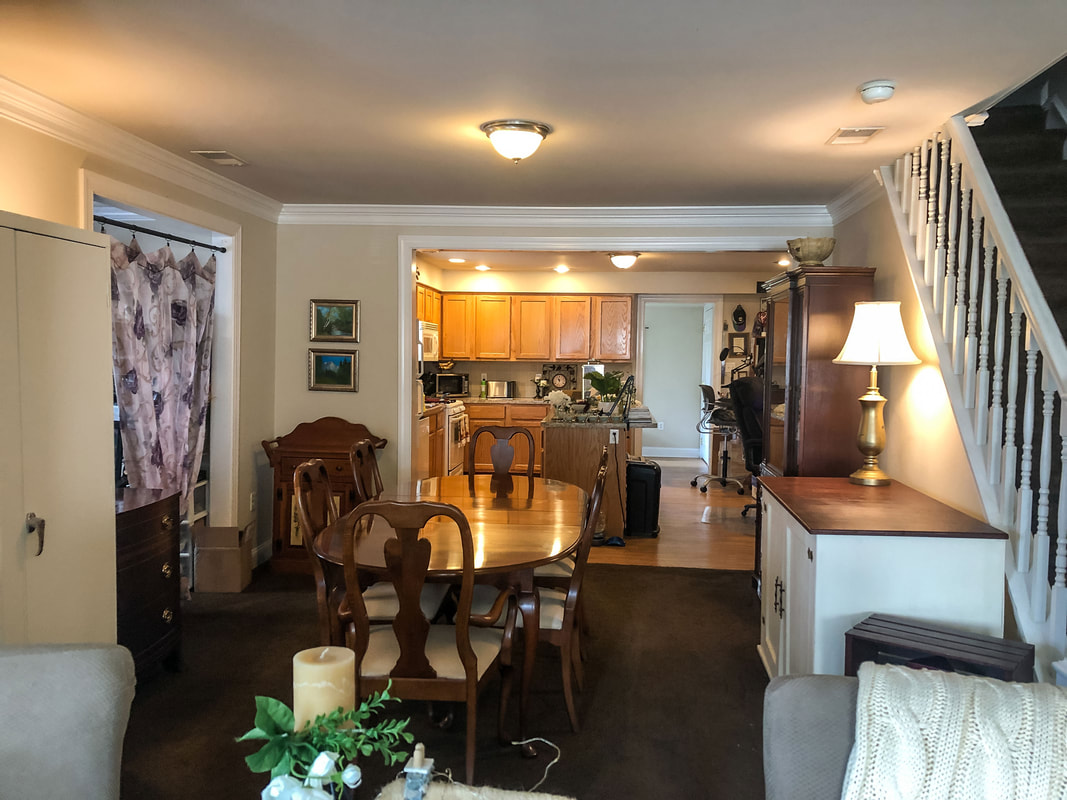 Dark dining room before lights and decor. Photo by Diane M. Lilly, 2022. So, let me share tips and ideas for bringing dark spaces into the light…literally! Use lighter or brighter colors Bright colors—such as orange or yellow—tend to give a space warmth and a sense of vibrance and energy. A bright color can “lift” the vibration of a room and make it feel lighter and more welcoming. There is a school of thought that if you go loud with your decor—for example, hanging large, colorful art pieces in space—the space will come alive and feel lighter. I guess that depends on the art piece! But, in the end, it’s all about how color makes you feel when in the space. If you are looking for something more tame--and you like the cooler side of the color wheel--you could opt for a light blue or green. This approach would create a serene environment that mimics nature and lifts the spirits. The most popular options right now are neutral light browns, cool grays, warm grays, or white throughout interior spaces. This approach makes it easy to coordinate furniture and accessories to create a light and airy interior.  Image by FollowTheFlow on Adobe Stock. Use lightweight furniture Heavy, bulky furniture and furnishings will always make the room feel heavy, especially if the color scheme and wood are dark. Traditional bulky furniture can make a room feel dark and heavy, but this doesn’t mean you have to go out and buy sleek modern furniture. A traditional-style dark wood chair with slimmer lines, for instance, can go a long way to lightening the overall feel of a space. Even if the chair wood is dark, slender lines lessen the impact, creating more negative space through which light can travel. Of course, if you like sleek modern furniture, I say go for it!  Image by Andrey on Adobe Stock. Declutter your space When creating a lighter feel to a room, sometimes less is more. The minimalist style aesthetic stresses clean, uncluttered spaces, and those interiors tend to feel airy and light. It’s not necessary, however, to go to that extreme if it’s not your thing. It’s worth noting, though, that having a lot of knick-knacks and furniture in a space will make the room feel heavier and claustrophobic. If the room is full of furnishings and accessories, there is less space for light to travel, so if your goal is to lighten up the room, it's worth getting brutally strategic about how much decor and furnishings are on display.  Last year's early spring vignette lit by a table lamp. Photo by Diane M. Lilly, 2022. Use reflective surfaces We all know reflective surfaces can make a room feel stylish and glamorous. Shiny surfaces allow light to bounce outward into the room, amplifying the luminance of the space. High gloss or metal furnishings and finishes can brighten up a space in a passive way without having to use more electricity. One of the most effective reflective surfaces to use is mirrors. Mirrors reflect the light and create the illusion of double the space, making the room feel larger. 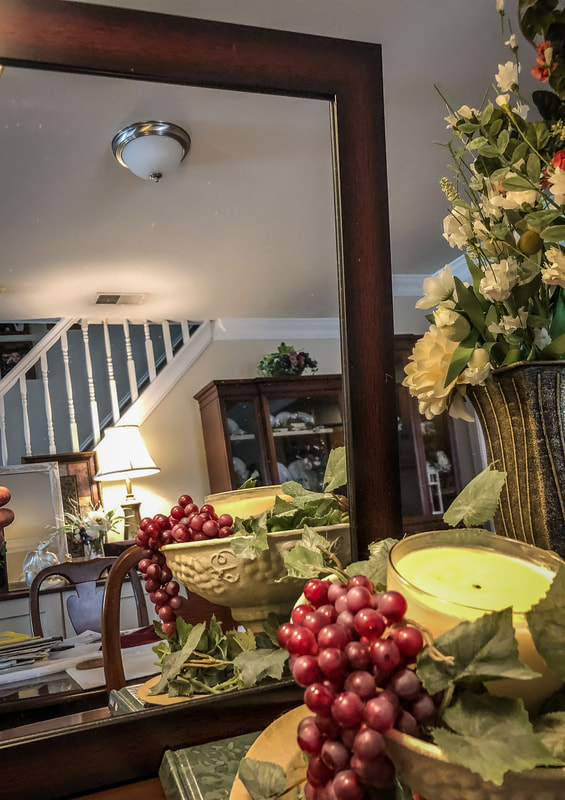 Layered mirrors in my dining room expand the visual space. Photo by Diane M. Lilly, 2023. Maximize natural light The best—and cheapest—way to lighten up a room in the daytime is to maximize the natural light entering the space through the windows. Take advantage of the natural light by using sheer curtains and removing window coverings and furnishings in front of the windows. Also, remove anything outside the window that blocks the windows, such as trees or bushes. If you live in a more modern home, add a light shelf. A light shelf is a small shelf installed within a foot of the top of your window that bounces that upper-level light deeper into the room. So instead of the natural light just illuminating the first few feet of the room, you could increase the reach several more feet into the space, decreasing the reliance on electricity. Most of us in more traditional homes probably can’t do that, but it’s worth a mention! 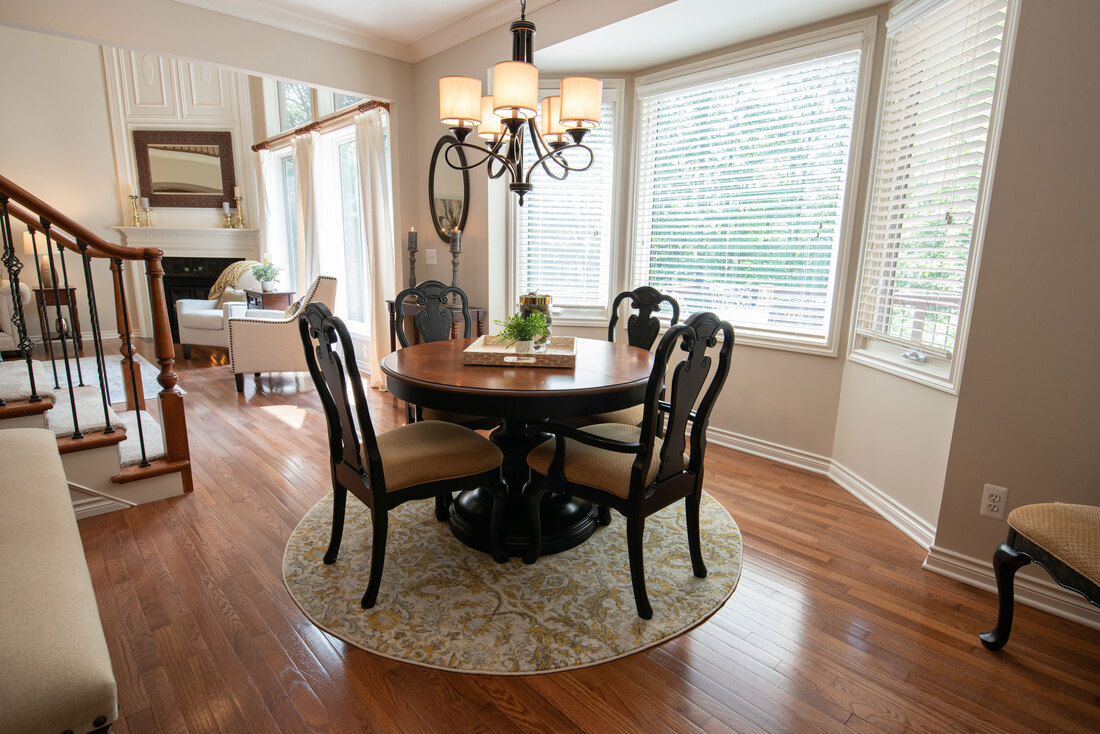 Image by J.A. at Adobe Stock. Assess artificial lighting There’s no way of getting around the reality that we rely on electricity most of the time. The best way to maximize light in a space—and dispel the shadows in those dark corners—is to create a layered lighting plan. Your lighting plan should utilize overhead or ambient lighting, task lighting, accent lighting (such as wall sconces and table lamps), and mood lighting. The more options you have to light up your room, the lighter the interior space will feel in the evenings or on those cloudy, rainy days. Details mean everything, so examine all the ways light is needed in the space to find ways to maximize the use of your indoor lighting. Anything that requires a lamp shade (such as table lamps, wall sconces, and chandeliers) could benefit from switching to light-colored covers to allow light to pass through better. If you have decorative lighting with crystals, those should be kept clean to maximize the reflective properties. Use uplighting on stairs or other architectural features to highlight artwork or increase the general lighting in the space. And finally, add in strands of LED fairy lights, white Christmas lights, LED candles, or real candles to create a romantic “hygge” mood. 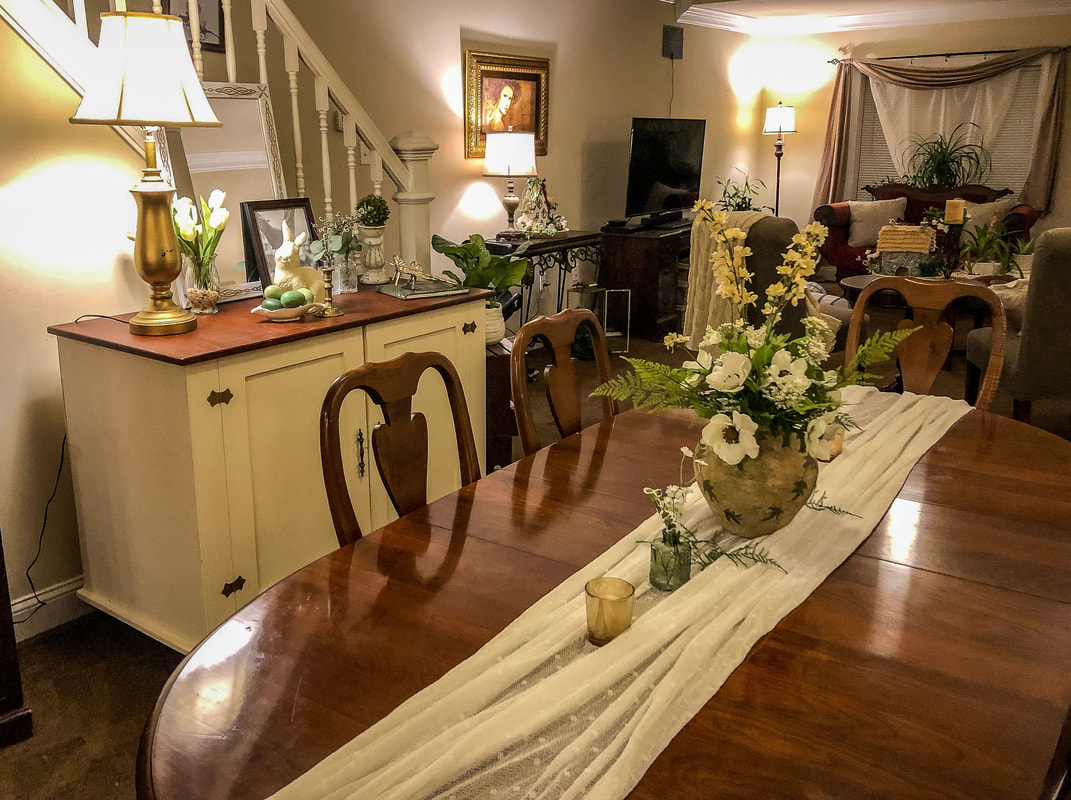 Dining room and living rooms all lit with the warm glow of lamps. Photo by Diane M. Lilly, 2022. So, those are my six tips for creating an interior space that feels lighter and brighter. What do you think? Did I miss anything? Have you tried any of these ideas in your own space? Leave a comment below and let me know! Related blogs you may want to read: Eight tips for assessing natural light in your home Five ways to create light layers in a room Does bringing nature into the home improve your mood? How to reupholster a dining room chair in 9 simple steps Eight tips for creating spring vignettes A spring decor makeover for my small rental bathroom Small houseplants that love bathroom humidity How to care for faux florals Eight health benefits of decorating with plants 11 interior decorating tips that help reduce anxiety and depression Nine hygge decor ideas Winter color palette ideas for your home decor Eight ways to create cozy winter interiors after the holiday decor comes down A little project with jute twine and an old foot stool DIY refurbishment of a dining room cabinet DIY upholstery cleaning methods Creating a kitchen coffee bar Let’s talk about houseplants How to clean a fabric lampshade This article may contain a few items or commercial mentions, but I only used them for demonstration purposes only. I am not endorsing any particular product or receiving any monetary gain for this blog.
0 Comments

Ponytail palm soaking up the light in a southerly front window. Photo by Diane M. Lilly, 2022.
Whether you are deciding on which types of houseplants to buy, trying to identify artificial light needs, or have concerns about fabric or artwork that may fade in direct sunlight, you will need to understand how the natural light interacts with your interior space. Consider this scenario… A couple of years ago, I got the “plant” bug and bought a bunch of houseplants from my local home improvement store. I loaded them into the back of my Jeep, transported them home, and merrily unloaded them straight into my living room. I plopped them here and there on tables and windowsills, thinking that my living room would get plenty of light. Then reality hit when some of them started dying. As it turns out, there’s not enough direct light in the space to keep some of the more fussy plants alive. That revelation started me on a quest to understand how much natural light each room in my home receives and when. So today, I thought I’d share some tips learned from this experience and my research into daylighting, which refers to using natural sunlight as passive lighting in an interior space. Identify how your home is oriented to the cardinal compass points One of your first tasks is to figure out how your home is laid out according to the cardinal points on a compass. There are mobile compass apps you can download that identify the cardinal direction of each wall. Knowing the orientation of your home will help you understand the natural light (and passive heat, but that’s a subject for another blog article) that you will receive in your interior spaces. It’s well worth getting familiar with the four directions about your home. 
Image by Cultura Creative on Adobe Stock.
Note the orientation of your windows Once you have your mobile app, this is a simple process. Align the phone perpendicular to each window wall and note the cardinal direction. Since most homes are not built in specific cardinal directions, you may have windows on a northeast, northwest, southeast, or southwest axis. And that’s ok! You are looking for a general idea of the direction each window faces so that you can start understanding how much light to expect to receive through each opening. Below is a very general overview of this relationship: Windows facing east—The most direct light will be in the morning Windows facing west—The most direct light will occur in the evening Windows facing south—The most direct light in the middle of the day Windows facing north—Mostly indirect light through a good portion of the day 
Image by FollowTheFlow on Adobe Stock.
Assess the window size & position on the wall Note the size and placement of all windows in a particular space so you can assess how much natural light you will get from all directions. Combinations of window sizes and shapes within a space will create overlapping light values and cross-lighting within your interior space. This cross-lighting can help eradicate those pesky shadows. 
Image by topntp on Adobe Stock.
Understand the sun’s daily trajectory Windows that face south get the most natural light, and windows facing north will get indirect sunlight. As we all know, most homes are not oriented so neatly, so you'll need to identify the cardinal directions for your home’s site and each window in your space. Fortunately, the sun’s daily trajectory is predictable. As the sun rises, it will come up from the east, then gradually travel through the sky towards the west, where it sets later in the day. This means you'll be able to follow the sun's path from your easterly windows to your westerly windows as the day progresses. You could even create a chart with timetables for when direct light enters each window. 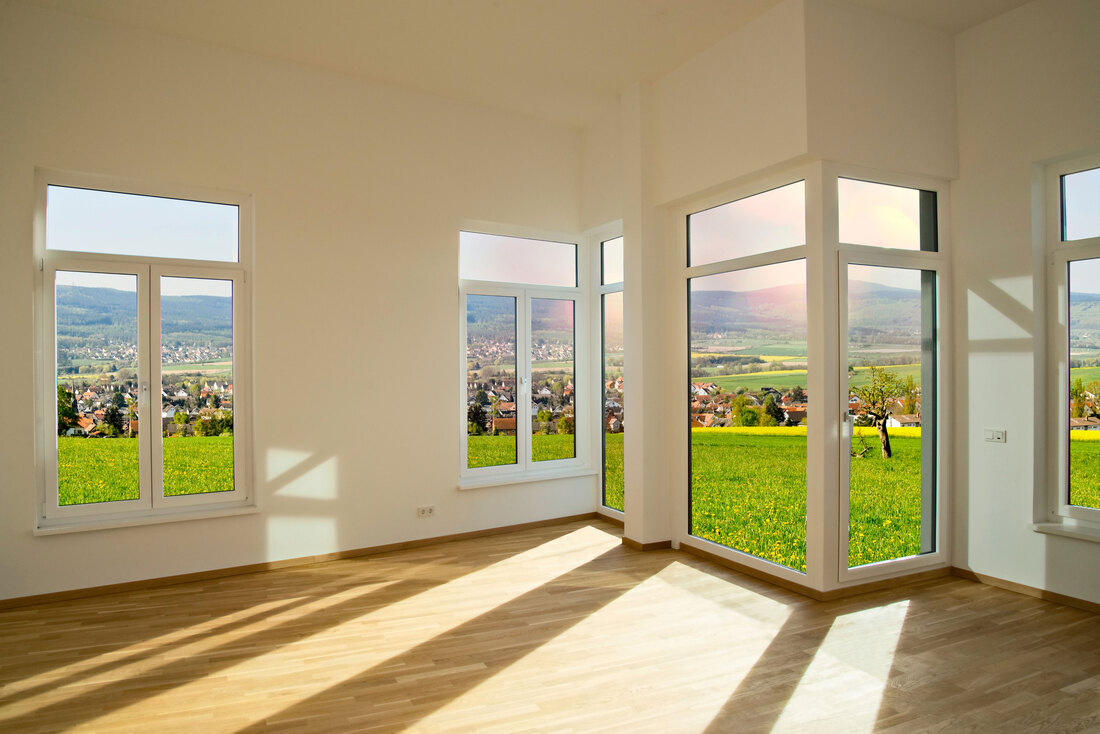
Image by gopixa on Adobe Stock.
Understand the seasonal orientation of the sun in the sky During the summer, the sun is higher in the sky, which means the direct light will not penetrate as deeply into the interior. However, the light that does enter will be much more intense, creating glare. Harness the power of this glare by bouncing it off shiny surfaces that reflect the light deep into the room. In the winter, the sun sits lower in the sky, and while it is weaker in strength than summer sunlight, the lower angle means direct light can travel deeper into your interior. 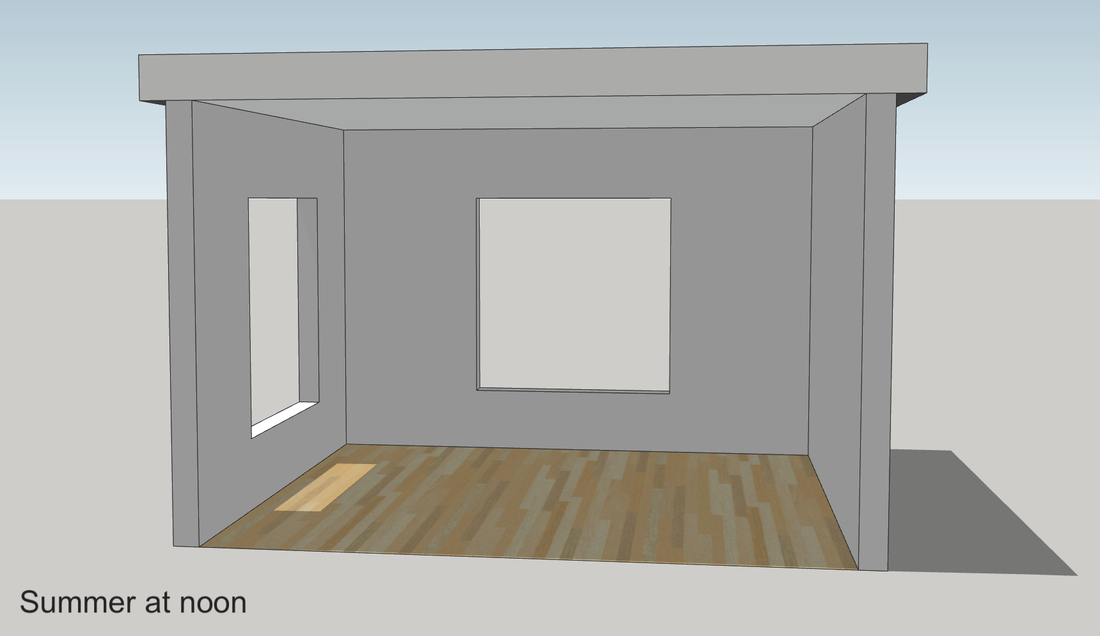
SketchUp model 1 by Diane M. Lilly.
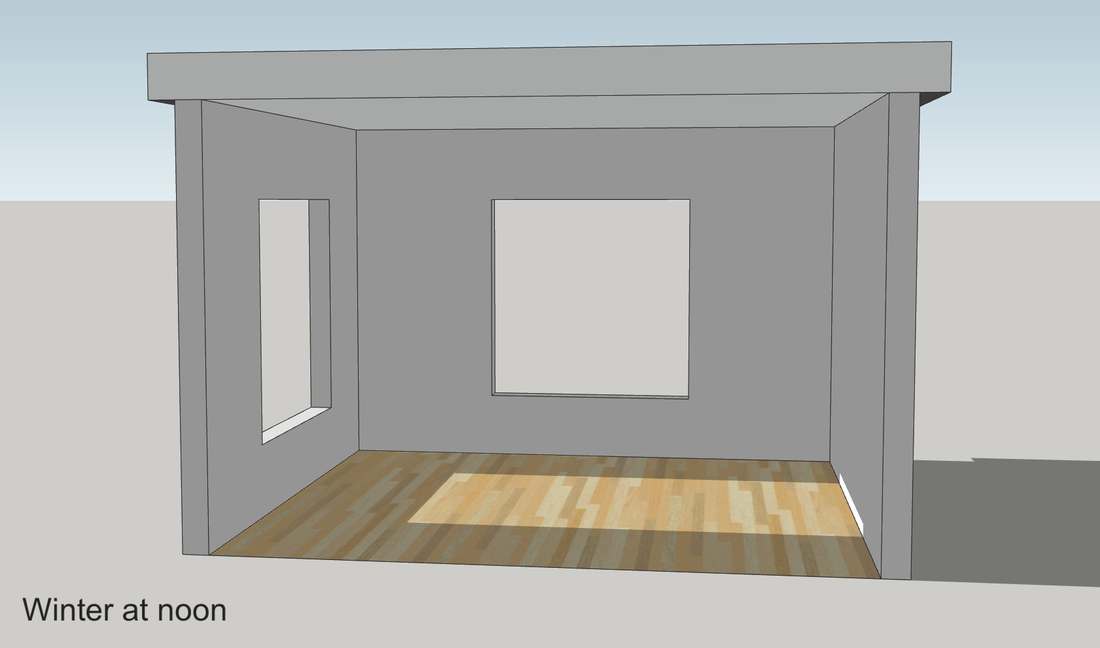
SketchUp model 2 by Diane M. Lilly.
Spend some time in your space studying the light Spend some quiet time in the space at different times of day and at various times of year. Observe when sunlight shines into your space. Is it direct sunlight or just bright indirect light? How far into your space does the direct light penetrate? Does it seem like the indirect light is bright enough, or do you observe shadows? Direct light is the sun beating down on the windowsill, as opposed to bright, indirect light that is less direct and more ambient. Indirect light would be a little further away but still getting some light. This may be already in the medium light spectrum for your home. The low light is away from the direct light (probably across the room) but still gets a little light. This changes as the day progresses and according to the seasons. 
SketchUp floor plan by Diane M. Lilly.
One tip that I learned as an amateur photographer is to use your phone to take snapshots. You will see the difference in lightness and darkness just by how bright or dark your images look on your phone. Ironically, this is how I discovered just how dark my living room is and how quickly the light fades as you move through the space. The eye can lie to you, so it’s great to have a tool to help measure the light levels. Identify the brightest and darkest areas of your space After studying the general light levels, you should be ready to identify the brightest and the darkest areas in your space. This is especially important for live plants, delicate fabrics, or precious artwork. Many houseplants need at least some direct sunlight for proper photosynthesis, but that artwork you paid a pretty penny for has no tolerance for direct sunlight. Also, you wouldn’t want to put a live plant in a dark corner. Certain hardy plants like peace lilies might live, but most houseplants won’t forgive you for putting them in darkness! In other words, know how you intend to use the space for optimal use of light and dark areas.
Image by Pixel Shot on Adobe Stock.
Identify light overlap and indirect light In most larger rooms, there will be multiple windows and light sources. The combination will create an overlap in direct and indirect light, adding to the complexity of light and shadow levels in a space. But you also need to consider the indirect light filtering in from an adjacent space. That filtered light will overlap and enhance the light in a given room, but conversely, there may be times when that extra light will shine at a different angle and create weird shadows within your space. You'll need to assess whether that light helps or hinders your natural light needs. Remember that trick with taking snapshots with your phone? This is where it comes in handy. Your eye can’t always make sense of complex light levels, but your camera lens will show you. Just take a series of shots moving along a line through the space and watch as the images get darker and brighter. It’s a fun and eye-opening experience! And it will help you better understand how to use the natural light in your home! 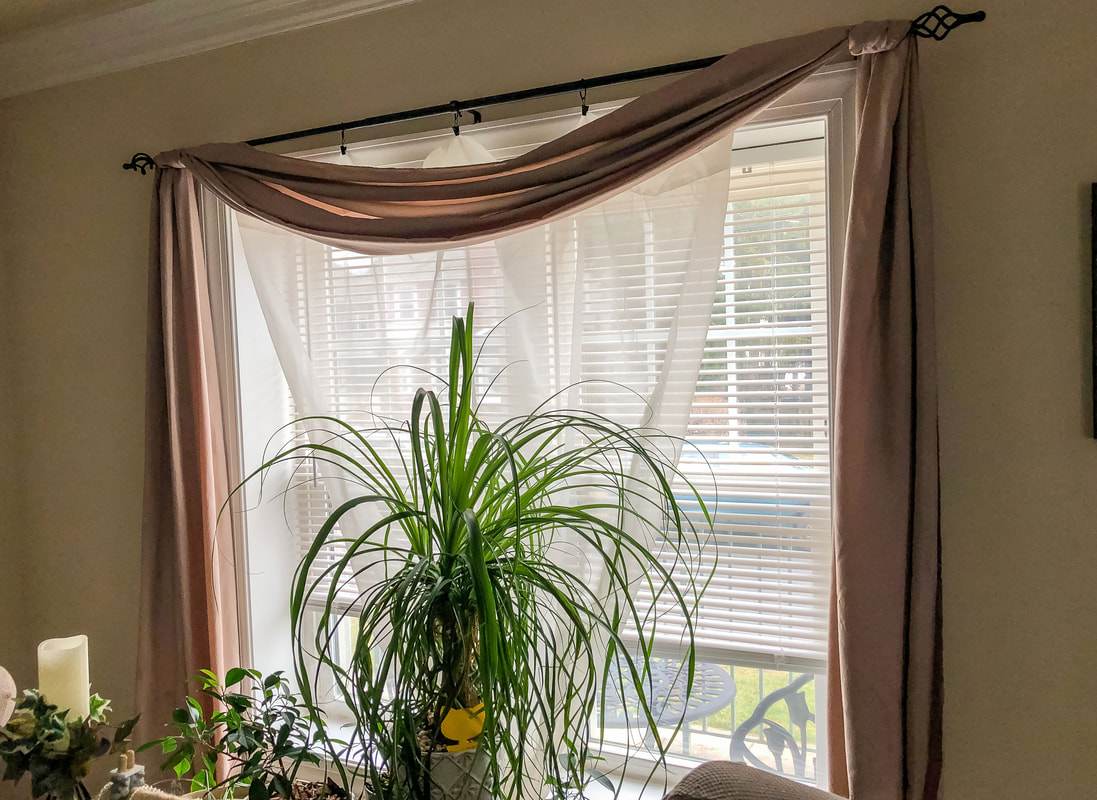
Front window iPhone shot 1. Photo by Diane M. Lilly, 2023.
Front window iPhone shot 2. Photo by Diane M. Lilly, 2023.
 There are a variety of light meters on the market that measure light intensity through foot candles (or lux). These tools can help you precisely measure the amount of light in your space. However, the tips I have chosen work well for the layperson trying to sort out the general natural lighting situation in their space. So those are my eight tips for assessing the natural light in your interior spaces. Whether you are growing plants, protecting furnishings and artwork, looking to save on electric bills, or just love that warm sunlight, taking the time to observe the way natural light enters your home pays off. If you have more tips, drop a line in the comments below!
Related blogs you may want to read:
Five ways to create light layers in a room Six tips to lighten up a dark room Does bringing nature into the home actually improve your mood? How to reupholster a dining room chair in 9 simple steps Eight tips for creating spring vignettes A spring decor makeover for my small rental bathroom Small houseplants that love bathroom humidity How to care for faux florals Eight health benefits of decorating with plants 11 interior decorating tips that help reduce anxiety and depression Nine hygge decor ideas Winter color palette ideas for your home decor Eight ways to create cozy winter interiors after the holiday decor comes down A little project with jute twine and an old foot stool DIY refurbishment of a dining room cabinet DIY upholstery cleaning methods Creating a kitchen coffee bar Let’s talk about houseplants
Affiliate Disclosure
Some of the posts in this article contain affiliate links. This means if you click on the link and purchase the item, I will receive an affiliate commission at no extra cost to you. I will only recommend products or services I use personally and/or believe will add value to my readers, so there is no conflict of interest. 
Fairy lights and table lamps accentuate floral decor. Photo by Diane M. Lilly, 2022.
What do you think of when you think of winter? For most of us, the very mention of winter makes us shiver…but there are positive ways to approach the coldest season of the year. Over the past couple of years, I have researched a curious Danish lifestyle outlook called hygge. Winters up north are long, cold, and dark…and yet the population is said to be one of the happiest in the world! What a bunch of weirdos, right?! But they seem to have learned a trick to cope with the long winters indoors. At the heart of this whole “hygge” thing is the idea that your life is enriched by surrounding yourself with simple things that bring you joy. Embracing hygge in the home means choosing cozy decor that feels safe, warm, and inviting. If you want to learn more about hygge, I recommend the book by Meik Wiking called The Little Book of Hygge: Danish Secrets to Happy Living, which you can purchase on Amazon.  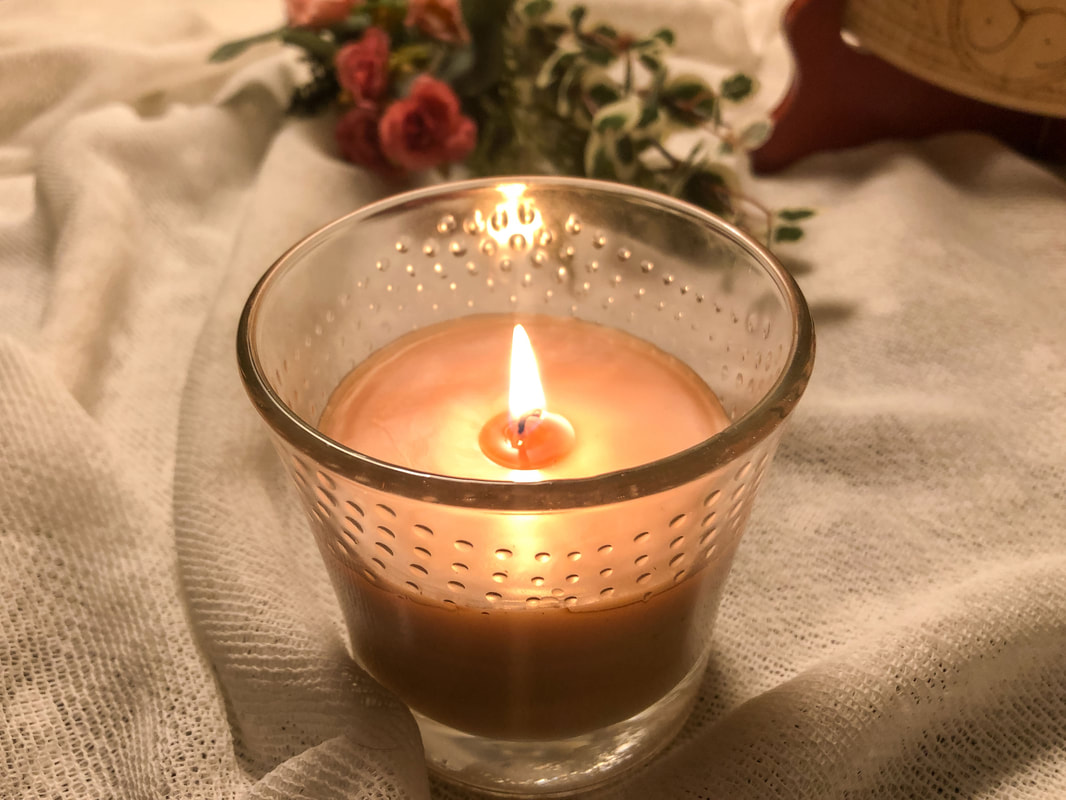
Burning candles for a hygge feel. Photo by Diane M. Lilly, 2022.
This brings me to the topic of lighting… Lighting can be one of those decor elements that we don’t think about as much as we should. Lighting (or lack of it) has a significant effect on mood. The best way to harness the ambiance in your home is to provide several sources of light that can be turned on and adjusted as needed. In the interior design world, this is called layering light. A cozy, user-friendly home utilizes adjustable light levels from various light sources-- such as overhead lighting, task lighting, and mid-level lighting on walls and tables. Before I get into the five ways you can create multiple layers of light in your interior space, let me first make a quick side note about color temperature and lighting. If your goal is to create a cozy space through lighting, stay on the warmer end of the spectrum. Cool lights negatively affect mood (think of the blue light from computers) and disrupt sleep patterns. Light color is measured with the Kelvin scale—2000K-3000K range is the warmer, more yellow range, 3100K-4500K is the white/blue range, and over 4500K is the “daylight range. Keep these ranges in mind as you’re making lighting choices, sticking to the lower end of the Kelvin spectrum for the softer, warmer lighting that will make your interior glow during the cold winter months. 
Image by ohsuriya at Adobe Stock.
Assess natural light & window orientation All good lighting plans start with having a good grasp of how natural light enters your interior, the idea being to utilize as much free natural light as possible before turning on the lights. Electricity is not cheap these days! Do you know your home's orientation to the cardinal's compass points? Well, it’s a good idea to find out! All you need is one of those compass apps on your phone, and you’re all set! You should be familiar with your home’s orientation for a couple of reasons…First, houseplants need light to grow, so their placement is critical to survival. Second—and the subject of this article—you will need to understand how utilize the natural light in your home to minimize dependence on artificial lights and the electric bills associated with their usage. Natural light is free, don’t forget! 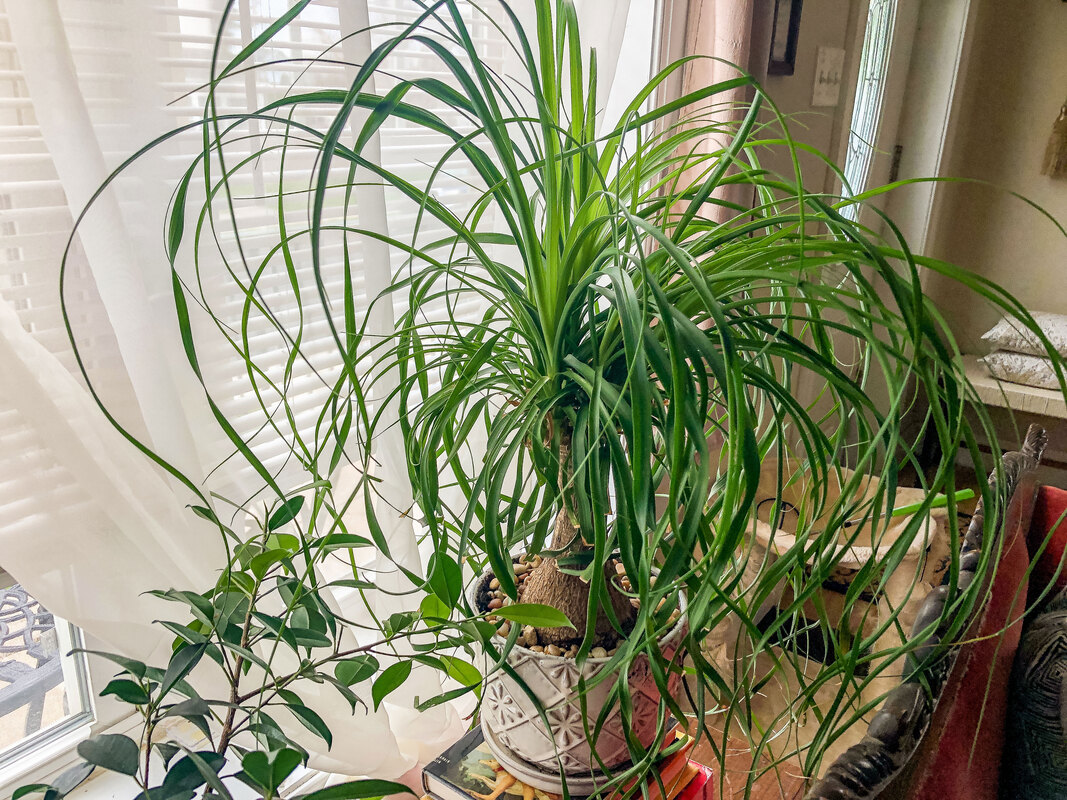
Ponytail palm enjoying natural light by front window. Photo by Diane M. Lilly, 2022.
In the winter, the sun sits lower on the horizon and travels further into the space, depending on the position of the windows. In the summer, the sun is higher in the sky and won’t penetrate as far into the interior, but the light is brighter and warmer than in winter. 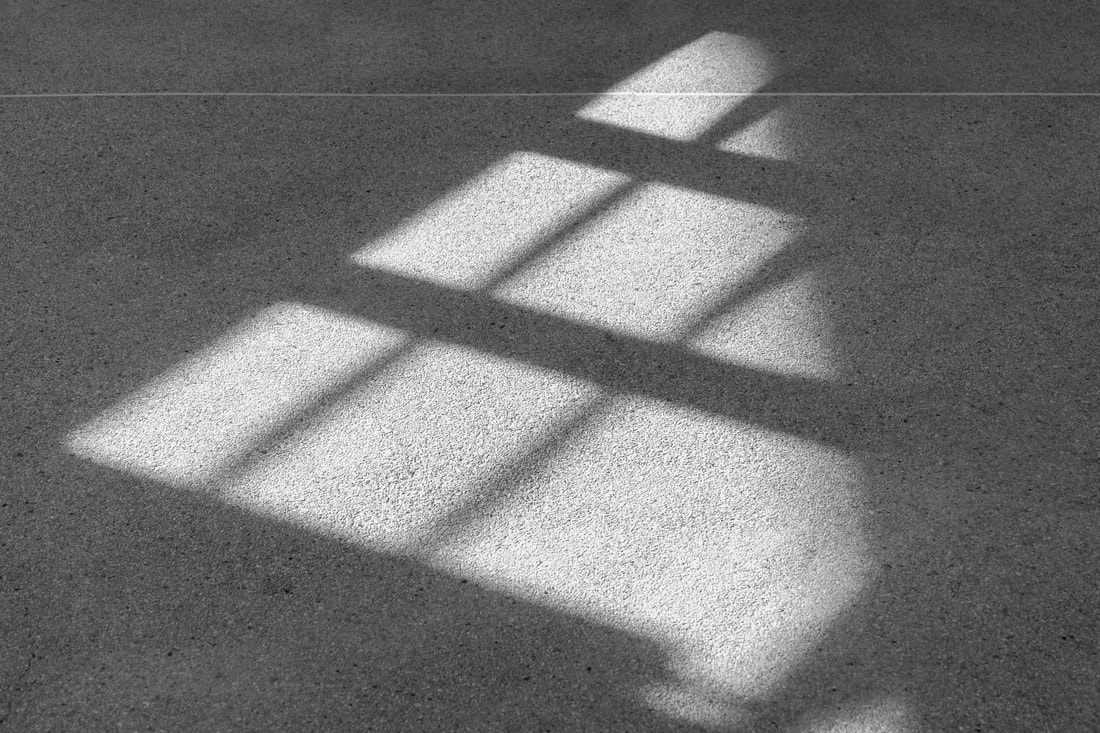
Image by lamyai at Adobe Stock.
The sun also travels through the sky as the day progresses. In the mornings, you will have the sun coming through easterly-facing windows, travel across the southern sky, and end up in the west. A home with main windows facing the south is the “perfect” orientation for maximizing passive natural light. (By the way, this also helps with passive heating.) Install general/ambient lighting Every room should have at least one overhead source of lighting. It just makes sense for general functions and traveling through a space. In addition to overhead lighting, lamps and wall sconces can serve as general lighting. This general lighting can be as simple or elaborate as your budget permits and provides light for everyday functions, movement, and wayfinding. Ideally, general lighting should illuminate most of the space as evenly as possible. 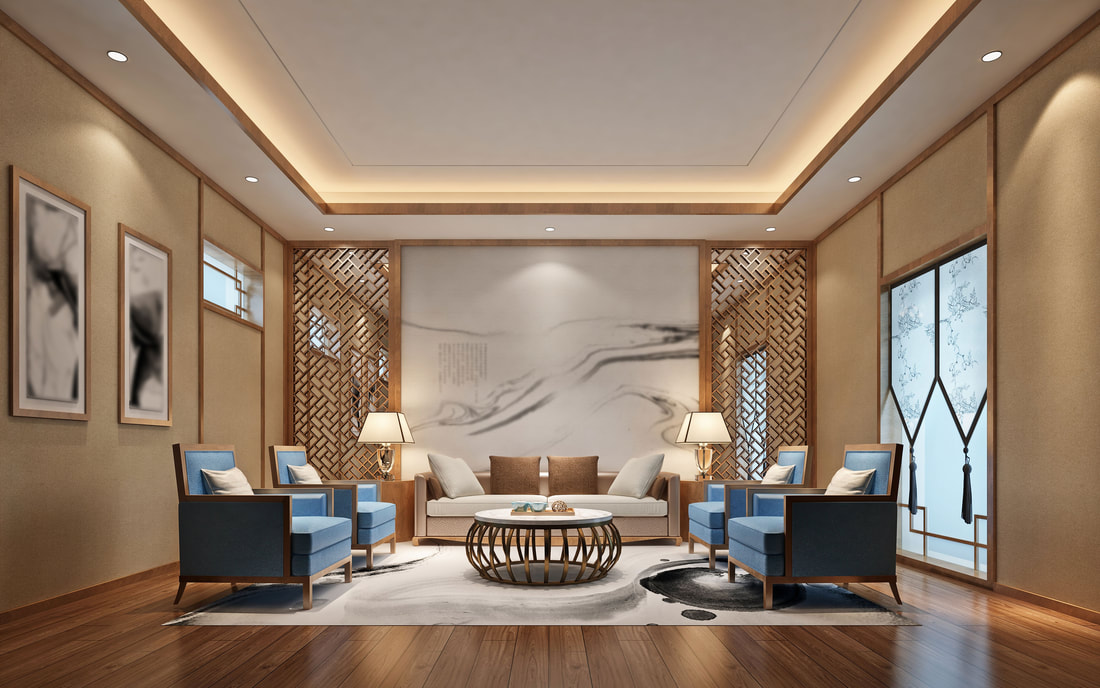
Image by murattellioglu at Adobe Stock.
Assess task lighting needs Task lighting is exactly how it sounds—lighting that allows you to see without straining when trying to complete specific tasks. For instance, this could be a desk lamp in an office or under-the-cabinet strip lighting in the kitchen. Task lighting--used in conjunction with general overhead lighting--will illuminate a small space better, facilitating work that requires attention to detail. 
Image by LIGHTED STUDIOS at Adobe Stock.
Get dramatic with specialty lighting Specialty lighting uses a variety of lighting fixtures to create dramatic visual effects. Use this added layer of lighting to illuminate decor or architectural elements and create visually appealing light pools on walls and floors. Examples of specialty lighting include picture lighting for artwork, track and monorail lighting on ceilings, and up-lighting along walls, steps, and columns. 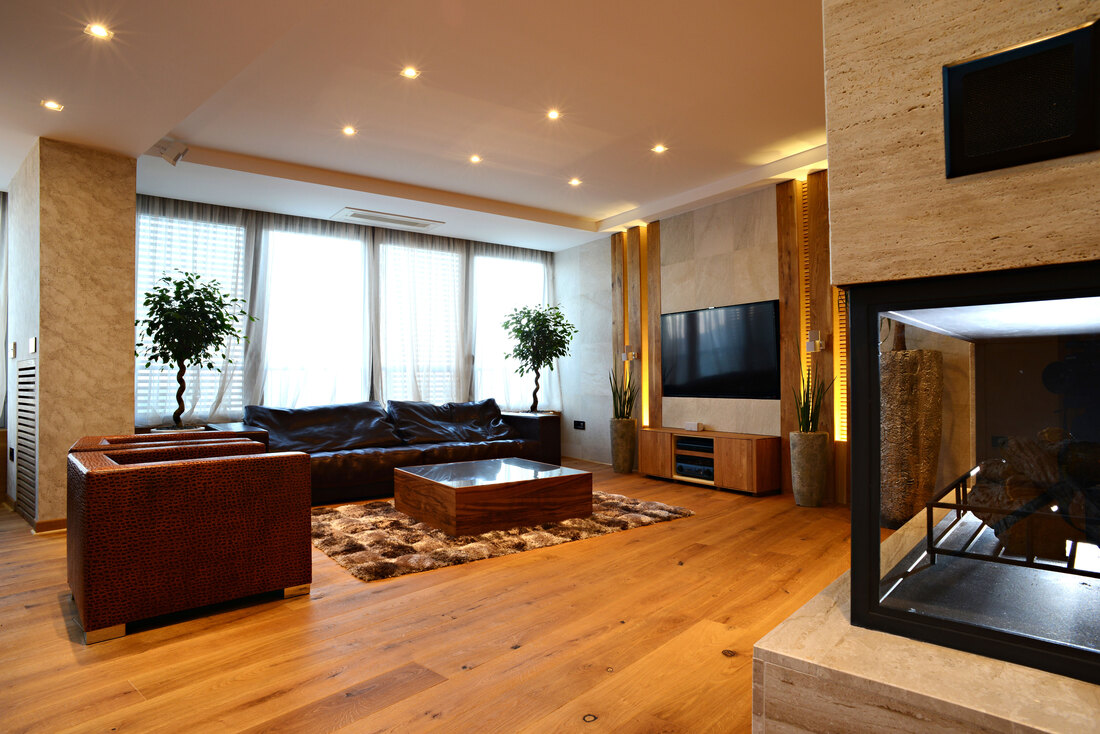
Image by poplasen at Adobe Stock.

Image by Tomasz Zajda at Adobe Stock.
Make your home inviting with mood lighting This is my favorite part of the lighting scheme! And I think this is where “hygge” really shines, especially in the darker winter months. This is where you can bring a little magic into your home. Mood lighting isn’t a specific type of light fixture but a careful combination of ambient and specialty lighting, natural light, lamps, wall sconces, and decorative lighting options. You could even light up or turn on a fireplace for that additional cozy ambiance. Your main lighting (like ceiling pendants) might have dimmer switches to bring the lights down to a moodier, relaxing level. Lamps might have options for lower light settings. Then there are candles (both real and LED), battery-operated fairy strands, and warm white Christmas light strands. You could even incorporate a variety of special LED lighting options or black light. It all depends on what type of mood you are looking to achieve.    
Handcrafted decorative candleholder with LED candle by Di's Studio Designs. Photo by Diane M. Lilly, 2022.
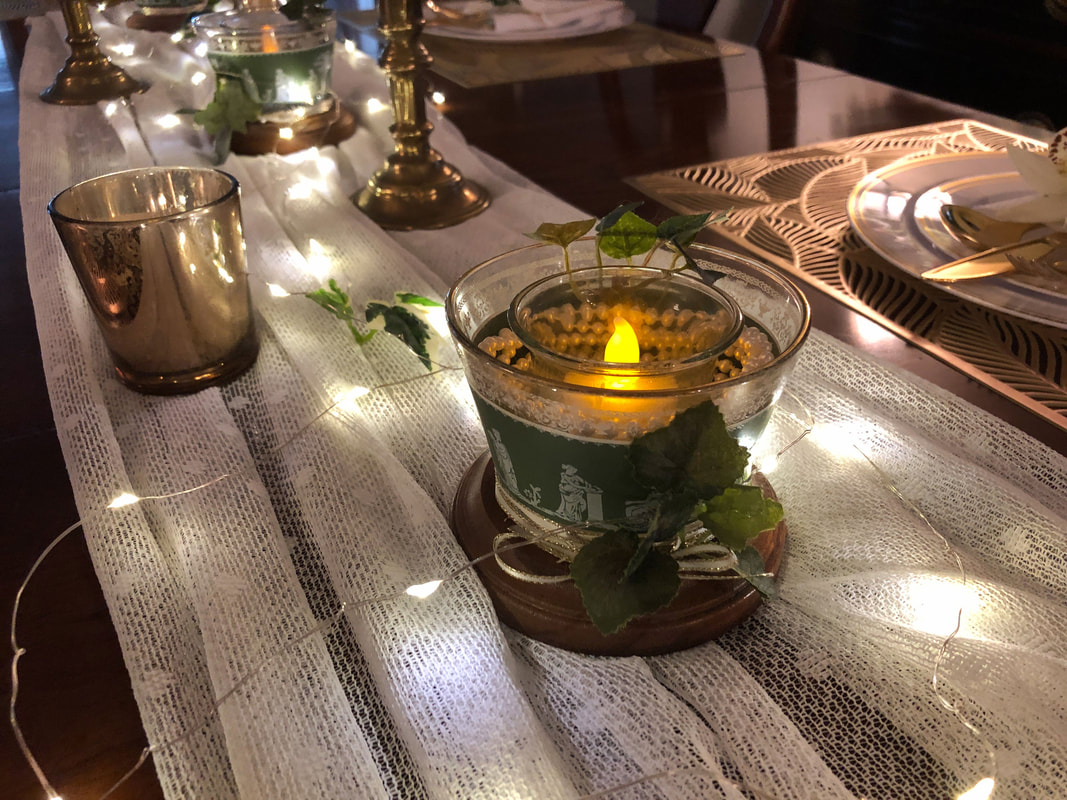
Dining room tablescape with LED candles, fairy light strands, and handcrafted decorative candleholder by Di's Studio Designs.Photo by Diane M. Lilly, 2022.
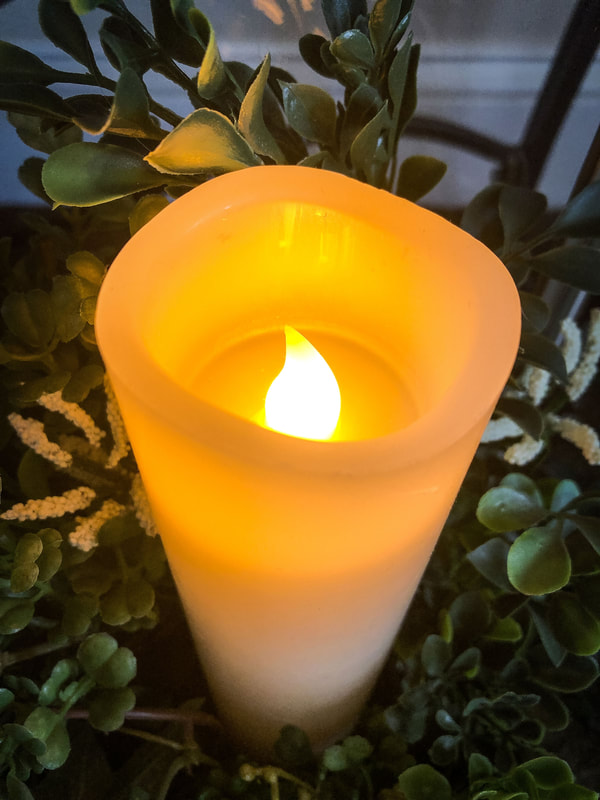
LED candle. Photo by Diane M. Lilly, 2022.
Returning to the whole hygge theme (this is winter, after all), my way of creating cozy light layering would be to use my warm white accent lamps on a low setting with a few real or LED candles and some fairy strands. I love the soft, warm glow that makes my home feel warm and welcome in the evenings. Sadly, I don’t have a fireplace, but we can’t have everything, can we?! 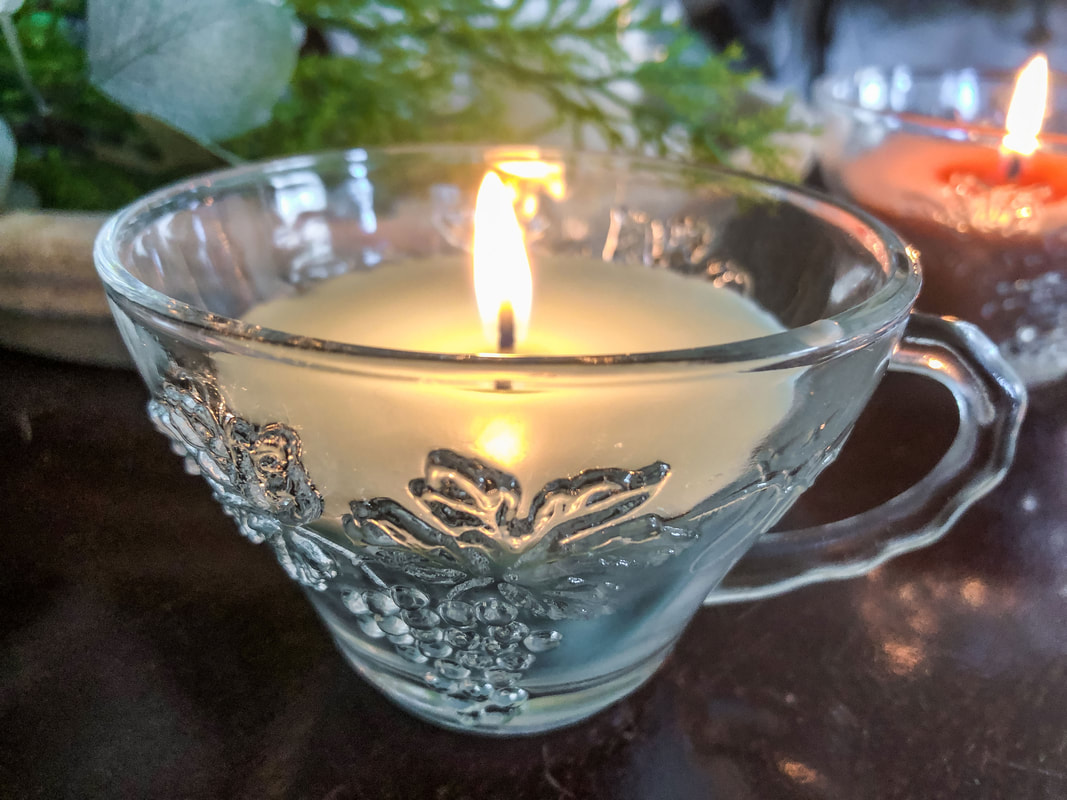
Burning a homemade eucalyptus candle. Photo by Diane M. Lilly, 2022.
How will you create cozy light layers in your home this winter? Leave a comment below and tell us about it! Related blogs you may want to read: Eight tips for assessing natural light in your home Six tips to lighten up a dark room Does bringing nature into the home actually improve your mood? How to reupholster a dining room chair in 9 simple steps Eight tips for creating spring vignettes A spring decor makeover for my small rental bathroom Small houseplants that love bathroom humidity How to care for faux florals Eight health benefits of decorating with plants 11 interior decorating tips that help reduce anxiety and depression Nine hygge decor ideas Winter color palette ideas for your home decor Eight ways to create cozy winter interiors after the holiday decor comes down A little project with jute twine and an old foot stool DIY refurbishment of a dining room cabinet DIY upholstery cleaning methods Creating a kitchen coffee bar Let’s talk about houseplants Affiliate Disclosure Some of the posts in this article contain affiliate links. This means if you click on the link and purchase the item, I will receive an affiliate commission at no extra cost to you. I will only recommend products or services I use personally and/or believe will add value to my readers, so there is no conflict of interest.  Spaghetti with meatballs baked. Photo by Diane M. Lilly, 2022. Spaghetti is one of the cheapest meals you can make—and I love it for that—but my family has become utterly sick of it! This “cost-effective” meal has become a waste of money, as 75% of it generally ends up in the trash…after a couple of days sitting in the fridge in quiet desperation. So much for saving money, right?! And then I brainstormed a way to ensure my poor spaghetti and meatballs got eaten…Add cheese and bake them in a casserole! This has been a game-changer! The ingredients are essentially all the same, with the addition of one ingredient— mozzarella cheese. It’s as simple as layering all the ingredients in a baking pan and cooking in the oven for 30-40 minutes. So here’s my simple (and cheap) Baked Spaghetti with Meatballs recipe… Ingredients: 2 boxes cooked spaghetti (or pasta of choice) 3 jars sauce (your choice) meatballs (I use frozen Italian seasoned) shredded mozzarella cheese parmesan cheese Italian seasoning garlic powder pepper garlic bread (opt) Make pasta according to package directions. Pour cooked pasta into a greased baking pan.  Boil pot of water. Photo by Diane M. Lilly, 2022.  Pack of spaghetti. Photo by Diane M. Lilly, 2022.  Boil the spaghetti. Photo by Diane M. Lilly, 2022.  Grease a baking pan. Photo by Diane M. Lilly, 2022.  Pour cooked spaghetti into greased pan. Photo by Diane M. Lilly, 2022. Top with layers of meatballs, sauce, parmesan cheese, garlic powder, mozzarella cheese, pepper, and Italian seasoning.  Layer meatballs on top of cooked spaghetti. Photo by Diane M. Lilly, 2022.  Jar of spaghetti sauce. Photo by Diane M. Lilly, 2022.  Pour spaghetti sauce over pasta and meatballs. Photo by Diane M. Lilly, 2022.  Parmesan cheese. Photo by Diane M. Lilly, 2022.  Sprinkle parmesan cheese over spaghetti, meatballs, and sauce. Photo by Diane M. Lilly, 2022.  Spices. Photo by Diane M. Lilly, 2022.  Shredded mozzarella cheese. Photo by Diane M. Lilly, 2022.  Layer shredded mozzarella over pasta, meatballs, and sauce. Photo by Diane M. Lilly, 2022.  Season dish before placing in oven. Photo by Diane M. Lilly, 2022. Bake at 400 degrees F for about 35 minutes, or until cheese is browned and meatballs are cooked. Serve with garlic bread, if desired.  Spaghetti and meatball baked dish finished. Photo by Diane M. Lilly, 2022. Honestly, this couldn’t be a more simple recipe! And guess what? My family actually eats it! Spice it up with pepperoni, mushrooms, or any other topping you like. This dish can be as cheap or as elaborate as your budget allows...That’s what makes it so versatile! So give it a try and let me know how it went. Have a recipe tip of your own? Share it down below in the comments. And Bon Appetit! Related blogs you may want to read: Festive vegetable bake recipe Spicy crock pot chili recipe Homemade chicken noodle soup recipe Potato soup recipe Tuna noodle casserole recipe Chicken vegetable pot pie Salmon chowder recipe How to eat healthy with chicken and roasted vegetables This article may contain a few items or commercial mentions, but I only used them for demonstration purposes only. I am not endorsing any particular product or receiving any monetary gain for this blog. |
Author
Some of the posts on this site contain affiliate links. This means if you click on the link and purchase the item, I will receive an affiliate commission. 
Categories
All
Archives
April 2024
|