|
Take a look at my top 17 picks from Blick Art Materials! 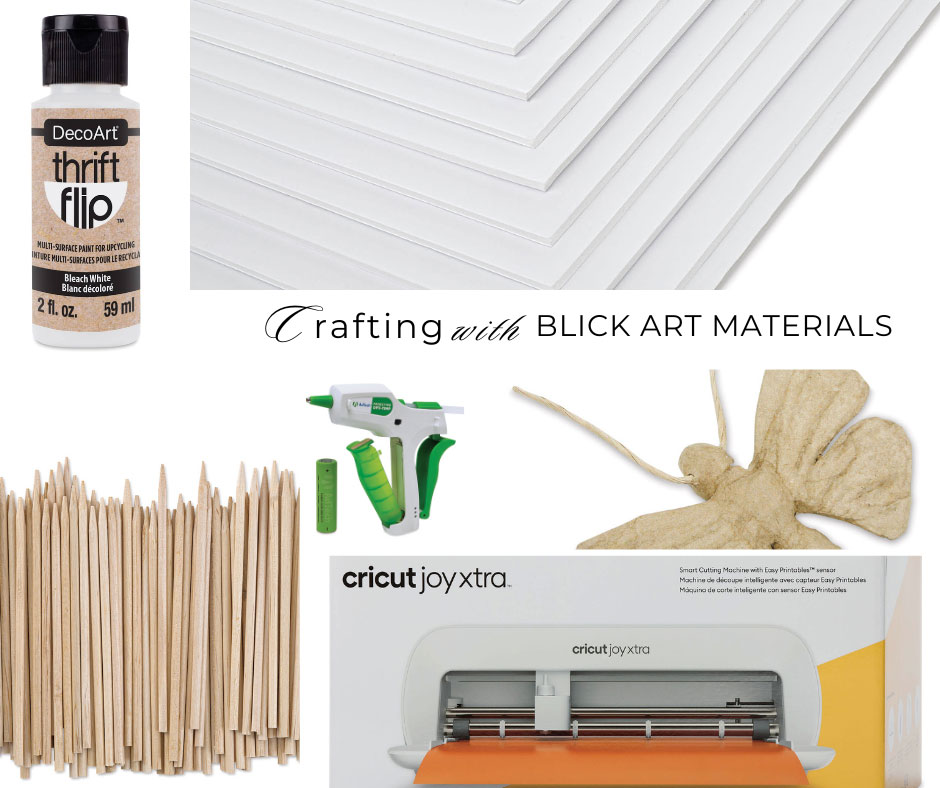 Images from Dickblick.com. Click the links below to view or purchase. Some of the posts in this article contain affiliate links. If you click on the link and purchase the item, I will receive an affiliate commission at no extra cost to you. I will only recommend products or services I use personally and/or believe will add value to my readers, so there is no conflict of interest. Spring is around the corner…and that means new craft projects! But you’ll get nowhere fast without the proper materials! This is the time of year when I plan out the projects for the next few months and take stock of my arts and crafts supplies. The most frustrating situation is when I am working on a craft and realize I have run out of something vital. Everything stops…including the creative roll. This is the life of a creative, right? In the spirit of starting this year off on the right foot, I scoured Blick Art Materials’ website to see what’s new in their spring catalog. I collated 17 handy items for your crafty spring DIY projects. Item 1—Cricut Joy Xtra Many of you are using Cricut for your craft projects, so this machine could be a worthwhile investment in future DIY projects!  Item 2--Cricut Transparent Printable Vinyl 12-pack To get you started, I found a pack of 12 printable vinyl sheets to help you reproduce those crafty images.  Item 3—Cricut Writable Vinyl Sheets 3-pack Make adorable labels for products or gifts with this three-pack of writable vinyl sheets.  Item 4—Pacon Ucreate White Foam Boards 10-pack White foam board is one of those supplies you don’t know you need until you need it, right? So stock up on these white foam boards from Blick’s new arrivals.  Item 5—Fiskars Everyday Softgrip Non-Stick Titanium Scissors If you need a new pair of durable scissors that can cut through sticky things like tape, try these with stainless steel blades.  Item 6—AdTech Project Pro Cordless Mini Hot Glue Gun Sometimes, the cord gets in the way when you’re working on craft projects, so this cordless hot glue gun might just come in handy!  Item 7—DAP RapidFuse Super Glue Gel Adhesive A fast-setting, secure glue is a must-have supply for any crafter! This glue sets quickly and can be used on a variety of materials.  Item 8—Envirotex Lite Kit Need to seal your favorite artwork? Try this epoxy resin product!  Item 9—Craft Medley Gemstones Gemstones…Because you never know when you might need a little bling for your projects!  Item 10—Creativity Street Natural Wood Sticks 100-pack Wood sticks are one of those supplies that may slip your mind until you realize you need them!  Item 11—DecoPatch Small Paper Mache Butterfly Paper mache projects are a creative way to pass an afternoon or a fun project to keep the grandkids busy for a few hours.  Item 12—Hands Craft DIY Miniature House Kit Do you have a miniature house fetish? You can build a little library with this kit!  Item 13—Sculpey Clay Crafts Ultimate DIY Kit If your passion is clay crafts, this DIY kit is for you!  Item 14—Perler Bead D.I.Y. Butterfly Activity Kit Bead kits are so popular right now! This kit features a butterfly—perfect for a child’s bedroom!  Item 15—DecoArt DecoEarth Premium Reclaimed Acrylic Paint Make your contribution to a better environment with eco-friendly craft paint!  Item 16—DecoArt Thrift Flip Multi-Surface Paint Did you know DecoArt has multi-surface craft paint? Try this paint on your next up-cycled decor project!  Item 17—Krylon Chalky Finish Spray Paint If you want the chalk finish on your up-cycled furniture but don’t want the hassle of using a brush, try this spray chalk paint from Krylon.  Do you like drawing tutorials and DIYs? Follow me on YouTube here! My channel has Celtic art drawing tutorials, faux floral videos, and crafty DIY projects. Visit my website to see my online shop, where you will find handcrafted faux floral designs, candleholders, wooden fairy houses, and wood-burned Celtic art. Related blogs you may want to read: Drawing supply gift ideas for the artist in the family
0 Comments
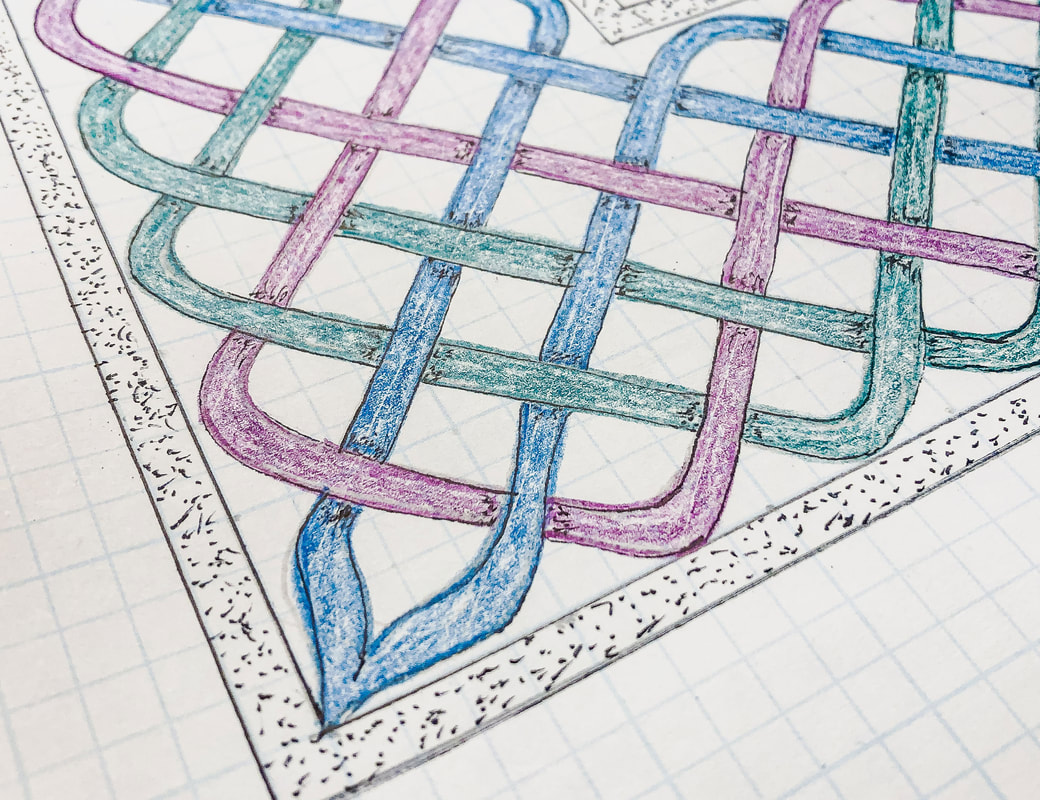 How to handle corners in Celtic knotwork Drawing borders with knotwork patterns can be a gratifying way to add drama to art pieces, picture frames, mirror frames, and trays. But what happens when you get to the corners? Dealing with corners can be tricky, but there are a few ways to handle this dilemma. One way to deal with the issue is to create a design or small piece of artwork specifically for the corners, separate from the border. This could be a stand-alone design or could be woven into the border in some creative way. You could even create a corner design that overlaps the borders. 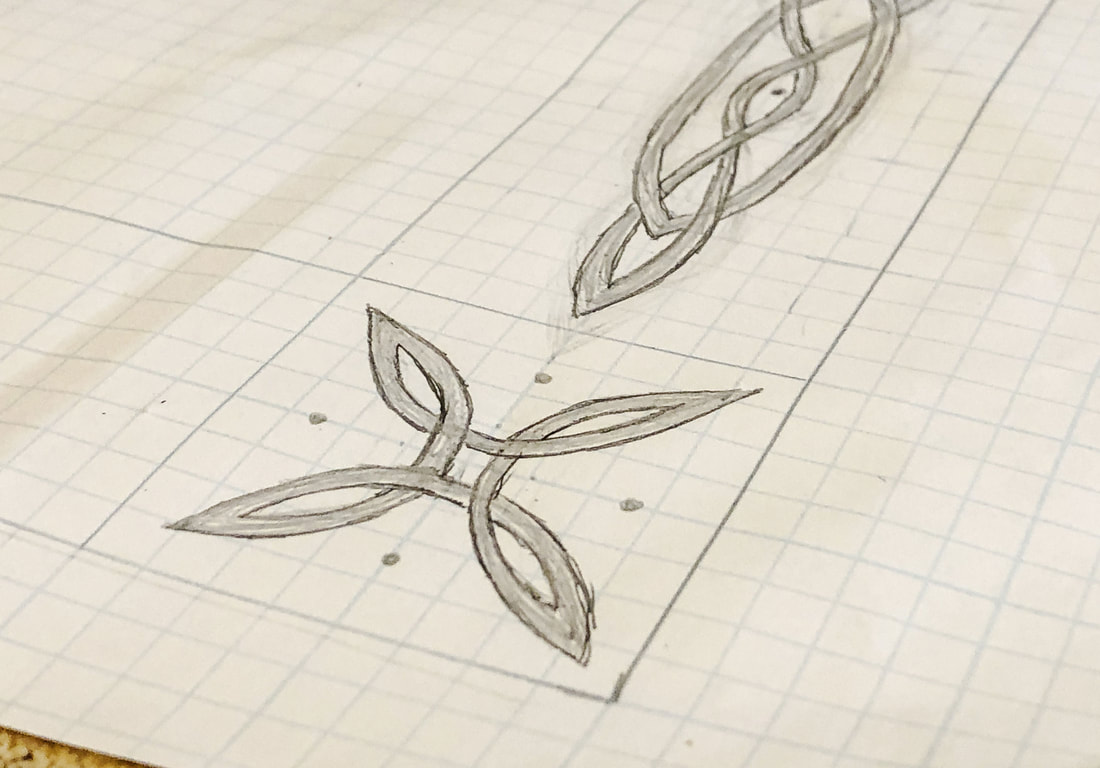  If you want a more consistent appearance for your border, a repetitive pattern created on a grid will help lay out your knot design. A simple repetitive square grid will allow you to produce a continuous border that handles that 90˚ turn with ease. This is the technique I will show you in the following two tutorial videos. A few basic knotwork border tutorial videos If you need a refresher on how to create simple Celtic knot borders—or are new to drawing knots—the following video tutorials will help you get a handle on the basics of drawing borders and using grids. How to Draw a Basic Celtic Knot Braid Tutorial How to draw a basic Celtic braid with a vertical break How to draw a basic Celtic braid with a horizontal break Recommended drawing supplies: A few of you have asked about supplies I use when drawing my Celtic knots, so here is a general supply list to get you started: (This supply list contains affiliate links, as I am an affiliate of Blick Art Materials. If you click on the link and purchase the item, I will receive an affiliate commission at no extra cost to you. I will only recommend products or services I use personally and/or believe will add value to my readers, so there is no conflict of interest.) Drawing pencils Markers Blending stumps Eraser Clic eraser Ruler Horse hair brush Grid paper Sketch pad Tracing paper Related blogs you may want to read: Circular twist border ring tutorial Circular Celtic border knot tutorial, basic braid Basic twist step-by-step drawing tutorial using grid paper Celtic braid step-by-step drawing tutorial Basic border knot with vertical breaks, step-by-step drawing tutorial Basic border knot with horizontal breaks, step-by-step drawing tutorial DIY chalk-painted tray with Celtic border A fun DIY project with paint and a thrifted mirror part 2 The Celtic Motherhood Knot, a symbol of love Celtic Tree of Life Basic Celtic Knot Tutorial Part 1 Celtic Knot Tutorial Part 2 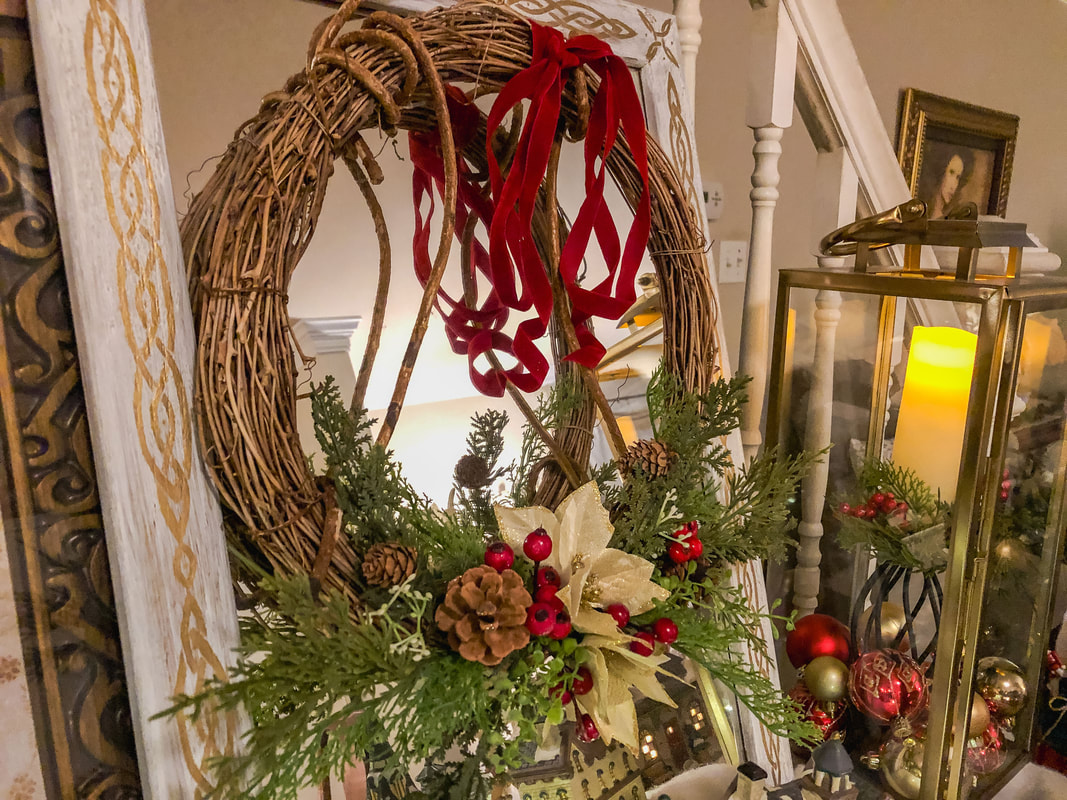 Are you looking for a quick, easy DIY idea for a welcoming holiday wreath? This DIY idea will take about 15 minutes to put together and is perfect for a last-minute touch or to fill an empty space on a door or wall. Supplies I used: grapevine wreath base faux juniper or pine red berries small white berries pine cones gold poinsettias red velvet ribbon hanger 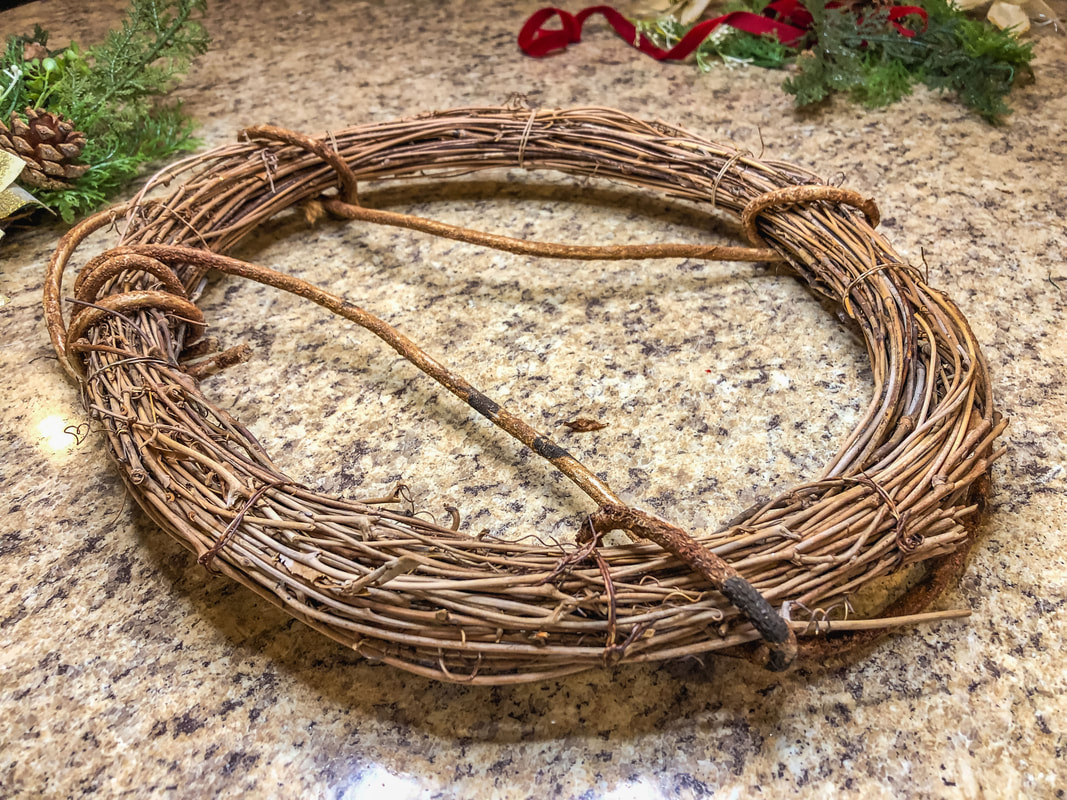 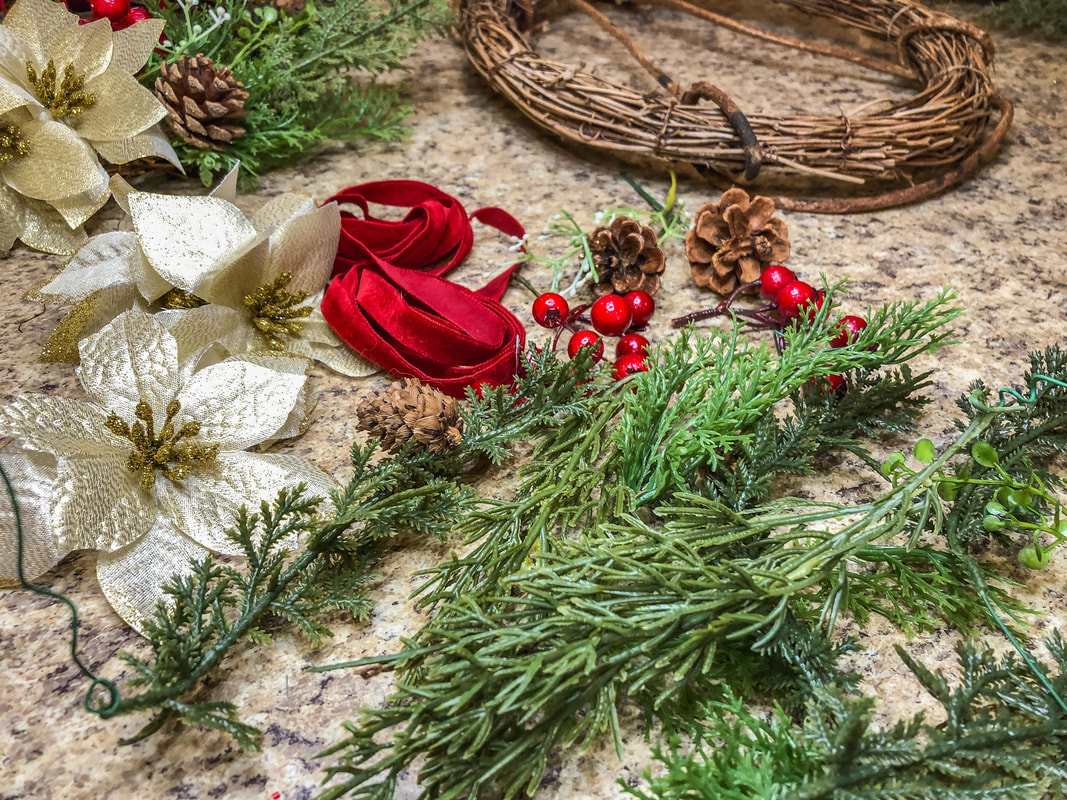 How to assemble: Insert 6-8 pine stems on either side of the center at the bottom of the wreath base. Insert three poinsettias at the center between these stems. Insert berries, pinecones, and other florals evenly on both sides of the poinsettias. Tweak your florals until you have the look you want. Find your favorite ribbon and tie it in a simple bow at the top of the wreath. And voila! You have a simple rustic wreath ready to hang on a mirror, wall, mantle, or door! Just an FYI…I did not use hot glue for my wreath because I take my wreaths apart often to create new floral designs. If you want your wreath to be permanent or if it will be exposed to the outdoors, you will want to use glue so your florals are more secure. 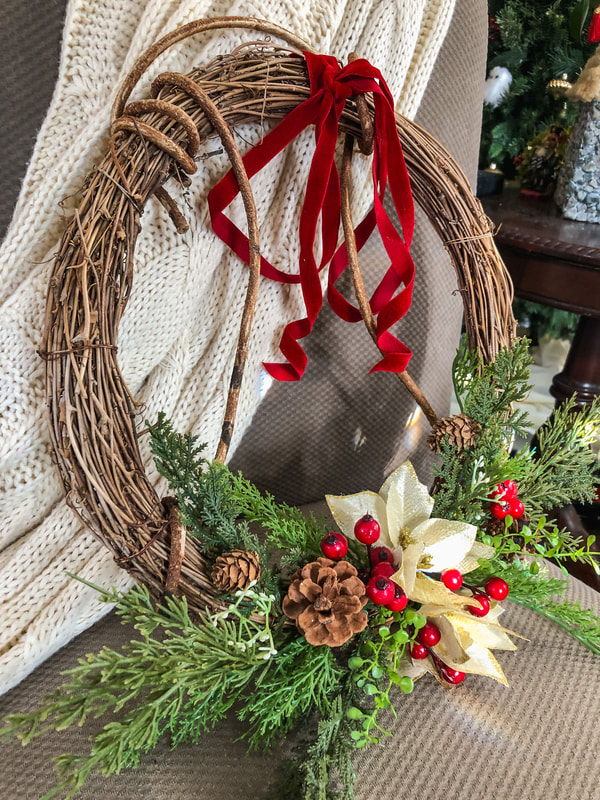 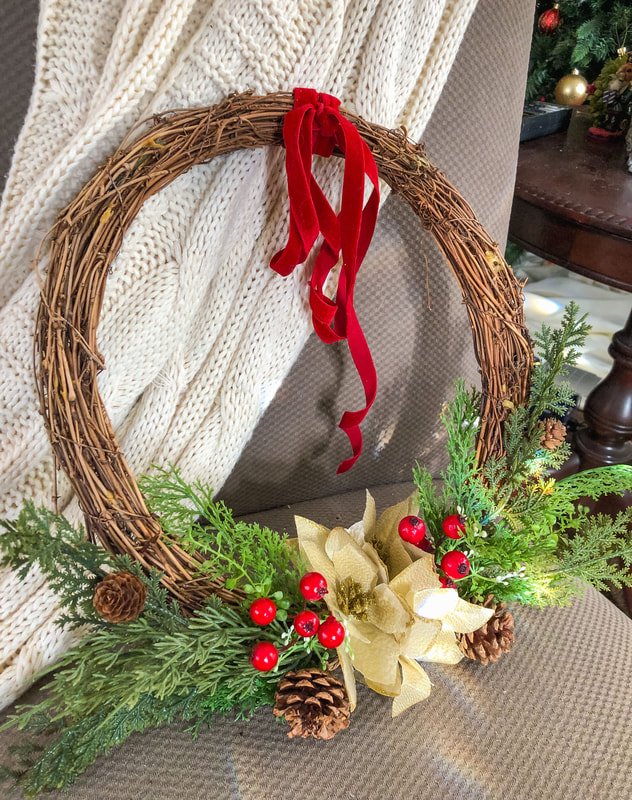 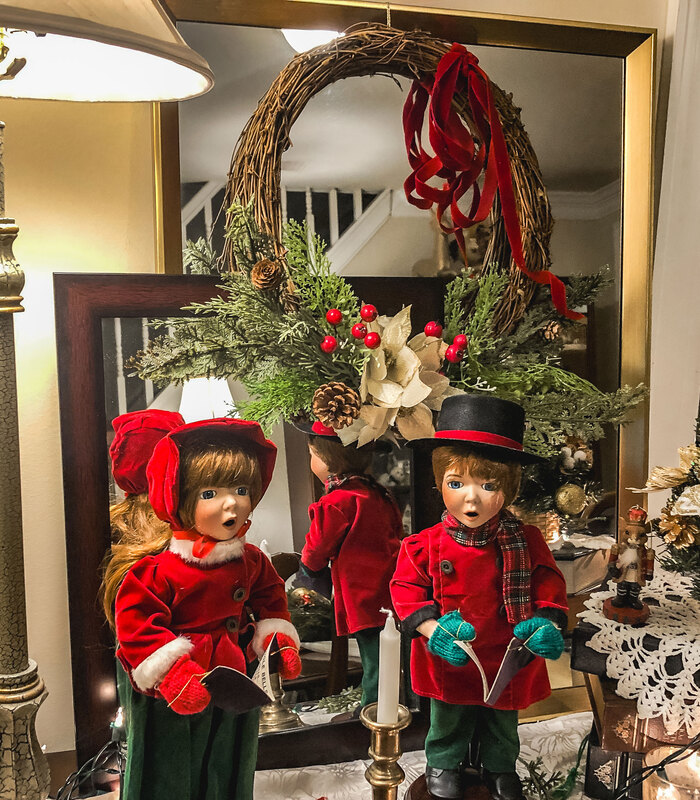 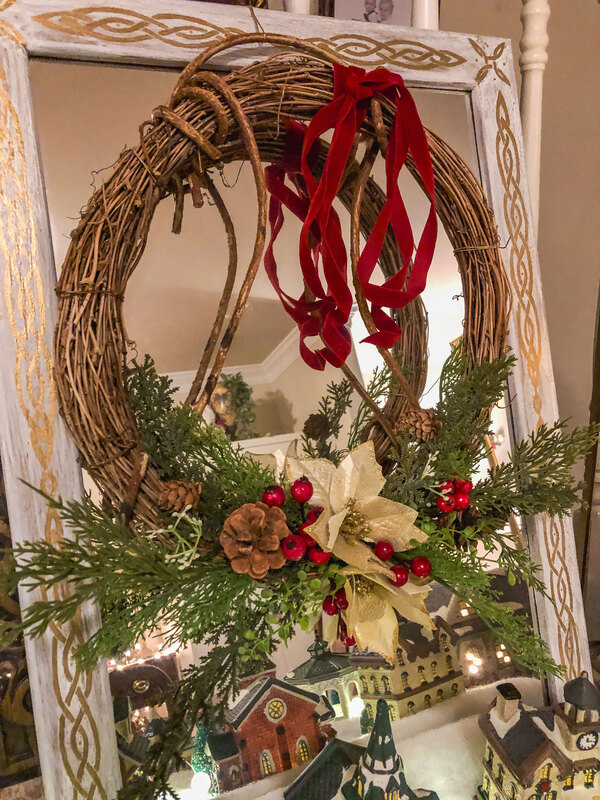 Check out the YouTube video for this tutorial… Another holiday wreath video tutorial you may like… Related blogs you may want to read: Simple Holiday Front Door Wreath Tutorial How to make handmade pearl swag Christmas tree ornaments How I decorated my Christmas tree on a budget this year How to make a simple faux floral wreath for the winter How to make a super easy faux ivy vine wreath for Christmas How to make cheap garland look festive for the holidays in just six steps DIY fall/winter decorative branch box Some of the posts in this article contain affiliate links. If you click on the link and purchase the item, I will receive an affiliate commission at no extra cost to you. I will only recommend products or services I use personally and/or believe will add value to my readers, so there is no conflict of interest. 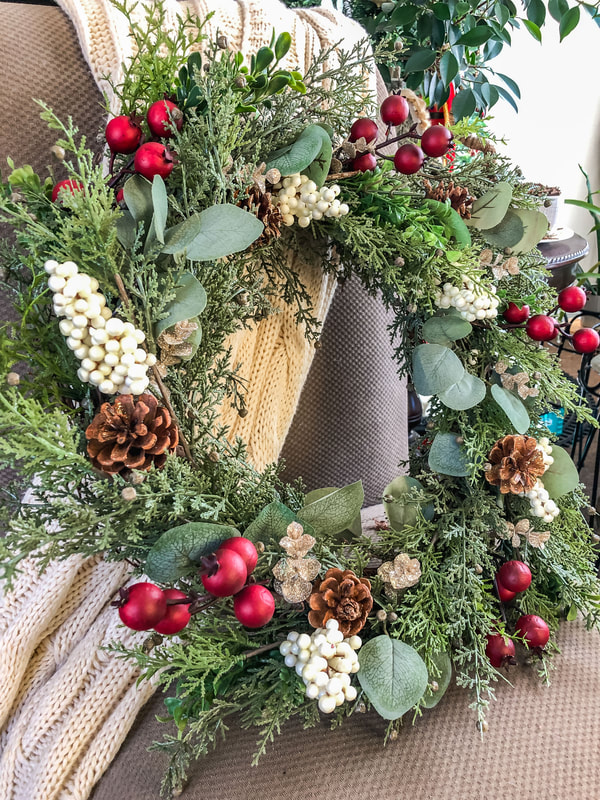 Last year, I created a few blogs about decorating on a budget. This year, we will continue this theme with new ideas! The cost of living is so high right now that it is more important than ever to be frugal and find ways to cut corners anywhere possible. Beautiful new decorations from the latest trending collections are impressive and make for gorgeous holiday interiors, but you can achieve a welcoming interior for your holiday guests on a budget. Today’s DIY will show you a simple way to create a statement for your front door using a grapevine wreath and faux florals from your own stash. You could even create something similar with florals from your local dollar store. Supplies needed: grapevine wreath base faux juniper or pine faux eucalyptus red berries pine cones white berries gold glitter stems door hanger 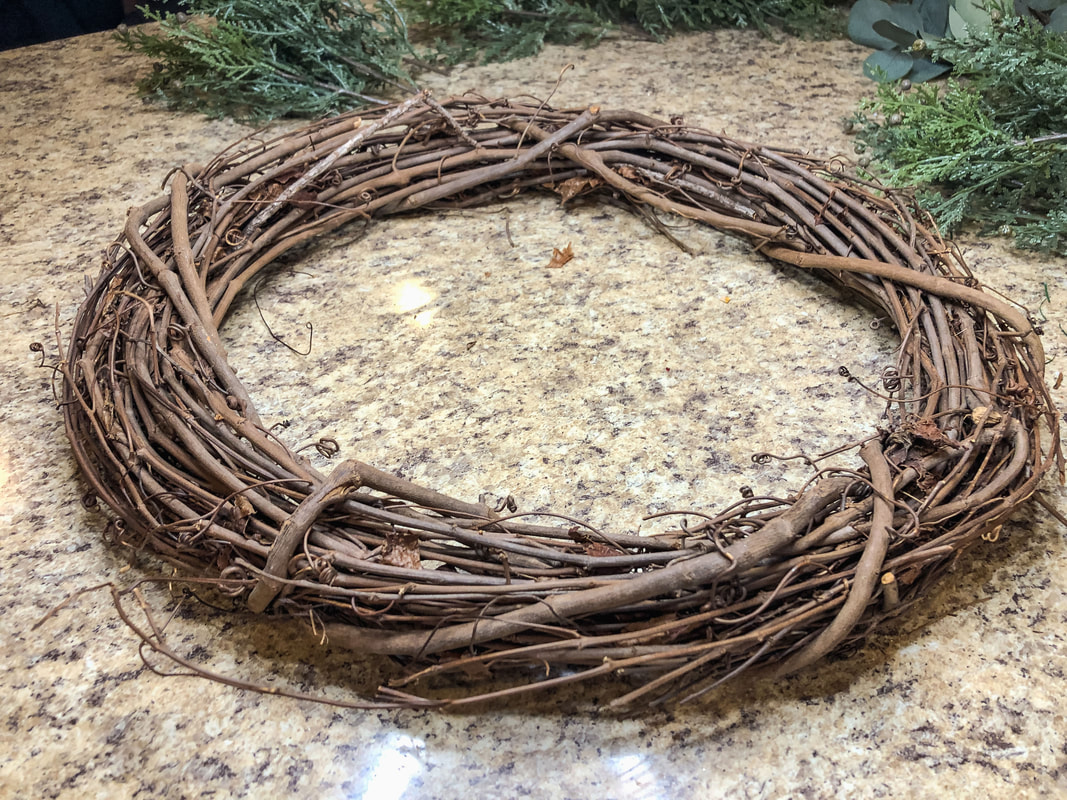 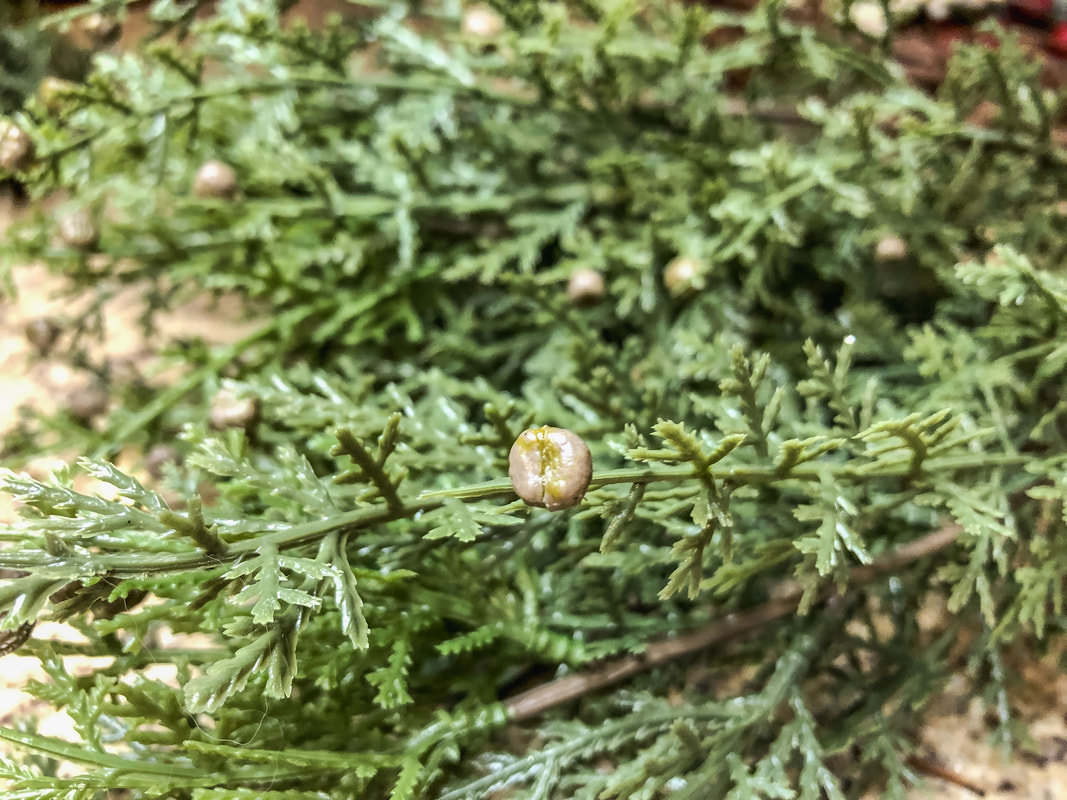 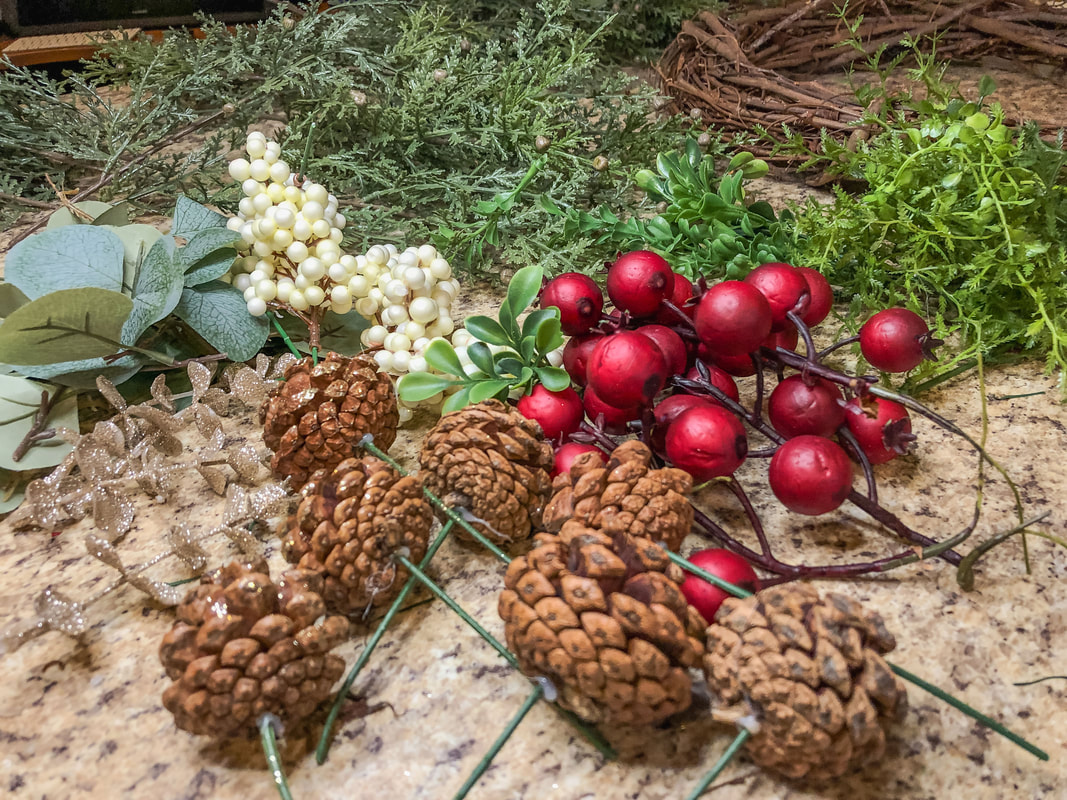 How to assemble: For this wreath design, work your stems into the base going in a clockwise direction. Insert the main greenery stems into your base, slightly overlapping as you work your way around in a clockwise direction. Add more greenery around the outside & inside of the wreath. Add in evenly-spaced eucalyptus stems. Insert evenly-spaced pinecones. Place red berries into the wreath, keeping them evenly spaced. Odd numbers will look the best. Insert evenly-spaced cream berries. Give the wreath a little glitter with some gold floral stems. Add any final touches, fill empty spaces with greenery, and hang! A quick note…If you want to hang this wreath outside, you may want to use a dab of hot glue as you insert your stems so that everything stays secure. Happy Holidays! 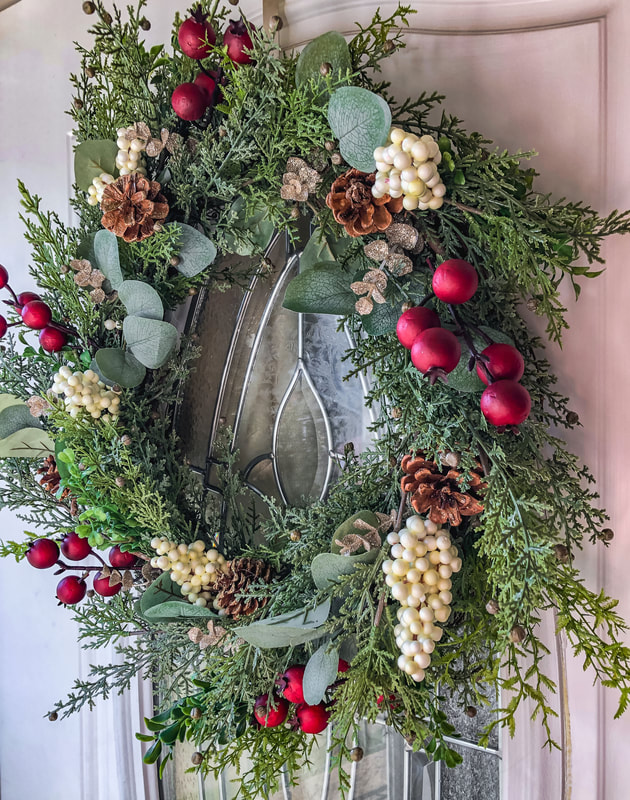 Check out the YouTube video for this tutorial… Another holiday wreath video tutorial you may like… Related blogs you may want to read: Simple Rustic DIY Holiday Wreath How to make handmade pearl swag Christmas tree ornaments How I decorated my Christmas tree on a budget this year How to make a simple faux floral wreath for the winter How to make a super easy faux ivy vine wreath for Christmas How to make cheap garland look festive for the holidays in just six steps DIY fall/winter decorative branch box Some of the posts in this article contain affiliate links. If you click on the link and purchase the item, I will receive an affiliate commission at no extra cost to you. I will only recommend products or services I use personally and/or believe will add value to my readers, so there is no conflict of interest.  I spent the past month writing blogs about different holiday decor styles and color schemes. This research inspired me to be brave and experiment with my usual Christmas tree decor. So, one sunny afternoon, I went shopping for ideas for my tree and ended up at Hobby Lobby, where I was greeted with a 50% off Christmas decor sale! (I’m not an affiliate or sponsored by Hobby Lobby.) My goal was to find some gorgeous extra wide ribbons and greenery to fill out my tree and wreaths. I walked out with a bundle of red cardinals, fluffy white owls, faux juniper sprays…and no ribbon. The ribbon aisle was picked clean, but the birds inspired me to create an entirely different decor scheme than was planned. So I came home and rifled through the trim-a-tree boxes and ribbon totes in search of ornaments and ribbons to coordinate with the stuff I bought. Long story short, this year’s Christmas tree features red, white, and gold decor. Which brings me to today’s little tutorial… I have this wonderful knack for creating projects for myself! Today’s project was to make some gold swag tree ornaments for my tree to give it more elegance and add visual variety. These ornament swags are a simple and inexpensive way to create a little holiday bling, but you don’t have to use gold pearls. Any color pearls or beads would work well for this project. I will say this project was a little fiddly, but the finished pieces were so worth it and took the look of my tree to another level! Supplies needed: Pearl strands (or beads) Hanging strings Gold ribbon or twine for the ends Hot glue gun Assembly: Cut three pearl strands for each swag at 10”, 8”, and 6”. Cut two hanging strings for each swag 6.5” in length. Find the ribbon or twine you would like to use to wrap and finish off the ends. Grab your hot glue gun. 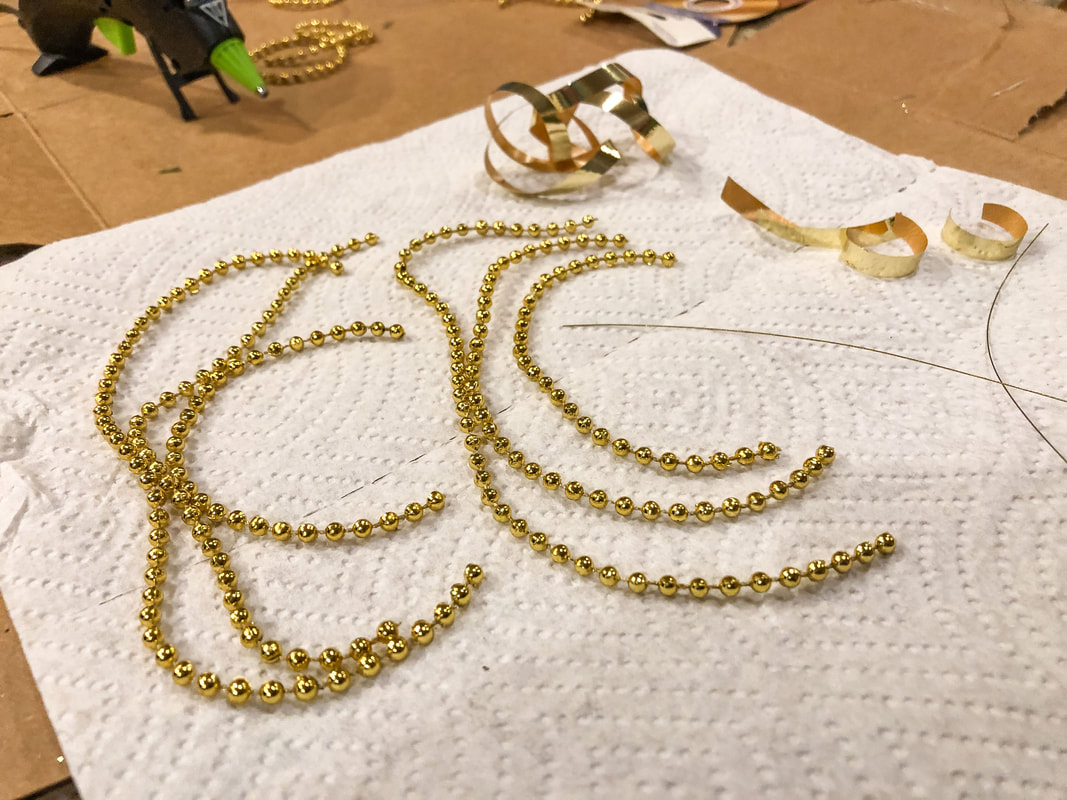 Lay down a small piece of ribbon and line up each pearl strand evenly, arranged from shortest to longest. Grab one piece of hanging string, fold it in half, and hot glue the ends on top of the glued pearls. Now you have the loop for one side of your swag. 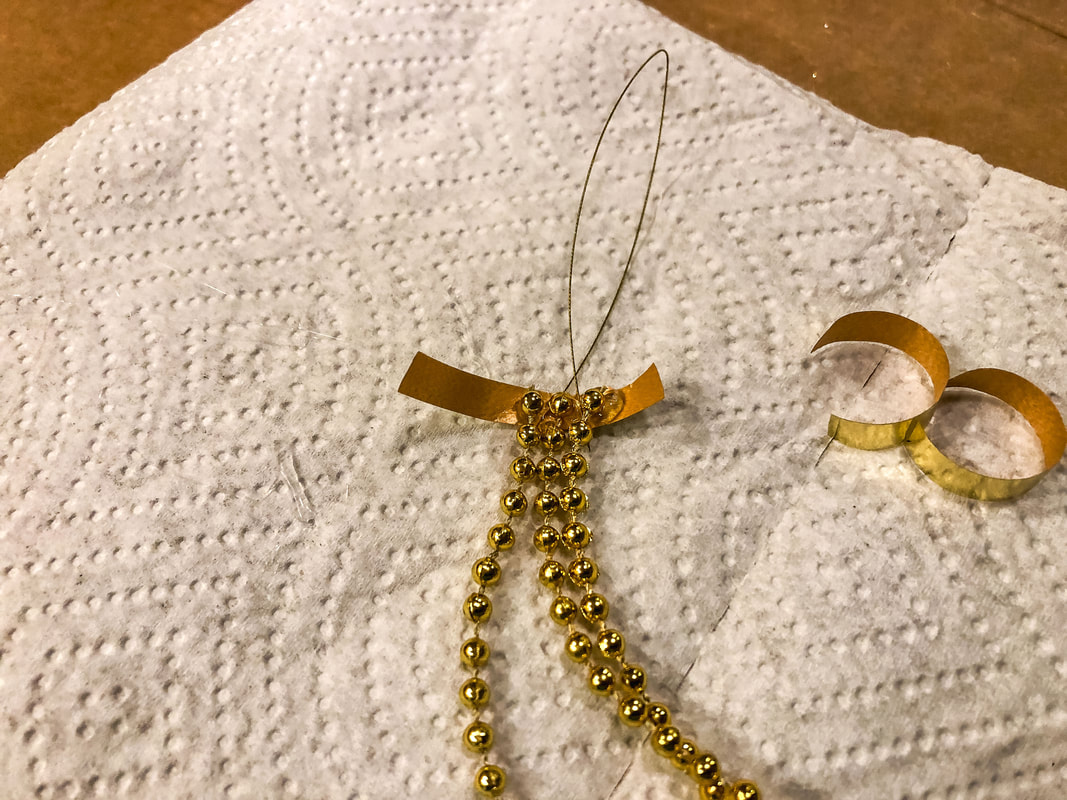 Wrap the pearl strand ends with your ribbon or twine—keeping them flat (not bunched up)—and secure with glue. 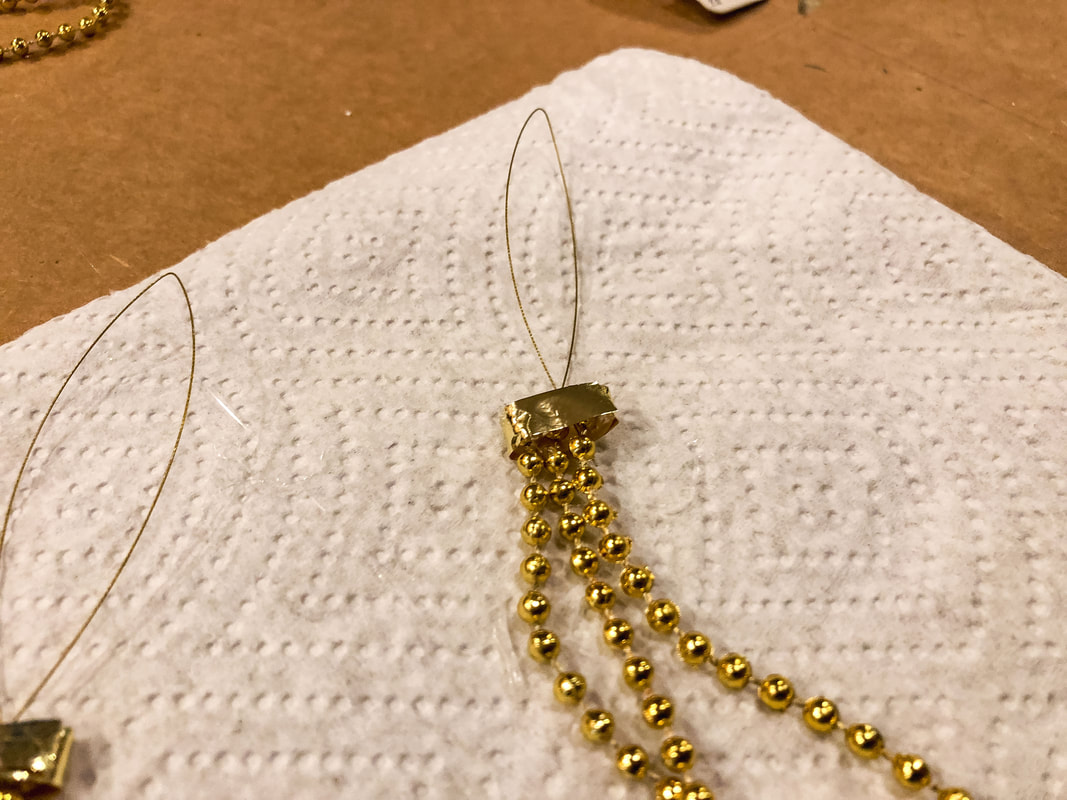 Once one end is secure, create a loop or swag with the pearl strands so that the opposite ends line up. Make adjustments as needed for the desired spaces between the strands. Slide your ribbon or twine under this end of the strands and follow the same steps as the first side. Once the glue is set, you can hang your new ornament on the tree! 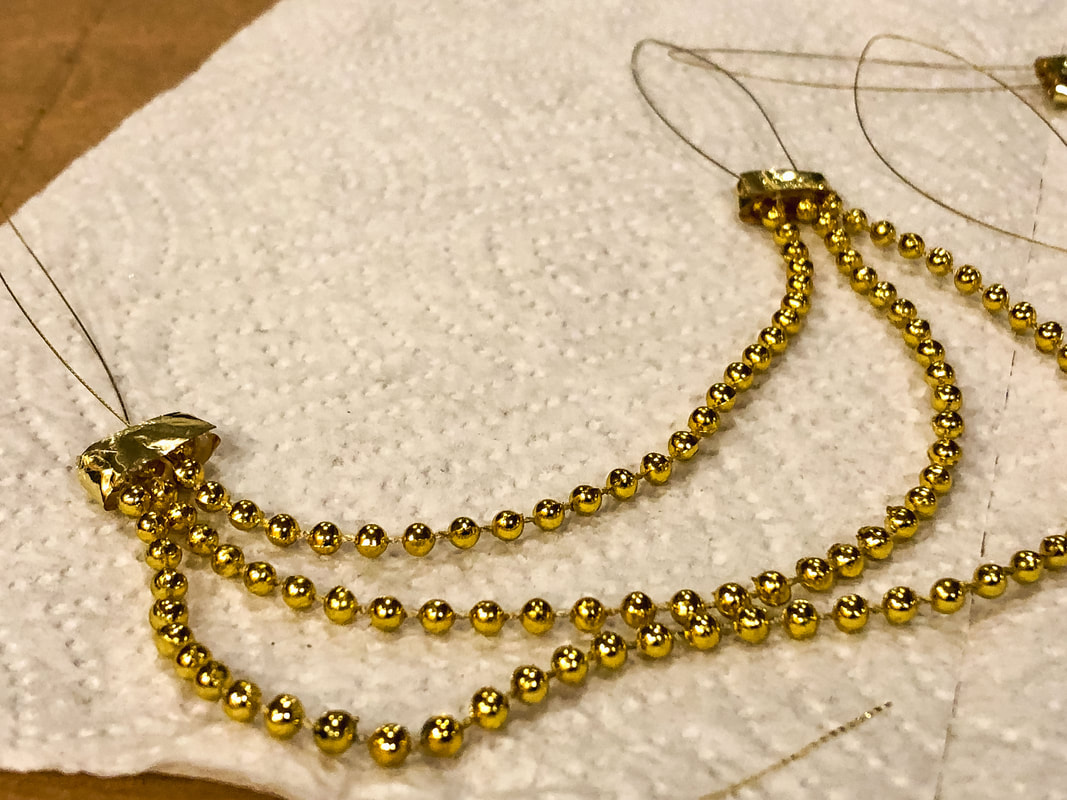 Let me know if you tried this project in the comments. If you did try it, what variation in materials did you use? Happy crafting…and Merry Christmas!  Related blogs you may want to read: 20 Traditional decor ideas to brighten your Christmas holidays Simple holiday or winter front door wreath tutorial How I decorated my Christmas tree on a budget this year How to make a simple faux floral wreath for the winter How to make a super easy faux ivy vine wreath for Christmas How to make cheap garland look festive for the holidays in just six steps DIY fall/winter decorative branch box Some of the posts in this article contain affiliate links. If you click on the link and purchase the item, I will receive an affiliate commission at no extra cost to you. I will only recommend products or services I use personally and/or believe will add value to my readers, so there is no conflict of interest. More Christmas gifts and stocking stuffer ideas from Blick Art!  Images from Dickblick.com. Click the links below to view or purchase. Some of the posts in this article contain affiliate links. If you click on the link and purchase the item, I will receive an affiliate commission at no extra cost to you. I will only recommend products or services I use personally and/or believe will add value to my readers, so there is no conflict of interest.  ’Tis the season for gift-giving…and crafting!!! Do you or someone you know need MORE craft supplies? (Because you can never have enough craft supplies, right?!) Do you need stocking stuffers for that crafty person in the family? (Or for your OWN stocking…I won’t judge!) Below is a list I compiled of twenty handy and creative gift ideas to fill up the holiday stockings and decorate the space under the tree! artPOP! Set of 48 Watercolor Brush Pens 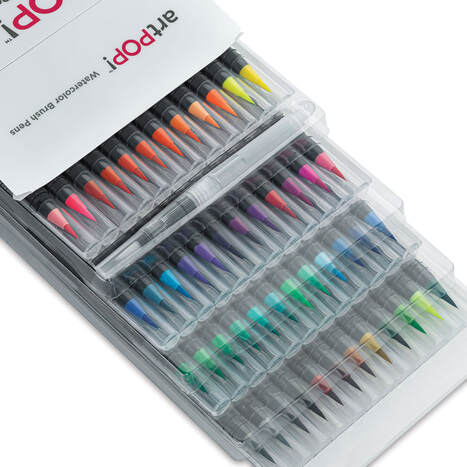 Winsor & Newton Studio Collection Set of 50 Watercolor Pencils 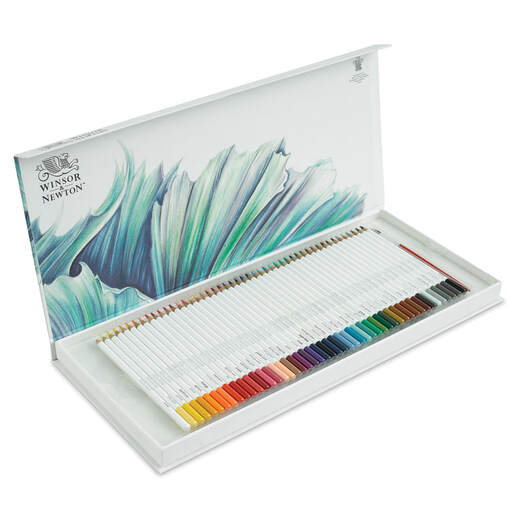 Hahnemuhle Akademie Aquarell Watercolor Book 8” x 11 1/2” 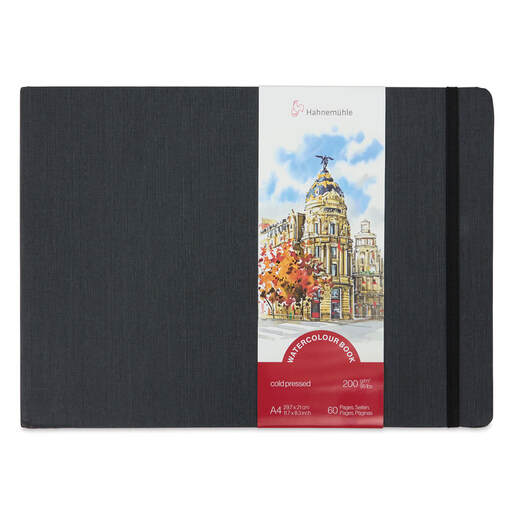 Cavallini Foraging Notebook with Mushroom Design 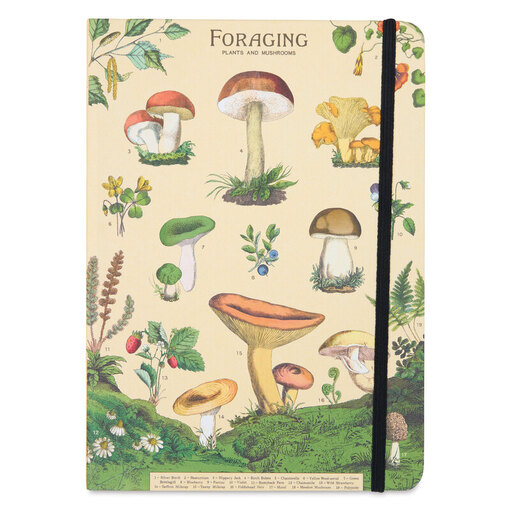 Gnomes in the Neighborhood, An Artist’s Coloring Book 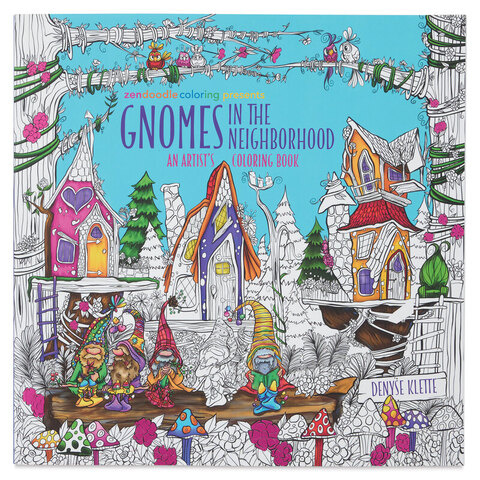 Moleskine Lorenzo Petrantoni Unplanned Planner  Set of 25 Craft Value Brush Set by Blick Essentials 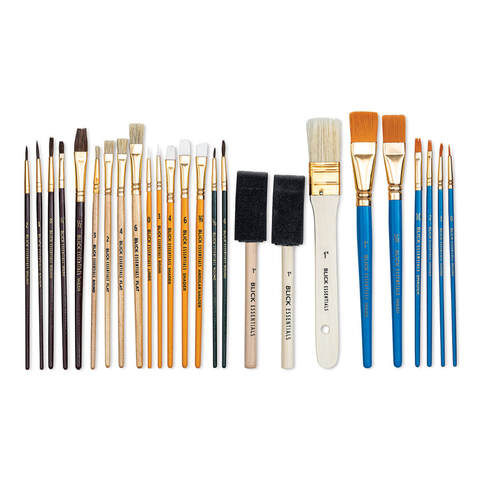 Herbin Round Glass Dip Pen for Calligraphy  24” x 36” Blick Self-Healing Cutting Mat in Gray & Black  E-Z Grip Knife in Black by Blick  Krylon Make It Stone Spray Paint 12 oz 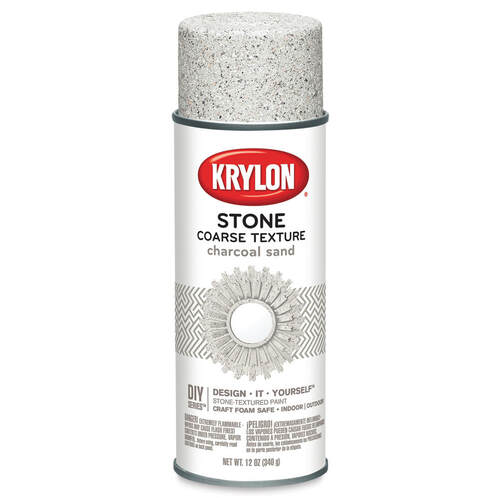 Fleur Chalky Look Paints 4.4 oz 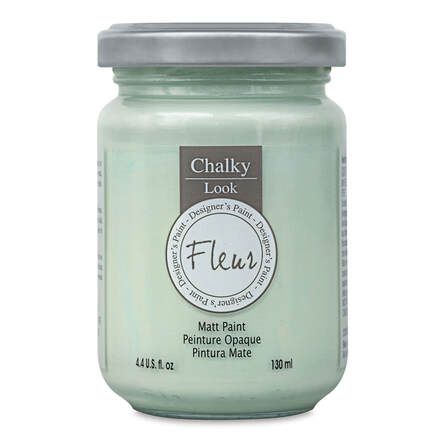 Excel Blades Mitre Box Set for Small Wood Projects  Excel Blades 7” Coping Saw with 4 Assorted Blades (for small woodwork)  12” x 12” Shadow Box by Ampersand Gessobord 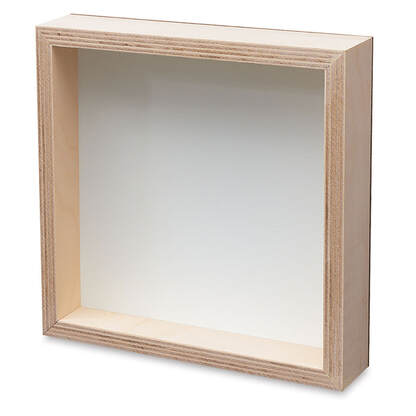 Craft Medley Wood Fairy Door 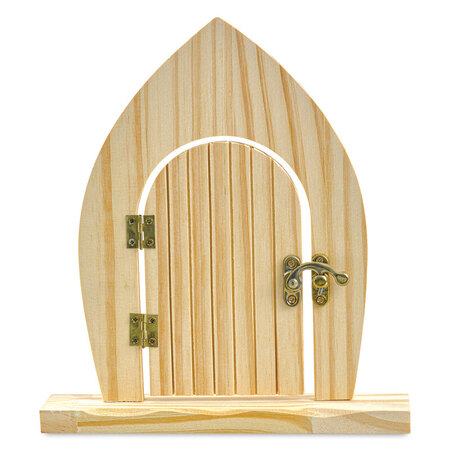 Milestones Mosaic Stepping Stone Kit 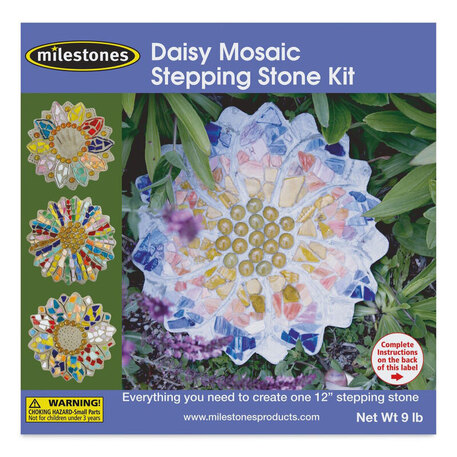 Stencil1 Font Stencils  Set of 5 Assorted Finishes Plaid Mod Podge Starter Set 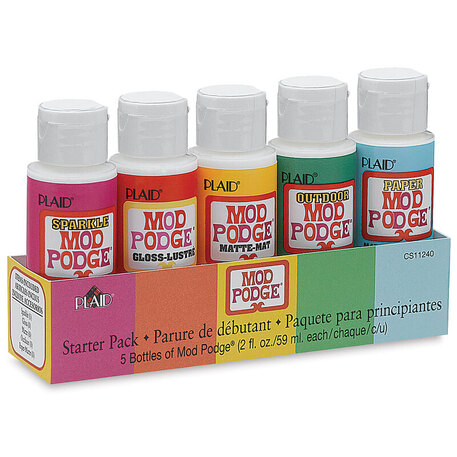 Cricut Maker 3  Do you like drawing tutorials and DIYs? Follow me on YouTube here! My channel has Celtic art drawing tutorials, faux floral videos, and crafty DIY projects. Visit my website to see my online shop, where you will find handcrafted faux floral designs, candleholders, wooden fairy houses, and wood-burned Celtic art. Related blogs you may want to read: https://disstudiodesigns.com/blog/drawing-supply-gift-ideas-for-the-artist-in-the-family 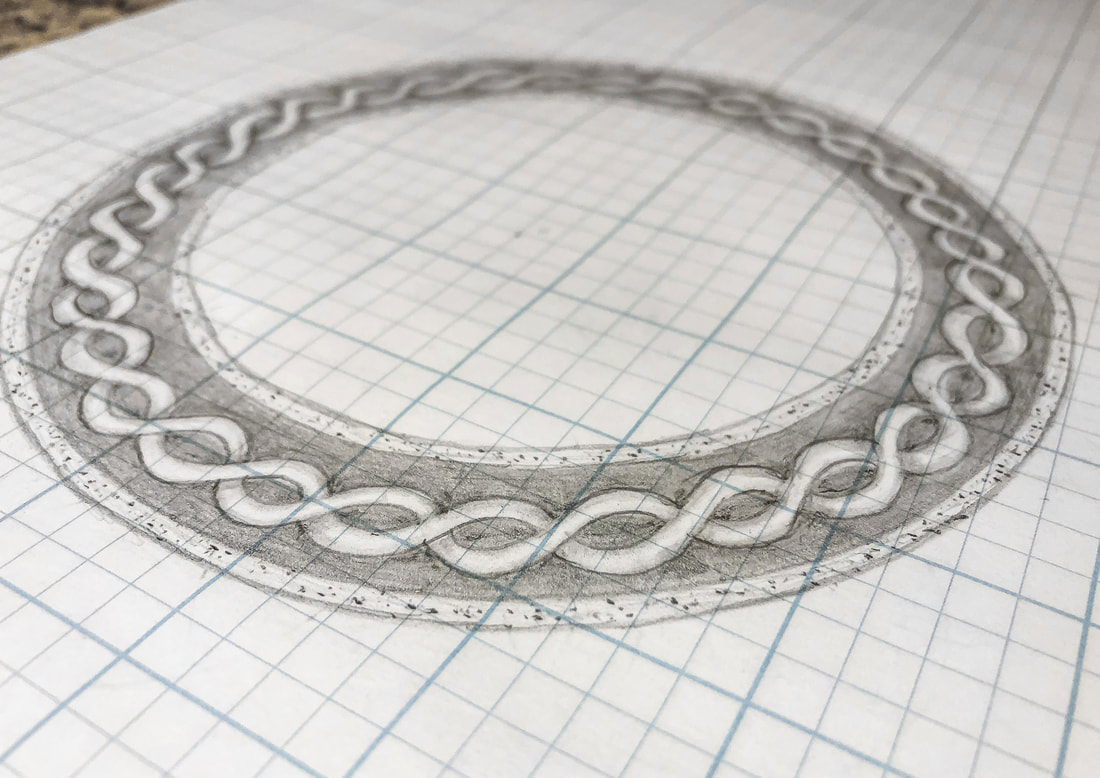 In a previous tutorial, we created a circular Celtic braid. This tutorial will be a simpler version of that design, just a basic twist that I will be using in a new piece of Celtic art—a High Cross. Gather your supplies: Drawing pencils Markers Blending stumps Eraser Clic eraser Ruler Horse hair brush Grid paper Sketch pad Tracing paper (This supply list contains affiliate links, as I am an affiliate of Blick Art Materials. If you click on the link and purchase the item, I will receive an affiliate commission at no extra cost to you. I will only recommend products or services I use personally and/or believe will add value to my readers, so there is no conflict of interest.) Before we start: Guidelines should be drawn using light pressure and/or a 2H drawing pencil so that they can be easily erased. Also, you may want to watch this YouTube tutorial, especially if you are only using a few basic tools: Now let’s get into the circular twist border tutorial! Step 1: Draw a circle 6.25” in diameter and a second inner circle 4.25” in diameter. 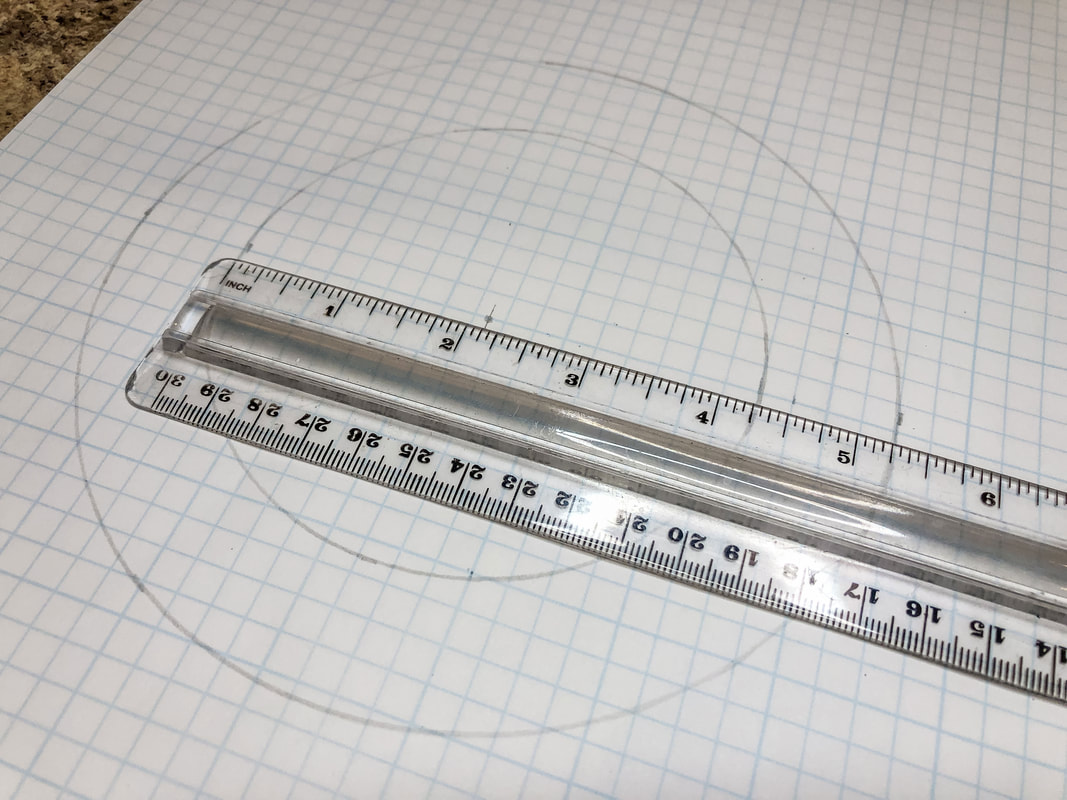 Step 2: Draw a circle 1/8” (or half a grid box if you are using grid paper) from each of these circles on the inside of the ring. This will be your decorative border. 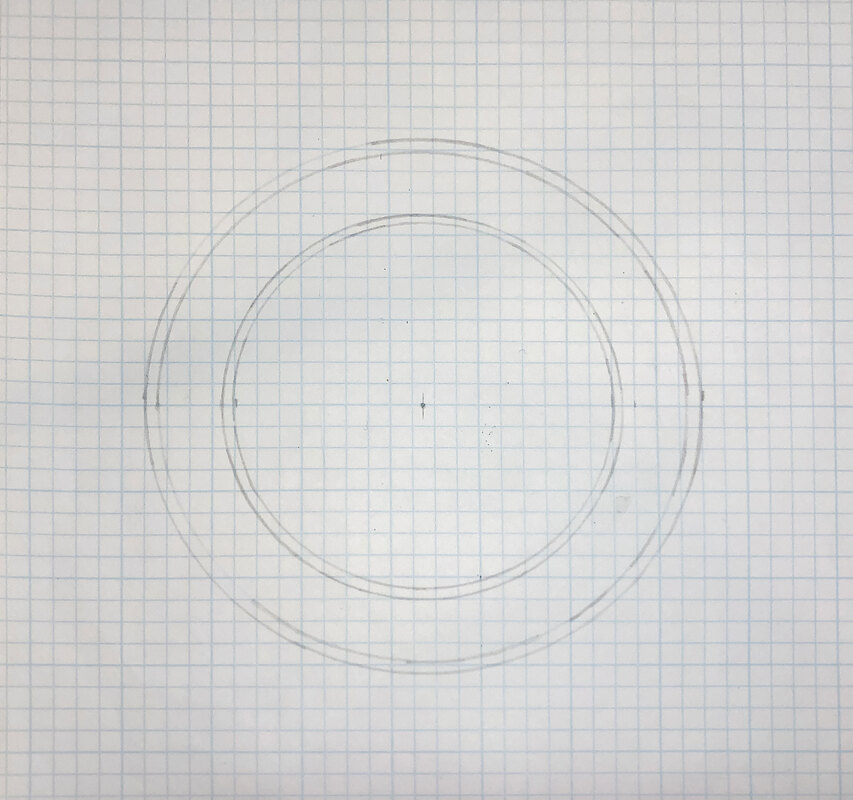 Step 3: Lightly draw a circle at the center point in between these two sets of border lines. This will be the first part of the grid to help you draw the twist. 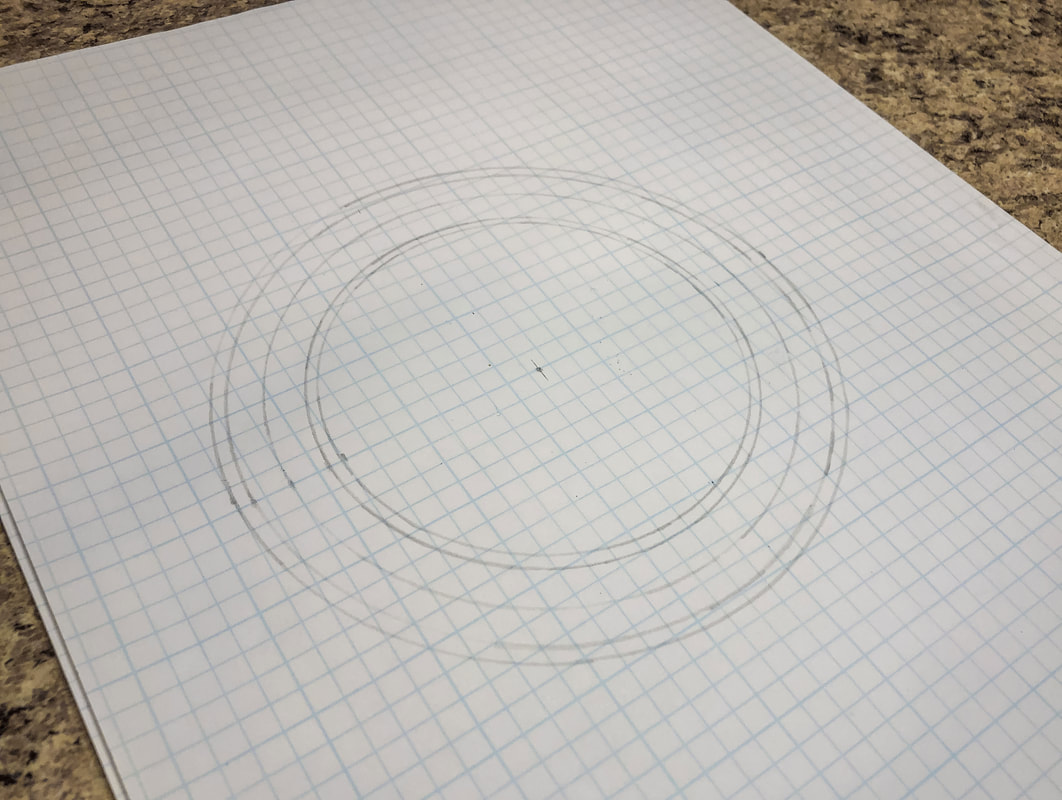 Step 4: Divide the ring into quarters using your ruler, or line up on grid paper. 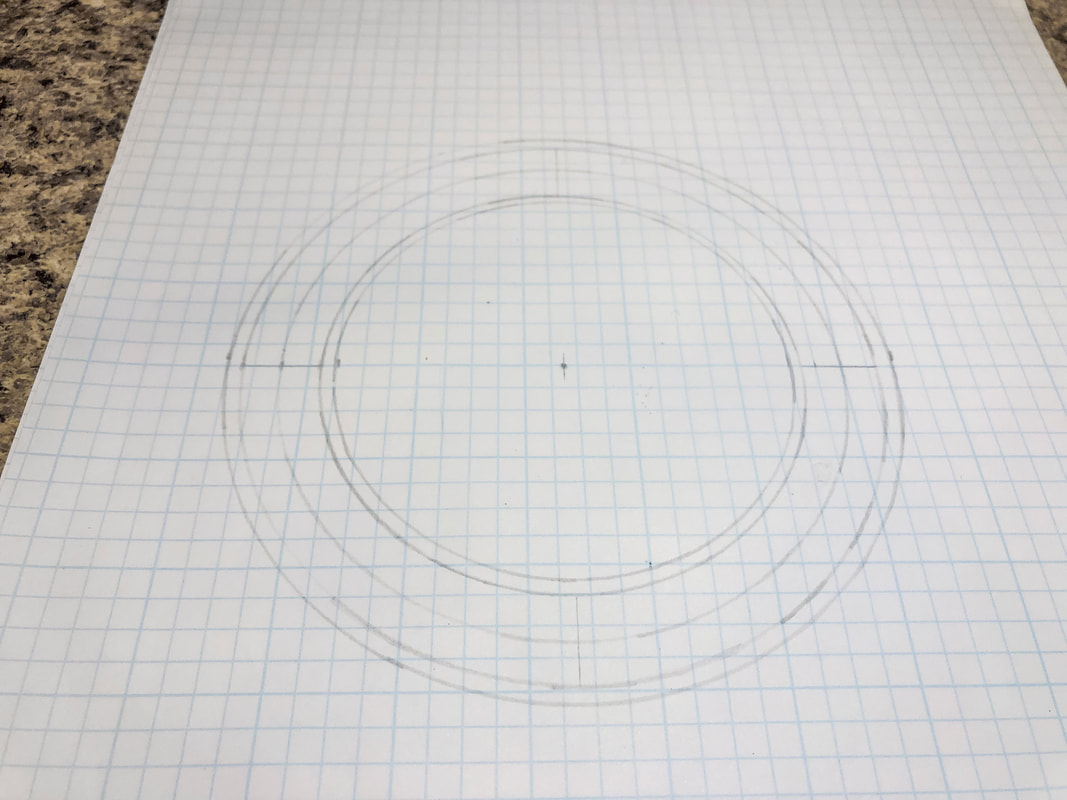 Step 5: Now divide the quarters in half, creating 8 sections. Use the technique from this tutorial to find the center of the arc by drawing overlapping circles and lining up the points where they intersect.  Step 6: Divide these sections in half to create 16 sections. 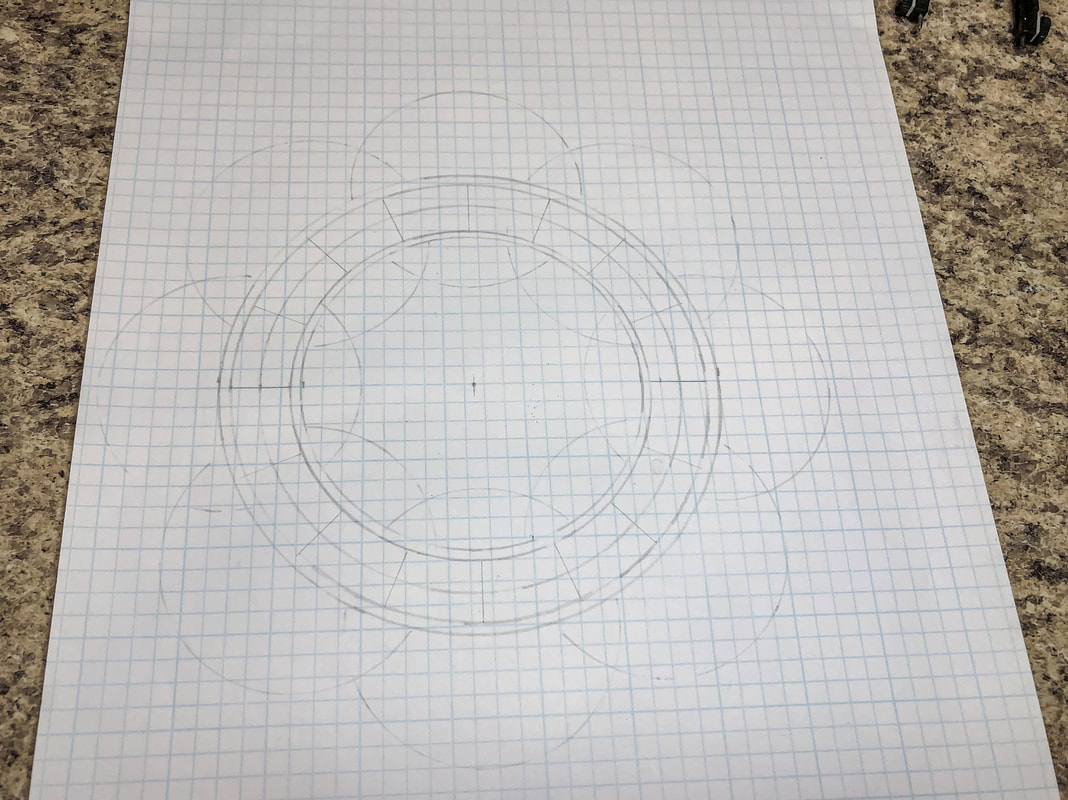 Step 7: And finally, divide those sections in half again to create 32 sections. 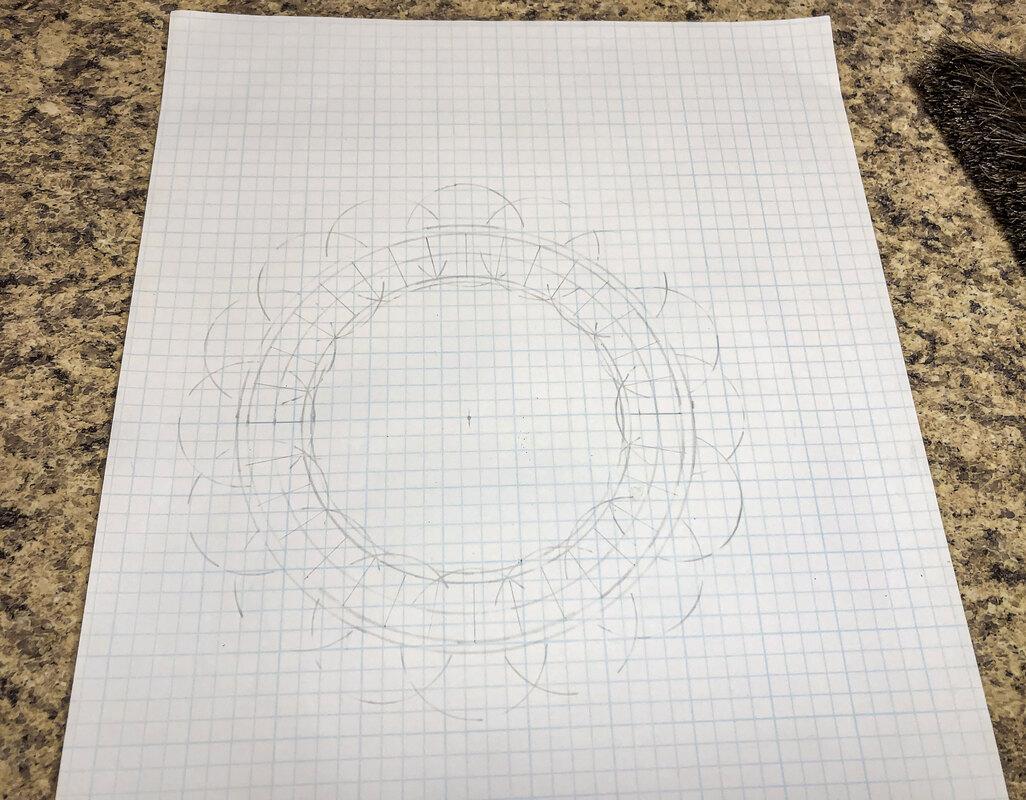 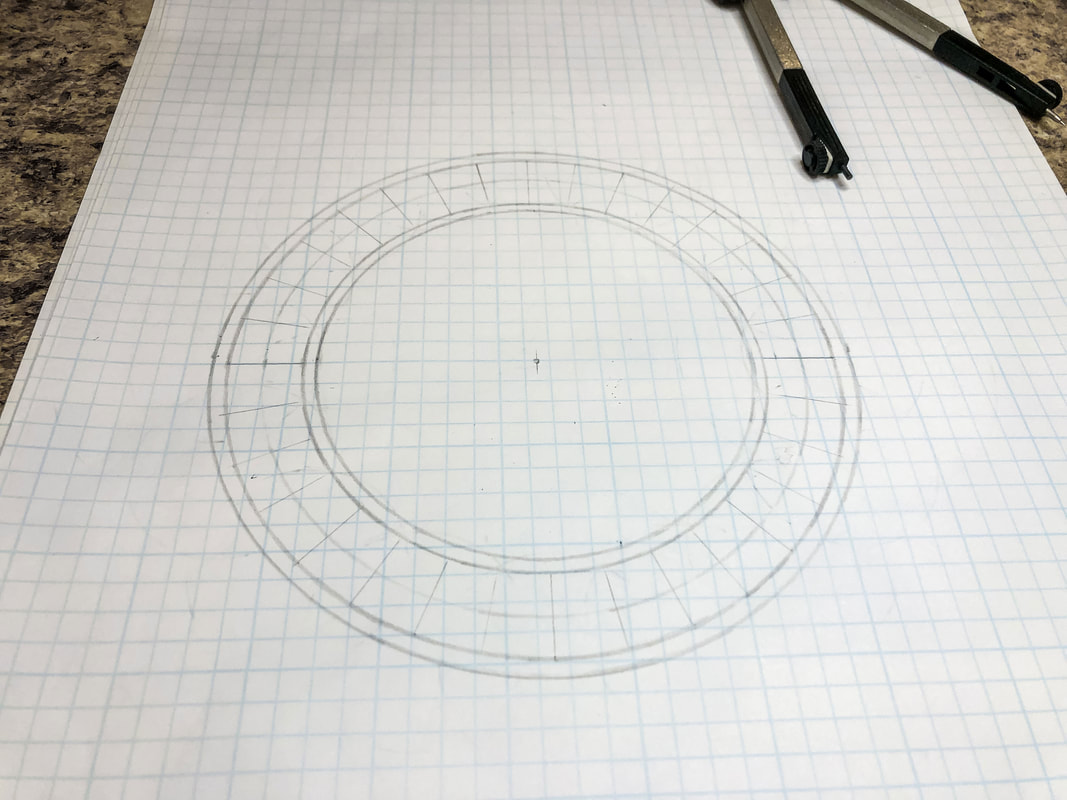 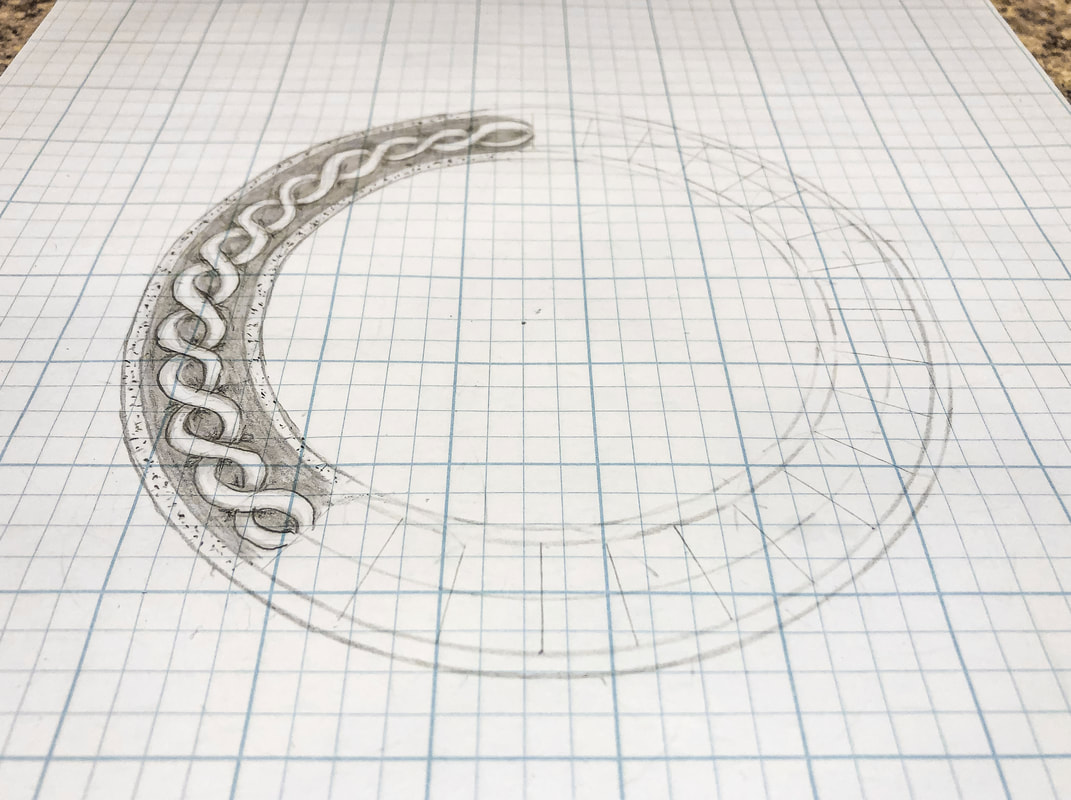 Step 8: Pick a square from this new grid to start. As shown below, draw a pair of “C”s from corner to corner. Think of this as the start of a thread, making your piece of thread as thin or as thick as you like, depending on how much space you want to take up and the style you want to create. 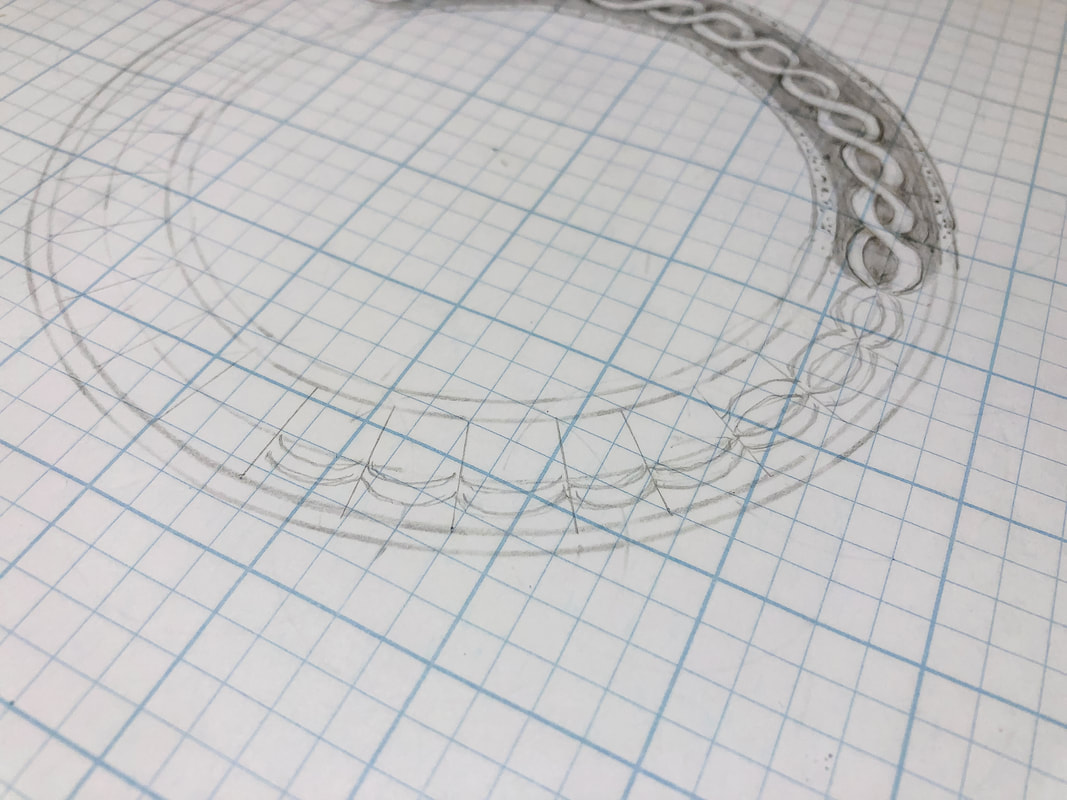 Step 9: Now fill the rest of the grid—top and bottom—with these same pairs of “C”s as shown. Try to keep your thread widths consistent. You will now have a circular grid full of links. 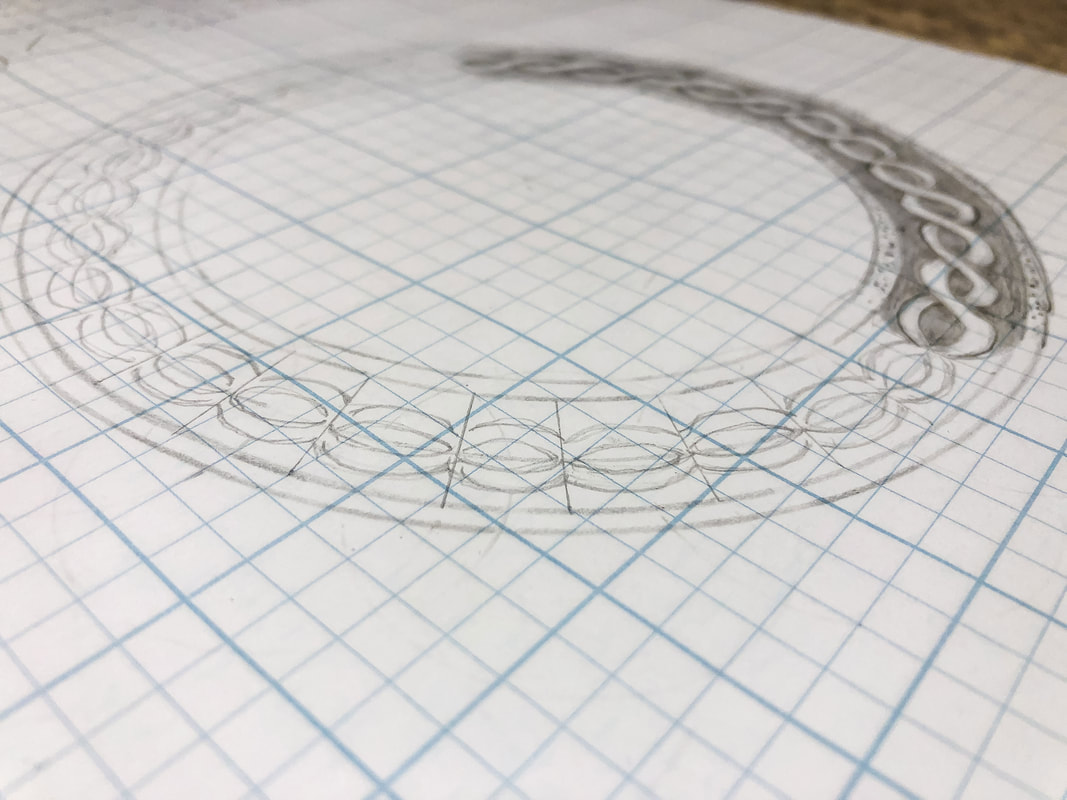 Step 10: Erase the intersections between the links to allow you to work more easily on the overs and unders. 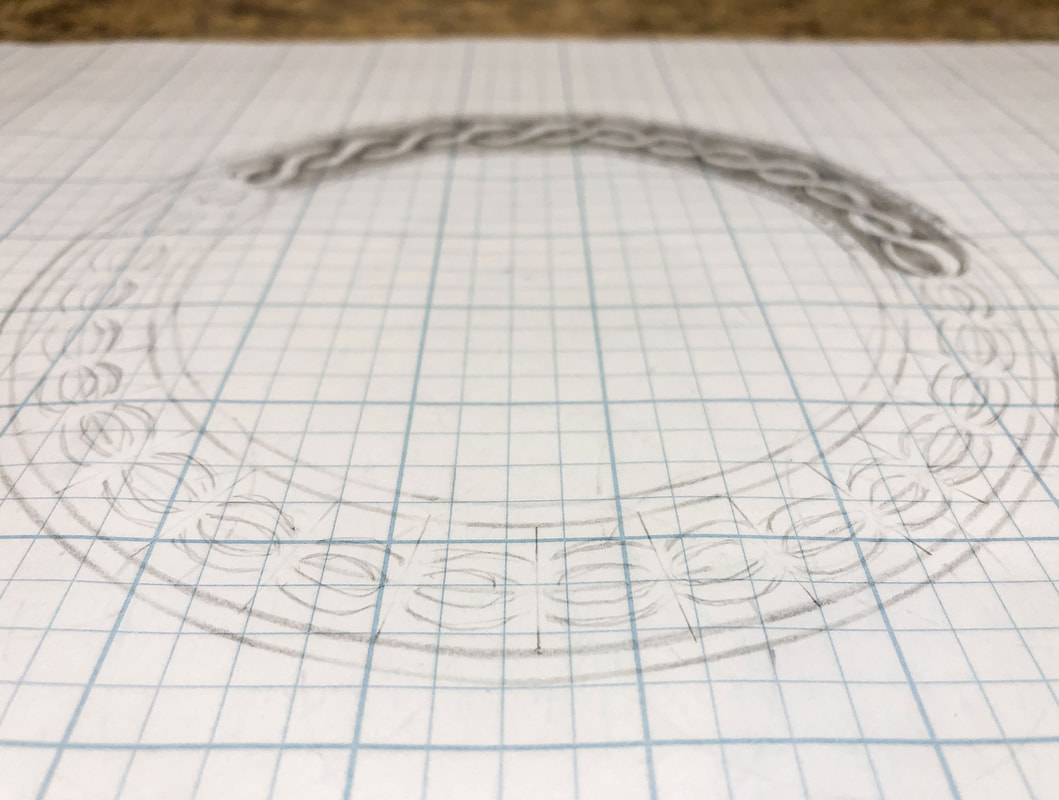 Step 11: Pick a place to start and create your first over-under intersection. Do not jump around. Work from this point and follow the pattern around the ring, making sure you end up with a thread that alternates over and under. 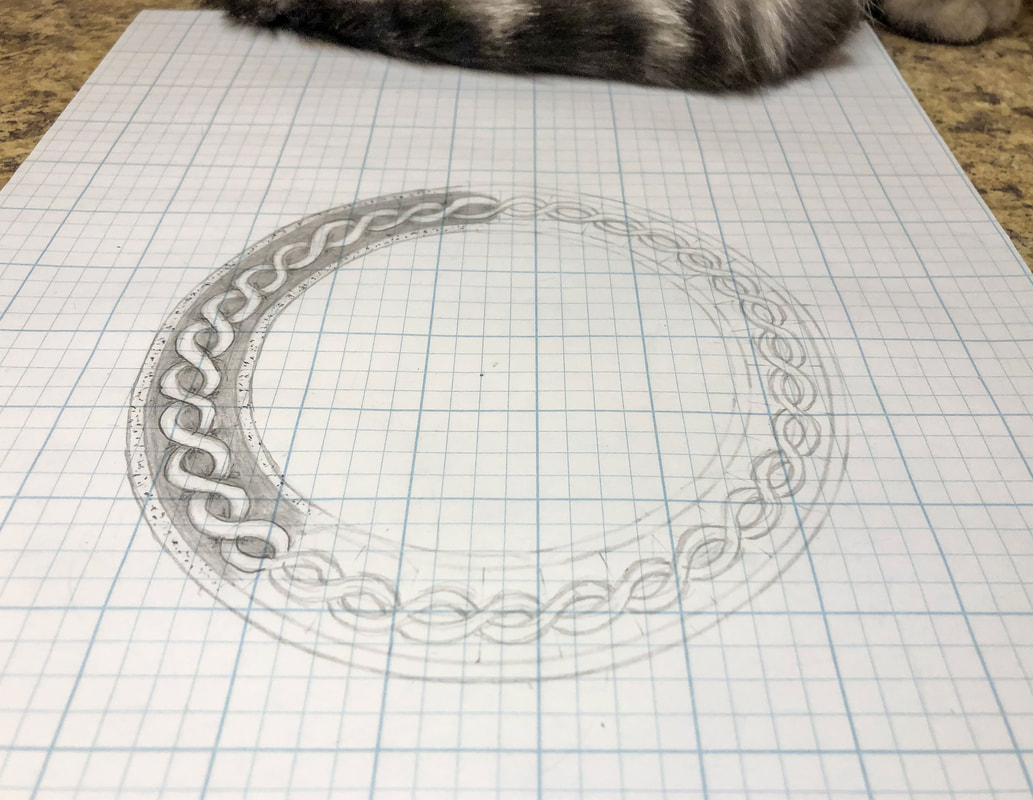 Step 12: Erase all the guidelines and clean up your lines as needed. Step 13: Add shading and stylize! 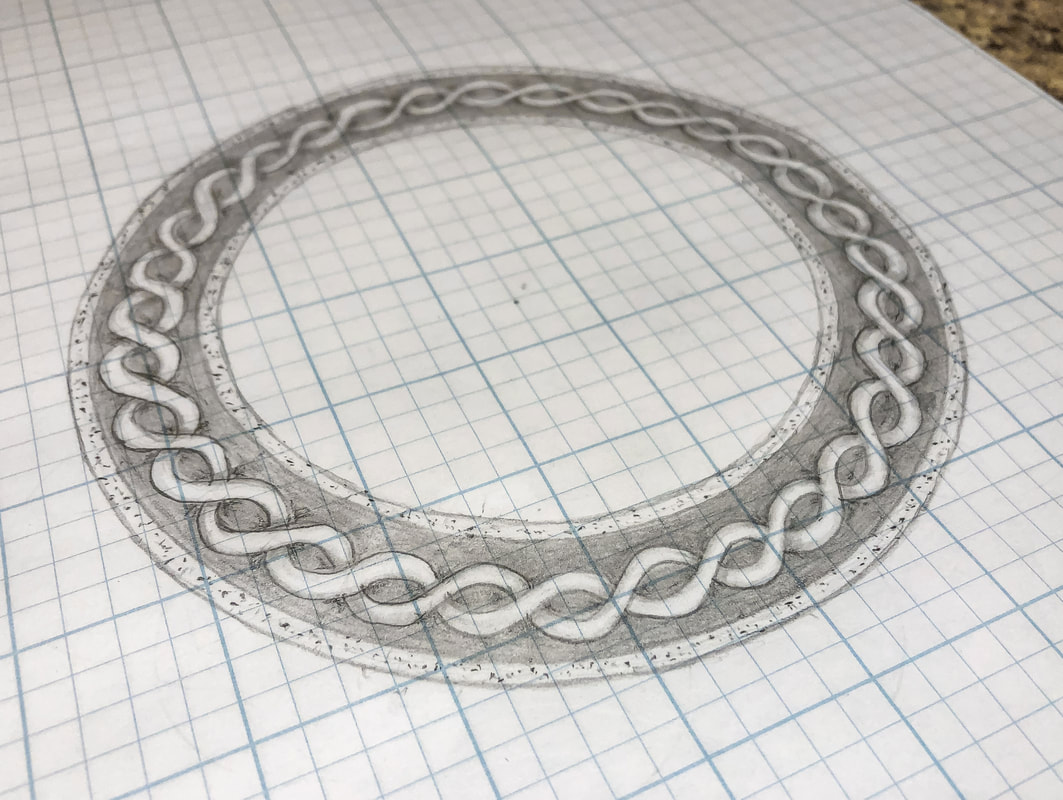 You’re finished! How did it go? Let me know in the comments below! I have created a YouTube tutorial to go with this blog for those of you who are visual learners like myself! You can view the full video tutorial on my YouTube channel here. Related blogs you may want to read: Circular Celtic border knot tutorial, basic braid Basic twist step-by-step drawing tutorial using grid paper Celtic braid step-by-step drawing tutorial Basic border knot with vertical breaks, step-by-step drawing tutorial Basic border knot with horizontal breaks, step-by-step drawing tutorial DIY chalk-painted tray with Celtic border A fun DIY project with paint and a thrifted mirror part 2 The Celtic Motherhood Knot, a symbol of love Celtic Tree of Life Basic Celtic Knot Tutorial Part 1 Celtic Knot Tutorial Part 2 Christmas gifts and stocking stuffer ideas from Blick Art Materials  Images from Dickblick.com. Click the links below to view or purchase. Some of the posts in this article contain affiliate links. If you click on the link and purchase the item, I will receive an affiliate commission at no extra cost to you. I will only recommend products or services I use personally and/or believe will add value to my readers, so there is no conflict of interest. Can you believe the holidays are almost here? Where the heck did this year go?! With only a few weeks left for holiday gift buying, the pressure is on to find something for the creatives in your life. I scoured Blick Art Supplies for some of the most practical drawing supplies for my artistic readers and YouTube followers! Some of the items below are supplies I own or have purchased for one of the creatives in my household. (We’re all creative souls here!) So, without further ado, here are some of my best picks for drawing supply gift ideas for the artist in your life… Item 1— Milan Sunset Series Double Decker Pencil Case with Supplies 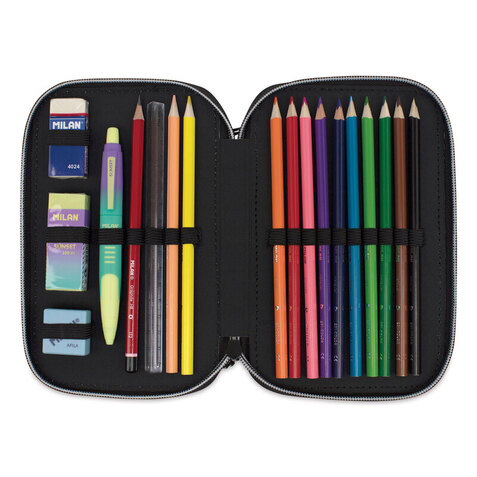 Item 2— artPOP! Sketchbox Easel 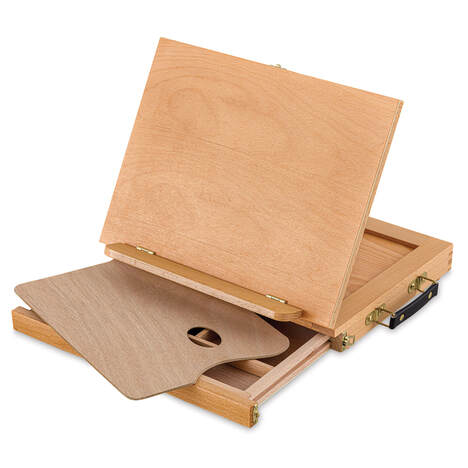 Item 3— Prismacolor Pencil Sharpener  Item 4— Blick Studio Artists’ Colored Pencils  Item 5— Blick Studio Drawing Pencils  Item 6— Strathmore 300 Series Drawing Pads  Item 7— Strathmore 400 Series Drawing Paper Pads 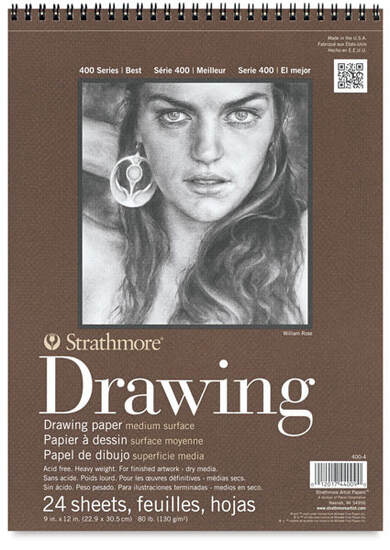 Item 8— Bienfang Mixed Media Pad  Item 9— Manuscript Modern Calligraphy Dip Pen Sets 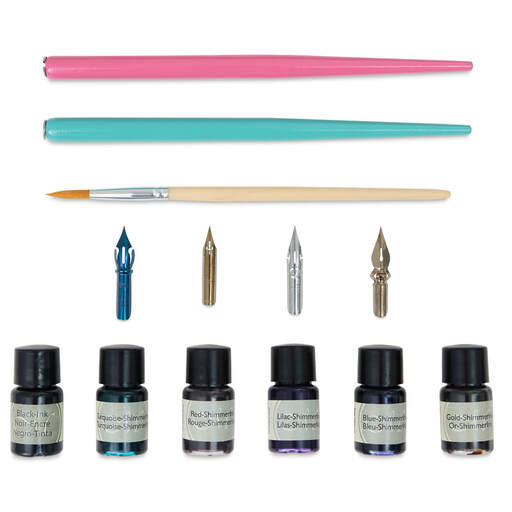 Item 10— Prismacolor Premier Dual-Ended Chisel Tip Markers 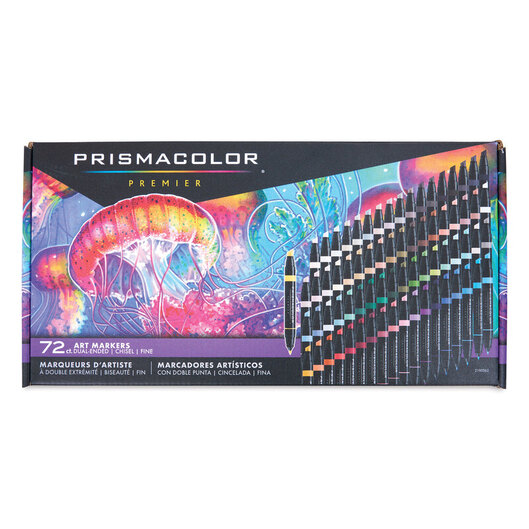 Item 11— Copic Sketch Markers 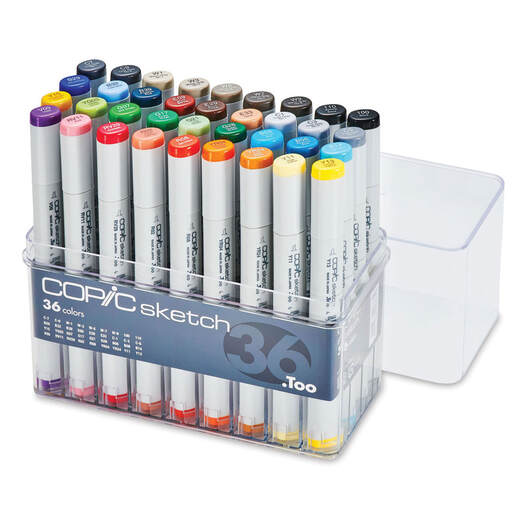 Item 12— Copic Multiliner SP Pens 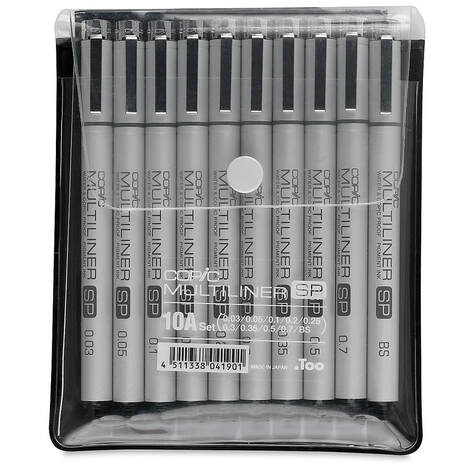 Item 13— Faber-Castell Pitt Artist Pen Set - Black Wallet Set, Set of 4, Assorted Nibs 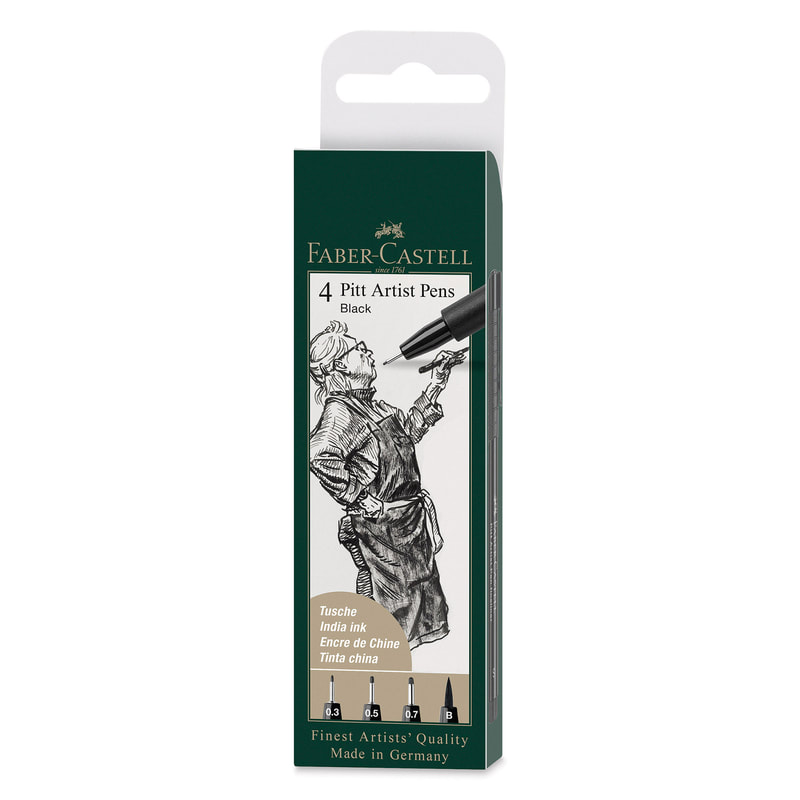 Item 14— Artograph LightPad LX LED Light Box  Item 15— Blick Studio Series Softside Portfolios  Item 16— Itoya I-Series Art Profolios  Do you like drawing tutorials and DIYs? Follow me on YouTube here! My channel has Celtic art drawing tutorials, faux floral videos, and DIY projects. You can also find many Celtic art drawing tutorials on my blog page here. https://www.disstudiodesigns.com/blog/category/celtic-inspired 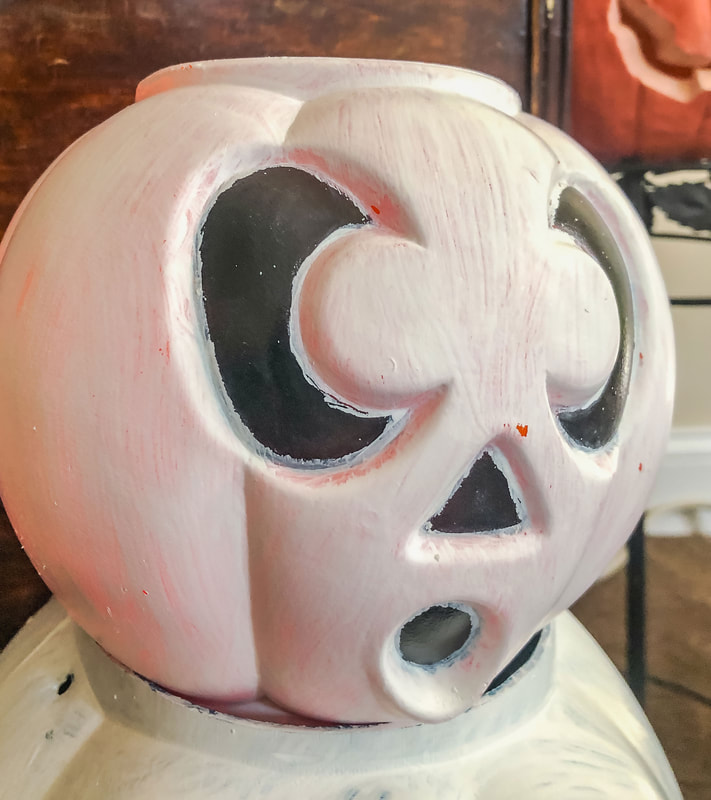 In a previous blog, I showed you how to up-cycled old jack-o-lanterns using chalk and craft paint. In this blog, I will share how I transformed a few old plastic Halloween candy buckets into “new” decor for my home. Reusing and updating old decor is such a fun and budget-friendly way to create a fresh look in your home for the season without breaking the bank! I don’t know about you, but money has been extraordinarily tight this year…And my kids are all grown now, so they don’t need those old buckets anyway! Here are some supplies that you may need for this project. (Items contain affiliate links.) Three plastic pumpkin buckets Dowel rod (optional) White craft paint Sponge brush General paintbrush Paint palette Thin paintbrush Spray sealant (optional) LED candles Fairy strands Step 1 Prep your buckets by pulling off the handles and giving them a thorough clean. 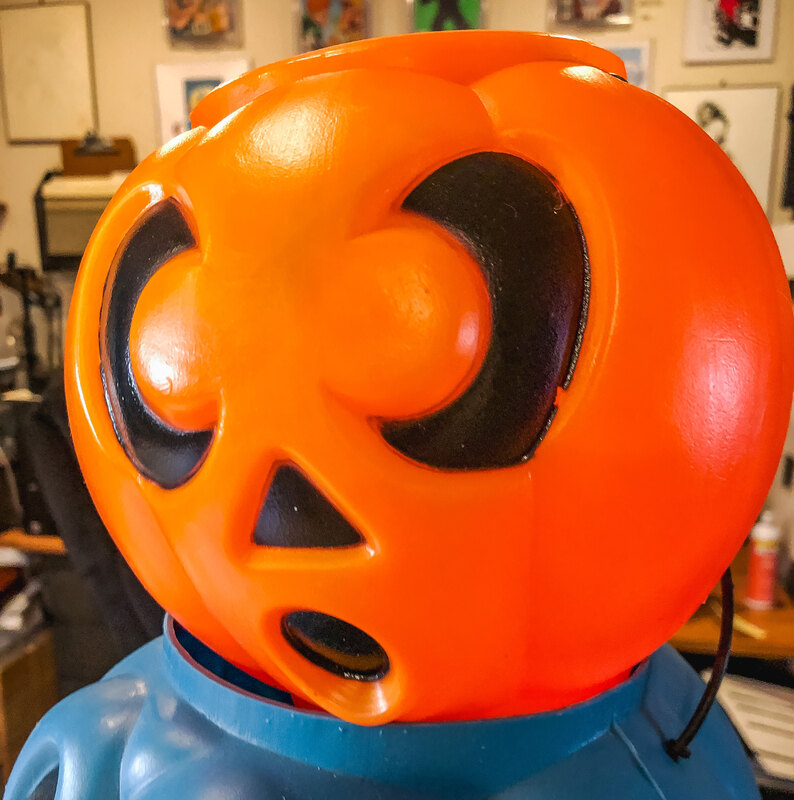 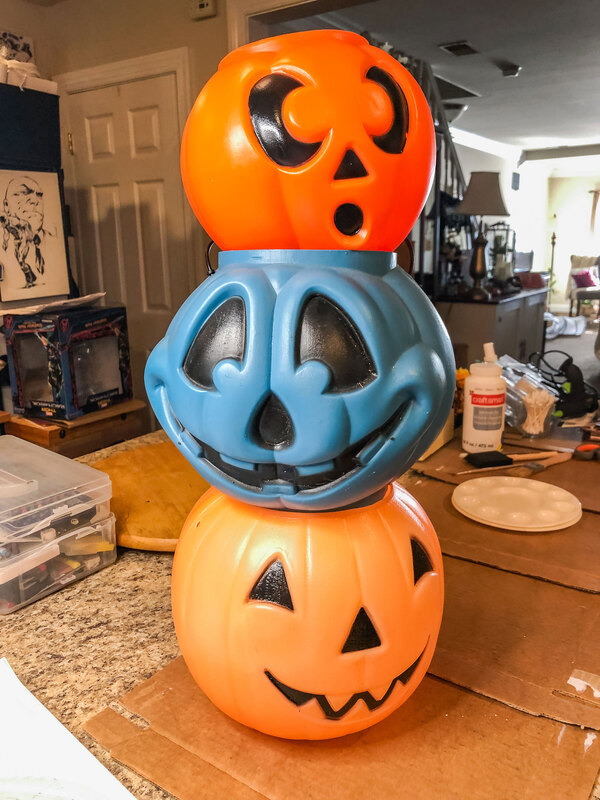 Step 2 (optional) Drill holes in the bottom of each bucket. Using a sharp blade, carefully cut out the eyes, nose, and mouth. Step 3 Apply the first couple coats of white paint on each pumpkin and let dry. You can opt for Mod Podge instead of craft paint if you’d like. The idea is to use something as a primer. 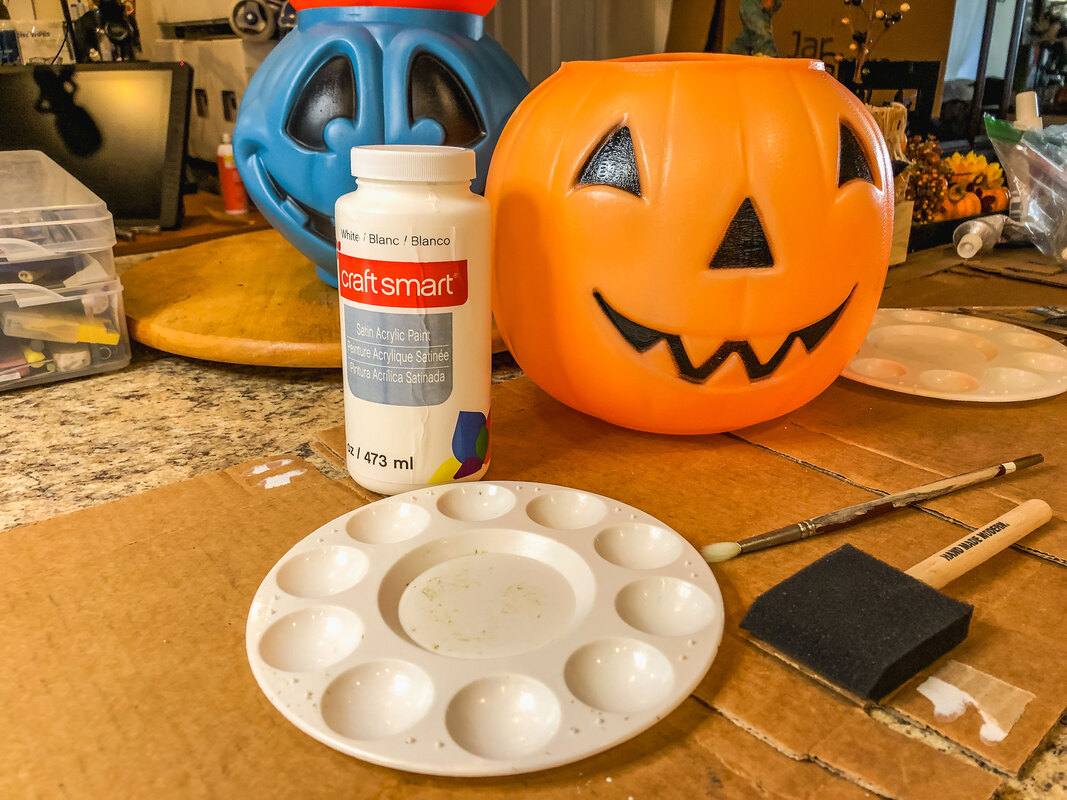 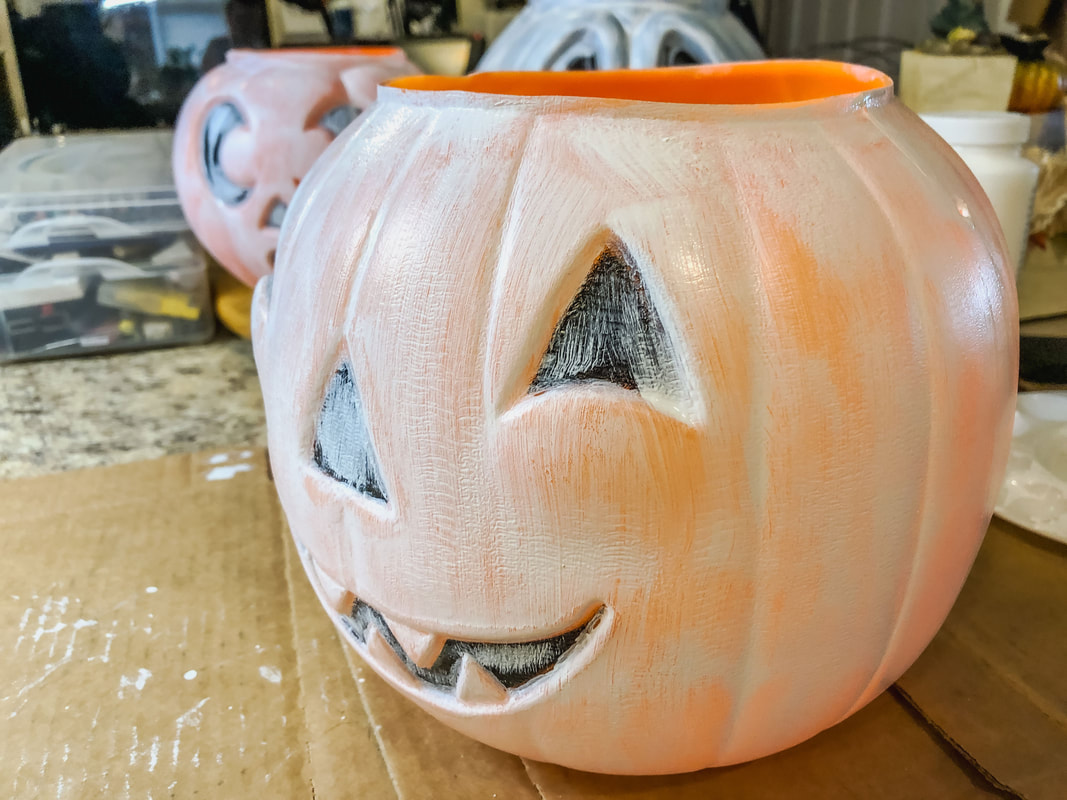 Step 4 Using a thin brush, paint inside all the creases of the pumpkins, including the areas inside the eyes, nose, and mouth that are not black. Use the same white paint for this step or a darker color to create a sense of depth. 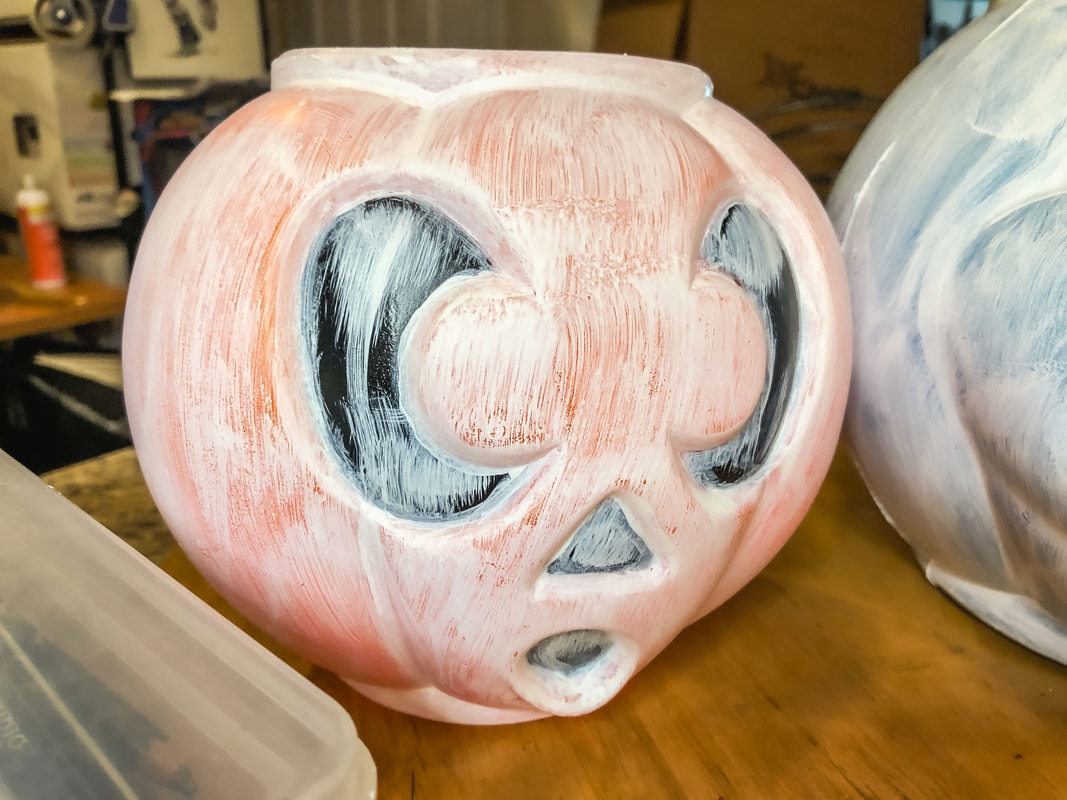 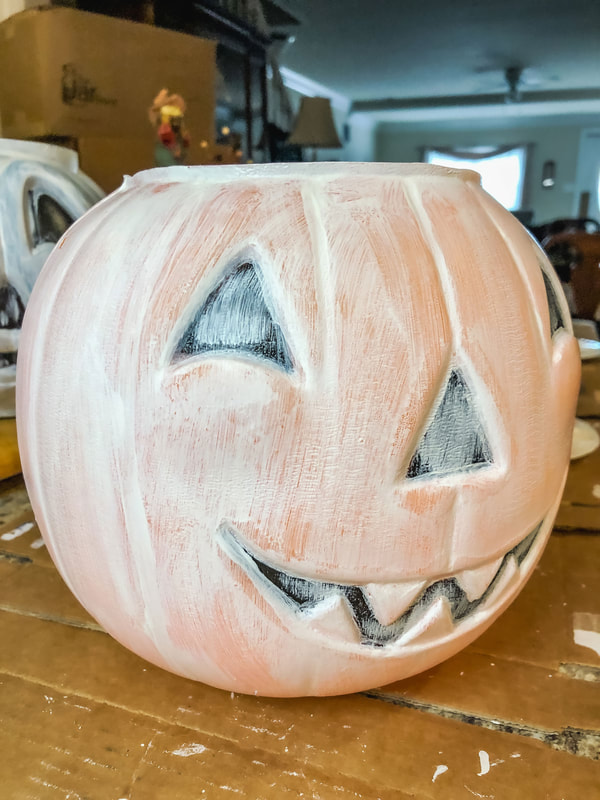 Step 5 Add a third coat of white paint, applied heavier this time to get full coverage. Let dry. Add a final coat of paint if desired. Step 6 Clean off any paint that may have gotten in the black areas of the eyes, nose, and mouth. (If you didn’t cut them out. ) 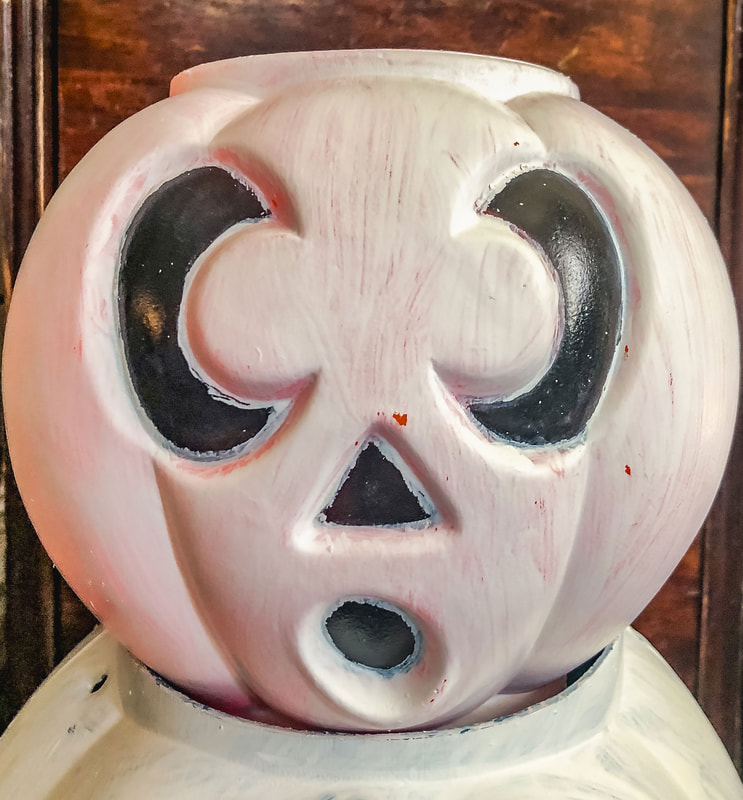 Step 7 (optional) Spray with a sealant if you will be using this decor outside. Step 8 Stack the newly painted pumpkin buckets one on top of another or attach them with a long, thin dowel rod. Light them up with LEDs or fairy strands to create a spooky glow! 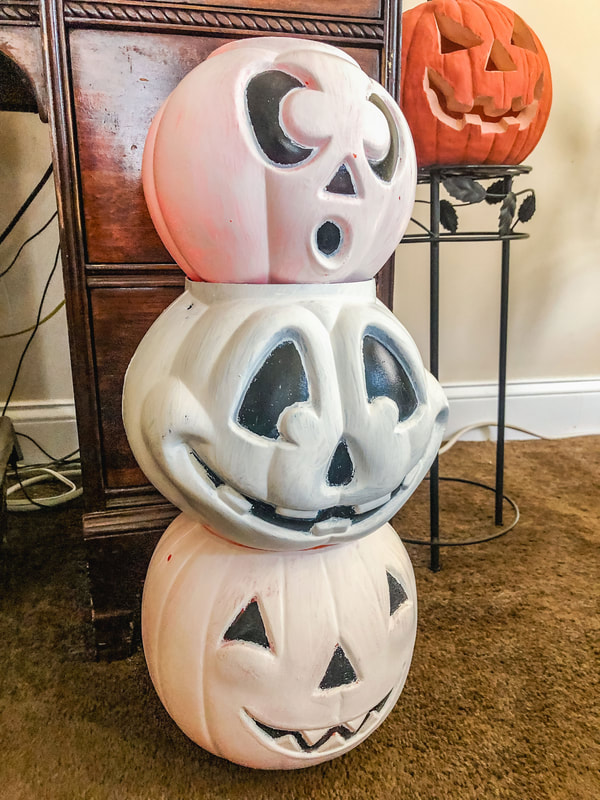 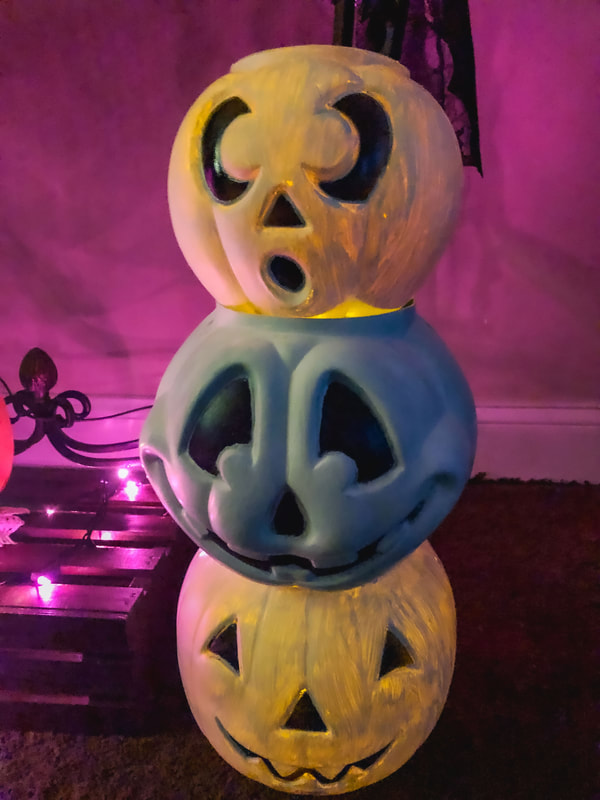 Related blogs you may want to read: Halloween DIY using chalk paint to revive an old plastic pumpkin Indoor Halloween Decor Inspiration Halloween Lawn Decor Ideas Some of the posts in this article contain affiliate links. If you click on the link and purchase the item, I will receive an affiliate commission at no extra cost to you. I will only recommend products or services I use personally and/or believe will add value to my readers, so there is no conflict of interest. 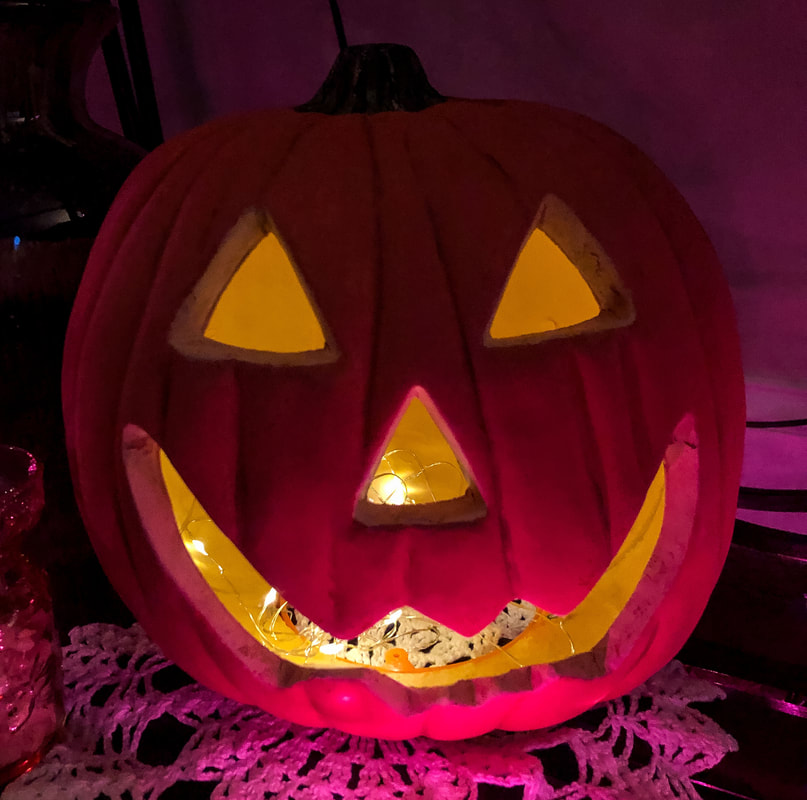 Money is tight this year, so the focus for the fall decorating season has been on up-cycling and reusing wherever possible. But, just to make my life more difficult, I also wanted to change my usual fall decor. Every year I pull out these light-up jack-o-lanterns along with the rest of my bright orange, yellow, and red fall and Halloween decor. This year, I decided I’d had enough of these bright colors! My kids are all grown, and I want more muted colors for this fall season. So, a Halloween DIY project was born! 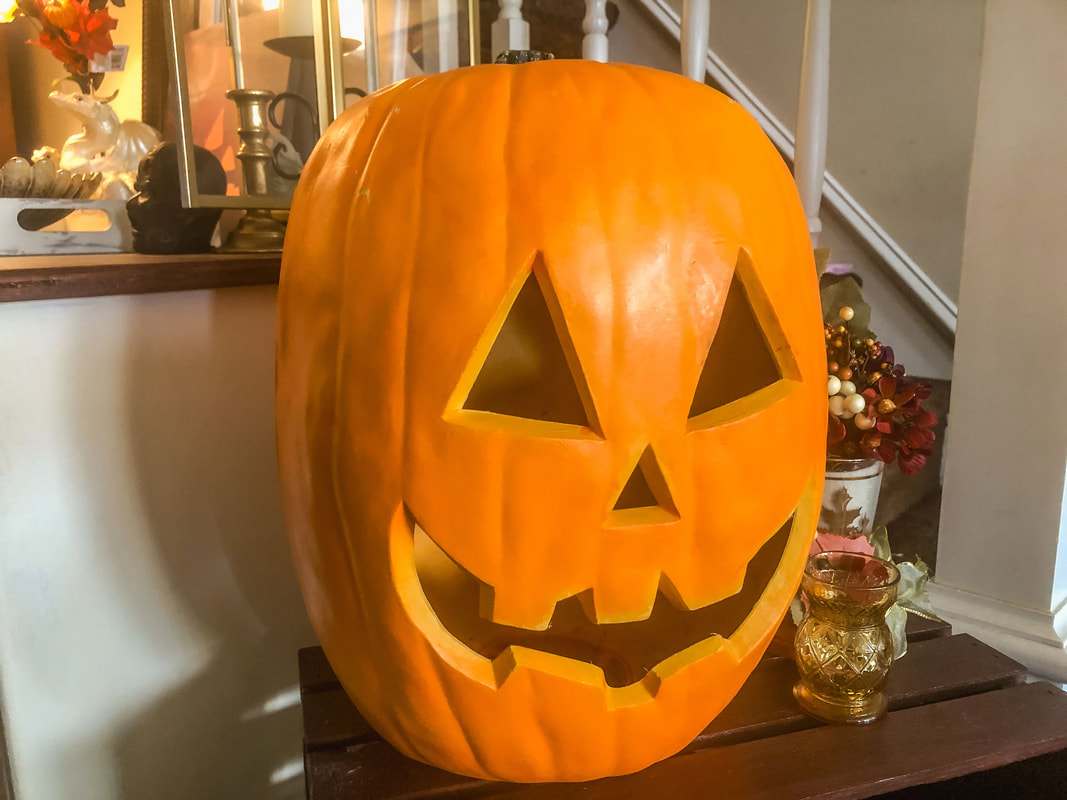 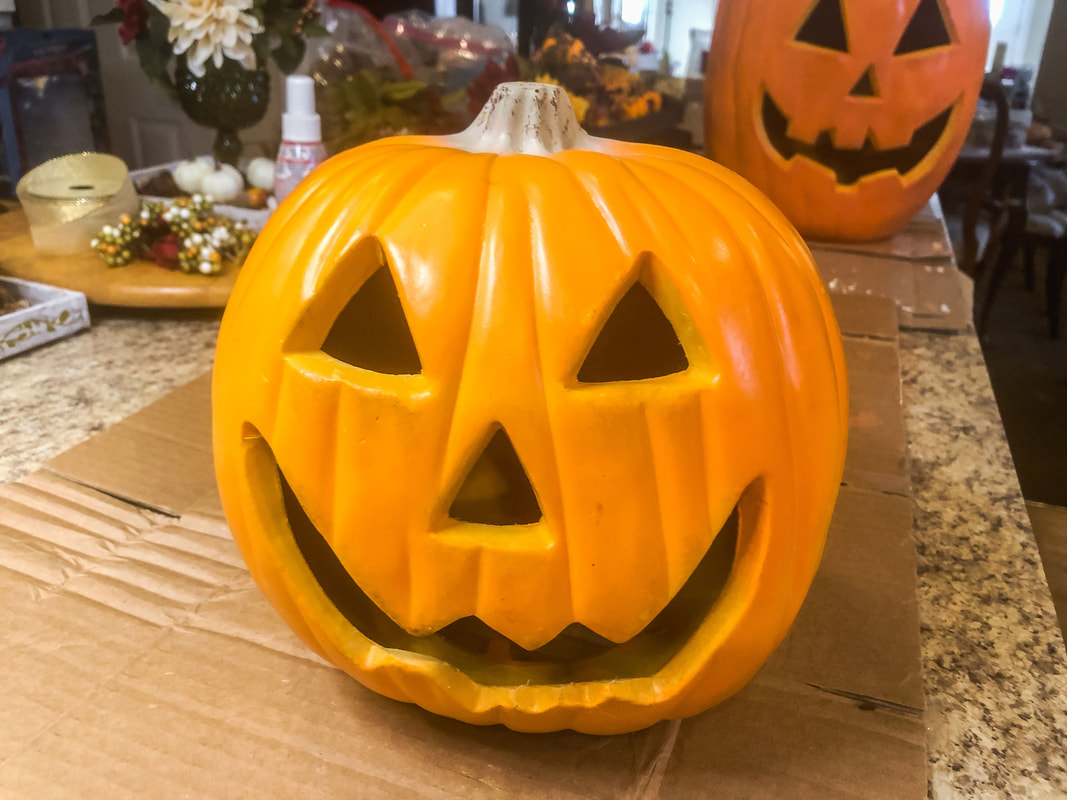 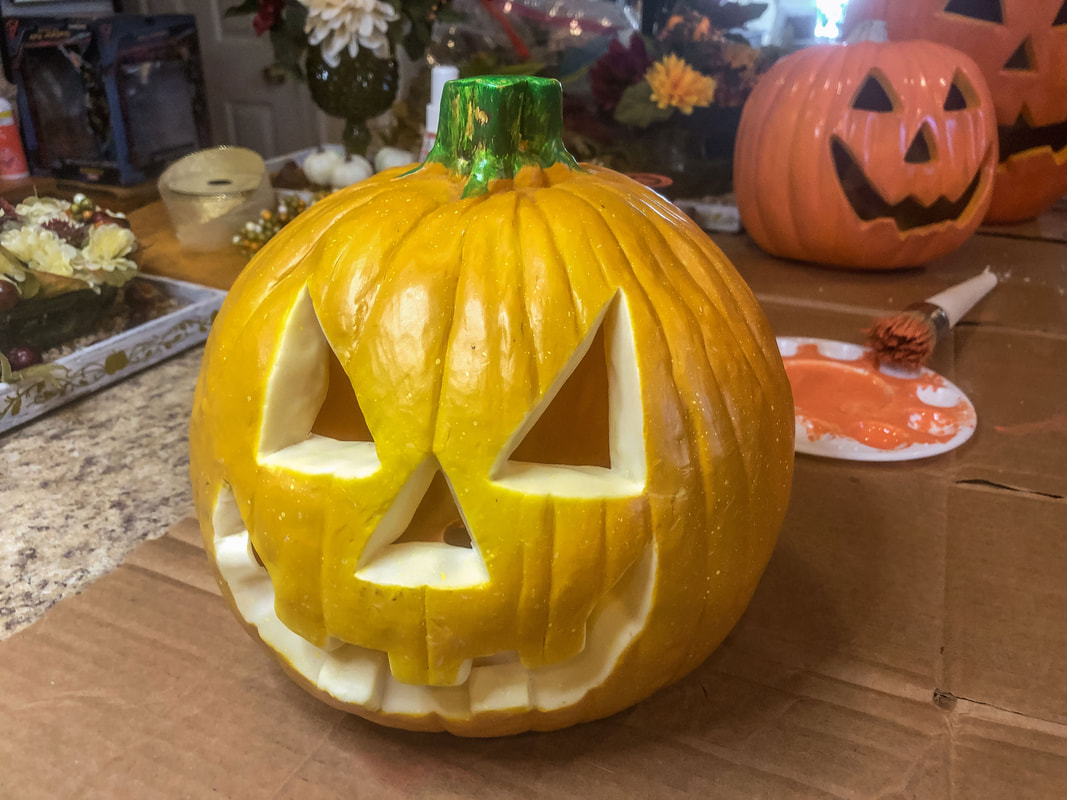 I gutted the lights of the three pumpkins and gave each one a good clean. I decided to use chalk paint and acrylic craft paint for this project, but you can use Mod Podge if that’s more to your liking. I’ve listed some supplies below that you may need for this project. (Items contain affiliate links.) Materials you’ll need: Old jack-o-lantern Chalk paint Craft paint Mod Podge Chalk paint brush Thin paint brush Foam brush Artist’s paint palette LED candle Fairy lights Step 1 Give your old jack-o-lantern a thorough wipe-down to clean off all the dust and grime. Step 2 Choose an orange shade of chalk paint (or Mod Podge) and a paintbrush. Liberally apply the first coat of paint over the surface of the pumpkin. Step 3 Allow the first coat to dry for a couple of hours, then apply a second coat of chalk paint. Allow that second coat to dry. Step 4 Use a thin brush and dark brown, red, orange, or green craft paint to lightly paint in the creases of the jack-o-lantern to give it some depth. Keep this process fluid and fun! Don’t use too much paint.  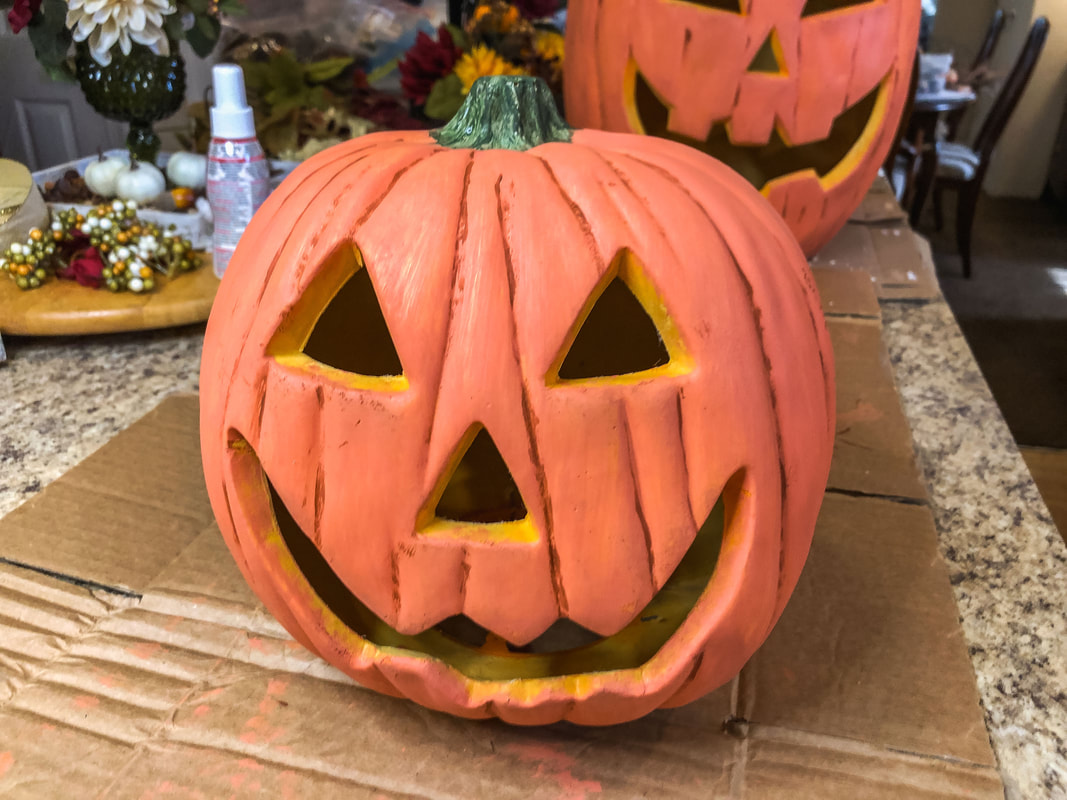 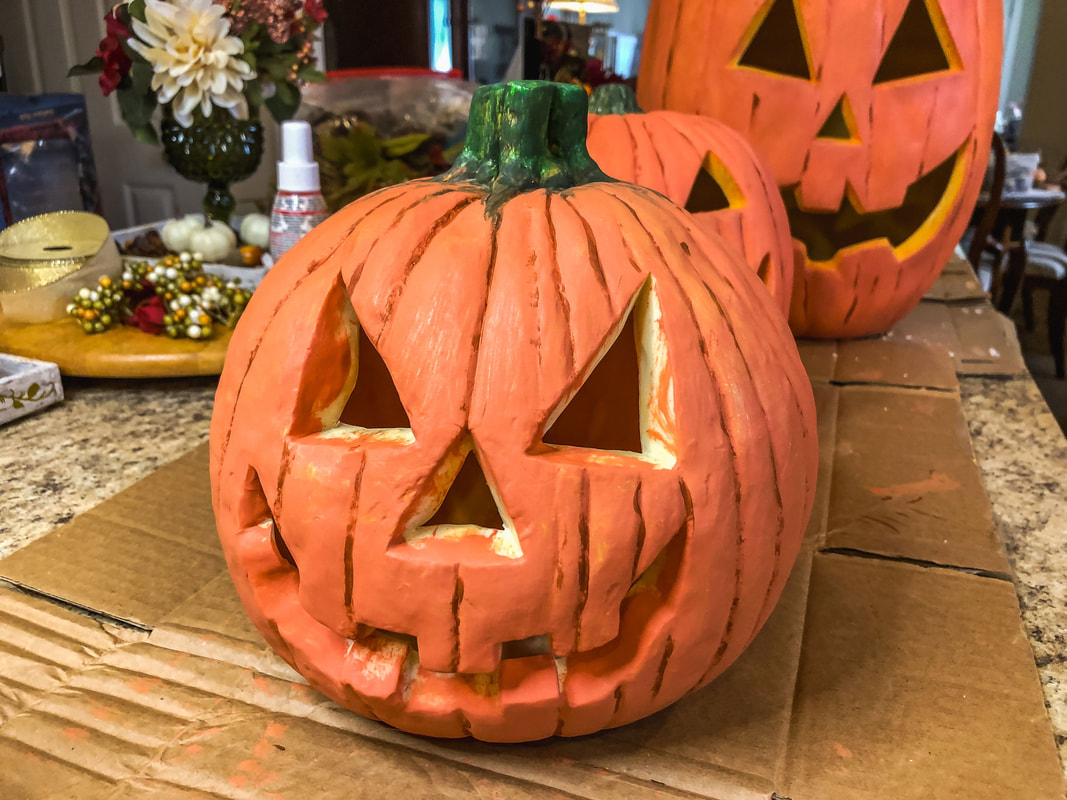 Step 5 Now choose a desired shade of green and paint the pumpkin’s stem. Step 6 Allow all the paint to dry so you can handle the pumpkin. Lightly apply a third coat of chalk paint. Do not use too much paint. You just want enough coverage to lighten the creases. (Think about blending makeup and contouring. Same concept.) Steps 7 and 8 Now for the finishing touches! Apply two coats of cream, orange, or yellow paint to the inside of the mouth, nose, and eyes. And that’s it! 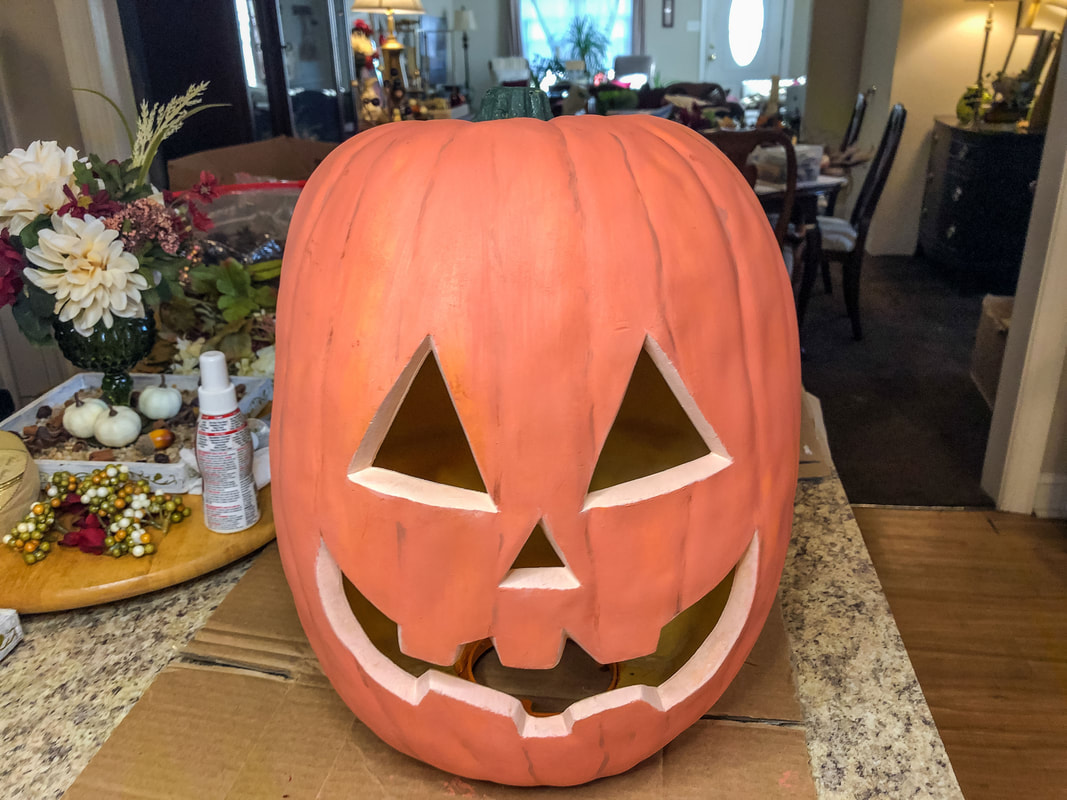 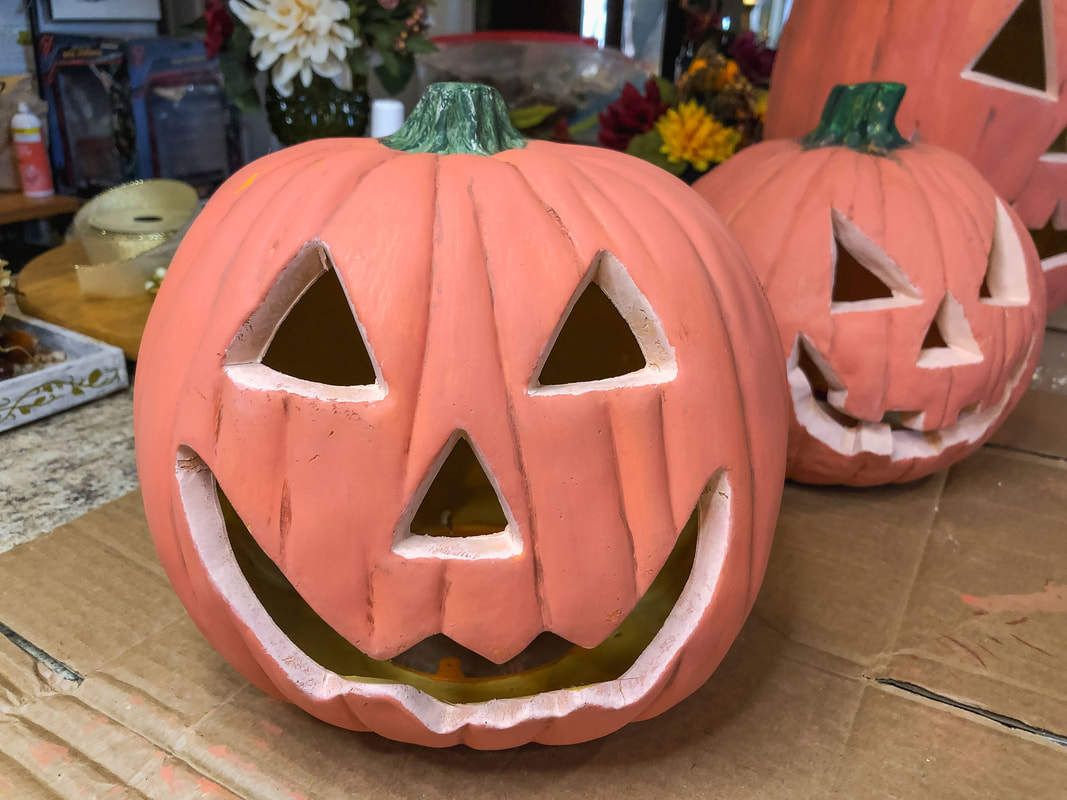 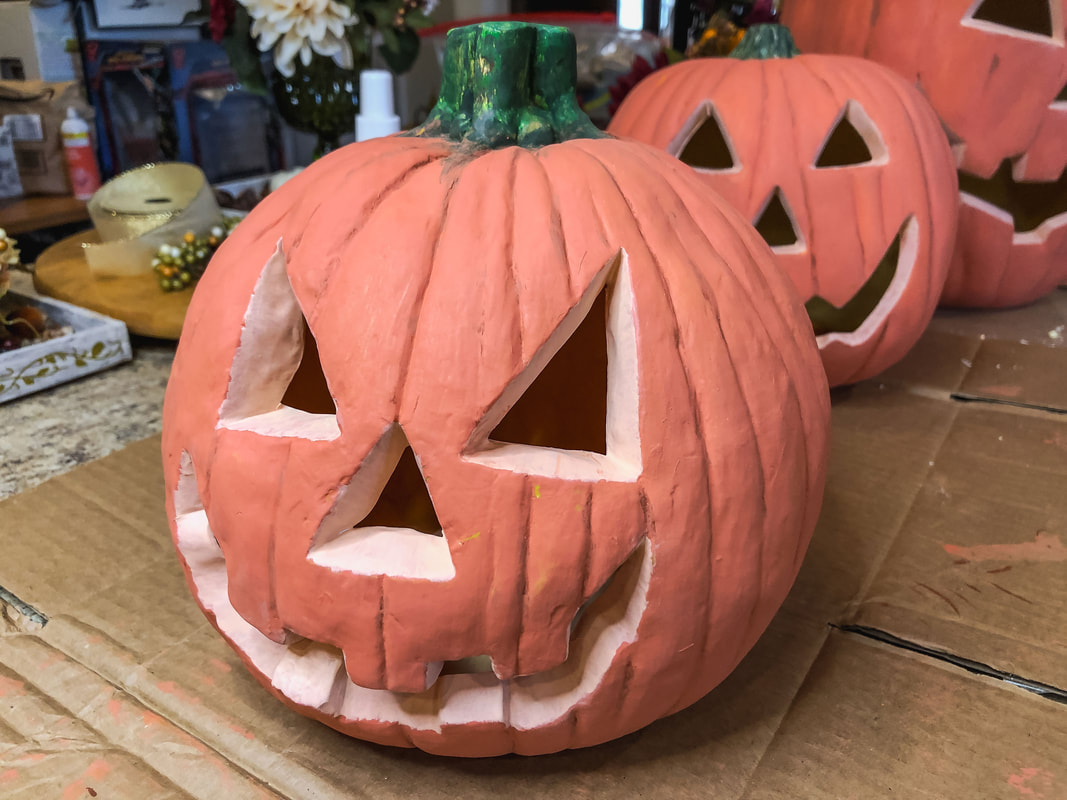 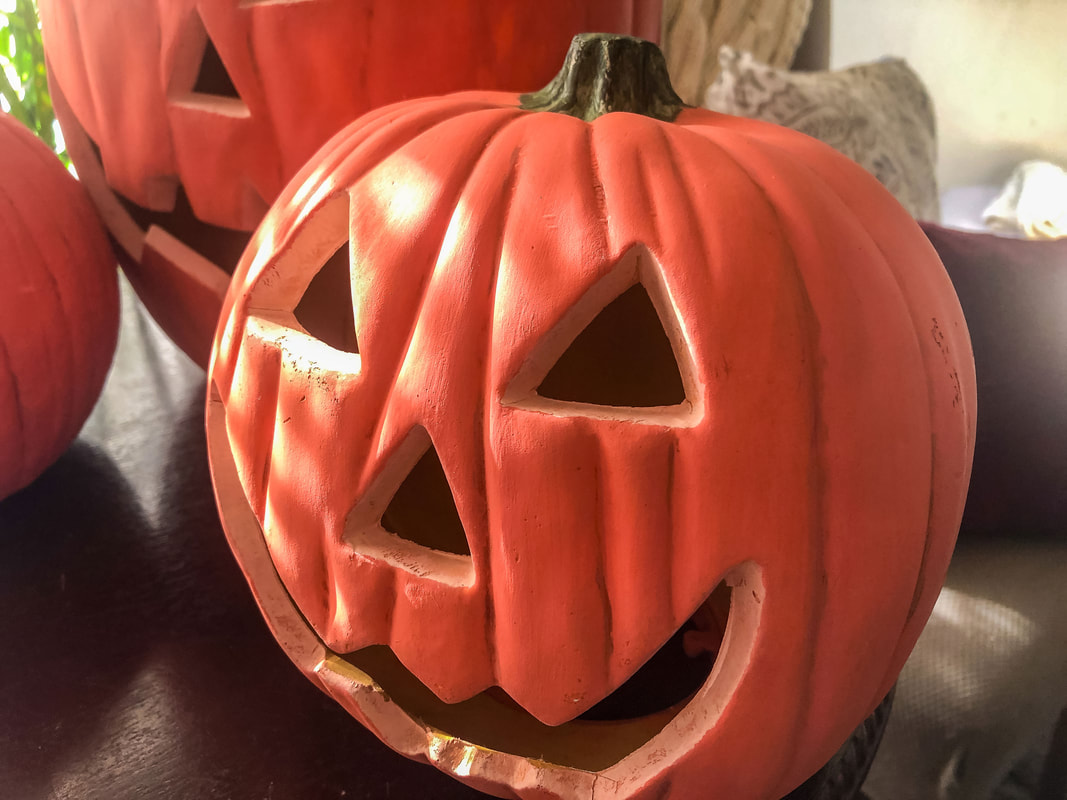  Light up your freshly painted, up-cycled jack-o-lantern with an LED candle or fairy lights! 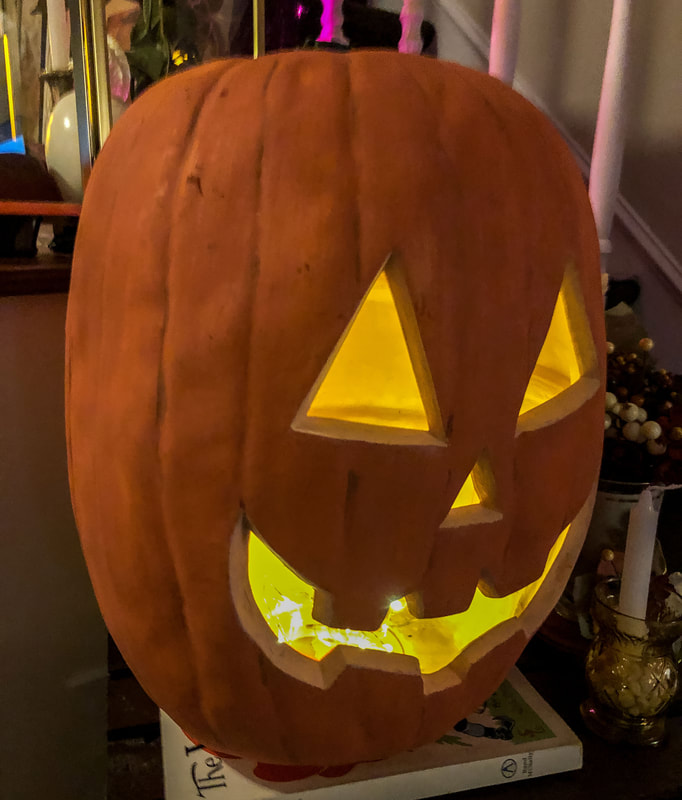 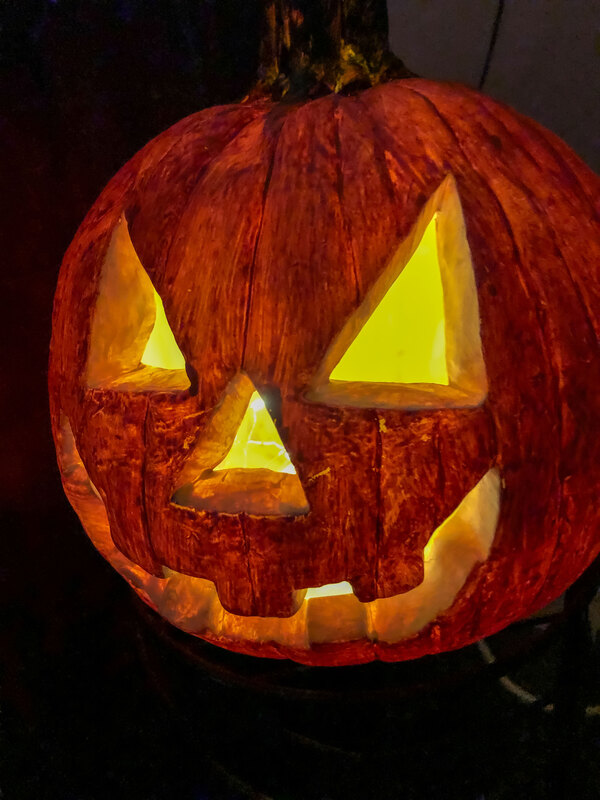  Related blogs you may want to read: DIY lighted pumpkin stack using up-cycled candy buckets Indoor Halloween Decor Inspiration Halloween Lawn Decor Ideas Some of the posts in this article contain affiliate links. If you click on the link and purchase the item, I will receive an affiliate commission at no extra cost to you. I will only recommend products or services I use personally and/or believe will add value to my readers, so there is no conflict of interest. We've all experienced the frustration of cleaning windows and mirrors, only to be left with stubborn streaks or cloudy surfaces. In this blog post, we'll walk you through some simple yet effective tips to help you achieve streak-free windows and mirrors. Your windows and mirrors probably have residue from cleaning products you may have used prior. This means the cleaner and materials you use have to cut through residue to reveal streak-free surfaces. So here are some tips to help you get those windows and mirrors clear and shiny!  Image by Lauris Rozitis Arins Wirestock on Adobe Stock. Gather Your Tools Before you dive in, you’ll need to gather the right tools for the job. Having the following items on hand will make your window and mirror cleaning experience much smoother: Microfiber cloths: A soft, lint-free cloth is perfect for achieving streak-free results. Avoid using paper towels or newspapers, as they can leave traces of residue and lint. (Newspapers are often mentioned as a “professional” way to clean mirrors, but many house cleaners recommend not using paper towels or newspapers.) Squeegee: Invest in a good-quality squeegee with a rubber blade. It helps to remove excess water and minimizes streaking.  Window cleaning solution: Opt for a commercial window cleaning solution or make your own using a mixture of white vinegar and water. This natural solution is eco-friendly and efficient at cutting through grime and smudges. I have frequently used a vinegar and water solution in my home with good results. Dust the Surfaces Remove dust and loose dirt from the windows and mirrors before applying any cleaning solution. Use a microfiber cloth or a dry duster to wipe away surface debris. This step significantly reduces the chances of creating streaks later on.  Prepare and Apply the Cleaning Solution If using a commercial window cleaning solution, follow the instructions on the label. Alternatively, you can create a homemade cleaning solution by combining equal parts white vinegar and water in a spray bottle. Liberally spray the solution onto the surface, ensuring complete coverage. This homemade vinegar solution has done wonders for my mirrors and glassware! The vinegar and water solution cuts through all the old grime and residue better than anything else I have tried!  Image by alexanderuhrin on Adobe Stock. Wipe with Microfiber Cloth Wipe the surface in a circular or zigzag motion using a clean microfiber cloth. Focus on small areas at a time to prevent the cleaning solution from drying too quickly and causing streaks. Apply gentle pressure to remove stubborn smudges.  Squeegee Technique for Large Surfaces For large windows, a squeegee can be a game-changer. Starting from the top corner, pull the squeegee down in a straight line overlapping each stroke slightly. Wipe the squeegee blade with a clean cloth after each stroke to avoid transferring dirt or solution.  Image by aozora on Adobe Stock. Tips for Mirrors When cleaning mirrors, pay attention to the edges and corners where dust and cleaning solution accumulate. Use cotton swabs or a smaller cloth to reach into those tight areas. Remember to change the fabric regularly to avoid streaking caused by residual dust. Bonus Tip! If you are in a pinch or need to quickly clean a bathroom mirror before some unexpected company shows up, try spraying your mirror with aerosol room spray, then wipe it off in the typical Z pattern with a microfiber cloth. Your room will smell amazing, and your mirror will look clean and shiny!  Image by andov on Adobe Stock. Tackle Difficult Stains Stubborn stains—like dried toothpaste or grease splatters—may require more effort. In this situation, apply a small amount of cleaning solution directly to the dirty area and let it sit for a few minutes (but don’t let it dry). Then, gently scrub the area with a soft cloth or a sponge. Rinse the surface thoroughly afterward. Try these tips and techniques to see if you get the streak-free windows and mirrors you’ve been wanting, and let me know your thoughts in the comments. Remember to be patient, work in small sections, and keep plenty of clean, lint-free rags on hand. Happy cleaning! Related blogs you may want to read: How to reupholster dining room chair seats in 9 simple steps A little project with jute twine and an old foot stool DIY refurbishment of a dining room cabinet Comparing DIY upholstery cleaning methods My top thrift finds this year How to replace a clock mechanism How to frame small canvas art How to rewire thrift buy lamps Some of the posts in this article contain affiliate links. If you click on the link and purchase the item, I will receive an affiliate commission at no extra cost to you. I will only recommend products or services I use personally and/or believe will add value to my readers, so there is no conflict of interest. 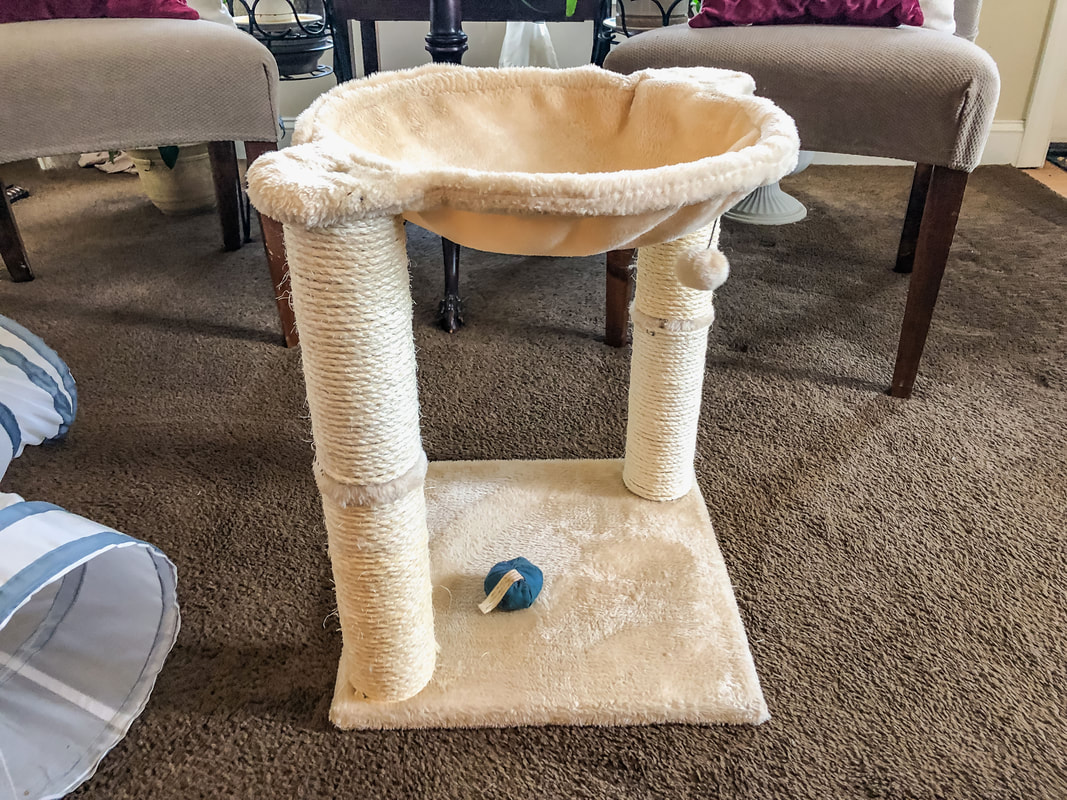 Hey there, fellow cat lovers! We all know how much our feline friends adore their scratching posts. Over time, though, these scratching posts can begin to look ragged. In this blog post, we'll walk you through rewrapping your cat's scratching post, giving it a fresh lease on life. So grab your materials, and let's dive right in! Why are scratching posts so essential for our furry companions, you might ask? The answer is that scratching is a natural behavior for cats. It helps keep their claws healthy, allows them to stretch their muscles, and provides an outlet for pent-up energy. A dedicated scratching post will save your furniture from sharp nails and provide a designated spot for your cats to do what they love. I have a large, multi-level cat tree and another small scratching post that my kitties adore. The small one--the scratching post I am using for this blog--was purchased from Amazon a couple of years back. What you'll need for this project
Assess the condition of your existing scratching post If your existing scratching post is frayed, torn, or no longer appealing to your furry friend, it's time to refresh. 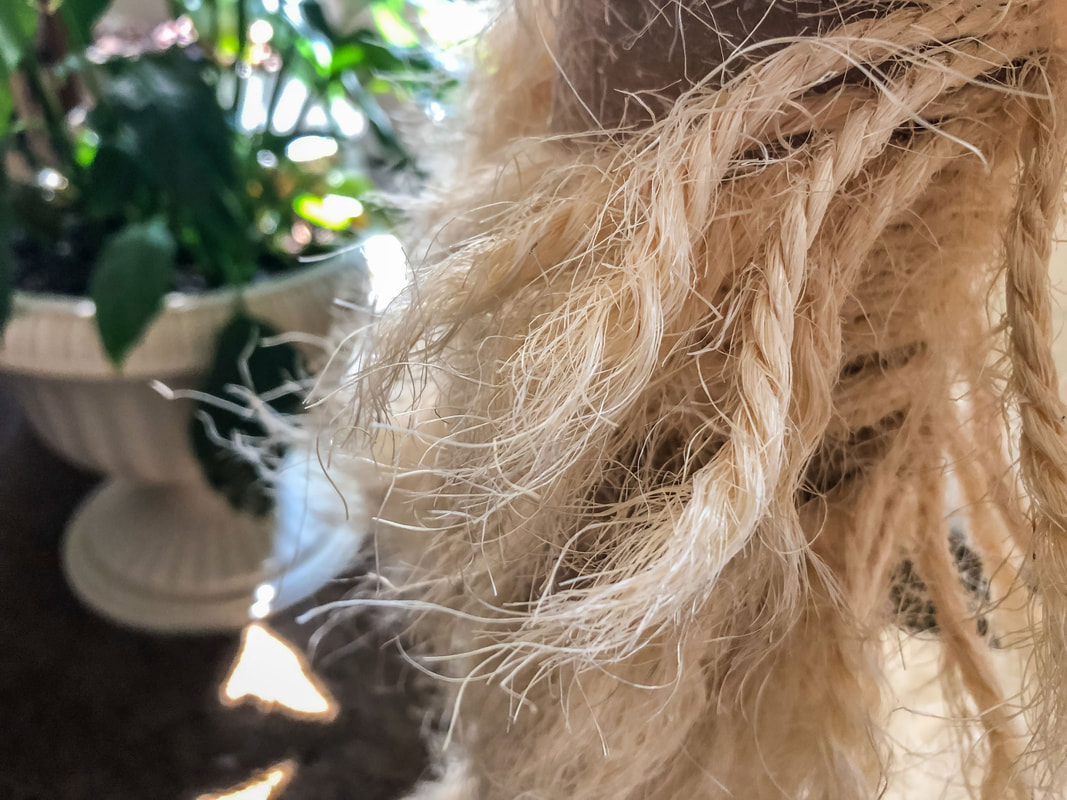 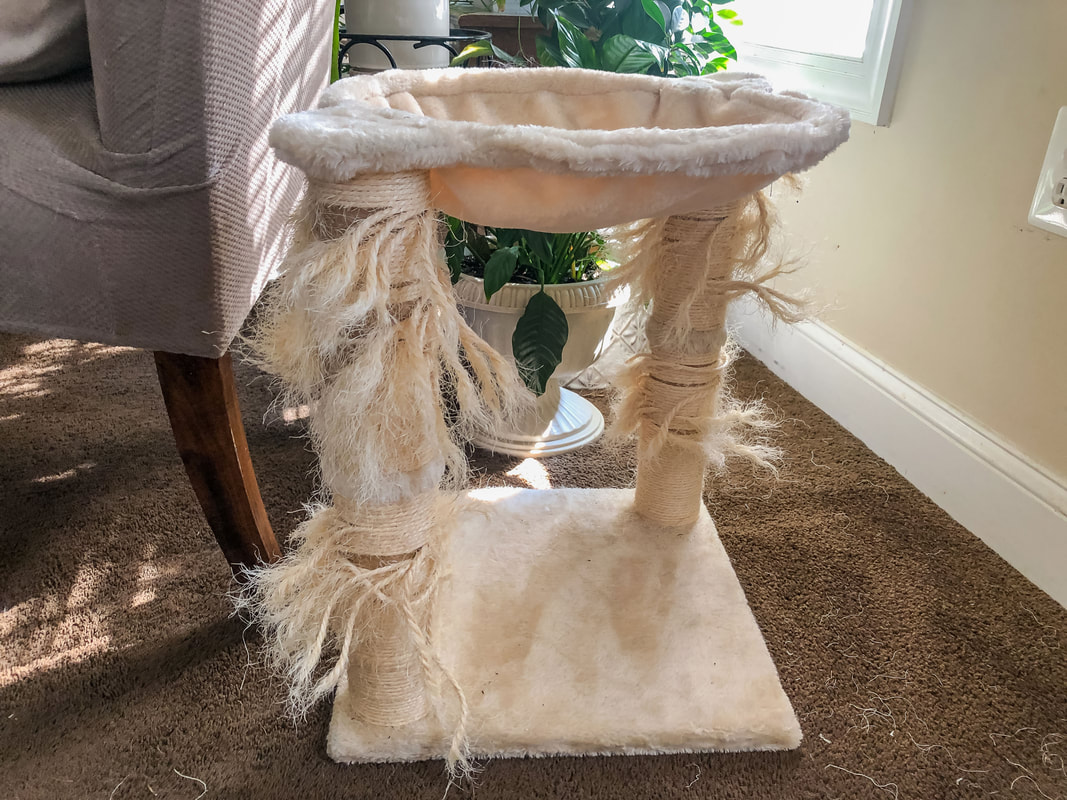 Remove the old wrapping Carefully unwind and remove the old sisal rope or twine from the scratching post. The existing twine on my scratching post had small upholstery tacks at each end for extra reinforcement. I made sure to keep these in case I need them later. 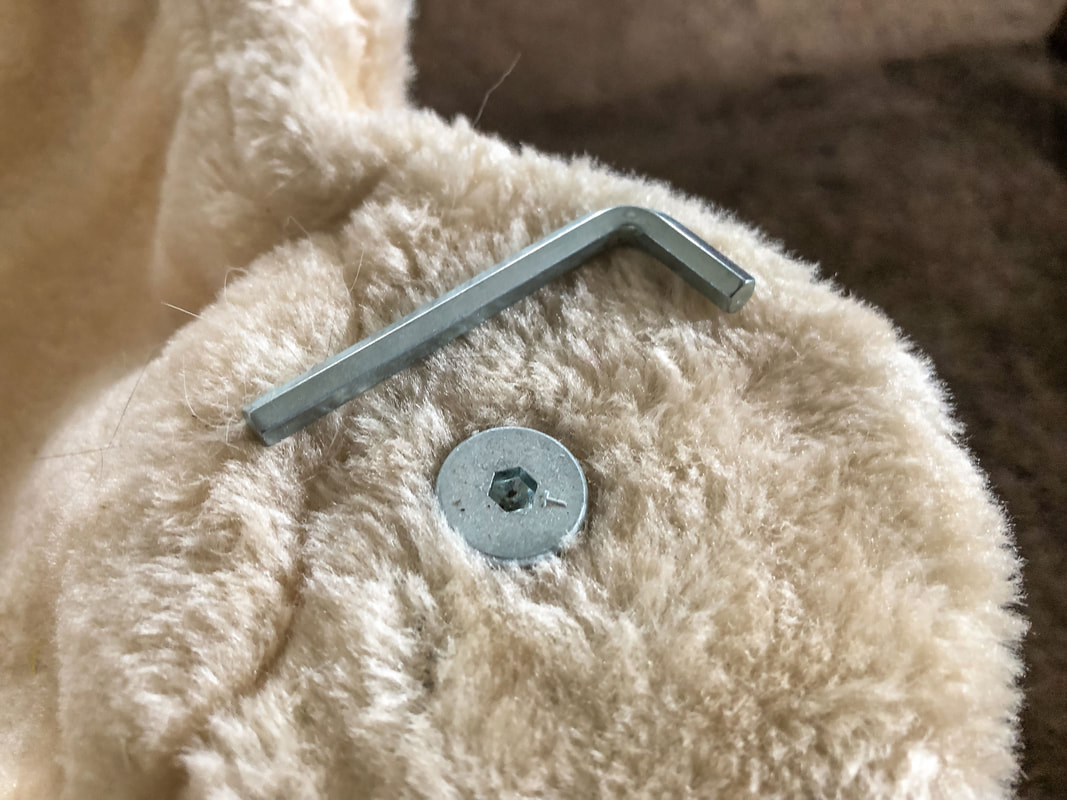 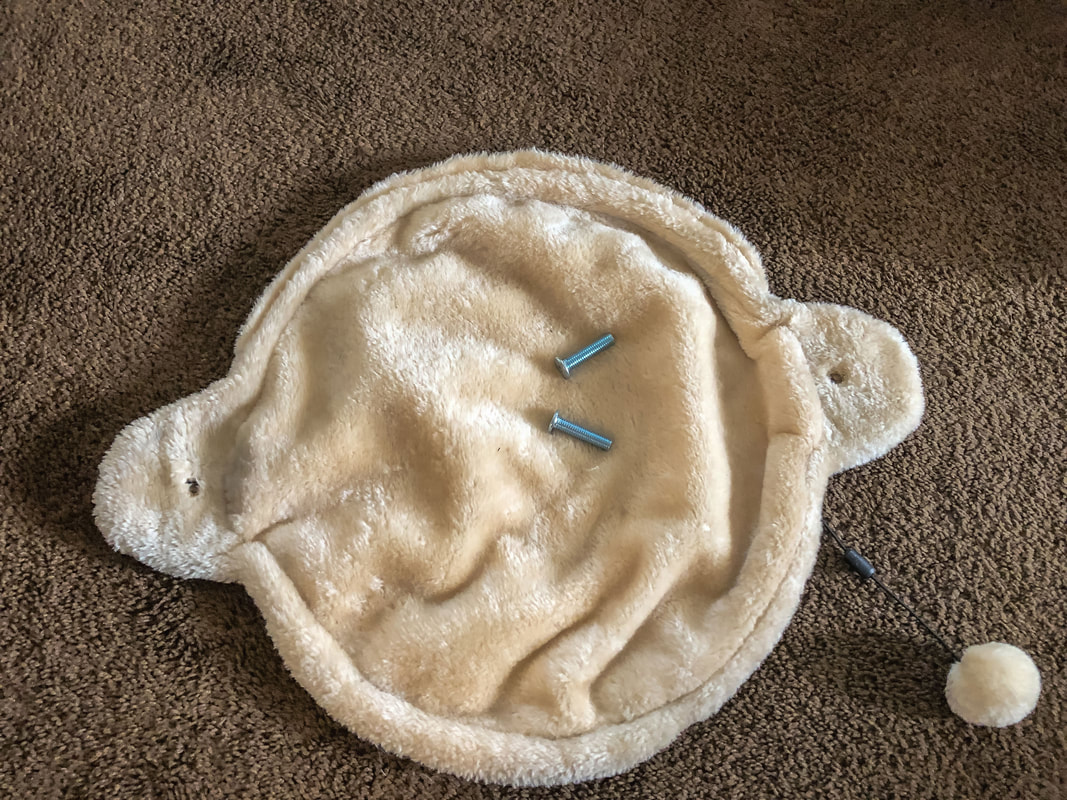 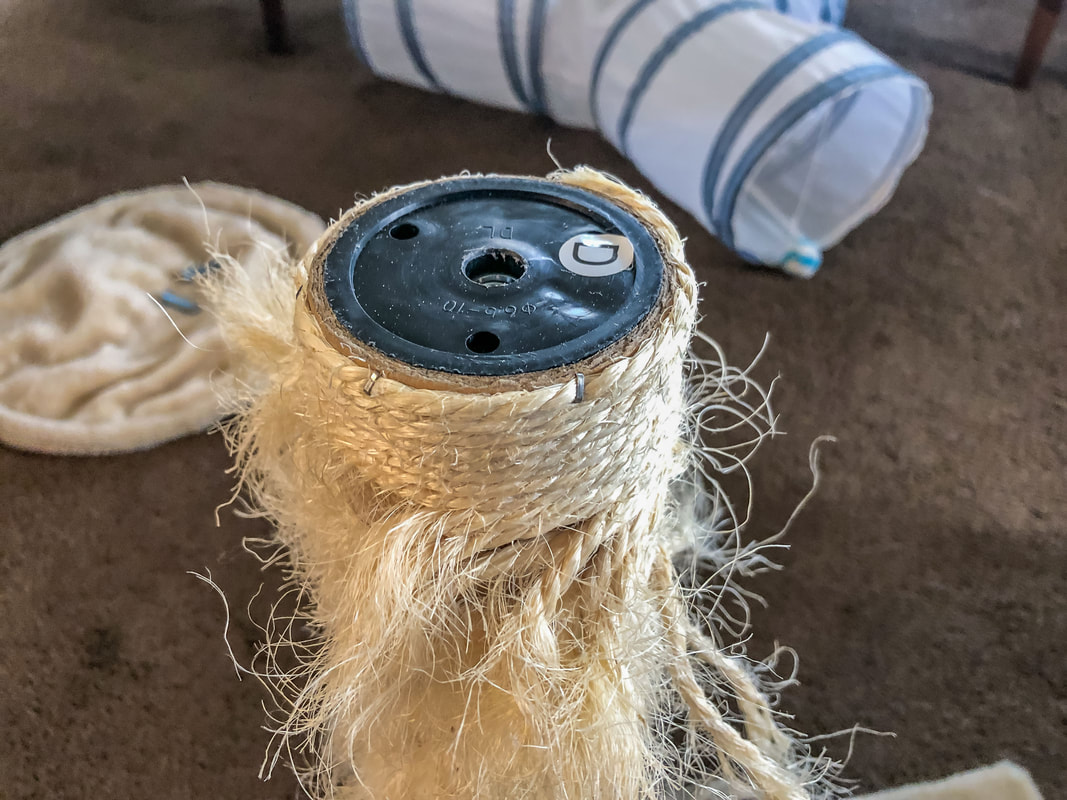 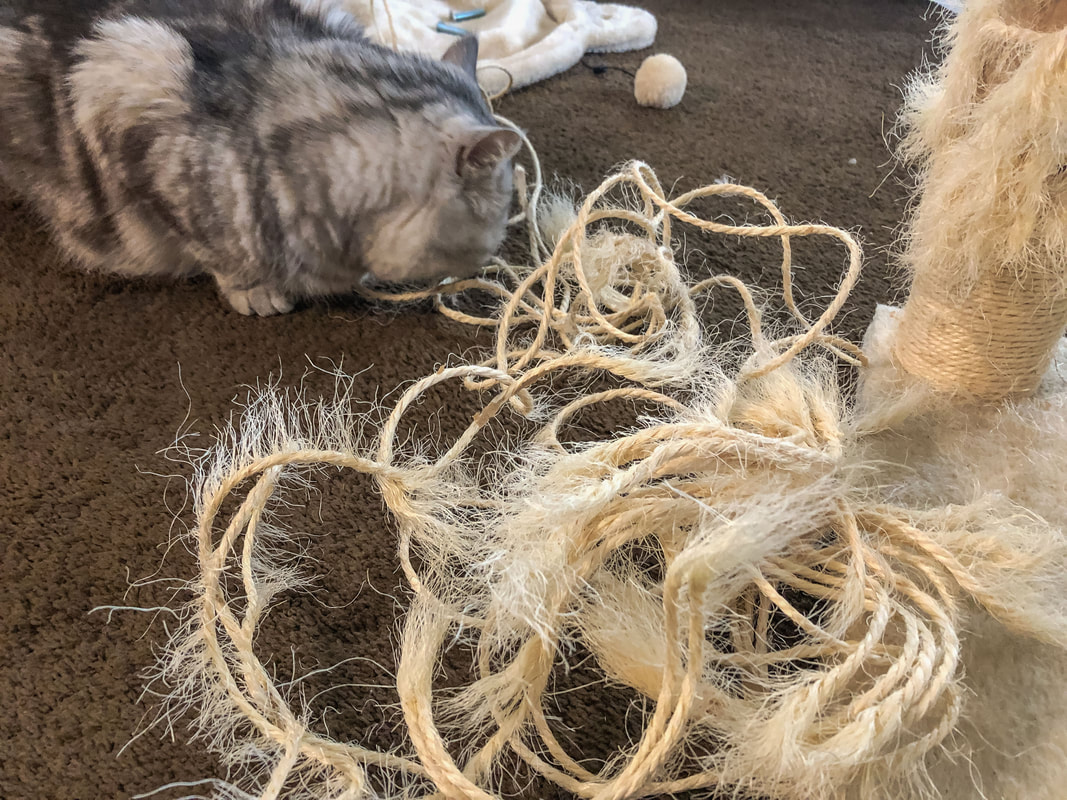 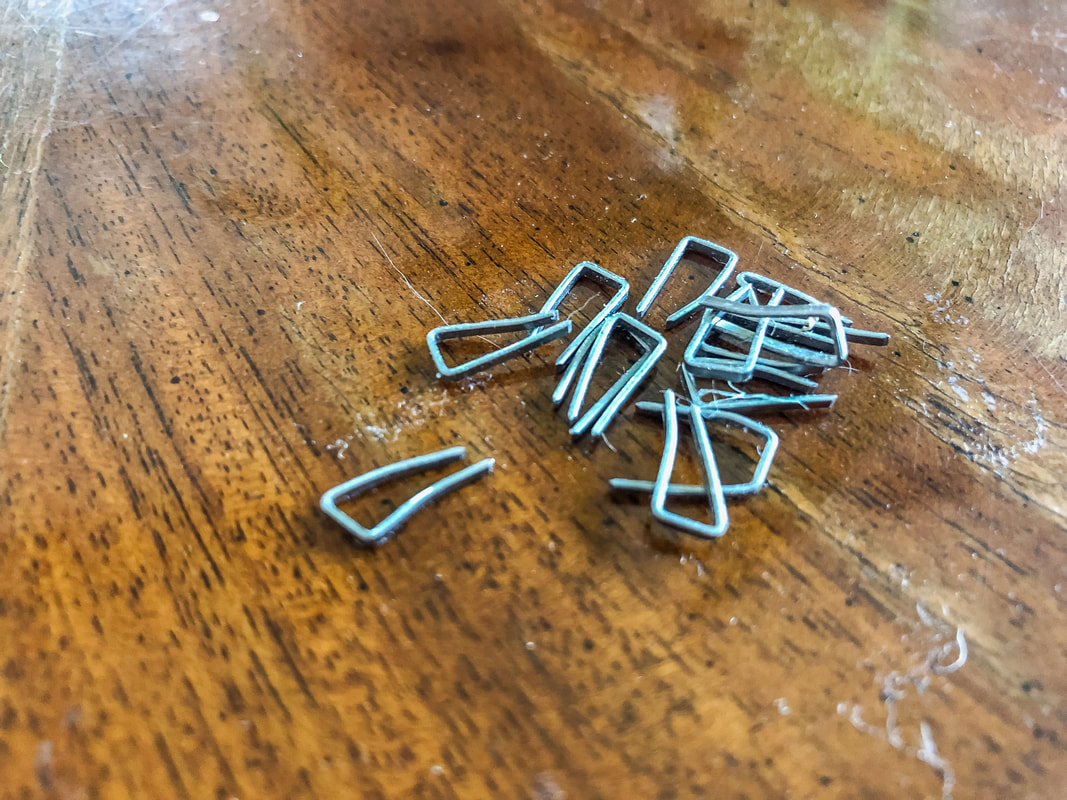 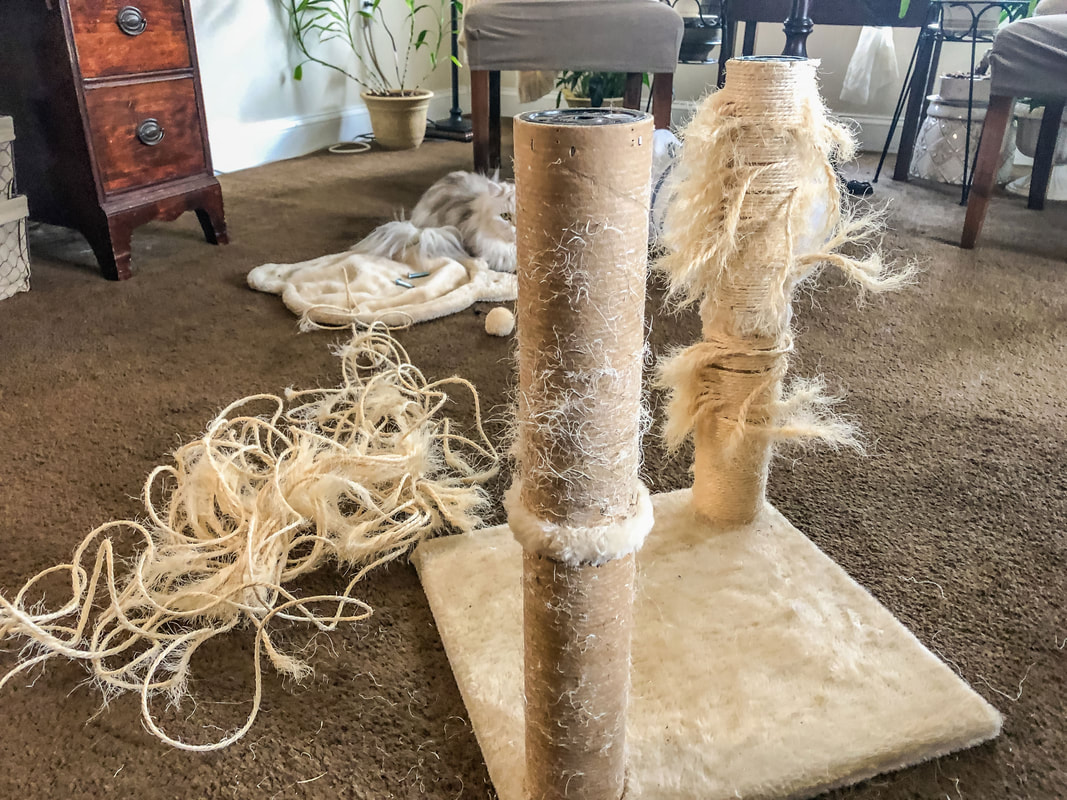 Prepare the new wrapping material Ensure you have enough twine for the height of the scratching post. It is better to have more than not enough! I made the mistake of not ordering enough and needed to order two more rolls to finish the second pole. Unfortunately, the second order of twine was a slightly different color than the first batch, but I made it work! 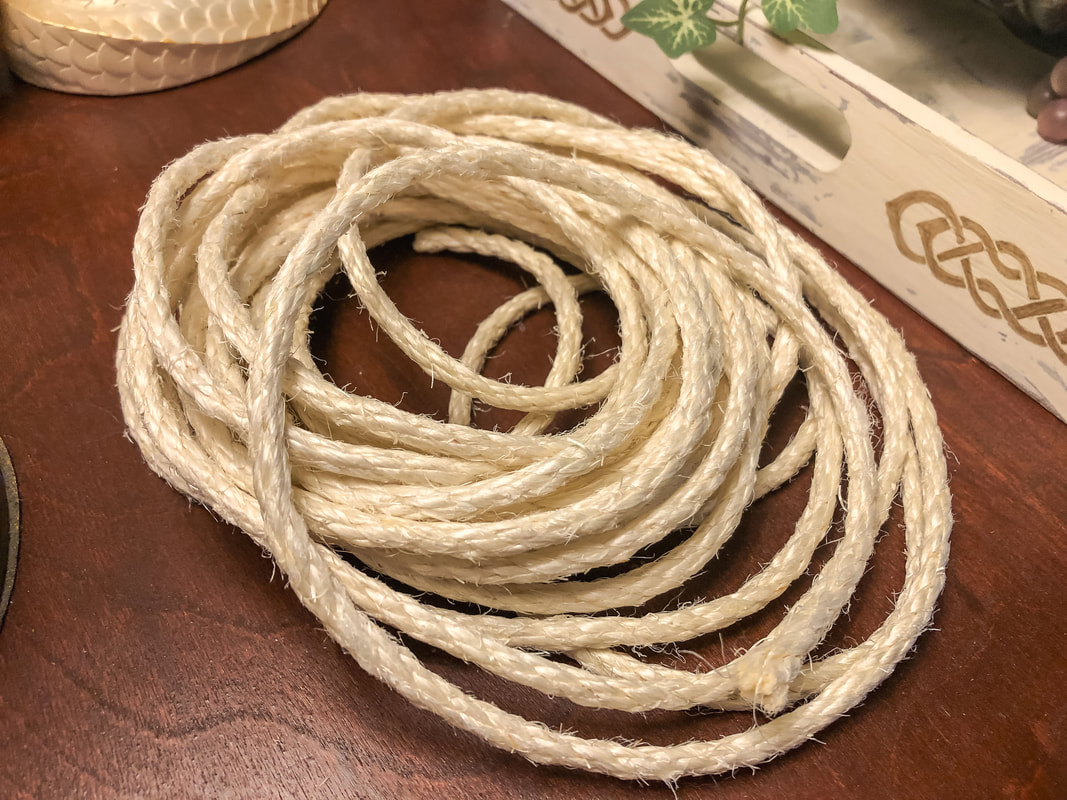 New sisal rope for the scratching post. Photo by Diane M. Lilly, 2023. Begin wrapping Start at the bottom of the post. Secure the end of the rope with a knot or a dab of adhesive, if desired, to keep it in place. I used a hot glue gun to secure the end of the twine in place while I wrapped the twine around the pole. 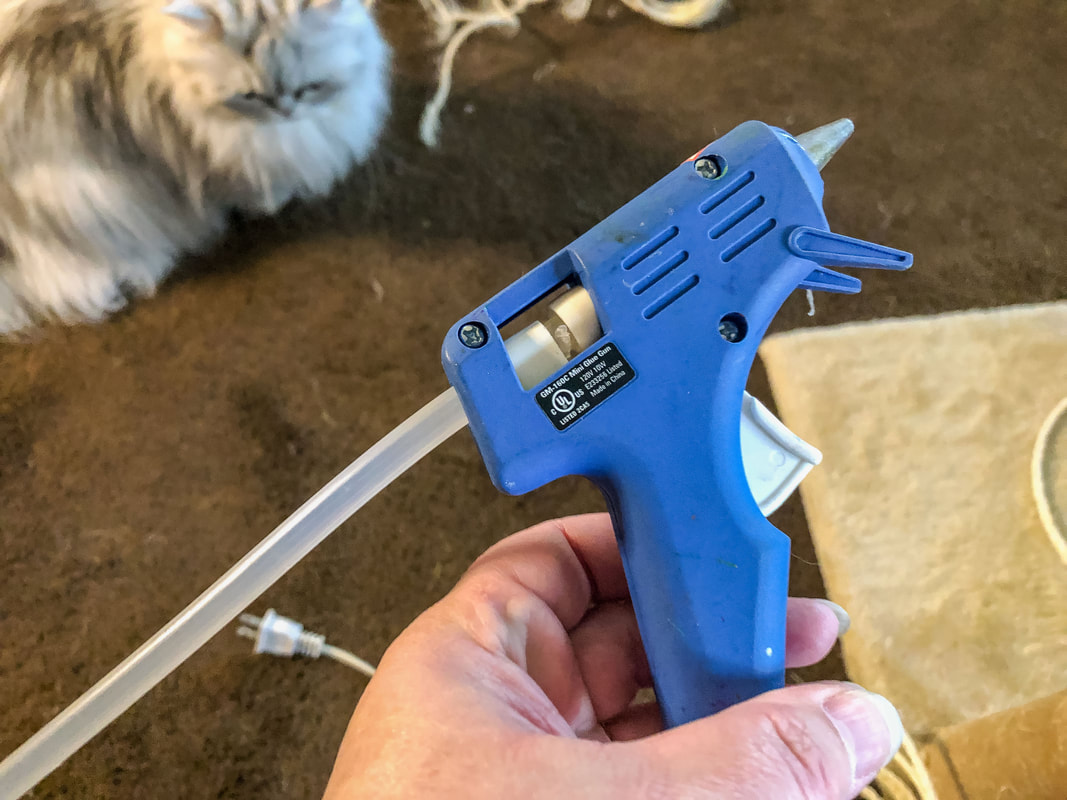 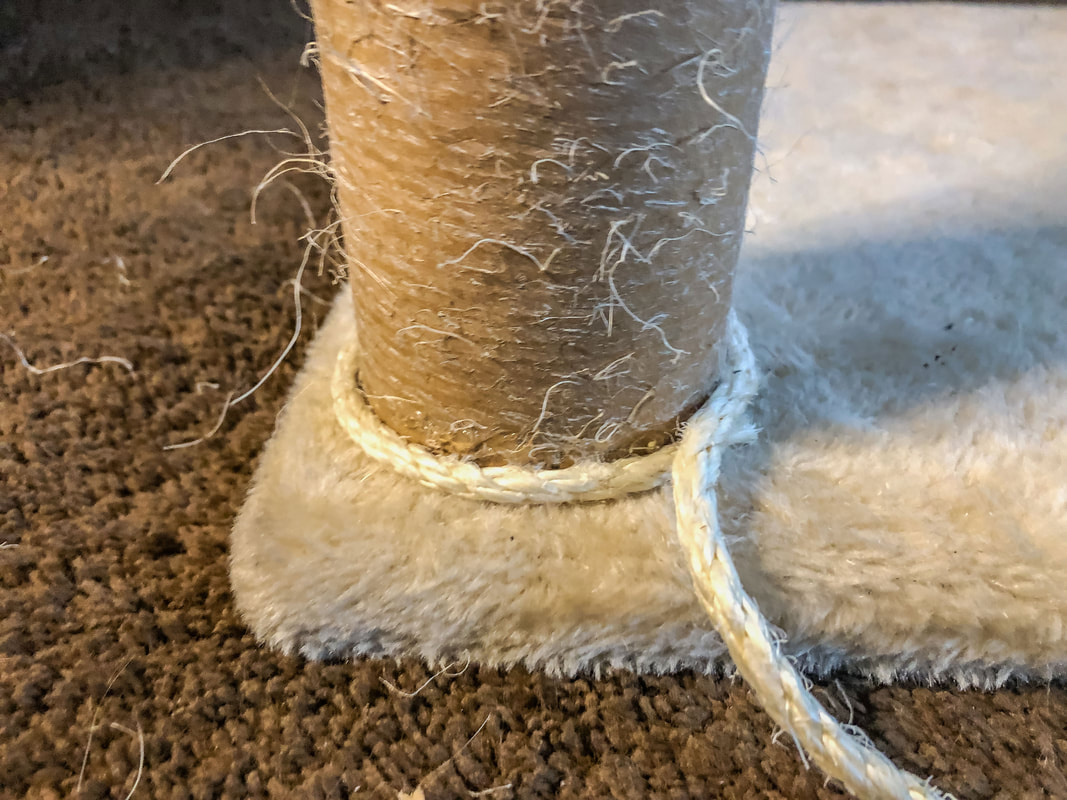 Keep it tight As you work your way up, maintain consistent tension, keeping the rope as tightly wound as possible. Wrap the twine around the pole, then push down against the previous row to close gaps. This will prevent sagging and ensure a sturdy surface for your cat's scratching pleasure. I also used Elmer’s glue on the pole for added adhesion. 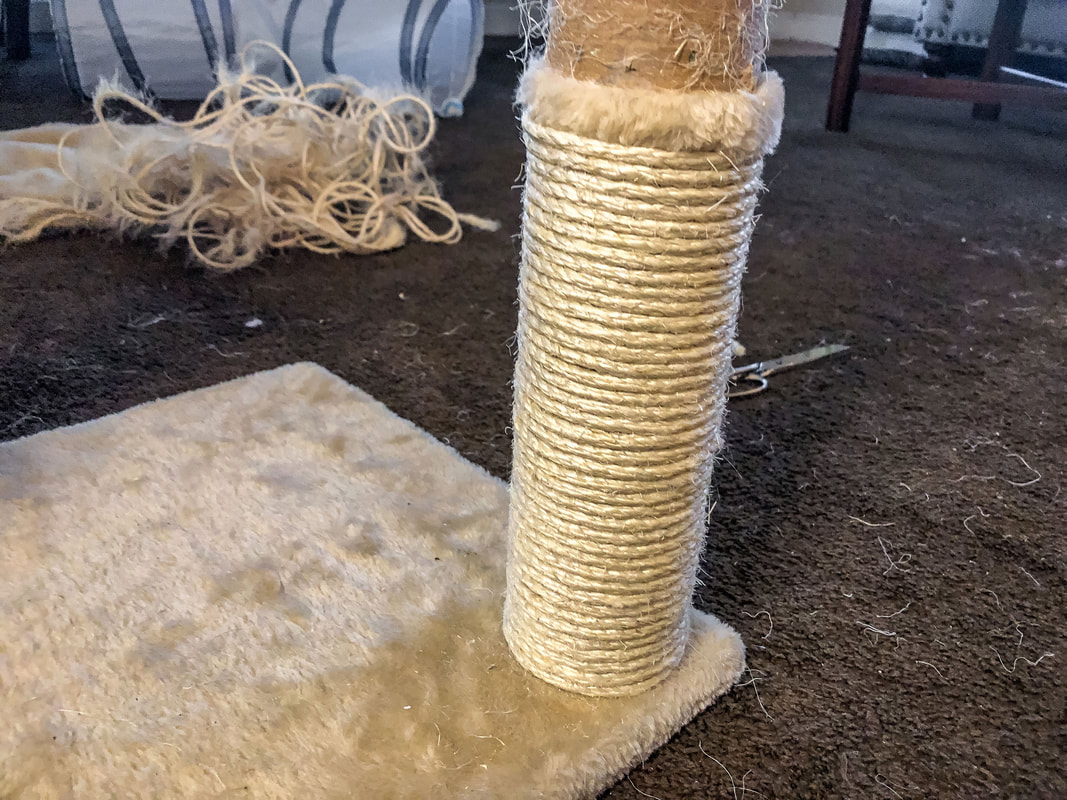 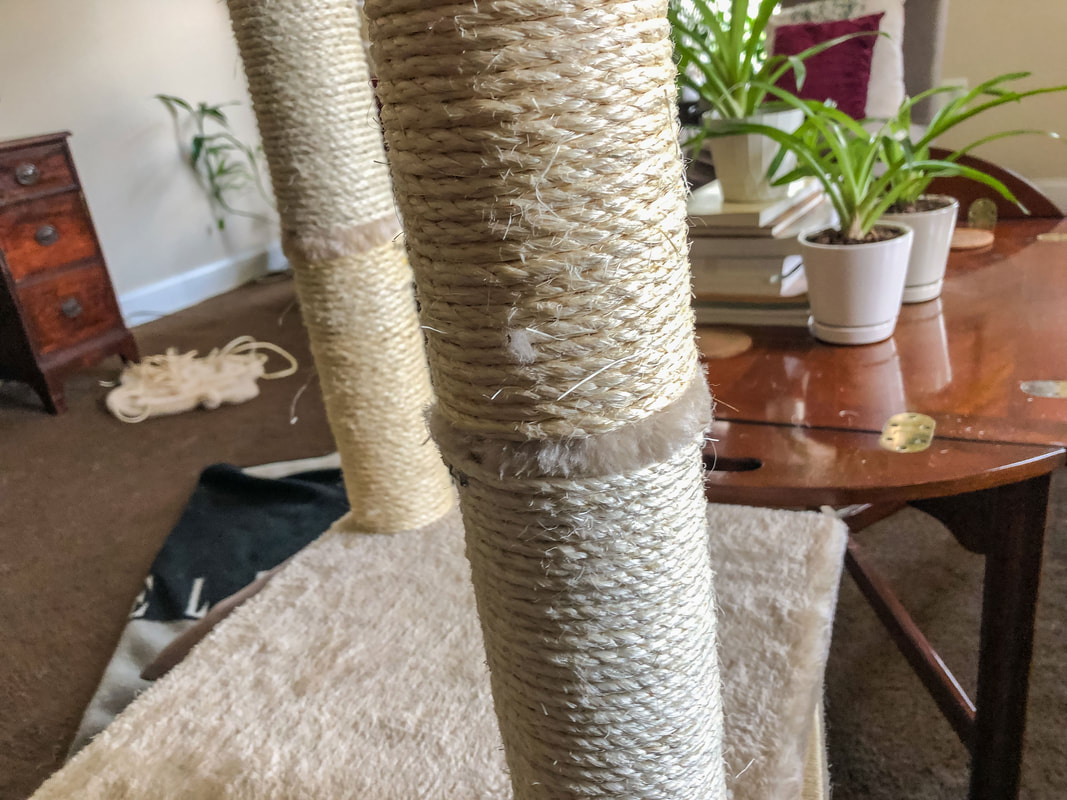 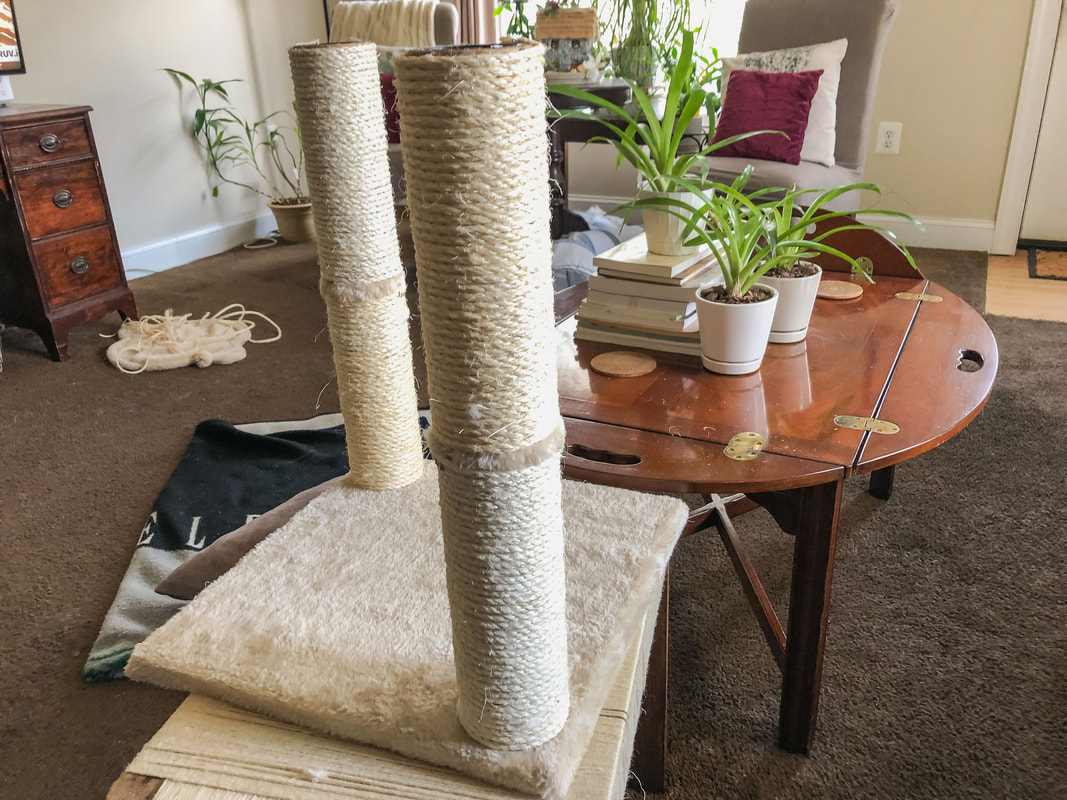 Finishing touches When you reach the end, secure the rope with a knot or adhesive. I used a hot glue gun for this step. Trim any excess rope to ensure a neat appearance. Make sure there are no loose ends that your cat could accidentally unravel. Extra reinforcement (optional) Reinforce large or frequently used posts with staples. Use an upholstery gun to add staples at each end. This way, the twine will not get pulled off by an overzealous cat! I saved the small upholstery tacks from the original twine and used a small hammer to tap them into place at the ends. Let it settle After the rewrapping process, let the scratching post settle. Cats have a keen sense of smell, so a transitional period will allow your cat to get used to the different scents. Don't forget the toys! Now it's time to add a few toys to your finished DIY scratching post. Dangly feathers, crinkly balls, or catnip-infused mice will entice your furry friend to use their newly rewrapped post. 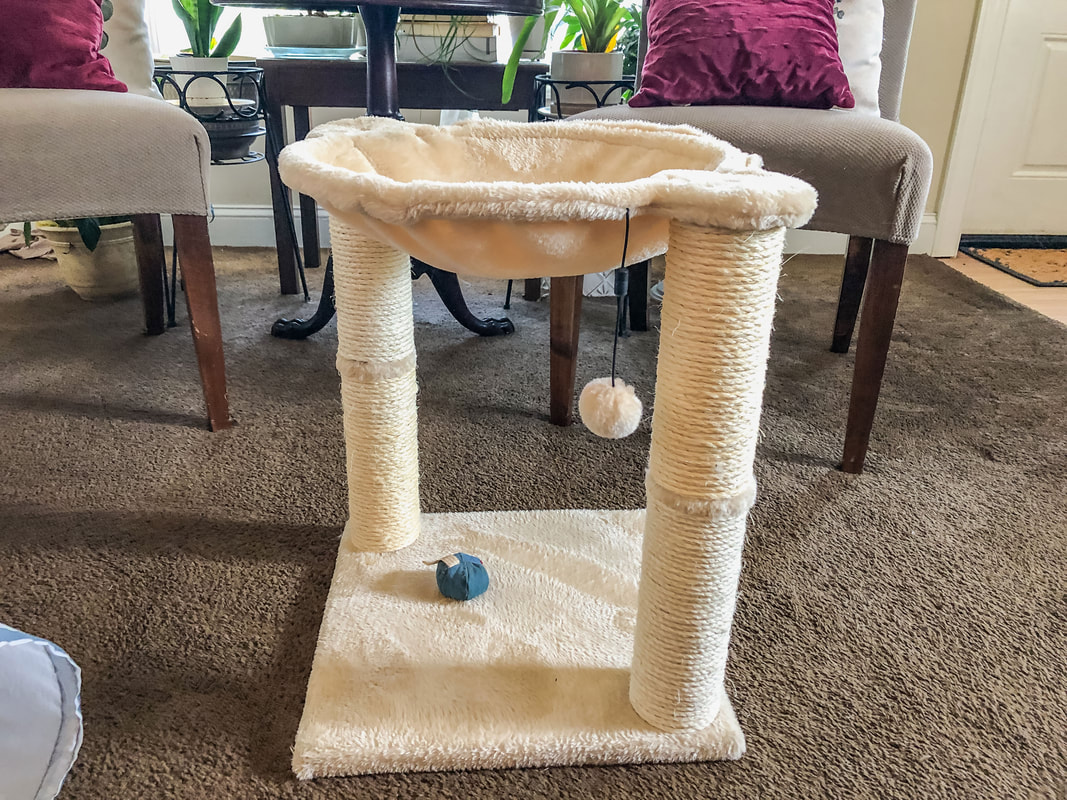 By following these simple steps, you will not only extend the life of the post but also provide your feline companion with a renewed space to stay active, happy, and healthy. Remember to observe your cat's behavior and check the scratching post periodically for signs of wear. Happy scratching to your furry friend! You can watch my Youtube video of this process here! Related blogs you may want to read: How to clean a fabric lampshade DIY chalk painted tray with chippy effect How to reupholster dining room chair seats in 9 simple steps A little project with jute twine and an old foot stool DIY refurbishment of a dining room cabinet DIY upholstery cleaning methods Creating a kithcen coffee bar How to replace a clock mechanism Affiliate Disclosure Some of the posts in this article contain affiliate links. This means if you click on the link and purchase the item, I will receive an affiliate commission at no extra cost to you. I will only recommend products or services I use personally and/or believe will add value to my readers, so there is no conflict of interest. 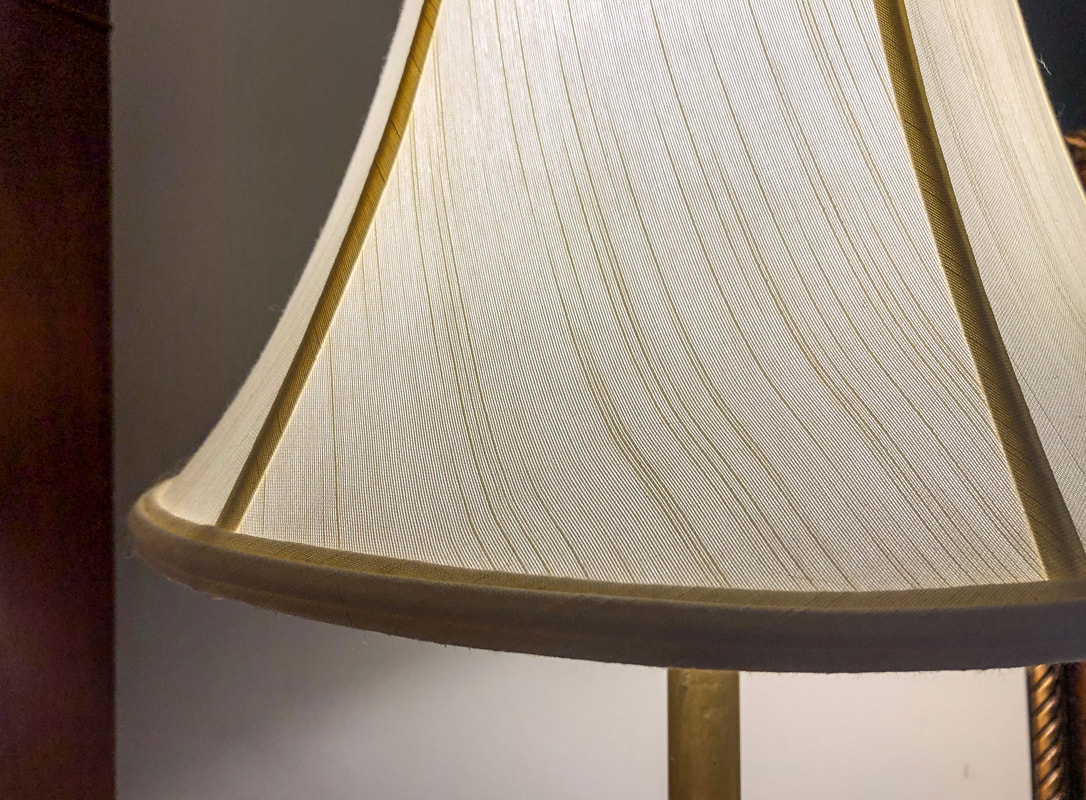 Do you have fabric lampshades that could use a good cleaning but are hesitant to try because you are afraid to damage the fabric? Today’s blog article offers a few tips for cleaning those dingy, dirty lampshades. There’s something incredibly gratifying about finding that perfect gem of a lamp at your local second-hand store, right?! What’s not so thrilling is the prospect of cleaning the lampshade. This is the situation I faced after a trip to my local thrift store. Let me tell you, I came home with one of the best hauls of amazing finds ever! This haul contained two lamps that were perfect for my dining room. All they needed was some rewiring and a good clean. Except it wasn’t quite that simple… 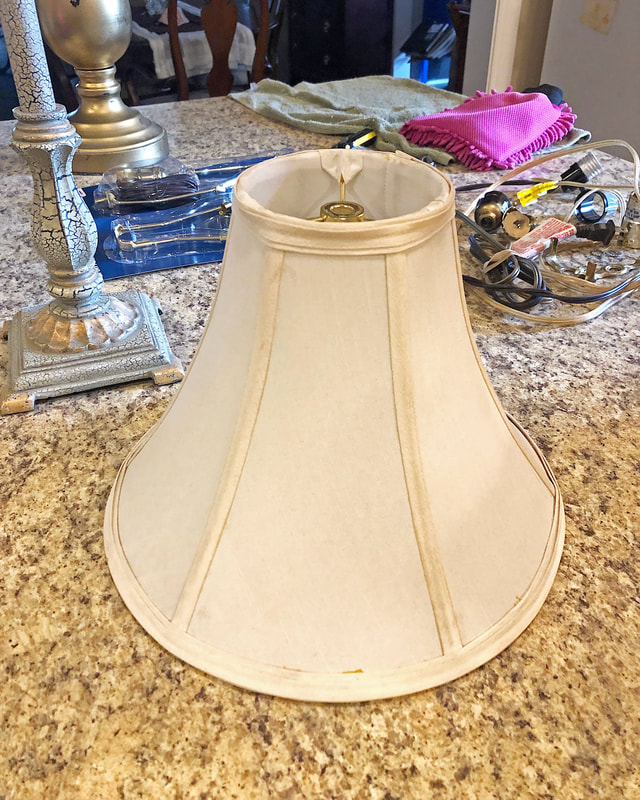 The fabric shades were stained in such a way that simple dusting wasn’t going to do the job. This project called for a deeper cleaning, but I had questions and concerns, as some of you do. I had apprehensions about the metal frame and the glue that held the seams together. And there was a very real concern that cleaning would create water stains on the fabric if I tried to spot clean small areas. So, I did some research before cleaning these stained second-hand lampshades. Below are some tips from my research and first-hand experience cleaning my lampshades… Cleaning lampshades using dry methods For simple surface cleaning of lamp shades to remove dust and pet hair, you can use a lint roller, microfiber cloth, vacuum cleaner attachment, or even sticky tape. I usually use a vacuum cleaner or very damp towel (almost dry) to remove dust for general house cleaning. Certain types of shades must be cleaned using dry methods. Silk shades can be easily ruined and should be professionally cleaned, so do not try to clean them yourself. The same goes for paper or fiber lampshades, which can disintegrate in water. (Paper shades can be cleaned using a gum eraser.) Finally, shades with color should not be soaked with water, especially if you think the color might stain or run.   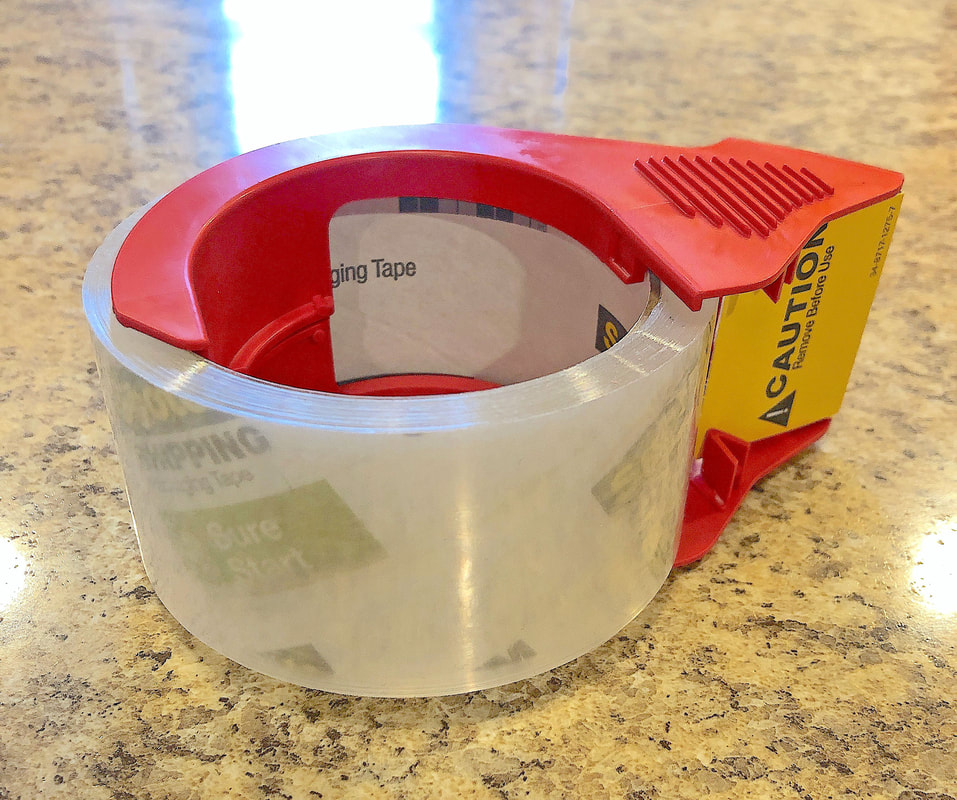 Prep lamp shade and materials for wet cleaning Never try to wet clean a lampshade while the base is plugged in! Unplug the lamp, remove the shade and attachments, and clean everything separately. Now it's time to prep the water for cleaning. If the seams on the lamp are held together with glue (which many are), the water you are using must be cold. Fill a small tub or sink with cold water, then mix in a small amount of GENTLE laundry detergent or dishwashing liquid. Just a few drops is enough so the shade doesn’t get soapy. You can add a little baking soda (about a teaspoon) to brighten the color of a white lampshade but do NOT add bleach.  Wet cleaning your lampshade Using a soft, lint-free fabric, use suds to clean the lamp while avoiding saturating the fabric with too much water. Try to dampen the whole lamp evenly to lessen the possibility of water stains once dry. Clean gently using an up-and-down motion with your soft, lint-free cloth. A soft toothbrush can be used for tough stains. 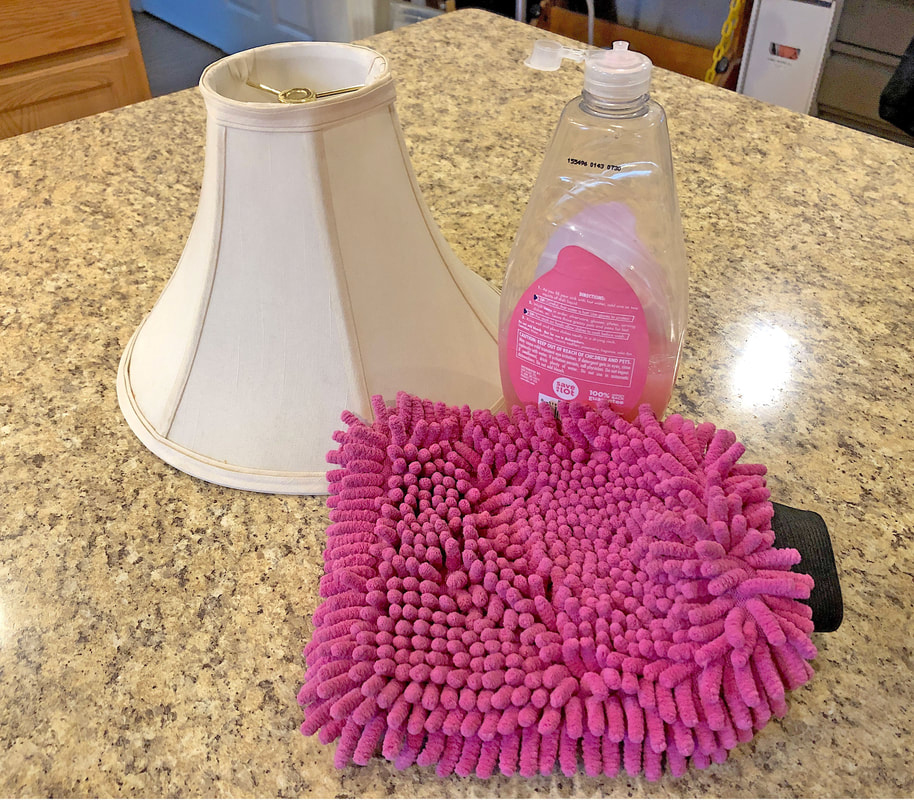 In certain situations, you may be able to submerge the lampshade in cold (or lukewarm) soapy water and let it sit for a few minutes, then clean it with the same gentle up-and-down motion as previously discussed. To rinse, submerge in clean, cold water. I felt a little uncertain about that technique, to be honest…Call it beginner’s nerves! One source I discovered explicitly said to avoid submerging a lampshade in water if any part of it has glue. Yet another source—as is so typical on the internet—stated that you can immerse the shade in COLD water and swish around, but do not let the shade soak in the water. Do not let the glue get so wet that it starts to lose its adhesiveness to the fabric. A quick dip to scrub and rinse, however, should not cause any damage to most shades. But if in doubt, try other methods of cleaning first. 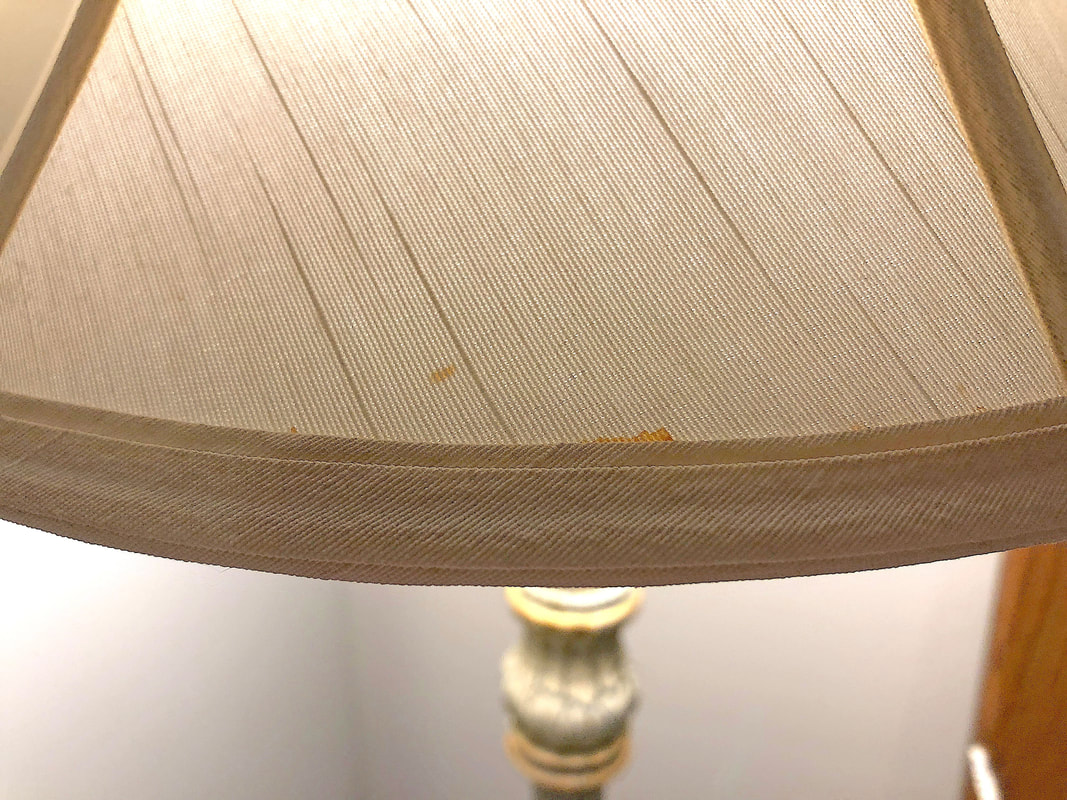 With that thought in mind, I decided to be brave! I quickly submerged the shade in soapy water, used a soft rag and my microfiber mitt to scrub, and finally rinsed the shade with cold water. All that was left to do was to shake off the excess water and let it dry on a towel. The cleaning project was done, and the shades looked good! Just a quick note here…Ensure the lampshade is thoroughly dry before re-attaching to the base and plugging in the lamp. (Water, metal, and electricity are not a good combination!) You may have to let the shade sit for a day to allow the seams to dry thoroughly. 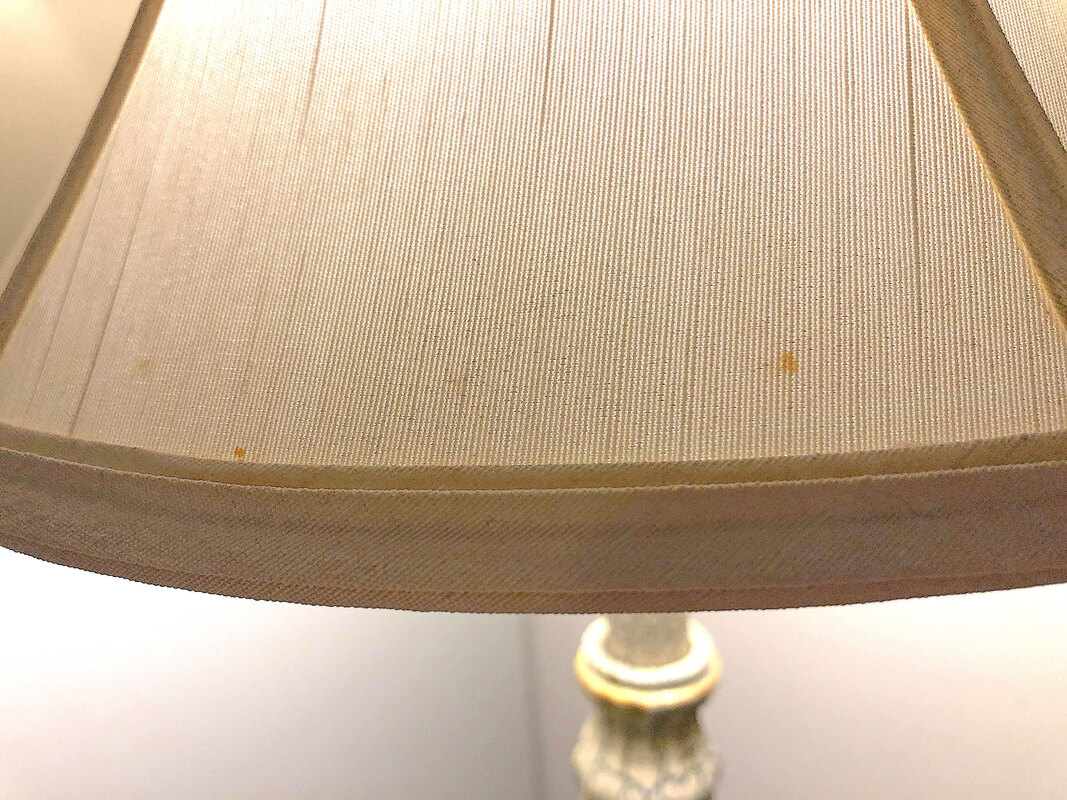 Final thoughts… This DIY lampshade cleaning project went surprisingly well--the results were remarkable! There were a couple of small spots that didn’t come out, but they are not noticeable, and I will be ordering some stain remover pens (similar to the ones below) to see if I can remove the remaining small spots. Overall, however, I am happy with the results. There is also a special dry-cleaning sponge available (for situations where you don’t want to wet clean) that helps remove stains from fabric blinds, shades, and wallpaper, so there are a few options for cleaning lampshades, besides the technique I used in this project. My advice would be to do some research before attempting to clean any fabric lamp shades so you can make an informed decision as to the best plan of attack for your project. So, I hope this article was helpful! Please feel free to comment below with any tips and tricks you'd like to share. If you’d like to sign up for occasional (generally monthly) newsletters, click here to go to the form on my contact page. This will keep you updated on the latest blog posts, merchandise sales, new items, etc. And you can follow me on any of my social media below! Related blogs you may want to read: How to reupholster dining room chair seats in 9 simple steps A little project with jute twine and an old foot stool DIY refurbishment of a dining room cabinet Comparing DIY upholstery cleaning methods My top thrift finds this year How to replace a clock mechanism How to frame small canvas art How to rewire thrift buy lamps 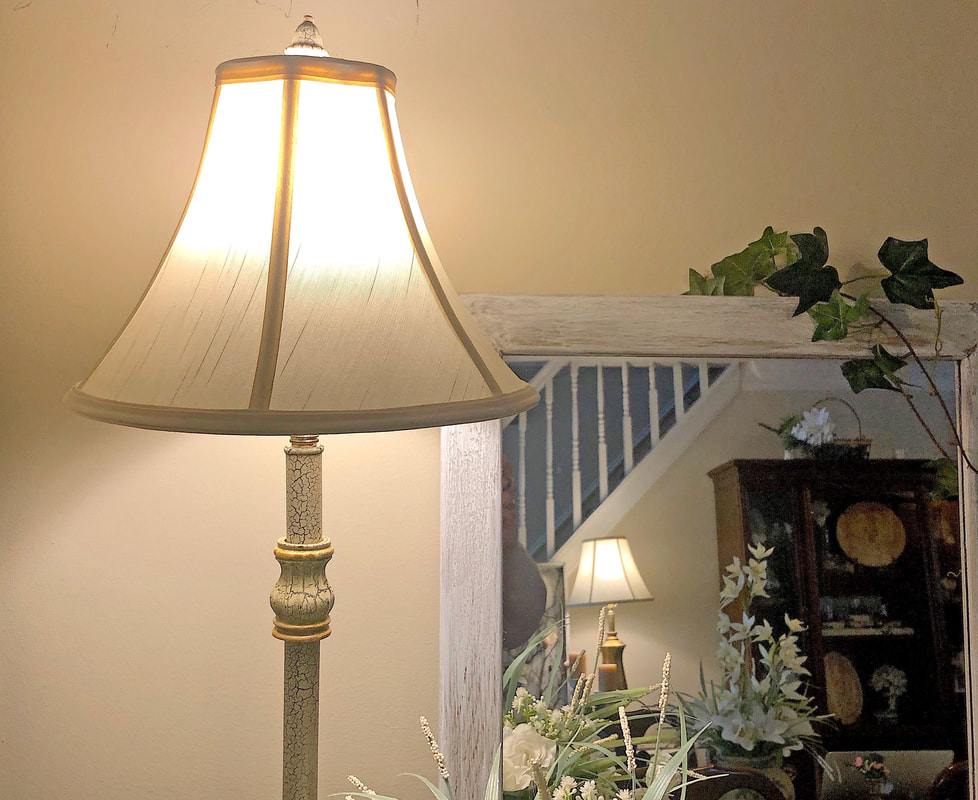 Affiliate Disclosure Some of the posts in this article contain affiliate links. This means if you click on the link and purchase the item, I will receive an affiliate commission at no extra cost to you. I will only recommend products or services I use personally and/or believe will add value to my readers, so there is no conflict of interest.  Gold ornament on my tree. Photo by Diane M. Lilly, 2022. I had many trendy ideas for decorating my Christmas tree this year…and until I checked my bank balance! Lol! Jokes aside, this year has been tough financially, and there isn’t enough money left in the pot to handle gifts, food, bills, Christmas dinner, AND expensive holiday decor. So, we scaled things back a little… This year, I have challenged myself to work with what I have on hand for all my holiday decor…and it WAS a challenge. Some areas could use more “stuff”—if I wanted to go out and buy extra decor—but for this year, it has to be what it is. Artificial pre-lit tree So, this project started with a gorgeous pre-lit tree we bought a couple of years ago. This beautiful 7ft tree came with berries and pinecones, which made it easy for me to find faux florals to add to the branches.  My artificial pre-lit Christmas tree. Photo by Diane M. Lilly, 2022.  The faux red berries on my Christmas tree. Photo by Diane M. Lilly, 2022. Assessing materials on hand Besides the artificial tree, I collected all of the faux florals, greenery, ribbon, and ornaments from storage that I thought would work well with this year’s decor scheme. All this potential material somehow ended up on my dining room table and sat there for days until I worked everything out! Anyway, the point is that what you see on the table is pretty much all I had to work with to decorate my dining and living rooms for the holidays.  This year's holiday decorating stash. Photo by Diane M. Lilly, 2022. Choosing a style and matching the faux florals The first important task was to decide on color and style. Almost all of my existing Christmas decorations are traditional in style, so since we are using what we already have for this season’s decor, we are sticking with that theme. After carefully assessing how much material was available between all the florals and ornaments, I decided on a color scheme of green, red, gold, and white. All the floral picks for this year’s Christmas tree had to be red, white, or gold. 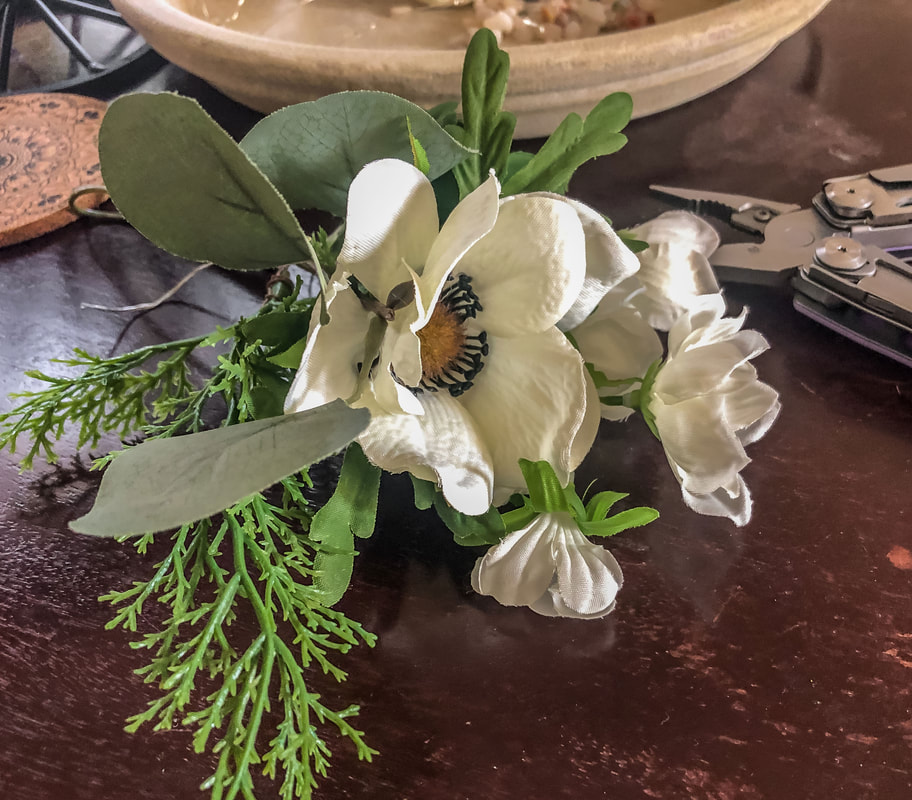 Faux white flowers being prepped for the tree. Photo by Diane M. Lilly, 2022. 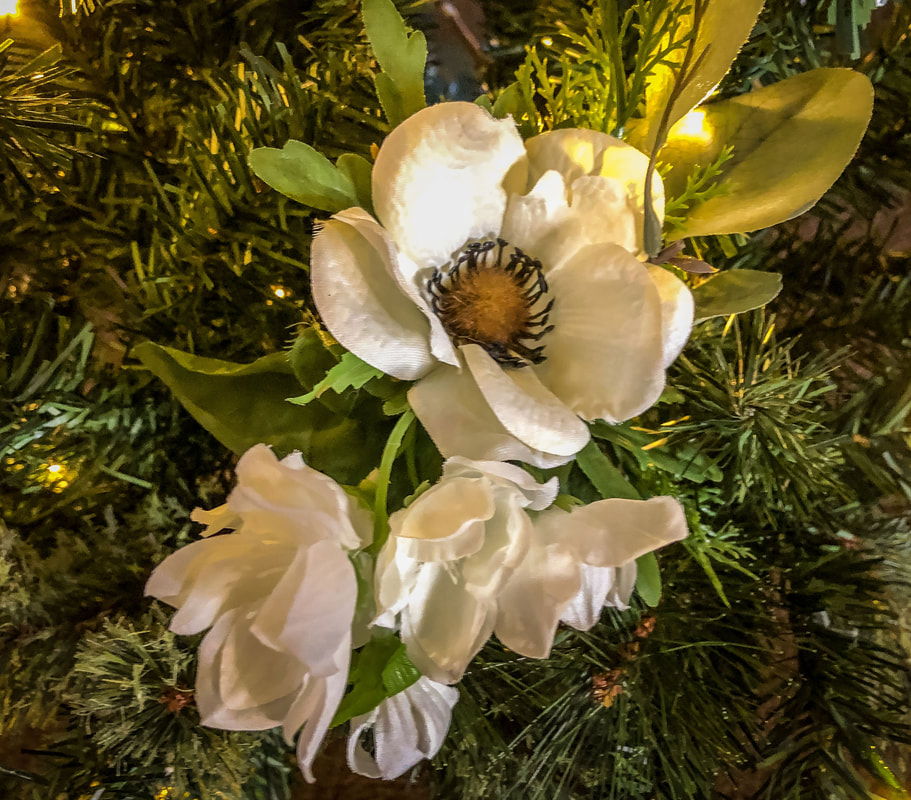 Faux white flowers inserted into the tree branches. Photo by Diane M. Lilly, 2022.  Faux red flowers inserted into the tree branches. Photo by Diane M. Lilly, 2022.  Red and white faux florals in the tree. Photo by Diane M. Lilly, 2022.  A bundle of white clematis inserted into the tree. Photo by Diane M. Lilly, 2022. 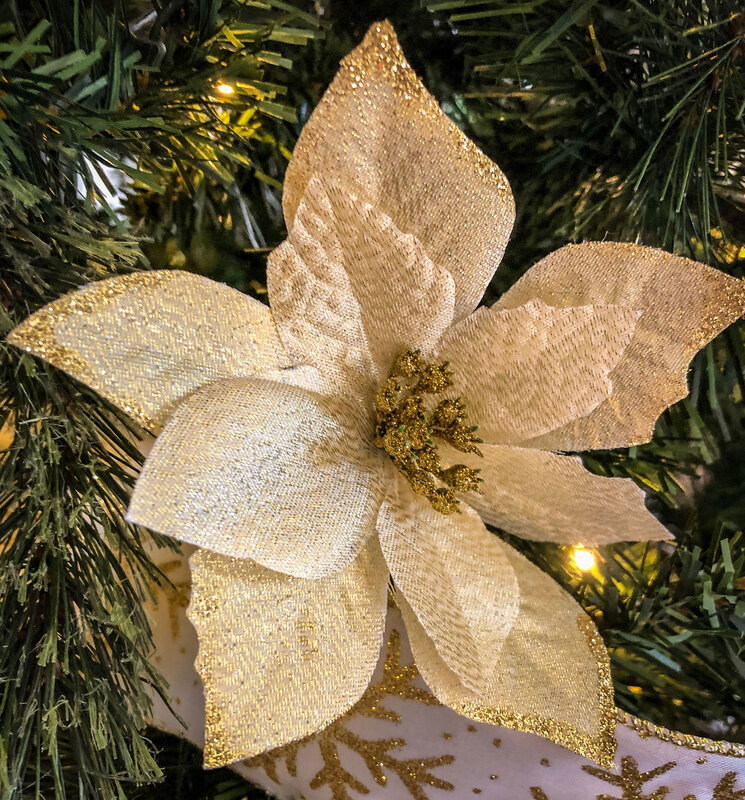 Gold fabric poinsettia attached to a tree branch. Photo by Diane M. Lilly, 2022. Assessing ornaments on hand There are some cool trends this year for Christmas tree decor, and one of them is using clusters of large ball ornaments. As much as I love that look, it simply wasn’t in my budget to go out and buy a bunch of large ornaments…sigh. Maybe next year. But I made the best of things and used the ornaments I already had in storage…and I think they look so classy on my tree!  White tassel ornament. Photo by Diane M. Lilly, 2022.  Red ball ornament. Photo by Diane M. Lilly, 2022.  Gold glitter snowflake ornament. Photo by Diane M. Lilly, 2022. 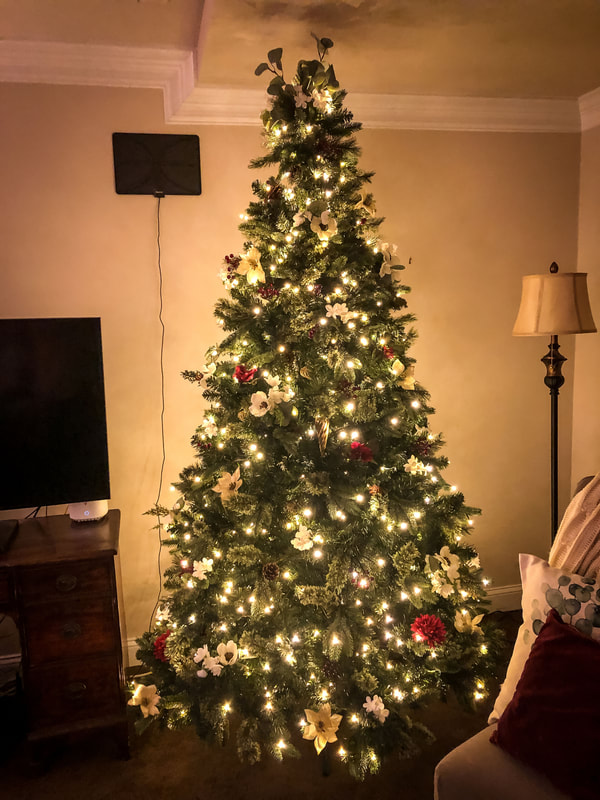 Decorated tree before the ribbon is applied. Photo by Diane M. Lilly, 2022.  Top of the tree before the ribbon is applied. Photo by Diane M. Lilly, 2022. Choosing ribbon for the tree The ribbon was another sore spot for me this year. I love the thick, voluptuous loops and bows on all the designer trees these days…but the ribbon is not cheap! I did splurge for one new ribbon because I needed a solid ribbon to help the translucent ribbons I already had stand out. I think over the year, I will keep my eyes open for some fancy wide ribbons for next year, but I made the best of what I had and dressed my beautiful tree in my best ribbons for the holidays. 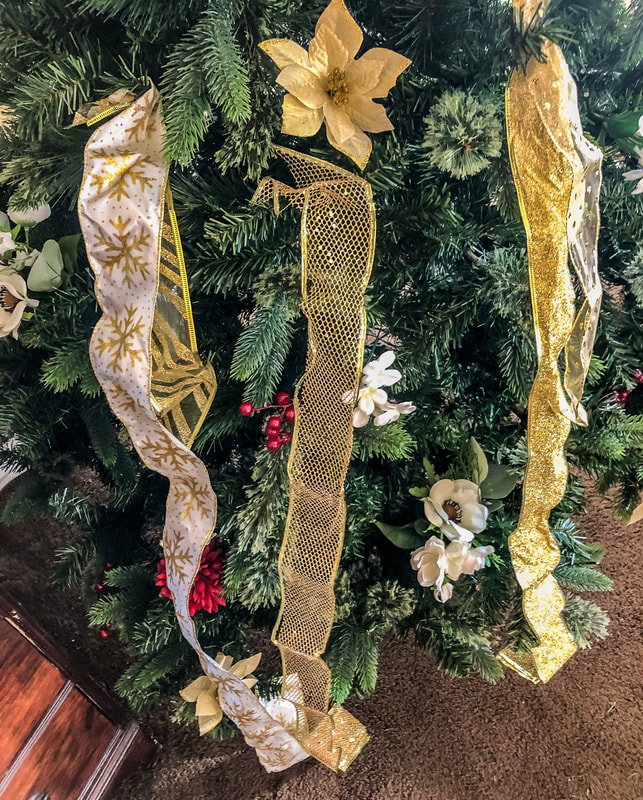 My ribbon choices for this year's Christmas decor and tree. Photo by Diane M. Lilly, 2022.  Top of tree with a fabric bow. Photo by Diane M. Lilly, 2022.  View of tree with fabric bow. Photo by Diane M. Lilly, 2022. 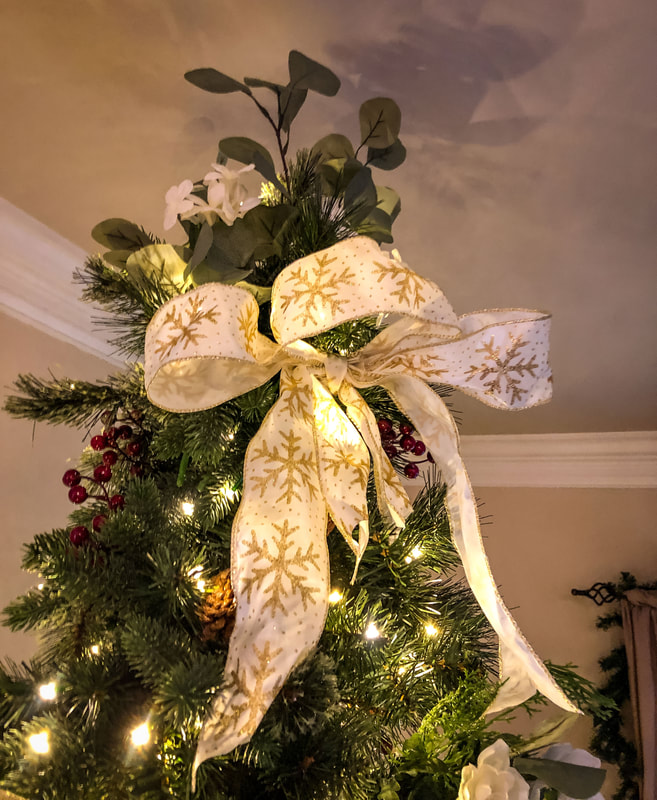 Closeup of the top of the tree with faux florals and fabric bow. Photo by Diane M. Lilly, 2022.  Tree wrapped in several types of ribbon. Photo by Diane M. Lilly, 2022.  The white and gold ribbon on the tree. Photo by Diane M. Lilly, 2022.  Deep red berries with fancy white and gold ribbon on this year's tree. Photo by Diane M. Lilly, 2022. Finishing touches And the tree is done! Just a couple of finishing touches…This year, my tree skirt is made with white and gold fabrics from my stash swirled around the bottom. My son then decided he had enough room to set up his train tracks…so he could play with his train and reminisce about his childhood. (He’s 21!)  Finished tree with garland behind. Photo by Diane M. Lilly, 2022.  This year's finished Christmas tree. Photo by Diane M. Lilly, 2022. This year's decorations may have been accomplished on a VERY slim budget, but the result was elegant. It was a challenge, but when there’s a will, there’s a way, right?! This tree was only one of several Christmas projects. I made three DIY wreaths, dressed up three rather sad garlands, and used leftover materials (which wasn’t much) to decorate four miniature trees. There are links to a few of these projects below. So, I hope you enjoyed seeing this year’s tree here at Di’s Studio Designs! From my family to yours…Merry Christmas and Happy Holidays! Related blogs you may want to read: How to make a simple faux floral wreath for the winter How to make a super easy faux ivy vine wreath for Christmas How to make cheap garland look festive for the holidays in just six steps DIY chalk painted tray with chippy effect DIY chalk painted tray with Celtic border Tips for creating a floral spring wreath A spring makeover for my small rental bathroom How to care for faux florals Nine hygge decor ideas Eight ways to create cozy winter interiors after the holiday decor comes down This article may contain a few items or commercial mentions, but I only used them for demonstration purposes only. I am not endorsing any particular product or receiving any monetary gain for this blog. 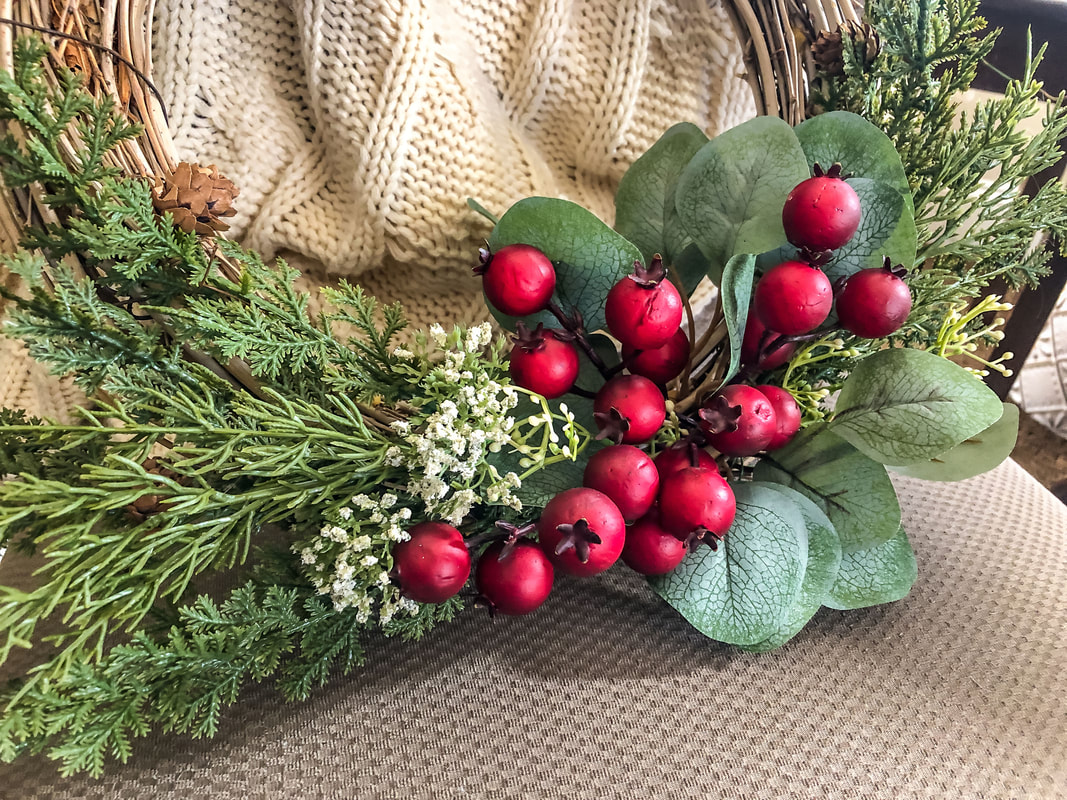 DIY wreath berries and faux greens. Photo by Diane M. Lilly, 2022. If you’ve read any of my previous blogs—or follow me on social media—chances are you’ve seen this wreath base before. The vine wreath base with the “Welcome” sign has become a decor staple, providing the perfect template for an ever-changing assortment of seasonal faux floral arrangements. 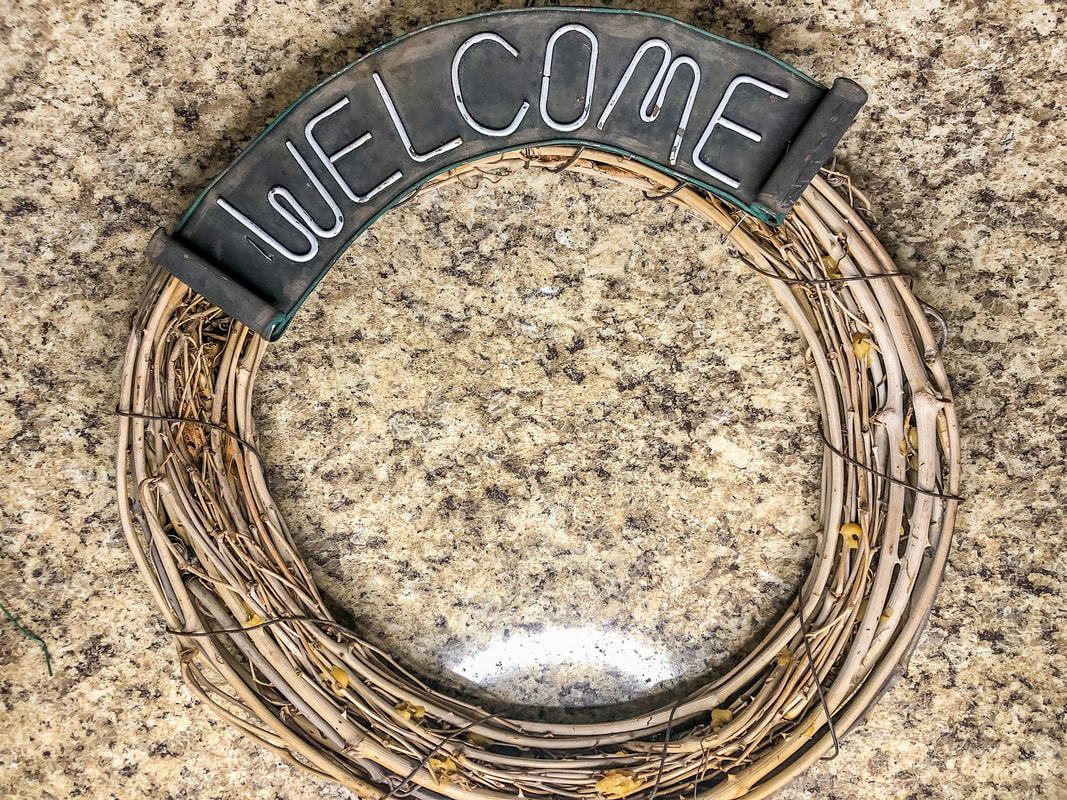 Empty vine wreath base. Photo by Diane M. Lilly, 2022. This wreath base will be used to create a holiday wreath that will stay up throughout the winter. I also had the added challenge of using only what I had on hand to economize during these trying economic times. Honestly, this arrangement was so easy to do! Here are the steps I took to create this gorgeous but simple holiday/winter wreath… Step 1—Choosing the greenery and floral elements For this design, I chose four greens, large red berry picks for the focal point, and small white accent flowers. Ideally, you want a variety of colors and textures with your greenery but always choose greens that complement each other and the focal florals. Speaking of focal florals, this simple design only requires one main focal element with a couple of contrasting florals to help make the main event stand out. 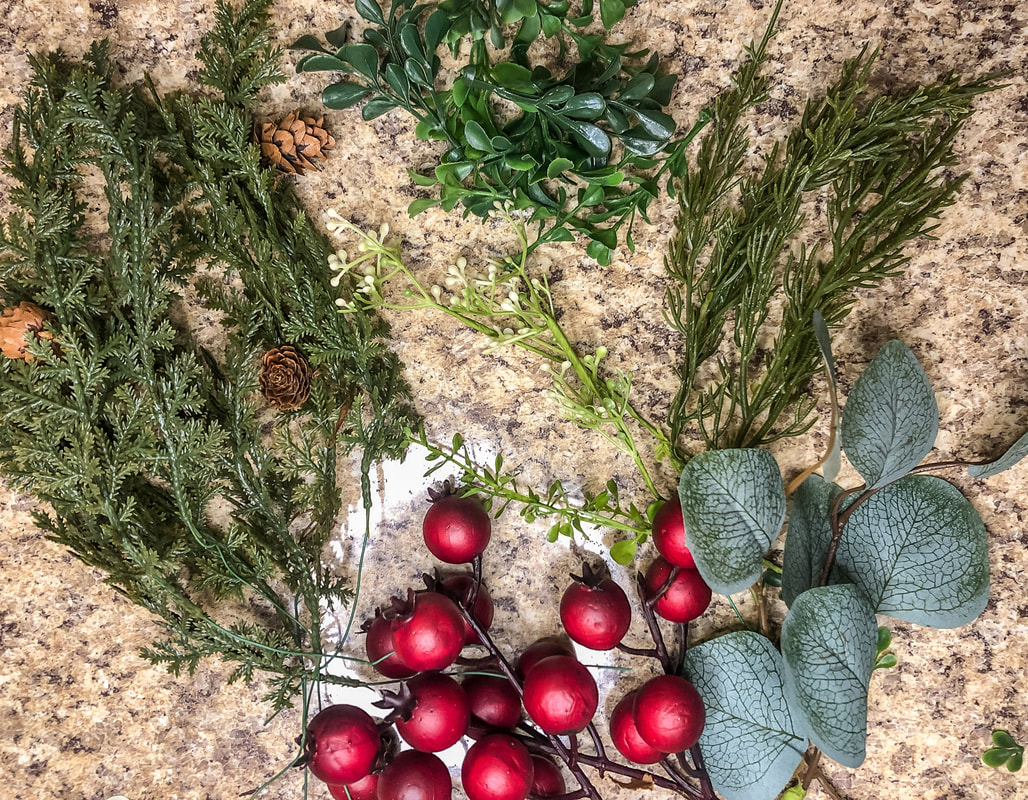 Assembling the faux greens and berries for the project. Photo by Diane M. Lilly, 2022. Step 2—Lay out the design In this stage, you will gather your materials to brainstorm and work out the desired look. Planning the design at this stage will make it much easier to make changes and additions before you attach your florals to the wreath base. 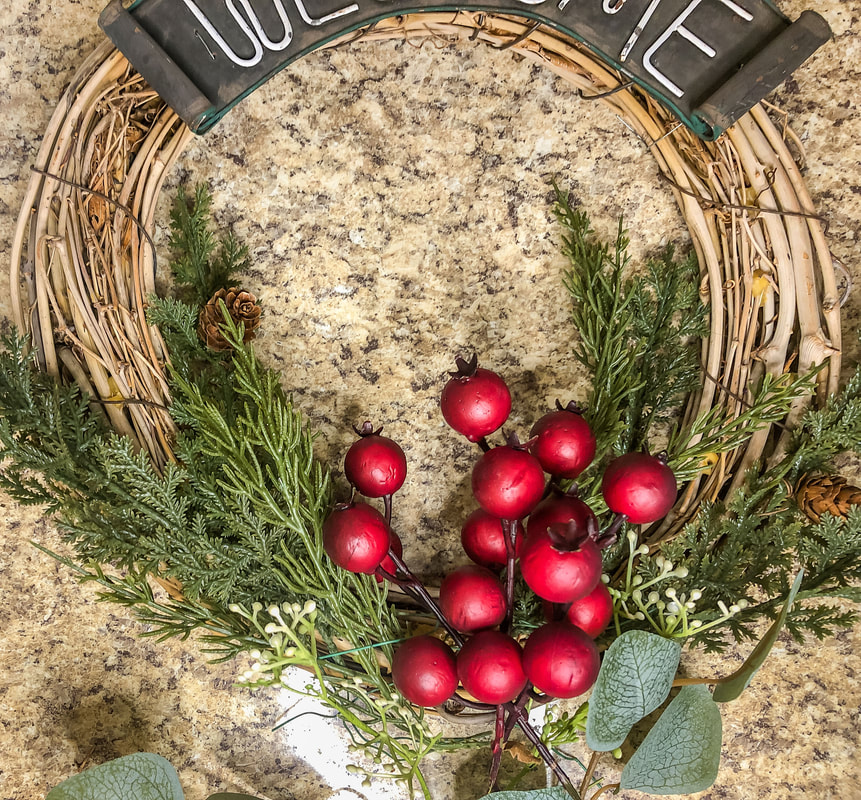 Planning out the design layout. Photo by Diane M. Lilly, 2022. Step 3—Insert the berries The focal point for this arrangement is a cluster of red berries, with the rest working outwards from there. A helpful tip: Wrap a piece of thin piece around each berry pick so your stems can be easily inserted and secured. 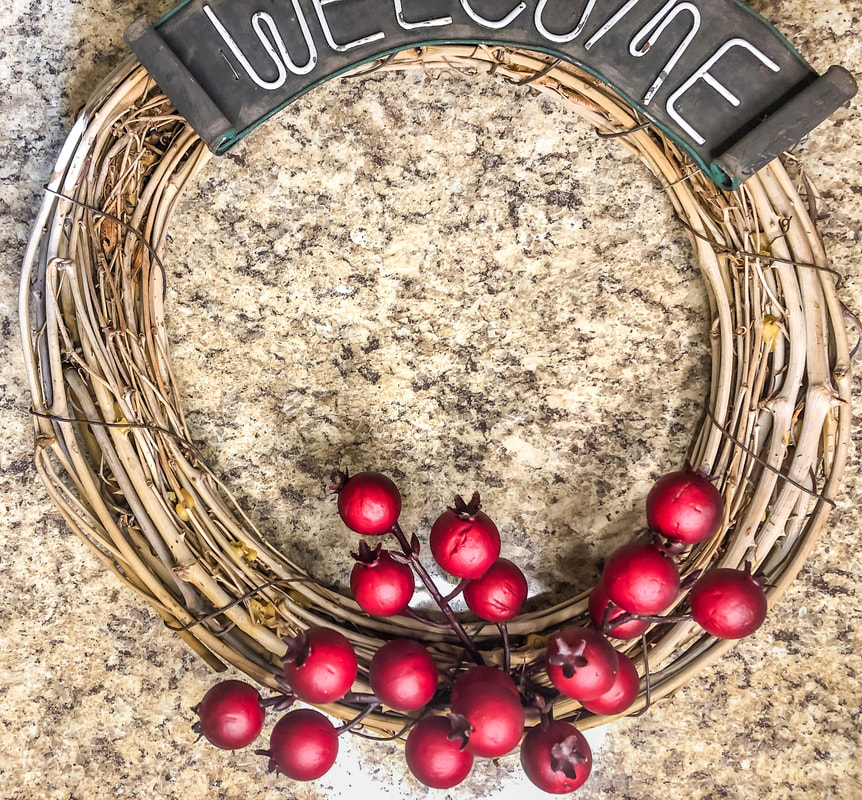 Berries inserted into the wreath base. Photo by Diane M. Lilly, 2022. Step 4—Insert the greenery Once the berries are nicely arranged and in place, start building up the design with the greenery. I started with the eucalyptus picks, inserting them under and around the berries and securing them within the vine with thin wire. At this point, a couple of sprigs of tiny white berries—one of two of my accent florals—were pushed into place. Next, I inserted the pine branches into the vine base on either side of the berries, balancing each side of the wreath. The branches should more or less follow the curve of the wreath, but it’s ok if a branch or two goes rogue and hangs a little. It will look a bit more natural that way! 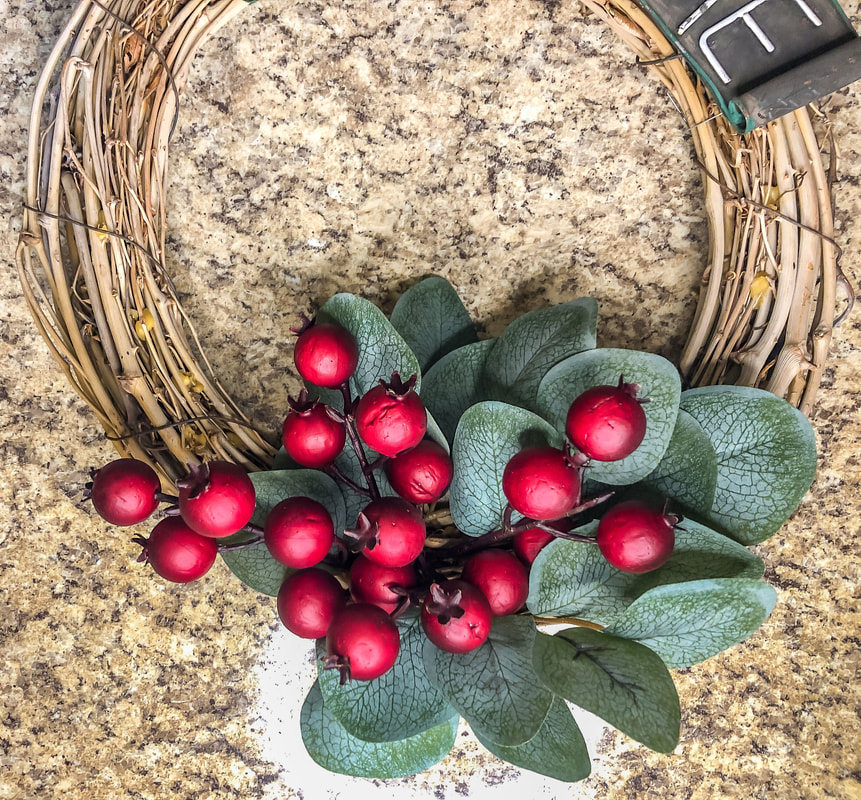 Eucalyptus inserted into the wreath base. Photo by Diane M. Lilly, 2022.  Small white berries inserted into the wreath base. Photo by Diane M. Lilly, 2022. 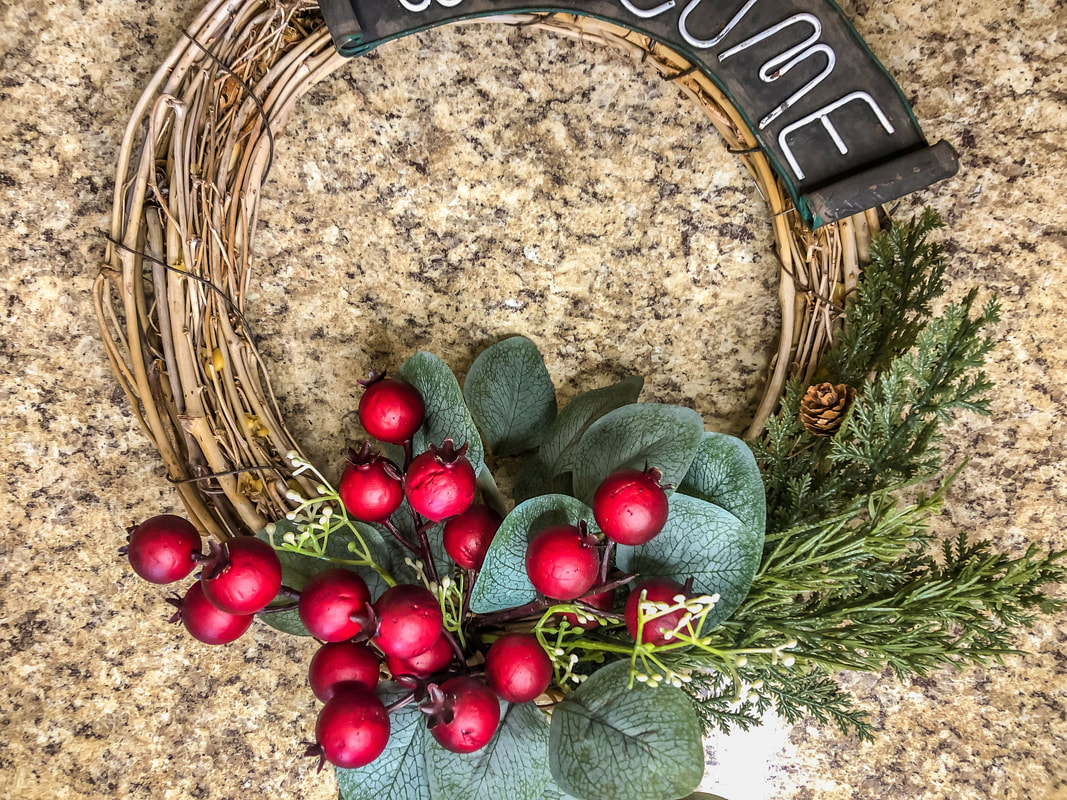 Faux greens inserted into the wreath base on one side of the red berries. Photo by Diane M. Lilly, 2022.  Wreath with all faux greens inserted. Photo by Diane M. Lilly, 2022. Step 5—Add in accent florals Finally, a few white flowers can be pushed into place to provide more contrast so that the berries stand out more. And that’s it!  Finished wreath with faux pine, eucalyptus, berries, and white flowers. Photo by Diane M. Lilly, 2022. This was one of the easiest faux floral arrangements I have ever done with this wreath base, and I love it! This project was limited to only what I had on hand, but you can make your wreath fuller with more greens, accent florals, and even pinecones. So what do you think? I encourage you to be brave--upcycle those old faux floral wreaths and create your own design with fresh faux florals. It’s really not too hard. All it takes is patience and imagination to give new life to an old wreath! There is a second vine base DIY that is also super easy, and I’ll include the link below! Happy Holidays!  Closeup of DIY wreath hanging on the front door. Photo by Diane M. Lilly, 2022.  Full view of the DIY winter wreath hanging on the front door. Photo by Diane M. Lilly, 2022. Related blogs you may want to read: How to make a super easy faux ivy vine wreath for Christmas How I decorated my tree on a budget this year How to make cheap garland look festive for the holidays in just six steps DIY chalk painted tray with chippy effect DIY chalk painted tray with Celtic border Tips for creating a floral spring wreath A spring makeover for my small rental bathroom How to care for faux florals Nine hygge decor ideas Eight ways to create cozy winter interiors after the holiday decor comes down This article may contain a few items or commercial mentions, but I only used them for demonstration purposes only. I am not endorsing any particular product or receiving any monetary gain for this blog. 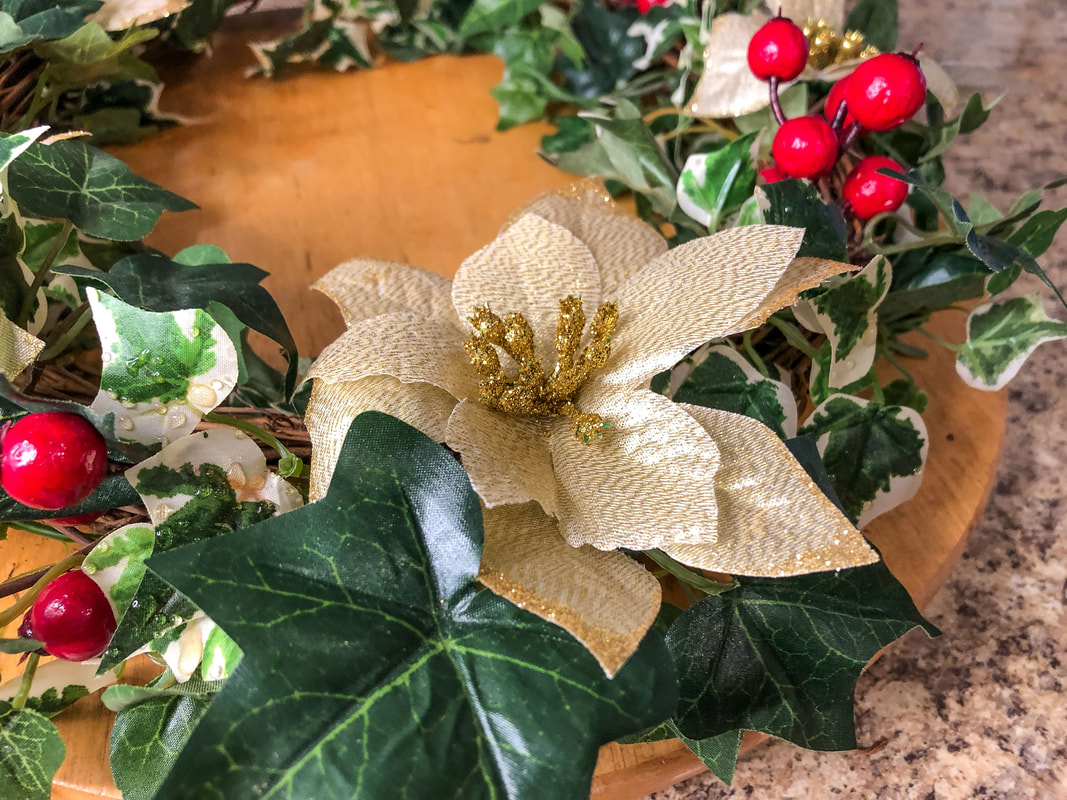 Closeup of ivy, gold poinsettia, and berries on this DIY wreath. Photo by Diane M. Lilly, 2022. This holiday decorating season has seen a lot of DIY projects, including this super simple ivy vine wreath! As with another recent DIY wreath project (see below), I started with a twisted vine wreath base stripped of all its old faux florals.  Another DIY wreath with red berries for my front door. Photo by Diane M. Lilly, 2022. Why so many DIY decor projects, you may ask? Well, it’s all about being economical this year and working with materials I already have rather than going out and spending money that I need for other things…like gifts! So what you see on this table (plus a box or two of Christmas ornaments) is all I had to work with for this holiday season’s greenery. A lot of thought also went into creating a sense of continuity in design between the different groupings, the dining room table, and the living room decor. Just because you are on a budget doesn’t mean you skimp on design! 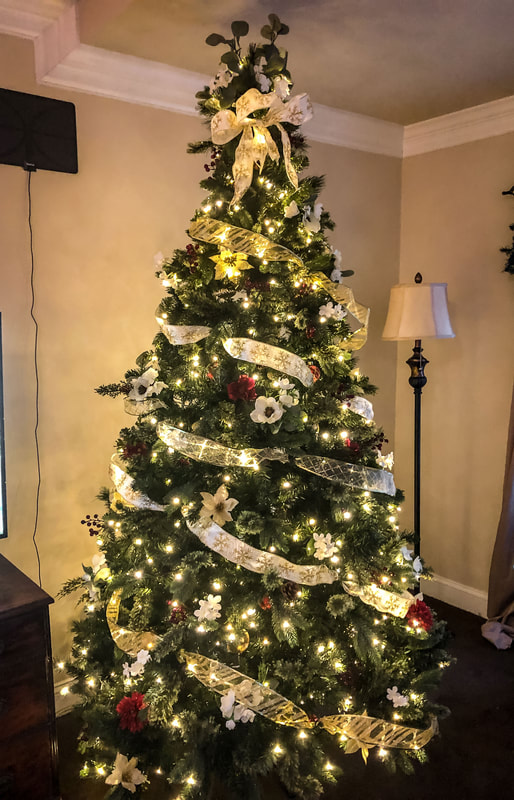 This year's Christmas tree. Photo by Diane M. Lilly, 2022. 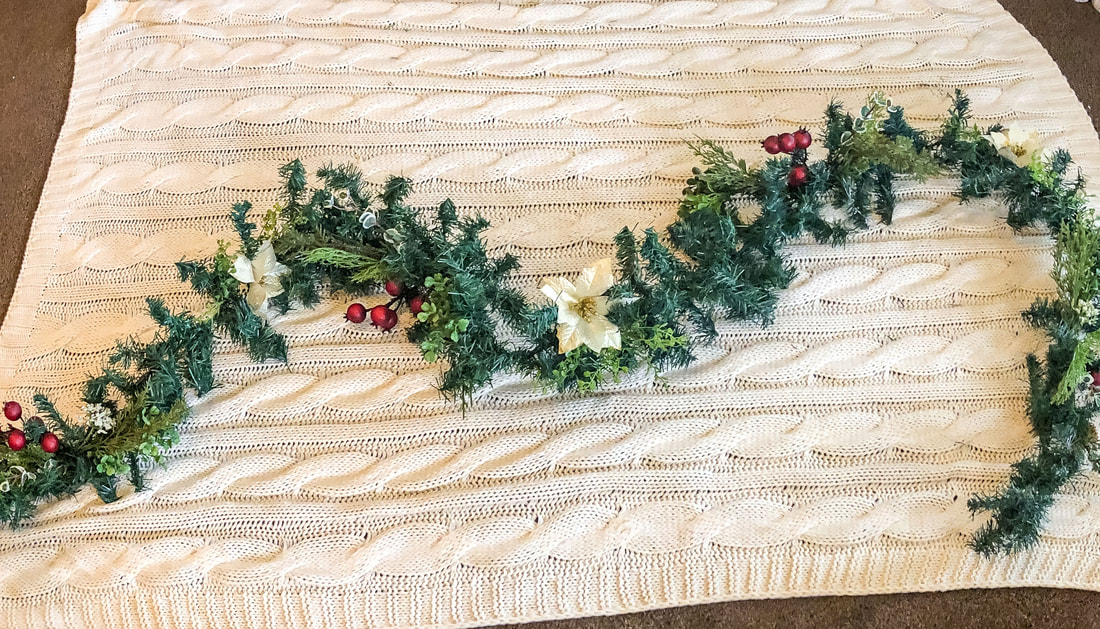 A DIY garland with gold poinsettias and red berries. Photo by Diane M. Lilly, 2022. This faux ivy wreath design was so quick and easy that I had to share it! Here are the four steps to make this simple wreath… Step 1—Wrap the green ivy Wrap the solid green ivy around the wreath and secure it into place by pushing the ends into the twisted vine. Wrap as much ivy as you like to create the desired thickness of the wreath. 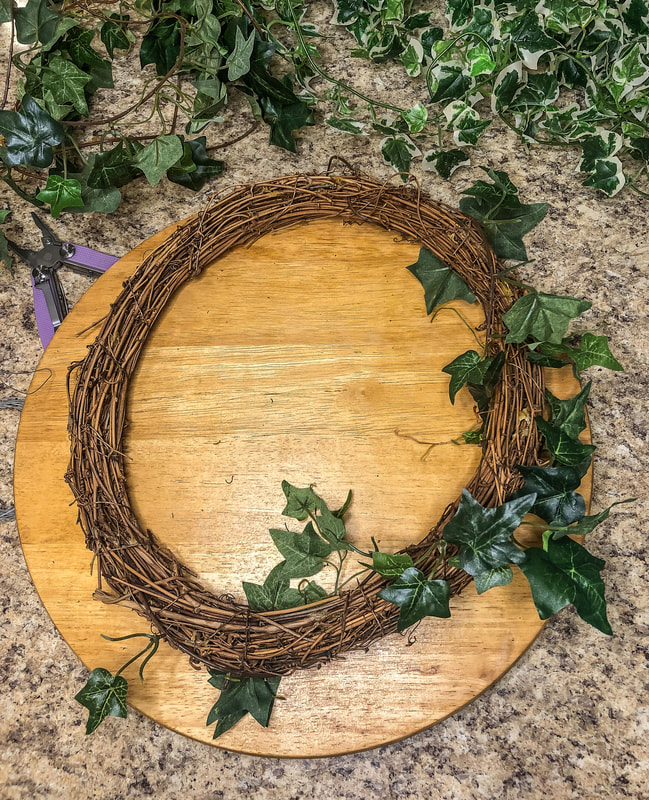 Vine wreath base with a few pieces of green ivy. Photo by Diane M. Lilly, 2022. 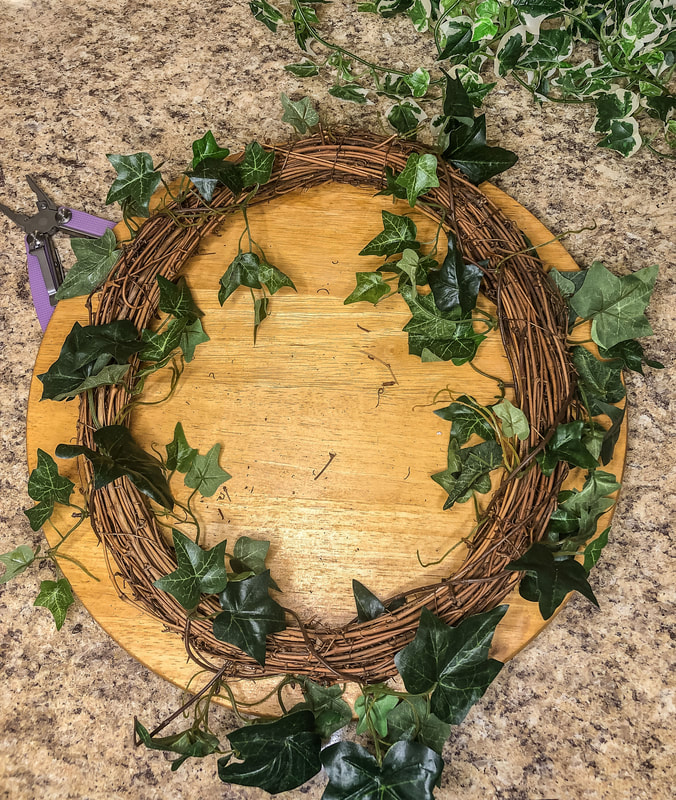 Working out how I want to fill the wreath base with the ivy. Photo by Diane M. Lilly, 2022. Step 2—Wrap the variegated ivy The variegated ivy—which provides visual contrast—can be wrapped over the green ivy, filling in the gaps between the vines. As with the green ivy, wrap it as many times as you like to create the desired thickness for your wreath, and push the ends into the wreath base to secure it in place. Keep the spacing even for a more balanced finished look. 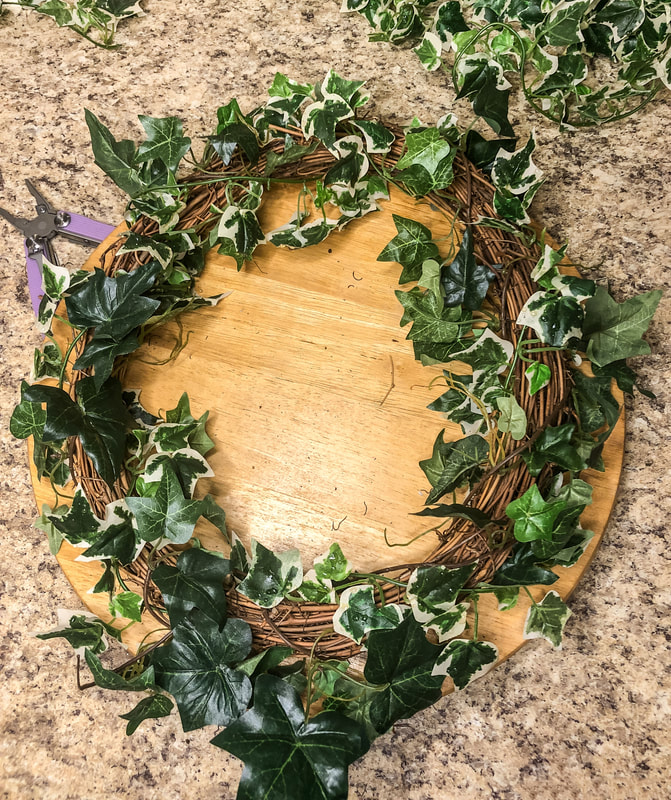 Wrapping the wreath base with the variegated ivy. Photo by Diane M. Lilly, 2022. Step 3—Add in berries This design calls for clusters of red berries to provide contrast and visual interest. When working with wreaths, it is essential to evenly space florals to create a sense of balance. Odd numbers are preferable, so I used five clusters, but this design would also work perfectly well with just four berry clusters. The berry picks are secured into place by pushing the stems into the twisted vine base. If the stems are too short, add thin wire to attach to the wreath. 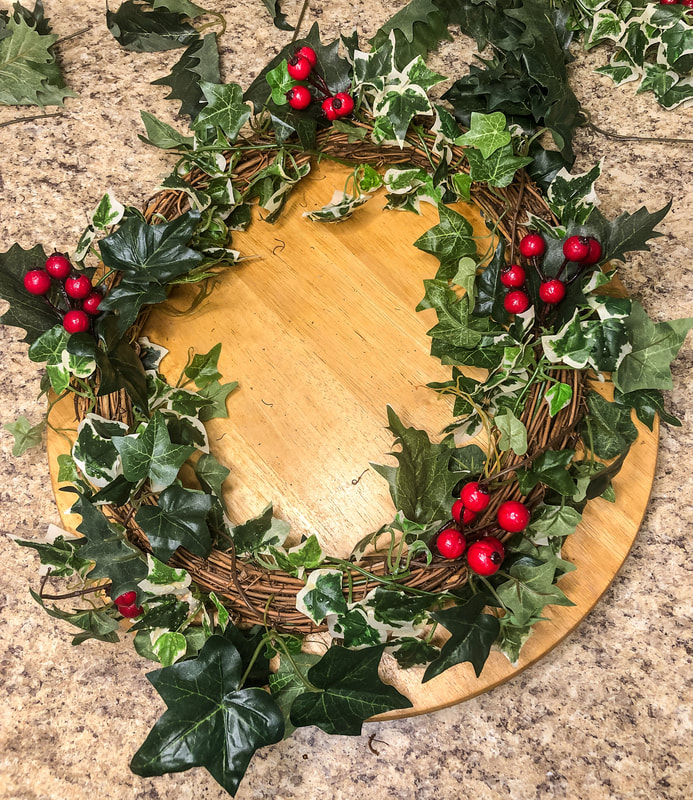 Adding the berry clusters to the wreath. Photo by Diane M. Lilly, 2022. Step 4—Attach gold poinsettias As with the berries, the poinsettias should be evenly spaced around the perimeter of your wreath. Five poinsettias were evenly spaced between the red berries. Since these poinsettia flowers had no stems, I used thin wire to attach each to my wreath.  The finished wreath with gold poinsettias added. Photo by Diane M. Lilly, 2022. And that’s it! Super simple, and yet very festive! All that’s left is to hang and dress up your wreath with fairy lights. I even had enough ivy left over to create a small wreath with no base—just ivy vines twisted into an oval and topped with a bow! 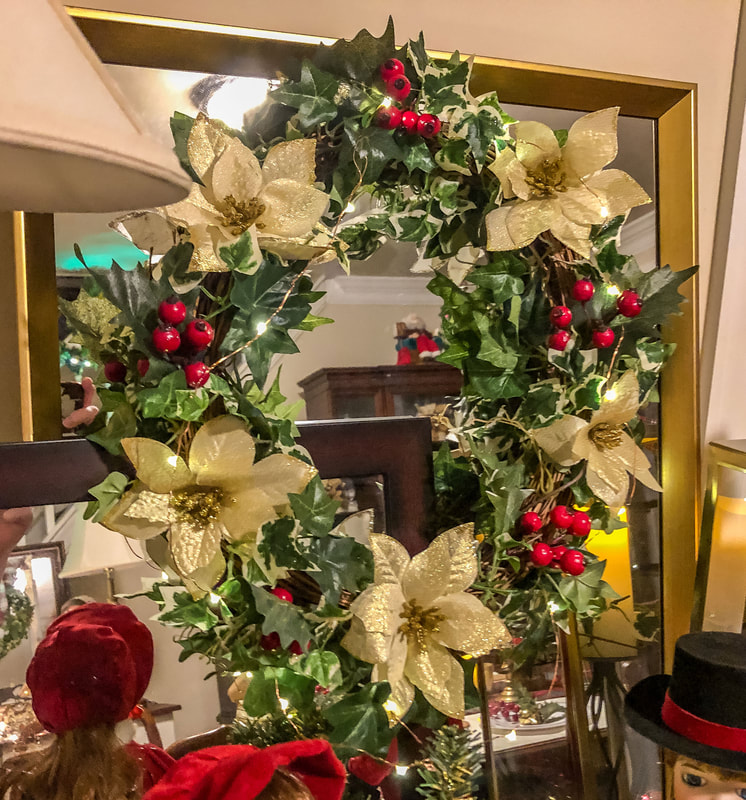 One view of the finished ivy wreath hanging over some mirrors in my dining room. Photo by Diane M. Lilly, 2022. 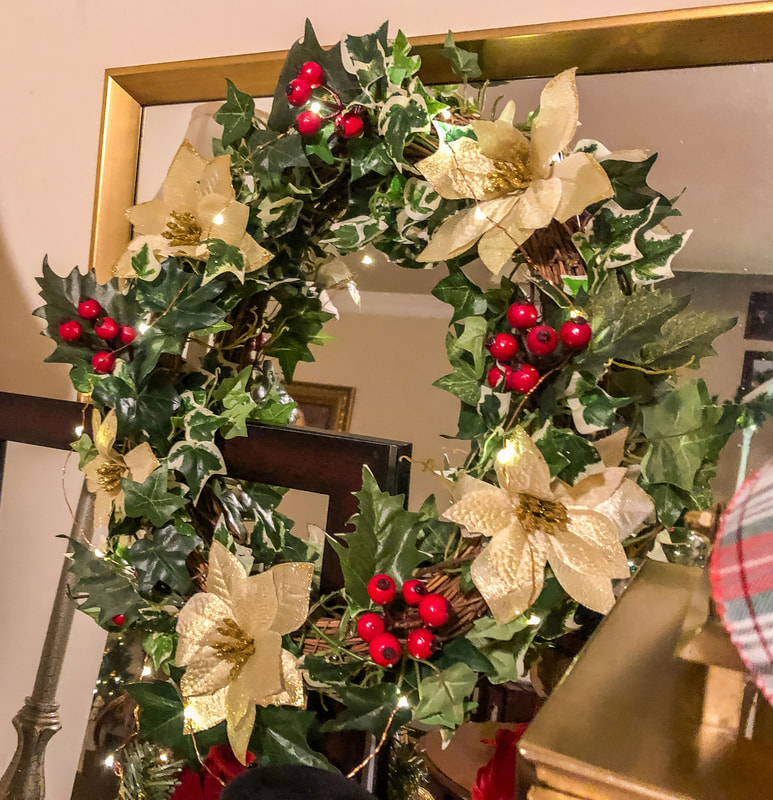 Another view of the finished ivy wreath. Photo by Diane M. Lilly, 2022. 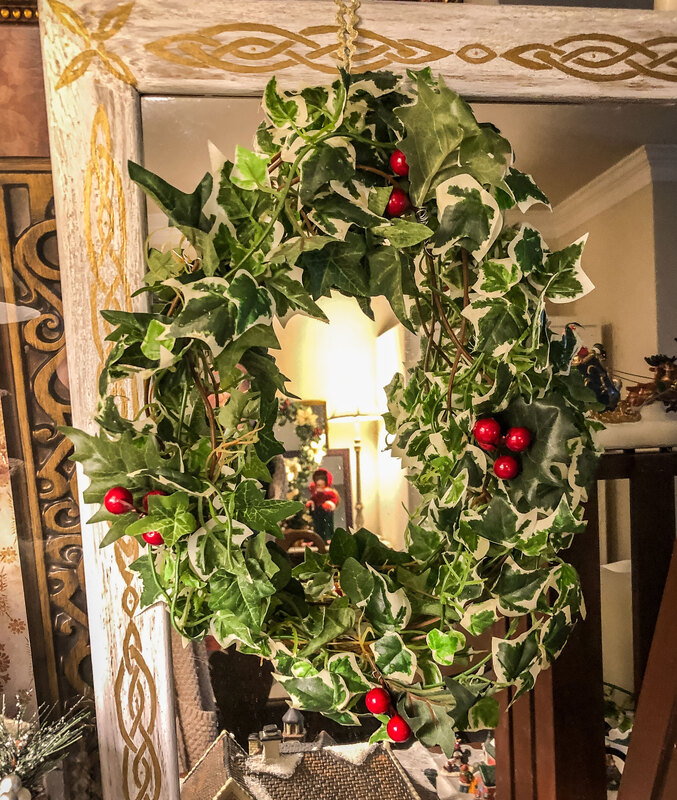 The extra wreath made by twisting the remaining vines into and oval shape. Photo by Diane M. Lilly, 2022. 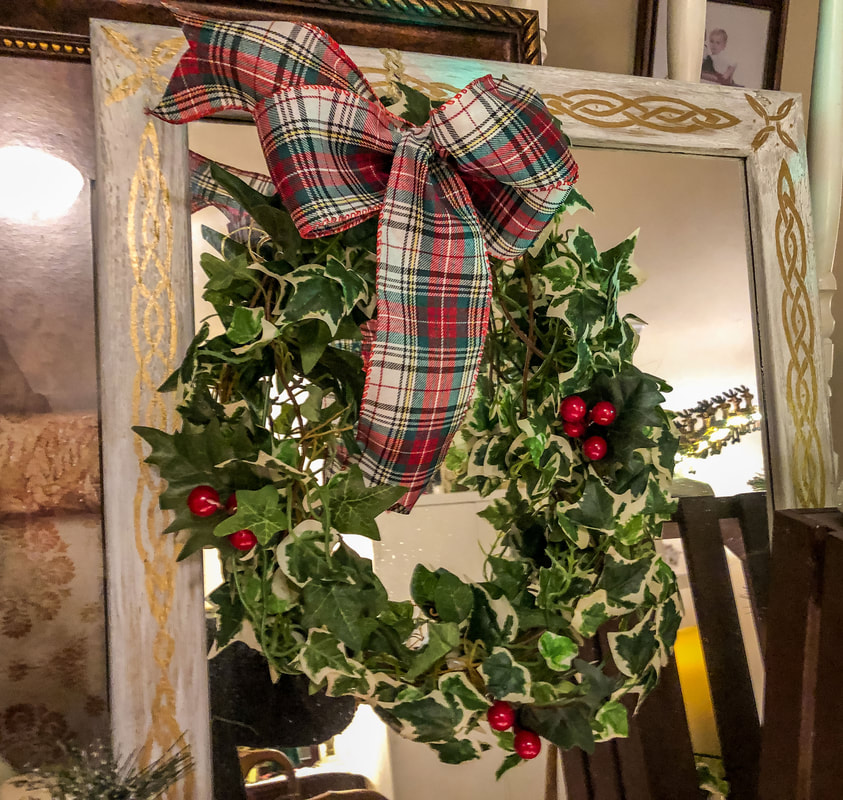 The extra ivy vine wreath with a plaid bow. Photo by Diane M. Lilly, 2022. 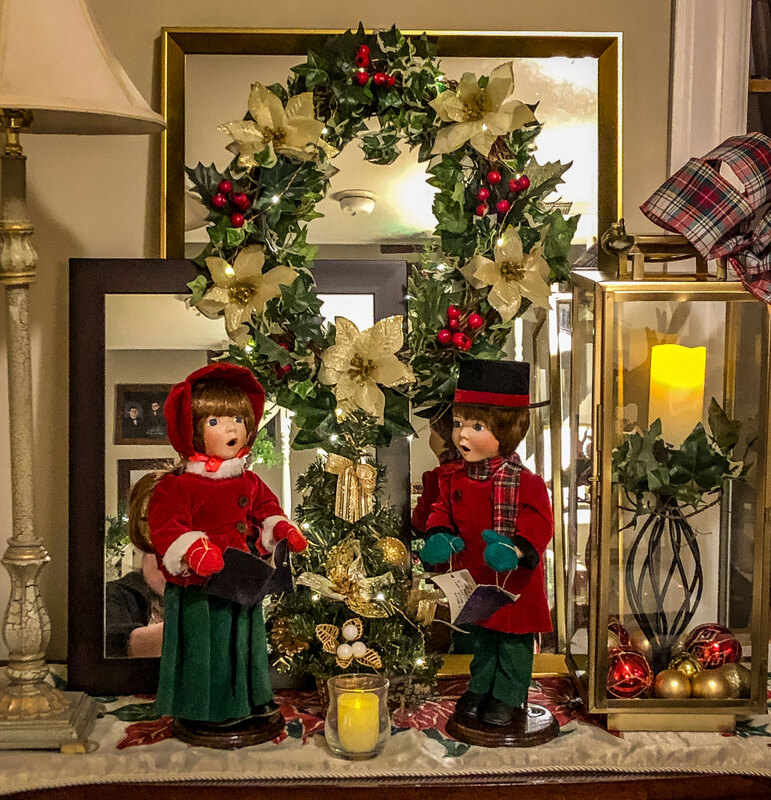 A final look at the finished DIY faux ivy vine wreath with red berries and gold poinsettias. Photo by Diane M. Lilly, 2022. So let me know in the comments whether you have tried anything similar, and don’t forget to check out my other holiday wreath DIY (listed below). Happy Holidays! Related blogs you may want to read: How to make a simple faux floral wreath for the winter How I decorated my Christmas tree on a budget this year How to make cheap garland look festive for the holidays in just six steps DIY chalk painted tray with chippy effect DIY chalk painted tray with Celtic border Tips for creating a floral spring wreath A spring makeover for my small rental bathroom How to care for faux florals Nine hygge decor ideas Eight ways to create cozy winter interiors after the holiday decor comes down This article may contain a few items or commercial mentions, but I only used them for demonstration purposes only. I am not endorsing any particular product or receiving any monetary gain for this blog. 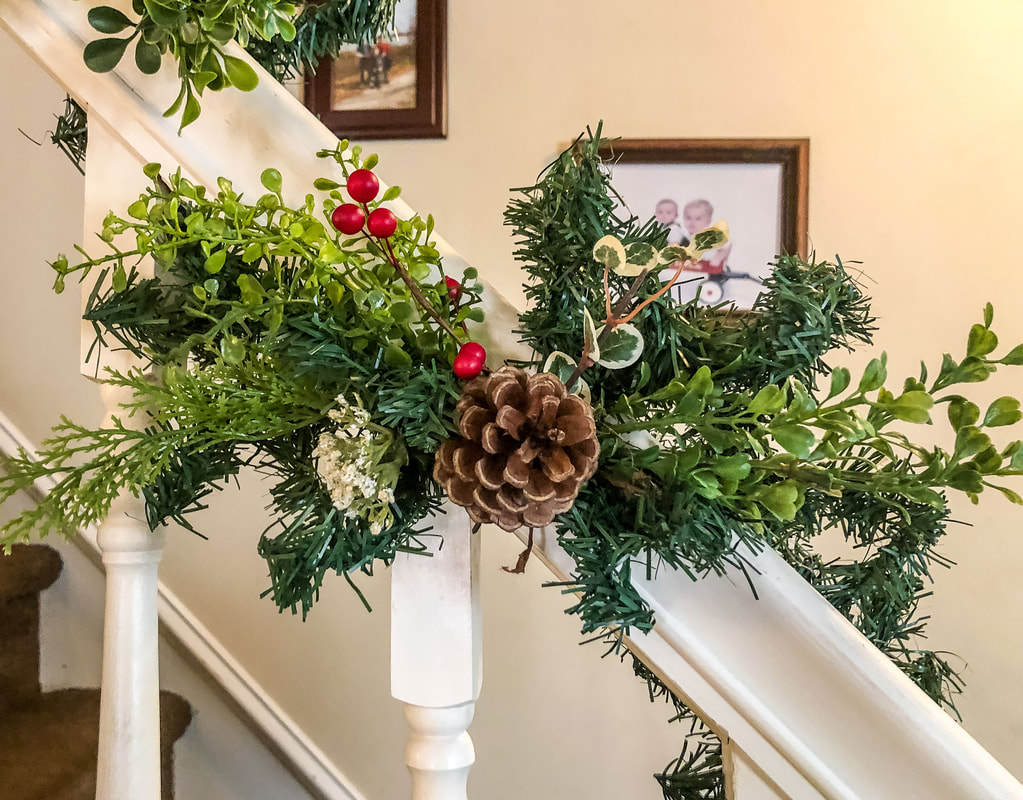 Wiry garland with faux greens, pinecone, and red berries. Photo by Diane M. Lilly, 2022. This year’s holiday season has been devastated by the current chaotic economy. It’s turning out to be a very lean holiday season indeed! This year—in particular—the festive decorations have become a beacon of light in the darkness, at least for me. But what do you do if you can’t afford to indulge in the latest trends in Christmas decorations? What if all you have to work with is cheap, wiry—and obviously fake—garland? This year, I have three cheap garlands, two hung over the top of my windows and one wrapped around the staircase railing. In this DIY, I'll share how I dressed them up to make them look festive. There were two stipulations for this decorating project: 1) I could only work with materials I had on hand, and 2) The final look had to match the rest of the holiday decor in my dining and living rooms. I picked through all of my faux florals, faux greenery, ribbons, and ornaments to see if I could come up with enough ideas to fill two rooms with holiday spirit while creating a cohesive look to the space. As you can see, I made such a mess of my dining room table! But it was worth it. Laying everything out in front of me allowed me to see what I had, explore what goes together, and assess how much of each material was available. What you see on this table (plus a box of ornaments) is all I had to work with for this year’s holiday floral decorating. 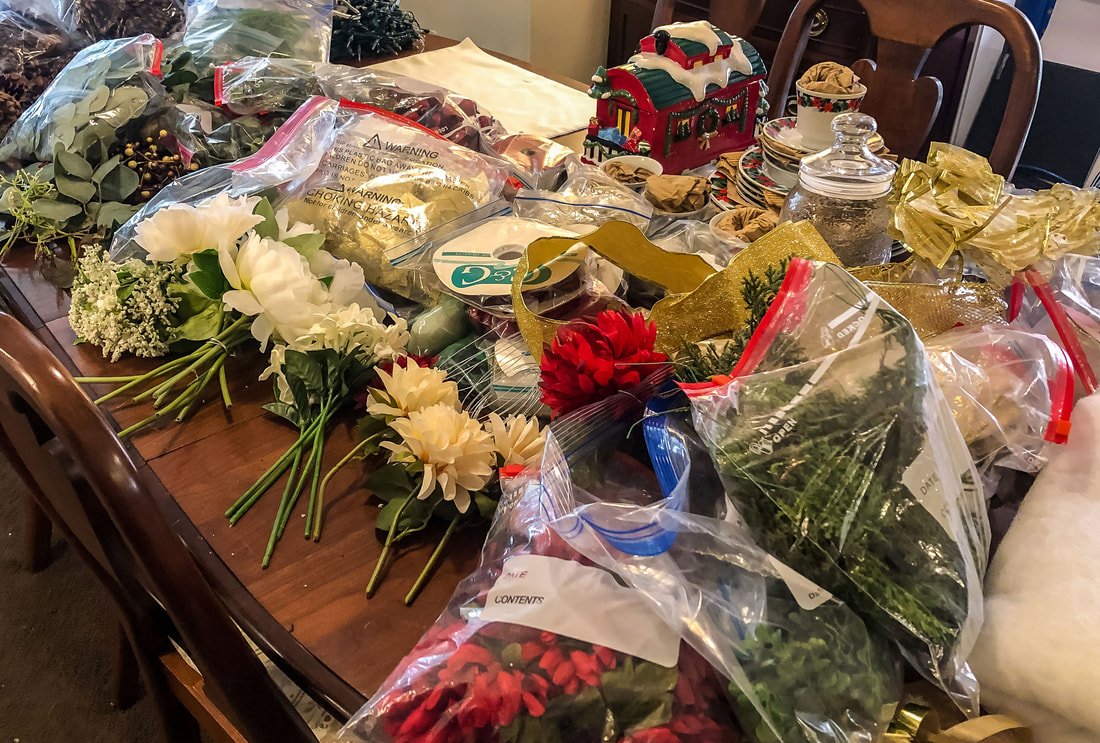 This year's supplies for holiday floral decorating. Photo by Diane M. Lilly, 2022. That decorating scheme also included creating two faux floral wreaths and filling out the pre-lit Christmas tree (I will leave links to those projects at the end), so everything you see on this table had to be carefully stretched to meet all my decorating needs. What a challenge this turned out to be!  This year's Christmas tree. Photo by Diane M. Lilly, 2022.  One of two DIY wreaths with faux greenery. Photo by Diane M. Lilly, 2022.  Another DIY wreath with faux greens and berries. Photo by Diane M. Lilly, 2022. So, let’s look at how I made my cheap garland look festive… Step 1—Fluff the garland The first step to making this cheap garland workable is to fluff every branch. As tedious as this sounds, you have to make sure to touch every single branch. Pull the branches apart and outwards in various directions away from the central wire. This creates a workable base for all of the materials you will add. Step 2—Plan out your spacing Take each bundle of greenery and experiment with the desired placement. I like to start with locating the center of the garland so that my end design has a pleasing symmetry. If you have an odd number of miniature floral arrangements, you will start in the center and work out, evenly spacing your greens. If your design calls for an even number of arrangements, you will carefully space out the bundles on either side of the central point. Either way, you will lay out your garland and greens before attaching anything to get the correct spacing. Using symmetry is the simplest way to make a dramatic visual impact! 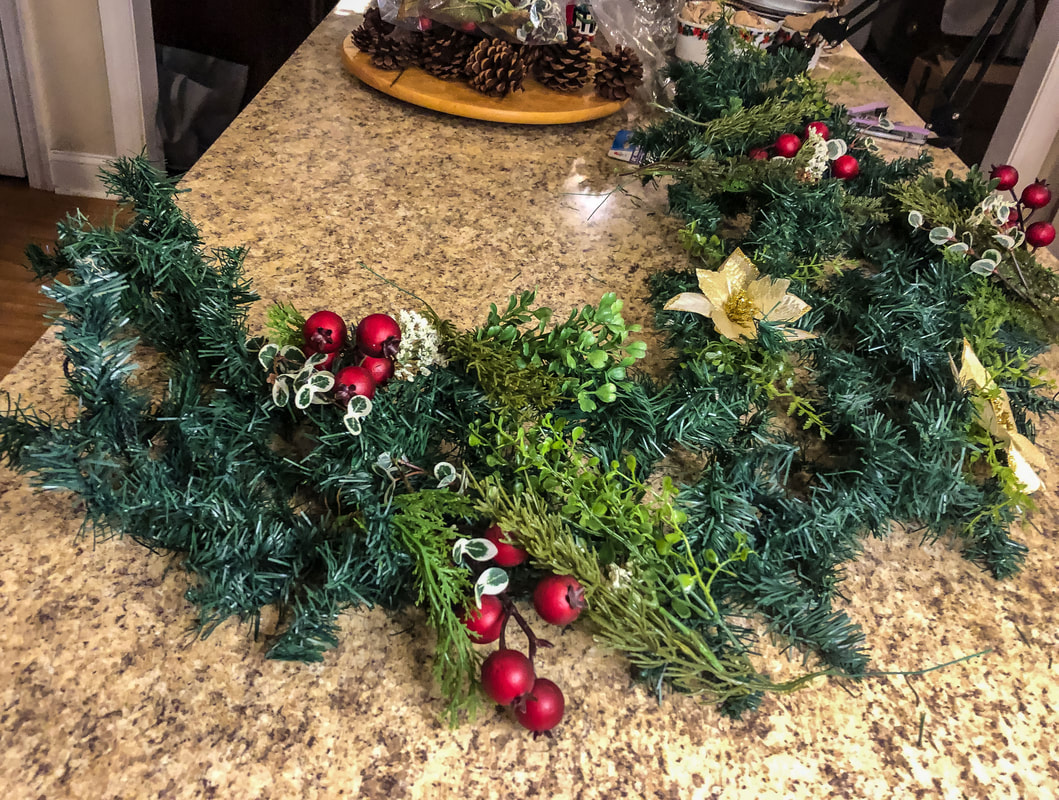 Planning the layout for my extra greens and florals. Photo by Diane M. Lilly, 2022. Step 3—Choose your faux greenery Ideally, you want more than one type of faux greenery to create visual interest. You’ll want to use greens that complement each other and the garland yet creates much-needed contrast. I used three or four different greens, including faux pine and variegated leaves. You don’t have to choose “Christmas” greens. You can use whatever works visually, and that’s ok! Just remember to keep in mind that you want a sense of continuity in the space, so try to use at least one type of greenery that appears elsewhere in your room. I used thin wire to attach and arrange my stems on either side of a central spot. This spot will be filled later with flowers. This set the stage for several miniature arrangements to be created along the length of the garland. 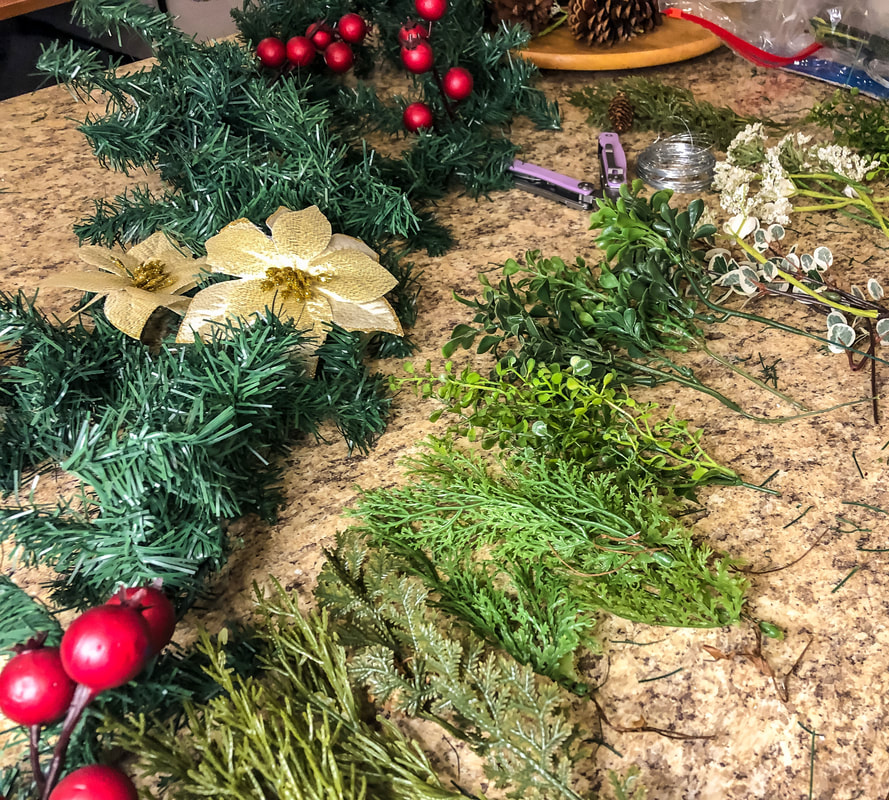 Laying out all the greenery for this project. Photo by Diane M. Lilly, 2022. 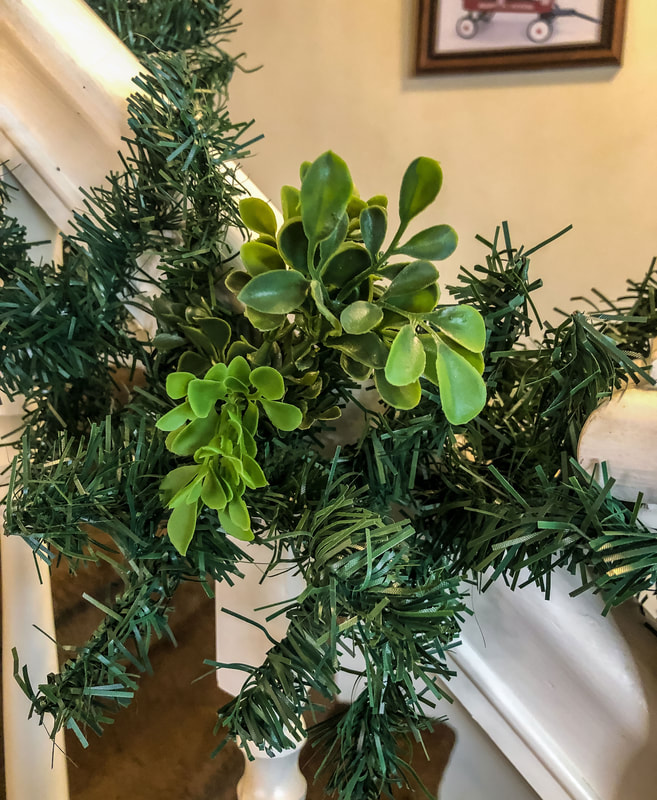 The first bit of greenery for the railing garland. Photo by Diane M. Lilly, 2022. Step 4—Layer in faux florals The faux florals in this project became individual focal points for the miniature arrangements on the garland. As I mentioned with the greenery, it is important to use repetition of design elements so that the garland blends in with the rest of your holiday decor. One of my garlands was wrapped around the staircase railing in the dining room. As there was quite a lot going on in that space already, I kept the garland simple. The other two garlands also had red berries, with the addition of gold poinsettias. Red berries, pinecones, and gold poinsettias are decorative elements in both my dining and living rooms. My tree, garlands, wreaths, and other decor all have some or all of these elements, making both spaces feel cohesive, even though I could not go out and buy expensive decorations this year. 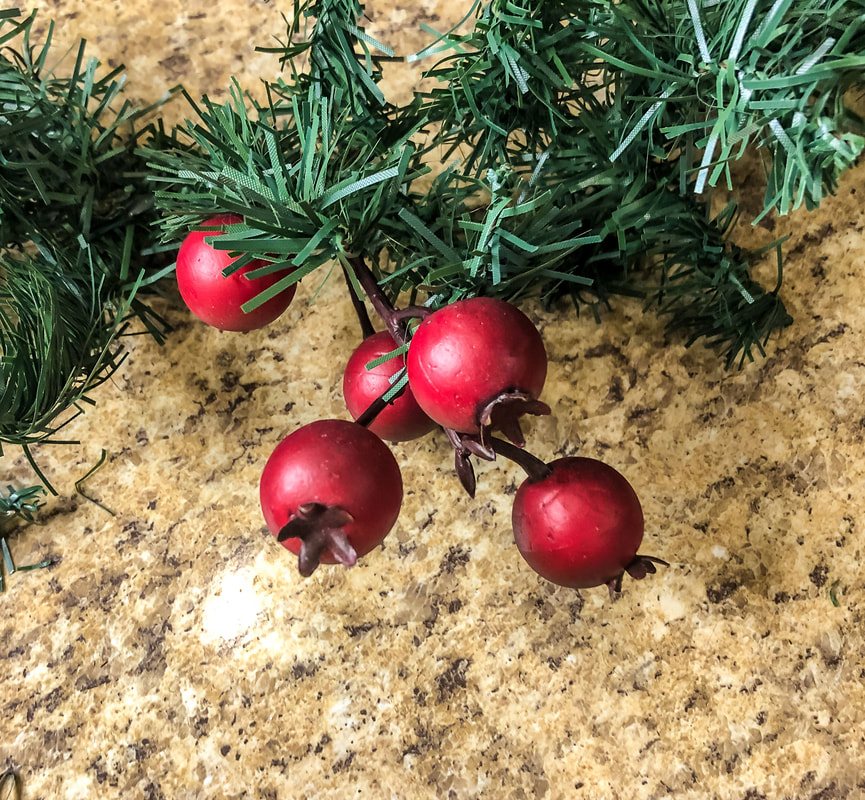 The red berries for the second garland. Photo by Diane M. Lilly, 2022. 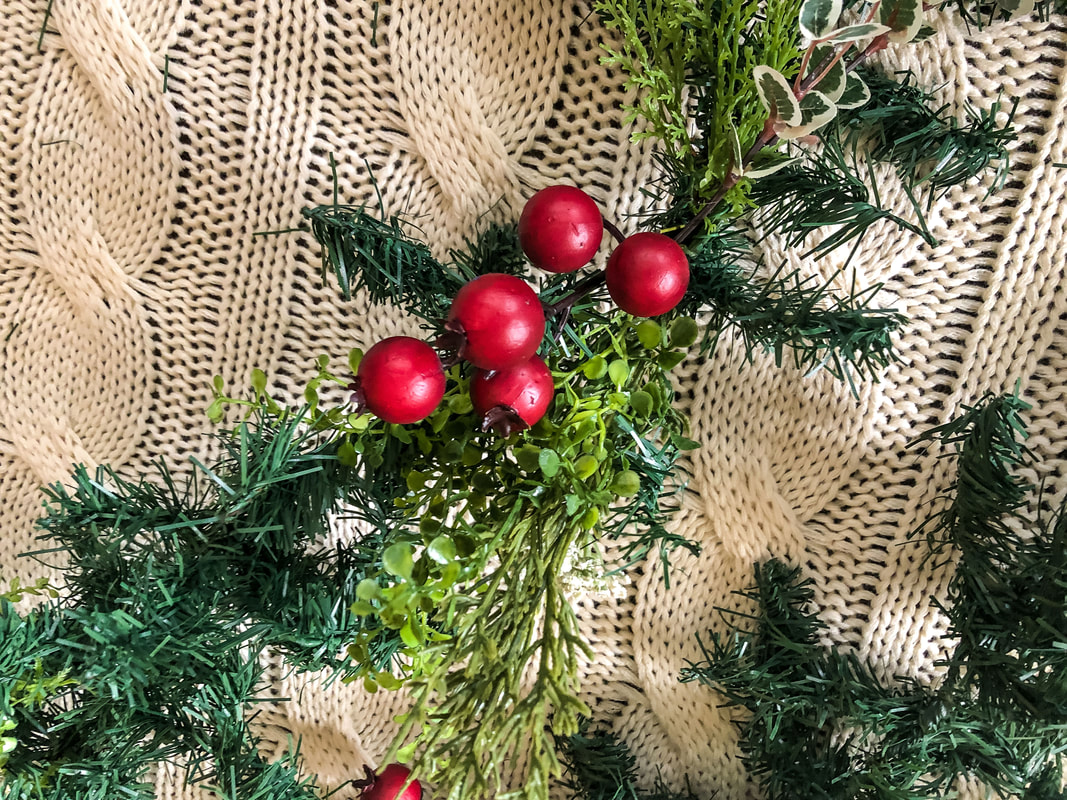 Filling in the berries and faux greenery for the second garland. Photo by Diane M. Lilly, 2022. 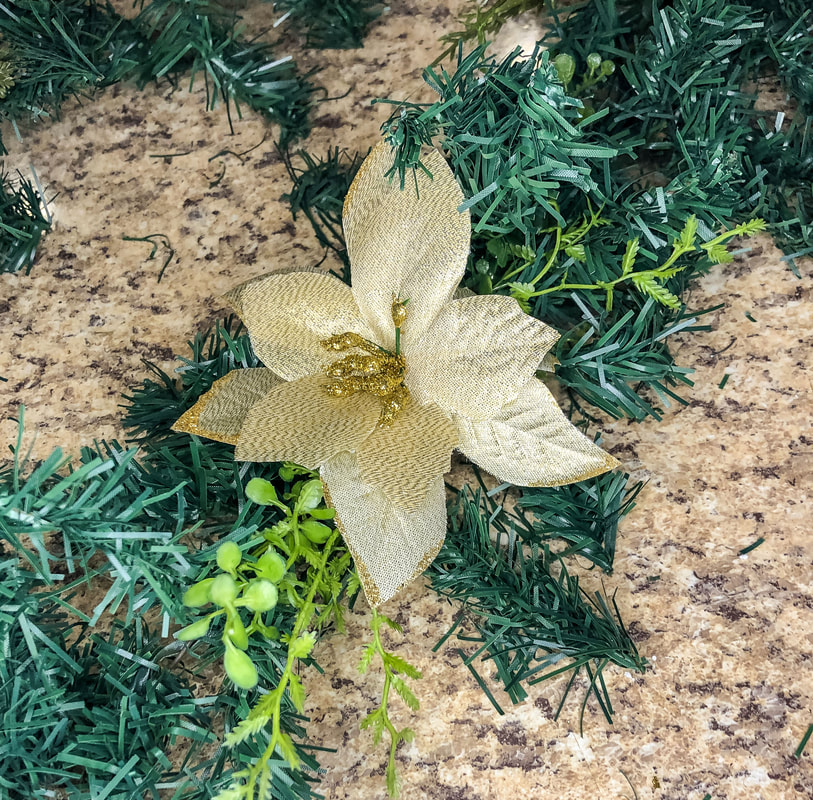 Filling in the gold poinsettias for the second garland. Photo by Diane M. Lilly, 2022.  The second garland is almost ready to be placed over the window. Photo by Diane M. Lilly, 2022. 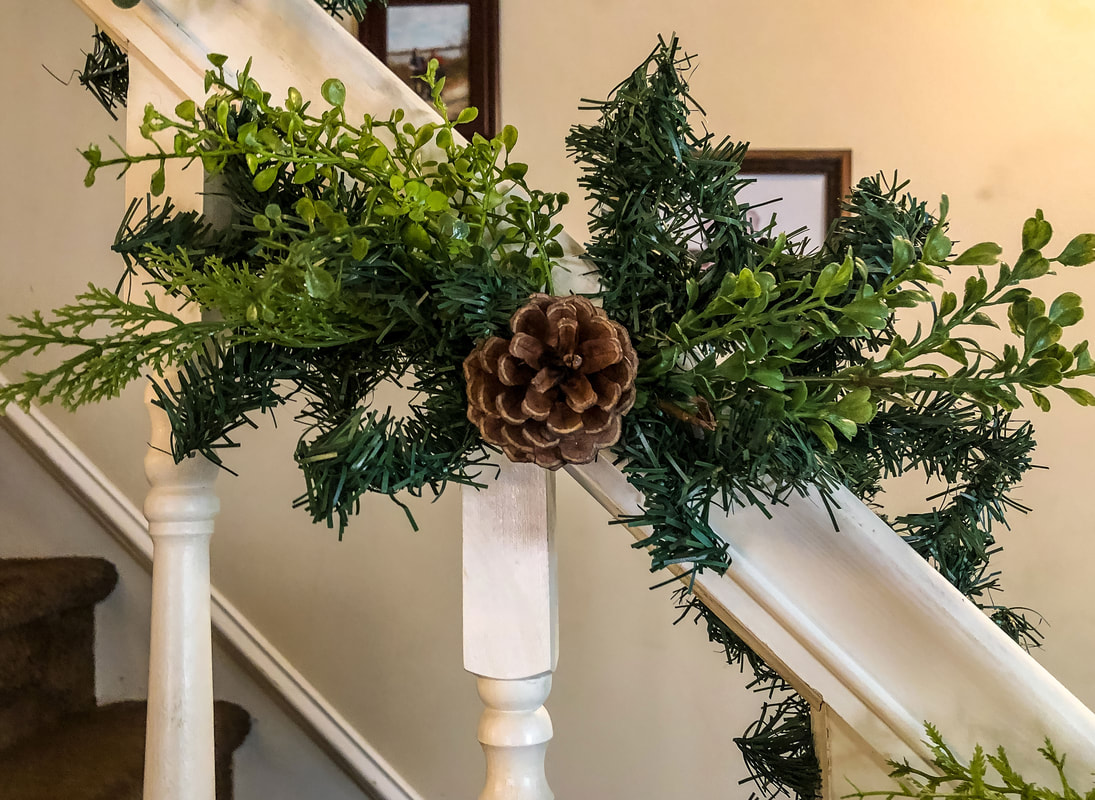 More greens and a pinecone added to the railing garland. Photo by Diane M. Lilly, 2022. 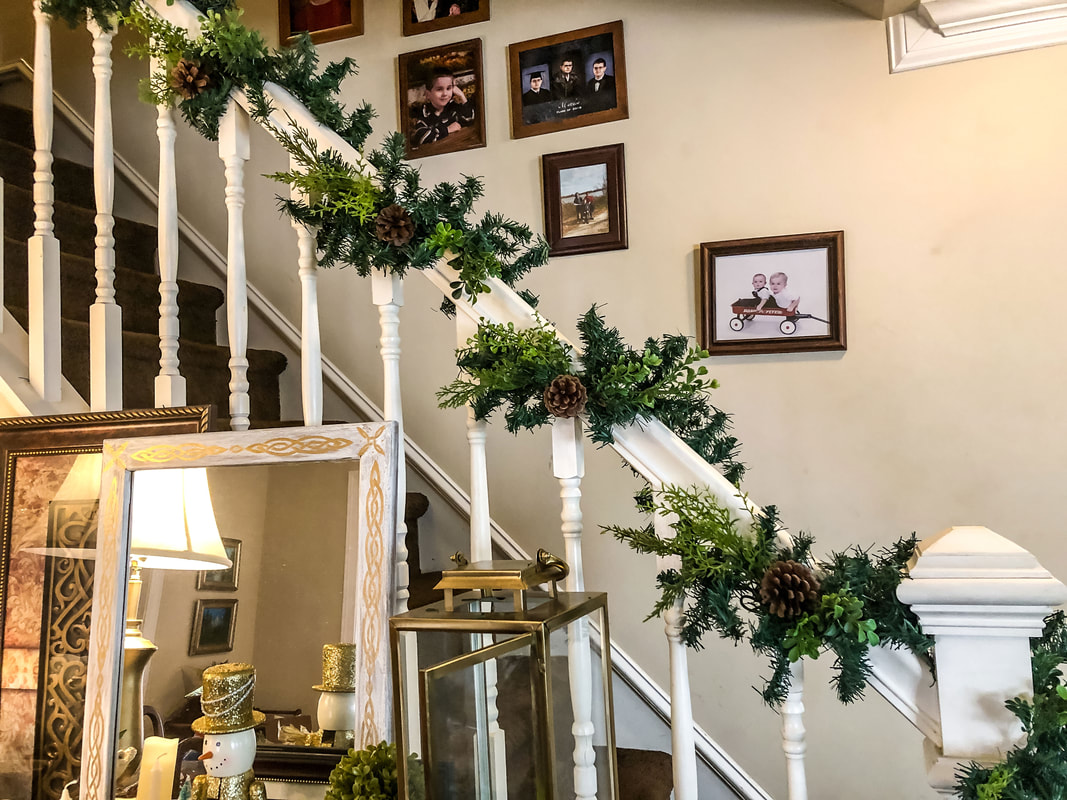 A wider view of the railing with the garland to check the spacing and miniature arrangements with pinecones. Photo by Diane M. Lilly, 2022. 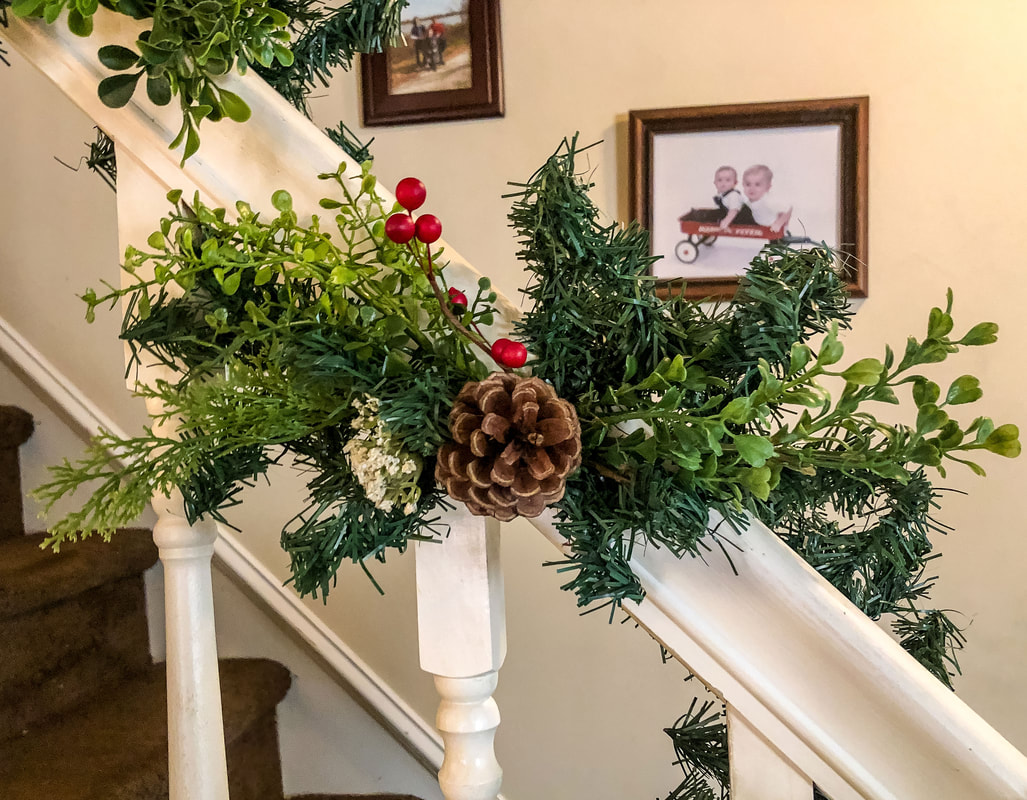 Red berries added to the clusters on the railing garland. Photo by Diane M. Lilly, 2022. 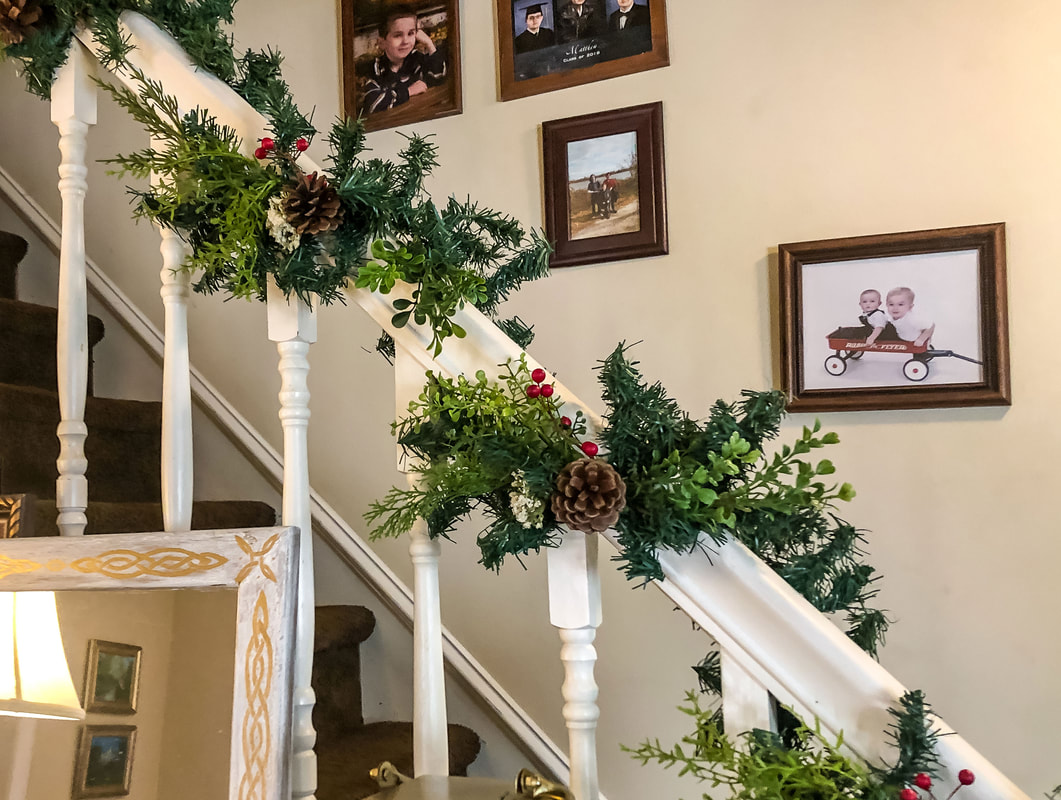 A wider view of the railing with the garalnd with berries added. Photo by Diane M. Lilly, 2022. 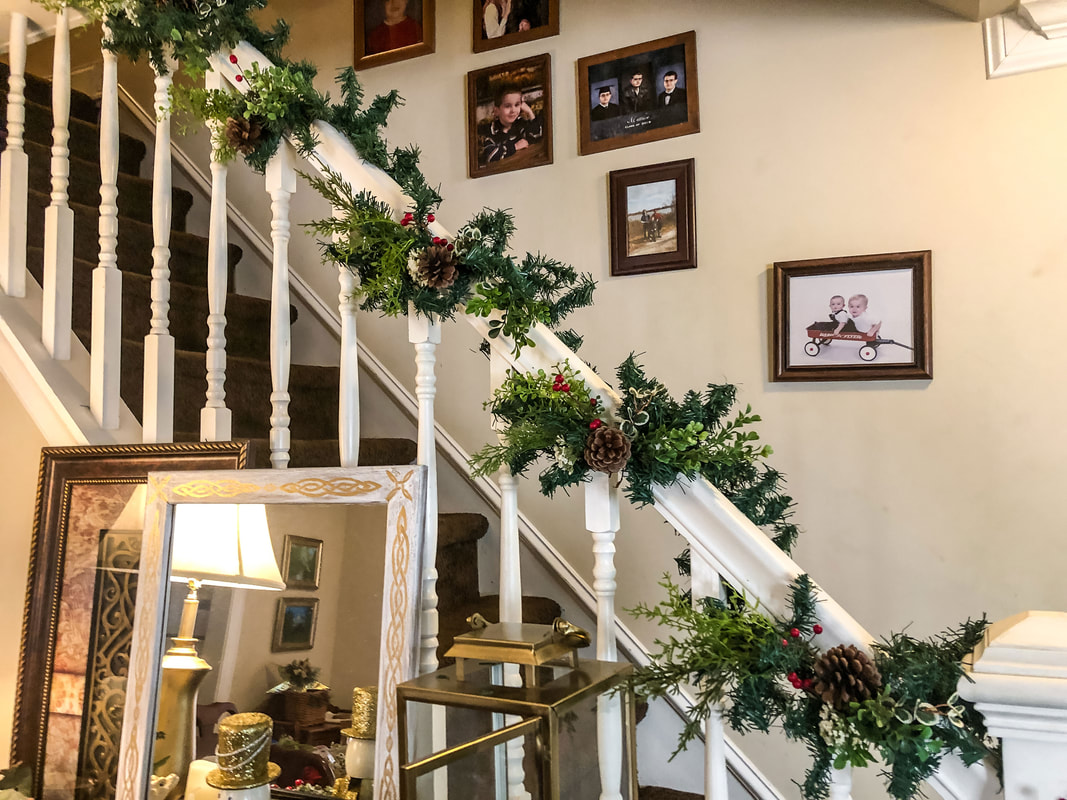 Another view of the railing garland with pinecones and berries. Photo by Diane M. Lilly, 2022. If you have enough materials to work with, continue to add in to further “fluff” the garland. The more florals and greenery you add, the more “expensive” the garland will look. As I worked with only what I had this year, I left the garland simple. If you have them, add ornaments to take your design up a notch! Step 5—Add ribbon Another way to make your garland look stylish and festive is to add ribbon. This year, the goal was to work only with what I had on hand, and unfortunately, I didn’t have enough ribbon left for bows! At some point, I will either have to splurge and buy a bit more ribbon or come up with an idea for how to use what I have interestingly. The image below is from last year’s garland…Doesn’t it just look so festive?! Your bows should match the rest of the room decor and be placed in natural corners and focal points along the garland. Space evenly for a cleaner look, and fill in gaps between the bows with smaller bits of ribbon to fill out the look. 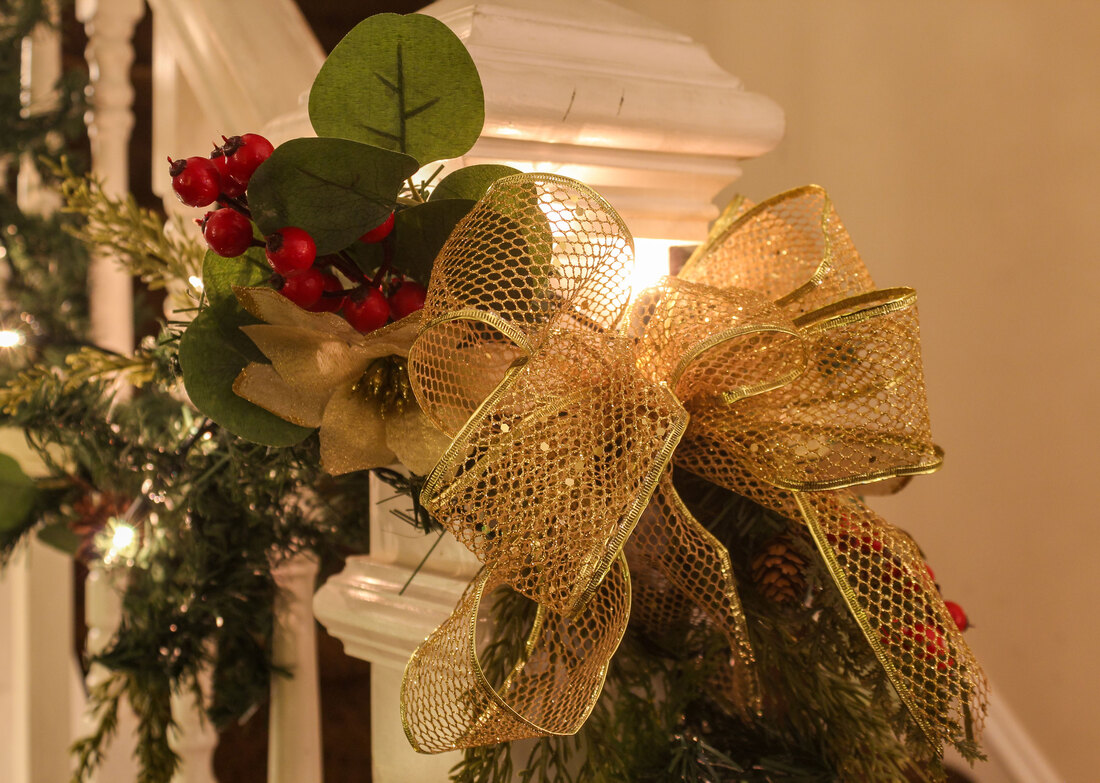 Last year's garland with gold ribbon around the newel post. Photo by Diane M. Lilly, 2021. Step 6—Add lights The last step to making your garland look festive is to light it up! I used fairy lights for the railing garland but traditional LED Christmas lights for the garlands above the windows. (I don’t love seeing the cords, so I’ll have to find a way to hide them.) Whichever lights you use, push them into the garland to light up nooks and crannies and create a more polished look. 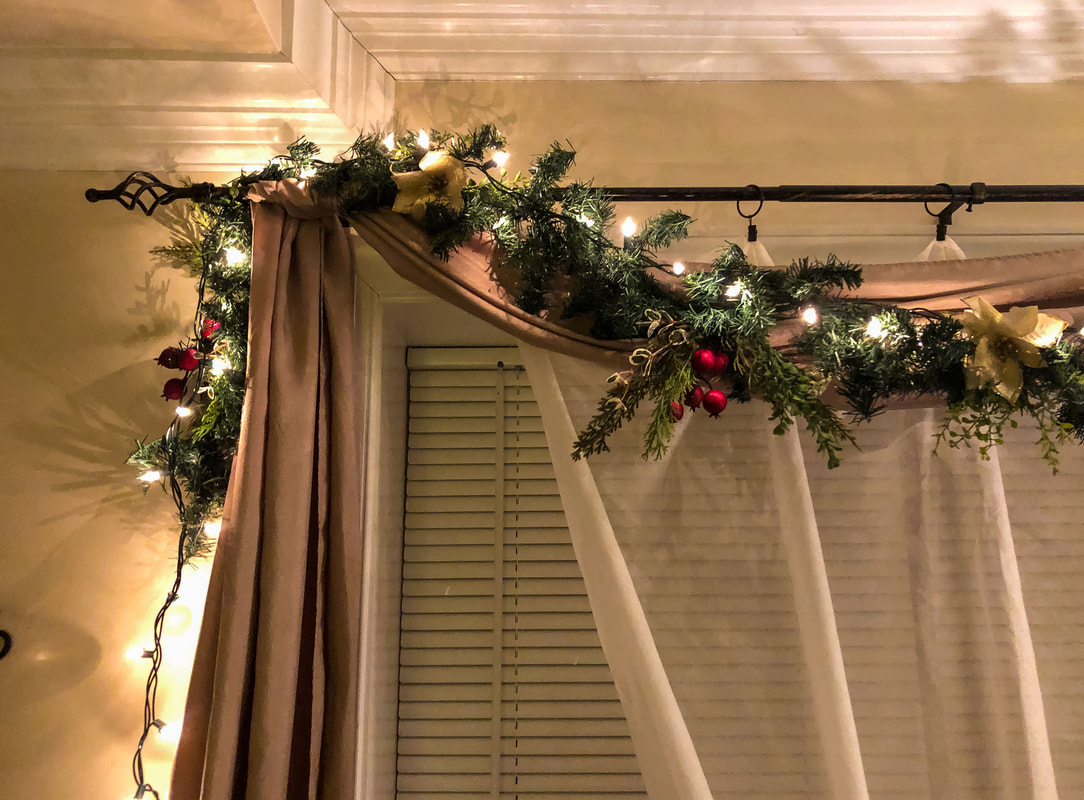 Closeup of the window garland with lights added. Photo by Diane M. Lilly, 2022. 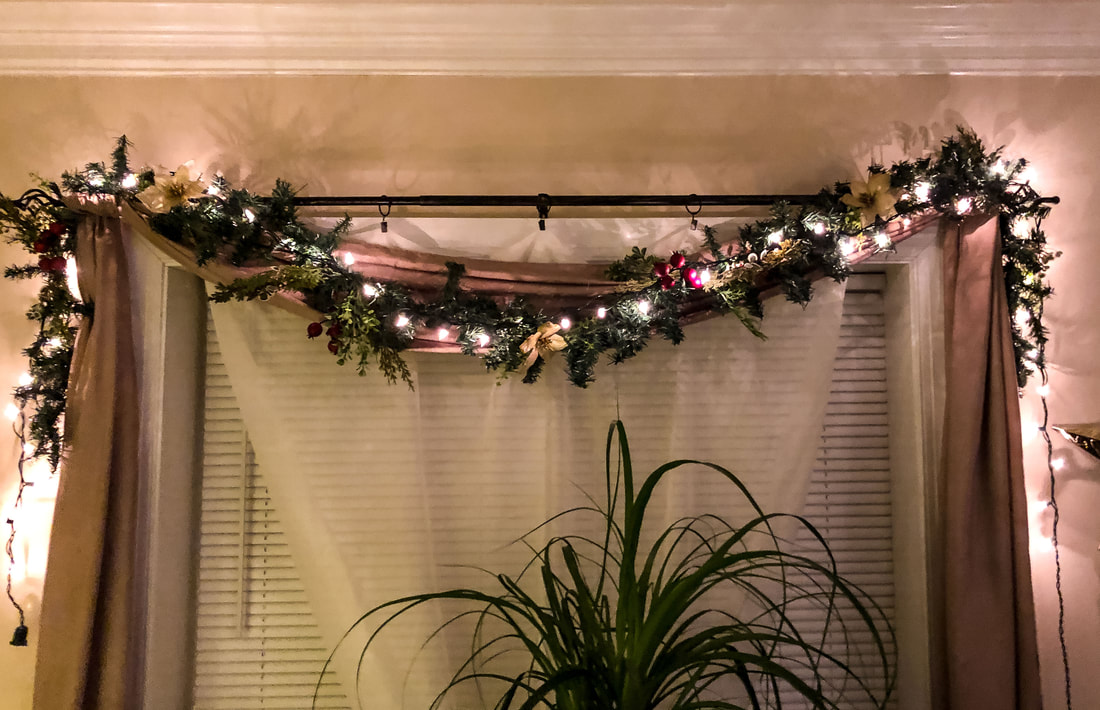 View of the garland with lights over the window. Photo by Diane M. Lilly, 2022.  View of the window garland with the tree. Photo by Diane M. Lilly, 2022. 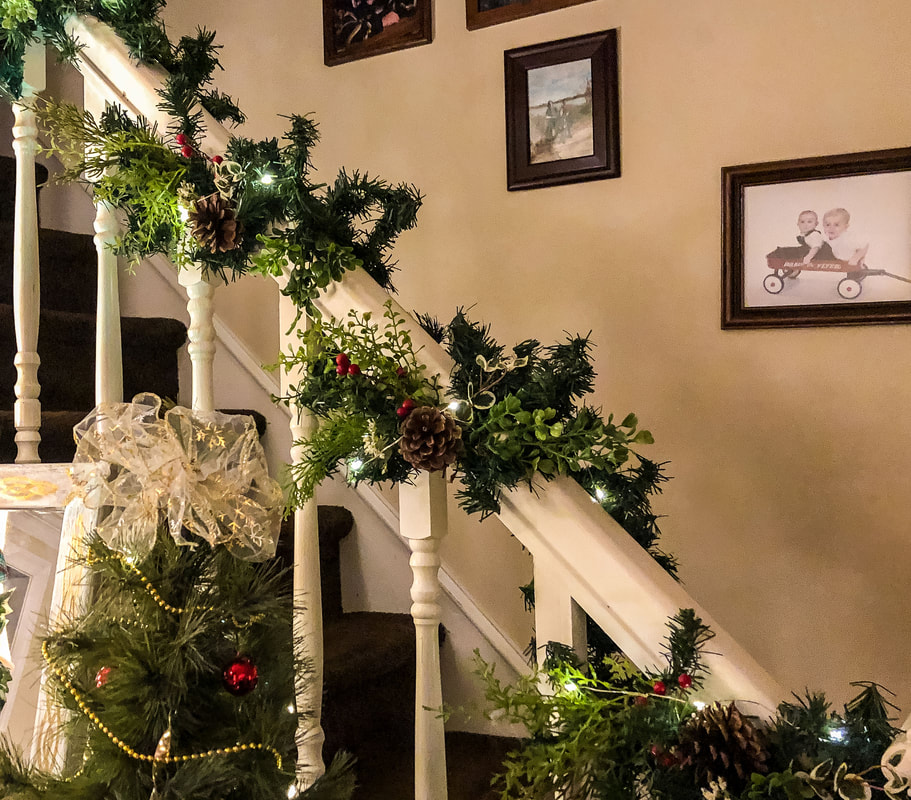 View of the railing garland with fairy lights added. Photo by Diane M. Lilly, 2022. When I started this decorating project, I was dubious about whether or not I had enough material to create a festive holiday space. While I wish I had more greenery and faux florals to fill out my garlands, I did pull off an economical yet stylish look. My new plan is to collect more materials for NEXT year so my holiday decor will have fuller greens and florals. So, I hope I inspired you to use what you have on hand to create festive garlands. It IS challenging to create a nice look with a limited budget! But it feels so good when you look around and see the holiday decor that YOU created! It is possible to take that cheap-looking garland and give it a makeover! If you have any thoughts or tips about creating beautiful holiday garlands, please share them below! And Happy Holidays! 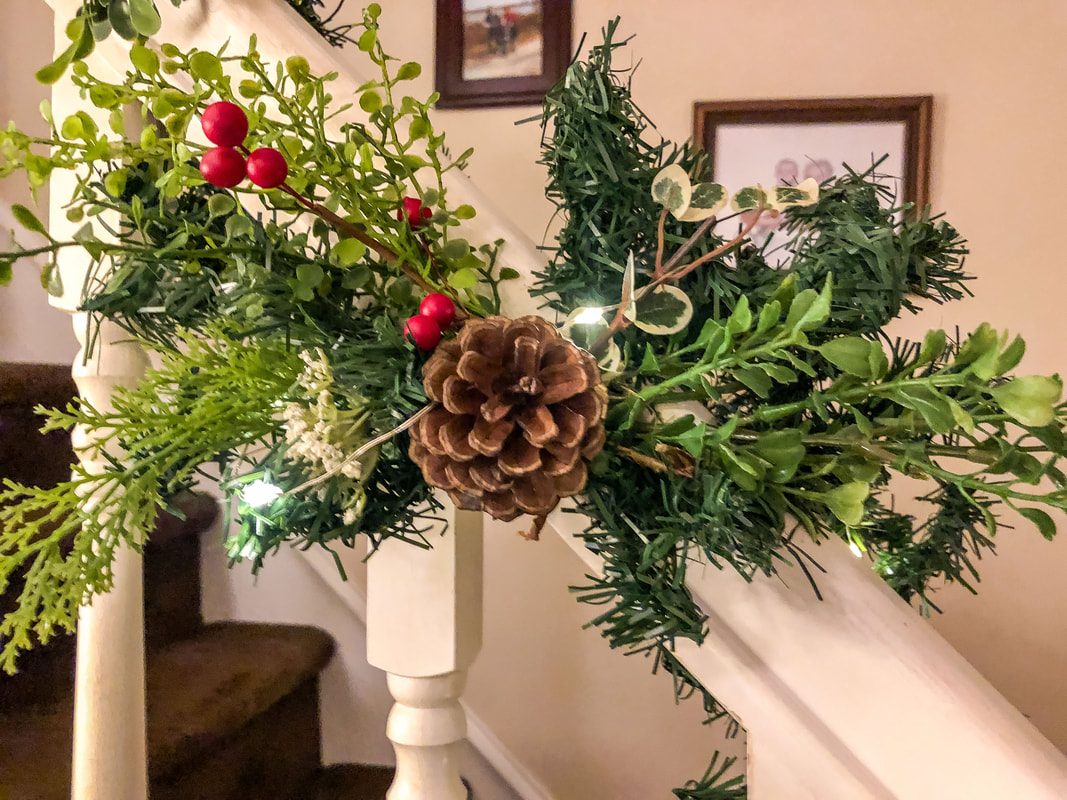 Closeup of the final pinecone and faux greenery arrangements on the railing garland. Photo by Diane M. Lilly, 2022. Related blogs you may want to read: How to make a simple faux floral wreath for the winter How to make a super easy faux ivy vine wreath for Christmas How I decorated my Christmas tree on a budget this year DIY chalk painted tray with chippy effect DIY chalk painted tray with Celtic border Tips for creating a floral spring wreath A spring makeover for my small rental bathroom How to care for faux florals Nine hygge decor ideas Eight ways to create cozy winter interiors after the holiday decor comes down This article may contain a few items or commercial mentions, but I only used them for demonstration purposes only. I am not endorsing any particular product or receiving any monetary gain for this blog. 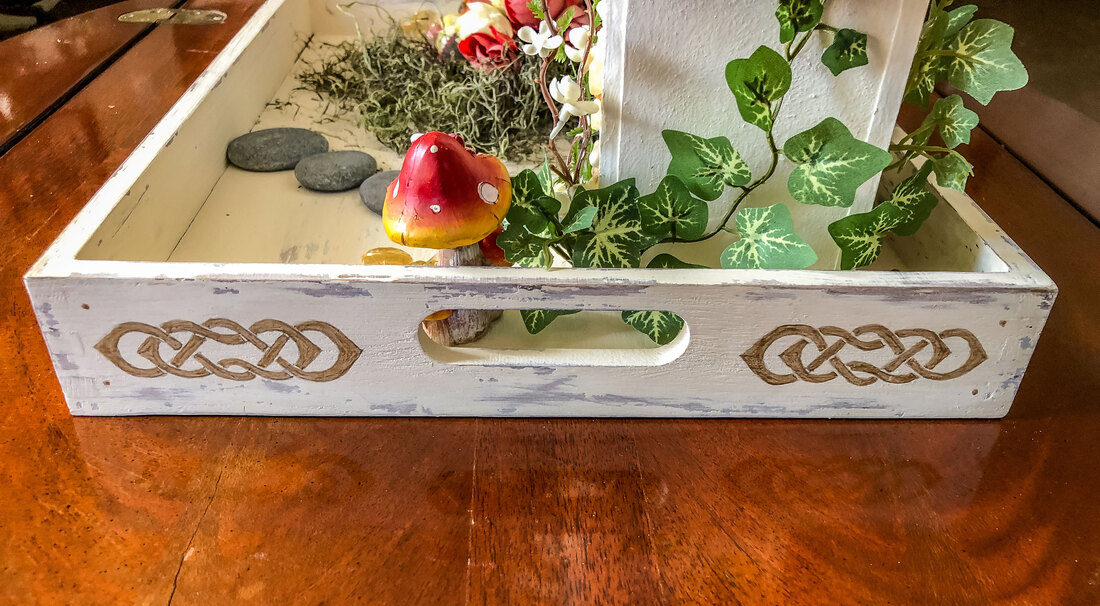 Celtic knot painted on a decorative tray. Photo by Diane M. Lilly, 2022. Welcome to part two of my DIY chalk-painted tray project! In part one, I chalk-painted a decorative tray using a “chippy” weathered effect. Now, let's go through the steps I took to design and paint a border around the vertical exterior sides of the tray. This will not be a tutorial on creating Celtic knots—that would turn this blog post into a book (which is in the works, by the way)! The goal is to help you create a simple design that can be traced onto the newly painted decorative tray for a bit more pizzazz.  DIY chalk painted decorative tray before knotwork details were added. Photo by Diane M. Lilly, 2022. I love Celtic art and knotwork! I am always looking for ways to sneak some Celtic knots into my decor, so when I started painting a decorative wood tray for my living room, it was inevitable that it would end up adorned with a Celtic knot border! So here we are at part 2 of this project, where I walk you through how I drew and painted a beautiful knot border onto the sides of my newly painted tray. So let’s dive right in and go through this process step by step… Materials needed: pencil eraser ruler grid paper tracing paper tape scissors craft paint sandpaper (optional) varnish (optional) Step 1—Get measurements The first thing you need to do in a project like this is to get some basic measurements. My tray is 16” x 12” with 2” H sides. The long side of my tray is 16” L x 2” H. The short sides of the tray have holes for handles that split the empty areas into two parts that are 4 1/2” L x 2” H each. Step 2—Plot out measurements on grid paper If you’re creating a freehand design, you won’t need grid paper, but you’ll still need to measure the drawing area on your paper so your template will fit the area to be painted. Using grid paper may help keep your design symmetrical and more accurately aligned. For this project, I plotted out one section measuring 16”x 2” and another measuring 4 1/2” x 2” on my grid paper. Marking the edges, I then plotted out the ‘working” area, meaning I made decisions on how much space to leave between the design and the edges of the tray. I took this opportunity to mark the midpoints for each section on the paper and the tray. This helps tremendously later on when we have to align the template onto the tray to get the design perfectly level…so don’t skip this step! 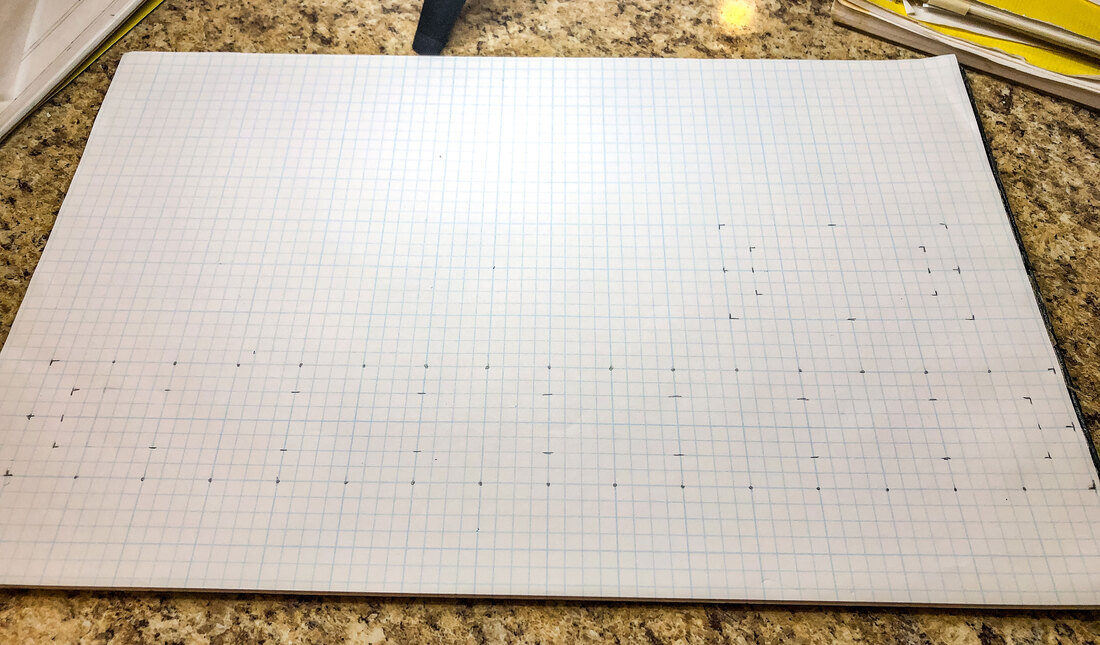 Grid paper maps out the exact measurements for the tray sides and work areas for the knotwork border. Photo by Diane M. Lilly, 2022. Step 3—Create a simple line design I am in the process of putting together future tutorials on how to create Celtic knots, but for the sake of this project, I will share one of the simplest ways to draw a Celtic knotwork border—starting with drawing a single line. I found a Celtic-style border knot in a linked pattern and then reverse-engineered it to make it work for the dimensions of my tray. To speed up and simplify the process, I decided to work it out with a single line first. (My rough grid includes the “breaks”—I’ll go into more detail on how to do that in a future tutorial.)  The grid pattern with breaks planned out before the knot is drawn. Photo by Diane M. Lilly, 2022. 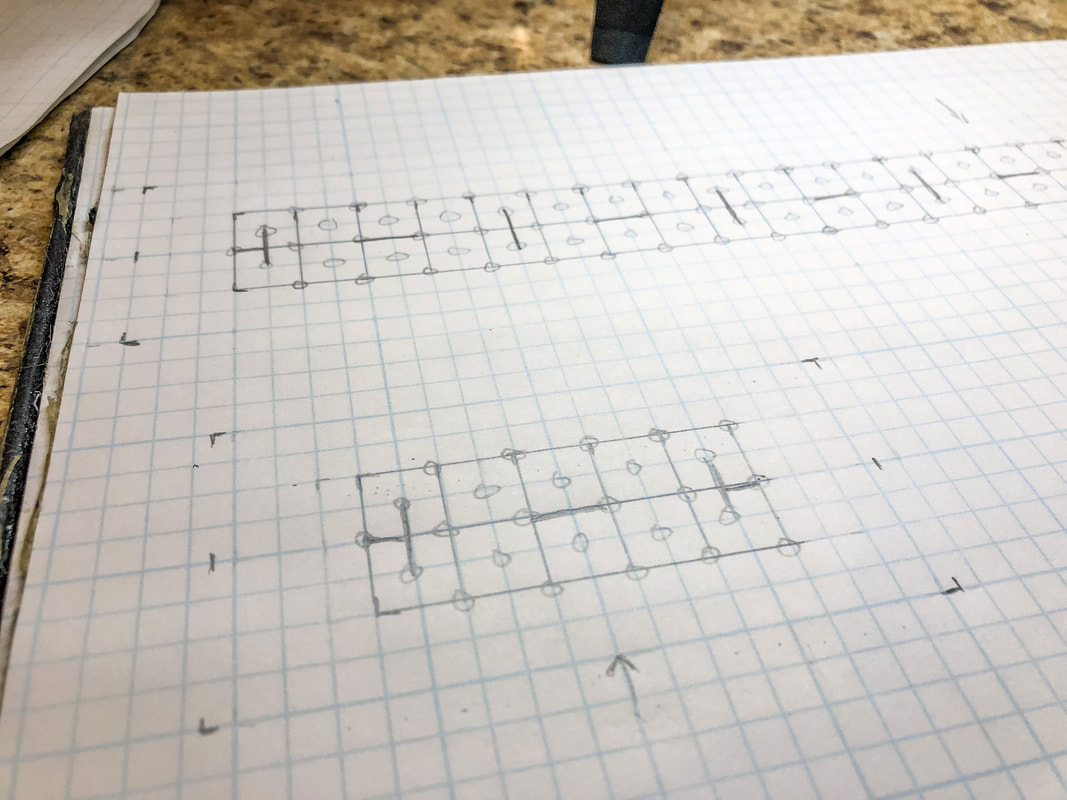 A section of the small knot mapped out on the grid with breaks. Photo by Diane M. Lilly, 2022. 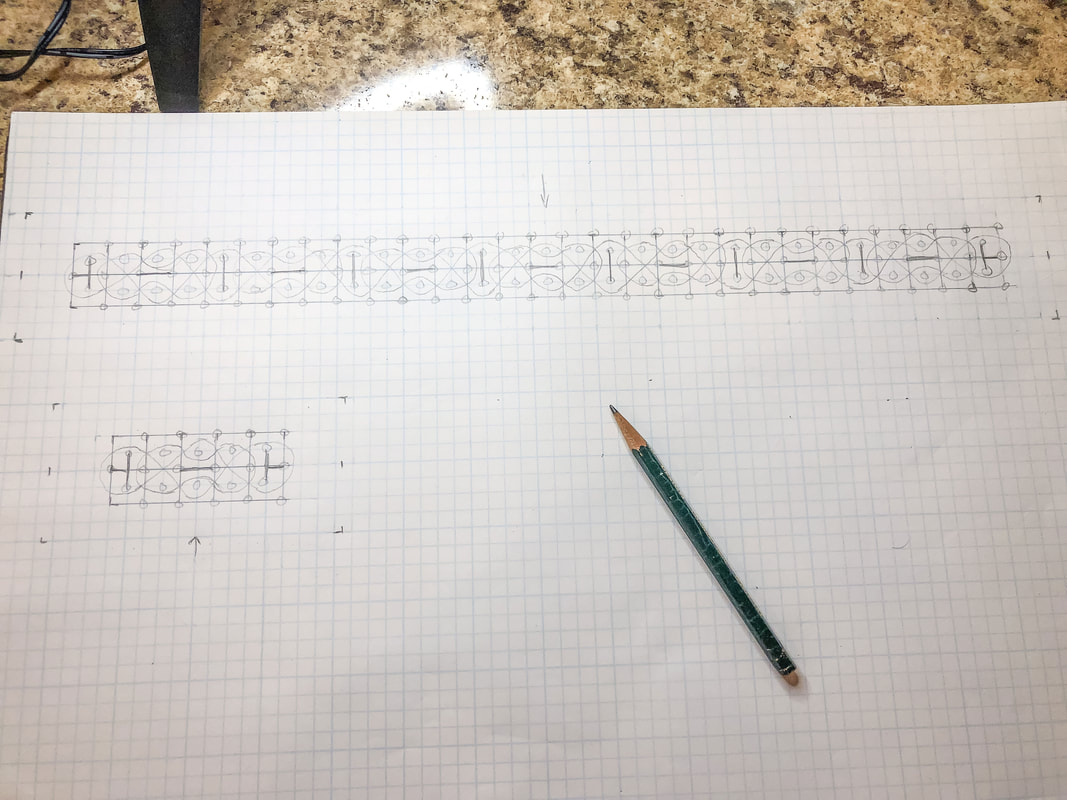 My basic line for my design drawn out on the plotted grid pattern. Photo by Diane M. Lilly, 2022. Step 4—Create the “thread” with “overs” and “unders” Now, it’s time to use the simple line as a guide to create the actual thread. Draw parallel lines on either side of your single line, working your way through your design. Don’t worry about drawing over other lines. All unnecessary lines will get erased when you start marking out the “overs” and “unders” (the weave pattern for your design). Once the “thread” has been established, erase that first single line. It’s done its job, and you don’t need it anymore! 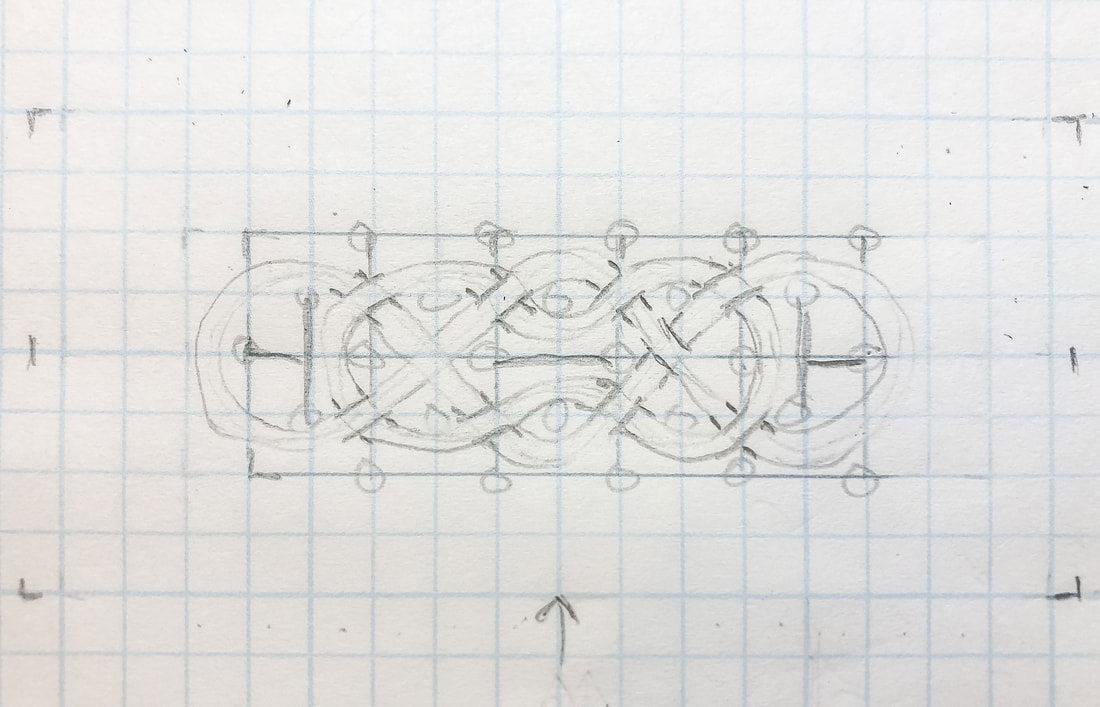 The double lines have been drawn and the single line erased to create the thread, overs, and unders. Photo by Diane M. Lilly, 2022. Now it is time to work through the “overs” and “unders”… Pick a starting junction and decide which thread will go under and which will go over, creating what some call a “bridge and tunnel” or the beginnings of a weave. Erase the lines accordingly and work through the design by following that thread, alternating over and under. DO NOT JUMP AROUND! Stay with that thread until you come back to your starting point. Work through any additional threads, double-checking that your overs and unders alternate. Once satisfied with your overs and unders, clean up the drawing and add stylistic details. 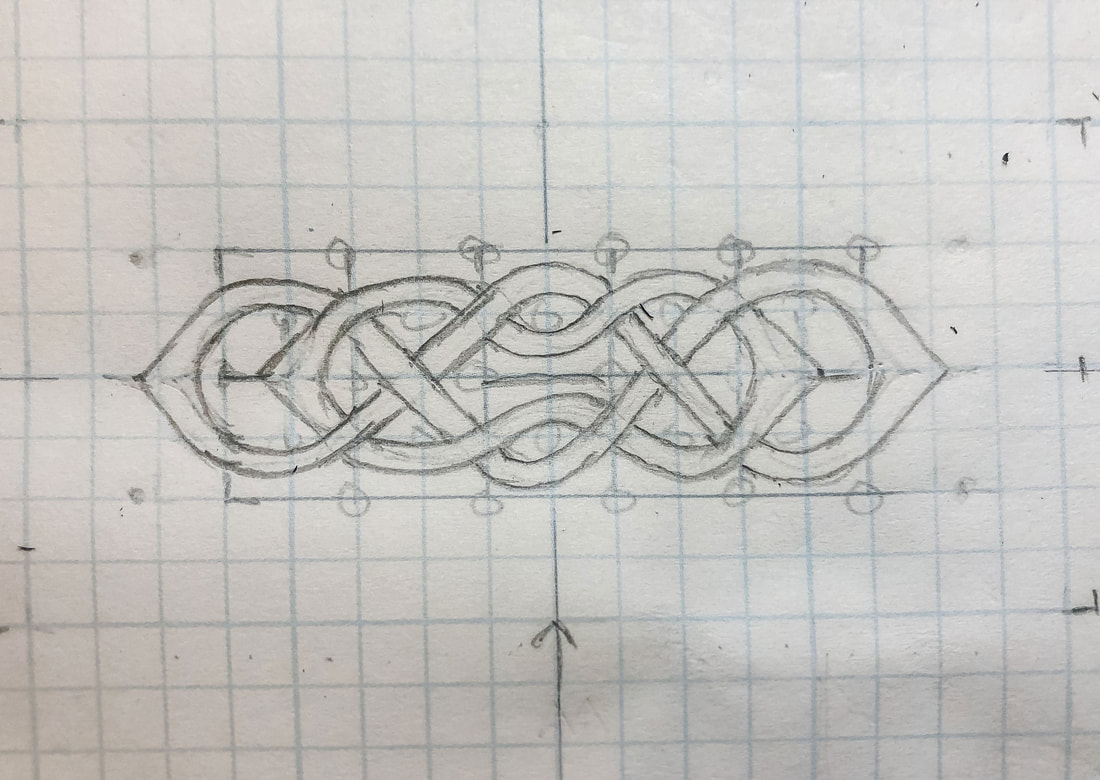 My basic thread knot has been stylized by adding points at the end. Photo by Diane M. Lilly, 2022. 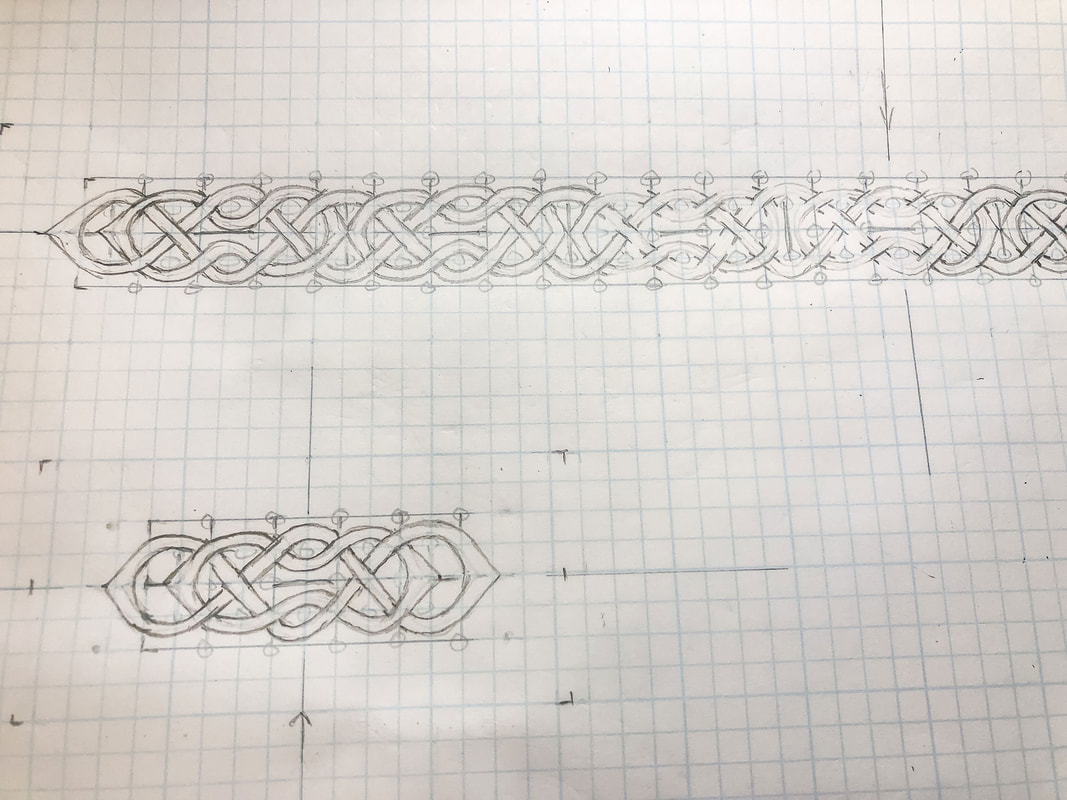 The small knot and a section of the large knot. Photo by Diane M. Lilly, 2022. Step 5—Create the template using tracing paper The new design can now be traced onto tracing paper to create the template. There are many techniques for creating templates--I am just sharing one that has worked well for me. Place a sheet of tracing paper over your drawing and securely tape it in place so it doesn’t move or bubble. Carefully trace your design lines with a pencil using fairly hard pressure. Mark the edges of your template (using a straight edge) and indicate the midlines on all four sides.  My knotwork redrawn on tracing paper for a template. Photo by Diane M. Lilly, 2022. Carefully cut out the templates along the edges. You should now have two templates with your new knotwork borders that perfectly fit your working space on your project. For my project, one template measured 16” x 2” and the other 4 1/2” x 2”. 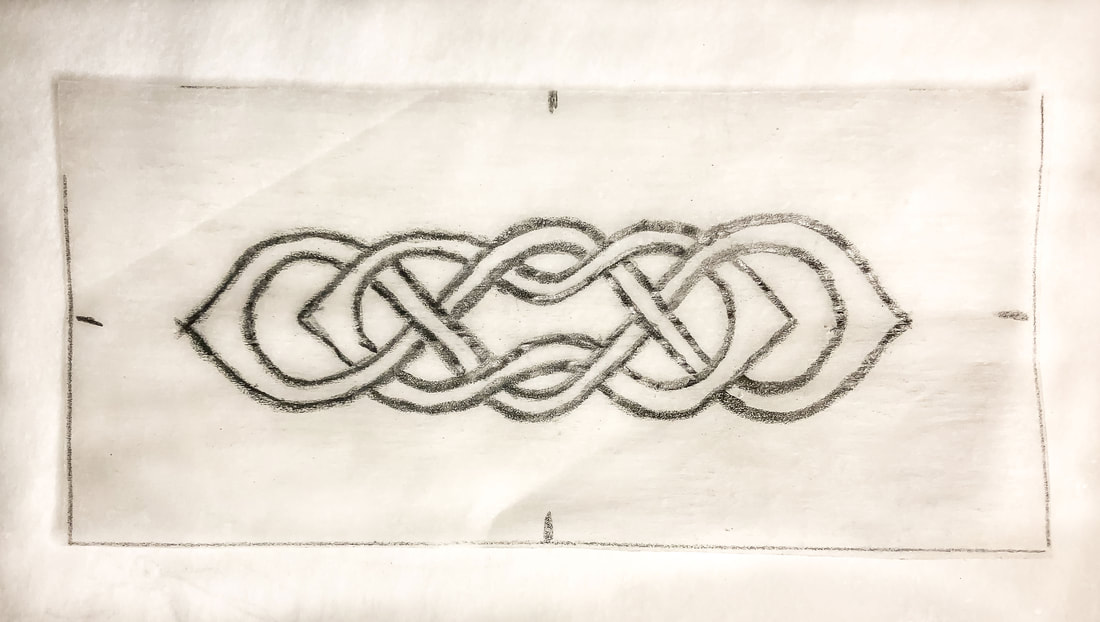 The small knot cut out as a template. Photo by Diane M. Lilly, 2022. Step 6—Trace the design onto the tray Turn the template pencil side down and securely tape it into a place where you want your design, carefully lining up the edges and midpoints for each of the four sides. Trace the lines with a pencil. Use enough pressure to transfer the pencil marks onto your workspace. If you’re unsure if you’re using enough pressure, remove a bit of tape (carefully) and check to see if you can see the design on the tray. Repeat this step on all four sides of the tray. 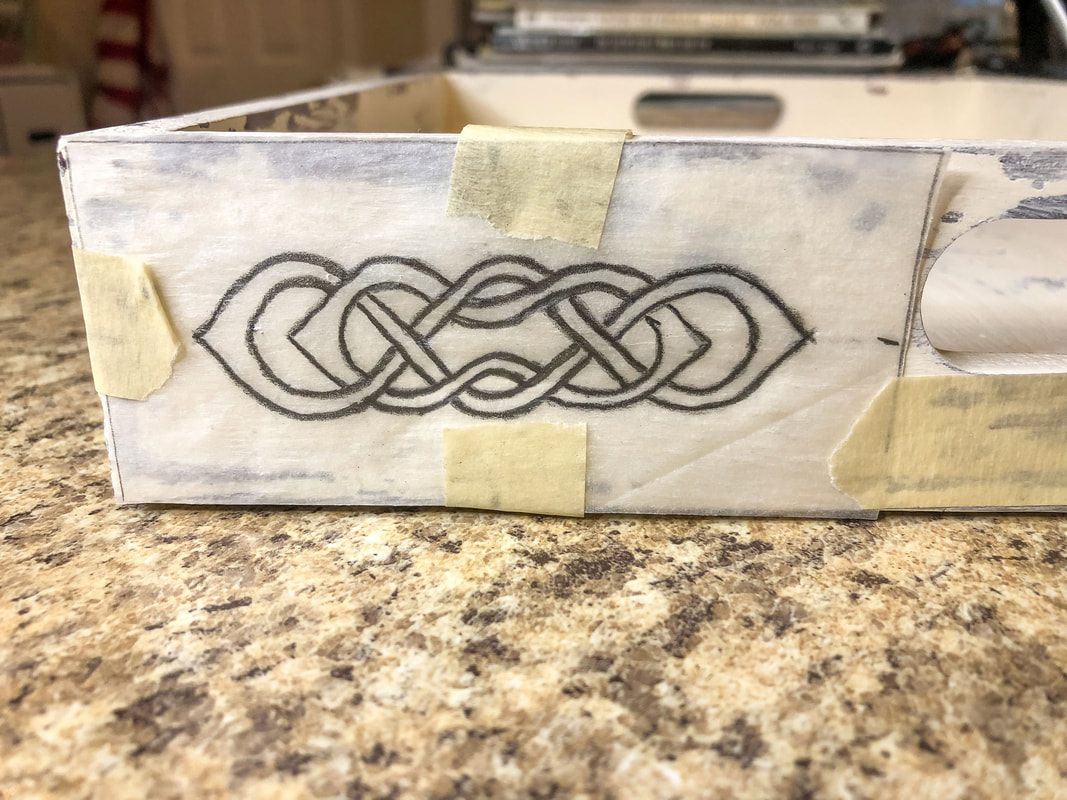 The small knot template taped onto the tray. Photo by Diane M. Lilly, 2022. 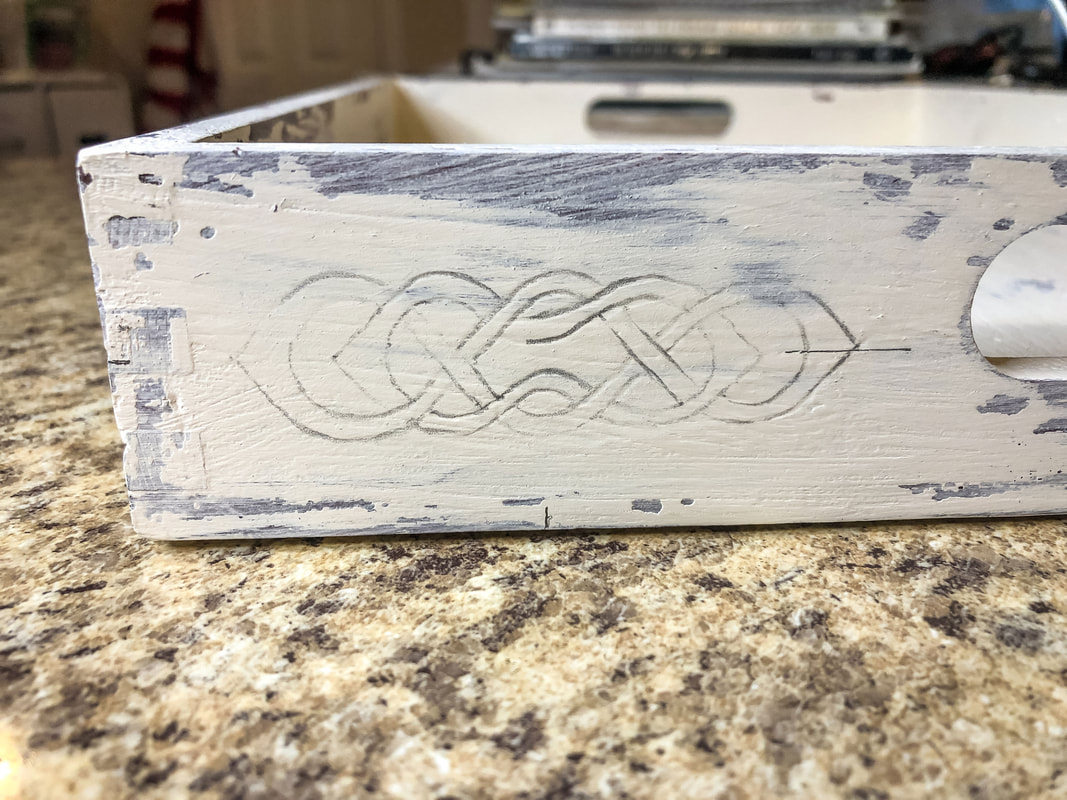 The small knot traced onto the tray. Photo by Diane M. Lilly, 2022. 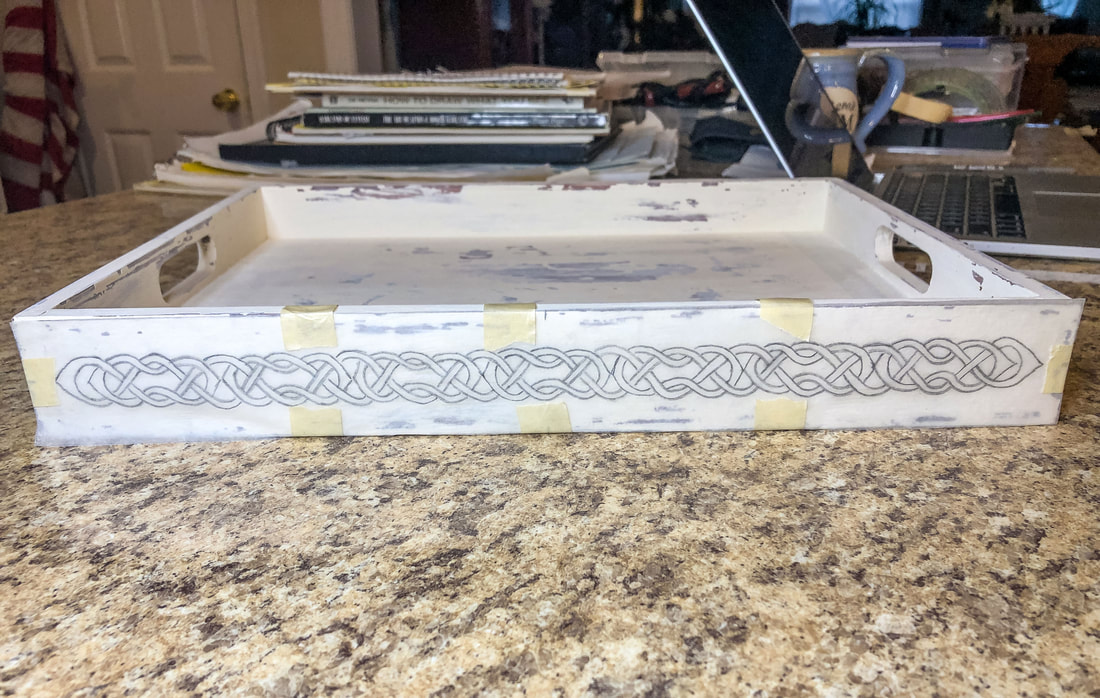 The large knotwork border template taped into place. Photo by Diane M. Lilly, 2022. 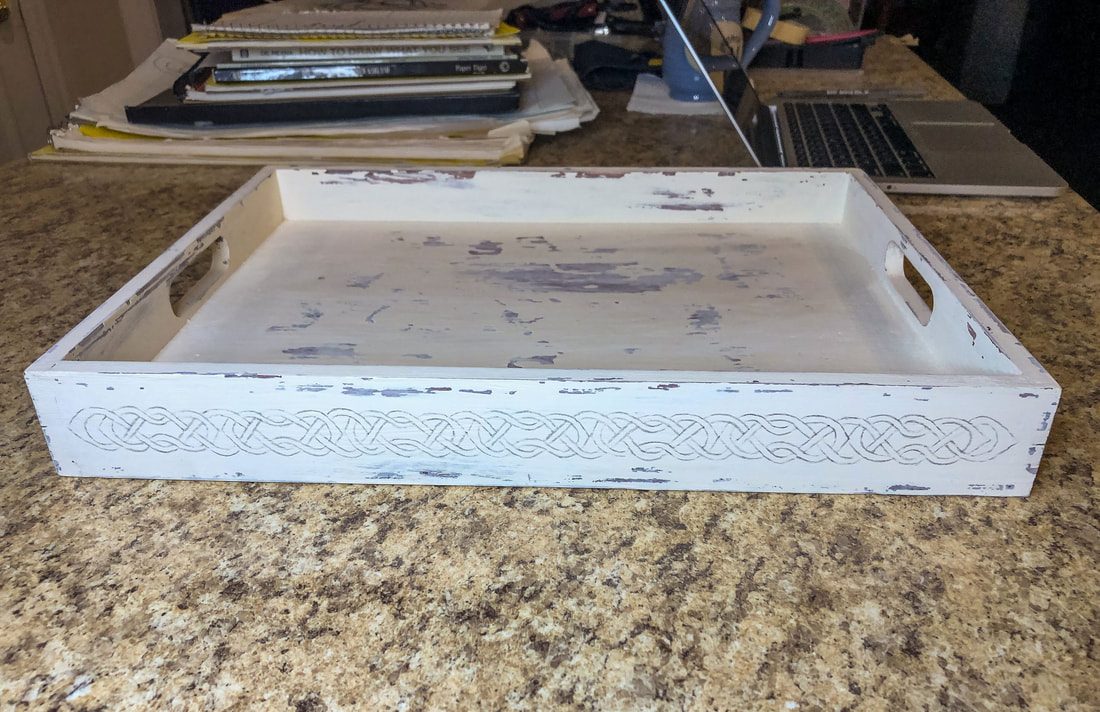 The large knotwork border traced onto the tray. Photo by Diane M. Lilly, 2022. Step 7—Paint the design Choose a paint color and a small paintbrush with pointy bristles, and start painting your design! This may require two to three coats, depending on the desired look. 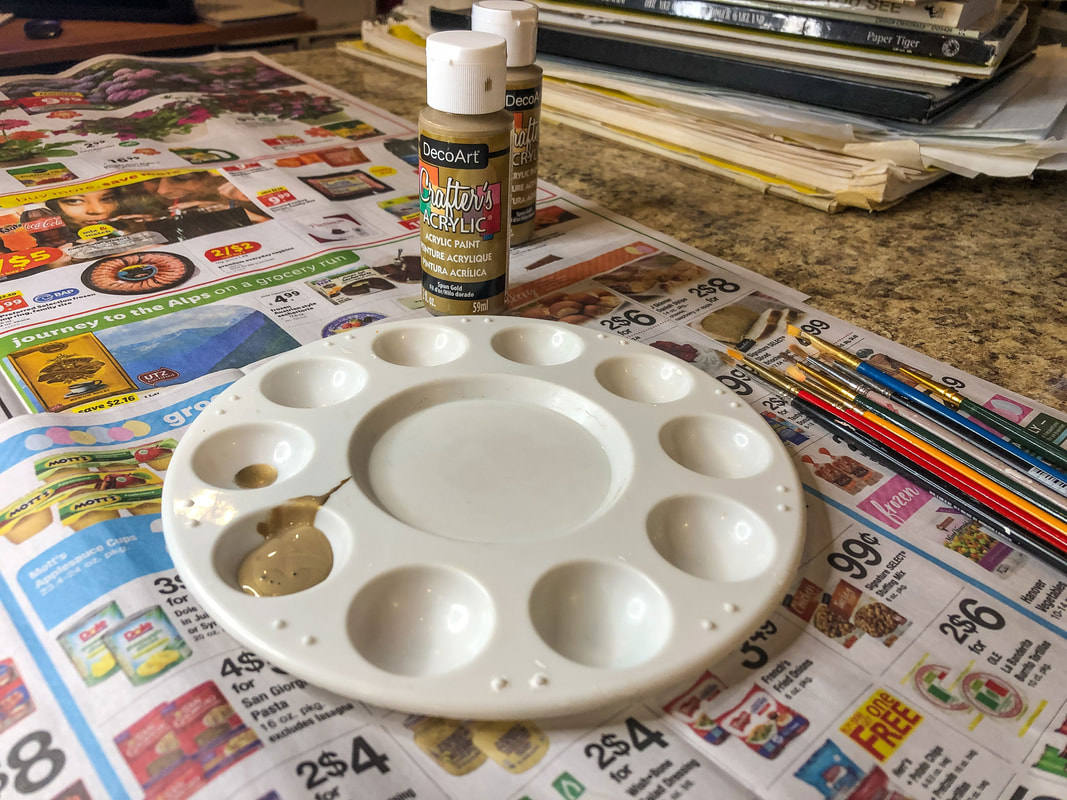 Gold craft paint. Photo by Diane M. Lilly, 2022. If you do not have a steady hand--or do not have the patience for hand painting--try using paint pens instead. For this project, I suffered through it and used the paint and brush technique, but I also purchased some gold paint pens from Amazon for another project and found the process much easier. The technique you use for this project is completely up to you. In part one of this project, the tray was painted to look used and battered, and I was satisfied with the results. Once the knotwork was finished, however, I decided the tray still needed more work. So, I took some 220 grit sandpaper and did a bit more sanding to get the final weathered effect. 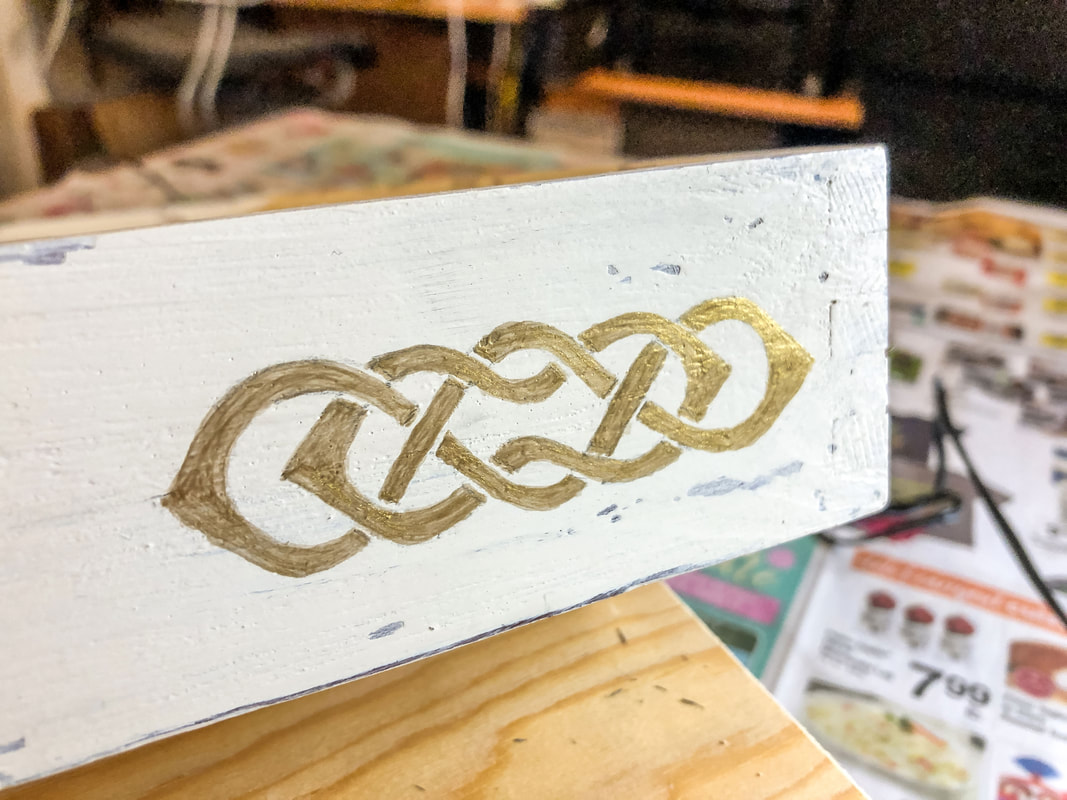 The small knot painted on tray in gold. Photo by Diane M. Lilly, 2022. 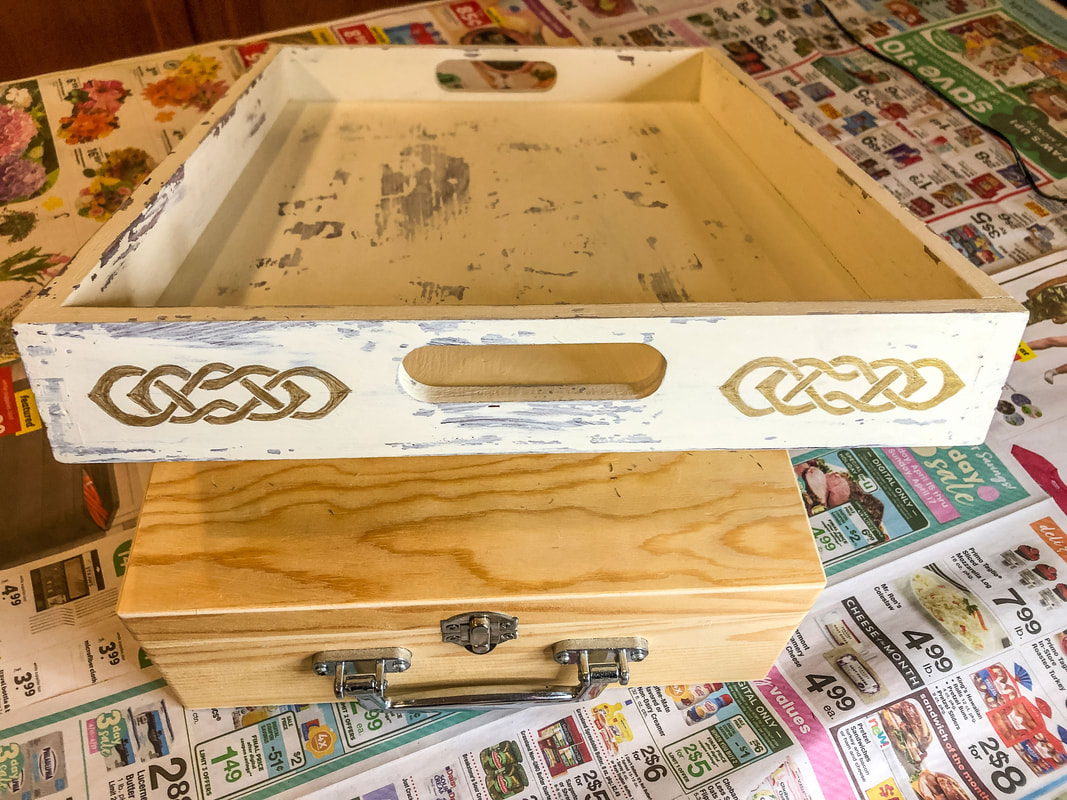 Knots painted on short end of tray. Photo by Diane M. Lilly, 2022.  The long end of the tray being painted with a gold knotwork pattern. Photo by Diane M. Lilly, 2022. 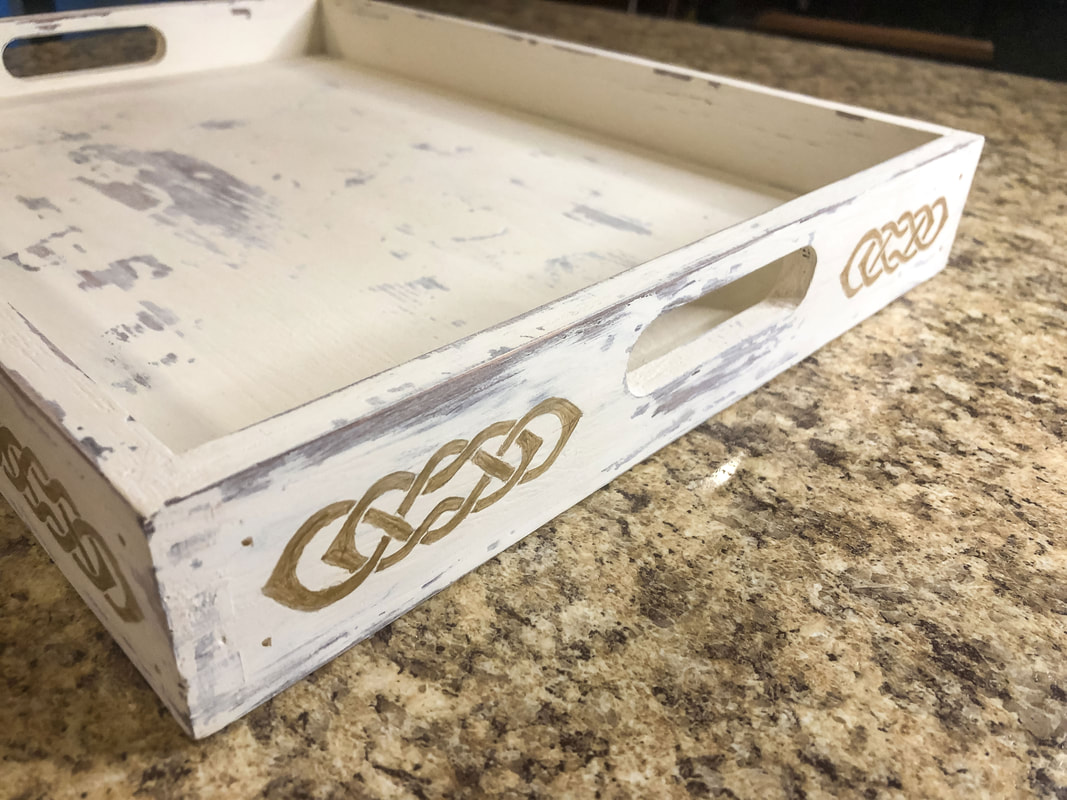 Celtic borders finished and more sanding done to tray. Photo by Diane M. Lilly, 2022. 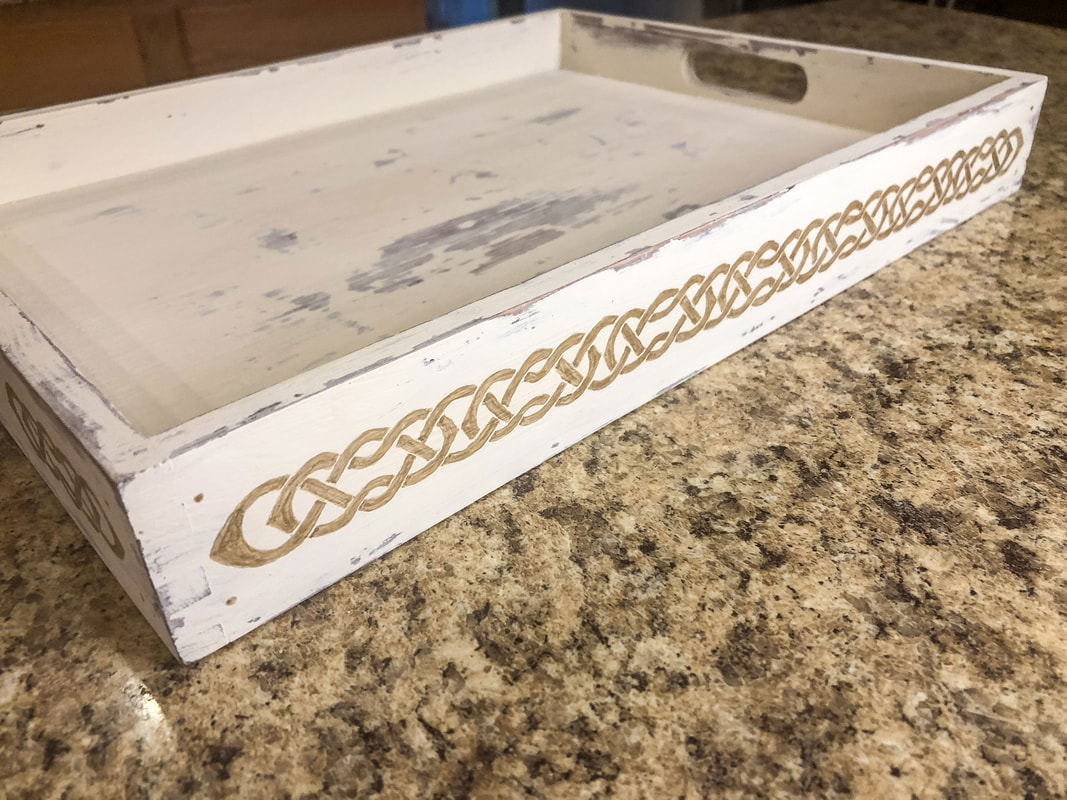 The long side of the tray with its new Celtic knotwork border. Photo by Diane M. Lilly, 2022. Step 8—Varnish to protect the paint (optional) This step is optional, but it can be a good way of protecting all your hard work! I’ve decided not to varnish my tray, at least for now. Usually, when I do a project like this, I add soft pads to the bottom to protect surfaces, but I may decide to make alterations or additions to this tray, so for now, I will forego the pads and varnish until later. So there you have it! The Celtic border knot was WAY more work than planned for this project, but I’m glad I did it. I love that I now have another decorative piece with beautiful Celtic art on it--Celtic art I drew and painted myself! This tray was a lot of work, but I love the rustic, charming look.  My tray is finished and staged with one of my new Celtic fairy houses. Photo by Diane M. Lilly, 2022.  A look at the long side of the tray. Photo by Diane M. Lilly, 2022.  My Celtic inspired diy tray staged with the new Fairy House cottage. Photo by Diane M. Lilly, 2022. 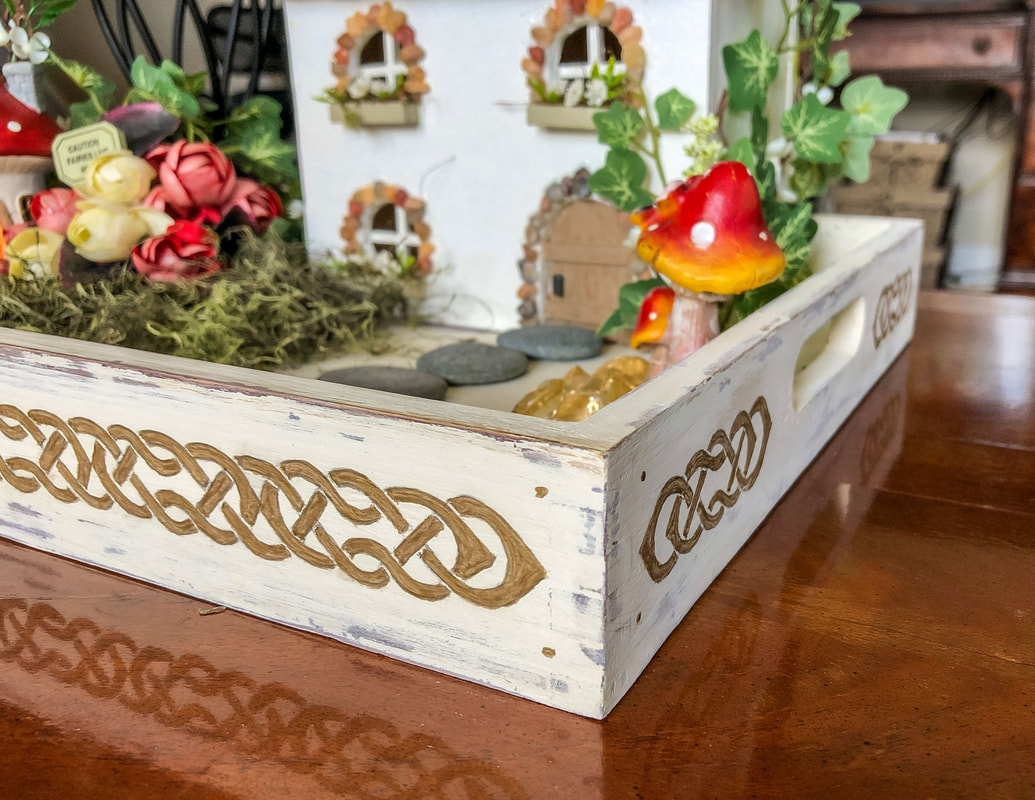 Closeup of the tray corner with views to both sides and Cletic knot borders. Photo by Diane M. Lilly, 2022. I know this was a complex project to throw out there, and the thought occurred to me that people might want to learn how to draw this kind of intricate artwork, so I have decided to start work creating and compiling downloadable ebooks with tutorials on how to construct Celtic knots. I’m unsure when they will be available, but sign up for periodic emails for updates on these ebooks and other projects. Let me know in the comments if you've done anything similar and what you think of this project! Related blogs you may want to read: DIY chalk painted tray with chippy effect A little project with jute twine and an old foot stool DIY refurbishment of a dining room cabinet A fun DIY project with paint and a thrifted mirror part 1 A fun DIY project with paint and a thrifted mirror part 2 Creating a kitchen coffee bar On a mission to recycle this neglected vintage stool The stain stripping stage of rescuing my vintage stool Staining my vintage stool with brewed tea My tattered vintage stool transformed into a beautiful plant stand Homemade candle recipe with a eucalyptus fragrance Homemade candle recipe with a hazelnut fragrance Affiliate Disclosure Some of the posts in this article contain affiliate links. This means if you click on the link and purchase the item, I will receive an affiliate commission at no extra cost to you. I will only recommend products or services I use personally and/or believe will add value to my readers, so there is no conflict of interest. 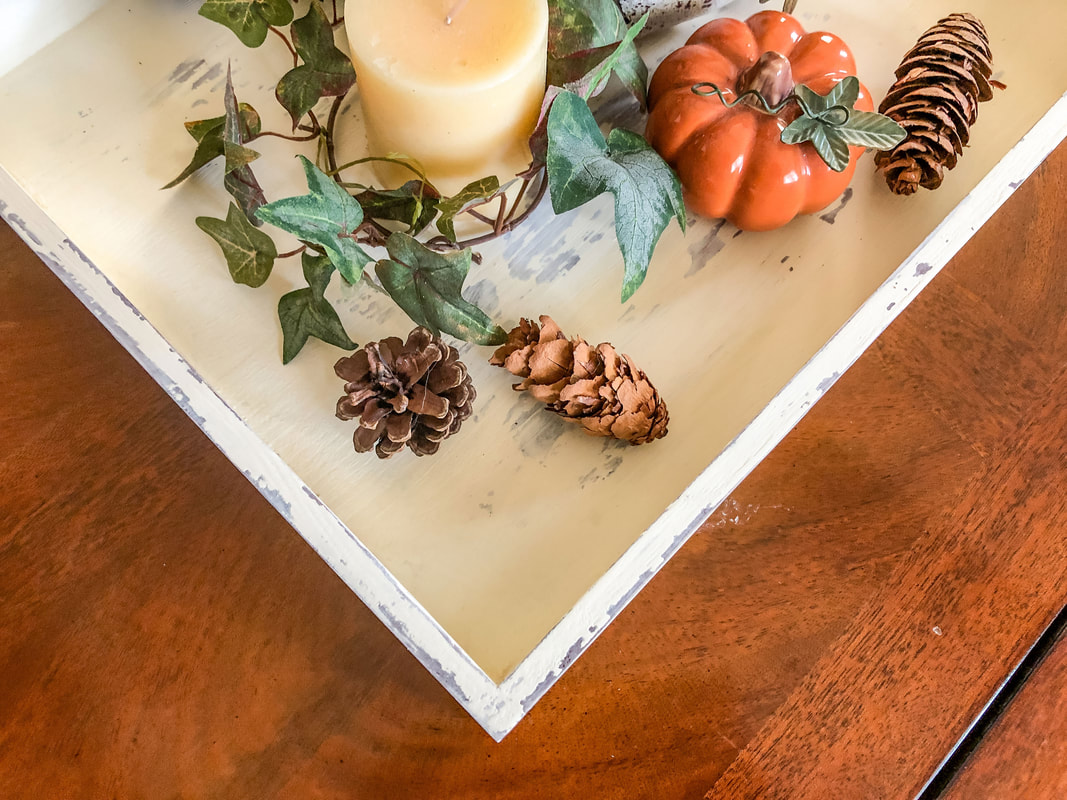
Finished diy weathered tray with some fall decor. Photo by Diane M. Lilly, 2022.
This month, I tackled a simple DIY project using an unfinished wooden tray, furniture stain, and chalk paint. The tray was one of those items that kept getting moved from cabinet to cabinet…because "someday" I would come up with an idea for a DIY project! 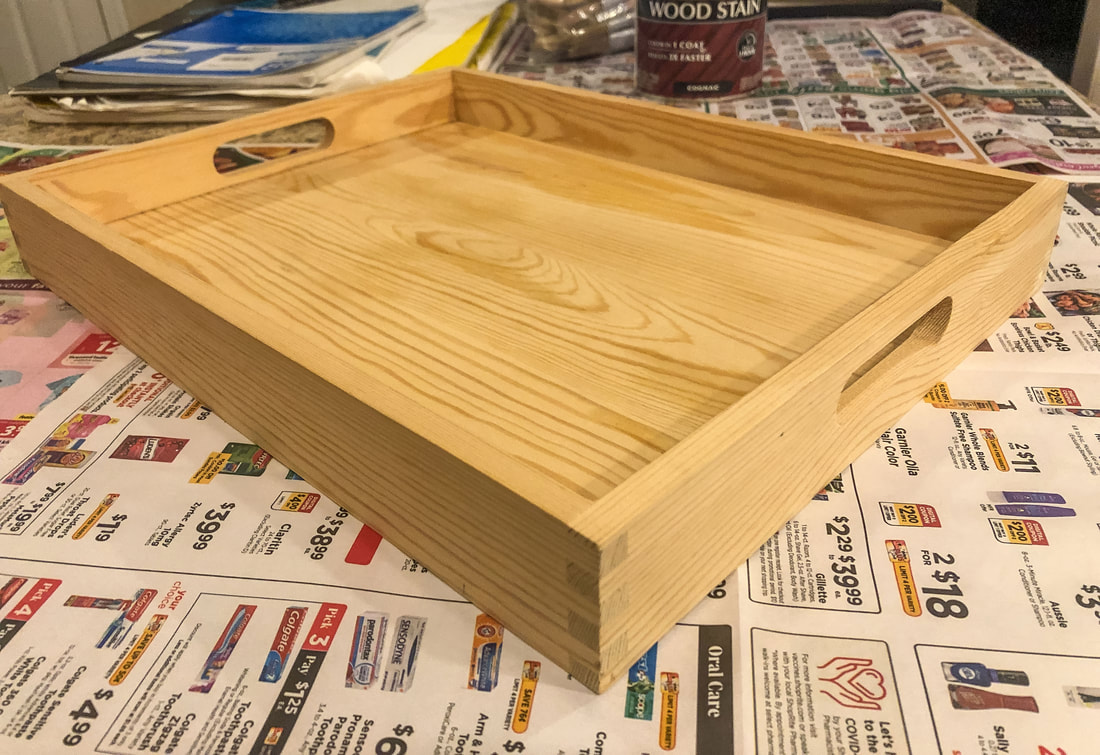
Unfinished wood tray. Photo by Diane M. Lilly, 2022.
Well, the time has finally come. The stars have finally aligned, allowing me the time to take my idea and make it happen! And speaking of time, my time is limited, so any DIY project HAS to be simple…and inexpensive. The inspiration for today’s DIY project came from a technique I found on The Country Cottage that I thought I’d try. I’ll modify the materials to fit my project, and we’ll see how it turns out! This tray project has two parts…The weathered paint technique will be covered in this blog (which I am calling “part 1”), and the second part will be a “part 2” blog on how to create a Celtic border on the sides of the tray. But first, let’s tackle part 1… All that is needed for part one of this project is a dark coat of paint (I used Varathane Cognac wood stain), some candle wax (I used my homemade soy candles), and some light-colored chalk paint (I used Rust-oleum Chiffon Cream Ultra Matte chalk paint). The idea for this project is to create a worn look to this tray as if this was something found in an old dusty attic or picked up from a flea market. I want it to look aged but not too beat up. And not too much like Farmhouse, although the result could work well in a Farmhouse decor scheme. In other words, I want it chippy but not TOO chippy, if that makes any sense! 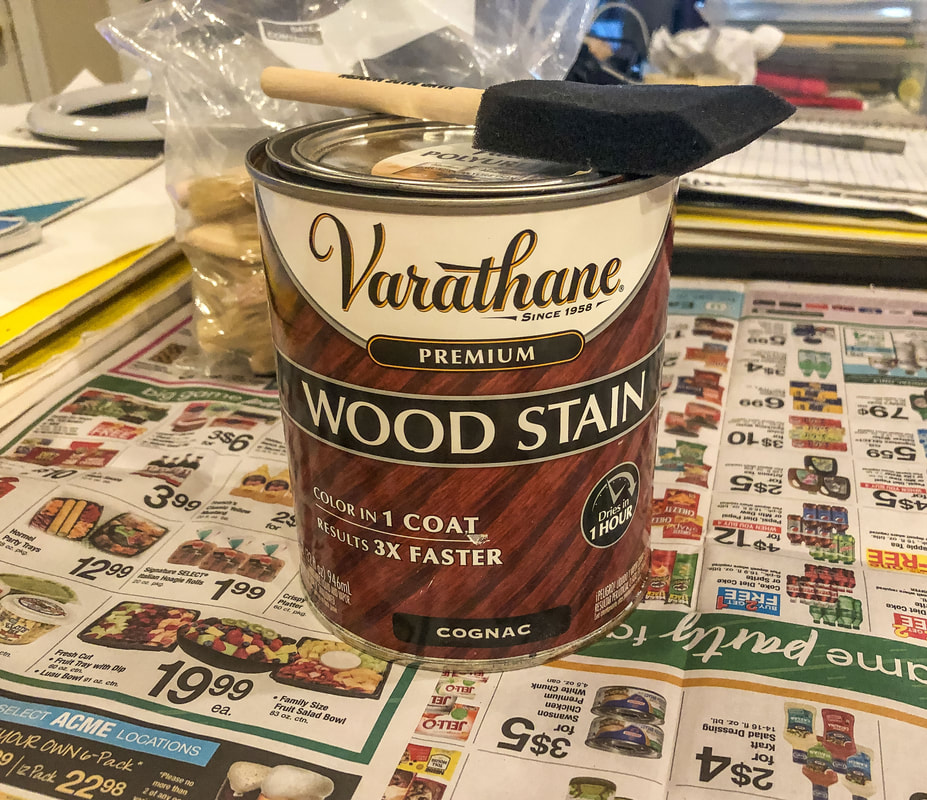
Cognac wood stain by Varathane. Photo by Diane M. Lilly, 2022.
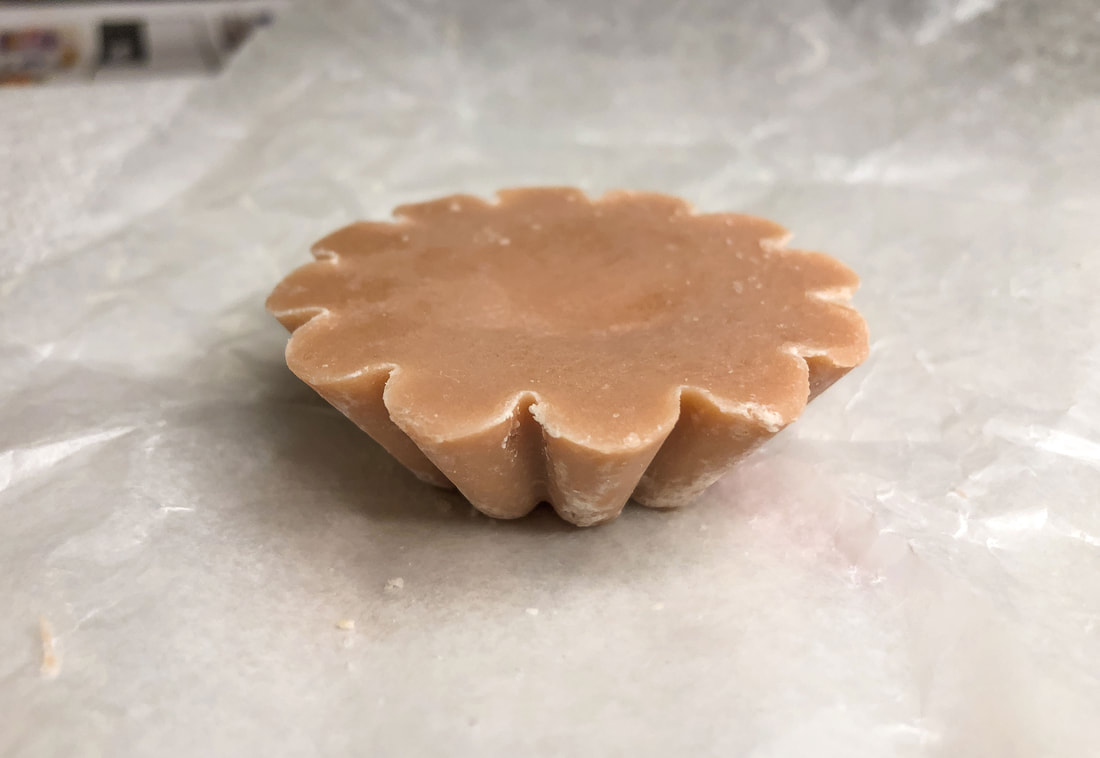
A handmade soy wax melt. Photo by Diane M. Lilly, 2022.
 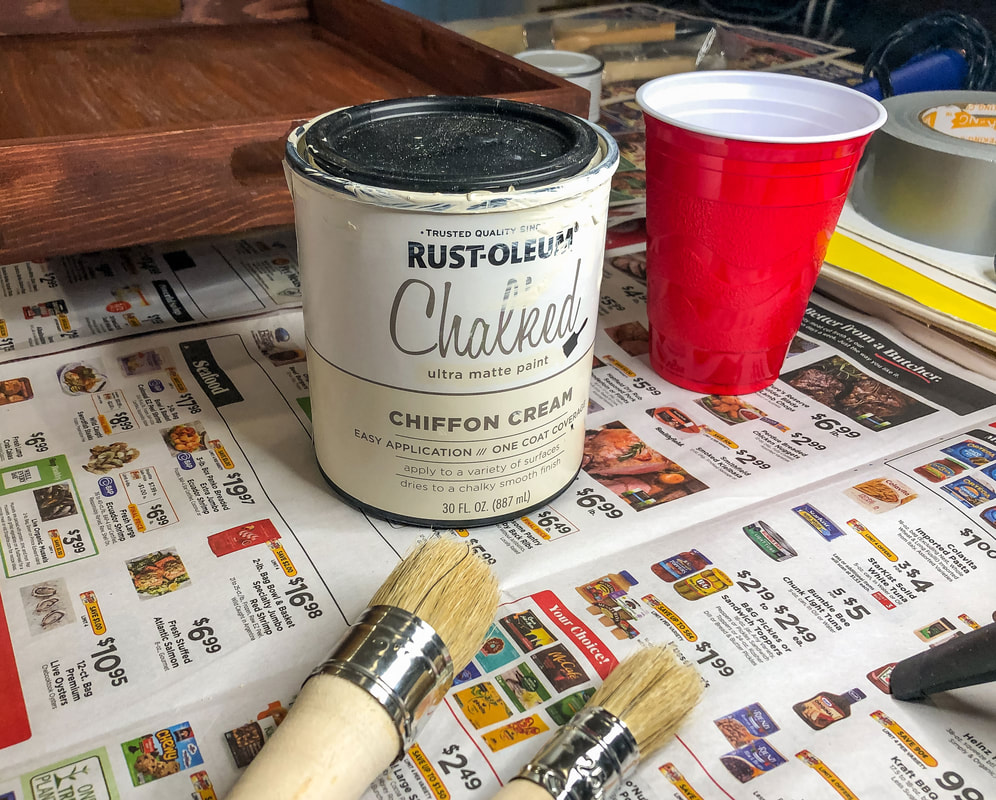
Chalk paint and paint brushes. Photo by Diane M. Lilly, 2022.
Materials needed: dark base paint or stain paint brushes or sponges candle wax chalk paint chalk paint brushes heat gun duct tape water sandpaper, 220 grit
Step 1—Sand the tray
Prep the bare wood for paint (or stain) with a light sanding. This cleans up any dirt and helps rough up the surface to help with stain or paint absorption. If I’m being honest, I forgot to do this step, but it all worked out okay anyway! Step 2—Apply the dark base coat The tray needed to blend in with my existing decor, so I chose a base color previously used in a DIY project in my dining room. I used the same stain and chalk paint from a dining room cabinet I painted last year. When you apply stain, you usually let it sit for some time (depending on how dark you want the color) and then wipe off the excess. This time--instead of wiping it off--I let it dry at full strength to achieve a rich, dark color. You’ll do whatever works best for your specific project. Make sure everything is dried completely before moving on to the next step. 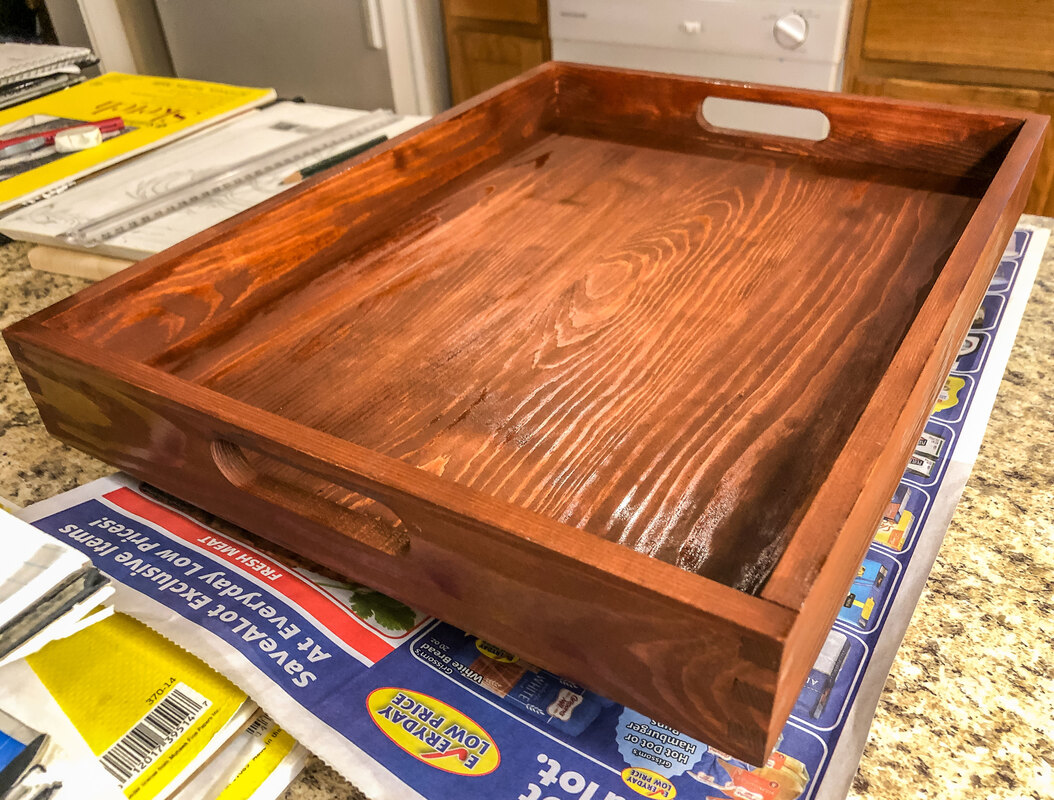
Tray with Cognac wood stain applied. Photo by Diane M. Lilly, 2022.
Step 3—Rub the wood with wax Once my stain was fully dry (the next day), I rubbed some of my homemade soy candle wax in areas I’d like to weather. I chose spots that would see wear and tear, like inside the tray and the edges and corners. 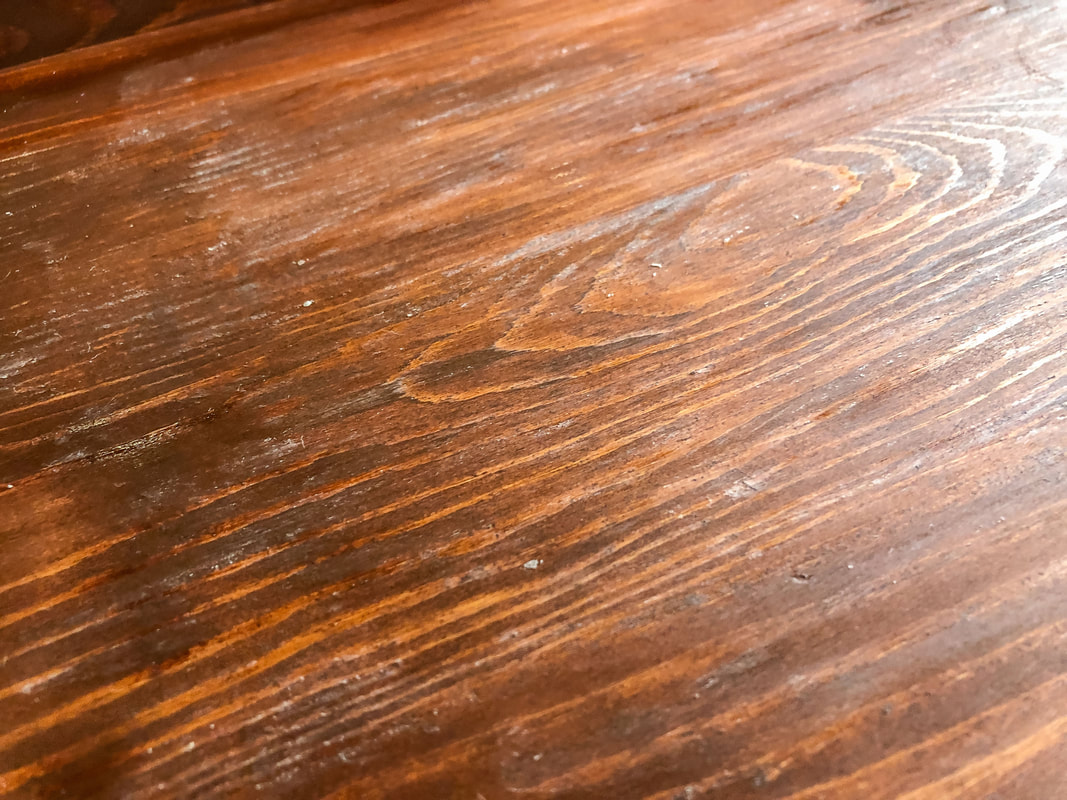
Wax rubbed into the wood tray. Photo by Diane M. Lilly, 2022.
Step 4—Apply the chalk paint top coats In the next step, I applied two coats of chalk paint over the wax and then the stain. There’s nothing complicated with this step--just slather it on! 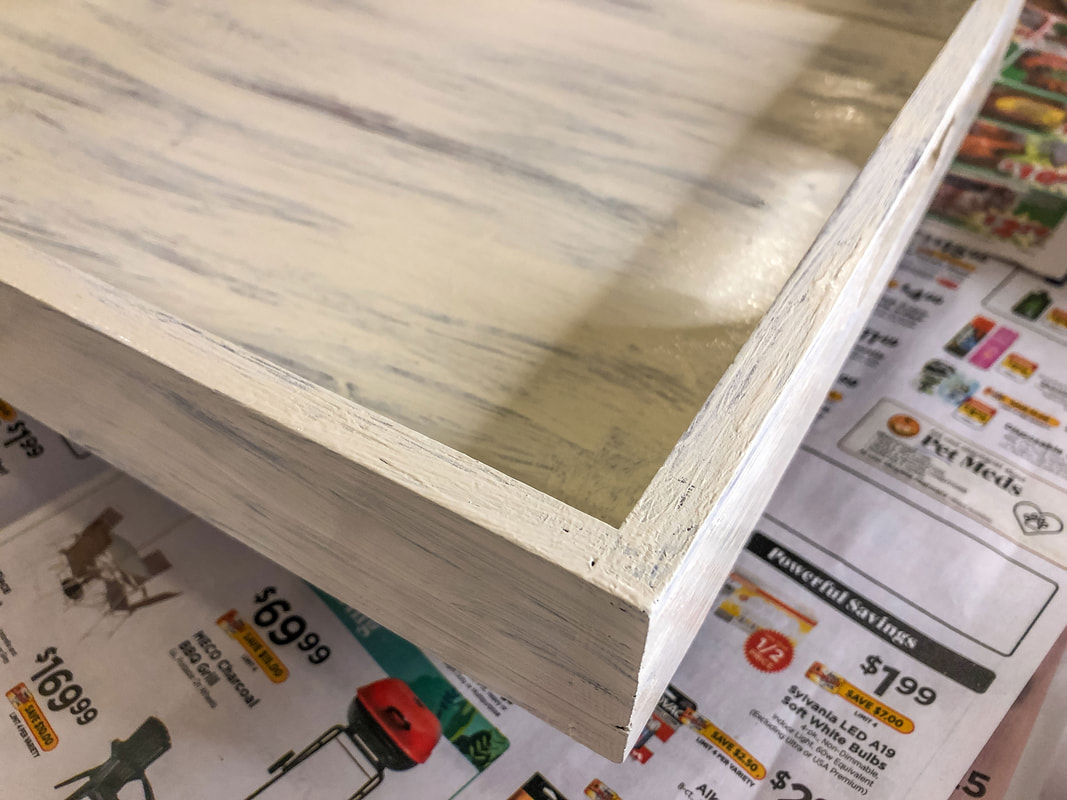
First coat of chalk paint on tray. Photo by Diane M. Lilly, 2022.
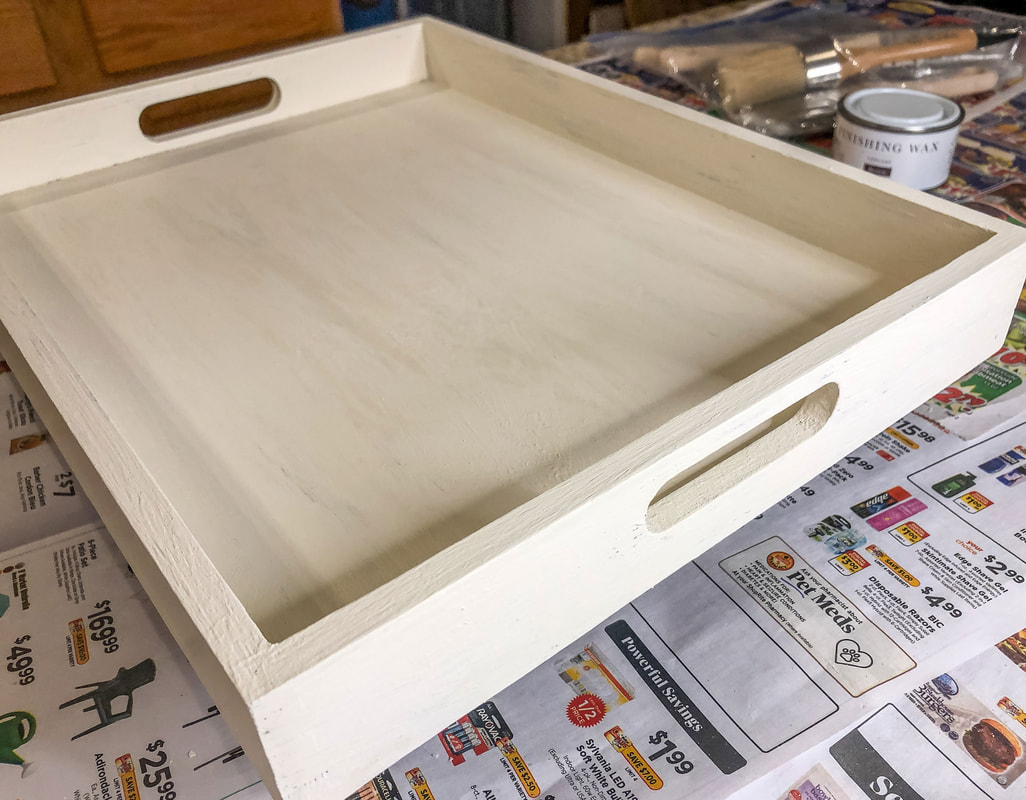
Second coat of chalk paint on tray. Photo by Diane M. Lilly, 2022.
Step 5—Heat and remove paint Using a heat gun (you can also use a hair dryer), I heated the areas where I wanted the paint chipped. It didn’t take much, just a few seconds. Now, here’s the tricky part…The directions say to take a small piece of duct tape and LIGHTLY apply it to the area, removing it immediately. I cannot stress enough that you must do this quickly and lightly, or you will remove too much top paint! The tape has to lightly stick and remove only small bits of the chalk paint top coat. I did pretty well until I got to the tray bottom, where I took off bit more than planned…but the look grew on me, and now I think it looks like it’s supposed to be that worn. 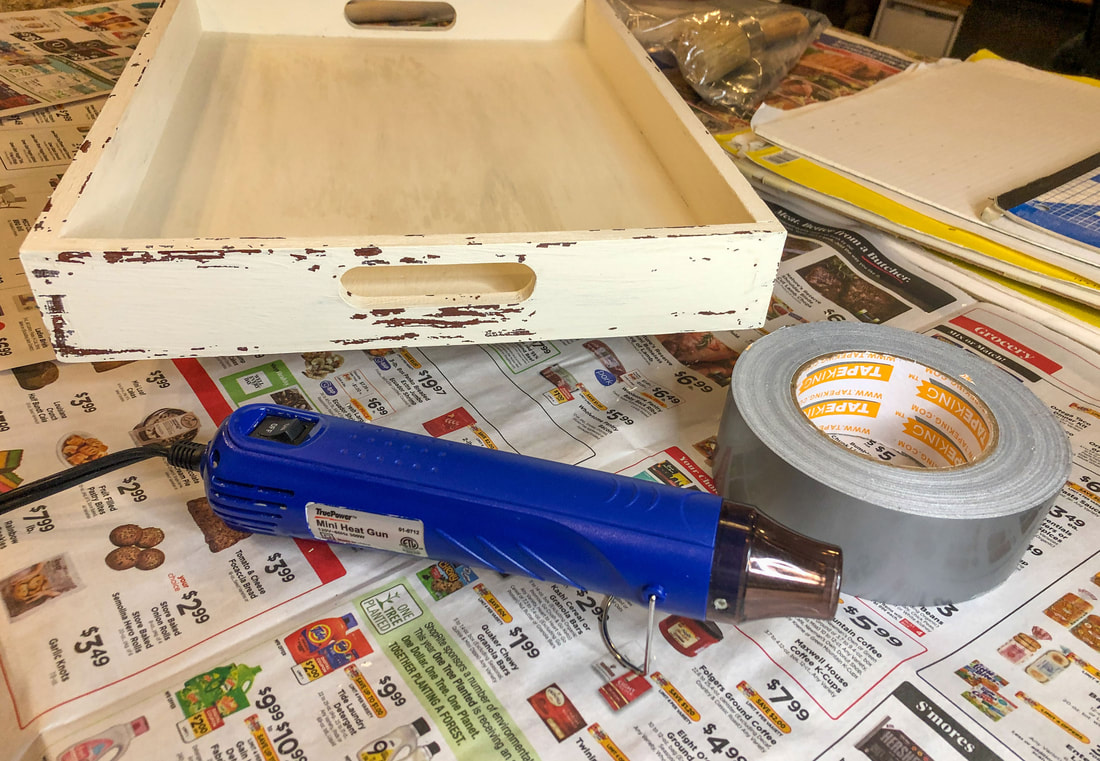
Tray sides weathered with heat gun and duct tape. Photo by Diane M. Lilly, 2022.
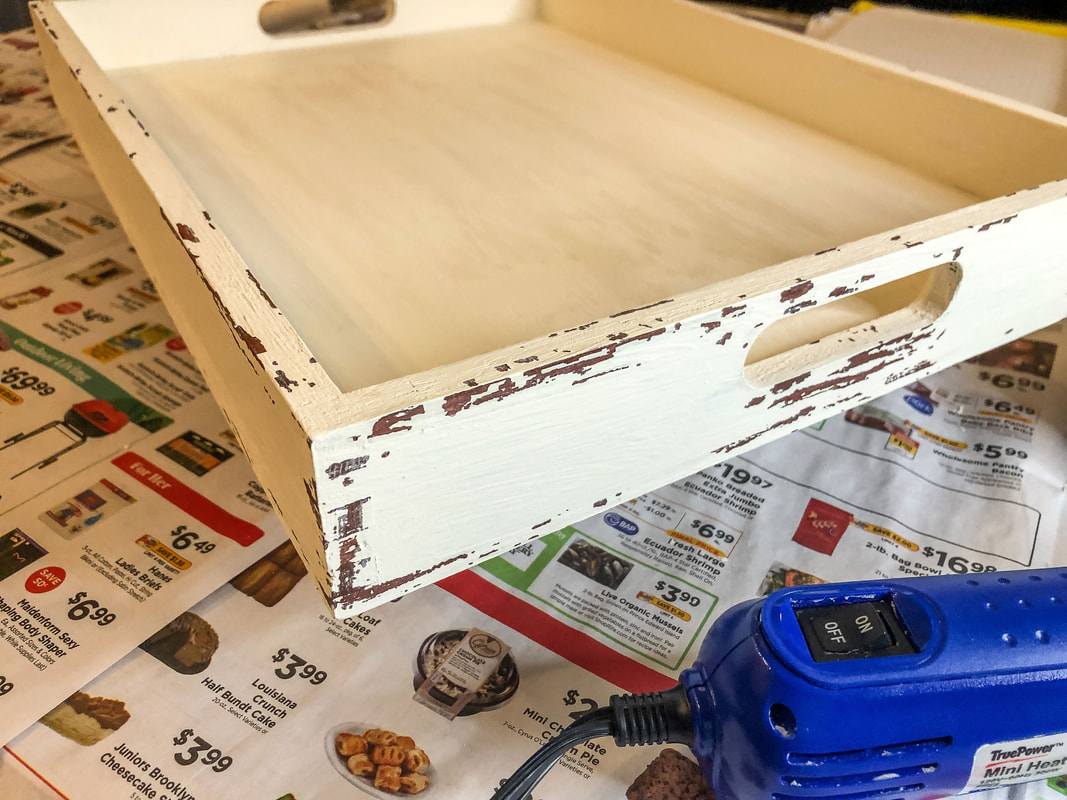
Closeup of tray corner after weathering technique has been applied. Photo by Diane M. Lilly, 2022.
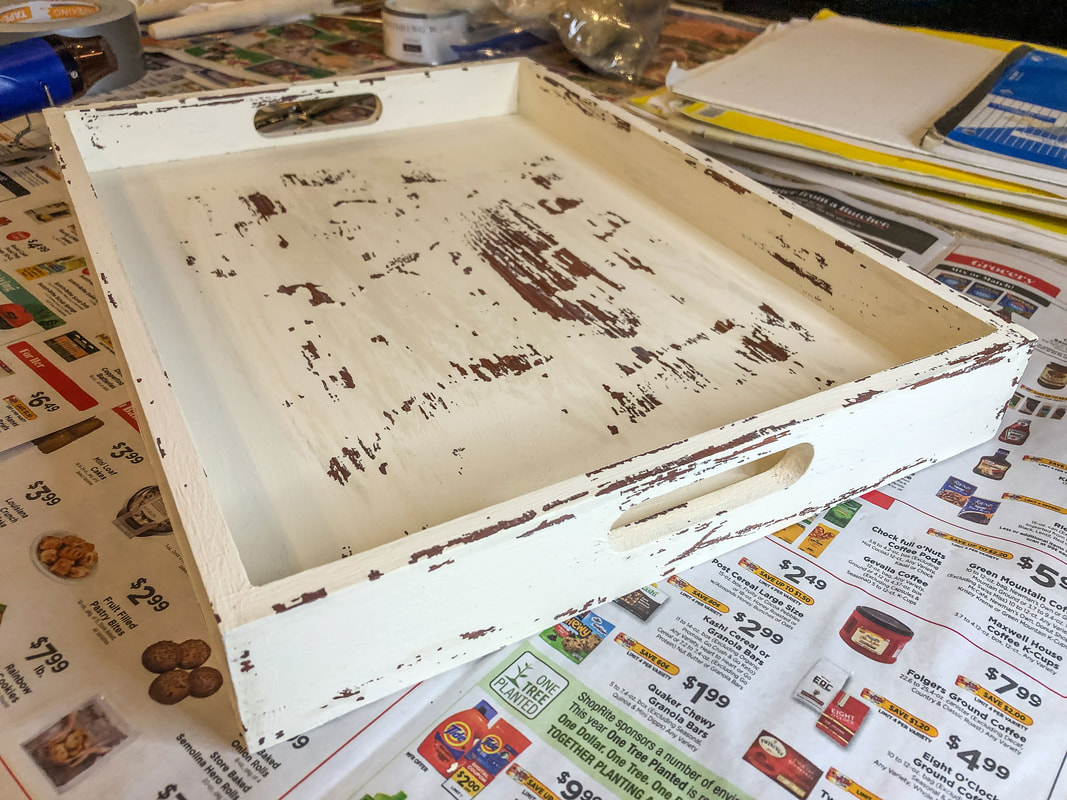
Tray after weathering technique has been applied. Photo by Diane M. Lilly, 2022.
Step 6—Lightly sand So here’s where I diverged from the original technique…I liked the chippy effect that this technique created, but it was just way too much like Farmhouse for my taste. (Sorry Farmhouse lovers!) For this tray to fit in with my decor style, I needed the “chippiness” (I just made up that word!) toned down a bit. I used 220 grit sandpaper to lighten the areas where the paint was chipped away, and that improved the situation somewhat…but it still needed to be lightened up even more. 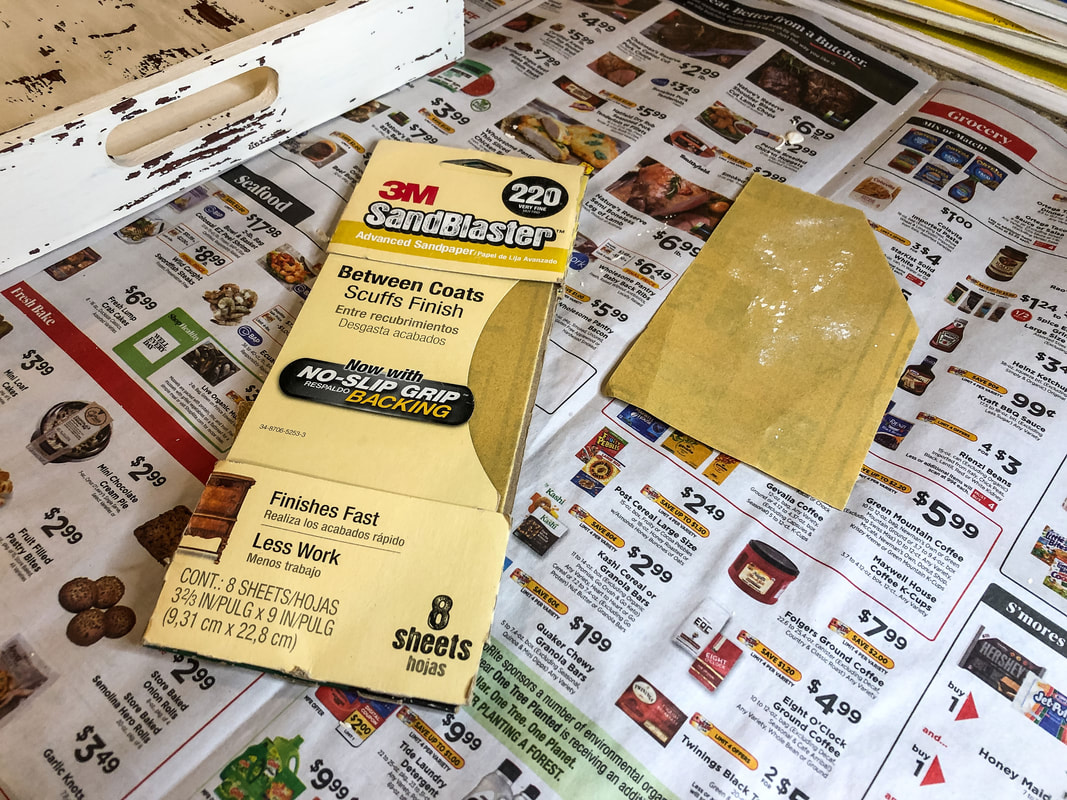
220 grit sandpaper for smoothing out the paint chip areas. Photo by Diane M. Lilly, 2022.
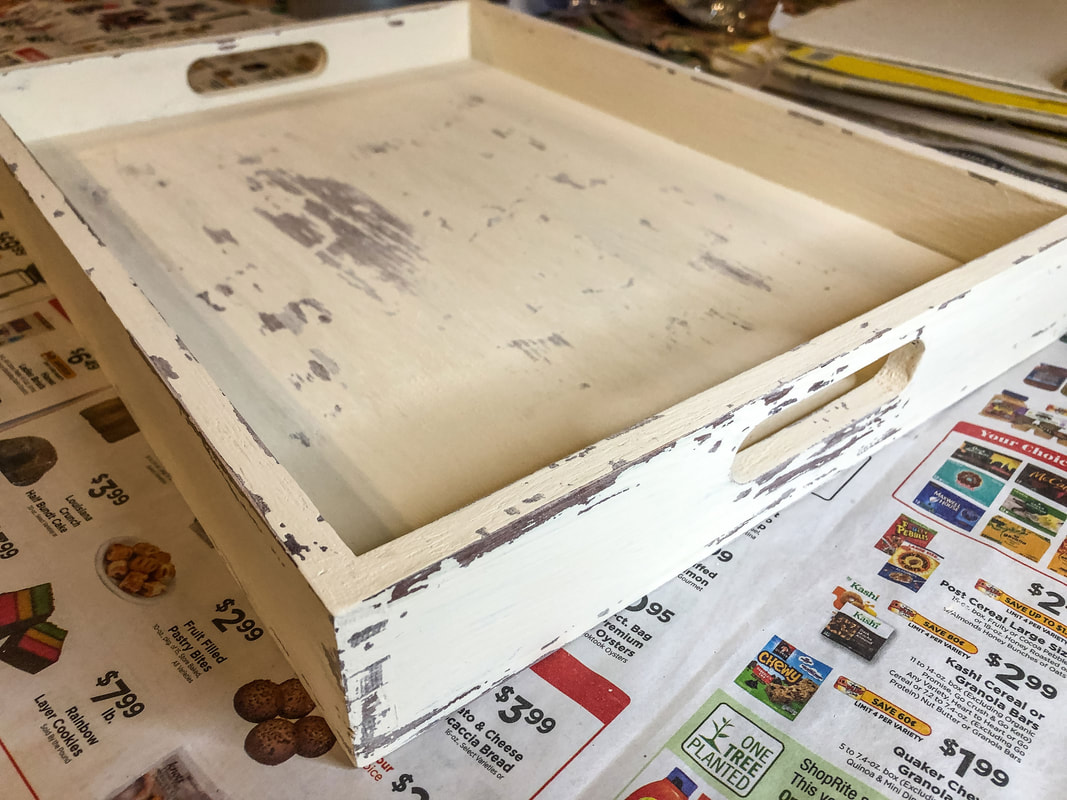
Tray after the paint effects have been sanded. Photo by Diane M. Lilly, 2022.
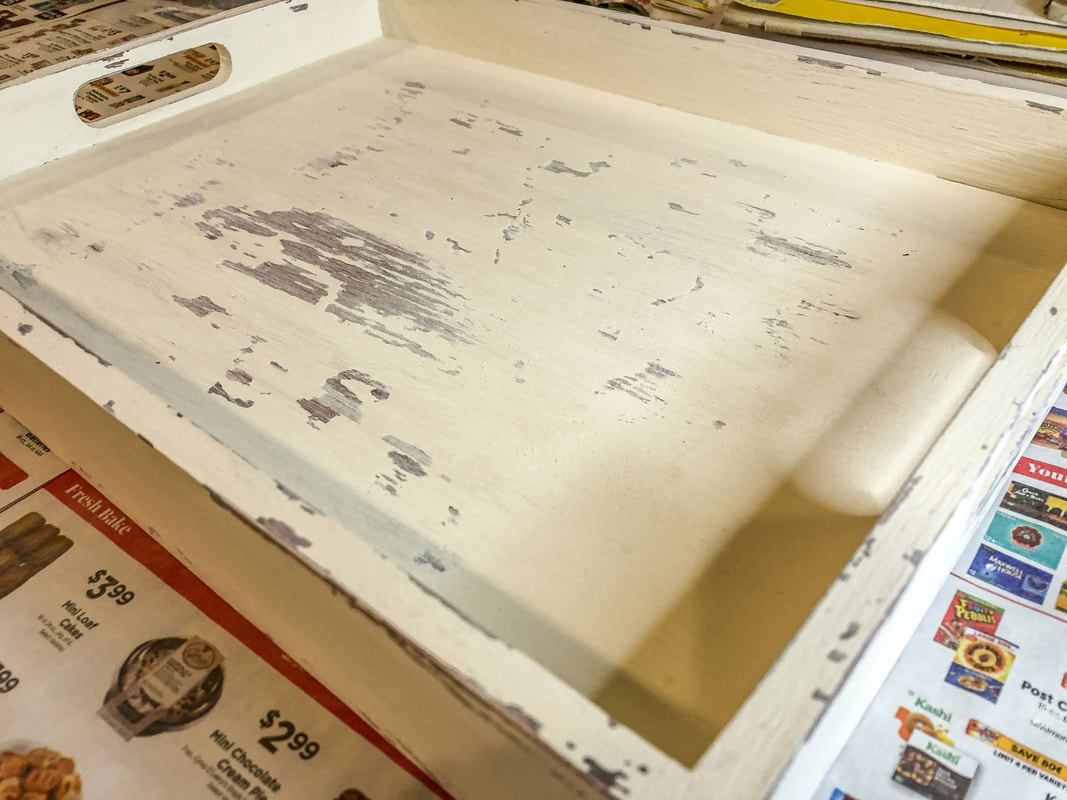
Bottom of tray blended with sandpaper. Photo by Diane M. Lilly, 2022.
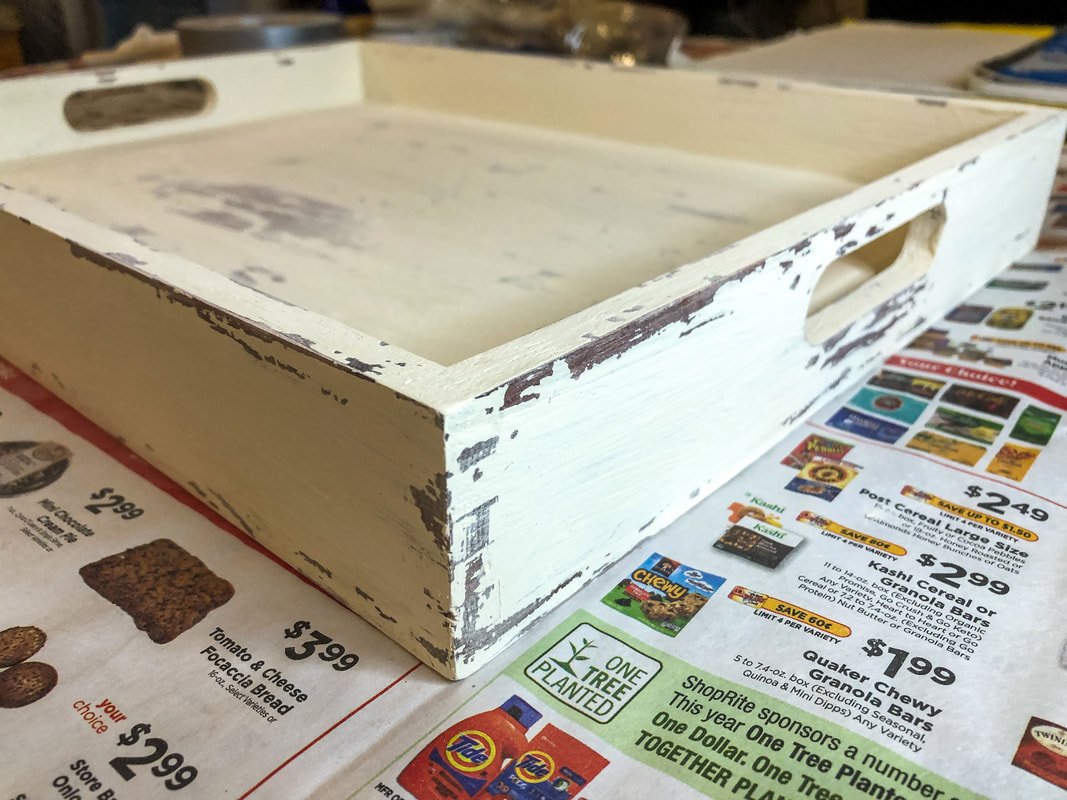
Closeup of tray corner after sanding. Photo by Diane M. Lilly, 2022.
Step 7—Blend with a damp brush To lighten the chipped paint effect even further, I took a slightly wet paintbrush and blended the chalk paint over the areas where the paint had been chipped off. Chalk paint is ideal because you can dampen the paint and rework or blend any trouble spots.) I loved the result! I feel like this tray now has the look of something old and worn without being too chippy. 
Water to blend the paint even further. Photo by Diane M. Lilly, 2022.
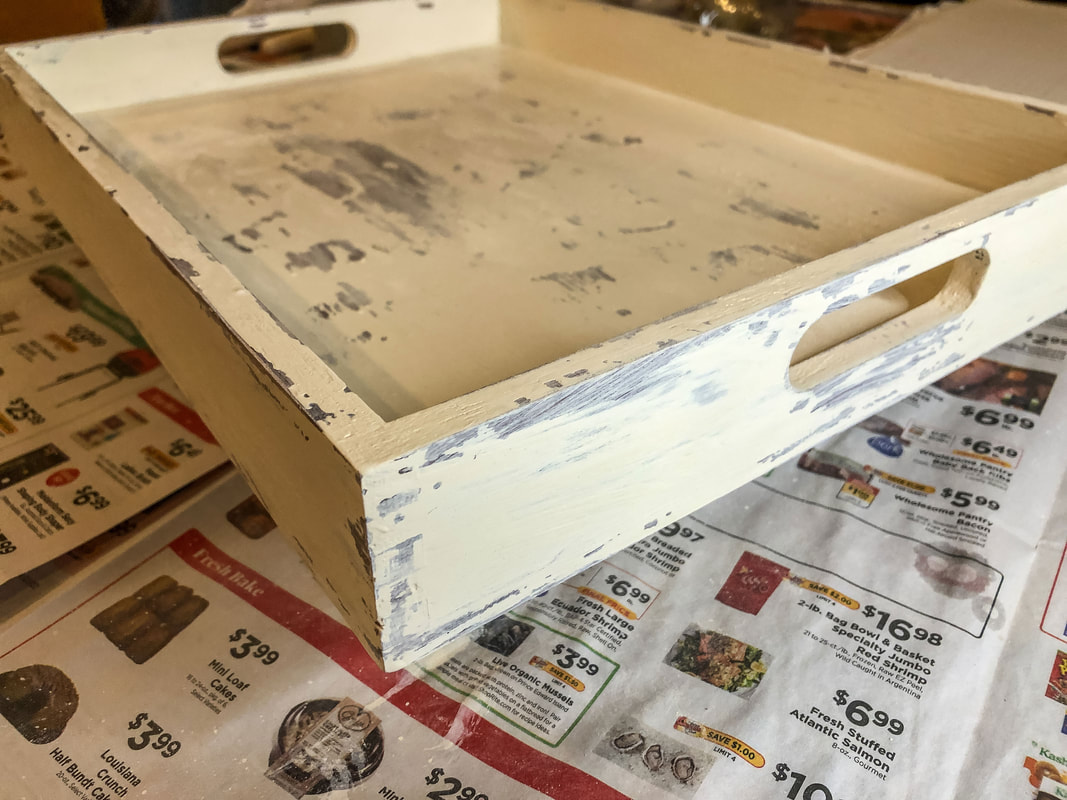
Tray corner and sides blended with water. Photo by Diane M. Lilly, 2022.
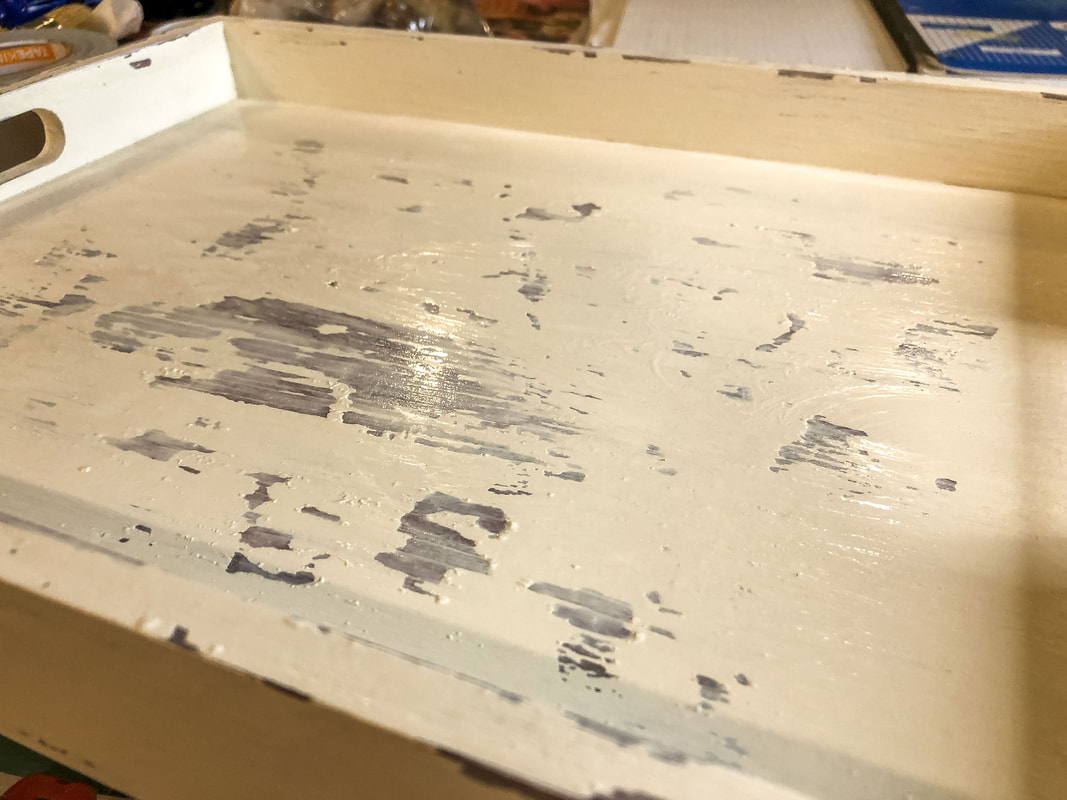
Tray bottom blended with water. Photo by Diane M. Lilly, 2022.
So that’s the end of the painting phase of this project. The technique was simple and quick, taking only two days to complete. What I learned, however, was that—as fun as it was to use wax, heat, and duct tape to create a chippy appearance—you don’t need to do that step. Later in the process (in “part 2”)—while taping border templates onto my tray sides—I accidentally removed more chips of paint from my top coat, which leads me to believe that you could probably skip the wax and use tape to remove areas of the top coat. I don’t know how well this would work if the base coat was also painted (since I used stain), so I don’t know how much paint would be removed, but a little trial and error and a lighter touch might yield good results. 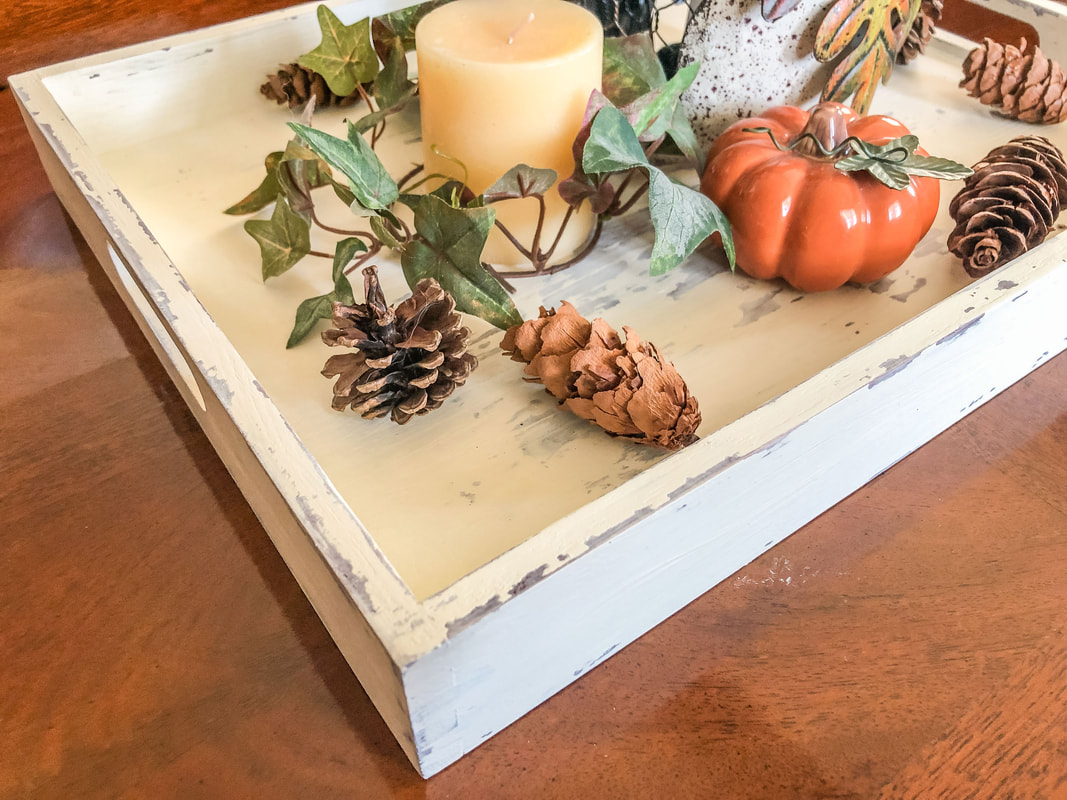
Decorative tray with weathered effect finished and staged with some Autumn decor. Photo by Diane M. Lilly, 2022.
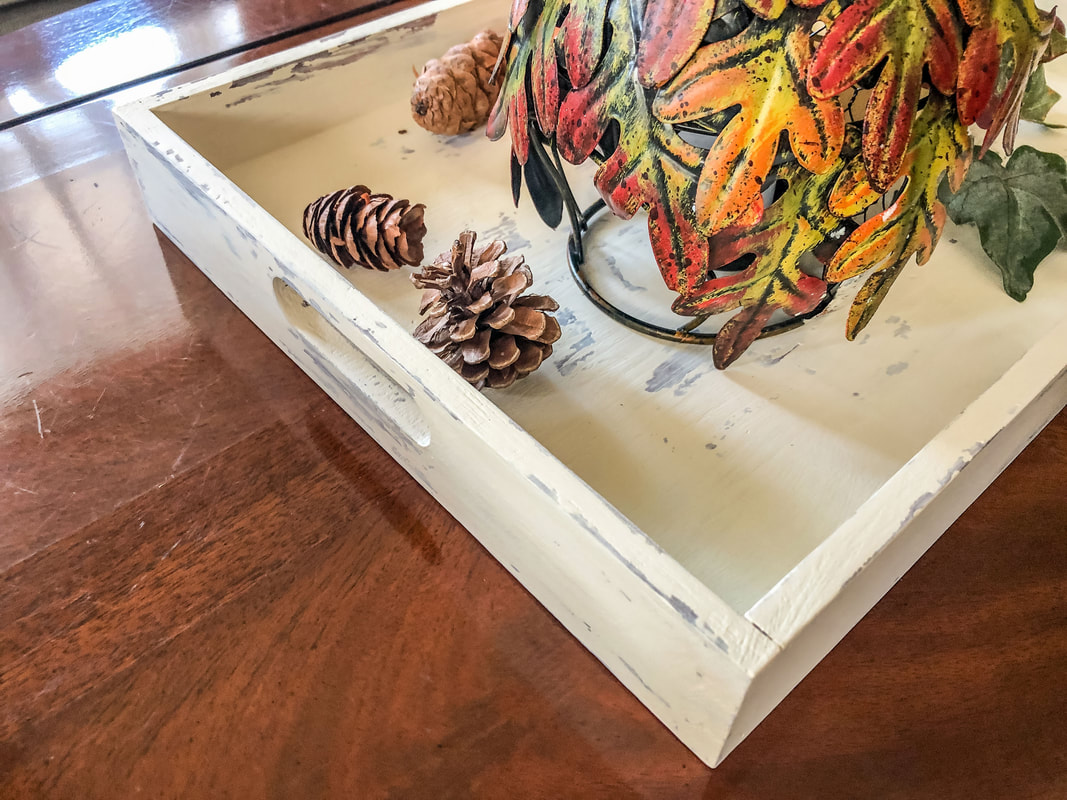
Another angle of the finished tray with diy weathered effect. Photo by Diane M. Lilly, 2022.
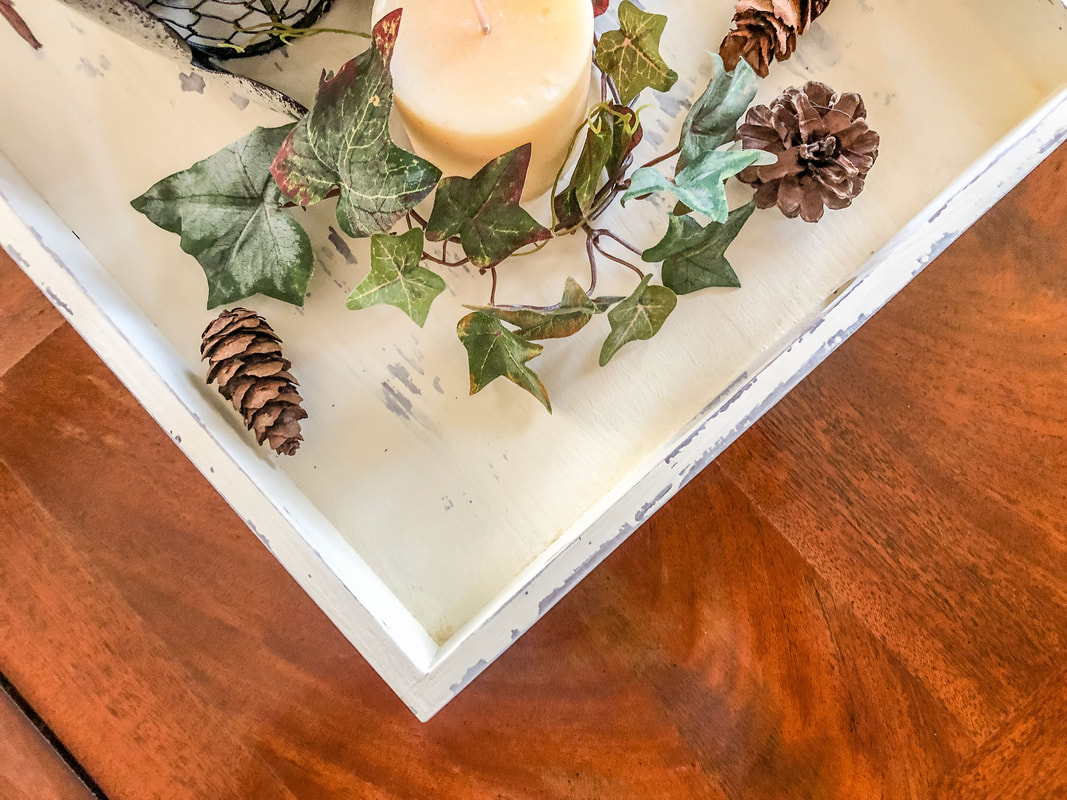
Final look at my DIY decorative tray with weathered technique using chalk paint. Photo by Diane M. Lilly, 2022.
All in all, this was a fun project, and I’m pleased with the outcome. But—as always—my sadistic side kicked in, and I had to take things up a notch! So, I had this crazy idea to paint a Celtic knot border around the exterior sides. Part two of this blog will take you through the basic steps needed to create a knotwork design for the sides of this tray. But you can also create any design of your own…vines, flowers, leaves, or any decorative motif you like to spruce up your tray! So what do you think? Have you done any similar projects with chalk paint? Do you have any tips or tricks for weathering paint effects you’d like to share? Feel free to drop a comment below! And don’t forget to read part two here, where I torture myself with a hand-drawn and painted Celtic knot border.
Related blogs you may want to read:
DIY chalk painted tray with Celtic border A little project with jute twine and an old foot stool DIY refurbishment of a dining room cabinet A fun DIY project with paint and a thrifted mirror part 1 A fun DIY project with paint and a thrifted mirror part 2 Creating a kitchen coffee bar On a mission to recycle this neglected vintage stool The stain stripping stage of rescuing my vintage stool Staining my vintage stool with brewed tea My tattered vintage stool transformed into a beautiful plant stand Homemade candle recipe with a eucalyptus fragrance Homemade candle recipe with a hazelnut fragrance Affiliate Disclosure Some of the posts in this article contain affiliate links. This means if you click on the link and purchase the item, I will receive an affiliate commission at no extra cost to you. I will only recommend products or services I use personally and/or believe will add value to my readers, so there is no conflict of interest. 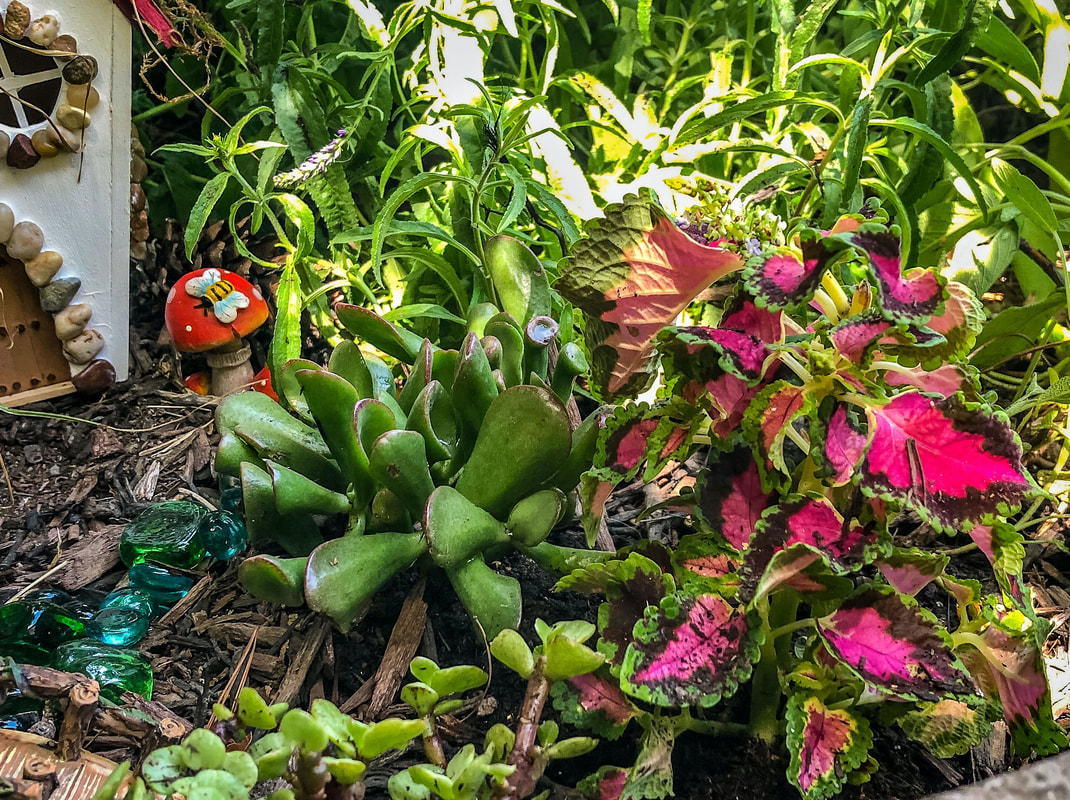 Succulents and coleus planted in my outdoor fairy garden. Photo by Diane M. Lilly, 2020. As a child, I loved everything related to castles and fairy tales. The irresistible pull of the unseen world wormed its way into my psyche and never let go. The sense of wonder I felt when I imagined worlds full of magical folk like fairies, elves, gnomes, and talking animals was perhaps a way to escape a troubled childhood.  Image by Sebastien Berthelot from AdobeStock. But it was something more than that…something hard to describe. There is just something about the world of miniatures that has always held my imagination. What is more fascinating than doll houses with miniature versions of our world, with tiny bits of furniture and interior decor? Or how about model train landscaping with streets, buildings, and train tracks? These are entire worlds where “little people” go about their business, oblivious to us mere mortals staring down at them like giant Cheshire cats.  Image by Luidmyla from AdobeStock. Fairy gardens evoke the same sense of intrigue and fascination, and creating a fairy garden is the perfect invitation to allow your imagination to again enter the realm of magic. Creating a fairy garden is essentially an activity inspired by nature and all that exists in the natural world, with a touch of whimsy that gives us a space tp escape the “rational” world for just a bit. So, what makes a fairy garden? What types of things are “essential” to a fairy garden? Let’s take a moment or two to suspend belief and discuss the ten essential elements that I believe are necessary for a successful fairy garden!  Image by Bari Garrett from Pixabay. Fairy habitats When it comes to creating a fairy habitat, the sky is the limit! Fairies love a habitat that is attractive to birds, bees, and butterflies…but maybe your fairy has other ideas! At its core the fairy garden is a tiny haven full of miniature structures surrounded by all sorts of things that attract the typical garden wildlife. But—again—your fairy might cut against the grain and embrace their inner alien or beach bum! (I’ve seen both…it gets interesting!) In the interest of keeping things simple, though, we’ll just discuss the typical garden or woodland fairy habitat.  Image by anca enache from AdobeStock. Fairy gardens are typically part of a larger garden (although they don’t have to be), so think of this space as a garden within a garden…a special little patch of real estate set aside just for your magical fairy resident. And put some thought into it! Put yourself in your fairy’s shoes…Visualize yourself about 3 inches tall and look around. (Maybe put that camera phone down to ground level and take some photos, just to get a more realistic perspective.) 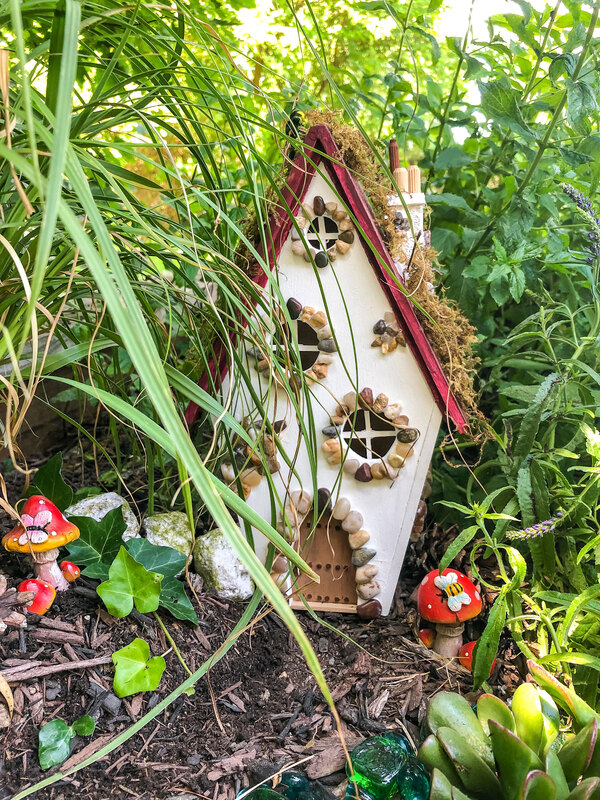 Outdoor fairy garden featuring handcrafted fairy cottage. Photo by Diane M. Lilly, 2020. Are there trees and tree stumps with hollows to live or hide in? Are there mushrooms for your fairy to sleep on or shelter under during a rainstorm? Is there a patch of flowers with vibrant colors and attractive fragrance that attracts birds and bees? Maybe there is even a hollow woodland log with clumps of ferns clinging to its reclining form on a forest floor. Whatever your choice of habitat, make it something fun, whimsical, and enchanted! Make it a place that will make your fairy feel welcome and want to stay.  Image by Mike Goad from Pixabay. A comfy fairy home If your fairy does decide to stay in the habitat you’ve so carefully chosen, she’ll need a place to do all the “domestic” stuff, the stuff of daily living. So what type of home will your fairy want? When it comes to fairy homes, this will depend on your chosen habitat, and—of course—your fairy’s preferences! A fairy’s house could be provided by nature, taking the form of a tree hollow, toadstool, or miniature cave made of rocks. Or maybe she’s an environmentalist who embraces the idea of repurposing old pots, wheelbarrows, or planters. Or maybe you are one of those crafty fairy guardians who builds her a birdhouse or fairy house. Whatever type of home you and your fairy choose, it should be attractive and comfy and provide shelter from wicked weather.  Image by 2000holmes from Pixabay.  Image by ImaArtist from Pixabay. Shelter & hiding places for fairies Your fairy will not spend ALL day inside her home! She will be out and about, exploring her gardens and surrounding areas, looking for food, and visiting friends. And sometimes—while she is out having too much fun—she gets caught in a rainstorm! Remember those tree stumps, toadstools, and flowers I mentioned before? This is where they come in handy! It is essential to your fairy’s happiness to provide places of shelter, even if it’s a thick bush or large leafy flower under which your fairy can hide from unwanted visitors or shelter from that occasional summer rainstorm.  Little hiding space in my outdoor fairy garden with a mushroom and pinecone. Photo by Diane M. Lilly, 2020. Fairy friends & companions Speaking of friends…We all need friends, and your fairy is no different! The perfect habitat will naturally attract butterflies, frogs, hummingbirds, and ladybugs all of whom will be curious about your resident magical being and easily befriend her. Maybe the neighborhood squirrels and rabbits pop in for a quick visit while on the way to find their morning meal. You could even invite companions from the fairy world, like gnomes and elves. (Don’t worry that they are resin statues…they come alive when you are not looking anyway!) Maybe your cat or dog makes a daily trek outside to pay a visit. (Make sure they are friendly to your fairy, or you may incur her wrath!) And don’t forget that YOU are her friend as well! Visit her now and again to check up on her and catch up!  Image from Pixabay.  Image by Jeroen from AdobeStock. Miniature garden areas for fairies Having a resident fairy comes with responsibilities, and one of those responsibilities is creating a beautiful garden in which your fairy can quietly meander on a cool misty dawn or entertain friends on a sunny summer afternoon. Nestling your fairy’s magical home into existing flower gardens is one of the easiest—and most natural—ways to surround your fairy with her very own garden patch. 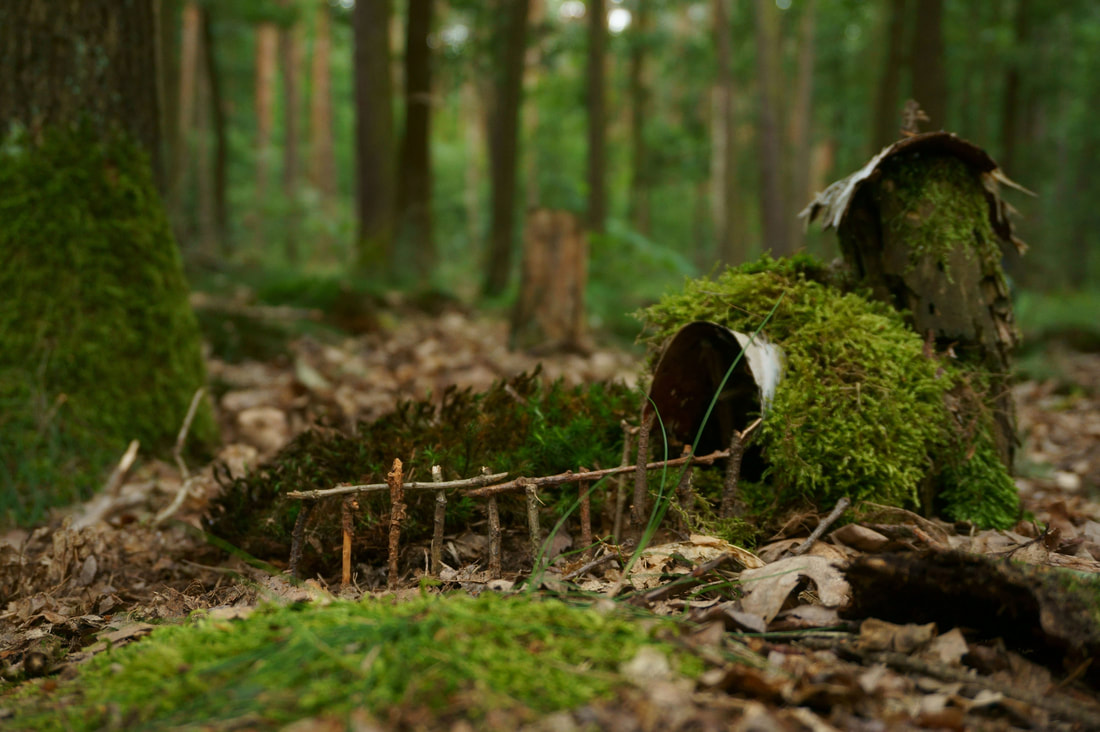 Image by jonnyseek from AdobeStock. Or…maybe this is where you have fun doing miniature landscaping! Creating miniature gardens is an art form that goes back decades, but lately, the fairy garden has become all the rage! How can you resist creating all those miniature walkways, garden patios, and landscaping?! If you decide to go this route, you’ll need miniature plants--succulents, miniature roses, or any relatively small plant that won’t get out of control and become overgrown. Maybe some plants are in pots, and maybe some grow from the soil…Just think low maintenance. (That doesn’t mean NO maintenance! You’ll have to visit your fairy friend often to do upkeep.) Whatever you choose to do for your fairy, creating a magical homestead for your fairy will entice her to stay…And that means good luck for you! 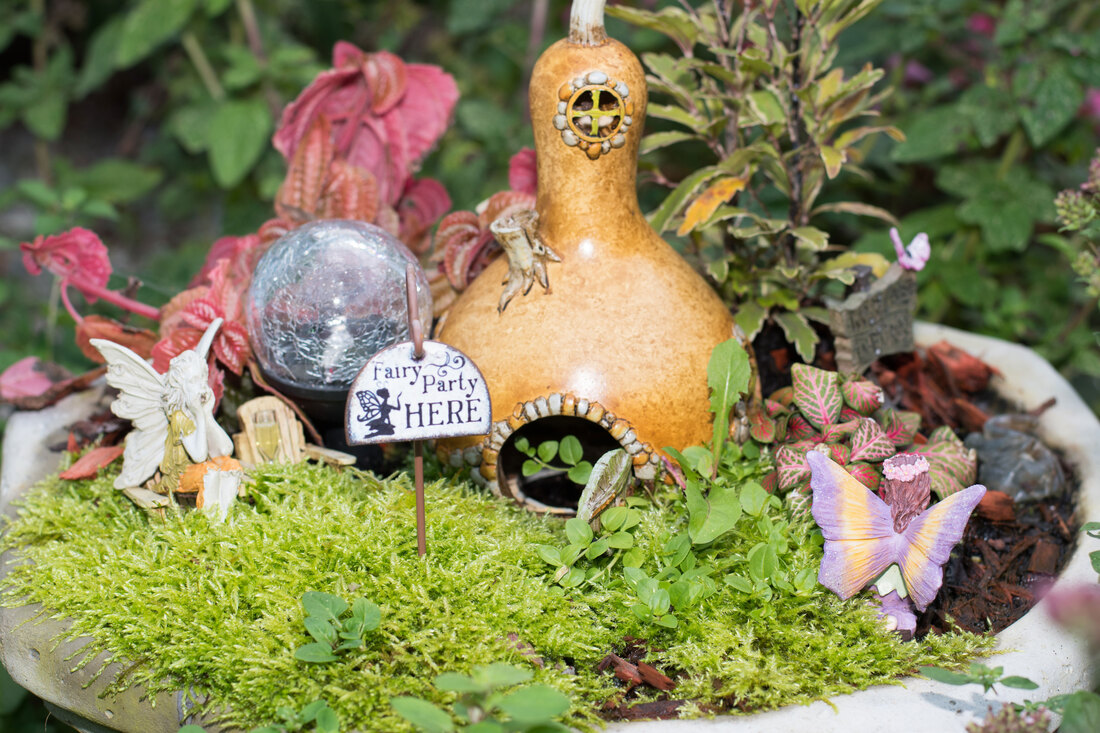 Image by Darwin Carozza from AdobeStock. Flowers in the fairy garden While we’re on the subject of gardens and flowers, let’s talk a little about the type of flowers and plants that will have your fairy swooning… So what types of plants and flowers attract fairies? Fairies are known to have a fondness for aromatic herbs, like thyme and rosemary. Planting herbs in and around your fairy garden attracts bees and other insects which are beneficial to the health of your garden…and the happiness of your fairy. And did I forget to mention the amazing scent that fills the air?! Beautiful flowers—like petunias, tulips, foxglove, pansies, and even wildflowers—can also add to the symphony of fragrances in your fairy’s garden. Flowers that have large petals also provide much needed shade on a sunny day, or even attractive places to hide in or sleep. Fruit trees and bushes make a good food source for your fairy, and having them close to home means she won’t have to risk traveling too far away to find her morning breakfast. 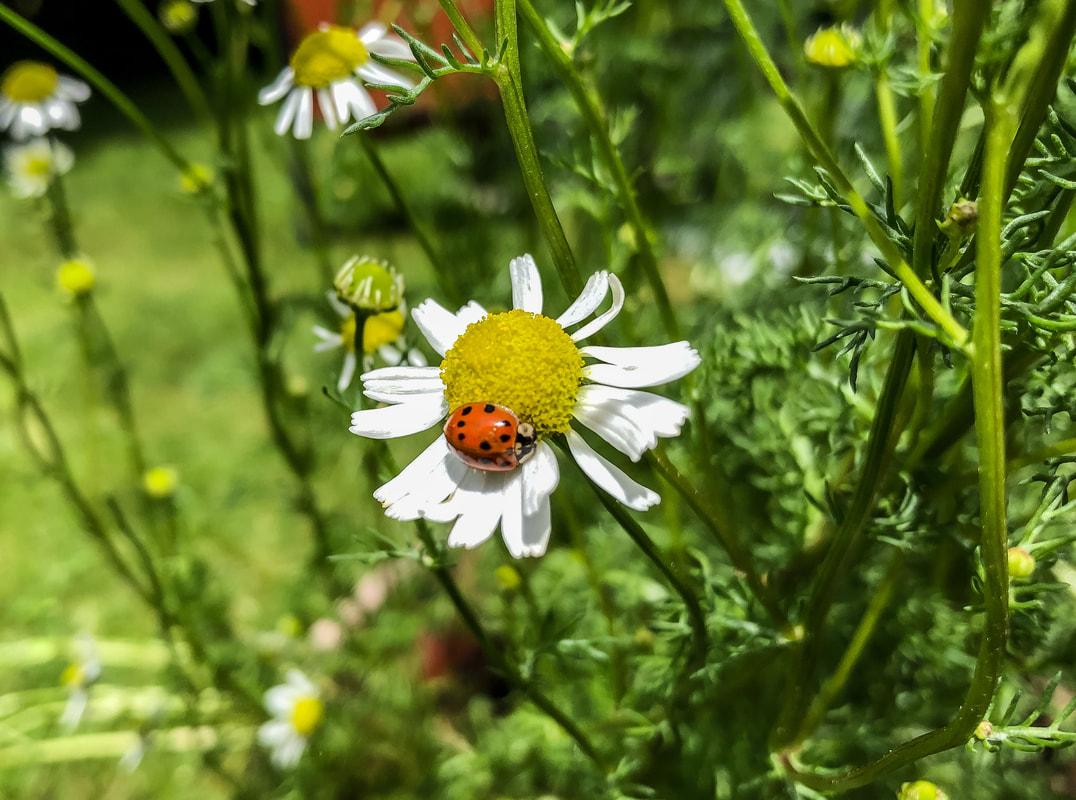 Ladybug climbing on a chamomile plant. Photo by Diane M. Lilly, 2022. 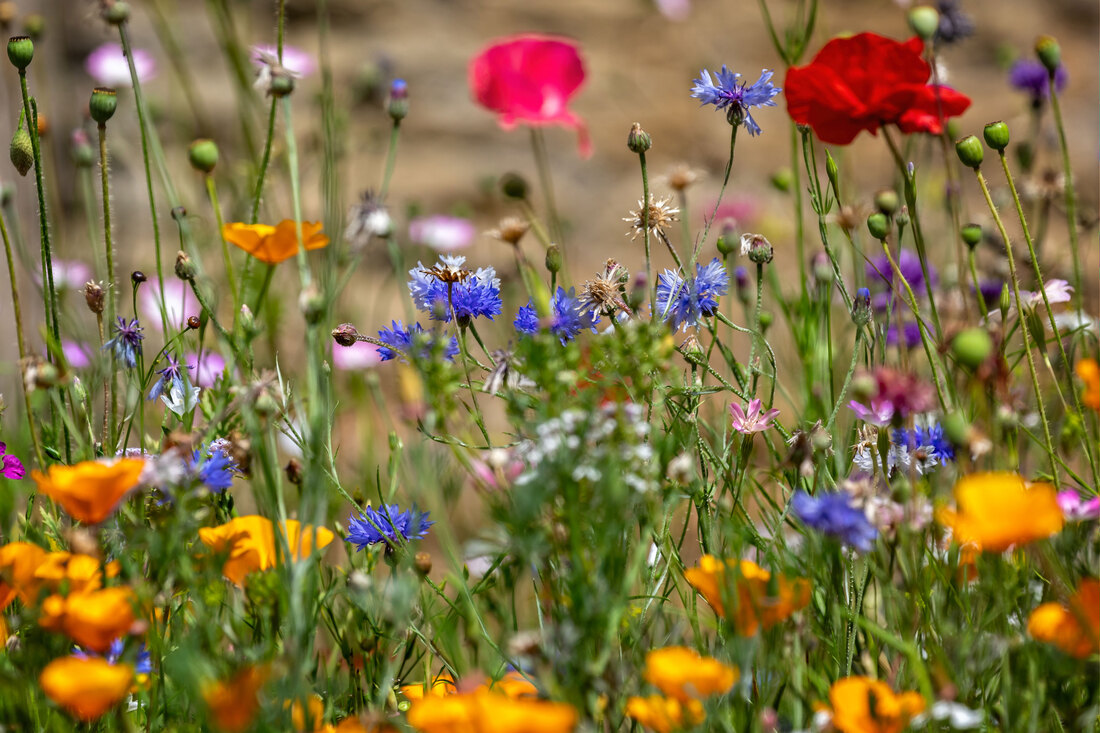 Image by Nigrl from AdobeStock.  Purple petunia with raindrops. Photo by Diane M. Lilly, 2022. Shiny objects and fairies In case you didn’t already know, fairies like shiny things! It is said that fairies are attracted to glittering shiny items, like fairy lights and sparkly gems. They are attracted to the light like moths to a flame, so it is important to use this to your advantage as you try to lure a fairy into your garden and entice them to stay. As you create your fairy garden, think about incorporating things like crystals, gem stones, glass beads, sparkly flocked decor, fairy lights, and even water. Your fairy will be mesmerized! 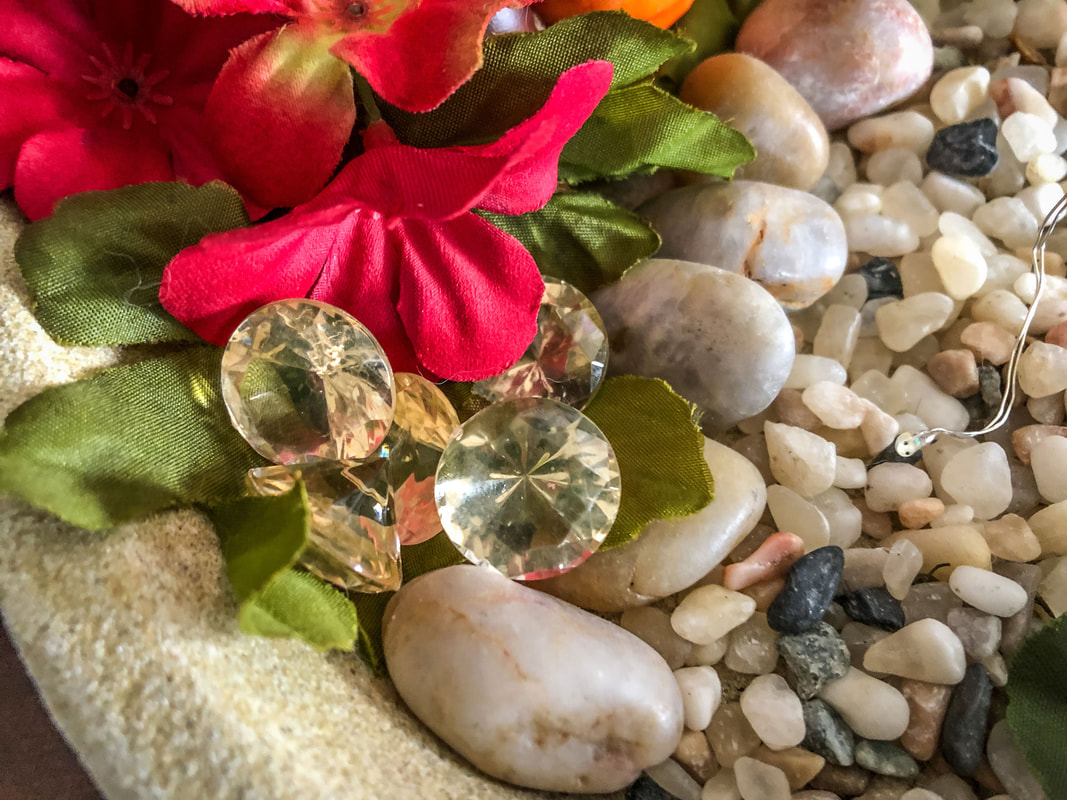 Sparkly gold crystal gemstones in my fairy garden. Photo by Diane M. Lilly, 2022. Water sources in the fairy garden Water is the source of all life…and fairies love it! The presence of water provides several benefits. Fairies like it for its shimmering properties, but they also bathe in pools of water and drink from nearby water sources. In ancient myths water had magical properties and represented a portal to another world. Remember, fairies are ethereal magical creatures that belong to another realm of reality, and the presence of water gives them easy access to that world. Ponds, streams, bird baths, or any pool of water—even miniature fountains—make excellent water sources for your fairy garden and any visitors that might arrive. 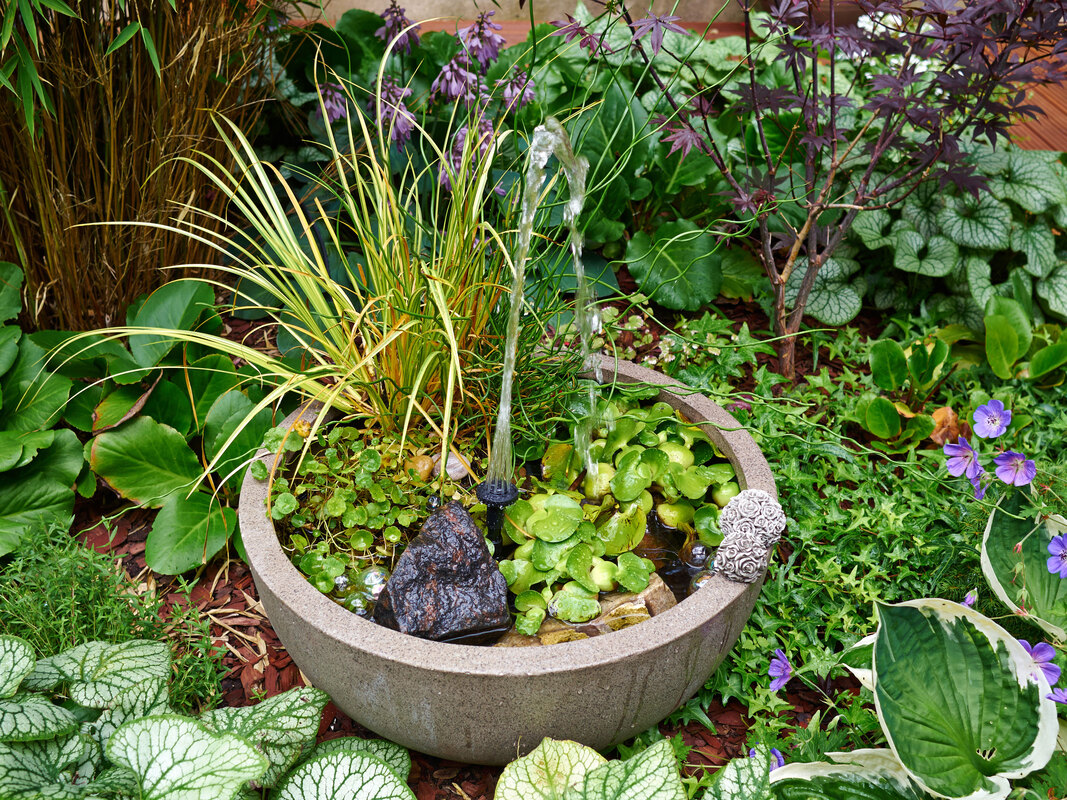 Image by Rony Zmiri from AdobeStock. What do you do if you can’t provide a source of actual water? Go “faux”! Even just the illusion of water is beneficial and will make your fairy happy. It can be as simple as blue stones arranged like a pond. Or you can get more decorative with decor filled with resin resembling a waterfall. It’s up to you! As long as the effort is there, your fairy will be grateful. 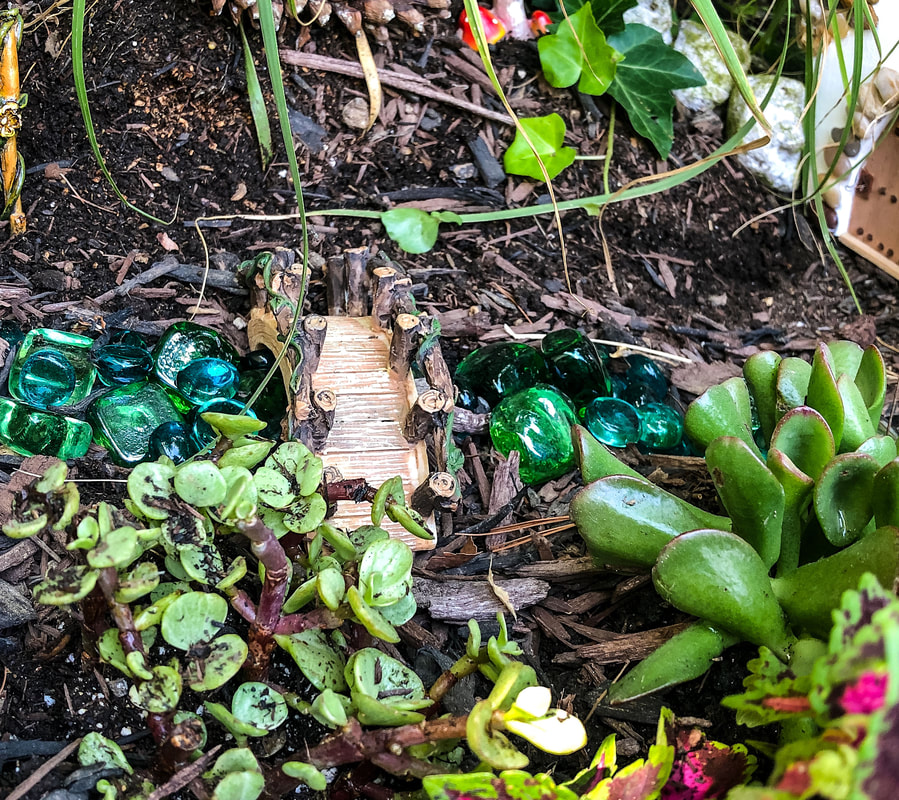 Outdoor fairy garden with a miniature bridge and blue gemstones to mimic water. Photo by Diane M. Lilly, 2020. Soothing sounds in the fairy garden We often forget about sound when we are creating gardens, but sound can have a powerful effect on us, for better or for worse. A pleasant sound—like the soft gurgling from a water feature—sets the tone for a calm quiet place to sit and meditate or daydream. All creatures—magical or otherwise—will benefit from such a place! The sound of wind chimes in the garden can also have a spellbinding effect on anyone who happens to be within earshot. The musical tones that keep time with the breeze take us to another level of sublime consciousness. The same sounds that are soothing to us are also loved by fairies, so this is a great opportunity to create relaxing tones that will make your fairy’s homestead more magical, but will also entice YOU to linger a few moments in your miniature garden and revel in your handiwork.  Image by Carla Burke from Pixabay. Using your imagination And finally…The number one essential element for creating a fairy garden is your own imagination! Use your imagination to come up with a garden that has a story to tell. Create a theme that tells the story of your garden fairy. Don’t be afraid to tap into that inner child and dream! Sit a while and think about little worlds and all the magic folk. Experiment with different setups, plants, decor. There is no right or wrong way to do it…just as long as you do it! 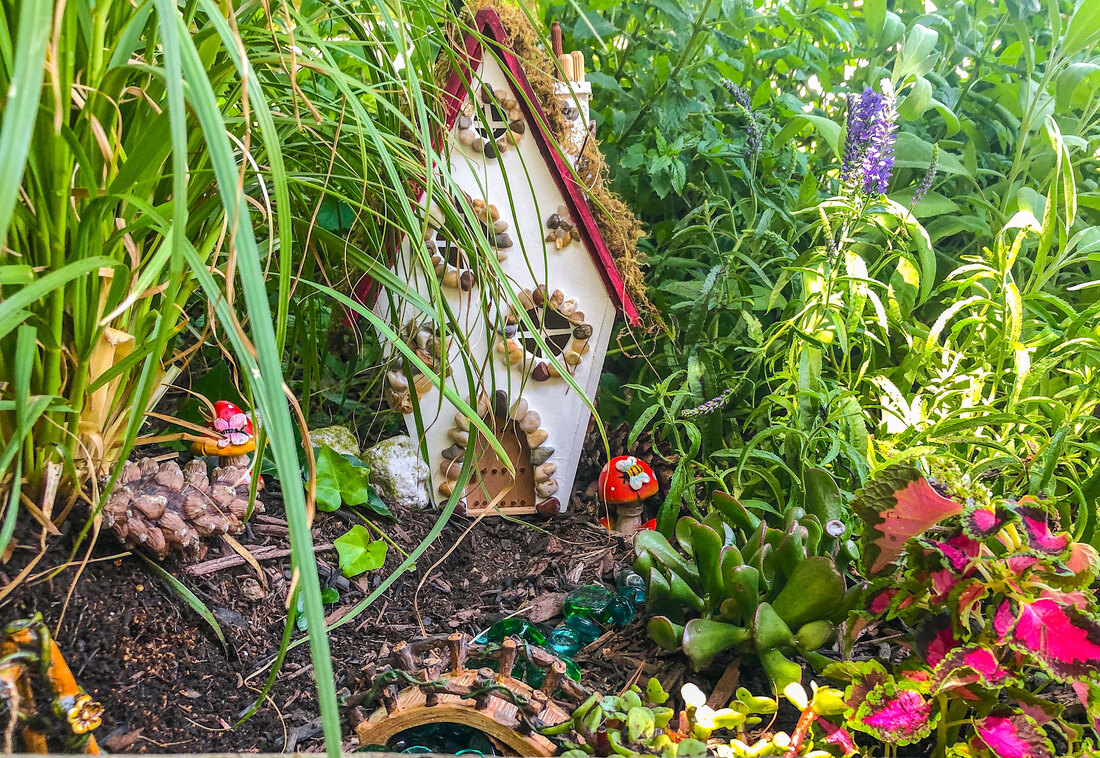 Outdoor fairy garden faeturing a handcrafted miniature fairy cottage. Photo by Diane M. Lilly, 2020. Creating a fairy garden is an opportunity to get your hands dirty and play with ideas for miniature landscaping. Even if you don’t believe in fairies, this is a way to be creative and expressive. The process of working in a garden is a fun way to relieve stress and escape—even if for just a few moments—from the craziness of our everyday lives. So go forth and dream…and create a whimsical magical world for your own resident fairy! So those were my top ten essential elements for creating a fairy garden. Now that you are inspired to go create your own magical fairy garden, what kind of garden do you think you will make? Or do you already have a resident fairy happily living in your garden? I’d love to hear your thoughts and experiences in the comments! Just an FYI…You can create beautiful decorative indoor fairy gardens as well. It is so much fun putting together indoor fairy gardens with faux florals and miniature decor! Decor can be easily changed out for the seasons or holidays to give you a fresh new vignette or tablescape whenever you like. If you have a moment, go check out my handcrafted fairy houses created specifically for indoor fairy gardens. 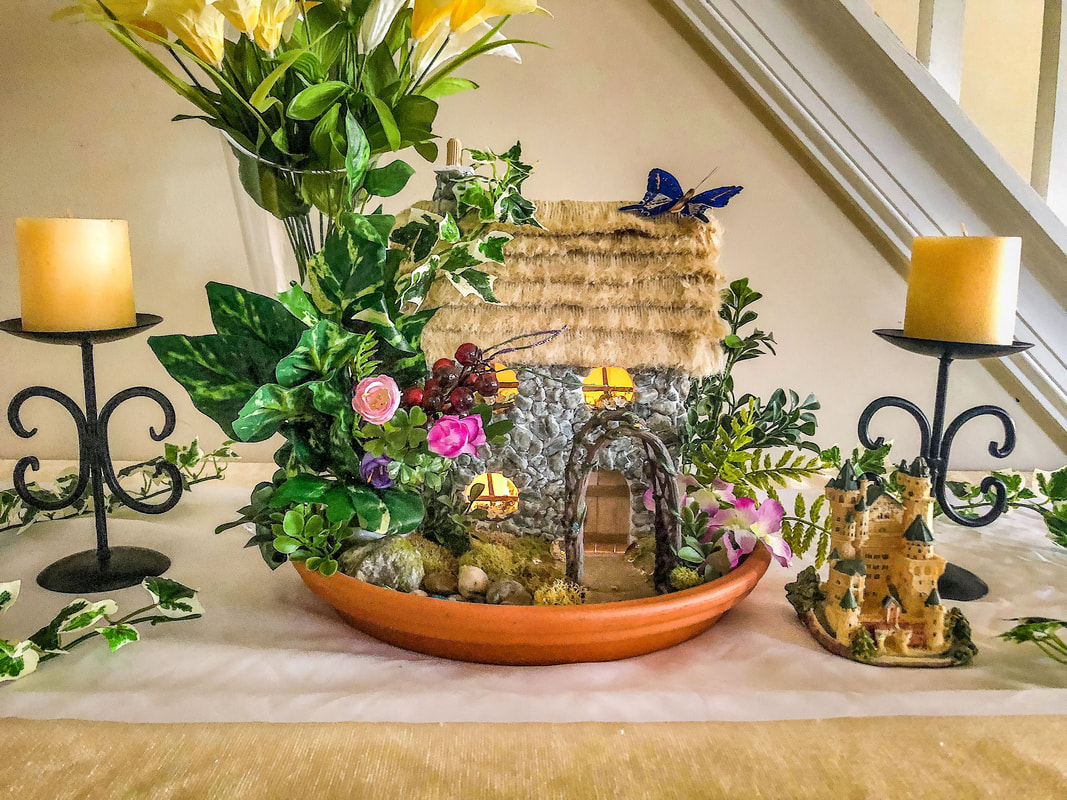 Indoor fairy garden featuring a handcrafted miniature English Cottage. Photo by Diane M. Lilly, 2019. Related blogs you may want to read: A brief history of the origins of fairy gardens My spring 2022 indoor fairy gardens Spring makeover for my indoor fairy gardens My outdoor fairy garden My fairy house project Sources: https://www.gardeningknowhow.com/special/spaces/attracting-fairies-in-the-garden.htm https://theforestfairy.com/flowers-that-attract-and-welcome-the-fairies-into-your-garden/ https://obsessionwithbutterflies.com/2019/08/miniature-fairy-gardening/ https://fifthseasongardening.com/the-magical-world-of-fairy-gardens https://www.almanac.com/gardening-miniature http://www.buckscountrygardens.com/the-enchanted-garden-miniature-fairy-gardens/ https://davesgarden.com/guides/articles/view/2080 This article may contain a few items or commercial mentions, but I only used them for demonstration purposes only. I am not endorsing any particular product or receiving any monetary gain for this blog. |
Author
Some of the posts on this site contain affiliate links. This means if you click on the link and purchase the item, I will receive an affiliate commission. 
Categories
All
Archives
April 2024
|