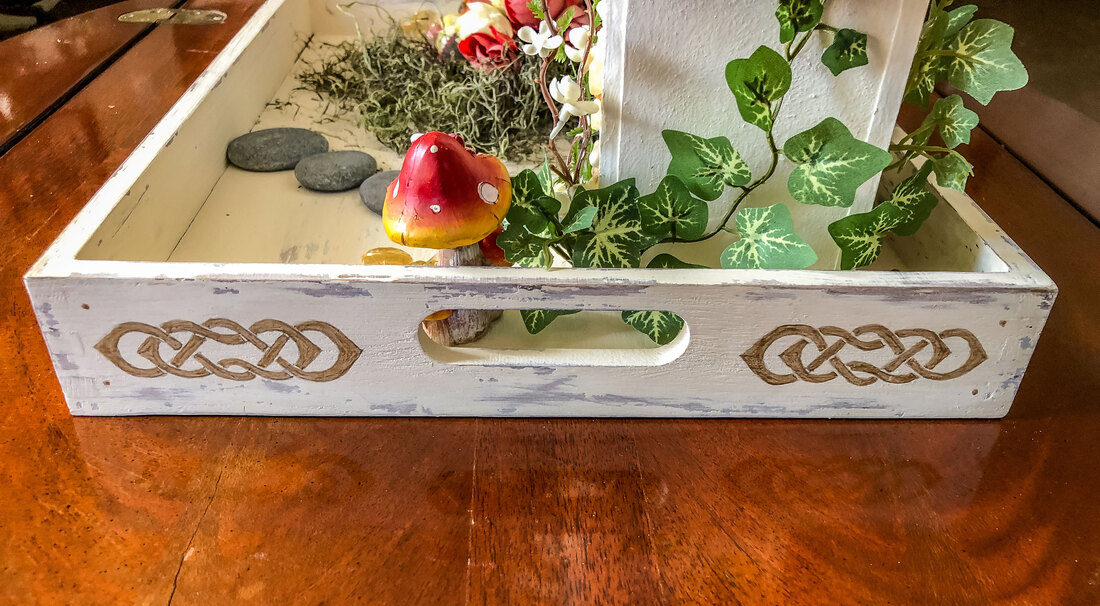
 Celtic knot painted on a decorative tray. Photo by Diane M. Lilly, 2022. Welcome to part two of my DIY chalk-painted tray project! In part one, I chalk-painted a decorative tray using a “chippy” weathered effect. Now, let's go through the steps I took to design and paint a border around the vertical exterior sides of the tray. This will not be a tutorial on creating Celtic knots—that would turn this blog post into a book (which is in the works, by the way)! The goal is to help you create a simple design that can be traced onto the newly painted decorative tray for a bit more pizzazz.  DIY chalk painted decorative tray before knotwork details were added. Photo by Diane M. Lilly, 2022. I love Celtic art and knotwork! I am always looking for ways to sneak some Celtic knots into my decor, so when I started painting a decorative wood tray for my living room, it was inevitable that it would end up adorned with a Celtic knot border! So here we are at part 2 of this project, where I walk you through how I drew and painted a beautiful knot border onto the sides of my newly painted tray. So let’s dive right in and go through this process step by step… Materials needed: pencil eraser ruler grid paper tracing paper tape scissors craft paint sandpaper (optional) varnish (optional) Step 1—Get measurements The first thing you need to do in a project like this is to get some basic measurements. My tray is 16” x 12” with 2” H sides. The long side of my tray is 16” L x 2” H. The short sides of the tray have holes for handles that split the empty areas into two parts that are 4 1/2” L x 2” H each. Step 2—Plot out measurements on grid paper If you’re creating a freehand design, you won’t need grid paper, but you’ll still need to measure the drawing area on your paper so your template will fit the area to be painted. Using grid paper may help keep your design symmetrical and more accurately aligned. For this project, I plotted out one section measuring 16”x 2” and another measuring 4 1/2” x 2” on my grid paper. Marking the edges, I then plotted out the ‘working” area, meaning I made decisions on how much space to leave between the design and the edges of the tray. I took this opportunity to mark the midpoints for each section on the paper and the tray. This helps tremendously later on when we have to align the template onto the tray to get the design perfectly level…so don’t skip this step! 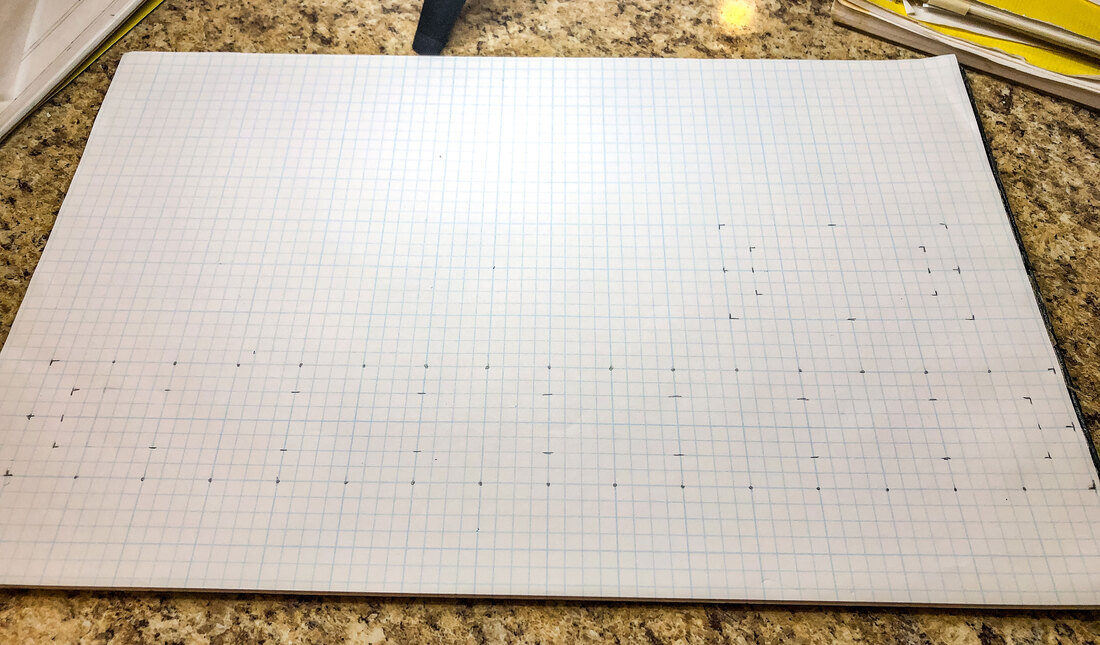 Grid paper maps out the exact measurements for the tray sides and work areas for the knotwork border. Photo by Diane M. Lilly, 2022. Step 3—Create a simple line design I am in the process of putting together future tutorials on how to create Celtic knots, but for the sake of this project, I will share one of the simplest ways to draw a Celtic knotwork border—starting with drawing a single line. I found a Celtic-style border knot in a linked pattern and then reverse-engineered it to make it work for the dimensions of my tray. To speed up and simplify the process, I decided to work it out with a single line first. (My rough grid includes the “breaks”—I’ll go into more detail on how to do that in a future tutorial.)  The grid pattern with breaks planned out before the knot is drawn. Photo by Diane M. Lilly, 2022. 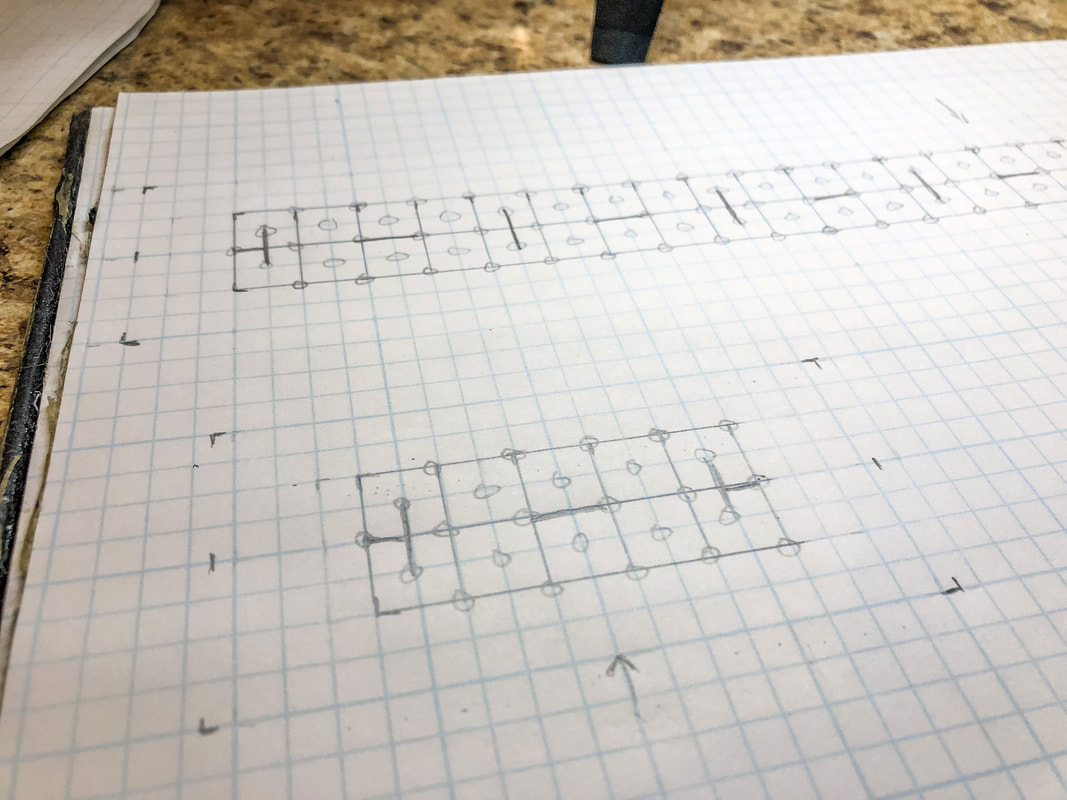 A section of the small knot mapped out on the grid with breaks. Photo by Diane M. Lilly, 2022. 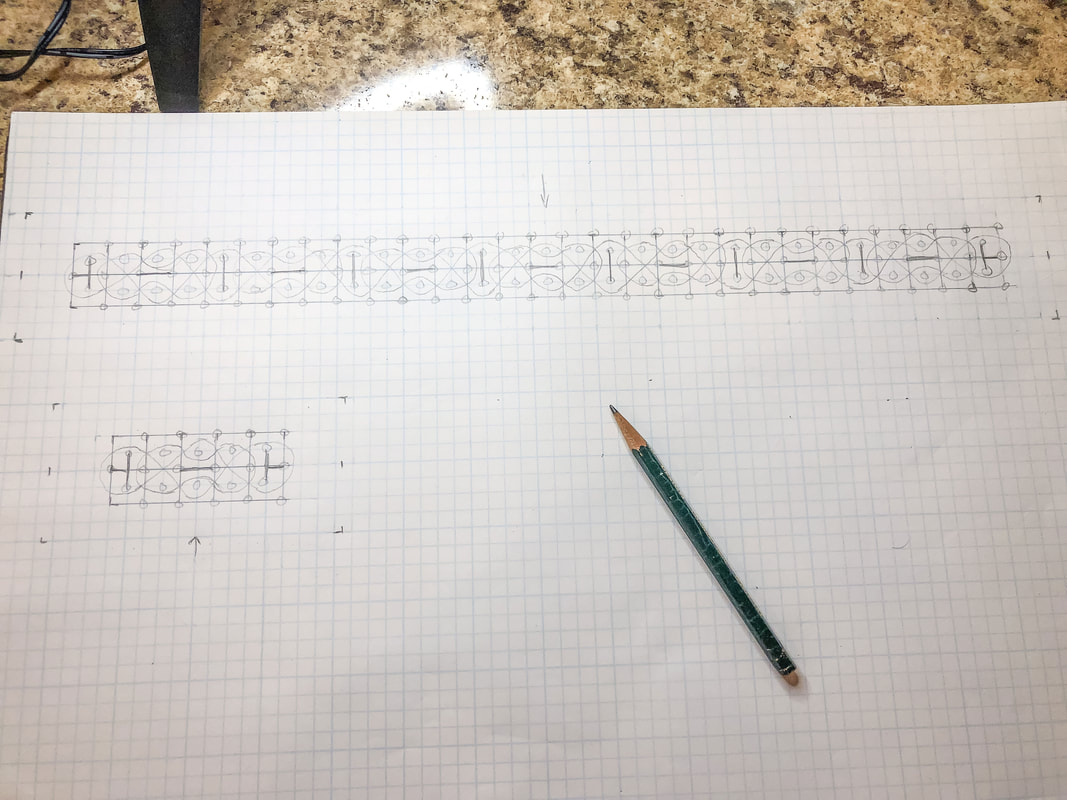 My basic line for my design drawn out on the plotted grid pattern. Photo by Diane M. Lilly, 2022. Step 4—Create the “thread” with “overs” and “unders” Now, it’s time to use the simple line as a guide to create the actual thread. Draw parallel lines on either side of your single line, working your way through your design. Don’t worry about drawing over other lines. All unnecessary lines will get erased when you start marking out the “overs” and “unders” (the weave pattern for your design). Once the “thread” has been established, erase that first single line. It’s done its job, and you don’t need it anymore! 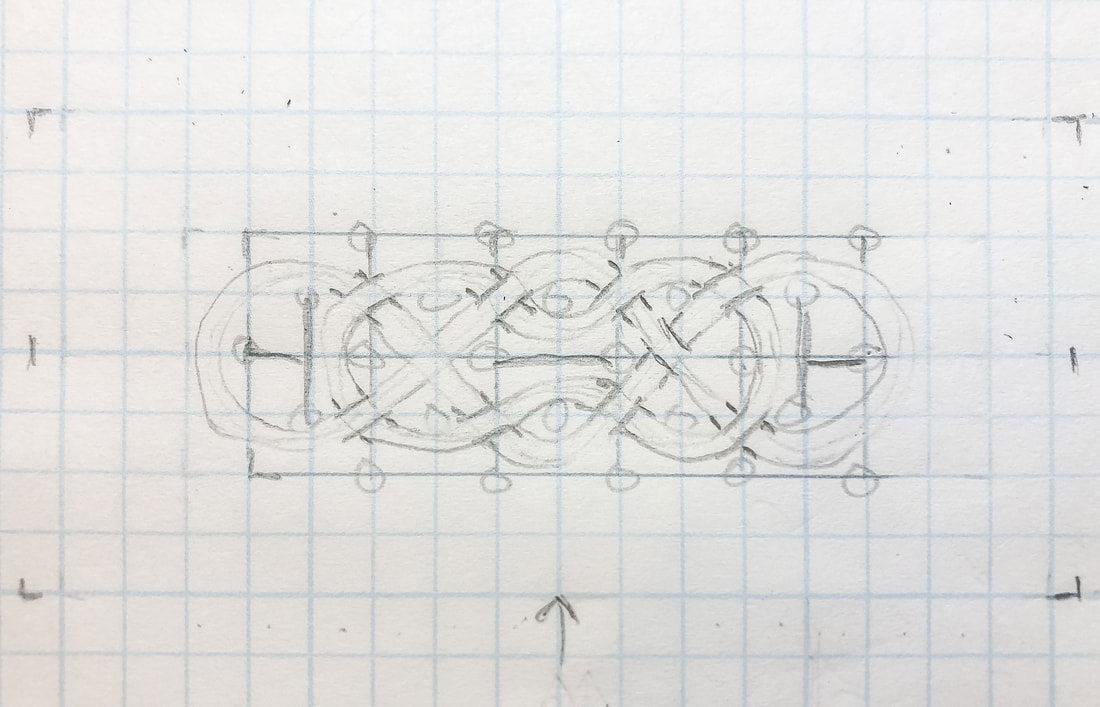 The double lines have been drawn and the single line erased to create the thread, overs, and unders. Photo by Diane M. Lilly, 2022. Now it is time to work through the “overs” and “unders”… Pick a starting junction and decide which thread will go under and which will go over, creating what some call a “bridge and tunnel” or the beginnings of a weave. Erase the lines accordingly and work through the design by following that thread, alternating over and under. DO NOT JUMP AROUND! Stay with that thread until you come back to your starting point. Work through any additional threads, double-checking that your overs and unders alternate. Once satisfied with your overs and unders, clean up the drawing and add stylistic details. 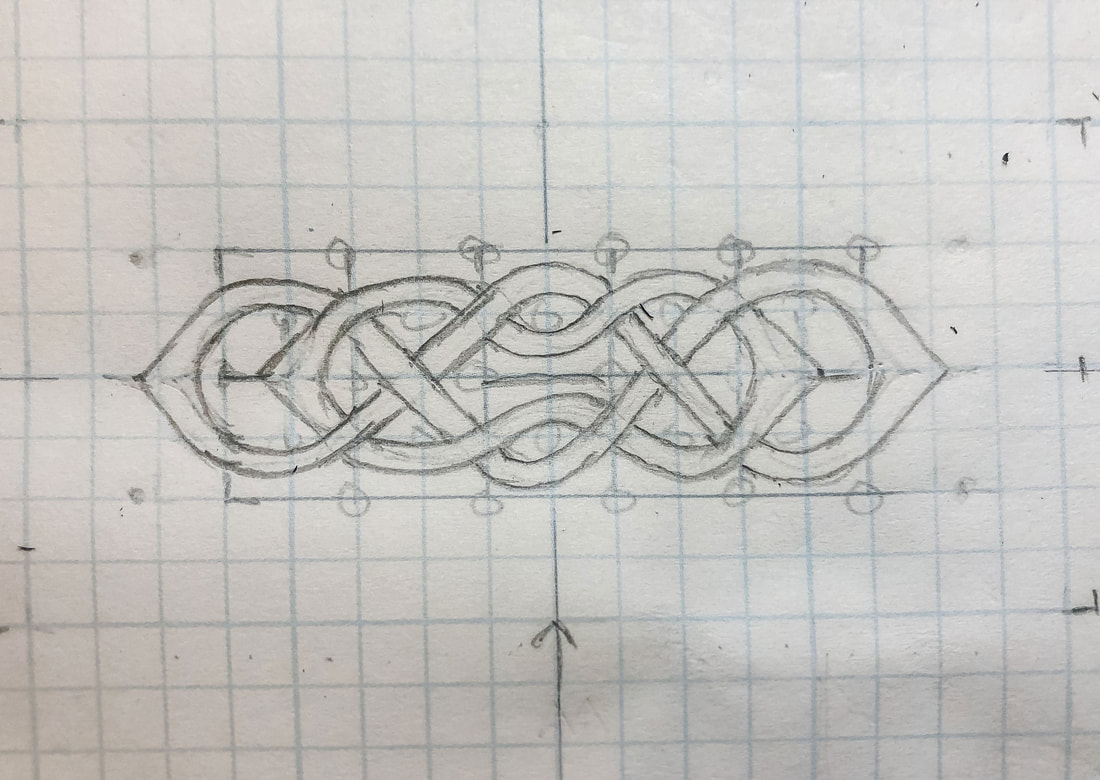 My basic thread knot has been stylized by adding points at the end. Photo by Diane M. Lilly, 2022. 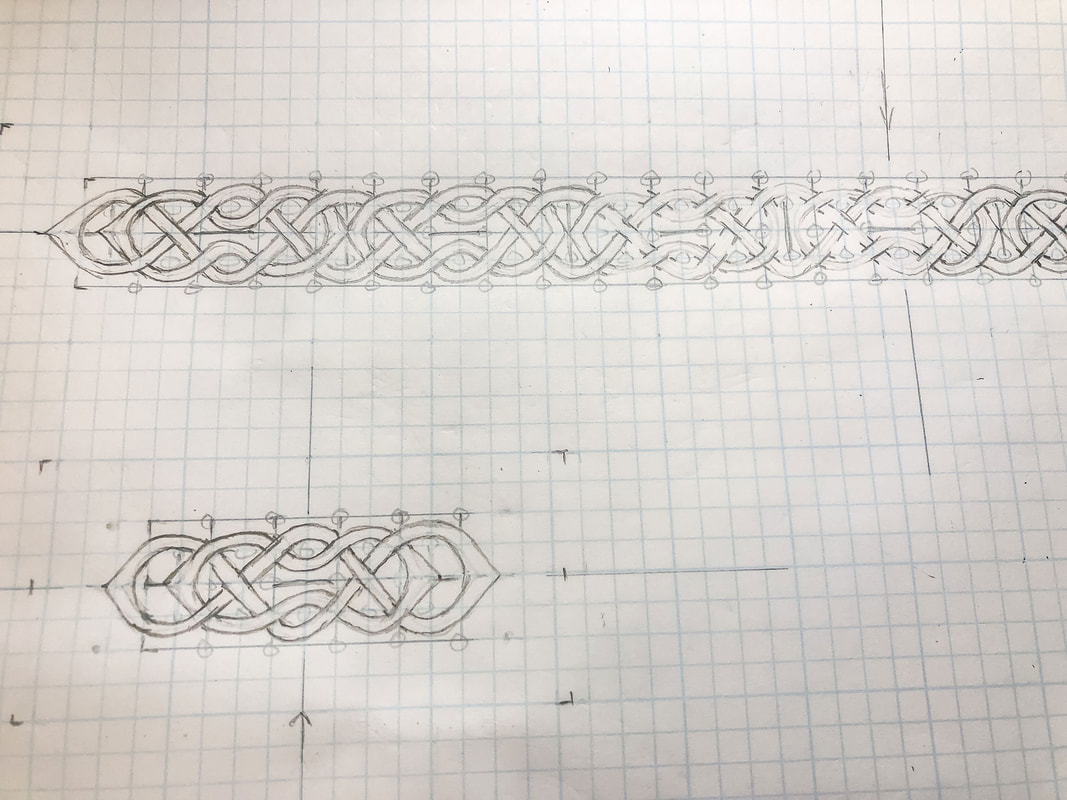 The small knot and a section of the large knot. Photo by Diane M. Lilly, 2022. Step 5—Create the template using tracing paper The new design can now be traced onto tracing paper to create the template. There are many techniques for creating templates--I am just sharing one that has worked well for me. Place a sheet of tracing paper over your drawing and securely tape it in place so it doesn’t move or bubble. Carefully trace your design lines with a pencil using fairly hard pressure. Mark the edges of your template (using a straight edge) and indicate the midlines on all four sides.  My knotwork redrawn on tracing paper for a template. Photo by Diane M. Lilly, 2022. Carefully cut out the templates along the edges. You should now have two templates with your new knotwork borders that perfectly fit your working space on your project. For my project, one template measured 16” x 2” and the other 4 1/2” x 2”. 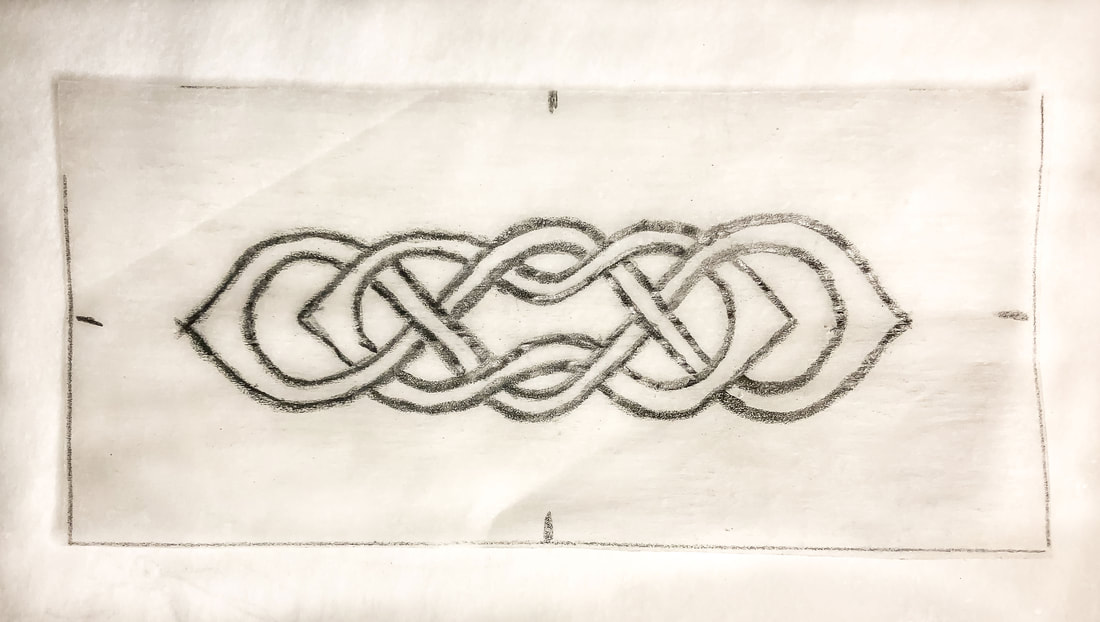 The small knot cut out as a template. Photo by Diane M. Lilly, 2022. Step 6—Trace the design onto the tray Turn the template pencil side down and securely tape it into a place where you want your design, carefully lining up the edges and midpoints for each of the four sides. Trace the lines with a pencil. Use enough pressure to transfer the pencil marks onto your workspace. If you’re unsure if you’re using enough pressure, remove a bit of tape (carefully) and check to see if you can see the design on the tray. Repeat this step on all four sides of the tray. 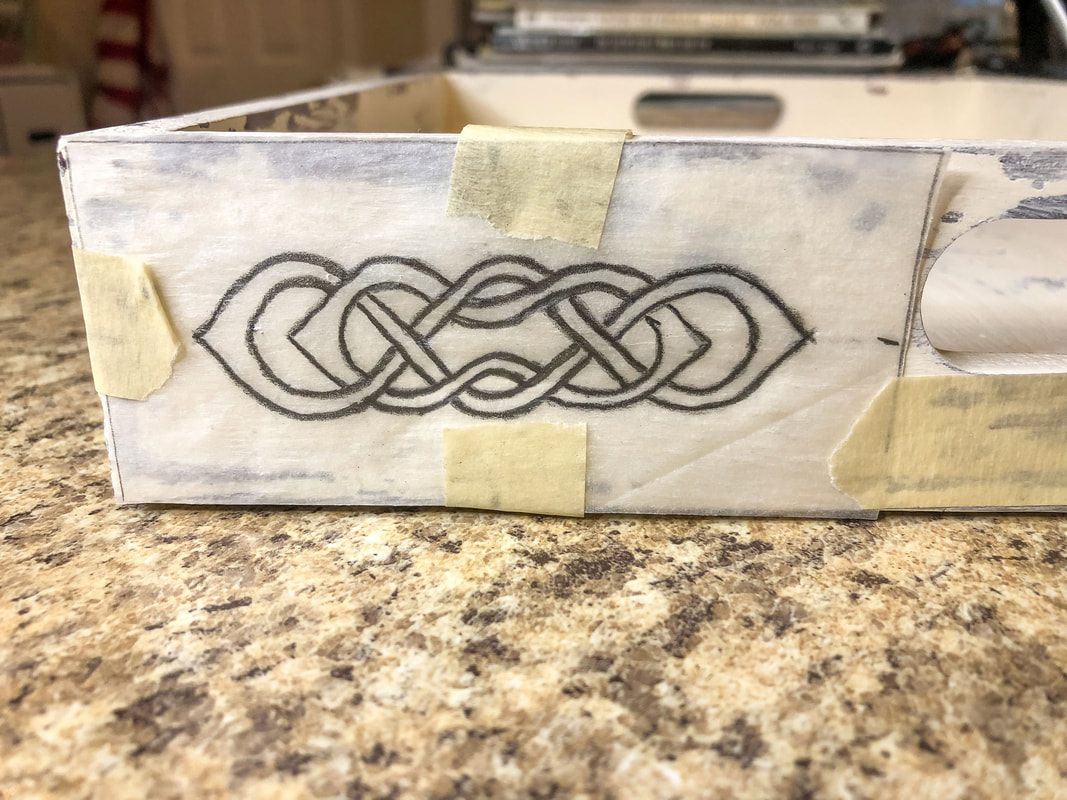 The small knot template taped onto the tray. Photo by Diane M. Lilly, 2022. 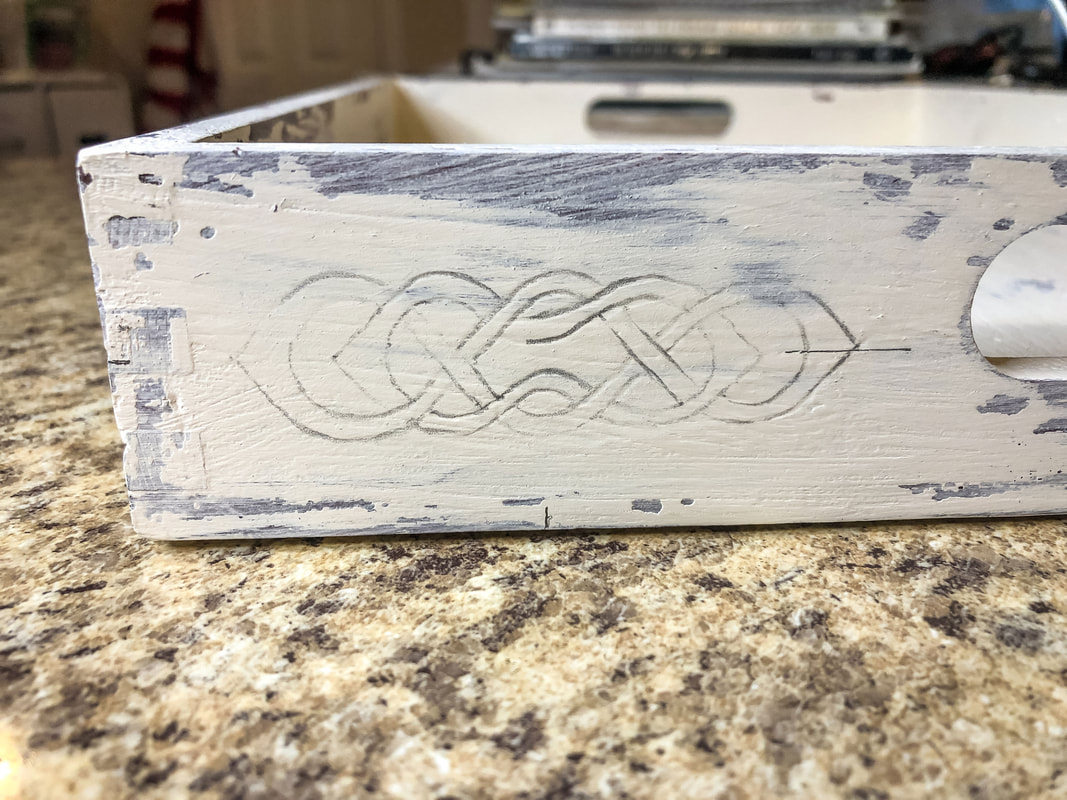 The small knot traced onto the tray. Photo by Diane M. Lilly, 2022. 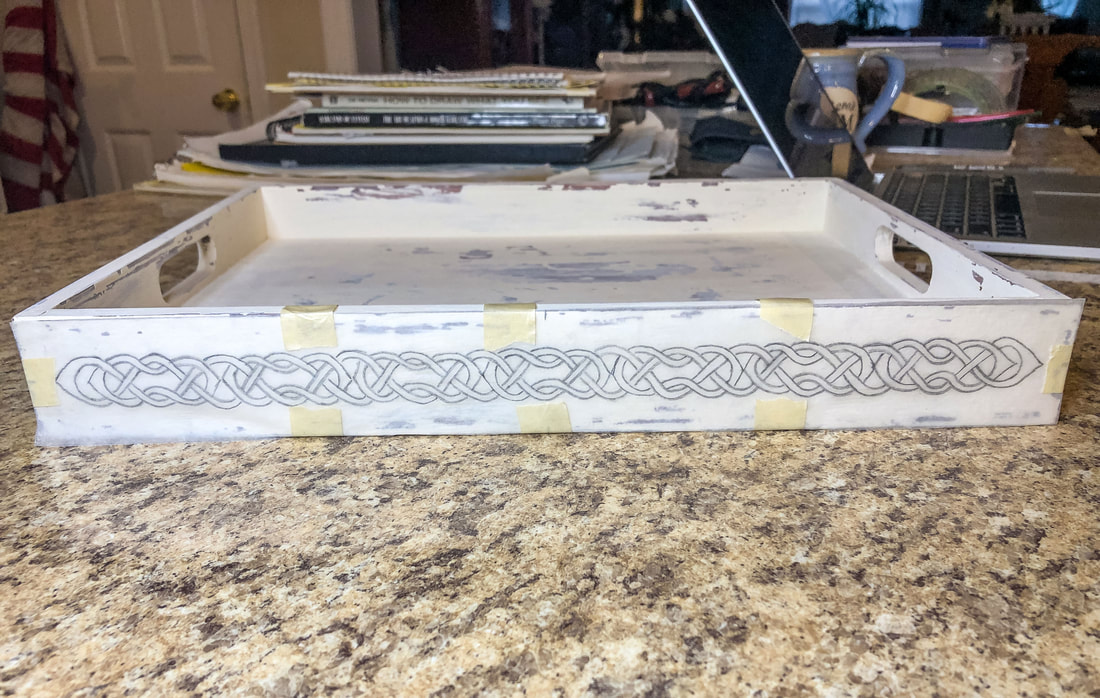 The large knotwork border template taped into place. Photo by Diane M. Lilly, 2022. 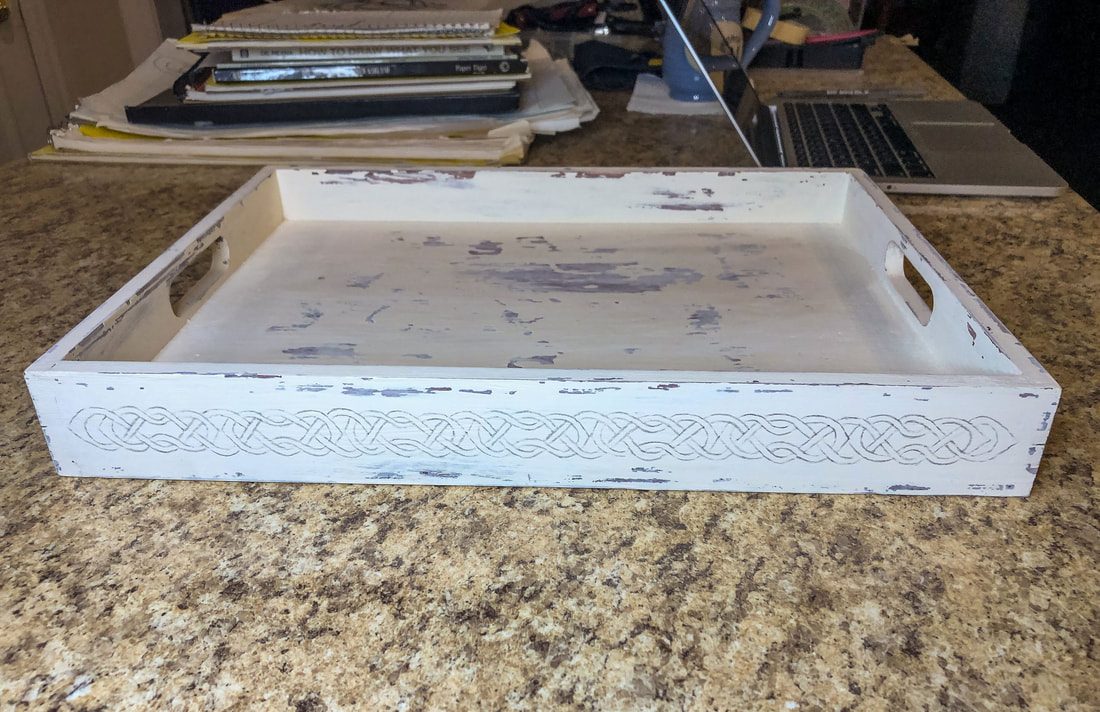 The large knotwork border traced onto the tray. Photo by Diane M. Lilly, 2022. Step 7—Paint the design Choose a paint color and a small paintbrush with pointy bristles, and start painting your design! This may require two to three coats, depending on the desired look. 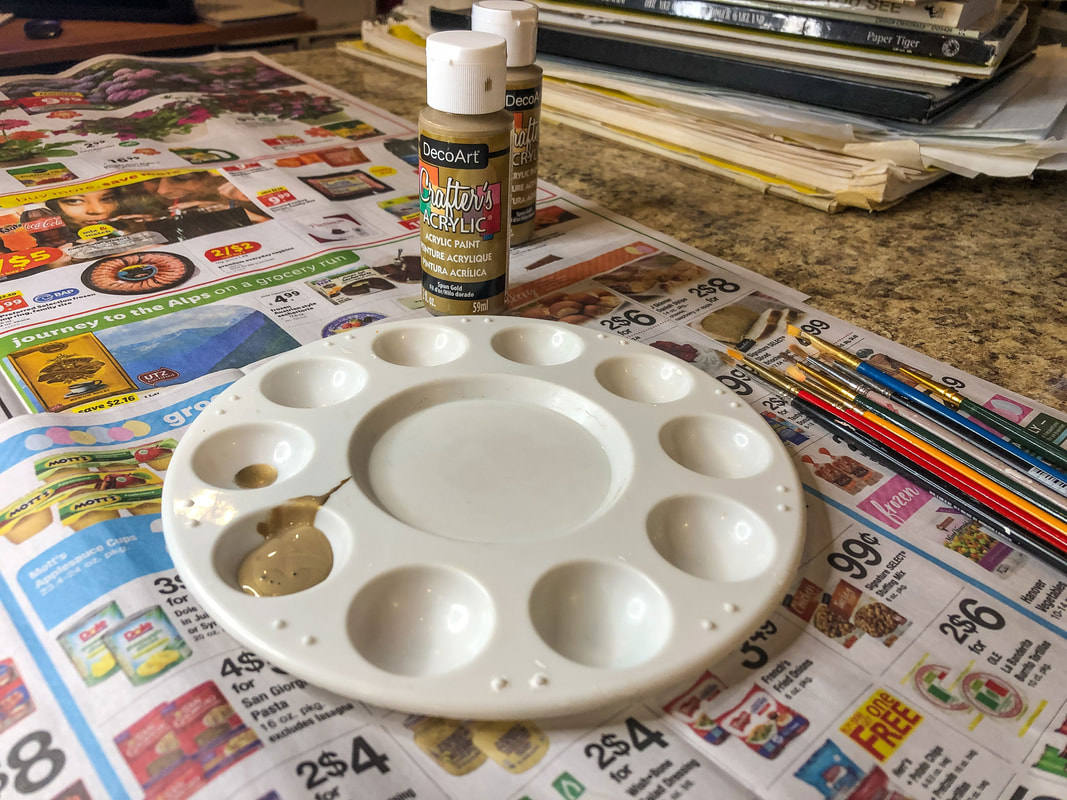 Gold craft paint. Photo by Diane M. Lilly, 2022. If you do not have a steady hand--or do not have the patience for hand painting--try using paint pens instead. For this project, I suffered through it and used the paint and brush technique, but I also purchased some gold paint pens from Amazon for another project and found the process much easier. The technique you use for this project is completely up to you. In part one of this project, the tray was painted to look used and battered, and I was satisfied with the results. Once the knotwork was finished, however, I decided the tray still needed more work. So, I took some 220 grit sandpaper and did a bit more sanding to get the final weathered effect. 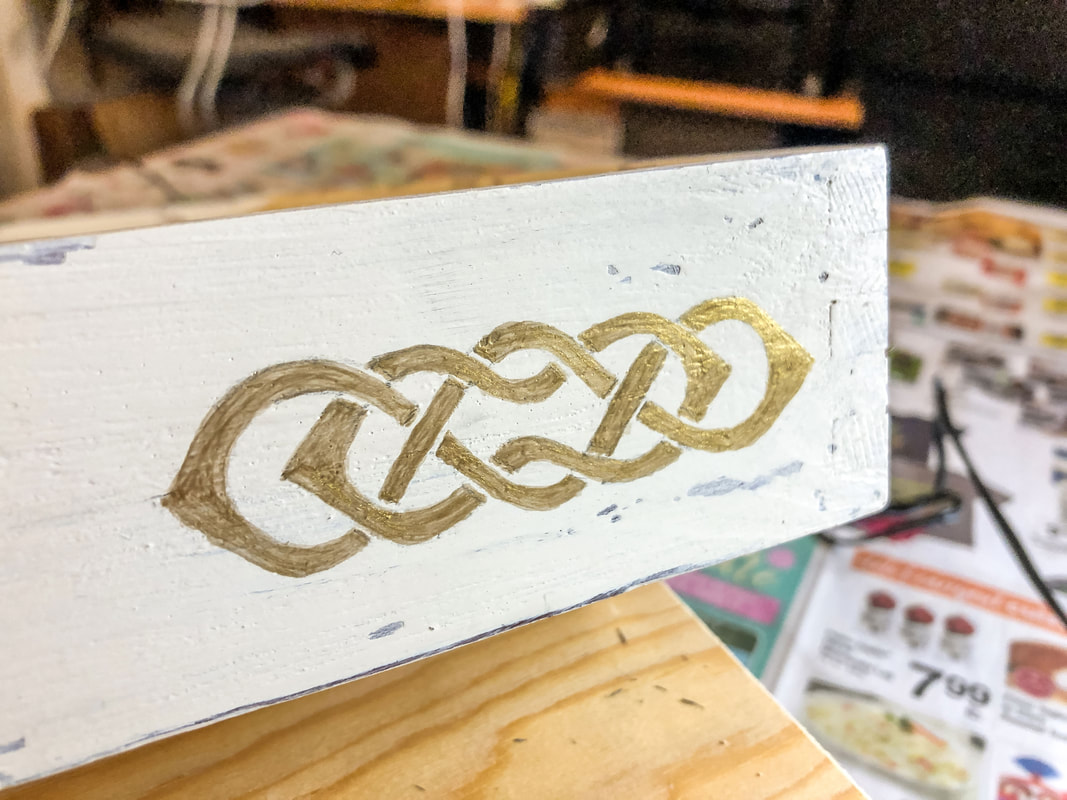 The small knot painted on tray in gold. Photo by Diane M. Lilly, 2022. 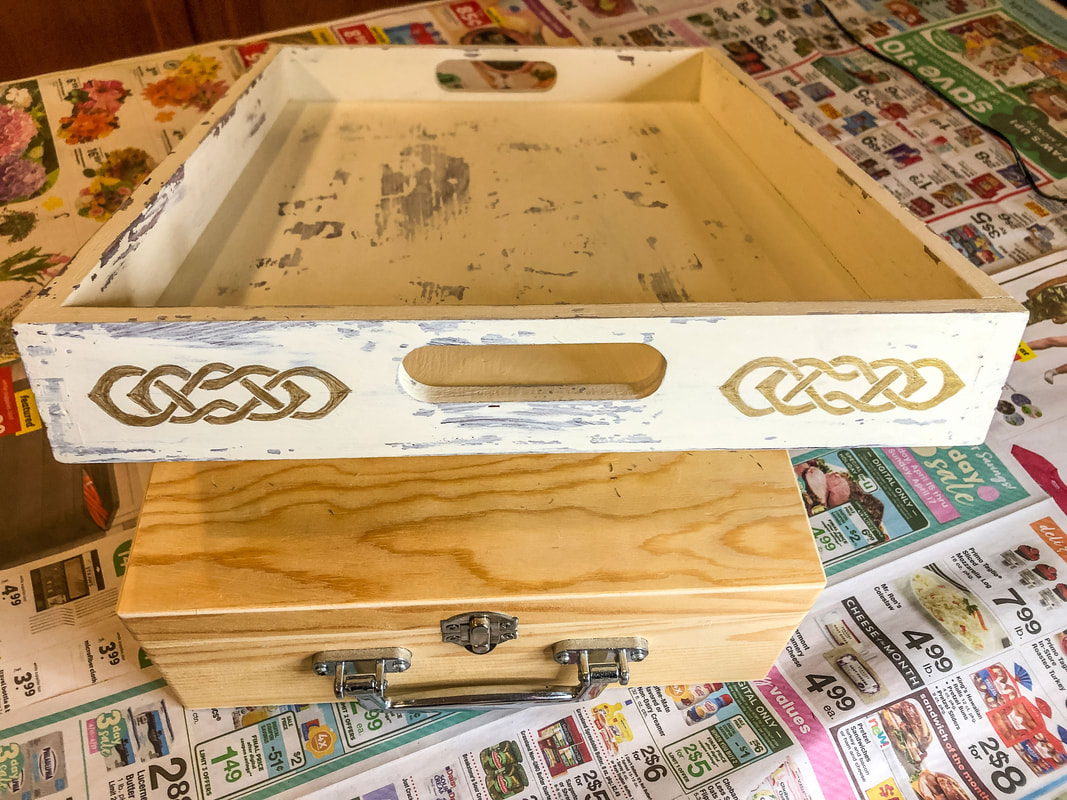 Knots painted on short end of tray. Photo by Diane M. Lilly, 2022.  The long end of the tray being painted with a gold knotwork pattern. Photo by Diane M. Lilly, 2022. 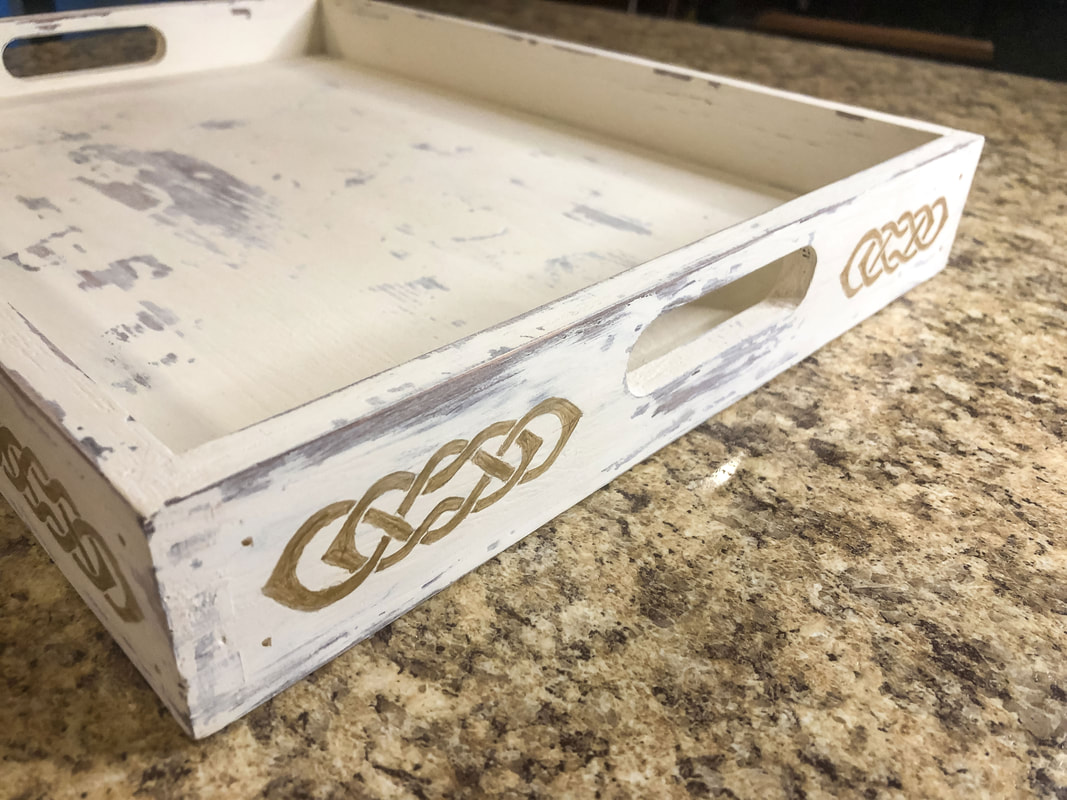 Celtic borders finished and more sanding done to tray. Photo by Diane M. Lilly, 2022. 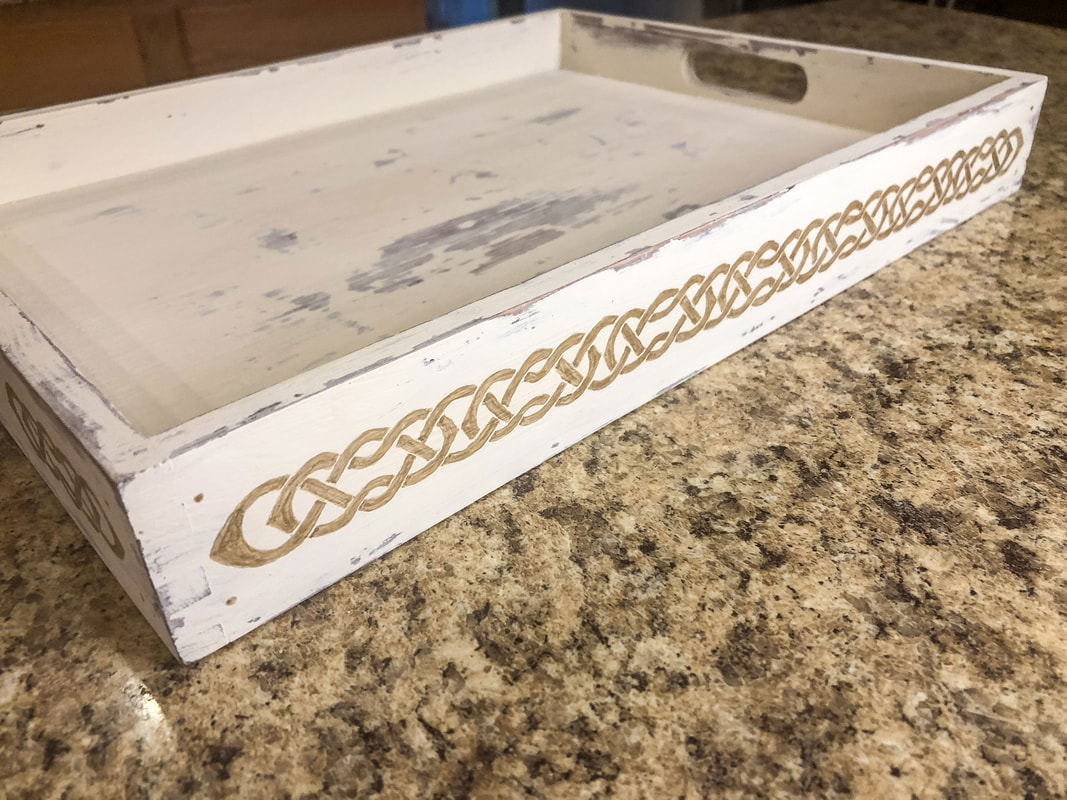 The long side of the tray with its new Celtic knotwork border. Photo by Diane M. Lilly, 2022. Step 8—Varnish to protect the paint (optional) This step is optional, but it can be a good way of protecting all your hard work! I’ve decided not to varnish my tray, at least for now. Usually, when I do a project like this, I add soft pads to the bottom to protect surfaces, but I may decide to make alterations or additions to this tray, so for now, I will forego the pads and varnish until later. So there you have it! The Celtic border knot was WAY more work than planned for this project, but I’m glad I did it. I love that I now have another decorative piece with beautiful Celtic art on it--Celtic art I drew and painted myself! This tray was a lot of work, but I love the rustic, charming look. 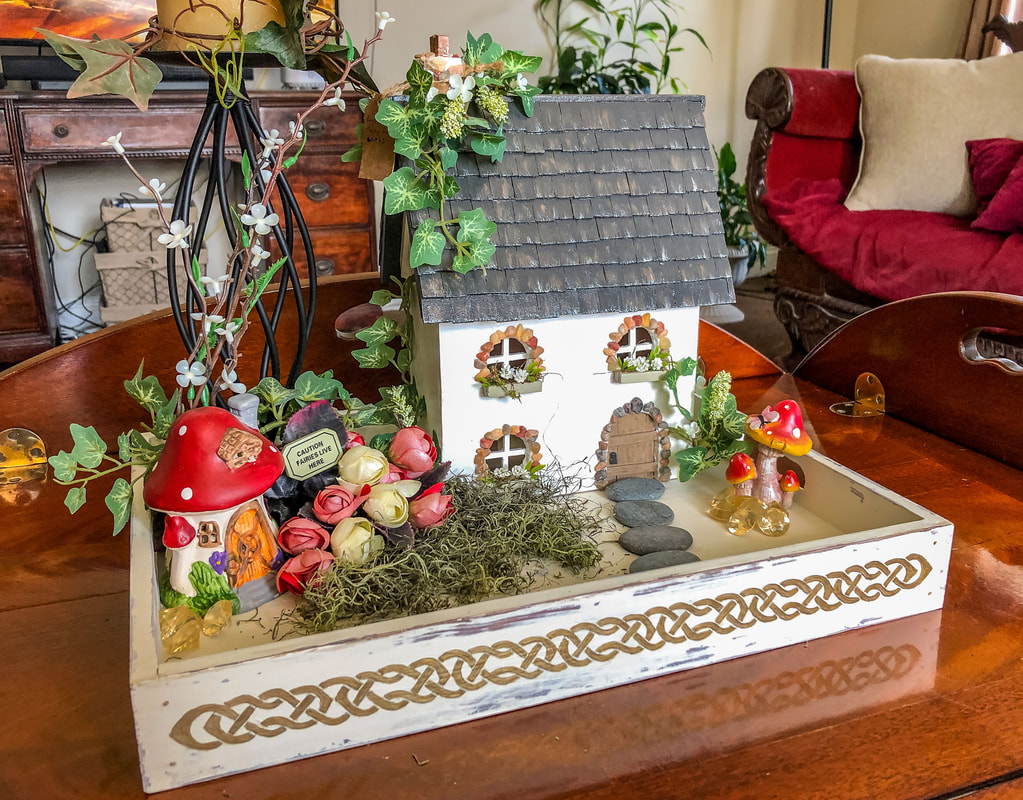 My tray is finished and staged with one of my new Celtic fairy houses. Photo by Diane M. Lilly, 2022. 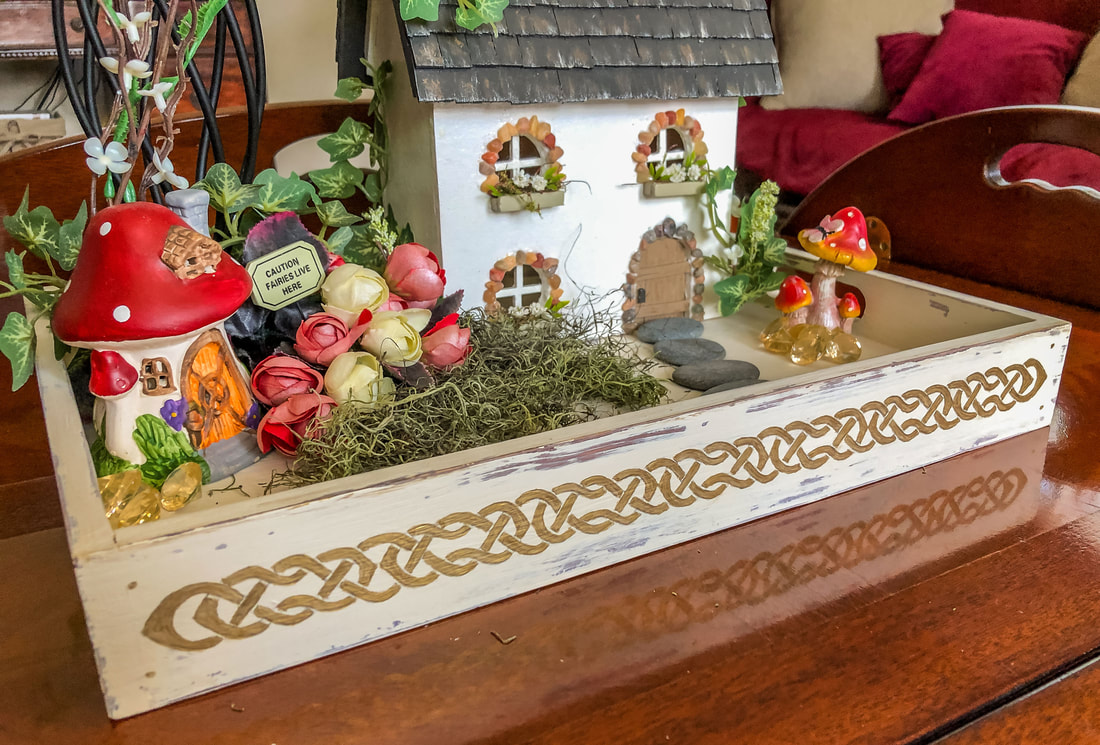 A look at the long side of the tray. Photo by Diane M. Lilly, 2022. 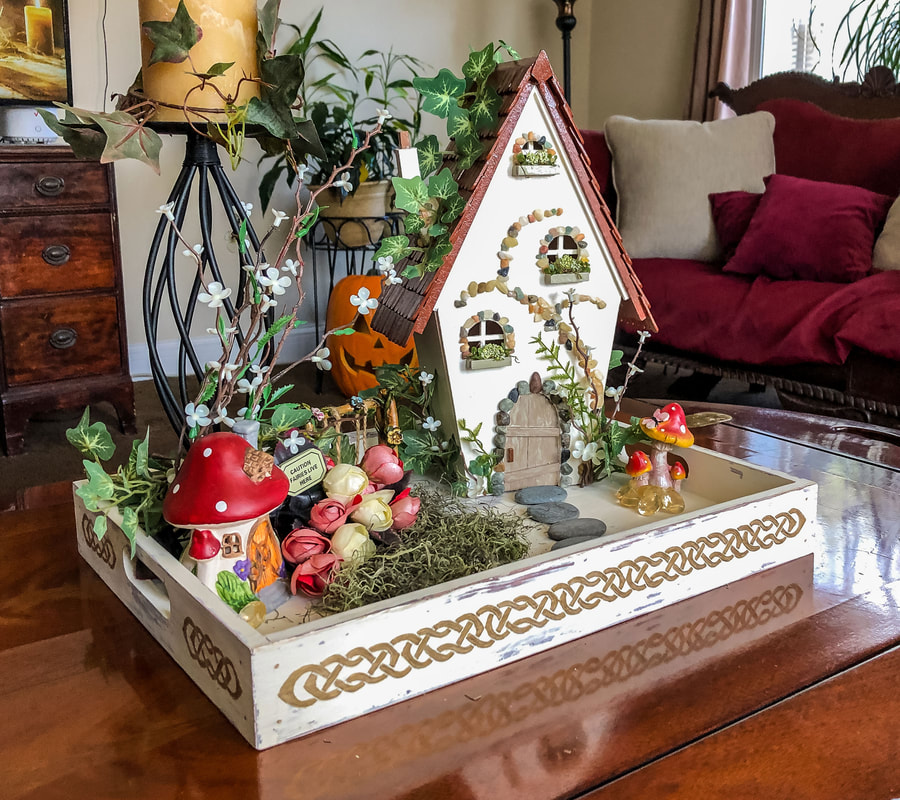 My Celtic inspired diy tray staged with the new Fairy House cottage. Photo by Diane M. Lilly, 2022. 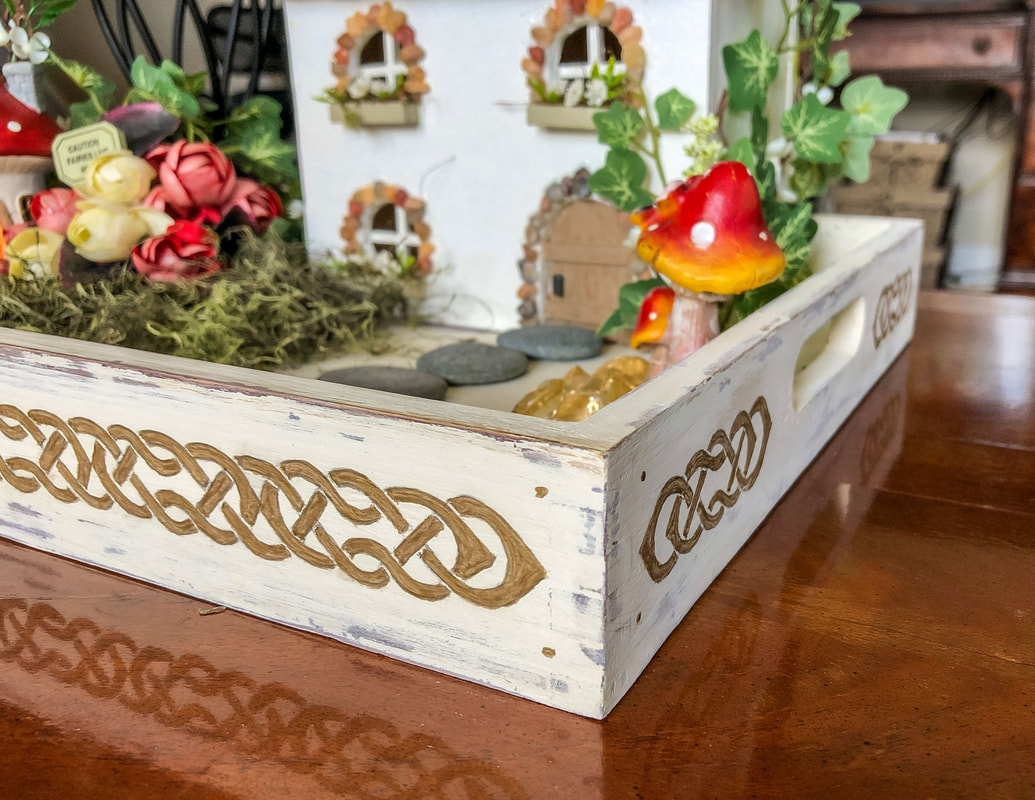 Closeup of the tray corner with views to both sides and Cletic knot borders. Photo by Diane M. Lilly, 2022. I know this was a complex project to throw out there, and the thought occurred to me that people might want to learn how to draw this kind of intricate artwork, so I have decided to start work creating and compiling downloadable ebooks with tutorials on how to construct Celtic knots. I’m unsure when they will be available, but sign up for periodic emails for updates on these ebooks and other projects. Let me know in the comments if you've done anything similar and what you think of this project! Related blogs you may want to read: DIY chalk painted tray with chippy effect A little project with jute twine and an old foot stool DIY refurbishment of a dining room cabinet A fun DIY project with paint and a thrifted mirror part 1 A fun DIY project with paint and a thrifted mirror part 2 Creating a kitchen coffee bar On a mission to recycle this neglected vintage stool The stain stripping stage of rescuing my vintage stool Staining my vintage stool with brewed tea My tattered vintage stool transformed into a beautiful plant stand Homemade candle recipe with a eucalyptus fragrance Homemade candle recipe with a hazelnut fragrance Affiliate Disclosure Some of the posts in this article contain affiliate links. This means if you click on the link and purchase the item, I will receive an affiliate commission at no extra cost to you. I will only recommend products or services I use personally and/or believe will add value to my readers, so there is no conflict of interest.
0 Comments
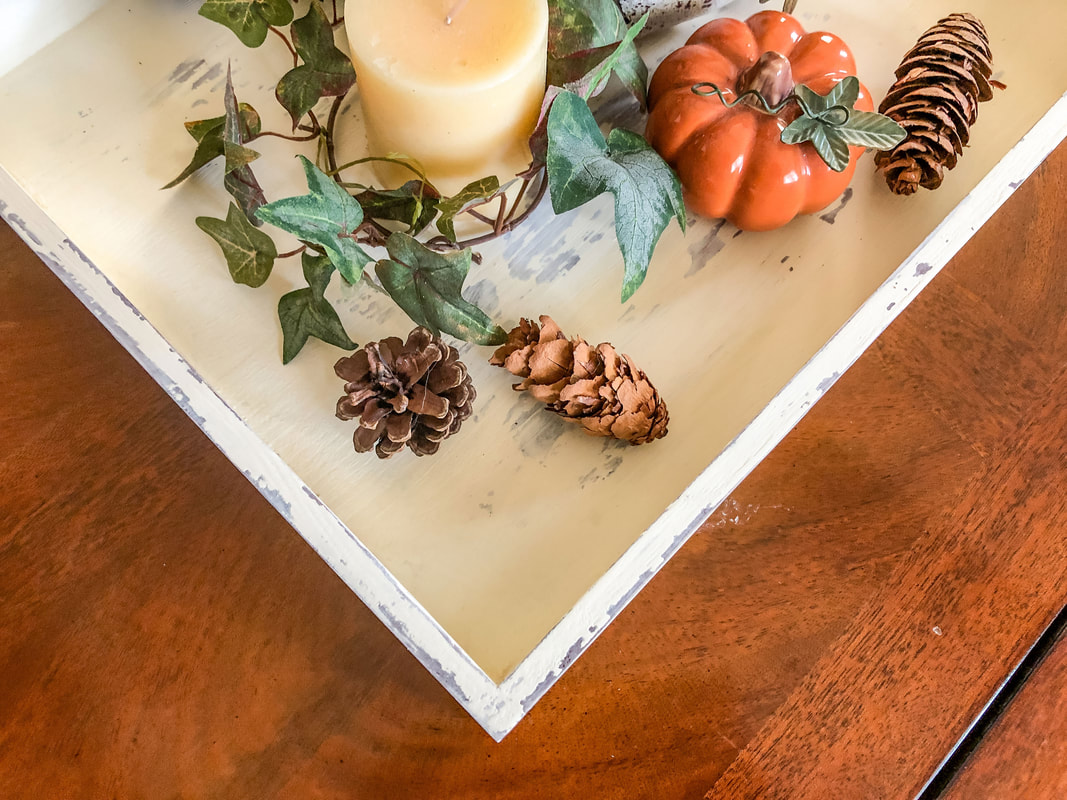
Finished diy weathered tray with some fall decor. Photo by Diane M. Lilly, 2022.
This month, I tackled a simple DIY project using an unfinished wooden tray, furniture stain, and chalk paint. The tray was one of those items that kept getting moved from cabinet to cabinet…because "someday" I would come up with an idea for a DIY project! 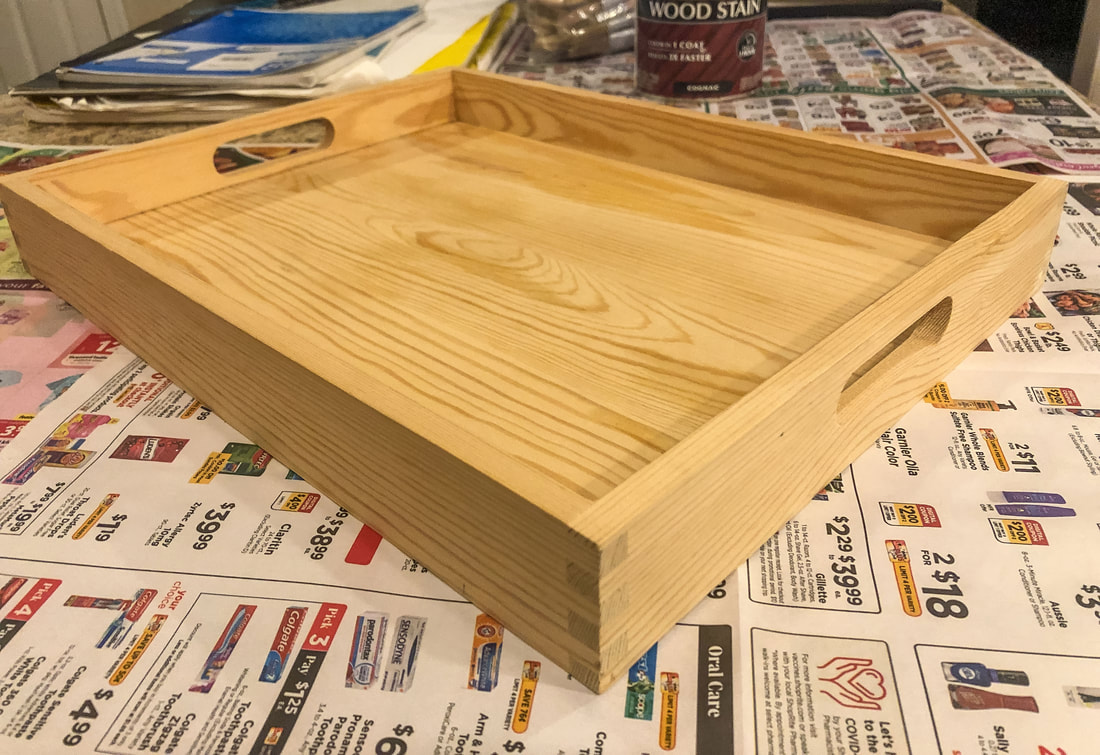
Unfinished wood tray. Photo by Diane M. Lilly, 2022.
Well, the time has finally come. The stars have finally aligned, allowing me the time to take my idea and make it happen! And speaking of time, my time is limited, so any DIY project HAS to be simple…and inexpensive. The inspiration for today’s DIY project came from a technique I found on The Country Cottage that I thought I’d try. I’ll modify the materials to fit my project, and we’ll see how it turns out! This tray project has two parts…The weathered paint technique will be covered in this blog (which I am calling “part 1”), and the second part will be a “part 2” blog on how to create a Celtic border on the sides of the tray. But first, let’s tackle part 1… All that is needed for part one of this project is a dark coat of paint (I used Varathane Cognac wood stain), some candle wax (I used my homemade soy candles), and some light-colored chalk paint (I used Rust-oleum Chiffon Cream Ultra Matte chalk paint). The idea for this project is to create a worn look to this tray as if this was something found in an old dusty attic or picked up from a flea market. I want it to look aged but not too beat up. And not too much like Farmhouse, although the result could work well in a Farmhouse decor scheme. In other words, I want it chippy but not TOO chippy, if that makes any sense! 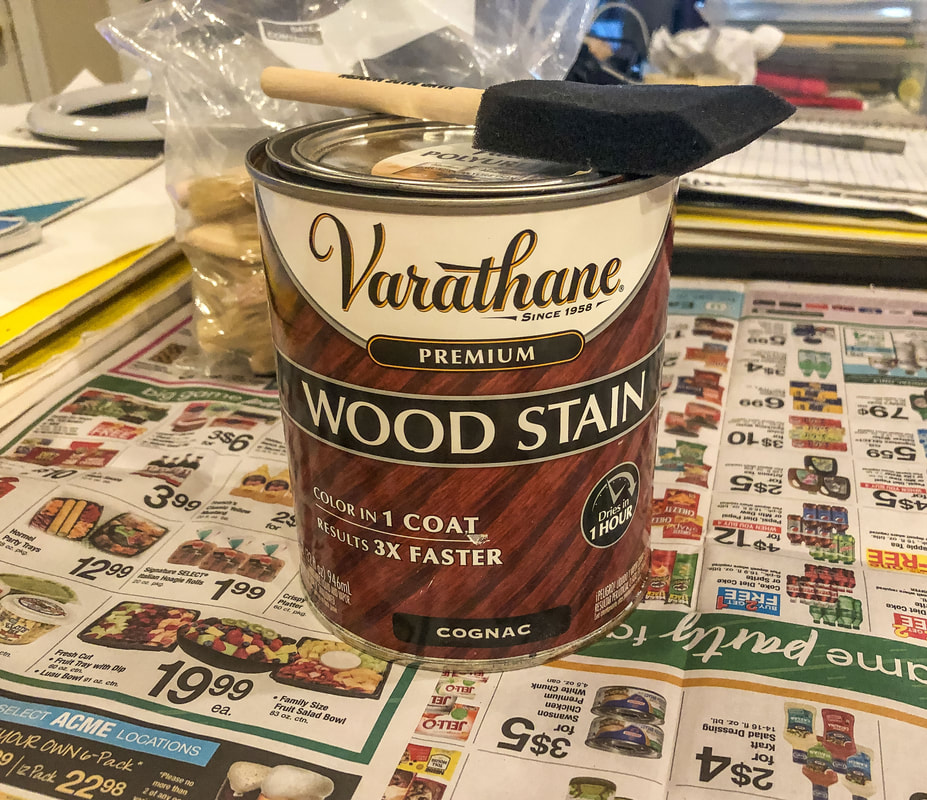
Cognac wood stain by Varathane. Photo by Diane M. Lilly, 2022.
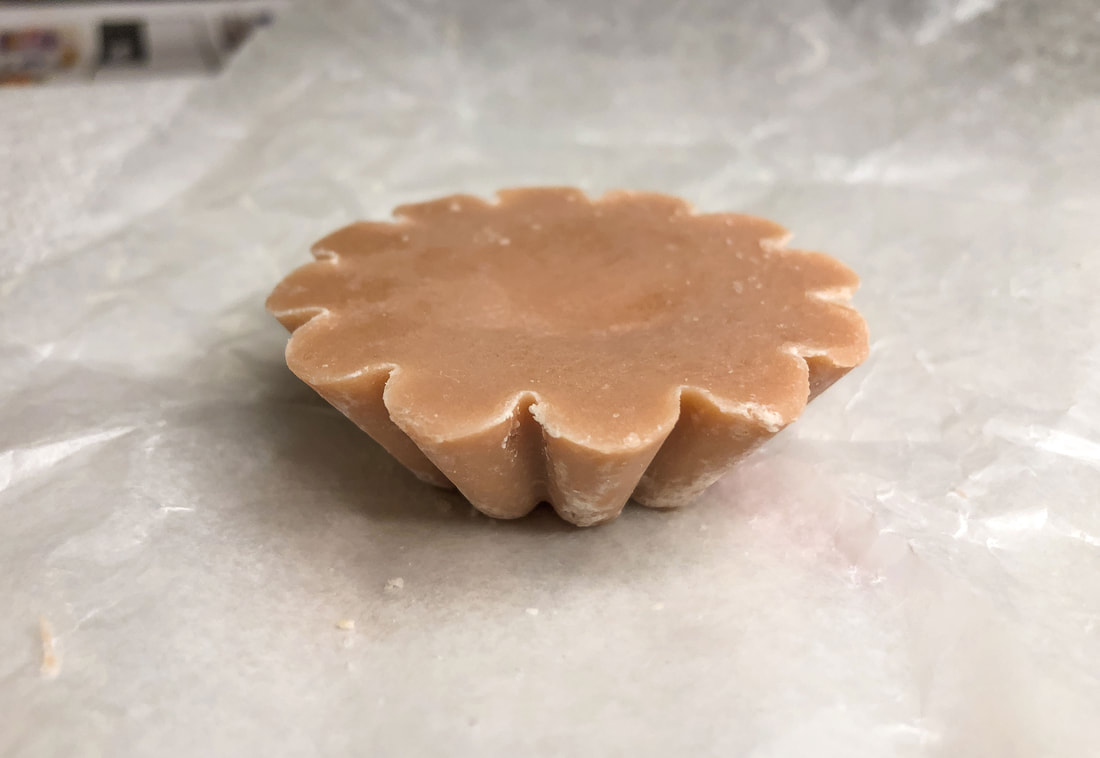
A handmade soy wax melt. Photo by Diane M. Lilly, 2022.
 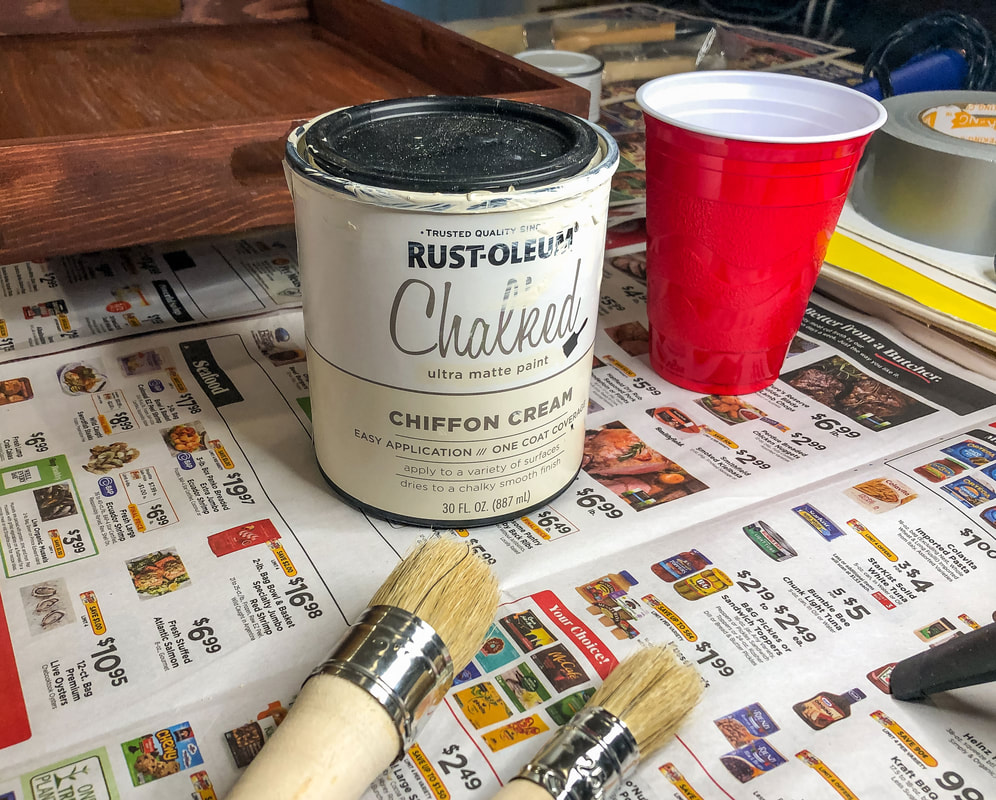
Chalk paint and paint brushes. Photo by Diane M. Lilly, 2022.
Materials needed: dark base paint or stain paint brushes or sponges candle wax chalk paint chalk paint brushes heat gun duct tape water sandpaper, 220 grit
Step 1—Sand the tray
Prep the bare wood for paint (or stain) with a light sanding. This cleans up any dirt and helps rough up the surface to help with stain or paint absorption. If I’m being honest, I forgot to do this step, but it all worked out okay anyway! Step 2—Apply the dark base coat The tray needed to blend in with my existing decor, so I chose a base color previously used in a DIY project in my dining room. I used the same stain and chalk paint from a dining room cabinet I painted last year. When you apply stain, you usually let it sit for some time (depending on how dark you want the color) and then wipe off the excess. This time--instead of wiping it off--I let it dry at full strength to achieve a rich, dark color. You’ll do whatever works best for your specific project. Make sure everything is dried completely before moving on to the next step. 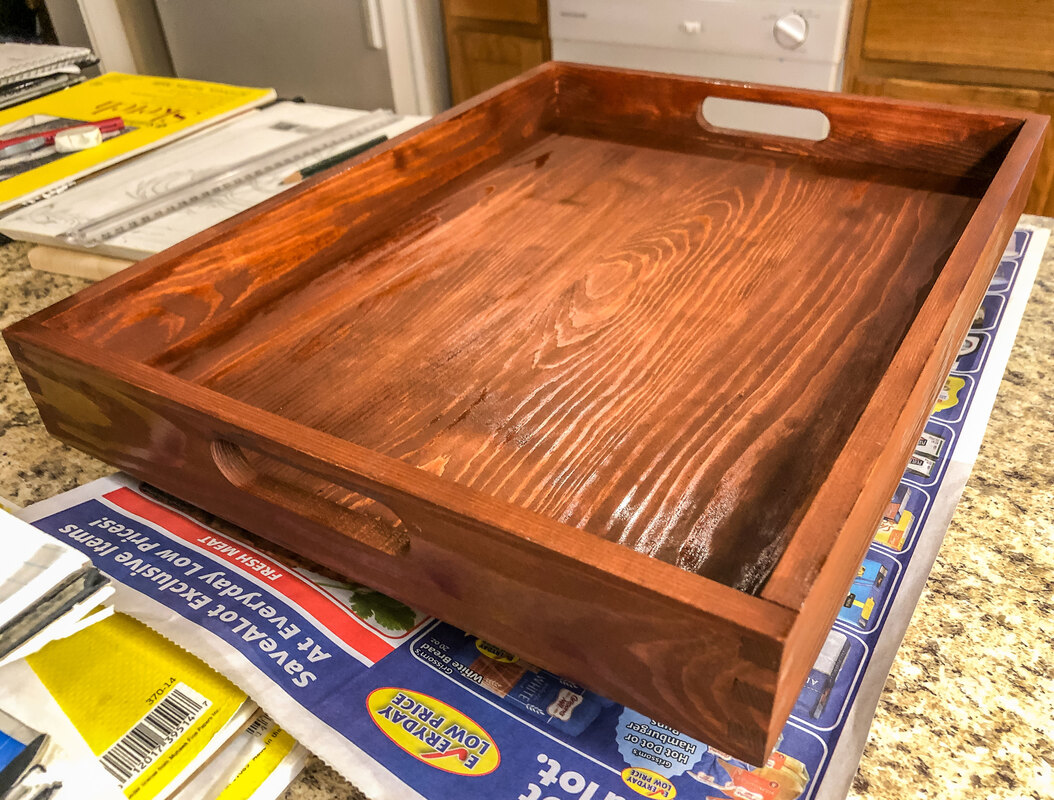
Tray with Cognac wood stain applied. Photo by Diane M. Lilly, 2022.
Step 3—Rub the wood with wax Once my stain was fully dry (the next day), I rubbed some of my homemade soy candle wax in areas I’d like to weather. I chose spots that would see wear and tear, like inside the tray and the edges and corners. 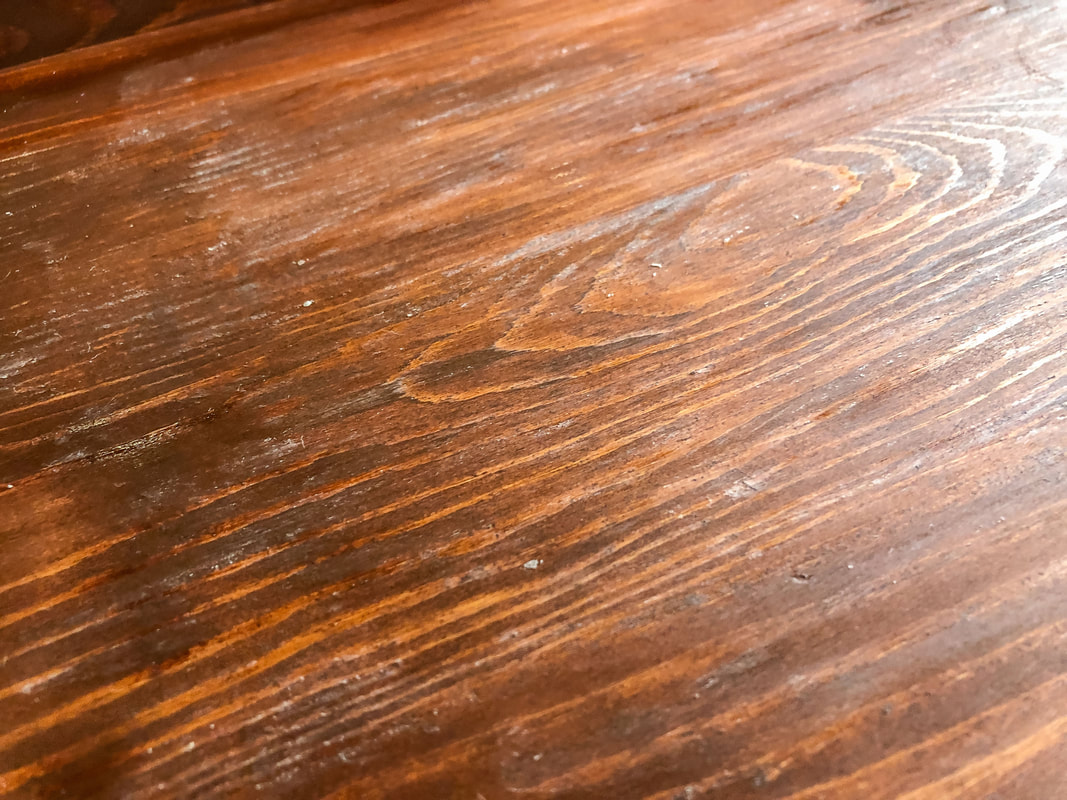
Wax rubbed into the wood tray. Photo by Diane M. Lilly, 2022.
Step 4—Apply the chalk paint top coats In the next step, I applied two coats of chalk paint over the wax and then the stain. There’s nothing complicated with this step--just slather it on! 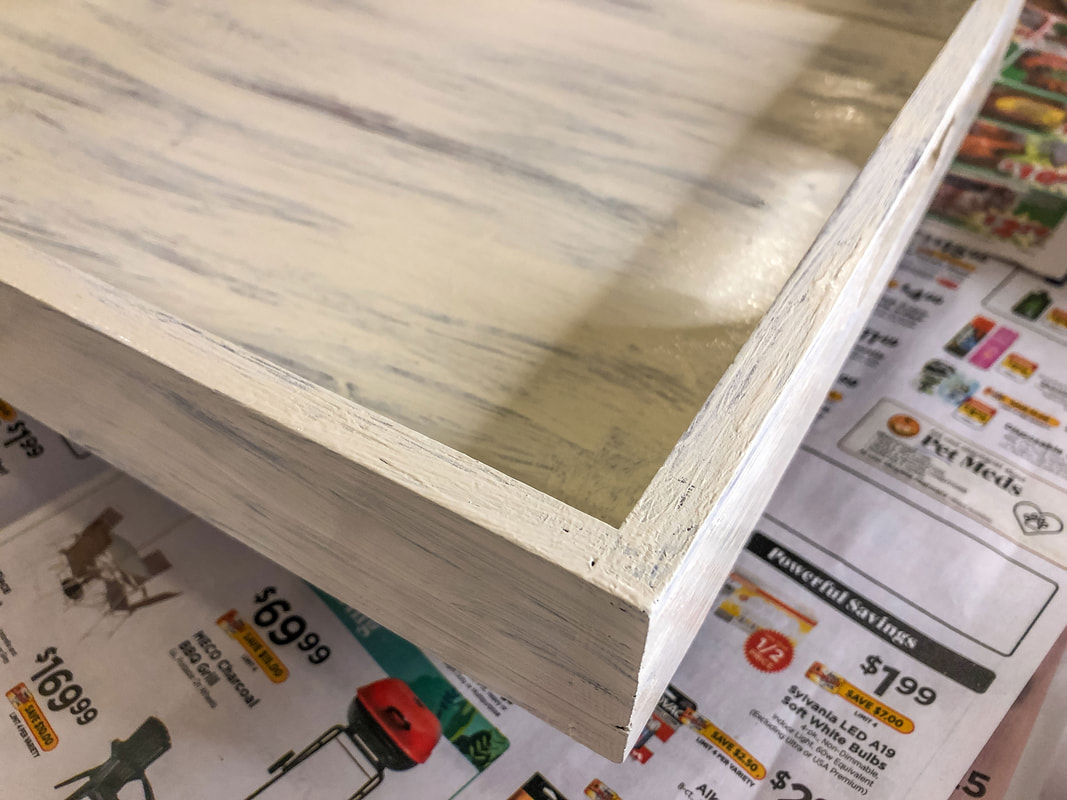
First coat of chalk paint on tray. Photo by Diane M. Lilly, 2022.
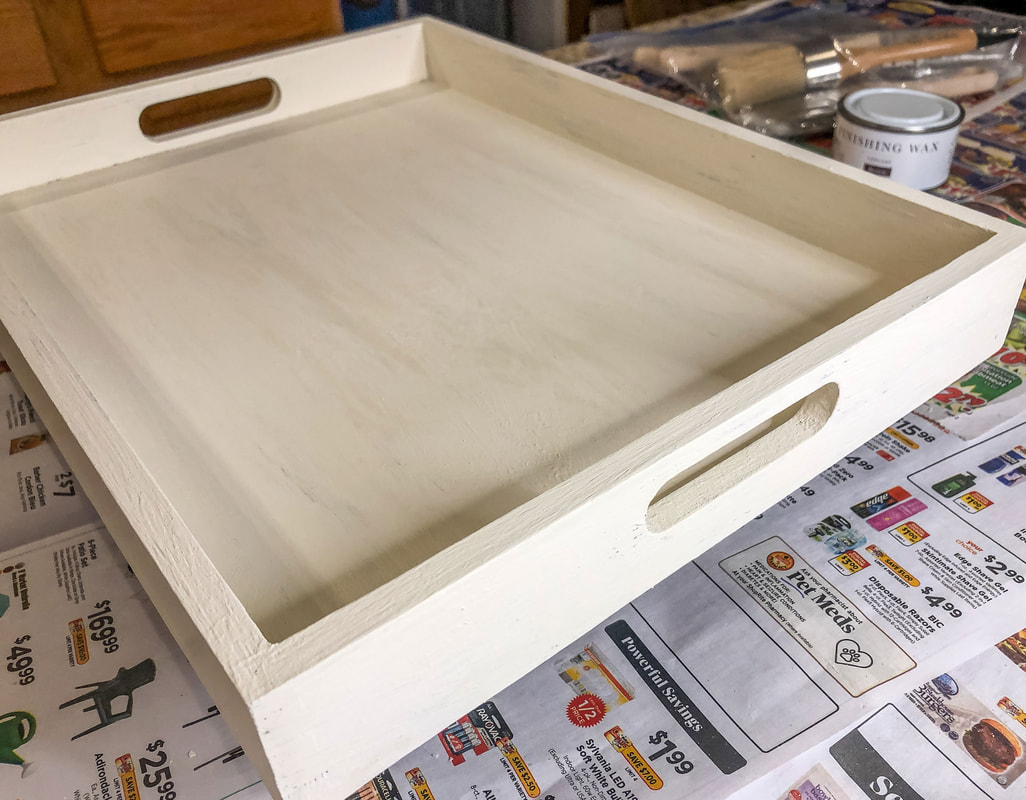
Second coat of chalk paint on tray. Photo by Diane M. Lilly, 2022.
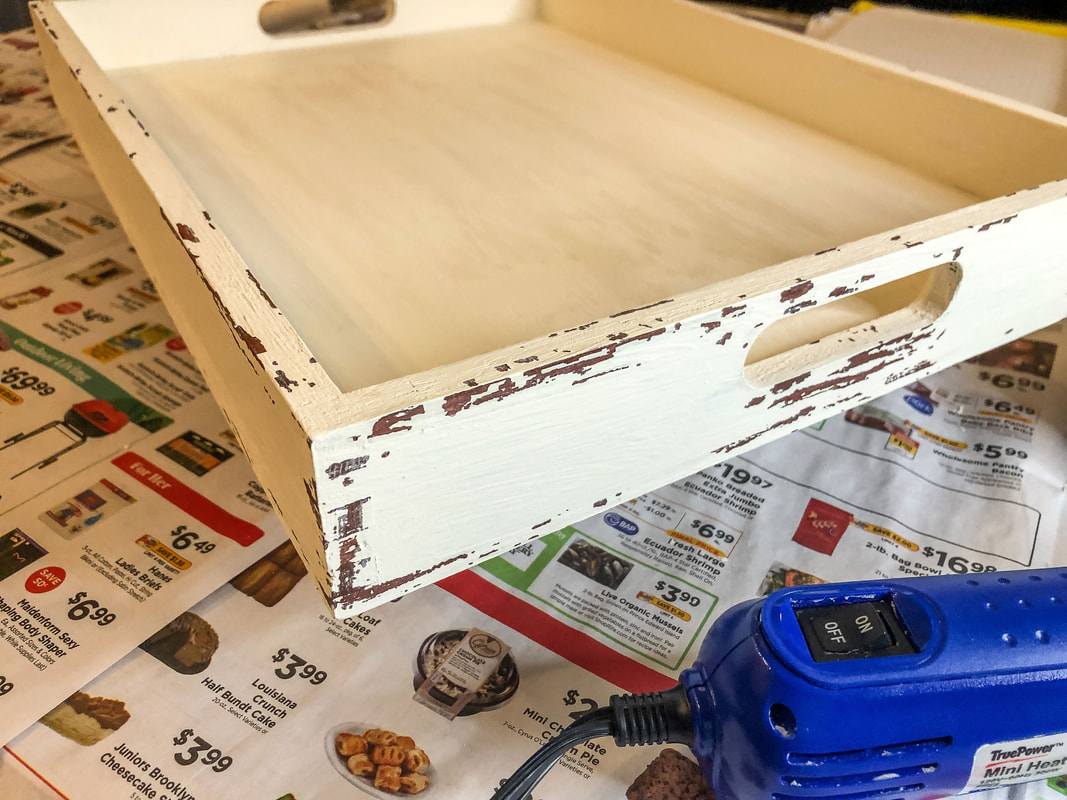
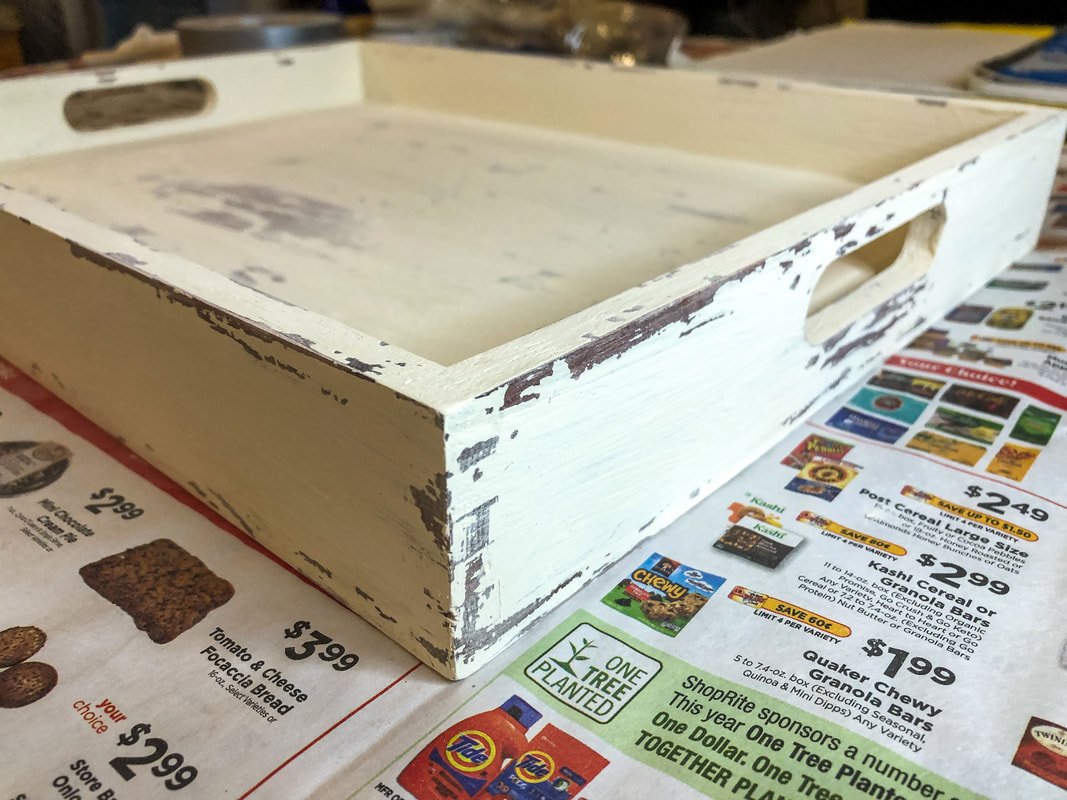
Step 5—Heat and remove paint Using a heat gun (you can also use a hair dryer), I heated the areas where I wanted the paint chipped. It didn’t take much, just a few seconds. Now, here’s the tricky part…The directions say to take a small piece of duct tape and LIGHTLY apply it to the area, removing it immediately. I cannot stress enough that you must do this quickly and lightly, or you will remove too much top paint! The tape has to lightly stick and remove only small bits of the chalk paint top coat. I did pretty well until I got to the tray bottom, where I took off bit more than planned…but the look grew on me, and now I think it looks like it’s supposed to be that worn. 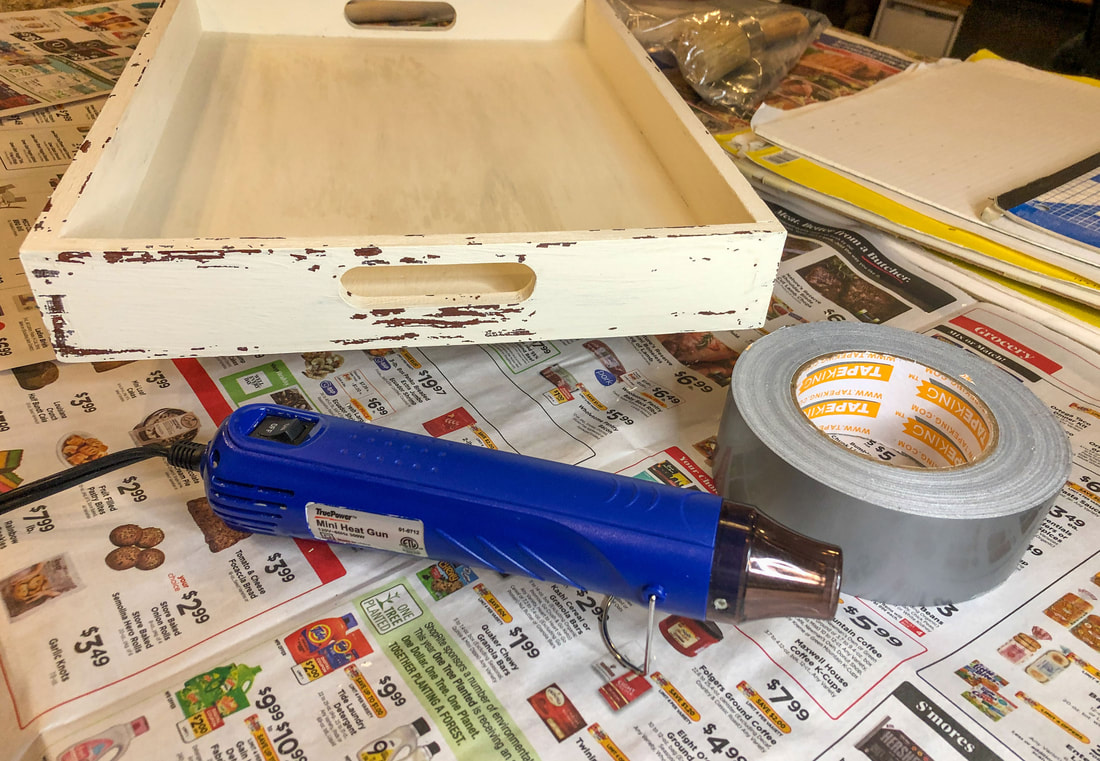
Tray sides weathered with heat gun and duct tape. Photo by Diane M. Lilly, 2022.
Closeup of tray corner after weathering technique has been applied. Photo by Diane M. Lilly, 2022.
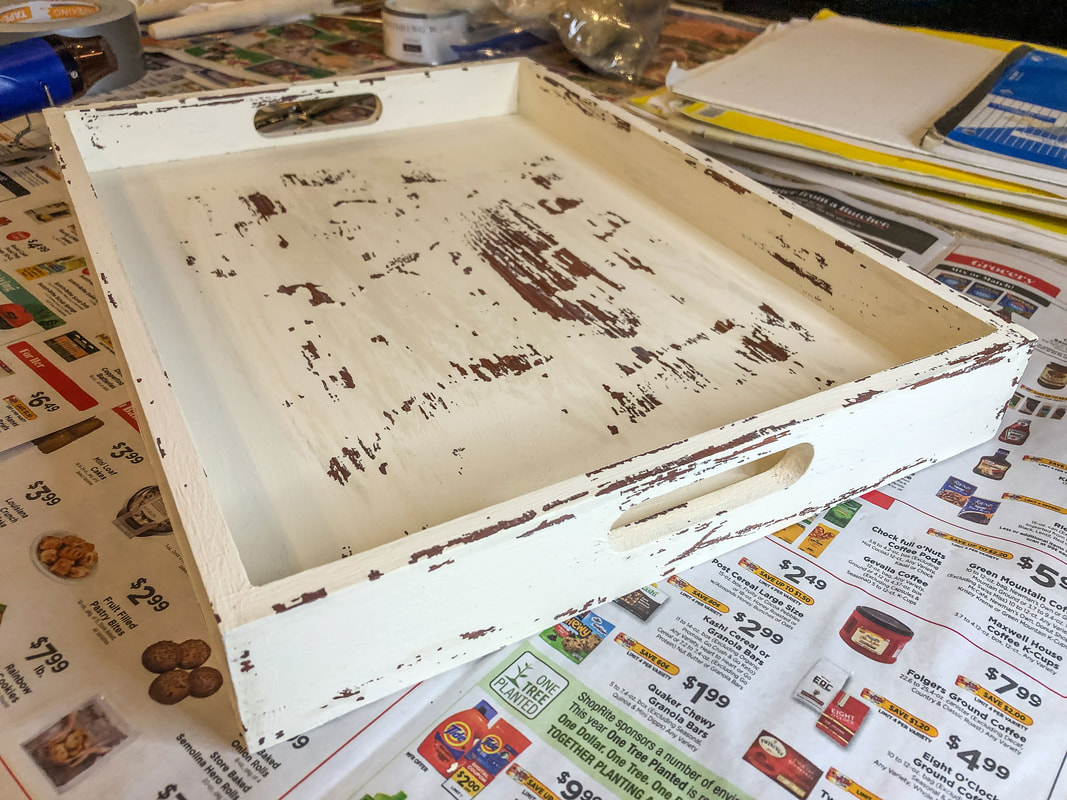
Tray after weathering technique has been applied. Photo by Diane M. Lilly, 2022.
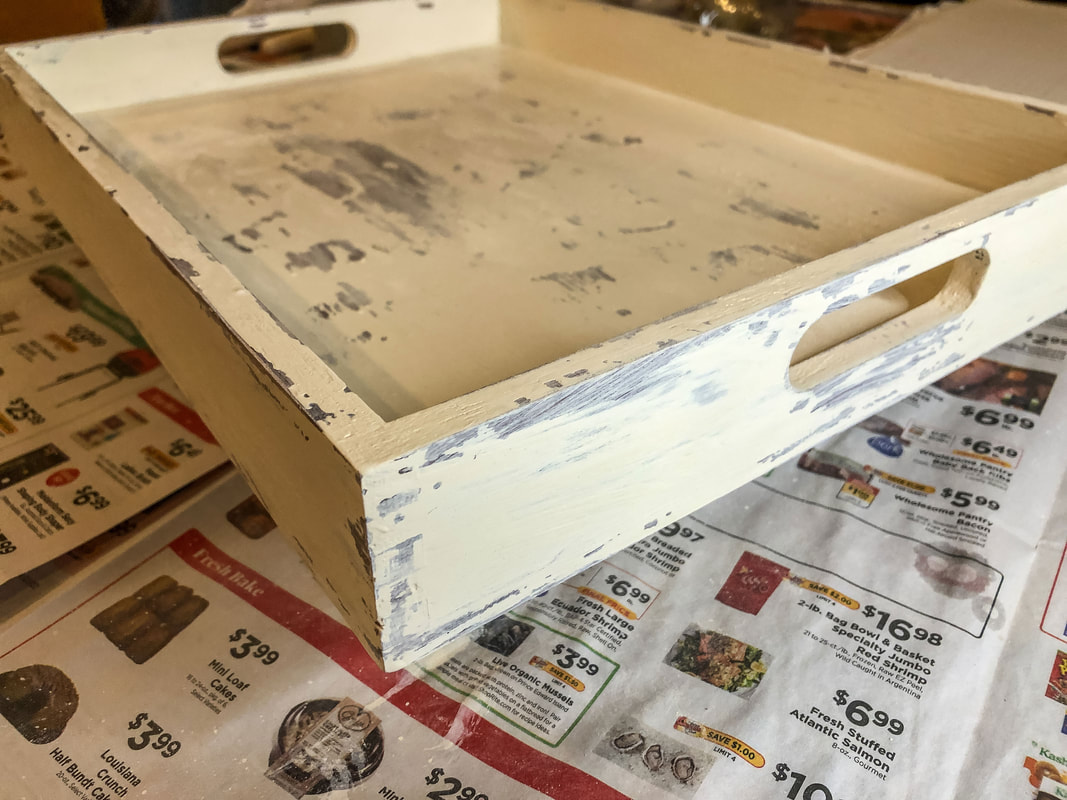
Step 6—Lightly sand So here’s where I diverged from the original technique…I liked the chippy effect that this technique created, but it was just way too much like Farmhouse for my taste. (Sorry Farmhouse lovers!) For this tray to fit in with my decor style, I needed the “chippiness” (I just made up that word!) toned down a bit. I used 220 grit sandpaper to lighten the areas where the paint was chipped away, and that improved the situation somewhat…but it still needed to be lightened up even more. 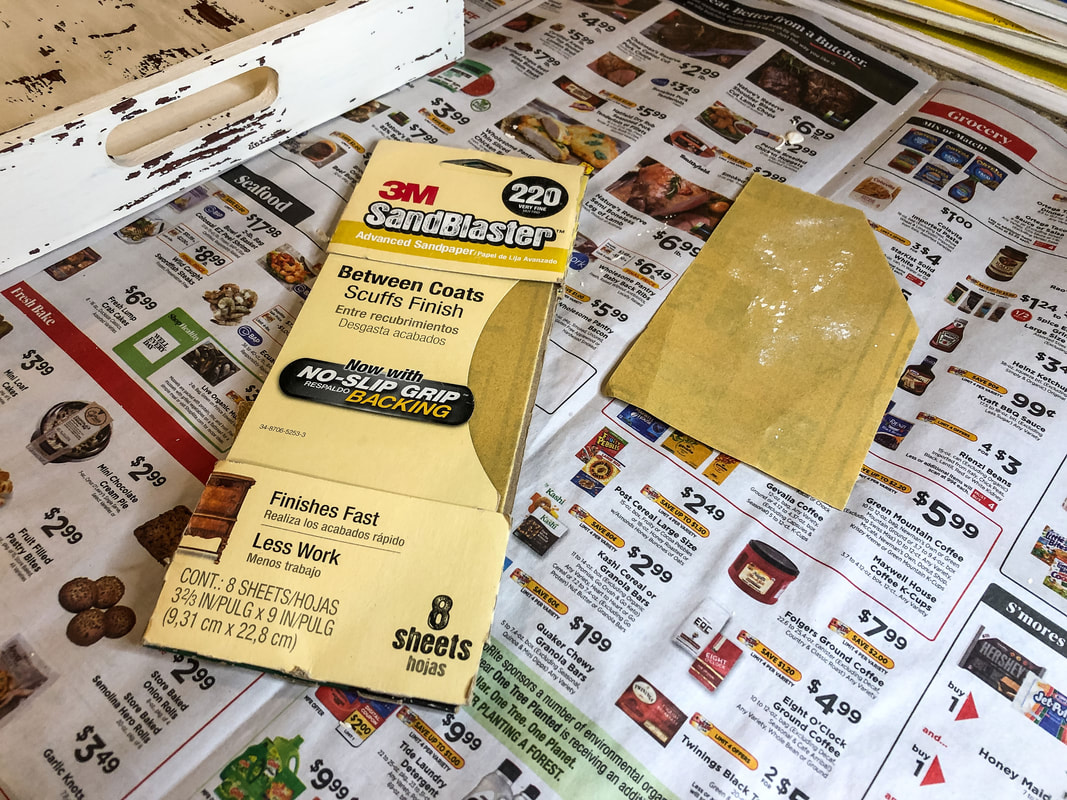
220 grit sandpaper for smoothing out the paint chip areas. Photo by Diane M. Lilly, 2022.
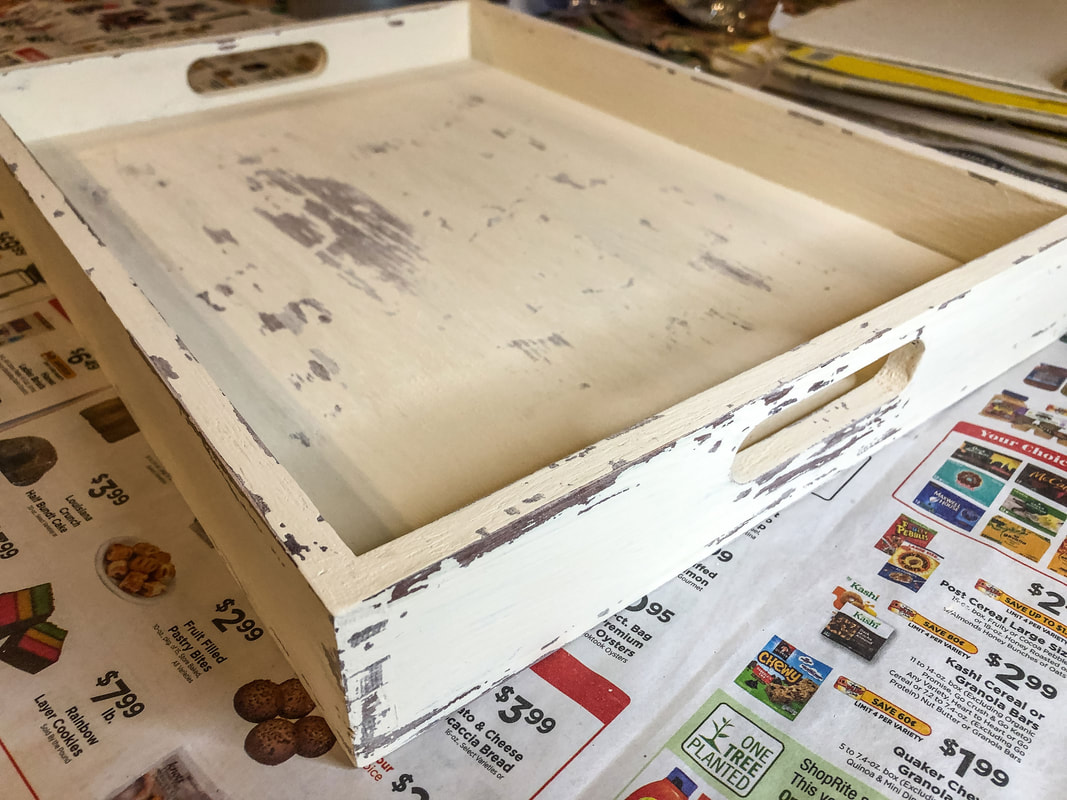
Tray after the paint effects have been sanded. Photo by Diane M. Lilly, 2022.
Bottom of tray blended with sandpaper. Photo by Diane M. Lilly, 2022.
Closeup of tray corner after sanding. Photo by Diane M. Lilly, 2022.
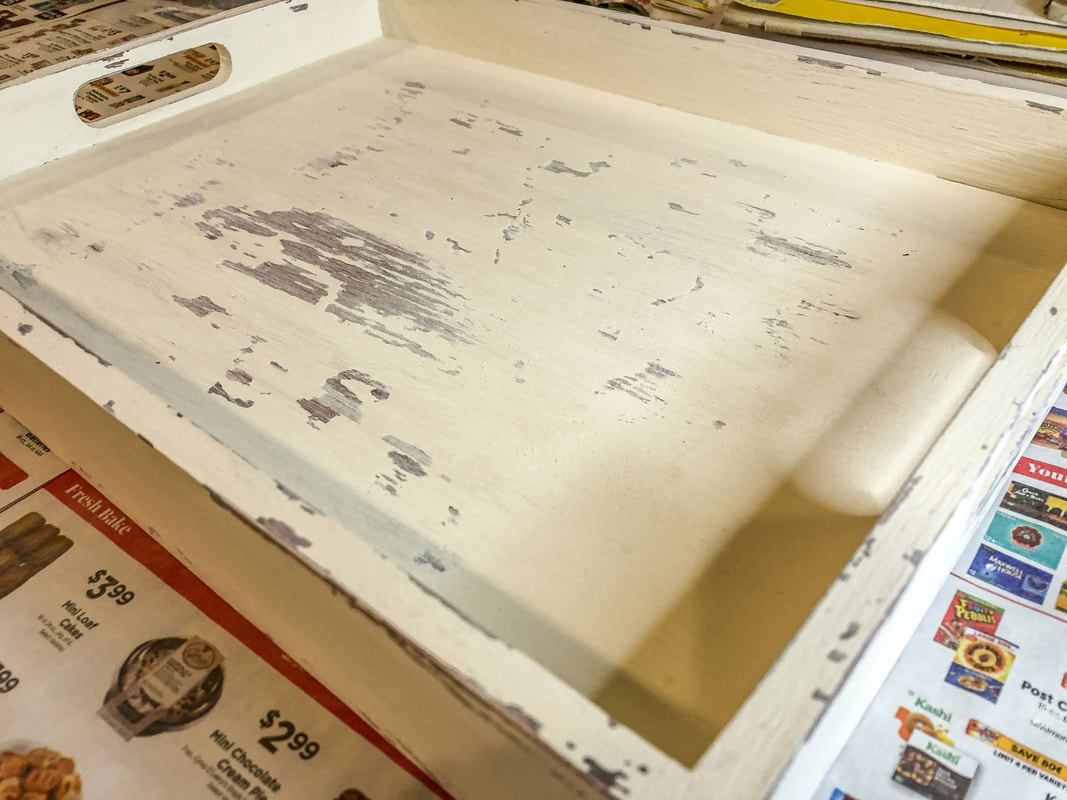
Step 7—Blend with a damp brush To lighten the chipped paint effect even further, I took a slightly wet paintbrush and blended the chalk paint over the areas where the paint had been chipped off. Chalk paint is ideal because you can dampen the paint and rework or blend any trouble spots.) I loved the result! I feel like this tray now has the look of something old and worn without being too chippy. 
Water to blend the paint even further. Photo by Diane M. Lilly, 2022.
Tray corner and sides blended with water. Photo by Diane M. Lilly, 2022.
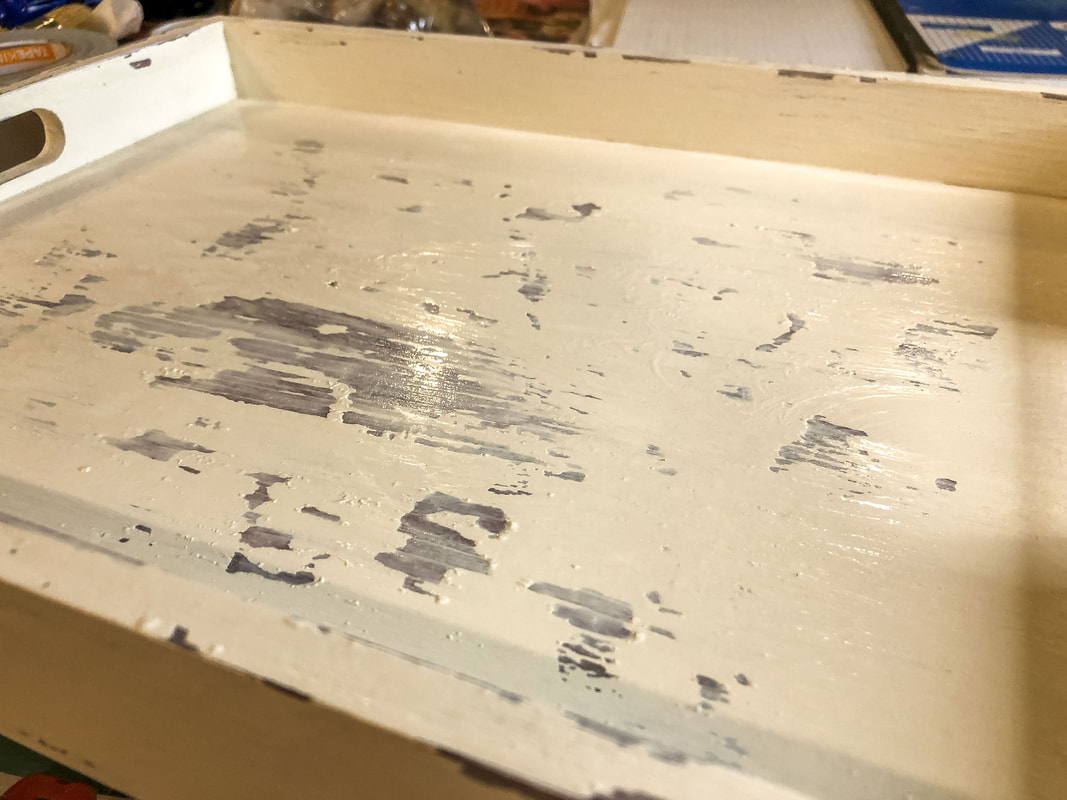
Tray bottom blended with water. Photo by Diane M. Lilly, 2022.
So that’s the end of the painting phase of this project. The technique was simple and quick, taking only two days to complete. What I learned, however, was that—as fun as it was to use wax, heat, and duct tape to create a chippy appearance—you don’t need to do that step. Later in the process (in “part 2”)—while taping border templates onto my tray sides—I accidentally removed more chips of paint from my top coat, which leads me to believe that you could probably skip the wax and use tape to remove areas of the top coat. I don’t know how well this would work if the base coat was also painted (since I used stain), so I don’t know how much paint would be removed, but a little trial and error and a lighter touch might yield good results. 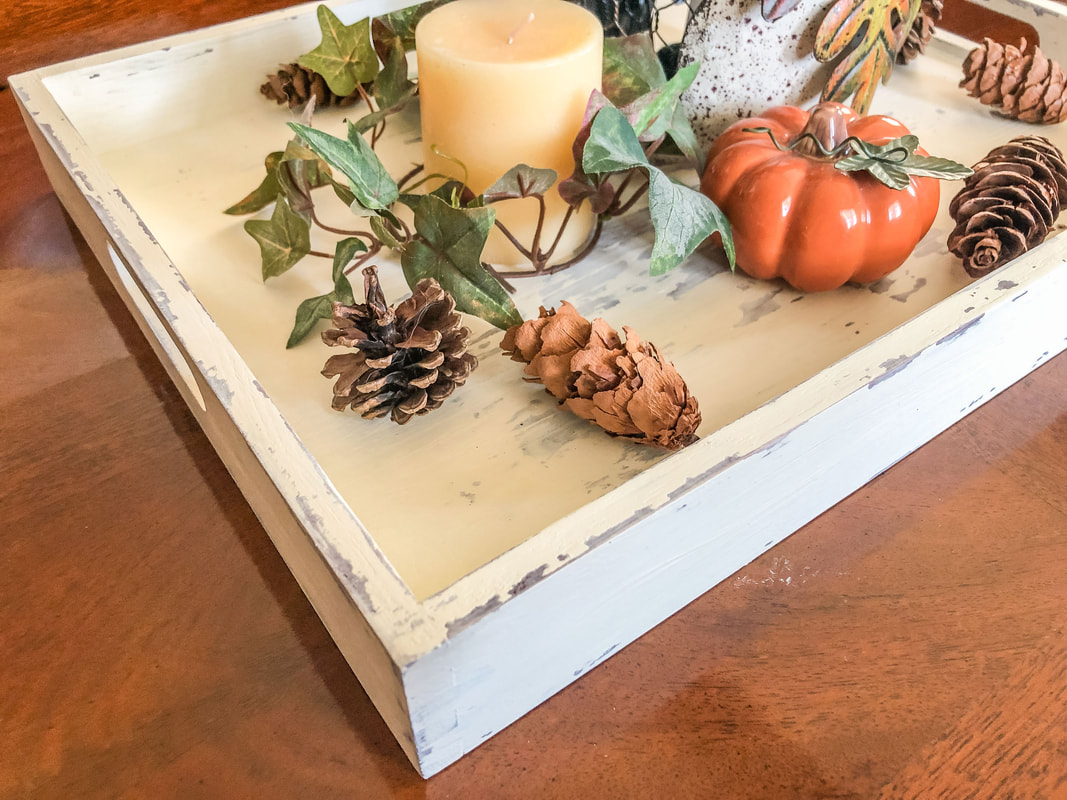
Decorative tray with weathered effect finished and staged with some Autumn decor. Photo by Diane M. Lilly, 2022.
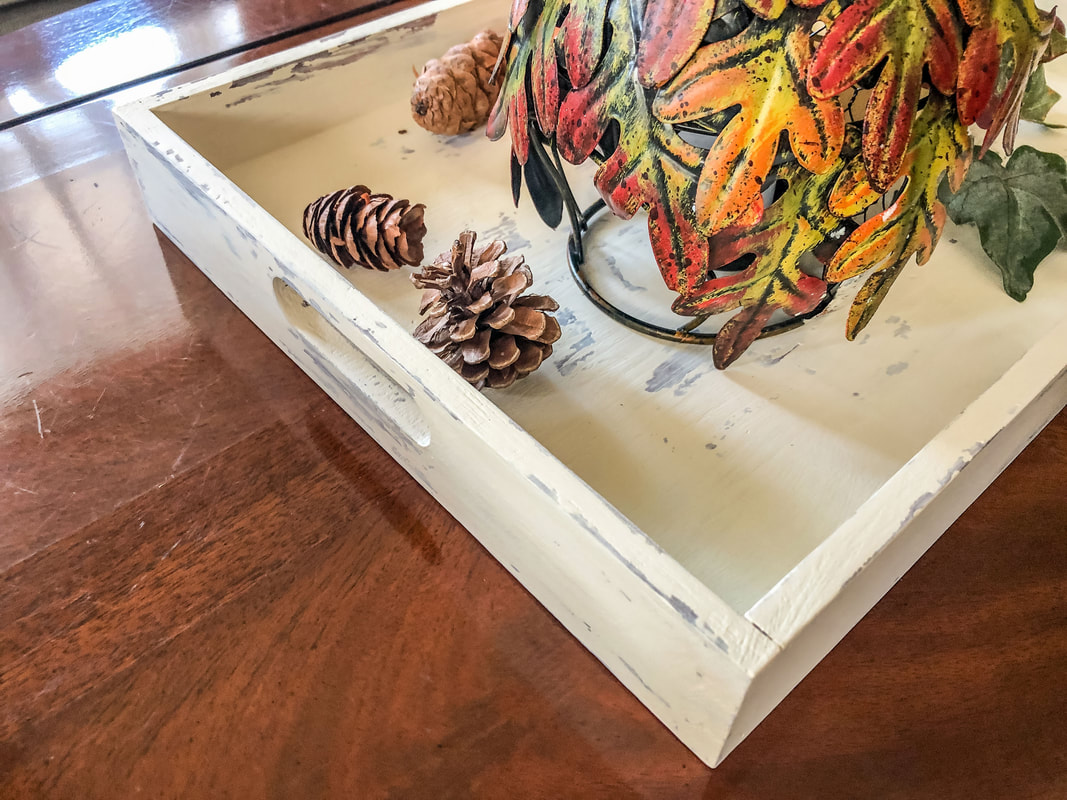
Another angle of the finished tray with diy weathered effect. Photo by Diane M. Lilly, 2022.
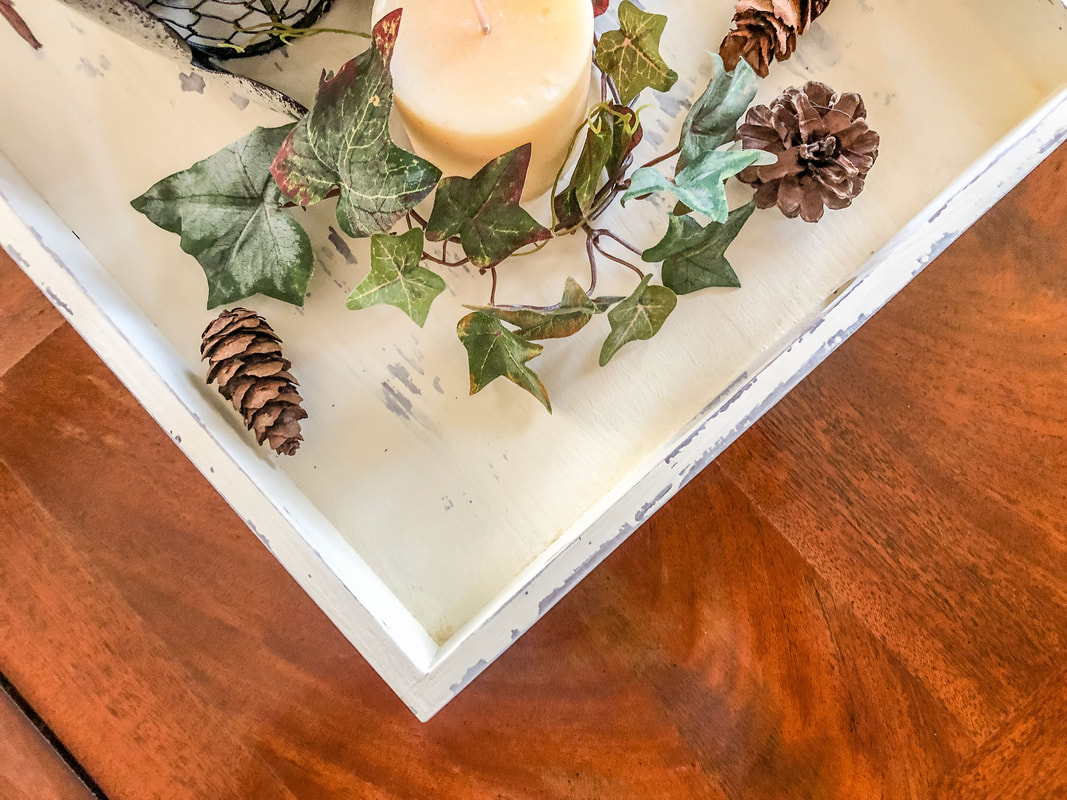
Final look at my DIY decorative tray with weathered technique using chalk paint. Photo by Diane M. Lilly, 2022.
All in all, this was a fun project, and I’m pleased with the outcome. But—as always—my sadistic side kicked in, and I had to take things up a notch! So, I had this crazy idea to paint a Celtic knot border around the exterior sides. Part two of this blog will take you through the basic steps needed to create a knotwork design for the sides of this tray. But you can also create any design of your own…vines, flowers, leaves, or any decorative motif you like to spruce up your tray! So what do you think? Have you done any similar projects with chalk paint? Do you have any tips or tricks for weathering paint effects you’d like to share? Feel free to drop a comment below! And don’t forget to read part two here, where I torture myself with a hand-drawn and painted Celtic knot border.
Related blogs you may want to read:
DIY chalk painted tray with Celtic border A little project with jute twine and an old foot stool DIY refurbishment of a dining room cabinet A fun DIY project with paint and a thrifted mirror part 1 A fun DIY project with paint and a thrifted mirror part 2 Creating a kitchen coffee bar On a mission to recycle this neglected vintage stool The stain stripping stage of rescuing my vintage stool Staining my vintage stool with brewed tea My tattered vintage stool transformed into a beautiful plant stand Homemade candle recipe with a eucalyptus fragrance Homemade candle recipe with a hazelnut fragrance Affiliate Disclosure Some of the posts in this article contain affiliate links. This means if you click on the link and purchase the item, I will receive an affiliate commission at no extra cost to you. I will only recommend products or services I use personally and/or believe will add value to my readers, so there is no conflict of interest. 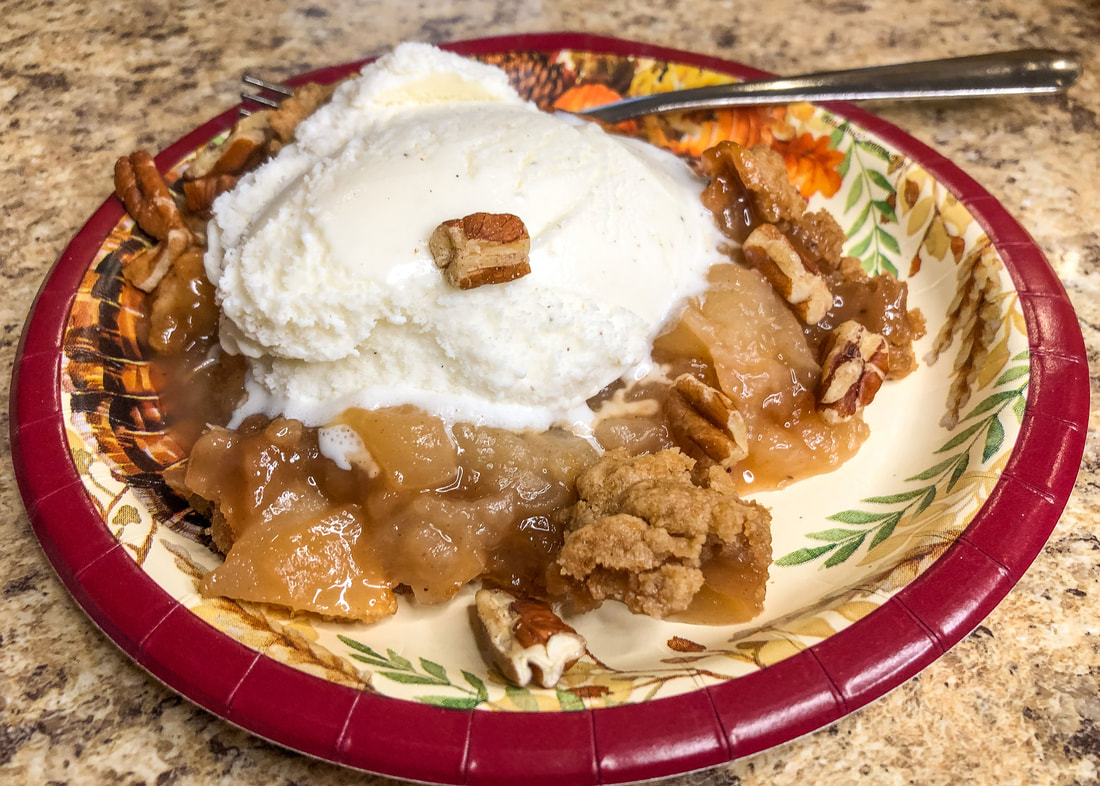 Apple crumble dessert with vanilla ice cream. Photo by Diane M. Lilly, 2022. Something about the crisp fall air triggers the inner baker in me! In my household, apple and pumpkin pies appear in October and become staple desserts throughout the holiday season. And even though it’s a heck of a lot of work, I usually insist on making my apple pie crusts from scratch using the good old-fashioned flour and rolling pin. Sometimes, I even take it to a whole new level of insanity by creating a two-crust pie (one bottom crust and crust for the top), but on those occasions when I need a shortcut, the crumble topping makes a delicious sugary substitute. (If you’d like to see my homemade apple pie recipe, you can find it here in an older blog post from a few years back.) 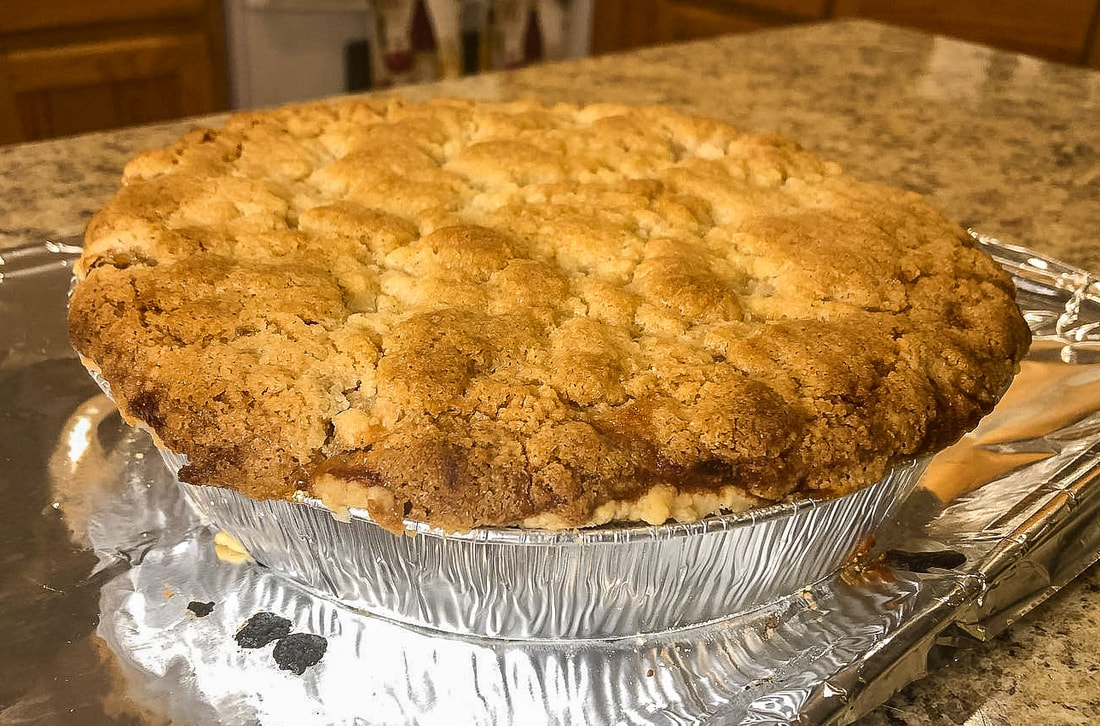 Homemade apple pie with crumble topping. Photo by Diane M. Lilly, 2020. Lately, I’ve been spending time on Pinterest looking for recipe ideas. While happily pinning away, I stumbled across a recipe for an apple crumble--a recipe that was essentially my apple pie without the bottom crust. As much as I love baking apple pies, I don’t enjoy all the work that goes into creating the pie crust, so this crumble recipe is an excuse to cut corners but still end up with a delicious dessert! As this recipe is similar to my apple pie filling, I used my recipe—minus the pie crust—with a few tweaks taken from the Pinterest recipe to experiment with flavor. And I had to adjust for the servings because I’m a family of five, so I need to make a LOT! This apple dessert has two main parts: apple filling and crumbly topping. For this recipe’s filling, I used 14 McIntosh apples to fill a 9 x 13 baking pan. So here’s the recipe I used for this mouthwatering apple dessert… Apple filling ingredients: 14 apples, peeled and sliced 2 TBS lemon juice 1/2 tsp vanilla extract 1/3 cup granulated sugar 1/4 cup brown sugar 1/4 cup all purpose flour 1/2 tsp salt 1/2 tsp ground cinnamon 1/2 tsp nutmeg  McIntosh apples. Photo by Diane M. Lilly, 2022. 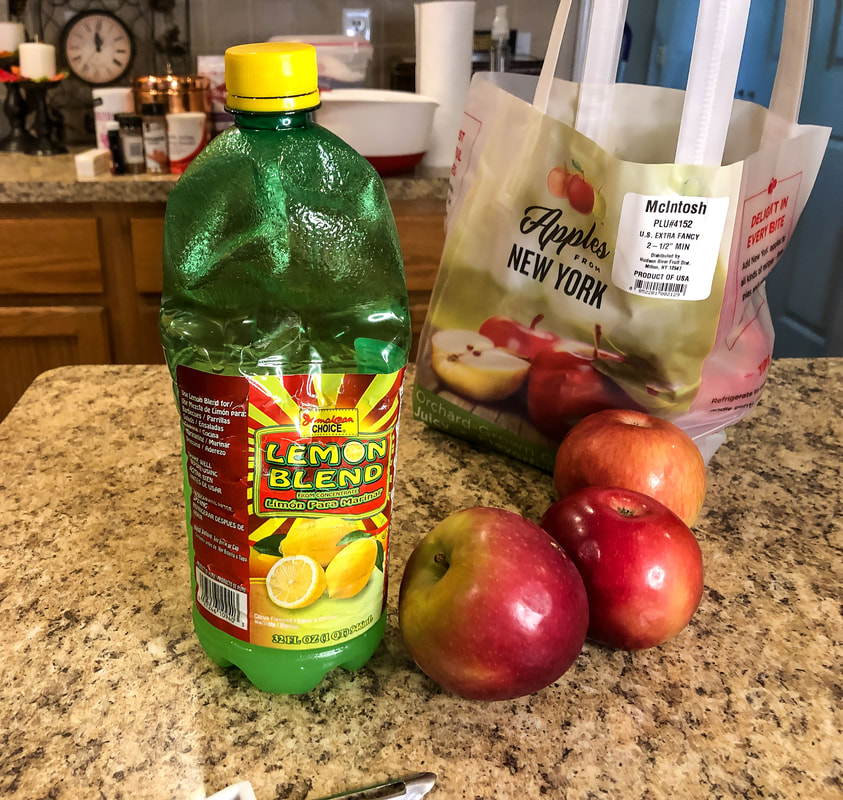 Lemon juice and apples. Photo by Diane M. Lilly, 2022. 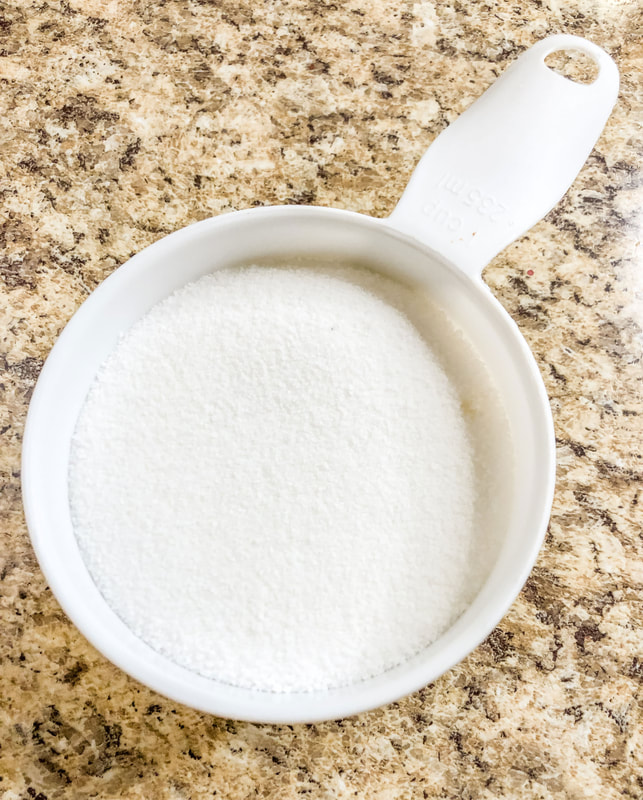 Cup of sugar. Photo by Diane M. Lilly, 2022. 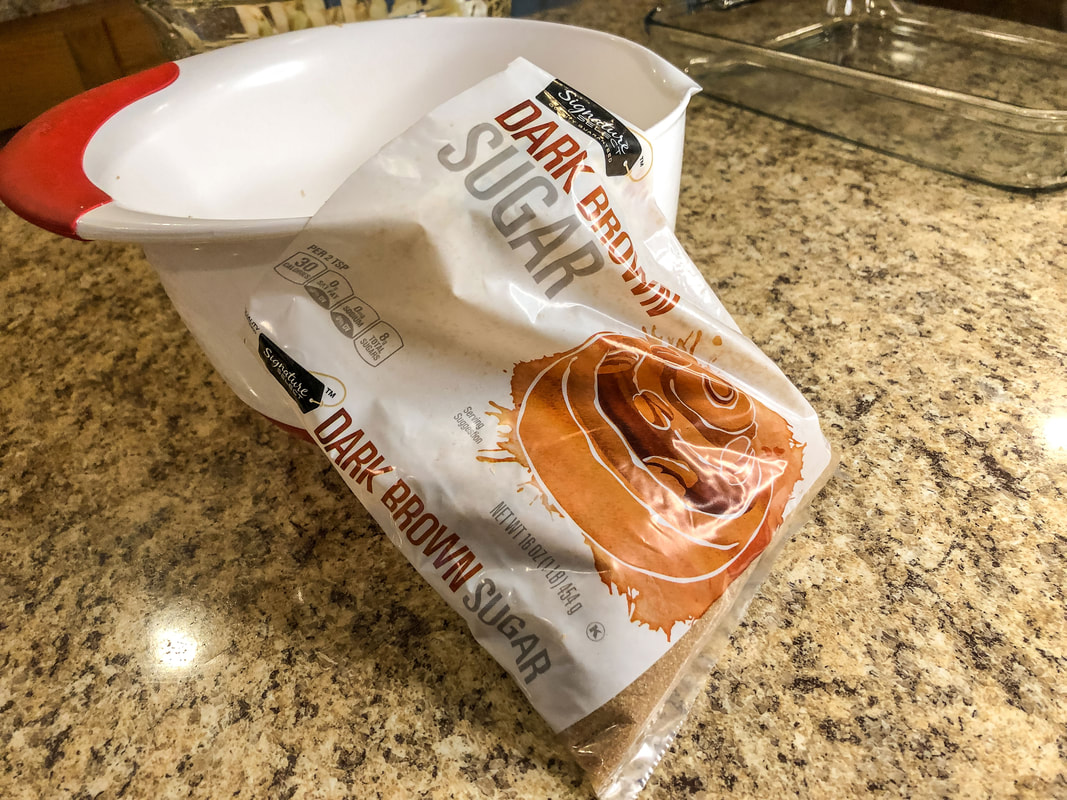 Dark brown sugar. Photo by Diane M. Lilly, 2022. 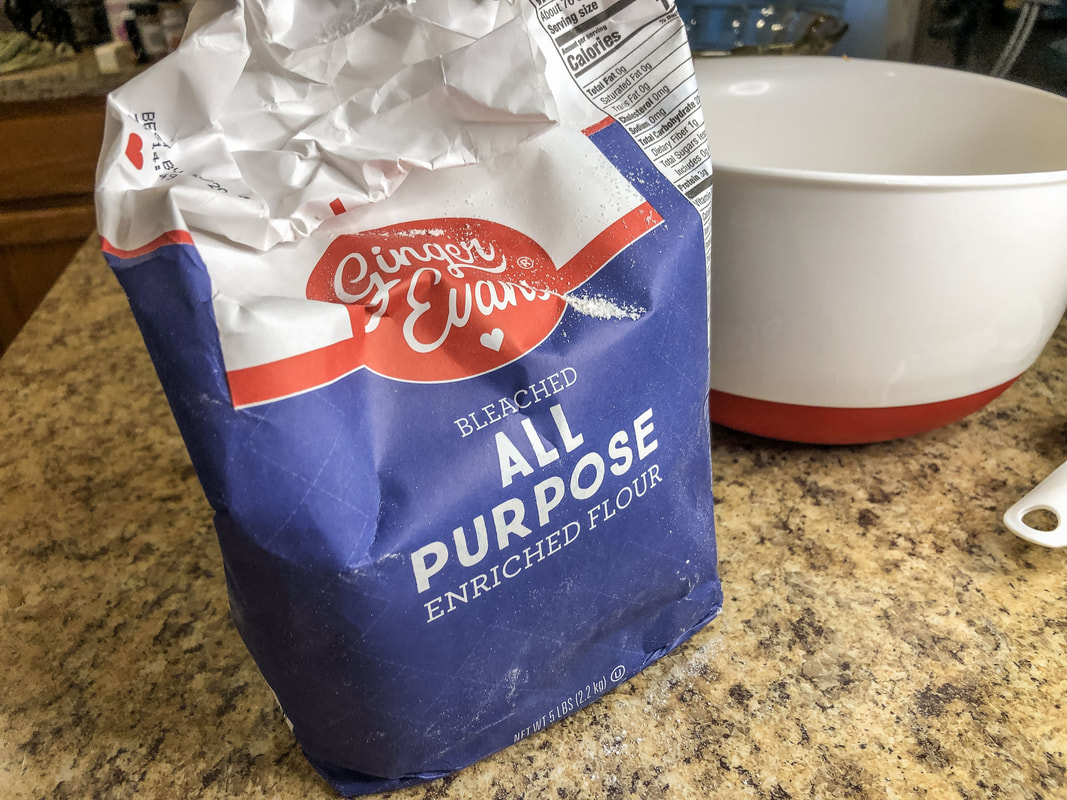 All purpose flour. Photo by Diane M. Lilly, 2022.  Iodized salt. Photo by Diane M. Lilly, 2022.  Spices and vanilla extract. Photo by Diane M. Lilly, 2022. Crumbly topping ingredients: 1 stick butter, unsalted 1 cup all purpose flour 1 tsp baking powder 1/2 cup packed brown sugar (light or dark) 1/2 tsp ground cinnamon 1/2 tsp salt  Butter. Photo by Diane M. Lilly, 2022.  Baking powder. Photo by Diane M. Lilly, 2022. Preheat oven to 375˚. Peel, core, and chop apples. Coat in lemon juice. Add vanilla extract, brown sugar, sugar, flour, salt, nutmeg, and cinnamon. Pour mixture into a greased 9 x 13 baking dish. 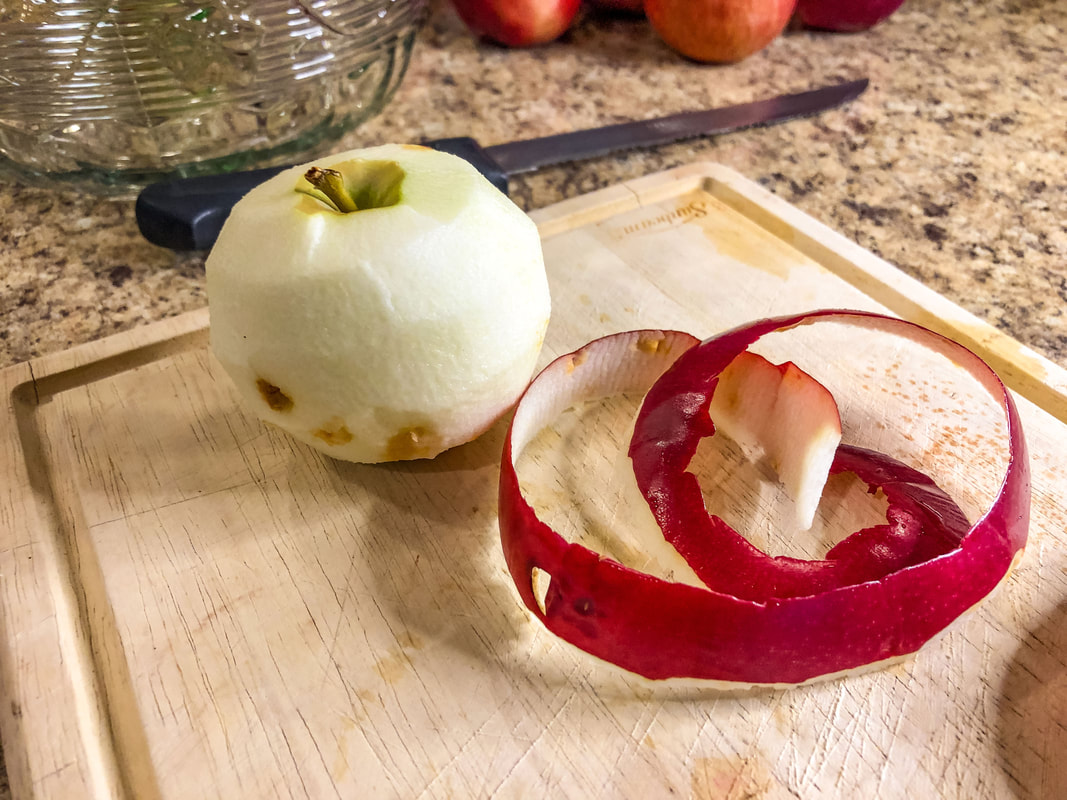 Apple peeled. Photo by Diane M. Lilly, 2022. 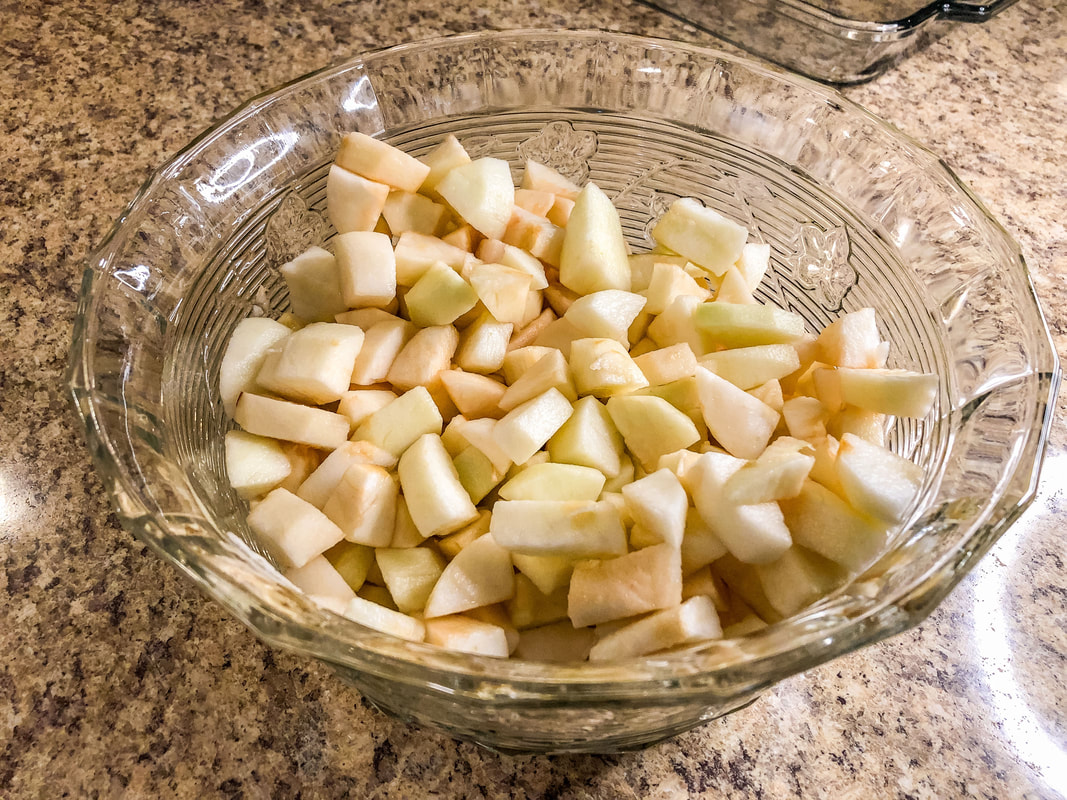 Apple chunks. Photo by Diane M. Lilly, 2022. 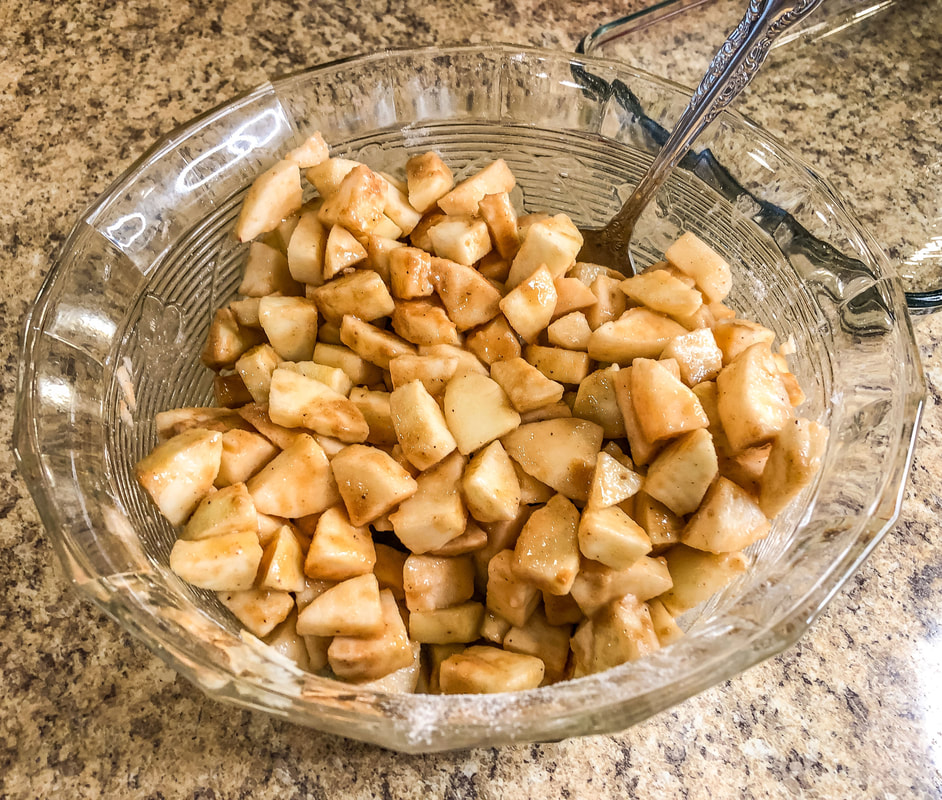 Apple chunks with sugars. Photo by Diane M. Lilly, 2022. 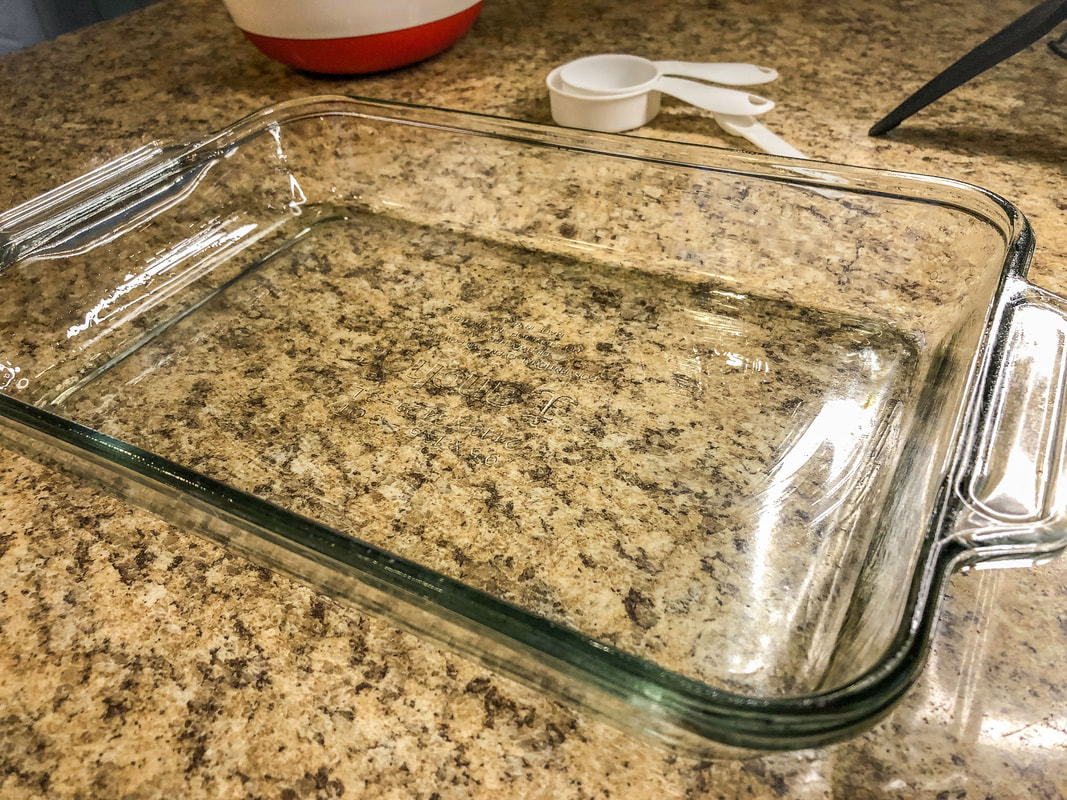 9 x 13 greased baking pan. Photo by Diane M. Lilly, 2022. 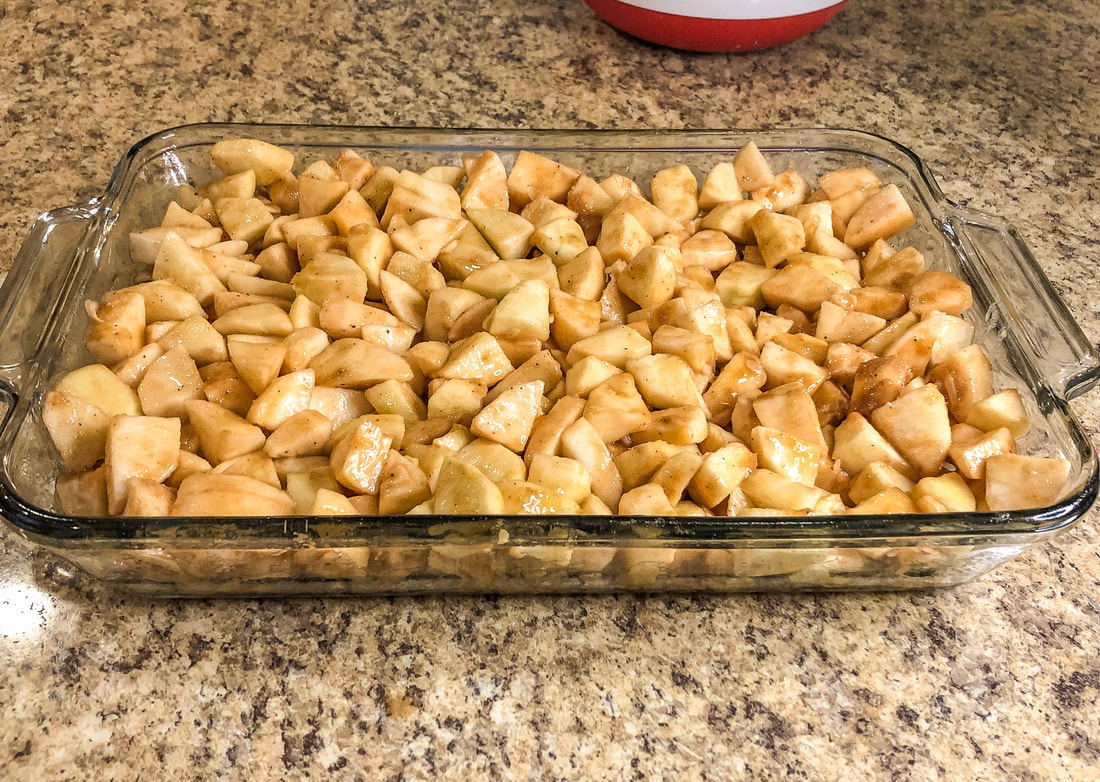 Apple mixture in pan. Photo by Diane M. Lilly, 2022. Mix dry ingredients in a bowl for crumb topping. Cut in melted butter until you get a crumbly texture. Spread evenly over the top of the apple pie filling. 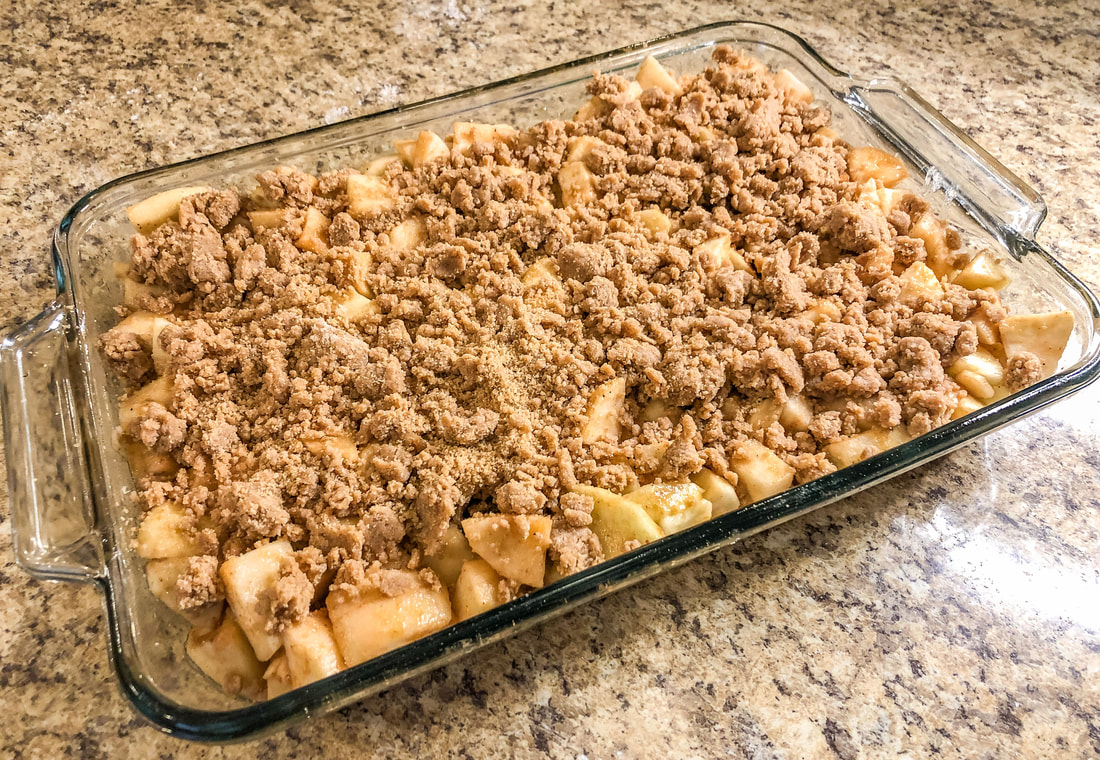 Apple mixture with crumb topping ready for the oven. Photo by Diane M. Lilly, 2022. Put in oven and bake for approximately 40 minutes. When done, remove from the oven and let sit for 10-15 minutes so the filling thickens. 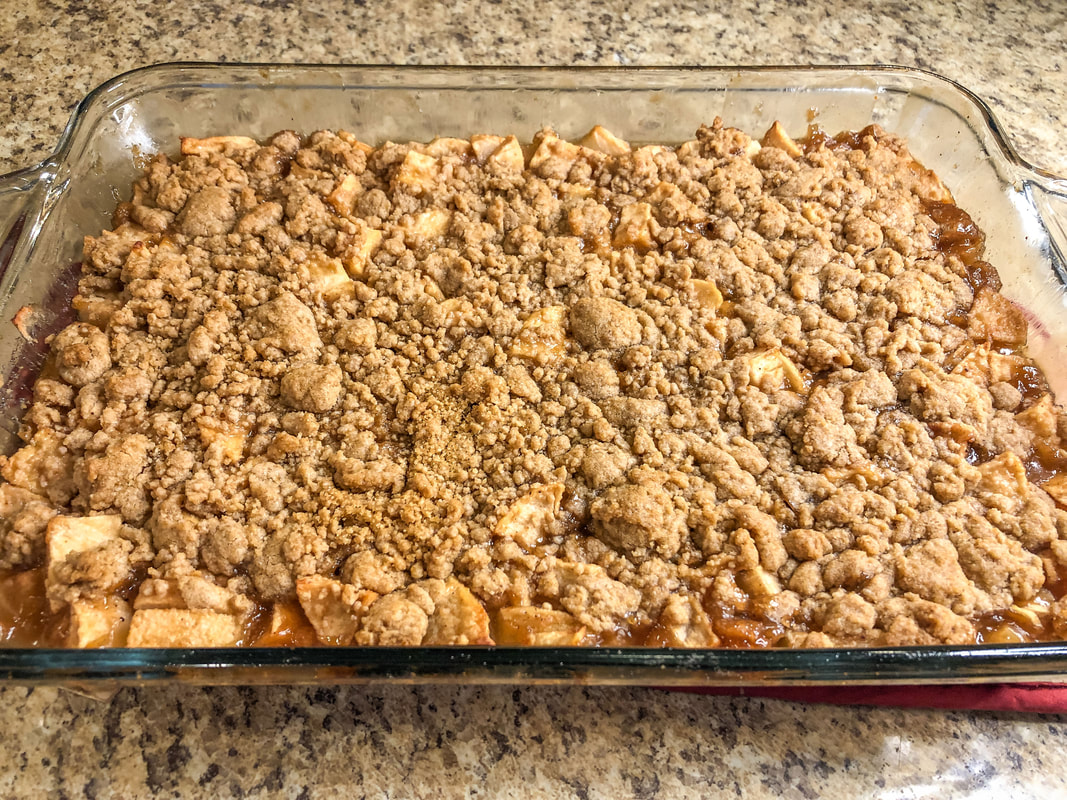 Apple crumble dessert fresh out of the oven. Photo by Diane M. Lilly, 2022. 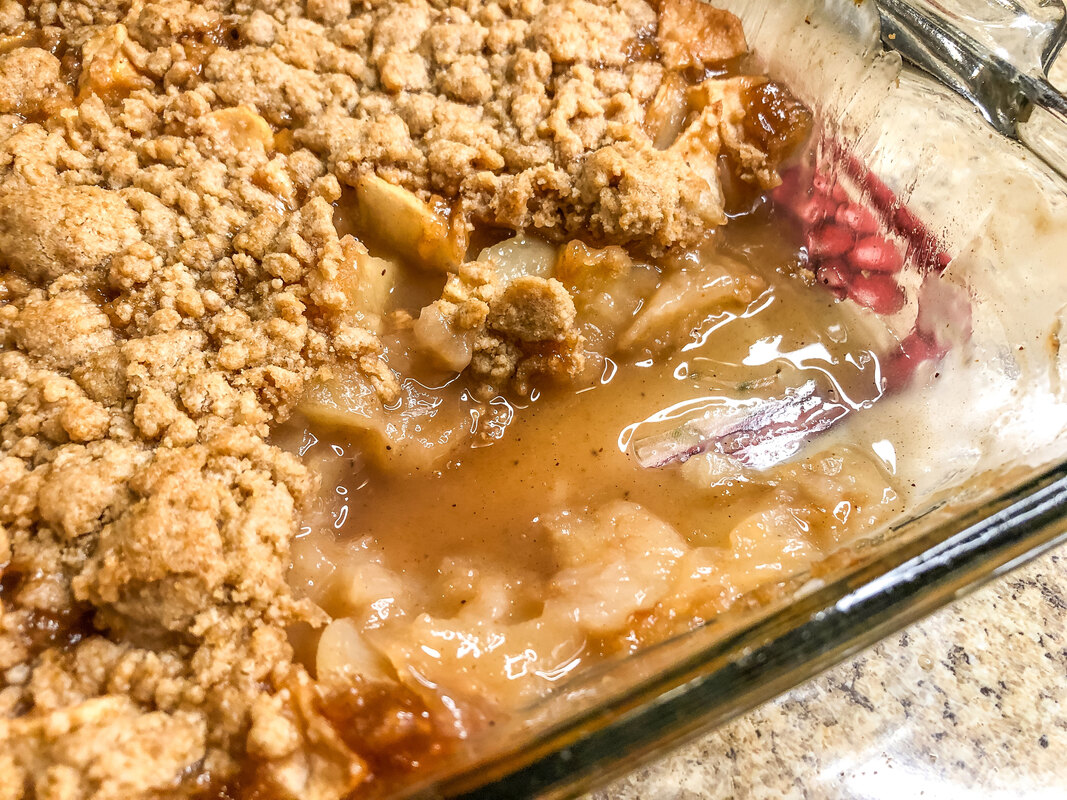 Apple crumble dessert. Photo by Diane M. Lilly, 2022. Once cooled, a sliver of this warm apple dessert was served with a scoop of vanilla ice cream and chopped pecans…and WOW! It all just melts in the mouth! The tartness of the apple mixes perfectly with the sweet vanilla ice cream and the nutty flavor of the pecans. This could also be served with melted caramel, whipped topping, or nuts. You could also mix raisins into the apple mixture before baking for a delicious variation.  Chopped pecans. Photo by Diane M. Lilly, 2022.  Vanilla ice cream. Photo by Diane M. Lilly, 2022. The one thing I will do differently the next time I make this delicious apple crumble will be to double the ingredients for the topping. I just felt like the topping was a bit on the skimpy side…Not that the result tasted any less heavenly! 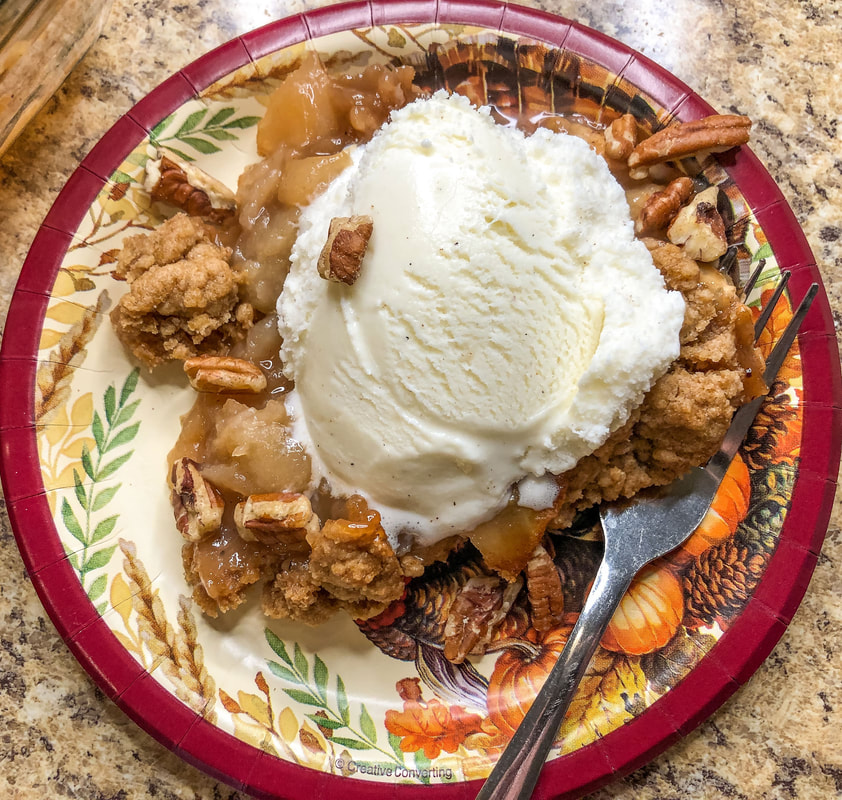 Apple crumble dessert with pecans and vanilla ice cream. Photo by Diane M. Lilly, 2022. Do you have a favorite apple dessert for the fall holidays? Drop a comment below with your recipe tips, tricks, or variations. I’d love to hear other delicious dessert ideas! Btw…If you like recipes, follow me on Pinterest, where I have started boards for dessert and meal recipes. Related blogs you may want to read: Homemade chicken noodle soup recipe Banana and raisin bread recipe Potato soup recipe Tuna noodle casserole recipe Chicken vegetable pot pie Salmon chowder recipe How to eat healthy with chicken and roasted vegetables This article may contain a few items or commercial mentions, but I only used them for demonstration purposes only. I am not endorsing any particular product or receiving any monetary gain for this blog. |
Author
Some of the posts on this site contain affiliate links. This means if you click on the link and purchase the item, I will receive an affiliate commission. 
Categories
All
Archives
April 2024
|