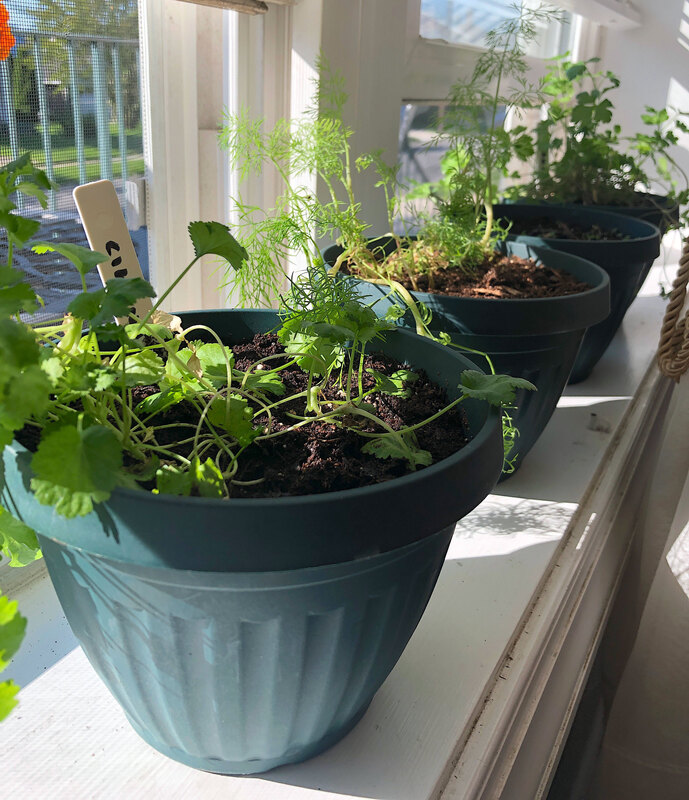
 My indoor herb pots on the windowsill. Photo by Diane M. Lilly, 2021. This year was the year I decided to take the leap and grow some of my herbs indoors. In the past I planted a few herbs (like chives, mint, sage, chamomile, parsley, cilantro, and rosemary) outside in the garden, but having some herb plants indoors would be so much more convenient when cooking and would provide the opportunity to appreciate the beauty of the plants as they grow throughout the year. So the question that needed to be answered was what to grow and why? In addition to the obvious reasons, the herbs needed to provide a natural fragrance to the home. It would also be nice if some of the plant stems could be used in vases, either alone or in a floral arrangement. Ultimately, the decision was made to plant rosemary, dill, parsley, catnip, cilantro, and thyme. I wanted to grow lavender indoors as well, but research indicates that lavender can be harmful to cats (and I have two fur babies), so those seeds were planted outside. The seeds were planted (with the exception of the lavender) in styrofoam cups and covered with plastic wrap. When the plants sprouted tall enough the plastic was removed. Each plant was watered with a tablespoon every couple of days, just enough to keep the soil moist without drowning the poor things! Once they got a little hardier I watered deeper, making sure the soil had drainage. In a few weeks each plant will be repotted into their “forever” pots…But that’s a whole other post!  Dill seedlings. Photo by Diane M. Lilly, 2021. 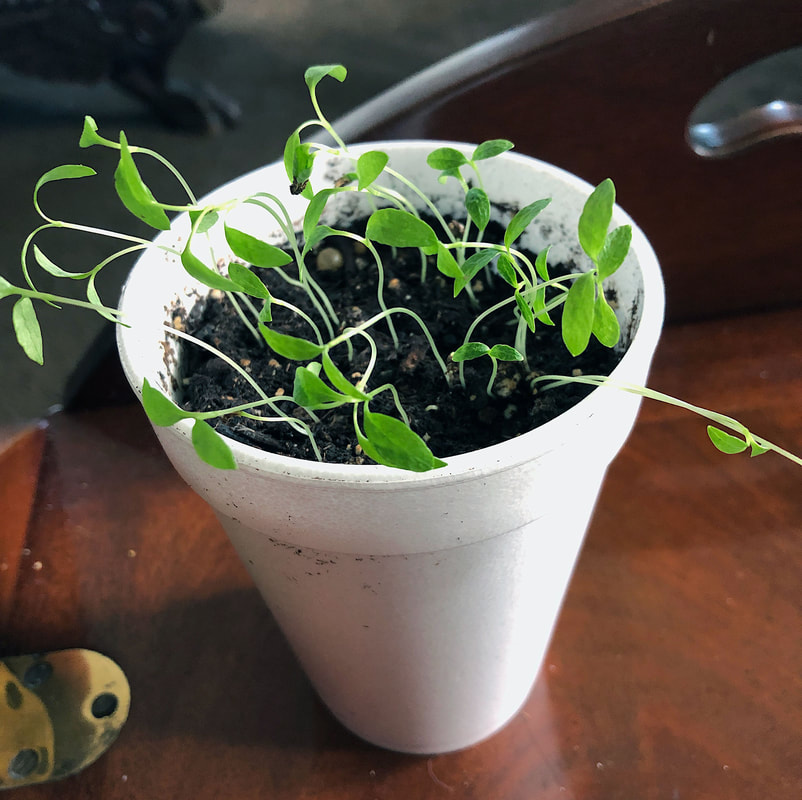 Parsley seedlings. Photo by Diane M. Lilly, 2021. 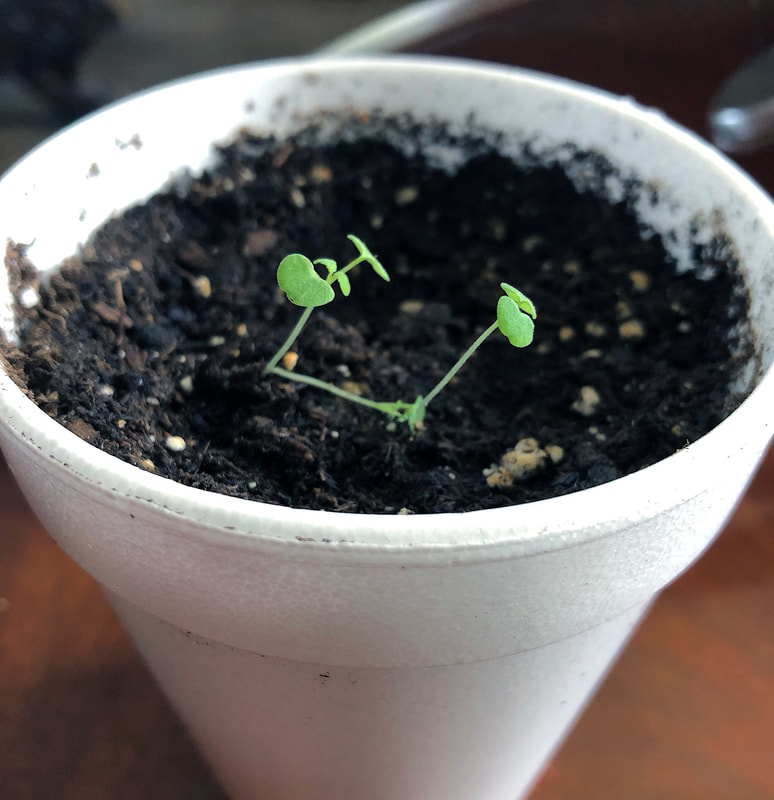 Catnip seedlings. Diane M. Lilly, 2021. 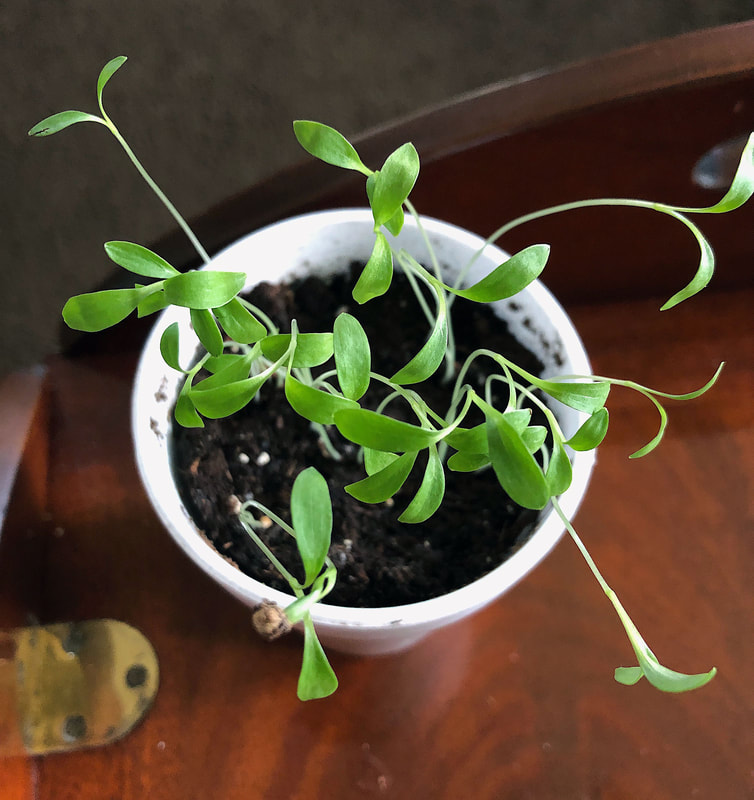 Cilantro seedlings. Photo by Diane M. Lilly, 2021.  Thyme seedlings. Photo by Diane M. Lilly, 2021. As we are all easing into this growing season, I thought I’d share a few tips for planting and using these six common herbs, starting with one of my favorites—rosemary! Rosemary Rosemary is a fragrant evergreen shrub that has blue flowers in the summer. It’s also an amazing herb to cook with, especially when paired with honey and lemon! I personally use it quite a lot on chicken, and I hear it is tasty with potatoes (and you know I’ll be trying THAT out!) Rosemary likes full southern sun and will grow tall and bushy, so put it in a big sturdy pot in a nice sunny location. This herb is notoriously difficult to grow from seed. I’ve tried four or five times, and even when I get it to sprout, it dies on me within a couple of weeks. I’m trying again this year, but if this endeavor fails I will just go buy a plant! For those intrepid enough to try growing this herb from seed, here are a few tips: Plant the seeds 1/4” deep (don’t “bury” them) and cover with plastic. Water a tablespoon or so a day until the seeds start to sprout, in about 15-25 days. Use soil that drains well (like sandy soil, or premium potting mix) with ph levels ranging between 6.0 and 7.0, or slightly acidic to neutral. Water this plant well then let dry out before watering again. 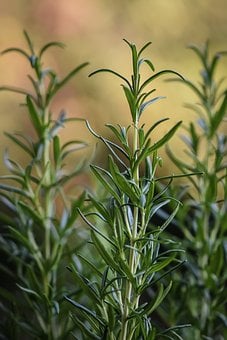 Rosemary plant. Pixabay image. 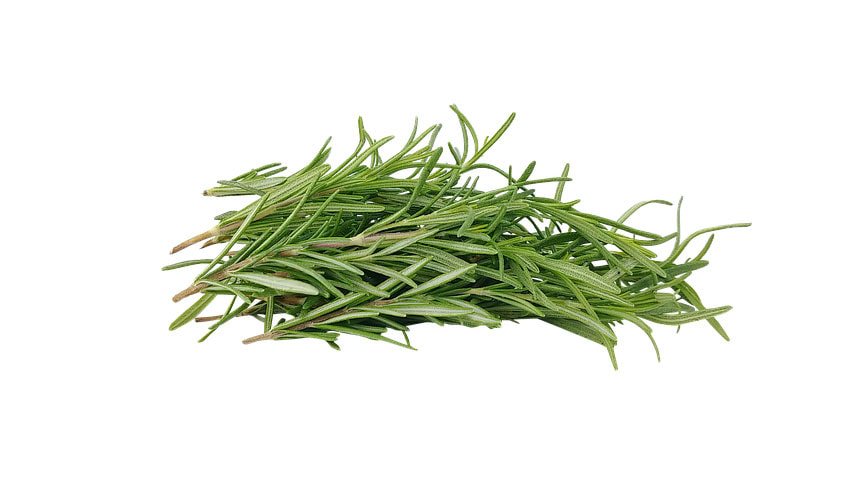 Rosemary. Pixabay image. Dill I love garnishing fish with fresh fragrant dill, and I often use this herb with homemade cucumber salads, because it just adds that little extra bit of zest. Dill can also be used as a garnish on deviled eggs (yessss!). This plant has multiple uses in cooking—dill leaves can be used as herbs and the flowers seeds can be used as a spice—and this beautiful feathery herb is apparently good for your health too (it is said to freshen breath and help with digestion)! If you’re looking to grow dill, here are some tips: Dill likes full sun and when it matures it will grow tall and/or long (“leggy”). Plant seeds in a pot about 12” deep, because this plant develops a taproot which will require space under the plant for the root system. (This herb does not like its roots disturbed so don’t transplant it. I do transplant it but it doesn’t always like me for it!) This herb likes well drained or sandy soil and doesn’t like to be overwatered. The seeds will sprout in 7-14 days and the plant will mature in about 90 days, sprouting yellow flowers in the mid summer. 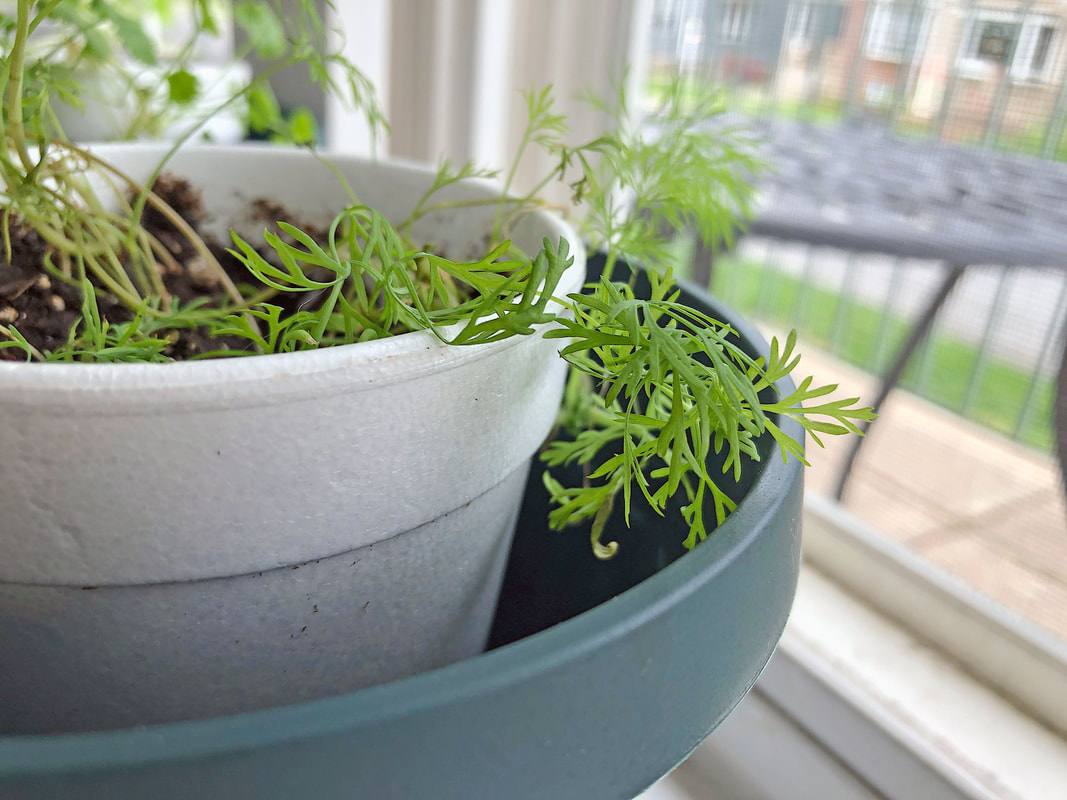 My dill plant. Photo by Diane M. Lilly, 2021. 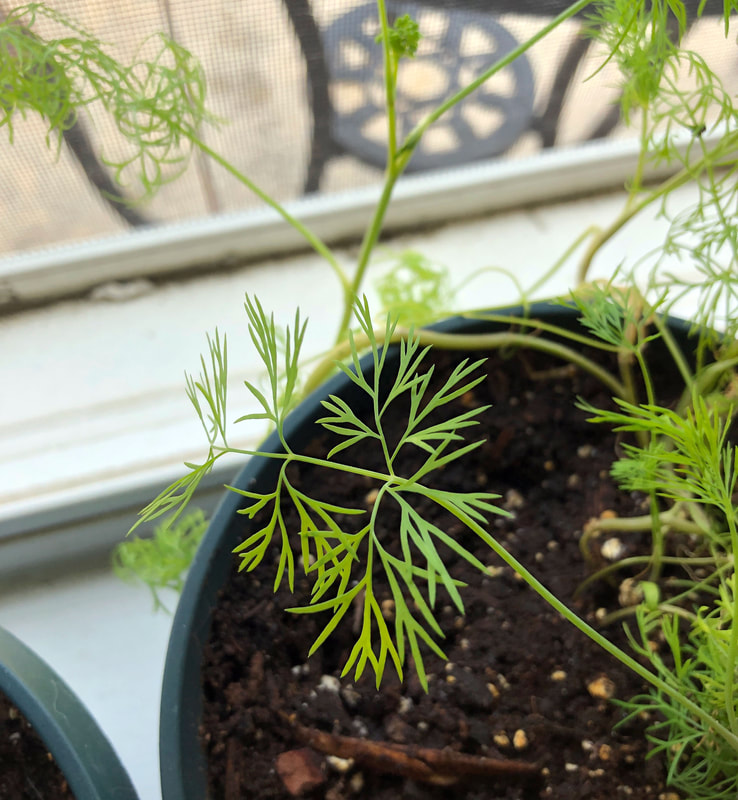 Dill leaf closeup. Photo by Diane M. Lilly, 2021. Parsley Parsley is amazing in soups and salads! I use it whenever I make homemade chicken soup, roasted potatoes, and in marinades. My research has uncovered a variety of health benefits to using parsley, including freshening breath, improvement to the digestive system, improved urinary tract health, and anti-inflammatory properties. Here are some tips for you for planting parsley: Soak seeds in room temp water, then plant them 1/4-1/2” deep in well draining soil, and you will see your parsley seeds sprout in 21-28 days. Parsley likes full sun, so plant them in a spot that gets plenty of sun during the day, or put them in pots on a sunny patio. If growing indoors, put them in a south facing window and they’ll be happy! 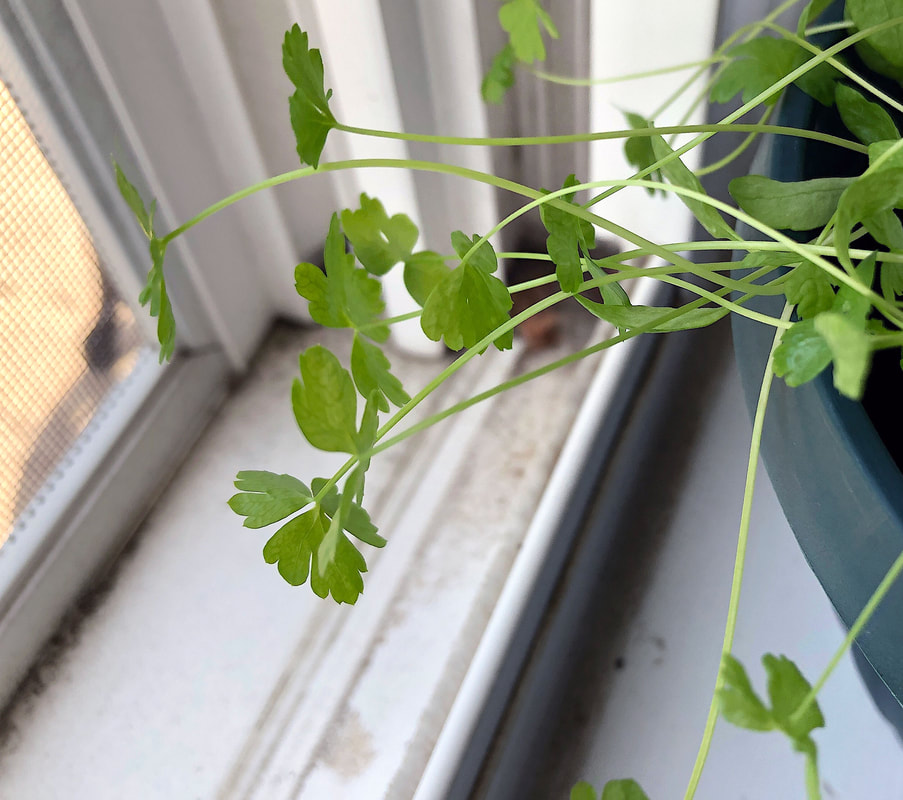 Parsley stems. Photo by Diane M. Lilly, 2021. 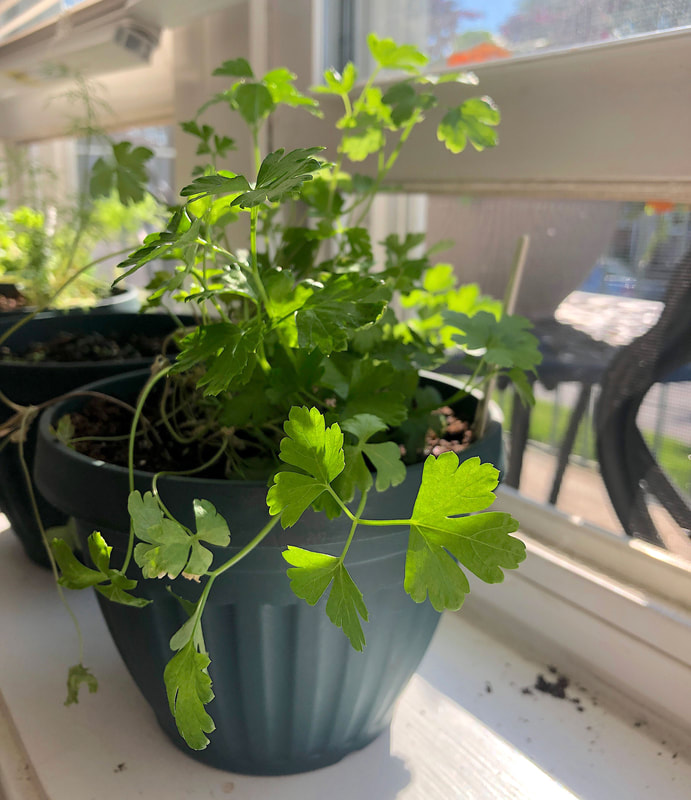 My parsley plant. Photo by Diane M. Lilly, 2021. Catnip My cats are gonna love me this summer—or they’ll just attack the plant…Either way it should be interesting! If there’s anything left, maybe I’ll try making a tea. Yes, you heard right… People can use catnip too! Apparently catnip can be used in teas to help sooth anxiety, aid insomnia, and help with digestive issues. And it is useful in the garden as well…Plant it in between your plants as an insect repellent. Just beware of neighborhood cats! If you want fresh catnip for your own kitties, here are a few tips for planting: Catnip needs well draining soil and plenty of sun. Bury seeds 1/4” deep in good potting soil and water with a tablespoon until it sprouts in about 7-10 days. Keep soil moist but never soggy. Once the plant starts maturing, only water when the soil is dry. Harvest catnip once it starts to flower, then cut the flowers to keep the plant producing more leaves. 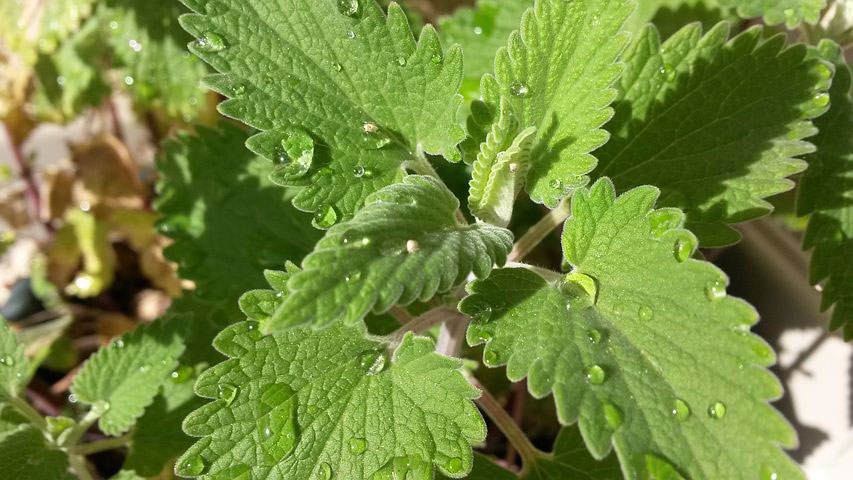 Catnip. Pixabay image. Cilantro I have to be honest, I have had little luck growing cilantro, but I am determined! This year I think I got a plant that is growing okay…so far. I’d love to be able to use fresh cilantro in homemade salsas and pico de Gallo, so my fingers are crossed this plant doesn’t die on me! I’d also love to experiment with salad, fish, and soup recipes with cilantro. Oh, and the cilantro leaves are just part of the fun…The plant will produce seeds (coriander) that can be used in additional recipes as a spice—so double the fun! This plant can be used as an anti-inflammatory and for a variety of other health issues related to eyes, skin, diabetes, etc. Cilantro likes full sun and needs soil with good drainage. Water this plant only when semi-dry—don’t overwater but don’t let dry out completely. Plant seeds in their “forever” pot (it does not like to be transplanted, which might be why mine keep dying?!) 1/4” deep, and wait for it to sprout in about 7-10 days. 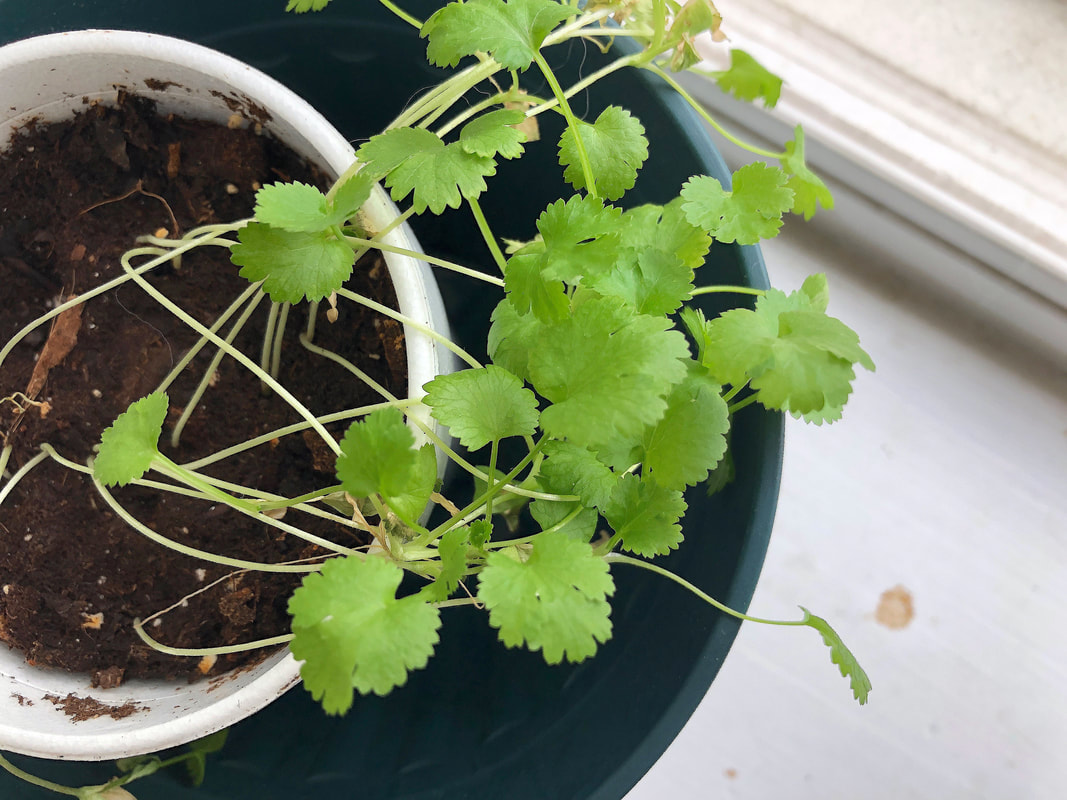 My cilantro plant. Photo by Diane M. Lilly, 2021. Thyme I have heard good things about thyme, so I thought I’d give it go this year. Typically it is used outside as a fragrant ground cover, but there are varieties that do well in pots. I actually forget which type was planted, but I’m pretty sure I did my homework and purchased seeds that do well in pots (hopefully). If not, there will be nice ground cover for an empty spot in the garden! As for other uses, it is said to help with sore throats, so it might come in handy during cough and cold season. Tips for planting thyme: Plant seeds less than 1/4” deep or sprinkle on soil then mist to water. They should sprout in 8-20 days. When planting outside, plant in full sun about 8” apart in well drained soil. Some varieties of thyme can grow 8-12” tall and work well as attractive and fragrant ground cover. Plants can be harvested in 80-85 days, cutting older leaves to allow younger leaves and new growth to develop. 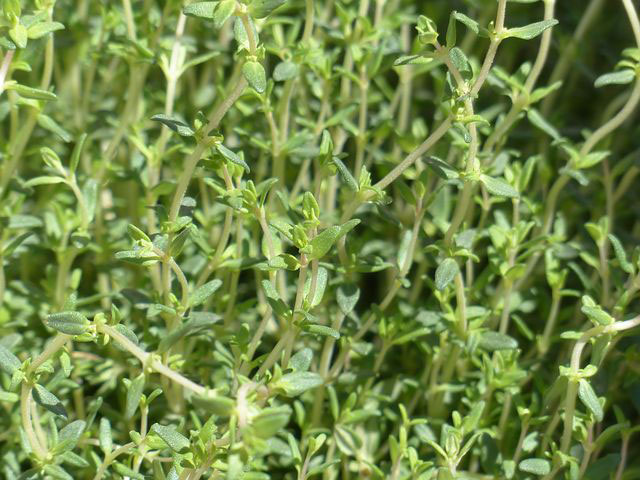 Thyme. Pixabay image. So there’s my herb project for this spring! Well, I’m not quite done. I still have other things to plant and I’m trying to make up my mind which ones to plant next. Recently someone from Happy DIY Home reached out to me with a blog article on a plant called Sorrel—a plant that I have admittedly never heard of before, but it sounds like an interesting leafy plant to grow in my outdoor garden (or maybe even in a pot indoors) for some future salad or other recipes. I hope you found this little article informative, and if you’d like to share your own experiences and comments down below, please feel free! I’d love to hear other people’s stories, triumphs and failures. I’m working on newsletters to start rolling out in a couple of months to allow my subscribers access to all my latest blog posts, merchandise sales, DIY projects, and social media posts, so if you’d like to subscribe to my email list, you can do so here!
0 Comments
 Celtic Motherhood Knot. Artwork done by Diane M. Lilly, 2021. So I Googled Celtic Mother’s Knot…thinking I would find THE Celtic symbol, break it down into its components, and do a quick sketch or two and explain my process…Not so easy! Turns out there are many variations of mother’s knots, some more modern than others. Some knots are more artistic expression than actual Celtic symbolism, but symbolism can be in the eye of the beholder anyway. So long as the symbol expresses the appropriate feeling and meaning, it’s all good. Anyway, I found myself having to make some tough decisions…Do I do quick sketches of a few of them? Or do I do one or two really good sketches? Do I do a really good rendering of just one style? And if so, which style? Ultimately, my decision came down to how much time I realistically had to devote to this project, which—unfortunately—is not enough to explore all of those options! So I’ve decided to talk about the symbolism of a Celtic Motherhood Knot, then break down one of the most “authentic” styles (if I can use that term), and finally show you a finished stylized rendering of one of these beautiful knot work patterns. The symbolism behind the Celtic Motherhood Knot To start with, there are a wide number designs that are called “mother’s knot”, “motherhood knot”, “mother and daughter knot”, and “mother and son knot”. They all involve a design that includes a heart, an embrace, or some combination of the two. At the core of their designs is the concept of the unbreakable and eternal bond and love between a mother and child. From a Christian standpoint, the knots could represent the Madonna and child, and many versions of the knot have a Trinity knot as the basis upon which the rest of the design is built. From an ancient Irish Celtic world view, the basic idea behind a mother’s knot (or motherhood knot) may represent the three cycles of a woman’s life—maiden, mother, and crone. It’s hard to really know for sure where the Celtic symbolism ends and the Christian symbolism begins, as these two beliefs became intertwined long ago and much of the original meanings have been lost. So for today’s design project, I have chosen what I think may be one of the more traditional Celtic Motherhood Knot styles, which consists of two hearts, stacked one atop the other, and three dots. Each dot represents one child, so I drew three dots, one for each of my boys. Let’s break it down… Start by drawing the basic lines for the design, either freehand or using guides. I chose to use a few guides because I was going for a cleaner look, but this design could just as easily be drawn completely freehand. A Motherhood Knot looks more complicated than it actually is…It really just consists of two hearts overlapping and each heart has an elliptical loop down its center. The loop from the bottom heart can be just a bit longer, if that’s the style you want. 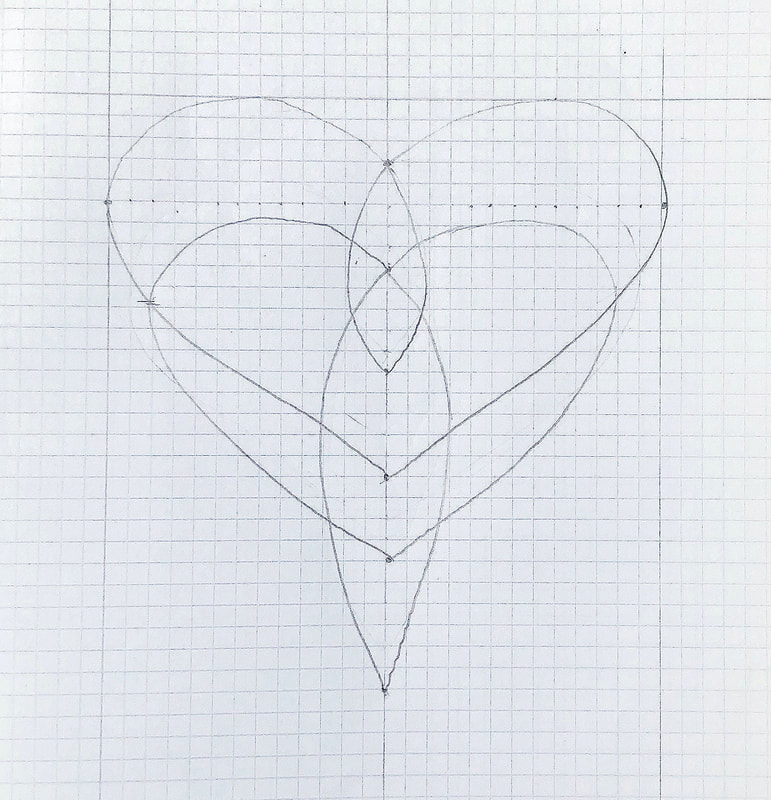 Basic line drawing for Motherhood knot. You then start to draw new lines on either side of the basic lines you’ve just drawn. Do this for all of the lines in the drawing, then go back and erase (yes, erase!) the original line. Now that your basic design is in place, you have to pick one spot where the lines of your thread would overlap and make a decision…Which line goes under and which goes over? Once you make a decision, erase the lines that don’t need to be there anymore so that your thread can overlap. Now follow that thread to the next intersection and do the opposite. In other words, if your thread went OVER the last line, it will go UNDER at this intersection. And you just follow the lines until every intersection has an over-under. Trace your design again with your finger to make sure that there are no mistakes. 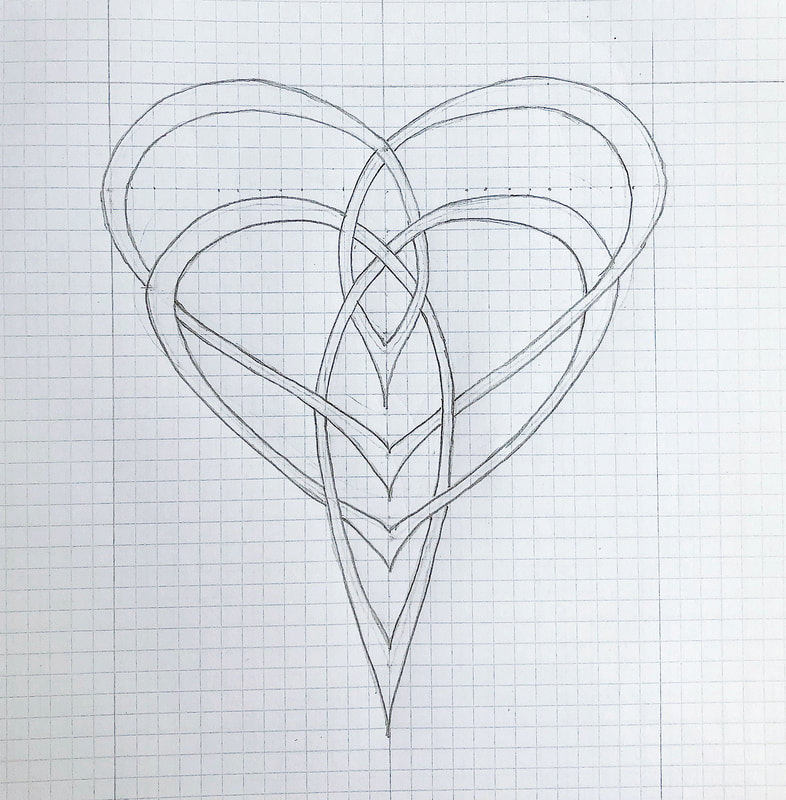 Under-over threads for Motherhood knot. The next step is where the fun begins! You can do anything you want from here on out to stylize this design the way you wish. You can change the thickness of the lines or add flair to certain sections of the threads (like I did with my elongated points). And this is also where you may want to start thinking about final details, like where to put dots and where to add other artistic details to your design. The sky is literally the limit! 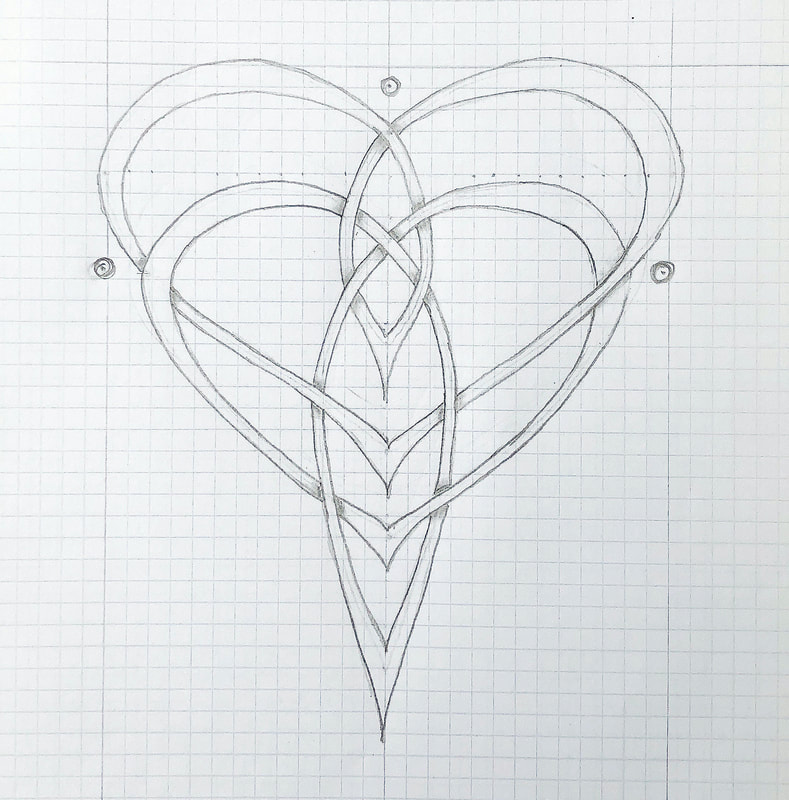 Dots added for children in Motherhood knot design. And the final piece… Add in all the final details and sharpen everything up where you think the lines need to be darker or crisper. You may want to bring in colored pencils or markers or paints to bring this design to life. In the sketch below, I decided to keep my design in pencil, but added shading and texture to give the knot a lift and a decorative vine to give a more finished look. I’m thinking I may revisit this drawing in the future as a focal point of a wood burning project, perhaps one of my decorative plates! 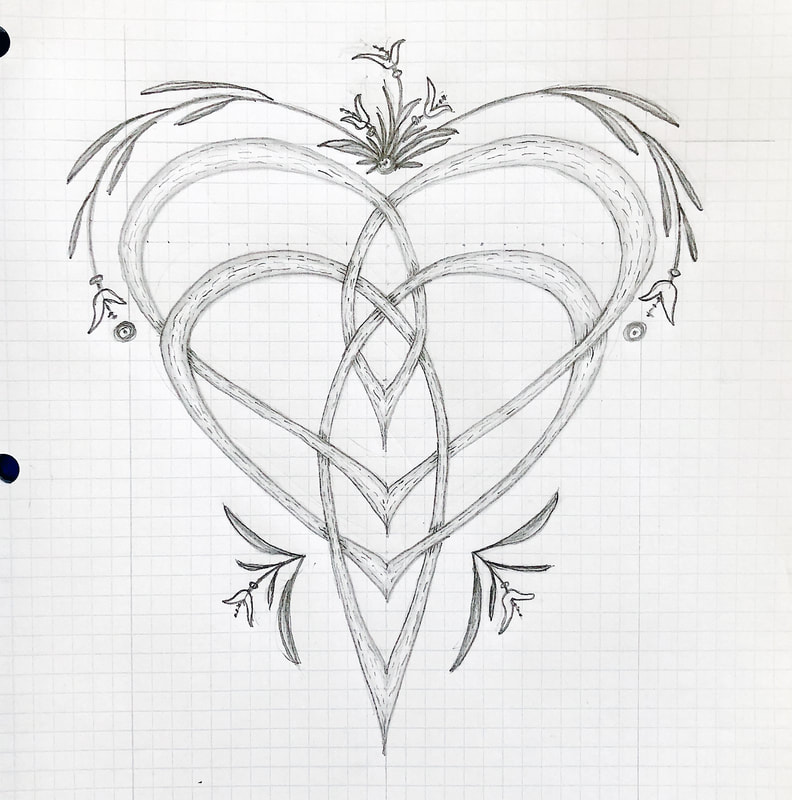 Finished pencil design of Celtic Motherhood Knot. Artwork done by Diane M. Lilly, 2021. So what do ya think? Do you have a favorite style of Celtic Mother’s Knot? Feel free to share in the comments below! And you can click here and here to go to previous blog posts with tutorials for a couple of different knots you can practice! If you’d like to subscribe to my email list you can get monthly newsletters (coming soon) alerting you to my new blog posts, special merchandise sales, ongoing DIY projects, and social media events. Related blog posts you may want to read: Celtic Tree of Life A foray into customizable artwork Celtic Knot tutorial, part 1 Celtic Knot tutorial, part 2 Celebrating Irish Celtic Art for St. Patrick's Day Getting out of my way 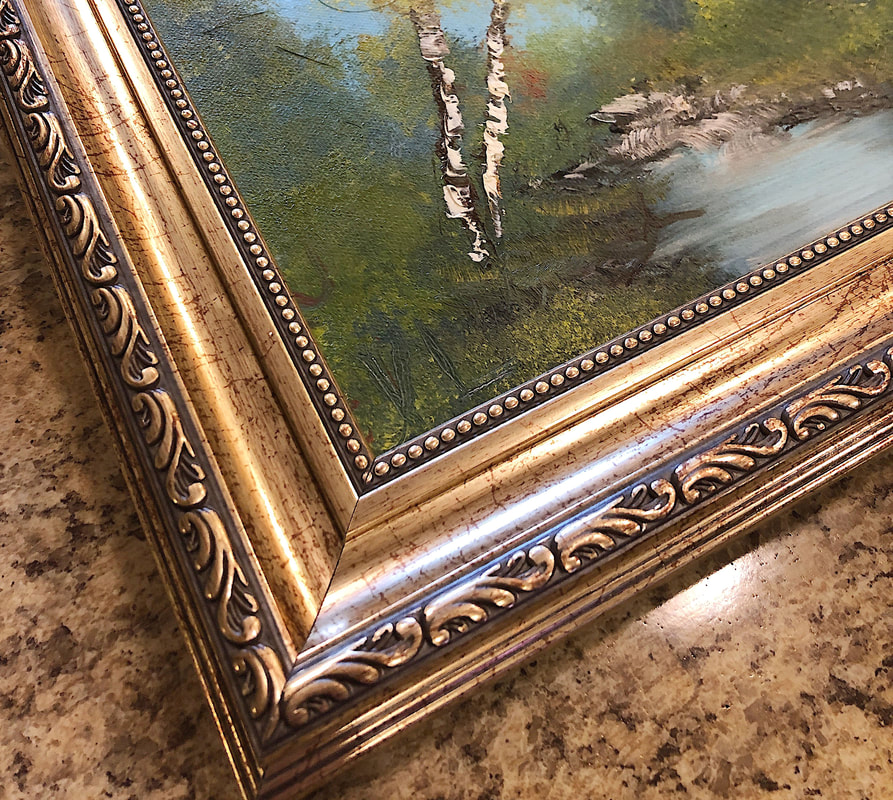 New gold frame for my son's artwork. Photo by Diane M. Lilly, 2021. My teenage son is a budding artist who likes to paint in the Bob Ross style with oil paints. He has had these two 8 x 10 finished oil paintings just sitting in a cabinet for quite a while, so I thought, why not pull them out and display them in frames on my dining room wall? But there was just one problem—I had absolutely no idea how to frame and hang art! I did a little research, and it turns out it’s not difficult at all. So let me take you through the steps I took to frame and hang canvas art… Let’s start first with assessing the type of artwork… The first stage of this process is simply assessing the type of medium to be framed (paint or print type, etc.) and the thickness of the canvas. If framing a painting (like in my case), how you frame it will depend on whether the canvas you are working with is stretched or not stretched (stretched canvases are already attached to wood brackets, whereas unstretched canvases can be rolled up until ready to frame). Knowing the type of paint used or other important information about the type of medium will help guide your decisions from this point on, especially in regards to whether or not to use protective coverings. (In my situation, I have two 8 x 10 landscape oriented oil paintings on 5/8” thick pre-stretched canvas. They do not require any protective coverings.) In this stage, you are also looking at the style and size of your artwork and how it fits into your space. These assessments will guide you in choosing the style of frame. 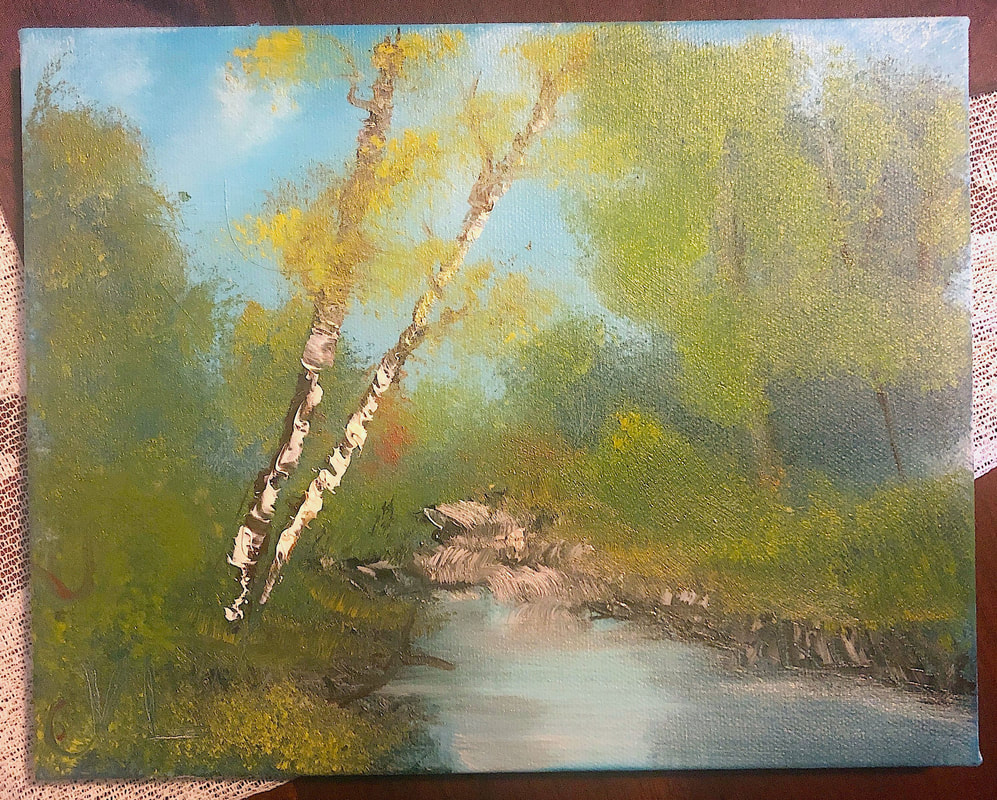 One of my son's paintings. Photo by Diane M. Lilly, 2021.  Another of my son's paintings. Photo by Diane M. Lilly, 2021. So let’s talk about choosing frames… As I said before, I really didn’t know a thing about framing this type of artwork before now. I searched high and low for the “right” frames, those “special” frames I assumed were made just for canvas art! Here’s what I learned…You can hang your artwork in whatever frame you like, so long as you make sure it is secured to the frame and does not stick out ridiculously far from the frame. It doesn’t need to be any more complicated than that! A frame should enhance the artwork as well as the decor in the room where the artwork is to be hung. You have to decide whether your art piece will look good with a thin or thick frame, whether or not you will use matting, and what style and color will go well with the room’s decor. As for frame width, a thin frame may work well in a modern setting, but make sure it also enhances the artwork and helps give it a defined edge. Sometimes thicker frames add balance and a more finished look to the artwork—it all depends on the piece itself and the stylistic decisions you made for the space in which it will be hung. A good frame should draw the eye to the piece without competing with it for attention (unless that is part of the overall style). I was all over there place trying to figure out what type of frames would work well with my son’s art work. In truth, I was scared to death to make a mistake or wrong decision! At first I was considering simple thin plain black frames, but that wouldn’t work at all in my newly redesigned dining room or with the paintings themselves. What I needed was something more traditional in style to match the rest of the decor, as well as a way to make the artwork “pop”. Brown wood frames were a consideration, but I felt like that would just be too much wood and make it too dark in the corner where I wanted to hang the artwork, so I settled on the idea of using gold frames. There are a couple of options for framing the stretched canvas art like the ones I am hanging. There are the traditional frames where the picture or artwork fits into the back (open back type of frame), and then there are front mounted or tile frames where the art is mounted into the front and gets screwed into the frame from the back. I ended up just opting for the traditional type of frame. After hunting around a while at Michaels, and then shopping online, I finally found a pair of frames I loved on Amazon. These frames actually tie in with similar style frames in my living room, they work well with the traditional style in my dining room, and I think they give the paintings a bit of sophisticated flair! 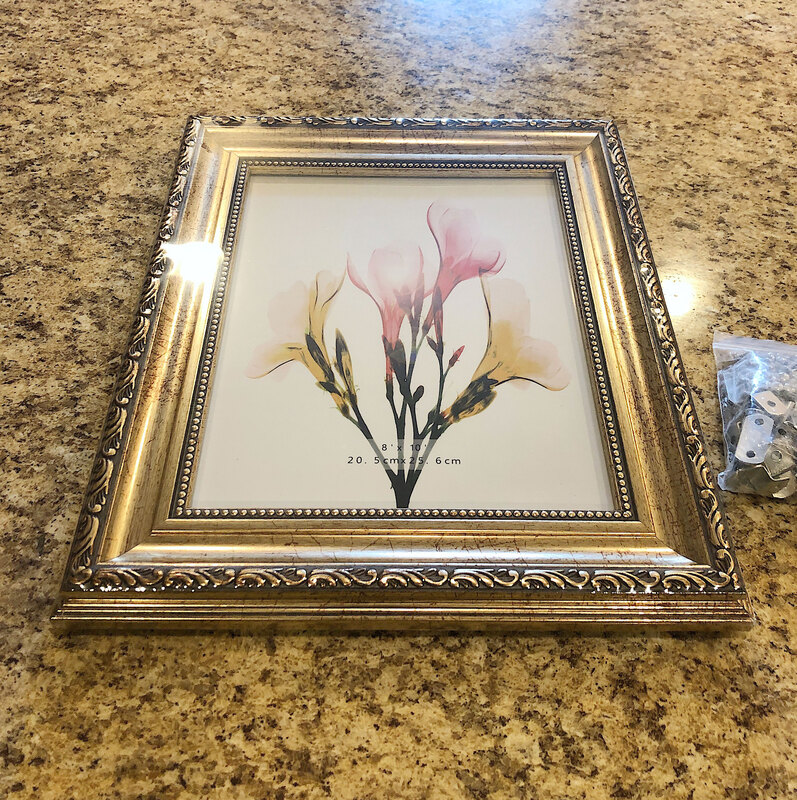 Lovely gold frame from Amazon. Photo by Diane M. Lilly, 2021. 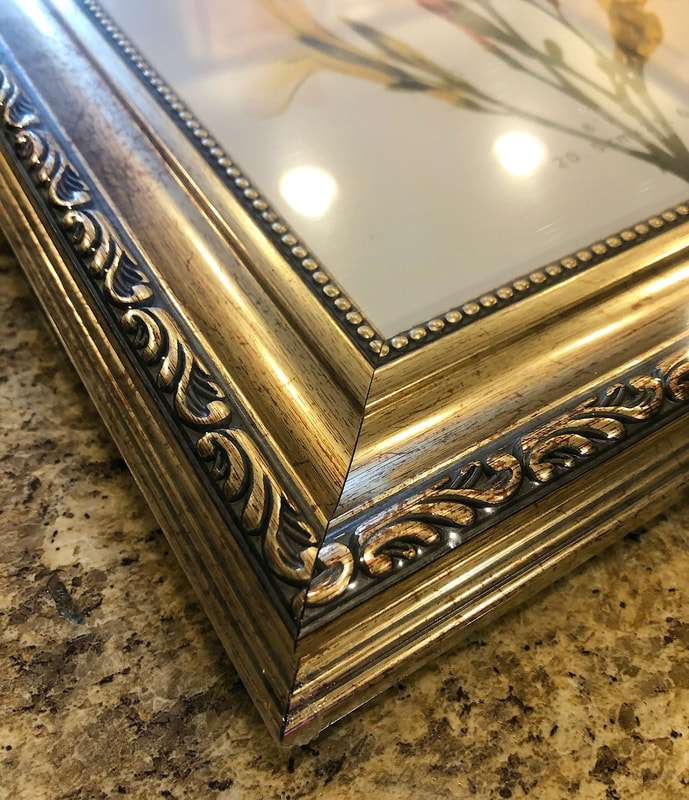 Up close detail of gold frame. Photo by Diane M. Lilly, 2021. Special considerations for paintings… Depending on the paint medium and type of canvas, you may want to explore options like matting, glass front, or dust covers on the back. In my situation, the oil paint my son uses does not require a glass front or dust cover. In fact, those options may increase the chance that trapped humidity could damage the painting over a period of time. (All oil paint requires is an occasional dusting and to be kept out of direct sunlight.) This is where it is important to know what type of canvas and paint were used so you can make decisions for proper protections for your artwork. If you’re not sure whether or not to add protections, do a quick Google search and you’ll get your answers! It’s important, so don’t skip this step… As for matting, that is a preferential decision. There are a wide variety of ways to use matting, and I won’t go into them here, but I advise you to explore them to see whether they work for your situation. (I found a good informational link on matting here that goes a little more into depth about the matting process.) In my case, matting just wasn’t necessary. Mounting artwork into a frame… Ideally your frame should be as close in thickness to your canvas as possible so that the your artwork is secure and the canvas and frame can hang nicely against the wall. When using frames that are thinner in thickness than the canvas art, however, you will need offset clips. These clips get screwed into the frame (not the canvas), and they sort of cradle the artwork into the frame so that it doesn’t move. I found my clips online on Amazon, but I'm sure you could find them at a local hardware or crafts store. These come in a variety of sizes so that you can choose the size that fits snuggly against the canvas.  Offset clips. Photo by Diane M. Lilly, 2021. 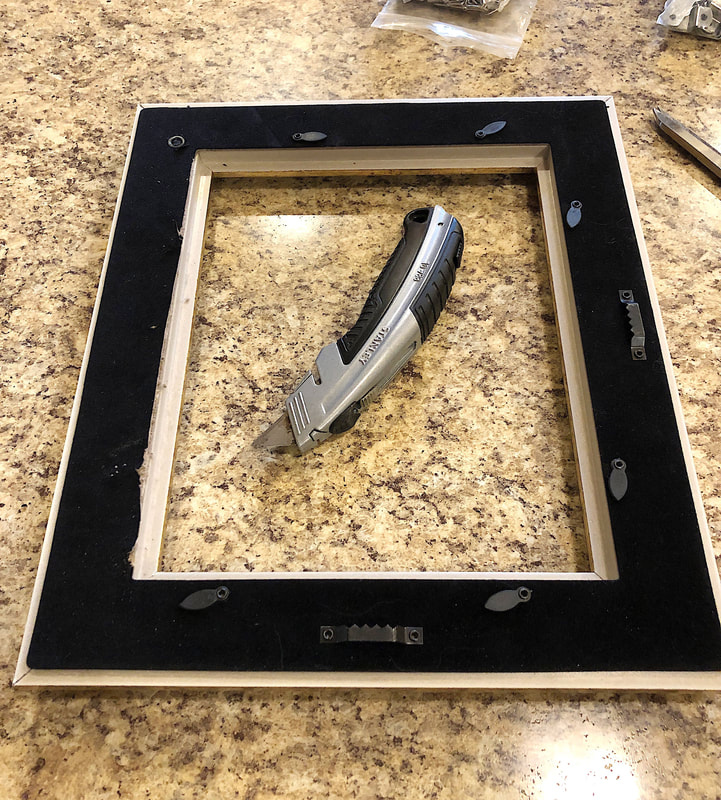 Frame back removed. Photo by Diane M. Lilly, 2021. 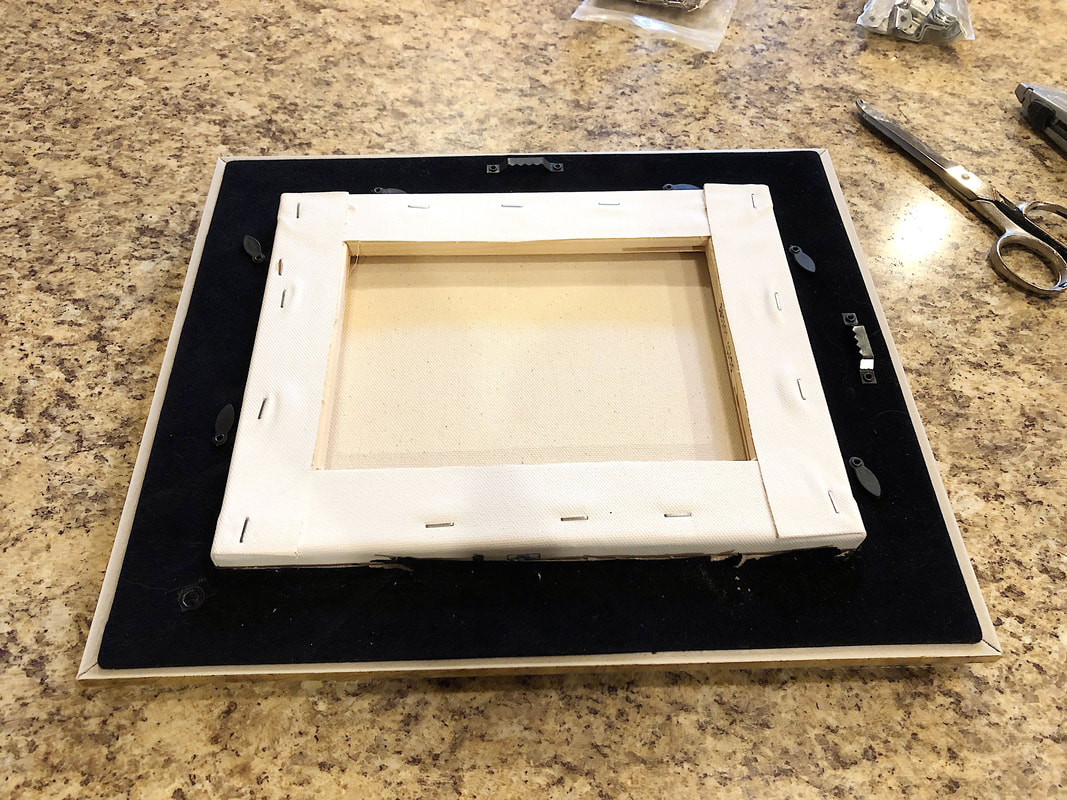 Canvas placed into frame. Photo by Diane M. Lilly, 2021. 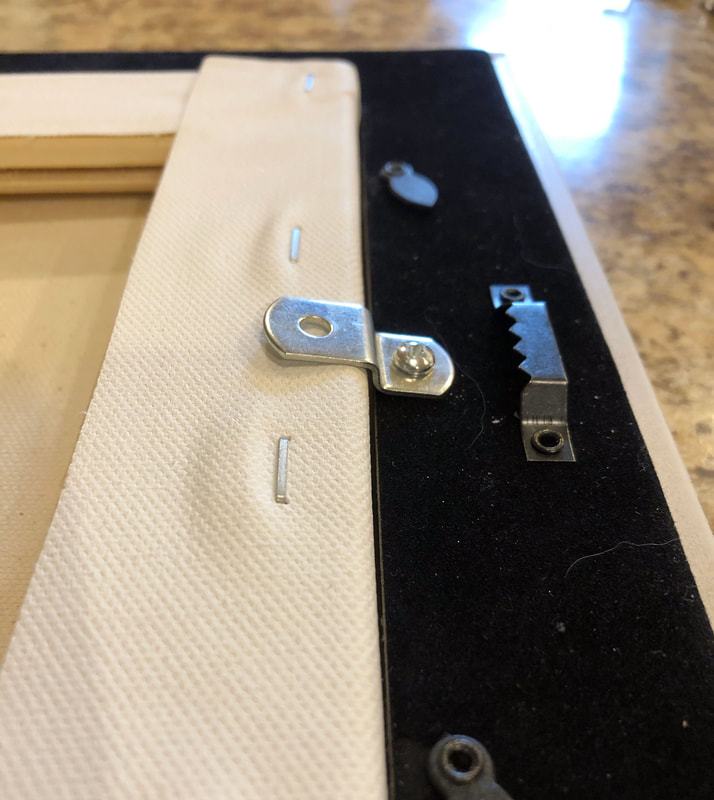 Offset clip mounted to frame. Photo by Diane M. Lilly, 2021. 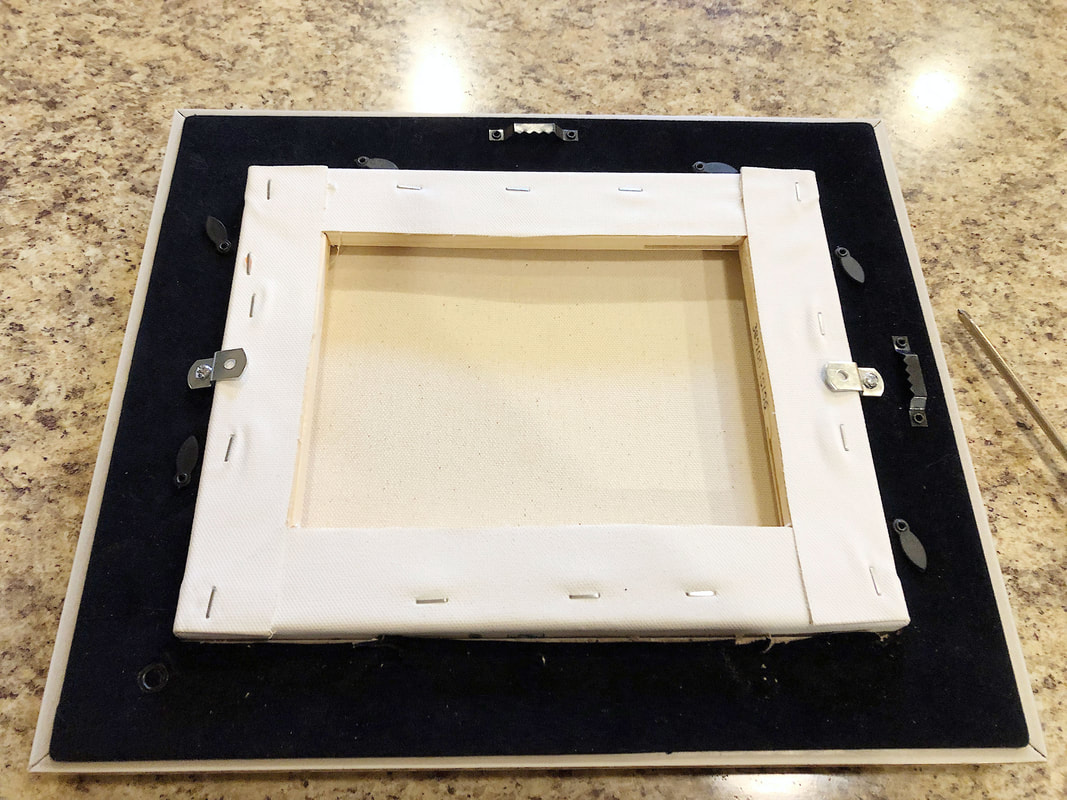 Both offset clips mounted to frame. Photo by Diane M. Lilly, 2021. Attaching hanging apparatus… There a a few ways you can hang your newly framed artwork, so I’ll just touch on them here then talk about what I used for my own project. A simple method for hanging is to use a sawtooth bracket and a nail. This is just a simple nail in the wall and the sawtooth bracket on the back of the frame just sits on the nail. This method is good for small pieces of artwork that can hang flush to the wall. Larger, heavier, or bulkier pieces will require a different approach using hanging wire and hooks. Let’s start with the hooks…There are a few different hook styles you can choose—D rings/hooks, eye hooks, triangle D hooks. Whichever type of hook you choose, you will mount them about 2/3 from the bottom of the canvas (or 1/3 from the top). I happened to have a bunch of triangle D hooks on hand, so that is what I used for this project. They are a little awkward—I probably should have used eye hooks—but they work okay since this is a small project. 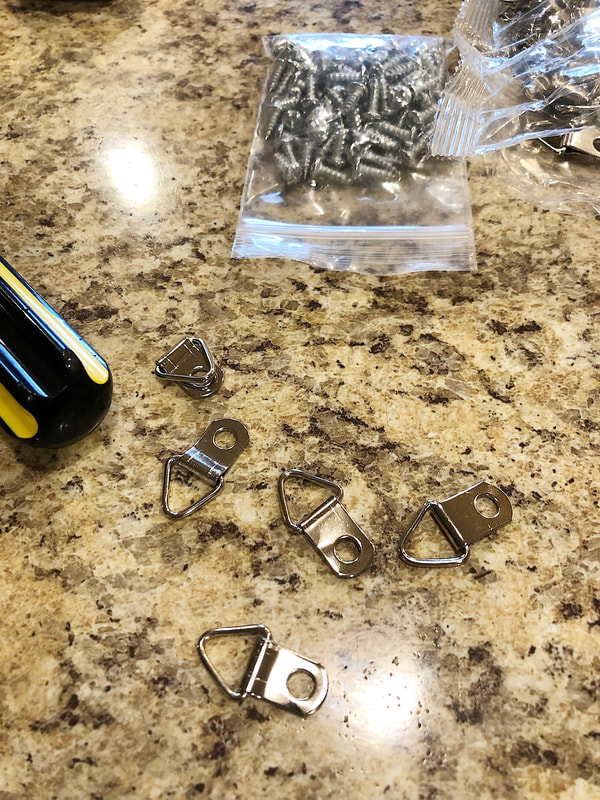 Triangle D hooks. Photo by Diane M. Lilly, 2021. 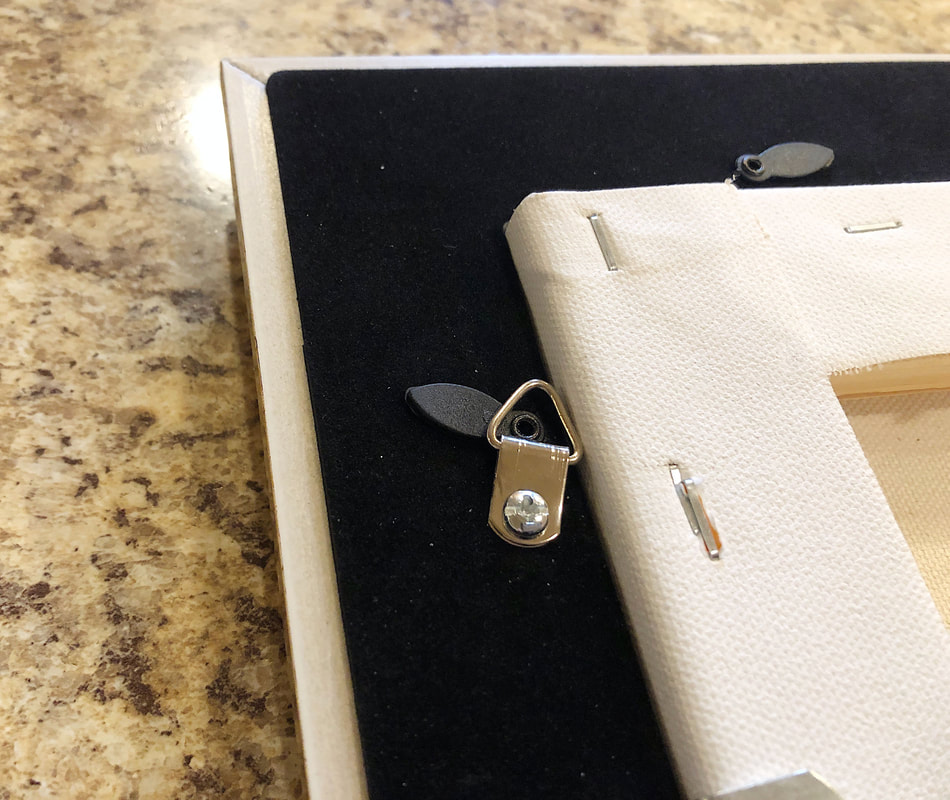 Triangle D hook mounted to frame. Photo by Diane M. Lilly, 2021. Once the hooks are securely mounted, you can string your hanging wire between the two hooks. Essentially you string one end of the wire around one hook, pull it up to a pint just below the top edge of the frame, then bring the wire back down to wrap it around the second hook. This allows the wire to have the slack needed to properly hang on the wall. You can finish things off with small pads on the bottom corners of the frame to correct any lean that might damage the wall or the frame. Small artwork (like in my project) can just hang from a simple nail (make sure to hammer it in at an angle so the artwork can’t slide off), but larger heavier pieces will require more stability. In that case you can use a J hook, which anchors better into the wall and supports the weight of your artwork. There is also the option of using adhesive strips instead of putting holes in walls, but whether or not you should use that technique will depend on the size and weight your artwork. 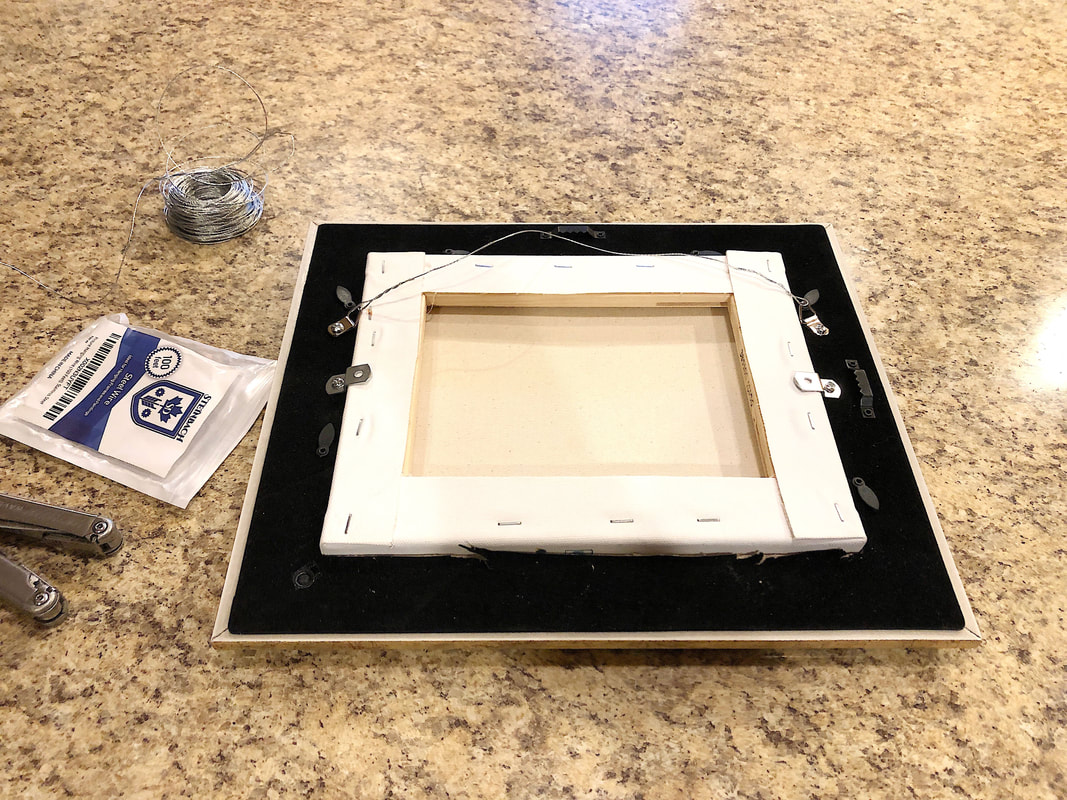 Picture hanging wire mounted to frame. Photo by Diane M. Lilly, 2021. 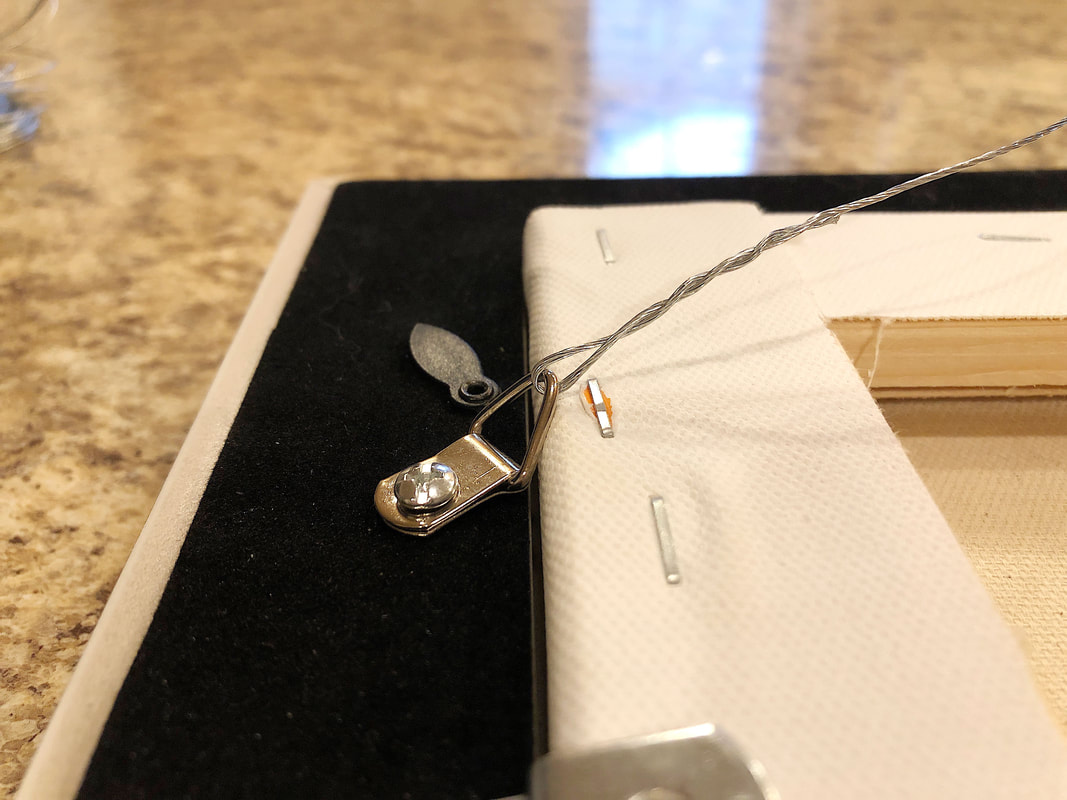 Picture hanging wire threaded through triangle D hook. Photo by Diane M. Lilly, 2021. 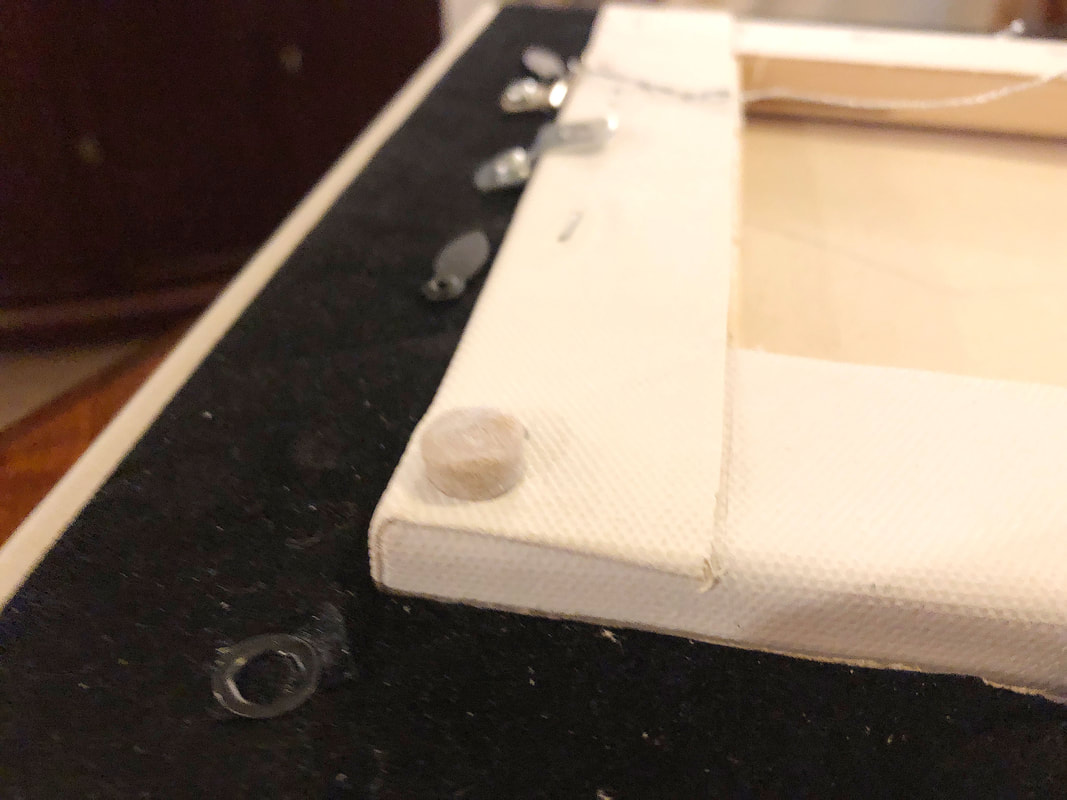 Felt pad attached to corner of canvas. Photo by Diane M. Lilly, 2021. And finally, let’s hang your artwork… In the interior design industry there are standards for how high to hang artwork on a wall. Generally speaking, artwork should be hung approximately at eye level. Traditional pictures should be hung with the bottom at 58”-60” AFF (above finished floor). Pictures hung on over another should have a center point between them at 58”-60” AFF and be about 2” apart. Use a level to make sure the pictures are hung straight. Also, consider that the bottom picture’s edge should be 8-10 inches from the top of the furniture over which it is being hung. Keeping the above standard rule of thumb in mind, make the measurements necessary to get the correct heights for the hooks, adjusting as necessary. In my case, I hung the bottom picture first, then measured up from there to find the location of the next nail. 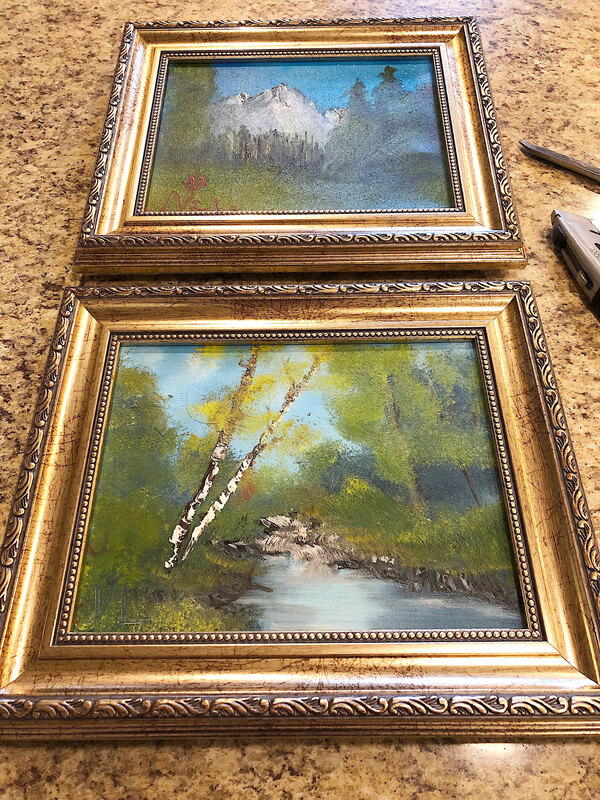 Closeup of newly framed artwork. Photo by Diane M. Lilly, 2021. 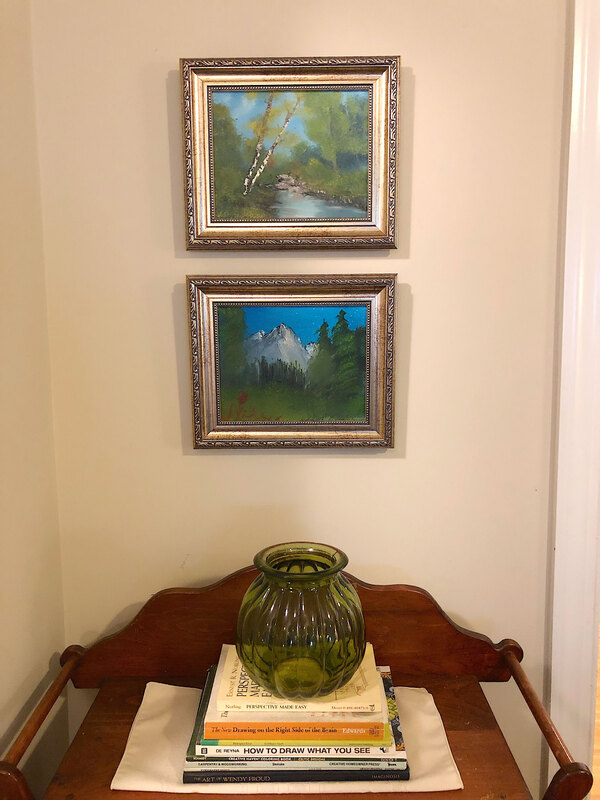 Both art pieces, framed and hung. Photo by Diane M. Lilly, 2021. And there it is! Both pictures are successfully hanging on the wall in my dining room above a small wooden cabinet, creating a little area of visual interest. (You can read about my recent dining room redesign project here!) This was a fun learning experience I thought I’d share, and I hope you found it interesting! Feel free to leave comments or other tips in the comments below! If you are interested in receiving notifications for new blog posts, new items, and other exciting stuff, sign up for my email list to receive my monthly newsletter which I am working on rolling out in a couple months. This article contains external links for demonstration purposes only, and I am not being financially compensated for specific products or brands. Related blog posts you may want to read: My dining room redesigned as a multi-function space How to replace a clock mechanism How to rewire thrift buy lamps Creating a kitchen coffee bar Comparing DIY upholstery cleaning methods DIY refurbishment of a dining room cabinet 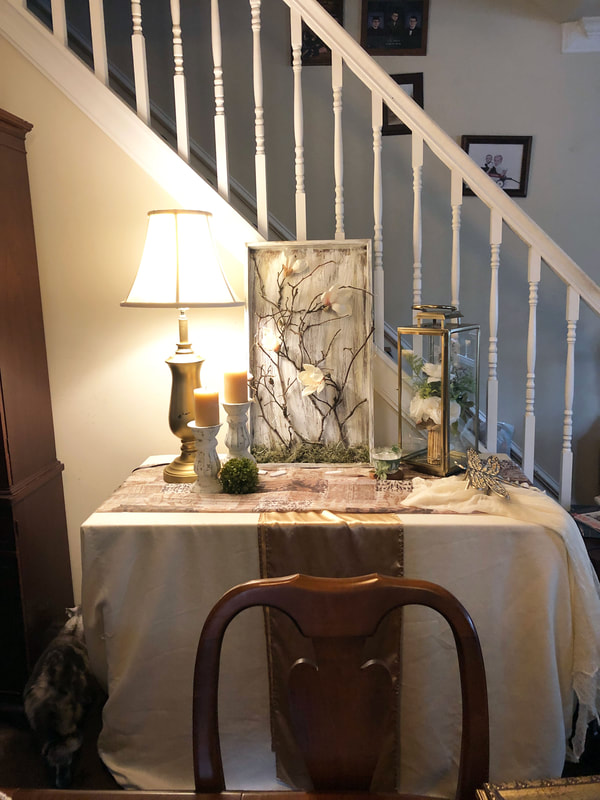 "New" thrift lamp, rehabbed and staged. Photo by Diane M. Lilly, 2021. While casually strolling through a local thrift shop, I happened to spy these two gorgeous lamp bases. I knew they were just perfect for my dining room vignettes, but they needed a little work first. One was missing the lamp shade and harp components, while the other just needed some TLC. Both lamps needed to be completely rewired to replace the cords that were older than grandma. Don’t need any electrical fires here! So today’s project will be to replace the lamp cord for each lamp. 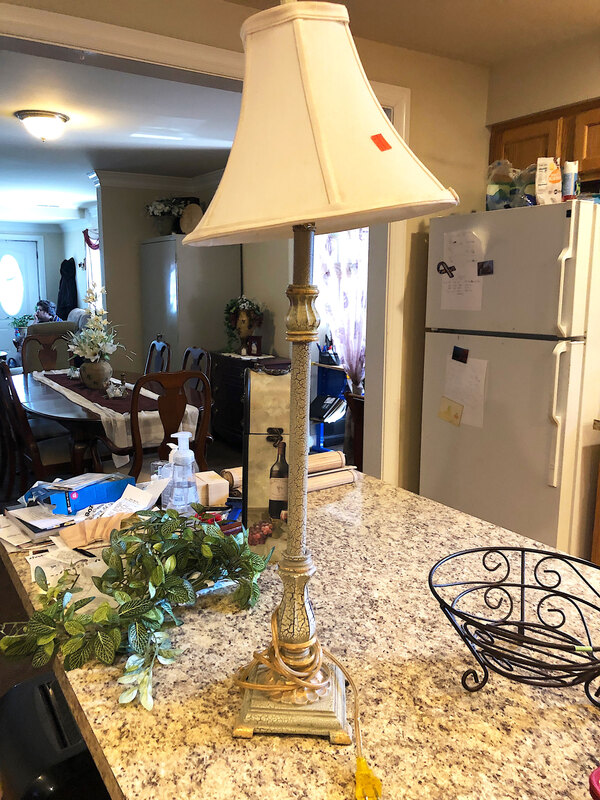 Candlestick lamp purchased at Goodwill. Photo by Diane M. Lilly, 2021.  Base of a gold lamp purchased from Goodwill. Photo by Diane M. Lilly, 2021. Two lamp kits from my local Home Depot cost me about $17 each. They have three way switches, so that I can adjust the light…Perfect! Saving energy already! I also needed to purchase a new harp and lamp shade for the gold lamp base, which was the most expensive part of this project by far! So I have my two lamp bases and the lamp kits and shades... 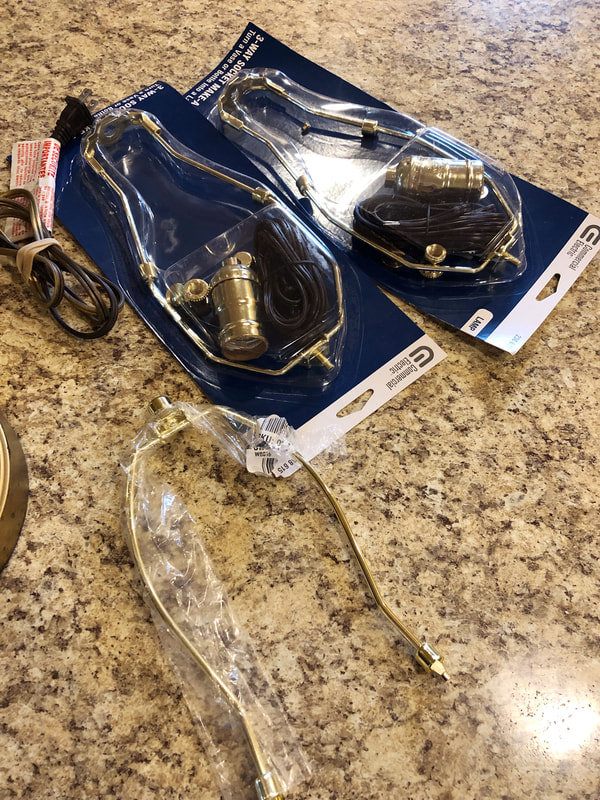 Lamp kits purchased from Home Depot. Photo by Diane M. Lilly, 2021.  Harp for lamp shade. Photo by Diane M. Lilly, 2021. 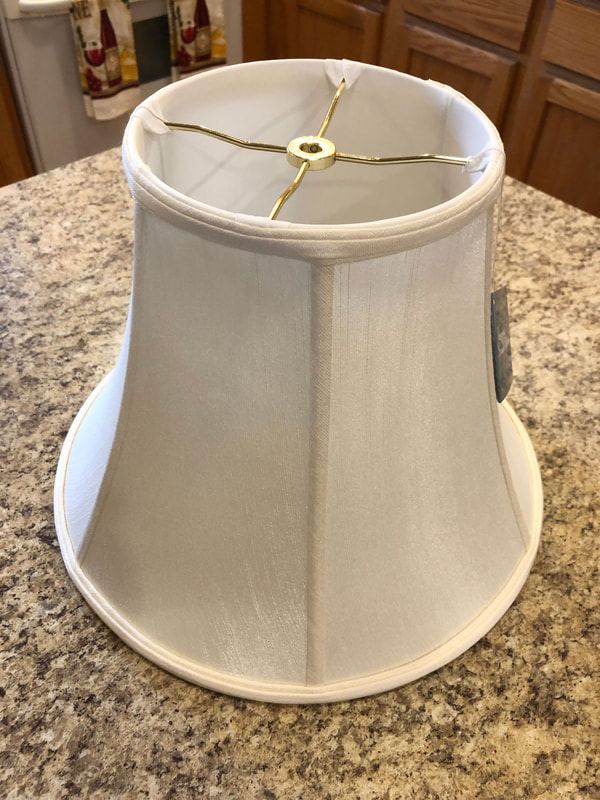 New lamp shade. Photo by Diane M. Lilly, 2021. 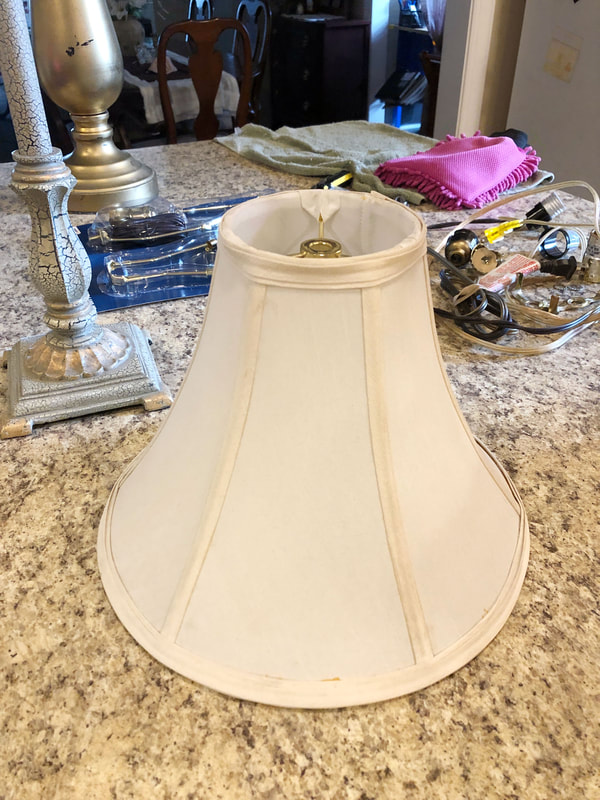 Existing lampshade from candlestick lamp to be cleaned. Photo by Diane M. Lilly, 2021. All I need to do now is take out the old wiring and put in the new and improved wiring, but first let’s sort out the basic anatomy of a lamp and its electrical fittings… 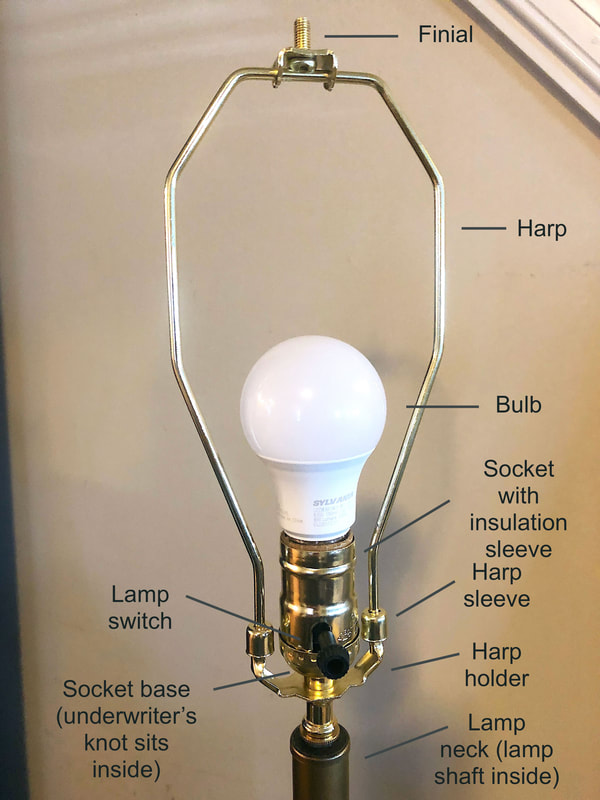 Lamp anatomy. Photo & diagram by Diane M. Lilly, 2021. You may need to refer back to this diagram from time to time during the process, so that’s why I thought this diagram would be useful! After all, it’s not like any of us replace lamp cords every day, right? Taking out the old wiring… First…please, please, unplug the lamp first! Never, ever do electrical work when an appliance is plugged in! You can start with something easy—unscrewing the decorative top finial (if there is one) from the harp (see diagram). Remove the harp by lifting the sleeves that hold it in place, pushing the ends of the harp towards each other. You can remove the felt base of the lamp (if there is one) to access the cord and cut at the bottom. Remove the top part of the socket and insulator. (Try squeezing it to get it out. There may also be a screw that will require removal on the socket base, so if it doesn’t come off look around for that screw.) Unscrew the wires from either side of the socket. (May have two different color screws corresponding to the positive and negative wires.) Unscrew the base of the socket. Untie the knot (underwriters knot) in the cord that holds it in place and pull the cord out. 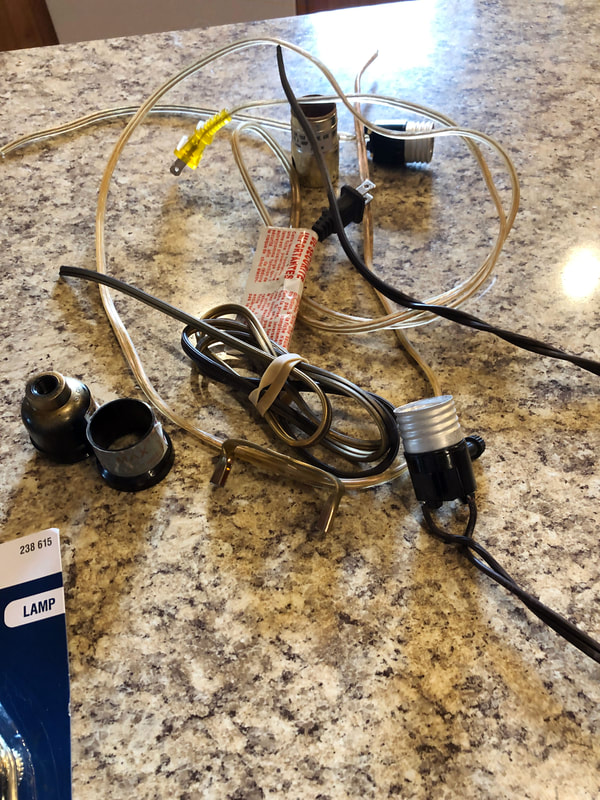 Old wiring taken out of thrift lamps. Photo by Diane M. Lilly, 2021. And putting in the new wiring… Take the new cord and twist the two separated ends together (if they are not together already) so you can feed the cord through the bottom of the lamp and up through the shaft. Once the cord is all the way through you can put the new base cap back on, screw it down, tighten set screw (if it has one). Separate the two strands of wire to give enough wire needed to tie a knot and wrap around the screws. Tie an underwriter’s knot…Loop one wire end in front of the cord (like half a bow), loop the second wire end around the back of the main cord shaft and push it through the first loop, now take the end of the first loop and push it through the second loop, then pull both ends to create a knot. After you tie the knot, pull the cord through the lamp shaft to tighten the slack. Now it’s time to attach the wires to the socket. Take the new socket apart to find the part where the wires are attached. Note about the cardboard insulator inside the socket…You must have it because it is the insulation and is a safety mechanism for the the electrical components. Do not throw it away! It’s supposed to be there, so leave it in place. Look for the brass and silver screws—these create the polarization. Brass is hot, silver is neutral and these screws correspond to the plug at the other end of the cord, with the wide side being neutral and small side being hot. When you look at you lamp cord, one side of the wire is smooth (for the hot screw) and one is ribbed (for the neutral screw). So match up the brass screw with the smooth wire (sometimes wire will have a black tip) and the silver screw with ribbed wire (sometimes wire will have a silver tip). This part is really important for electrical safety and lamp function. Loosen two screws and wind the corresponding wire to the appropriate screw, using needle nose pliers to create a clockwise turn with the wire around the screw. Once the wires are connected—and double checked for safety—put the socket pieces back together by pushing down until everything goes into place. All that’s left is to attach the harp and shade, and screw in the lightbulb! 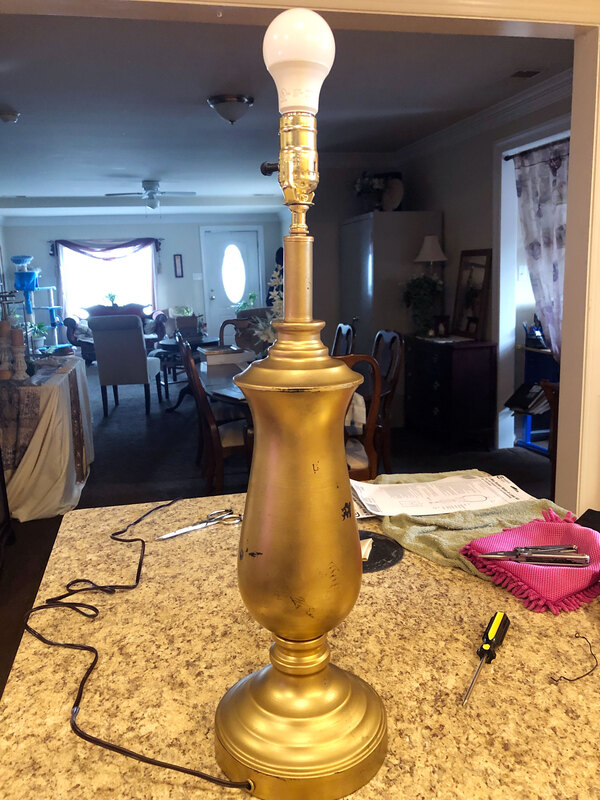 Gold lamp rewired and lit. Photo by Diane M. Lilly, 2021. 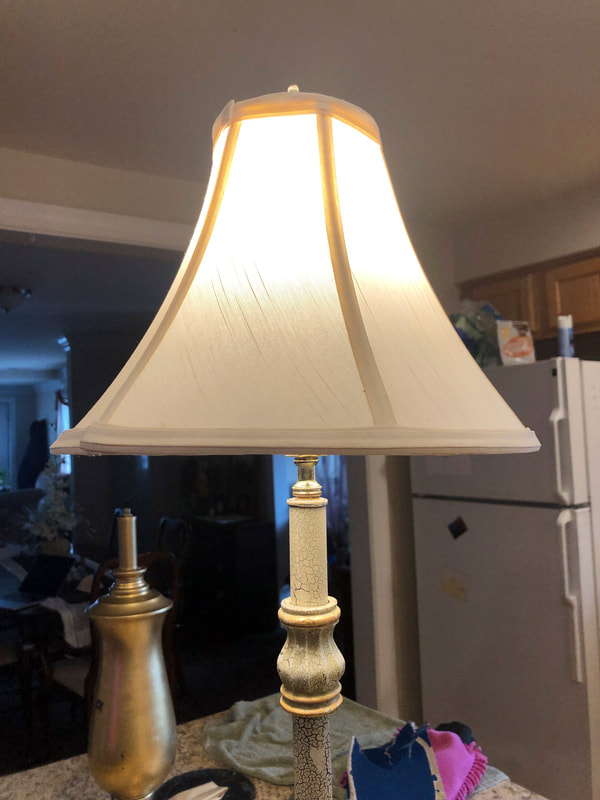 Candlestick lamp rewired and lit. Photo by Diane M. Lilly, 2021. A couple of real life situations… Ok, so now that I’ve shared the steps required for taking apart and re-assembling a lamp to rewire it, let me share with you my ACTUAL experiences with the two lamps I recently rehabbed. 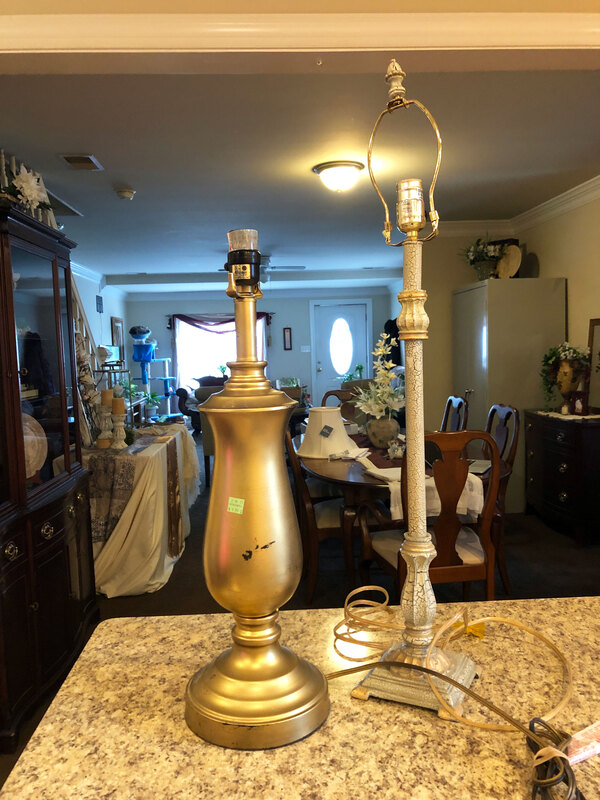 Two lamp bases before rewiring. Photo by Diane M. Lilly, 2021. Lamp #1…My new candlestick lamp Whoever owned this lamp before me not only re-assembled the socket crooked, they glued the top and bottom of the lamp shaft. Long story short, it took my son and I—and several tries with a variety of wrenches and tools—to pry this baby apart. We had to untighten the shaft from the lamp base so that we could get the top bit out to get a handle on the crooked socket base and glued in washer and harp seat. This lamp gave us such a problem! What should’ve take no more than maybe 15 minutes to do, took us almost an hour. Once we were able to sort that mess out though, it was smooth sailing! We just followed the instructions on the package (which are essentially the same as the ones listed above) and had my salvaged lamp wired and lit up in no time. Oh and I almost forgot to mention—I had to clean the filthy shade with soapy water and thankfully I didn’t ruin it! 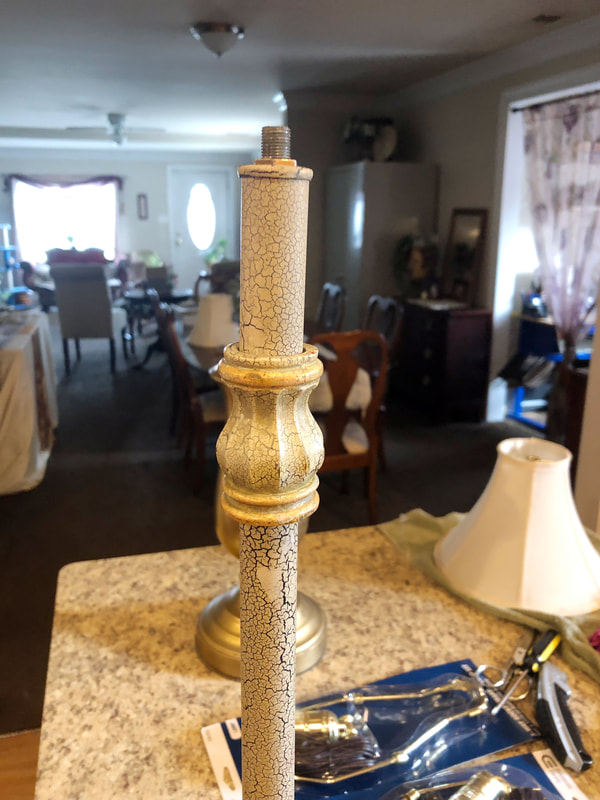 Candlestick lamp base after the socket base was removed. Photo by Diane M. Lilly, 2021. 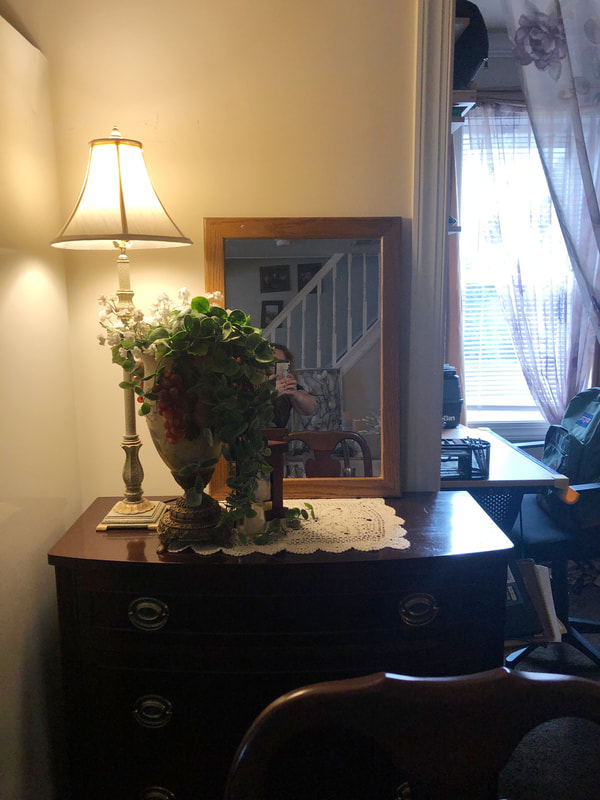 Candlestick lamp finished and staged in my dining room. Photo by Diane M. Lilly, 2021. Lamp #2…My new gold lamp This one was much easier, but sort of had the opposite problem. Unlike the candlestick lamp—where the shaft was all one piece—the gold lamp’s shaft was in three pieces, and loose, and when I tried to fish the new wire through it just got stuck. So we had to take the whole lamp apart and fish the wire through bit by bit, then re-assemble and tighten the whole ensemble. Then it was smooth sailing…again. 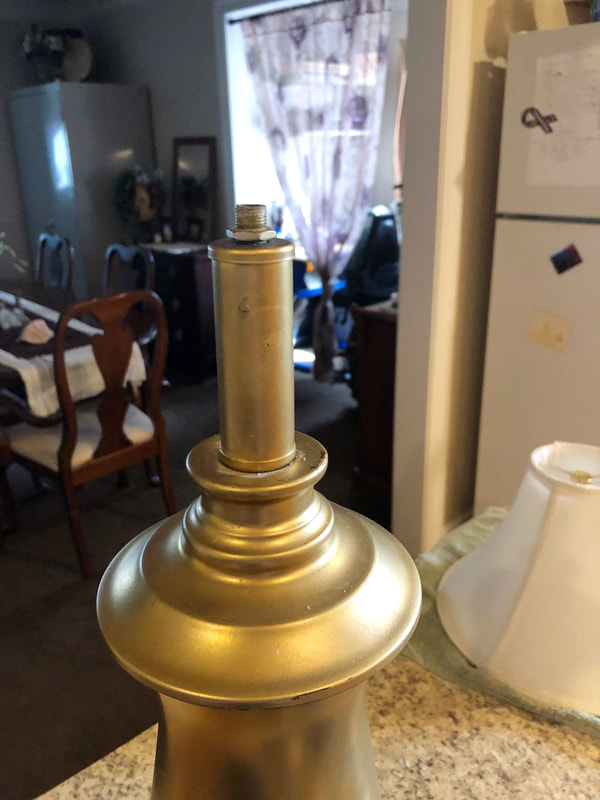 Gold lamp after socket base was removed. Photo by Diane M. Lilly, 2021. 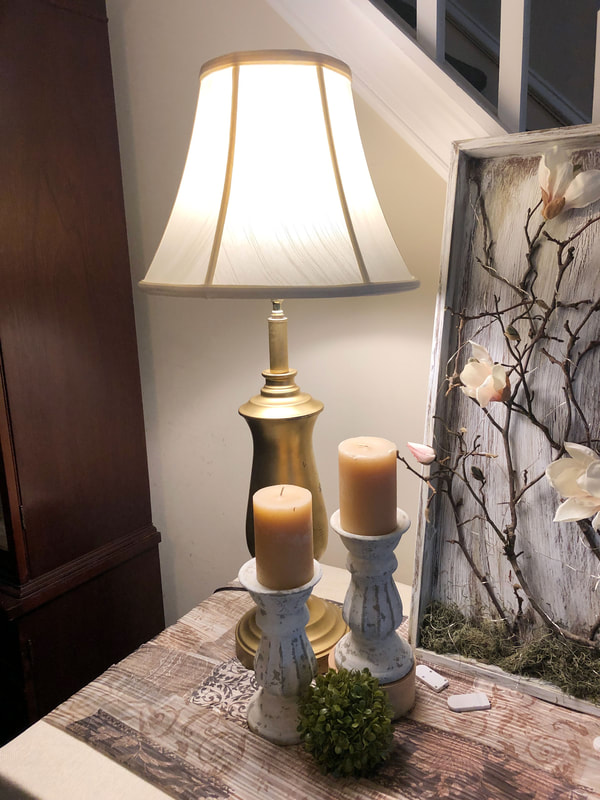 Gold lamp rewired and staged in my dining room. Photo by Diane M. Lilly, 2021. The moral of the story is when you are dealing with thrift lamps, expect the unexpected! It probably will not be as easy as you hoped, so leave a little time to figure it out. Unlike Youtube videos—which make it look and sound soooo easy—the real thing can be tricky, but with a little perseverance and elbow grease it will be well worth it to rehab an interesting old lamp! Even with all of the problems I encountered with these lamps, I love the special character they each bring to the room and the vignettes in which the were placed! Please feel free to add your own comments and experiences below. And, as always, you can to add your name to my email list to start receiving monthly notifications for new blog posts, new items, sales, and other exciting stuff from Di’s Studio Designs. This article contains external links for demonstration purposes only, and I am not being financially compensated for specific products or brands. Related blog posts you may want to read: My dining room redesigned as a multi-function space How to replace a clock mechanism How to frame small canvas art Creating a kitchen coffee bar Comparing DIY upholstery cleaning methods DIY refurbishment of a dining room cabinet 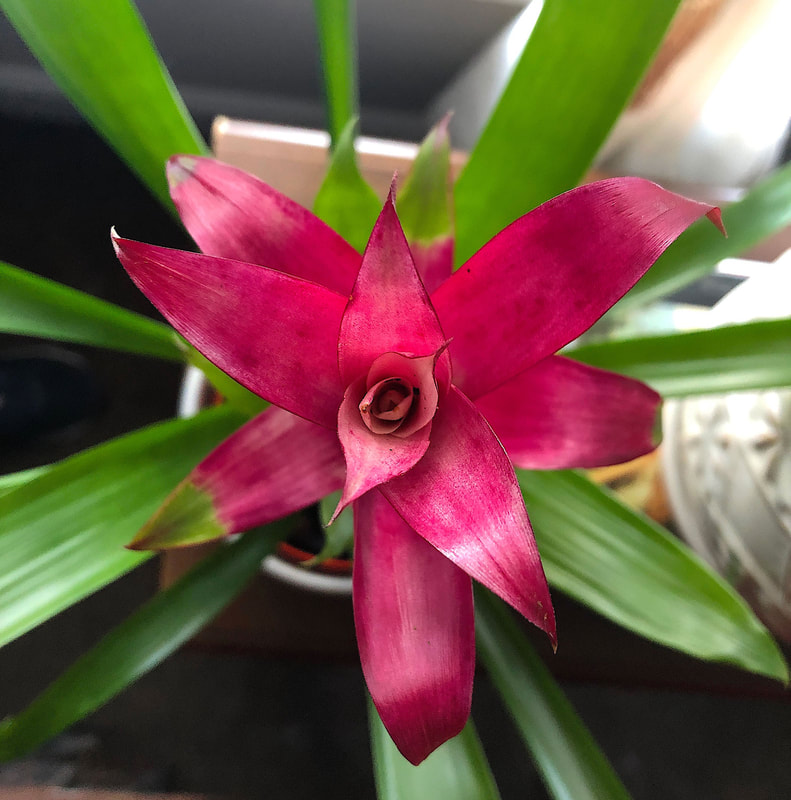 Bromeliad. Photo by Diane M. Lilly, 2021. We’ve all been there…You take down all the festive holiday and winter decor and you’re left looking at a cold empty chasm whose soul left the building! This year I tried—in vain—to decorate and make things look nice, but I needed more. I needed my space to feel alive. I needed something organic and living (besides my cats) in my “living” room. I don’t know why I never bothered to get a lot of houseplants before. I like plants. I like poking at them and watching them grow. I do have a few of them already—they have become sad and neglected, but still alive (well, mostly!). Sure I kill a few here and there, but overall we have a symbiotic relationship. This year—of all years—I decided I had to make a major change. This year I wanted to buy some beautiful houseplants and become a proud plant mom. (Yeah, that sounds weird even to me!) Sounds simple enough, right? But these are not inanimate objects you are bringing into your home. Unlike a sofa or chair, a plant will wither and die if the conditions are not right—trust me, I know—and there is soooo much to learn about plants! Once I started down that road, I realized other people are probably in the same boat, wanting to bring real plants home but feeling overwhelmed with all of the new information and responsibility that would come with having plants. After going through my own experience, I thought it would be helpful to share my thoughts on that process and maybe provide you out there with aspirations of being houseplant moms (or dads) some helpful tips I learned to successfully bring more greenery into your own spaces. There’s a lot to consider from budget to safety to lighting and care, and it pays dividends to learn as much as possible up front BEFORE you go shopping for plants. So let me walk you through my experience… Budget: Yeah, so let’s talk about budget. As with any new design, you should always have a budget, but expect to go over that budget! There will always be aspects of the project that cost more than you had guesstimated, and there will always be unforeseen expenses you had not even thought of (like maybe potting soil, plant stands, decorative pots, and plant food). My budget was about $200.00…Yep, I blew it! I ended up spending $330.00 at Home Depot, and I’m still not really done yet. I discovered that I need a few more things, like Neem Oil (for pesky gnats), more potting soil, specialized potting soil (for my succulents) and a few more pots. (I also have to replace a couple plants that tragically didn’t make it! 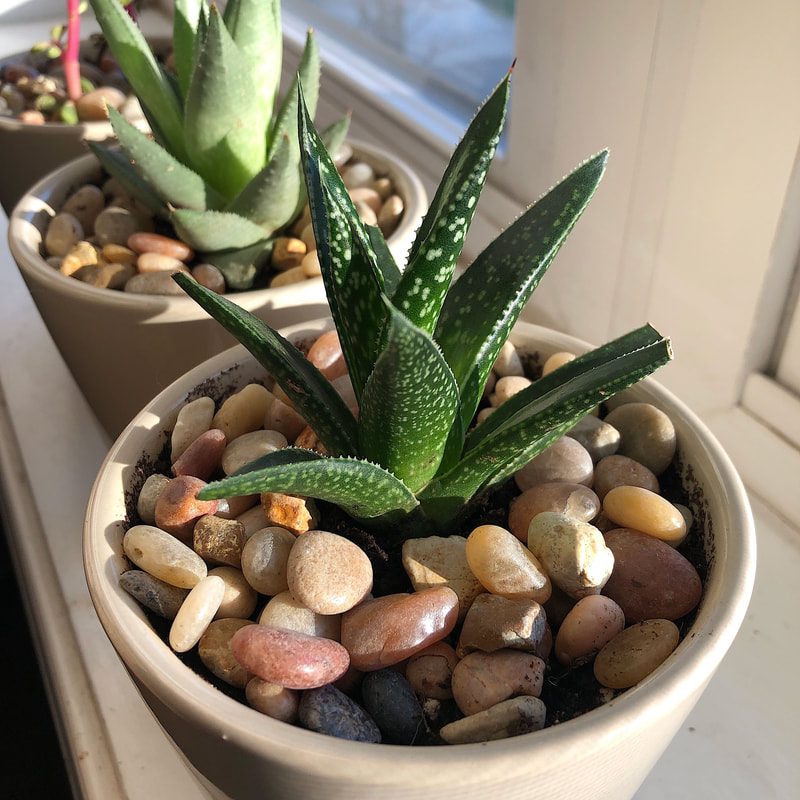 My succulents. Photo by Diane M. Lilly, 2021. Safety, health, & maintenance needs: One of the most important things I researched before I bought any houseplants was plant toxicity. I have two beautiful kitties, and it would absolutely devastate me if they got sick from munching on a toxic plant I was responsible for bringing into the house! My cats have never really bothered any of my existing peace lilies—which are not said to be good for cats—but they don’t bother them, so I think these are safe to keep.  My two kitties, watching me garden. Photo by Diane M. Lilly, 2018. 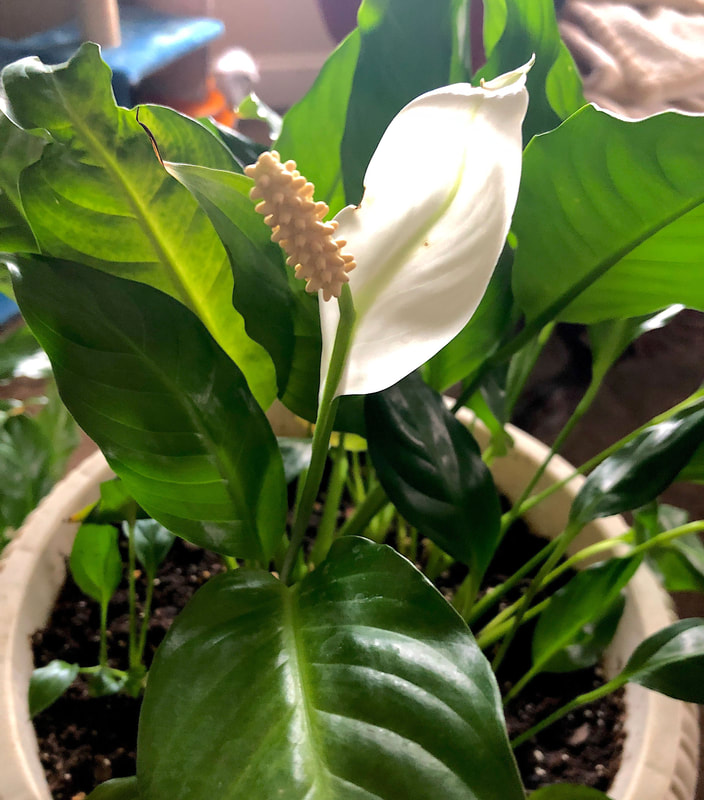 Peace lily. Photo by Diane M. Lilly, 2021. In addition to safety, any plants I bought needed to be low maintenance, because me and finicky plants don’t get along. So when it comes to constant watering and pruning and feeding…Nope. I just don’t have the time. My Dieffenbachia can go for a few weeks without watering, as can Ponytail palms, succulents, and the Money Tree. My Ficus does not like to dry out completely, but equally doesn’t like to be soggy, and so it requires slightly more attention than the plants just mentioned. On the other end of the spectrum are my Bromeliad and Tillandsia (air plants). The air plants (which are part of the Bromeliad family) require frequent misting and soaking. The Bromeliad (which technically does not require soil) needs humidity—which it gets from the air in nature—and so requires more attention than some of my other plants, but all of the bromeliads are so intriguing to me that I’m willing to exert the effort! 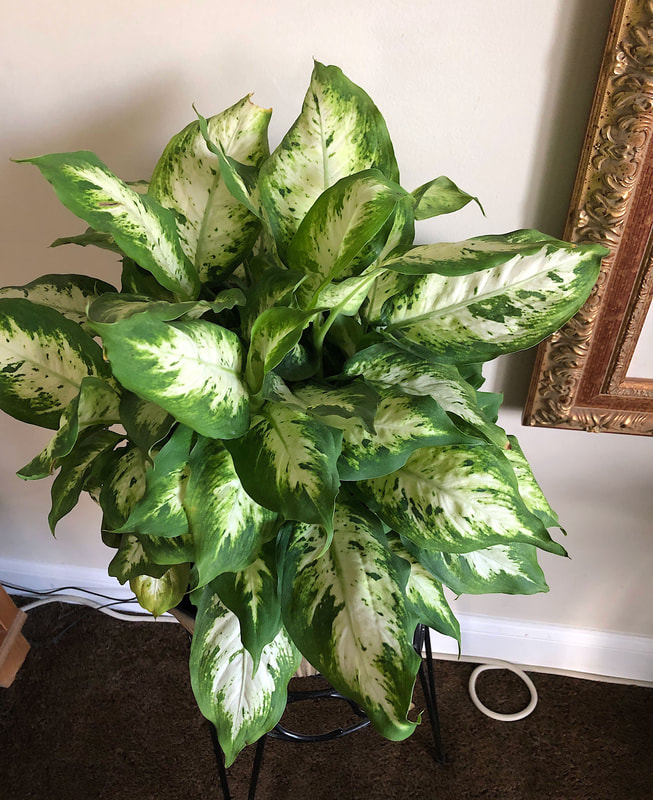 Dieffenbachia. Photo by Diane M. Lilly, 2021. 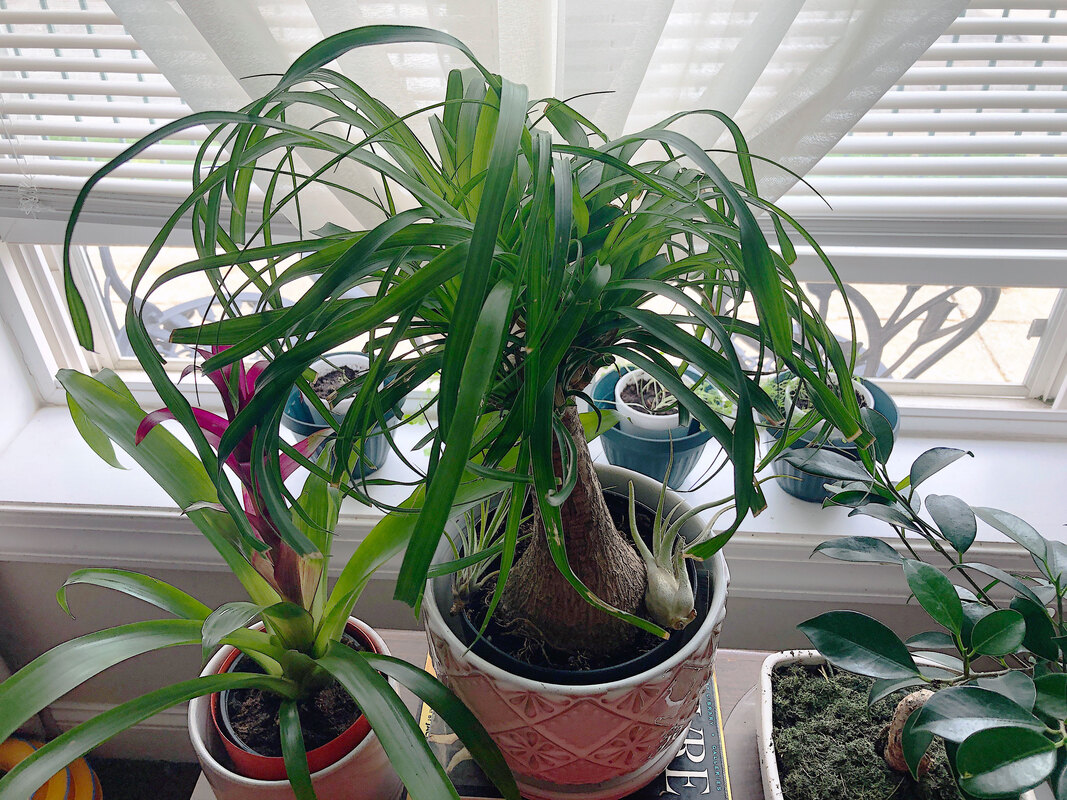 Ponytail palm. Photo by Diane M. Lilly, 2021. 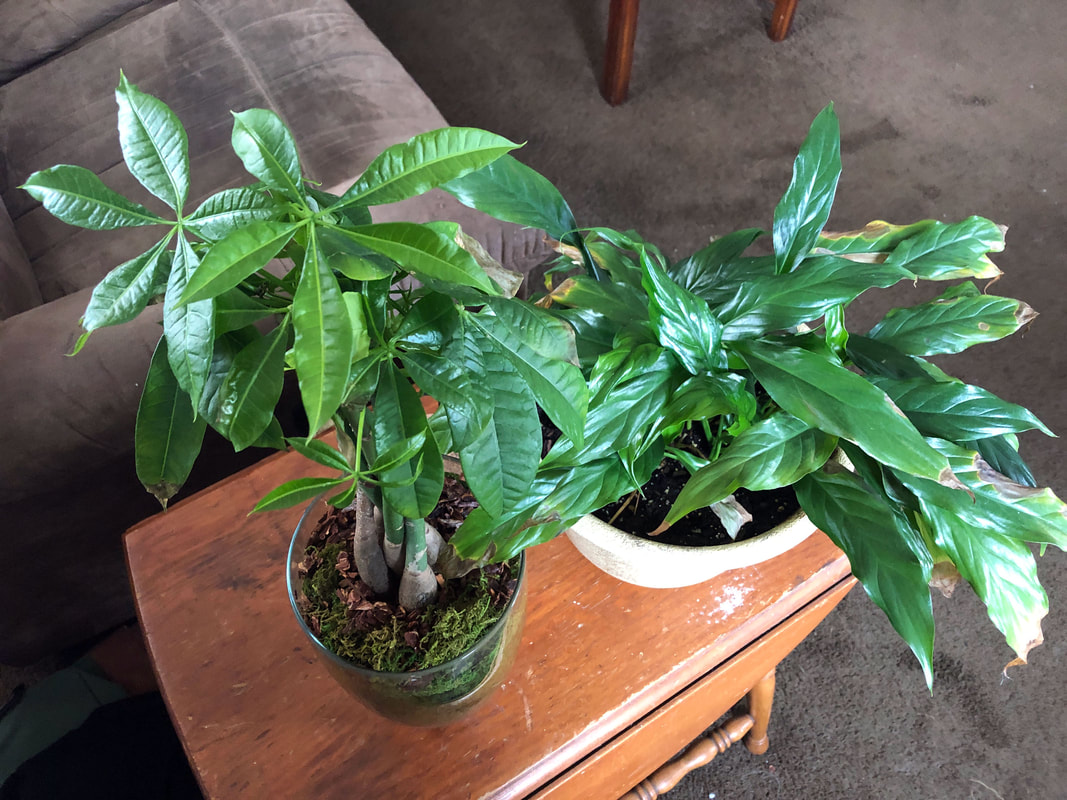 Money Tree with a Peace lily. Photo by Diane M. Lilly, 2021. 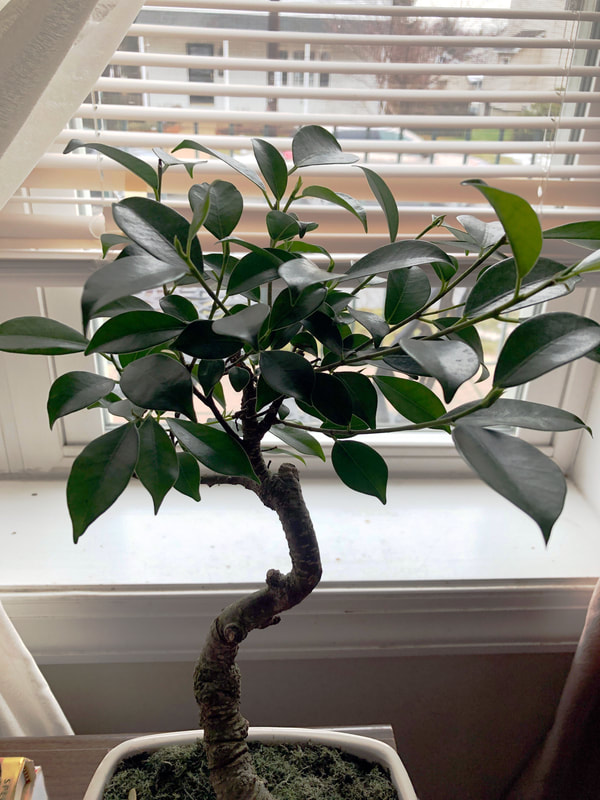 Bonsai Ficus. Photo by Diane M. Lilly, 2021. 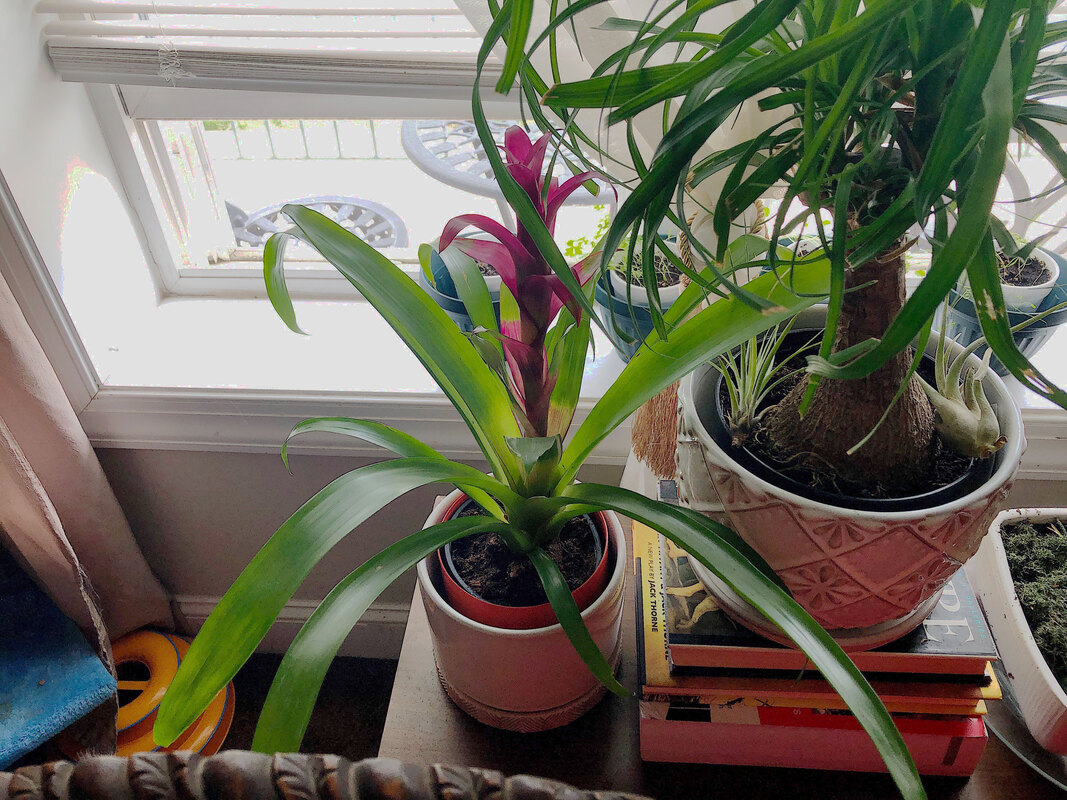 Bromeliad in my window. Photo by Diane M. Lilly, 2021. 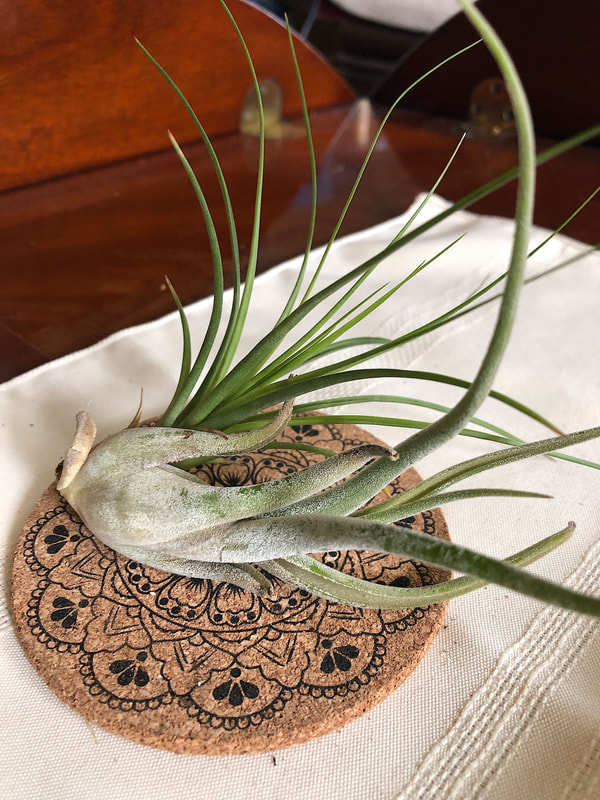 Tillandsia (a.k.a. air plants). Photo by Diane M. Lilly, 2021. Another “must” on my list for preferences are plants that filter the air, because I am really big on indoor air quality and doing things naturally, if possible or feasible. Peace lilies are good to buy if you want plants that help filter the bad stuff out of the air in your home. (They can be especially useful in bedrooms, as they will remove the toxins from the air as you sleep.) With three Peace lilies my indoor air quality should be superb! 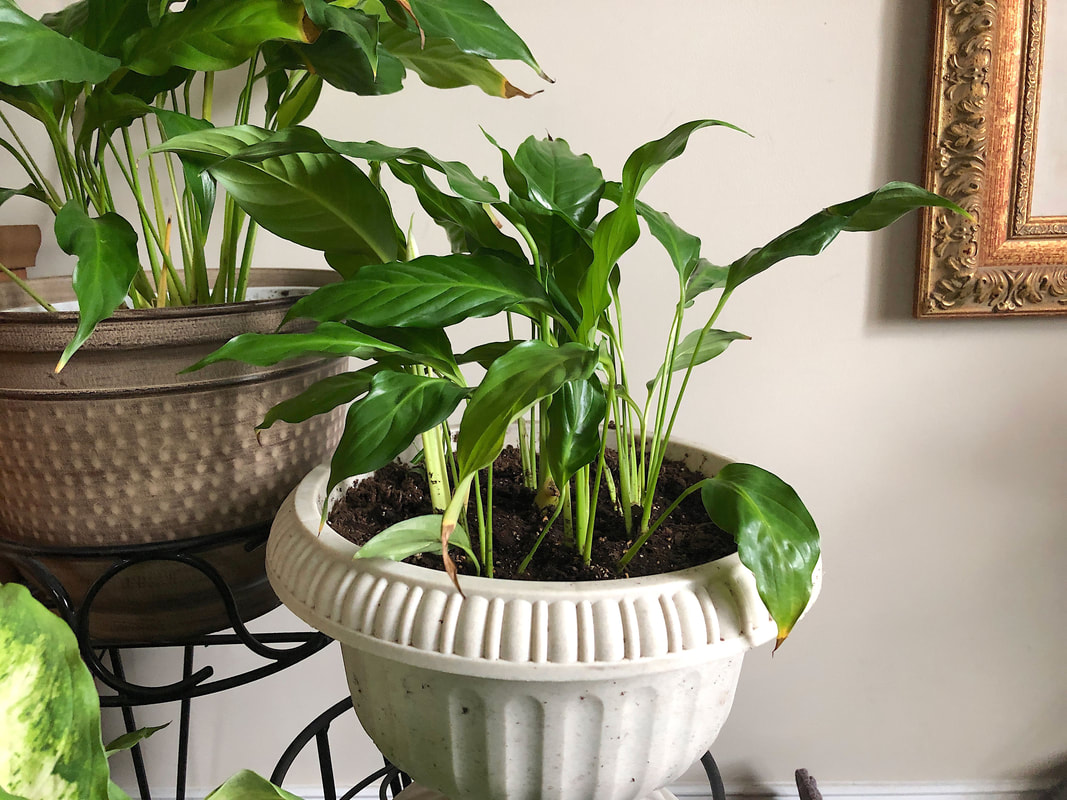 Peace lily just transplanted. Photo by Diane M. Lilly, 2021. Spatial considerations: A helpful activity you should do before picking out plants is to think about WHERE your plant will live. Not just the room or general area, but on which table or windowsill. Or do you want a floor plant? Do you have a plant stand or other space you want to fill? How much actual space do you have to give up for plants? The tabletop plants you choose will probably need to be small or medium size or maybe tall in stature. When I was assessing my own space I decided that I could comfortably accommodate plants in five, maybe six, spots in my living room. Of those spaces, I had two windowsills at my disposal that could fit small pots. Which brings me on to my next point, lighting. 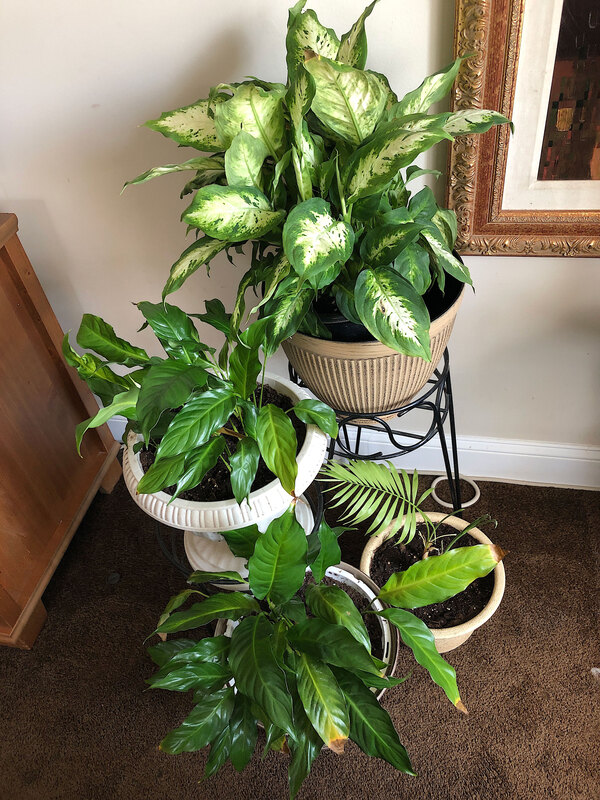 My floor plant grouping. Photo by Diane M. Lilly, 2021. Lighting needs: If you remember nothing else, remember that lighting is almost the most important thing you need to sort out for your plants (besides watering). Too much light can kill some plants, and too little light can stunt the growth or even kill others. I almost killed a Parlor palm and Lucky bamboo that were left sitting in a window, forgotten, for far too long. (I’m so sorry!!) Below I have photos of my two plants—now separated (they were in the same pot) and in the rehab stage. The Lucky Bamboo is getting its darker green color back, but the palm does not look like it’s going to make it. But there’s still hope! 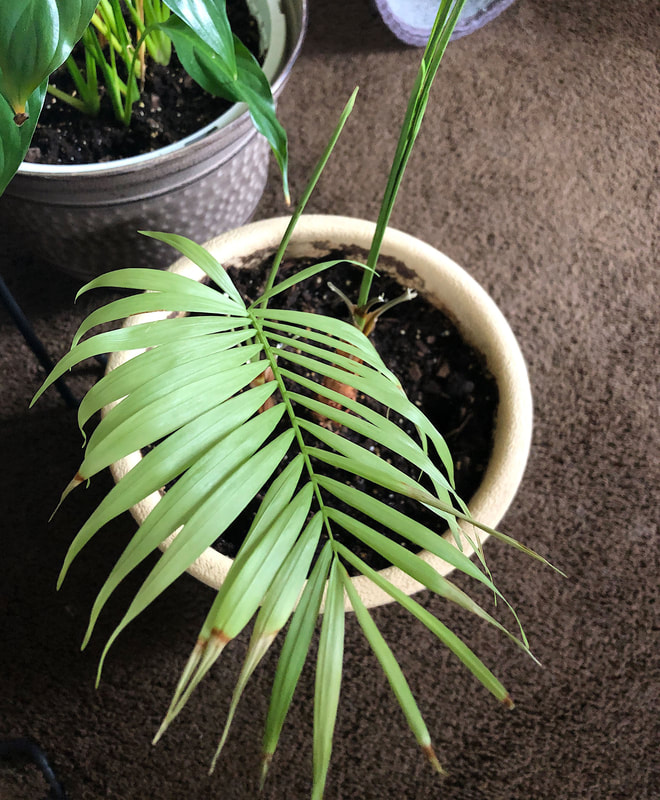 My Parlor palm rehabbing. Photo by Diane M. Lilly, 2021. 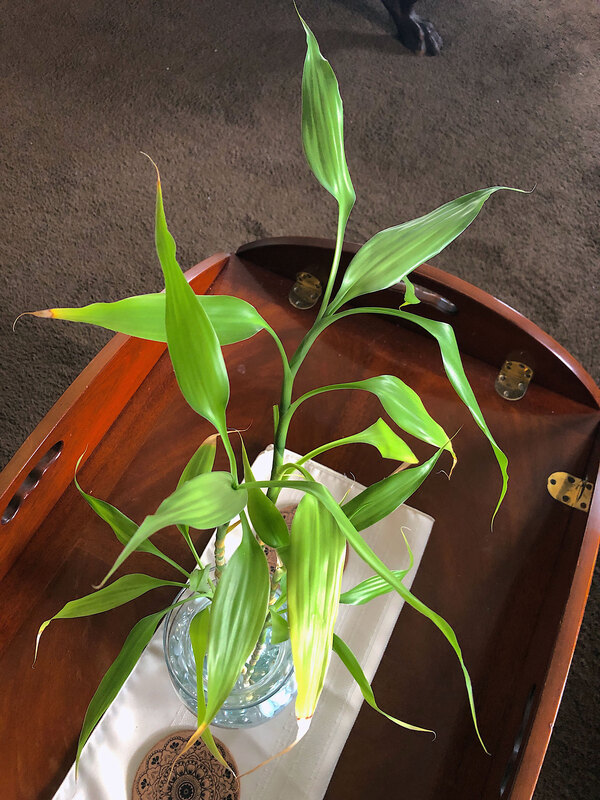 My Lucky bamboo growing roots in water. Photo by Diane M. Lilly, 2021. Know your plant, know its lighting needs before you bring it home. Southern facing windows will always get the most direct bright light (unless you have awnings or some other obstacle that blocks the light). North facing windows will get light, but not the bright direct light that you get from the south. This is really important for plants. In my situation, my living room windows are southeast and southwest facing. This is good for most plants, but some plants may need to come away from the window a little bit to avoid some of the really direct light that is hot enough to burn the leaves of sensitive plants. My Peace lilies got a few crispy leaves from being in my front window, and I will have to move my Bromeliad when the hot summer sun starts to beat through the window. Conversely, if the only natural light you have is a north facing window, you’ll need a plant that does not require full sun or bright direct light. Any plant that needs quite a lot of light that is put in a place without adequate light generally won’t do well at all. 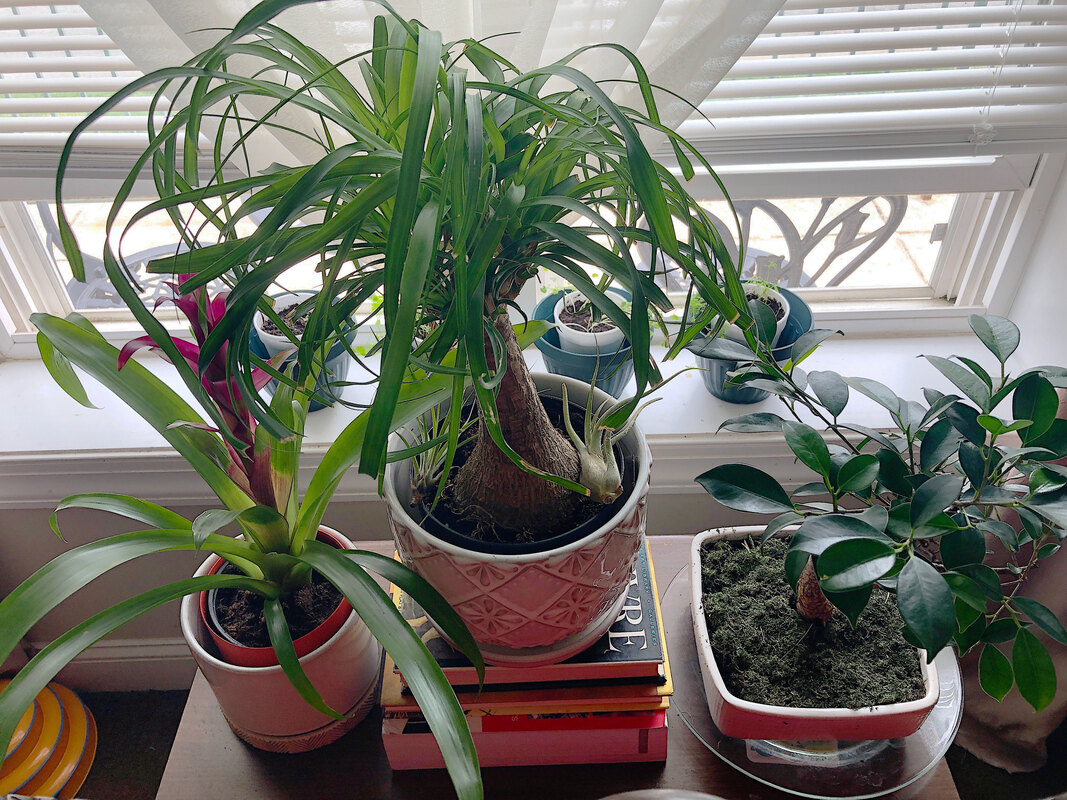 My happy window plant grouping. Photo by Diane M. Lilly, 2021. There is so much more information to digest—and I’m just really scratching the surface—but these are a few of the primary or basic considerations you will need to assess before buying real houseplants for your home. Inevitably, some plants just won’t survive, and sometimes that just comes down to either the plant being sick when you bought it, the shock of being moved, or just not having the right environment for the poor thing. When in doubt, buy one plant. Try one plant that you find fascinating, research it, and try to figure out how to help it thrive (and survive!). Once you figure out how to keep one plant alive, you will find yourself wanting more plant babies…’cause one is just not enough! Plants are so fascinating! And they really bring an empty inanimate space alive! I hope you found this article useful! If you did please share it and help my community grow. And please feel free to add your own thoughts and experiences below…Let’s get a conversation started! Feel free to add your name to my email list if you would like to start receiving monthly notifications for new blog posts, new items, sales, and other exciting stuff from Di’s Studio Designs. This article contains external links for demonstration purposes only, and I am not being financially compensated for specific products or brands. Related blog posts you may want to read: Six herbs I planted indoors It's planting season again |
Author
Some of the posts on this site contain affiliate links. This means if you click on the link and purchase the item, I will receive an affiliate commission. 
Categories
All
Archives
April 2024
|