 Gold ornament on my tree. Photo by Diane M. Lilly, 2022. I had many trendy ideas for decorating my Christmas tree this year…and until I checked my bank balance! Lol! Jokes aside, this year has been tough financially, and there isn’t enough money left in the pot to handle gifts, food, bills, Christmas dinner, AND expensive holiday decor. So, we scaled things back a little… This year, I have challenged myself to work with what I have on hand for all my holiday decor…and it WAS a challenge. Some areas could use more “stuff”—if I wanted to go out and buy extra decor—but for this year, it has to be what it is. Artificial pre-lit tree So, this project started with a gorgeous pre-lit tree we bought a couple of years ago. This beautiful 7ft tree came with berries and pinecones, which made it easy for me to find faux florals to add to the branches.  My artificial pre-lit Christmas tree. Photo by Diane M. Lilly, 2022.  The faux red berries on my Christmas tree. Photo by Diane M. Lilly, 2022. Assessing materials on hand Besides the artificial tree, I collected all of the faux florals, greenery, ribbon, and ornaments from storage that I thought would work well with this year’s decor scheme. All this potential material somehow ended up on my dining room table and sat there for days until I worked everything out! Anyway, the point is that what you see on the table is pretty much all I had to work with to decorate my dining and living rooms for the holidays.  This year's holiday decorating stash. Photo by Diane M. Lilly, 2022. Choosing a style and matching the faux florals The first important task was to decide on color and style. Almost all of my existing Christmas decorations are traditional in style, so since we are using what we already have for this season’s decor, we are sticking with that theme. After carefully assessing how much material was available between all the florals and ornaments, I decided on a color scheme of green, red, gold, and white. All the floral picks for this year’s Christmas tree had to be red, white, or gold. 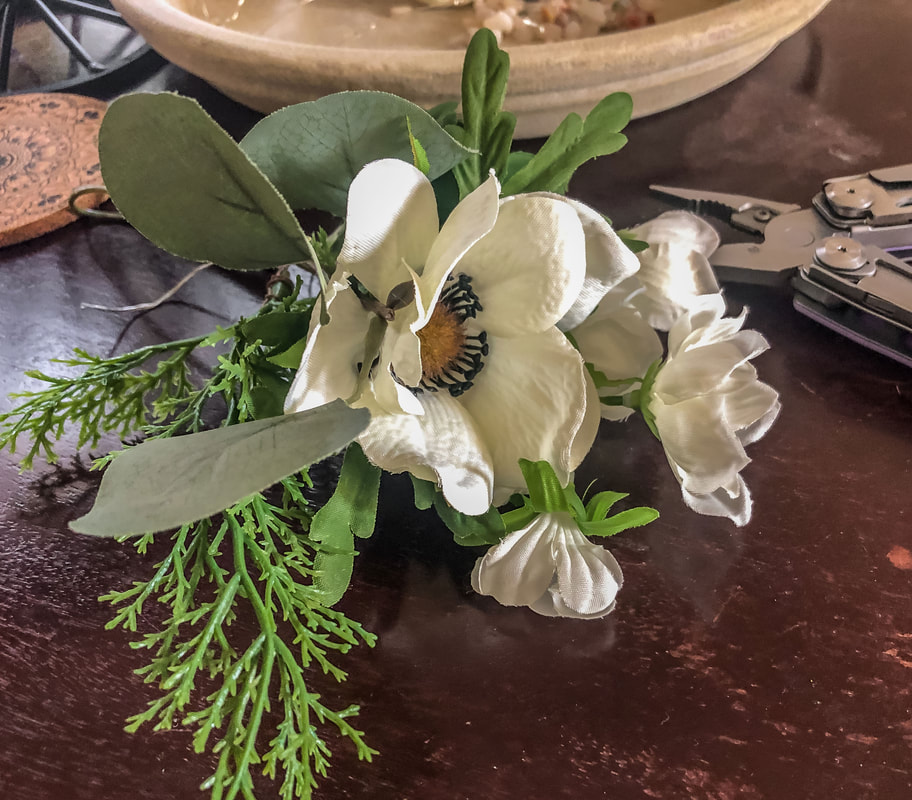 Faux white flowers being prepped for the tree. Photo by Diane M. Lilly, 2022. 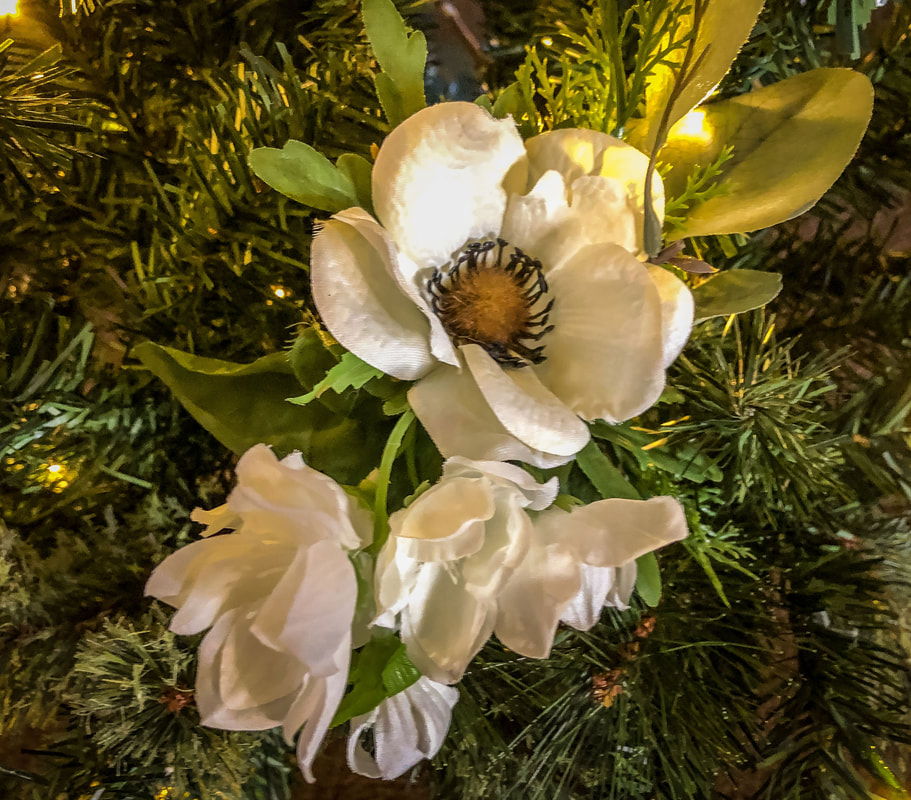 Faux white flowers inserted into the tree branches. Photo by Diane M. Lilly, 2022. 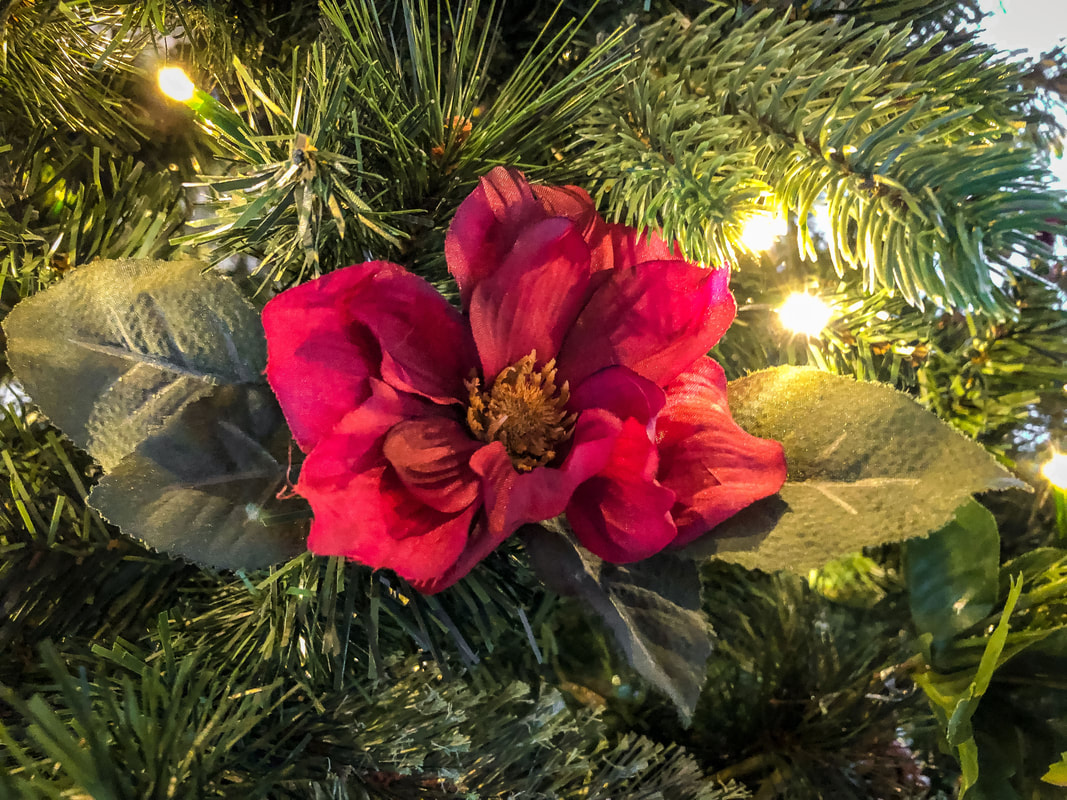 Faux red flowers inserted into the tree branches. Photo by Diane M. Lilly, 2022. 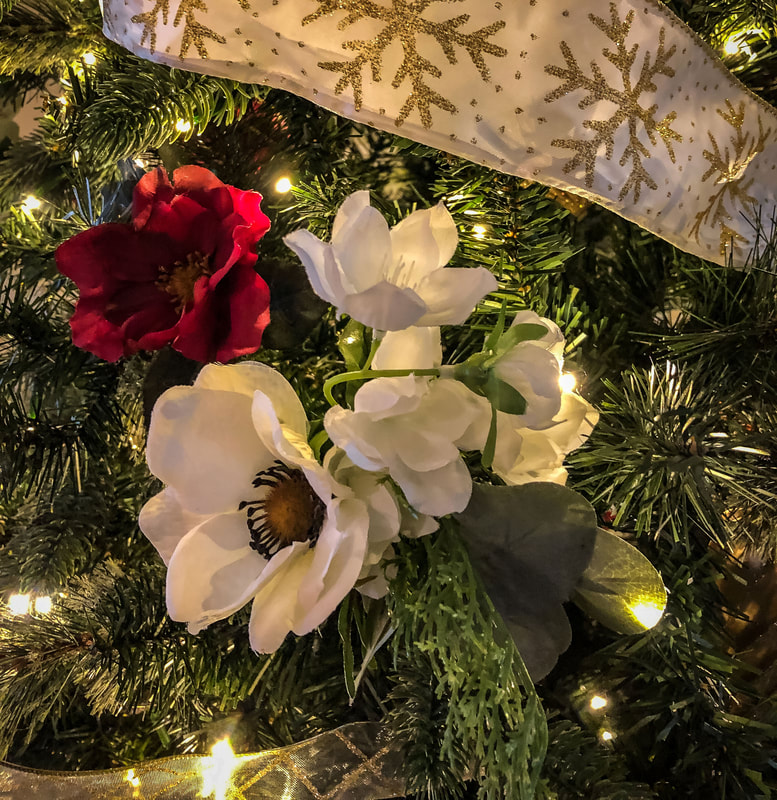 Red and white faux florals in the tree. Photo by Diane M. Lilly, 2022. 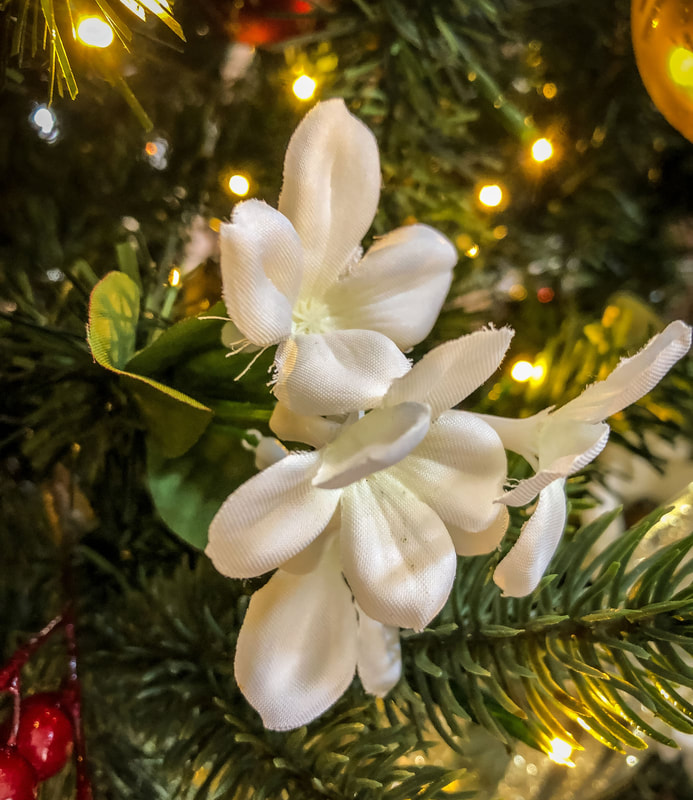 A bundle of white clematis inserted into the tree. Photo by Diane M. Lilly, 2022. 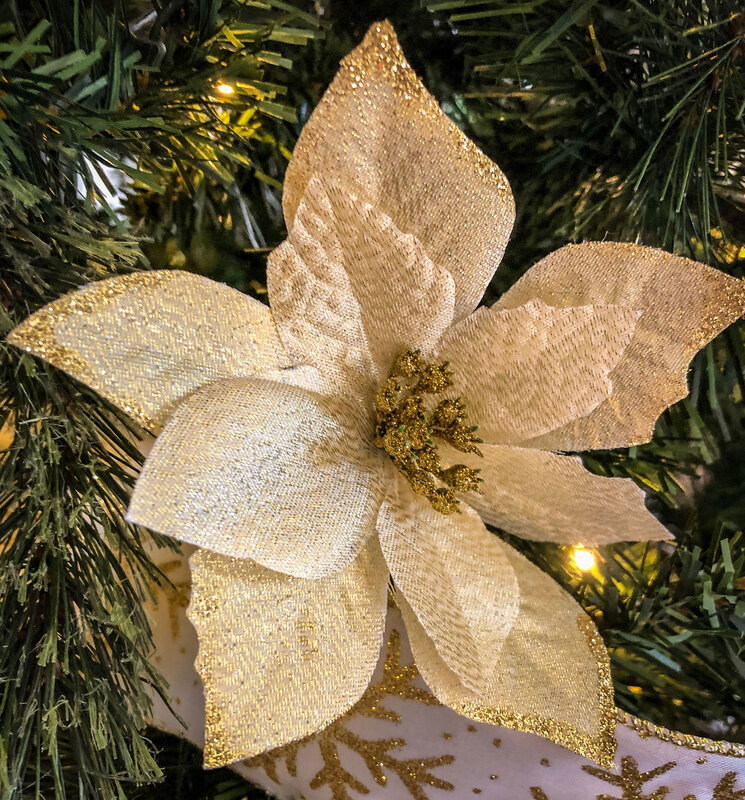 Gold fabric poinsettia attached to a tree branch. Photo by Diane M. Lilly, 2022. Assessing ornaments on hand There are some cool trends this year for Christmas tree decor, and one of them is using clusters of large ball ornaments. As much as I love that look, it simply wasn’t in my budget to go out and buy a bunch of large ornaments…sigh. Maybe next year. But I made the best of things and used the ornaments I already had in storage…and I think they look so classy on my tree!  White tassel ornament. Photo by Diane M. Lilly, 2022.  Red ball ornament. Photo by Diane M. Lilly, 2022.  Gold glitter snowflake ornament. Photo by Diane M. Lilly, 2022. 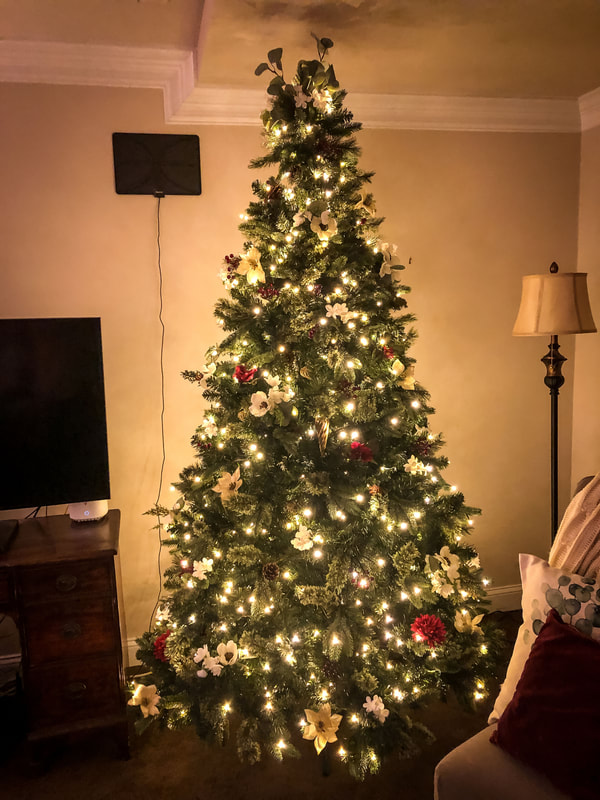 Decorated tree before the ribbon is applied. Photo by Diane M. Lilly, 2022.  Top of the tree before the ribbon is applied. Photo by Diane M. Lilly, 2022. Choosing ribbon for the tree The ribbon was another sore spot for me this year. I love the thick, voluptuous loops and bows on all the designer trees these days…but the ribbon is not cheap! I did splurge for one new ribbon because I needed a solid ribbon to help the translucent ribbons I already had stand out. I think over the year, I will keep my eyes open for some fancy wide ribbons for next year, but I made the best of what I had and dressed my beautiful tree in my best ribbons for the holidays. 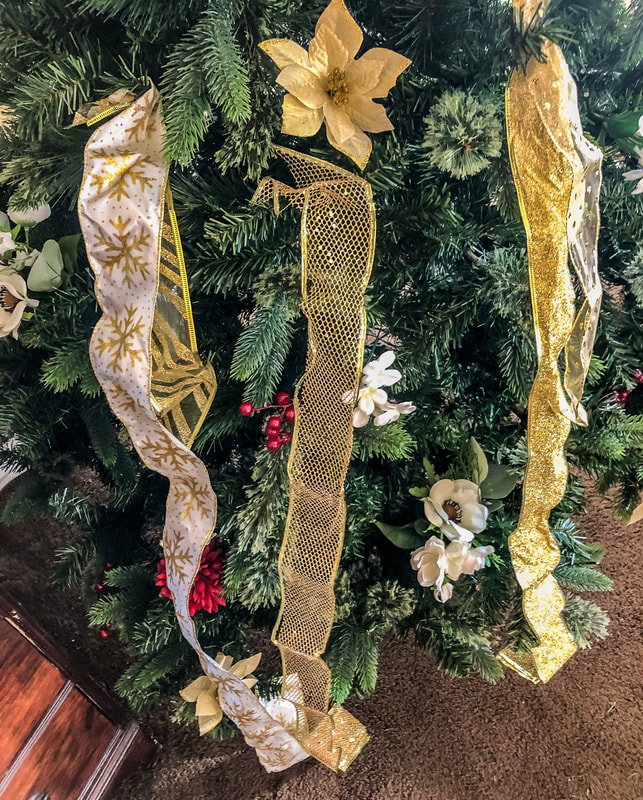 My ribbon choices for this year's Christmas decor and tree. Photo by Diane M. Lilly, 2022. 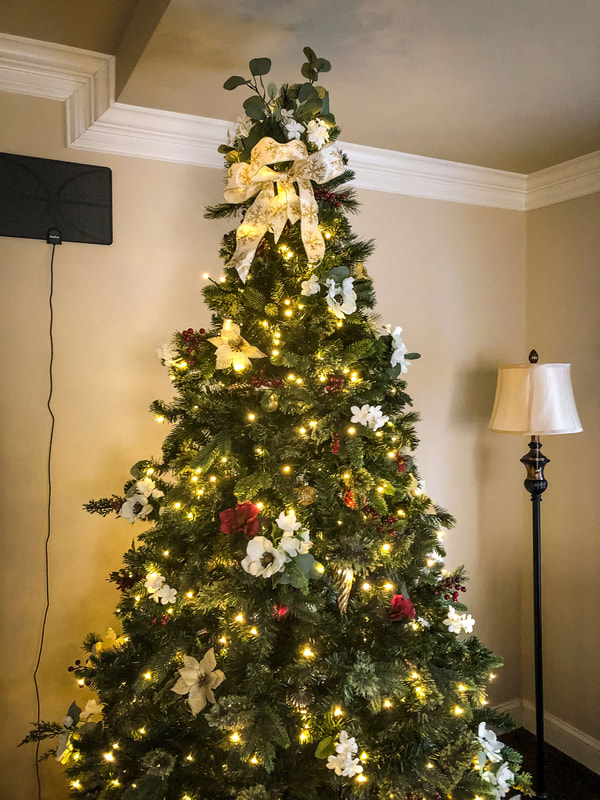 Top of tree with a fabric bow. Photo by Diane M. Lilly, 2022.  View of tree with fabric bow. Photo by Diane M. Lilly, 2022. 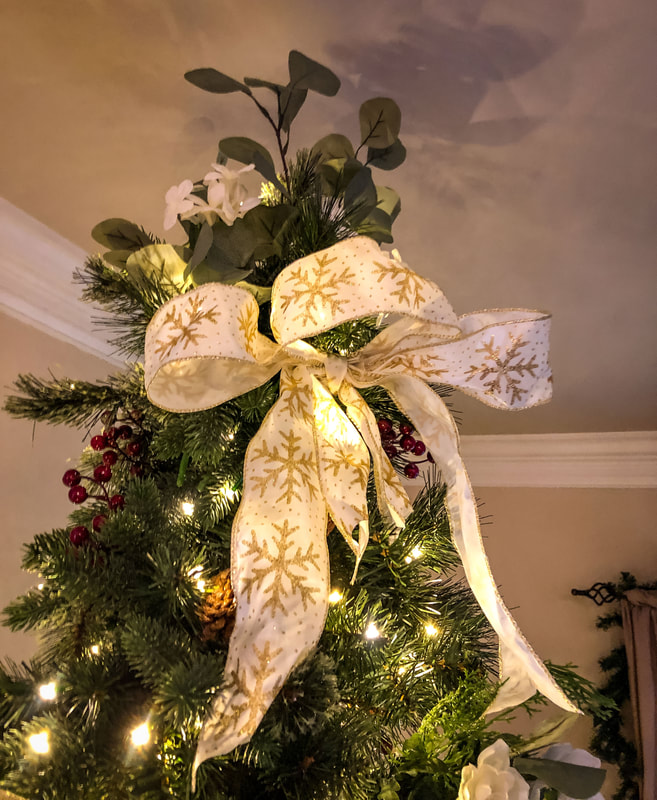 Closeup of the top of the tree with faux florals and fabric bow. Photo by Diane M. Lilly, 2022.  Tree wrapped in several types of ribbon. Photo by Diane M. Lilly, 2022.  The white and gold ribbon on the tree. Photo by Diane M. Lilly, 2022.  Deep red berries with fancy white and gold ribbon on this year's tree. Photo by Diane M. Lilly, 2022. Finishing touches And the tree is done! Just a couple of finishing touches…This year, my tree skirt is made with white and gold fabrics from my stash swirled around the bottom. My son then decided he had enough room to set up his train tracks…so he could play with his train and reminisce about his childhood. (He’s 21!)  Finished tree with garland behind. Photo by Diane M. Lilly, 2022.  This year's finished Christmas tree. Photo by Diane M. Lilly, 2022. This year's decorations may have been accomplished on a VERY slim budget, but the result was elegant. It was a challenge, but when there’s a will, there’s a way, right?! This tree was only one of several Christmas projects. I made three DIY wreaths, dressed up three rather sad garlands, and used leftover materials (which wasn’t much) to decorate four miniature trees. There are links to a few of these projects below. So, I hope you enjoyed seeing this year’s tree here at Di’s Studio Designs! From my family to yours…Merry Christmas and Happy Holidays! Related blogs you may want to read: How to make a simple faux floral wreath for the winter How to make a super easy faux ivy vine wreath for Christmas How to make cheap garland look festive for the holidays in just six steps DIY chalk painted tray with chippy effect DIY chalk painted tray with Celtic border Tips for creating a floral spring wreath A spring makeover for my small rental bathroom How to care for faux florals Nine hygge decor ideas Eight ways to create cozy winter interiors after the holiday decor comes down This article may contain a few items or commercial mentions, but I only used them for demonstration purposes only. I am not endorsing any particular product or receiving any monetary gain for this blog.
0 Comments
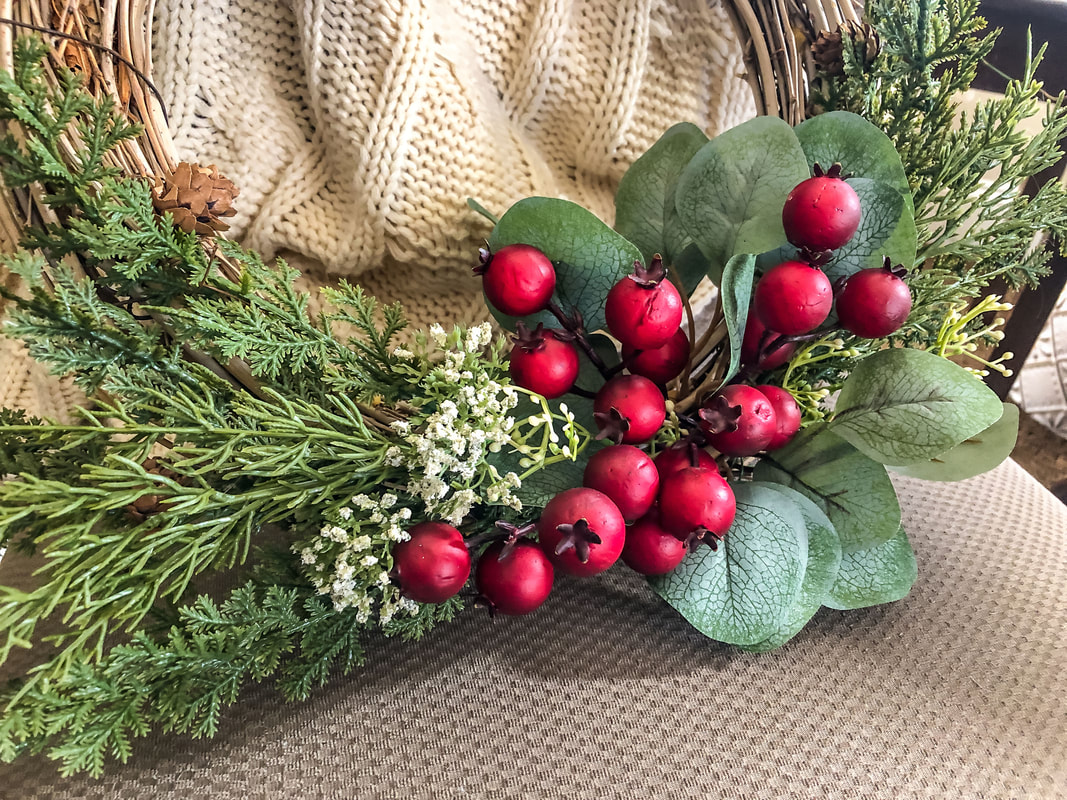 DIY wreath berries and faux greens. Photo by Diane M. Lilly, 2022. If you’ve read any of my previous blogs—or follow me on social media—chances are you’ve seen this wreath base before. The vine wreath base with the “Welcome” sign has become a decor staple, providing the perfect template for an ever-changing assortment of seasonal faux floral arrangements. 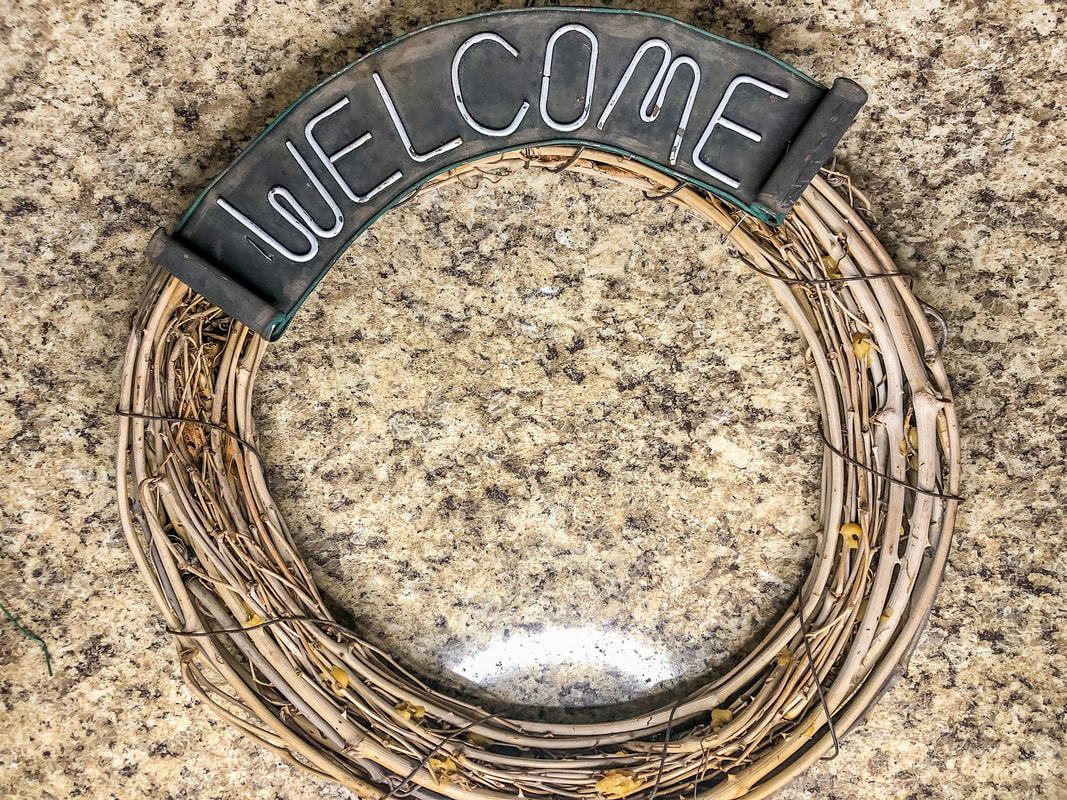 Empty vine wreath base. Photo by Diane M. Lilly, 2022. This wreath base will be used to create a holiday wreath that will stay up throughout the winter. I also had the added challenge of using only what I had on hand to economize during these trying economic times. Honestly, this arrangement was so easy to do! Here are the steps I took to create this gorgeous but simple holiday/winter wreath… Step 1—Choosing the greenery and floral elements For this design, I chose four greens, large red berry picks for the focal point, and small white accent flowers. Ideally, you want a variety of colors and textures with your greenery but always choose greens that complement each other and the focal florals. Speaking of focal florals, this simple design only requires one main focal element with a couple of contrasting florals to help make the main event stand out. 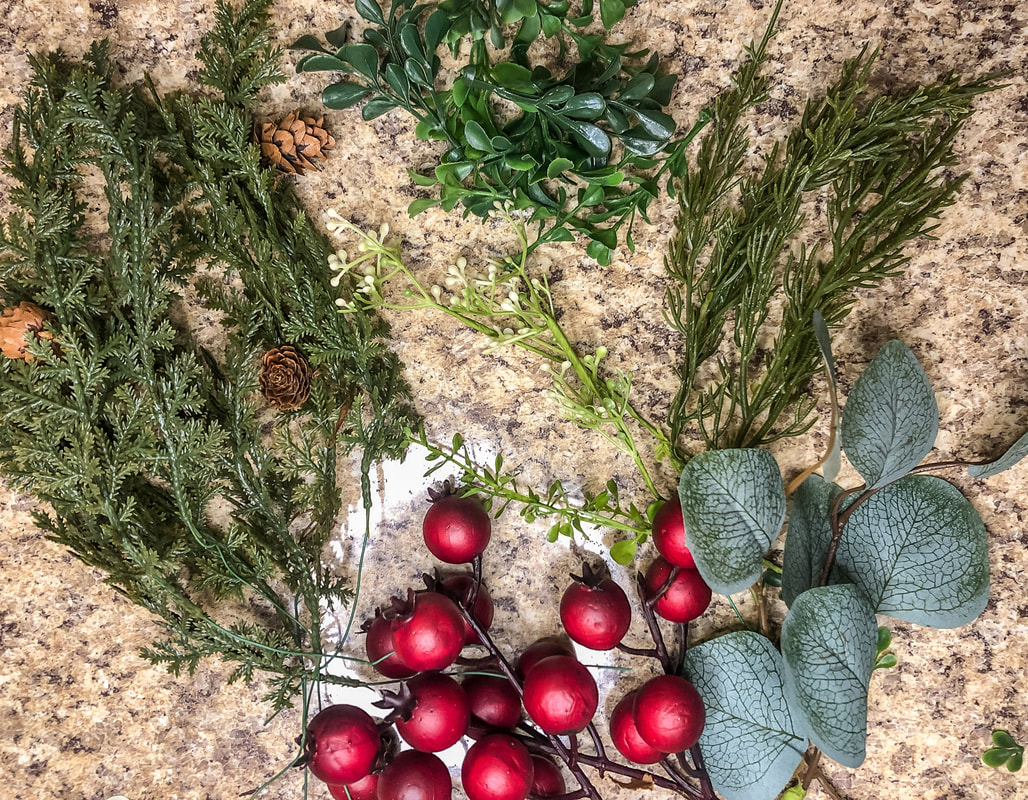 Assembling the faux greens and berries for the project. Photo by Diane M. Lilly, 2022. Step 2—Lay out the design In this stage, you will gather your materials to brainstorm and work out the desired look. Planning the design at this stage will make it much easier to make changes and additions before you attach your florals to the wreath base. 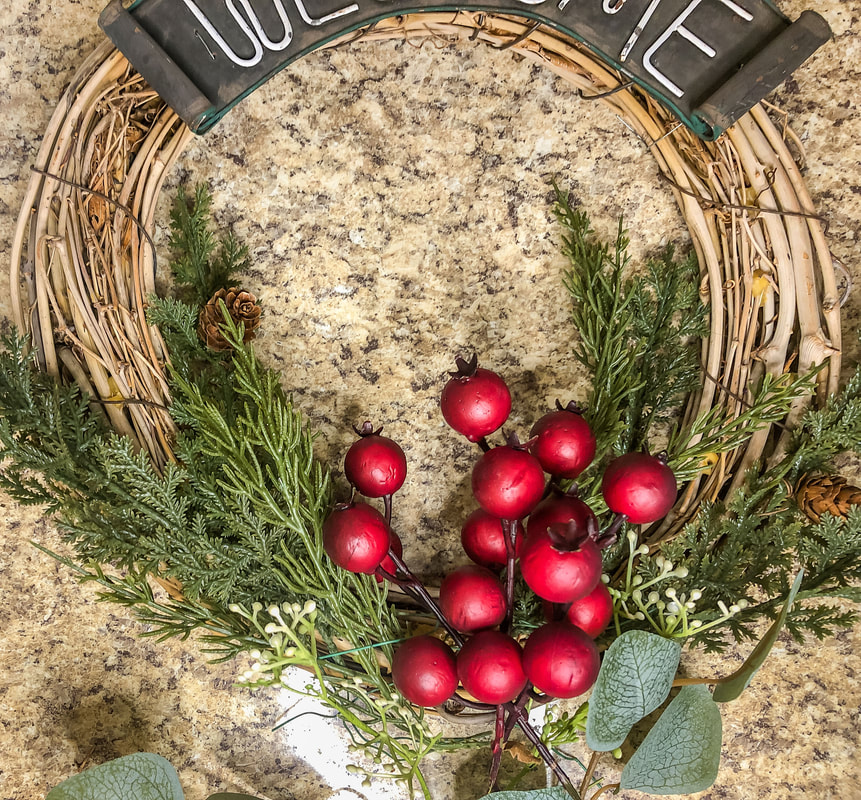 Planning out the design layout. Photo by Diane M. Lilly, 2022. Step 3—Insert the berries The focal point for this arrangement is a cluster of red berries, with the rest working outwards from there. A helpful tip: Wrap a piece of thin piece around each berry pick so your stems can be easily inserted and secured. 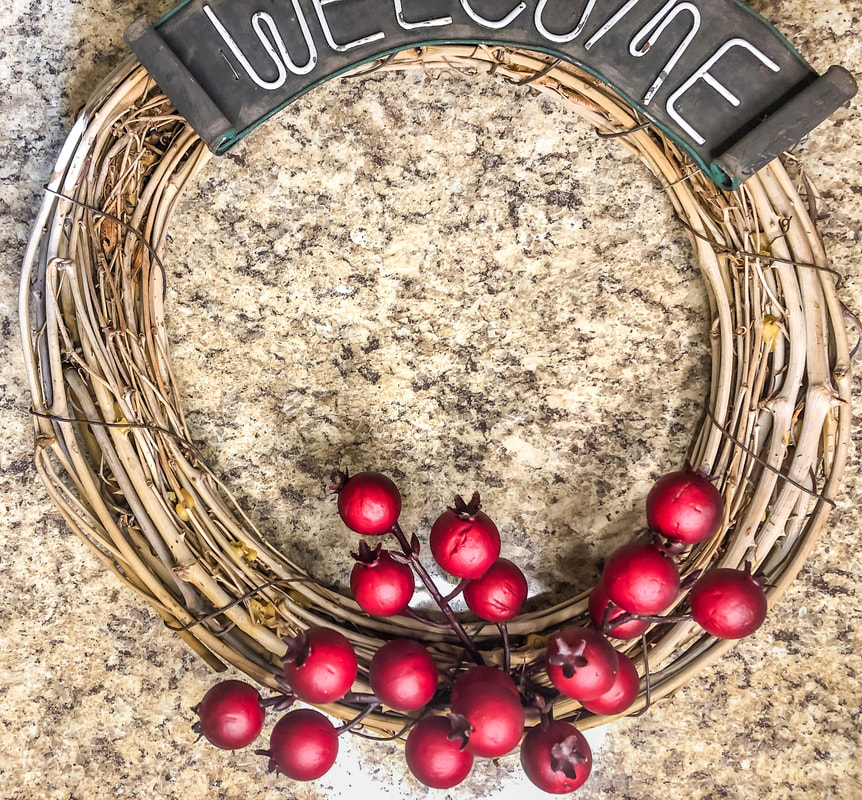 Berries inserted into the wreath base. Photo by Diane M. Lilly, 2022. Step 4—Insert the greenery Once the berries are nicely arranged and in place, start building up the design with the greenery. I started with the eucalyptus picks, inserting them under and around the berries and securing them within the vine with thin wire. At this point, a couple of sprigs of tiny white berries—one of two of my accent florals—were pushed into place. Next, I inserted the pine branches into the vine base on either side of the berries, balancing each side of the wreath. The branches should more or less follow the curve of the wreath, but it’s ok if a branch or two goes rogue and hangs a little. It will look a bit more natural that way! 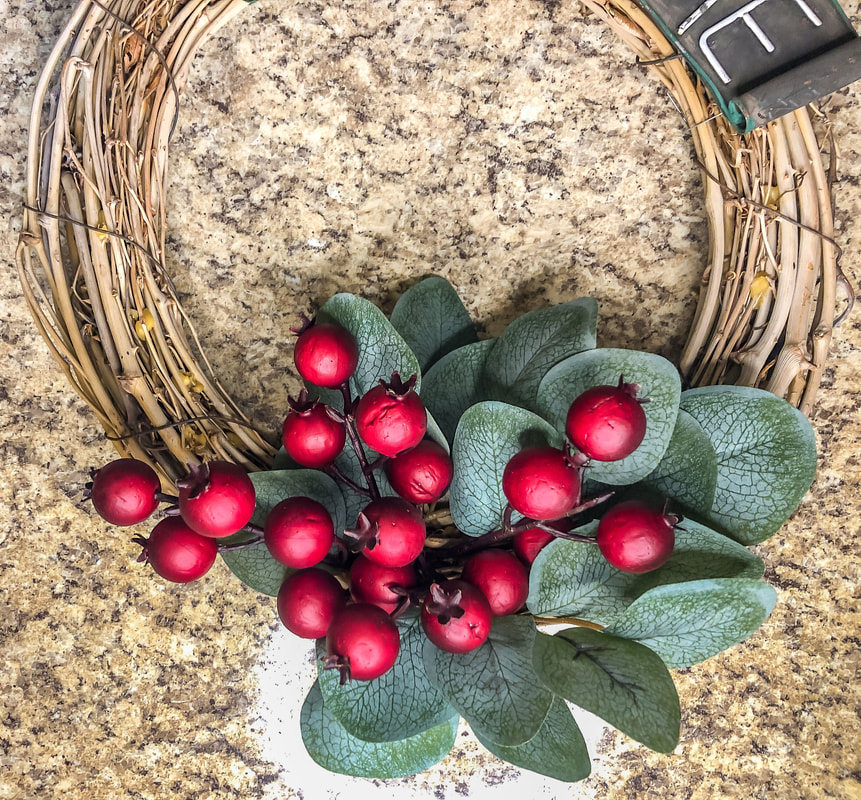 Eucalyptus inserted into the wreath base. Photo by Diane M. Lilly, 2022. 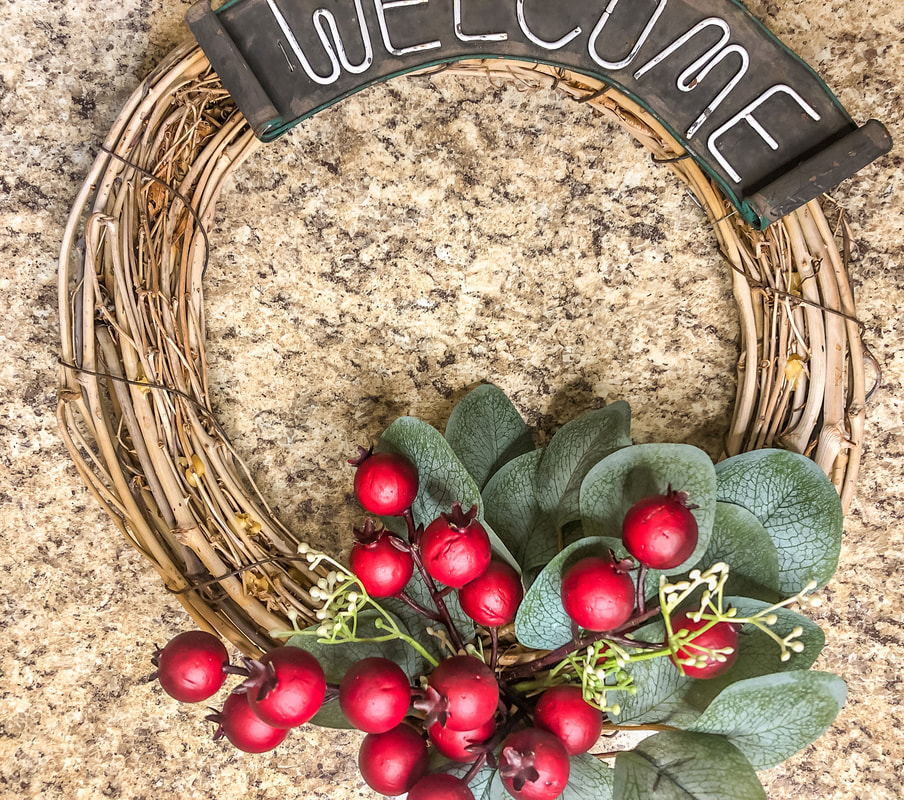 Small white berries inserted into the wreath base. Photo by Diane M. Lilly, 2022. 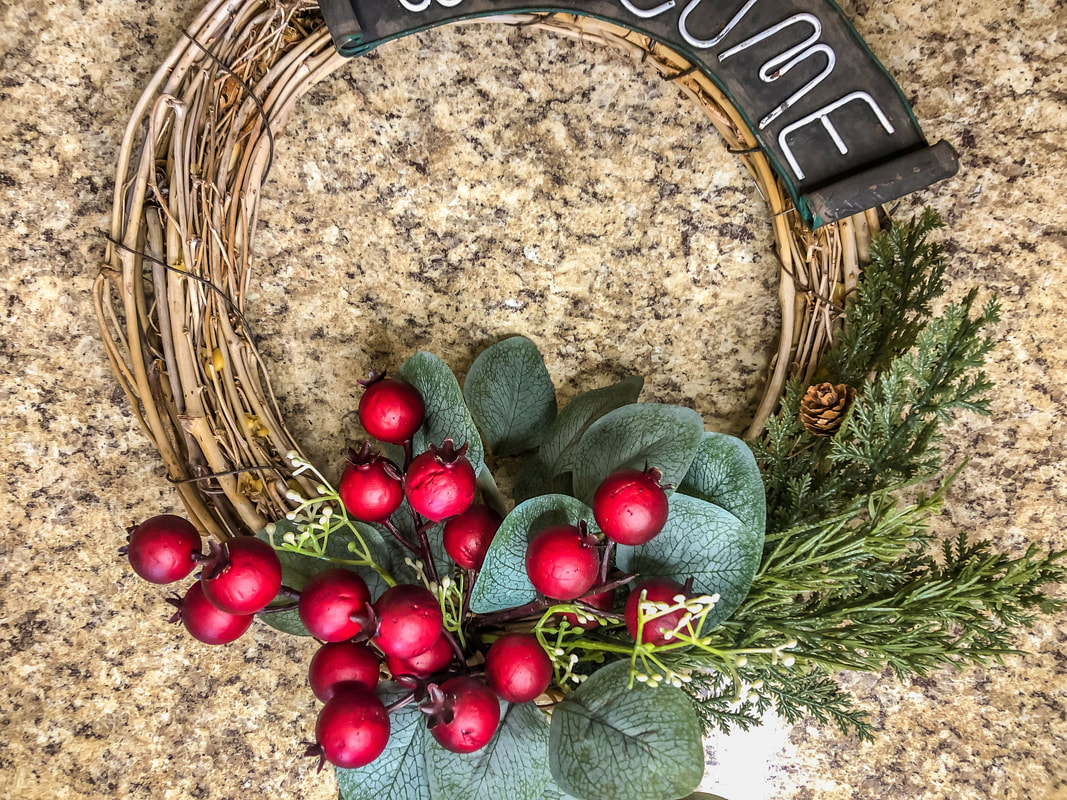 Faux greens inserted into the wreath base on one side of the red berries. Photo by Diane M. Lilly, 2022. 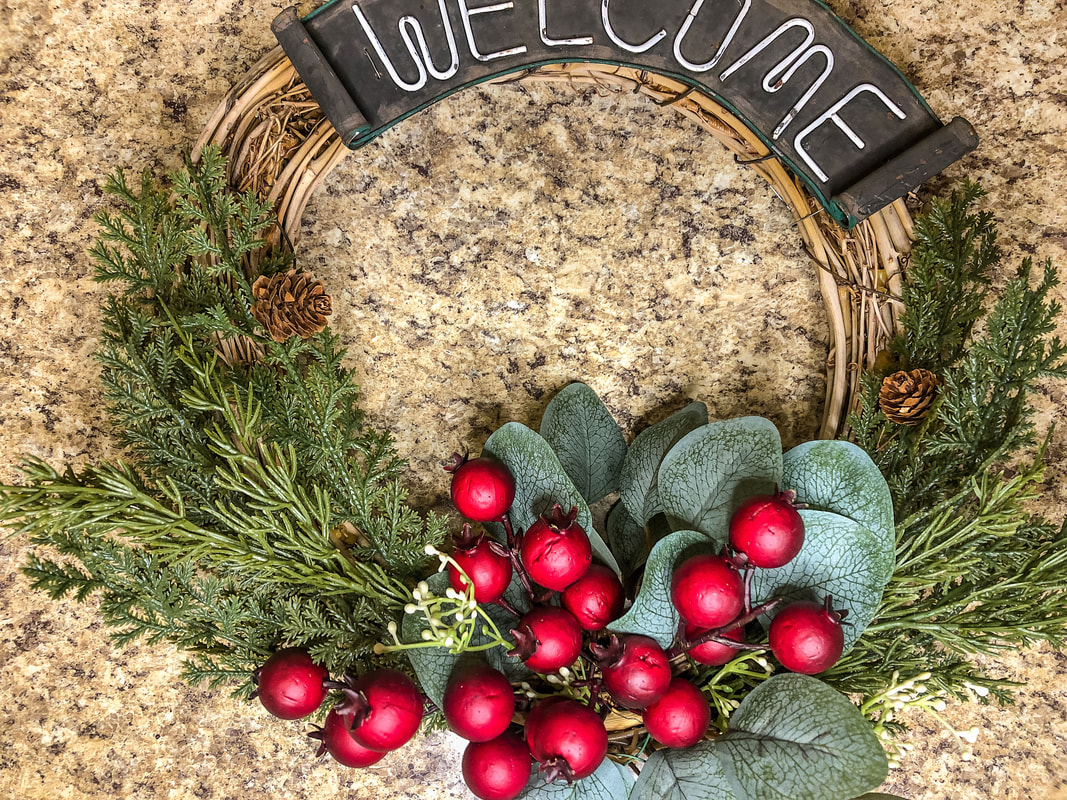 Wreath with all faux greens inserted. Photo by Diane M. Lilly, 2022. Step 5—Add in accent florals Finally, a few white flowers can be pushed into place to provide more contrast so that the berries stand out more. And that’s it!  Finished wreath with faux pine, eucalyptus, berries, and white flowers. Photo by Diane M. Lilly, 2022. This was one of the easiest faux floral arrangements I have ever done with this wreath base, and I love it! This project was limited to only what I had on hand, but you can make your wreath fuller with more greens, accent florals, and even pinecones. So what do you think? I encourage you to be brave--upcycle those old faux floral wreaths and create your own design with fresh faux florals. It’s really not too hard. All it takes is patience and imagination to give new life to an old wreath! There is a second vine base DIY that is also super easy, and I’ll include the link below! Happy Holidays! 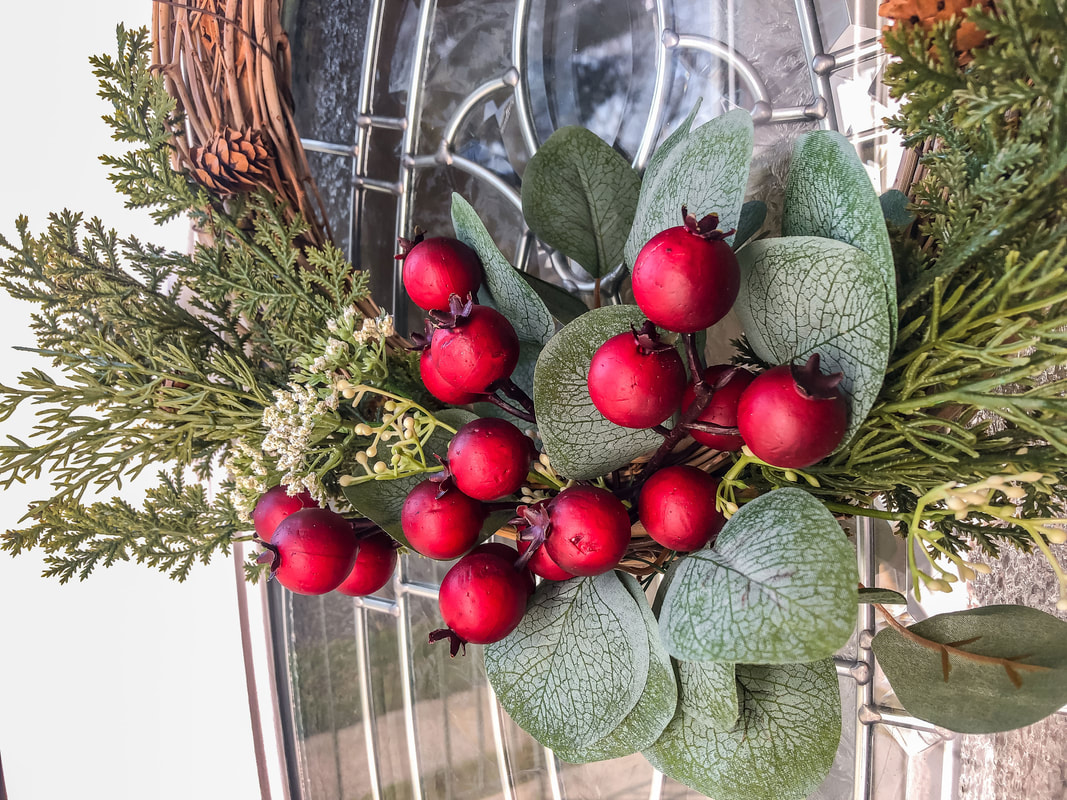 Closeup of DIY wreath hanging on the front door. Photo by Diane M. Lilly, 2022. 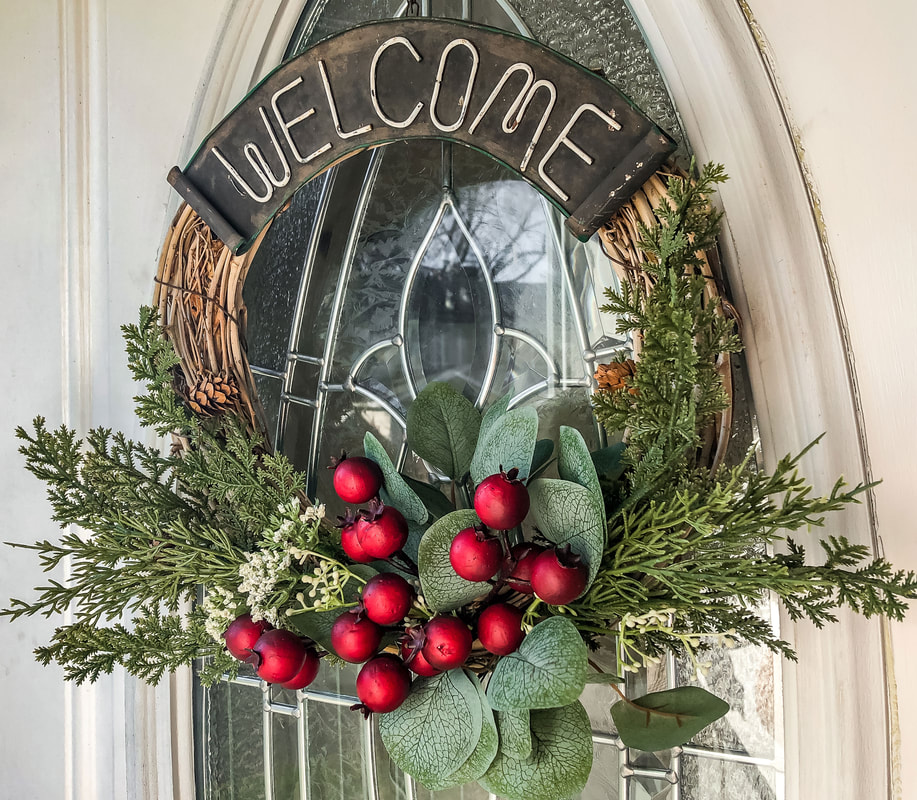 Full view of the DIY winter wreath hanging on the front door. Photo by Diane M. Lilly, 2022. Related blogs you may want to read: How to make a super easy faux ivy vine wreath for Christmas How I decorated my tree on a budget this year How to make cheap garland look festive for the holidays in just six steps DIY chalk painted tray with chippy effect DIY chalk painted tray with Celtic border Tips for creating a floral spring wreath A spring makeover for my small rental bathroom How to care for faux florals Nine hygge decor ideas Eight ways to create cozy winter interiors after the holiday decor comes down This article may contain a few items or commercial mentions, but I only used them for demonstration purposes only. I am not endorsing any particular product or receiving any monetary gain for this blog. 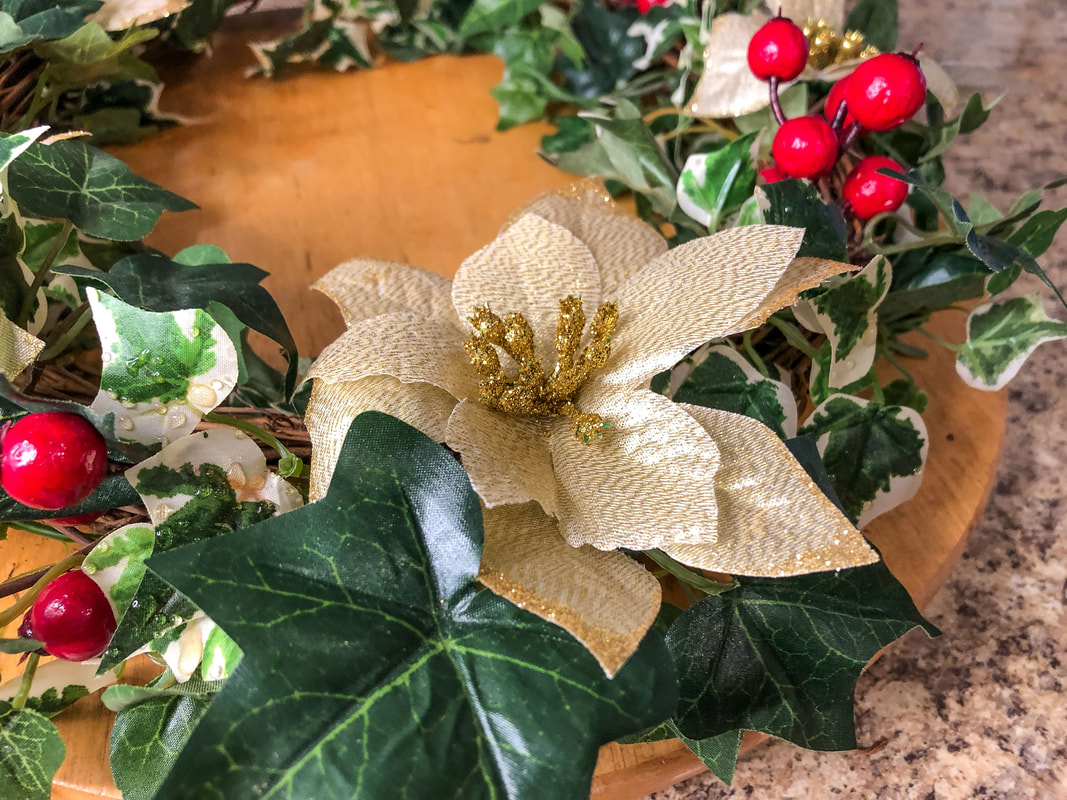 Closeup of ivy, gold poinsettia, and berries on this DIY wreath. Photo by Diane M. Lilly, 2022. This holiday decorating season has seen a lot of DIY projects, including this super simple ivy vine wreath! As with another recent DIY wreath project (see below), I started with a twisted vine wreath base stripped of all its old faux florals.  Another DIY wreath with red berries for my front door. Photo by Diane M. Lilly, 2022. Why so many DIY decor projects, you may ask? Well, it’s all about being economical this year and working with materials I already have rather than going out and spending money that I need for other things…like gifts! So what you see on this table (plus a box or two of Christmas ornaments) is all I had to work with for this holiday season’s greenery. A lot of thought also went into creating a sense of continuity in design between the different groupings, the dining room table, and the living room decor. Just because you are on a budget doesn’t mean you skimp on design! 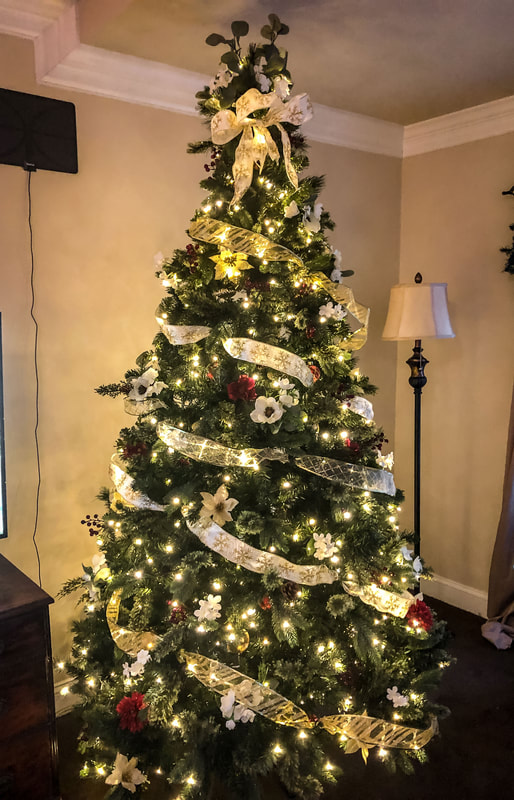 This year's Christmas tree. Photo by Diane M. Lilly, 2022. 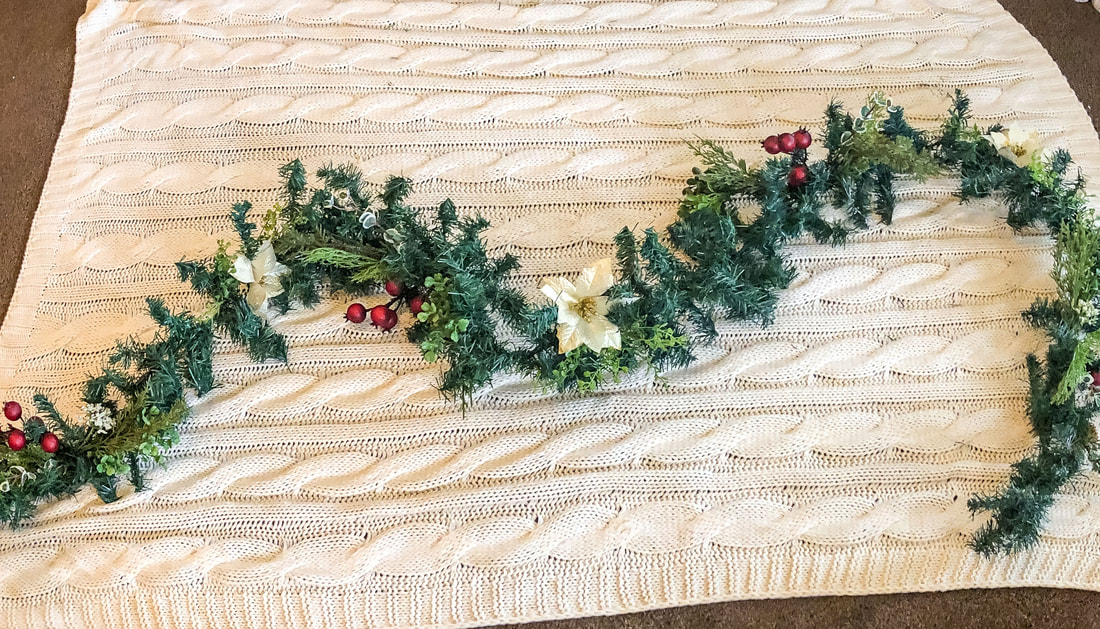 A DIY garland with gold poinsettias and red berries. Photo by Diane M. Lilly, 2022. This faux ivy wreath design was so quick and easy that I had to share it! Here are the four steps to make this simple wreath… Step 1—Wrap the green ivy Wrap the solid green ivy around the wreath and secure it into place by pushing the ends into the twisted vine. Wrap as much ivy as you like to create the desired thickness of the wreath. 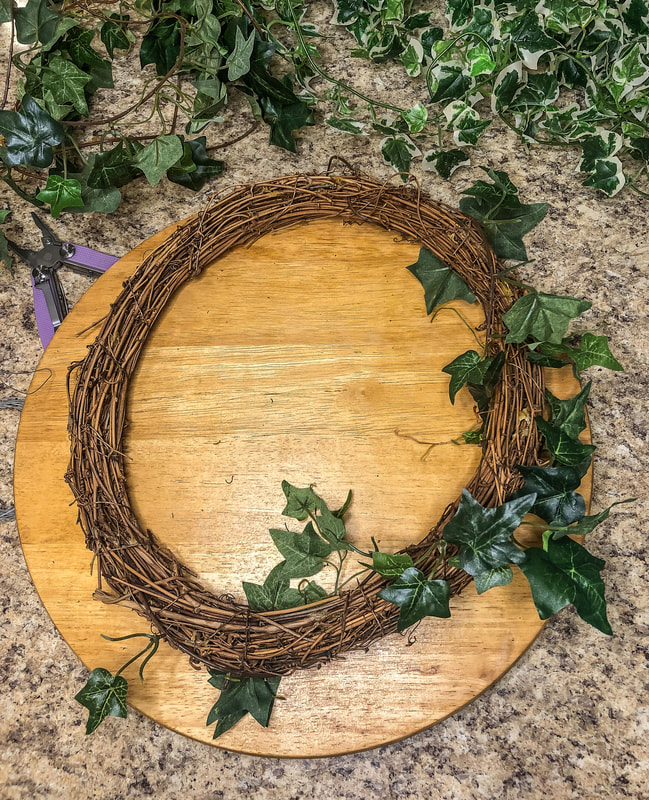 Vine wreath base with a few pieces of green ivy. Photo by Diane M. Lilly, 2022. 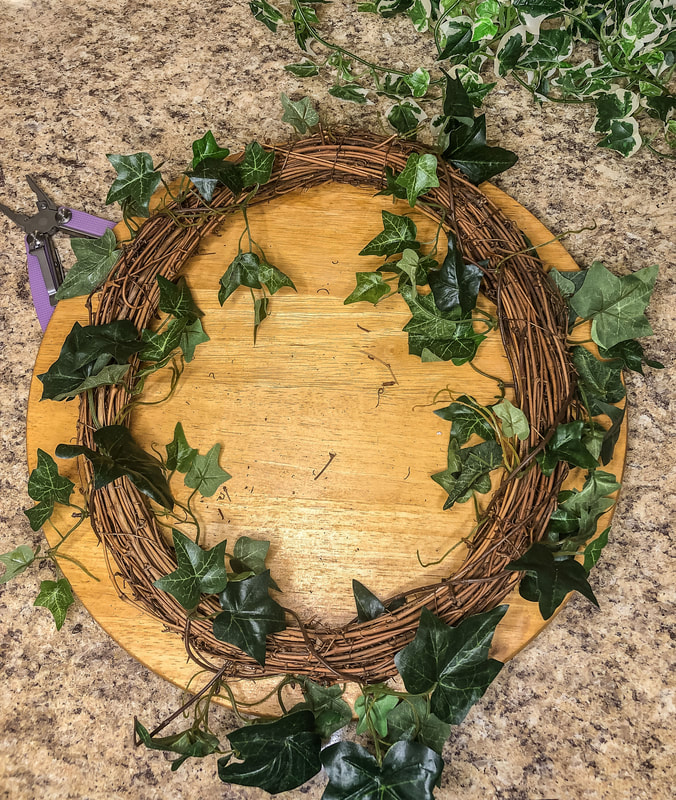 Working out how I want to fill the wreath base with the ivy. Photo by Diane M. Lilly, 2022. Step 2—Wrap the variegated ivy The variegated ivy—which provides visual contrast—can be wrapped over the green ivy, filling in the gaps between the vines. As with the green ivy, wrap it as many times as you like to create the desired thickness for your wreath, and push the ends into the wreath base to secure it in place. Keep the spacing even for a more balanced finished look. 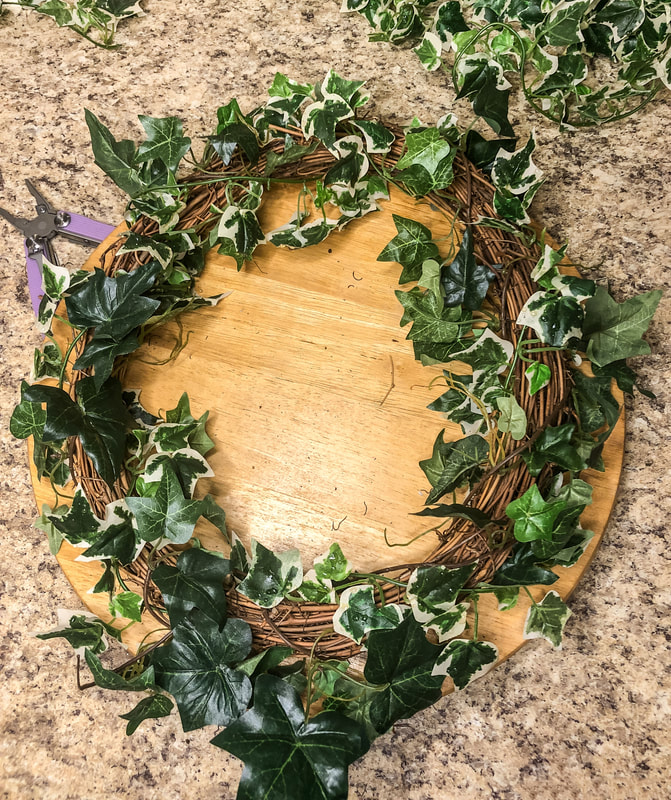 Wrapping the wreath base with the variegated ivy. Photo by Diane M. Lilly, 2022. Step 3—Add in berries This design calls for clusters of red berries to provide contrast and visual interest. When working with wreaths, it is essential to evenly space florals to create a sense of balance. Odd numbers are preferable, so I used five clusters, but this design would also work perfectly well with just four berry clusters. The berry picks are secured into place by pushing the stems into the twisted vine base. If the stems are too short, add thin wire to attach to the wreath. 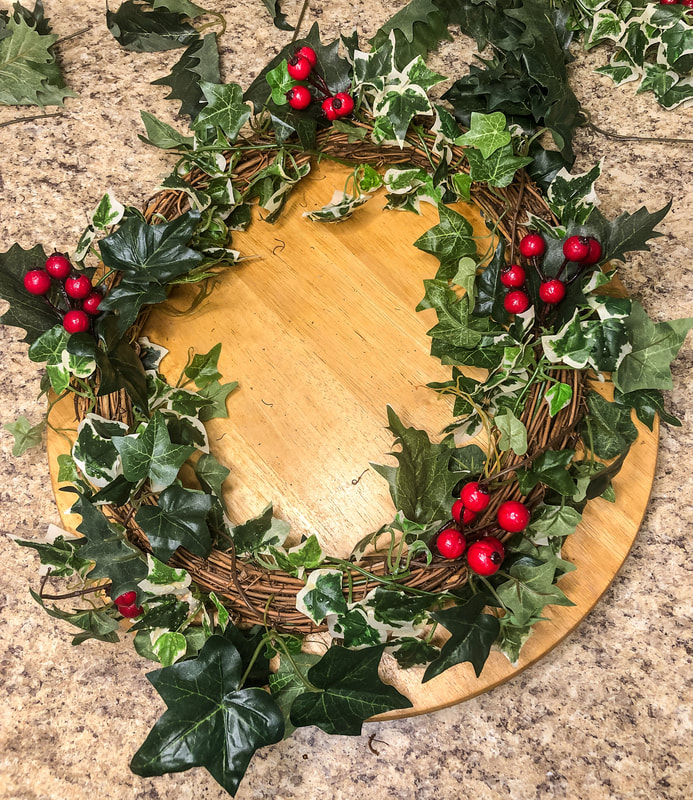 Adding the berry clusters to the wreath. Photo by Diane M. Lilly, 2022. Step 4—Attach gold poinsettias As with the berries, the poinsettias should be evenly spaced around the perimeter of your wreath. Five poinsettias were evenly spaced between the red berries. Since these poinsettia flowers had no stems, I used thin wire to attach each to my wreath.  The finished wreath with gold poinsettias added. Photo by Diane M. Lilly, 2022. And that’s it! Super simple, and yet very festive! All that’s left is to hang and dress up your wreath with fairy lights. I even had enough ivy left over to create a small wreath with no base—just ivy vines twisted into an oval and topped with a bow! 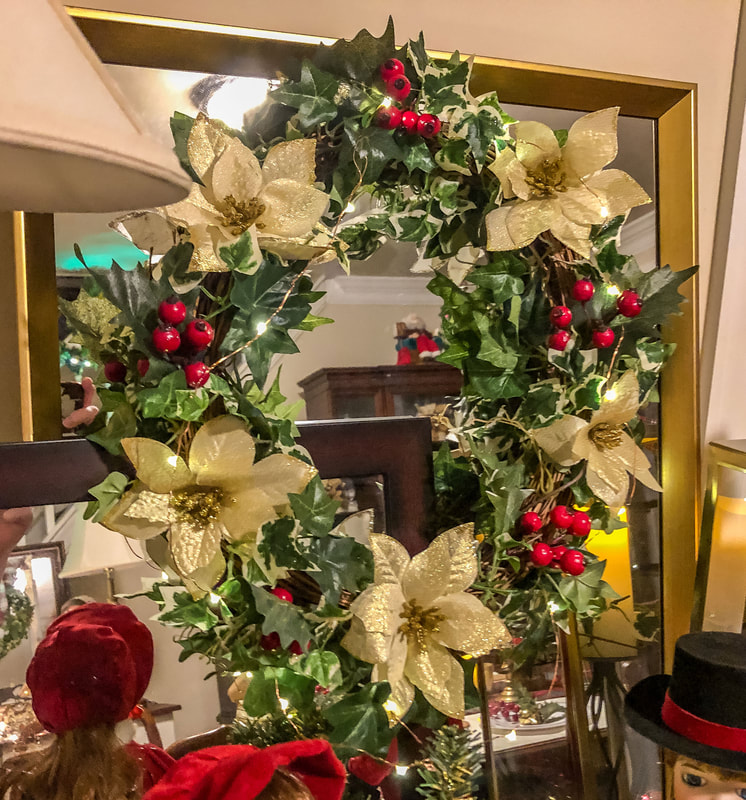 One view of the finished ivy wreath hanging over some mirrors in my dining room. Photo by Diane M. Lilly, 2022.  Another view of the finished ivy wreath. Photo by Diane M. Lilly, 2022. 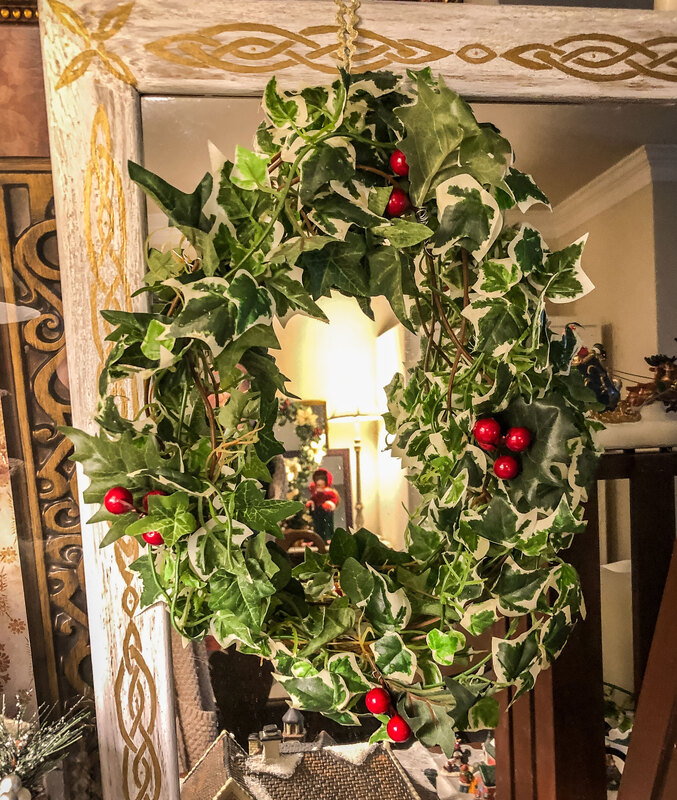 The extra wreath made by twisting the remaining vines into and oval shape. Photo by Diane M. Lilly, 2022. 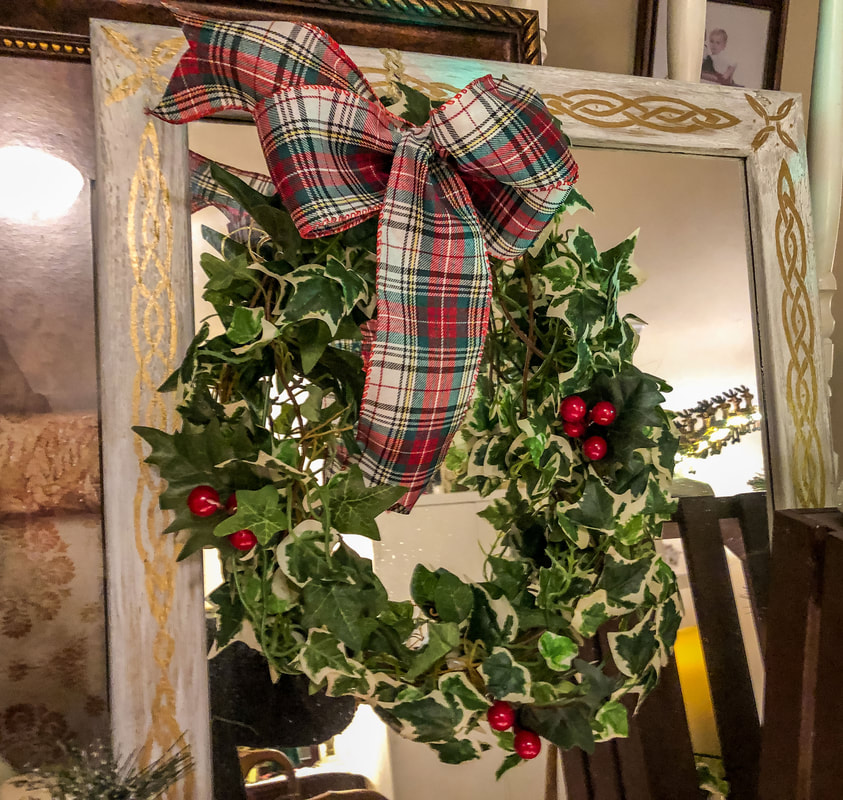 The extra ivy vine wreath with a plaid bow. Photo by Diane M. Lilly, 2022. 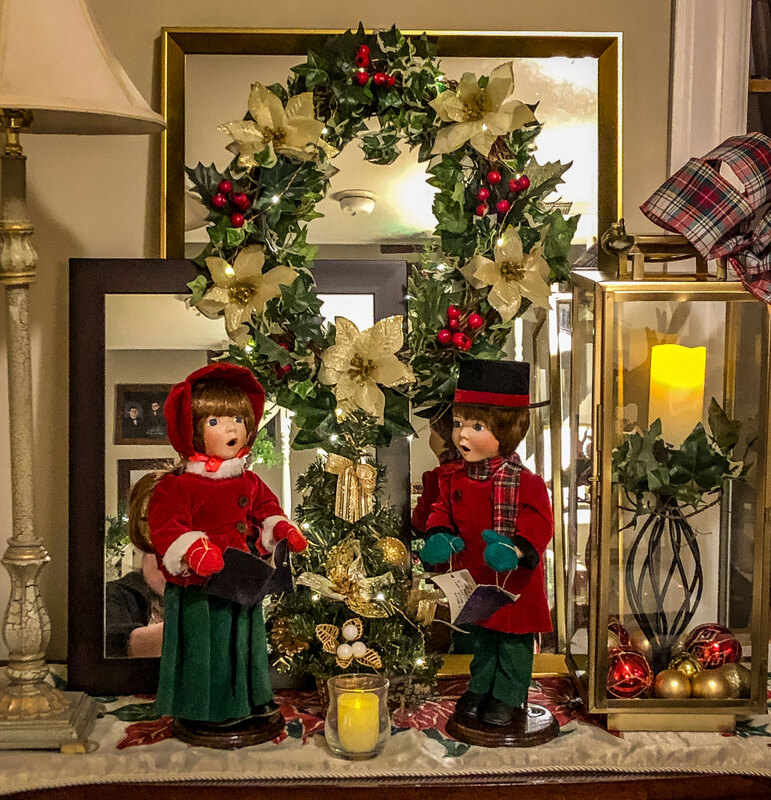 A final look at the finished DIY faux ivy vine wreath with red berries and gold poinsettias. Photo by Diane M. Lilly, 2022. So let me know in the comments whether you have tried anything similar, and don’t forget to check out my other holiday wreath DIY (listed below). Happy Holidays! Related blogs you may want to read: How to make a simple faux floral wreath for the winter How I decorated my Christmas tree on a budget this year How to make cheap garland look festive for the holidays in just six steps DIY chalk painted tray with chippy effect DIY chalk painted tray with Celtic border Tips for creating a floral spring wreath A spring makeover for my small rental bathroom How to care for faux florals Nine hygge decor ideas Eight ways to create cozy winter interiors after the holiday decor comes down This article may contain a few items or commercial mentions, but I only used them for demonstration purposes only. I am not endorsing any particular product or receiving any monetary gain for this blog. 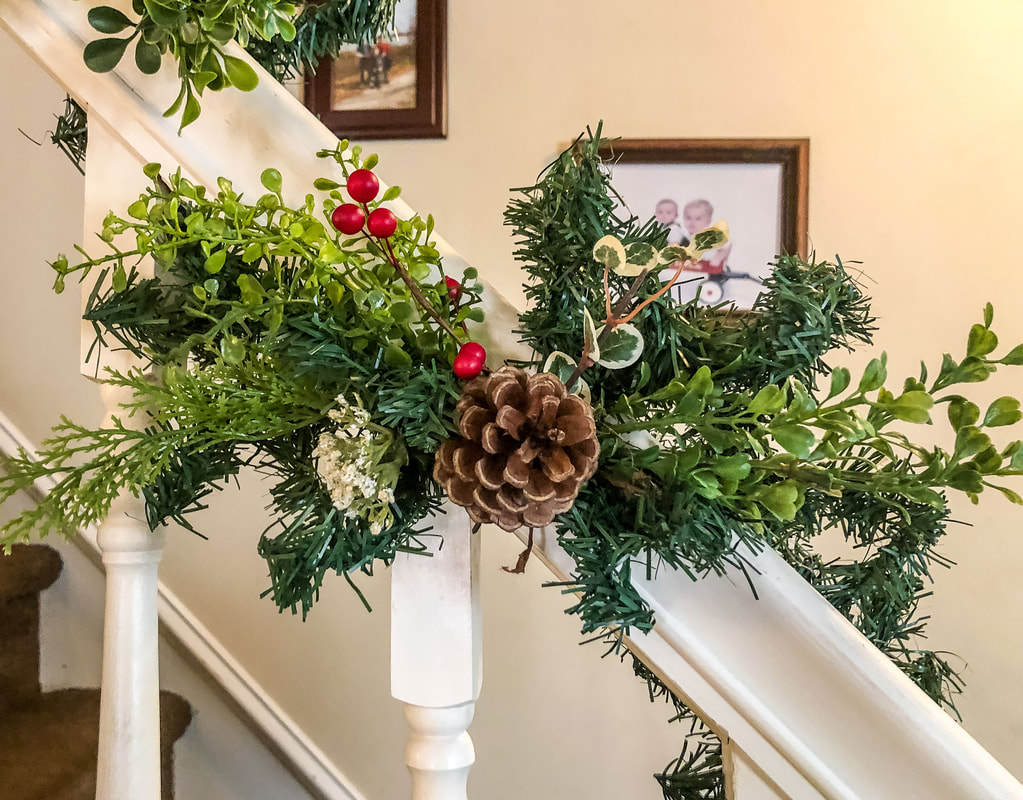 Wiry garland with faux greens, pinecone, and red berries. Photo by Diane M. Lilly, 2022. This year’s holiday season has been devastated by the current chaotic economy. It’s turning out to be a very lean holiday season indeed! This year—in particular—the festive decorations have become a beacon of light in the darkness, at least for me. But what do you do if you can’t afford to indulge in the latest trends in Christmas decorations? What if all you have to work with is cheap, wiry—and obviously fake—garland? This year, I have three cheap garlands, two hung over the top of my windows and one wrapped around the staircase railing. In this DIY, I'll share how I dressed them up to make them look festive. There were two stipulations for this decorating project: 1) I could only work with materials I had on hand, and 2) The final look had to match the rest of the holiday decor in my dining and living rooms. I picked through all of my faux florals, faux greenery, ribbons, and ornaments to see if I could come up with enough ideas to fill two rooms with holiday spirit while creating a cohesive look to the space. As you can see, I made such a mess of my dining room table! But it was worth it. Laying everything out in front of me allowed me to see what I had, explore what goes together, and assess how much of each material was available. What you see on this table (plus a box of ornaments) is all I had to work with for this year’s holiday floral decorating. 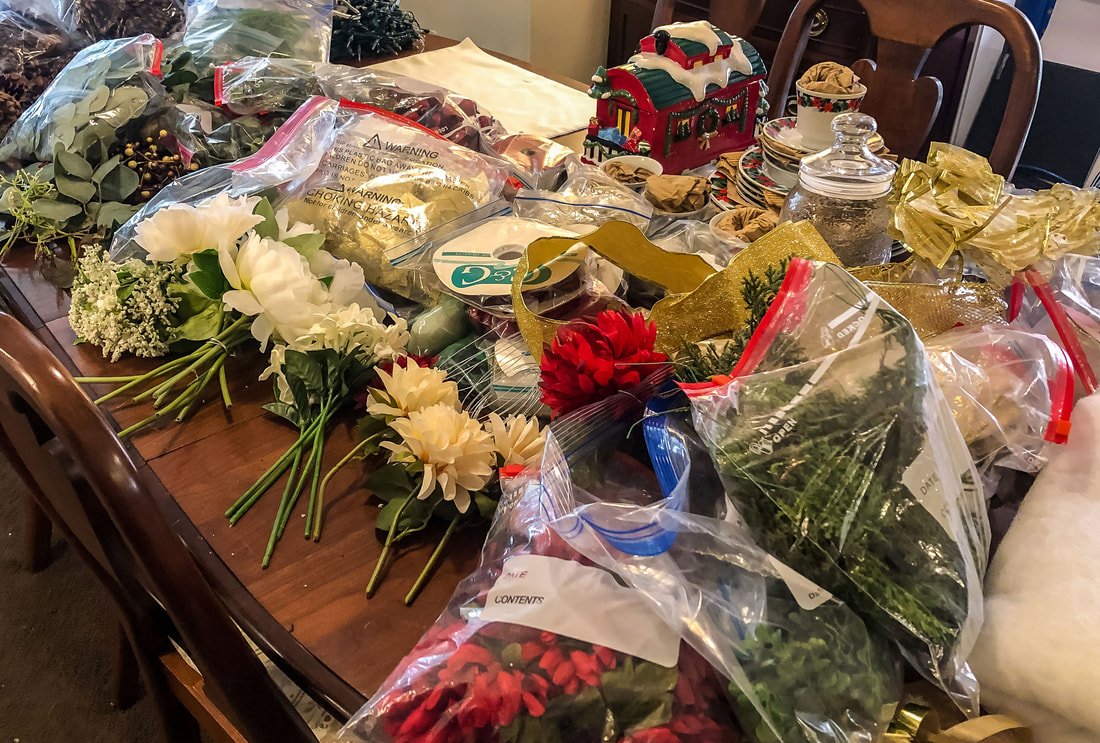 This year's supplies for holiday floral decorating. Photo by Diane M. Lilly, 2022. That decorating scheme also included creating two faux floral wreaths and filling out the pre-lit Christmas tree (I will leave links to those projects at the end), so everything you see on this table had to be carefully stretched to meet all my decorating needs. What a challenge this turned out to be!  This year's Christmas tree. Photo by Diane M. Lilly, 2022.  One of two DIY wreaths with faux greenery. Photo by Diane M. Lilly, 2022.  Another DIY wreath with faux greens and berries. Photo by Diane M. Lilly, 2022. So, let’s look at how I made my cheap garland look festive… Step 1—Fluff the garland The first step to making this cheap garland workable is to fluff every branch. As tedious as this sounds, you have to make sure to touch every single branch. Pull the branches apart and outwards in various directions away from the central wire. This creates a workable base for all of the materials you will add. Step 2—Plan out your spacing Take each bundle of greenery and experiment with the desired placement. I like to start with locating the center of the garland so that my end design has a pleasing symmetry. If you have an odd number of miniature floral arrangements, you will start in the center and work out, evenly spacing your greens. If your design calls for an even number of arrangements, you will carefully space out the bundles on either side of the central point. Either way, you will lay out your garland and greens before attaching anything to get the correct spacing. Using symmetry is the simplest way to make a dramatic visual impact! 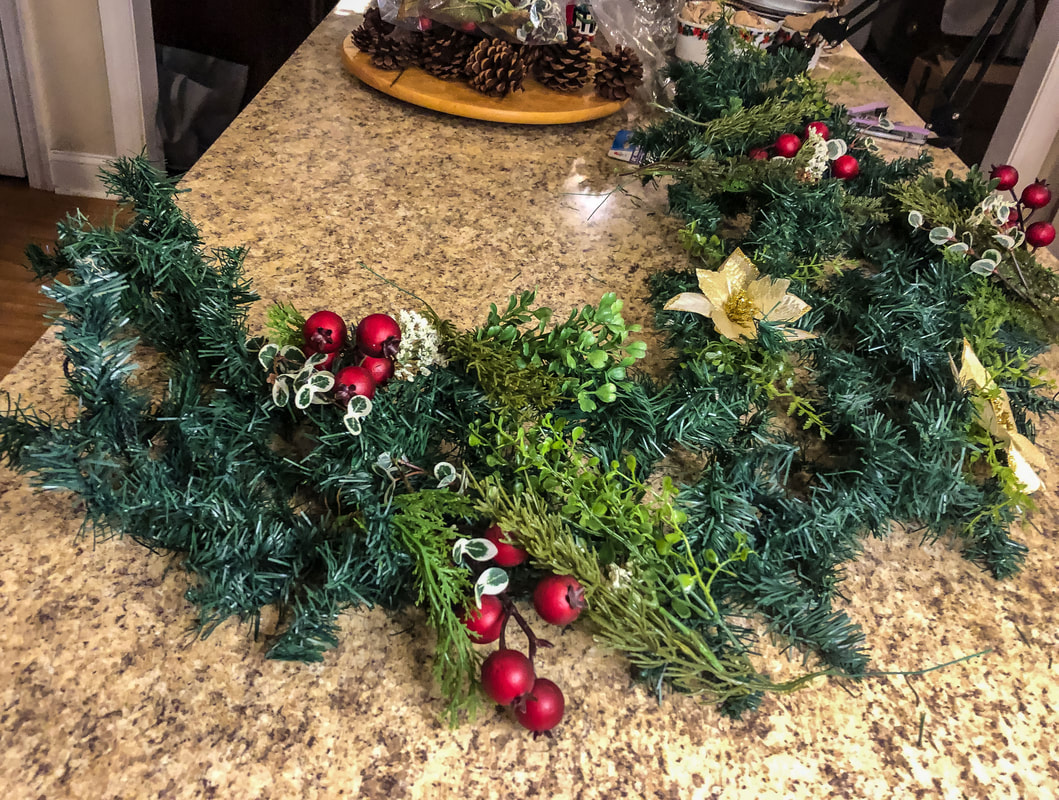 Planning the layout for my extra greens and florals. Photo by Diane M. Lilly, 2022. Step 3—Choose your faux greenery Ideally, you want more than one type of faux greenery to create visual interest. You’ll want to use greens that complement each other and the garland yet creates much-needed contrast. I used three or four different greens, including faux pine and variegated leaves. You don’t have to choose “Christmas” greens. You can use whatever works visually, and that’s ok! Just remember to keep in mind that you want a sense of continuity in the space, so try to use at least one type of greenery that appears elsewhere in your room. I used thin wire to attach and arrange my stems on either side of a central spot. This spot will be filled later with flowers. This set the stage for several miniature arrangements to be created along the length of the garland. 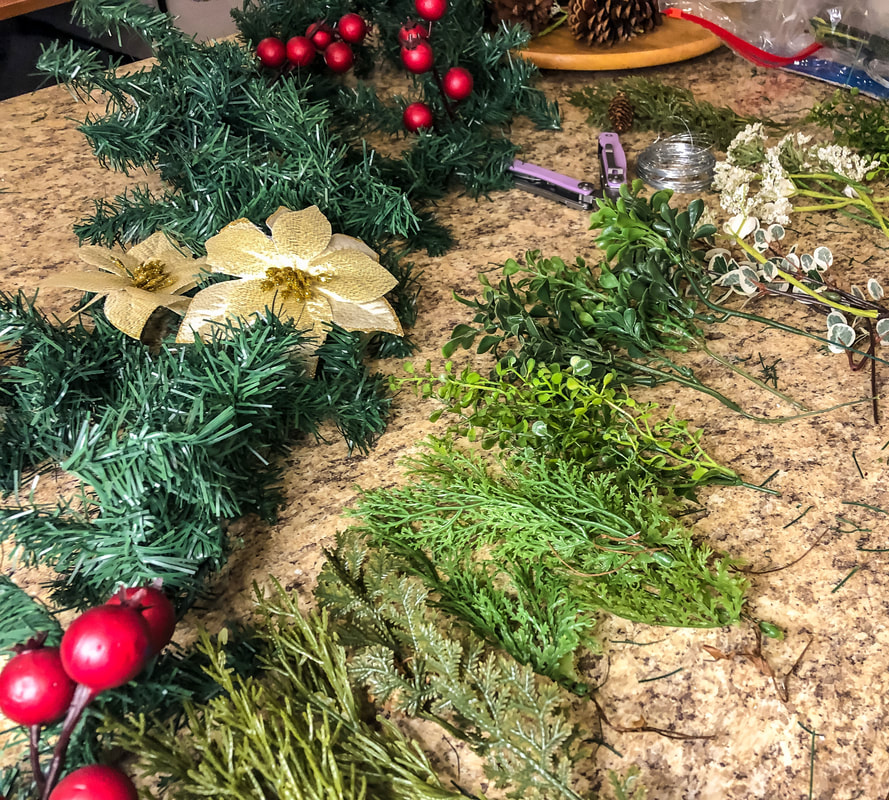 Laying out all the greenery for this project. Photo by Diane M. Lilly, 2022.  The first bit of greenery for the railing garland. Photo by Diane M. Lilly, 2022. Step 4—Layer in faux florals The faux florals in this project became individual focal points for the miniature arrangements on the garland. As I mentioned with the greenery, it is important to use repetition of design elements so that the garland blends in with the rest of your holiday decor. One of my garlands was wrapped around the staircase railing in the dining room. As there was quite a lot going on in that space already, I kept the garland simple. The other two garlands also had red berries, with the addition of gold poinsettias. Red berries, pinecones, and gold poinsettias are decorative elements in both my dining and living rooms. My tree, garlands, wreaths, and other decor all have some or all of these elements, making both spaces feel cohesive, even though I could not go out and buy expensive decorations this year. 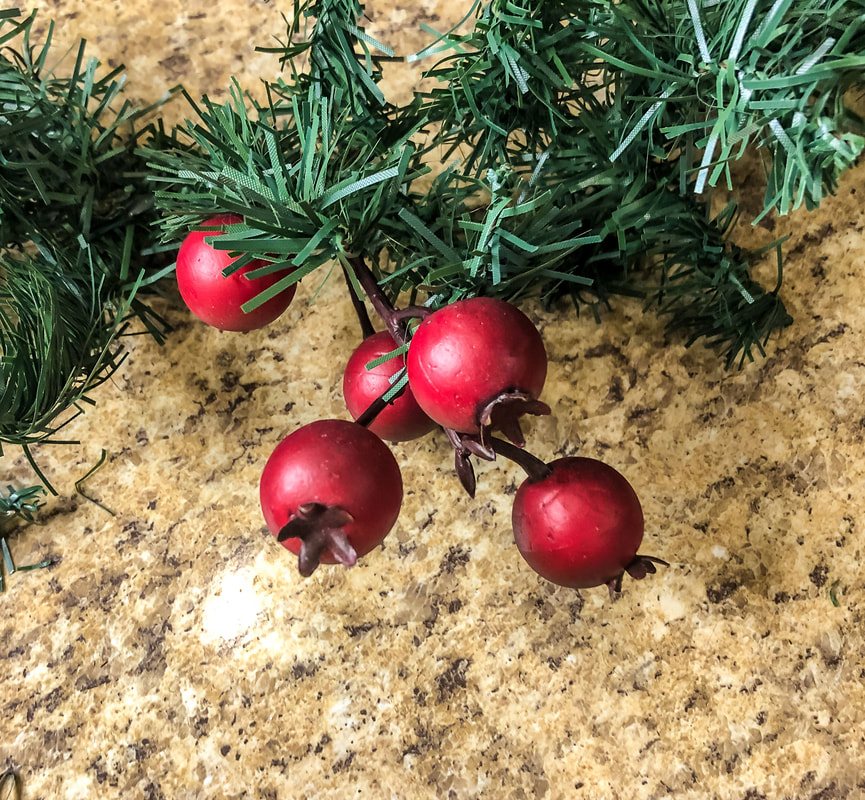 The red berries for the second garland. Photo by Diane M. Lilly, 2022. 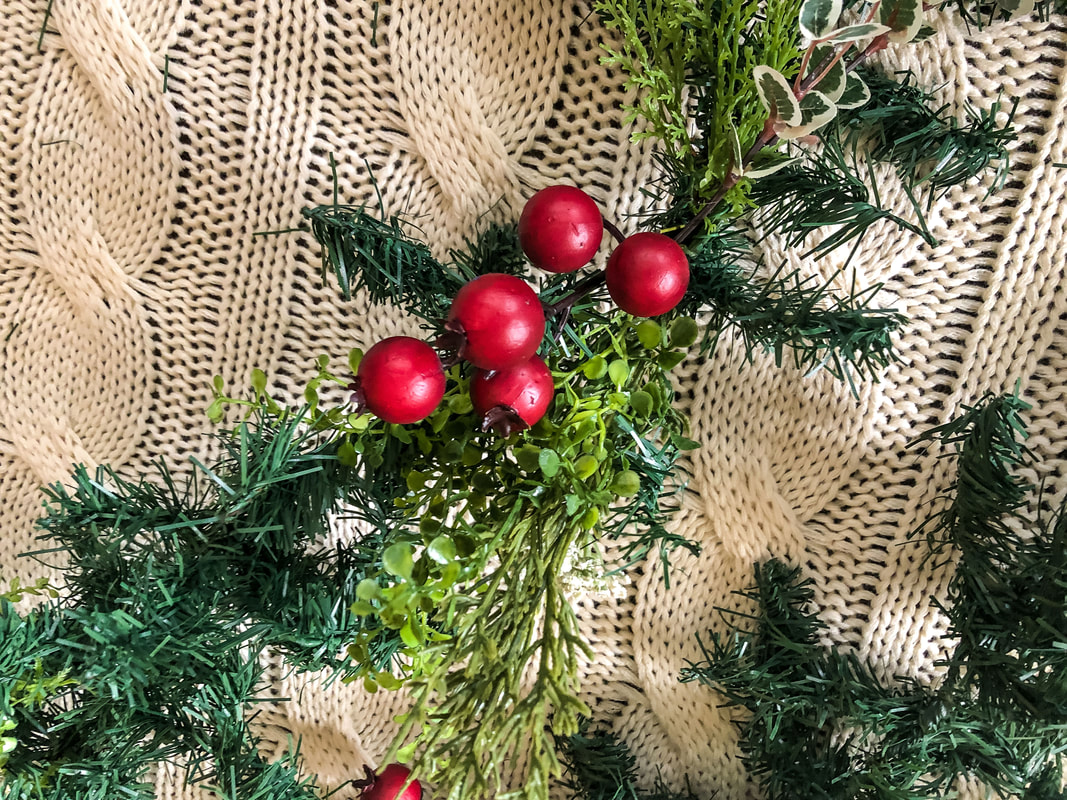 Filling in the berries and faux greenery for the second garland. Photo by Diane M. Lilly, 2022. 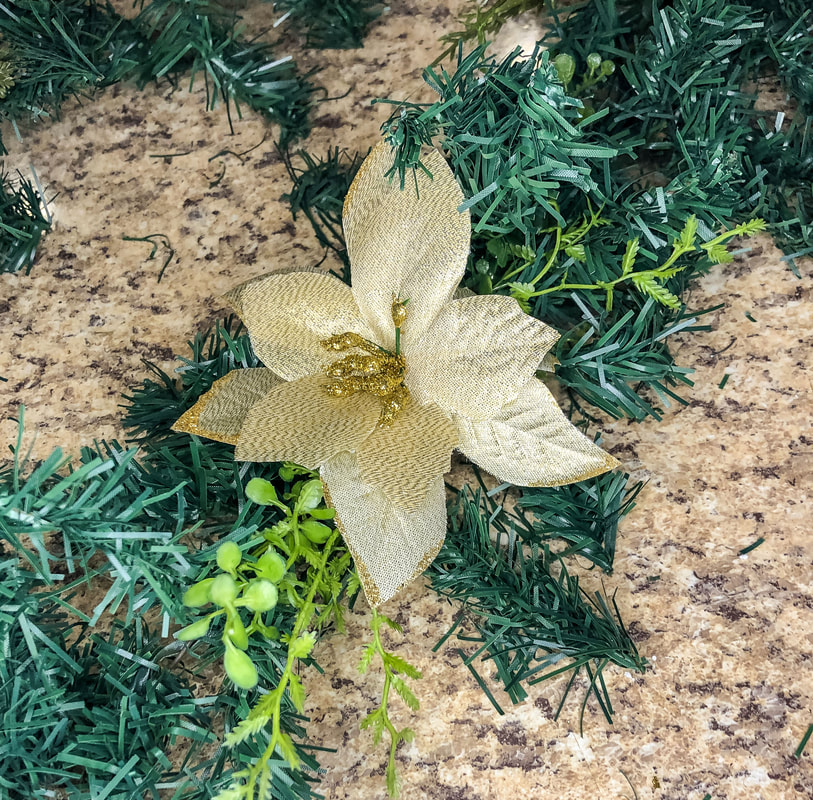 Filling in the gold poinsettias for the second garland. Photo by Diane M. Lilly, 2022.  The second garland is almost ready to be placed over the window. Photo by Diane M. Lilly, 2022. 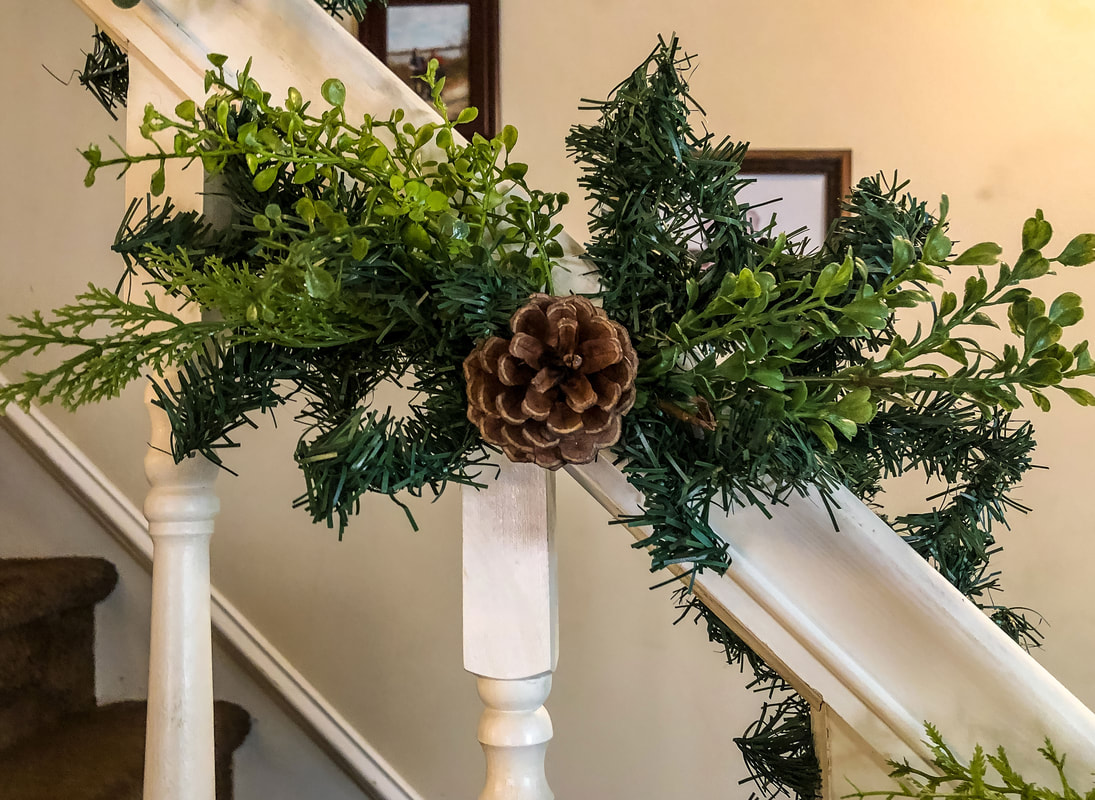 More greens and a pinecone added to the railing garland. Photo by Diane M. Lilly, 2022. 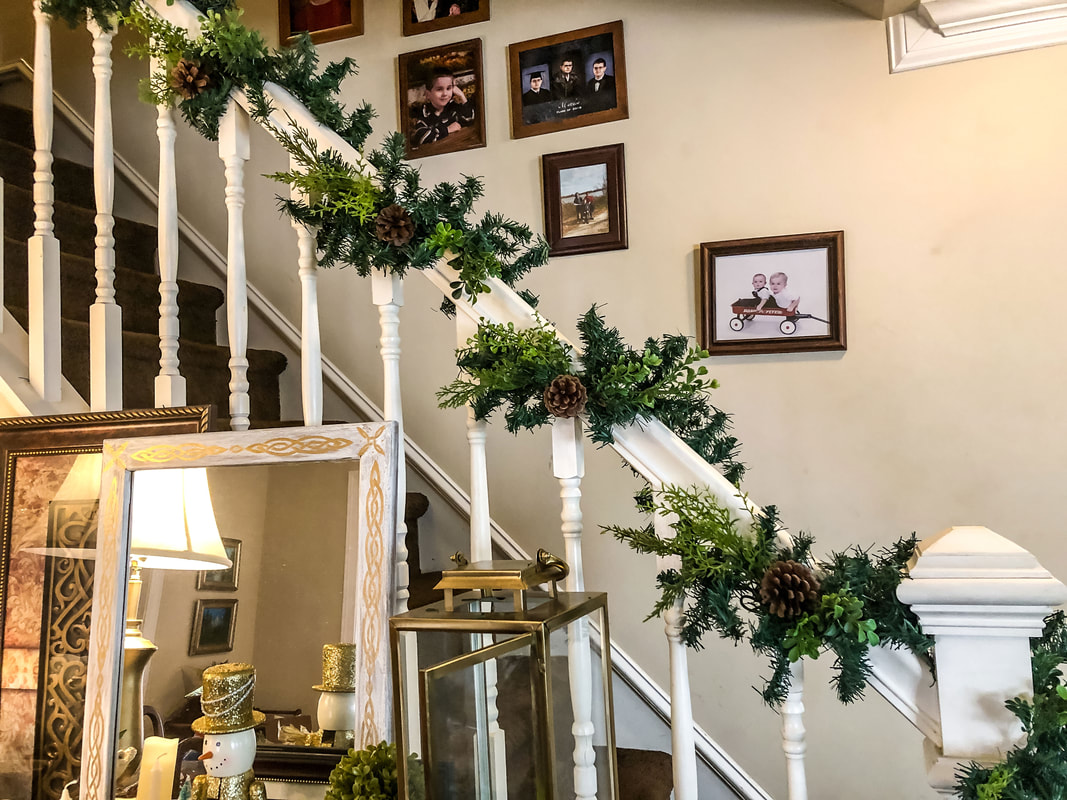 A wider view of the railing with the garland to check the spacing and miniature arrangements with pinecones. Photo by Diane M. Lilly, 2022. 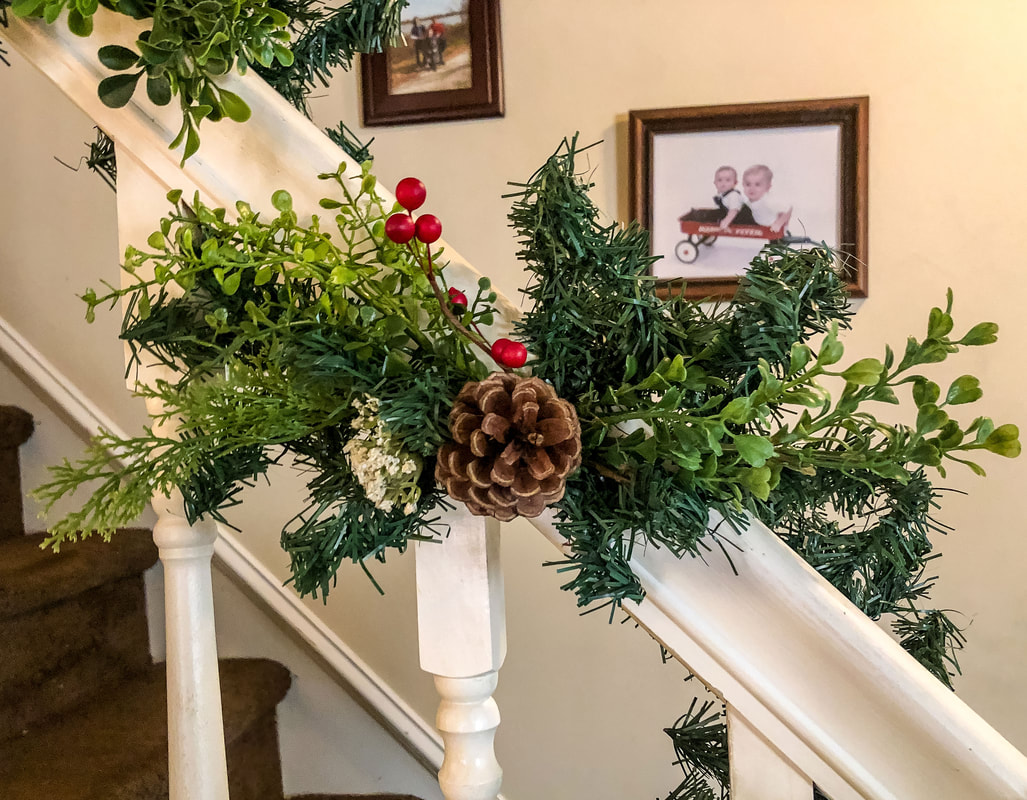 Red berries added to the clusters on the railing garland. Photo by Diane M. Lilly, 2022.  A wider view of the railing with the garalnd with berries added. Photo by Diane M. Lilly, 2022. 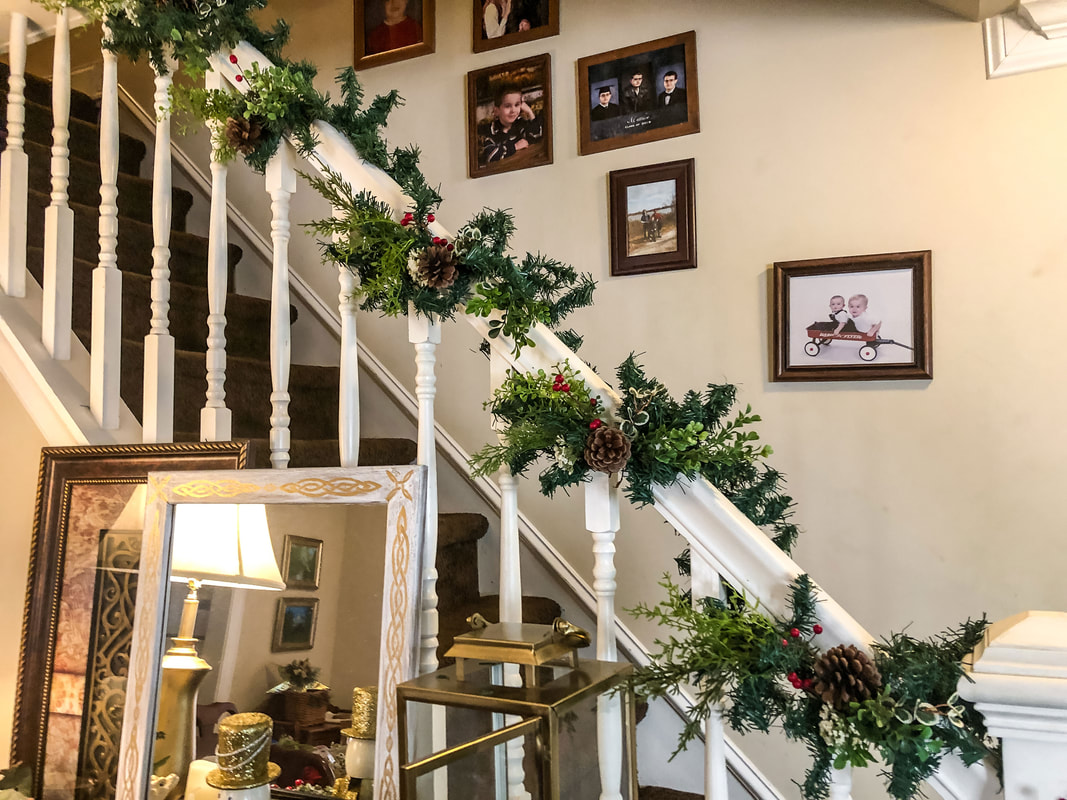 Another view of the railing garland with pinecones and berries. Photo by Diane M. Lilly, 2022. If you have enough materials to work with, continue to add in to further “fluff” the garland. The more florals and greenery you add, the more “expensive” the garland will look. As I worked with only what I had this year, I left the garland simple. If you have them, add ornaments to take your design up a notch! Step 5—Add ribbon Another way to make your garland look stylish and festive is to add ribbon. This year, the goal was to work only with what I had on hand, and unfortunately, I didn’t have enough ribbon left for bows! At some point, I will either have to splurge and buy a bit more ribbon or come up with an idea for how to use what I have interestingly. The image below is from last year’s garland…Doesn’t it just look so festive?! Your bows should match the rest of the room decor and be placed in natural corners and focal points along the garland. Space evenly for a cleaner look, and fill in gaps between the bows with smaller bits of ribbon to fill out the look. 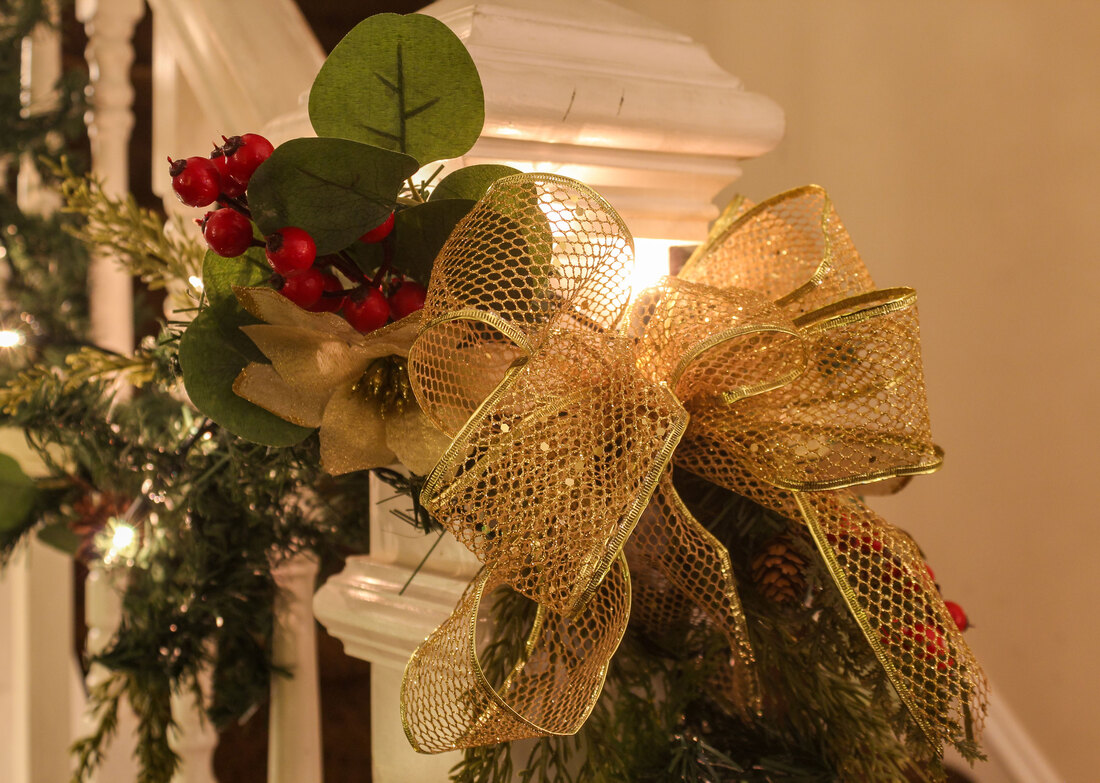 Last year's garland with gold ribbon around the newel post. Photo by Diane M. Lilly, 2021. Step 6—Add lights The last step to making your garland look festive is to light it up! I used fairy lights for the railing garland but traditional LED Christmas lights for the garlands above the windows. (I don’t love seeing the cords, so I’ll have to find a way to hide them.) Whichever lights you use, push them into the garland to light up nooks and crannies and create a more polished look. 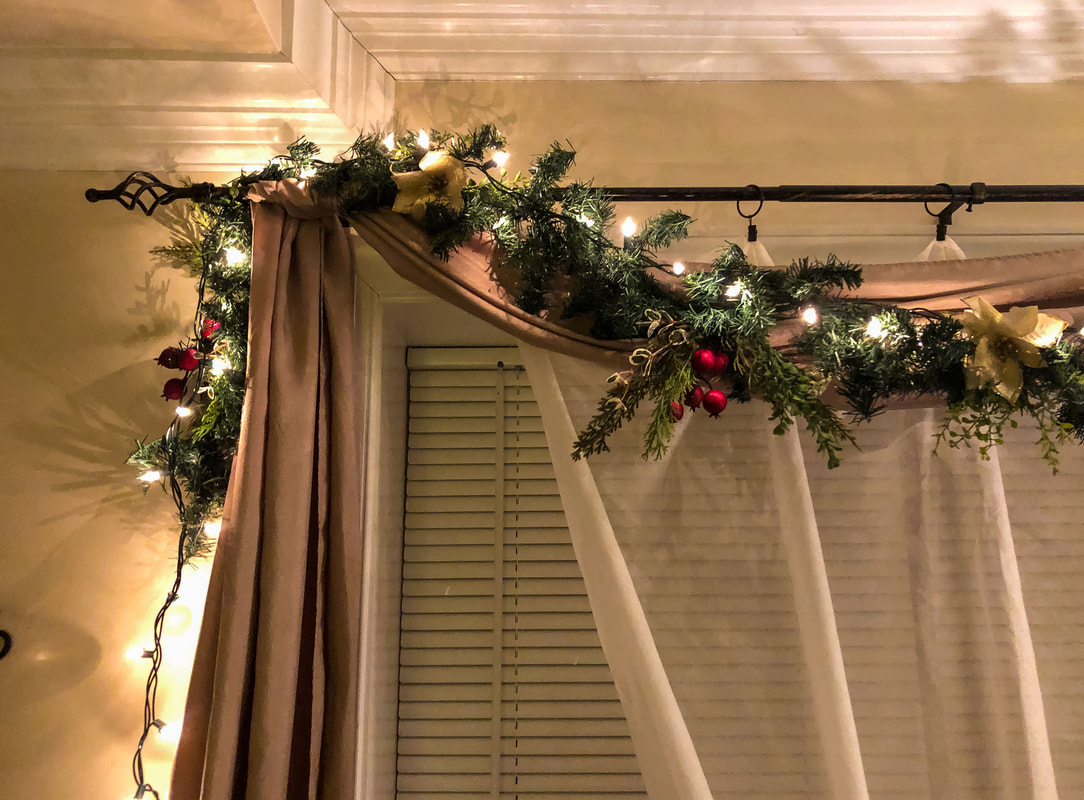 Closeup of the window garland with lights added. Photo by Diane M. Lilly, 2022. 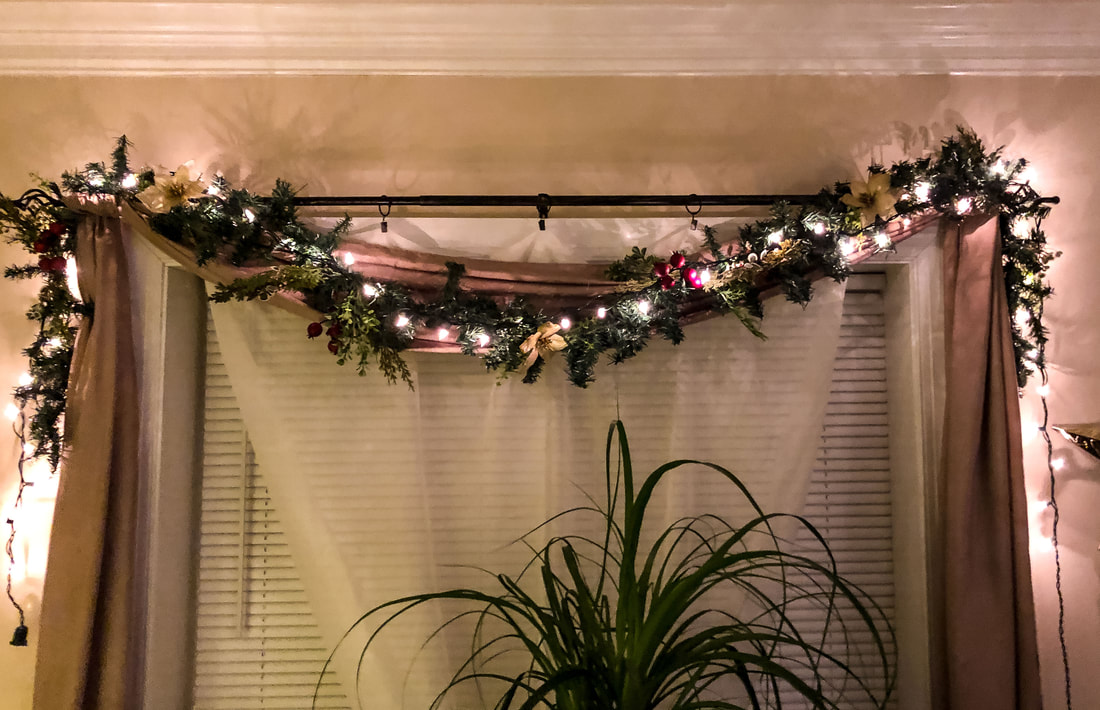 View of the garland with lights over the window. Photo by Diane M. Lilly, 2022.  View of the window garland with the tree. Photo by Diane M. Lilly, 2022. 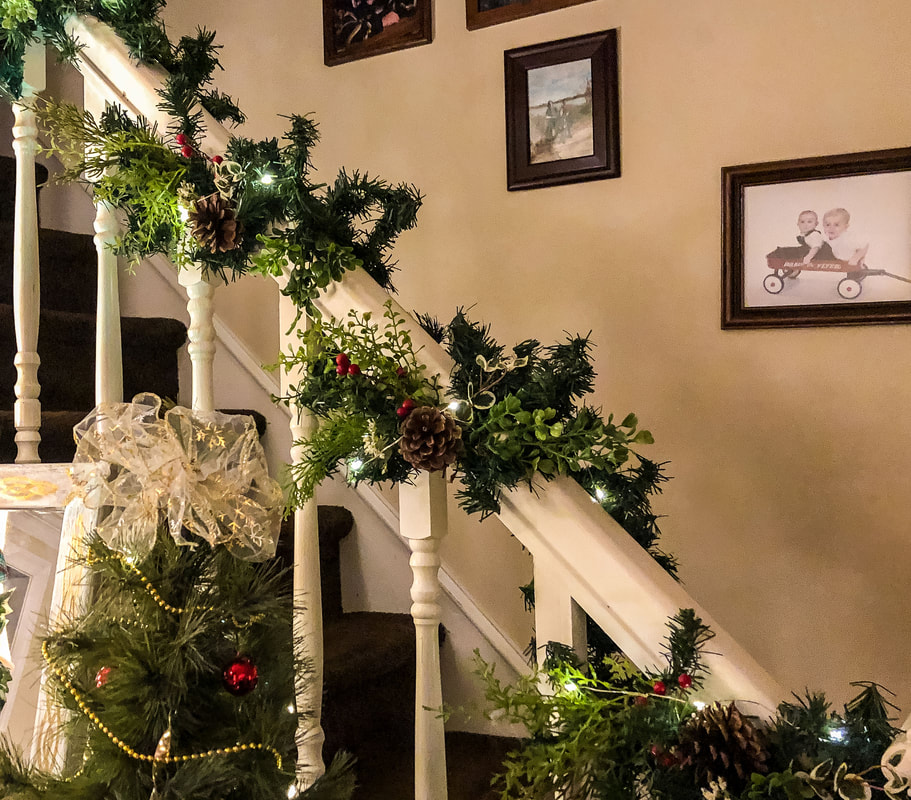 View of the railing garland with fairy lights added. Photo by Diane M. Lilly, 2022. When I started this decorating project, I was dubious about whether or not I had enough material to create a festive holiday space. While I wish I had more greenery and faux florals to fill out my garlands, I did pull off an economical yet stylish look. My new plan is to collect more materials for NEXT year so my holiday decor will have fuller greens and florals. So, I hope I inspired you to use what you have on hand to create festive garlands. It IS challenging to create a nice look with a limited budget! But it feels so good when you look around and see the holiday decor that YOU created! It is possible to take that cheap-looking garland and give it a makeover! If you have any thoughts or tips about creating beautiful holiday garlands, please share them below! And Happy Holidays! 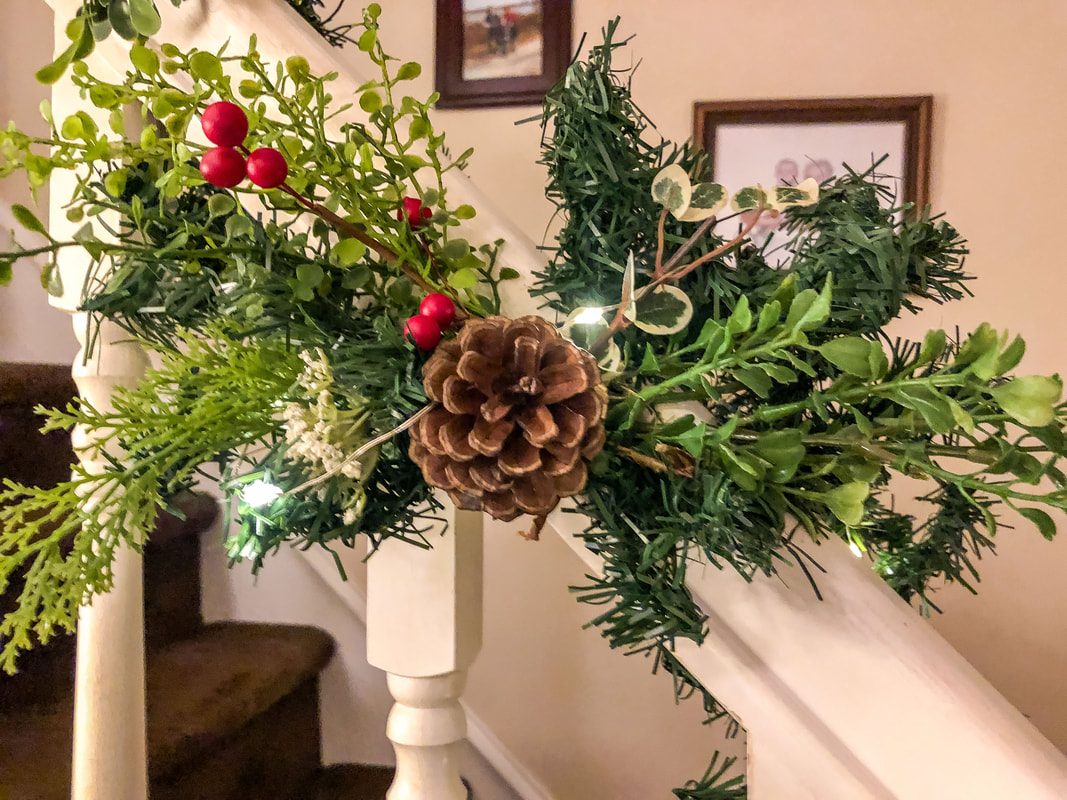 Closeup of the final pinecone and faux greenery arrangements on the railing garland. Photo by Diane M. Lilly, 2022. Related blogs you may want to read: How to make a simple faux floral wreath for the winter How to make a super easy faux ivy vine wreath for Christmas How I decorated my Christmas tree on a budget this year DIY chalk painted tray with chippy effect DIY chalk painted tray with Celtic border Tips for creating a floral spring wreath A spring makeover for my small rental bathroom How to care for faux florals Nine hygge decor ideas Eight ways to create cozy winter interiors after the holiday decor comes down This article may contain a few items or commercial mentions, but I only used them for demonstration purposes only. I am not endorsing any particular product or receiving any monetary gain for this blog.  Festive vegetable bake dish. Photo by Diane M. Lilly, 2022. Are you tired of having green bean casserole during the holidays? I have been using a recipe for several years now that is a variation of the green bean casserole using mixed vegetables, and it has been a hit at my holiday dinners! And since we are on the doorstep of the winter holiday season, why not change things up a little bit with a new recipe with that same home-cooked goodness? This is the easiest recipe ever…just FOUR main ingredients! But of course, you can play with the recipe and make it your own! I usually double the ingredients to feed more people, but here is the basic recipe… Ingredients 16 ounces frozen mixed vegetables (I use the cauliflower, carrots, and broccoli mix) 10 3/4 oz condensed cream of broccoli soup 1/3 cup of milk 2.8 oz can of French onions dash of salt (opt) dash of pepper (opt) splash of Worcestershire sauce (opt) Preheat oven to 375˚. Grease a baking pan of your choosing. (I usually use a 9 x 13 glass pan.) Mix the first three ingredients plus about a third of the French onions in a bowl. Pour into your greased pan. (The grocery store was out of cream of broccoli, so I substituted cream of celery.) Spread the remaining French onions evenly over the top. Bake in the oven for 30-35 minutes.  Glass pan sprayed with oil. Photo by Diane M. Lilly, 2022.  California mixed vegetables spread out in the baking pan. Photo by Diane M. Lilly, 2022. 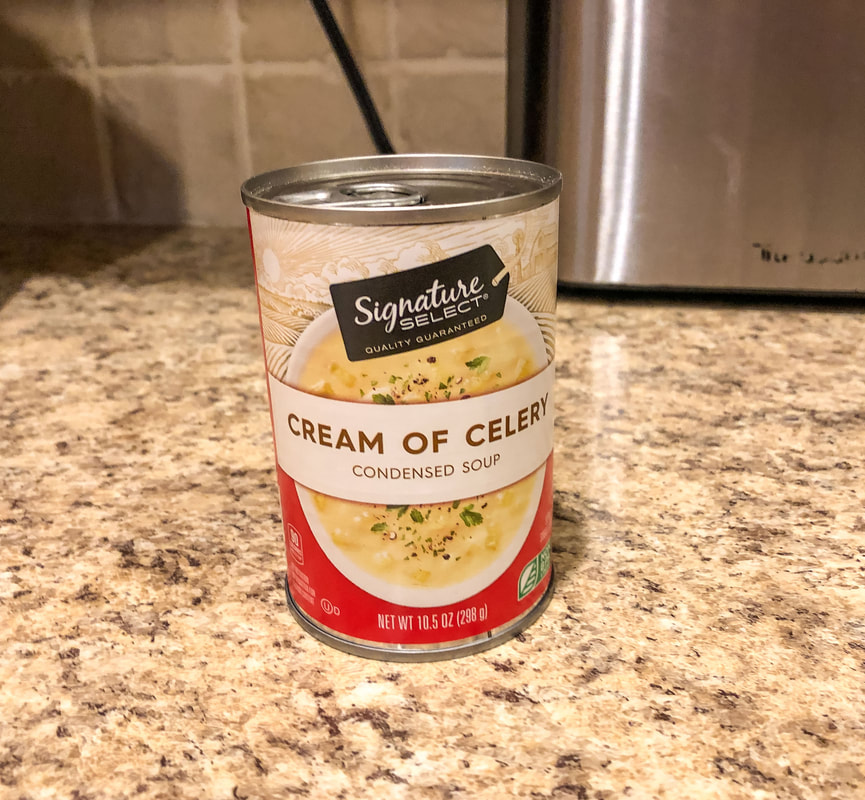 Cream of celery, substituted for the cream of broccoli. Photo by Diane M. Lilly, 2022. 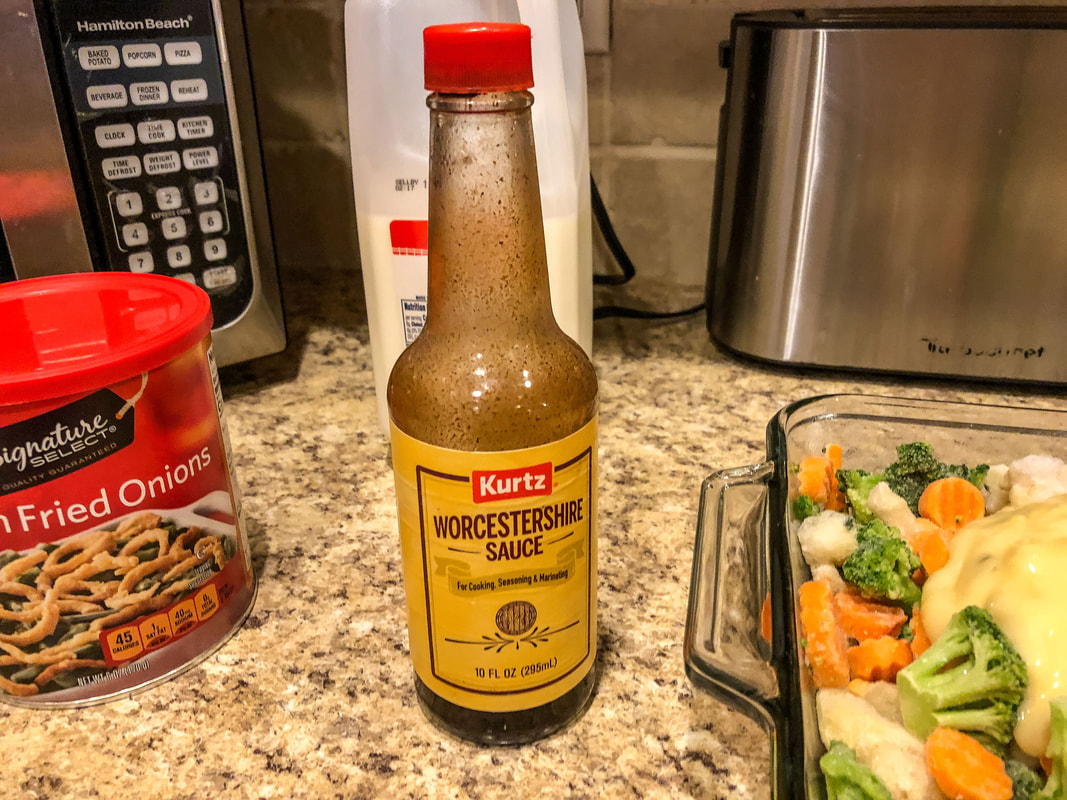 Worcestershire sauce. Photo by Diane M. Lilly, 2022. 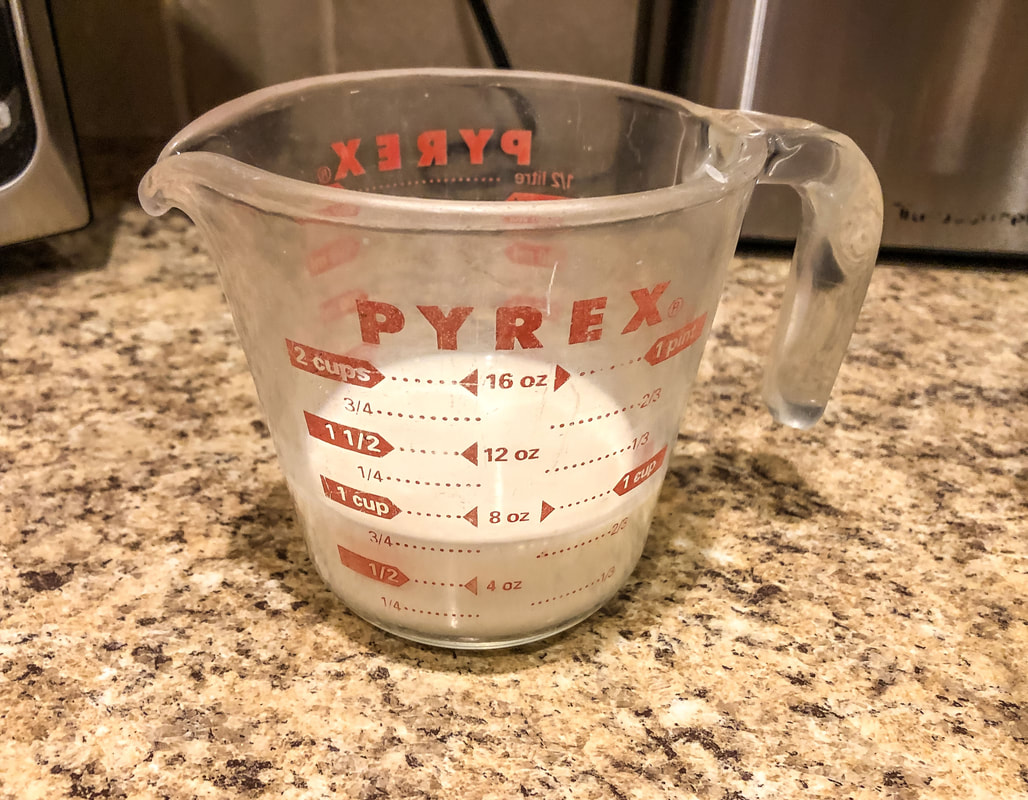 Milk for the recipe. Photo by Diane M. Lilly, 2022. 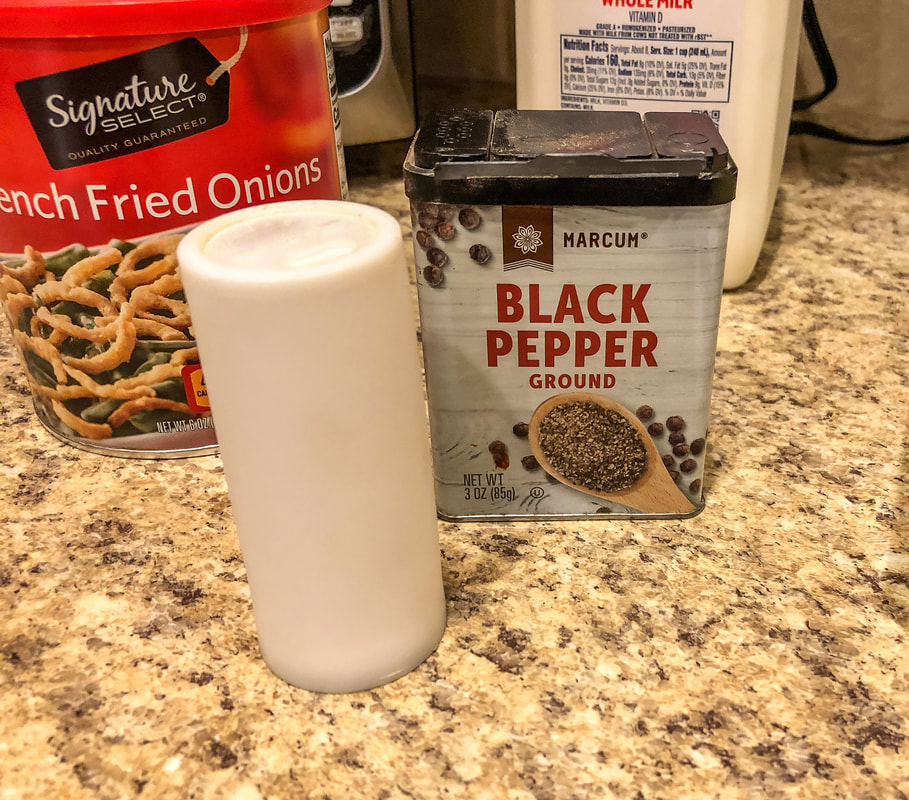 Salt and pepper. Photo by Diane M. Lilly, 2022.  French onions. Photo by Diane M. Lilly, 2022.  All ingredients mixed into the vegetables with French onions on top. Photo by Diane M. Lilly, 2022.  Finished festive vegetable bake. Photo by Diane M. Lilly, 2022. It’s that easy!!! This recipe has been one of my favorites for the holidays every year. It’s quick, easy, and inexpensive…What’s not to like about it?! Give it a try, and let me know what you think in the comments below! And Happy Holidays!  Closeup of the finished festive vegetable bake dish. Photo by Diane M. Lilly, 2022. Related blogs you may want to read: Spicy crock pot chili recipe Homemade chicken noodle soup recipe Potato soup recipe Tuna noodle casserole recipe Chicken vegetable pot pie Salmon chowder recipe How to eat healthy with chicken and roasted vegetables This article may contain a few items or commercial mentions, but I only used them for demonstration purposes only. I am not endorsing any particular product or receiving any monetary gain for this blog. |
Author
Some of the posts on this site contain affiliate links. This means if you click on the link and purchase the item, I will receive an affiliate commission. 
Categories
All
Archives
April 2024
|