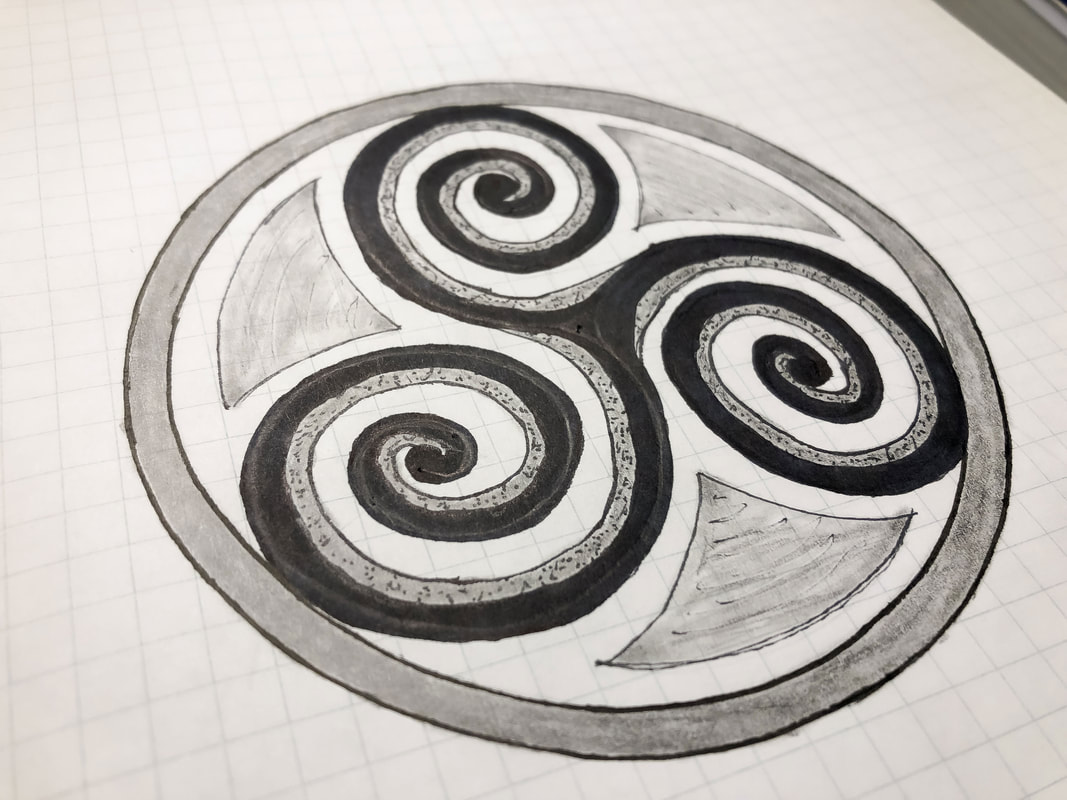
 If you want to learn how to draw a triskele—like those seen in Ireland—you’ve come to the right place! In today’s blog, I will take you through a step-by-step process for drawing a basic triskele design. You can then use this simple design as a base for a more complicated design. All you will need for this tutorial is a compass, eraser, ruler, and paper, but I have provided a list below of supplies you may want for this and other drawing projects. (Disclaimer: I am a Blick Art affiliate so this list contains affiliate links. If you click on the link and purchase the item, I will receive an affiliate commission at no extra cost to you. I will only recommend products or services I use personally and/or believe will add value to my readers, so there is no conflict of interest.) Gather your supplies: Drawing pencils Markers Blending stumps Eraser Click eraser Ruler Horse hair brush Grid paper Sketch pad Tracing paper Step 1: Draw a circle Draw a circle using a compass and mark the midpoint of that circle. Step 2: Divide the circle in half vertically Use a ruler to divide the circle in half vertically and mark the center. 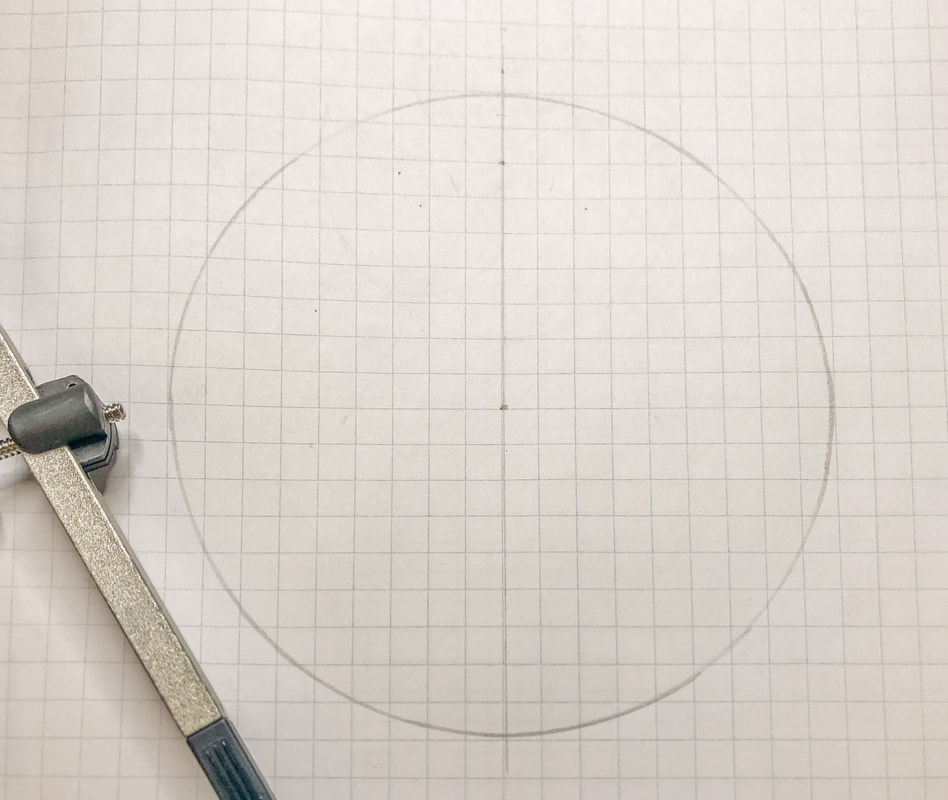 Step 3: Divide the circle into six sections For this step, you will use the same settings and radius on your compass as you used to draw the circle. Place the sharp point at the bottom of the vertical line and draw an arc on either side of the line on the circle’s circumference. Use a ruler to draw a line from the point where one arc intersects the line, through the circle’s center, to the opposite side of the circle. Do the same for the other arc. You should now have six equal triangular sections in your circle. 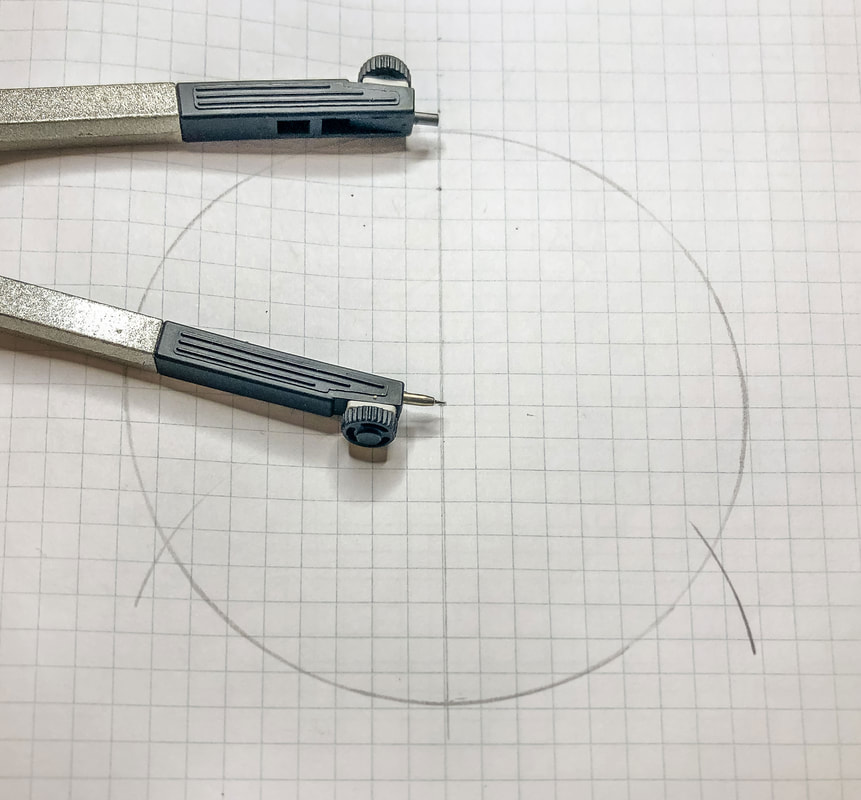 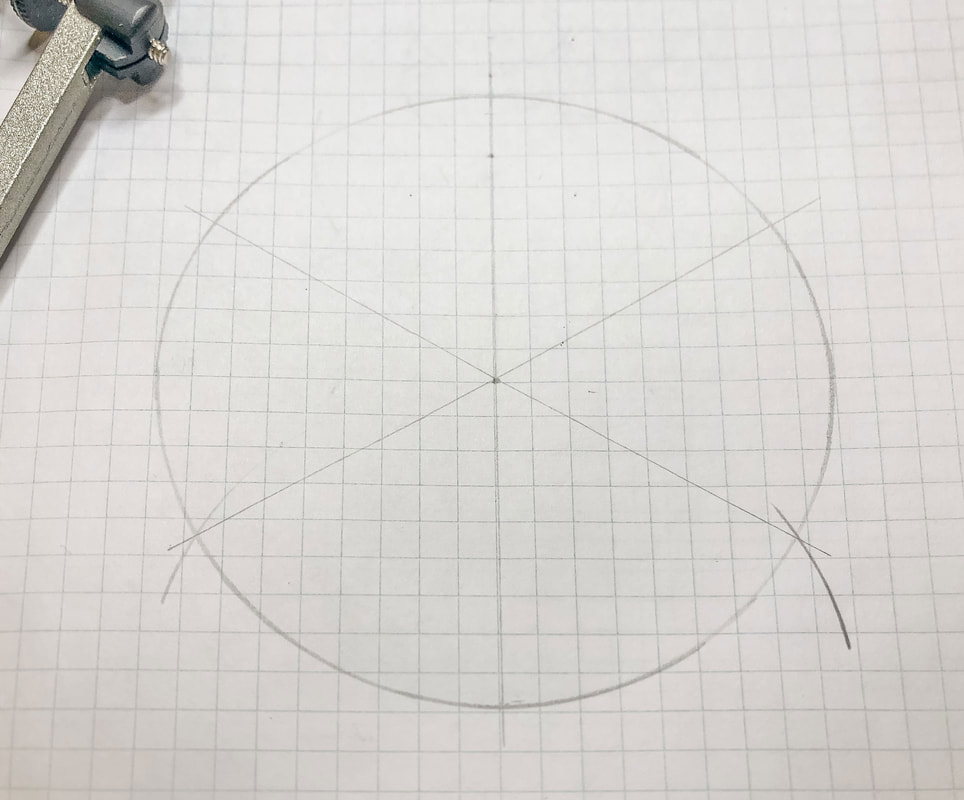 Step 4: Find the midpoint of three lines Take a look at the first image below. To draw a triskele, you will use the top half of the vertical line and the two lines that come off the center at an angle, forming an upside-down “Y”. In this step, you will find the midpoint of these three line segments. Set the compass a little wider than half the length of the line segment. Place the compass point at the circle’s center and draw an arc on either side of the line. Now, move the point to the opposite end of the line segment and draw an arc again on either side of the line segment. (If you need a tutorial for finding the midpoint of a line, you can click here for the blog or view the video tutorial here.) As you can see in the second image below, you end up with crossing arcs on either side of the line segment. Use a ruler to line the intersections of these arcs up, and where this line crosses your line segment is the middle of the line. Use this method to find the midpoint for the other two line segments in your upside-down “Y”. 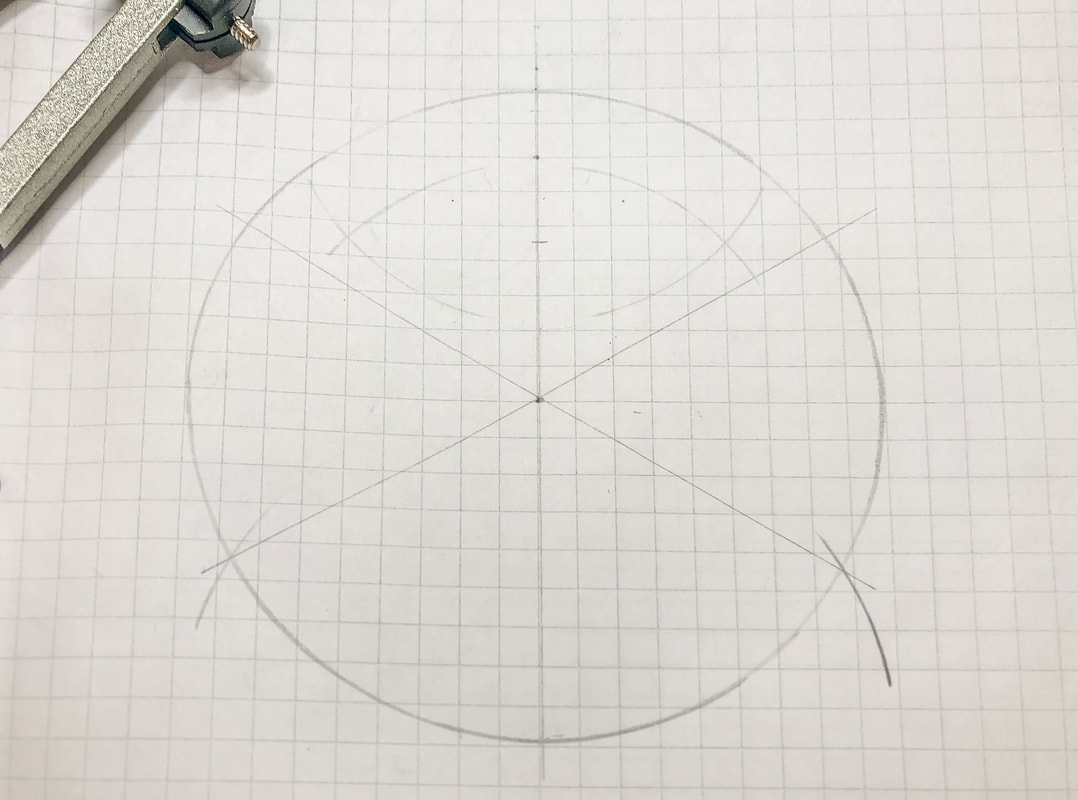 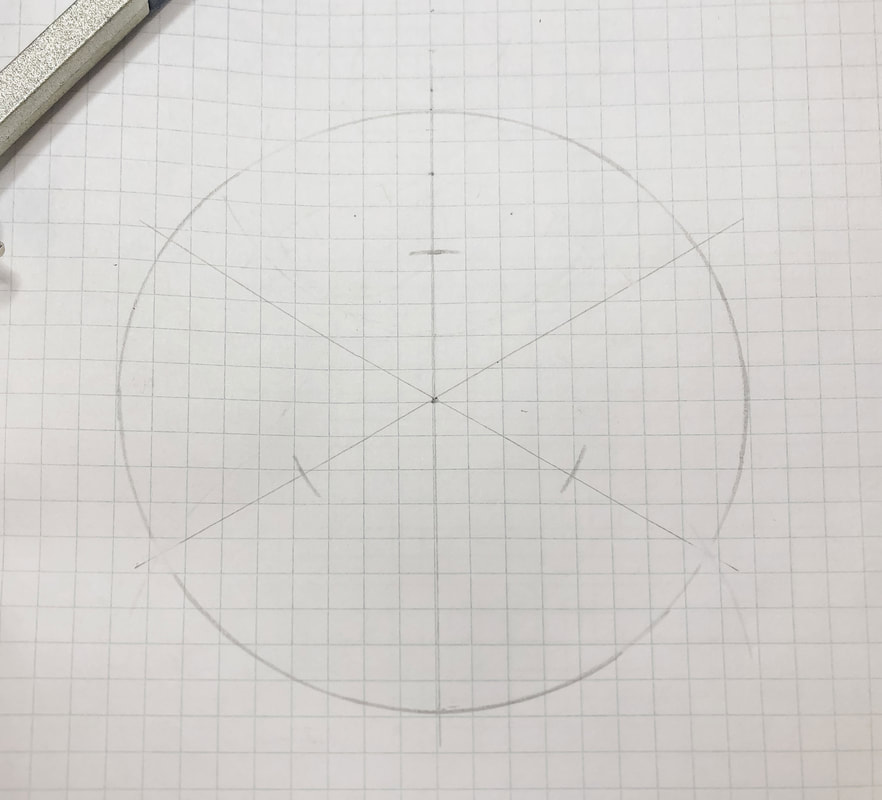 Step 5: Further divide the line segments in half Once those three line segments are divided in half, you will divide each of the resulting six line segments in half again using the same method as above. When you are finished, each line in your upside-down “Y” should have three tick marks. 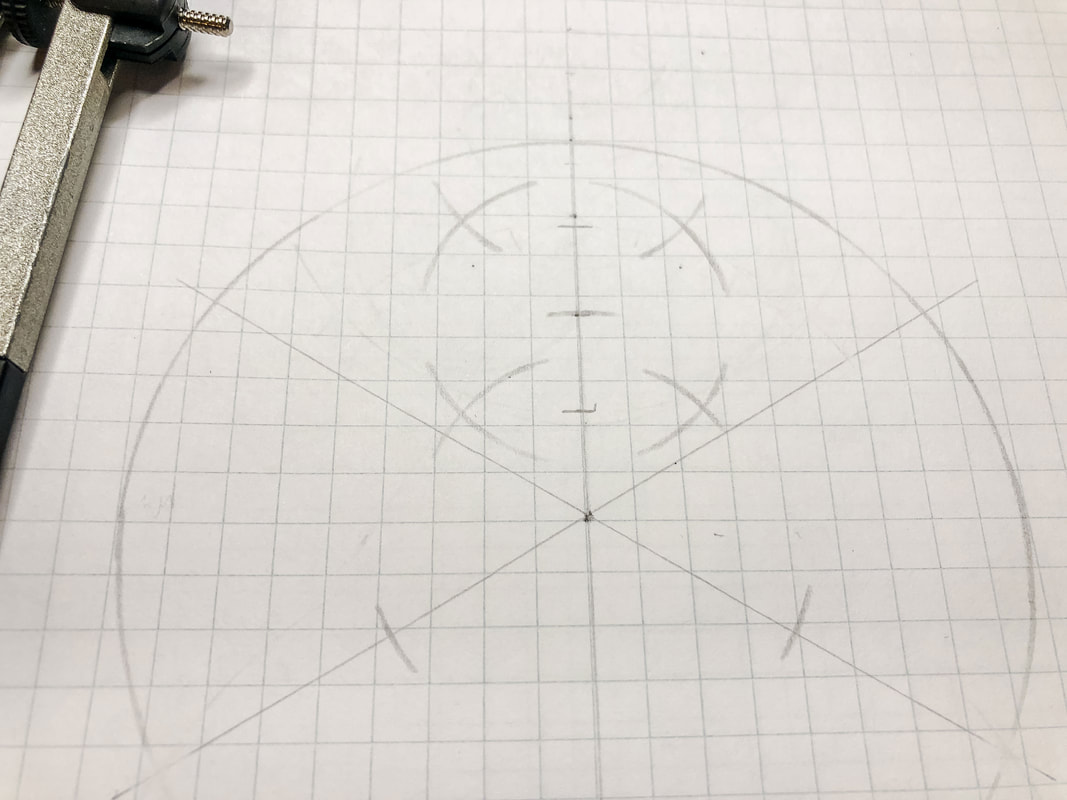 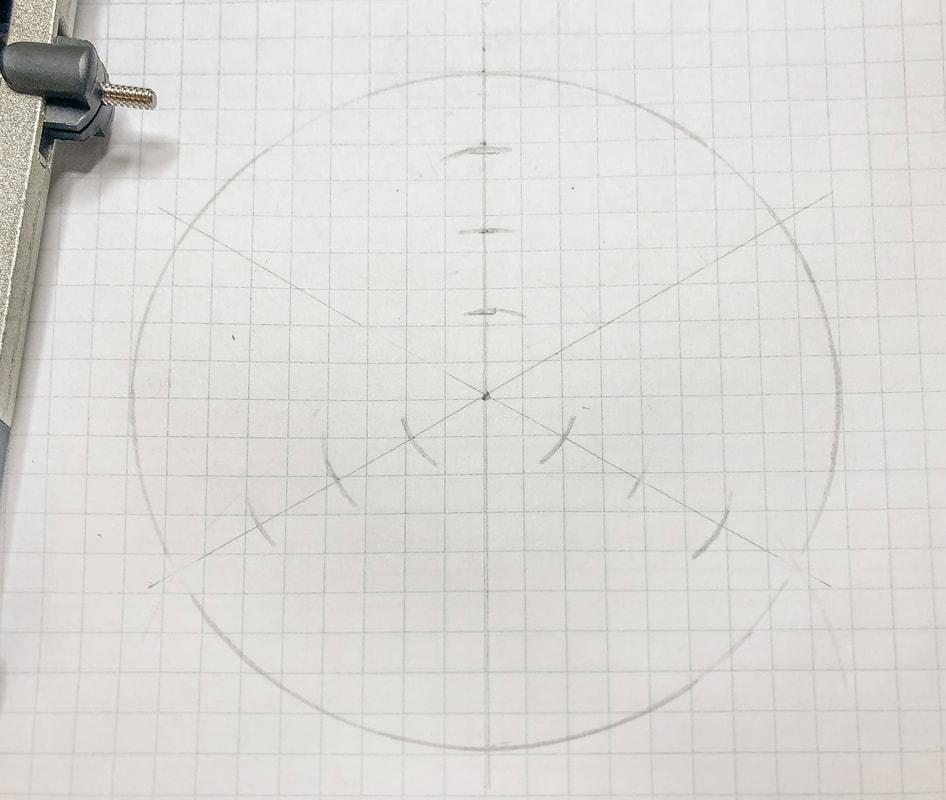 Step 6: Draw the first curves Starting with the top vertical line, place your compass point in the center of that line segment and draw a semi-circle from the circle’s center to the circumference (the top of the line). Do this for the other two lines with the tick marks. 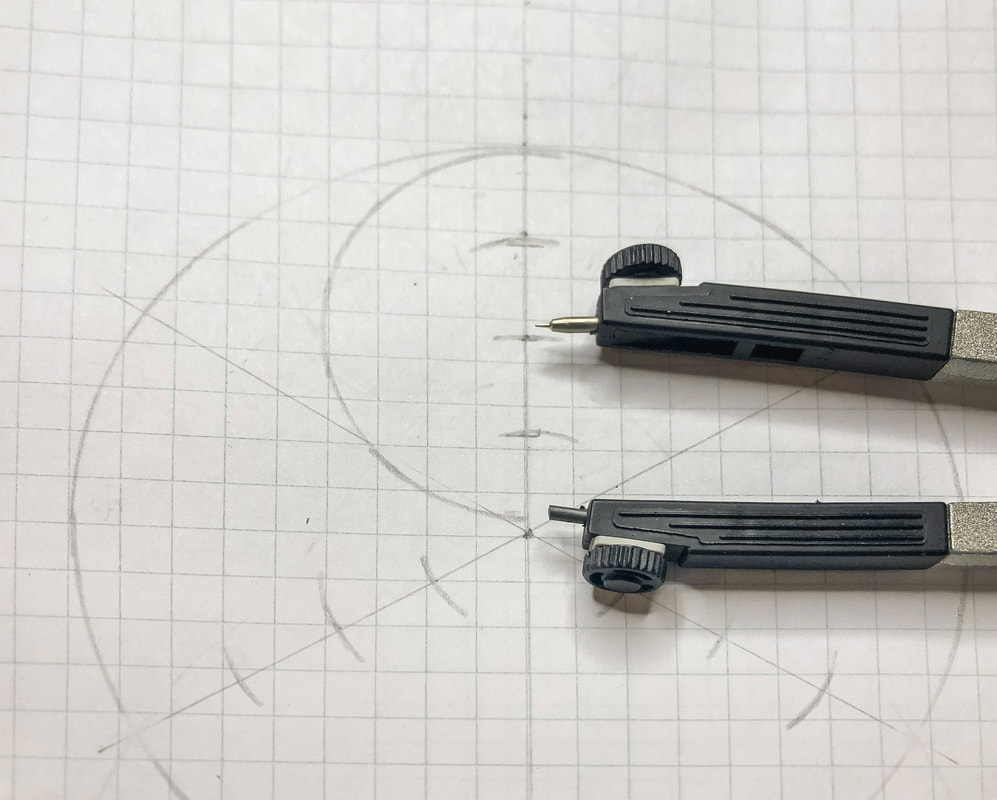 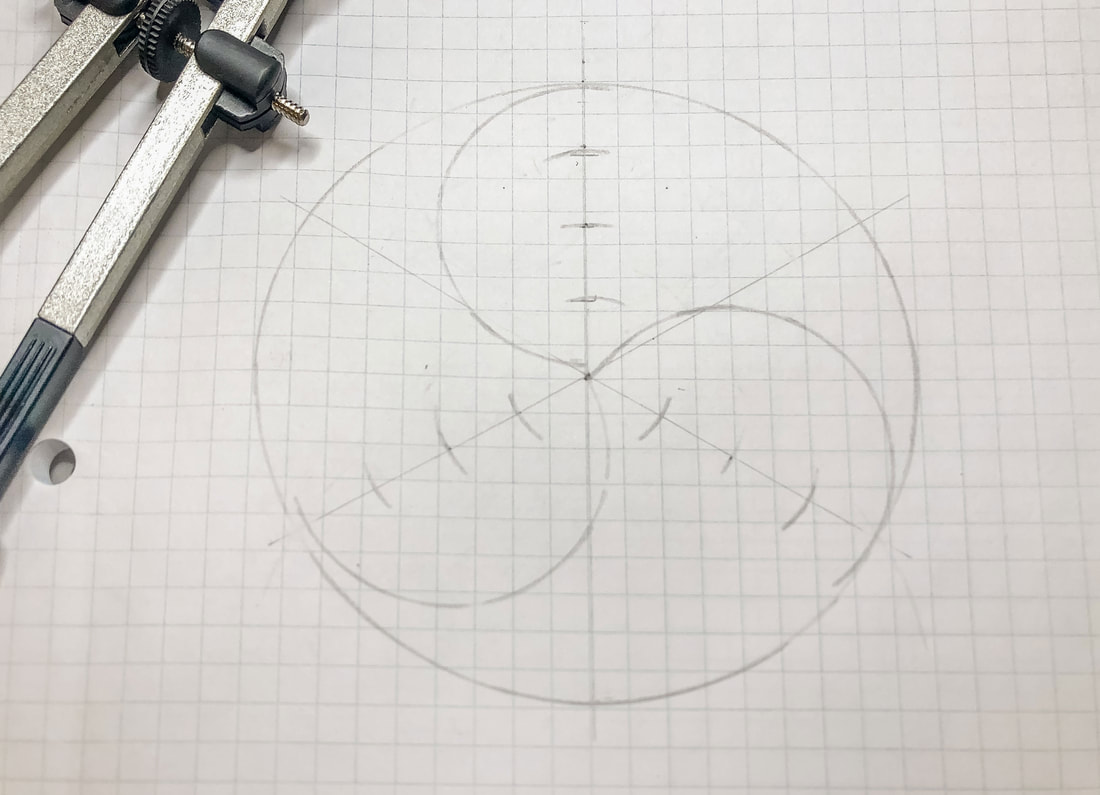 Step 7: Find the midpoint for the second curve Before you draw the second part of the curve, find the midpoint between the first and second tick marks (see the image below). 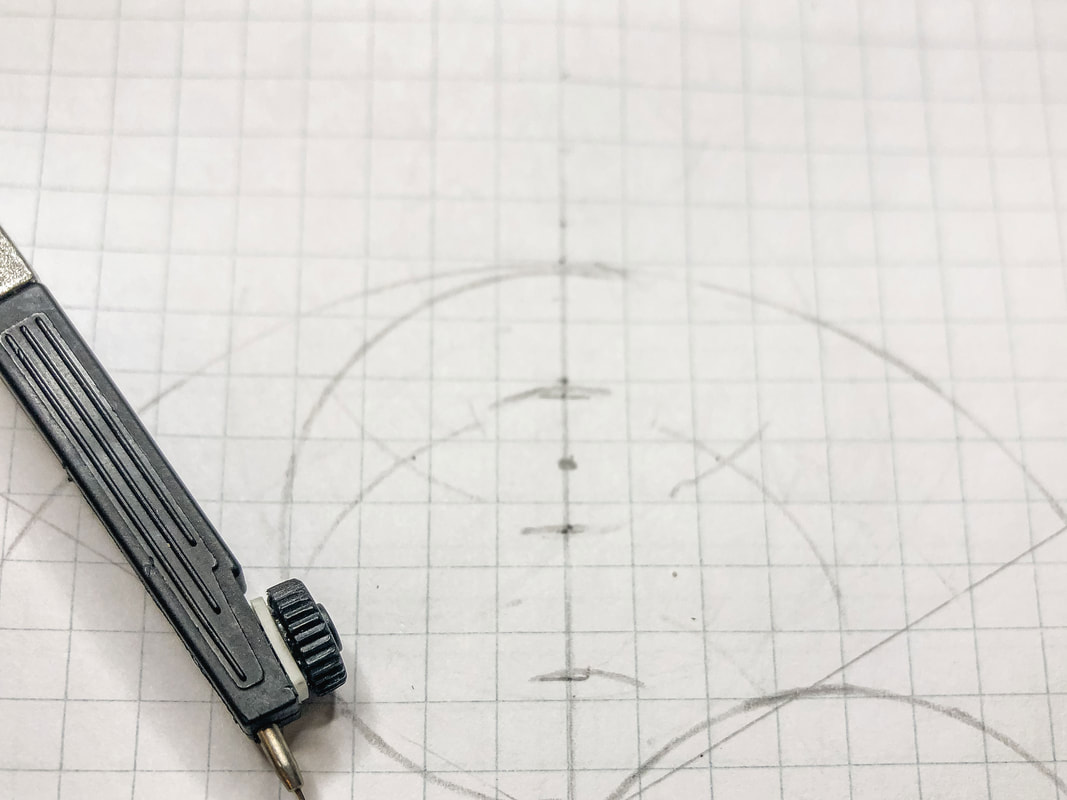 Step 8: Draw the second curves Now that you have the midpoint, place the compass point on it and draw a semi-circle from the top of the circle down to the third tick mark. Do the same thing for the other two “Y” lines. 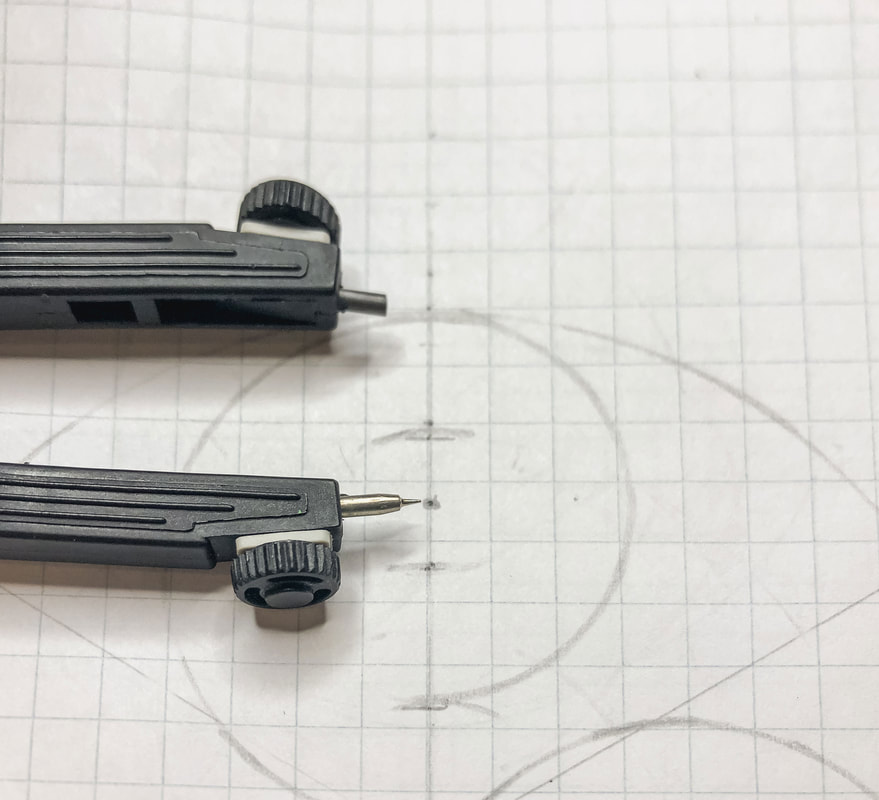 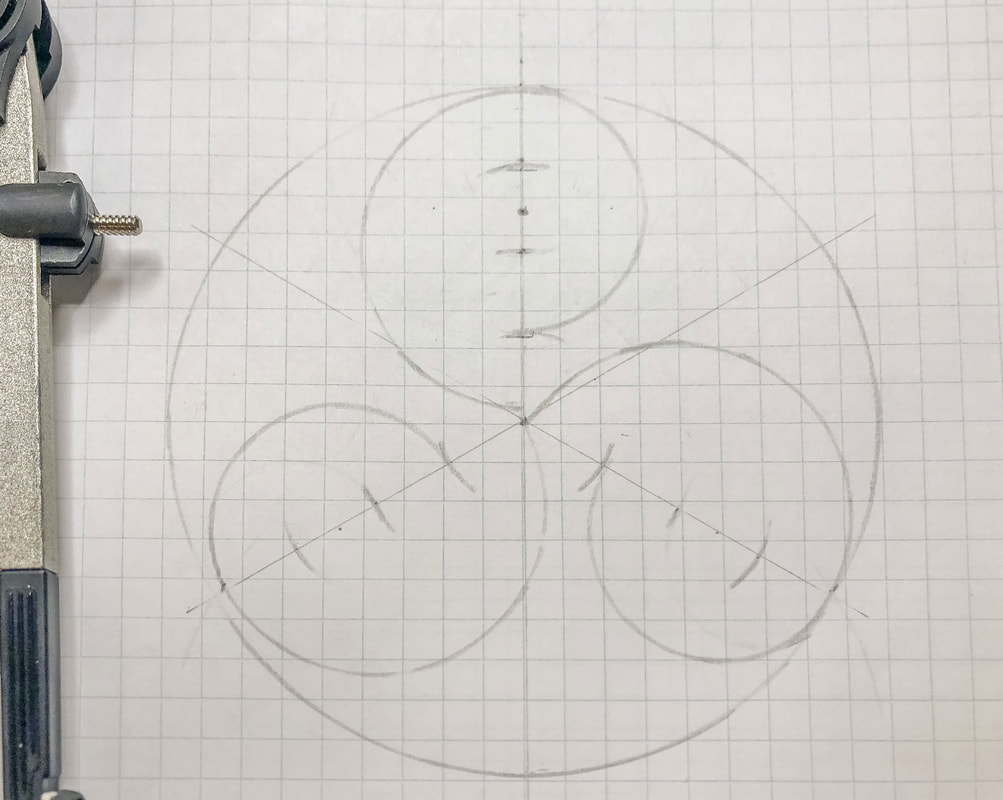 Step 9: Draw the third set of curves Go back to the top line and find the second tick mark. Place the point of the compass on that tick mark and draw a semi-circle from the first to the third tick mark. Do the same thing for the other two “Y” lines. 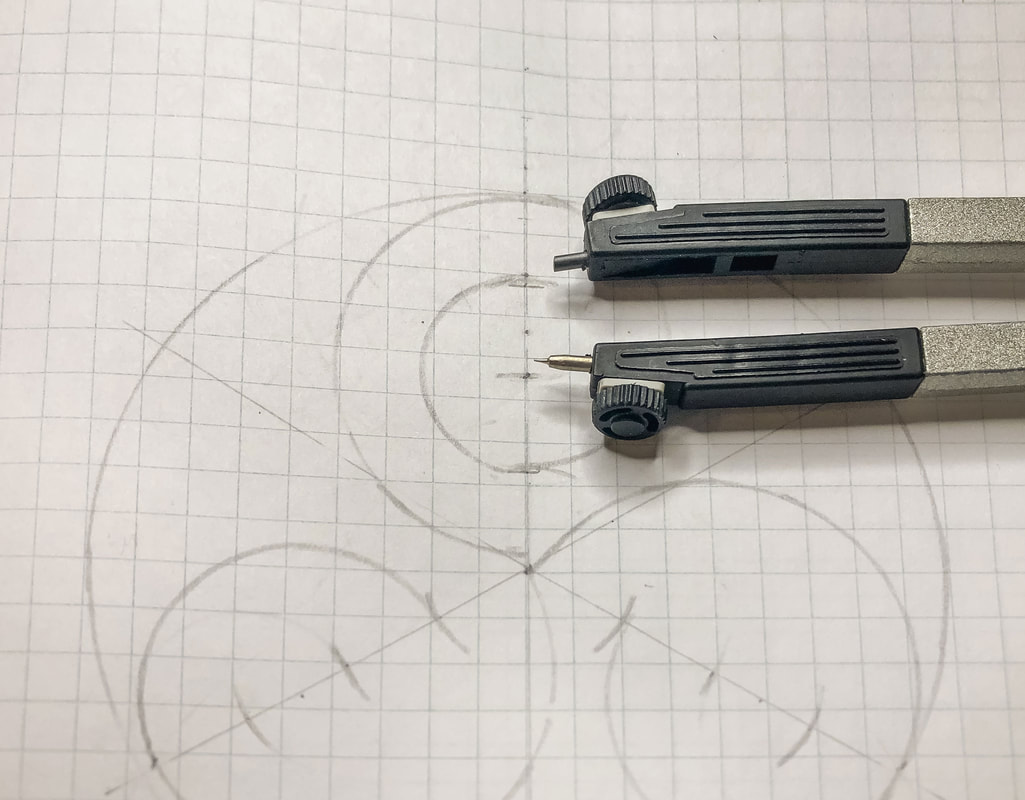 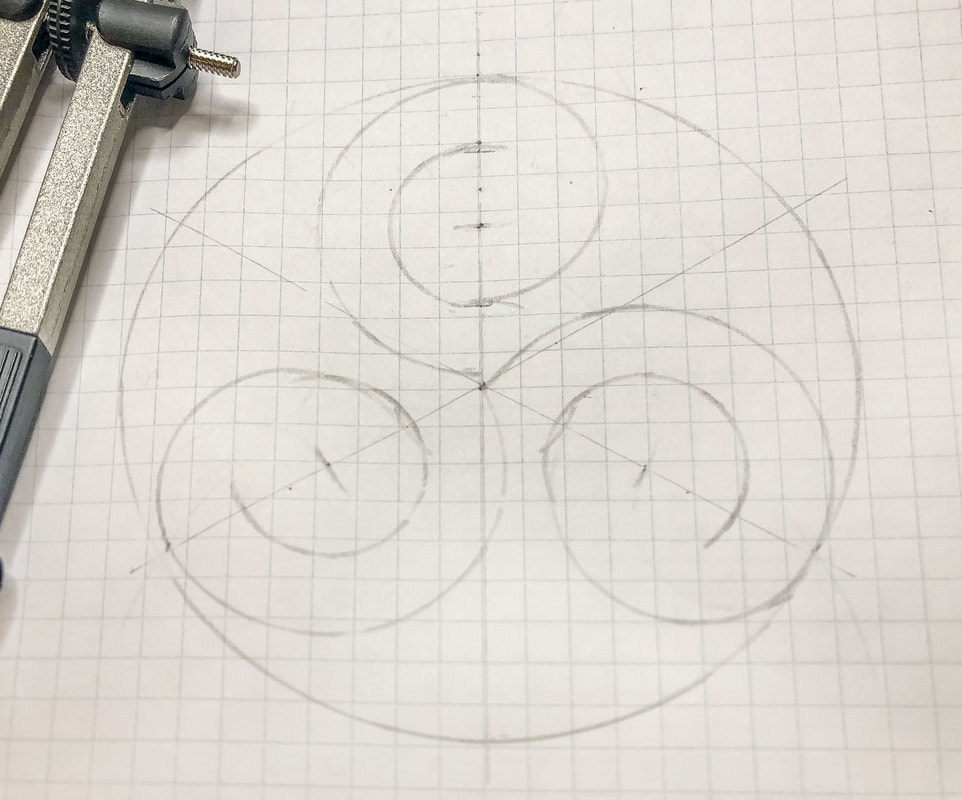 Step 10: Draw the fourth set of curves Go back to the top vertical line and find the center point between the first and second tick marks. Place the point of the compass on that mark and draw a semi-circle from the first to the second tick mark. Do the same thing for the other two “Y” lines. 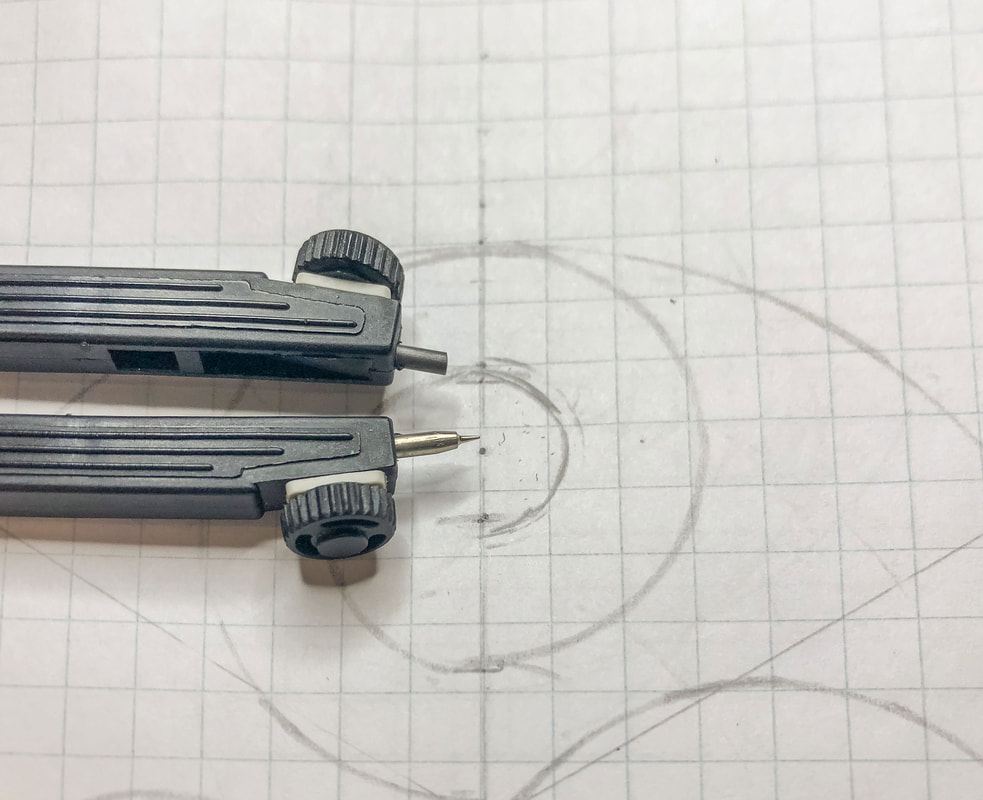 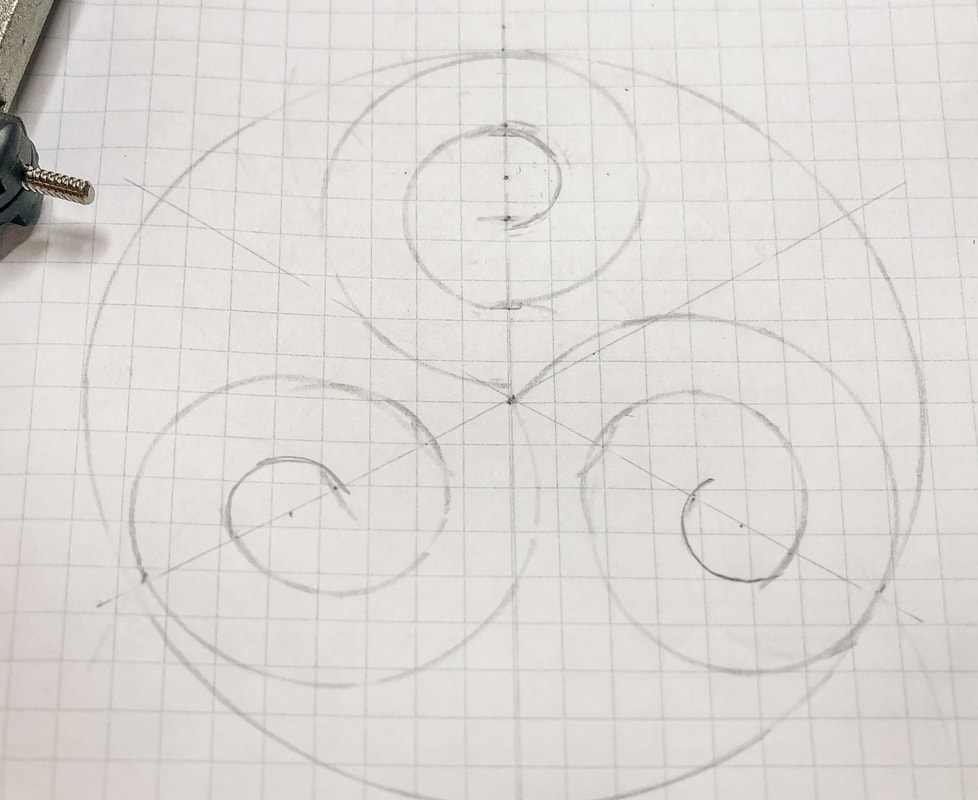 Step 11: Darken your lines and stylize And now you have the basic line drawing for a triskele. Create shading, texture, outlines, and finishing touches to give your triskele some style. 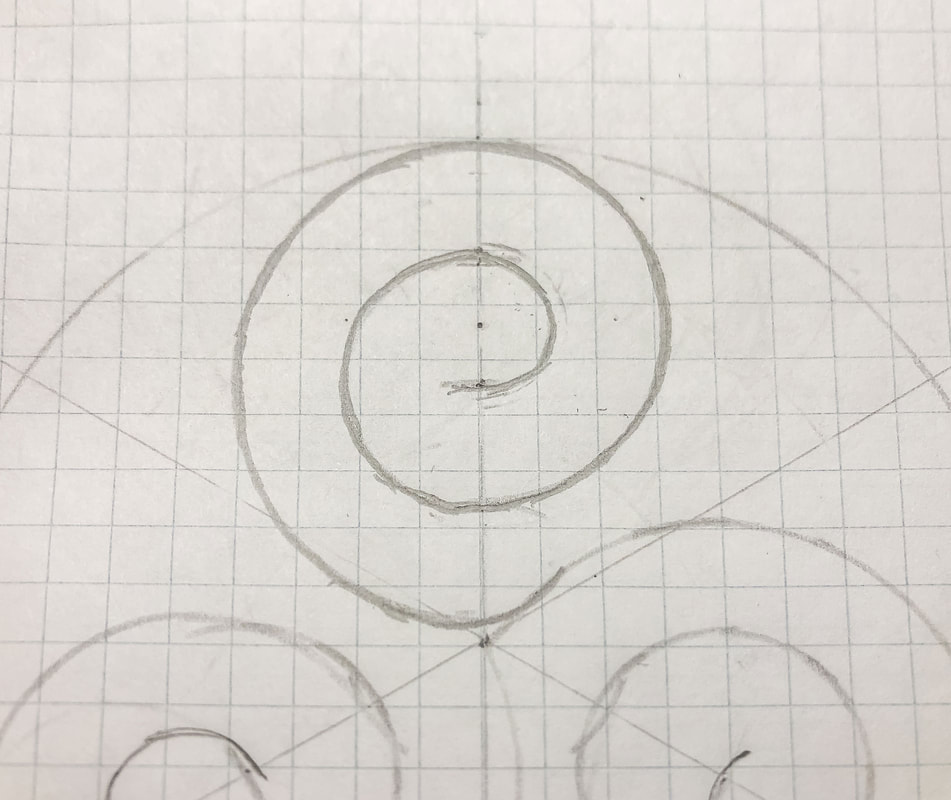  The number of tick marks you create with your “Y” segments will determine how loose or tight your spiral will be. One or two tick marks per line will result in a loose spiral. Four or more tick marks per line will result in a spiral with several tight loops. Also, you can draw your spiral facing either direction. It all depends on your preference. So, how did you do? Was this tutorial helpful? Let me know in the comments how it went! Related blogs you may want to read: How to draw a simple Celtic triquetra using three circles Circular Celtic border knot tutorial, basic braid Basic twist step-by-step drawing tutorial using grid paper Celtic braid step-by-step drawing tutorial Basic border knot with vertical breaks, step-by-step drawing tutorial Basic border knot with horizontal breaks, step-by-step drawing tutorial DIY chalk-painted tray with Celtic border A fun DIY project with paint and a thrifted mirror part 2 The Celtic Motherhood Knot, a symbol of love Celtic Tree of Life Basic Celtic Knot Tutorial Part 1 Celtic Knot Tutorial Part 2
0 Comments
21 home decor finds from Amazon that will add an enchanting touch to your room 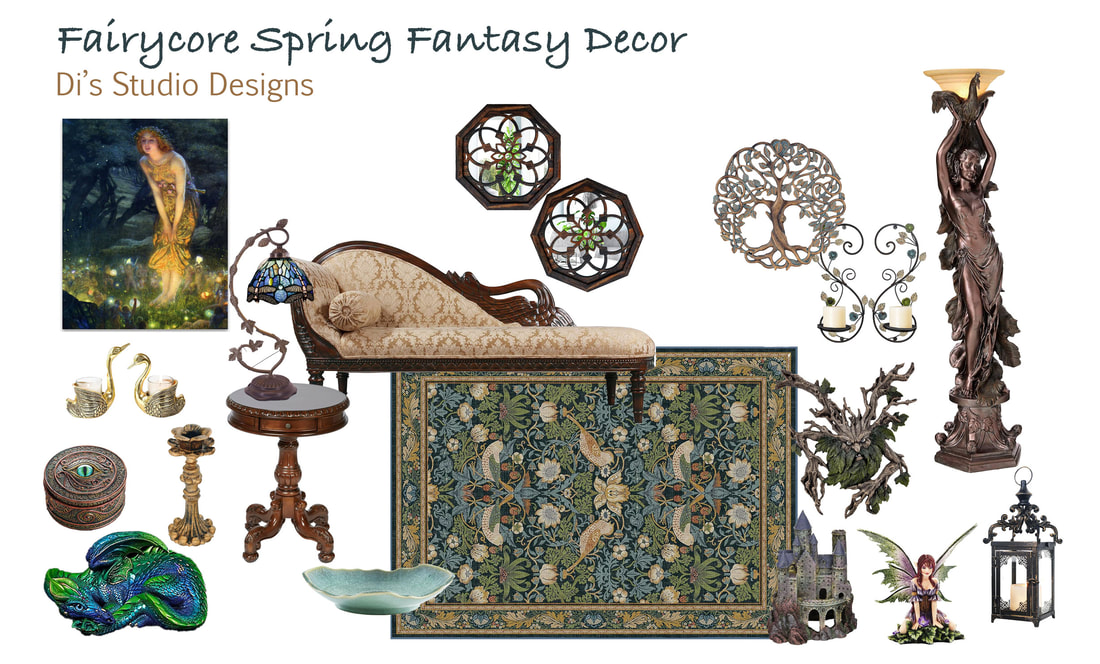 Images from Amazon.com. Click the links below to view or purchase. Some of the posts in this article contain affiliate links. If you click on the link and purchase the item, I will receive an affiliate commission at no extra cost to you. I will only recommend products or services I use personally and/or believe will add value to my readers, so there is no conflict of interest. It’s officially spring! And you know what that means…Spring decorating! This year, I’m leaning into my love of fairytales, castles, dragons, and fairies. Call it escapism. But what a wonderful way to escape reality, right?! So I spent an afternoon combing through Amazon, looking for whimsical home decor that captures the magical Fairycore vibe for this spring’s decorating inspiration. And here are some of my favorites so far… Item 1—Tree of Life Wall Plaque from the Old River Outdoors I love this Tree of Life with its aged copper finish. It reminds me of my wood-burned Tree of Life plate (for sale on my online shop here). A woodland tree fairy would appreciate the organic curves in this beautiful wall art. 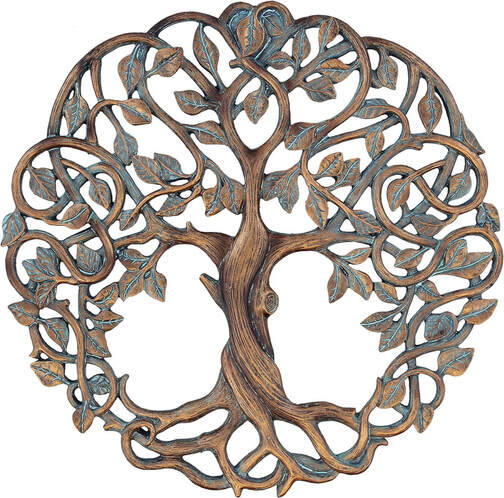 Item 2—Crotchety Crank Tree Ent Wall Sculpture from the Design Toscano Store This wood spirit sculpture by fantasy artist Liam Manchester is a must-have home accent if you love the Lord of the Rings. The design and details in this piece are fantastic, right down to the expression on the tree ent’s face! 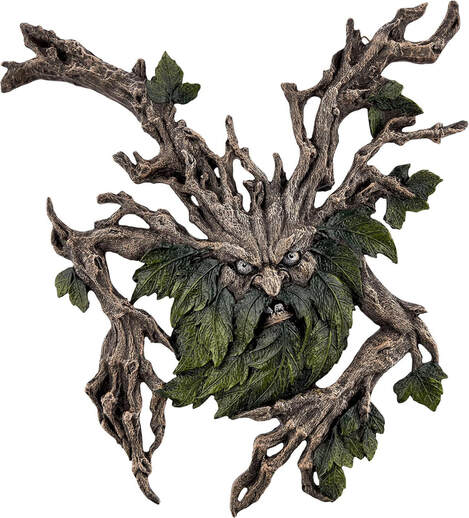 Item 3—Dragon Eye Trinket Box from the Pacific Giftware Store Something is unnerving yet irresistible about this resin trinket box with this captivating blue-green dragon eye! There is so much detail in the dragon scales that you hardly know where to look! 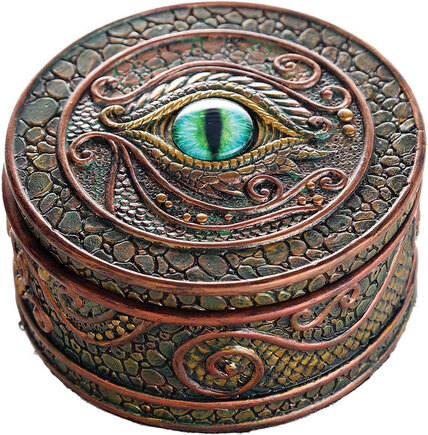 Item 4—Resin Wizard’s Castle Figurine from the Penn-Plax Store Create a magical water world in your fish tank with this fantasy castle. Don’t have a fish tank? Use this figurine in a fairytale-themed vignette instead! 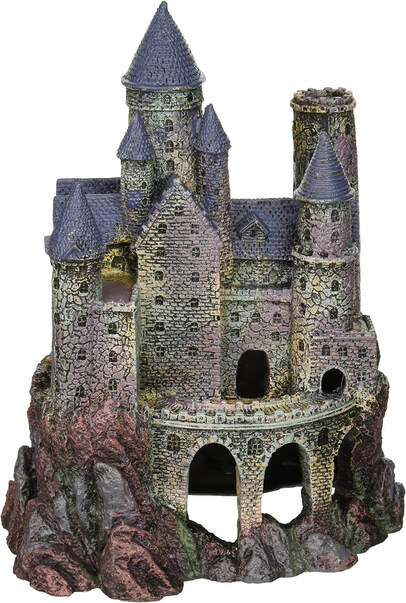 Item 5—Peacock Goddess Torchiere Floor Lamp from the Design Toscano Store While not specifically Fairycore, this six-foot tall Art Deco-style torchiere has a sensual feminine energy. This woodland nymph is holding a peacock, which symbolizes renewal and rebirth—perfect for a spring makeover! 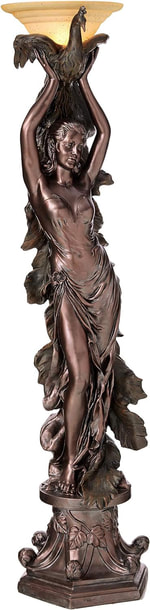 Item 6—Set of 6 Crown Tealight Candle Holders from the Glasseam Store Can you say fairy crowns? Maybe I have fairies on the brain, but that was my first impression of these glittering glass tealight holders!  Item 7—Set of 2 Gold Metal Swan Candle Holders from the BEHOMA Store Swans have a long history in fairytales, folklore, and mythology. They symbolize things like purity, light, grace, and transformation and have inspired many a work of art through the ages. (You can find a piece of my wood-burned art here.) Bring a bit of those qualities into your space with these gold swan candle holders. 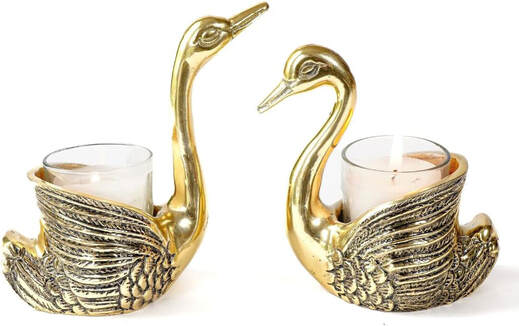 Item 8—Antique Bronze Candlestick Holder from Thindolex Place your favorite taper candles into this distressed resin candleholder with a flower-shaped crown. The finish feels old, long-loved, and well-worn. 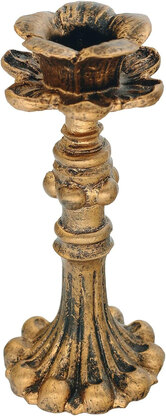 Item 9—Green Ceramic Key Bowl from the VOMANA Store I fell in love with this decorative bowl the second I saw it! The organic shape, blue-green color, and sensual visual texture are imbued with the soothing nature of water or forest leaves. Place this eye-catching bowl on a console in an entryway or a coffee table. 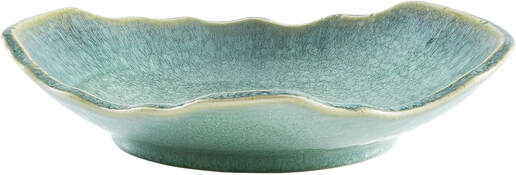 Item 10—Cortona Victorian-style Pedestal Table from the Touch of Class Store The Victorians sure knew how to design nature-inspired furniture. This Autumn Cherry side table is a nod to that style with its leaf and flower petal carvings. This is the perfect table for your fairy figurines! 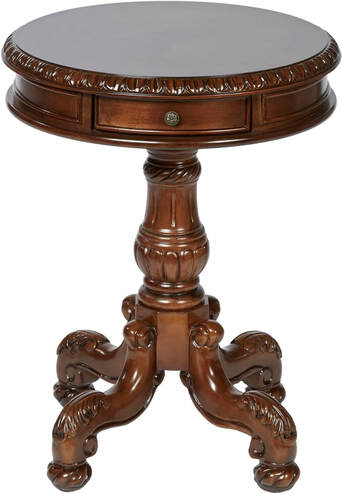 Item 11—Morris & Co Area Rug in Strawberry Thief Indigo from the RUGGABLE Store Every inch of this chenille Victorian-style area rug is filled with birds, leaves, and flowers! Your floor will look refreshed for spring with this nature-inspired, stain-resistant, washable rug! 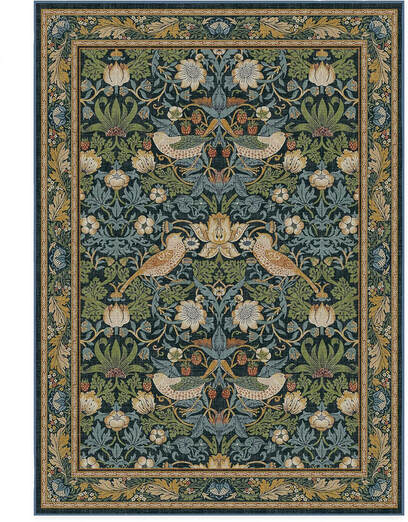 Item 12—Vintage Metal Candle Holder Lantern from the DECORKEY Store Hang this lantern or place it on a side table or fireplace to create a warm ambient glow. The worn antique-style finish and curvy fretwork look right at home in a fairy-inspired space. 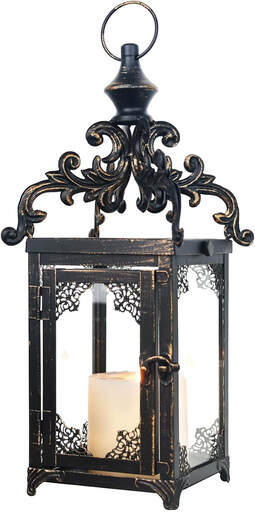 Item 13—Misummer Eve 11 x 14 Poster Based on a painting by Victorian-era artist Edward Robert Hughes, this poster print features a glimmering fairy circle in a moonlit wood. Place this artwork in an ornate gold frame and hang it in a prominent spot on your wall to set the perfect magical mood for the room! 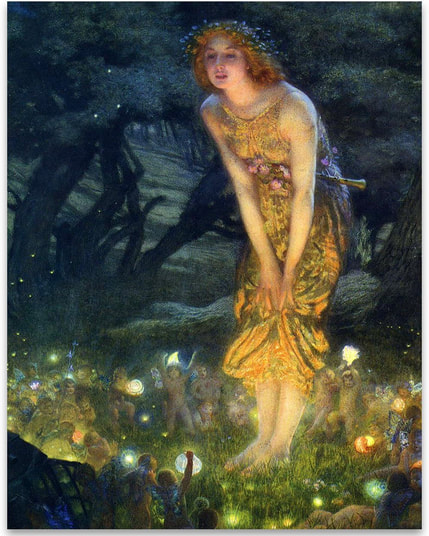 Item 14—Sheer Chiffon Fabric for Draping in Nude from the MDS-MEGADECORSUPPLY Store Get creative with this sheer chiffon draping fabric! Hang this fabric for an ethereal flowing effect, or use it on a tablescape as a base for fairy-inspired table decor. 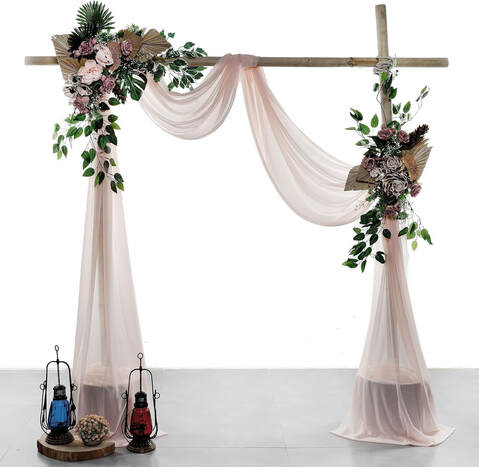 Item 15—Green Ivy Leaves Garland with Fairy Lights 2 Pack from the KANLONG Store Use this ivy and fairy light garland in conjunction with the sheer fabric to take the magical factor up a notch. The warm LED lights create a romantic ambiance, while the ivy brings in a woodland feel, turning your space into a magical fairyland. 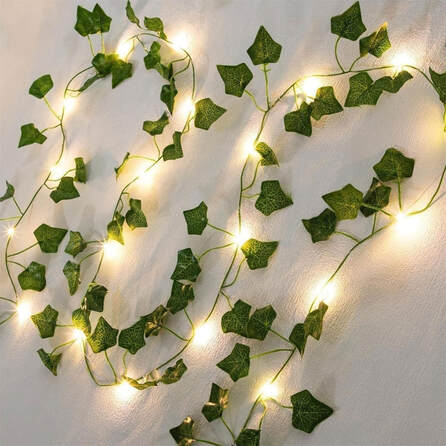 Item 16—Swan Fainting Couch in Walnut from the Design Toscano Store I need a fainting couch in my life! This 73” mahogany antique-style couch with swan carvings replicates Victorian-style seating. Swans are symbolic of transformation, and spring is all about transformation! 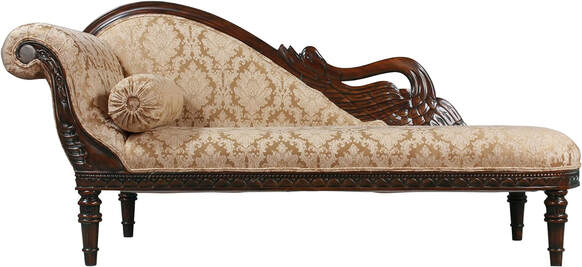 Item 17—Set of 2 Leaf Branch Metal Wall Sconce Candle Holders from JUCONSIN These wall sconces with antiqued metal scrollwork, leaves, and dainty flowers make a fine addition to your spring-themed walls. 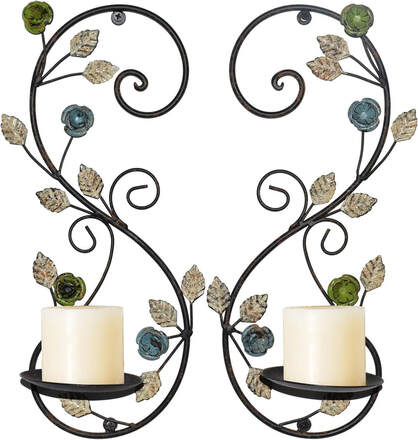 Item 18—Set of 2 Octagon Decorative Accent Mirrors from the ZOLAPI Store The flower petal design in these accent mirrors is what caught my eye. What says spring more than flowers? The style of these mirrors is versatile enough to use in a variety of home decor styles, including Traditional, Transitional, Cottagecore, and Farmhouse. 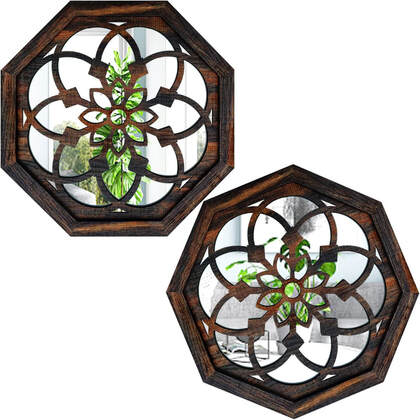 Item 19—Amy Brown Fantasy Wild Violet Faery Figurine from the Pacific Giftware Store If you want a proper Fairycore space, you must have a fairy! I found this lovely hand-painted resin fairy figurine by artist Amy Brown, and I fell in love with the contrasting green and lavender colors. She looks deep in thought, doesn’t she? 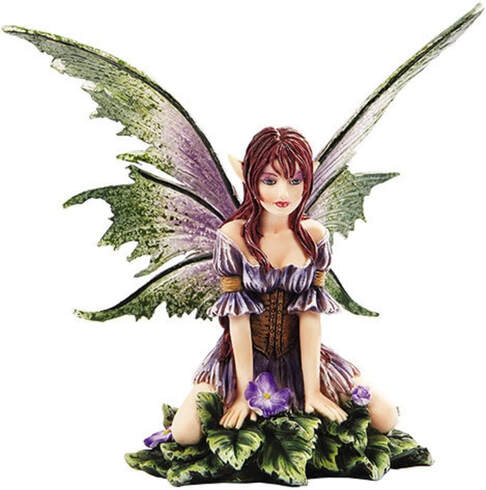 Item 20—Emerald Peacock Mother Dragon from Windstone Editions I am a proud owner of a couple of dragon pieces from Windstone Editions, so of course, I was smitten with this resting dragon sculpture with its blue, green, and purple hues. This dragon figurine is handmade, hand-painted, and absolutely gorgeous!  Item 21—Tiffany Blue Stained Glass Dragonfly Table Lamp from the WERFACTORY Store Dragonflies have incredibly powerful symbolism! They represent transformation, self-realization, and change. I was moved to create my own dragonfly art piece at a critical point in my life, and I can tell you the magic is real! So, of course, this stained glass lamp with dragonflies spoke to me!  So, are you inspired? Do you plan on jumping on the Fairycore bandwagon? Let me know in the comments how you plan to create your own magical space this spring! Related blogs you may want to read: Romantic Fairycore Cottage Bedroom Decor 21 Enchanting Woodland Fairycore Home Accents Hygge Decor Ideas for Winter 2024 17 Must-have Cottagecore Home Accents Dark Academia Decor for the Fall Inspirational ideas for creating that cozy boho style Nine hygge decor ideas  In today’s blog, I’d like to walk you through creating a panel with Celtic knotwork inspired by those seen on a Celtic Cross in Clonmacnoise, Ireland. We will draw four 4 x 4 grids that are interconnected using the same repeated design. So grab some grid paper, a ruler, and a pencil, and let’s get started! If you need drawing supplies, my recommended supply list is below. (Disclaimer: I am a Blick Art affiliate, so this list contains affiliate links. If you click on the link and purchase the item, I will receive an affiliate commission at no extra cost to you. I will only recommend products or services I use personally and/or believe will add value to my readers, so there is no conflict of interest.) Gather your supplies: Drawing pencils Markers Blending stumps Eraser Click eraser Ruler Horse hair brush Grid paper Sketch pad Tracing paper Draw any grid lines, dots, and guidelines lightly so they can be easily erased when you finalize your design. (I use a 2H pencil or light pressure.) Step 1: Create a 4 x 4 grid Draw a 4 x 4 grid on grid paper. Place dots in the center of each box and at each intersection. 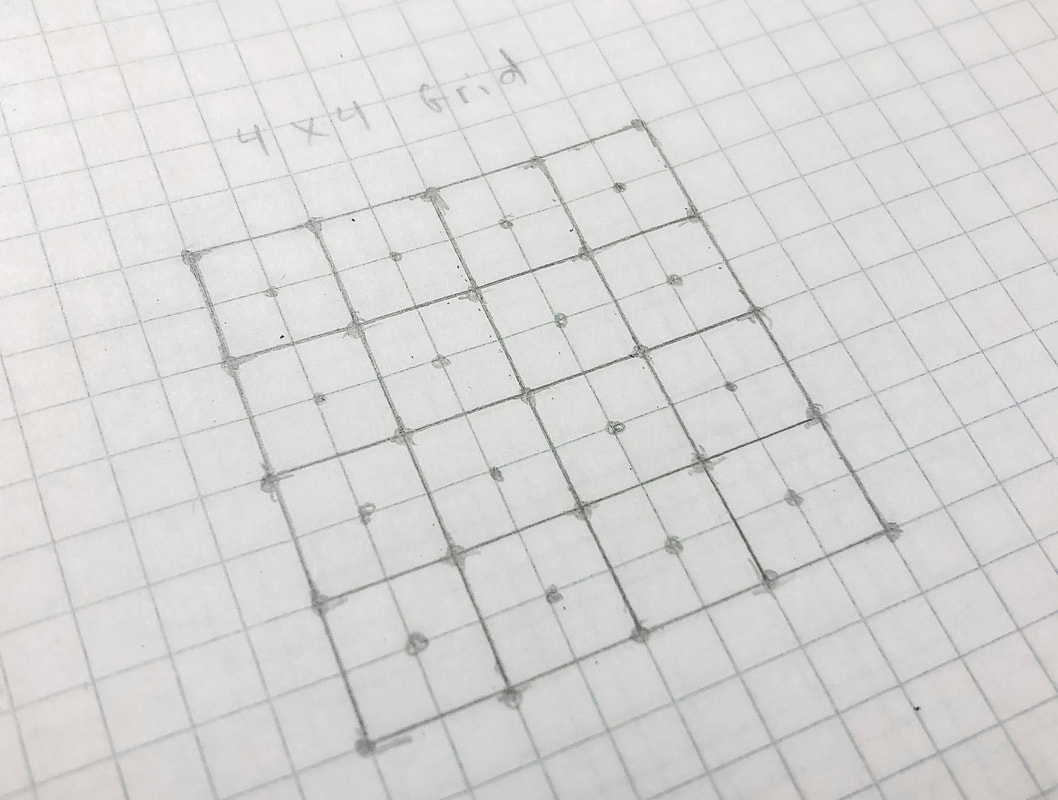 Step 2: Draw the breaks Draw the breaks for the pattern as shown. 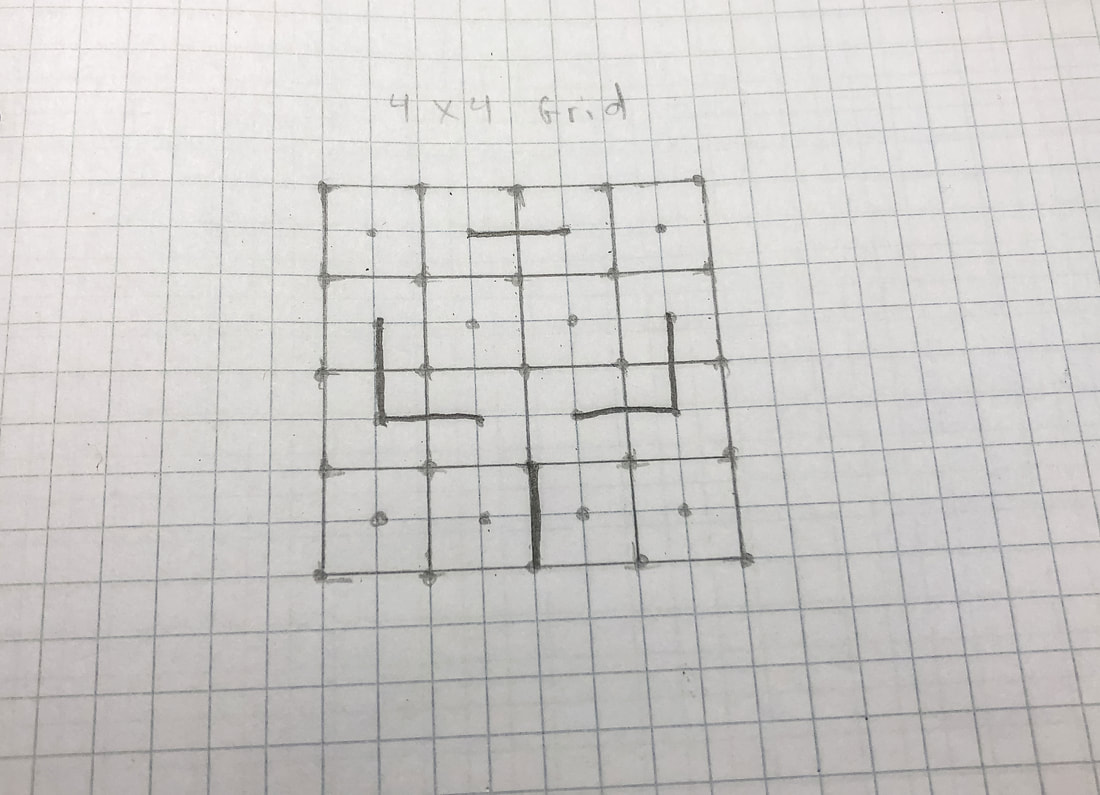 Step 3: Draw a diagonal grid Create a diagonal grid running between the dots as shown. 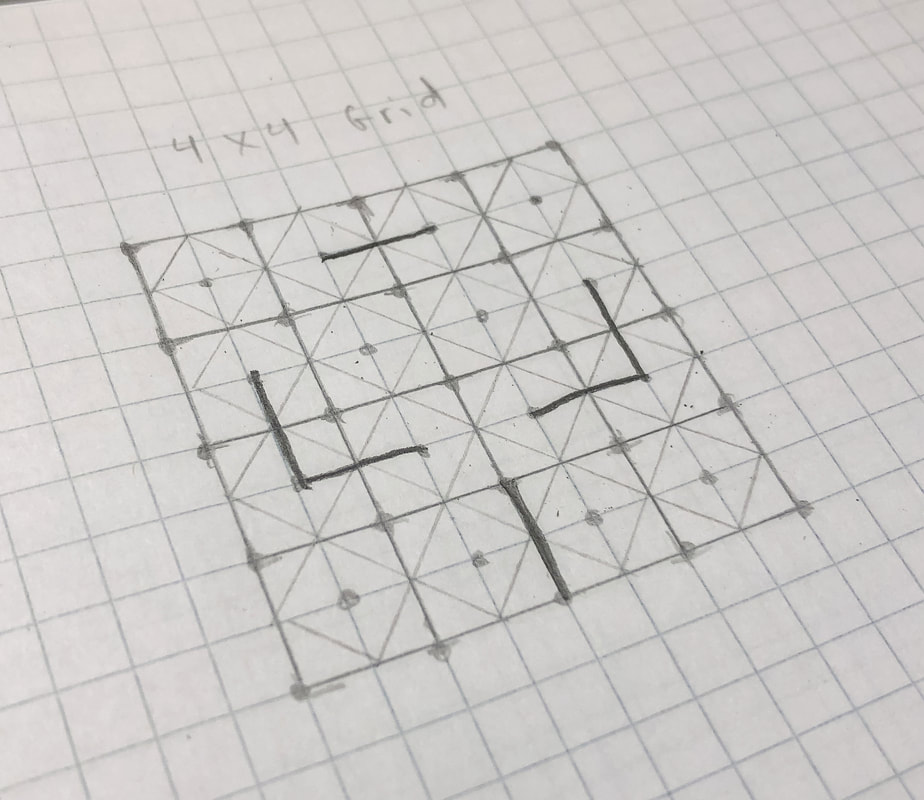 Step 4: Draw the spine for the thread Pick a corner and start drawing the spine for the thread following the diagonal grid. When you hit a break or wall the line should turn 90 degrees, except at the two sides (see the diagram). Follow this spine back to the point where you started. 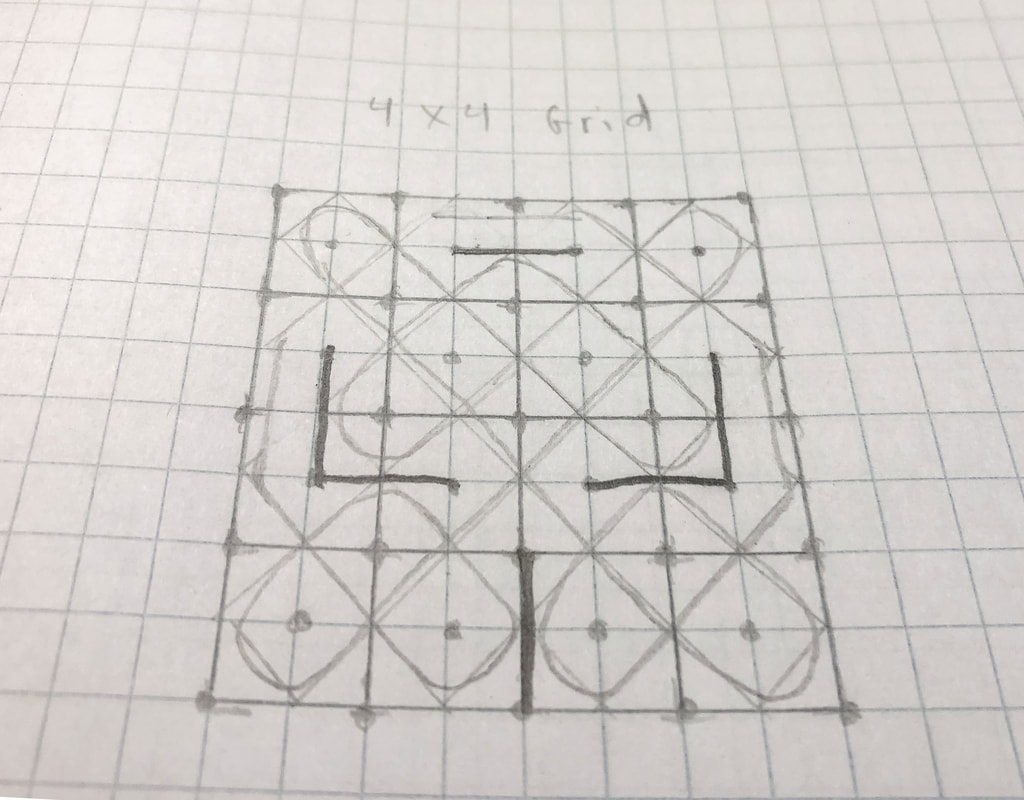 Step 5: Create the thread Draw parallel lines to the spine to create the thread for this pattern. Pick a starting intersection and create alternating overs and unders at each successive intersection. This is the basic knot pattern you will use for the rest of the panel. 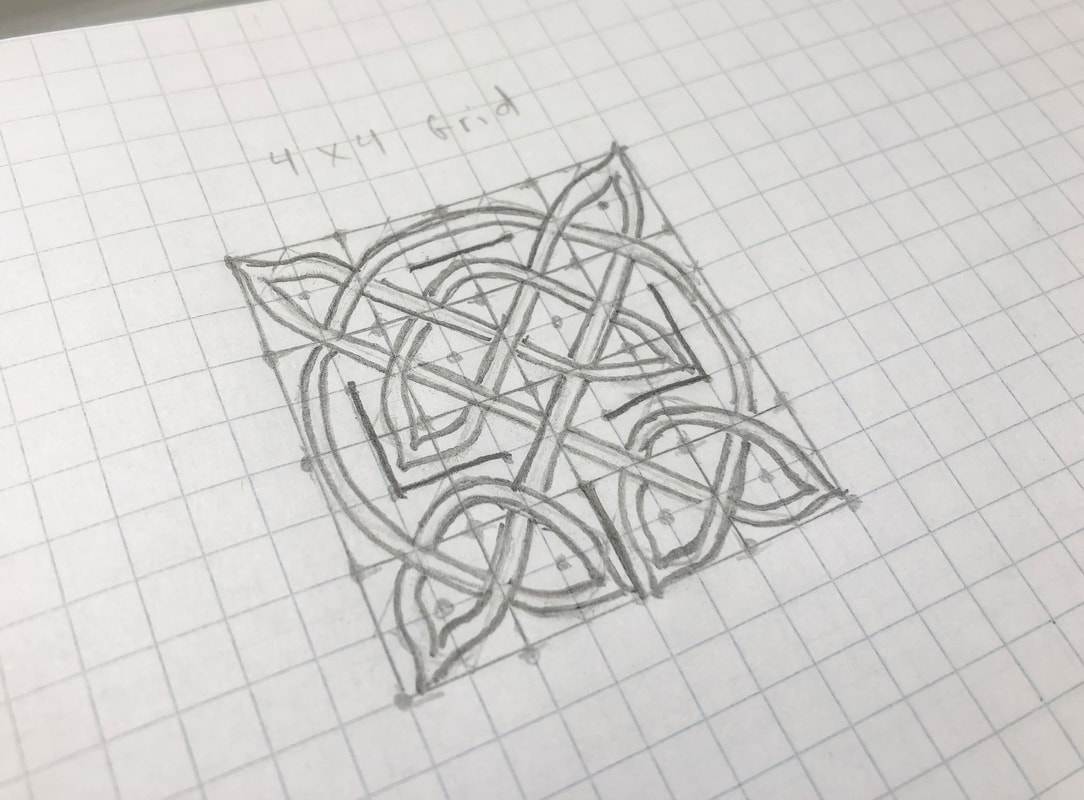 Step 6: Create a second grid below the first Repeat steps 1-5 to create a grid below the first one for the second part of the panel. Adjust the intersections so that the threads from the top grid intertwine with the bottom grid (as shown). 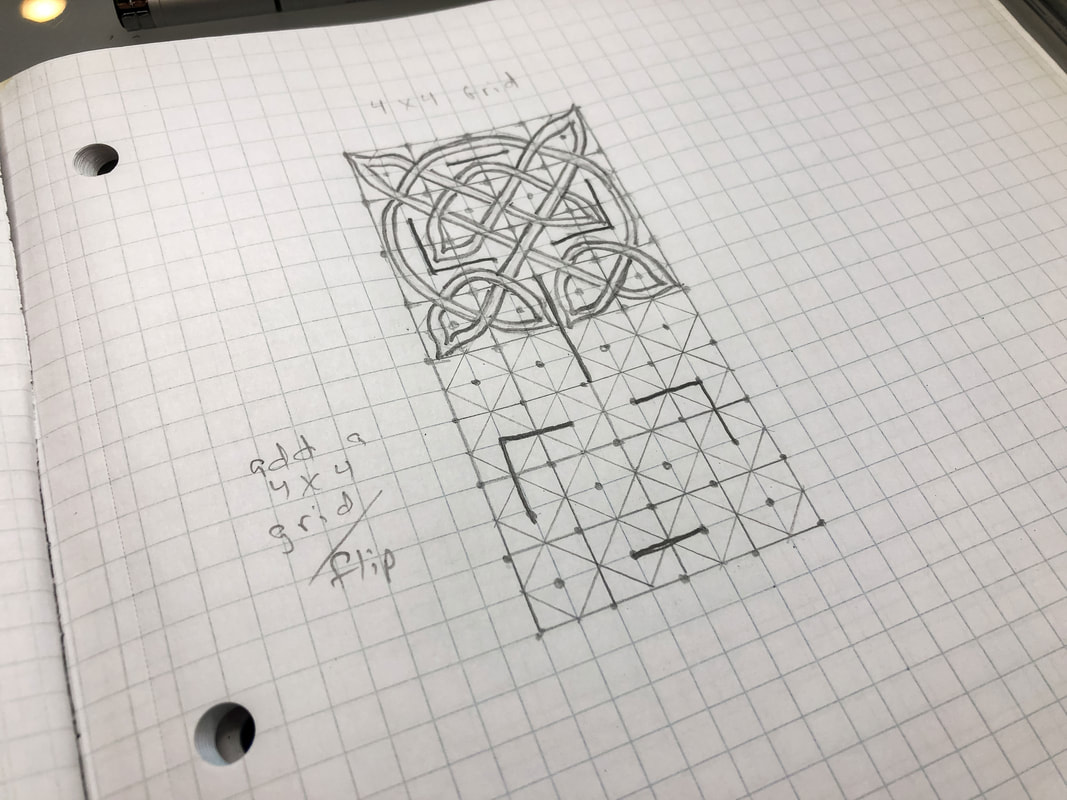 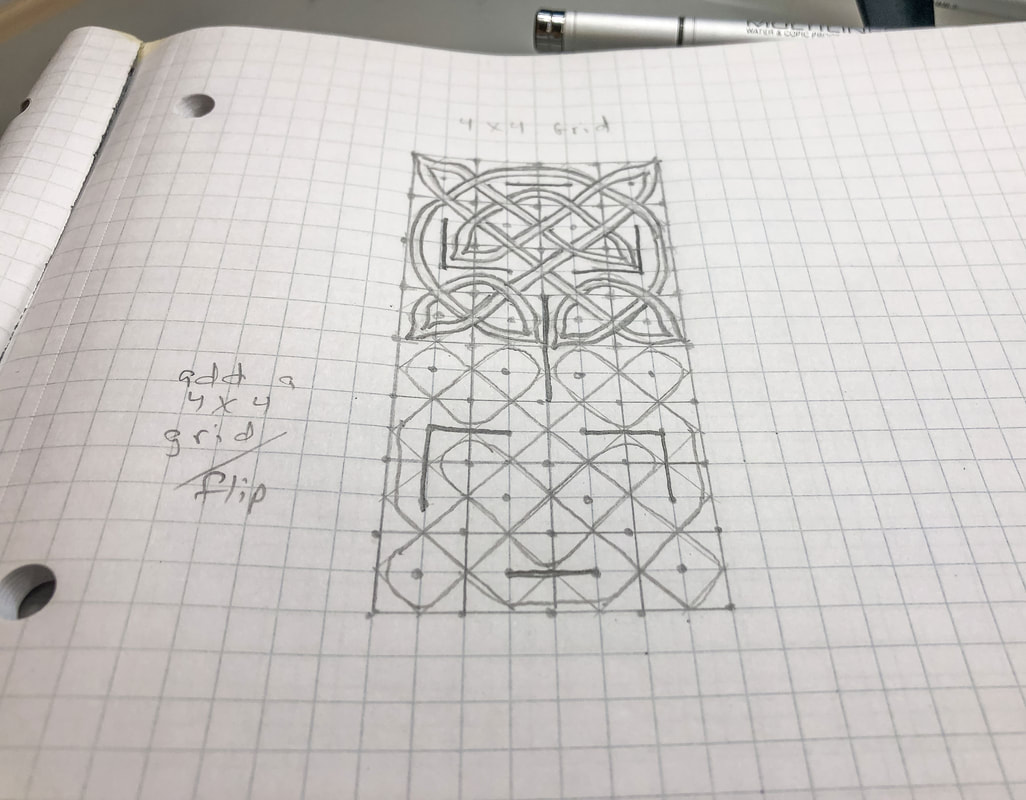 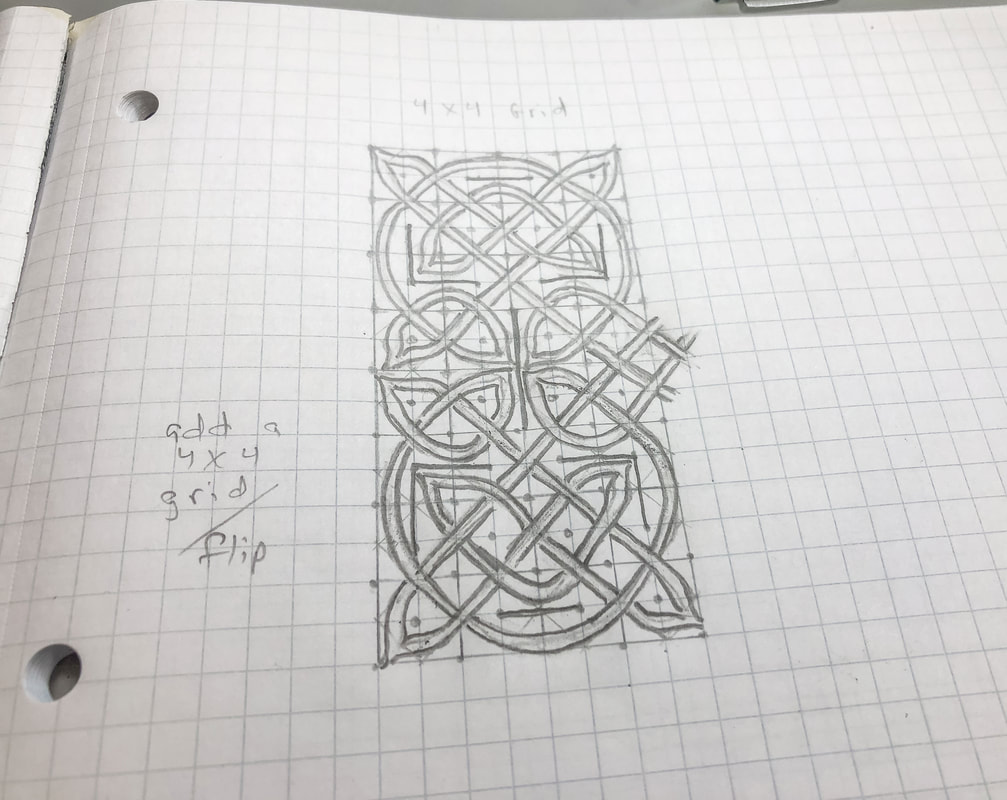 Step 7: Create a third grid next to the first Repeat steps 1-5 to create a grid next to the first one for the third part of the panel. Adjust the intersections so that the threads from the first two grids intertwine with the third grid (as shown). 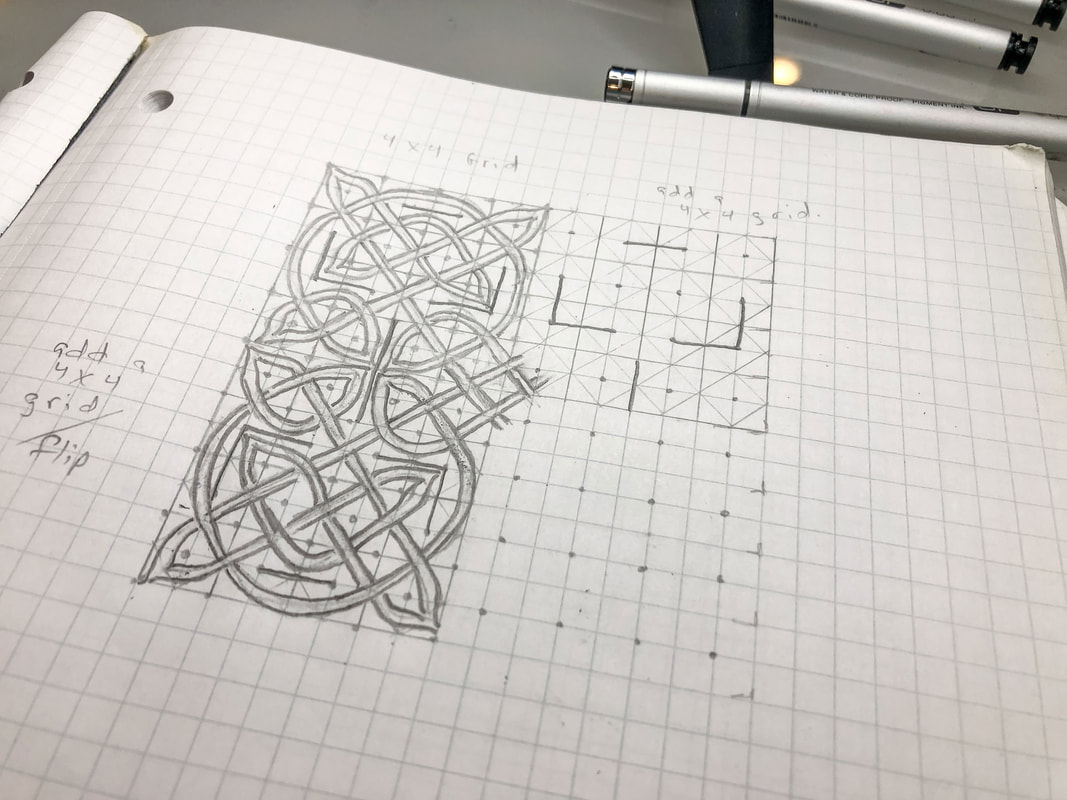 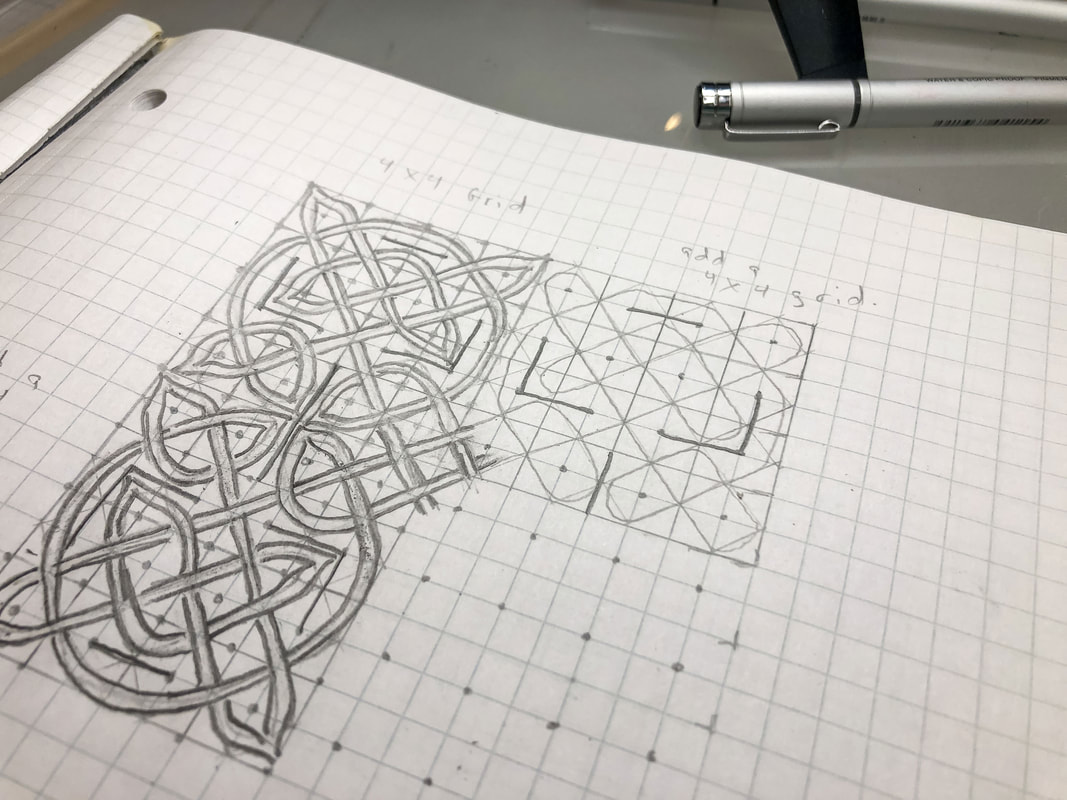 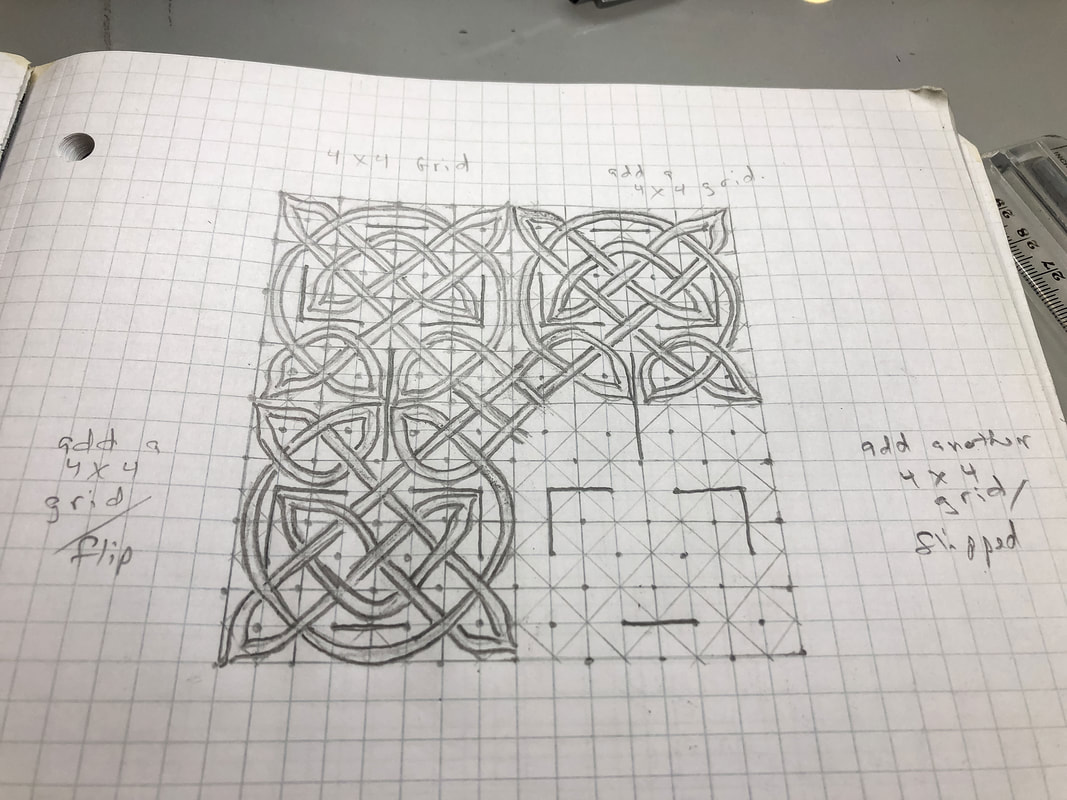 Step 8: Create the fourth grid Repeat steps 1-5 to create the fourth part of the panel in the bottom right corner. Adjust the intersections so that the threads from the first three grids intertwine with the fourth grid (as shown). 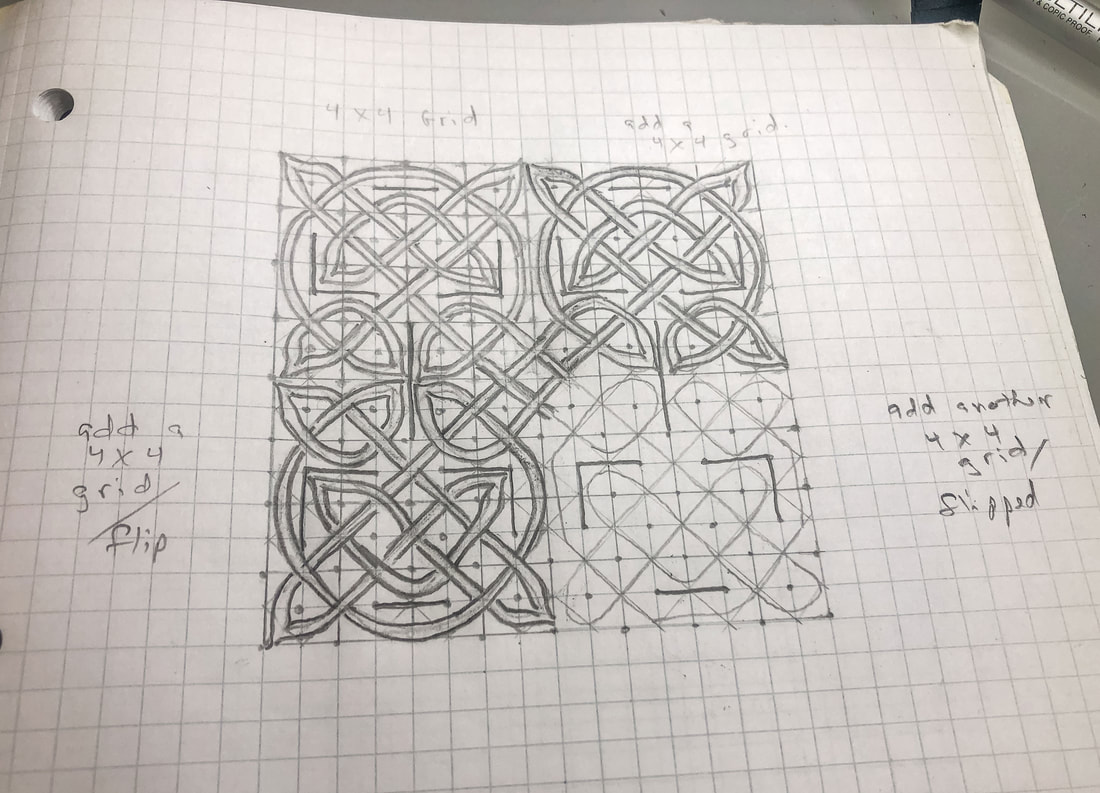 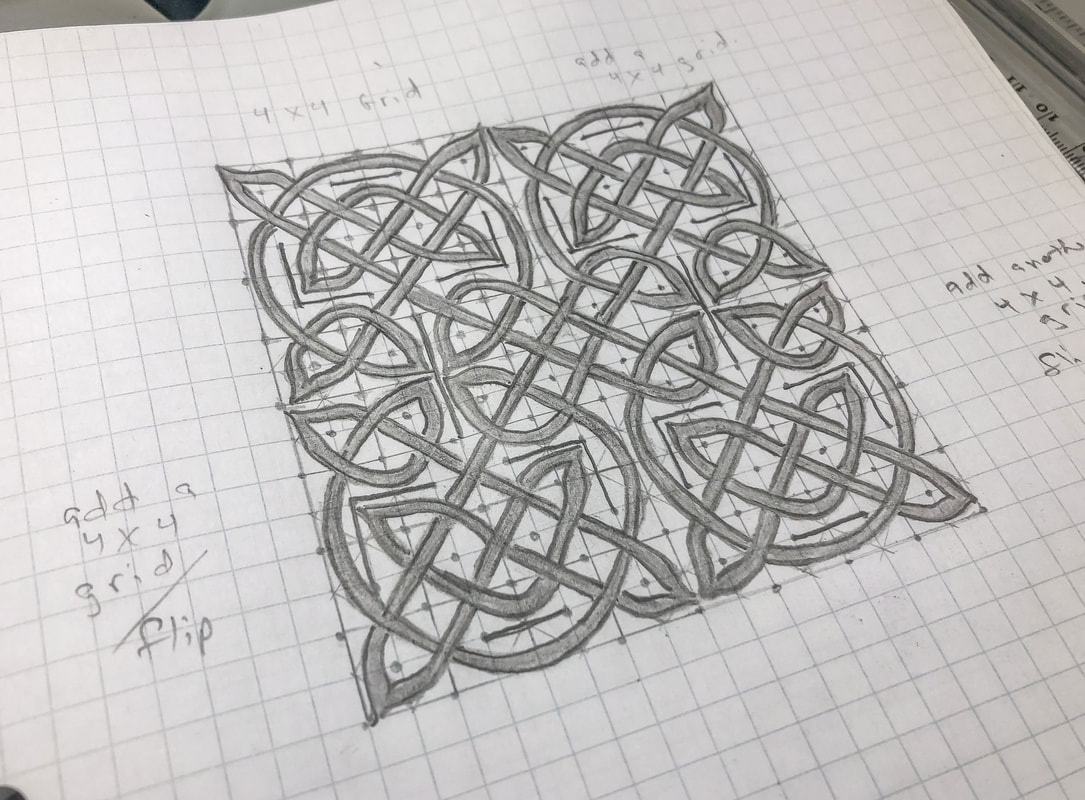 Step 9: Stylize Clean up the lines, and add shading, texture, and finishing touches to the final panel design. And you're done! How did you do? Let me know in the comments. If you'd like to follow along with me in my YouTube video tutorial you can find it here! Related blogs you may want to read: How to draw a simple Celtic triquetra using three circles Circular Celtic border knot tutorial, basic braid Basic twist step-by-step drawing tutorial using grid paper Celtic braid step-by-step drawing tutorial Basic border knot with vertical breaks, step-by-step drawing tutorial Basic border knot with horizontal breaks, step-by-step drawing tutorial DIY chalk-painted tray with Celtic border A fun DIY project with paint and a thrifted mirror part 2 The Celtic Motherhood Knot, a symbol of love Celtic Tree of Life Basic Celtic Knot Tutorial Part 1 Celtic Knot Tutorial Part 2 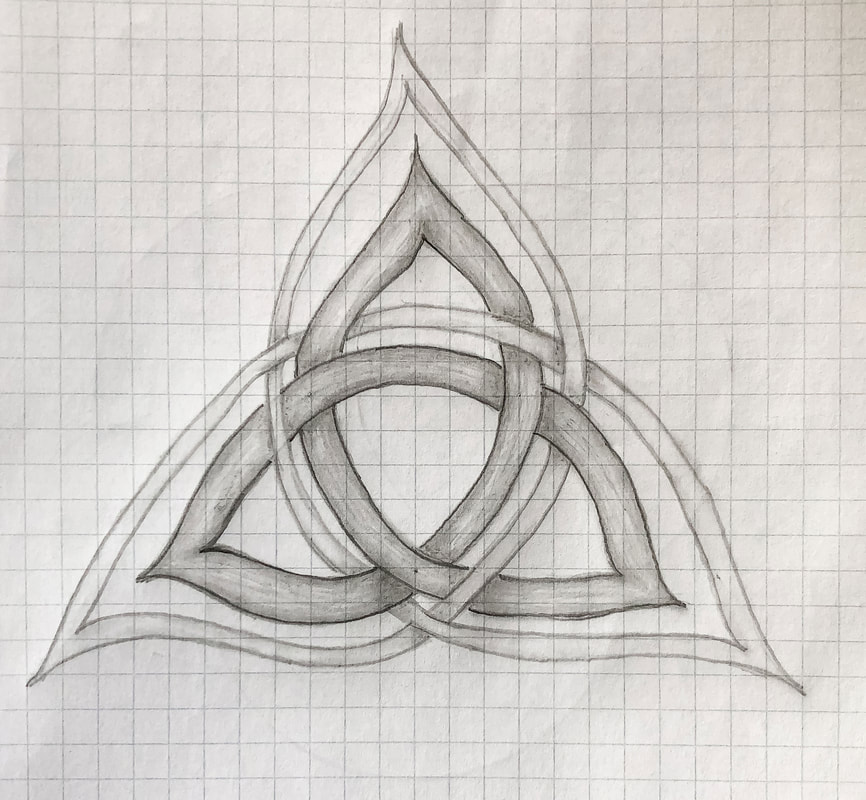 In today’s blog, I will walk you through the steps for drawing a simple triquetra using three circles to get an equilateral shape. There are other methods you can use, such as using a square to map out your angles and intersections, but whichever method you choose, you will end up with the equilateral triangle as the base for this style of triquetra. (There are other triangles and triquetra shapes, but this tutorial is for the triquetra that is even on all sides.) In my method, you won’t draw this triangle, but if you connect the intersections, you will see that they unveil an equilateral triangle. 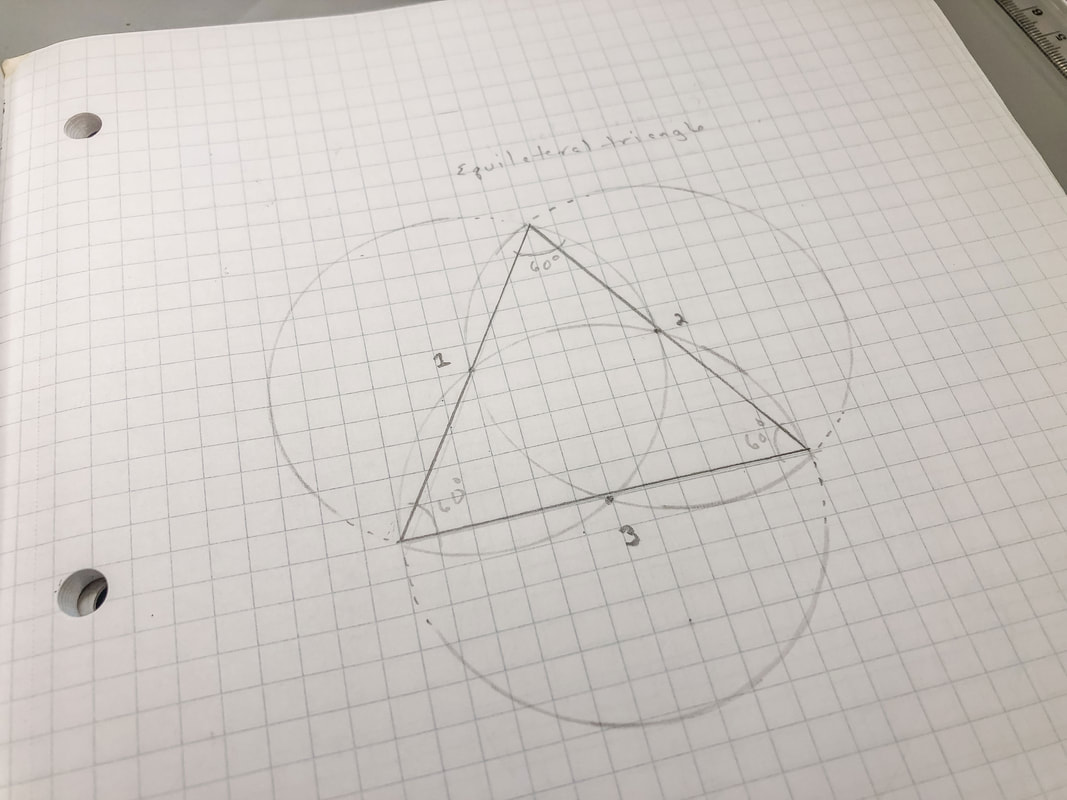 All you will need for this tutorial is a compass, eraser, and paper, but I have provided a list below of supplies you may want for this and other drawing projects. (Disclaimer: I am a Blick Art affiliate so this list contains affiliate links. If you click on the link and purchase the item, I will receive an affiliate commission at no extra cost to you. I will only recommend products or services I use personally and/or believe will add value to my readers, so there is no conflict of interest.) Gather your supplies: Drawing pencils Markers Blending stumps Eraser Click eraser Ruler Horse hair brush Grid paper Sketch pad Tracing paper Step 1: Draw a circle Draw a circle using a compass and mark the midpoint of that circle. 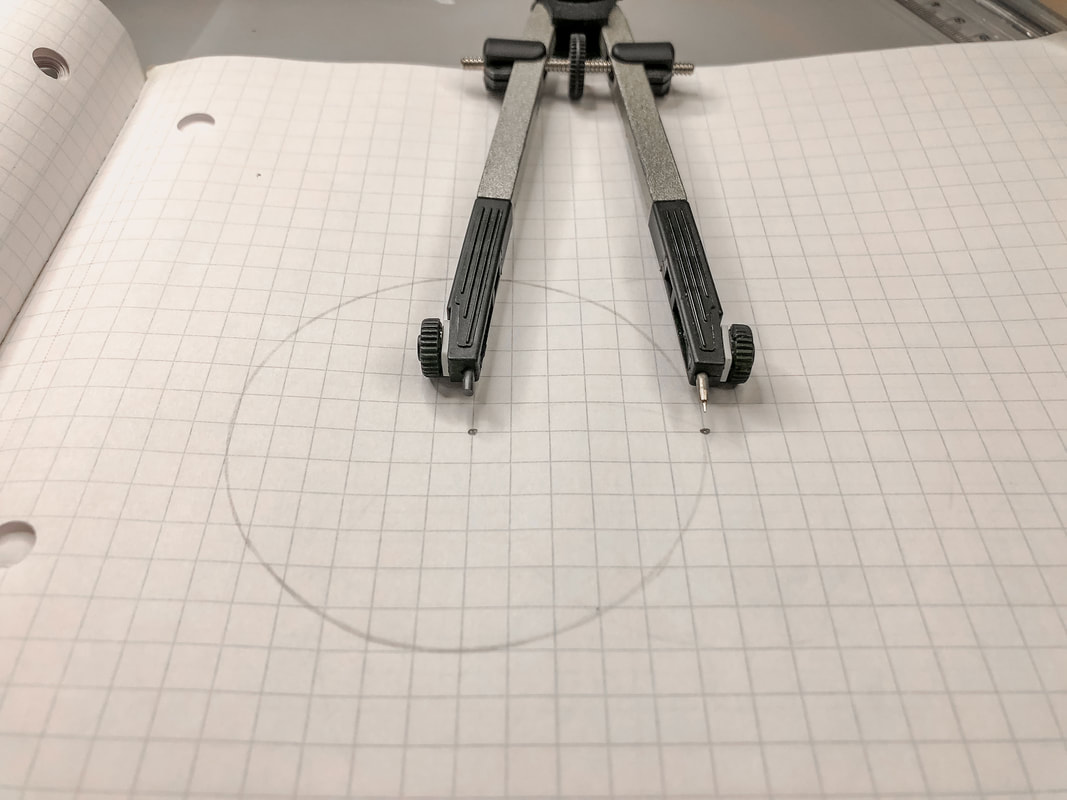 Step 2: Draw a second circle Mark a point on the circle’s circumference. This will be the center point of the second circle. Using the same settings on the compass draw a second circle. 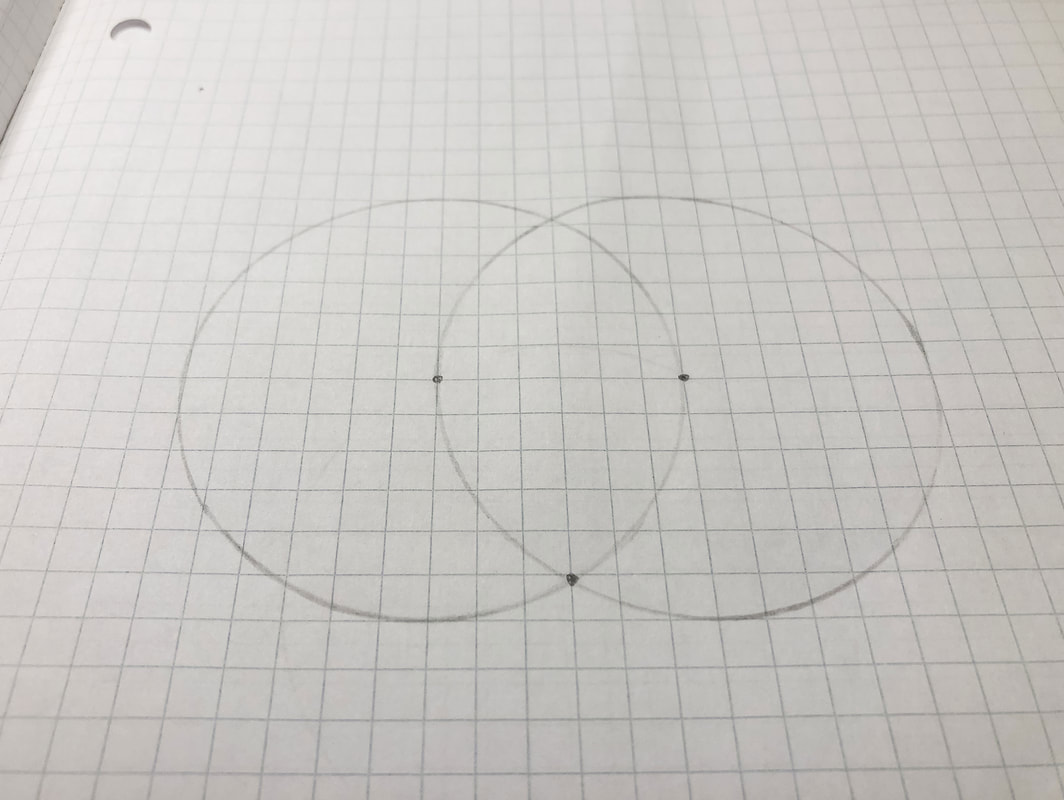 Step 3: Draw a third circle Mark the point where the two circles intercept at the bottom. Using the same compass setting, draw a third circle with that as the center point. Erase the parts of the circles outside the points of intersection. 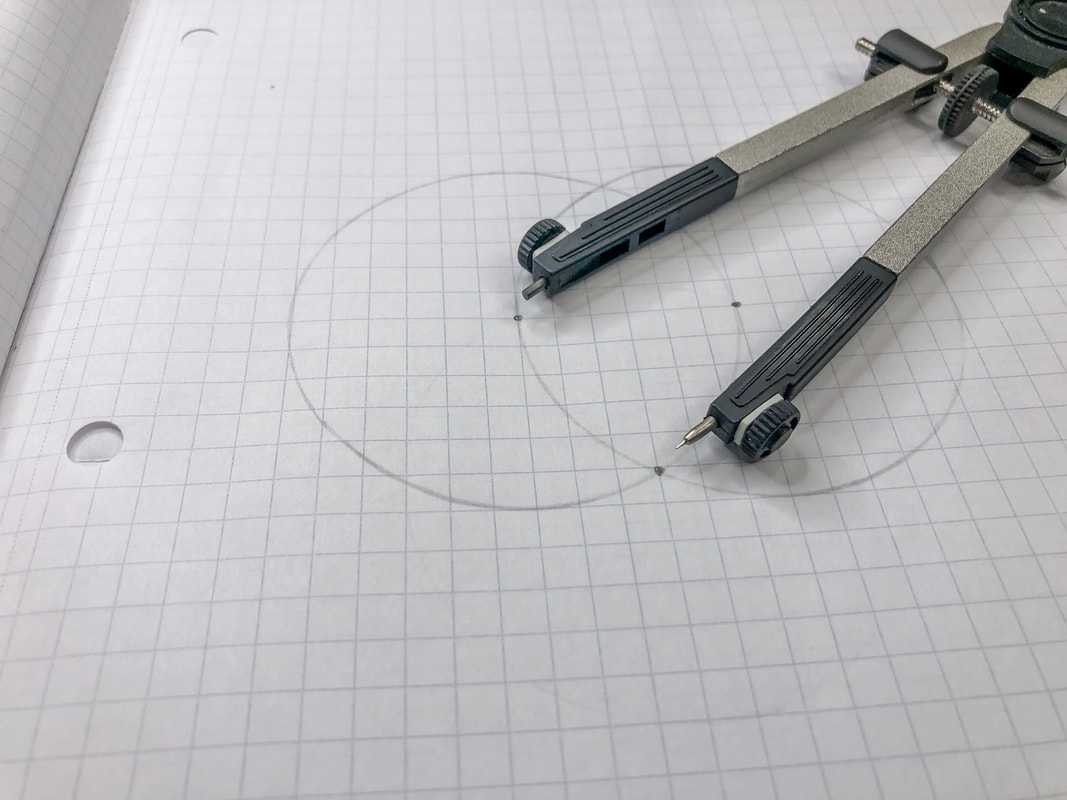 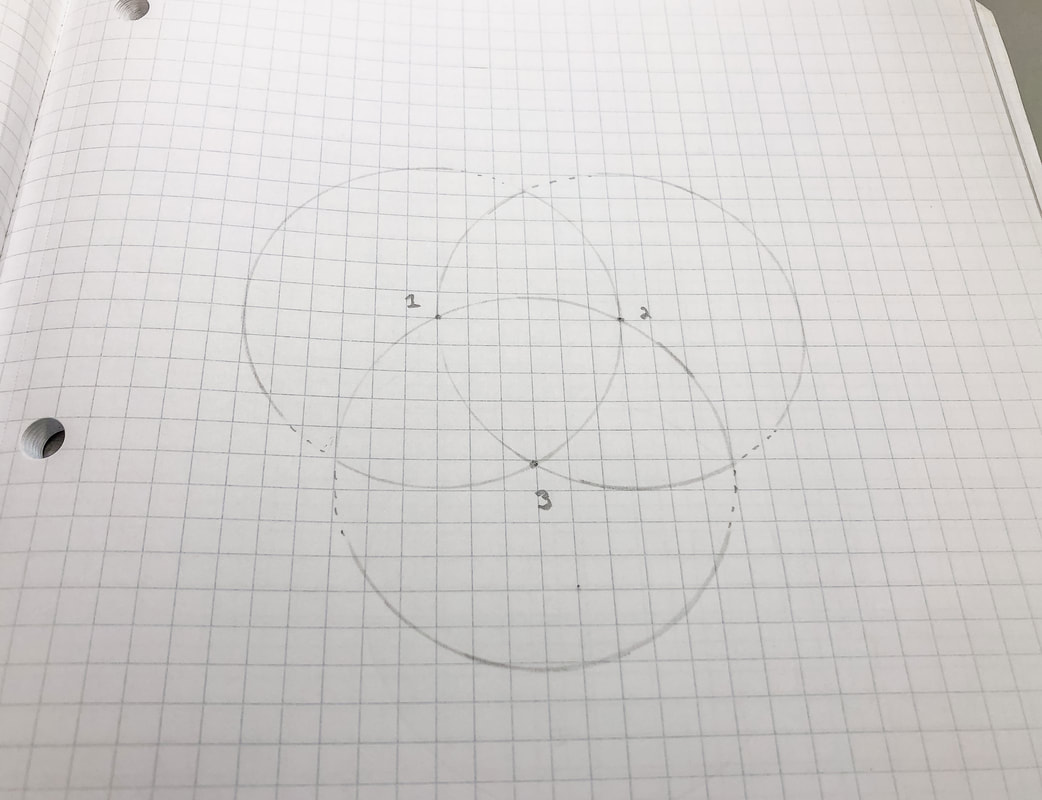 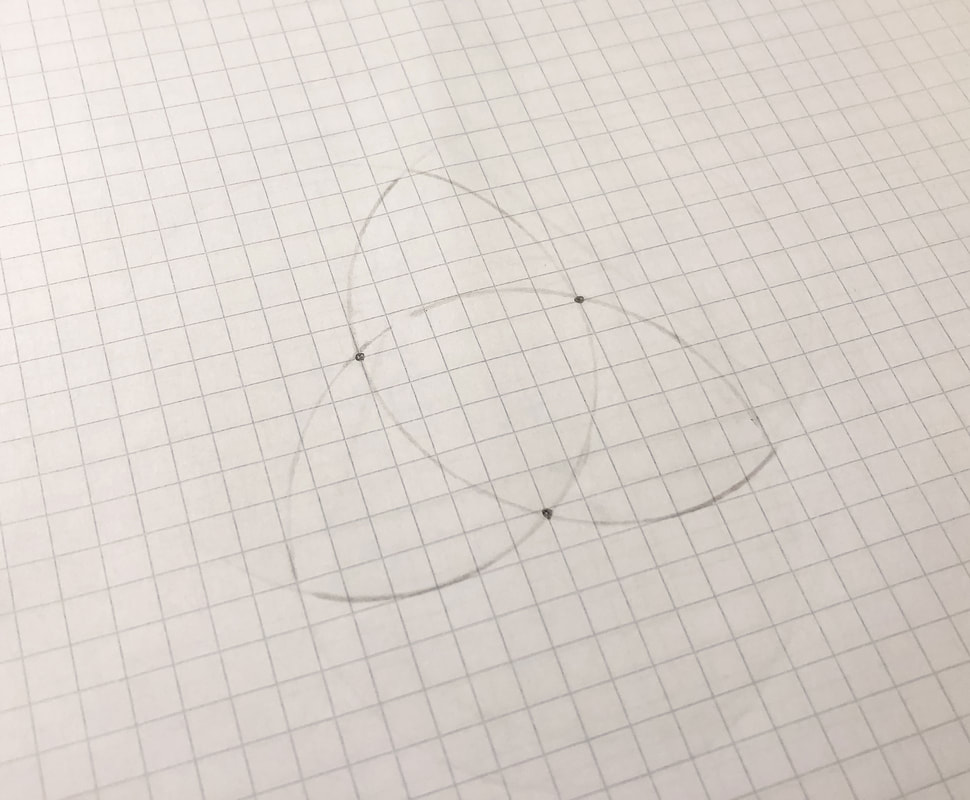 Step 4: Draw parallel lines Draw new lines parallel to the lines that are left. The parallel lines can be drawn inside or outside the triquetra shape, depending on your preference. 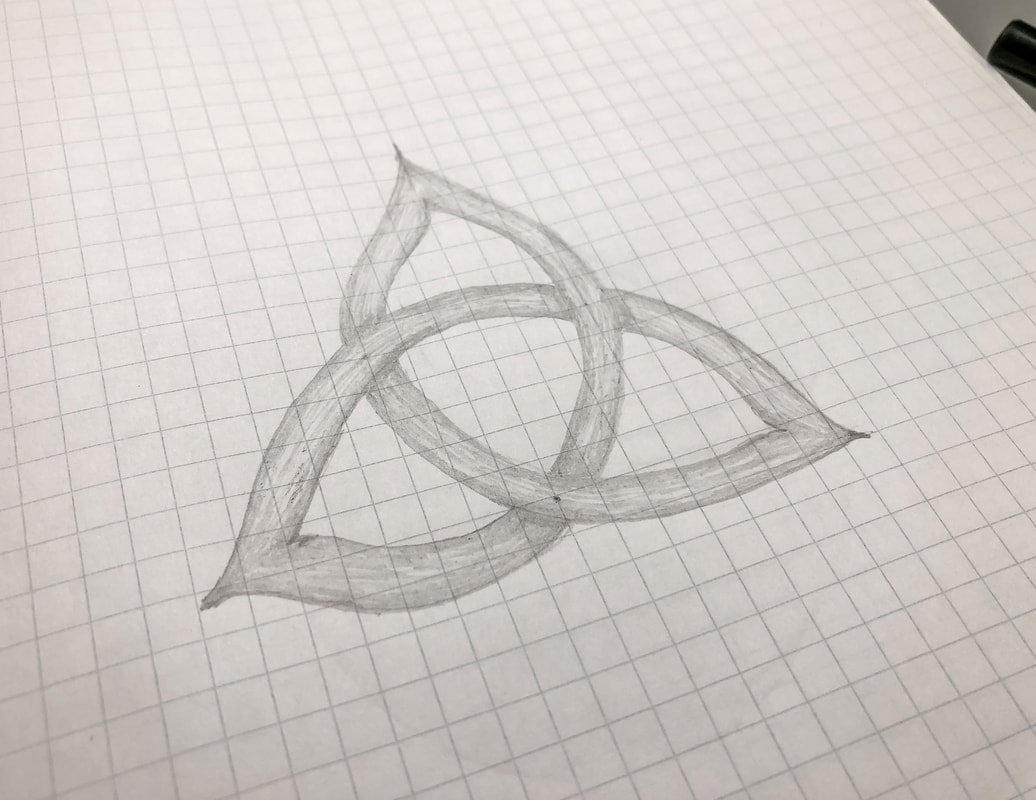 Step 5: Create the overs and unders Pick a point where the lines intersect and create an “over” thread. Go to the very next intersection and create an “under” thread. Follow this thread, creating alternating overs and unders until you arrive back at the beginning. Step 6: Stylize Create shading, texture, outlines, and finishing touches for the design. 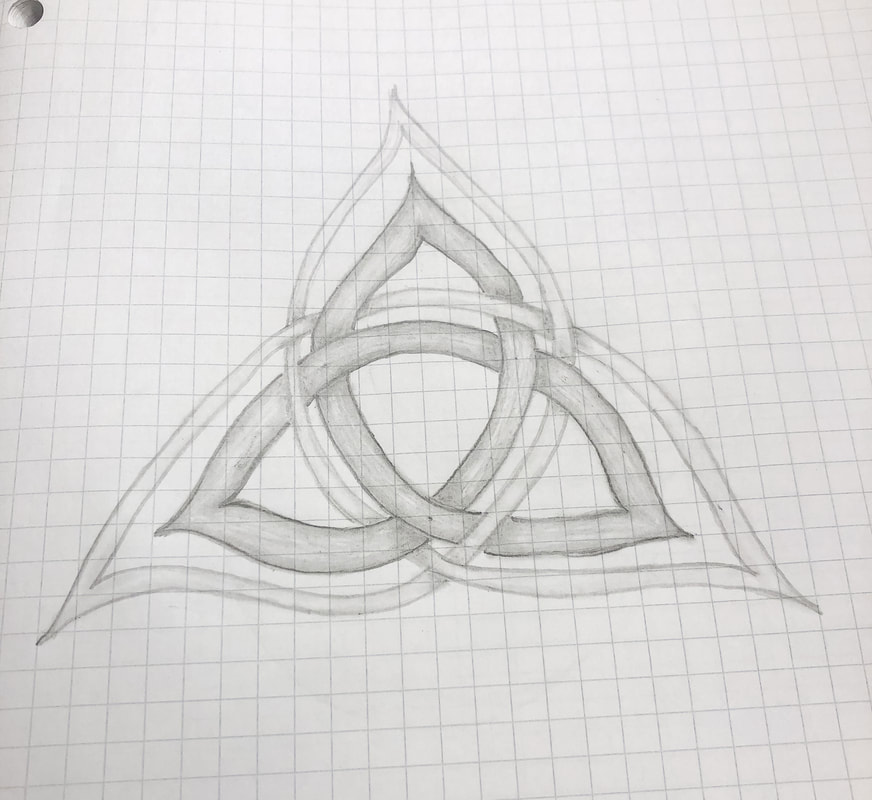 If you would like to see the video tutorial for this triquetra you can view it here. Please like, share, comment, and subscribe so we can grow our little community! Related blogs you may want to read: Creating a knotwork pattern inspired by the Clonmacnoise South Cross Circular Celtic border knot tutorial, basic braid Basic twist step-by-step drawing tutorial using grid paper Celtic braid step-by-step drawing tutorial Basic border knot with vertical breaks, step-by-step drawing tutorial Basic border knot with horizontal breaks, step-by-step drawing tutorial DIY chalk-painted tray with Celtic border A fun DIY project with paint and a thrifted mirror part 2 The Celtic Motherhood Knot, a symbol of love Celtic Tree of Life Basic Celtic Knot Tutorial Part 1 Celtic Knot Tutorial Part 2 |
Author
Some of the posts on this site contain affiliate links. This means if you click on the link and purchase the item, I will receive an affiliate commission. 
Categories
All
Archives
April 2024
|