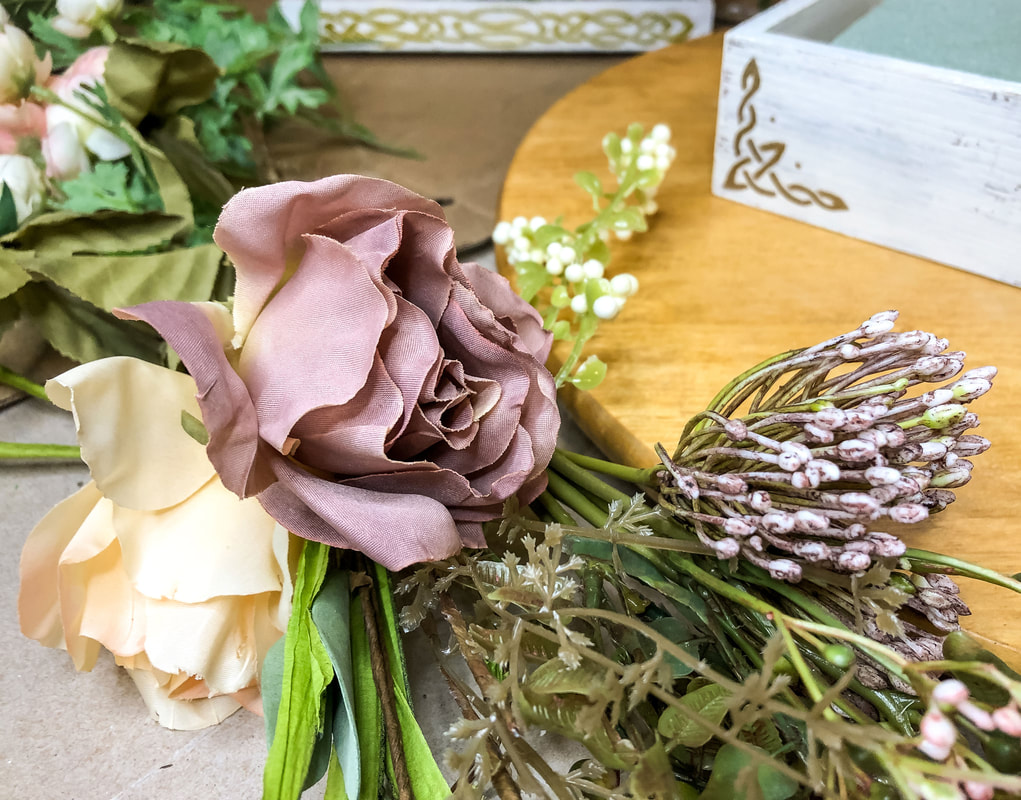
 Faux roses and florals for new spring decor. Photo by Diane M. Lilly, 2023. I feel like I’m a little late to the party…It’s already March, and I’m only just now updating you on what’s on tap this year at DSD. I don’t know what happened to January and February…I guess they just got away from me! Honestly, I’ve been keeping my head down and staying busy. Quite a lot is happening, and a lot of projects are either in the works or are slated to get done within the next few months. My goal this year is to fill my online shop with beautiful items for you and pump out all new blog material about some of my (and your) favorite topics. This year I am full on embracing faux florals, fairy decor, and Celtic inspired art. If you like fairies, knotwork, castles, and nature inspired faux floral designs, you’re in for a treat New blog articles are coming! In addition to the usual DIY, how-to, and recipe blogs, I will be introducing some new topics with Celtic and fairy themes. This spring we are celebrating the magic of fairies and the beauty of Celtic art! 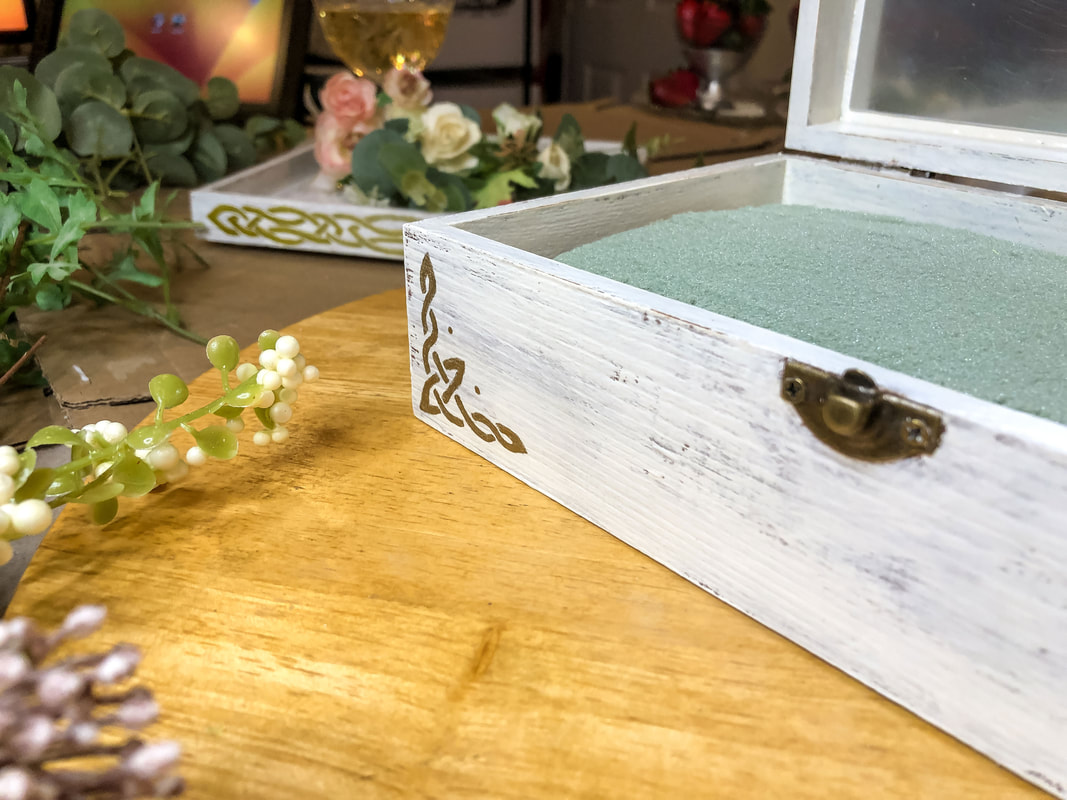 Jewelry box with hand painted Celtic knot design. Photo by Diane M. Lilly, 2023. New fairy houses Did I mention you will be seeing more fairy themed stuff?! Fairy houses will be making more of an appearance this year, with a couple new designs that are in the pipeline. The intention is to marry two of my deepest passions—fairy tales and miniature houses. I can’t wait to show you my new designs! But you’ll have to be patient! These things take a bit of time! 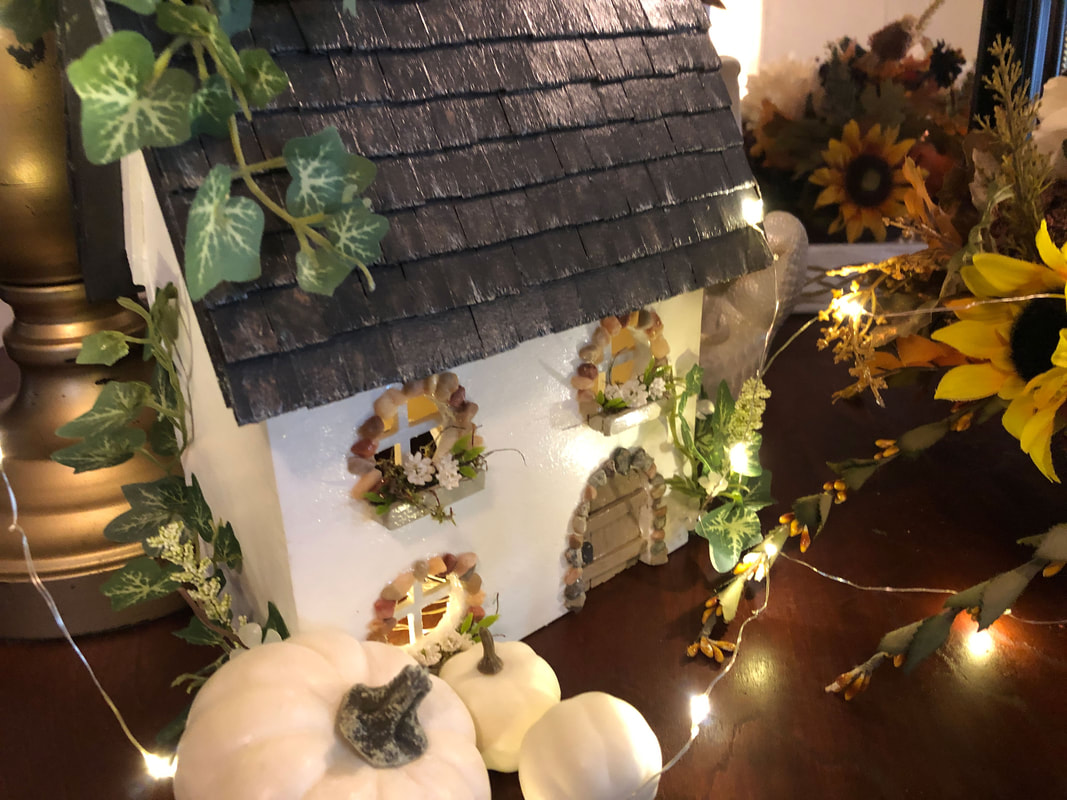 English Cottage miniature fairy house by Di's Studio Designs. Photo by Diane M. Lilly, 2022. 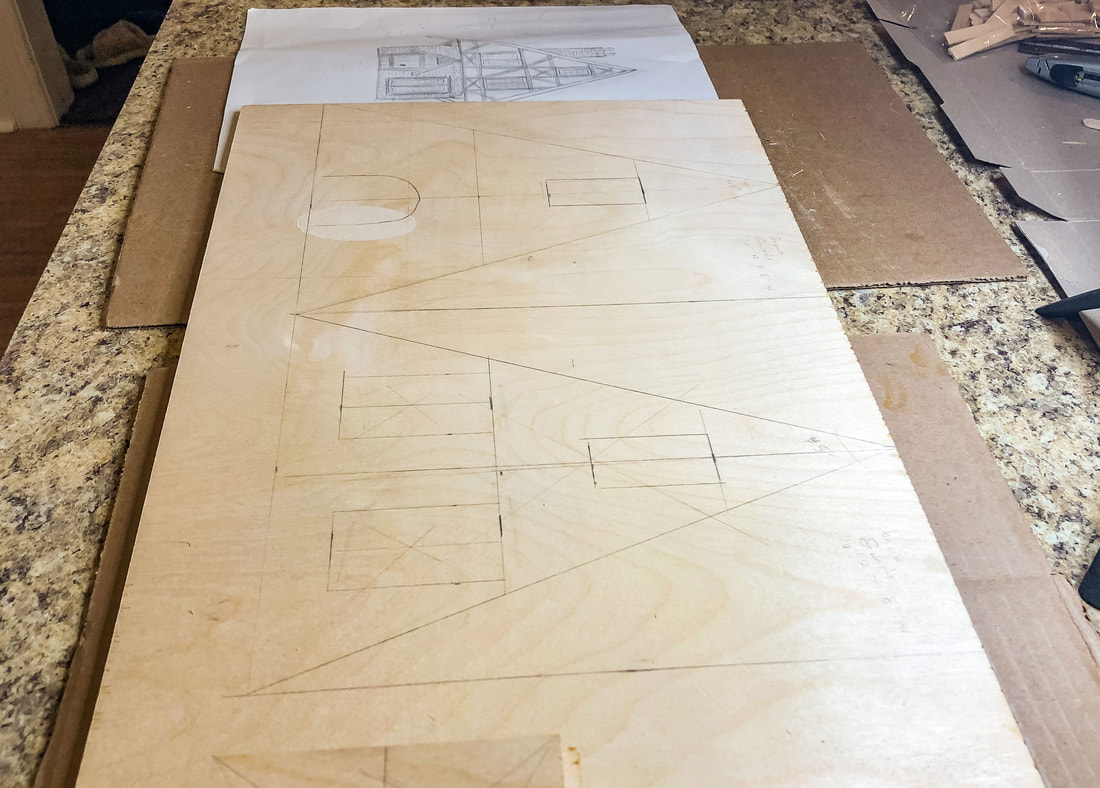 New designs for a miniature fairy shop in the works. Photo by Diane M. Lilly, 2022. 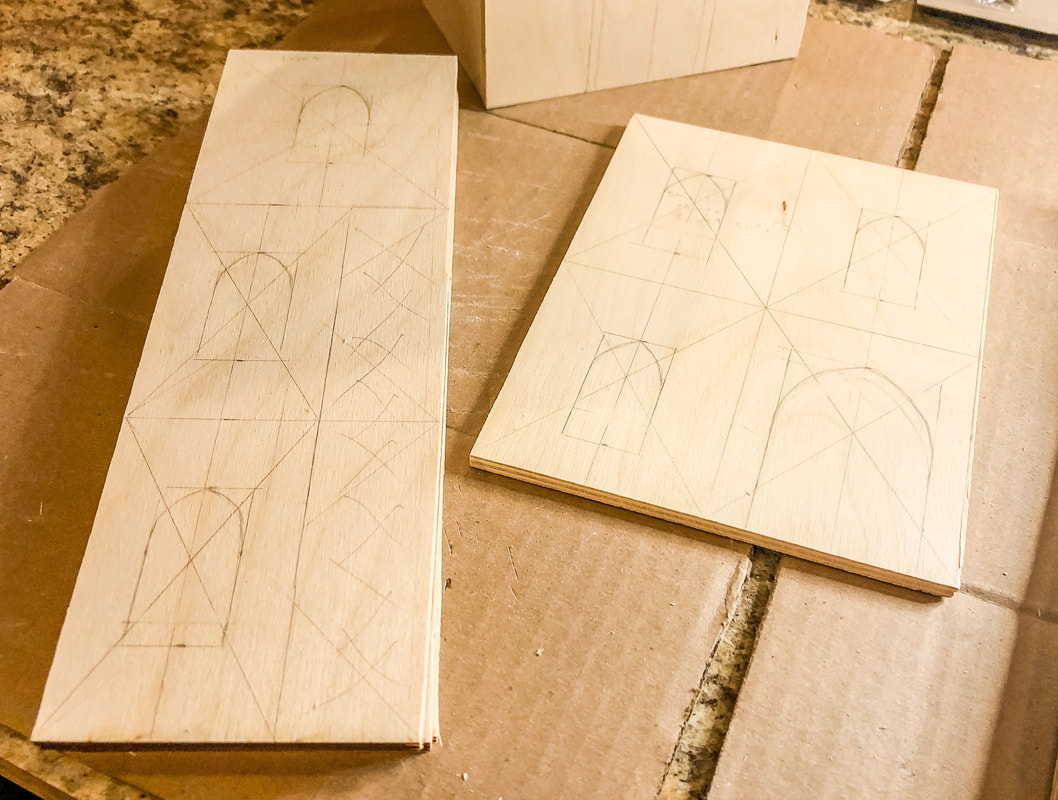 New designs for miniature fairy castle are also in the works. Photo by Diane M. Lilly, 2022. Home decor with a Celtic flair Celtic inspired art is making an appearance on new home decor designs in the form of painted knotwork borders. These are still a work in progress, but I can tell you they already look like they are right out of a fairy tale! 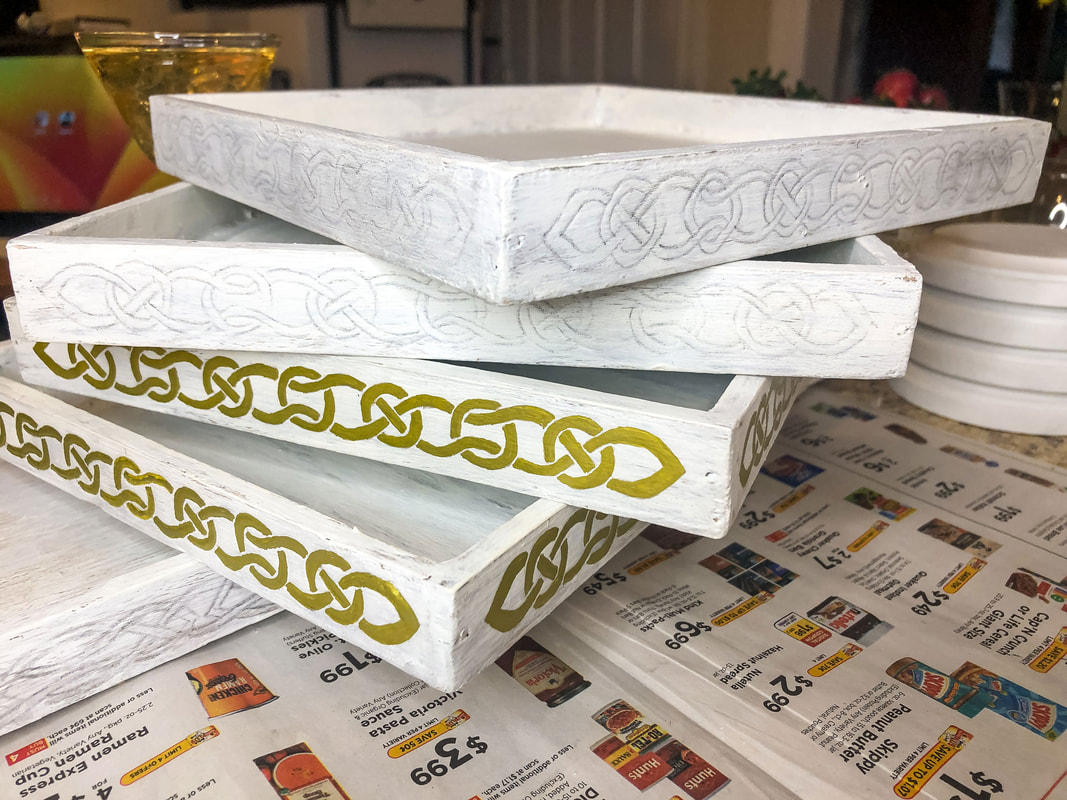 Hand painted wood trays with gold painted Celtic knot work borders. Photo by Diane M. Lilly, 2023. 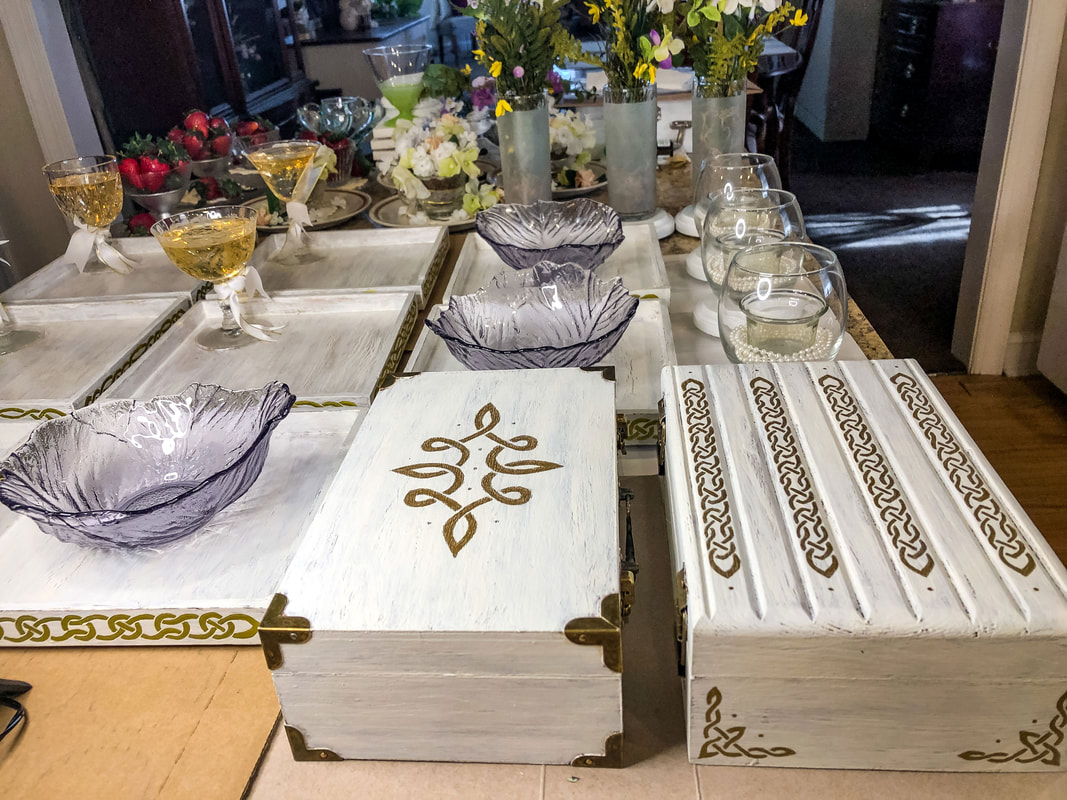 Some of the new projects that are currently in progress. Photo by Diane M. Lilly, 2023. New faux floral designs This year will see not only new nature inspired candleholders, but also spring faux floral arrangements. These new designs are going to be a breath of fresh air in my shop, just in time for spring…or at least April! 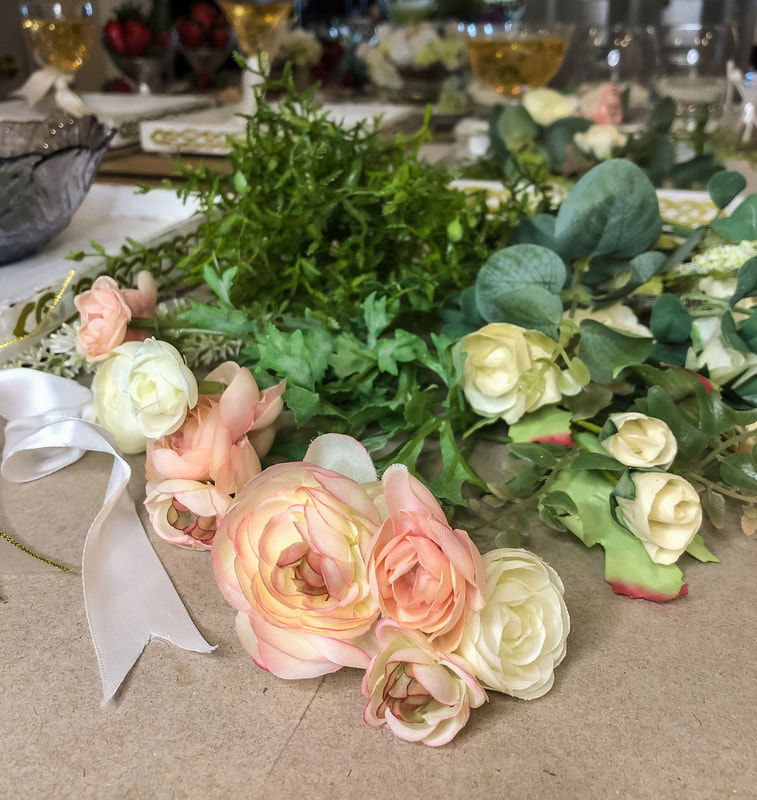 Some of the faux florals for this spring's new projects. Photo by Diane M. Lilly, 2023. 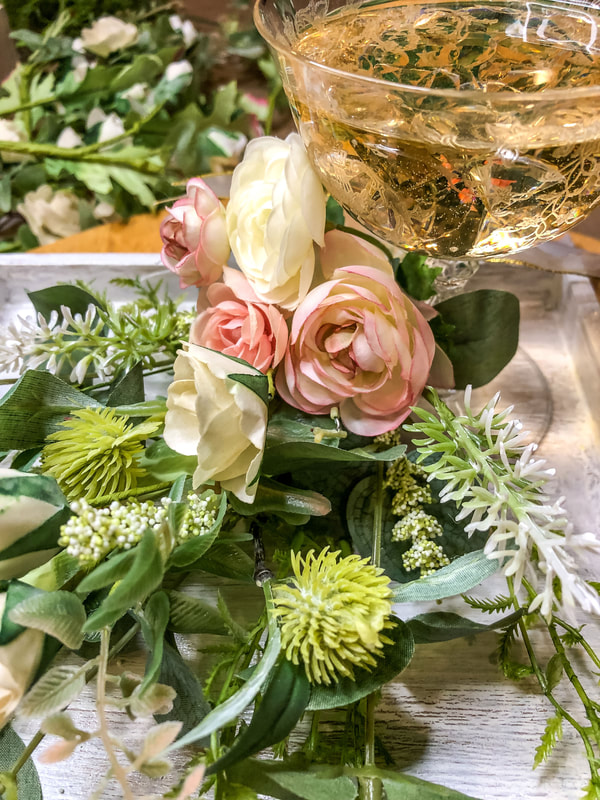 Sneak peak at one of the upcoming new faux floral designs. Photo by Diane M. Lilly, 2023. 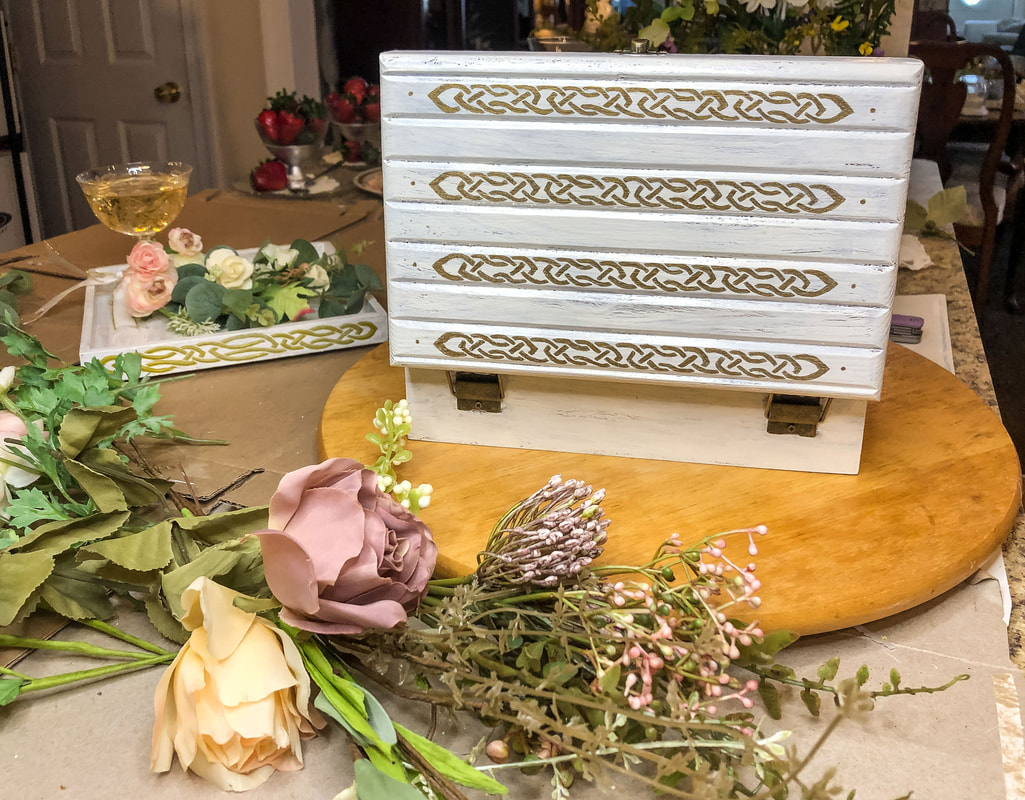 Hand painted jewelry box with gold Celtic knotwork, and some of the faux florals that are going inside. Photo by Diane M. Lilly, 2023. New candleholders And yes, there will be a few new candleholder designs this year, along with a few tweaks on some older designs. Everything is getting a much needed update for the 2023 spring season! 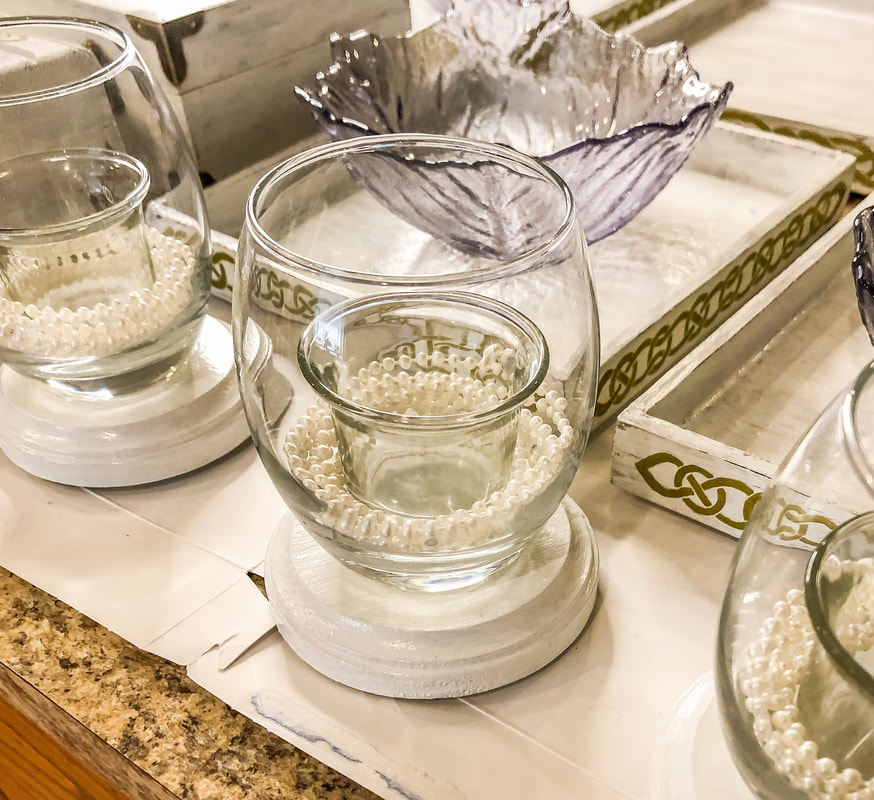 Smaller candleholder designs are currently in progress. Photo by Diane M. Lilly, 2023. 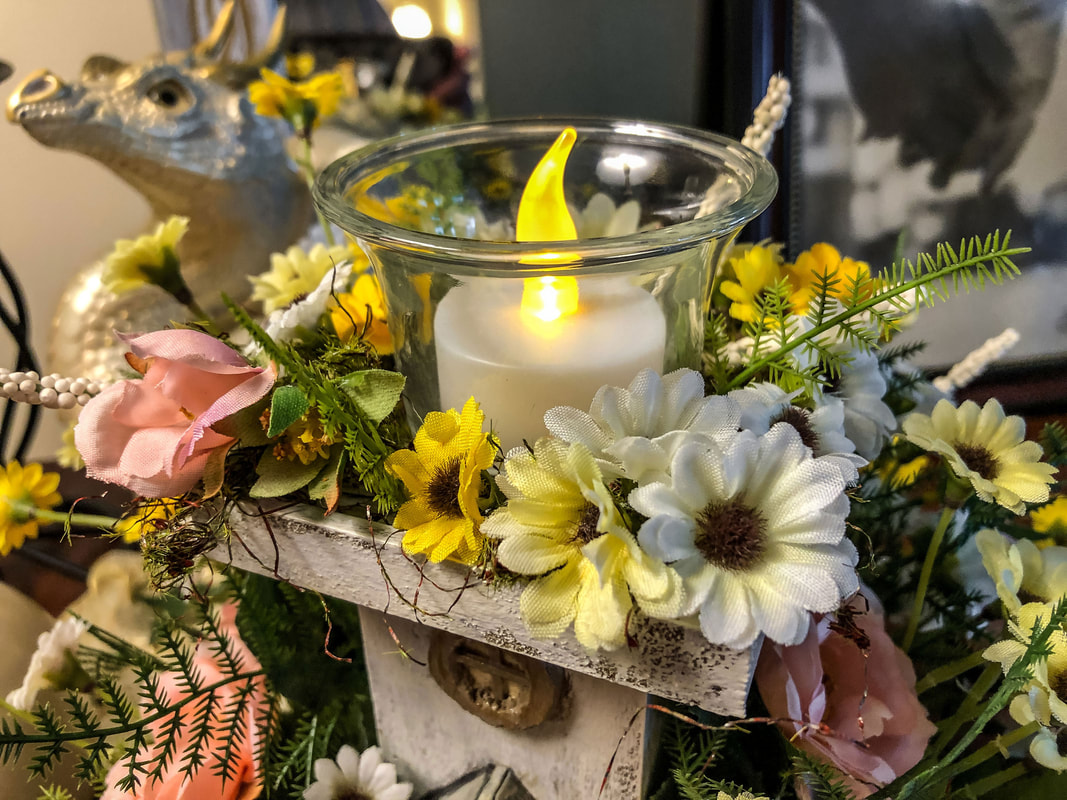 Handcrafted fairy themed spring candleholder by Di's Studio Designs. Photo by Diane M. Lilly, 2022. More wood burned art Sadly, my poor Celtic shop has been neglected. I’ve sold several pieces and have not had the time to make more wood burned art…But that is about to change! The goal this spring is to build up my Celtic art shop, so I have set aside time to finally finish the many pieces that were started last year (and the year before, so sorry). I can’t wait to get back to doing some artwork again! 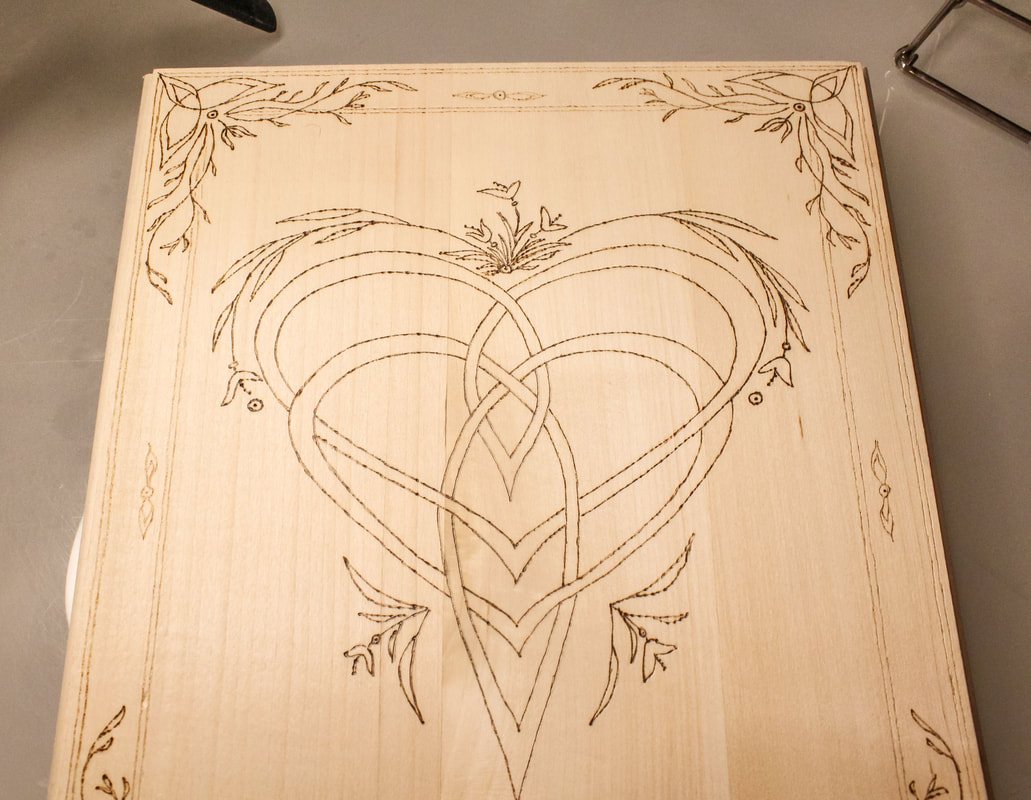 Custom designed wood burned Celtic Mother's Knot currently a work in progress. Photo by Diane M. Lilly, 2022. 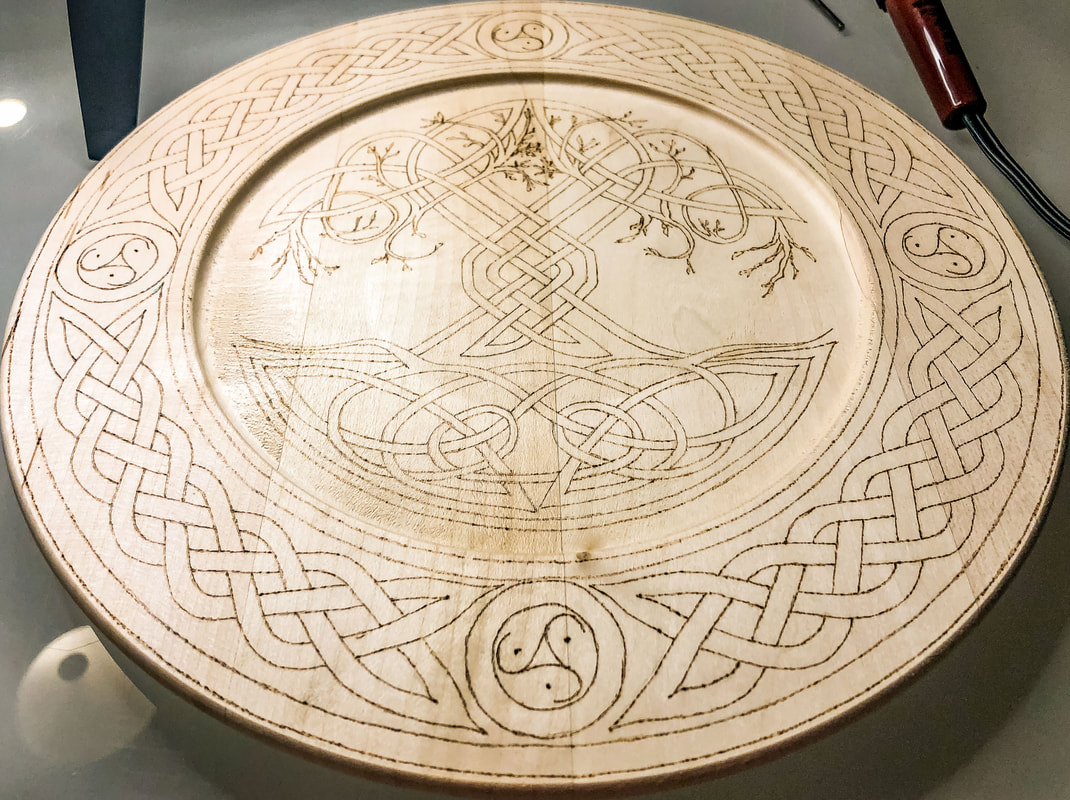 Custom designed Celtic Tree of Life wood burned plate also currently a work in progress. Photo by Diane M. Lilly, 2022. 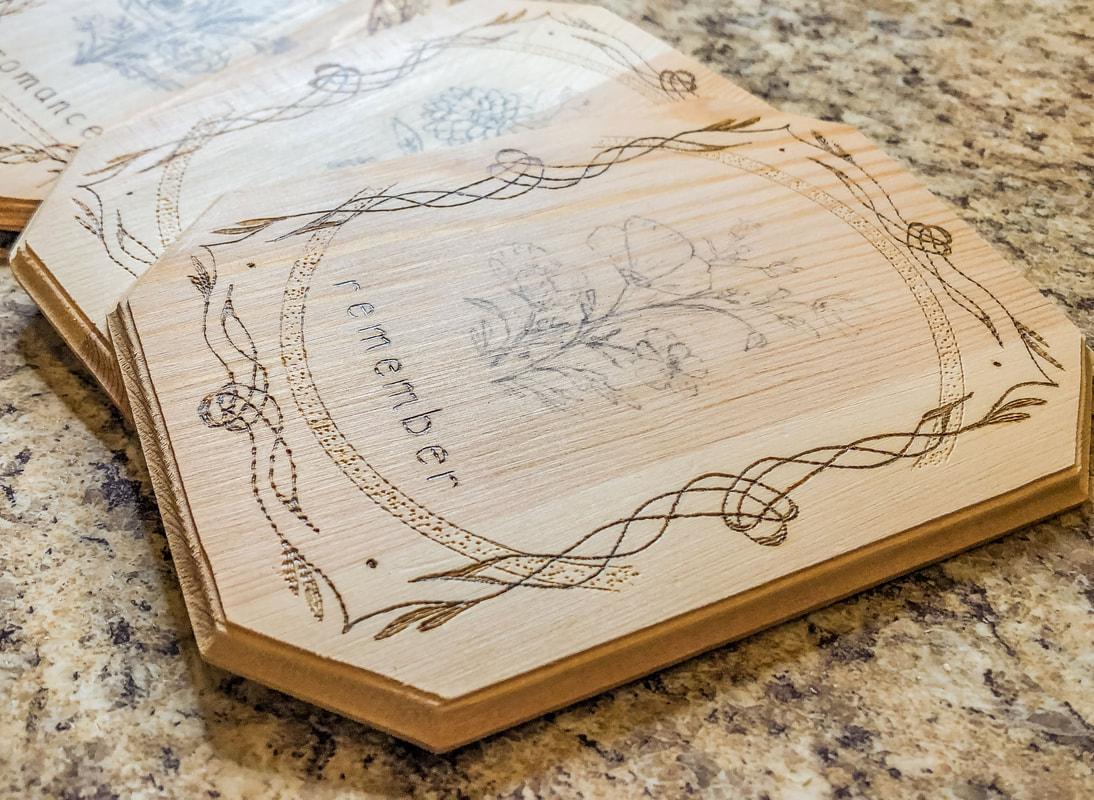 Small Celtic inspired wood burned plaques are a work in progress. Photo by Diane M. Lilly, 2022. A Youtube channel Wait…what?! Yes a Youtube channel! So this is not set in stone, but I’m thinking of finally embracing the video age! The intention is to create some short videos of my designs and processes to share with you on a Youtube channel, and maybe grow a community. But I’m getting ahead of myself…I just want to make some videos showing you some of my works in progress and maybe some DIY projects, and whatever else might be interesting for you to watch. I’ll drop a link to the page in my social media and on my web site if this should come to fruition. OR… Would you prefer joining a Patreon page, where you could potentially have access to more private and exclusive stuff…for a monthly fee, of course (probably only $5)! Let me know in the comments. 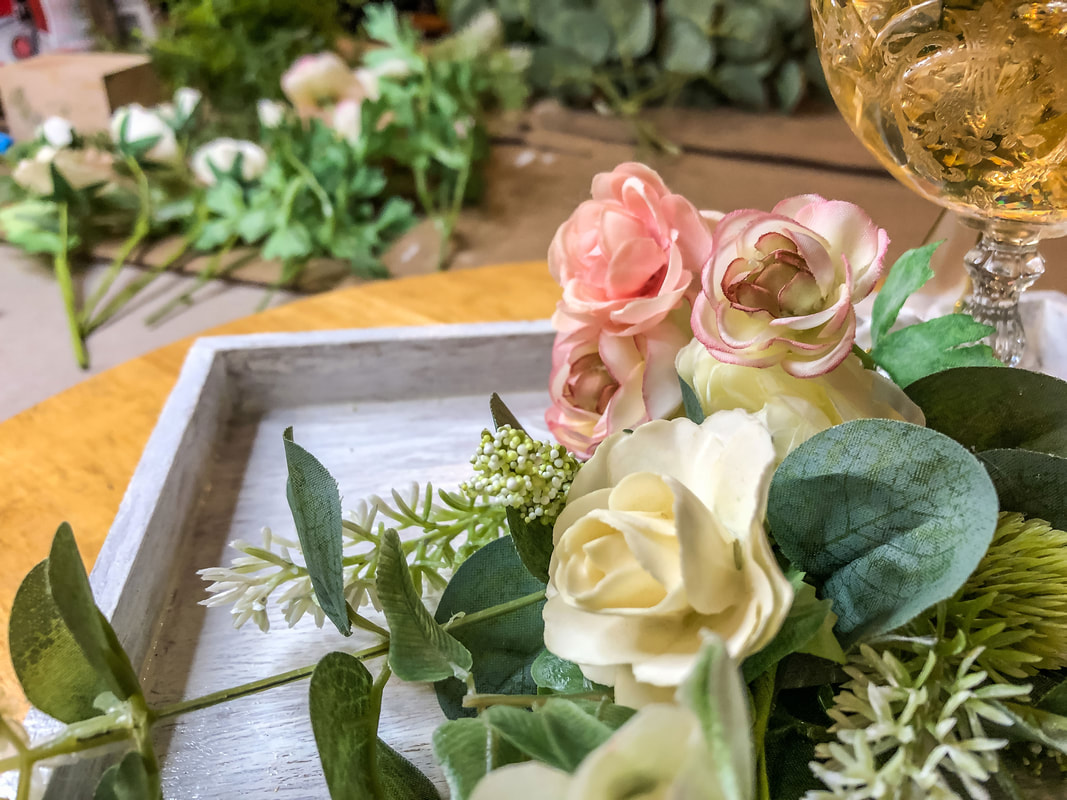 Another sneak peak at a wedding themed spring faux floral design by Di's Studio Designs. Photo by Diane M. Lilly, 2023. So that’s what’s in the works. I have a very ambitious schedule, so things may change a bit here and there, and it might take me longer than I planned to get certain things done, but I would really like to see most of these things rolled out before summer. So, as always, stay tuned and follow me on social media for updates and my latest shenanigans. And don’t forget to share, comment, like, follow…all that good stuff…so I can continue to build this up and create more beautiful things for you guys! Related blogs you may want to read: DIY chalk painted tray with Celtic border 10 essential elements for a magical outdoor fairy garden A brief history of the origins of fairy gardens Tips for creating a faux floral spring wreath My spring 2022 indoor fairy gardens How to care for faux florals The Celtic Motherhood Knot, a symbol of love Spring makeover for my indoor fairy gardens
0 Comments
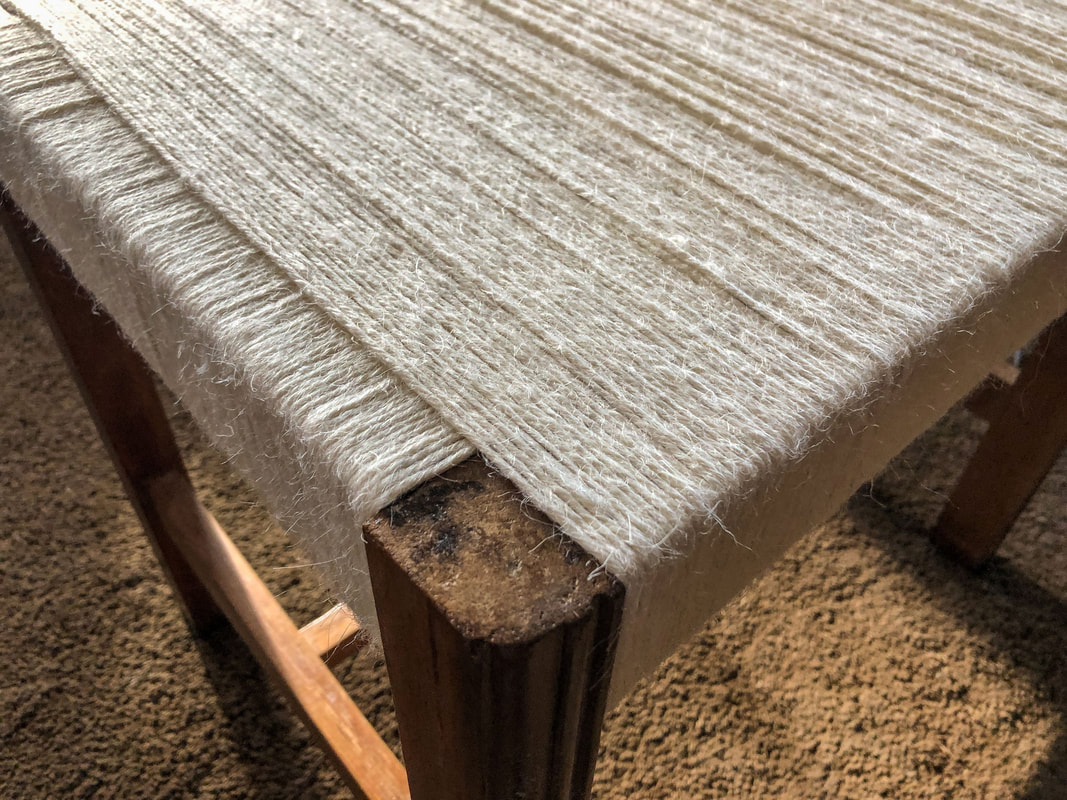 Corner closeup of finished stool. Photo by Diane M. Lilly, 2021. A few years back I bought a beat up second hand vintage foot stool with the idea that I would reupholster it and give it a new lease on life. Once it was taken apart, however, I came up with another idea… It was 2018, and I was toying with an idea of wrapping jute twine around the horizontal rails of this second hand foot stool to create a plant stand. For the life of me, I can’t remember from where the idea came, but somehow the universe inspired me to try out something a little “boho” (which is not my usual style, which leans more toward the Traditional end of the style spectrum). The “vision” was to create a plant stand with a weave effect using durable jute twine. The finished stool made for a perfect plant stand for my living room! As time went by though, the twine became stained from careless watering (shame on me)… 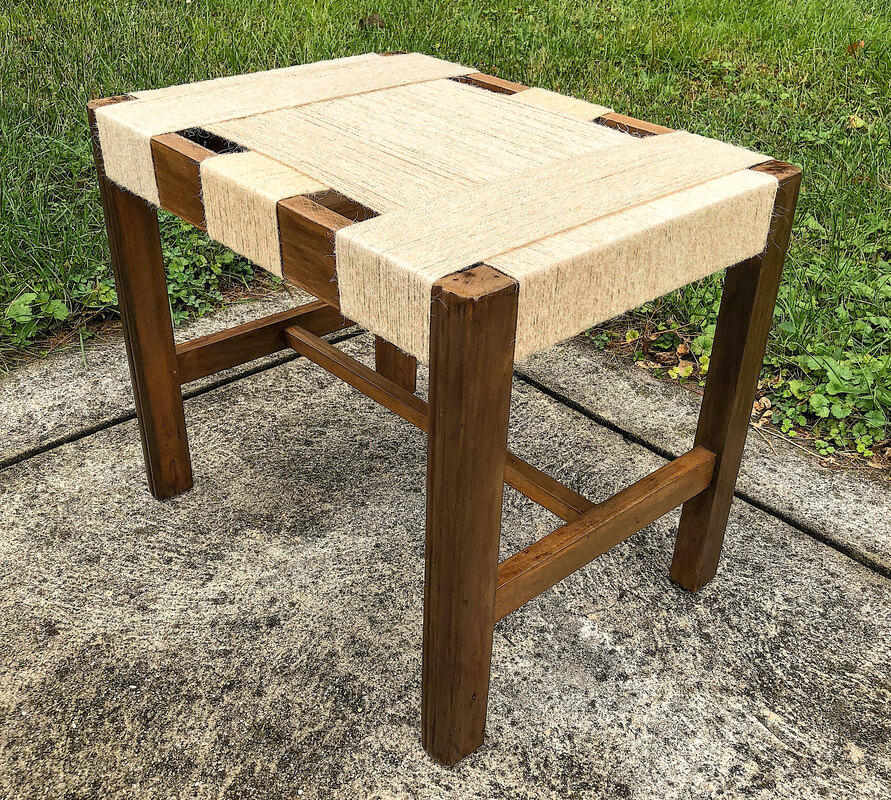 Finished stool from 2018. Photo by Diane M. Lilly. Fast forward to now (2021)…It was high time that stool got some love, right?! I bought some fresh jute twine (about 4 skeins) from Amazon and got to work giving this stool a facelift. Previous experience showed me just how monotonous and repetitive this type of project can be. The ultimate effect looks great, but—like most things creative—it’s not fun in the moment! My work area became my living room floor, conveniently situated in front of the television so I could be entertained while I wrapped…and wrapped…and wrapped…and wrapped. And my fur babies were equally entertained! They got excited, thinking I was making them a new toy, silly kitties! Try doing anything with string around cats…Shit gets interesting! 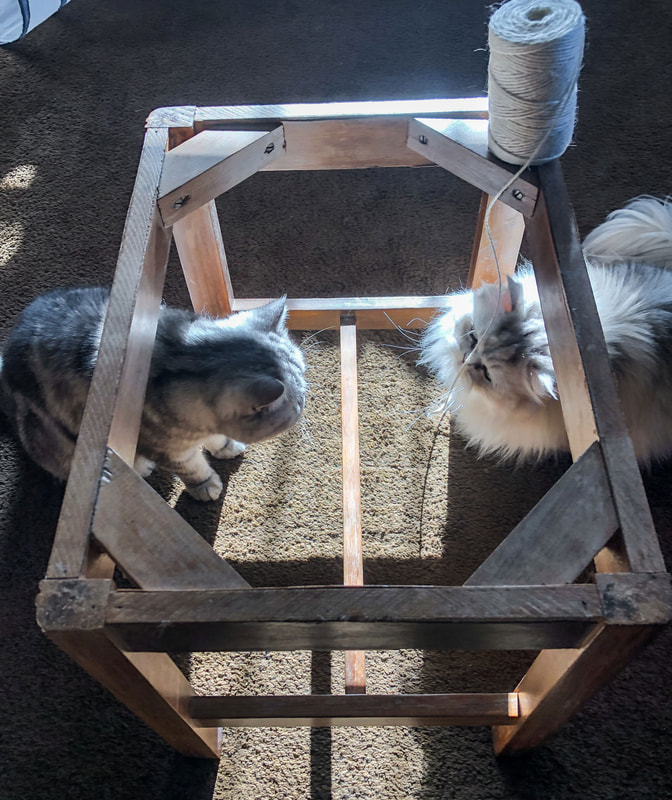 My two fur babies playing with my twine. Photo by Diane M. Lilly, 2021. 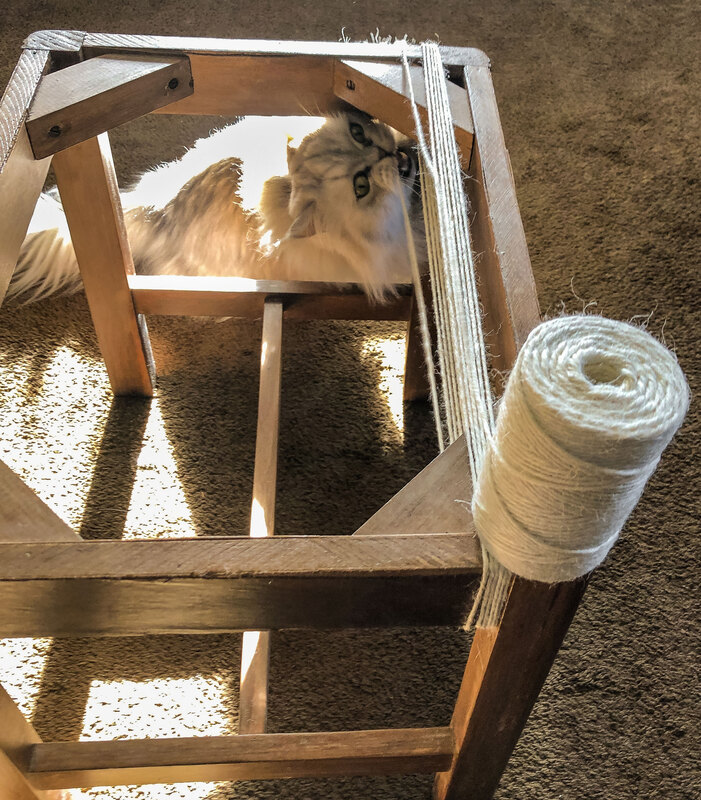 My fur baby trying to eat the twine! Photo by Diane M. Lilly, 2021. Anyway, after wasting time amusing myself watching my cats be amused, I steeled myself for the inevitably tedious task of wrapping, pulling, pushing threads tightly together, and looping around again, over and over and over. I started with the longest side first, pulling the twine taut to prevent sag when sat on or when something with weight is placed on it. 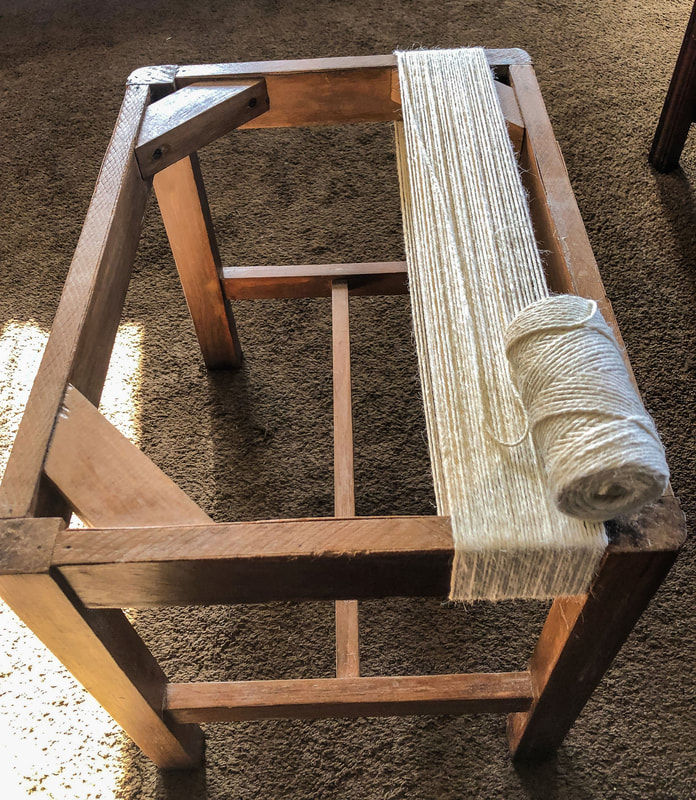 Starting to wrap twine along the long axis. Photo by Diane M. Lilly, 2021. 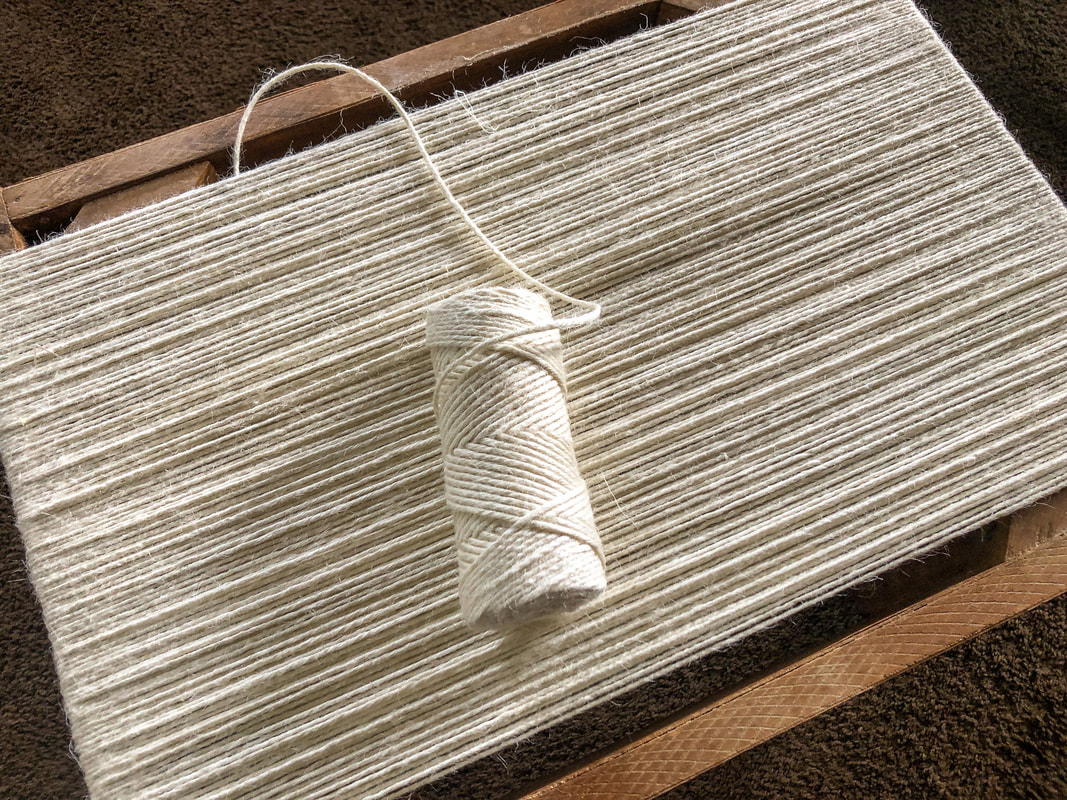 The long axis of the stool finished being wrapped in twine. Photo by Diane M. Lilly, 2021. For the short side, I simply wrapped the twine over top of the long side, creating just a simple double layer. This reincarnation was to be a stool for us to sit on when we are putting on or taking off our shoes at the back door, so it didn’t need to be fancy, just functional. There was no need to do the weave effect like last time (which, incidentally, was incredibly laborious), saving me time and sanity. 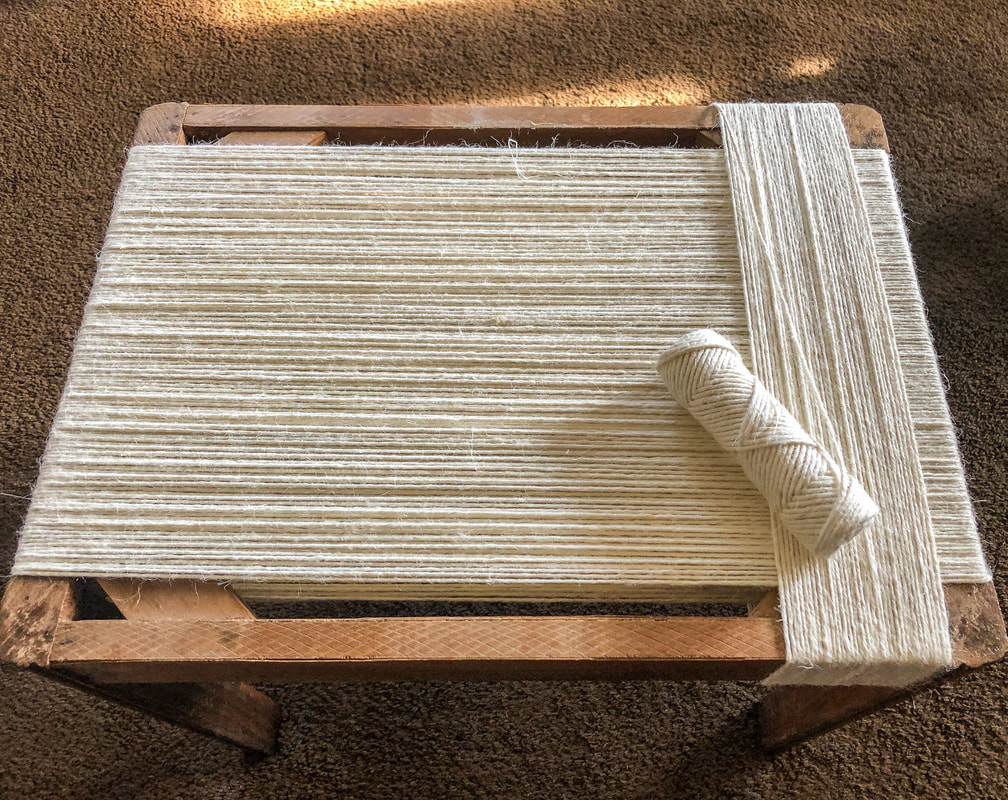 Starting to wrap the short axis of my stool. Photo by Diane M. Lilly, 2021. After several hours of wrapping I finally had my finished stool! The jute twine seat is definitely sturdy enough to hold our weight when we sit on it (and we’re not little people anymore!). This second hand stool just keeps getting resurrected! I wonder what the next rendition will be?! 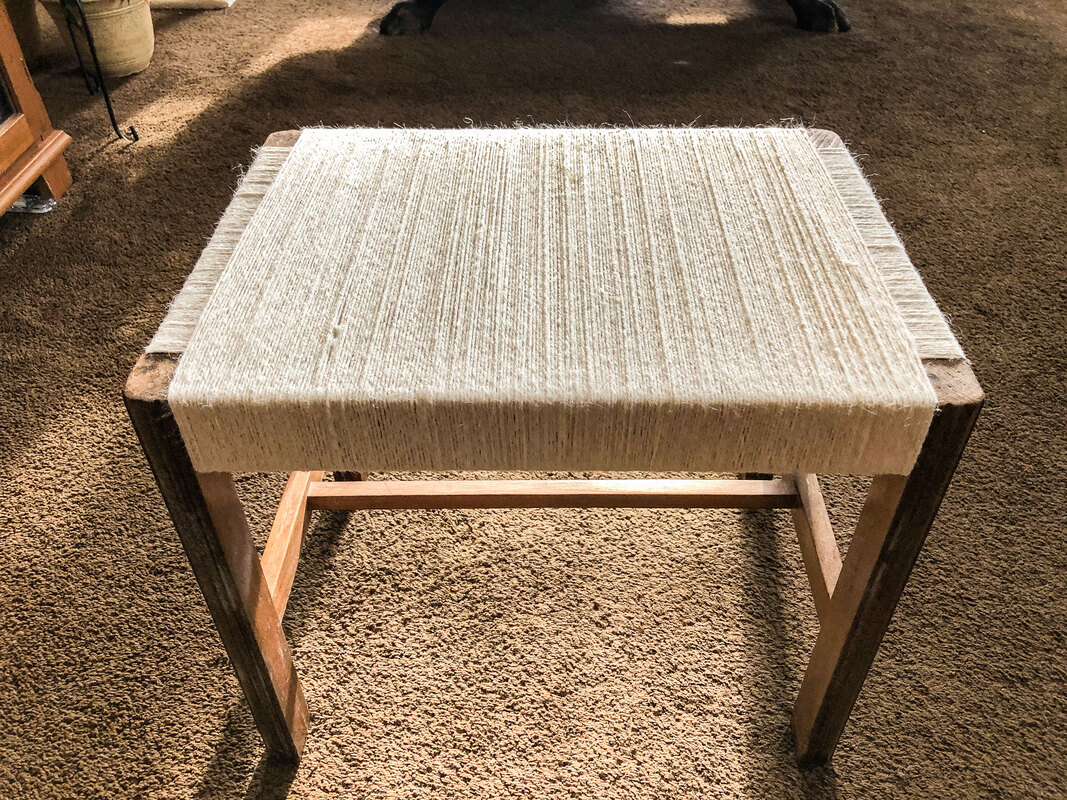 Finished stool for 2021. Photo by Diane M. Lilly, 2021. 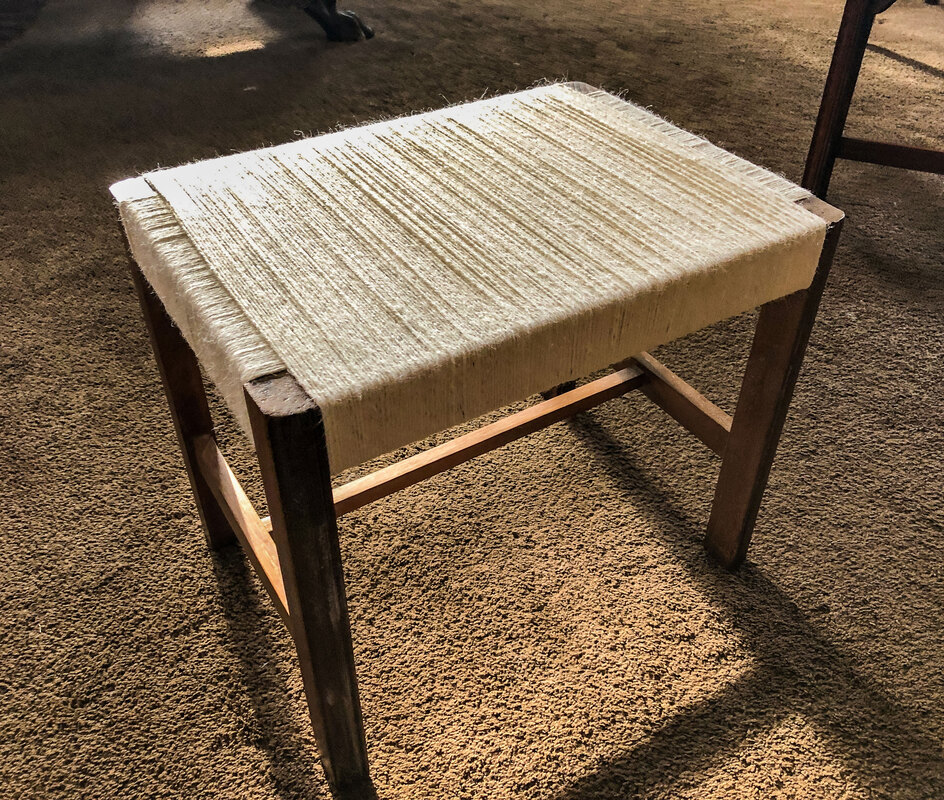 Another pic of the finished stool. Photo by Diane M. Lilly, 2021. I know I complained about how “tedious” and “monotonous” and “repetitive” this project was, but to be honest, it was rather therapeutic. You are not just mindlessly looping…It takes care and close attention to make sure the threads are packed together tightly and pulled taut enough that the finished piece has the strength needed to function properly. There is something strangely satisfying in seeing it all finished! So let me know what you think of my little project in the comments below, and feel free to drop a line about any similar projects of your own! If you’d like to be notified of new blog posts or merchandise sales you can sign up for my monthly newsletter (coming soon) on my contact page. And if you’d like to see what I’m up to on social media, click on the links below! This article may contain a few items or commercial mentions, but I only used them for demonstration purposes only. I am not endorsing any particular product or receiving any monetary gain for this blog. Related blogs you may want to read: On a mission to recycle this neglected vintage stool The stain stripping stage of rescuing my vintage stool Staining my vintage stool with brewed tea My tattered vintage stool transformed into a beautiful plant stand How to replace a clock mechanism How to rewire thrift buy lamps Creating a kitchen coffee bar 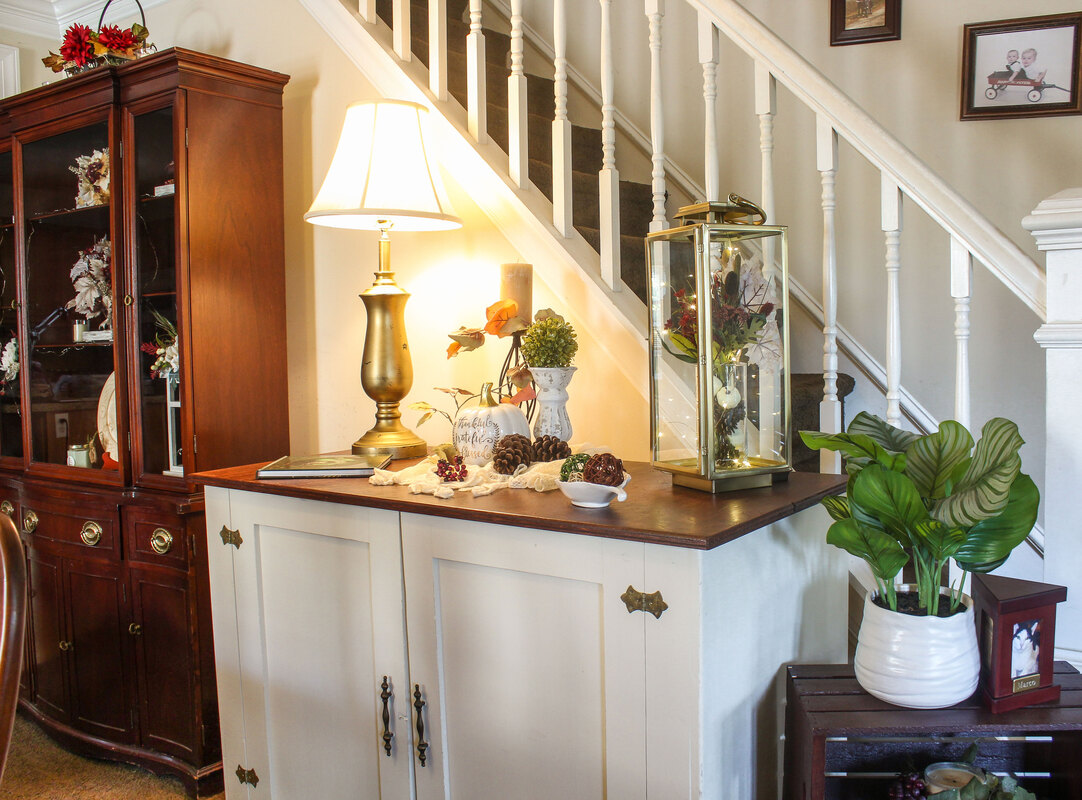 Finished and decorated dining room cabinet. Photo by Diane M. Lilly, 2021. Overview: Back in mid-Summer I found myself itching to do another DIY project. I had just finished a few other projects and my dining room was beautifully styled—except for this one miserable looking smaller cabinet. This sad looking piece of furniture had been sitting in my dining room for a few years waiting for me to find the time to give it a face lift and some style. We bought it several years ago from someone who must’ve been using it in their garage. It had no feet, no base, and the body was made of plywood with a pine wood top. Despite the haphazard materials, the piece was well constructed with classy looking door pulls and hinges. I knew I could make this cabinet look beautiful for my dining room. Besides, it was only $40 and I desperately needed storage! Fast-forward to this past summer, and I finally got around to giving this cabinet some much needed attention. 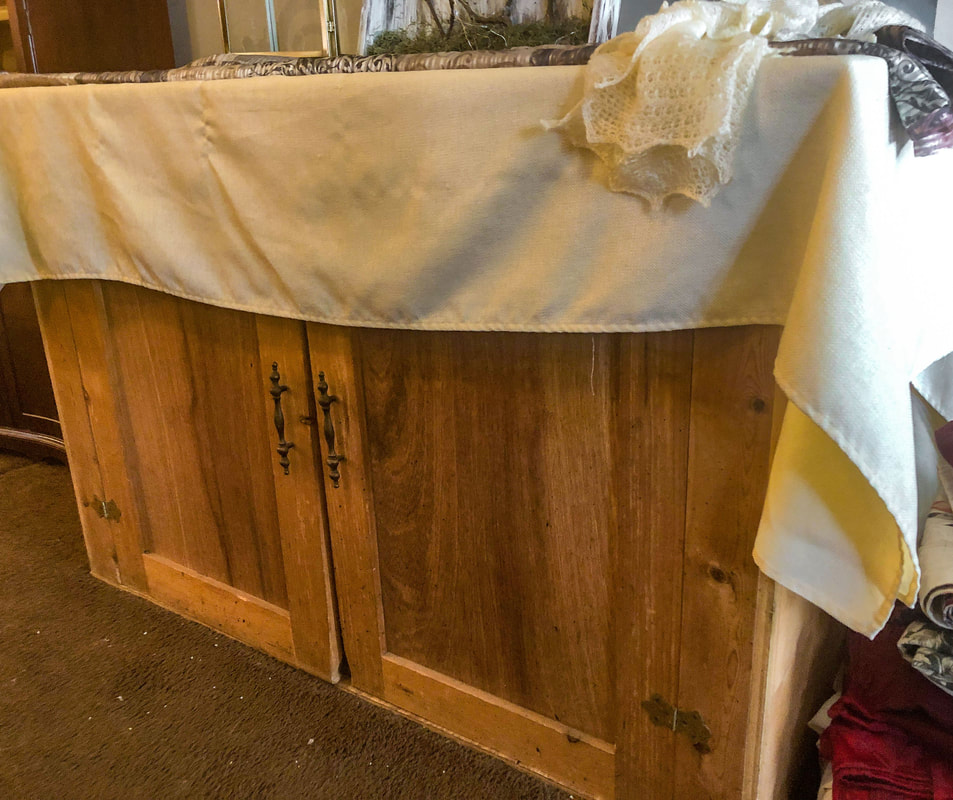 Rustic wooden cabinet before refurbishment. Photo by Diane M. Lilly, 2021. For those of you who are curious how I did it, I’m going to walk you through my DIY process, step by step, below… Step 1: Deciding on a finished look So the first thing I did was have a think about paint colors and style. The finished piece needed to blend in with the rest of my dining room, which I recently redesigned in a traditional style with cherry wood finishes and cream accent colors. I spent a considerable amount of time searching Pinterest and pondering how to make this cabinet look like a traditional piece of dining room furniture. My final inspiration came from a combination of the hardware on the cabinet doors and images of French Country furniture from online. 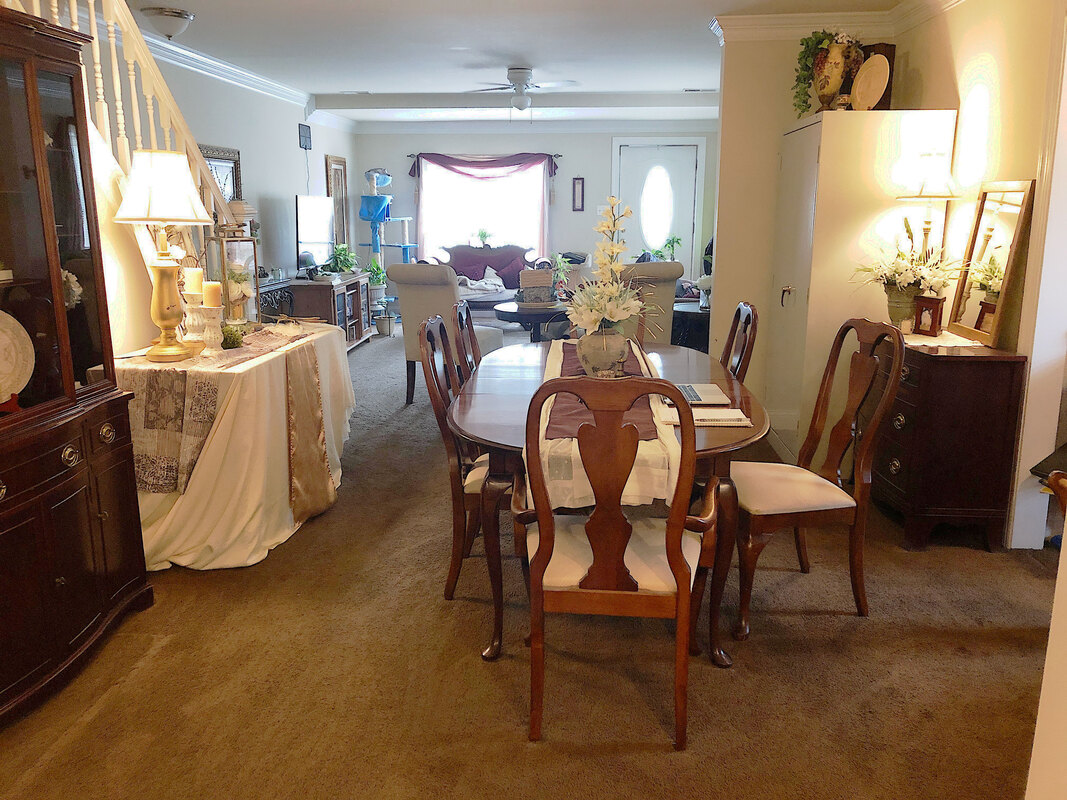 My redesigned dining room. Photo by Diane M. Lilly, 2021. 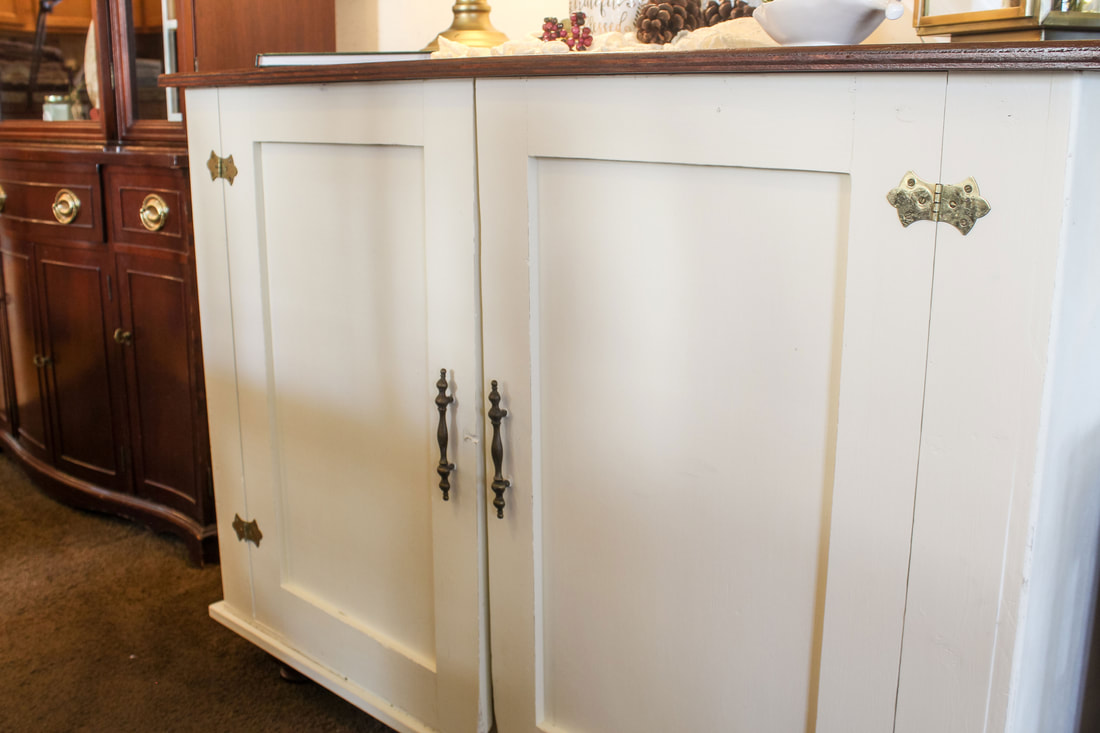 Traditional style hinges and door pulls on cabinet. Photo by Diane M. Lilly, 2021. Step 2: Color choices and purchasing the paint, stain, and finishes As I mentioned before, my new dining room colors contain dark red wood with cream color accents, so this smaller cabinet needs to echo that color scheme so that it looks like it is part of the overall set of furniture. My local Home Depot has a nice selection of Varathane furniture stains, and it was so hard to choose just the right shade! I finally settled on the Cognac stain for the cabinet top and legs. It is a nice dark cherry-toned stain that closely matches that of the rest of the furniture. The final protective coat is a Varathane Polyurethane in a satin finish, purchased on Amazon. The reason it’s a polyurethane has to do with the fact that the Cognac stain—being a dark red color—is an oil-based stain, meaning it needs an oil-based polyurethane finish, rather than a polycrylic (water-based) finish that will cause the color to dull or turn brown. The choice for the satin sheen was just a personal choice—I wanted to keep the entire furniture piece more of a matte finish with a slightly rustic feel.  Dark red wood dining room table with cream decorative accents. Photo by Diane M. Lilly, 2021. Step 3: Attaching the wood base We also bought an extra 24 x 48 x 1 inch particle board to attach to the cabinet bottom to give it a more finished look and to provide something into which to screw the furniture feet. Ultimately, I wanted to keep the look simple, matching the existing style of the cabinet. Any base that was too “stylized” would look out of place on this piece of DIY furniture. So the choice was made to keep it simple, understated, and rustic. 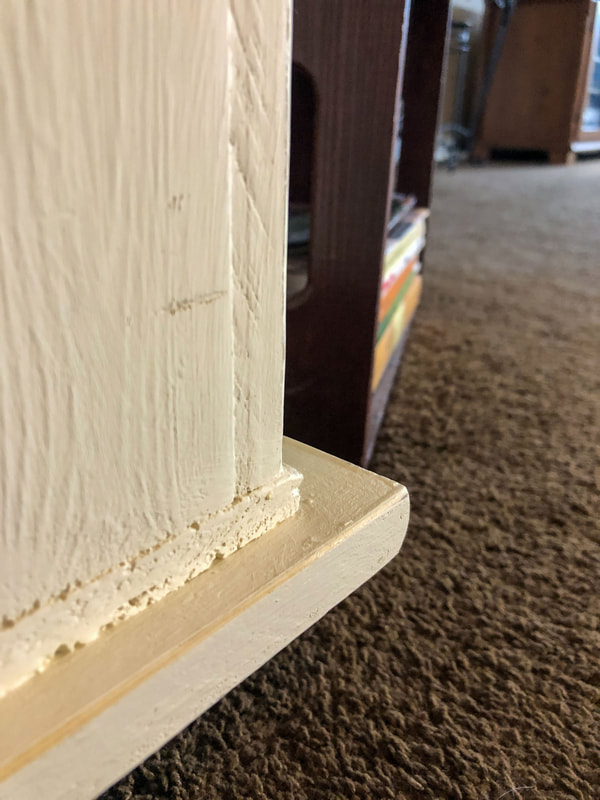 Bottom corner of rustic cabinet. Photo by Diane M. Lilly, 2021. Step 4: Painting and attaching the feet The choice for the feet was fairly easy. I already had a vision of what I wanted in my head based on some of the research I had been doing on furniture feet and French Country interior style. I wanted turned feet, low to the ground with a squat sturdy appearance, a bun foot design. Home Depot had these perfect and inexpensive basswood turned bun feet to give this cabinet the lift it needed to get it off the ground and add support. All four feet were treated with the same Varathane Cognac furniture stain and polyurethane as the cabinet top. Each one was then screwed into the bottom base a few inches from each corner. 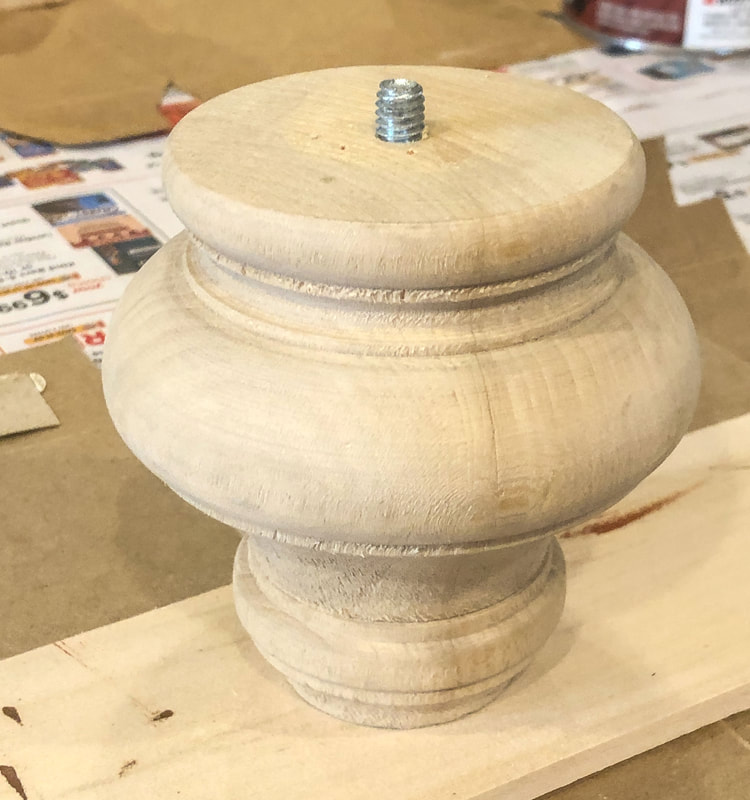 Unfinished turned bun foot. Photo by Diane M. Lilly, 2021. 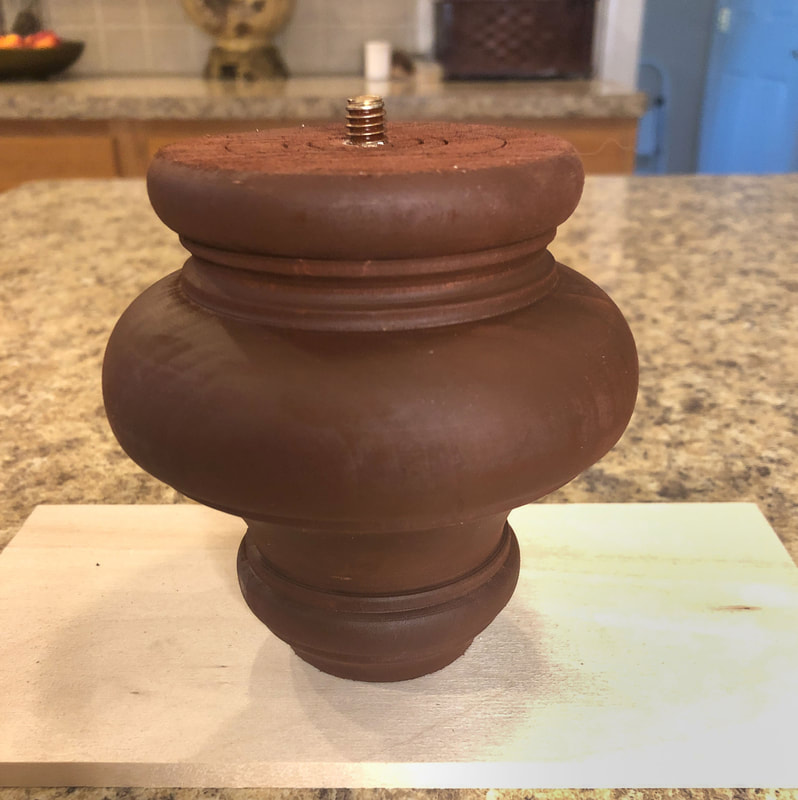 Newly stained turned bun foot. Photo By Diane M. Lilly, 2021. Step 5: Painting the cabinet body and doors I prepped the surface of the cabinet by giving it a once over with 100 grit sandpaper to remove any dirt and rough surfaces. The doors were taken off and painted first, with three coats of Rust-oleum Chiffon Cream chalk paint on each side, then the rest of the cabinet body was painted. It took three coats of paint to get the coverage I liked. (No matter what people online say, in my experience it always takes at least three coats of chalk paint to properly cover a surface, unless you prime it first.) The plan was to apply a clear wax finish to the chalk paint once it dried, but I tried it and hated it! For some reason, it seemed to leave weird colorations in some areas, so I stopped after only doing one of the (not as noticeable) sides. In the end, the part I actually treated with wax dried clear, but I didn’t want to take the chance of spending a lot of time and effort to ultimately destroy all my hard work painting! (It has to be said, though, I could’ve just painted over it to fix it.) My thinking is that nothing wet touches this piece, and I can always touch it up or repaint it if it gets too scratched, but right now I don’t mind the “worn” look. I even distressed some of the edges, just a little, for a subtle aged look. 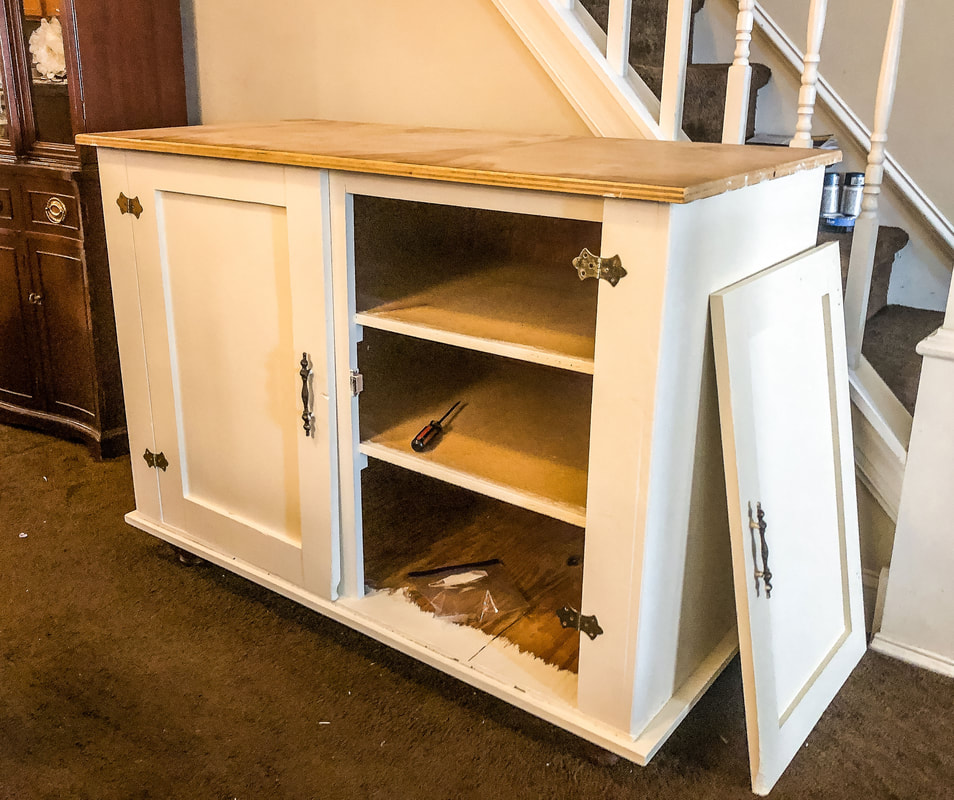 Chalk painted cabinet body. Photo by Diane M. Lilly, 2021. 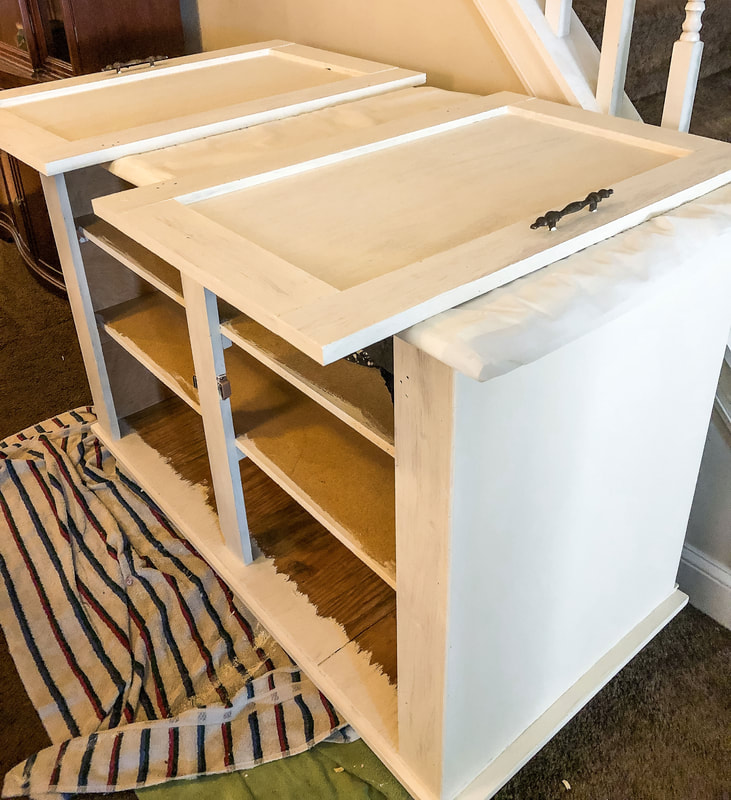 Cabinet doors drying after chalk paint. Photo by Diane M. Lilly, 2021. 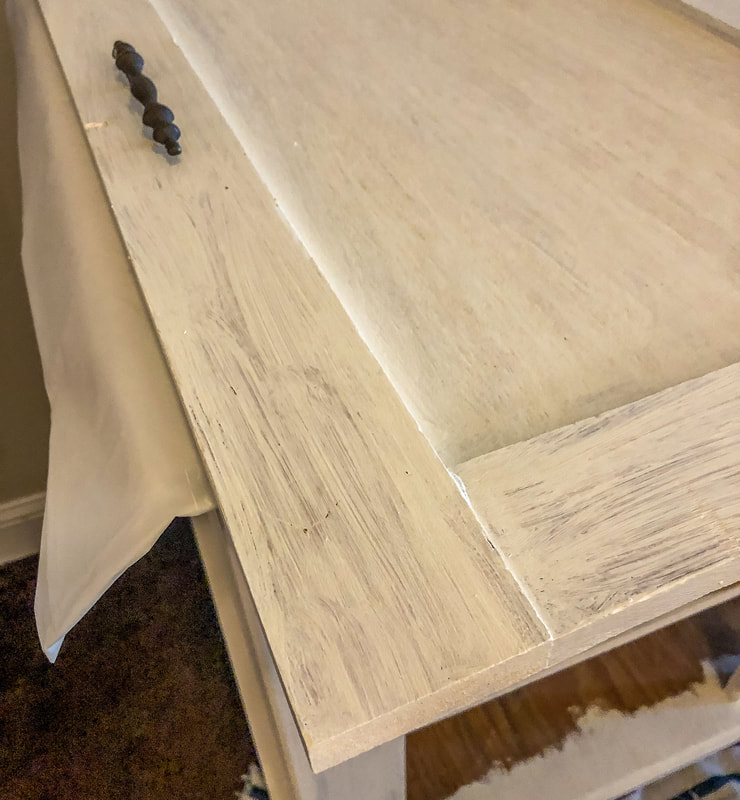 First coat of paint on cabinet doors. Photo by Diane M. Lilly, 2021. 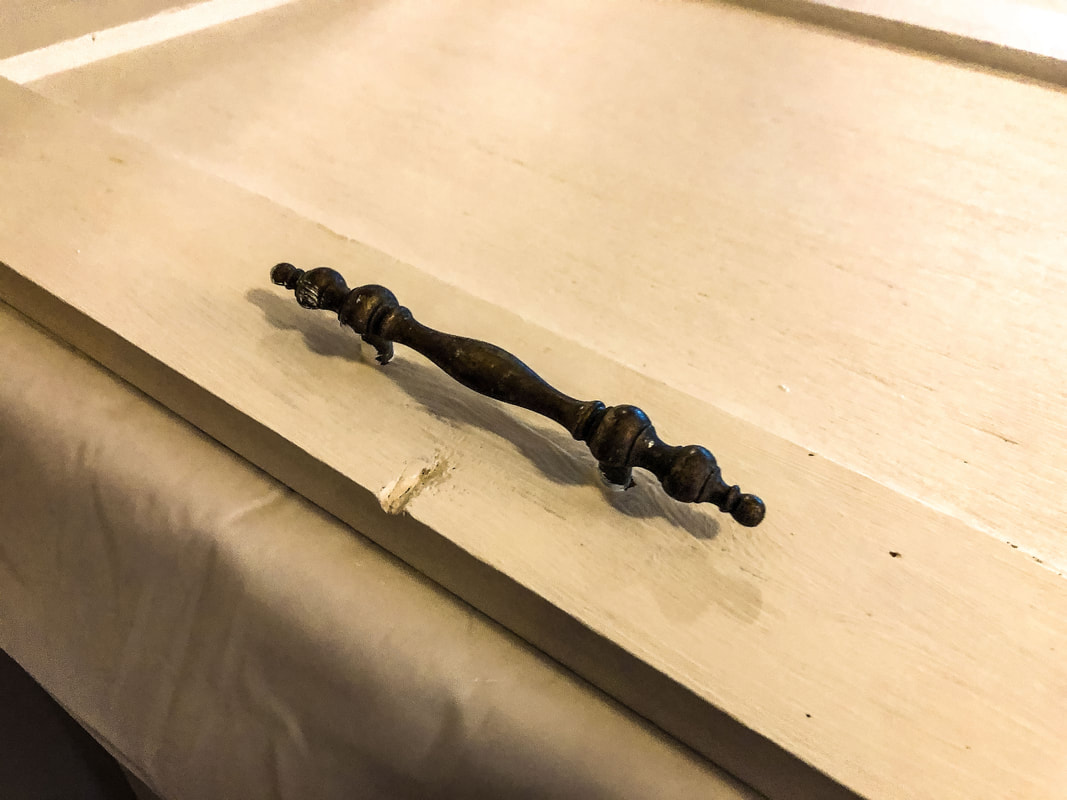 Cabinet door after three coats of paint. Photo by Diane M. Lilly, 2021. 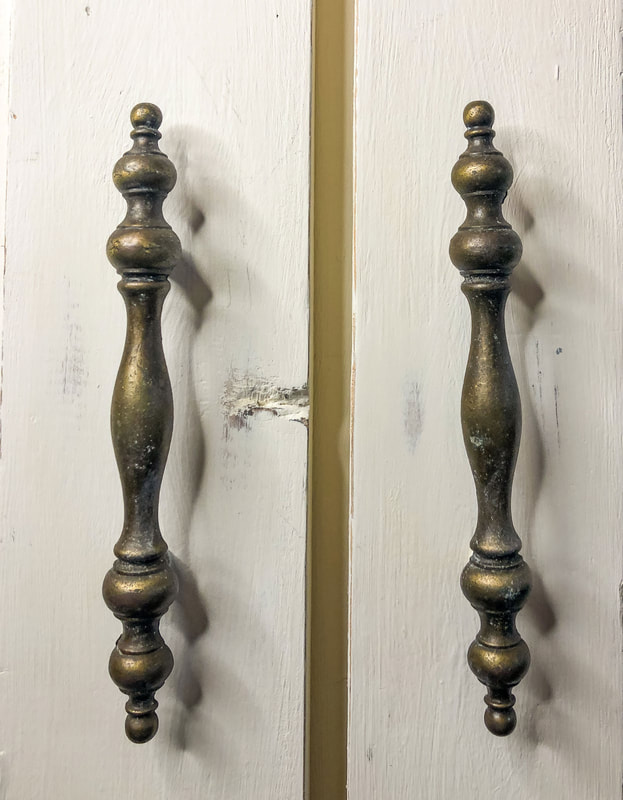 Cabinet door pulls and slight distressing of wood paint. Photo by Diane M. Lilly, 2021. Step 6: Lining the shelves with floral paper The inside of this cabinet need some love as well. I had this beautiful floral liner paper that I had been given and had no idea what to do with it. Then a light bulb went off—I could line the shelves of this cabinet with this beautiful paper, enhancing the quaint traditional style I was looking for in the finished piece. Each shelf was lined with this floral paper, which was attached with glue. When all of the detail work was done, the doors were reattached and the cabinet base was prepped for the next step—staining the top. 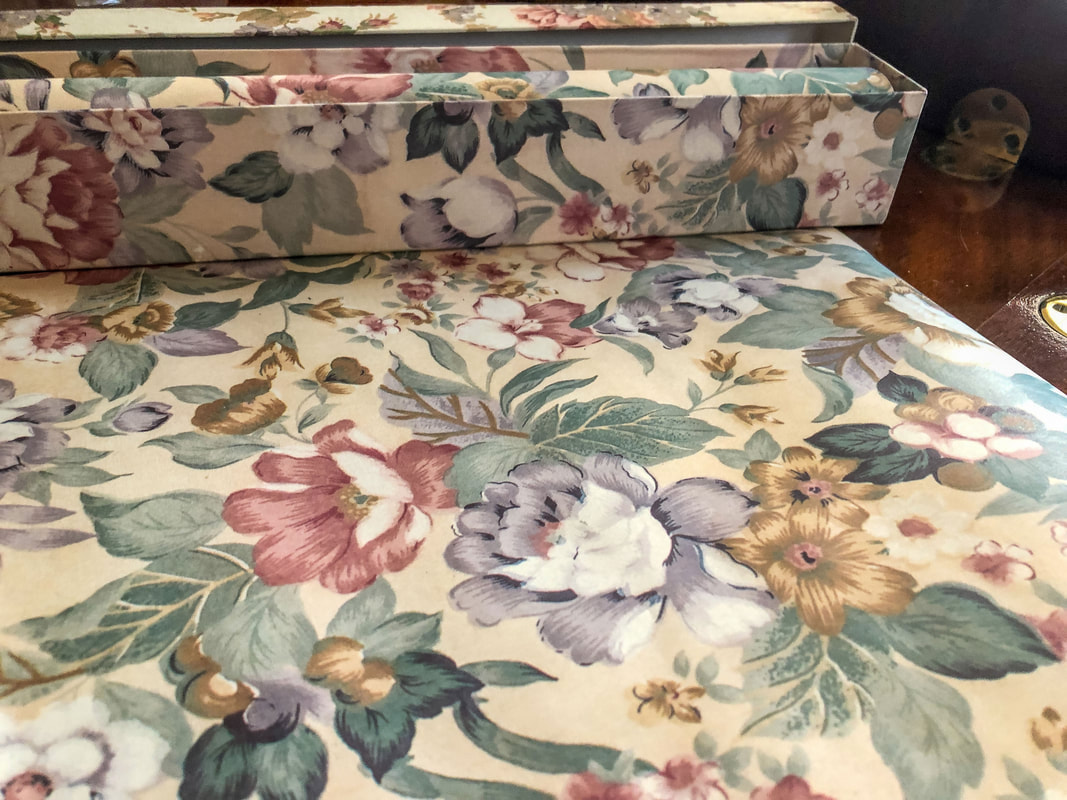 Floral paper for shelves. Photo by Diane M. Lilly, 2021. 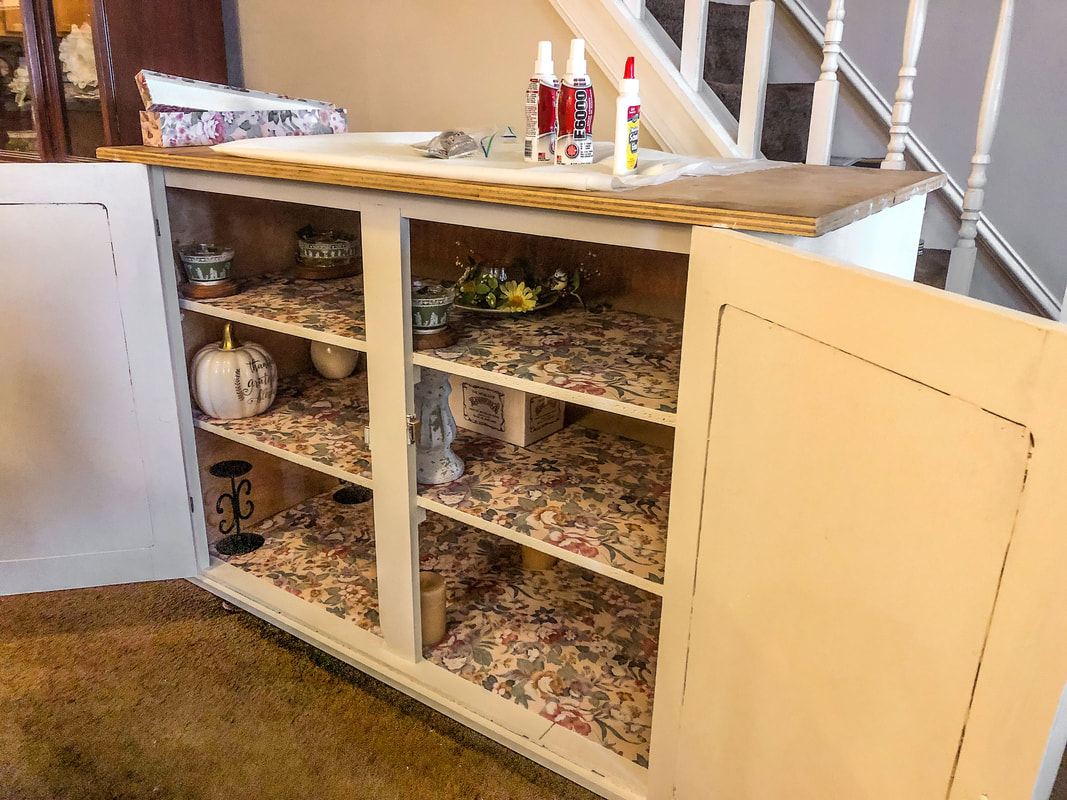 Cabinet shelves lined with floral paper. Photo by Diane M. Lilly, 2021. 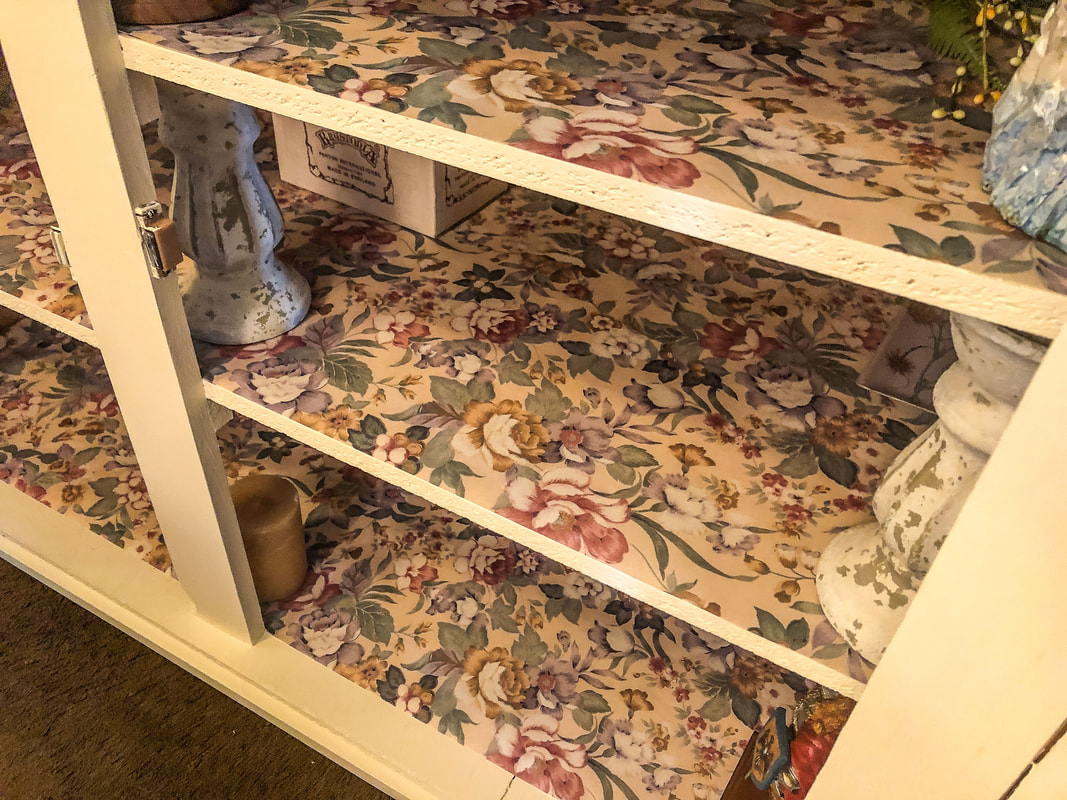 Closeup of cabinet shelves lined with floral paper. Photo by Diane M. Lilly, 2021. Step 7: Painting and finishing the cabinet top The cabinet bottom was wrapped in trash bags and secured with painters tape because I really did not want to get a red stain on my freshly painted white surface! After lightly sanding the top to clean off any dirt and grime, I applied two coats of stain. Boy does this stain dry fast! I was able to apply a second coat in less than an hour! I waited until the next day to apply the final satin finish (Varathane Polyurethane), and half a day later I unveiled my latest furniture piece for my dining room! 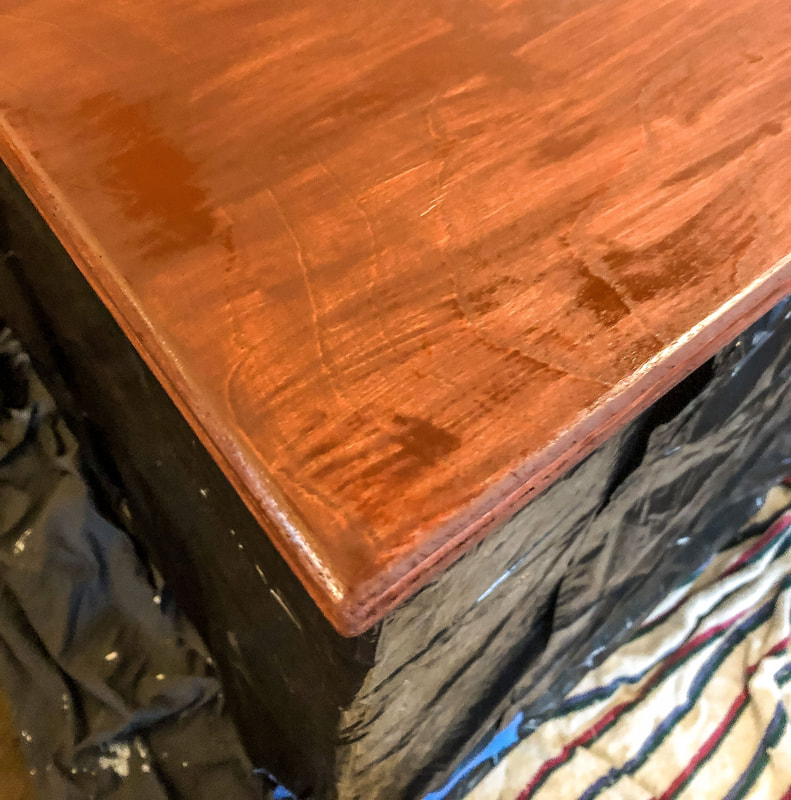 First coat of Cognac stain on cabinet top. Photo by Diane M. Lilly, 2021.  Cabinet top after fully stained and finished. Photo by Diane M. Lilly, 2021. 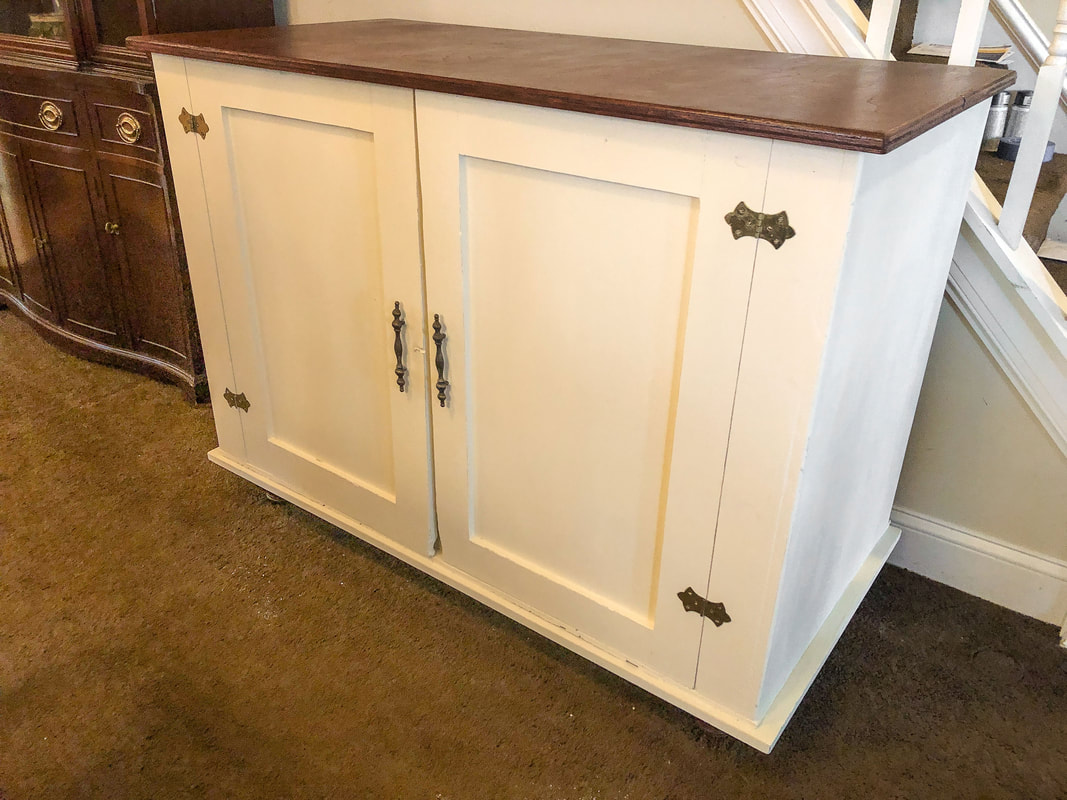 Cabinet refurbishment when done. Photo by Diane M. Lilly, 2021. Step 8: Dress it up! The big unveiling took my breath away! The finished piece looks amazing in my dining room and fits right in! My dining room has become a very nice space to work in, especially once I pulled out the decor and gave the space some much needed interior styling detail. I’ve created a space I love in the style that suits my tastes and inspires me to want to sit down and work in the morning…And that is priceless! 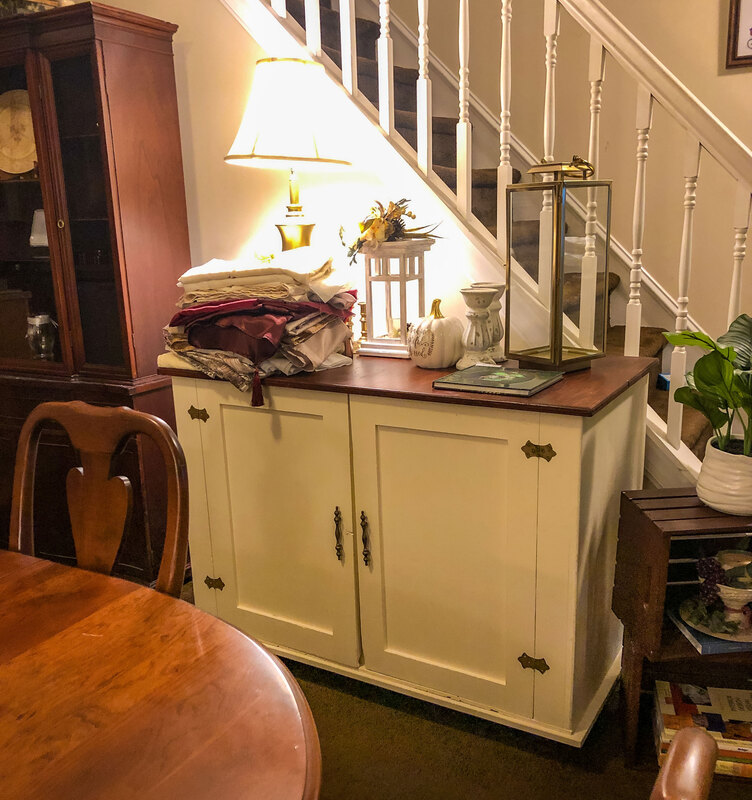 Getting ready to decorate the cabinet top. Photo by Diane M. Lilly, 2021. 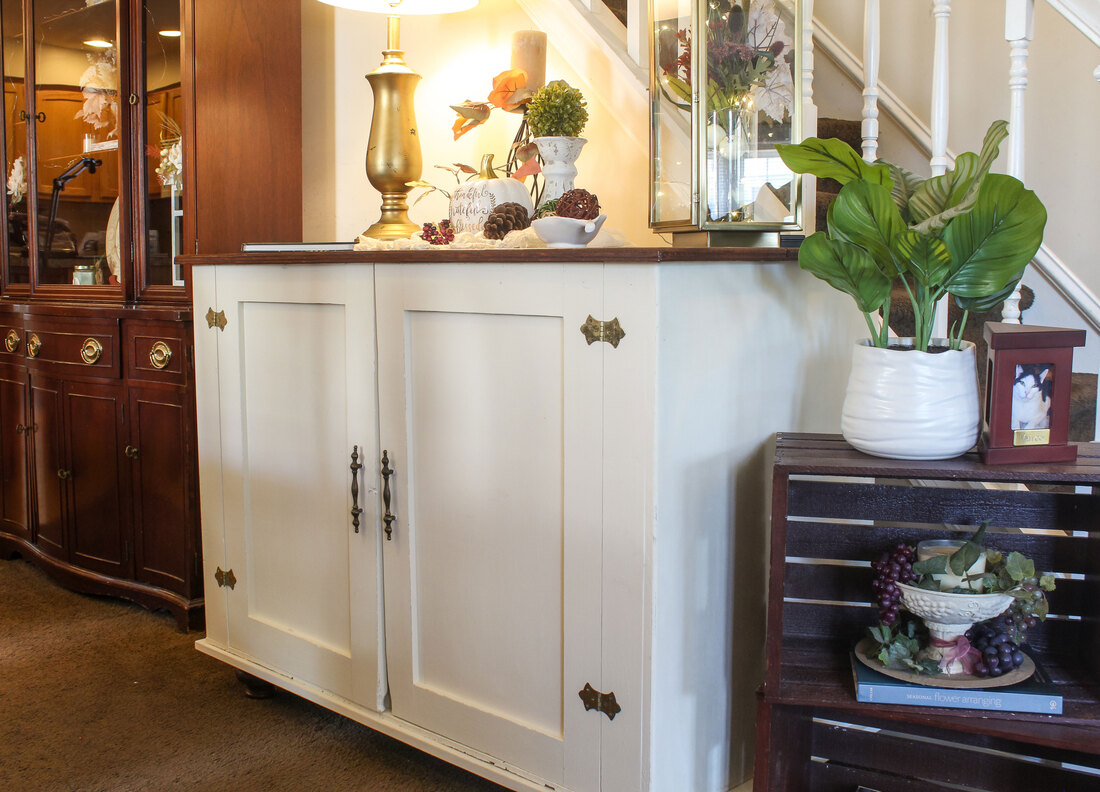 The fully finished cabinet, refurbished and decorated. Photo by Diane M. Lilly, 2021. Let me know what you think of my little project in the comments below! If you’d like to be notified of new blog posts or merchandise sales you can sign up for my monthly newsletter (coming soon) on my contact page. And if you’d like to see what I’m up to on social media, click on the links below! Related blogs you may want to read: How to replace a clock mechanism How to rewire thrift buy lamps Creating a kitchen coffee bar Comparing DIY upholstery cleaning methods My dining room redesigned as a multi-functional space A fun DIY project with paint and a thrifted mirror, part 1 A fun DIY project with paint and a thrifted mirror, part 2 Affiliate Disclosure Some of the posts in this article contain affiliate links. This means if you click on the link and purchase the item, I will receive an affiliate commission at no extra cost to you. I will only recommend products or services I use personally and/or believe will add value to my readers, so there is no conflict of interest. In Part 1 of this project blog I repainted a frame from a mirror I bought at a local thrift shop for dirt cheap. My original intention was to paint a base coat for the reddish undertones I wanted to show through a crackled gold top coat. The end result looked ok…for a different room. The almost solid gold color just looked gaudy in my dining room, even though I have a lot of decorative things with gold accents. This mirror, unfortunately, was just too over-the-top gold. The end result was me painting over it with a new layer of crackle and white craft paint. 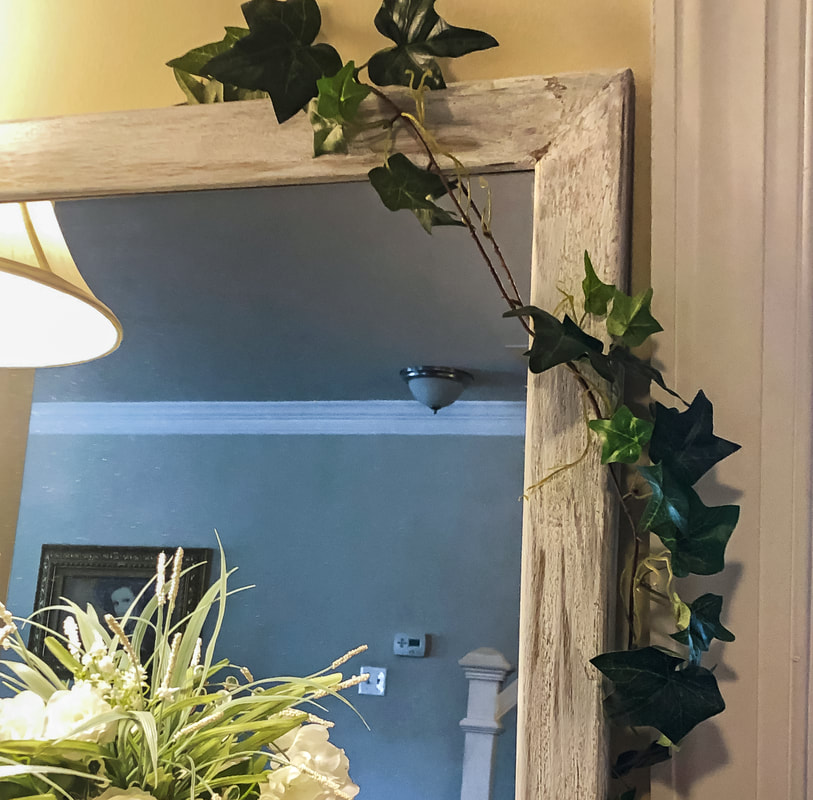 Painted frame from the previous DIY project. Photo by Diane M. Lilly, 2021. And this is where I left off in Part 1 of this project…My task now was to find a way to fix this mirror and make it work in my dining room. So I’m standing there—several hours of work and layers of paint later—wondering why this frame does not work. It just didn’t feel finished. I kept looking at it and trying to visualize how to get a more ornate look with gold accents. And then it hit me…This mirror needs a gold Celtic knot! I brainstormed and created templates of straight border knots that I would eventually trace onto the frame. I drew ideas on a sketchpad until I got a design I liked. This was a challenge—I knew I wanted to accentuate the corners and midpoints along the frame, so my border has broken to create visual interest, but I admit it took me some time to get the design right! Once I finally got the design I wanted, the pattern was redrawn at full scale on grid paper. The idea was to create a template that I would trace onto the frame so that it could be painted in…wait for it…GOLD! 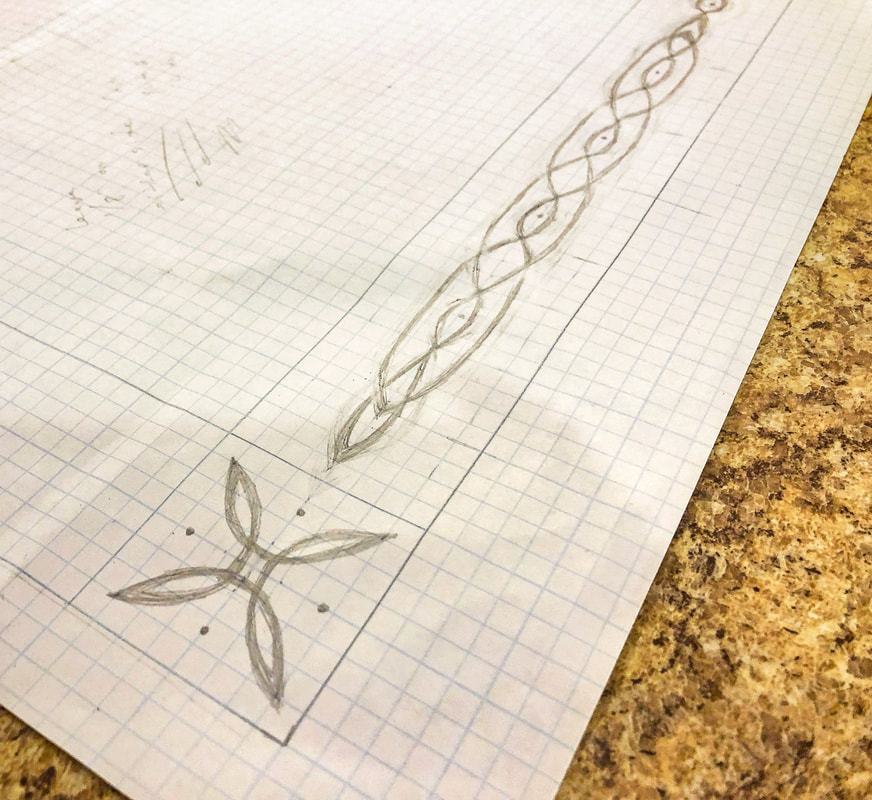 Basic lifework for my new Celtic border. Photo by Diane M. Lilly, 2021. 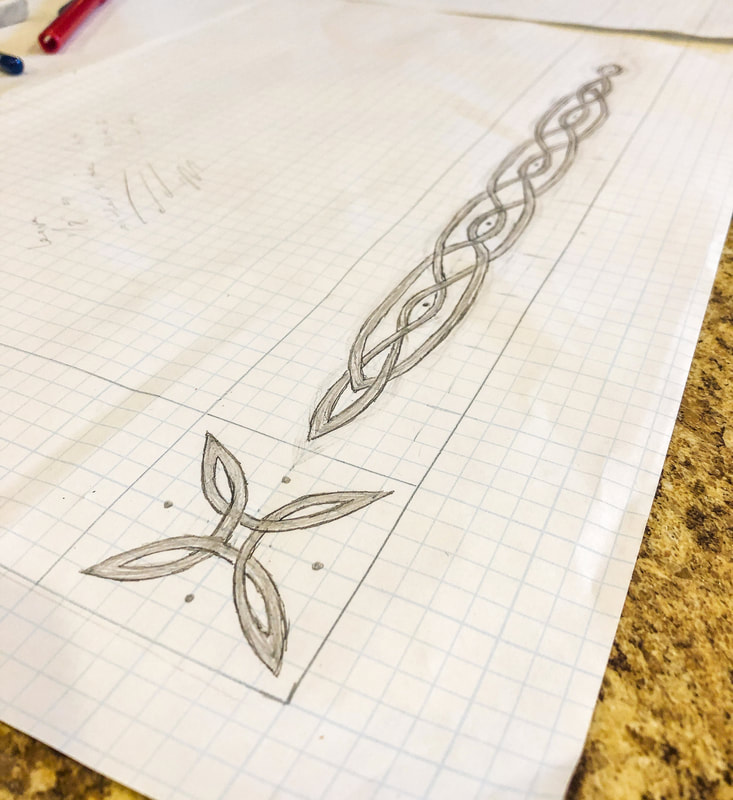 Finished knot work for template of the Celtic border. Photo by Diane M. Lilly, 2021. The template I made only needed the top and left sides with three corners, so some of the work could be simplified. Once the top and left side were traced, I could flip the paper over and retrace the design on the bottom and top. Using a very dark pencil, I traced the finished design on the back side of the paper, turned it over, and then lined it up on the frame. The paper was carefully taped down, and I painstakingly traced my knot design onto the two-inch wide wood frame. With the design template drawn onto the frame, it was time to paint! 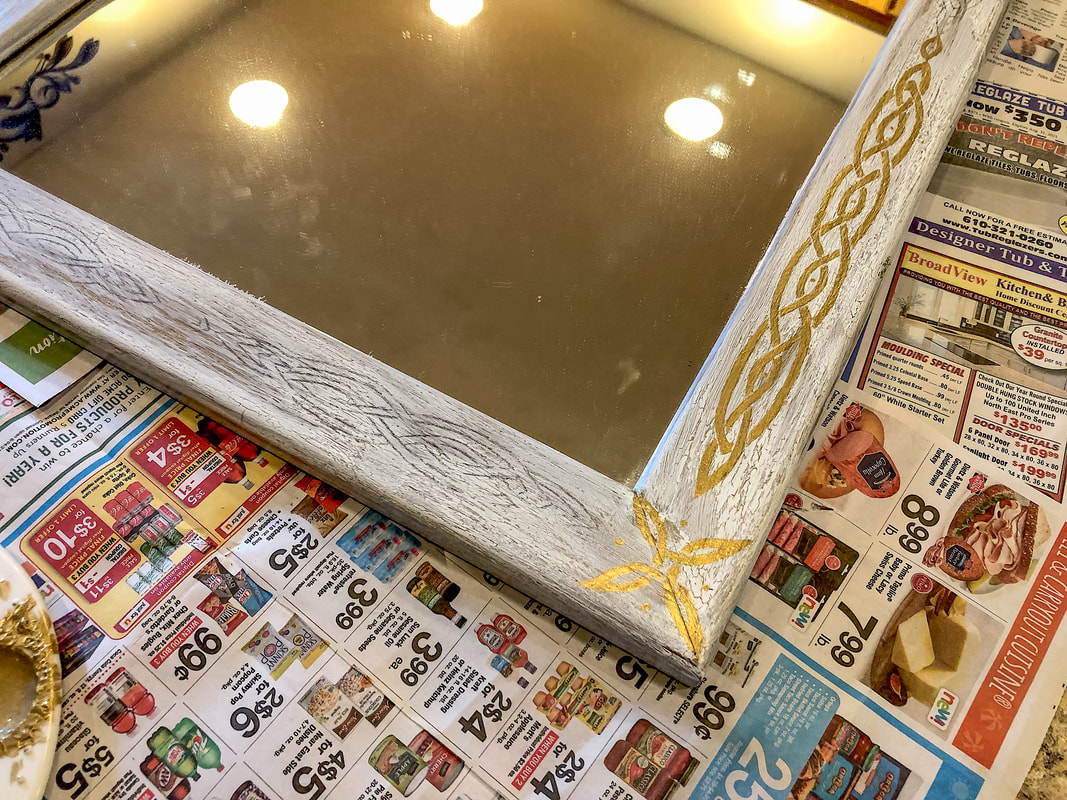 View of template on frame and some of it painted gold. Photo by Diane M. Lilly, 2021. The brush used was a very fine brush with bristles that came to a point, so that my very shaky hands could control the brush strokes! It took two very carefully applied paint layers to finish the gold knotwork, but this design element was the perfect touch and made all the difference in the world! I now have a work of art and a mirror that fits in well with all the other understatedly classy pieces of decor in that space. I love this piece, and it is versatile enough to use elsewhere should I decide to move it. But for now, it stands in pride of place above my new office drawers (which are in my dining room, but that’s another blog post!).  Finished painted knot work on frame corner. Photo by Diane M. Lilly, 2021. 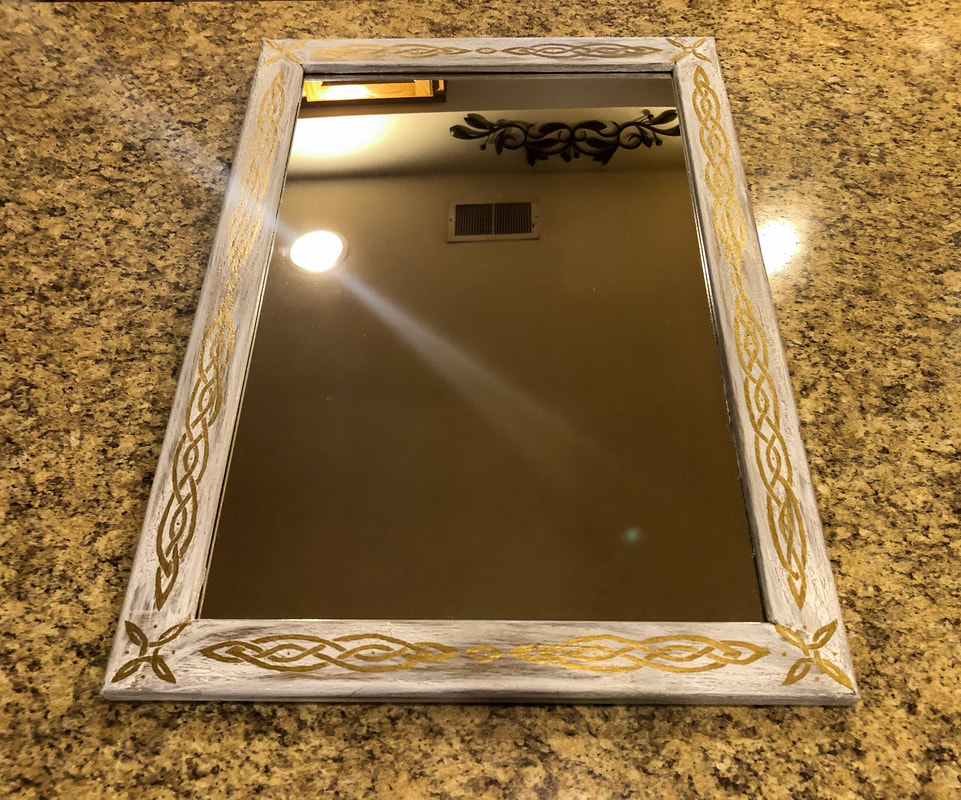 View of the frame and mirror with gold painted Celtic knot work border. Photo by Diane M. Lilly, 2021. 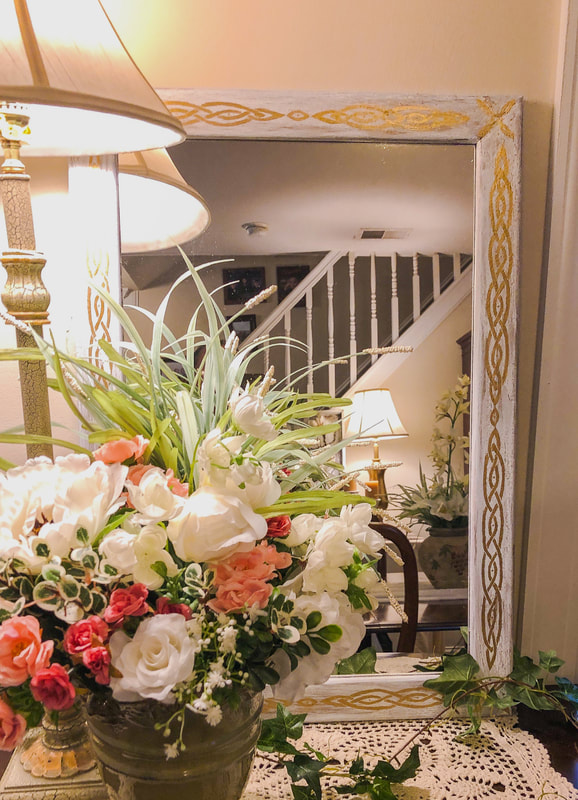 Finished mirror in a dining room vignette. Photo by Diane M. Lilly, 2021. 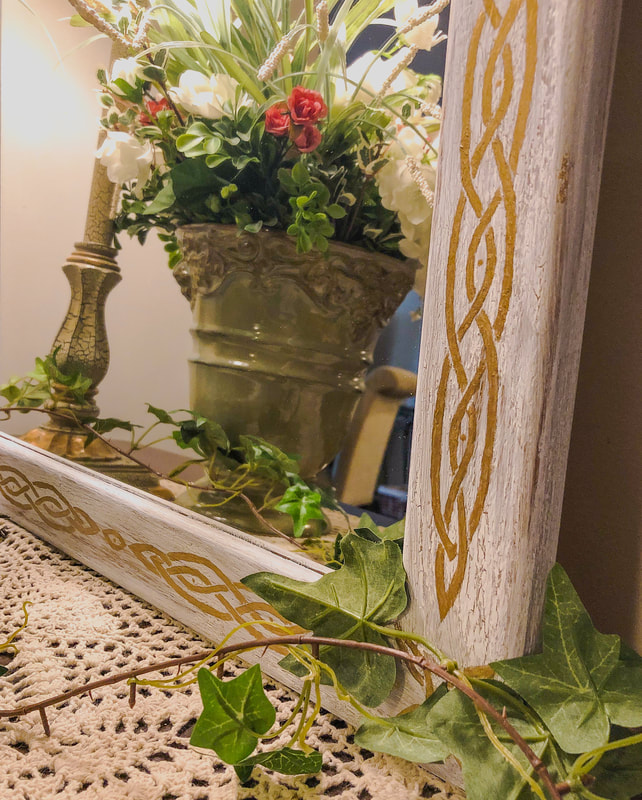 Closeup of finished gold painted Celtic knot work border. Photo by Diane M. Lilly, 2021. Let me know your thoughts on this project in the comments below, and don’t forget to read Part 1 to see how this whole thing started! Let me know if you’d like to see more of this type of project in the future. If you’d like to be notified of new blog posts or merchandise sales, you can sign up for my monthly newsletter (coming soon) on my contact page. And if you’d like to see what I’m up to on social media, click the links below! Related blogs you may want to read: Part 1 of this project My top thrift finds this year How to replace a clock mechanism How to frame small canvas art How to rewire thrift buy lamps DIY Fall/Winter decorative branch box Creating a kitchen coffee bar My dining room redesigned as a multi-functional space DIY refurbishment of a dining room cabinet 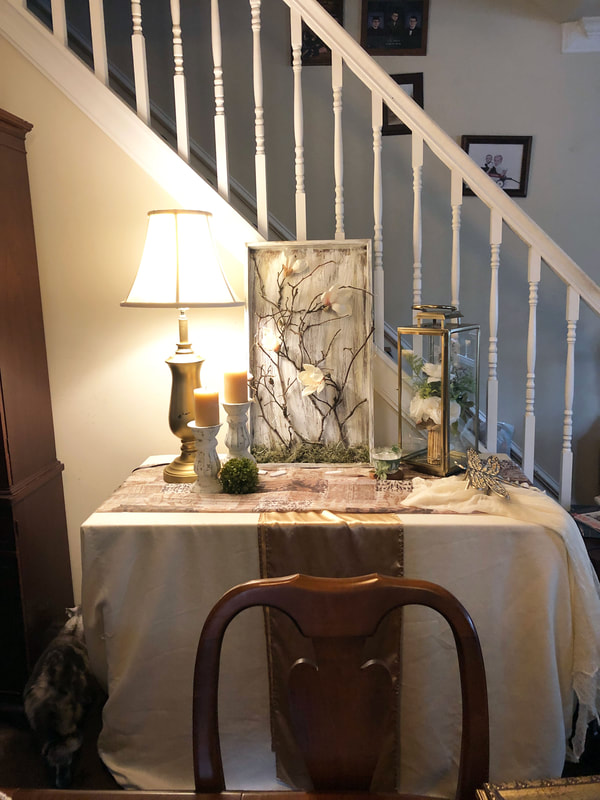 "New" thrift lamp, rehabbed and staged. Photo by Diane M. Lilly, 2021. While casually strolling through a local thrift shop, I happened to spy these two gorgeous lamp bases. I knew they were just perfect for my dining room vignettes, but they needed a little work first. One was missing the lamp shade and harp components, while the other just needed some TLC. Both lamps needed to be completely rewired to replace the cords that were older than grandma. Don’t need any electrical fires here! So today’s project will be to replace the lamp cord for each lamp. 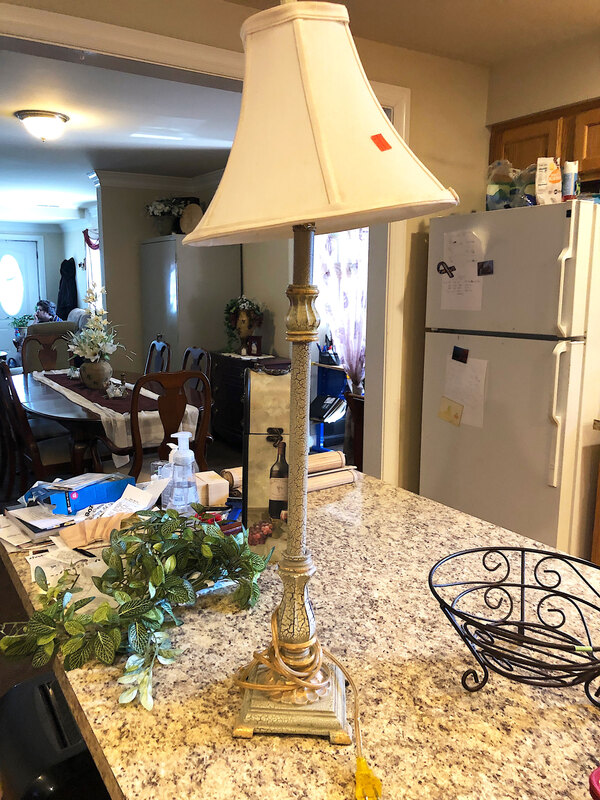 Candlestick lamp purchased at Goodwill. Photo by Diane M. Lilly, 2021.  Base of a gold lamp purchased from Goodwill. Photo by Diane M. Lilly, 2021. Two lamp kits from my local Home Depot cost me about $17 each. They have three way switches, so that I can adjust the light…Perfect! Saving energy already! I also needed to purchase a new harp and lamp shade for the gold lamp base, which was the most expensive part of this project by far! So I have my two lamp bases and the lamp kits and shades... 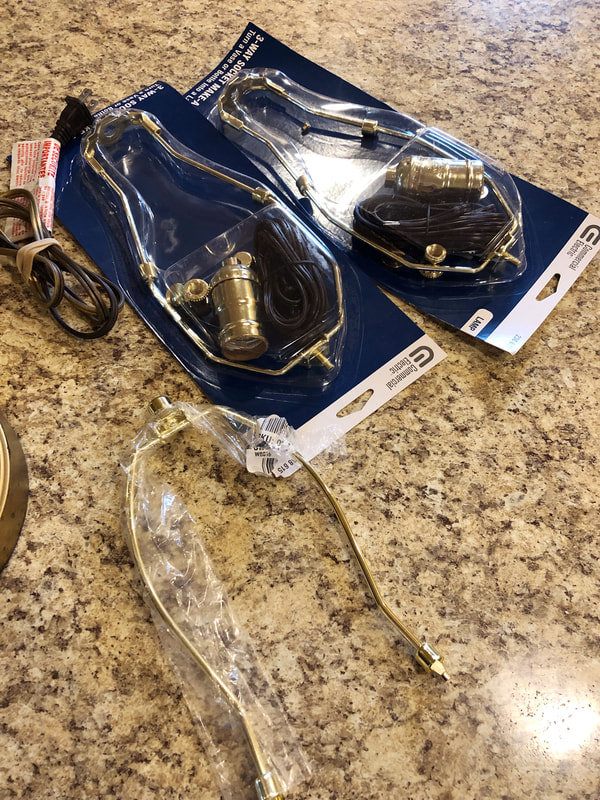 Lamp kits purchased from Home Depot. Photo by Diane M. Lilly, 2021.  Harp for lamp shade. Photo by Diane M. Lilly, 2021. 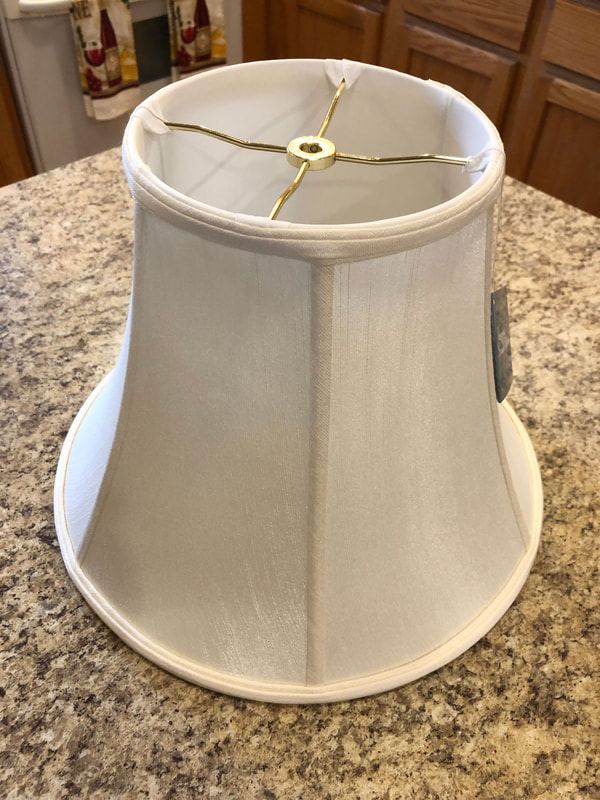 New lamp shade. Photo by Diane M. Lilly, 2021. 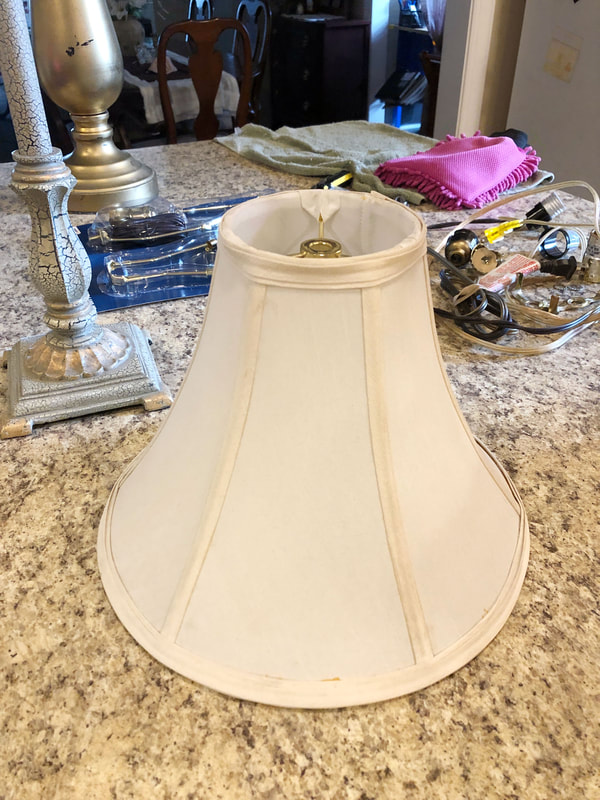 Existing lampshade from candlestick lamp to be cleaned. Photo by Diane M. Lilly, 2021. All I need to do now is take out the old wiring and put in the new and improved wiring, but first let’s sort out the basic anatomy of a lamp and its electrical fittings… 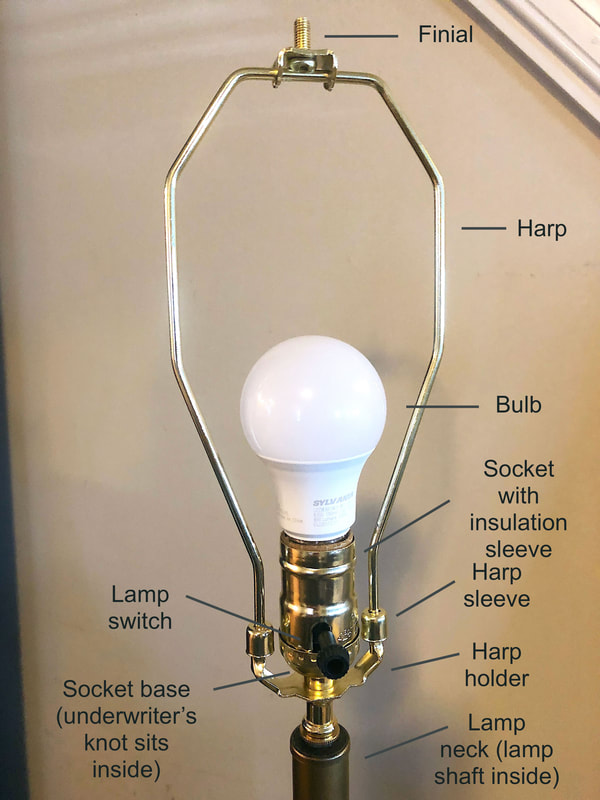 Lamp anatomy. Photo & diagram by Diane M. Lilly, 2021. You may need to refer back to this diagram from time to time during the process, so that’s why I thought this diagram would be useful! After all, it’s not like any of us replace lamp cords every day, right? Taking out the old wiring… First…please, please, unplug the lamp first! Never, ever do electrical work when an appliance is plugged in! You can start with something easy—unscrewing the decorative top finial (if there is one) from the harp (see diagram). Remove the harp by lifting the sleeves that hold it in place, pushing the ends of the harp towards each other. You can remove the felt base of the lamp (if there is one) to access the cord and cut at the bottom. Remove the top part of the socket and insulator. (Try squeezing it to get it out. There may also be a screw that will require removal on the socket base, so if it doesn’t come off look around for that screw.) Unscrew the wires from either side of the socket. (May have two different color screws corresponding to the positive and negative wires.) Unscrew the base of the socket. Untie the knot (underwriters knot) in the cord that holds it in place and pull the cord out. 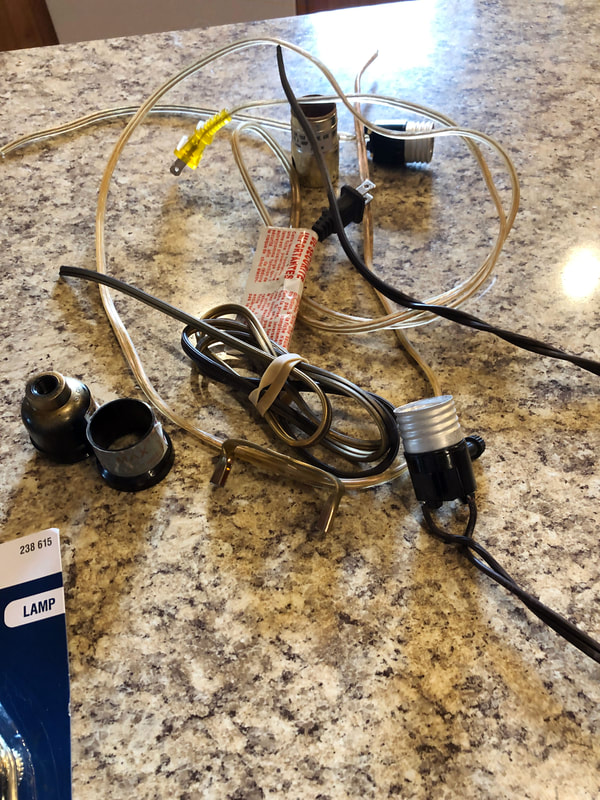 Old wiring taken out of thrift lamps. Photo by Diane M. Lilly, 2021. And putting in the new wiring… Take the new cord and twist the two separated ends together (if they are not together already) so you can feed the cord through the bottom of the lamp and up through the shaft. Once the cord is all the way through you can put the new base cap back on, screw it down, tighten set screw (if it has one). Separate the two strands of wire to give enough wire needed to tie a knot and wrap around the screws. Tie an underwriter’s knot…Loop one wire end in front of the cord (like half a bow), loop the second wire end around the back of the main cord shaft and push it through the first loop, now take the end of the first loop and push it through the second loop, then pull both ends to create a knot. After you tie the knot, pull the cord through the lamp shaft to tighten the slack. Now it’s time to attach the wires to the socket. Take the new socket apart to find the part where the wires are attached. Note about the cardboard insulator inside the socket…You must have it because it is the insulation and is a safety mechanism for the the electrical components. Do not throw it away! It’s supposed to be there, so leave it in place. Look for the brass and silver screws—these create the polarization. Brass is hot, silver is neutral and these screws correspond to the plug at the other end of the cord, with the wide side being neutral and small side being hot. When you look at you lamp cord, one side of the wire is smooth (for the hot screw) and one is ribbed (for the neutral screw). So match up the brass screw with the smooth wire (sometimes wire will have a black tip) and the silver screw with ribbed wire (sometimes wire will have a silver tip). This part is really important for electrical safety and lamp function. Loosen two screws and wind the corresponding wire to the appropriate screw, using needle nose pliers to create a clockwise turn with the wire around the screw. Once the wires are connected—and double checked for safety—put the socket pieces back together by pushing down until everything goes into place. All that’s left is to attach the harp and shade, and screw in the lightbulb! 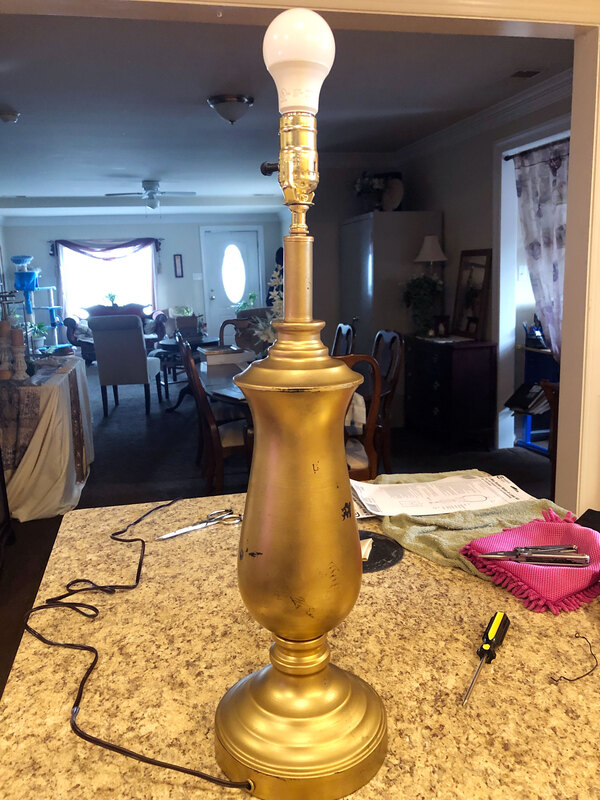 Gold lamp rewired and lit. Photo by Diane M. Lilly, 2021. 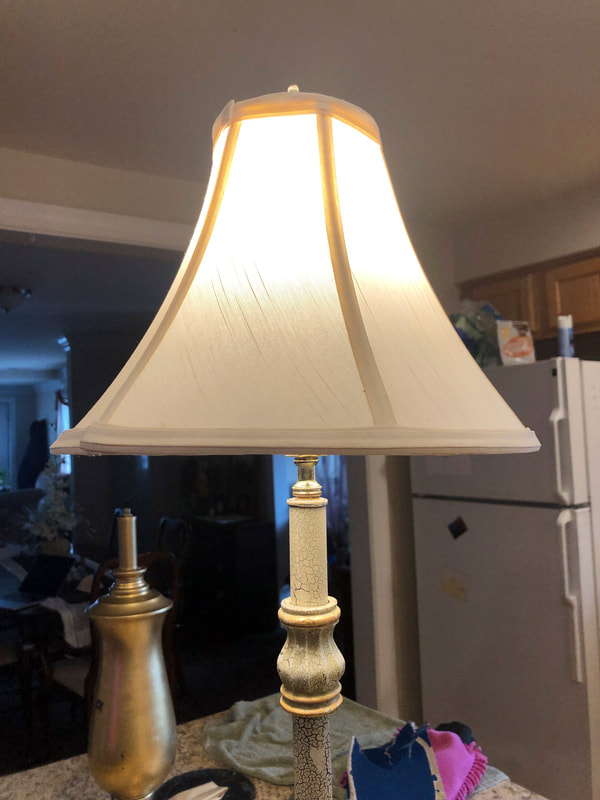 Candlestick lamp rewired and lit. Photo by Diane M. Lilly, 2021. A couple of real life situations… Ok, so now that I’ve shared the steps required for taking apart and re-assembling a lamp to rewire it, let me share with you my ACTUAL experiences with the two lamps I recently rehabbed. 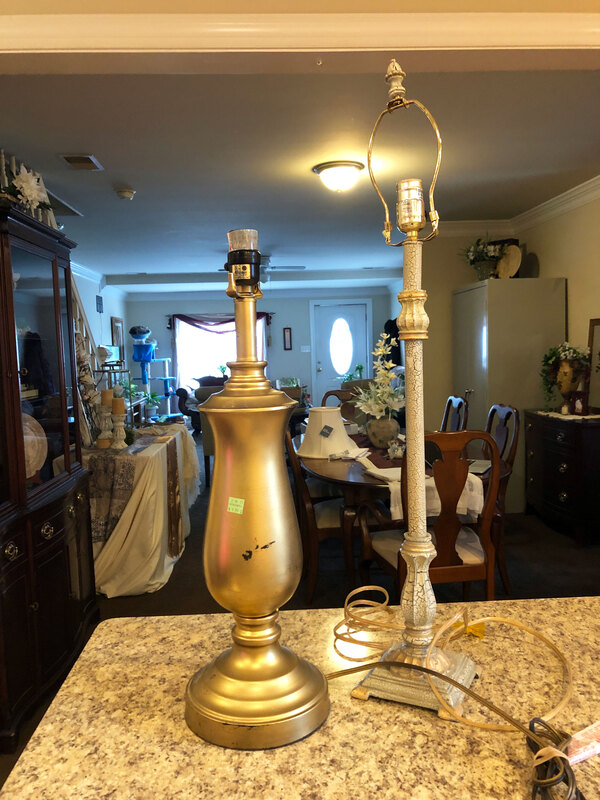 Two lamp bases before rewiring. Photo by Diane M. Lilly, 2021. Lamp #1…My new candlestick lamp Whoever owned this lamp before me not only re-assembled the socket crooked, they glued the top and bottom of the lamp shaft. Long story short, it took my son and I—and several tries with a variety of wrenches and tools—to pry this baby apart. We had to untighten the shaft from the lamp base so that we could get the top bit out to get a handle on the crooked socket base and glued in washer and harp seat. This lamp gave us such a problem! What should’ve take no more than maybe 15 minutes to do, took us almost an hour. Once we were able to sort that mess out though, it was smooth sailing! We just followed the instructions on the package (which are essentially the same as the ones listed above) and had my salvaged lamp wired and lit up in no time. Oh and I almost forgot to mention—I had to clean the filthy shade with soapy water and thankfully I didn’t ruin it! 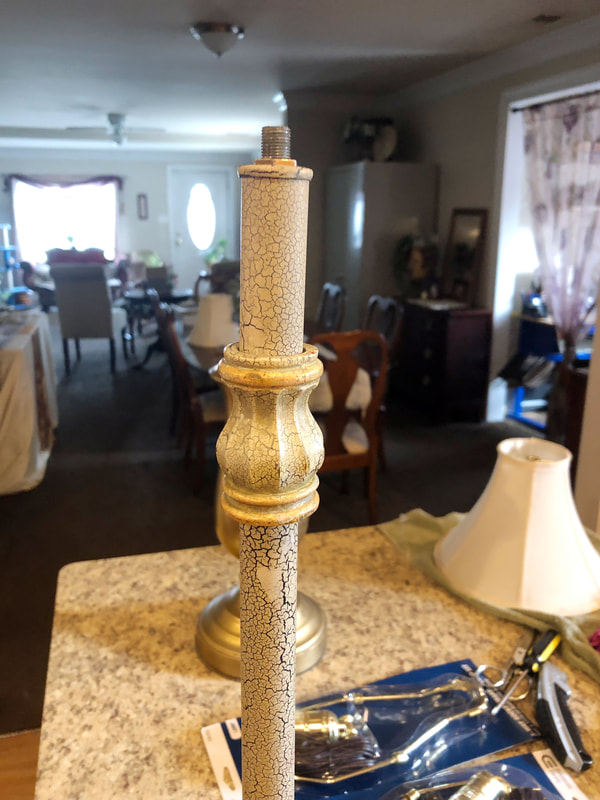 Candlestick lamp base after the socket base was removed. Photo by Diane M. Lilly, 2021. 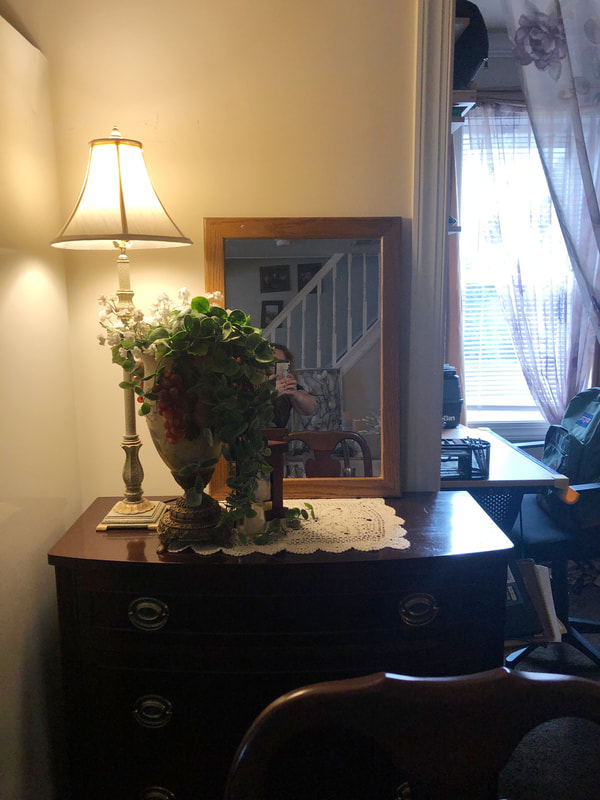 Candlestick lamp finished and staged in my dining room. Photo by Diane M. Lilly, 2021. Lamp #2…My new gold lamp This one was much easier, but sort of had the opposite problem. Unlike the candlestick lamp—where the shaft was all one piece—the gold lamp’s shaft was in three pieces, and loose, and when I tried to fish the new wire through it just got stuck. So we had to take the whole lamp apart and fish the wire through bit by bit, then re-assemble and tighten the whole ensemble. Then it was smooth sailing…again. 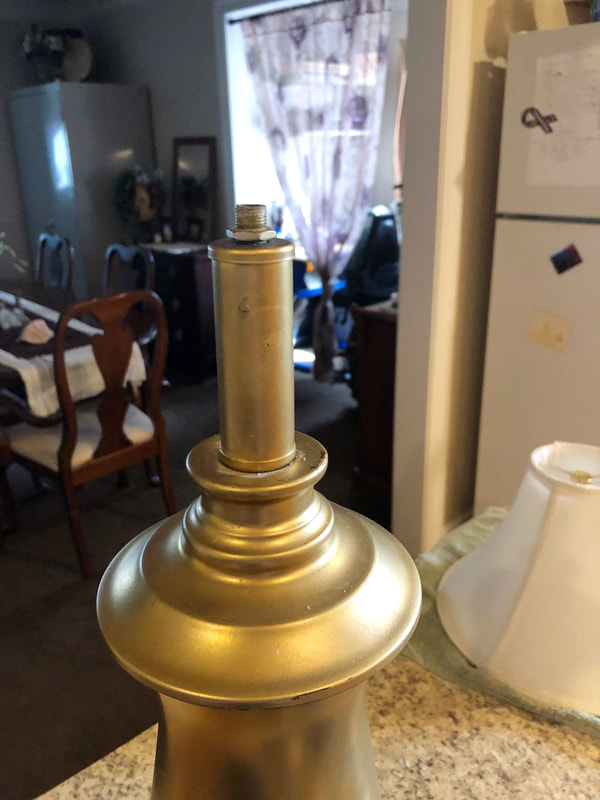 Gold lamp after socket base was removed. Photo by Diane M. Lilly, 2021. 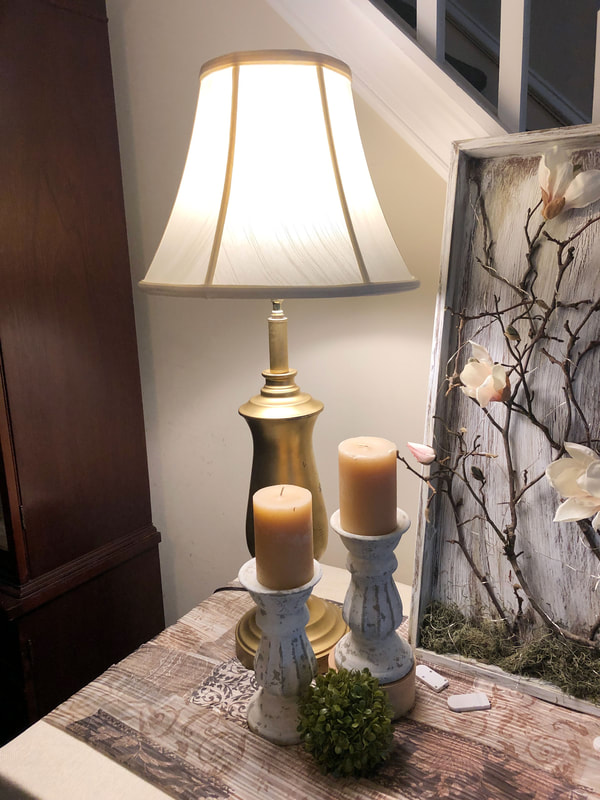 Gold lamp rewired and staged in my dining room. Photo by Diane M. Lilly, 2021. The moral of the story is when you are dealing with thrift lamps, expect the unexpected! It probably will not be as easy as you hoped, so leave a little time to figure it out. Unlike Youtube videos—which make it look and sound soooo easy—the real thing can be tricky, but with a little perseverance and elbow grease it will be well worth it to rehab an interesting old lamp! Even with all of the problems I encountered with these lamps, I love the special character they each bring to the room and the vignettes in which the were placed! Please feel free to add your own comments and experiences below. And, as always, you can to add your name to my email list to start receiving monthly notifications for new blog posts, new items, sales, and other exciting stuff from Di’s Studio Designs. This article contains external links for demonstration purposes only, and I am not being financially compensated for specific products or brands. Related blog posts you may want to read: My dining room redesigned as a multi-function space How to replace a clock mechanism How to frame small canvas art Creating a kitchen coffee bar Comparing DIY upholstery cleaning methods DIY refurbishment of a dining room cabinet 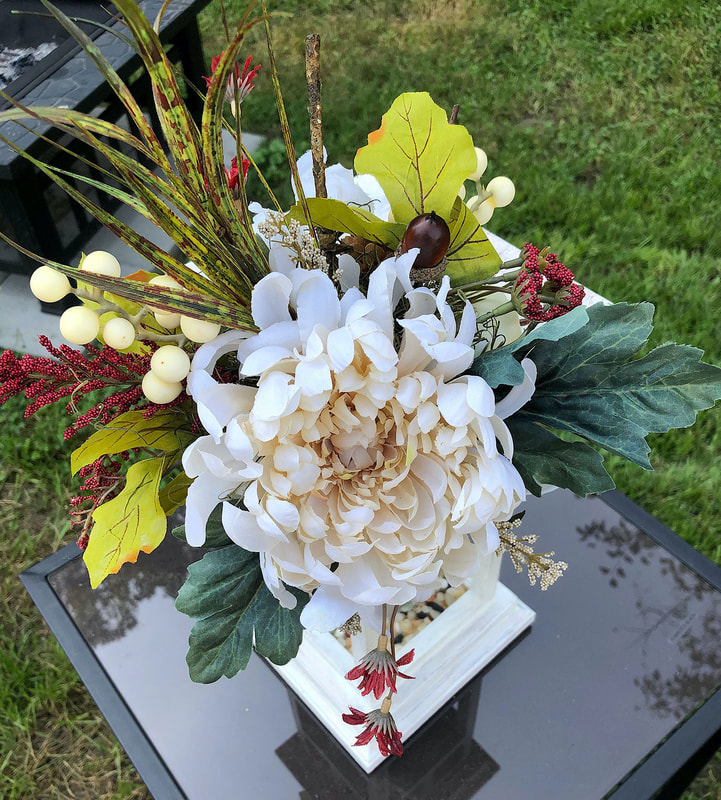 Fall Foliage Decorative Lantern by Di's Studio Designs. Di’s Studio Designs has added something new to the line of handcrafted decorative candleholders—wooden lanterns! I’ve wanted to create lanterns for quite a while, but so many other projects and priorities cropped up that I just had to file the idea in the back of my mind to try later. The idea came to me a few years ago when I made an Asian-themed wood decor table tray. I just fixated on the lanterns and thought…“That could be a stand-alone design!”.  Asian Tea Party hand crafted wood decor by Di's Studio Designs. Somewhere in the deepest recesses of my mind, I started visualizing what I wanted my lanterns to look like once I finally got around to the project. The simple lines remind me of Japanese design (which I have an affinity for), and lanterns—with their intrinsic relationship to gardens—are perfect for use with faux florals.  Image from Pixabay, 2020. Lanterns of all shapes and sizes are making their appearance in weddings…And what goes hand in hand with weddings? Flowers! 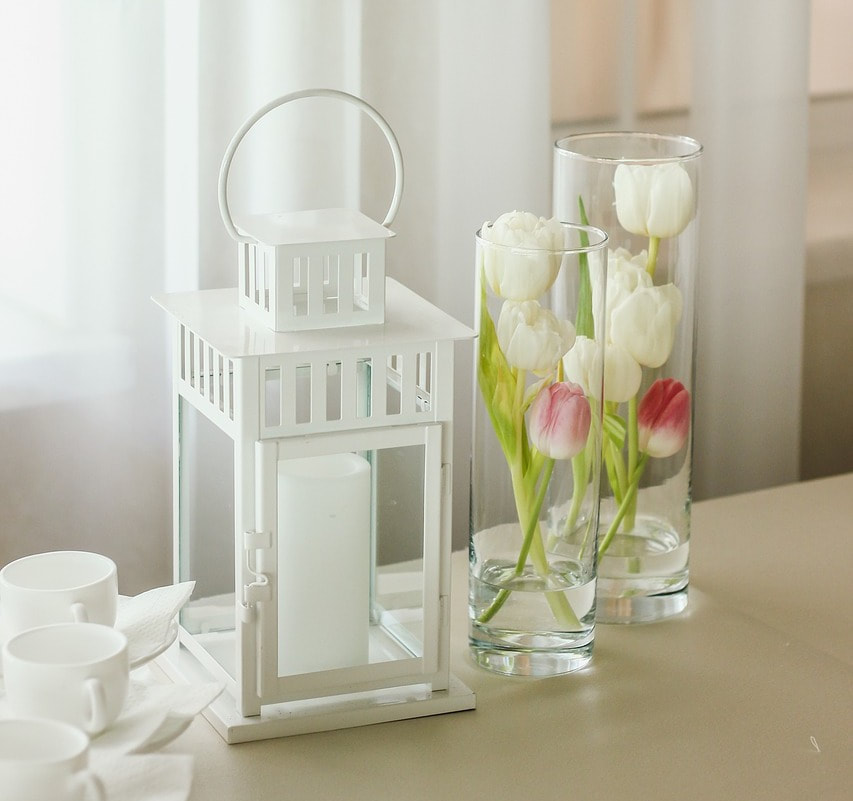 Image from Pixabay, 2020. While exploring Pinterest for Fall wedding themes (as part of my research into the latest trends), I found some striking fall floral color schemes and lantern ideas. Then, I got to work on the floral designs for my lanterns, inspired by my previous Asian Tea Party project. As usual, I bought wood from Balsa Wood Inc., florals from Michaels and Factory Direct Craft, and votive holders and LED candles from Michaels. All my wood pieces are hand-cut (except for the base and top, which I bought pre-cut from FDC) and assembled using wood glue and nails. 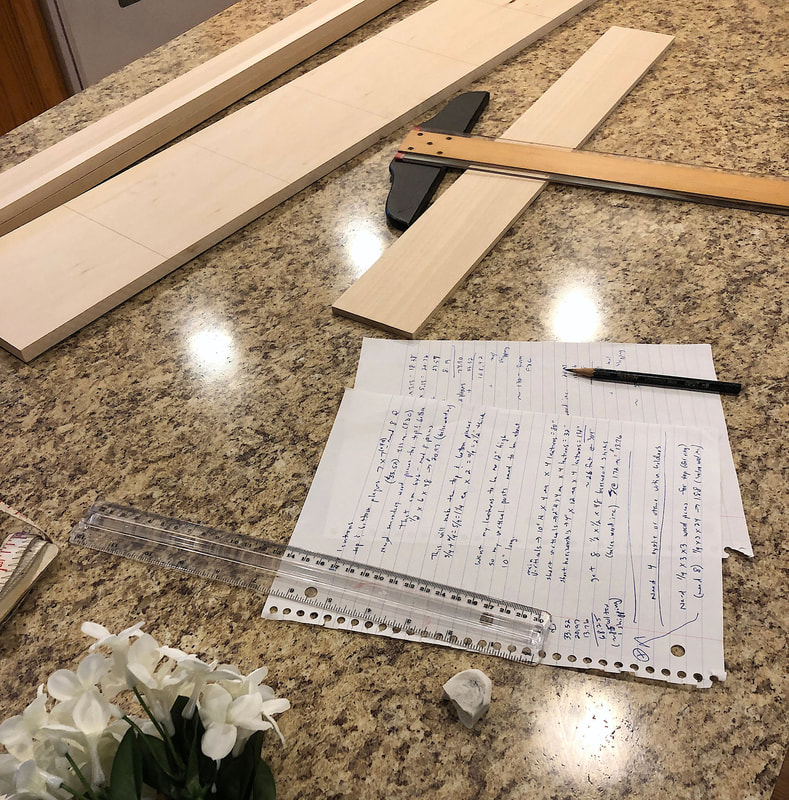   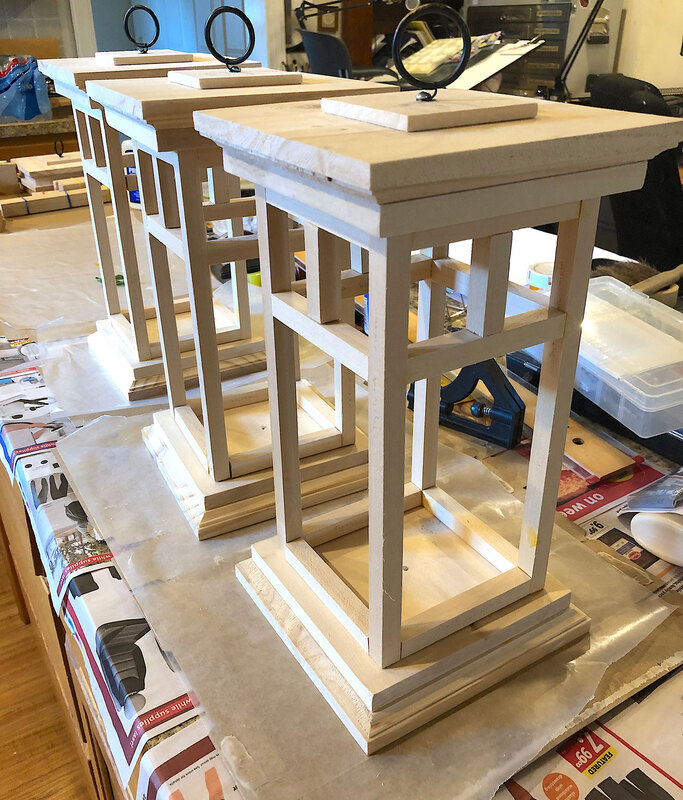 Next, the bare wood is painted, painstakingly building up several layers of paint in a technique that creates a weathered wood effect. All my finished wood pieces are then protected with varnish and felt pads, making them durable and long-lasting. 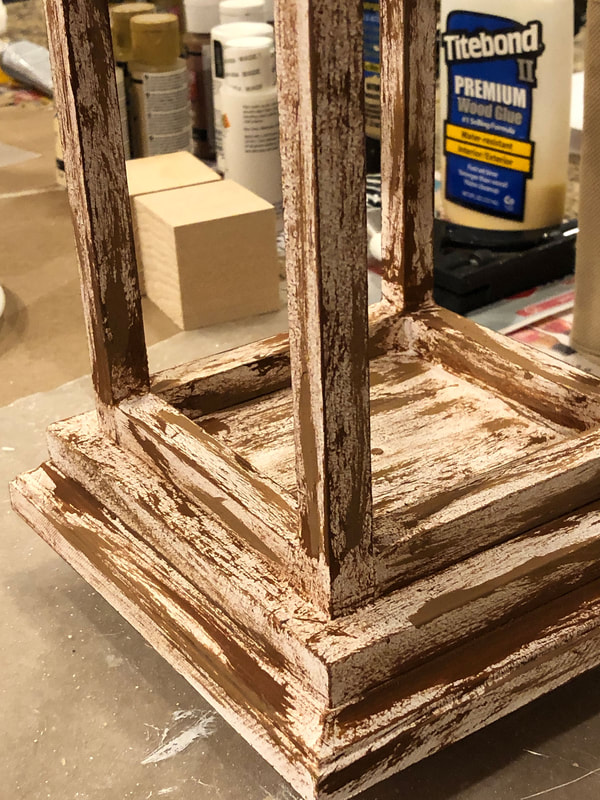 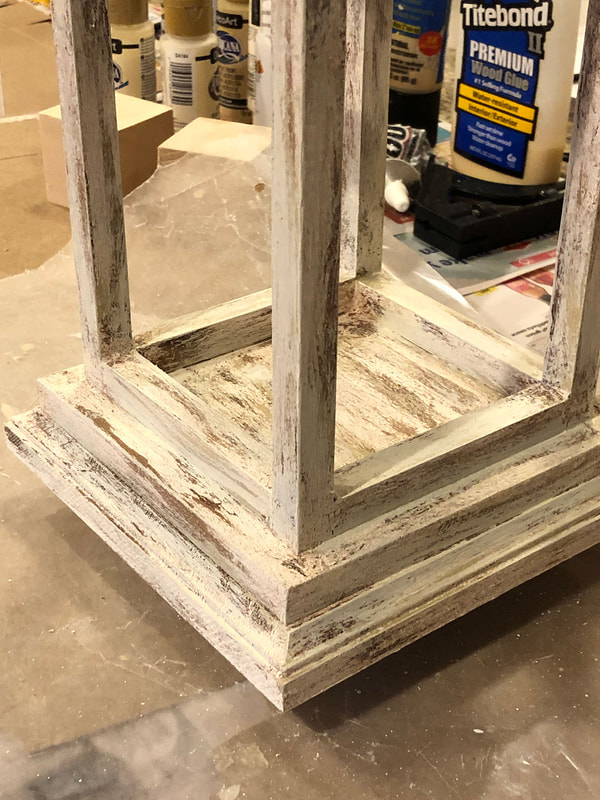 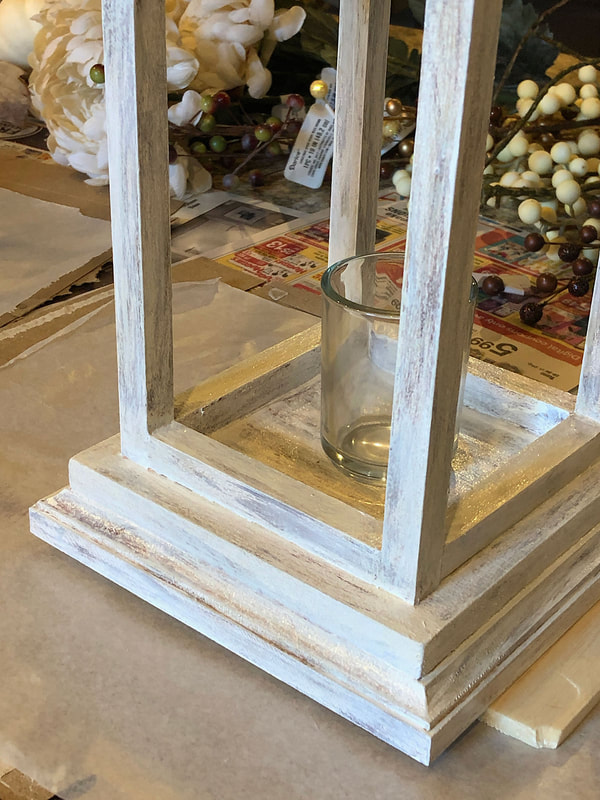 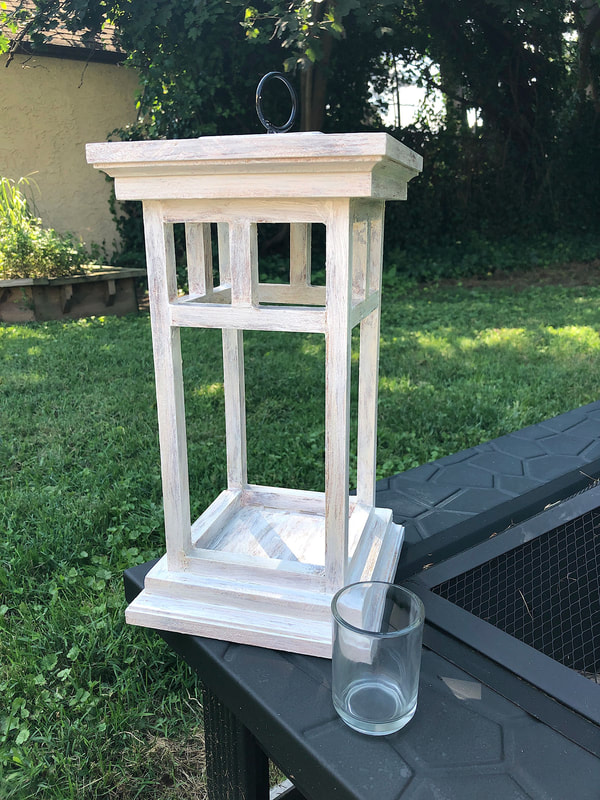 The florals and decor are all specially chosen for each project. Once the “vision” becomes clear, I start carefully attaching each decorative element to the lanterns using heavy-duty e6000 glue, which is incredibly strong! For this fall season, I decided to make two different floral designs. The first one I call September Vibes, and this one plays with a color palette of green and golden yellow, reminiscent of the types of tree colors usually seen in September or early October. 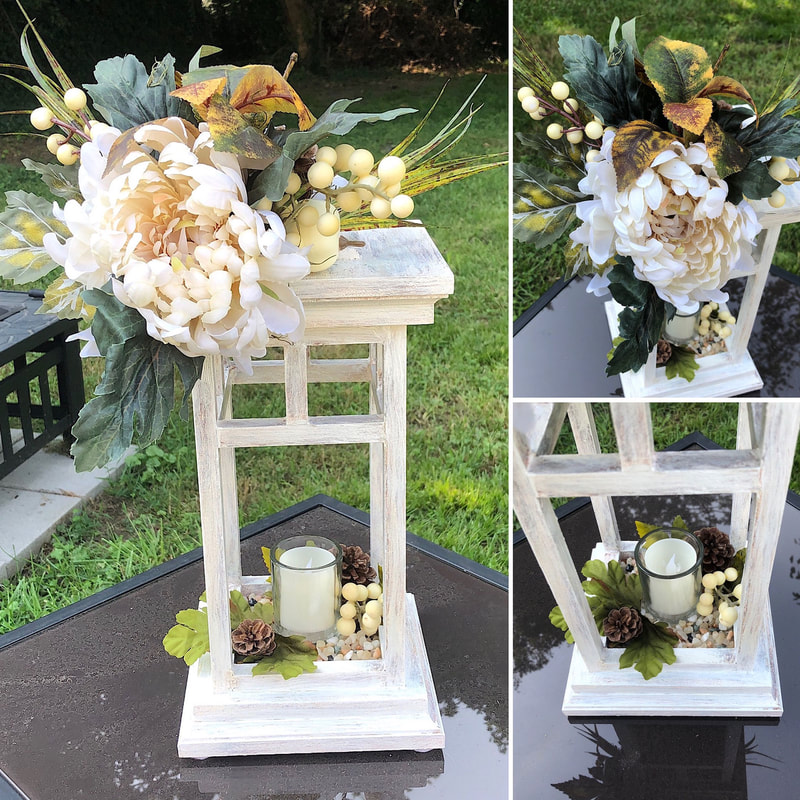 September Vibes Decorative Lantern Candleholder by Di's Studio Designs, 2020. The second floral design is called Fall Foliage. This version incorporates more of the deep red or wine tones that start to make an appearance in October through November. 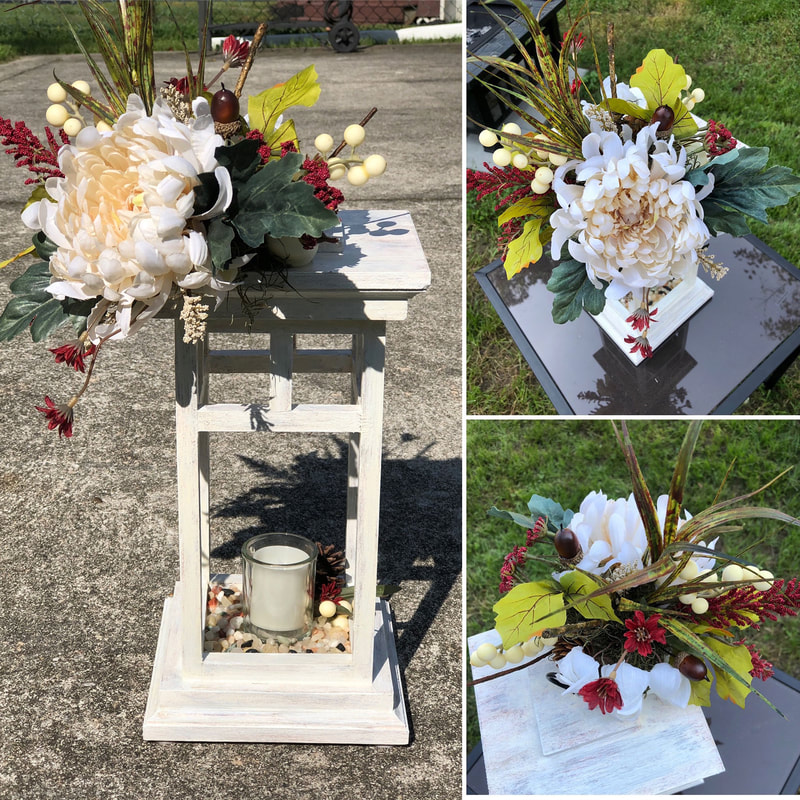 Fall Foliage Decorative Lantern Candleholder by Di's Studio Designs, 2020. My lanterns (and all of my hand-crafted decorative candleholders) are not made for the outdoors and are not recommended for use with open-flame candles. They are made with LED candles in mind (which I usually buy from Amazon or Michaels), which makes them charming, safe, and simple to operate. These new lantern projects were so much fun that I plan to create more floral designs for the Spring/Summer. The supplies are already purchased and waiting, and work may begin as soon as December…but more probably January! (I have a couple of Celtic art pieces to finish first!) Visit http://disstudiodesigns.com/decorative-candleholders.html for these and more seasonal decorative candleholders by Di’s Studio Designs. Please feel free to comment, message, or email me with any requests or questions! This article contains external links for demonstration purposes only, and are not endorsements for specific products or brands. Related blog posts you may want to read: DIY Fall/Winter decorative lighted branch box Finding creative inspiration from nothing Art imitates nature Creation of a centerpiece  The Tree of Life…There are not too many symbolic icons that stretch so far back into the mists of time and mean so much to so many cultures. It’s a symbol that represents anything from the afterlife, the bond between heaven and earth, the connection to the earth, and the cycles of life (birth, life, death, and renewal). The trees were sacred to the Celts, and different trees held special meanings to the people of the time. So, of course, I had to create an art piece with the Tree of Life! My latest Tree of Life art piece is the third rendition—the first one I kept for myself, and the second one sold within a half hour of listing it for sale! So I decided to make another one… I already had the template from my previous versions, so this step in the process was already done. I needed to trace the design onto the blank plate and wood burn. (I say that like it was a quick and easy process. It was still a lot of work!) 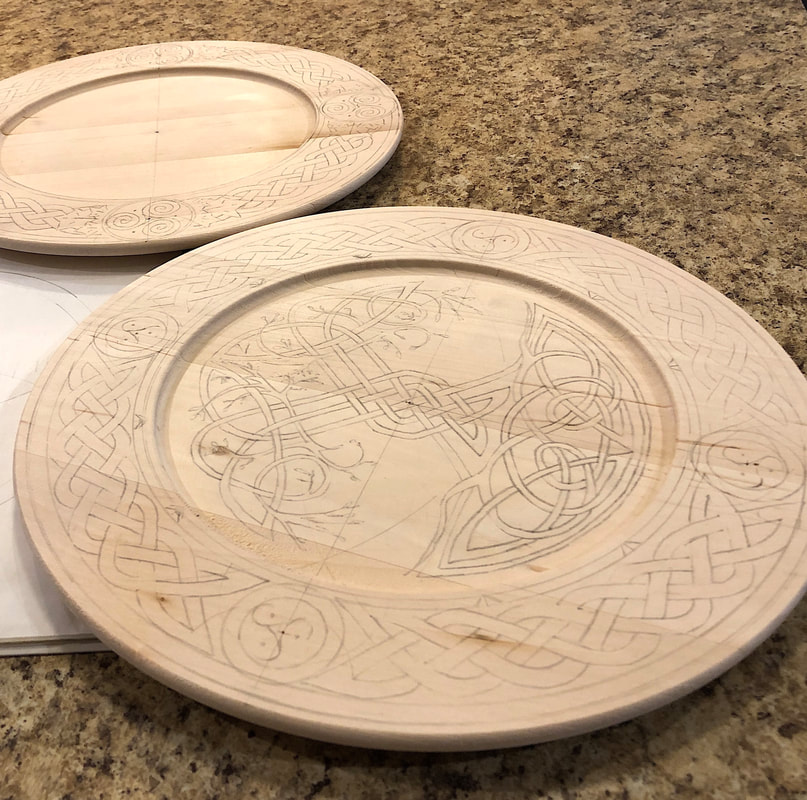 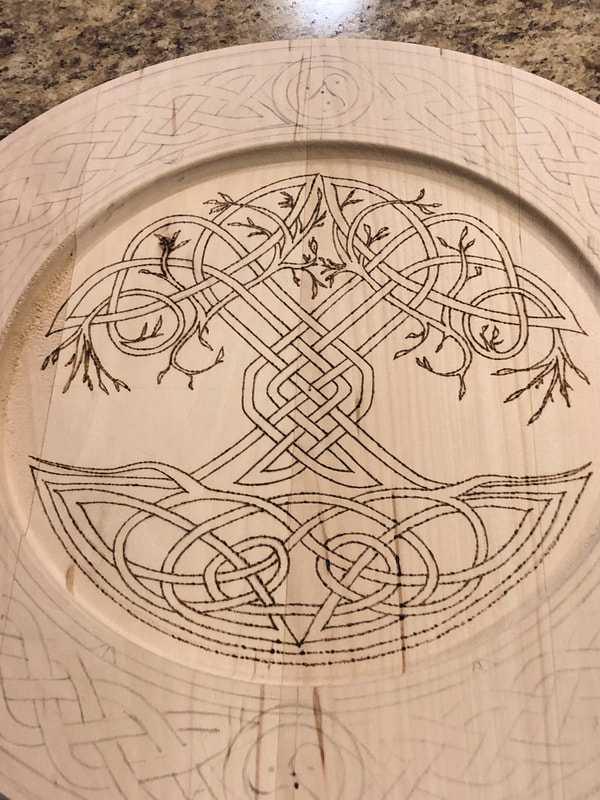  A project like this should only take me maybe a few weeks from start to finish—depending on how long it takes me to finish a final draft of a drawing. But coronavirus happened…Let’s just say I got sidetracked. I started this piece in late January or early February and was slated to be finished before mid-March, but it didn’t quite work out that way. We are now in mid-May, and I finally got around to putting on the varnish. The artwork was done by mid-March, but I couldn't find the time to apply the protective varnish coating. Then--when I finally thought I had found the time--my household came down with the virus…and, well, it just didn’t happen. But now it’s done…better late than never!  And, oh, by the way…This one is now for sale! 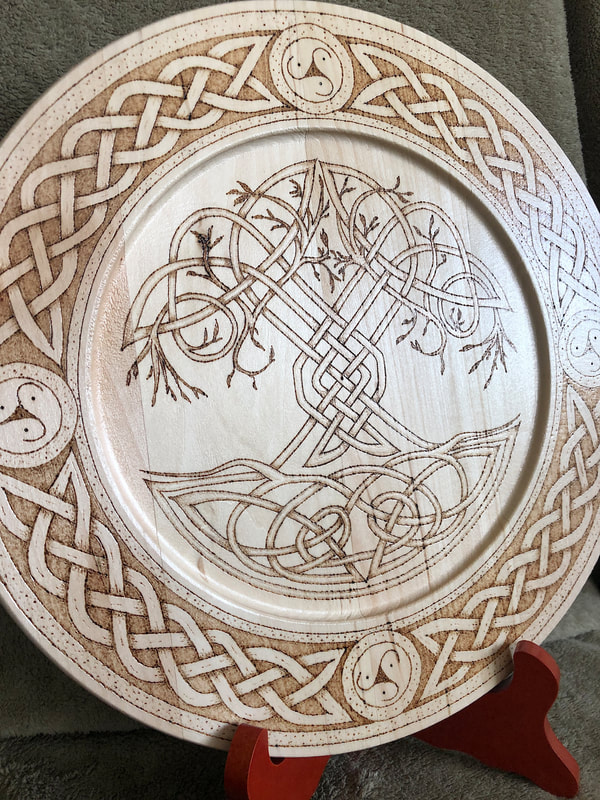 To view or purchase my latest decorative plate, visit Related blog posts you may want to read: Celebrating Irish Celtic Art for St. Patrick's Day Basic Celtic Knot tutorial part 1 Celtic Knot tutorial part 2 A foray into customizable artwork The Celtic Motherhood Knot, a symbol of love Getting out of my own way So far, this year has been sad and distressing, but despite all of it, I have somehow found the space in my head to be inspired to create new art pieces. Three art pieces are a work-in-progress, and a fourth “idea” for an art piece in the brainstorming phase. In addition, there are preliminary plans for new candleholder design projects to keep me busy during the summer. But that’s just the tip of the iceberg! Not to be cryptic, but plans are in the works as we speak to unveil new design options, so stay tuned for that! For now, three art pieces are in different stages of completion. (Clearly, my ADD has kicked in!) The one closest to completion is a new Tree of Life plate. This one is just waiting for a couple of coats of varnish, and then it can be listed for sale. 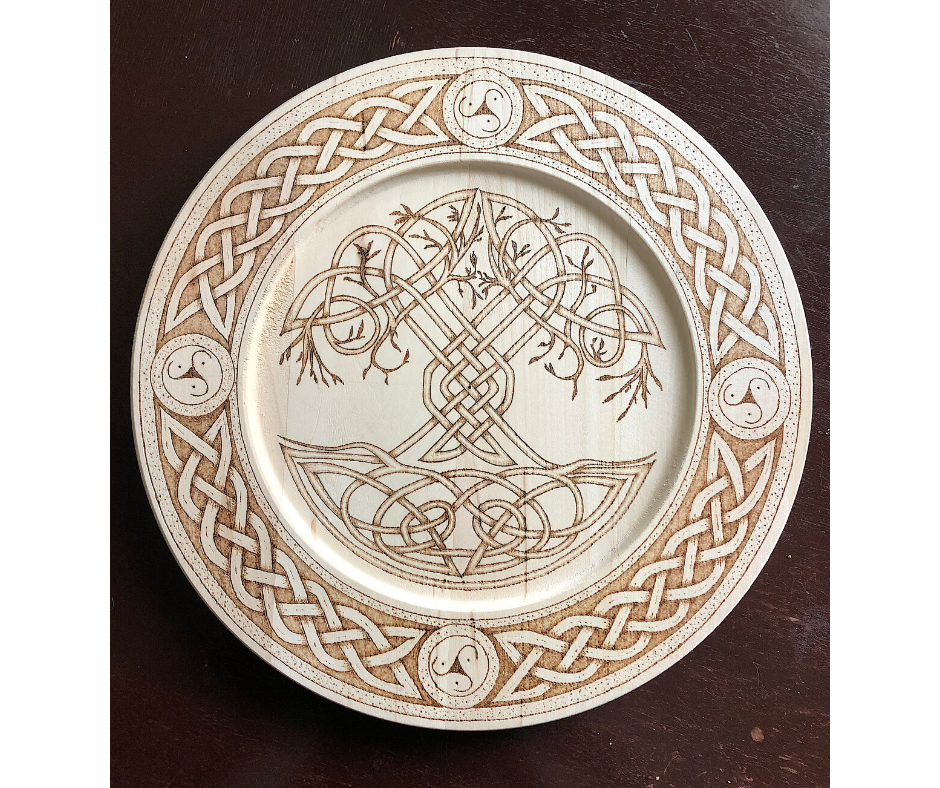 The next one to be finished will be a decorative plate featuring a dreamy castle ruin…because I love drawing castles—I love everything about castles—and wanted to woodburn one. I can’t believe it took me this long to get around to it! 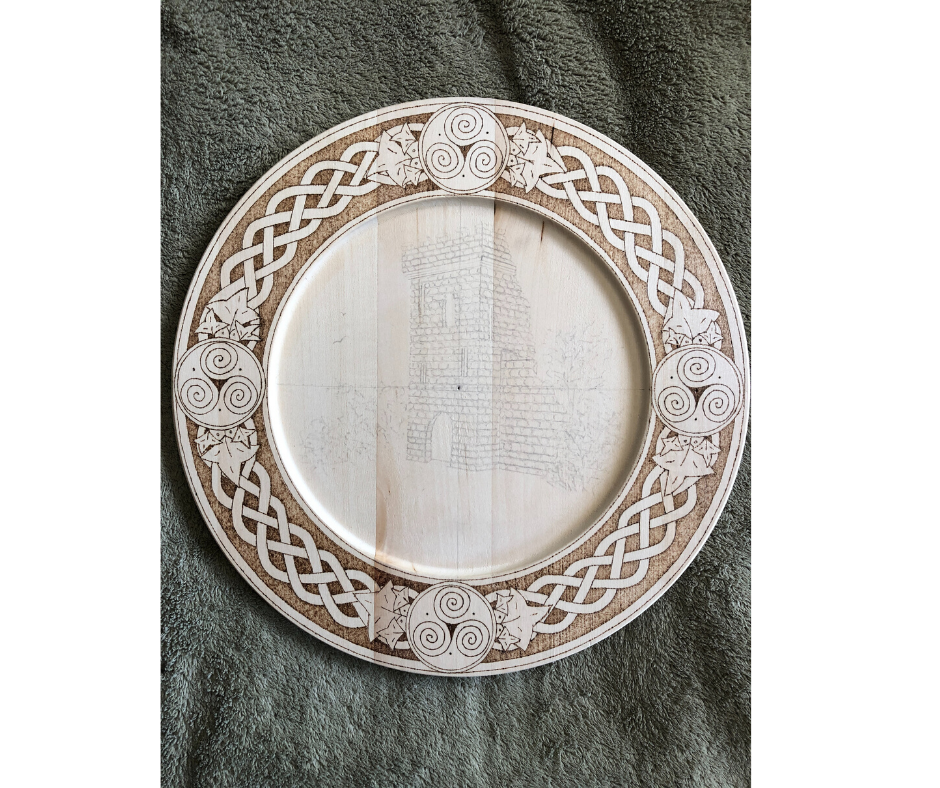 And the final piece of Celtic artwork—which is only just in the drawing stage—is a commemorative plate for my mom. She passed away a few days before Easter—right in the middle of this pandemic. I decided the best way to honor her memory was to create a plate with her family crest--a pear tree. (There is supposed to be an arm with a hand holding the tree, but I took some artistic license for aesthetic reasons.) 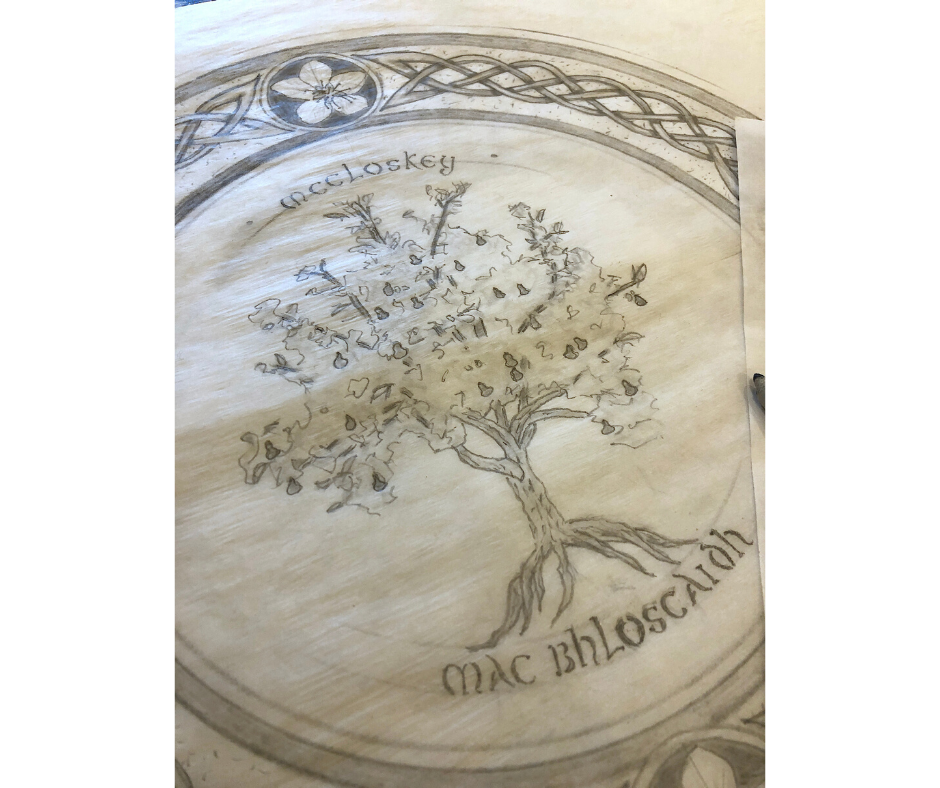 This one (obviously) will not be for sale, but I am open to special requests starting in June. Just shoot me an email at dmlilly@disstudiodesigns.com. So that about sums up the chaos in “Di’s World” for now. A lot is happening, and some new stuff is coming soon! I’ll do my part and keep you posted…so stay tuned! Related blog posts you may want to read: Celtic Tree of Life I like to draw—particularly Celtic-inspired knotwork and designs—and in the past few years, I’ve discovered an outlet for these drawings through wood burning. As it turns out, wood burning is not much different from drawing with pencils—except you can’t just use an eraser to fix a mistake! But I love the challenge and the beautiful pieces of finished artwork. I’ve decided recently to try my hand at some customized wood-burned designs. Last year, I collaborated with my husband, who does comic illustration. Our joint project was to create a graduation gift for our son, who loves Batman. My husband drew out the basic sketch, and then I took that sketch and “translated” it onto a blank wood plaque.  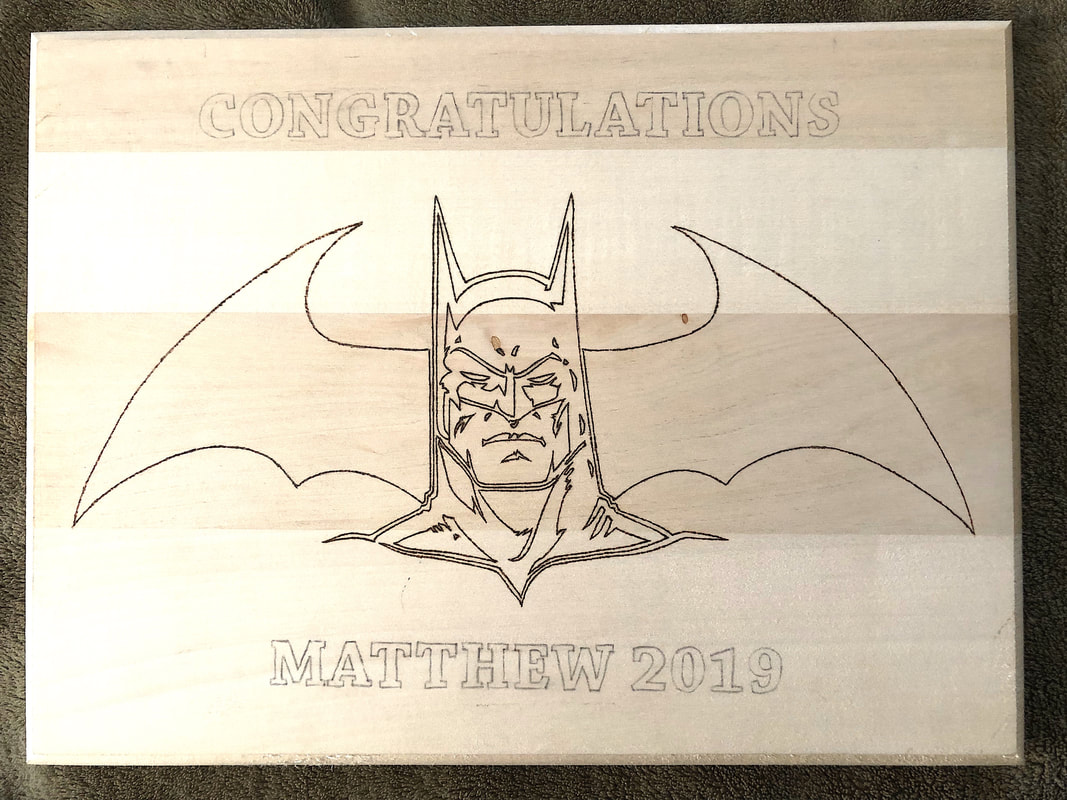 Needless to say, comic art is a WAY different style than I am used to, but it was refreshing to try something new and outside my comfort zone. I had a lot of fun exploring line styles and shading techniques. And my son loved the finished piece! If you would like a custom wood-burned piece, contact me at dmlilly@disstudiodesigns.com. And check out my husband’s work on the following social media pages: Thomas H. Lilly https://www.facebook.com/ForceOneStudios/ https://www.instagram.com/force1studios/ Related blog posts you may want to read: Celebrating Irish Celtic Art for St. Patrick's Day Basic Celtic Knot tutorial part 1 Celtic Knot tutorial part 2 The Celtic Motherhood Knot, a symbol of love Celtic Tree of Life |
Author
Some of the posts on this site contain affiliate links. This means if you click on the link and purchase the item, I will receive an affiliate commission. 
Categories
All
Archives
April 2024
|