|
11 items from Amazon to get you started! When we speak of Boho (short for Bohemian) certain words come to mind—artistic, eccentric, casual, eclectic, gypsy, hippie, carefree, and creative. And if you ask me fall is the perfect time of year to let your inner gypsy shine! The boho look is an incredibly simple look to pull off with its mix of earthy (or jewel tones if you’re not afraid of color), textural, and slightly exotic design elements. To help inspire you to embrace this design style this season I combed through Amazon to find a few interesting items that might help get you started! 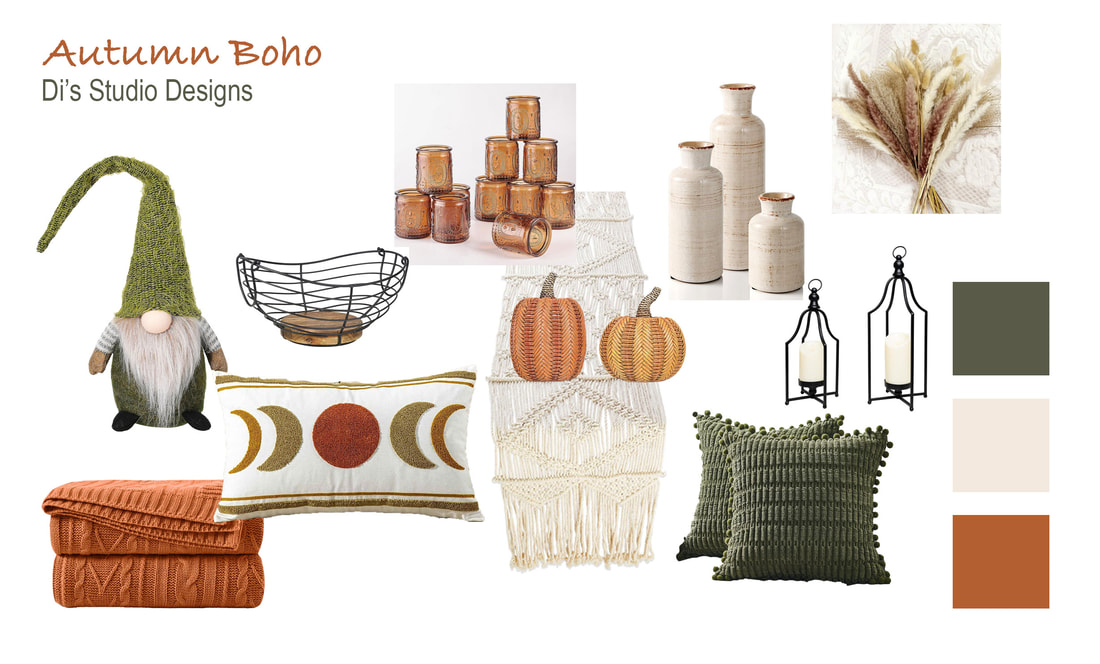 Images from Amazon.com. Click the links below to view or purchase. Some of the posts in this article contain affiliate links. If you click on the link and purchase the item, I will receive an affiliate commission at no extra cost to you. I will only recommend products or services I use personally and/or believe will add value to my readers, so there is no conflict of interest. Item 1—Swedish Handmade Plush Gnome by Funoasis Gnomes are all the rage this season! The rustic shades of green and the long furry beard are a whimsical addition to the boho accessories on this mood board. The handcrafted look of this magical little guy works well with the rest of the accessories and adds a little element of surprise to the look. 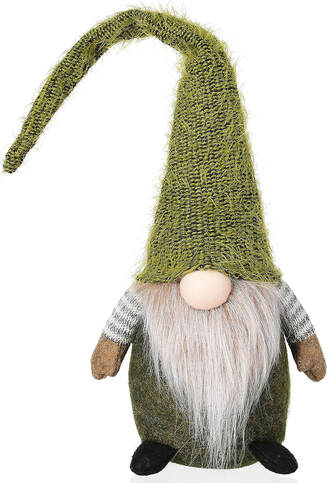 Item 2—Rust Orange Cable Knit Throw Blanket by Aormenzy No fall living space is complete without a cozy cable knit blanket! This machine-washable rusty orange throw is the perfect color for a fall boho space. Curl up with this blanket in a rattan chair and read a book or take a nap!  Item 3—Embroidered Bohemian Moon Decorative Throw Pillow Cover by FAVDEC The design on this lumbar pillow not only makes a quintessential boho design statement but pulls in the range of rustic greens and oranges used in the rest of the mood board. It also provides a nice contrast to the green tassel pillows. 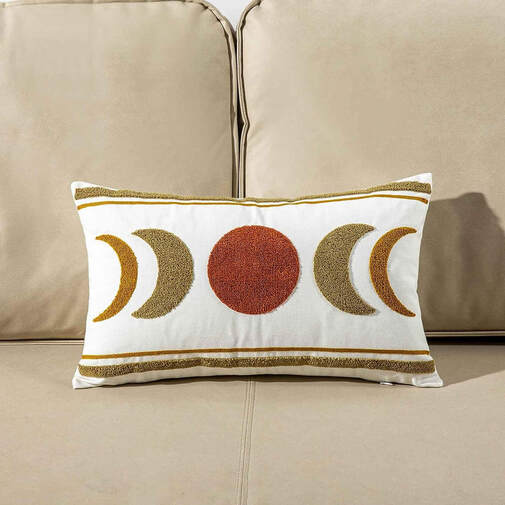 Item 4—Vintage Wire and Wooden Base Fruit Basket by Tribello This item is described as a fruit basket but could be used in any space as a decorative accessory. The wood base and wire basket would work well in this boho collection used alone or filled with other decorative elements.  Item 5—Amber Glass Tealight & Votive Candle Holders by TripodBird These tea-light votive candle holders have a sensual rustic feel, and an amber color blends well in a fall vignette or tablescape. Set these around the room or display them in a vignette or tablescape with warm LED lights. 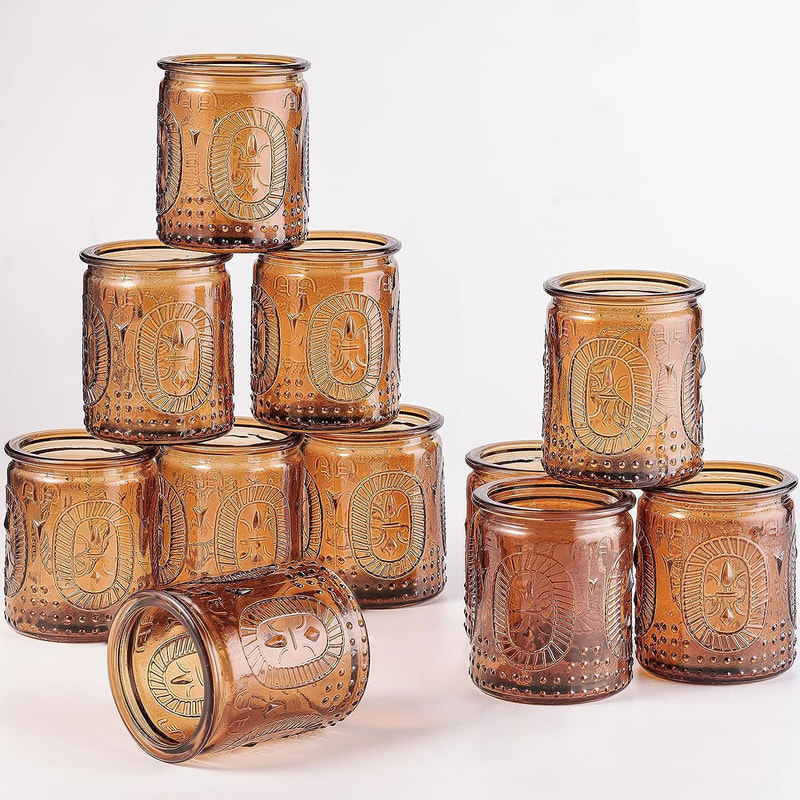 Item 6—Artificial Rattan Pumpkins by Valery Madelyn Pumpkins are a must-have in any fall decor, right? These rattan pumpkins are so unique and boho that I had to include them in this mood board! 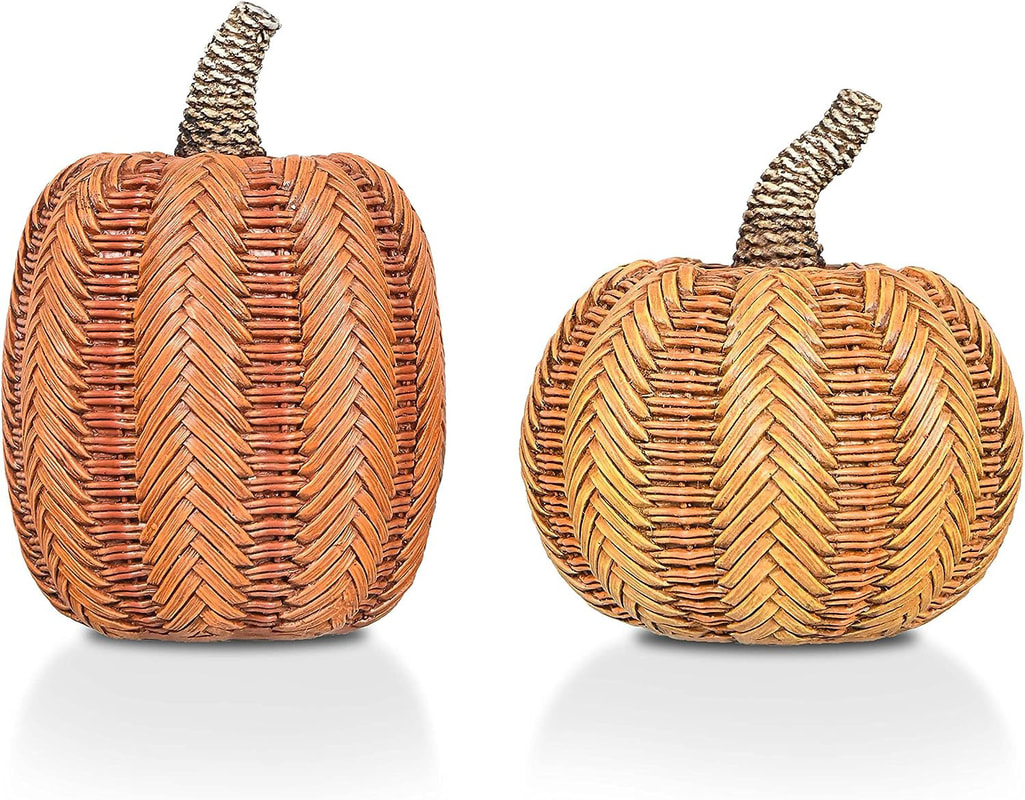 Item 7—Macrame Table Runner by Folkulture I know it’s cliche, but nothing says boho like macrame! This cream-colored table runner makes a unique statement and sets the stage for the rest of the boho-inspired table decor. 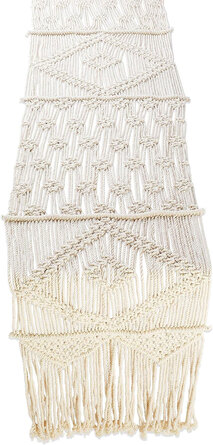 Item 8—Olive Green Decorative Throw Pillow Covers by Topfinel This olive green pillow with pompom tassels and a distinctive textural pattern continues the rustic fall look while embracing the quirkiness of the boho style.  Item 9—Black Metal Candle Lanterns by HPC DEC R OUR HAPPY PLACE Black metal candle lanterns were chosen to match the wire basket and add a nod to Moroccan lanterns without the heaviness of the traditional Moroccan lantern style. These candle holders would look amazing displayed with the rattan pumpkins and gnome! 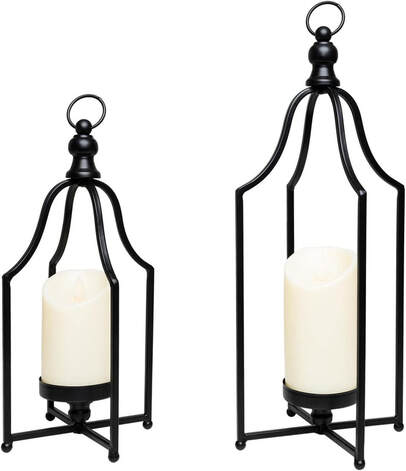 Item 10—Rustic Ceramic Vase Set by Eyamumo The distressed stone finish of these ceramic vases has that organic feel associated with the boho style. These vases work well when used alone or filled with a floral arrangement of choice. 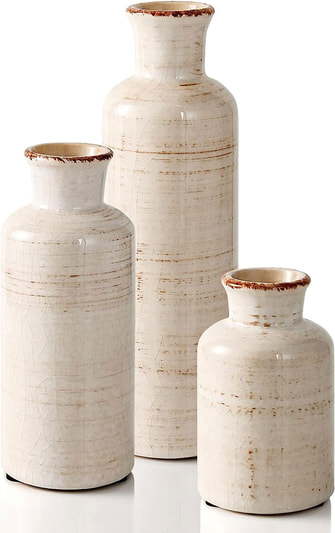 Item 11—Natural Dried Pampas Grass by Ainiyuo This choice of dried pampas grass stems includes colors like dusty rose, cream, light brown, and pale ochre. The earthy colors complement the organic yet quirky boho style. Arrange these in the ceramic vases to top off the look! 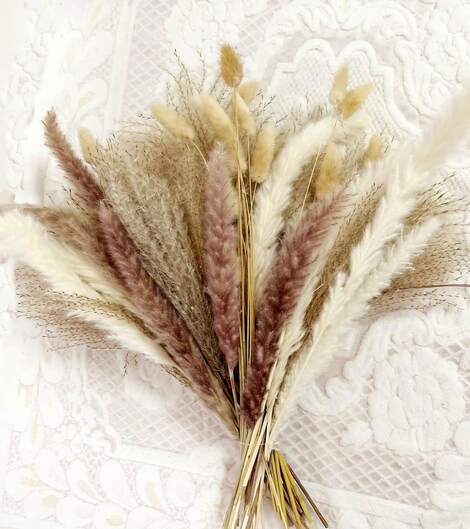 Related blogs you may want to read: Dark Academia Decor for the Fall Brighten up your autumn decor with these items! Create a cozy relaxing interior space this fall with neutral colors Need ideas for incorporating the color blue into your fall decor? Nine hygge decor ideas Winter color palette ideas for your home decor Design concept for a dreamy coastal interior Let’s talk Bohemian
0 Comments
Here are 10 items from Amazon to inspire you! Fall is one of my favorite times of year to decorate. Once September rolls around, that is my cue to start getting creative with festive decor for the next few months. But lately, I’ve been finding the traditional colors a little…well…stale! I’m not knocking the vibrant orange, red, and yellow color palette, but sometimes you just need to shake things up a little bit. I guess you could say I’m searching for inspiration, a way to expand my horizons. I’ve always wanted to try using blue in my fall and winter decor, and one day—when the budget allows—I will gather the courage and take the plunge! Blue can be an extremely versatile color, fitting into any season of the year, but can feel a little cold. I discovered that if you pair blue with warm creams and gold, the result can be an exciting color scheme! Blue and yellow are complimentary colors on the color wheel and go well together, creating a pleasing contrast that feels light and airy. Exchanging the yellow for gold gives your decor an upscale yet inviting appeal. As I combed through Amazon for inspiration, I found a few interesting items that could be used to create an elegant yet modern look. In my mood board below—titled Autumn Blues—you will see a collection of pieces that include a range of blues paired with gold and cream accents. The selections reflect the vibrant mood of autumn yet feel refreshingly clean and uncluttered. And the best part…All of these items together cost less than $300! Not bad in today’s economy! 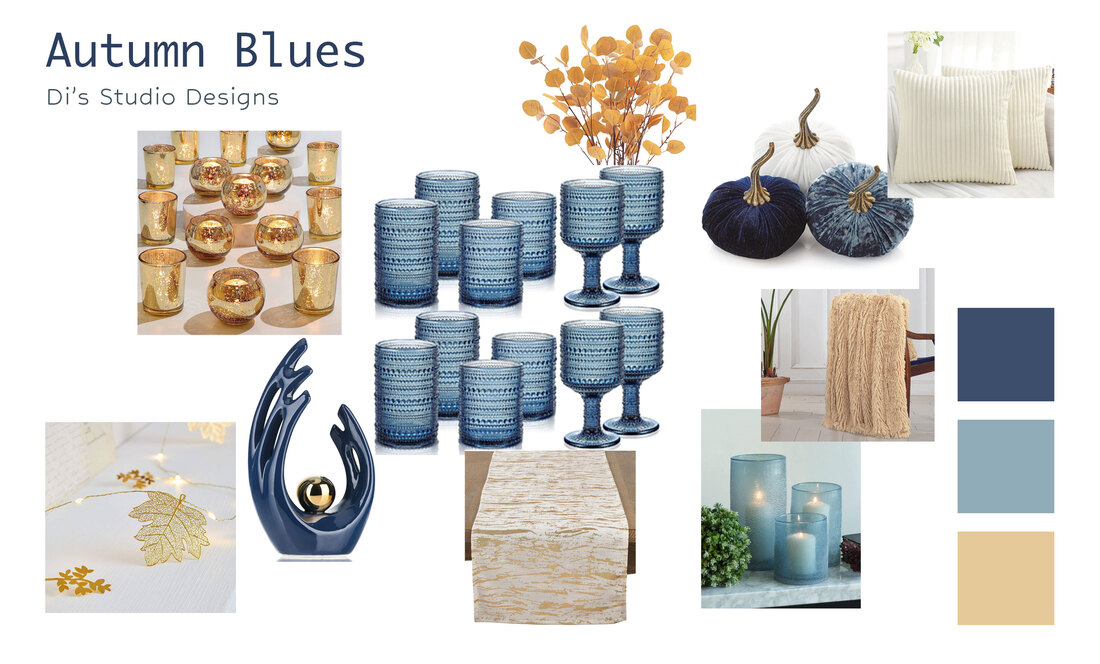 Images from Amazon.com. Click the links below to view or purchase. Some of the posts in this article contain affiliate links. If you click on the link and purchase the item, I will receive an affiliate commission at no extra cost to you. I will only recommend products or services I use personally and/or believe will add value to my readers, so there is no conflict of interest. 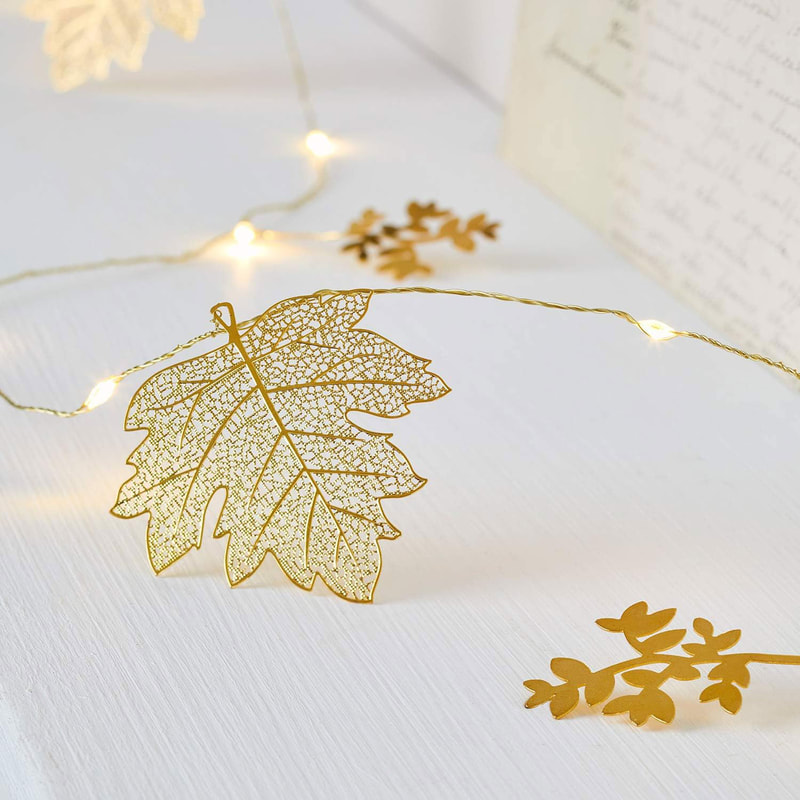 Item 1—Gold Maple Fall Leaf Indoor Battery Operated Micro LED Gold Wire String Lights by Lights4fun, Inc. This fairy light strand with gold fall filigree maple leaves would look so festive on a mantle or a dining room table! The warm LED light complements and warms up the blue and cream decor and works well for both fall and winter decor. The battery-powered strand also has a timer and a remote.  Item 2—Mid-Century Modern Abstract Ceramic Sculpture by XMGZQ This Mid-century blue and gold abstract sculpture is a unique accent piece for a table. The abstract form has an organic feel, almost like the shape of dead leaves with holes and leaf veins. 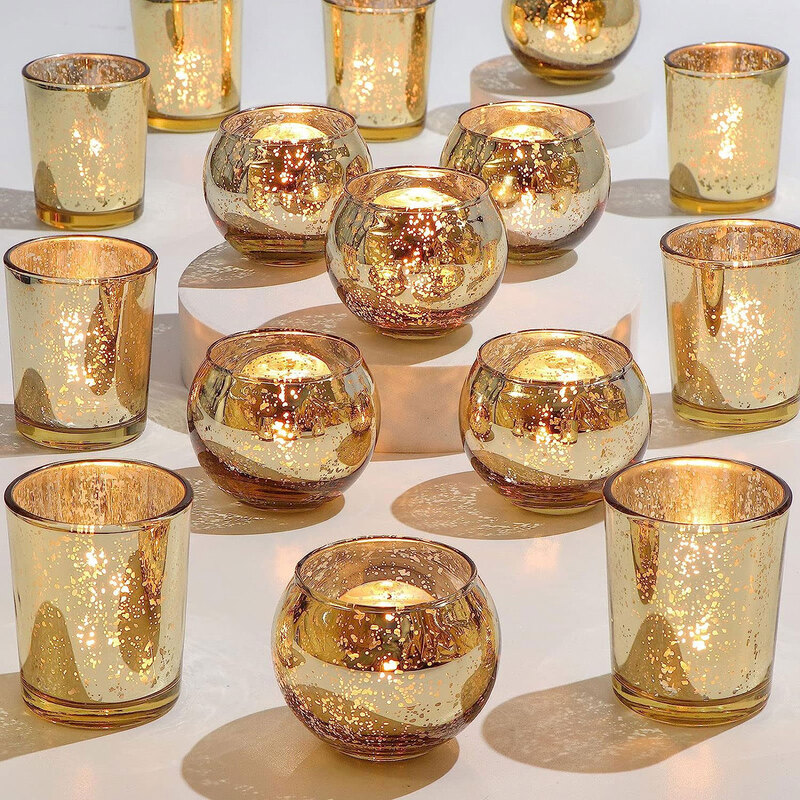 Item 3—Mercury Glass Votive Candle Holders by DEVI Mercury votive holders are so on point this year! They give a classy look to just about any decor style, but I particularly love these tea-light votive holders in this blue scheme. This set of mercury glass votive candle holders comes in two different shapes. They can be combined with other decorative elements to create elegant vignettes or tablescapes. 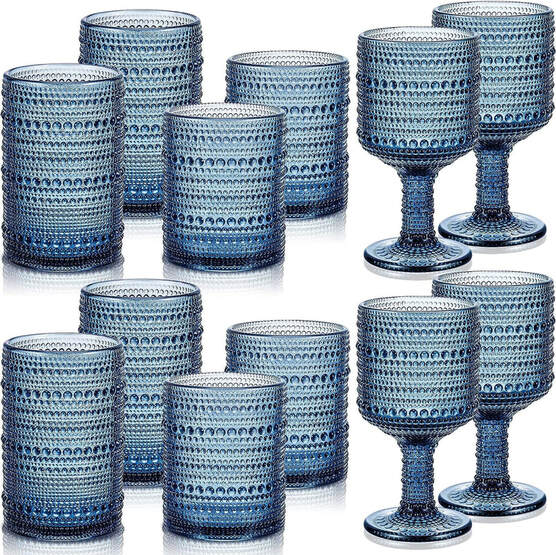 Item 4—Vintage Glassware Beaded Drinking Glasses by Irenare I’m so in love with these beaded blue glasses! They are a must-have for my Autumn Blues mood board! These textural glasses would look stunning in fall dining room table settings, especially with the mercury glass votive holders mentioned previously. 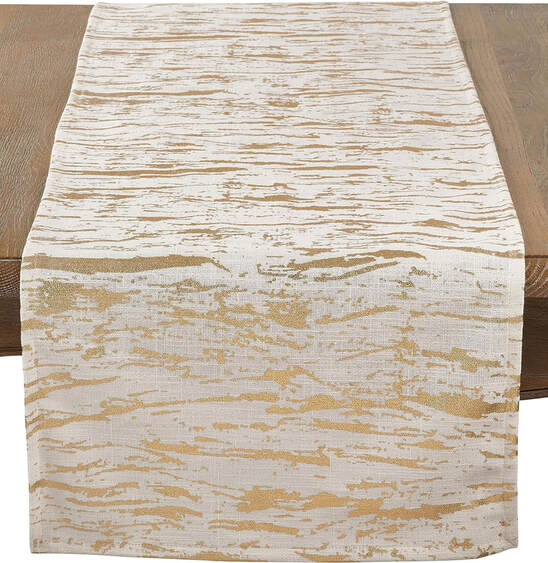 Item 5—Distressed Foil Metallic Design Cotton Table Runner by SARO LIFESTYLE This distressed foil metallic table runner has such a unique look. The cream and gold pattern looks like an abstract impression of tree bark while having a modern, clean-lined style. 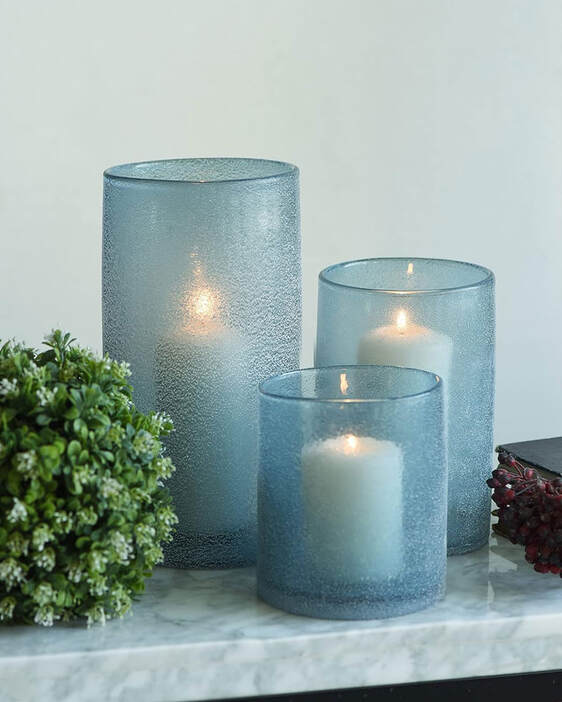 Item 6—Sandy Blue Hurricane Candle Holders by ARIAMOTION These hurricane candle holders are a bit on the pricey side, but I could not pass up the frosted glass! It’s simply gorgeous yet elegant. the frosted texture diffuses the candlelight in such a romantic way, making it the perfect candle holder for fall, holiday, or winter decor. 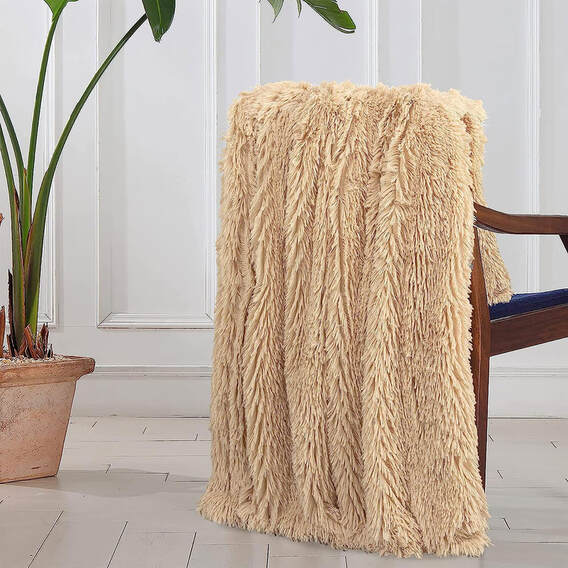 Item 7—Faux Fur Blanket by Tuddrom The perfect way to cozy up a space is to add fur—faux fur that is! This textural blanket has shaggy fur on one side and fleece on the underside. Grab this blanket and snuggle in a nice comfy chair. And it’s machine washable! 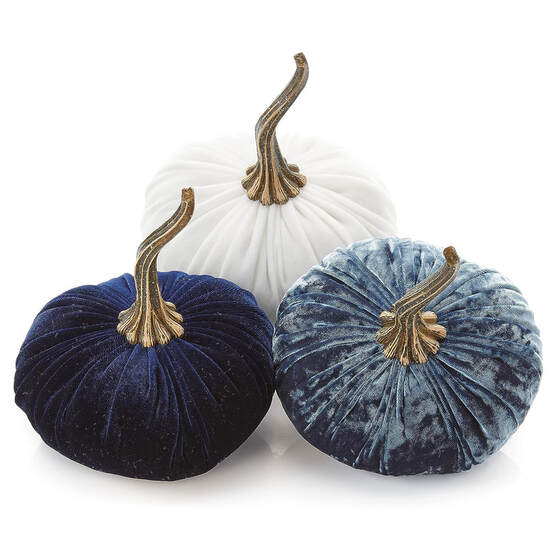 Item 8—6.25 Inch Large Velvet Pumpkins by Your Heart’s Content It wouldn’t be autumn without a pumpkin or two, would it?! This trio of plush pumpkins are velvety soft with gold stems that give them a refined look. Stick these on a table or mantle with other blue and gold accents for a unique vignette or tablescape.  Item 9—Cream Decorative Throw Pillow Covers by Sinmore I chose these cream pillow covers to warm up the cool blue hues in the other selections. The fabric on these pillow covers is an inexpensive way to add warmth to the modern style. 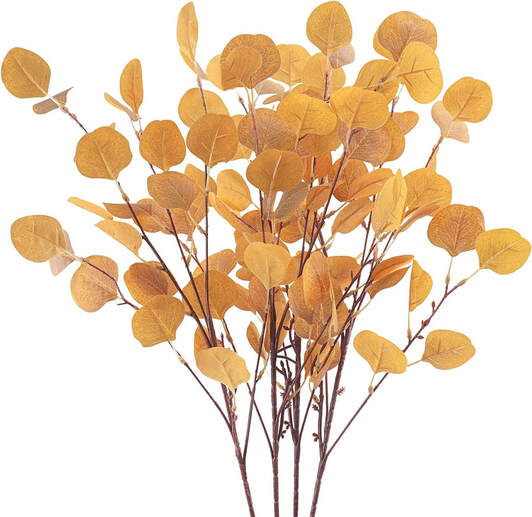 Item 10—Artificial Eucalyptus Leaves Stems by Tepaler And finally, this mood board needed some floral elements for that added “pop”. These golden faux eucalyptus leaves made from luxurious silk are called Autumn Yellow—perfect for my mood board and so striking! Related blogs you may want to read: Dark Academia Decor for the Fall Brighten up your autumn decor with these items! Create a cozy relaxing interior space this fall with neutral colors Inspirational ideas for creating that cozy autumn boho style Let’s talk Bohemian Nine hygge decor ideas Winter color palette ideas for your home decor Design concept for a dreamy coastal interior  Image by Lukas on Pexels. Floral arrangements uplift our spirits, brighten a room, and create a touch of natural beauty in our interior spaces. Flowers come in a wide range of shapes, sizes, colors, and textures, each with its unique character. Some popular flowers used in arrangements include roses, lilies, tulips, daisies, sunflowers, and orchids, but don't be afraid to play with any of your favorite flowers and greenery. Creating a balanced floral arrangement is all about channeling your creativity while following (more or less) the principles of floral design. In this blog post, we'll explore the art of floral design and share some valuable tips on creating balanced and visually appealing flower arrangements for your home. So let's get started! Choose a Focal Point Every floral arrangement needs a focal point that grabs attention. Select a standout flower or an interesting element like a unique branch or ornamental grass to act as the centerpiece. This will serve as the anchor for your composition.  Image by Oleksandr Blishch on Adobe Stock. Consider Height and Proportion It's crucial to play with varying heights and proportions to achieve balance. Combine tall flowers or branches with medium-sized and shorter blooms. This creates depth and visual interest within your arrangement. However, the height differences should not overpower or overshadow the other flowers. 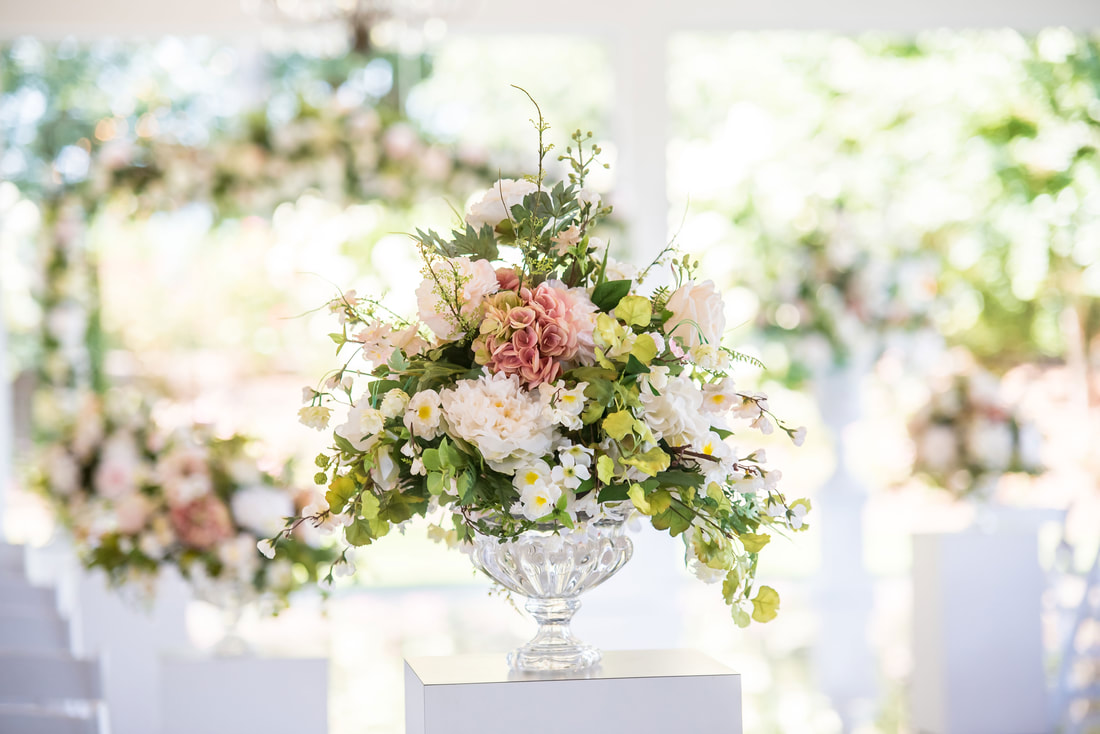 Image by Jaimie McGowan/Wirestock on Adobe Stock. Balance Colors and Textures When selecting flowers for your arrangement, consider using colors and textures that complement each other. Choose a color palette that harmonizes with the room or environment in which the arrangement will be displayed. Pair delicate, airy flowers with more robust blooms to create a balanced contrast of textures.  Image by Stanislav on Adobe Stock. Embrace Odd Numbers Odd-numbered groupings of flowers tend to create a more aesthetically pleasing arrangement. Create flower groupings of threes or fives for visual appeal and unity. Odd numbers are more captivating to the eye than even numbers, which can sometimes appear too symmetrical and static.  Image by Olga Pulchina on Adobe Stock. Pay Attention to Vessel Selection The vessel you choose for your arrangement is just as essential as the flowers. A tall vase pairs well with long-stemmed flowers, while a shallow dish is perfect for a low and compact arrangement. Use the rule of thirds when selecting your containers to make the overall floral arrangement visually pleasing. This means your flowers should be either one-third or two-thirds the height of your container. (A composition that is too equal in size will not feel natural.) Experiment with various containers like mason jars, vintage pitchers, or elegant glass vases to find the perfect complement to your chosen flowers. Image by Rawpixel.com on Adobe Stock. Creating a balanced floral arrangement is an art form that allows you to showcase your creativity and infuse spaces with natural beauty. By keeping the principles of floral design in mind, playing with height, proportion, colors, and textures, and embracing odd numbers, you can create stunning arrangements that breathe life into any room. Remember, practice makes perfect, so don't be afraid to experiment and even break the rules if it makes your arrangement look better! In time, you’ll learn to trust your eye and creative instincts, and those floral designs will look gorgeous! So, grab your favorite flowers and get creative! Happy arranging! If you'd like to watch me do an arrangement and learn how to do a simple floral design watch my videos on my new Youtube channel! There is a Part 1 and Part 2 tutorial video for this project! Related blogs you may want to read: 10 non-flowering houseplants that are toxic to cats 8 flowering houseplants that are toxic to cats 6 more flowers that attract fairies to your fairy garden 8 flowers that attract fairies to your fairy garden 7 houseplants you can't kill 7 more houseplants you can't kill 7 ways to kill a succulent How to repot a bonsai ficus How to repot a pothos plant 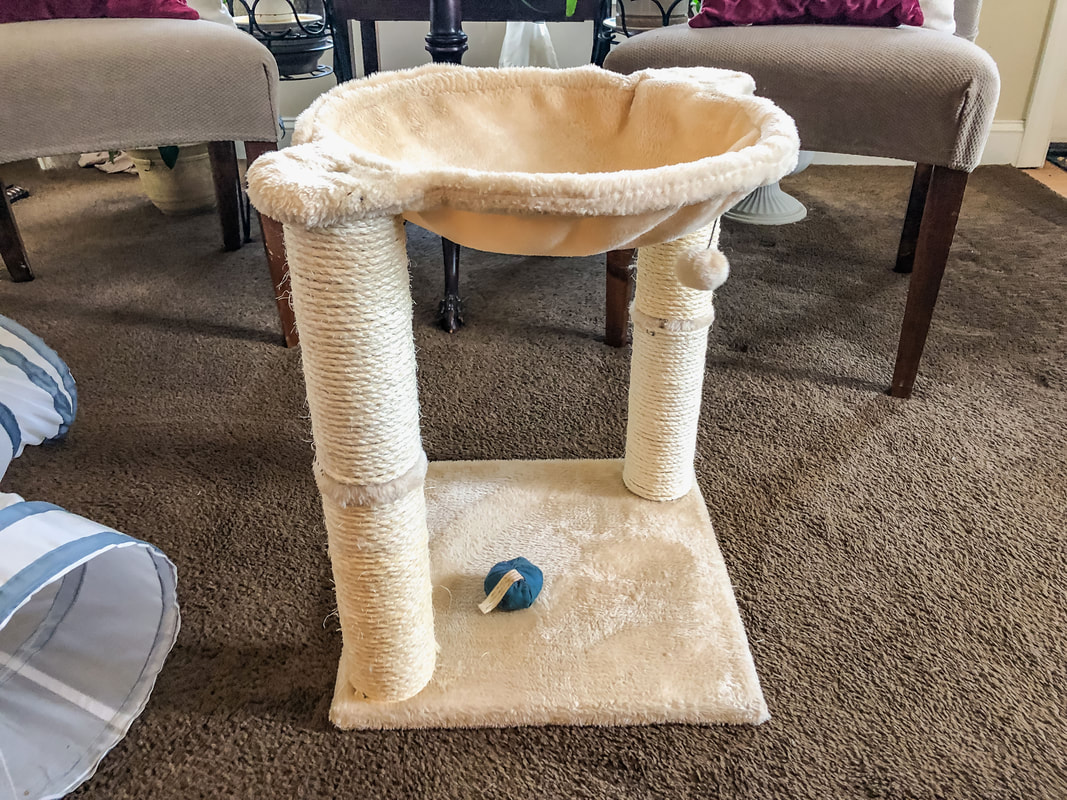 Hey there, fellow cat lovers! We all know how much our feline friends adore their scratching posts. Over time, though, these scratching posts can begin to look ragged. In this blog post, we'll walk you through rewrapping your cat's scratching post, giving it a fresh lease on life. So grab your materials, and let's dive right in! Why are scratching posts so essential for our furry companions, you might ask? The answer is that scratching is a natural behavior for cats. It helps keep their claws healthy, allows them to stretch their muscles, and provides an outlet for pent-up energy. A dedicated scratching post will save your furniture from sharp nails and provide a designated spot for your cats to do what they love. I have a large, multi-level cat tree and another small scratching post that my kitties adore. The small one--the scratching post I am using for this blog--was purchased from Amazon a couple of years back. What you'll need for this project
Assess the condition of your existing scratching post If your existing scratching post is frayed, torn, or no longer appealing to your furry friend, it's time to refresh. 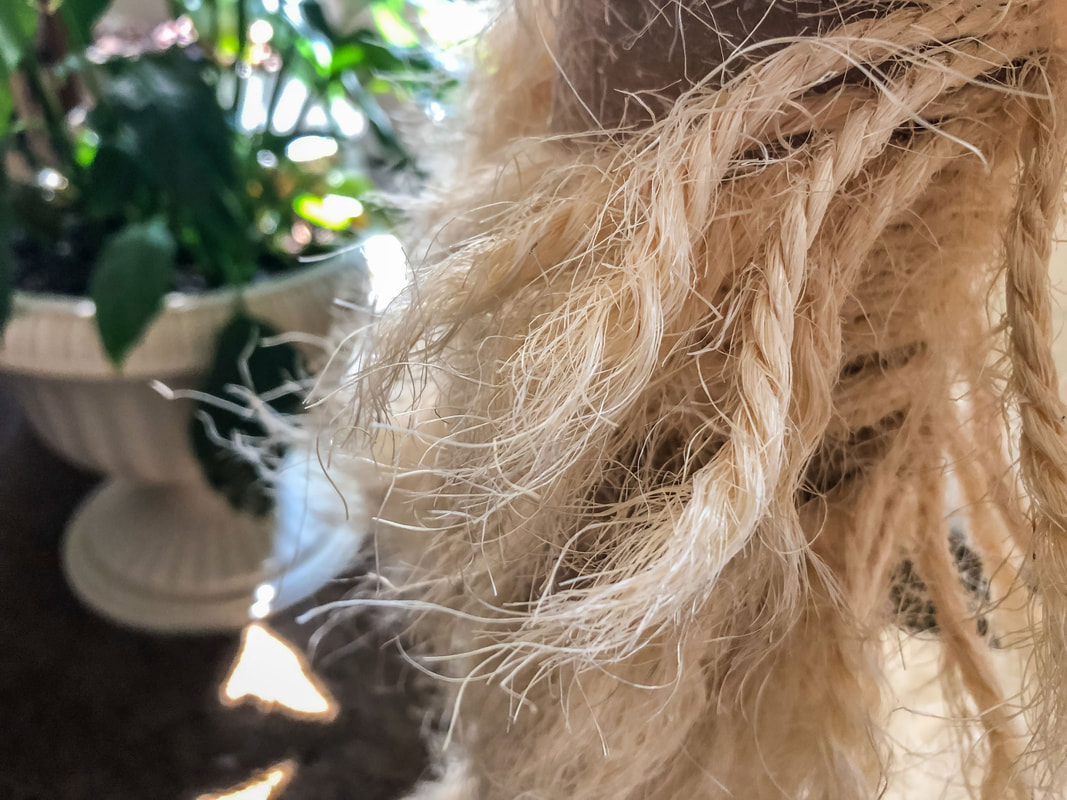 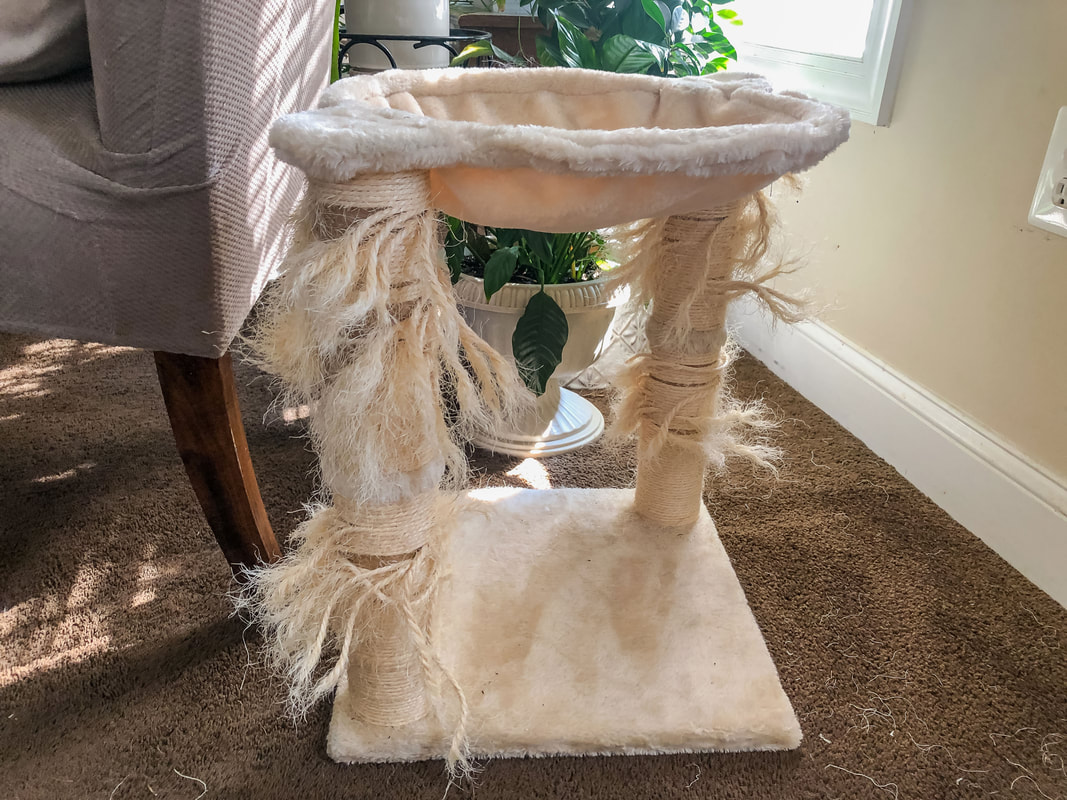 Remove the old wrapping Carefully unwind and remove the old sisal rope or twine from the scratching post. The existing twine on my scratching post had small upholstery tacks at each end for extra reinforcement. I made sure to keep these in case I need them later.  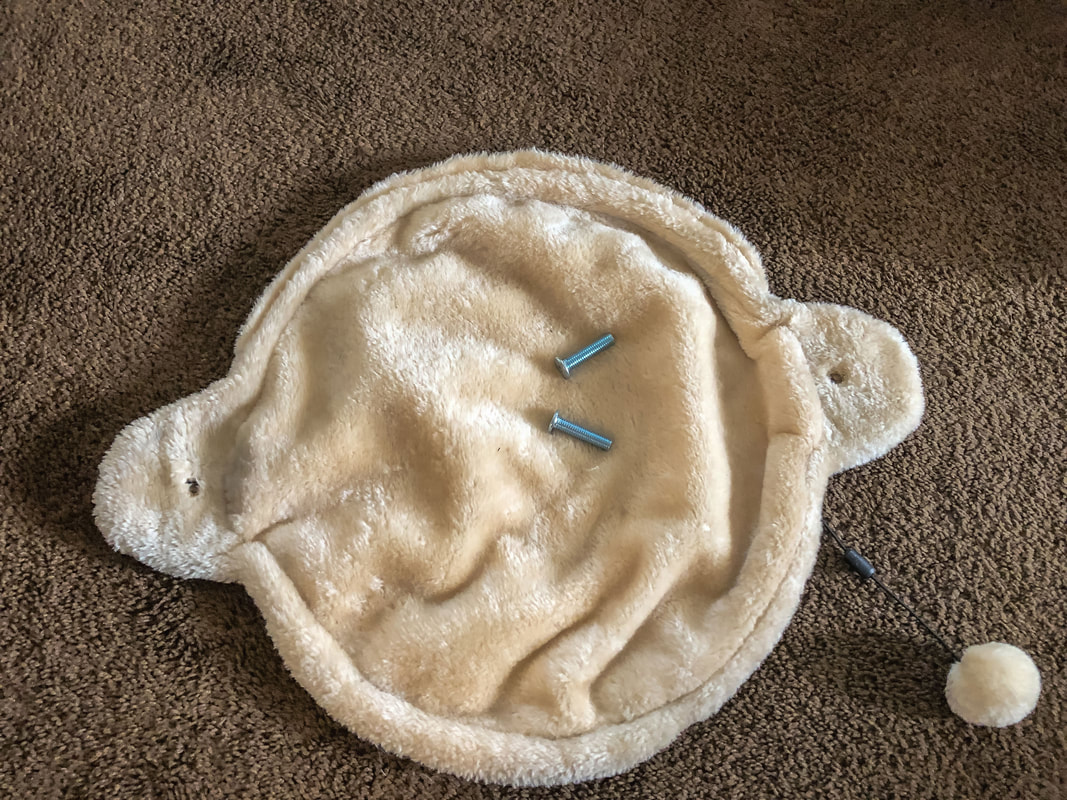 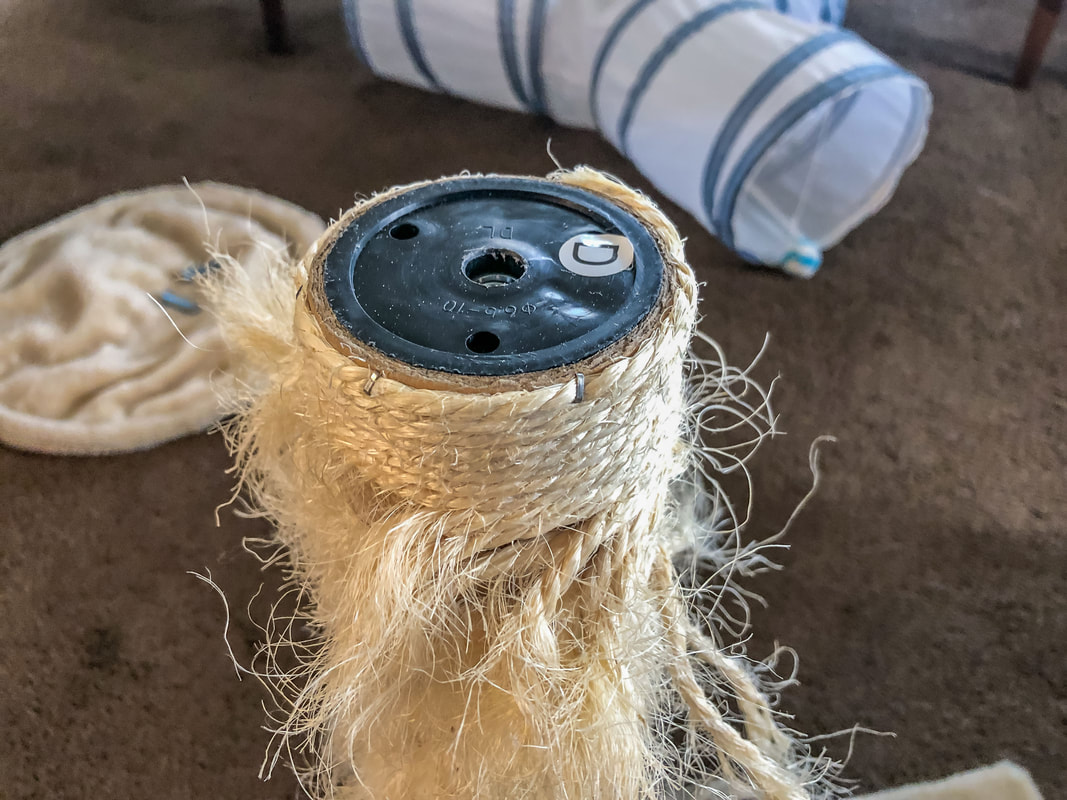 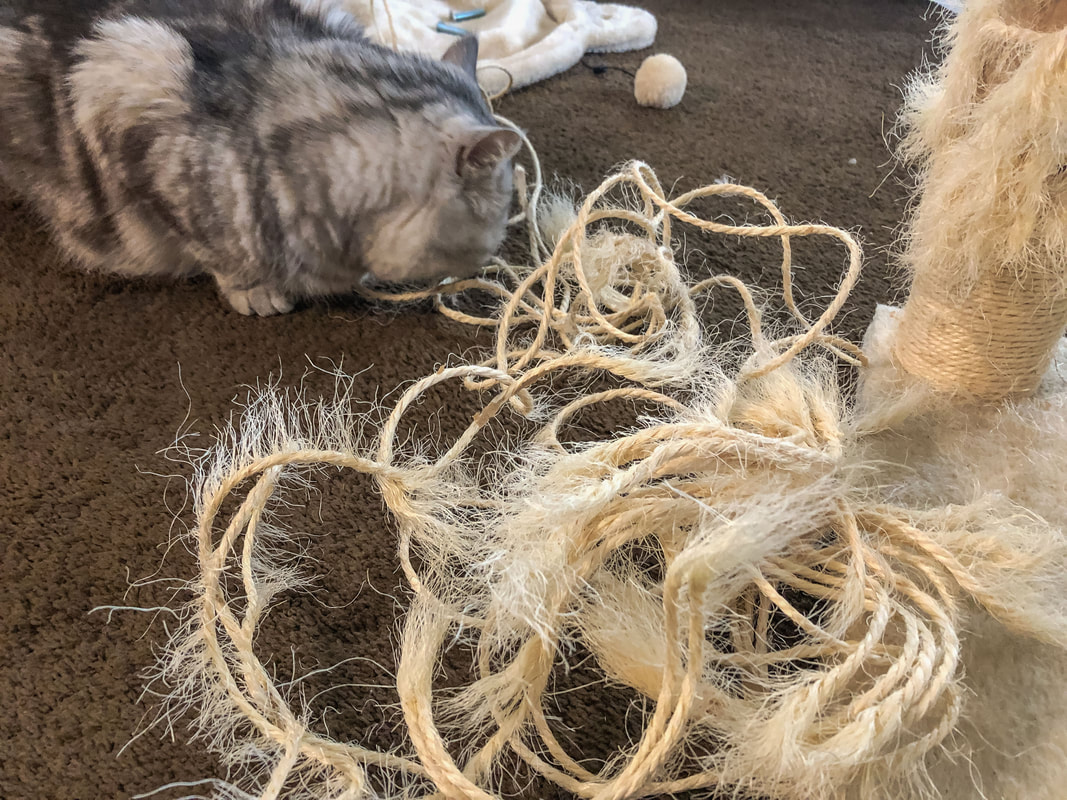 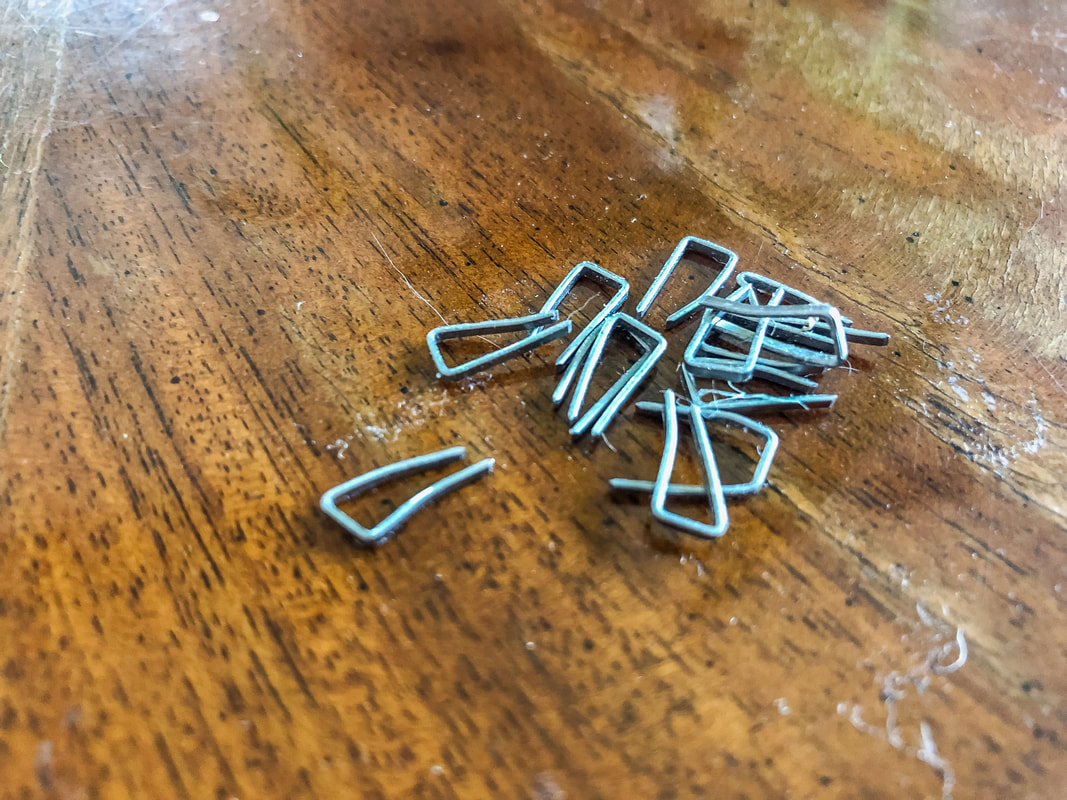 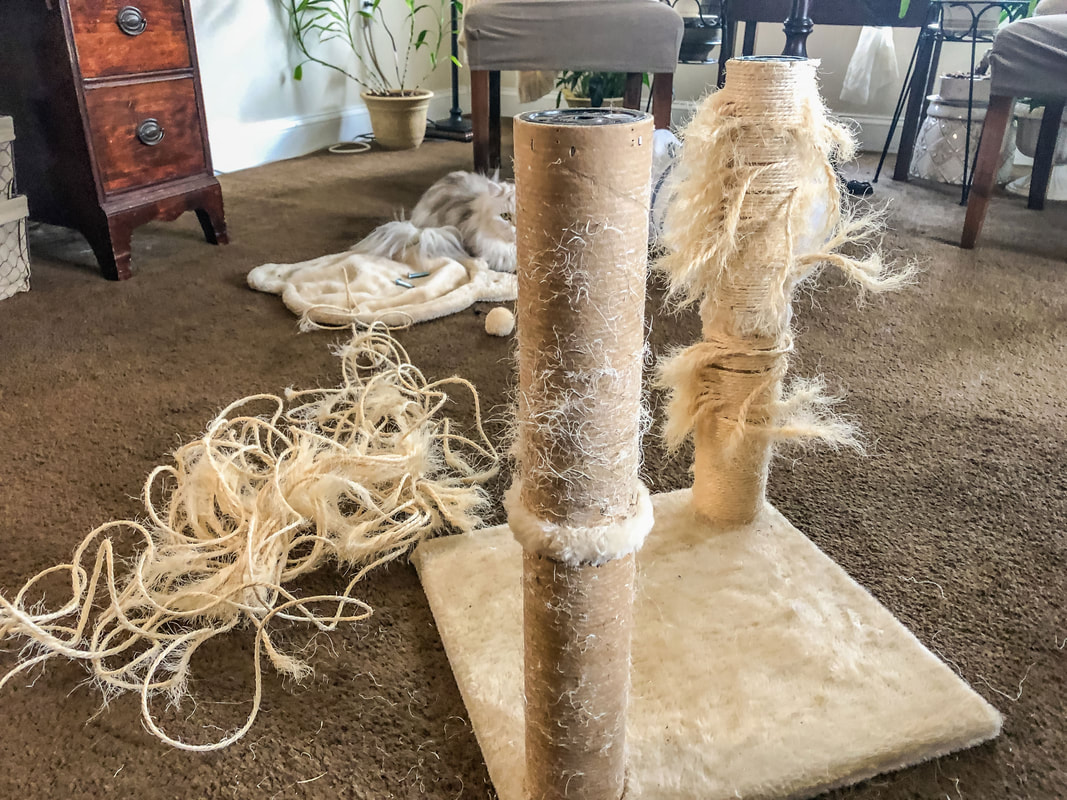 Prepare the new wrapping material Ensure you have enough twine for the height of the scratching post. It is better to have more than not enough! I made the mistake of not ordering enough and needed to order two more rolls to finish the second pole. Unfortunately, the second order of twine was a slightly different color than the first batch, but I made it work! 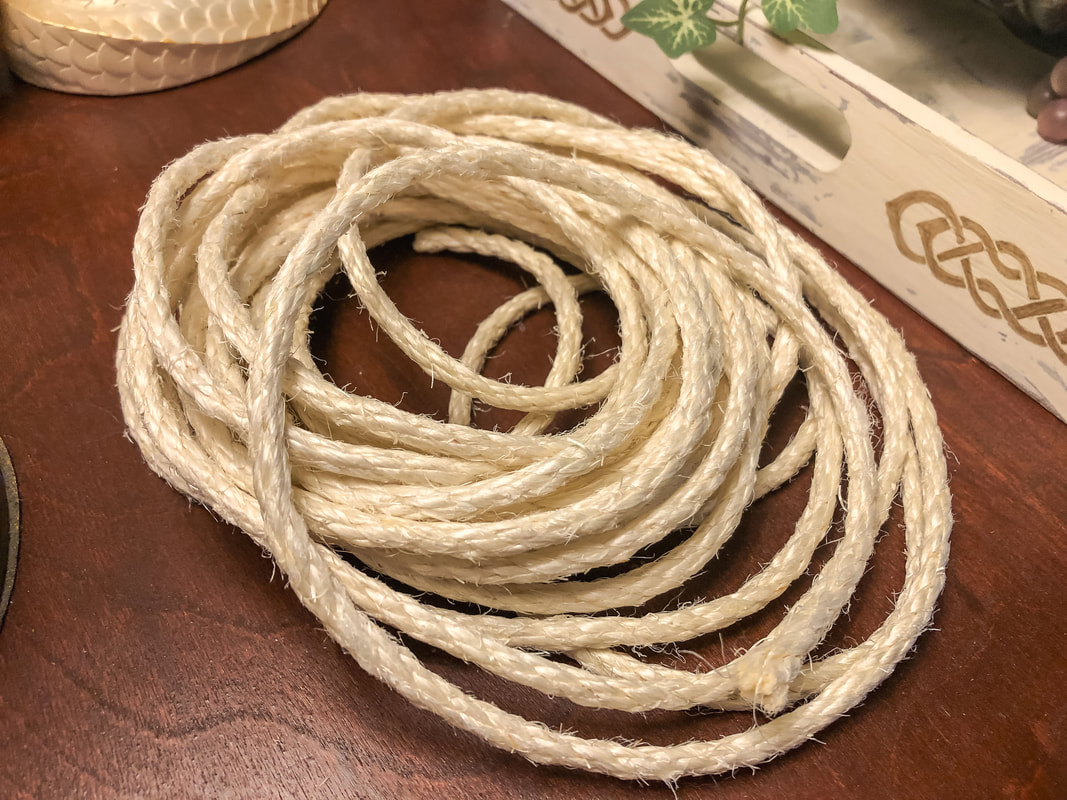 New sisal rope for the scratching post. Photo by Diane M. Lilly, 2023. Begin wrapping Start at the bottom of the post. Secure the end of the rope with a knot or a dab of adhesive, if desired, to keep it in place. I used a hot glue gun to secure the end of the twine in place while I wrapped the twine around the pole.  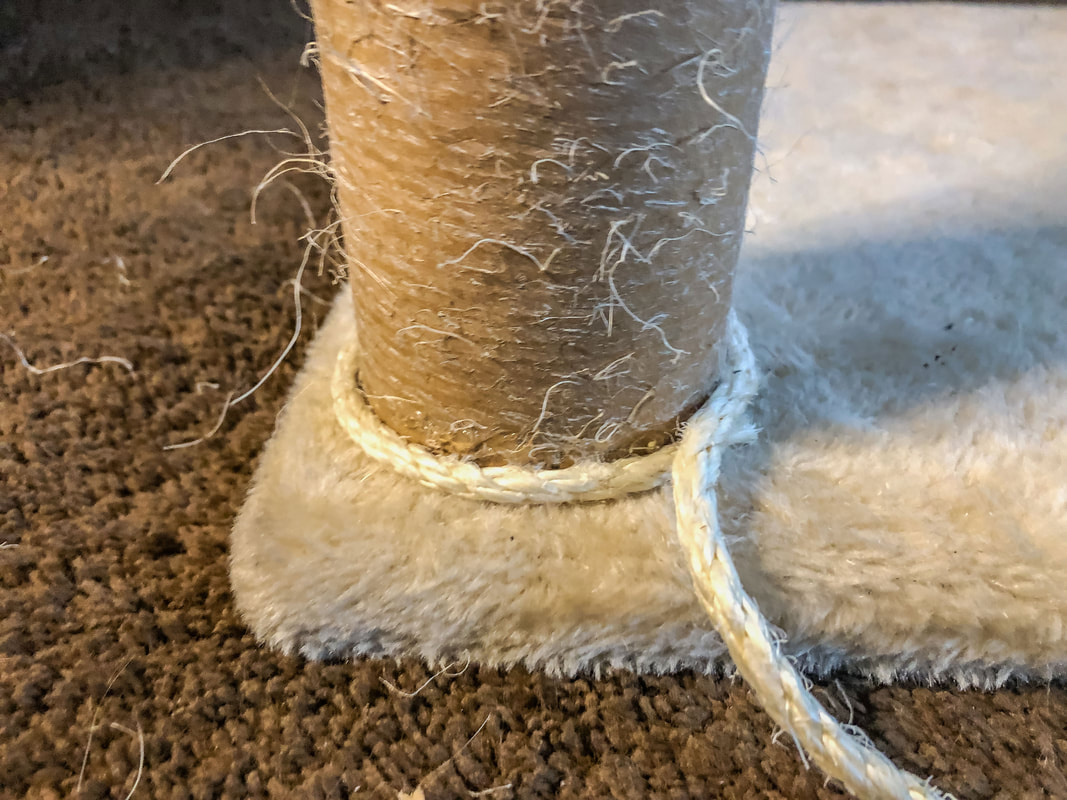 Keep it tight As you work your way up, maintain consistent tension, keeping the rope as tightly wound as possible. Wrap the twine around the pole, then push down against the previous row to close gaps. This will prevent sagging and ensure a sturdy surface for your cat's scratching pleasure. I also used Elmer’s glue on the pole for added adhesion. 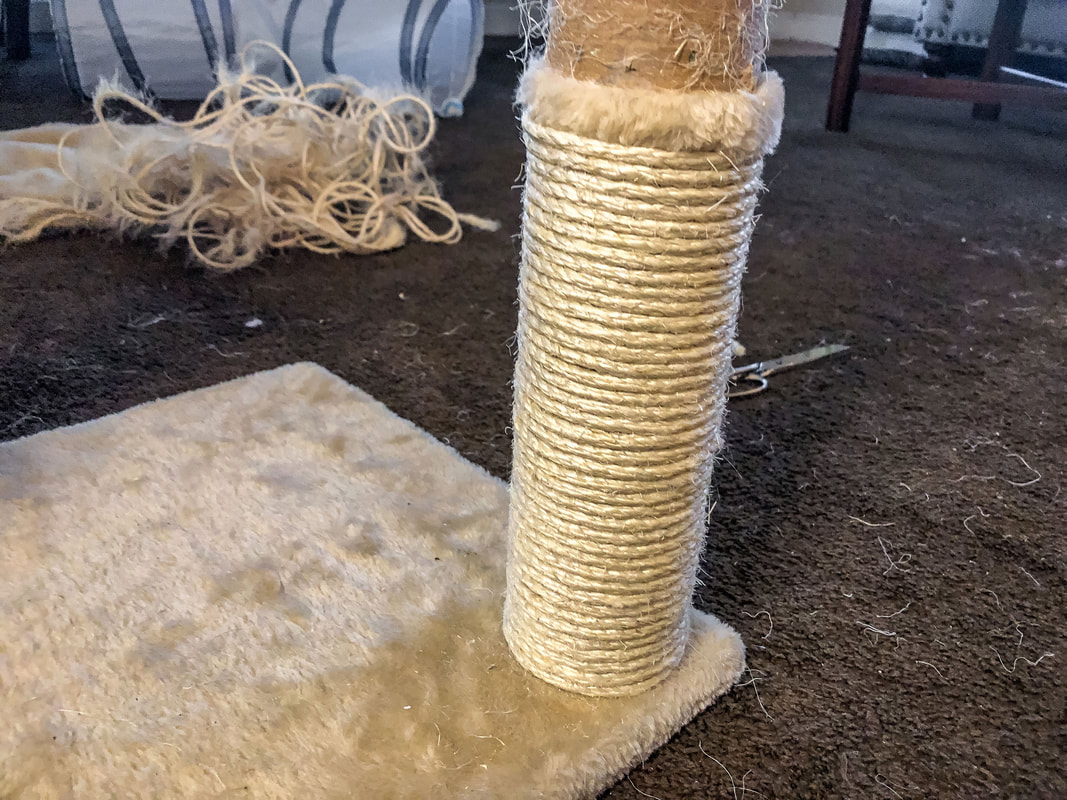 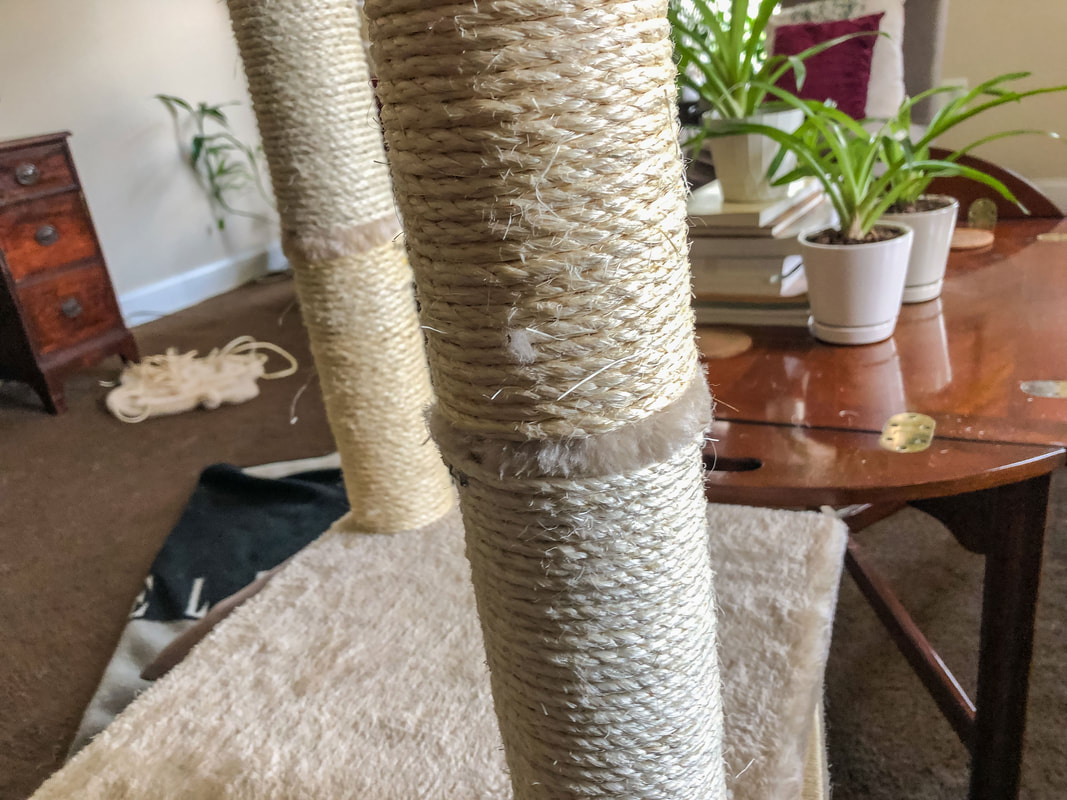 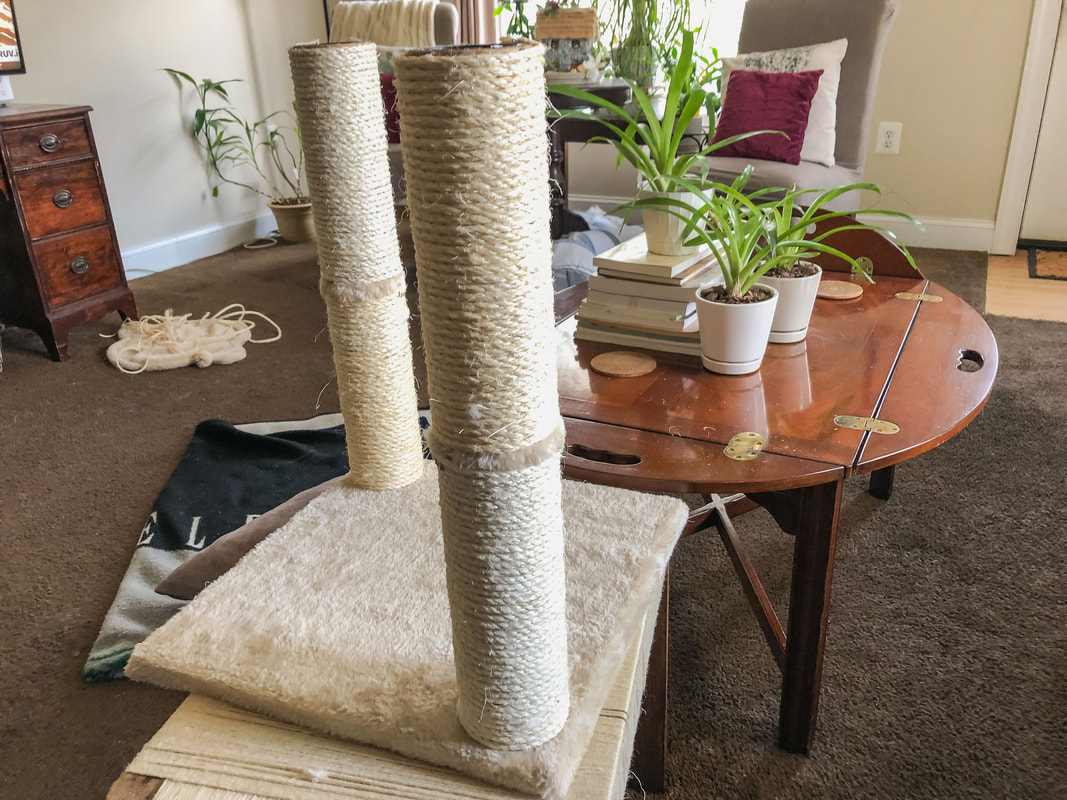 Finishing touches When you reach the end, secure the rope with a knot or adhesive. I used a hot glue gun for this step. Trim any excess rope to ensure a neat appearance. Make sure there are no loose ends that your cat could accidentally unravel. Extra reinforcement (optional) Reinforce large or frequently used posts with staples. Use an upholstery gun to add staples at each end. This way, the twine will not get pulled off by an overzealous cat! I saved the small upholstery tacks from the original twine and used a small hammer to tap them into place at the ends. Let it settle After the rewrapping process, let the scratching post settle. Cats have a keen sense of smell, so a transitional period will allow your cat to get used to the different scents. Don't forget the toys! Now it's time to add a few toys to your finished DIY scratching post. Dangly feathers, crinkly balls, or catnip-infused mice will entice your furry friend to use their newly rewrapped post. 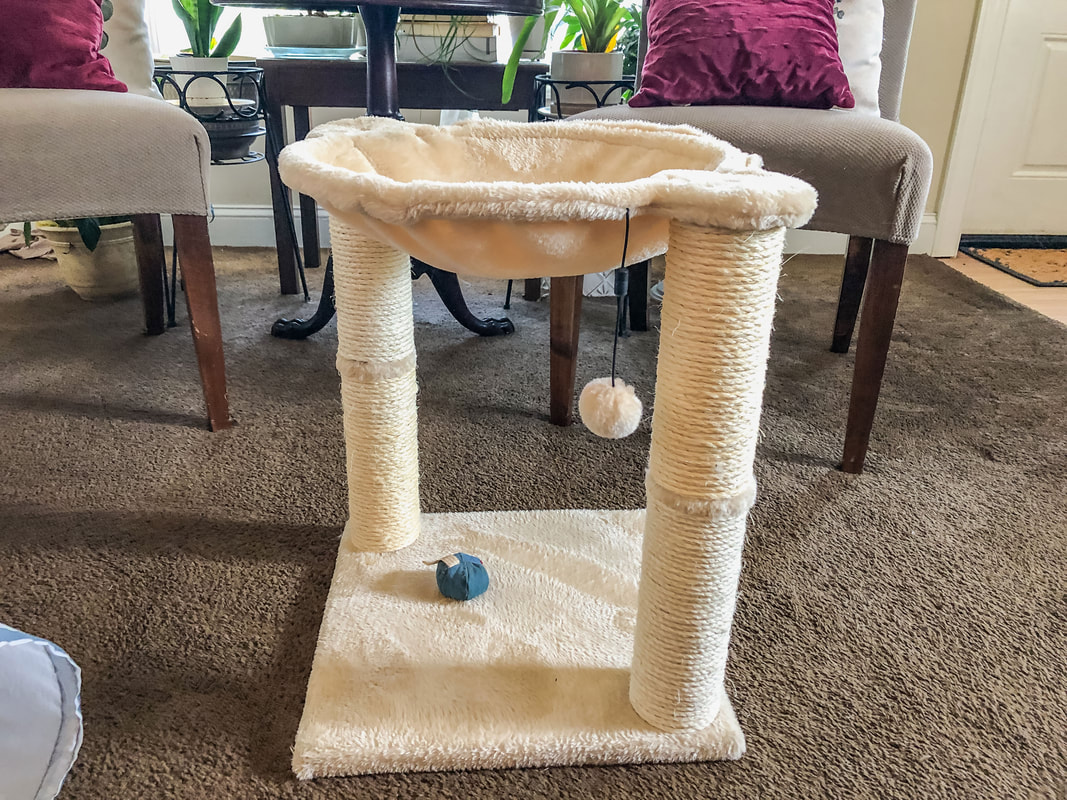 By following these simple steps, you will not only extend the life of the post but also provide your feline companion with a renewed space to stay active, happy, and healthy. Remember to observe your cat's behavior and check the scratching post periodically for signs of wear. Happy scratching to your furry friend! You can watch my Youtube video of this process here! Related blogs you may want to read: How to clean a fabric lampshade DIY chalk painted tray with chippy effect How to reupholster dining room chair seats in 9 simple steps A little project with jute twine and an old foot stool DIY refurbishment of a dining room cabinet DIY upholstery cleaning methods Creating a kithcen coffee bar How to replace a clock mechanism Affiliate Disclosure Some of the posts in this article contain affiliate links. This means if you click on the link and purchase the item, I will receive an affiliate commission at no extra cost to you. I will only recommend products or services I use personally and/or believe will add value to my readers, so there is no conflict of interest.  Image by Maryna on Adobe Stock. If you enjoyed one of my latest articles, “8 Flowers that Attract Fairies to Your Fairy Garden”, here are six more fairy flowers for your garden! Interest in fairy gardens has been growing for quite a while now, and the trend shows no sign of stopping any time soon! The act of creating a fairy garden awakens the inner child, providing an escape from the problems of the mundane and sometimes stressful world around us. And it’s a gift that keeps on giving! Once you create the garden, it becomes a refuge where you can escape from it all and let your imagination out of the box. I have been experimenting with my fairy gardens, and—being a lifelong lover of fairy tales—it got me thinking about the types of flowers fairies might like in their garden. I’m sharing some of my research with you to help you on your way to creating a fairy-friendly garden! Columbine Columbine is a beautiful, graceful flower that reminds me of the layers on a fairy dress! The flower is closely associated with women and sensuality and symbolizes the balance between fragility and strength. The word Columbine has a Latin root that means “dove” which symbolizes peace, but the flower also has associations with the eagle and war. This duality in meaning is also reflected in other names for this flower, such as Granny’s Bonnet and Lion’s Herb. Plant this stunning flower in your garden to attract butterflies, hummingbirds, bees…and fairies!  Image by Paul McGowan on Pixabay. Pansies Pansies are such sweet, colorful flowers! You can often find them growing wild just about anywhere, especially in shady or tucked-away places where the fairy folk like to hide. Other names this flower may go by are Johnny Jump-ups or Viola. Symbolically, the flower represents the act of reflection or remembrance, keeping someone in your thoughts. In folklore, pansies can attract love or make someone fall in love with you and are known to ward off bad spirits and evil spells. Look at the flower petals from a certain angle and see a fairy face staring back at you! This is a must-have flower for your fairy garden!  Image by Manfred-Richter on Pixabay. Petunias Petunias (with their velvety petals) are a visually stunning and aromatic addition to any fairy garden! This flower symbolizes positive vibes of well-being and friendship, and is thought to repel negative energy and evil spirits. A garden filled with petunias will invite wonder, inspiration, and creative ideas. These beautiful flowers also attract hummingbirds, butterflies, and bees. Any fairy would feel quite at home surrounded by a patch of petunias!  Purple and white petunia. Photo by Diane M. Lilly, 2022. Snapdragons Snapdragons (also known as dog flower, dragon flower, or lion’s mouth) symbolize peace, grace, and inner strength. In folklore, this flower wards off spells and evil spirits, attracts positive vibes, and provides magical protection. The curly petals of the snapdragon attract bees…and—of course—fairies!  Image by Hans on Pixabay. Tulips What would be a fairy garden without tulips?! Fairies have been known to hide or sleep inside the tulip flowers, away from the prying eyes of us humans. They even use these flowery havens as cribs for their infants. But the tulip is not just significant to fairies…According to old superstitions, tulips symbolize luck, abundance, love, and declaring new love. So plant a few in or near your fairy garden for your special guest!  Image by neirfy on Pixabay. Violets Violets have powerful symbolism, and any garden would be bare without them! In many traditions, violets are associated with transformation and the cycles of life, birth, and rebirth. This flower can also represent new love. The magical and mystical time of twilight--when the veil between worlds is thin, as they say—is also closely associated with violets. This is the perfect flower for your resident fairy for easy travel between here and the Otherworld, and a must-have plant for a magical fairy garden!  Image by perlphoto on Adobe Stock. So there are six more flowers that you can plant in your fairy garden to attract the fae folk. If you haven’t had a chance to read the first article with eight flowers that attract fairies, the link is down below! Happy planting! (And say hi to the fairies for me!) Related blogs you may want to read: 8 flowers that attract fairies to your fairy garden Who are the Irish fairies? 10 essential elements for a magical outdoor fairy garden A brief history of the origins of fairy gardens My spring 2022 indoor fairy gardens Spring makeover for my indoor fairy gardens My outdoor fairy garden Sources: https://www.terriwindling.com/blog/2019/05/wildflower-season.html https://www.terriwindling.com/blog/2019/05/wildflower-lore.html https://theforestfairy.com/flowers-that-attract-and-welcome-the-fairies-into-your-garden/ https://www.llewellyn.com/journal/article/3028 https://greenwitchfarm.com/all-you-need-to-know-about-columbine/ https://amovitam.ca/the-fairy-in-the-pansy-flower/ https://hive.blog/hive-148441/@yidneth/violas-and-pansies-folklore-mythology-legends-and-properties-of-these-beautiful-flowers https://www.petalrepublic.com/petunia-meaning/ https://a-z-animals.com/blog/snapdragon-meaning-symbolism-and-proper-occasions/  Image by Lauriekay Wirestock on Adobe Stock. Bringing flowers into your home is one of the easiest ways to add beauty, color, and texture to an interior space. Flowers can make a statement all their own or complement existing decor, and many have an amazing fragrance that can be a natural room deodorizer. But if you have cats (or other pets) or even small children in your home, you must be selective about which flowers you use and purposeful about where those plants are placed. In some cases, it could mean the difference between life and death!  My Persian cat Smokey. Photo by Diane M. Lilly, 2020.  My munchkin cat Bandit. Photo by Diane M. Lilly, 2021. I have two beautiful cats in my home that share a space with my plants, so I’ve embarked on a journey to discover which plants and flowers might be toxic to my fur babies. Today’s blog is part of a series of articles on this subject, where I pick a few of the most popular houseplants and flowers that pose a threat to cats. The focus will be on cats, but this information could pertain to other pets and small children. So here are a few flowering plants you should avoid (or monitor) if you have cats… Amaryllis The entire amaryllis plant is toxic, but the bulb is the most toxic, containing raphide oxalate crystals. The rest of the plant contains phenanthridine alkaloid and lycorine. Symptoms of toxic poisoning from this plant may be breathing problems, drop in blood pressure, vomiting, irritation of the mouth, drooling, pawing at the face, diarrhea, and tremors. It’s best to keep this plant out of the reach of your cats!  Image by wjarek on Adobe Stock. Azalea The azalea is not typically an indoor plant, but it's worth noting due to its popularity and use in some floral arrangements. Azaleas contain grayanotoxin, which affects the heart and can cause diarrhea and vomiting. The whole plant is toxic to cats, so watch your outdoor cats! Image by Pixel Shot on Adobe Stock. Begonia Begonias are one of the most popular potted plants but are not the safest flowering plant for cats. The whole plant is toxic, but the roots contain soluble calcium oxalates, which can cause vomiting, drooling, and kidney failure. This one may be better off as a hanging plant!  Image by detailfoto on Adobe Stock. Carnation Carnations--while not as bad for your cat as some other flowering plants--are still mildly toxic. Signs that your cat has ingested this plant might be upset stomach and dermatitis. So be careful with those flower arrangements! Image by Pixel Shot on Adobe Stock. Chrysanthemum Commonly known as mum, this pretty but hazardous plant contains pyrethrins, sesquiterpene, and lactones--toxins found in pesticides and certain flea and tick meds and can be very bad if ingested by your cat. Some toxic symptoms might include drooling, vomiting, diarrhea, and skin issues. 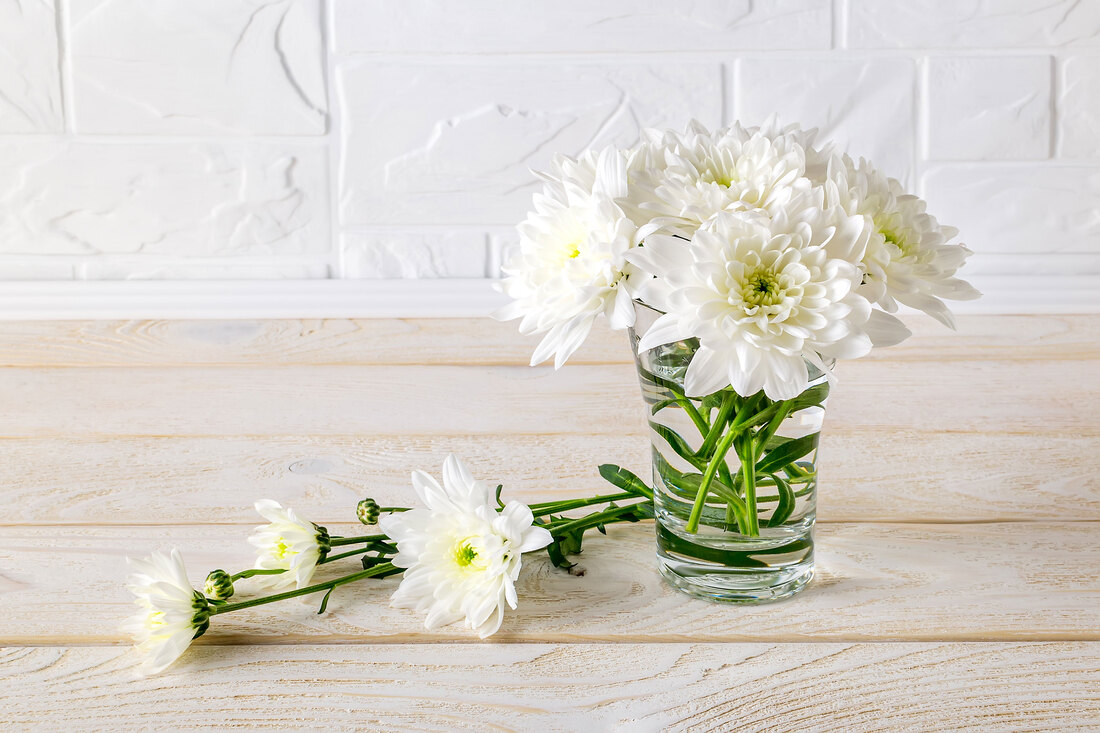 Image by Maryia on Adobe Stock. Cyclamen This is a whimsical plant with colorful pinwheel petals reaching toward the sky, but make no mistake, Cyclamen is extremely toxic--if not deadly--to your cats! The toxins it contains include Terpenoid saponins, also known as triterpene glycosides. The entire plant, including the tubers, is toxic, and ingesting any part of the plant can cause vomiting, diarrhea, drooling, heart problems, seizures, and possibly death for your cat.  Image by womue on Adobe Stock. Daffodils Also called Narcissus, the whole plant is toxic—flowers, leaves, and especially the bulbs. Daffodils contain lycorine, phenanthridine alkaloids, and calcium oxalate crystals, which even in small quantities can result in diarrhea, stomach upset, vomiting, tremors, drooling, drop in blood pressure, and cardiac issues. Be very careful with this flower around your cats! 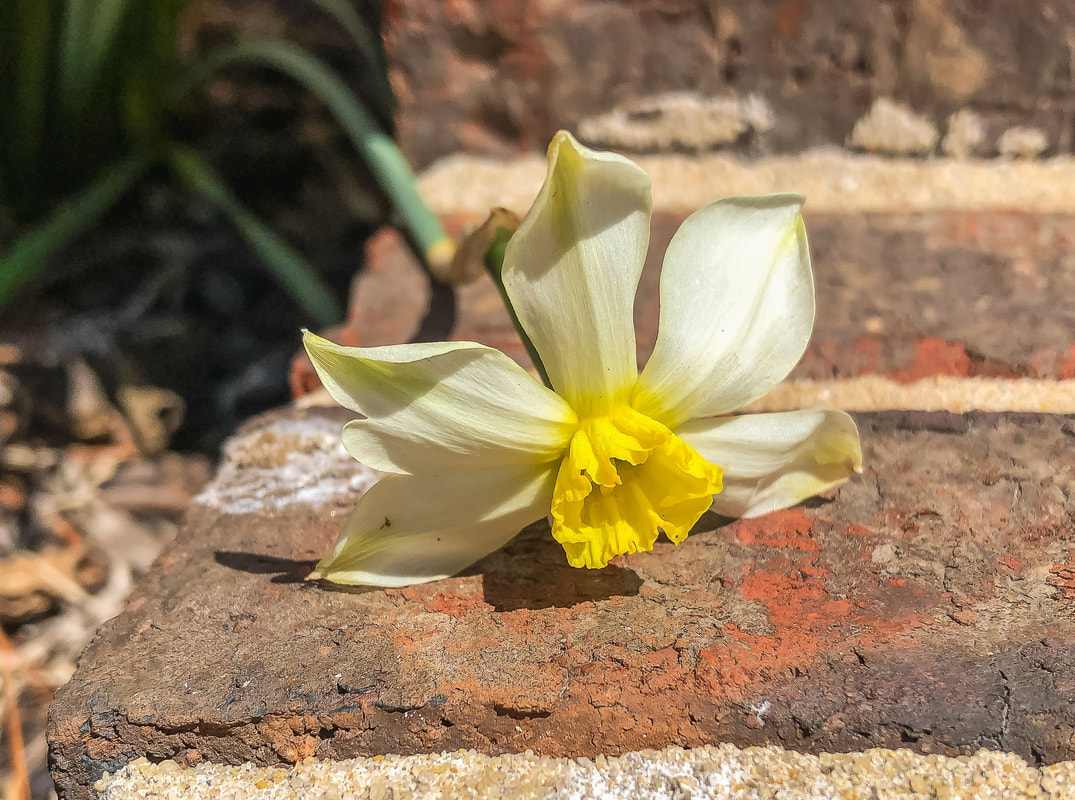 Lazy Daffodil. Photo by Diane M. Lilly, 2022. Hyacinth Like most bulb plants, hyacinths are dangerous for cats. The hyacinth plant contains alkaloids like lycorine and calcium oxalate raphides, which can cause diarrhea, vomiting, dermatitis, and tremors. So, if you receive one of these aromatic flowering plants for Easter or Mother’s Day, it may be best to keep it outside, away from your indoor cats! 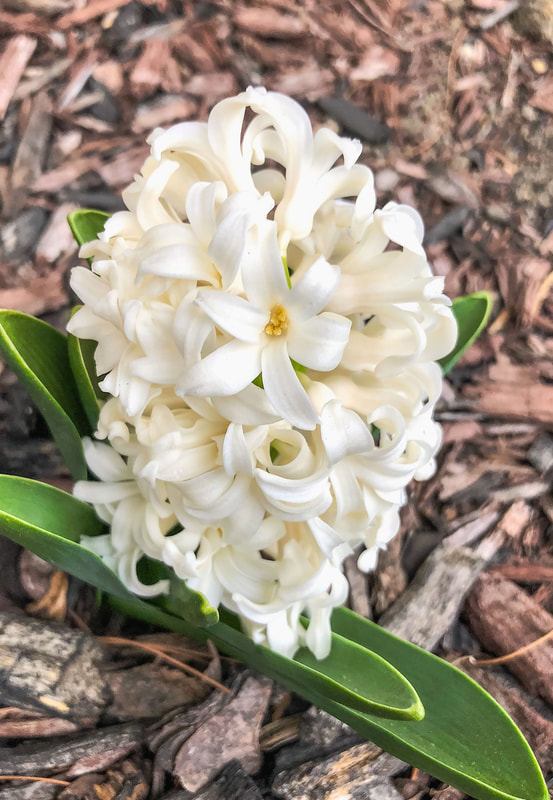 White hyacinth. Photo by Diane M. Lilly, 2019. So, there are a few flowering plants to monitor if you have cats. There are many more, and I’ll add more articles with additional plants as I do more research. Please remember I am NOT a vet, so if you are at all concerned that your cat has ingested part of your plants, please consult a veterinarian immediately. Also, remember to do your own research so you can properly care for your plants while keeping your pets and small children safe. Related blogs you may want to read: 10 non flowering houseplants that are toxic to cats Eight tips for assessing natural light in your home How to repot a bonsai ficus How to repot a pothos plant How to propagate bromeliad pups Small houseplants that love bathroom humidity Eight health benefits of decorating with plants Let’s talk about houseplants Sources: https://www.hillspet.com/cat-care/routine-care/house-plants-toxic-to-cats?lightboxfired=true# https://www.thespruce.com/houseplants-toxic-to-cats-4775359 https://www.preventivevet.com/cats/common-household-plants-toxic-to-cats https://www.aspca.org/pet-care/animal-poison-control/toxic-and-non-toxic-plants?field_toxicity_value[]=02 https://www.marthastewart.com/8376743/houseplants-toxic-to-cats https://www.farmersalmanac.com/toxic-houseplants-30149 https://pethelpful.com/cats/Houseplants-Poisonous-to-your-Cats https://www.dailypaws.com/cats-kittens/health-care/cat-poisoning-toxins/plants-toxic-to-cats https://pets.webmd.com/ss/slideshow-pets-poisonous-plants https://www.sleepyhollowanimalhospital.com/the-houseplants-that-could-poison-your-cat/ 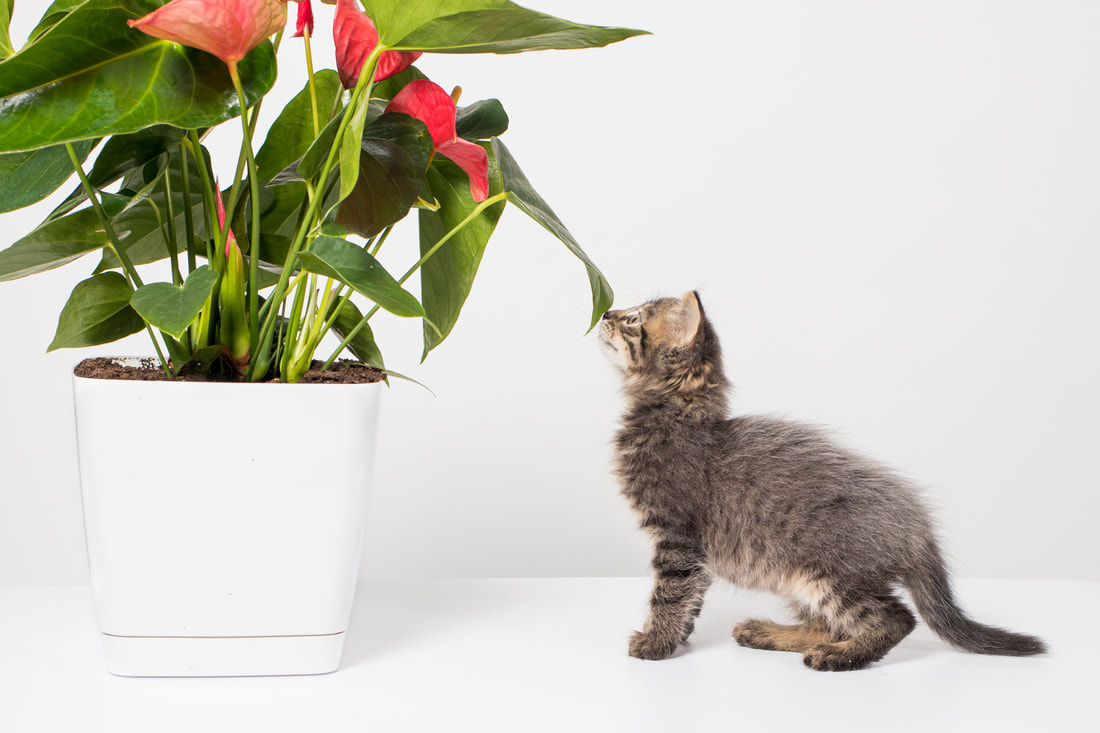 Image by Zarina Lukash on Adobe Stock. If you have houseplants AND pets, this information is for you! For most of my life, there has always been a cat or two in the home, and I can’t imagine life without them! Houseplants, on the other hand, are a far more recent phenomenon. A few years back (after our 14-year-old fur baby passed away), our household was blessed with two beautiful munchkin kittens. It’s been five years, and they have grown into such sweet cats! Suddenly, I’ve become aware that the house is full of luscious green plant babies that may not get along with my fur babies.  Smokey and the Bandit as kittens. Photo by Diane M. Lilly, 2017. I’m only just learning the ins and outs of plant care, and one of the topics on my mind is plant toxicity. I finally carved out time to do some much-needed research on the subject. This would be an actual book if I tried to list ALL the plants and flowers that could be toxic, so I decided to break up the list into several blogs featuring the most common houseplants. Today we will look at ten houseplants that are (more or less) NON-flowering that could be problematic for your cats. So, let’s get to it! Aloe vera Who doesn’t love an aloe plant? They are easy to maintain and look good in just about any pot. Their simplicity and good looks, however, hide the fact that these plants can be harmful to your kitty if it should happen to take a nibble. Aloe plants contain toxins known as saponins (anthraquinone glycosides), so this plant is harmful if ingested, although on the more moderate end of the toxin spectrum. If your cat eats this plant, it may show symptoms such as diarrhea, vomiting, and lethargy. 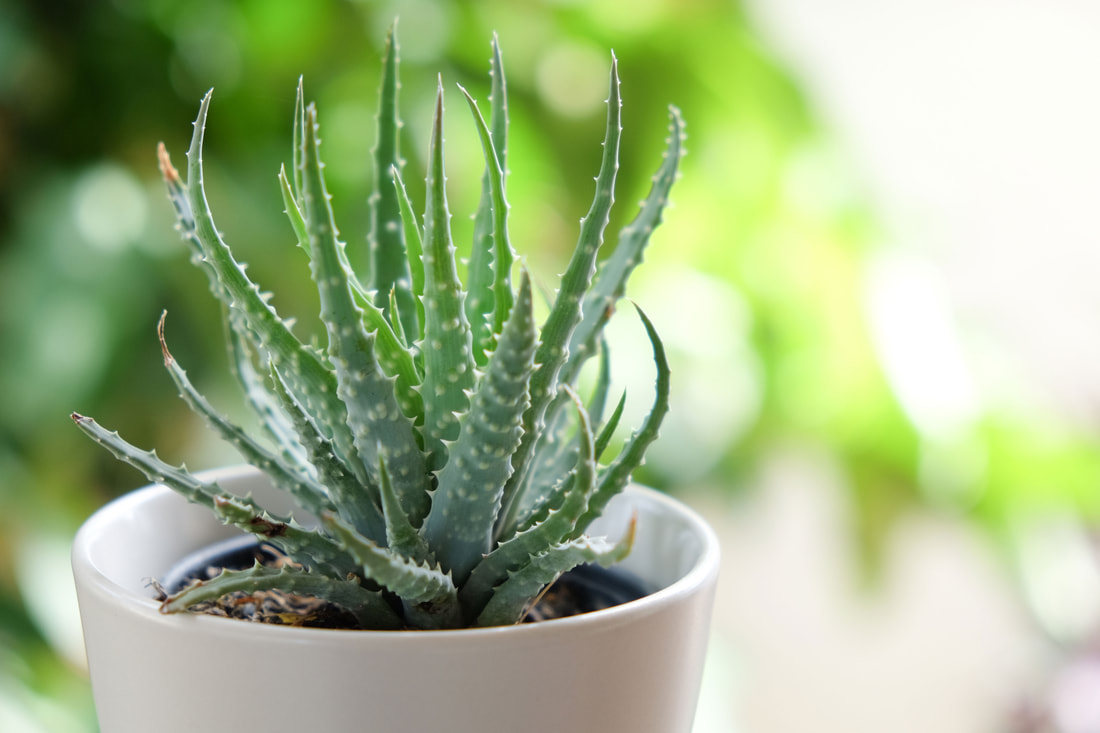 Image by Nattapol_Sritongcom on Adobe Stock. Asparagus fern Another mildly toxic plant that contains sapogenins is the wispy asparagus fern. This green plant looks like something out of a fairy forest, but what appeals to the fairies can make cats sick! Cats ingesting this plant may develop skin allergies, dermatitis, diarrhea, vomiting, and upset stomach.  Image by Studio Light & Shade on Adobe Stock. Caladium The caladium plant is a bit more serious when it comes to toxicity. This plant with incredibly striking leaves contains Insoluble calcium oxalates, and these toxins can be quite bad for cats. The toxic symptoms could include vomiting, swelling of the mouth, excessive drooling, and difficulty swallowing and will require--at the very least--an immediate call to your vet. 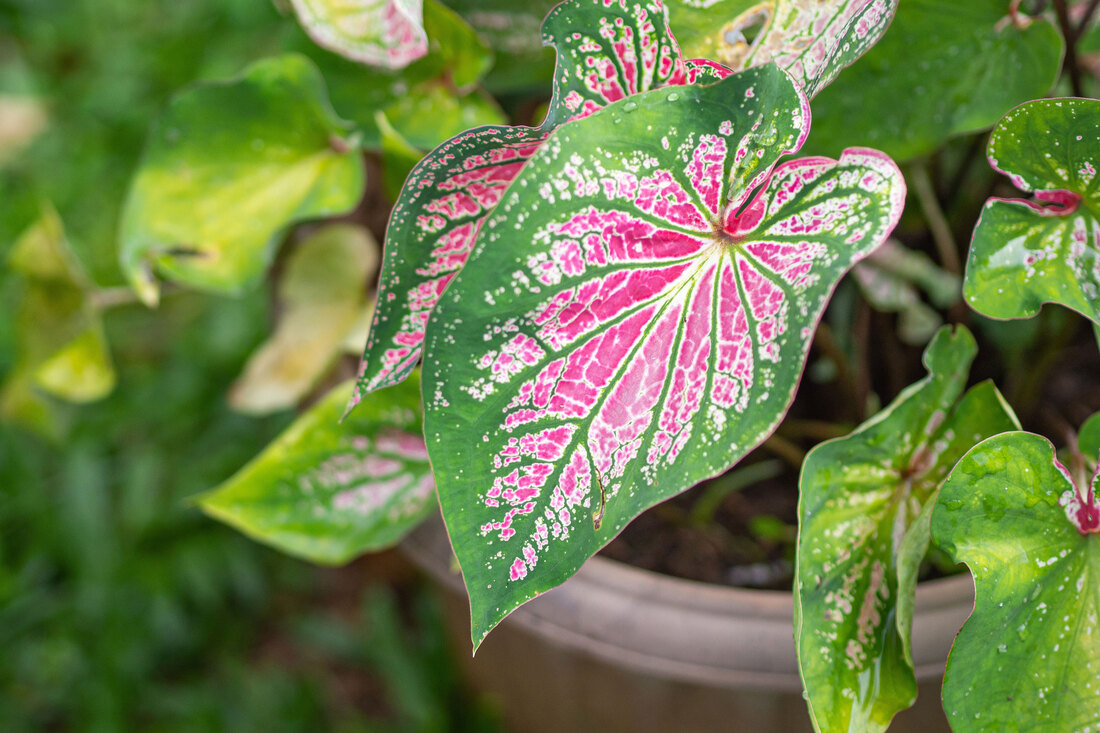 Image by meeboonstudio on Adobe Stock. Castor bean The castor bean is a plant that you should cross off your list. This is a very toxic plant containing ricin, and anyone who ingests this plant is in very real danger from the effects of the toxins. In cats, the toxins of the castor bean plant can cause damage to the nervous system, kidney failure, diarrhea, vomiting, loss of appetite, weakness, convulsions, and even death. 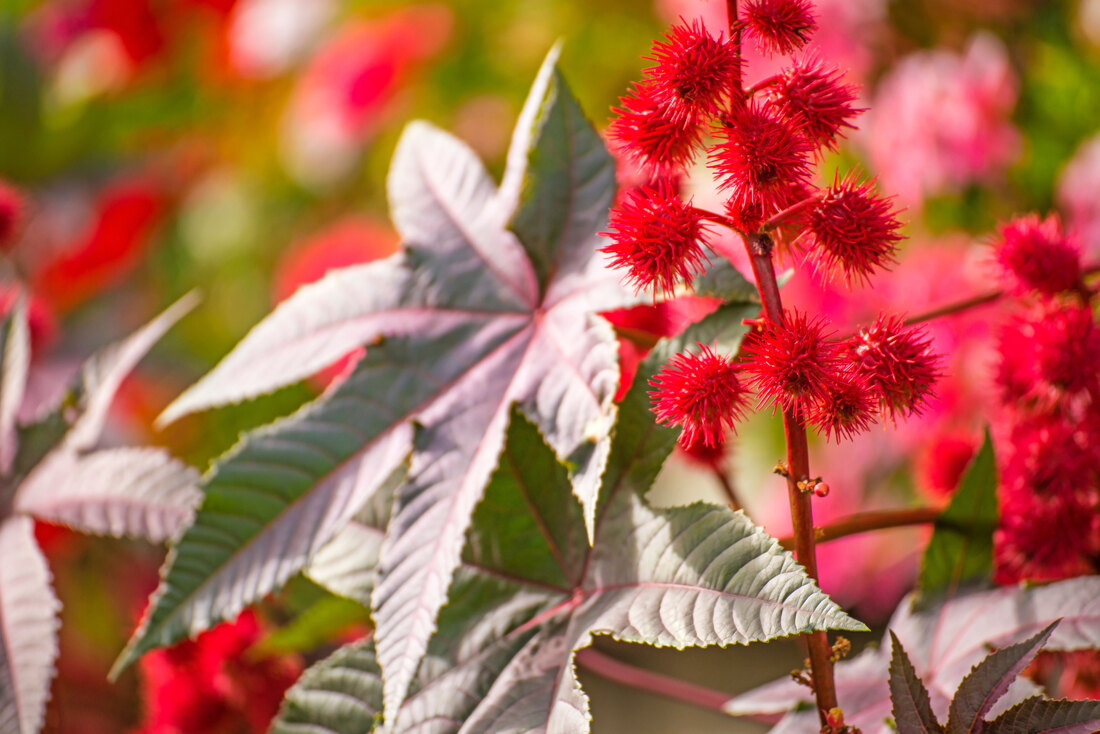 Image by hjschneider on Adobe Stock. Coleus Coleus is another houseplant that flaunts striking leaves but contains toxins that are very harmful to pets and small children. If you have this plant, look for symptoms such as diarrhea, vomiting, and changes in your cat’s mood.  Image by yvonneboylan on Pixabay. Cutleaf philodendron Also known as Monstera, Ceriman, split leaf philodendron, or Swiss Cheese plant, this popular plant contains Insoluble calcium oxalates, which—just as with the caladium—means they are toxic to cats. If one of these large trendy plants has found a home in a cozy corner of your living room, keep an eye on your kitty and look for symptoms such as mouth and tongue swelling, excessive drooling, difficulty swallowing, and vomiting.  Image by ArtBackground on Adobe Stock. Dieffenbachia This plant contains insoluble calcium oxalates that, as previously mentioned, can have terrible effects if ingested by your pets or small children. Also known as Dumb Cane or Charming Dieffenbachia, a proteolytic enzyme makes this plant a very toxic choice for a houseplant. The toxins negatively affect the gastrointestinal tract. These poisons also cause difficulty swallowing and swelling of the lips, tongue, and face. 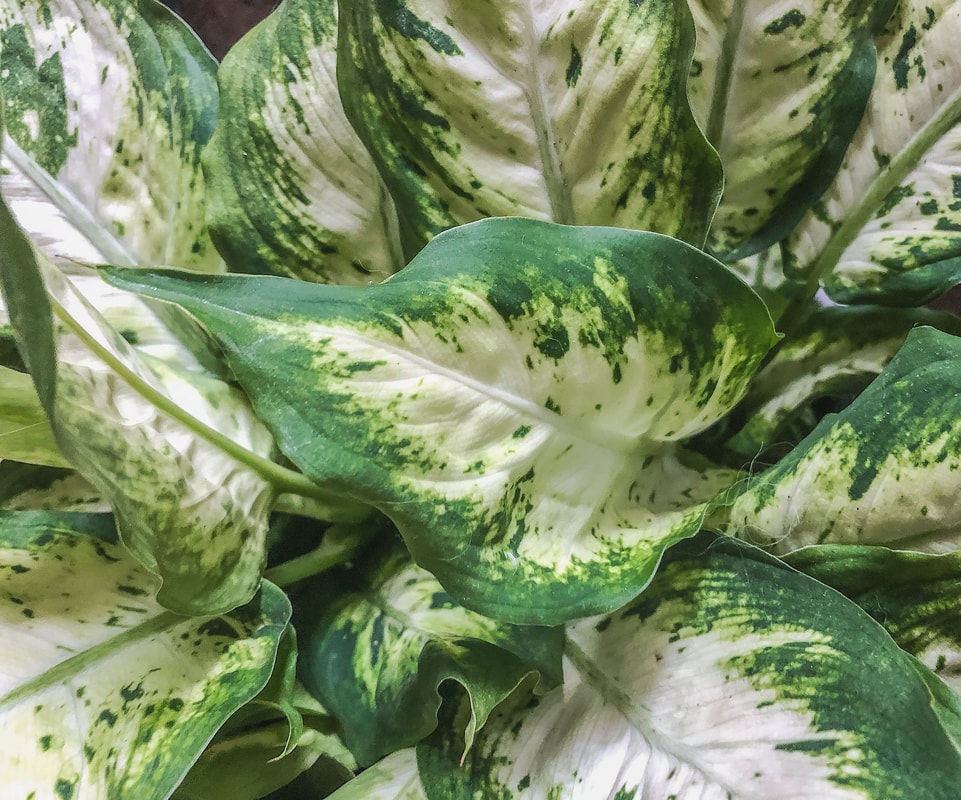 Dieffenbachia leaves. Photo by Diane M. Lilly, 2021. Dracaena Also known as the Corn Plant, the dracaena contains saponins, which can cause vomiting, lack of appetite, drooling, and lethargy in your cat if ingested. Many different plants fall under the category of dracaena, so do your homework before bringing unknown plants home! 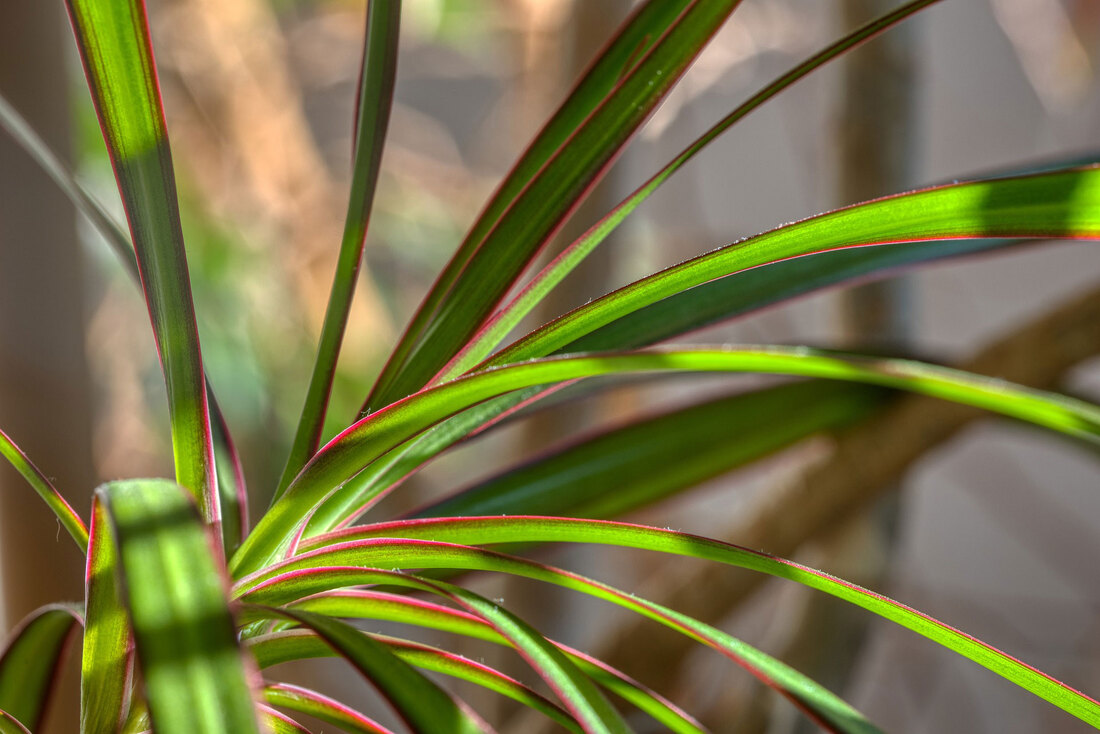 Image by Gabriele Lasser on Pixabay. English ivy One of my all-time favorite plants is English ivy, but unfortunately, this can never have a place inside my home. Ivy contains Triterpenoid saponins, making it very toxic and dangerous to animals, causing excessive drooling, diarrhea, and vomiting. And this may be the case for many types of ivy, so do your research!  Image by Dimitris Vetsikas on Pixabay. Eucalyptus The trendy eucalyptus plant—unfortunately—contains eucalyptol and harmful essential oils. Contact with this plant (or the essential oil) can cause excessive drooling, oral irritation, airway swelling, weakness, vomiting, diarrhea, and low mood in your cat. This may look gorgeous in wedding bouquets and on Instagram, but keep it away from your pets! I recently found out that essential oils can be harmful to pets, so use these oils wisely. It's best to keep them away from your dogs and cats.  Image by Denise Torres on Adobe Stock. It’s important to point out that certain plants only require minimum exposure to bring on symptoms, but others need quite a bit more ingestion. Your kitty's response to the toxicity also depends on their size and constitution, so this list is only meant to be a guide. I am also NOT a veterinarian, so please consult a vet if you believe your cat is reacting to any plant in your house. This article is meant to raise cat owners' awareness of hidden dangers in common houseplants. That doesn’t necessarily mean you can’t have your favorite plant baby, but maybe place it somewhere out of reach of your other precious babies of the furry variety! Related blogs you may want to read: 8 flowering houseplants that are toxic to cats Eight tips for assessing natural light in your home How to repot a bonsai ficus How to repot a pothos plant How to propagate bromeliad pups Small houseplants that love bathroom humidity Eight health benefits of decorating with plants Let’s talk about houseplants Sources: https://www.hillspet.com/cat-care/routine-care/house-plants-toxic-to-cats?lightboxfired=true# https://www.thespruce.com/houseplants-toxic-to-cats-4775359 https://www.preventivevet.com/cats/common-household-plants-toxic-to-cats https://www.aspca.org/pet-care/animal-poison-control/toxic-and-non-toxic-plants?field_toxicity_value[]=02 https://www.marthastewart.com/8376743/houseplants-toxic-to-cats https://www.farmersalmanac.com/toxic-houseplants-30149 https://pethelpful.com/cats/Houseplants-Poisonous-to-your-Cats https://www.dailypaws.com/cats-kittens/health-care/cat-poisoning-toxins/plants-toxic-to-cats https://pets.webmd.com/ss/slideshow-pets-poisonous-plants https://www.sleepyhollowanimalhospital.com/the-houseplants-that-could-poison-your-cat/ https://www.aspcapro.org/resource/17-plants-poisonous-pets  Bluebells image by Andy Evans on Adobe Stock. Even if you don’t believe in fairies, a beautiful garden full of fragrant flowers bursting with vibrant blooms feels enchanting--don’t you think? To my mind, fairies are more than tiny winged or magical creatures. They represent the idea that the natural world is brimming with wonders, wonders we miss while living our busy lives. But take the time to go deeper, and you'll find magic all around you. Fairies and flowers have long had a close association, as this poem by Robert Louis Stevenson beautifully illustrates: The Flowers “All the names I know from nurse: Gardener's garters, Shepherd's purse, Bachelor's buttons, Lady's smock, And the Lady Hollyhock. Fairy places, fairy things, Fairy woods where the wild bee wings, Tiny trees for tiny dames-- These must all be fairy names! Tiny woods below whose boughs Shady fairies weave a house; Tiny tree-tops, rose or thyme, Where the braver fairies climb! Fair are grown-up people's trees, But the fairest woods are these; Where, if I were not so tall, I should live for good and all” Robert Louis Stevenson When we were children, our imagination allowed us to escape this world into someplace ethereal and mystical...and then we grew up. But, let’s say, for the sake of argument, fairies DO exist…How would you go about creating a natural haven for your magical guests? My quest is to find the perfect flowers to attract fairies to my garden, and it’s been a fascinating journey! In today's blog, I'd like to share a few flowers that may help you create your magical fairy world! Bluebells Out of all the flowers, bluebells may be one of the most closely associated with fairies. Carpets of bluebells can be found on many forest floors, rippling like water in the breeze. It may look beautiful, but enter that field of blue at your own risk! Fields of bluebells represent places of the other realm where the fairy folk meet, dance, and feast. Stroll into this field, and you may disappear into the realm of the fairies! This realm is a place of enchantment where time moves much slower. If you manage to escape and return to reality, you may find significant time has elapsed. It is also said that stepping on bluebells or hearing them ring can mean impending death for you or someone close to you. But don’t let any of that scare you! Planting bluebells in your garden, nurturing them, and respecting the space is a surefire way to entice fairies to your garden!  Bluebells image by armennano on Pixabay. Clover We’re all familiar with the iconic clover! How many of you spent hours as a child lying in the grass searching for the elusive four-leaf clover? So it should come as no surprise that clover leaves symbolize luck, particularly the four-leaf variety. Four-leaf clovers not only attract but allow you to see the fairies! Clover leaves in fairy lore are said to offer magical protection and fairy glamour, but the clover flowers have a symbolism of their own--they aid in matters of the heart. And bees love clover too, so clover just might be a handy plant to have in your garden!  Red clover image by Couleur on Pixabay. Cowslips Cowslips are related to primrose and are one of the first flowers of spring. The flowers resemble keys and are said to be the keys to the fairy realm. Another common name for cowslips is "fairy cup" because it is said that fairies take shelter in these during times of danger. Fairy folklore says a patch of cowslips is a sign that fairy gold or treasure is hidden nearby! This flower is a must-have if you want some powerful fairy magic in your garden!  Cowslips image by Annette Meter on Pixabay. Foxglove Foxglove is another flower that has traditionally been very closely associated with the fairies and is said to be a flower in which fairies like to sleep. Other names used to refer to foxgloves are fairy thimbles, folk gloves, or fairy gloves. The name means gloves of the Good Folk (Fairy Folk) because, in fairy lore, magical creatures were said to wear foxgloves on their feet or as gloves. Like the bluebells, foxgloves have contradictory symbolism. These flowers can be used for healing but can equally be associated with death or witches, but as long as you treat foxgloves and the fairies with respect, you have nothing to worry about! So plant a few of these blue beauties to attract fairies—and bees—to your garden!  Foxglove image by NoName 13 on Pixabay. Lavender Lavender is such an aromatic and beautiful flower to have in your garden! Another common name for lavender is elf leaf, as this plant is thought to gift the ability to see the fairies when they are near. It is also a powerful defender, warding off negative energy or evil fairy folk. Lavender also has practical benefits--a beautiful scent and medicinal properties. This gorgeous and fragrant flower is known to attract fairies and—of course—bees.  Lavender image by Sabrina Wisian on Pixabay. Primrose The primrose plant symbolizes the gateway to the fairy realm and offers protection from dark fairy magic or witchcraft. But it’s worth noting that, as much as primrose grants you the ability to peer into the enchanting realm of the fairies, this flower also allows fairies to use it to become invisible! It’s worth noting that fairies love primrose, so neglecting this flower could cause you to lose favor, but nurturing the plant and helping it grow will encourage fairy blessings. This is a potent fairy flower, so use it wisely!  Primrose image by Peggychoucair on Pixabay. Rosemary Another name for rosemary—just like lavender—is elf leaf. Rosemary is a powerful herb that is said to ward off wicked fairies and their spells and attract only the good fairies to your garden. Rosemary is incredibly aromatic and handy in a wide variety of recipes. It’s one of my favorite herbs--and the fairies love it as well!  Rosemary. Photo by Diane M. Lilly, 2022. Thyme Planting thyme can help ward off harmful fairies while enticing the good ones to stay and make their homes in your charming garden. Thyme is one of the plants—along with primrose and lavender—that is thought to help you spot the fairies when they are nearby. Maybe you’ll even be lucky enough to glimpse the fairy queen asleep in her bed of thyme! This herb is so aromatic and can be a beautiful ground cover in a fairy patch.  Thyme. Photo by Diane M. Lilly, 2022. This journey of learning about flowers and their relation to the fairy folk has been fascinating! The ones covered today are just a sample of the wide variety of flowers associated with the mystical world of the fae. My research is ongoing, and more articles covering fairy flowers are in the works. But hopefully, this will inspire you to get started with your fairy garden…and drop a line in the comments below to let me know how it goes! Related blogs you may want to read: Who are the Irish fairies? 10 essential elements for a magical outdoor fairy garden A brief history of the origins of fairy gardens My spring 2022 indoor fairy gardens Spring makeover for my indoor fairy gardens My outdoor fairy garden Sources: https://www.groveandgrotto.com/blogs/articles/the-faery-dozen https://bethtrissel.wordpress.com/2014/06/01/plants-the-fairies-like-and-dislike/ https://talesfromthefairies.wordpress.com/tag/flowers/ https://solsticesisters.co/blogs/post/5-plants-to-please-the-fae https://sarah-liz1976.tripod.com/id28.html https://www.llewellyn.com/journal/article/3028 https://www.icysedgwick.com/fairy-friendly-garden/ https://theforestfairy.com/flowers-that-attract-and-welcome-the-fairies-into-your-garden/ http://chalicecentre.net/blog/the-faery-lore-of-foxgloves/ https://www.terriwindling.com/blog/2019/05/wildflower-season.html https://annafranklinhearthwitch.wordpress.com/2022/04/16/the-lore-magic-of-clover/ https://www.pansymaiden.com/flowers/meaning/clover/ https://greenwitchfarm.com/all-you-need-to-know-about-columbine/ https://www.terriwindling.com/blog/2019/05/wildflower-lore.html https://www.luminescents.net/shop/herbal/botanicals/flowers-and-petals/cowslip-flowers-primula-veris/ https://gardenandhappy.com/fairy-garden-ideas/ https://www.moonfishwriting.com/post/a-celtic-spring-of-flowers-folklore-and-food https://www.moonfishwriting.com/post/chamomile-and-lavender-in-medicine-celtic-folklore-and-magic  Freshly baked mulberry muffins. Photo by Diane M. Lilly, 2023. There is simply nothing like harvesting your own food for tasty recipes! My backyard garden has become one grand experiment to see what I can grow and how to use the plants in homemade recipes. But I never even realized there was a berry tree in my yard (planted by previous owners) until a couple of years ago when the branches started hanging down low around the raised garden. It was then that I noticed the purple berry mess covering the ground. After investigating, I discovered that this “annoying” tree was mulberry!  Mulberries on my mulberry tree. Photo by Diane M. Lilly, 2023. This year—rather than letting those ripe berries go to waste in the grass—I decided to pick some and use them in homemade muffins. I searched online and found a simple recipe for blackberry muffins on AllRecipes.com, so I decided to try it out, substituting mulberries for blackberries. Here’s the recipe I followed…  Freshly picked and washed mulberries. Photo by Diane M. Lilly, 2023. Dry ingredients: 2 cups flour 2/3 cups sugar 1 TBS baking powder 1/2 tsp salt Wet ingredients: 1 cup sour cream 1/2 stick butter, softened 2 eggs 1 tsp milk 1 tsp vanilla extract fresh mulberries The first step is to carefully wash, dry, and remove the stems of the berries. My fingers turned a lovely shade of purple! These berries DO stain, so be careful what they touch!  Fingers stained with mulberry juice! Photo by Diane M. Lilly, 2023. Preheat oven to 450˚. Mix dry ingredients in a bowl.  Two-thirds cup of sugar. Photo by Diane M. Lilly, 2023.  One tablespoon of baking powder. Photo by Diane M. Lilly, 2023.  One half teaspoon of salt. Photo by Diane M. Lilly, 2023.  Two cups of flour. Photo by Diane M. Lilly, 2023. Whisk wet ingredients—except mulberries—in a separate bowl.  Milk, sour cream, butter, and vanilla extract. Photo by Diane M. Lilly, 2023. Whisk dry and wet ingredients together. Fold in the mulberries, gently.  Bowl of mulberries. Photo by Diane M. Lilly, 2023.  Mulberries mixed into muffin batter. Photo by Diane M. Lilly, 2023. Pour batter into greased muffin pan (or other baking pan of your choice).  Greased muffin pan. Photo by Diane M. Lilly, 2023.  Muffin batter poured into muffin pan. Photo by Diane M. Lilly, 2023. Bake in oven for 18-20 minutes, or until a toothpick comes out clean.  Mulberry muffins finished baking! Photo by Diane M. Lilly, 2023. Now for the taste test… I can’t say enough about this recipe! The texture was the perfect amount of moisture, not dry like some recipes I’ve tried. And the muffins were not overly sweet either. The sublime sweetness from the mulberries gave the muffins a fresh taste I hadn’t experienced in a while!  Taste test for the mulberry muffins! Photo by Diane M. Lilly, 2023. This recipe was a resounding success! In the future, I may substitute mulberries or blackberries for raspberries, blueberries, or bananas. The original link is below if you'd like to try it out. Happy baking! Original recipe: https://www.allrecipes.com/recipe/254923/delicious-blackberry-muffins/?utm_source=pinterest&utm_medium=social&utm_campaign=shareurlbuttons Related blogs you may want to read: How to make muffins with fresh rosemary A simple but delicious apple crumb recipe Learning how to harvest and use fresh mint from the garden Harvesting lavender for homemade potpourri Tips for harvesting chamomile for homemade tea Banana and raisin bread recipe This article may contain a few items or commercial mentions, but I only used them for demonstration purposes only. I am not endorsing any particular product or receiving any monetary gain for this blog.  Image by Nattapol Sritongcom on Adobe Stock. Succulents are generally some of the most hardy houseplants you can have in your home, but that doesn’t mean they are indestructible! Succulents are known for storing water in their leaves, allowing them to survive dry spells in their native habitat. That said, succulents can come from many natural habitats, and each plant might have slightly different needs. There are a few general rules to follow when caring for succulents to keep them alive and thriving. Below are a few ways you could potentially damage or even kill your precious plants! Stick them in the dark Succulents need several hours (about 6) daily of bright indirect light. Don’t put them in dark corners—they will not thrive there! Remember to rotate the plant periodically. This assures each side of the plant gets even light and prevents reaching or leaning. Place the succulent near south or west-facing windows just out of the direct light.  Haworthia. Photo by Diane M. Lilly, 2021. Leave the plant in direct sunlight for too long While it is true cacti come from a desert habitat where they sit out in the scorching sun all day, many other succulents will burn when left in direct sunlight for too long, causing permanent damage. If the sunburned leaves become too damaged, the plant will suffer and possibly die. Image by Nattapol Sritongcom on Adobe Stock. Overwater or leave the plant in soggy soil Succulents store water in their fleshy parts and leaves, so there is no need to overwater. This may be the quickest way to kill a succulent! Give succulents a thorough watering and let them dry out before watering again. (Suggestion--Use a water meter to test the soil between waterings.) 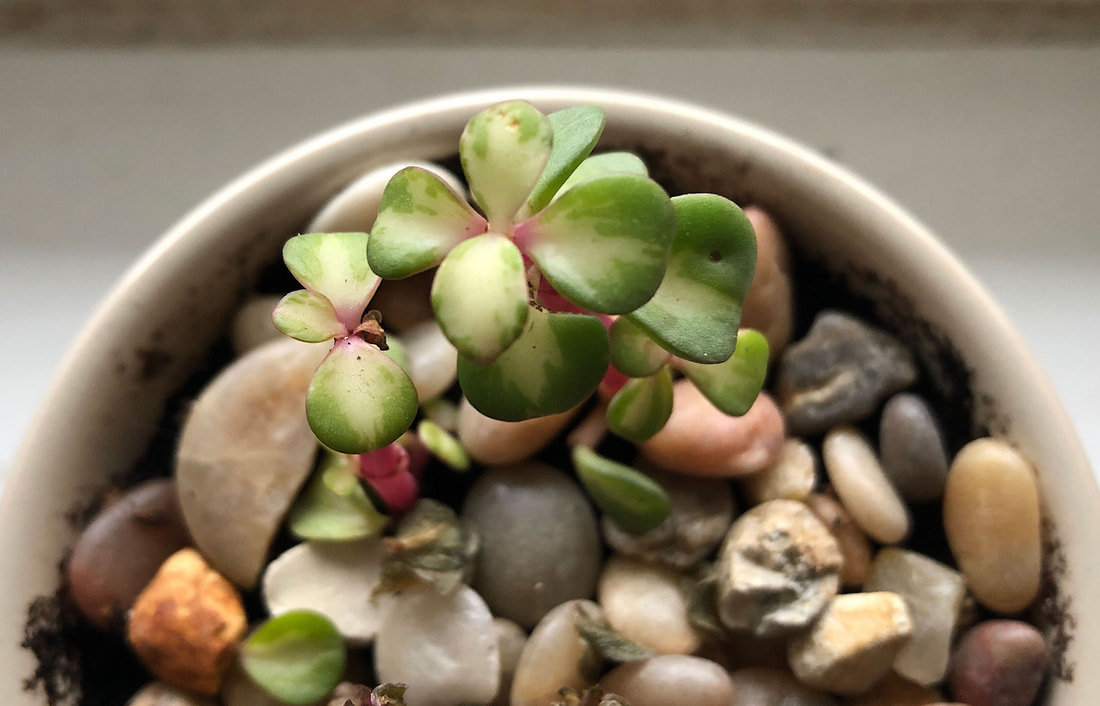 Elephant tears. Photo by Diane M. Lilly, 2021. Plant in soil and pot with poor drainage If the soil and pot don’t have proper drainage, your succulent may end up sitting in soggy soil, which causes rot. And rot is the arch nemesis of plants! Soil with some sand works well, or you could use cactus soil or anything coarse with sand and pumice. Also, soggy soil can attract gnats and other pests that can harm the plant. 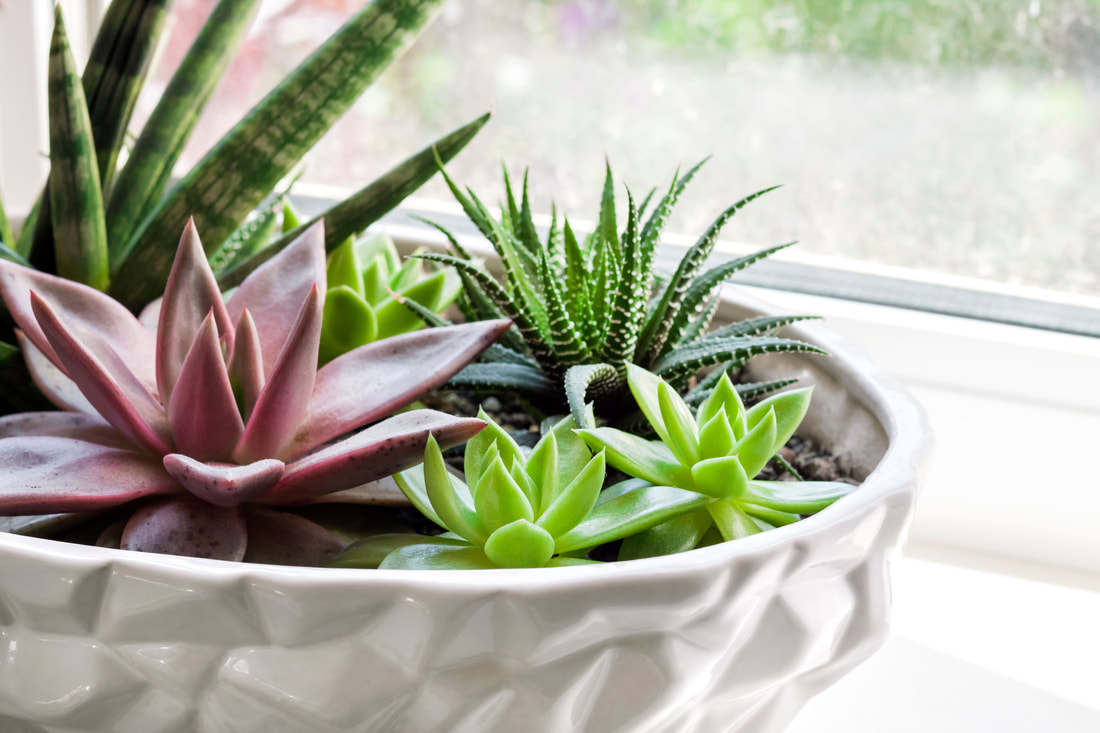 Image by tynza on Adobe Stock. Wet the plant leaves Pouring water on the leaves or misting can cause mold, rot, or burn on the succulent leaves. It’s better to water the soil directly. (Note: Certain tropical varieties actually like an occasional mist, so check your plant label for care instructions.) 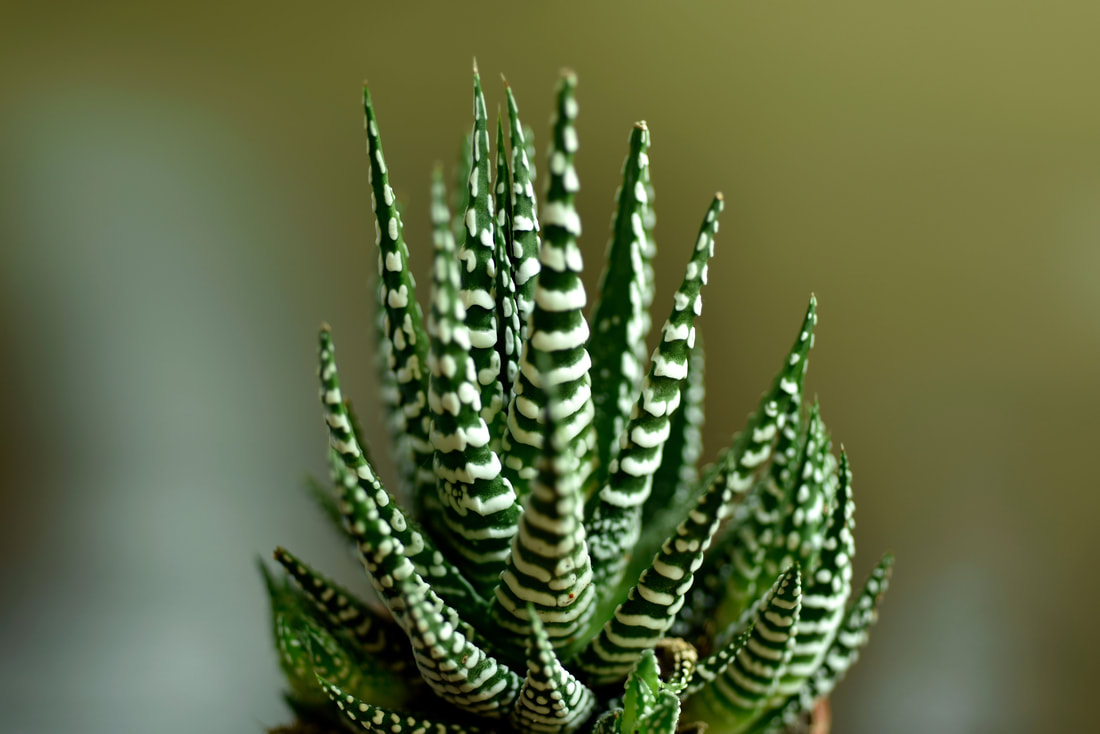 Image by hossein1351 on Adobe Stock. Place outside in the extreme cold or heat Some succulents—like cacti—can handle extremes of hot or cold, but many succulents come from milder habitats. When in doubt, it’s better to err on the side of caution and avoid placing the plant in very hot or cold environments. 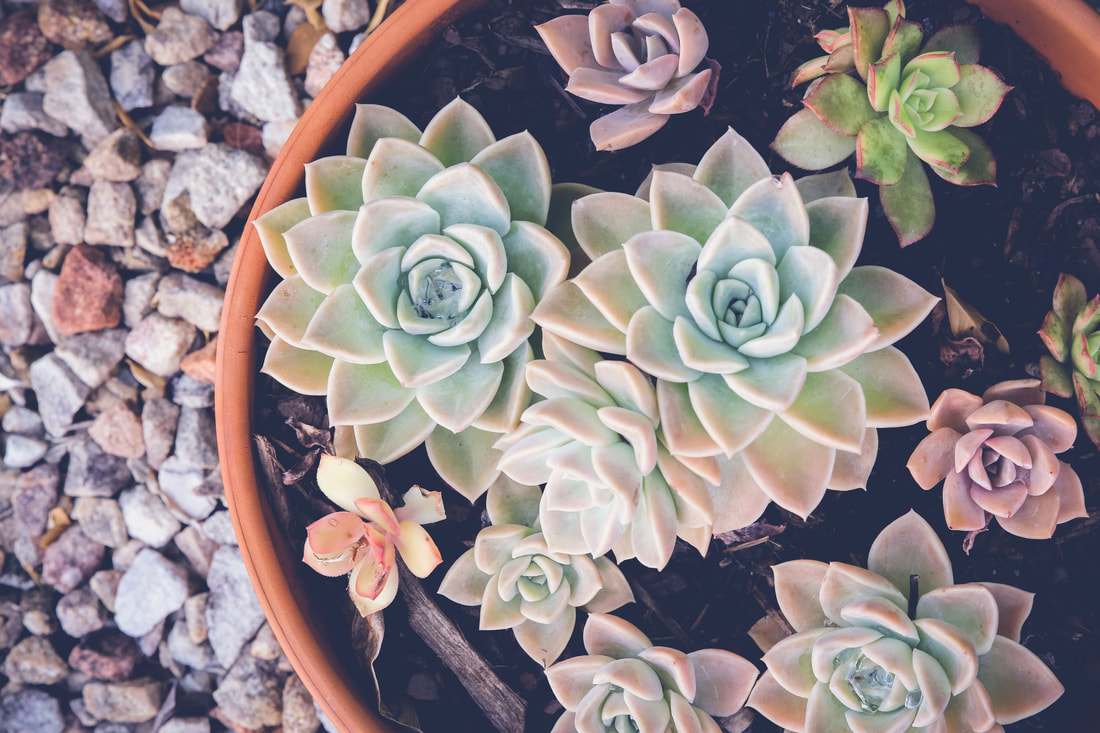 Image by SewcreamStudio on Adobe Stock. Not knowing the specific needs of the plant It’s vital to know what type of plant you have and learn a bit about its native habitat so you can mimic (as best you can) the environment. Knowing the proper care for your specific type of succulent will help your plant thrive and stay alive! For example, Snake plants, Haworthias, and other variegated succulents don’t like full sun. Succulent plants with bright colors like red or orange, on the other hand, may enjoy a bit of time in the sun. So read those labels! Just like other types of plants, there are a lot of variables to consider when caring for succulents…if you want to keep them alive, that is! Soil, pot size, environment, lighting, humidity, watering needs, season, and location determine how you care for your succulents. But keeping your stunning succulents alive starts with the basics…Give them appropriate lighting for their variety, well-draining soil, an environment tailored to their specific needs, and don’t overwater for a happy, thriving plant! Image by Rawpixel.com on Adobe Stock. Related blogs you may want to read: 7 houseplants you can’t kill! 7 MORE houseplants you can’t kill! Eight tips for assessing natural light in your home How to repot a bonsai ficus How to repot a pothos plant How to propagate bromeliad pups Small houseplants that love bathroom humidity Eight health benefits of decorating with plants Let’s talk about houseplants Sources: https://www.architecturaldigest.com/story/how-to-care-for-succulents https://www.gardendesign.com/succulents/care.html https://www.succulentsandsunshine.com/guide-growing-succulents-indoor-house-plants/ https://www.joyusgarden.com/how-often-should-you-water-succulents/?utm_source=Flodesk&utm_medium=newsletter&utm_campaign=Garden_Gazette https://www.joyusgarden.com/how-much-sun-do-succulents-need/?utm_source=Flodesk&utm_medium=newsletter&utm_campaign=Garden_Gazette This article may contain a few items or commercial mentions, but I only used them for demonstration purposes only. I am not endorsing any particular product or receiving any monetary gain for this blog. In a previous blog, I introduced you to seven houseplants that can tolerate a bit of neglect. In today’s blog, I will share seven MORE houseplants that can take a little abuse from an absent-minded or inexperienced plant parent. Ready for more? Here we go… Philodendron There is a wide variety of philodendrons, from the large monstera to the cut-leaf philodendron to smaller plants with heart-shaped leaves that grow in vines. Your options depend on the space available for your new plant babies. These easy-to-care-for plants do very well in humid conditions like bathrooms, but they don’t like to sit in wet soil, so don’t overwater. Just water the soil evenly, then let dry out before watering again. Philodendrons don’t love direct sun but will thrive in bright indirect light and tolerate dimly lit spaces.  Image by ArtBackground on Adobe Stock. Ponytail Palm (a.k.a. Beaucarnea recurvata) I call this the Dr. Seuss plant. I bought a ponytail palm two years ago and stuck it in my southwestern-facing window, and it has doubled—if not tripled—in size! For me, it was love at first sight! These plants can get very large and heavy over time, so they are not your typical windowsill plant. How fast and large they grow will depend on the size pot, so the larger the pot, the larger the plant will grow! 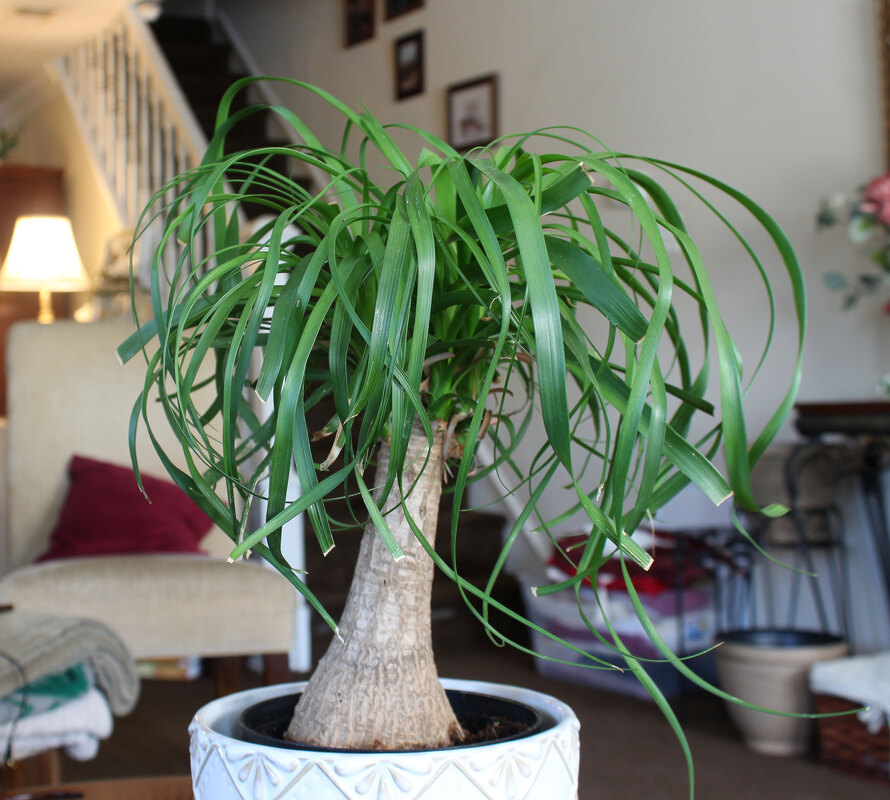 Ponytail palm. Photo by Diane M. Lilly, 2021. The name implies it’s a palm, but it’s actually a succulent related to the yucca or agave. Ponytail palms store water in the trunk, so they don’t need watering as much as other plants. Don’t overwater this plant. Water it thoroughly and evenly, then let the soil dry out completely before watering again. For a happy plant, use succulent or cactus soil and place in a spot with bright indirect light but not direct sun. Pothos (a.k.a. Epipremnum aureum or Devil’s Ivy or Golden Pothos) Pothos is a vine plant that will thrive under the right conditions. If you want to keep it more bushy, you can trim it back. Or, if you like the long trailing vines, you can place your pothos in a spot where the leaves can dangle. My pothos is currently sitting on the window ledge in my bathroom—where it gets easterly sun, mostly indirect except for first thing in the morning—and it is starting to take over! 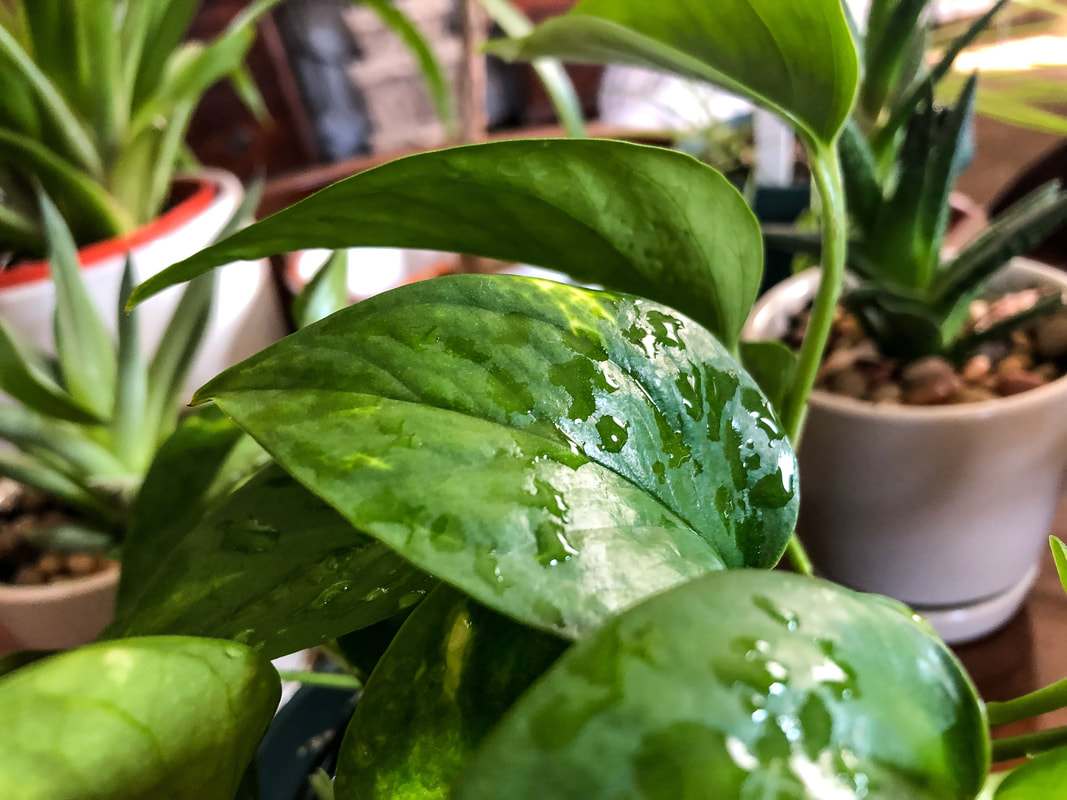 Pothos. Photo by Diane M. Lilly, 2022. This vine plant likes humidity but can tolerate dry conditions as well. Give this plant well-draining potting soil some bright indirect light, and don’t overwater it, and you’ll have a happy pothos! It will even tolerate lower light levels if that’s the best you can do. Rubber Plant (a.k.a. Ficus elastica) Like the ponytail palm, this drought-resistant plant can grow tall and heavy, so put your rubber plant in a sturdy pot. This is a good plant for a well-lit corner, as it prefers bright indirect light. Use well-draining soil and keep it slightly moist but never soggy.  Image by LIGHTFIELD STUDIOS on Adobe Stock. Snake Plant (a.k.a. Sansevieria, or Mother-in-Law’s Tongue) The snake plant—commonly known as sansevieria or Mother-In-Law’s Tongue—thrives in humid conditions. My snake plant temporarily had its home in my bathroom until my pothos and haworthia crowded it out! The plant now looks quite happy living in my front window with my other plants. Image by Pixel-Shot on Adobe Stock. The snake plant is another type of succulent that stores water in its leaves, so water thoroughly and then let the soil dry out. Use well-draining soil for best results. Sansevierias will tolerate a range of lighting conditions but thrive in medium to bright light levels, just not direct sun. Spider Plant (a.k.a. Chlorophytum comosum or Airplane Plant. not to be confused with Air Plant) Spider plants are one of the most well-known houseplants and seem to thrive in a variety of conditions. This dangly plant produces tons of plantlets or spiderettes that you can clip and propagate to get new plants! Other than that, spider plants don’t need frequent repotting. As for watering, wet the soil thoroughly and evenly, and don’t water again until the soil is just dry. The plant will wilt to let you know when you need to give it water ASAP. Hang this houseplant in a window with bright indirect sun if you want a happy plant with tons of new babies!  Image by AHatmaker on Adobe Stock. ZZ Plant (a.k.a. Zamioculcas Zamiifolia, Zanzibar Gem, or Eternity Plant) And finally, yet another plant that stores water in its leaves! ZZ plants can survive neglect and low light and are drought tolerant. If you want your plant to be its best, put it in bright indirect light, give it decent potting soil, and water only when the soil is dry.  Image by fabrizio on Adobe Stock. Make sure you go back and read “7 Houseplants You Can’t Kill!”! Let me know in the comments if you have a favorite plant baby that has been super simple to maintain. Do you have a neglected plant that still keeps going? Drop it in the comments below! Related blogs you may want to read: 7 ways to kill a succulent 7 houseplants you can’t kill! Eight tips for assessing natural light in your home How to repot a bonsai ficus How to repot a pothos plant How to propagate bromeliad pups Small houseplants that love bathroom humidity Eight health benefits of decorating with plants Let’s talk about houseplants This article may contain a few items or commercial mentions, but I only used them for demonstration purposes only. I am not endorsing any particular product or receiving any monetary gain for this blog. Sources: https://www.guide-to-houseplants.com/10-house-plants-you-cant-kill.html https://www.bhg.com/gardening/houseplants/projects/houseplants-you-cant-kill/ https://balconygardenweb.com/houseplants-you-cant-kill-even-if-you-want/ https://smartgardenguide.com/hard-to-kill-houseplants/ https://youhadmeatgardening.com/best-hard-to-kill-houseplants/ https://blog.mytastefulspace.com/2021/07/24/impossible-to-kill-houseplant/ https://www.thespruce.com/easy-houseplants-hard-to-kill-4141665 https://www.gardeningknowhow.com/houseplants/hpgen/hard-to-kill-houseplants.htm https://www.treehugger.com/houseplants-are-almost-impossible-kill-4863173 If you have a black thumb—or are just starting to wrap your head around buying houseplants for the first time—this blog is for you! Houseplants can be tricky, right? There’s a lot to take in—proper light, water needs, soil types, fertilizing, best trimming practices, propagating, pest control—but some plants are less fussy than others. Today, we’ll look at seven plant babies for beginners or people who want easy houseplants. Air Plant (a.k.a. Tillandsia app.) This first plant is as easy as it gets! Air plants are epiphytes or plants that attach to trees and other natural elements in shaded spots and collect necessary nutrients through trichomes in their leaves. No soil is needed, hence the name Air Plant. This biological wonder takes much of what it needs from the air, and its needs are minimal.  Air plant. Photo by Diane M. Lilly, 2021. Many varieties only need to soak in water once a week (15-30 minutes) and maybe occasional misting to keep them from drying out. One piece of advice is to know which variety you have because the furry ones don’t like to be soaked in water. I made that mistake with one of my plants, causing the poor thing to rot and die. Place the air plant in bright light but not directly in the sun to prevent burning of the leaves. And that’s it! Air plants are resilient and self-sufficient with minimal care. Hang them up or stick them in with other plants and let them do their thing! Aloe Vera Aloe vera is a type of succulent, meaning it stores water in its leaves. This ability to store water means that aloe—like many succulents—tends to be drought-resistant, and that’s good news for forgetful plant parents. 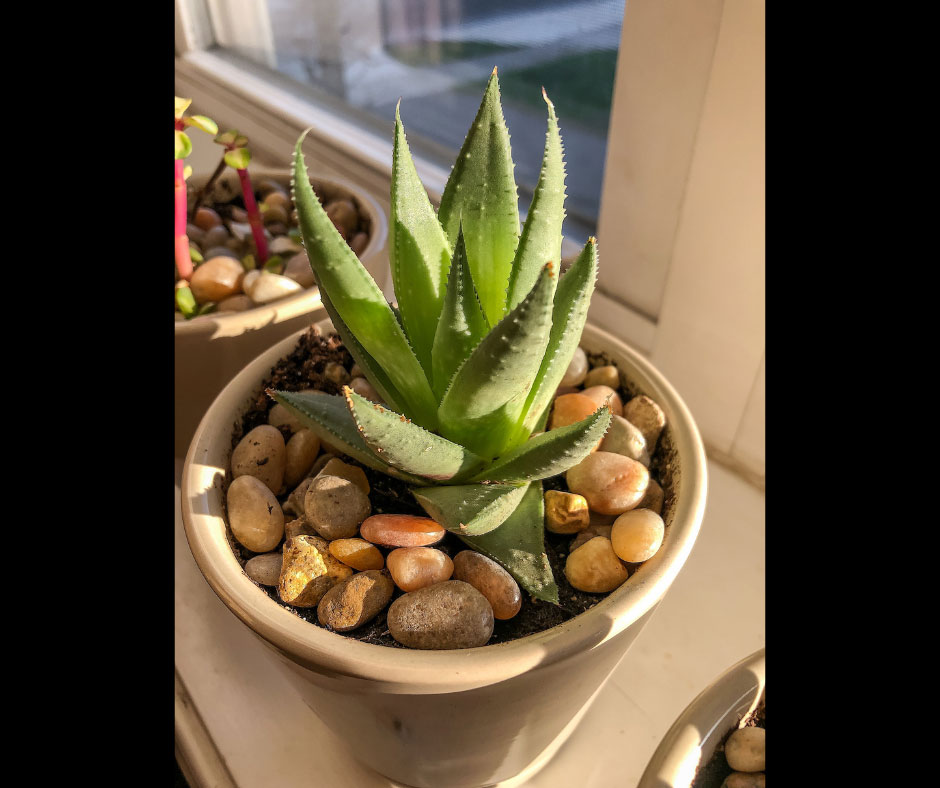 Aloe vera. Photo by Diane M. Lilly, 2021. This plant thrives better when ignored--making it an easy plant for beginners. The one nemesis for aloe, though, is overwatering. Overwatering can lead to rot, which kills the plant, so the best practice is to wet thoroughly and then let the plant dry out in between waterings. As for other care, give your aloe well-draining soil and bright indirect light (direct light may burn the leaves). There’s no need to repot the plant until it gets too crowded in the pot. Cactus Like the aloe, cacti are succulents, which means they are drought tolerant and store water. These adaptable plants need water only when the soil is dry, so if you get a bit forgetful it’s okay! 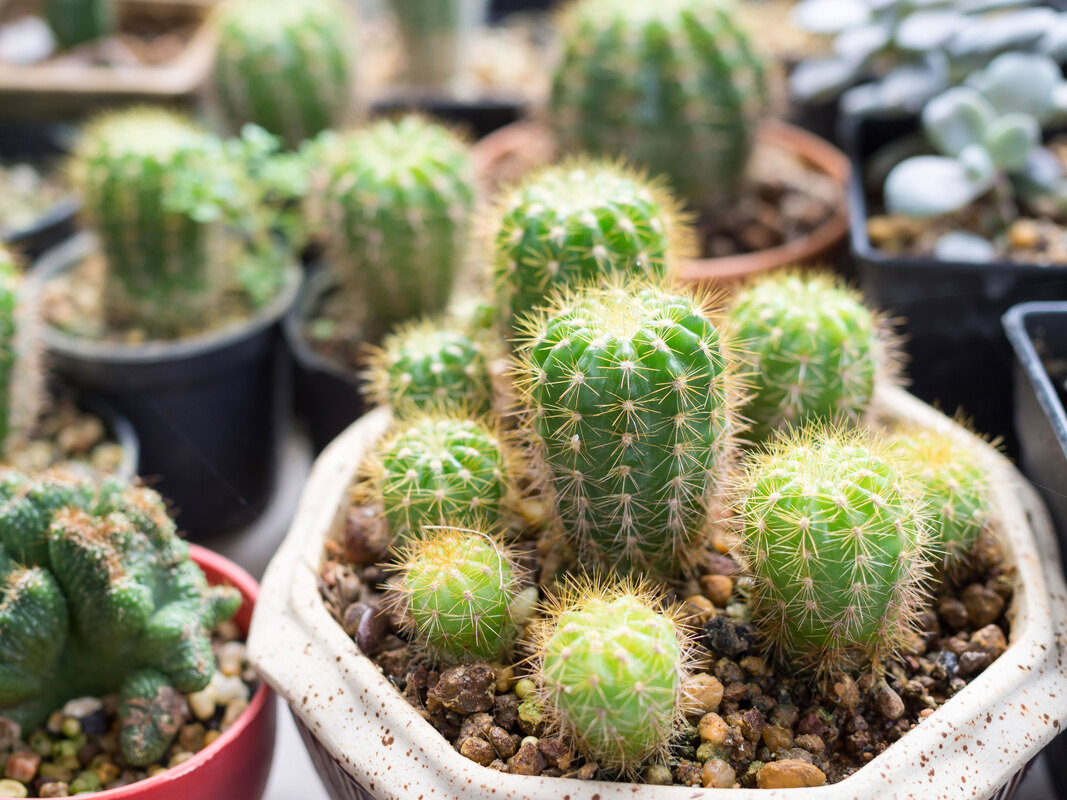 Image by apimook on Adobe Stock. Cacti are incredibly versatile as houseplants. They only need well-draining soil, bright indirect or direct sun (depending on the variety), and occasional watering. Cast Iron Plant (a.k.a. Aspidistra spp.) The hint is in the name! The Cast Iron Plant is very forgiving, even when neglected. Give this plant well-draining soil and bright light, and it will thrive. But this hardy houseplant also manages to live in low-light places as well…Just keep it out of direct light to prevent burned leaves. 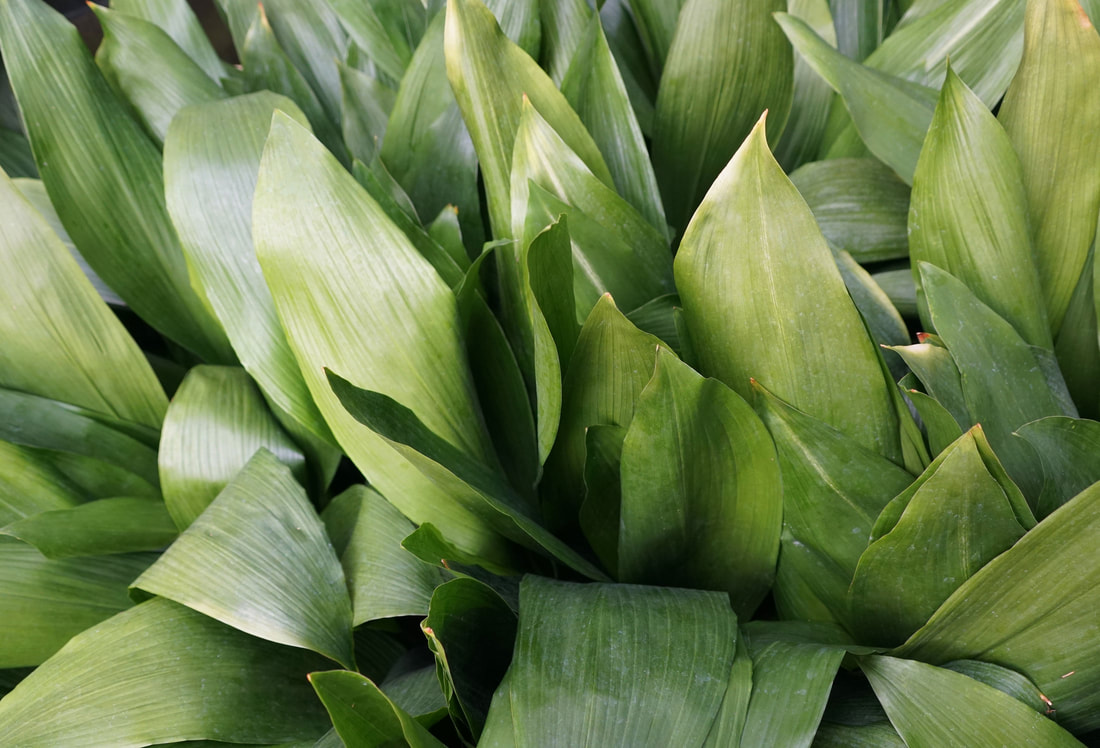 Image by K.A. on Adobe Stock. Chinese Evergreen (a.k.a. Aglaonema sp.) Sometimes called the “Ag” plant, the Chinese Evergreen is a versatile and easy-to-maintain houseplant. I’ve even seen them happily existing in the corners of doctor’s offices with no windows. This slow-growing plant thrives better in bright indirect light, but low-light conditions will suit it just fine if that’s your only option. As for care, keep it out of direct light and drafts and let it dry out between waterings. 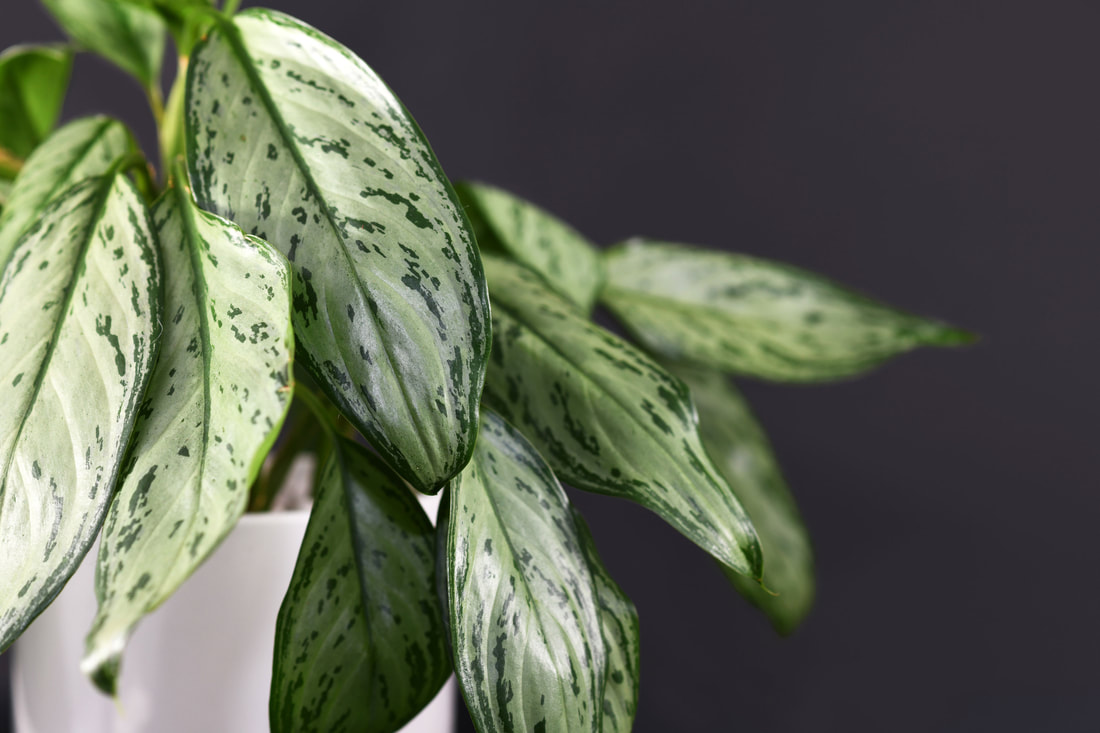 Image by Firn on Adobe Stock. Jade Plant (a.k.a. Crassula ovata) This plant might be a little tricky because it can get bulky, but having said that, you don’t need to re-pot your jade plant very often unless you want it to grow in size. 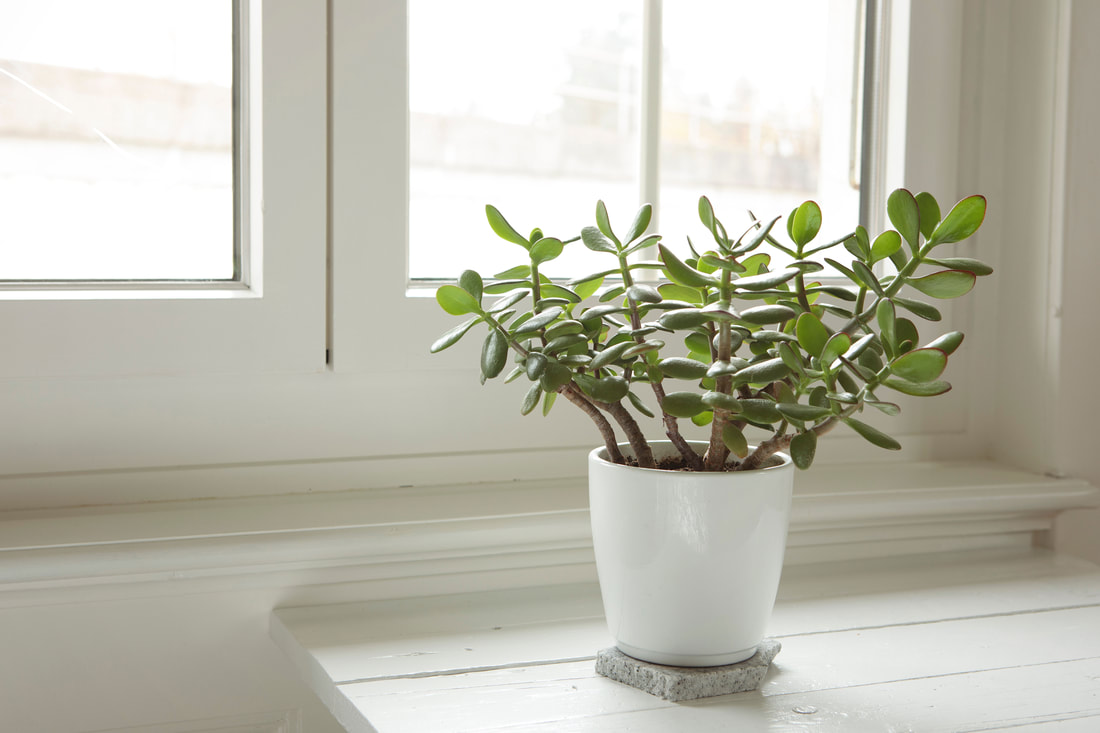 image by MindestensM on Adobe Stock. Like all succulents, this plant stores water in its leaves, which means you can let the soil dry out between waterings. Just use well-draining soil and place the plant in bright, indirect light. Some varieties can withstand a few hours of direct sunlight. This is one of those plants that can tell you what it needs just by looking at its foliage. If the leaves become shriveled, it's time to give the poor thing some water. If the leaves are dropping off, you may need to up the water intake. Peace Lily (a.k.a. Spathiphyllum sp.) The peace lily is an incredibly hardy plant! I know from experience! My peace lilies have been through the wars! I have forgotten to water them for long periods, stuck them in drafty windows or gloomy spots, and over-watered them out of guilt (causing gnats)…And they still live! These hardy plants will survive a lot. Granted the poor things may not look the greatest, but they survive! 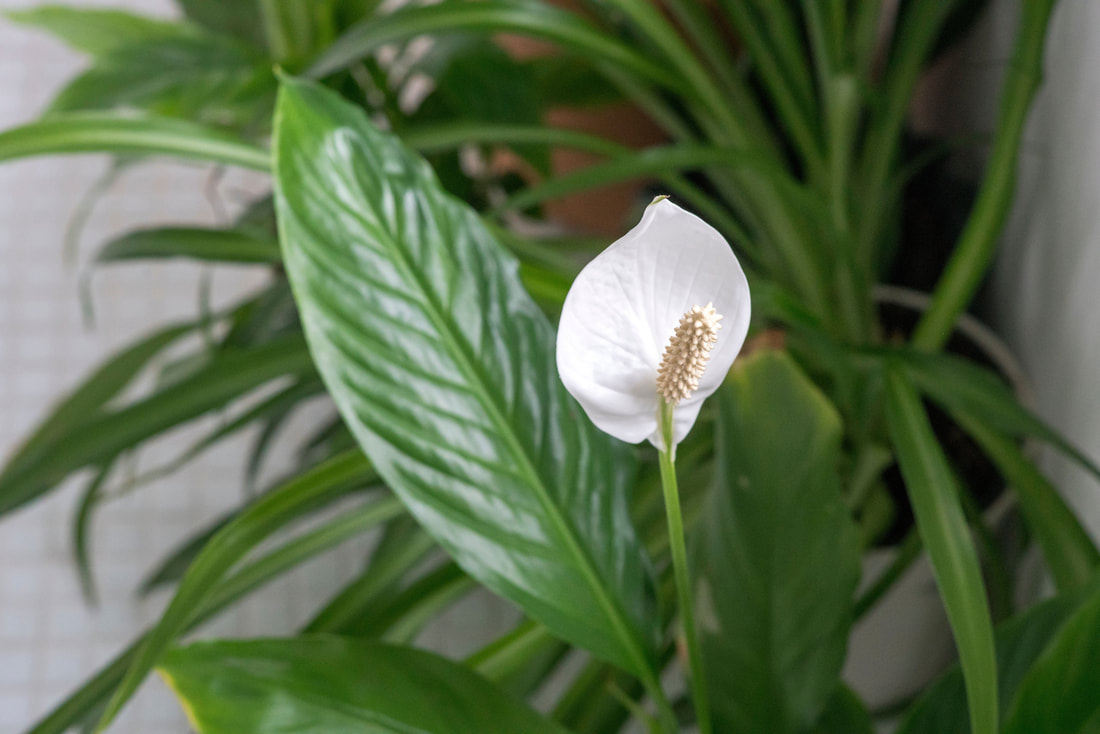 Image by Christine on Adobe Stock. If you want your peace lily to look its best, water the plant thoroughly and evenly, then leave it until the soil becomes somewhat dry. This plant literally tells you when it needs a drink because you’ll see the leaves begin to droop. The drooping leaves are the plant telling you to grab that watering can and give it a drink! Peace lilies like well-draining soil and bright indirect light (not direct sun) but can tolerate low light conditions. If the plant gets the optimal amount of light it needs, it will reward you with elegant white flowers. Next time you are in a doctor’s office or any office space with little to no natural light, look around and see what plants have made their home there. Chances are you will see one of these plants! Be sure to read part 2--“7 More Houseplants You Can’t Kill!”--for even more easy-to-care-for houseplants! Related blogs you may want to read: 7 ways to kill a succulent 7 more houseplants you can’t kill! Eight tips for assessing natural light in your home How to repot a bonsai ficus How to repot a pothos plant How to propagate bromeliad pups Small houseplants that love bathroom humidity Eight health benefits of decorating with plants Let’s talk about houseplants This article may contain a few items or commercial mentions, but I only used them for demonstration purposes only. I am not endorsing any particular product or receiving any monetary gain for this blog. Sources: https://www.guide-to-houseplants.com/10-house-plants-you-cant-kill.html https://www.bhg.com/gardening/houseplants/projects/houseplants-you-cant-kill/ https://balconygardenweb.com/houseplants-you-cant-kill-even-if-you-want/ https://smartgardenguide.com/hard-to-kill-houseplants/ https://youhadmeatgardening.com/best-hard-to-kill-houseplants/ https://blog.mytastefulspace.com/2021/07/24/impossible-to-kill-houseplant/ https://www.thespruce.com/easy-houseplants-hard-to-kill-4141665 https://www.gardeningknowhow.com/houseplants/hpgen/hard-to-kill-houseplants.htm https://www.treehugger.com/houseplants-are-almost-impossible-kill-4863173 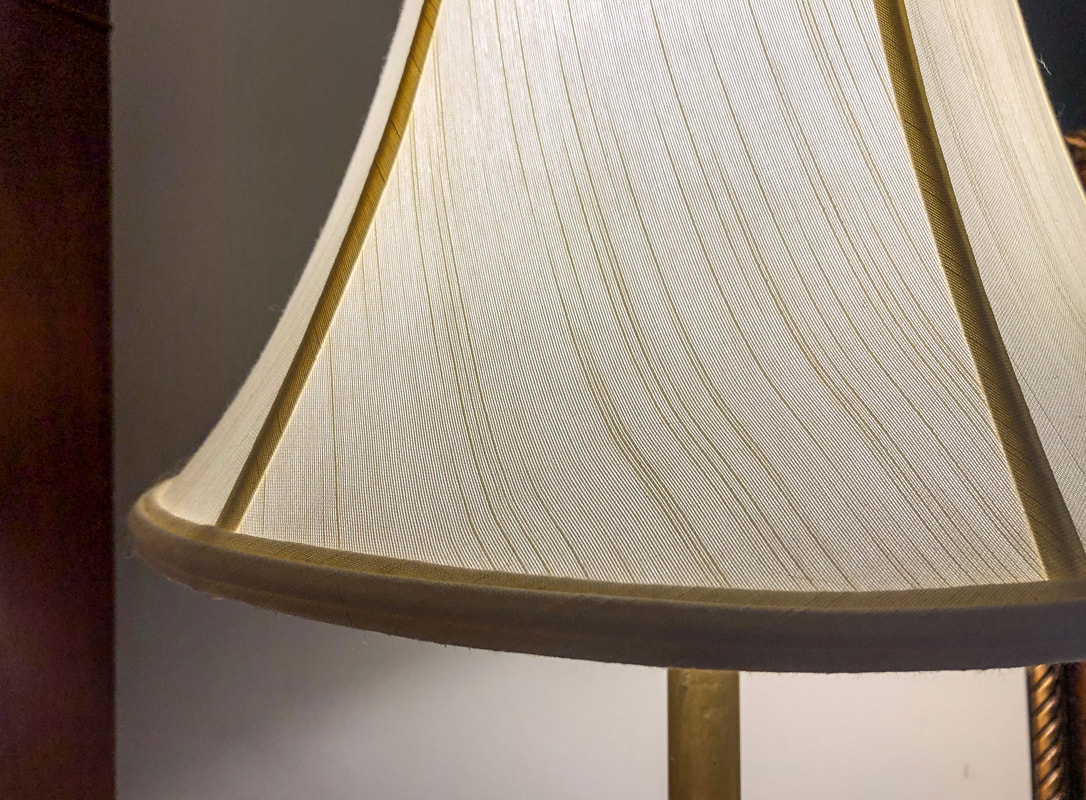 Do you have fabric lampshades that could use a good cleaning but are hesitant to try because you are afraid to damage the fabric? Today’s blog article offers a few tips for cleaning those dingy, dirty lampshades. There’s something incredibly gratifying about finding that perfect gem of a lamp at your local second-hand store, right?! What’s not so thrilling is the prospect of cleaning the lampshade. This is the situation I faced after a trip to my local thrift store. Let me tell you, I came home with one of the best hauls of amazing finds ever! This haul contained two lamps that were perfect for my dining room. All they needed was some rewiring and a good clean. Except it wasn’t quite that simple… 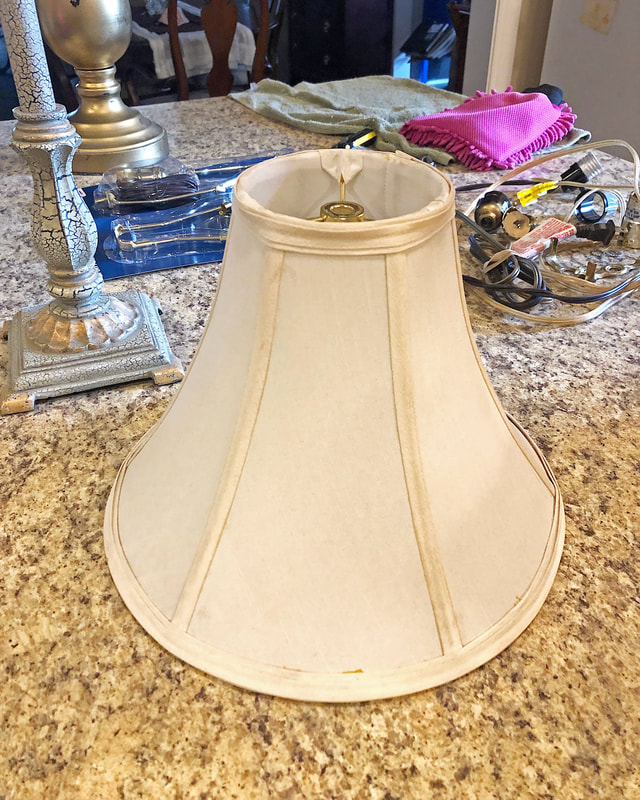 The fabric shades were stained in such a way that simple dusting wasn’t going to do the job. This project called for a deeper cleaning, but I had questions and concerns, as some of you do. I had apprehensions about the metal frame and the glue that held the seams together. And there was a very real concern that cleaning would create water stains on the fabric if I tried to spot clean small areas. So, I did some research before cleaning these stained second-hand lampshades. Below are some tips from my research and first-hand experience cleaning my lampshades… Cleaning lampshades using dry methods For simple surface cleaning of lamp shades to remove dust and pet hair, you can use a lint roller, microfiber cloth, vacuum cleaner attachment, or even sticky tape. I usually use a vacuum cleaner or very damp towel (almost dry) to remove dust for general house cleaning. Certain types of shades must be cleaned using dry methods. Silk shades can be easily ruined and should be professionally cleaned, so do not try to clean them yourself. The same goes for paper or fiber lampshades, which can disintegrate in water. (Paper shades can be cleaned using a gum eraser.) Finally, shades with color should not be soaked with water, especially if you think the color might stain or run.    Prep lamp shade and materials for wet cleaning Never try to wet clean a lampshade while the base is plugged in! Unplug the lamp, remove the shade and attachments, and clean everything separately. Now it's time to prep the water for cleaning. If the seams on the lamp are held together with glue (which many are), the water you are using must be cold. Fill a small tub or sink with cold water, then mix in a small amount of GENTLE laundry detergent or dishwashing liquid. Just a few drops is enough so the shade doesn’t get soapy. You can add a little baking soda (about a teaspoon) to brighten the color of a white lampshade but do NOT add bleach.  Wet cleaning your lampshade Using a soft, lint-free fabric, use suds to clean the lamp while avoiding saturating the fabric with too much water. Try to dampen the whole lamp evenly to lessen the possibility of water stains once dry. Clean gently using an up-and-down motion with your soft, lint-free cloth. A soft toothbrush can be used for tough stains. 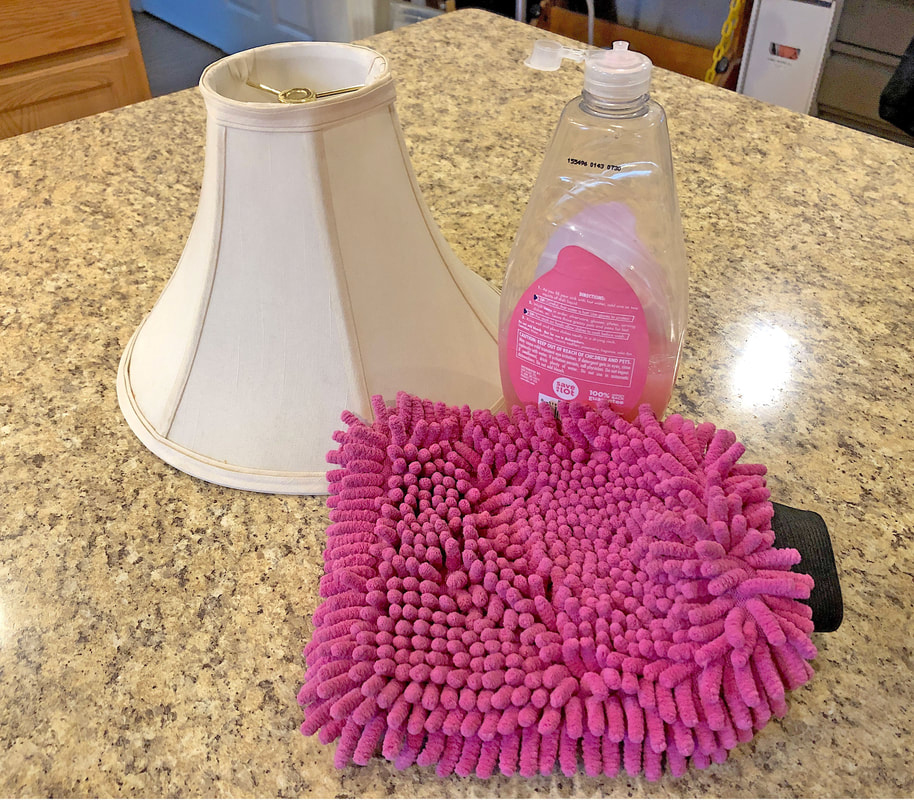 In certain situations, you may be able to submerge the lampshade in cold (or lukewarm) soapy water and let it sit for a few minutes, then clean it with the same gentle up-and-down motion as previously discussed. To rinse, submerge in clean, cold water. I felt a little uncertain about that technique, to be honest…Call it beginner’s nerves! One source I discovered explicitly said to avoid submerging a lampshade in water if any part of it has glue. Yet another source—as is so typical on the internet—stated that you can immerse the shade in COLD water and swish around, but do not let the shade soak in the water. Do not let the glue get so wet that it starts to lose its adhesiveness to the fabric. A quick dip to scrub and rinse, however, should not cause any damage to most shades. But if in doubt, try other methods of cleaning first. 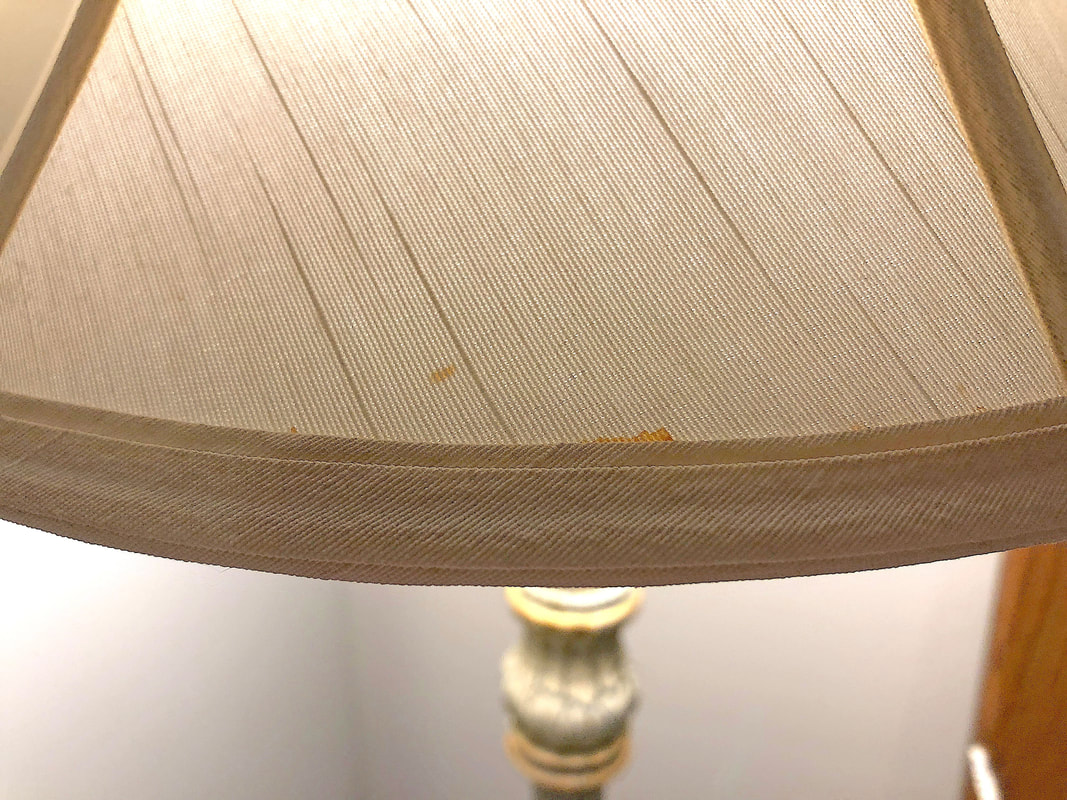 With that thought in mind, I decided to be brave! I quickly submerged the shade in soapy water, used a soft rag and my microfiber mitt to scrub, and finally rinsed the shade with cold water. All that was left to do was to shake off the excess water and let it dry on a towel. The cleaning project was done, and the shades looked good! Just a quick note here…Ensure the lampshade is thoroughly dry before re-attaching to the base and plugging in the lamp. (Water, metal, and electricity are not a good combination!) You may have to let the shade sit for a day to allow the seams to dry thoroughly.  Final thoughts… This DIY lampshade cleaning project went surprisingly well--the results were remarkable! There were a couple of small spots that didn’t come out, but they are not noticeable, and I will be ordering some stain remover pens (similar to the ones below) to see if I can remove the remaining small spots. Overall, however, I am happy with the results. There is also a special dry-cleaning sponge available (for situations where you don’t want to wet clean) that helps remove stains from fabric blinds, shades, and wallpaper, so there are a few options for cleaning lampshades, besides the technique I used in this project. My advice would be to do some research before attempting to clean any fabric lamp shades so you can make an informed decision as to the best plan of attack for your project. So, I hope this article was helpful! Please feel free to comment below with any tips and tricks you'd like to share. If you’d like to sign up for occasional (generally monthly) newsletters, click here to go to the form on my contact page. This will keep you updated on the latest blog posts, merchandise sales, new items, etc. And you can follow me on any of my social media below! Related blogs you may want to read: How to reupholster dining room chair seats in 9 simple steps A little project with jute twine and an old foot stool DIY refurbishment of a dining room cabinet Comparing DIY upholstery cleaning methods My top thrift finds this year How to replace a clock mechanism How to frame small canvas art How to rewire thrift buy lamps  Affiliate Disclosure Some of the posts in this article contain affiliate links. This means if you click on the link and purchase the item, I will receive an affiliate commission at no extra cost to you. I will only recommend products or services I use personally and/or believe will add value to my readers, so there is no conflict of interest.  Image by ajcabeza on Adobe Stock. What would you say if someone were to ask you to describe a fairy? Would you envision tiny winged humanlike beings small enough to fit in the palm of your hand? Sure...this is the image conjured up by the modern mainstream. If you look up the word fairy, you’ll find descriptive terms like diminutive, magical, feminine, imaginary, and supernatural.  Image by shaiith on Adobe Stock. But there are much older cultural ideas of the fairy not so benign and whimsical. Over the years, I’ve developed a particular fascination with the rather more ambiguous nature of Irish fairies. And that’s the topic I’d like to touch on today… The faerie folk To start with, those “diminutive” little fairies with wings are a recent phenomenon, more or less dating from the Victorian era. Before that, most European countries had a rich collection of fae, faerie, or fairy folk that took on many shapes and sizes. The more recognizable include magical beings like pixies, gnomes, trolls, elves, dwarfs, brownies, and giants.  Image by M W on Pixabay. Ireland's unique flavor of fairy folklore is blended with its rich historical mythology. This mystical green land is known for a mythical race of beings that are not spoken of by name but referred to in generic phrases, such as “the people of the mounds”, “the good people”, “the fair folk”, “them”—anything but “fairy”. These beings are also often referred to in ancient Gaelic terms as the “sidhe”, “daoine sidhe”, or “aes sidhe”. The term “sidhe” refers to the places where they dwell—typically natural or man-made mounds—but also represents the people as a way to name “them” without incurring their wrath.  Image by captblack76 on Adobe Stock. Just like in the rest of Europe, the Irish have specific names for each being belonging to the sidhe. The most recognizable is the leprechaun—a crafty little man who guards the treasure. The banshee (or ban sidhe, in Irish) is a wailing woman who predicts the death of a member of a particular clan. The Cailleach—possibly the predecessor to what we now know of as the witch—is an old woman who is said to have flown through the air and dropped large boulders from her apron to form some of the more dominant landscape features that play an important part in Irish mythology. The Irish also have their version of the mermaid called the Merrow. The female half woman half fish was attractive with a beautiful song that enticed young men, but the uglier male versions would pull sailors into the depths of the sea and enslave them. A rather terrifying creature in Irish fairy tales is the Pooka (Puca in Irish). The Pooka can take the shape of any animal but most often appears as a black horse with red eyes. This creature (like the banshee) is sometimes an omen of bad things to come but can be either helpful or destructive. These are just a few of the many types of sidhe in Ireland.  Image by Ed Smedley on Pixabay. Irish Mythology & the Sidhe So what are the origins of the sidhe? Let’s take a brief dive into Irish mythology for a moment… Most of the sidhe seem to represent old deities from ancient times, particularly from the mythical race of people called the Tuatha De Danann or the People of Danu. The origins of these people are shrouded in mystery and described as a group of invaders deep in antiquity that ruled over Ireland for a time, eventually being replaced by new invaders from Spain called Milesians, or sons of Mil. The mythology says the Milesians banished the Tuatha De Danann to the hills, and the mythical land they came to inhabit was called Tir na nOg, Land of Youth, or the Otherworld. Interestingly, the Greek word for the Iron Age Celts—Keltoi—means “the hidden ones”. It’s a curious coincidence, don’t you think?!  Image by Rubende Antonio on Adobe Stock. Irish mythology can be complex and contradictory, and there is so much more than I can discuss here. If you’d like to take a deep dive into this topic, check out mythicalireland.com, where Irish author, researcher, and photographer Anthony Murphy provides endless material about everything to do with Irish mythology. Another site--https://emeraldisle.ie/home--has a plethora of tales and legends you can read, but even this is just scratching the surface! The habitat of the sidhe The sidhe are said to live lives similar to our own but in a parallel world, if you will. A magical barrier keeps us from seeing them most of the time, but they are there just out of reach. The ethereal places of fairies or fairy magic are often described as “places where the veil between this world and the next is thin”. The old timers and true believers will tell you the sidhe can be found in many wild or hidden places across the land. The natural world and mythical heritage sites are full of fairy habitats, and these places are to be respected and left alone.  Image by Samantha Lachs on Pixabay.  Image by Overburn on Adobe Stock. Ireland is a land of mystical beauty, to be sure. Dotted all along its verdant landscape are thousands of ancient and prehistoric sites--ring forts or raths, burial mounds, stone circles, dolmen, and henges. These sites have significance in Irish history and folklore and make convenient dwelling places for the fairy folk.  Image by veneratio on Adobe Stock. Trees in Celtic lore are highly symbolic, and any solitary tree or cluster of trees with a unique presence in the landscape are identified as “fairy trees” and are said to be imbued with sacred or magical powers. One such tree is the hawthorn (aka, whitethorn), whose striking form with branches lopsidedly outstretched and seemingly reaching out can be seen dotted across the countryside. The rowan is another revered tree whose berries are associated with youthfulness and healing and are said to be the food of the Good People. Other trees with sacred significance include oak, blackthorn, holly, yew, and elder.  Image by Evgeni Tcherkasski on Pixabay.  Image by Thilo Wirestock on Adobe Stock. Water in Irish folklore—as in most cultures—plays a significant role in all things mystical and sacred. Many Irish wells and springs were usurped by Christian saints (such as St. Brigid) and the Virgin Mary, who act as guardians of the sacred water. Ancient peoples threw precious objects into some of these water sources as a sacrifice in reverence to the life-giving female aspect of existence or to the gods and goddesses of their time. The salmon of knowledge known in ancient Celtic mythology swims in a stream under a hazel tree. Not only is water symbolic of wisdom, but it can often be the gateway to the Otherworld.  Image by Eddie Cloud on Adobe Stock. The do’s and don’ts when dealing with the sidhe The sidhe are known for their enjoyment of music and dance, entrapping travelers who happen to wander into their magical spaces. On the surface, it may sound like quite an adventure to stumble upon such a place, but there are stories of people who spent time with the fairies, only to return to the land of the living to find many years have passed and everyone they once knew is long gone.  Image by FotoHelin on Adobe Stock. Reverence to the sidhe and their dwelling places remains embedded in Irish culture to this day. Trees and mounds are left alone, and construction projects have been forced to work around certain areas so as not to anger the sidhe. The retribution of these fairy folk when angered can be swift and vengeful. People are said to have been struck ill, plagued by bad luck, or even died because they dared mess with a fairy dwelling!  Image by Myri Roet on Pixabay. According to popular superstitions, you can repel a malicious fairy with salt or iron. There are tales of mothers placing something made of iron near a baby’s crib to prevent the sidhe from stealing their babies and replacing them with changelings. If you happen to be on foot traveling and are trying to avoid a pursuing fairy, you could try crossing a stream or other body of flowing water. Popular lore says most fairies do not cross running water. (Remember the Lord of the Rings with the Black Riders?) If you want to get on the good side of the fair folk, try appeasing them with gold trinkets, gemstones, shells, shiny jewelry, or shrines with offerings such as milk, candies, or sweet cakes. Ending thoughts… With all that being said, given the right circumstances, the sidhe can sometimes be helpful to humans, so they are not entirely malevolent creatures. Like many other supernatural creatures of the fairy world, they are neither good nor bad. Fairy folk in Ireland and Europe represent the duality of the good and the bad in humankind and life experiences. Ireland has a rich and colorful history, with a penchant for interweaving mythology, history, religion, and folklore. The fairy folklore of this land has been born out of this tradition and is just as rich and contradictory. There’s simply no way of telling where the ancient Celtic religion ends and the more modern fairy tales begin. It is all just one fantastically colorful tapestry that defines the very essence of what it is to be Irish.  Image by Dawid on Adobe Stock. Related blogs you may want to read: 10 Fun Facts About Leprechauns A brief history of the origins of fairy gardens A brief history of the Irish shamrock Celtic Tree of Life Celebrating Irish art for St. Patrick’s Day Sources: http://chalicecentre.net/blog/into-the-faery-woods/ https://thecelticjourney.wordpress.com/ https://www.irishcentral.com/roots/history/irish-legend-pooka https://www.teeliesfairygarden.com/blogs/ https://www.terriwindling.com/blog/ http://irishhedgerows.weebly.com/folklore.html https://britishfairies.wordpress.com/ https://donegalsquare.com/are-fairy-trees-a-fairy-tale/ https://irishfolklore.wordpress.com/ https://folklorethursday.com/folklife/the-fairy-trees-blackthorn-hawthorn-and-rowan/ https://www.irishcelticjewels.com/celtic-wedding/2010/09/irish-mythology-the-merrow-sea-fairies/ https://www.beachcombingmagazine.com/blogs/news/the-irish-folklore-of-the-celtic-merrow http://www.zeluna.net/list-fairy-english-celtic.html https://blogs.lib.ku.edu/spencer/how-well-do-you-know-your-irish-fairies/  Image by Yuliya on Adobe Stock I love the month of March for two reasons—spring and St. Paddy’s Day. Most years, I try to find some cerebral topic to write about for St. Paddy’s Day as a way to embrace my own Irish heritage respectfully…but this year, I thought we’d just have a little fun! No sense in taking ourselves too seriously, right? This year’s topic is fun facts about the little green men. No, not aliens…Leprechauns! What do you know about those little green goblins called leprechauns? Today, I thought I’d give you ten fun facts you can share at that St. Paddy’s Day party! Red leprechauns?? Believe it or not, leprechauns were not always dressed in green. A couple hundred years ago, leprechauns in traditional Irish folklore wore red jackets and knickers with a tri-cornered red hat. What we know as the jolly little man wearing green with a red beard is a fairly recent development.  Image by cynoclub on Adobe Stock Little dudes In Irish lore, leprechauns are almost always little men with withered faces. They are known for their diminutive size (in most cases), and there are no female leprechauns!  Image by Christina Saymanski on Adobe Stock Crafty little dudes! Many Irish folk stories depict leprechauns as craftsmen, usually shoemakers. They are very good at making and repairing things. These guys have no problem working with their hands!  Image by Lars Nissen on Pixabay Hidden homes According to popular lore, leprechauns like to live in dark, out-of-the-way places like caves, tree trunk hollows, or basements (especially wine cellars). Out of sight, out of mind!  Image by Mike Goad on Pixabay Treasure hoarding Leprechauns are only one of many fairy folk known to collect and guard coins and treasure. This is deeply rooted in the mythology and folk tales across Europe.  Image by aleksandra85foto on Pixabay Tricksters Leprechauns are known to be shrewd tricksters who use human greed to fool those who want their gold. Keep your eyes on this little man if you want his gold, but know he will trick you by any means necessary! This mischievous fairy has fun inflicting low-level harm and practical jokes, so beware! Three wishes! If you are lucky enough to catch a leprechaun, you’re mighty crafty yourself! Now, set him free so you get your three wishes!  Image by Johan Bolhuis on Pixabay Ancient gods Leprechauns are considered fairies or one of the many beings from the mythical people in Irish mythology called the Tuatha de Danann. These were said to have once been a real race of people conquered and banished to the ancient mounds to live for eternity. Leprechauns could be a modern relic of one of their important Celtic deities, the sun god Lugh. Water sprites?! Alternatively, leprechauns could be descended from the ancient water sprites. Many folk tales from various parts of Ireland mention names of fairy folk that seem similar in the ancient Irish language to various versions of the word leprechaun. Protected by EU law? Seriously! And I’ll leave you with the strangest one of all… There is actually a place in Ireland said to be inhabited by many leprechauns—the caverns of Carlington Mountain. And—believe it or not—this place is actually protected by EU law! The leprechauns are an important part of the local ecosystem! Yes, seriously! So that’s it! Ten fun facts about leprechauns. You’re welcome. Now, go enjoy that green beer!  Image by Grafvision on Adobe Stock Related blogs you may want to read: A brief history of the Irish shamrock Celebrating Irish Celtic art for St. Patrick’s Day Who are the Irish fairies? Sources: https://www.celtic-weddingrings.com/celtic-resources/myth-of-the-leprechaun https://www.worldhistory.org/Leprechaun/ https://www.connollycove.com/leprechauns/ https://www.trafalgar.com/real-word/history-of-leprechauns-trickster-fairies/ 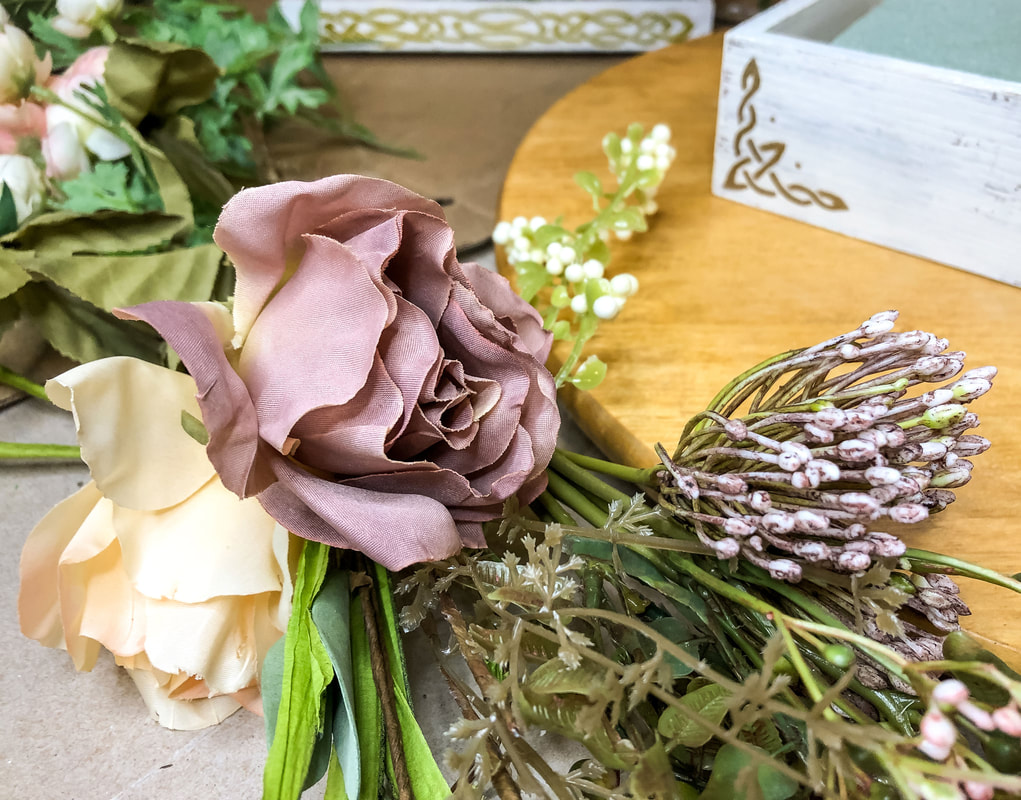 Faux roses and florals for new spring decor. Photo by Diane M. Lilly, 2023. I feel like I’m a little late to the party…It’s already March, and I’m only just now updating you on what’s on tap this year at DSD. I don’t know what happened to January and February…I guess they just got away from me! Honestly, I’ve been keeping my head down and staying busy. Quite a lot is happening, and a lot of projects are either in the works or are slated to get done within the next few months. My goal this year is to fill my online shop with beautiful items for you and pump out all new blog material about some of my (and your) favorite topics. This year I am full on embracing faux florals, fairy decor, and Celtic inspired art. If you like fairies, knotwork, castles, and nature inspired faux floral designs, you’re in for a treat New blog articles are coming! In addition to the usual DIY, how-to, and recipe blogs, I will be introducing some new topics with Celtic and fairy themes. This spring we are celebrating the magic of fairies and the beauty of Celtic art! 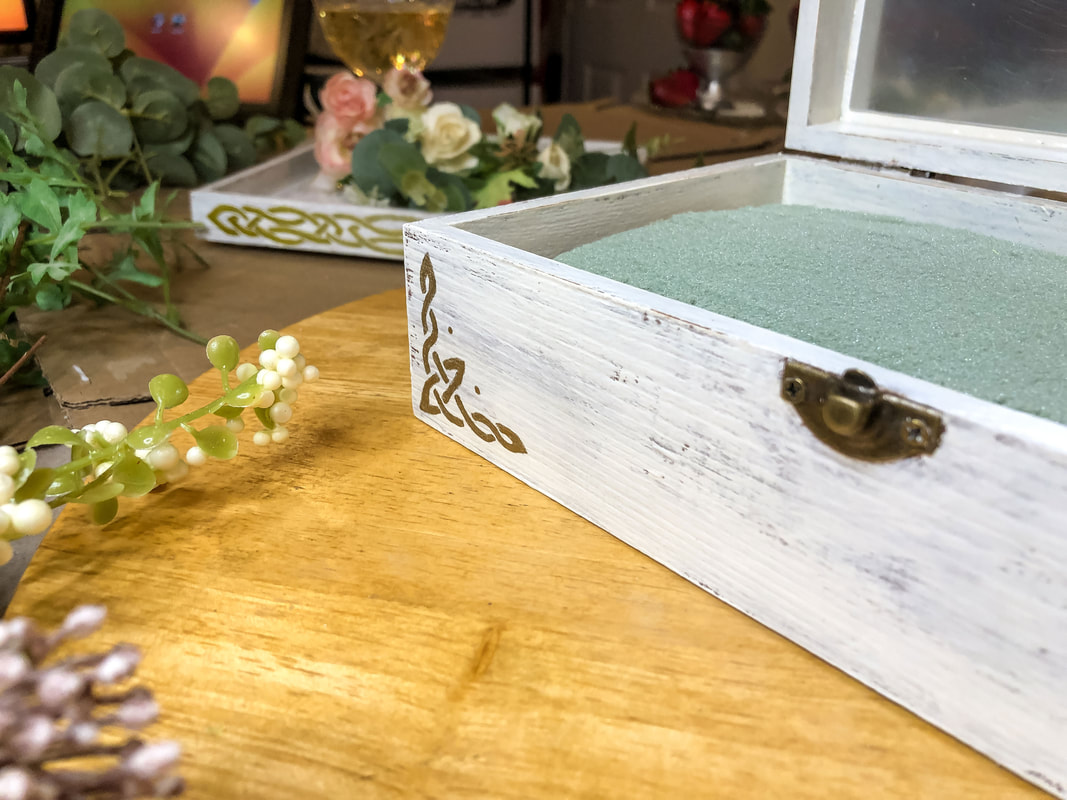 Jewelry box with hand painted Celtic knot design. Photo by Diane M. Lilly, 2023. New fairy houses Did I mention you will be seeing more fairy themed stuff?! Fairy houses will be making more of an appearance this year, with a couple new designs that are in the pipeline. The intention is to marry two of my deepest passions—fairy tales and miniature houses. I can’t wait to show you my new designs! But you’ll have to be patient! These things take a bit of time! 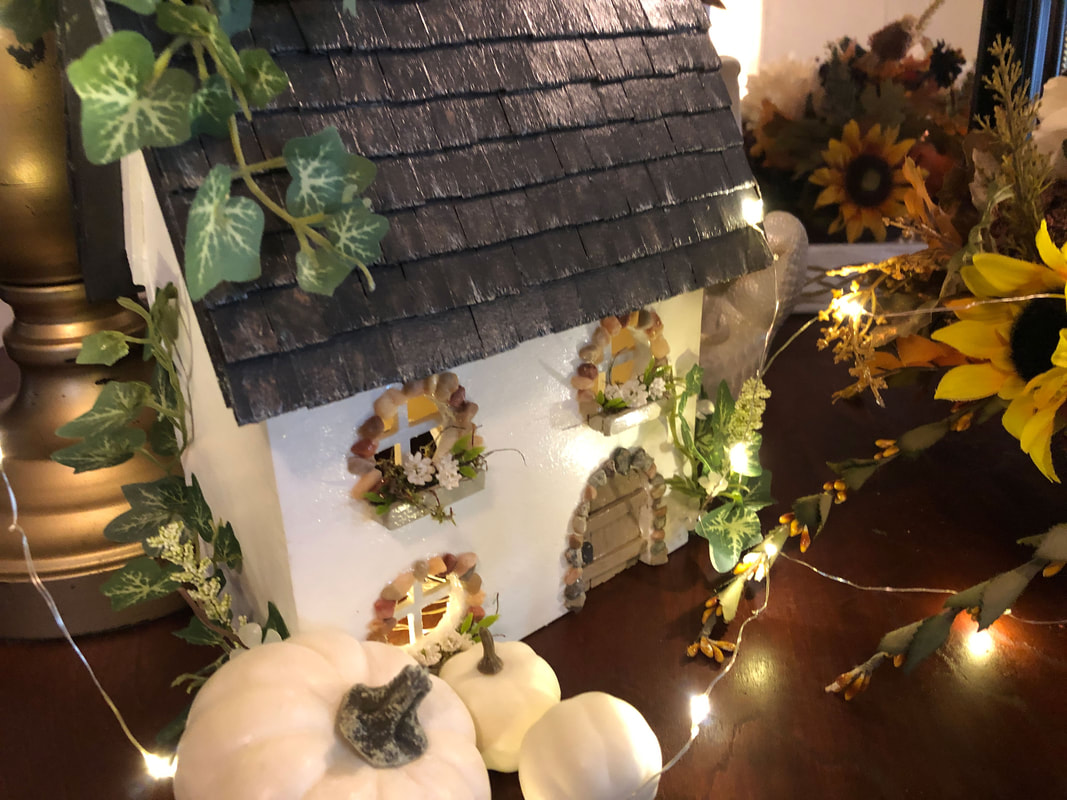 English Cottage miniature fairy house by Di's Studio Designs. Photo by Diane M. Lilly, 2022.  New designs for a miniature fairy shop in the works. Photo by Diane M. Lilly, 2022. 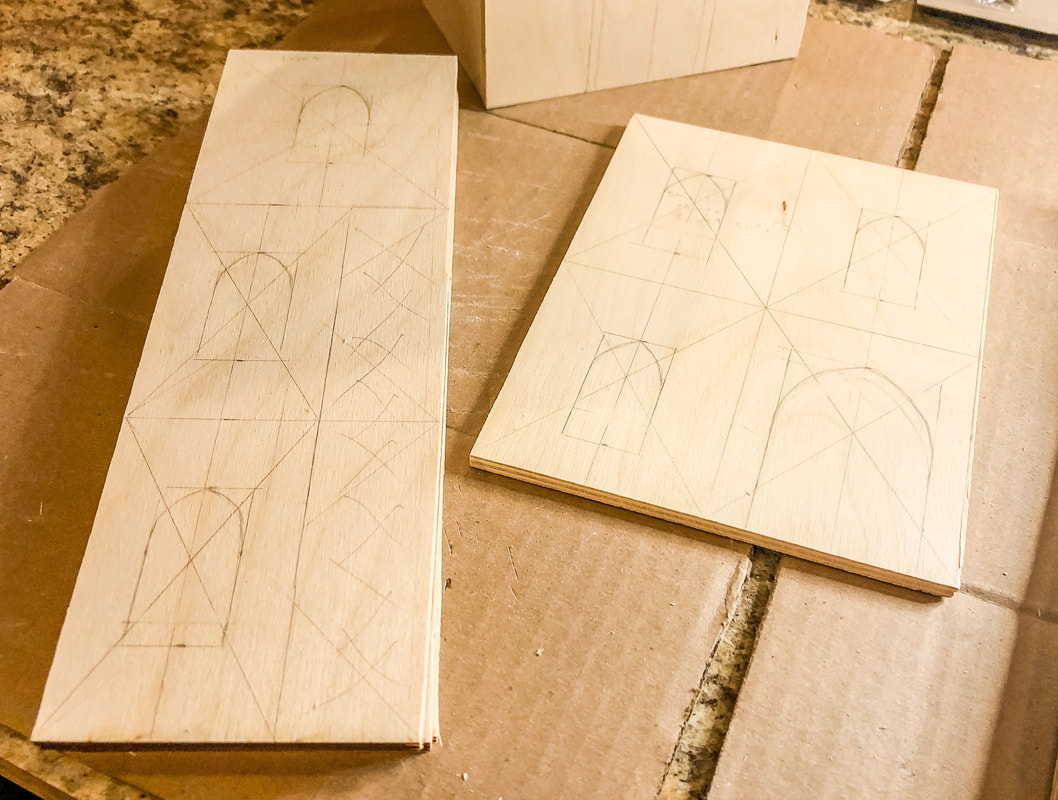 New designs for miniature fairy castle are also in the works. Photo by Diane M. Lilly, 2022. Home decor with a Celtic flair Celtic inspired art is making an appearance on new home decor designs in the form of painted knotwork borders. These are still a work in progress, but I can tell you they already look like they are right out of a fairy tale! 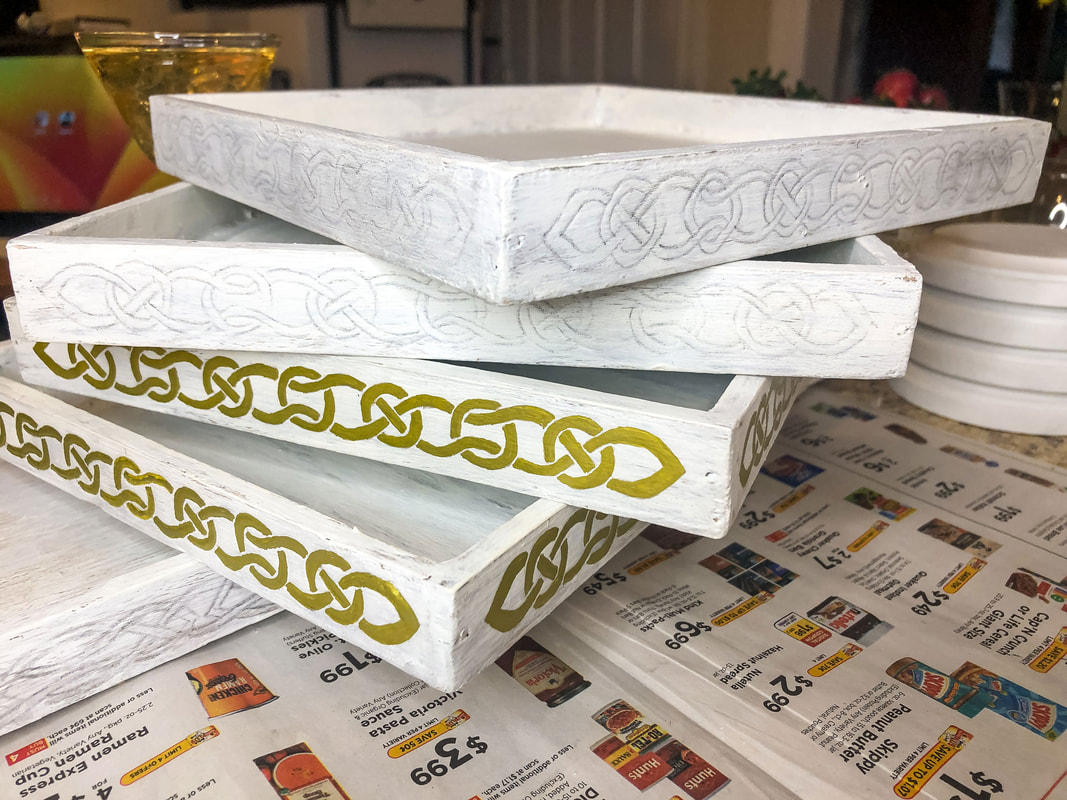 Hand painted wood trays with gold painted Celtic knot work borders. Photo by Diane M. Lilly, 2023. 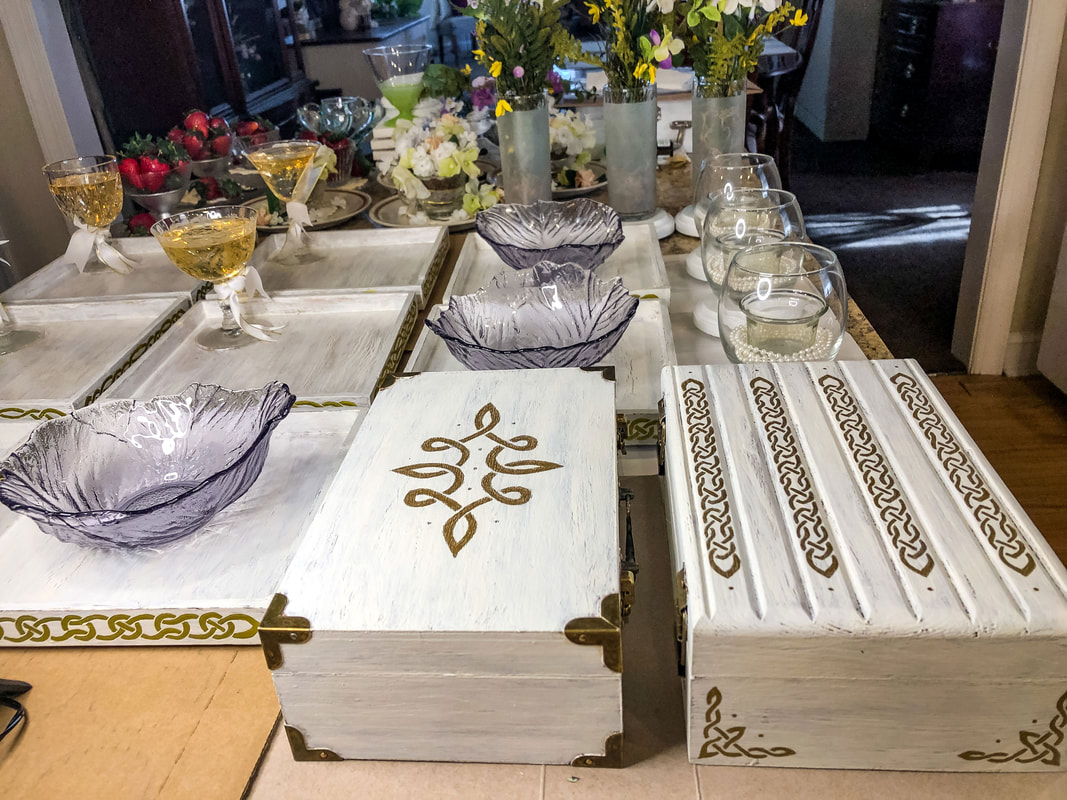 Some of the new projects that are currently in progress. Photo by Diane M. Lilly, 2023. New faux floral designs This year will see not only new nature inspired candleholders, but also spring faux floral arrangements. These new designs are going to be a breath of fresh air in my shop, just in time for spring…or at least April! 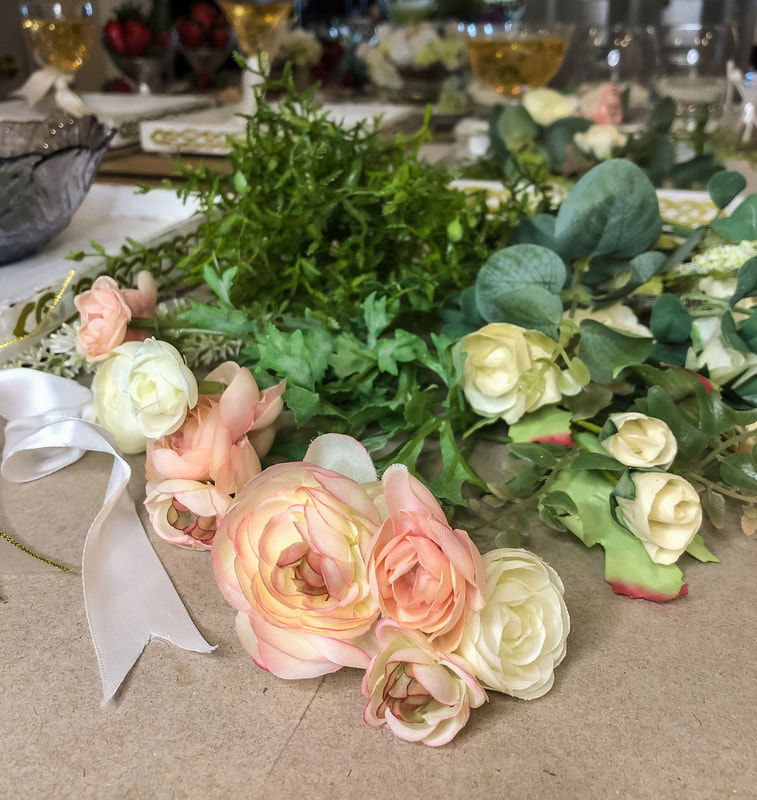 Some of the faux florals for this spring's new projects. Photo by Diane M. Lilly, 2023. 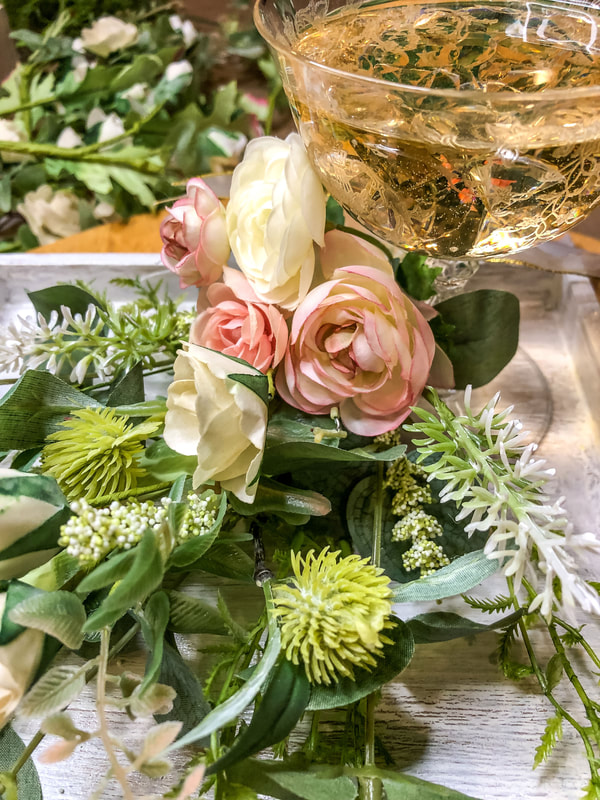 Sneak peak at one of the upcoming new faux floral designs. Photo by Diane M. Lilly, 2023. 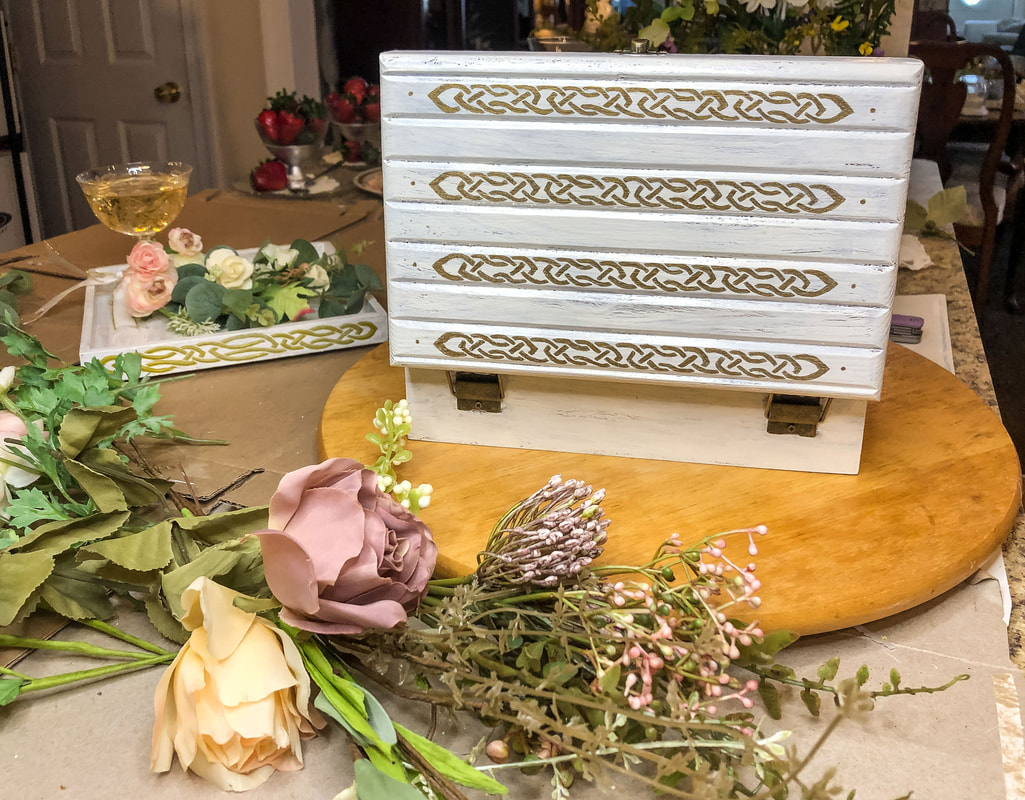 Hand painted jewelry box with gold Celtic knotwork, and some of the faux florals that are going inside. Photo by Diane M. Lilly, 2023. New candleholders And yes, there will be a few new candleholder designs this year, along with a few tweaks on some older designs. Everything is getting a much needed update for the 2023 spring season! 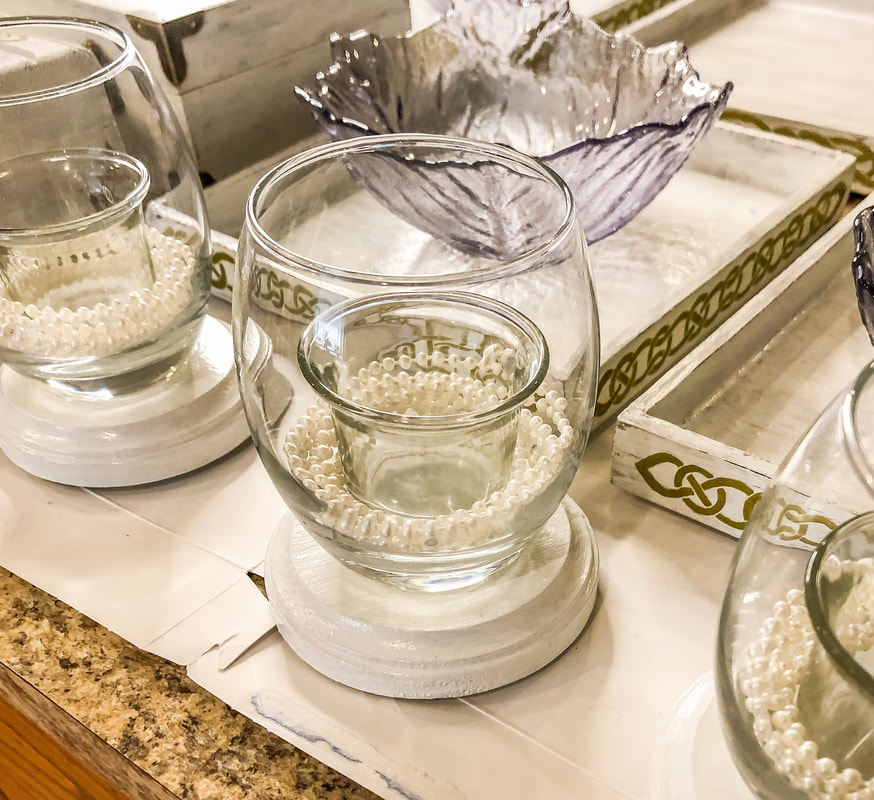 Smaller candleholder designs are currently in progress. Photo by Diane M. Lilly, 2023.  Handcrafted fairy themed spring candleholder by Di's Studio Designs. Photo by Diane M. Lilly, 2022. More wood burned art Sadly, my poor Celtic shop has been neglected. I’ve sold several pieces and have not had the time to make more wood burned art…But that is about to change! The goal this spring is to build up my Celtic art shop, so I have set aside time to finally finish the many pieces that were started last year (and the year before, so sorry). I can’t wait to get back to doing some artwork again!  Custom designed wood burned Celtic Mother's Knot currently a work in progress. Photo by Diane M. Lilly, 2022.  Custom designed Celtic Tree of Life wood burned plate also currently a work in progress. Photo by Diane M. Lilly, 2022.  Small Celtic inspired wood burned plaques are a work in progress. Photo by Diane M. Lilly, 2022. A Youtube channel Wait…what?! Yes a Youtube channel! So this is not set in stone, but I’m thinking of finally embracing the video age! The intention is to create some short videos of my designs and processes to share with you on a Youtube channel, and maybe grow a community. But I’m getting ahead of myself…I just want to make some videos showing you some of my works in progress and maybe some DIY projects, and whatever else might be interesting for you to watch. I’ll drop a link to the page in my social media and on my web site if this should come to fruition. OR… Would you prefer joining a Patreon page, where you could potentially have access to more private and exclusive stuff…for a monthly fee, of course (probably only $5)! Let me know in the comments.  Another sneak peak at a wedding themed spring faux floral design by Di's Studio Designs. Photo by Diane M. Lilly, 2023. So that’s what’s in the works. I have a very ambitious schedule, so things may change a bit here and there, and it might take me longer than I planned to get certain things done, but I would really like to see most of these things rolled out before summer. So, as always, stay tuned and follow me on social media for updates and my latest shenanigans. And don’t forget to share, comment, like, follow…all that good stuff…so I can continue to build this up and create more beautiful things for you guys! Related blogs you may want to read: DIY chalk painted tray with Celtic border 10 essential elements for a magical outdoor fairy garden A brief history of the origins of fairy gardens Tips for creating a faux floral spring wreath My spring 2022 indoor fairy gardens How to care for faux florals The Celtic Motherhood Knot, a symbol of love Spring makeover for my indoor fairy gardens  Early spring vignette free from clutter. Photo by Diane M. Lilly, 2022. Let me ask you a question…What is your favorite room in your home? Why do you love that space so much? Well, okay, that was two questions! But bear with me… Chances are you don’t even realize the effect lighting has on how you react to—and interact with—your favorite room. Is it a warm, cozy room with soft lighting? Is it a light and airy space with banks of windows that let in all that precious life-giving natural light? Light—or lack thereof—creates a mood in a space. It can make you feel content, invigorated, romantic, charged…or depressed. While exploring the natural lighting in my living spaces, I addressed the black hole called my dining room. This space receives so little direct natural light that growing live houseplants is impossible, and it occurred to me that spending time in this room made me feel depressed. A makeover was overdue, and lighting would be pivotal in bringing the space back to life. But that—as I found out—was only part of the equation.  Dark dining room before lights and decor. Photo by Diane M. Lilly, 2022. So, let me share tips and ideas for bringing dark spaces into the light…literally! Use lighter or brighter colors Bright colors—such as orange or yellow—tend to give a space warmth and a sense of vibrance and energy. A bright color can “lift” the vibration of a room and make it feel lighter and more welcoming. There is a school of thought that if you go loud with your decor—for example, hanging large, colorful art pieces in space—the space will come alive and feel lighter. I guess that depends on the art piece! But, in the end, it’s all about how color makes you feel when in the space. If you are looking for something more tame--and you like the cooler side of the color wheel--you could opt for a light blue or green. This approach would create a serene environment that mimics nature and lifts the spirits. The most popular options right now are neutral light browns, cool grays, warm grays, or white throughout interior spaces. This approach makes it easy to coordinate furniture and accessories to create a light and airy interior. 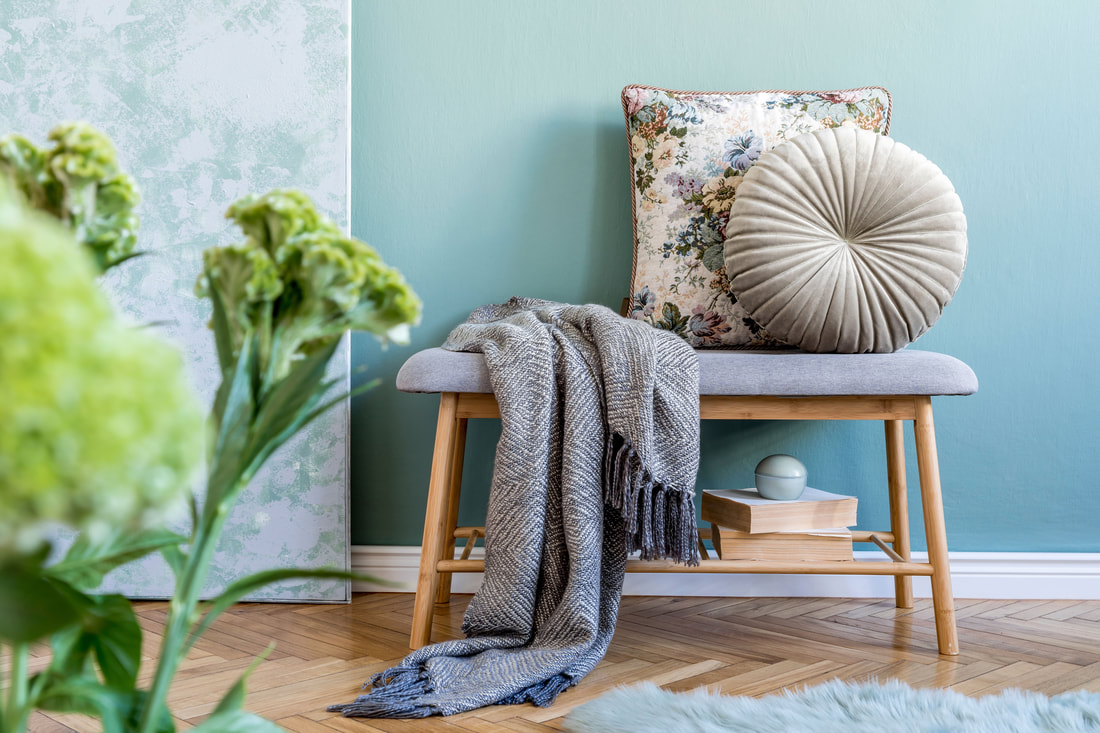 Image by FollowTheFlow on Adobe Stock. Use lightweight furniture Heavy, bulky furniture and furnishings will always make the room feel heavy, especially if the color scheme and wood are dark. Traditional bulky furniture can make a room feel dark and heavy, but this doesn’t mean you have to go out and buy sleek modern furniture. A traditional-style dark wood chair with slimmer lines, for instance, can go a long way to lightening the overall feel of a space. Even if the chair wood is dark, slender lines lessen the impact, creating more negative space through which light can travel. Of course, if you like sleek modern furniture, I say go for it! 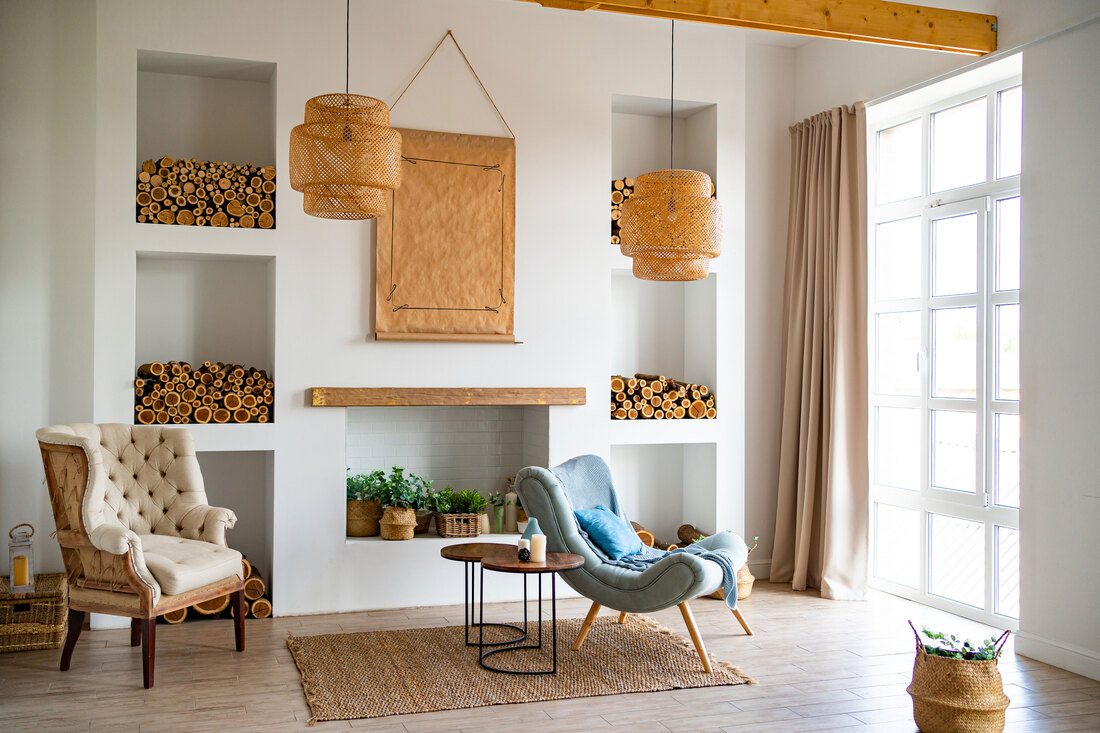 Image by Andrey on Adobe Stock. Declutter your space When creating a lighter feel to a room, sometimes less is more. The minimalist style aesthetic stresses clean, uncluttered spaces, and those interiors tend to feel airy and light. It’s not necessary, however, to go to that extreme if it’s not your thing. It’s worth noting, though, that having a lot of knick-knacks and furniture in a space will make the room feel heavier and claustrophobic. If the room is full of furnishings and accessories, there is less space for light to travel, so if your goal is to lighten up the room, it's worth getting brutally strategic about how much decor and furnishings are on display.  Last year's early spring vignette lit by a table lamp. Photo by Diane M. Lilly, 2022. Use reflective surfaces We all know reflective surfaces can make a room feel stylish and glamorous. Shiny surfaces allow light to bounce outward into the room, amplifying the luminance of the space. High gloss or metal furnishings and finishes can brighten up a space in a passive way without having to use more electricity. One of the most effective reflective surfaces to use is mirrors. Mirrors reflect the light and create the illusion of double the space, making the room feel larger.  Layered mirrors in my dining room expand the visual space. Photo by Diane M. Lilly, 2023. Maximize natural light The best—and cheapest—way to lighten up a room in the daytime is to maximize the natural light entering the space through the windows. Take advantage of the natural light by using sheer curtains and removing window coverings and furnishings in front of the windows. Also, remove anything outside the window that blocks the windows, such as trees or bushes. If you live in a more modern home, add a light shelf. A light shelf is a small shelf installed within a foot of the top of your window that bounces that upper-level light deeper into the room. So instead of the natural light just illuminating the first few feet of the room, you could increase the reach several more feet into the space, decreasing the reliance on electricity. Most of us in more traditional homes probably can’t do that, but it’s worth a mention!  Image by J.A. at Adobe Stock. Assess artificial lighting There’s no way of getting around the reality that we rely on electricity most of the time. The best way to maximize light in a space—and dispel the shadows in those dark corners—is to create a layered lighting plan. Your lighting plan should utilize overhead or ambient lighting, task lighting, accent lighting (such as wall sconces and table lamps), and mood lighting. The more options you have to light up your room, the lighter the interior space will feel in the evenings or on those cloudy, rainy days. Details mean everything, so examine all the ways light is needed in the space to find ways to maximize the use of your indoor lighting. Anything that requires a lamp shade (such as table lamps, wall sconces, and chandeliers) could benefit from switching to light-colored covers to allow light to pass through better. If you have decorative lighting with crystals, those should be kept clean to maximize the reflective properties. Use uplighting on stairs or other architectural features to highlight artwork or increase the general lighting in the space. And finally, add in strands of LED fairy lights, white Christmas lights, LED candles, or real candles to create a romantic “hygge” mood.  Dining room and living rooms all lit with the warm glow of lamps. Photo by Diane M. Lilly, 2022. So, those are my six tips for creating an interior space that feels lighter and brighter. What do you think? Did I miss anything? Have you tried any of these ideas in your own space? Leave a comment below and let me know! Related blogs you may want to read: Eight tips for assessing natural light in your home Five ways to create light layers in a room Does bringing nature into the home improve your mood? How to reupholster a dining room chair in 9 simple steps Eight tips for creating spring vignettes A spring decor makeover for my small rental bathroom Small houseplants that love bathroom humidity How to care for faux florals Eight health benefits of decorating with plants 11 interior decorating tips that help reduce anxiety and depression Nine hygge decor ideas Winter color palette ideas for your home decor Eight ways to create cozy winter interiors after the holiday decor comes down A little project with jute twine and an old foot stool DIY refurbishment of a dining room cabinet DIY upholstery cleaning methods Creating a kitchen coffee bar Let’s talk about houseplants How to clean a fabric lampshade This article may contain a few items or commercial mentions, but I only used them for demonstration purposes only. I am not endorsing any particular product or receiving any monetary gain for this blog. 
Ponytail palm soaking up the light in a southerly front window. Photo by Diane M. Lilly, 2022.
Whether you are deciding on which types of houseplants to buy, trying to identify artificial light needs, or have concerns about fabric or artwork that may fade in direct sunlight, you will need to understand how the natural light interacts with your interior space. Consider this scenario… A couple of years ago, I got the “plant” bug and bought a bunch of houseplants from my local home improvement store. I loaded them into the back of my Jeep, transported them home, and merrily unloaded them straight into my living room. I plopped them here and there on tables and windowsills, thinking that my living room would get plenty of light. Then reality hit when some of them started dying. As it turns out, there’s not enough direct light in the space to keep some of the more fussy plants alive. That revelation started me on a quest to understand how much natural light each room in my home receives and when. So today, I thought I’d share some tips learned from this experience and my research into daylighting, which refers to using natural sunlight as passive lighting in an interior space. Identify how your home is oriented to the cardinal compass points One of your first tasks is to figure out how your home is laid out according to the cardinal points on a compass. There are mobile compass apps you can download that identify the cardinal direction of each wall. Knowing the orientation of your home will help you understand the natural light (and passive heat, but that’s a subject for another blog article) that you will receive in your interior spaces. It’s well worth getting familiar with the four directions about your home. 
Image by Cultura Creative on Adobe Stock.
Note the orientation of your windows Once you have your mobile app, this is a simple process. Align the phone perpendicular to each window wall and note the cardinal direction. Since most homes are not built in specific cardinal directions, you may have windows on a northeast, northwest, southeast, or southwest axis. And that’s ok! You are looking for a general idea of the direction each window faces so that you can start understanding how much light to expect to receive through each opening. Below is a very general overview of this relationship: Windows facing east—The most direct light will be in the morning Windows facing west—The most direct light will occur in the evening Windows facing south—The most direct light in the middle of the day Windows facing north—Mostly indirect light through a good portion of the day 
Image by FollowTheFlow on Adobe Stock.
Assess the window size & position on the wall Note the size and placement of all windows in a particular space so you can assess how much natural light you will get from all directions. Combinations of window sizes and shapes within a space will create overlapping light values and cross-lighting within your interior space. This cross-lighting can help eradicate those pesky shadows. 
Image by topntp on Adobe Stock.
Understand the sun’s daily trajectory Windows that face south get the most natural light, and windows facing north will get indirect sunlight. As we all know, most homes are not oriented so neatly, so you'll need to identify the cardinal directions for your home’s site and each window in your space. Fortunately, the sun’s daily trajectory is predictable. As the sun rises, it will come up from the east, then gradually travel through the sky towards the west, where it sets later in the day. This means you'll be able to follow the sun's path from your easterly windows to your westerly windows as the day progresses. You could even create a chart with timetables for when direct light enters each window. 
Image by gopixa on Adobe Stock.
Understand the seasonal orientation of the sun in the sky During the summer, the sun is higher in the sky, which means the direct light will not penetrate as deeply into the interior. However, the light that does enter will be much more intense, creating glare. Harness the power of this glare by bouncing it off shiny surfaces that reflect the light deep into the room. In the winter, the sun sits lower in the sky, and while it is weaker in strength than summer sunlight, the lower angle means direct light can travel deeper into your interior. 
SketchUp model 1 by Diane M. Lilly.

SketchUp model 2 by Diane M. Lilly.
Spend some time in your space studying the light Spend some quiet time in the space at different times of day and at various times of year. Observe when sunlight shines into your space. Is it direct sunlight or just bright indirect light? How far into your space does the direct light penetrate? Does it seem like the indirect light is bright enough, or do you observe shadows? Direct light is the sun beating down on the windowsill, as opposed to bright, indirect light that is less direct and more ambient. Indirect light would be a little further away but still getting some light. This may be already in the medium light spectrum for your home. The low light is away from the direct light (probably across the room) but still gets a little light. This changes as the day progresses and according to the seasons. 
SketchUp floor plan by Diane M. Lilly.
One tip that I learned as an amateur photographer is to use your phone to take snapshots. You will see the difference in lightness and darkness just by how bright or dark your images look on your phone. Ironically, this is how I discovered just how dark my living room is and how quickly the light fades as you move through the space. The eye can lie to you, so it’s great to have a tool to help measure the light levels. Identify the brightest and darkest areas of your space After studying the general light levels, you should be ready to identify the brightest and the darkest areas in your space. This is especially important for live plants, delicate fabrics, or precious artwork. Many houseplants need at least some direct sunlight for proper photosynthesis, but that artwork you paid a pretty penny for has no tolerance for direct sunlight. Also, you wouldn’t want to put a live plant in a dark corner. Certain hardy plants like peace lilies might live, but most houseplants won’t forgive you for putting them in darkness! In other words, know how you intend to use the space for optimal use of light and dark areas.
Image by Pixel Shot on Adobe Stock.
Identify light overlap and indirect light In most larger rooms, there will be multiple windows and light sources. The combination will create an overlap in direct and indirect light, adding to the complexity of light and shadow levels in a space. But you also need to consider the indirect light filtering in from an adjacent space. That filtered light will overlap and enhance the light in a given room, but conversely, there may be times when that extra light will shine at a different angle and create weird shadows within your space. You'll need to assess whether that light helps or hinders your natural light needs. Remember that trick with taking snapshots with your phone? This is where it comes in handy. Your eye can’t always make sense of complex light levels, but your camera lens will show you. Just take a series of shots moving along a line through the space and watch as the images get darker and brighter. It’s a fun and eye-opening experience! And it will help you better understand how to use the natural light in your home! 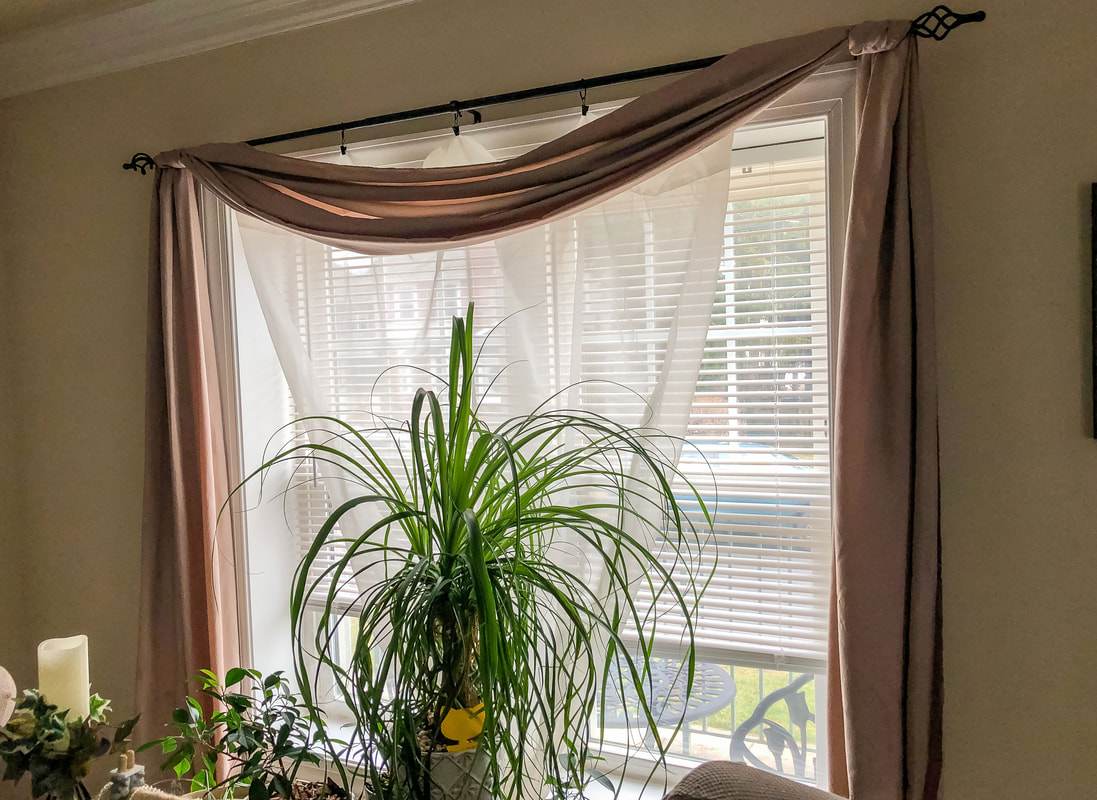
Front window iPhone shot 1. Photo by Diane M. Lilly, 2023.
Front window iPhone shot 2. Photo by Diane M. Lilly, 2023.
 There are a variety of light meters on the market that measure light intensity through foot candles (or lux). These tools can help you precisely measure the amount of light in your space. However, the tips I have chosen work well for the layperson trying to sort out the general natural lighting situation in their space. So those are my eight tips for assessing the natural light in your interior spaces. Whether you are growing plants, protecting furnishings and artwork, looking to save on electric bills, or just love that warm sunlight, taking the time to observe the way natural light enters your home pays off. If you have more tips, drop a line in the comments below!
Related blogs you may want to read:
Five ways to create light layers in a room Six tips to lighten up a dark room Does bringing nature into the home actually improve your mood? How to reupholster a dining room chair in 9 simple steps Eight tips for creating spring vignettes A spring decor makeover for my small rental bathroom Small houseplants that love bathroom humidity How to care for faux florals Eight health benefits of decorating with plants 11 interior decorating tips that help reduce anxiety and depression Nine hygge decor ideas Winter color palette ideas for your home decor Eight ways to create cozy winter interiors after the holiday decor comes down A little project with jute twine and an old foot stool DIY refurbishment of a dining room cabinet DIY upholstery cleaning methods Creating a kitchen coffee bar Let’s talk about houseplants
Affiliate Disclosure
Some of the posts in this article contain affiliate links. This means if you click on the link and purchase the item, I will receive an affiliate commission at no extra cost to you. I will only recommend products or services I use personally and/or believe will add value to my readers, so there is no conflict of interest. 
Fairy lights and table lamps accentuate floral decor. Photo by Diane M. Lilly, 2022.
What do you think of when you think of winter? For most of us, the very mention of winter makes us shiver…but there are positive ways to approach the coldest season of the year. Over the past couple of years, I have researched a curious Danish lifestyle outlook called hygge. Winters up north are long, cold, and dark…and yet the population is said to be one of the happiest in the world! What a bunch of weirdos, right?! But they seem to have learned a trick to cope with the long winters indoors. At the heart of this whole “hygge” thing is the idea that your life is enriched by surrounding yourself with simple things that bring you joy. Embracing hygge in the home means choosing cozy decor that feels safe, warm, and inviting. If you want to learn more about hygge, I recommend the book by Meik Wiking called The Little Book of Hygge: Danish Secrets to Happy Living, which you can purchase on Amazon.  
Burning candles for a hygge feel. Photo by Diane M. Lilly, 2022.
This brings me to the topic of lighting… Lighting can be one of those decor elements that we don’t think about as much as we should. Lighting (or lack of it) has a significant effect on mood. The best way to harness the ambiance in your home is to provide several sources of light that can be turned on and adjusted as needed. In the interior design world, this is called layering light. A cozy, user-friendly home utilizes adjustable light levels from various light sources-- such as overhead lighting, task lighting, and mid-level lighting on walls and tables. Before I get into the five ways you can create multiple layers of light in your interior space, let me first make a quick side note about color temperature and lighting. If your goal is to create a cozy space through lighting, stay on the warmer end of the spectrum. Cool lights negatively affect mood (think of the blue light from computers) and disrupt sleep patterns. Light color is measured with the Kelvin scale—2000K-3000K range is the warmer, more yellow range, 3100K-4500K is the white/blue range, and over 4500K is the “daylight range. Keep these ranges in mind as you’re making lighting choices, sticking to the lower end of the Kelvin spectrum for the softer, warmer lighting that will make your interior glow during the cold winter months. 
Image by ohsuriya at Adobe Stock.
Assess natural light & window orientation All good lighting plans start with having a good grasp of how natural light enters your interior, the idea being to utilize as much free natural light as possible before turning on the lights. Electricity is not cheap these days! Do you know your home's orientation to the cardinal's compass points? Well, it’s a good idea to find out! All you need is one of those compass apps on your phone, and you’re all set! You should be familiar with your home’s orientation for a couple of reasons…First, houseplants need light to grow, so their placement is critical to survival. Second—and the subject of this article—you will need to understand how utilize the natural light in your home to minimize dependence on artificial lights and the electric bills associated with their usage. Natural light is free, don’t forget! 
Ponytail palm enjoying natural light by front window. Photo by Diane M. Lilly, 2022.
In the winter, the sun sits lower on the horizon and travels further into the space, depending on the position of the windows. In the summer, the sun is higher in the sky and won’t penetrate as far into the interior, but the light is brighter and warmer than in winter. 
Image by lamyai at Adobe Stock.
The sun also travels through the sky as the day progresses. In the mornings, you will have the sun coming through easterly-facing windows, travel across the southern sky, and end up in the west. A home with main windows facing the south is the “perfect” orientation for maximizing passive natural light. (By the way, this also helps with passive heating.) Install general/ambient lighting Every room should have at least one overhead source of lighting. It just makes sense for general functions and traveling through a space. In addition to overhead lighting, lamps and wall sconces can serve as general lighting. This general lighting can be as simple or elaborate as your budget permits and provides light for everyday functions, movement, and wayfinding. Ideally, general lighting should illuminate most of the space as evenly as possible. 
Image by murattellioglu at Adobe Stock.
Assess task lighting needs Task lighting is exactly how it sounds—lighting that allows you to see without straining when trying to complete specific tasks. For instance, this could be a desk lamp in an office or under-the-cabinet strip lighting in the kitchen. Task lighting--used in conjunction with general overhead lighting--will illuminate a small space better, facilitating work that requires attention to detail. 
Image by LIGHTED STUDIOS at Adobe Stock.
Get dramatic with specialty lighting Specialty lighting uses a variety of lighting fixtures to create dramatic visual effects. Use this added layer of lighting to illuminate decor or architectural elements and create visually appealing light pools on walls and floors. Examples of specialty lighting include picture lighting for artwork, track and monorail lighting on ceilings, and up-lighting along walls, steps, and columns. 
Image by poplasen at Adobe Stock.

Image by Tomasz Zajda at Adobe Stock.
Make your home inviting with mood lighting This is my favorite part of the lighting scheme! And I think this is where “hygge” really shines, especially in the darker winter months. This is where you can bring a little magic into your home. Mood lighting isn’t a specific type of light fixture but a careful combination of ambient and specialty lighting, natural light, lamps, wall sconces, and decorative lighting options. You could even light up or turn on a fireplace for that additional cozy ambiance. Your main lighting (like ceiling pendants) might have dimmer switches to bring the lights down to a moodier, relaxing level. Lamps might have options for lower light settings. Then there are candles (both real and LED), battery-operated fairy strands, and warm white Christmas light strands. You could even incorporate a variety of special LED lighting options or black light. It all depends on what type of mood you are looking to achieve.    
Handcrafted decorative candleholder with LED candle by Di's Studio Designs. Photo by Diane M. Lilly, 2022.
Dining room tablescape with LED candles, fairy light strands, and handcrafted decorative candleholder by Di's Studio Designs.Photo by Diane M. Lilly, 2022.

LED candle. Photo by Diane M. Lilly, 2022.
Returning to the whole hygge theme (this is winter, after all), my way of creating cozy light layering would be to use my warm white accent lamps on a low setting with a few real or LED candles and some fairy strands. I love the soft, warm glow that makes my home feel warm and welcome in the evenings. Sadly, I don’t have a fireplace, but we can’t have everything, can we?! 
Burning a homemade eucalyptus candle. Photo by Diane M. Lilly, 2022.
How will you create cozy light layers in your home this winter? Leave a comment below and tell us about it! Related blogs you may want to read: Eight tips for assessing natural light in your home Six tips to lighten up a dark room Does bringing nature into the home actually improve your mood? How to reupholster a dining room chair in 9 simple steps Eight tips for creating spring vignettes A spring decor makeover for my small rental bathroom Small houseplants that love bathroom humidity How to care for faux florals Eight health benefits of decorating with plants 11 interior decorating tips that help reduce anxiety and depression Nine hygge decor ideas Winter color palette ideas for your home decor Eight ways to create cozy winter interiors after the holiday decor comes down A little project with jute twine and an old foot stool DIY refurbishment of a dining room cabinet DIY upholstery cleaning methods Creating a kitchen coffee bar Let’s talk about houseplants Affiliate Disclosure Some of the posts in this article contain affiliate links. This means if you click on the link and purchase the item, I will receive an affiliate commission at no extra cost to you. I will only recommend products or services I use personally and/or believe will add value to my readers, so there is no conflict of interest.  Spaghetti with meatballs baked. Photo by Diane M. Lilly, 2022. Spaghetti is one of the cheapest meals you can make—and I love it for that—but my family has become utterly sick of it! This “cost-effective” meal has become a waste of money, as 75% of it generally ends up in the trash…after a couple of days sitting in the fridge in quiet desperation. So much for saving money, right?! And then I brainstormed a way to ensure my poor spaghetti and meatballs got eaten…Add cheese and bake them in a casserole! This has been a game-changer! The ingredients are essentially all the same, with the addition of one ingredient— mozzarella cheese. It’s as simple as layering all the ingredients in a baking pan and cooking in the oven for 30-40 minutes. So here’s my simple (and cheap) Baked Spaghetti with Meatballs recipe… Ingredients: 2 boxes cooked spaghetti (or pasta of choice) 3 jars sauce (your choice) meatballs (I use frozen Italian seasoned) shredded mozzarella cheese parmesan cheese Italian seasoning garlic powder pepper garlic bread (opt) Make pasta according to package directions. Pour cooked pasta into a greased baking pan.  Boil pot of water. Photo by Diane M. Lilly, 2022.  Pack of spaghetti. Photo by Diane M. Lilly, 2022.  Boil the spaghetti. Photo by Diane M. Lilly, 2022.  Grease a baking pan. Photo by Diane M. Lilly, 2022.  Pour cooked spaghetti into greased pan. Photo by Diane M. Lilly, 2022. Top with layers of meatballs, sauce, parmesan cheese, garlic powder, mozzarella cheese, pepper, and Italian seasoning.  Layer meatballs on top of cooked spaghetti. Photo by Diane M. Lilly, 2022.  Jar of spaghetti sauce. Photo by Diane M. Lilly, 2022.  Pour spaghetti sauce over pasta and meatballs. Photo by Diane M. Lilly, 2022.  Parmesan cheese. Photo by Diane M. Lilly, 2022.  Sprinkle parmesan cheese over spaghetti, meatballs, and sauce. Photo by Diane M. Lilly, 2022.  Spices. Photo by Diane M. Lilly, 2022.  Shredded mozzarella cheese. Photo by Diane M. Lilly, 2022.  Layer shredded mozzarella over pasta, meatballs, and sauce. Photo by Diane M. Lilly, 2022.  Season dish before placing in oven. Photo by Diane M. Lilly, 2022. Bake at 400 degrees F for about 35 minutes, or until cheese is browned and meatballs are cooked. Serve with garlic bread, if desired.  Spaghetti and meatball baked dish finished. Photo by Diane M. Lilly, 2022. Honestly, this couldn’t be a more simple recipe! And guess what? My family actually eats it! Spice it up with pepperoni, mushrooms, or any other topping you like. This dish can be as cheap or as elaborate as your budget allows...That’s what makes it so versatile! So give it a try and let me know how it went. Have a recipe tip of your own? Share it down below in the comments. And Bon Appetit! Related blogs you may want to read: Festive vegetable bake recipe Spicy crock pot chili recipe Homemade chicken noodle soup recipe Potato soup recipe Tuna noodle casserole recipe Chicken vegetable pot pie Salmon chowder recipe How to eat healthy with chicken and roasted vegetables This article may contain a few items or commercial mentions, but I only used them for demonstration purposes only. I am not endorsing any particular product or receiving any monetary gain for this blog. |
Author
Some of the posts on this site contain affiliate links. This means if you click on the link and purchase the item, I will receive an affiliate commission. 
Categories
All
Archives
April 2024
|