|
Keep things soft and understated this fall season with these 10 home decor items from Amazon!  Images from Amazon.com. Click the links below to view or purchase. Some of the posts in this article contain affiliate links. If you click on the link and purchase the item, I will receive an affiliate commission at no extra cost to you. I will only recommend products or services I use personally and/or believe will add value to my readers, so there is no conflict of interest. If experimenting with a softer color palette this fall is on your agenda, this blog article is for you! Most fall home decor and accents in stores and advertising come in the typical vibrant oranges, reds, and yellows or the Farmhouse style that pairs white with black or orange. And there’s nothing wrong with that if that color scheme inspires you or works well with your existing decor. But there are other options… Pastel decor is usually associated with spring and Easter, but Pinterest has opened my eyes to a different way of thinking about seasonal decor. You can absolutely use pastel colors in the fall! I combed through selections on Amazon to put together an inspirational mood board to help you brainstorm a look for your own space. The key is to bring in accent pieces that speak to the season, such as pumpkins, fall leaves, and a few rustic elements that add a touch of coziness to the look. Here are a few items you may want to consider... Item 1—Artificial Gold Brushed White and Pink Pumpkins by Winlyn While you could use simple white pumpkins in this color scheme, why not add a little pink? These white and pastel pink foam pumpkins brushed with gold come in various sizes for use in tablescapes and vignettes. 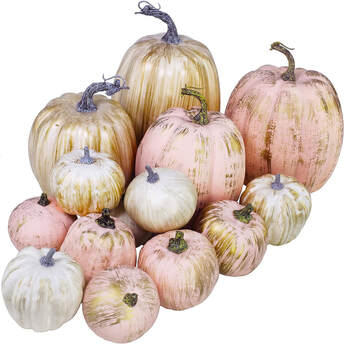 Item 2—Dusty Sage Green Cheesecloth Table Runner by Generic This 13-foot table runner is long enough for multiple styling ideas. Create a rustic or elegant look depending on your overall decor style using creative draping or gathering techniques. The sage green goes well with a pastel color palette and provides the perfect foundation for styling a fireplace mantle or dining room table. 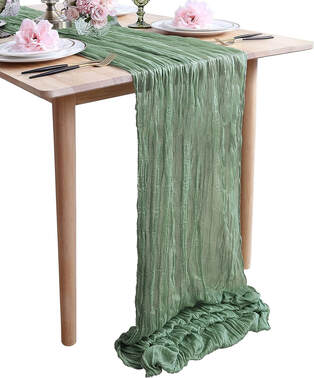 Item 3—Mercury Glass Tealight Candle Holders by Volens Mercury glass tealight candle holders add a touch of shimmer to any decor. The gold glass adds a touch of fall elegance and warm contrast to a pastel color palette. Use LED tealights for a cozy glow in the evenings!  Item 4—9FT Eucalyptus and Willow Leaf Garland by Ling’s Moment Check out this stunning eucalyptus garland with pampas grass and silk pink, peach, and white roses! The 9-foot garland can be paired with the sage green table runner or used separately on a table or mantle. 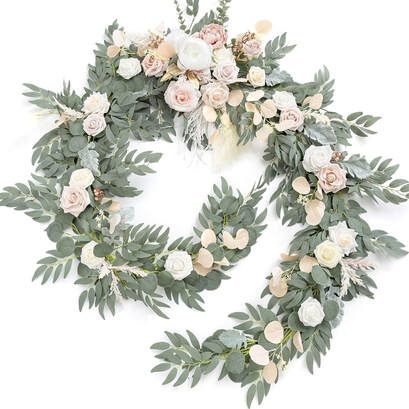 Item 5—Gold Foil Textured Forest Painting by Yihui Arts This wall art with birch trees is an understated yet unmistakably autumn focal point for any room. The background may be pastel blue-green, but the gold foil leaves are a definite nod to the changing of the seasons and colors of autumn.  Item 6—Pumpkin Pillow Cover Set by PSDWETS These pillow covers with pale blue and cream pumpkins are an inexpensive way to add a soft pastel accent to your living room chairs or sofa. Pair them with different-sized pillows to add more depth to your seating accents. 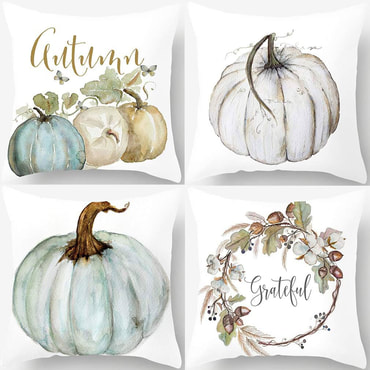 Item 7—Cream Cable Knit Throw Blanket by Battilo I own a set of these cream cable knit blankets, and I can tell you they are so soft! The throws are made with acrylic yarn and are machine-washable. The cream adds a little balance and contrast to this soft fall color scheme, breaking up the green and pink. 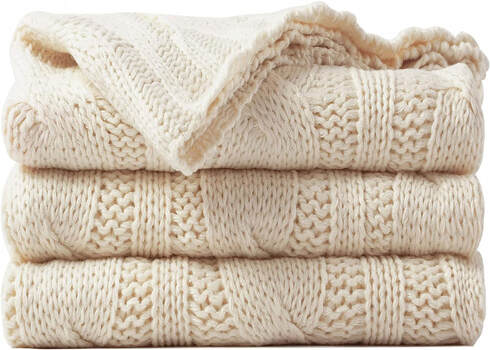 Item 8—Sage 24 x 24 Velvet Throw Pillow Covers by JUSPURBET Add a little luxury with these velvet sage green pillow covers! Pair these slightly larger pillow covers with the pumpkin pillows mentioned earlier to create visual and size contrast. 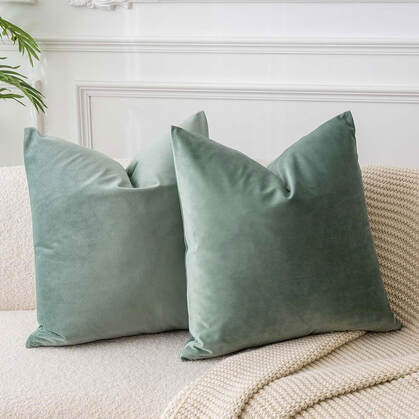 Item 9—Handmade Swedish Tomte Holiday Gnome by Funoasis I’m falling for this adorable Swedish gnome! This little guy can be used for seasonal or holiday decor. Plunk him down on a mantle or in a fall vignette for a whimsical accent!  Item 10—Dried Pampas Grass by MALIDAK I chose this pampas grass selection for its soft colors, full branches, and fluffy texture. The feathery texture and color work well with the rest of the pastel accents while adding an organic element to the room.  Related blogs you may want to read: Dark Academia Decor for the Fall Brighten up your autumn decor with these items! Create a cozy relaxing interior space this fall with neutral colors Need ideas for incorporating the color blue into your fall decor? Inspirational ideas for creating that cozy autumn boho style Nine hygge decor ideas Winter color palette ideas for your home decor Design concept for a dreamy coastal interior Let’s talk Bohemian
0 Comments
11 items from Amazon to get you started! When we speak of Boho (short for Bohemian) certain words come to mind—artistic, eccentric, casual, eclectic, gypsy, hippie, carefree, and creative. And if you ask me fall is the perfect time of year to let your inner gypsy shine! The boho look is an incredibly simple look to pull off with its mix of earthy (or jewel tones if you’re not afraid of color), textural, and slightly exotic design elements. To help inspire you to embrace this design style this season I combed through Amazon to find a few interesting items that might help get you started! 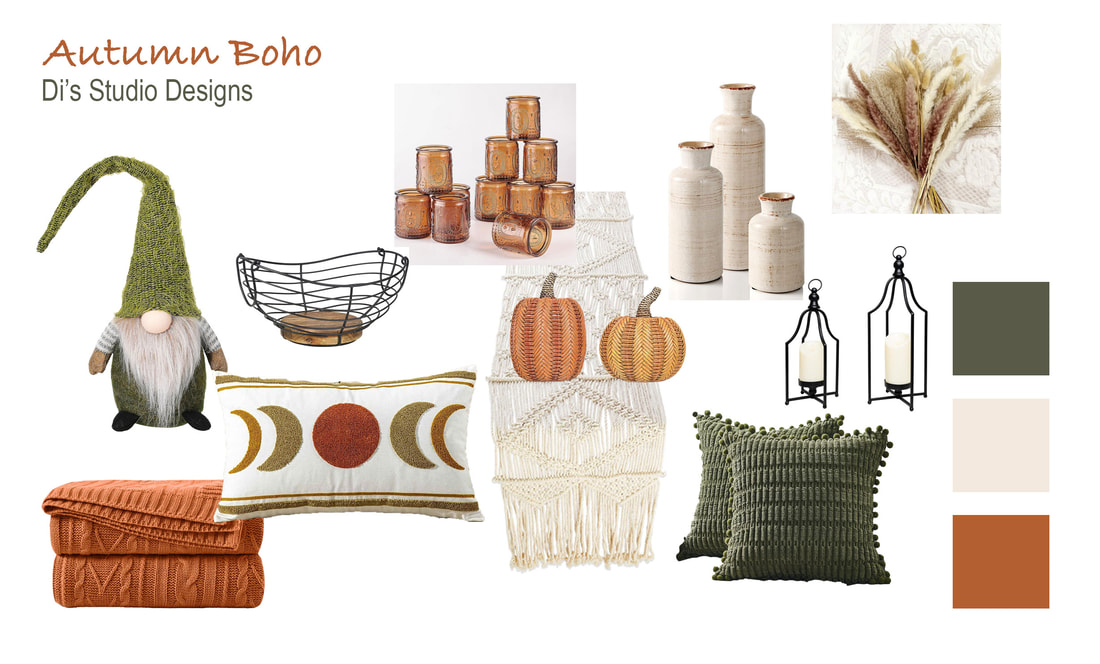 Images from Amazon.com. Click the links below to view or purchase. Some of the posts in this article contain affiliate links. If you click on the link and purchase the item, I will receive an affiliate commission at no extra cost to you. I will only recommend products or services I use personally and/or believe will add value to my readers, so there is no conflict of interest. Item 1—Swedish Handmade Plush Gnome by Funoasis Gnomes are all the rage this season! The rustic shades of green and the long furry beard are a whimsical addition to the boho accessories on this mood board. The handcrafted look of this magical little guy works well with the rest of the accessories and adds a little element of surprise to the look. 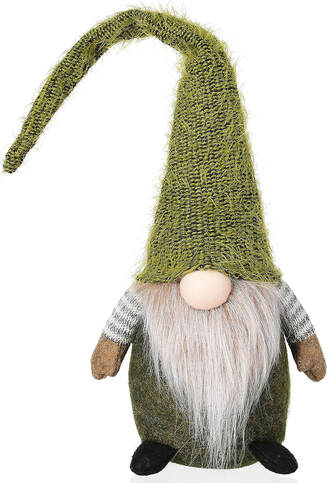 Item 2—Rust Orange Cable Knit Throw Blanket by Aormenzy No fall living space is complete without a cozy cable knit blanket! This machine-washable rusty orange throw is the perfect color for a fall boho space. Curl up with this blanket in a rattan chair and read a book or take a nap! 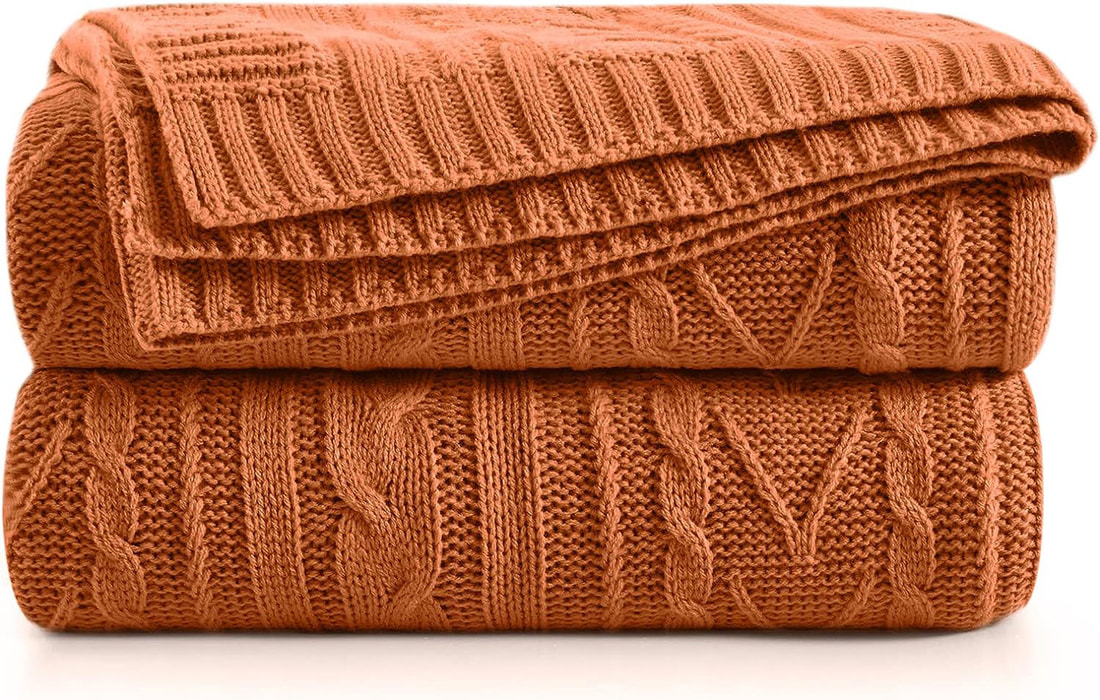 Item 3—Embroidered Bohemian Moon Decorative Throw Pillow Cover by FAVDEC The design on this lumbar pillow not only makes a quintessential boho design statement but pulls in the range of rustic greens and oranges used in the rest of the mood board. It also provides a nice contrast to the green tassel pillows. 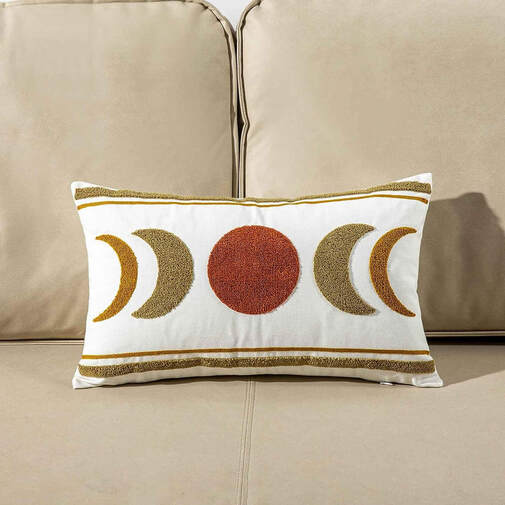 Item 4—Vintage Wire and Wooden Base Fruit Basket by Tribello This item is described as a fruit basket but could be used in any space as a decorative accessory. The wood base and wire basket would work well in this boho collection used alone or filled with other decorative elements.  Item 5—Amber Glass Tealight & Votive Candle Holders by TripodBird These tea-light votive candle holders have a sensual rustic feel, and an amber color blends well in a fall vignette or tablescape. Set these around the room or display them in a vignette or tablescape with warm LED lights. 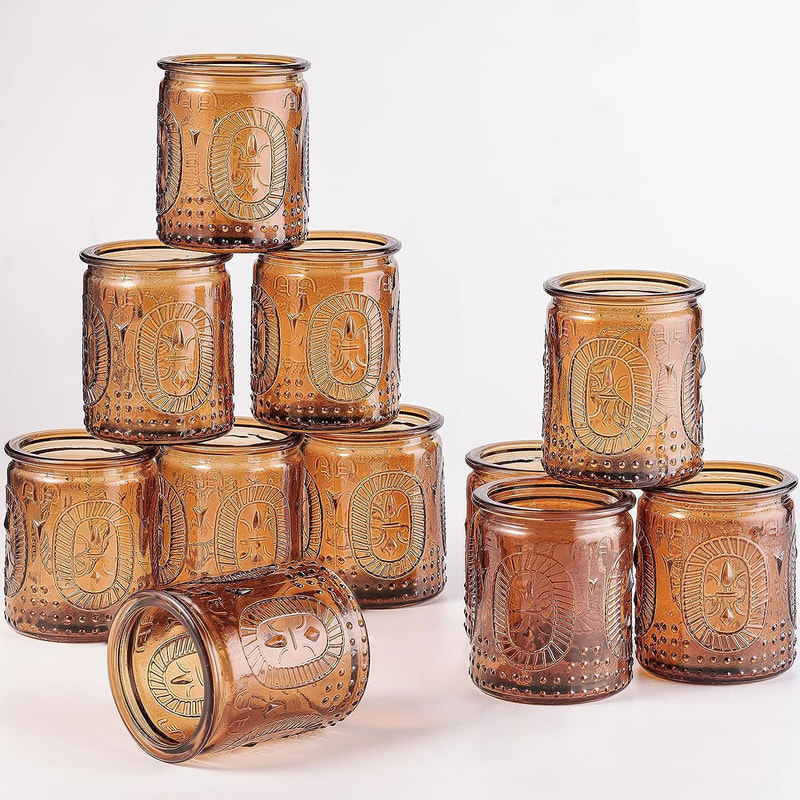 Item 6—Artificial Rattan Pumpkins by Valery Madelyn Pumpkins are a must-have in any fall decor, right? These rattan pumpkins are so unique and boho that I had to include them in this mood board! 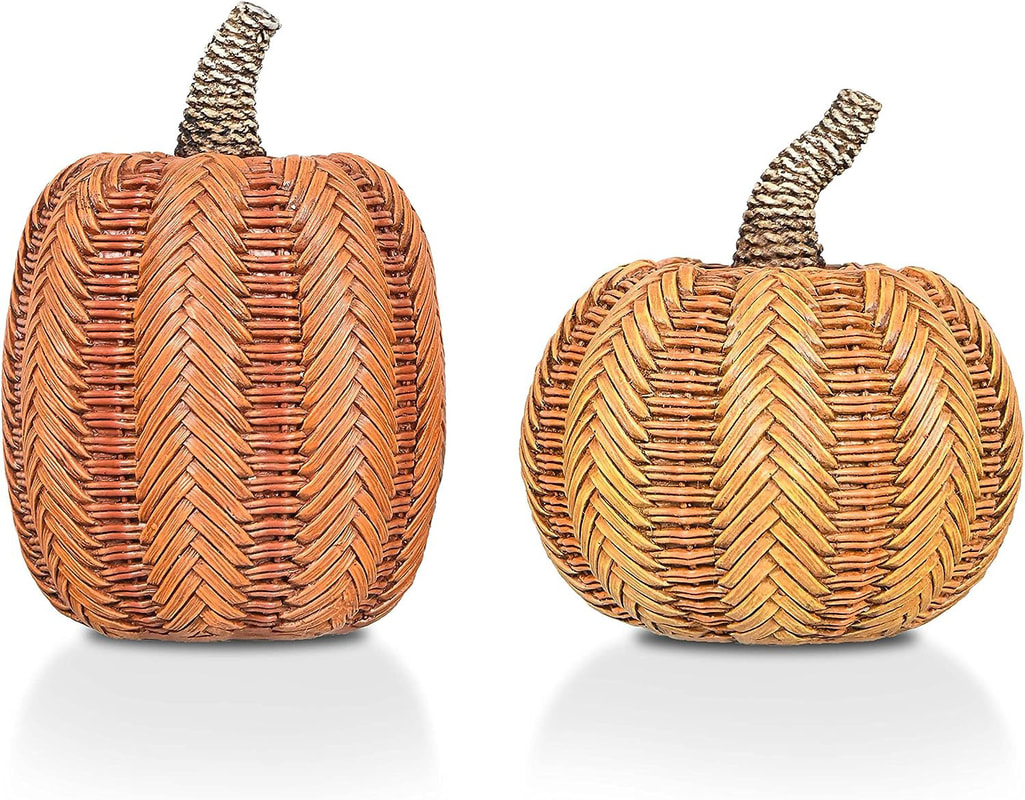 Item 7—Macrame Table Runner by Folkulture I know it’s cliche, but nothing says boho like macrame! This cream-colored table runner makes a unique statement and sets the stage for the rest of the boho-inspired table decor. 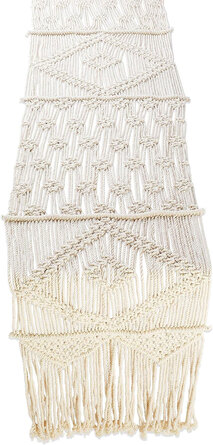 Item 8—Olive Green Decorative Throw Pillow Covers by Topfinel This olive green pillow with pompom tassels and a distinctive textural pattern continues the rustic fall look while embracing the quirkiness of the boho style. 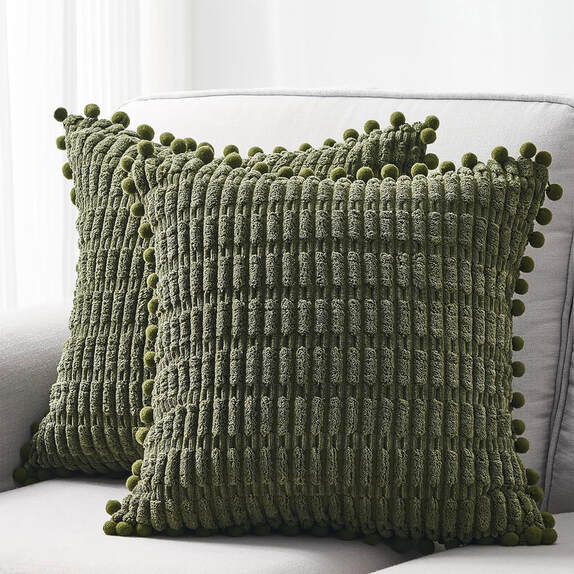 Item 9—Black Metal Candle Lanterns by HPC DEC R OUR HAPPY PLACE Black metal candle lanterns were chosen to match the wire basket and add a nod to Moroccan lanterns without the heaviness of the traditional Moroccan lantern style. These candle holders would look amazing displayed with the rattan pumpkins and gnome! 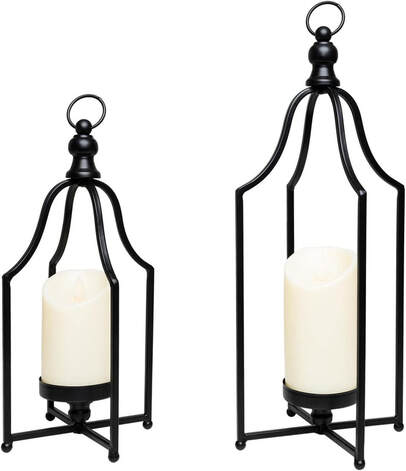 Item 10—Rustic Ceramic Vase Set by Eyamumo The distressed stone finish of these ceramic vases has that organic feel associated with the boho style. These vases work well when used alone or filled with a floral arrangement of choice. 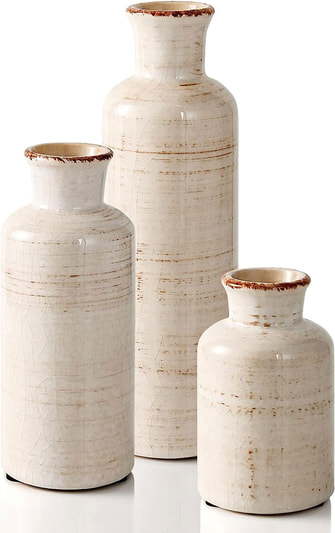 Item 11—Natural Dried Pampas Grass by Ainiyuo This choice of dried pampas grass stems includes colors like dusty rose, cream, light brown, and pale ochre. The earthy colors complement the organic yet quirky boho style. Arrange these in the ceramic vases to top off the look! 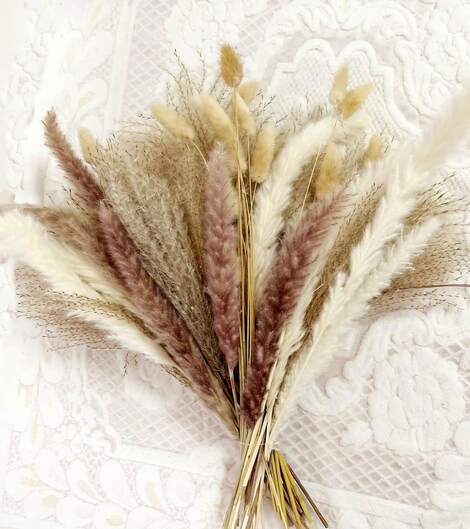 Related blogs you may want to read: Dark Academia Decor for the Fall Brighten up your autumn decor with these items! Create a cozy relaxing interior space this fall with neutral colors Need ideas for incorporating the color blue into your fall decor? Nine hygge decor ideas Winter color palette ideas for your home decor Design concept for a dreamy coastal interior Let’s talk Bohemian It’s frigid outside…cold wind whipping around you, your nose feeling like an ice cube, frosty white snow covering every surface. You open the front door to your home, feel the warm air on your face, and eagerly glance at a warm blanket on the other side of the room. We all want a space like this to come home to during these dark winter months. It’s a universal need to find refuge and healing in our homes during the colder, bleaker months of the year. Now that we’ve set the stage, let’s explore ways you can achieve a warmer, more inviting space to ward off the winter blues… 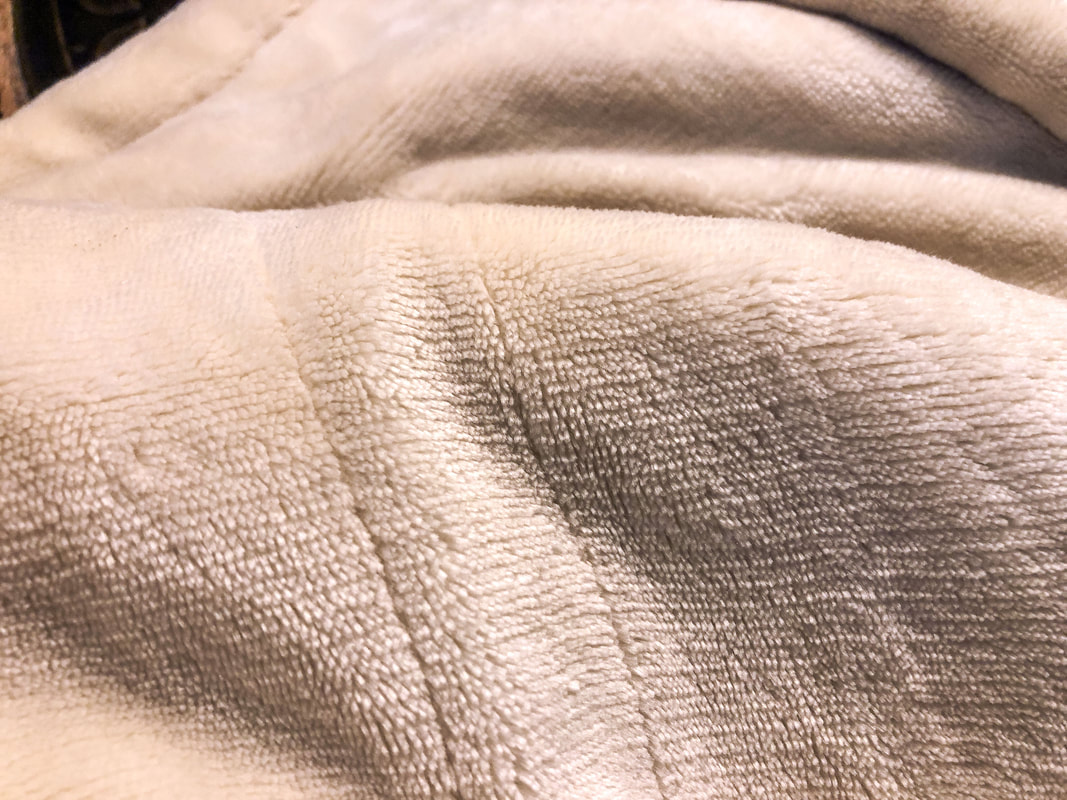 Cream heated blanket. Photo by Diane M. Lilly, 2022. The typical winter decorating color palette falls into one of two categories: cool color palettes that lean into the cold season or warm color palettes that create a cozy oasis. But there are wildcards among you! You know who you are—you love energy, and nothing makes you feel better than vibrant colors during the darkness of winter. Your design preference is all about how color makes you feel, especially if you suffer from anxiety and depression. (If you’d like some background information, Benjamin Moore has some great explanations and diagrams for assessing color value and how colors may look in a finished space.) I thought it would be interesting to explore some color options for these cold winter months and see how they can be used to spruce up your post-holiday interior space… Which design approach do you prefer? Let’s explore some options I have found… Warm color palette ideas In general, colors on the red/orange spectrum are energetic, and the less saturated they are, the more relaxing and neutral the color palette will become. Neutral colors (like those on the brown or woody end of the spectrum) will feel warm and peaceful, while more vibrant reds and oranges will fill a space with energy. With that in mind, below is a list of some ideas for creating a warm color palette in your post-holiday living space… 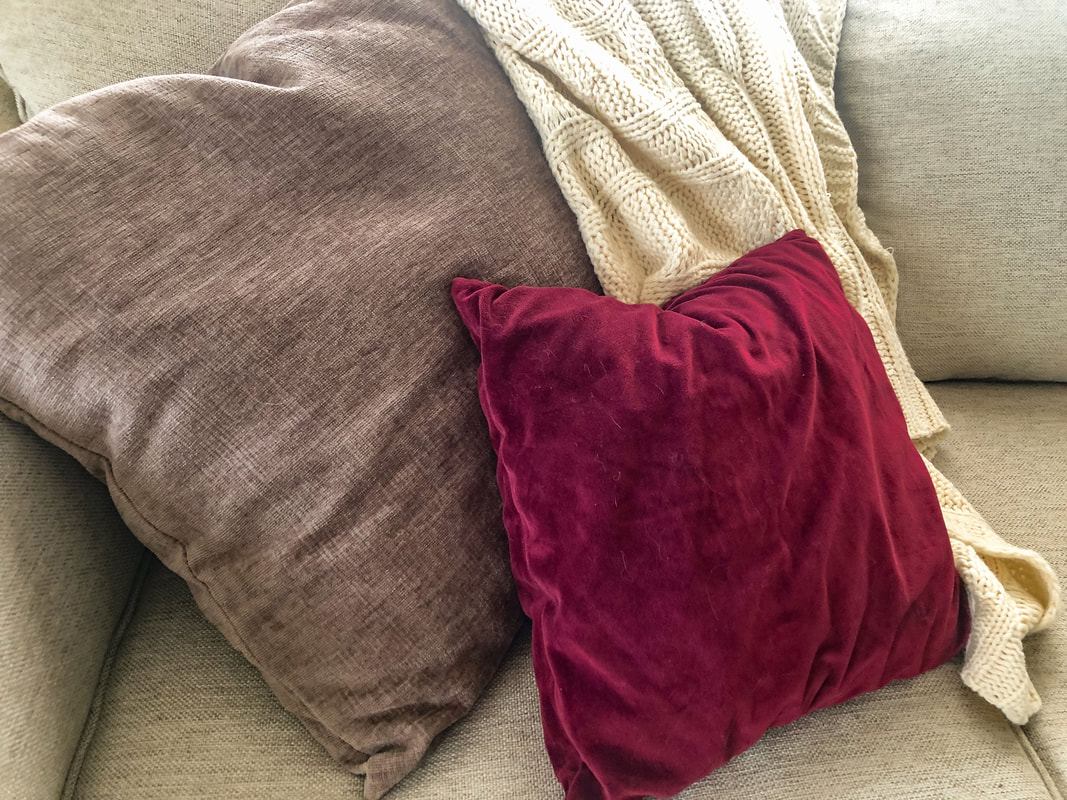 My red and neutral throw pillows. Photo by Diane M. Lilly, 2022. Keep some red holiday items out and pair them with neutrals and browns. If red is not your color, try a muted rust. Rust is an earthy red that can be used with a neutral color palette. Keep some of the holiday greenery out. On the color wheel, green is in the cool range, but when paired with warm neutrals, green can add an organic element that enhances the warmth of a space. (Btw…word has it green will be trending in 2022!)  Faux greenery on dining room table. Photo by Diane M. Lilly, 2022. Lean into the taupes, browns, espresso, creams, and even whites. Think hot cocoa and hygge! Use this neutral palette (maybe even leaning into Scandi design) as an opportunity for layering textiles to add visual interest. 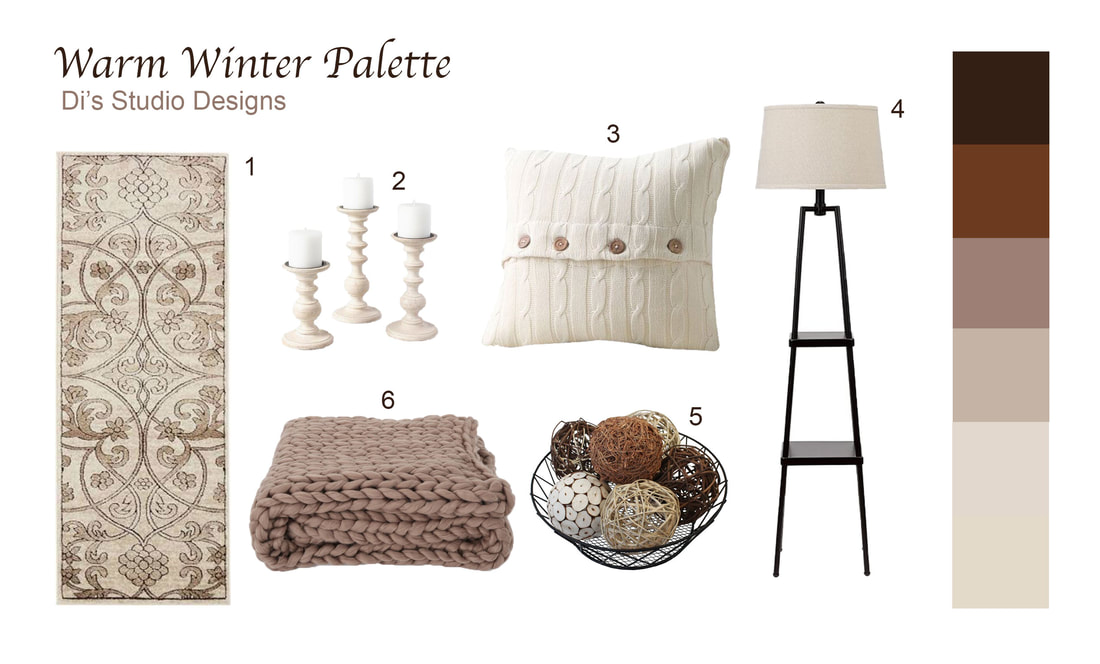 (1 Unique Loom Rushmore Washington Runner Rug, 2 White Wood Pillar Candle Holder, 3 Cable Knit Pillow, 4 Tray Table Floor Lamp, 5 Decorative Balls for Bowls, 6 Chunky Throw) Bring in the blushes, warm pinks, and plums. Pair these feminine colors with earthy creams, browns, and warm grays to create a cozy vibe. Add in pops of yellow…Yes, yellow! Shades of yellow can warm up a space for winter and then be re-used once the spring decor comes out of storage. Use gold metallics. This design approach is not only elegant and upscale, but it does add a warm glow to your space. Cool color palette ideas Now, let’s talk about using cool color palettes. Cool colors can have a calming effect on the mind and body, reminding us of water. If you want a relaxing, peaceful space and love the visual coldness of winter and snow, use colors like blue, white, silver, and purple. You could “warm up” the space by pairing a cool color palette with nature-inspired textures like wood, fur, wool, chunky blankets, etc. Here are some color palette ideas for those who love the cool end of the color spectrum… 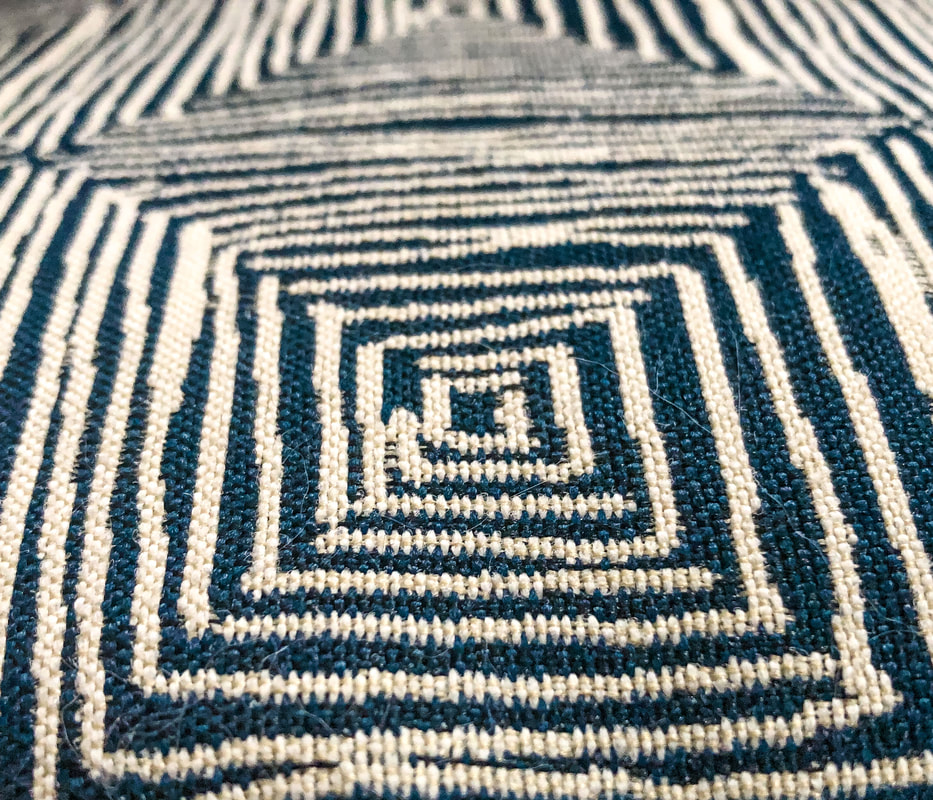 Blue and cream patterned throw pillow. Photo by Diane M. Lilly, 2022. Cool blues paired with warm brown. You can lean into the nature-inspired decor by combining cool blues with complimentary warm browns. The browns soften the cool blues, making your space more earthy and cozy. 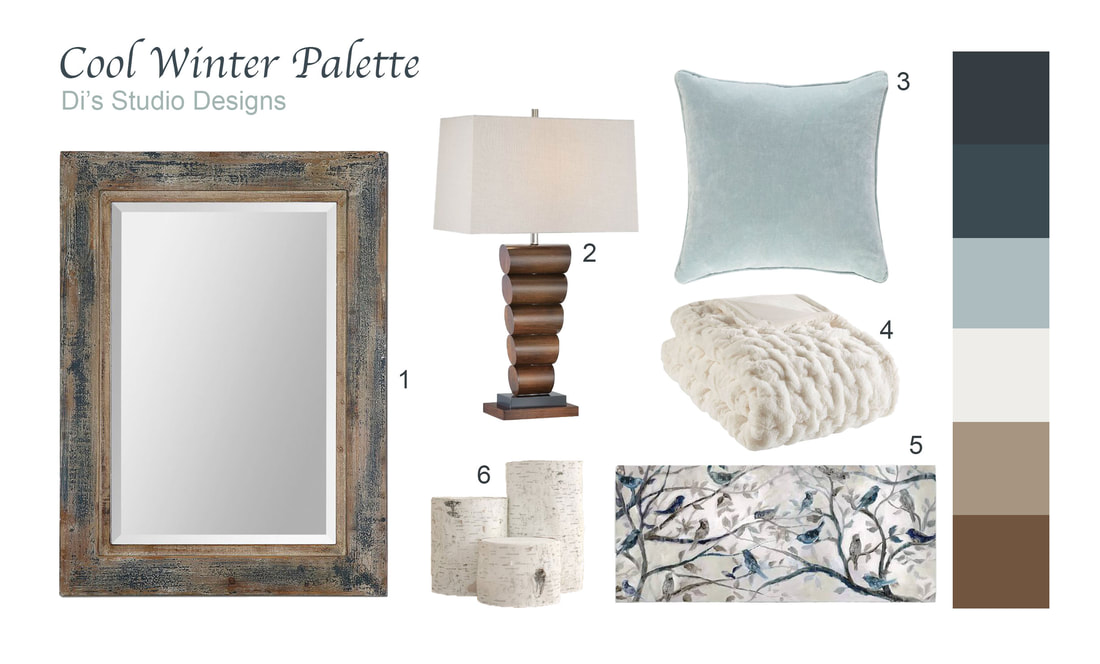 (1 Chunky wood wall mirror, 2 Minka Lavery Table Lamp, 3 Neppie Cotton Throw Pillow Cover, 4 Renee Throw, 5 Wexford Home 'Morning Chorus' Gallery Wrapped Canvas Wall Art, 6 Viktor 3 Piece Sculpture Set) A cool lavender—or lilac—combined with grey can be an elegant look for your winter interiors… Or you could go to the darker end of the spectrum, using deep purples paired with cream and neutrals. (The more blue in the purple, the cooler the color will be. The more red, the warmer the purple will be. Take a look at a few diagrams by Just Paint for examples.) Whites that lean more toward the cool end of the spectrum are reminiscent of snow. Lean into a white color scheme by creating layers of varying textures to create a sense of depth and even coziness in the space. 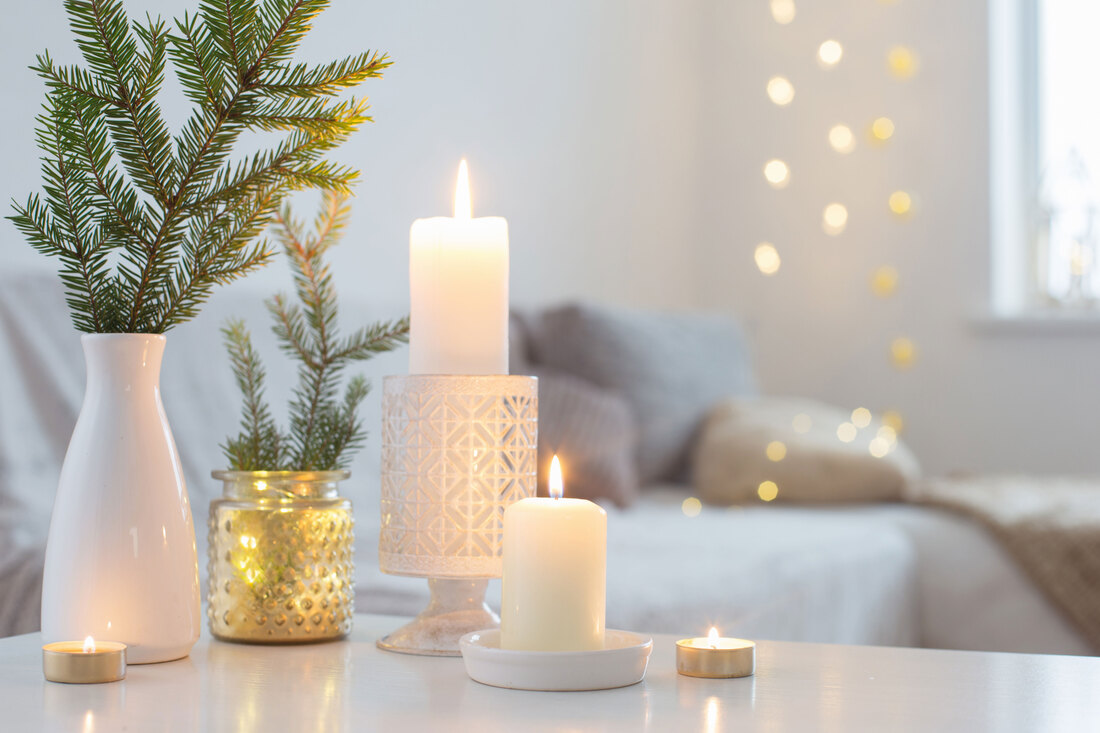 Image by Maya Kruchancova on Adobe Stock. Blue is the coldest color on the color wheel and can be used to great effect with cool whites for an interior that embraces the winter season. Keep the palette cool, or add wood or browns to soften the look. 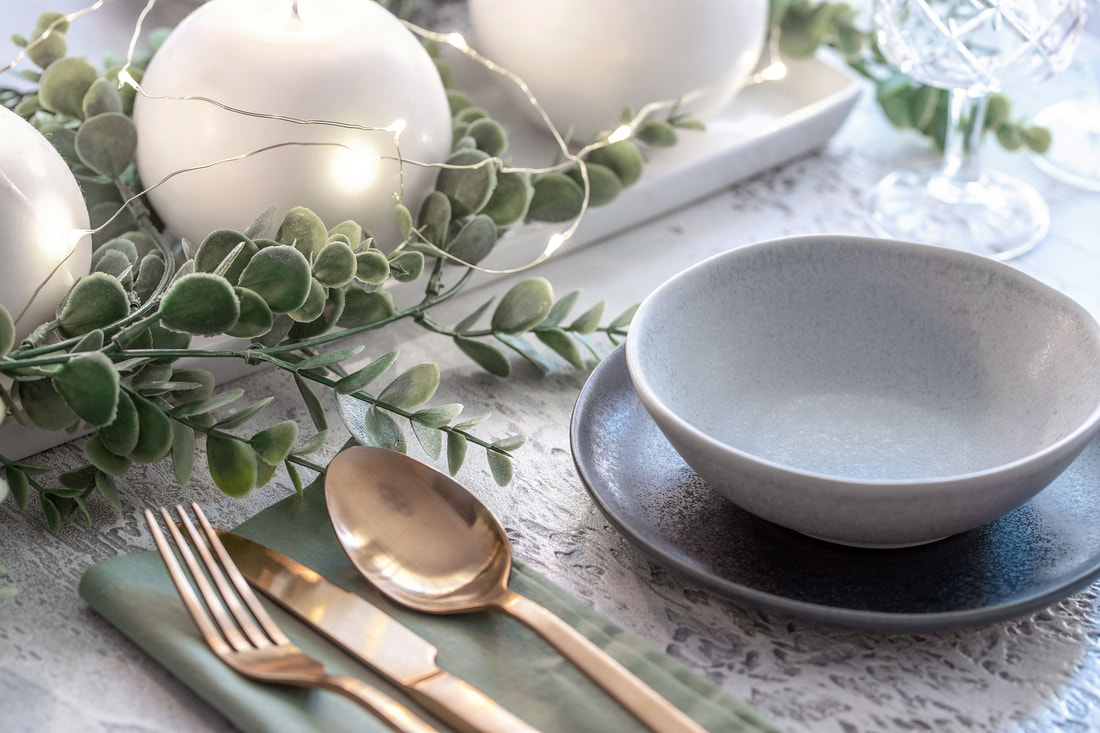 Image by vasanty on Adobe Stock. White and black combo—often used on the trendy Modern Farmhouse and other modern styles—might be your go-to winter palette. It can be rustic or elegant, depending on your decor style. Use silver and metallic items in your decor. Shiny things create sparkle, and reflective surfaces make a space feel bigger. Cool grey—as opposed to warm grey or greige—paired with white, blue, or other cool colors can feel elegant and neutral. Any green on the cooler end of the spectrum (especially those with more blue undertones) can be a way to introduce a more earthy feel to a space while still embracing a cool color palette. Bright color palettes I know I said most people like either warm or cool palettes in winter, but there are also those of you who love color—bold, bright, luscious colors. This design approach to a winter color palette applies saturated hues that are vivid, eye-catching, and cheerful—the ultimate defiance of winter! Here are a few color palette ideas for those who cannot live without your scrumptious colors! Image from Pixel-Shot on Adobe Stock. Teal and cranberry is one color combo I’ve seen mentioned a lot. It’s a color palette that feels very Bohemian to me but could be applied to any design style that embraces the pleasant contrast of these complimentary colors. Combine complementary blue and pink colors to create another color scheme with complimentary colors.  Image by Africa Studio on Adobe Stock. Use saturated oranges and yellows. Orange or yellow might be your go-to option for drowning out the winter blues! 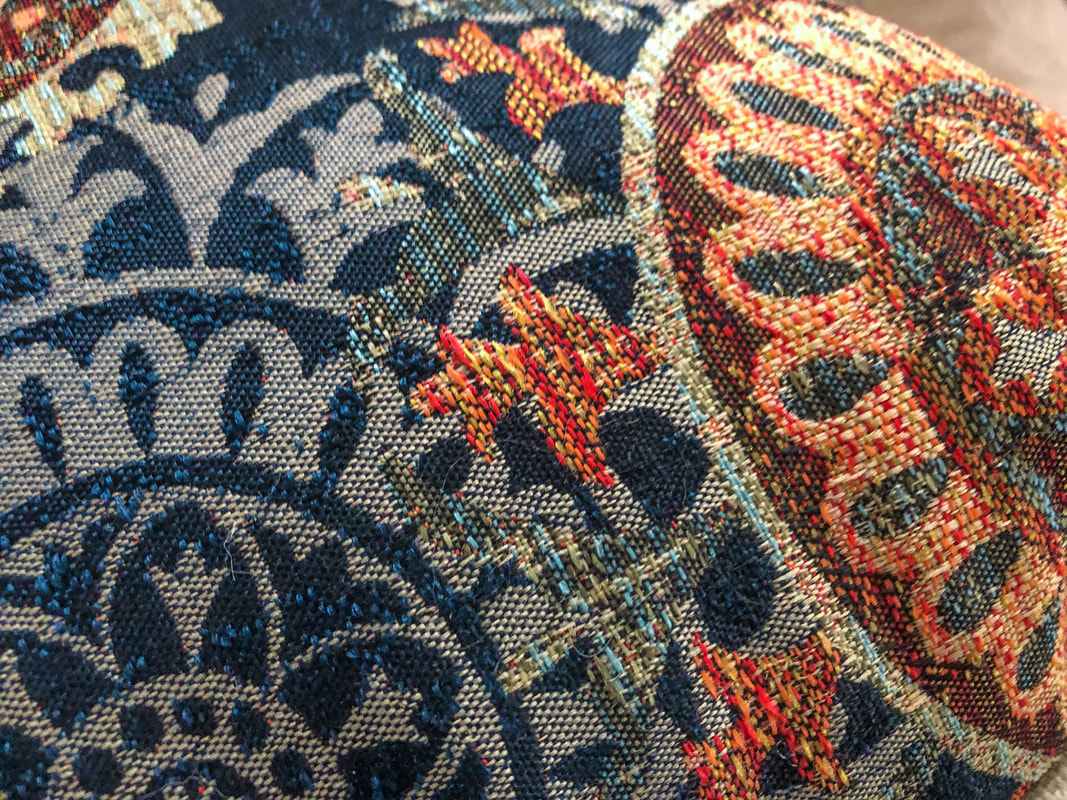 Blue and orange pattern throw pillow. Photo by Diane M. Lilly, 2022. Pops of hot pinks. Hot pink can be a bit much for some people, but if you love the color and don’t want to go overboard, try using it in small doses in your accessories, like pillows and vases. Bright turquoise. Turquoise blue can be used to add vibrant pops of color to your curtains, vignettes, pillows, area rugs, etc. 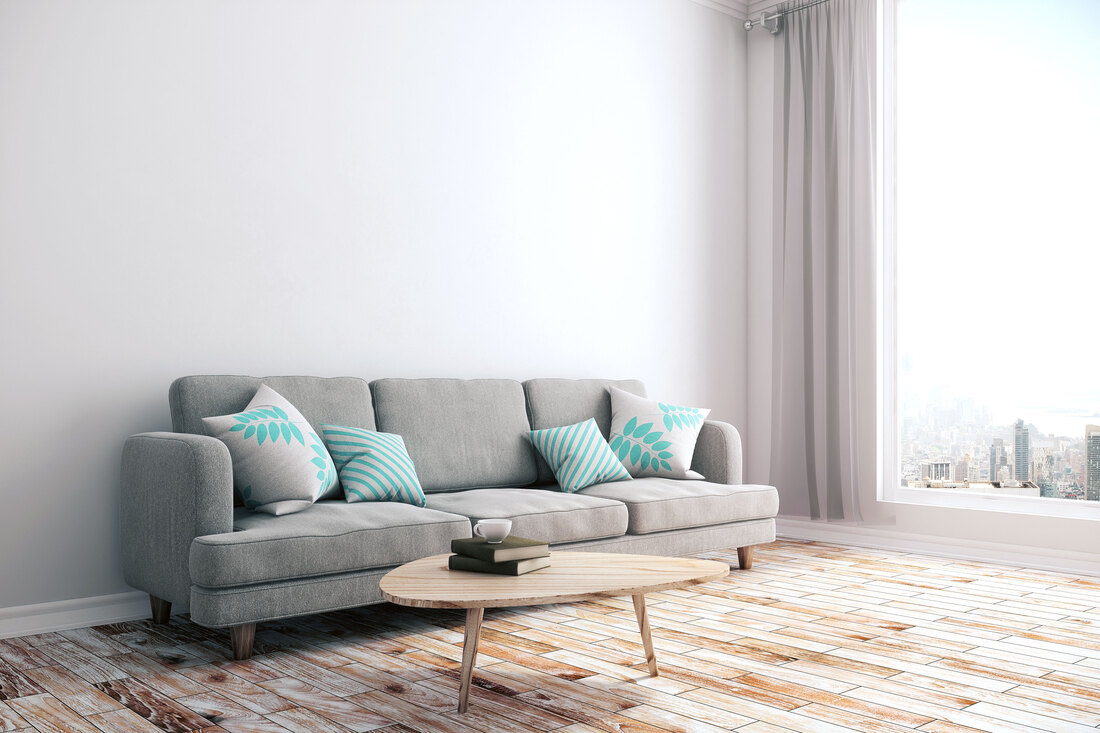 Image by peshkova on Adobe Stock. So, what did you think of my breakdown of the color palettes that can be used to spruce up your space after the holidays? Hopefully, you now have some inspiration for creating an inviting, cozy space for the winter months to keep you going until the arrival of the warmer spring weather. Feel free to share in the comments your methods of finding peace and rejuvenation in your home during the grey months of the year. This article may contain a few items or commercial mentions, but I only used them for demonstration purposes only. I am not endorsing any particular product or receiving any monetary gain for this blog. Related blogs you may want to read: Eight ways to create cozy interiors after the winter decor comes down Nine design trends for 2022 Nine hygge decor ideas 11 interior decorating tips that help reduce anxiety and depression 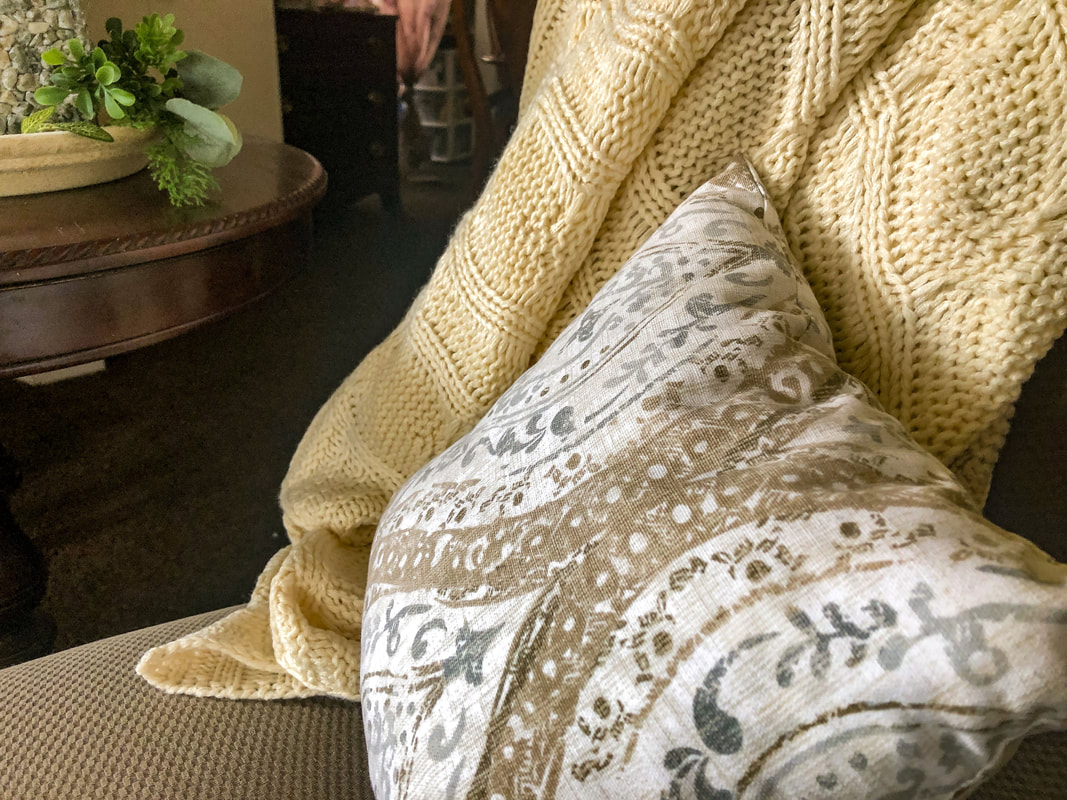 My new winter throw pillow and blanket. Photo by Diane M. Lilly, 2022. So it’s January…and you’re staring at an empty room devoid of all the cheery decor that’s been up for--what seems like--months. It happens every year, and the feeling can be depressing and cold. That’s one way to look at it…But a more positive approach is to use this experience to be creative, as a chance to redecorate with a clean slate. A fresh new start…Isn’t that what January is about? I’m all about using design and decor to boost my mood and creativity, and this year’s challenge is to try to incorporate some of the winter home decor ideas I’ve discovered into my own space. Use greenery One of the easiest ways to decorate for winter after the holidays is to leave out the greenery from the holiday or Christmas decor. Stuff basic off-the-shelf garlands with faux eucalyptus, pinecones, evergreen picks, berries, and even faux florals. Greens and neutrals create a tranquil, serene interior environment. 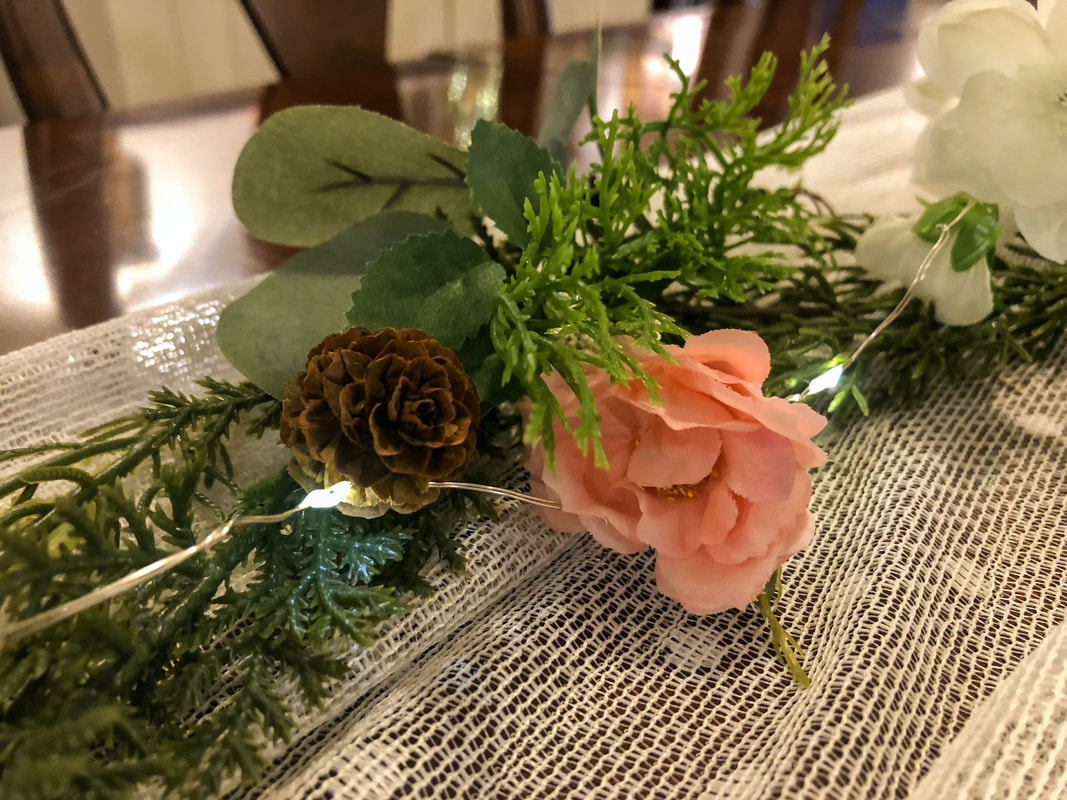 Faux greenery on my dining room table. Photo by Diane M. Lilly, 2022. If you want the benefit of natural fragrance, use real evergreens and eucalyptus. Real greens are only temporary...But while they last, your home will smell amazing! Mix live and artificial greens and florals to create beautiful winter floral arrangements, wreaths, garlands, and table decor. Use pine stems, pinecones, and real branches in a vase as a nature-inspired table centerpiece or as part of a vignette. Use wood textures One of the best ways to warm up a space is to use decor with wood texture—wood furniture, baskets, wood accents, anything made from natural wood or resembling a wood texture.  Warm wood texture. Photo by Diane M. Lilly, 2022. For a rustic touch, use branches from your yard to accent your mantle or in a vase as an arrangement. Piles of wood logs or in a basket provide that extra nature-inspired touch next to a fireplace. Decorative woven baskets--used as decor or as storage for logs, blankets, and throw pillows--are an easy way to add texture and style to your living room. Layer cozy textiles Want to make your interior space instantly cozy? Layer on the textiles! There’s nothing like the warmth of chunky throws, woven blankets, and soft pillows to take the chill out of a cold winter’s day. Slipcovers on furniture can be an inexpensive way to add that next level of texture to your space. 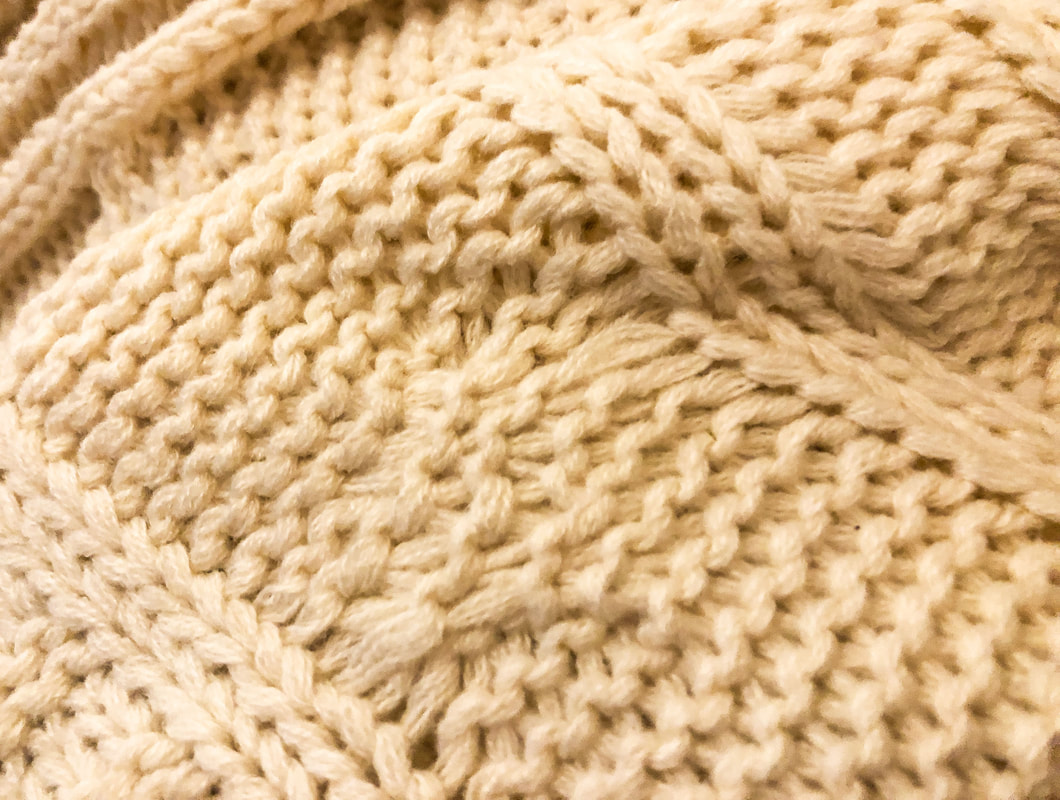 Warm textured blanket. Photo by Diane M. Lilly, 2022. Keep your feet toasty with area rugs made with faux furs, wool, and sheepskin. Add drapes and layers of fabric to windows to add luxurious texture and keep out cold drafts. This can make your space feel incredibly cozy! Layer lights Don’t put away those twinkle lights! Twinkle lights and fairy strands create a warm glow and cozy ambiance when used with candles. Create multiple layers of light with twinkle lights, fairy lights, LED candles, real candles, task and mood lighting…and if you are lucky enough to have a fireplace, light that up too! Even if you don’t have a fireplace, you can use rustic candles to mimic warm fire that illuminates your nature-inspired vignettes. 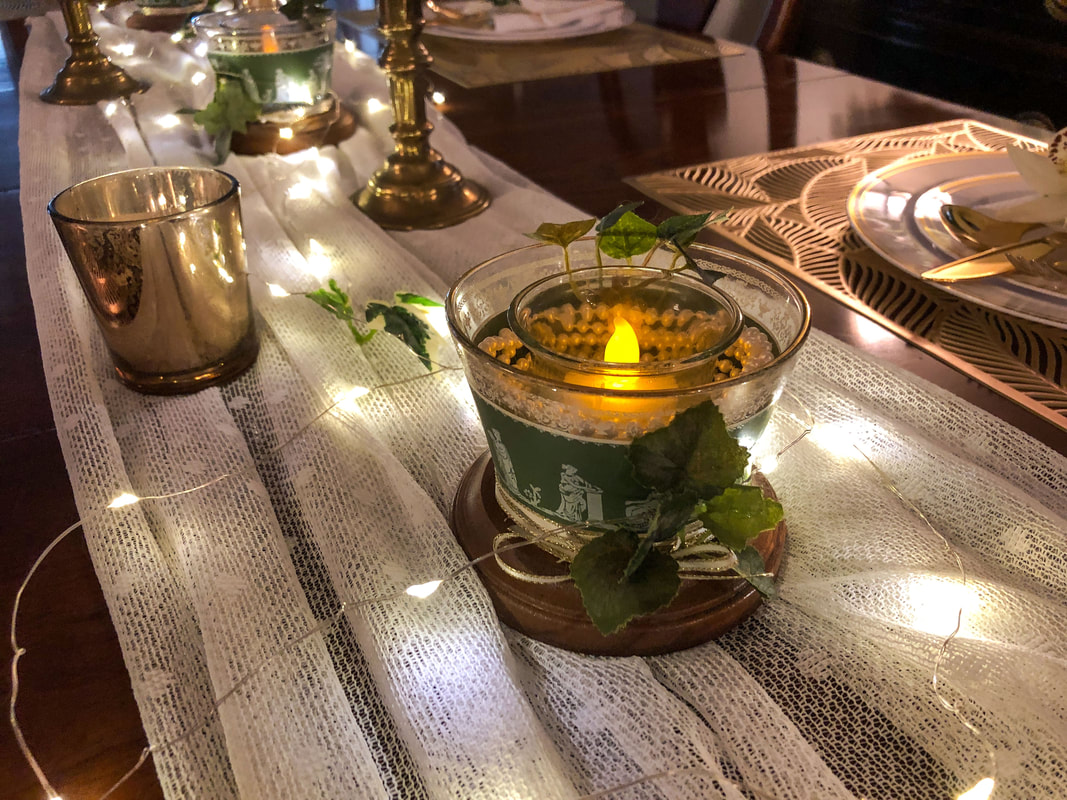 Fairy lights and LED lit candles on a dining room tablescape. Photo by Diane M. Lilly, 2021. 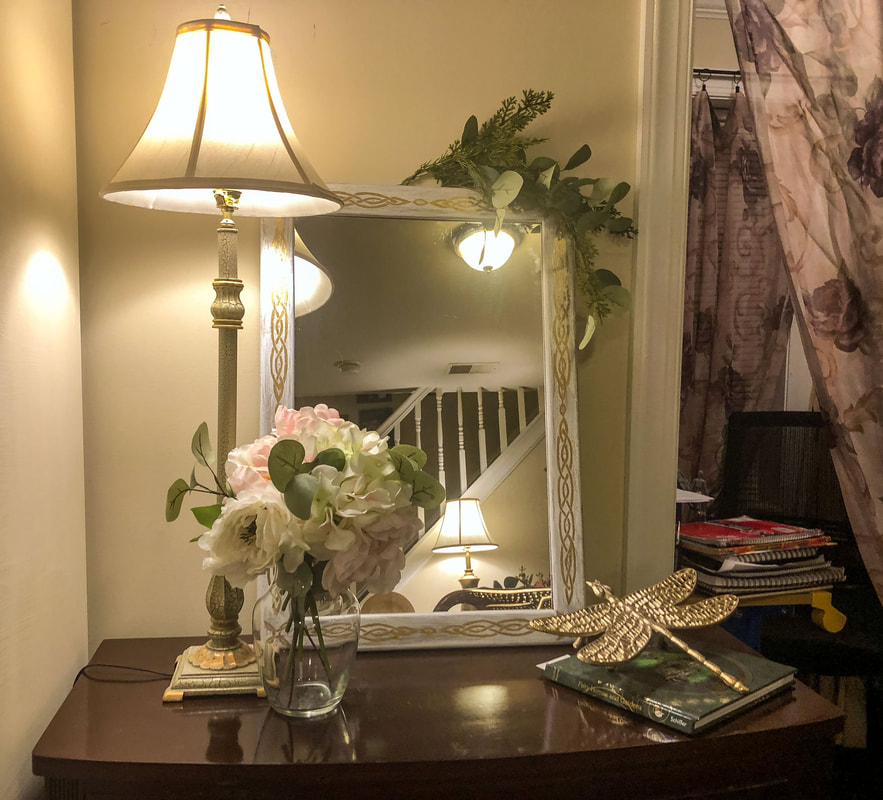 Little vignette with faux florals and candlestick table lamp. Photo by Diane M. Lilly, 2022. Play with color palettes When it comes to winter color palettes, you have options! This is where you get to decide what type of colors you love and which ones make you feel good and incorporate them into your new January decor scheme. Benjamin Moore has some good diagrams and examples of warm and cool color palettes in your space, which you can see here. 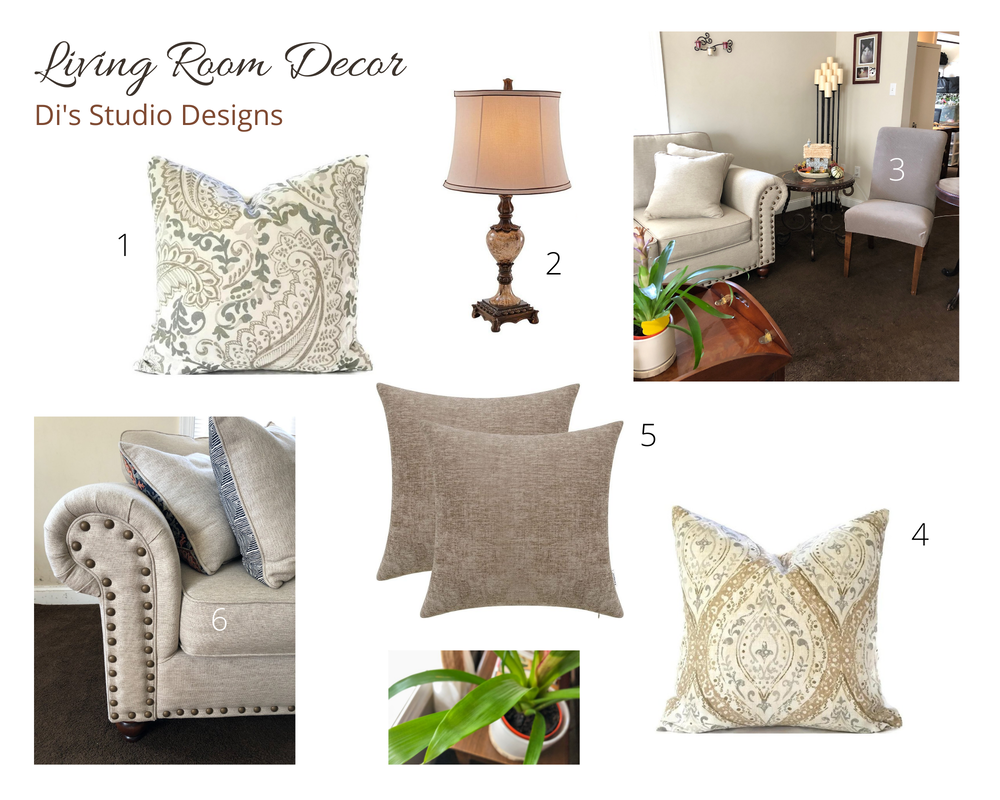 (My living room decor: 1. Paisley decorative throw pillow cover from Etsy, 2. Table lamp from Amazon, 3. Side chair taupe slipcovers from Amazon, 4. Decorative throw pillow cover from Etsy, 5. Chenille decorative throw pillow cover in taupe from Amazon, 6. Corliss sofa from Raymour & Flanigan) Go warm and neutral with creams, taupes, and browns, or embrace white by playing with layers of textures (and even some white bottle brush trees) to add interest. If you like the cooler end of the spectrum but don’t like white, try using combinations of blue, silver, or purple. Be defiant, and go for the bright colors! Bring out your bright-colored accents and decor. Add bold pops of your favorite color with pillows, blankets, vases, rugs, etc. Image by Pixel-Shot from Adobe Stock. Shop your own decor January is a good time to re-assess the decor in each room in your home. Once the holiday decor gets packed away, you have a clean slate. This is your opportunity to shop your house, move decor around, and redesign your spaces using home decor that you already own. Have fun, re-arrange some furniture, and experiment with space. Let your creativity shine! Use the sense of scent! We will miss December’s Christmas candles, but many of the same scents can still be enjoyed in January and February. Cinnamon, cookie, berry, and evergreen scented candles still have their place in your winter decor…unless you’re looking for something new, in which case you can find a myriad of winter scents at your local home goods store. Other ways to introduce fragrance: use potpourri, essential oils, and live plants and flowers. Any fragrance that makes you feel safe and warm in these cold winter months is okay. 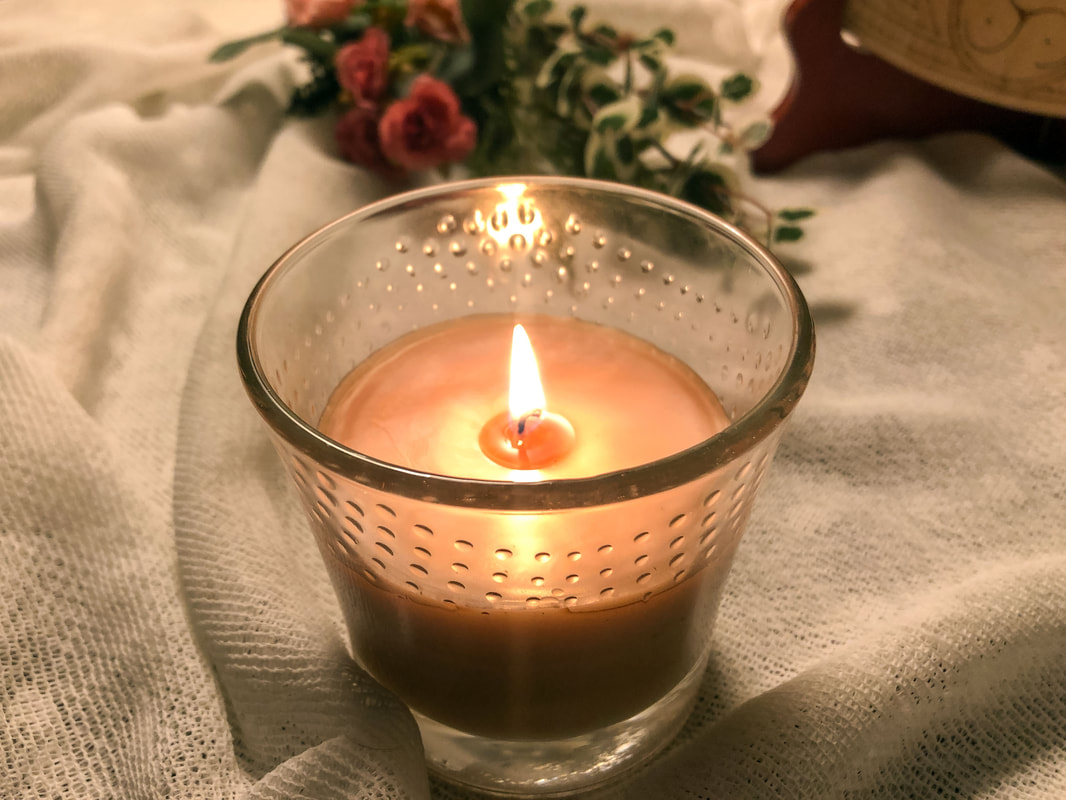 Lit scented candle. Photo by Diane M. Lilly, 2022. Embrace hygge My last tip isn’t a “thing”…it’s more like a state of mind, and any of the previous tips I mentioned could easily fall under this category. According to Visit Denmark, hygge is a Danish concept of embracing joy. Hygge means surrounding yourself with the sights, smells, and sounds that make you feel content. Make your interior space “hug” you and fill you with uplifting feelings by decluttering and adding home accents that have meaning for you. Find ways to pamper yourself with a cozy reading spot, a hot beverage station, some soft lighting, lots of texture, and a plant or two! 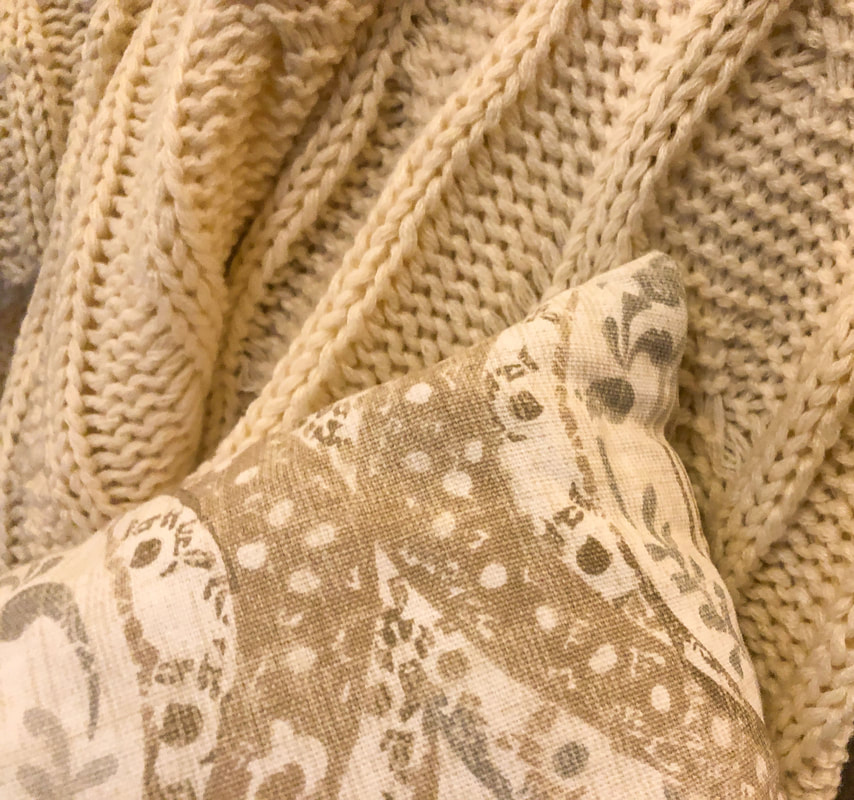 Throw pillow and knit blanket. Photo by Diane M. Lilly, 2022. What do you think of these eight tips for redecorating your space in January? How are YOU conquering those post-holiday decorating blues? Do you have any tips you’d like to share? Feel free to drop a comment below! Related blogs you may want to read: Nine design trends for 2022 Winter color palette ideas for you home decor Nine hygge decor ideas 11 interior decorating tips that help reduce anxiety and depression Affiliate Disclosure Some of the posts in this article contain affiliate links. This means if you click on the link and purchase the item, I will receive an affiliate commission at no extra cost to you. I will only recommend products or services I use personally and/or believe will add value to my readers, so there is no conflict of interest. 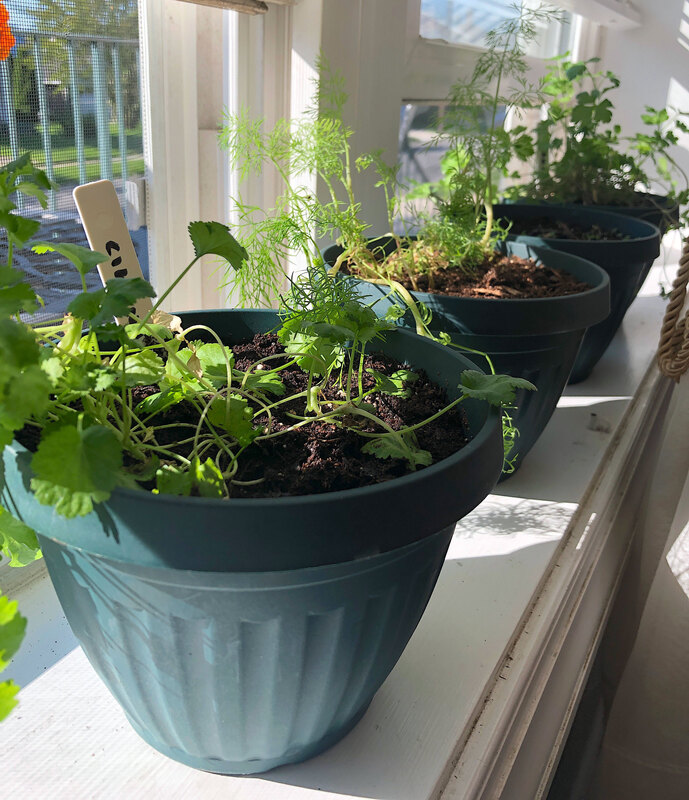 My indoor herb pots on the windowsill. Photo by Diane M. Lilly, 2021. This year was the year I decided to take the leap and grow some of my herbs indoors. In the past I planted a few herbs (like chives, mint, sage, chamomile, parsley, cilantro, and rosemary) outside in the garden, but having some herb plants indoors would be so much more convenient when cooking and would provide the opportunity to appreciate the beauty of the plants as they grow throughout the year. So the question that needed to be answered was what to grow and why? In addition to the obvious reasons, the herbs needed to provide a natural fragrance to the home. It would also be nice if some of the plant stems could be used in vases, either alone or in a floral arrangement. Ultimately, the decision was made to plant rosemary, dill, parsley, catnip, cilantro, and thyme. I wanted to grow lavender indoors as well, but research indicates that lavender can be harmful to cats (and I have two fur babies), so those seeds were planted outside. The seeds were planted (with the exception of the lavender) in styrofoam cups and covered with plastic wrap. When the plants sprouted tall enough the plastic was removed. Each plant was watered with a tablespoon every couple of days, just enough to keep the soil moist without drowning the poor things! Once they got a little hardier I watered deeper, making sure the soil had drainage. In a few weeks each plant will be repotted into their “forever” pots…But that’s a whole other post!  Dill seedlings. Photo by Diane M. Lilly, 2021. 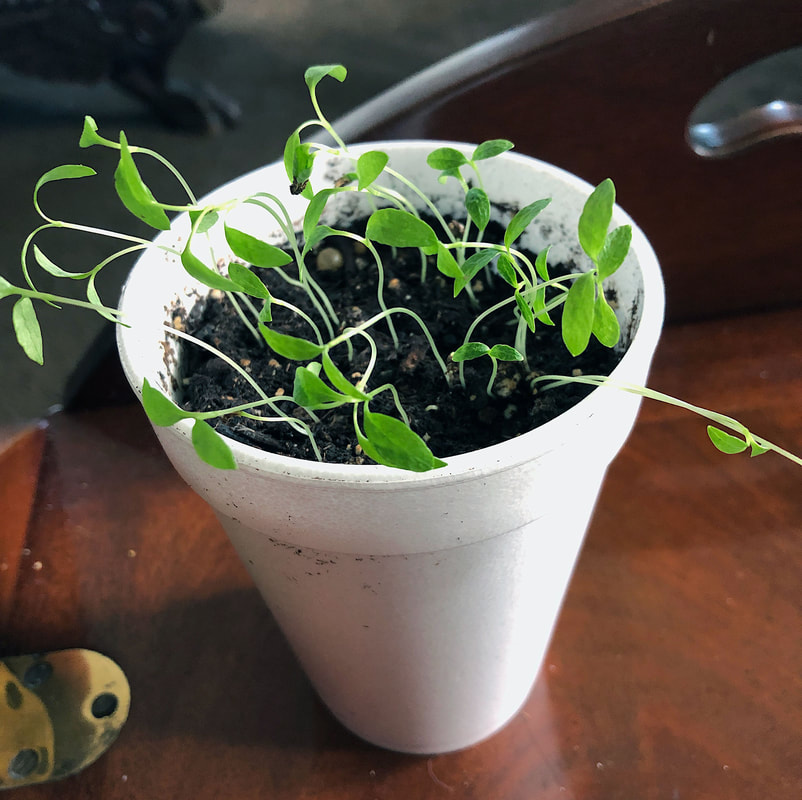 Parsley seedlings. Photo by Diane M. Lilly, 2021. 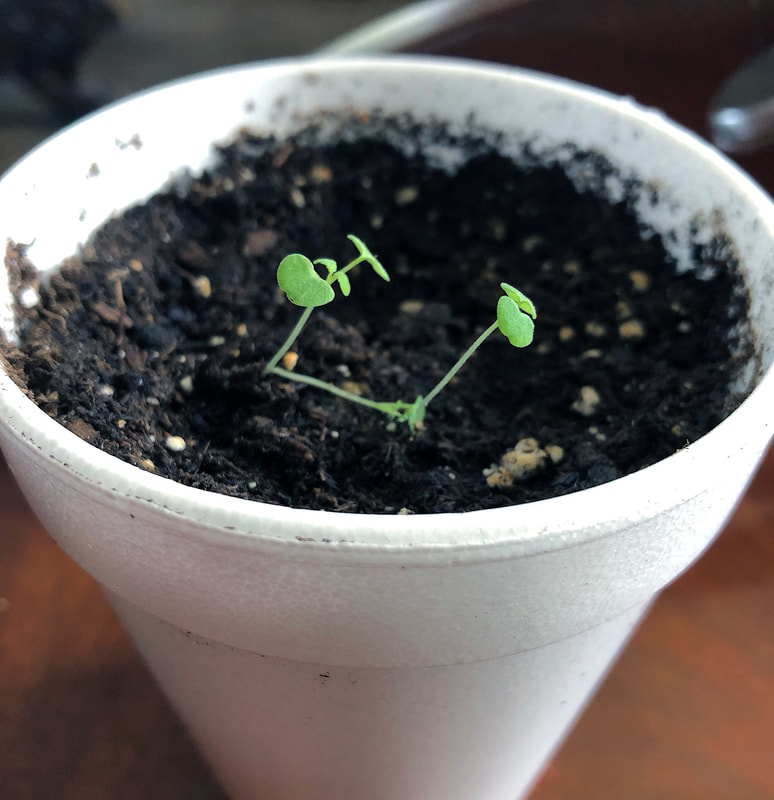 Catnip seedlings. Diane M. Lilly, 2021. 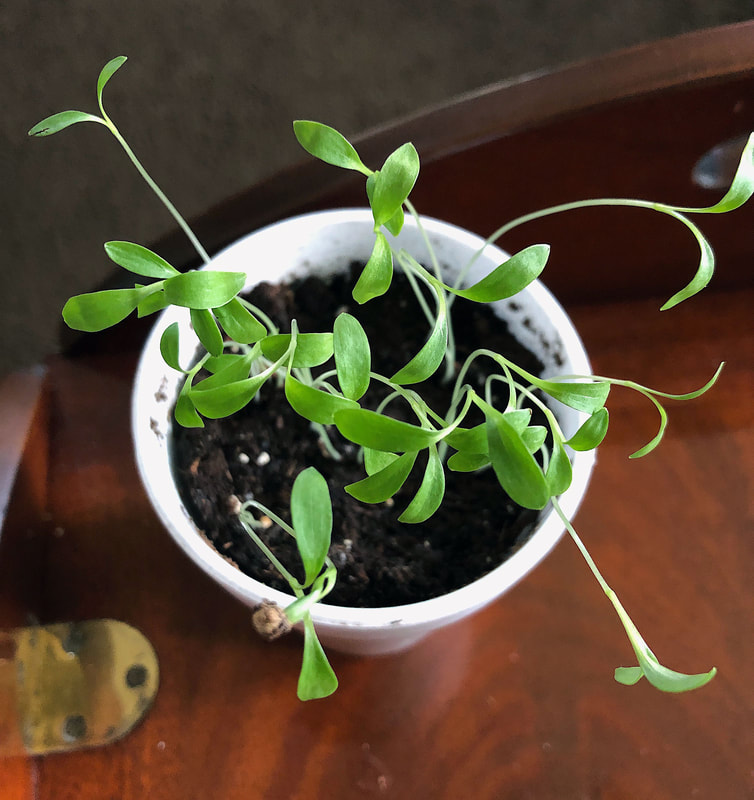 Cilantro seedlings. Photo by Diane M. Lilly, 2021.  Thyme seedlings. Photo by Diane M. Lilly, 2021. As we are all easing into this growing season, I thought I’d share a few tips for planting and using these six common herbs, starting with one of my favorites—rosemary! Rosemary Rosemary is a fragrant evergreen shrub that has blue flowers in the summer. It’s also an amazing herb to cook with, especially when paired with honey and lemon! I personally use it quite a lot on chicken, and I hear it is tasty with potatoes (and you know I’ll be trying THAT out!) Rosemary likes full southern sun and will grow tall and bushy, so put it in a big sturdy pot in a nice sunny location. This herb is notoriously difficult to grow from seed. I’ve tried four or five times, and even when I get it to sprout, it dies on me within a couple of weeks. I’m trying again this year, but if this endeavor fails I will just go buy a plant! For those intrepid enough to try growing this herb from seed, here are a few tips: Plant the seeds 1/4” deep (don’t “bury” them) and cover with plastic. Water a tablespoon or so a day until the seeds start to sprout, in about 15-25 days. Use soil that drains well (like sandy soil, or premium potting mix) with ph levels ranging between 6.0 and 7.0, or slightly acidic to neutral. Water this plant well then let dry out before watering again. 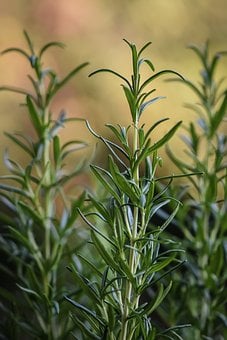 Rosemary plant. Pixabay image. 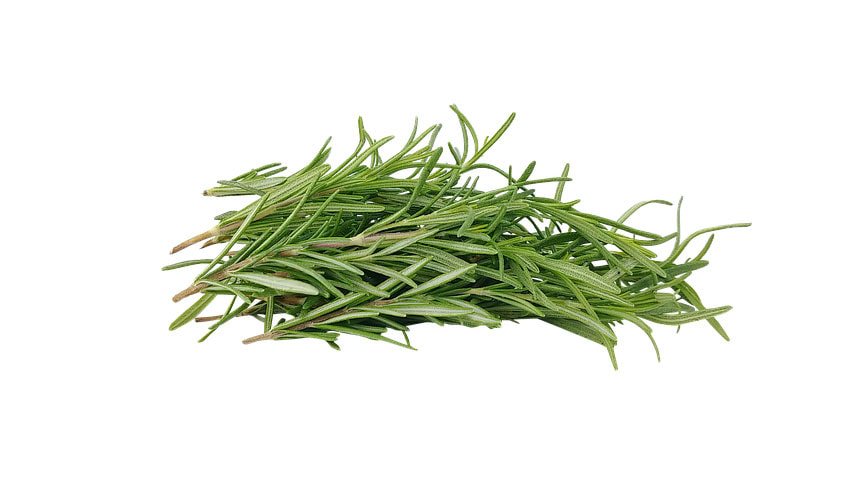 Rosemary. Pixabay image. Dill I love garnishing fish with fresh fragrant dill, and I often use this herb with homemade cucumber salads, because it just adds that little extra bit of zest. Dill can also be used as a garnish on deviled eggs (yessss!). This plant has multiple uses in cooking—dill leaves can be used as herbs and the flowers seeds can be used as a spice—and this beautiful feathery herb is apparently good for your health too (it is said to freshen breath and help with digestion)! If you’re looking to grow dill, here are some tips: Dill likes full sun and when it matures it will grow tall and/or long (“leggy”). Plant seeds in a pot about 12” deep, because this plant develops a taproot which will require space under the plant for the root system. (This herb does not like its roots disturbed so don’t transplant it. I do transplant it but it doesn’t always like me for it!) This herb likes well drained or sandy soil and doesn’t like to be overwatered. The seeds will sprout in 7-14 days and the plant will mature in about 90 days, sprouting yellow flowers in the mid summer. 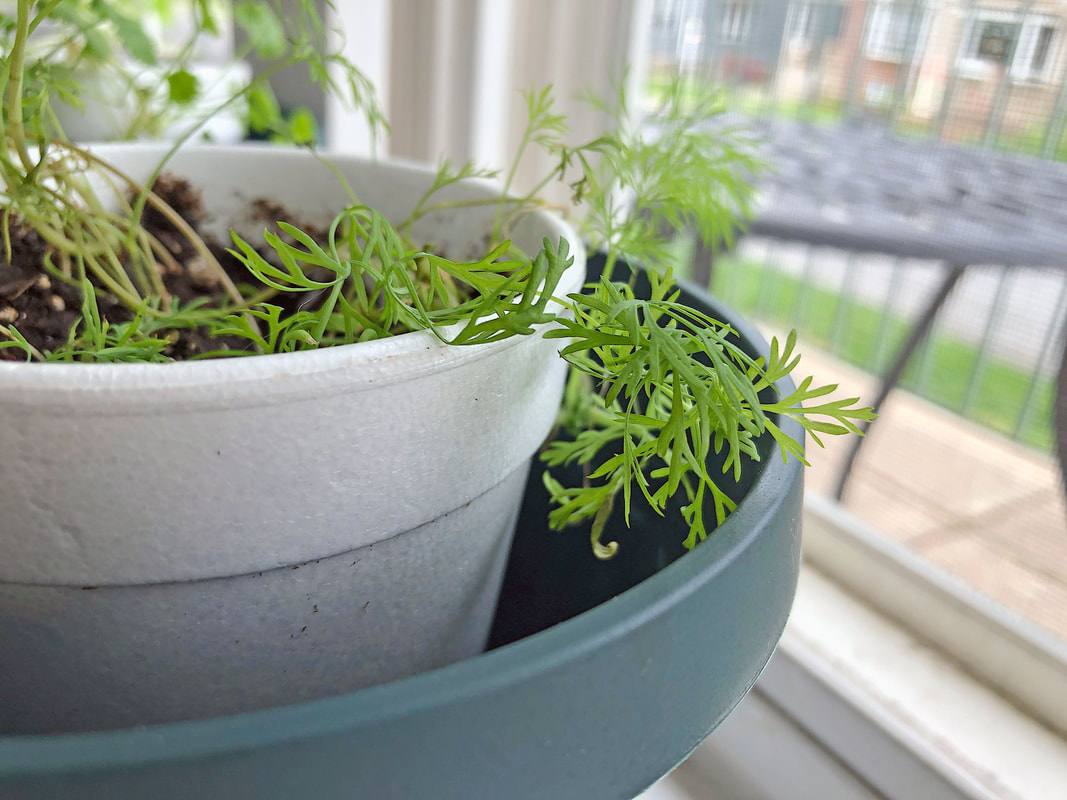 My dill plant. Photo by Diane M. Lilly, 2021. 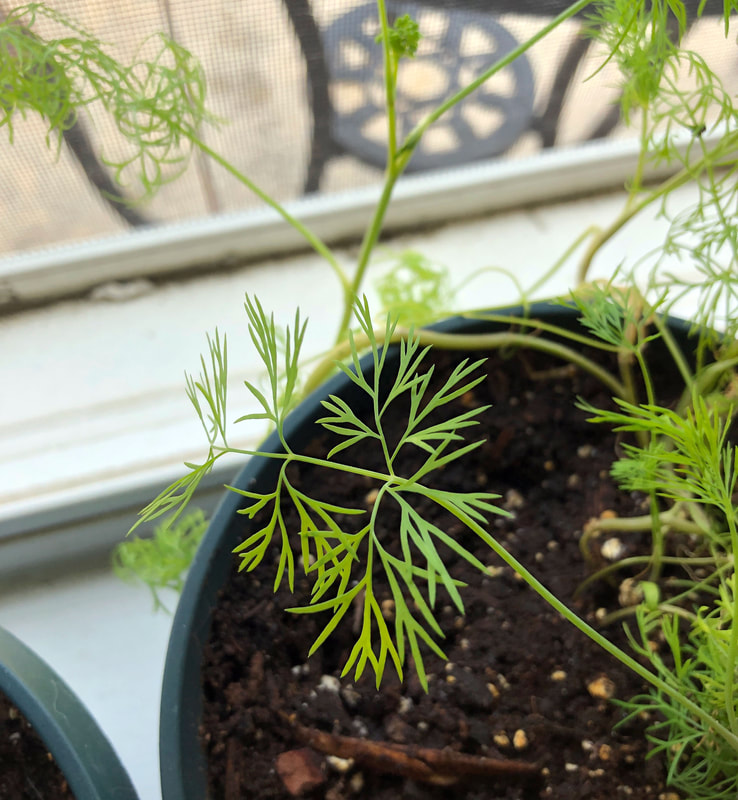 Dill leaf closeup. Photo by Diane M. Lilly, 2021. Parsley Parsley is amazing in soups and salads! I use it whenever I make homemade chicken soup, roasted potatoes, and in marinades. My research has uncovered a variety of health benefits to using parsley, including freshening breath, improvement to the digestive system, improved urinary tract health, and anti-inflammatory properties. Here are some tips for you for planting parsley: Soak seeds in room temp water, then plant them 1/4-1/2” deep in well draining soil, and you will see your parsley seeds sprout in 21-28 days. Parsley likes full sun, so plant them in a spot that gets plenty of sun during the day, or put them in pots on a sunny patio. If growing indoors, put them in a south facing window and they’ll be happy! 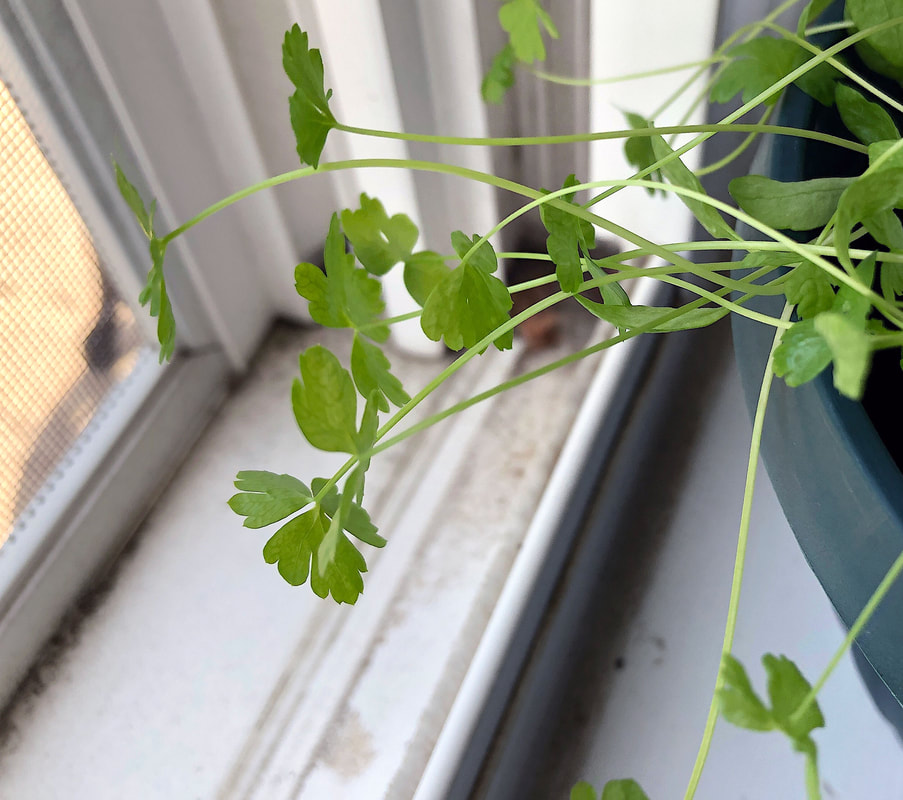 Parsley stems. Photo by Diane M. Lilly, 2021. 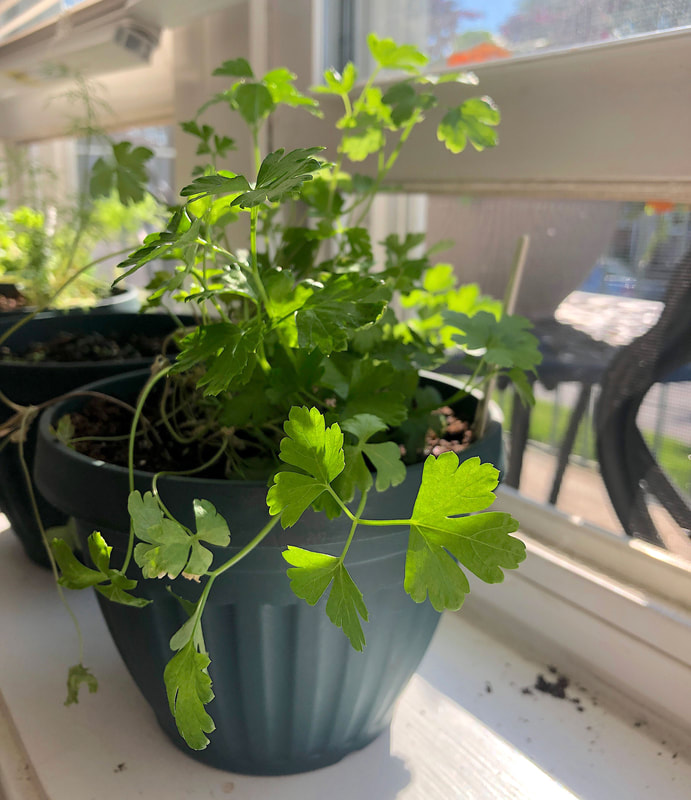 My parsley plant. Photo by Diane M. Lilly, 2021. Catnip My cats are gonna love me this summer—or they’ll just attack the plant…Either way it should be interesting! If there’s anything left, maybe I’ll try making a tea. Yes, you heard right… People can use catnip too! Apparently catnip can be used in teas to help sooth anxiety, aid insomnia, and help with digestive issues. And it is useful in the garden as well…Plant it in between your plants as an insect repellent. Just beware of neighborhood cats! If you want fresh catnip for your own kitties, here are a few tips for planting: Catnip needs well draining soil and plenty of sun. Bury seeds 1/4” deep in good potting soil and water with a tablespoon until it sprouts in about 7-10 days. Keep soil moist but never soggy. Once the plant starts maturing, only water when the soil is dry. Harvest catnip once it starts to flower, then cut the flowers to keep the plant producing more leaves. 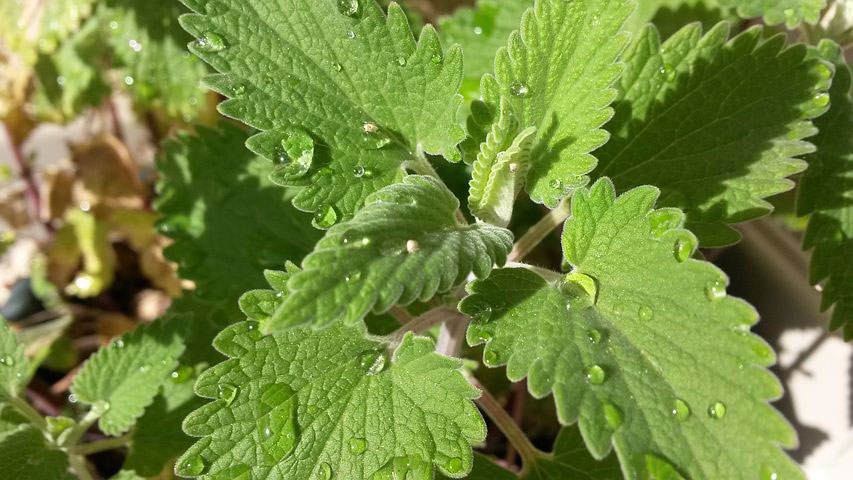 Catnip. Pixabay image. Cilantro I have to be honest, I have had little luck growing cilantro, but I am determined! This year I think I got a plant that is growing okay…so far. I’d love to be able to use fresh cilantro in homemade salsas and pico de Gallo, so my fingers are crossed this plant doesn’t die on me! I’d also love to experiment with salad, fish, and soup recipes with cilantro. Oh, and the cilantro leaves are just part of the fun…The plant will produce seeds (coriander) that can be used in additional recipes as a spice—so double the fun! This plant can be used as an anti-inflammatory and for a variety of other health issues related to eyes, skin, diabetes, etc. Cilantro likes full sun and needs soil with good drainage. Water this plant only when semi-dry—don’t overwater but don’t let dry out completely. Plant seeds in their “forever” pot (it does not like to be transplanted, which might be why mine keep dying?!) 1/4” deep, and wait for it to sprout in about 7-10 days. 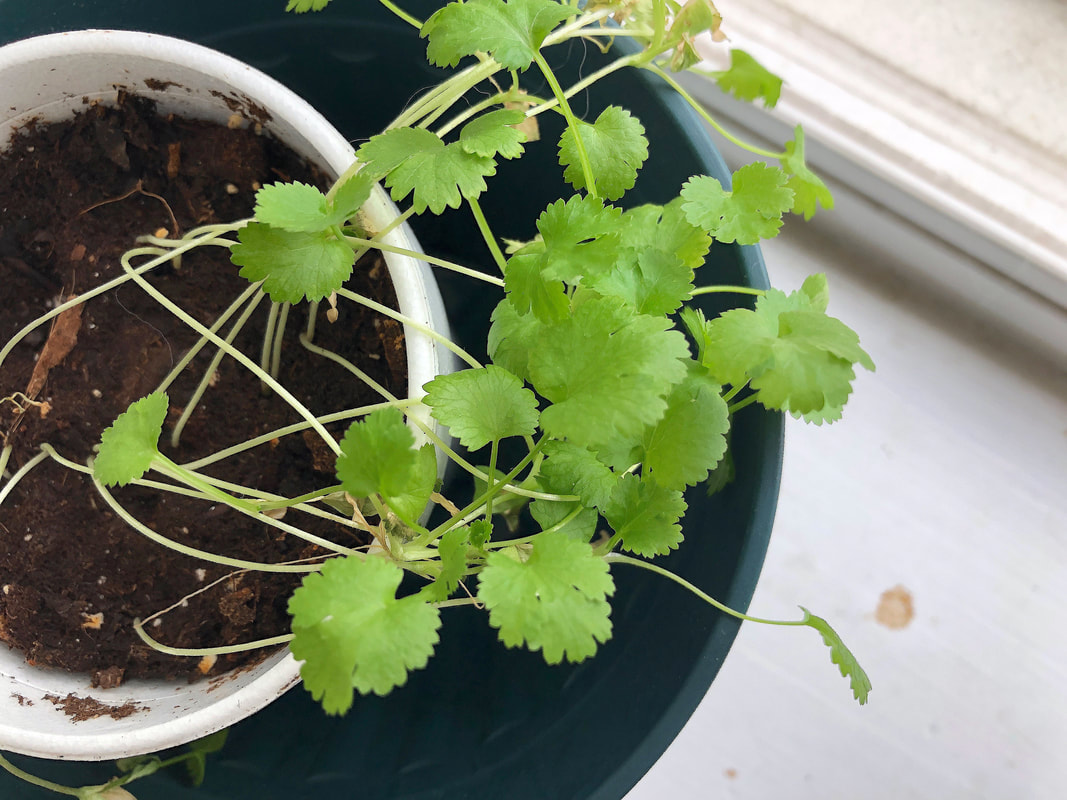 My cilantro plant. Photo by Diane M. Lilly, 2021. Thyme I have heard good things about thyme, so I thought I’d give it go this year. Typically it is used outside as a fragrant ground cover, but there are varieties that do well in pots. I actually forget which type was planted, but I’m pretty sure I did my homework and purchased seeds that do well in pots (hopefully). If not, there will be nice ground cover for an empty spot in the garden! As for other uses, it is said to help with sore throats, so it might come in handy during cough and cold season. Tips for planting thyme: Plant seeds less than 1/4” deep or sprinkle on soil then mist to water. They should sprout in 8-20 days. When planting outside, plant in full sun about 8” apart in well drained soil. Some varieties of thyme can grow 8-12” tall and work well as attractive and fragrant ground cover. Plants can be harvested in 80-85 days, cutting older leaves to allow younger leaves and new growth to develop.  Thyme. Pixabay image. So there’s my herb project for this spring! Well, I’m not quite done. I still have other things to plant and I’m trying to make up my mind which ones to plant next. Recently someone from Happy DIY Home reached out to me with a blog article on a plant called Sorrel—a plant that I have admittedly never heard of before, but it sounds like an interesting leafy plant to grow in my outdoor garden (or maybe even in a pot indoors) for some future salad or other recipes. I hope you found this little article informative, and if you’d like to share your own experiences and comments down below, please feel free! I’d love to hear other people’s stories, triumphs and failures. I’m working on newsletters to start rolling out in a couple of months to allow my subscribers access to all my latest blog posts, merchandise sales, DIY projects, and social media posts, so if you’d like to subscribe to my email list, you can do so here! I don’t know why, but miniature worlds fascinate me. I think it was preordained that I would one day design a fairy house. I mean, why wouldn’t I?! And so it was a couple of years ago I came up with a hair brained scheme to design two distinctly different fairy houses, with the main goal to use them in indoor fairy gardens or as part of a vignette. The design concept for one of these miniature houses was inspired by images of old English and Irish cottages, with their rough hewn walls and thatched roofs. The second fairy cottage (pictured below) developed out of childhood memories of enchanting illustrations in fairy tales. The vision behind these designs was to create miniature houses for use with faux florals and seasonal decor that can be refreshed as needed and illuminated with either LED candles or fairy light strands, creating a magical little focal point on a table. Since Spring has certainly sprung, it is now time for my home—and my fairy gardens—to transform into something more suitable for the season! This year I wanted to give my indoor fairy gardens an updated look, and that means new florals and freshly painted bases. 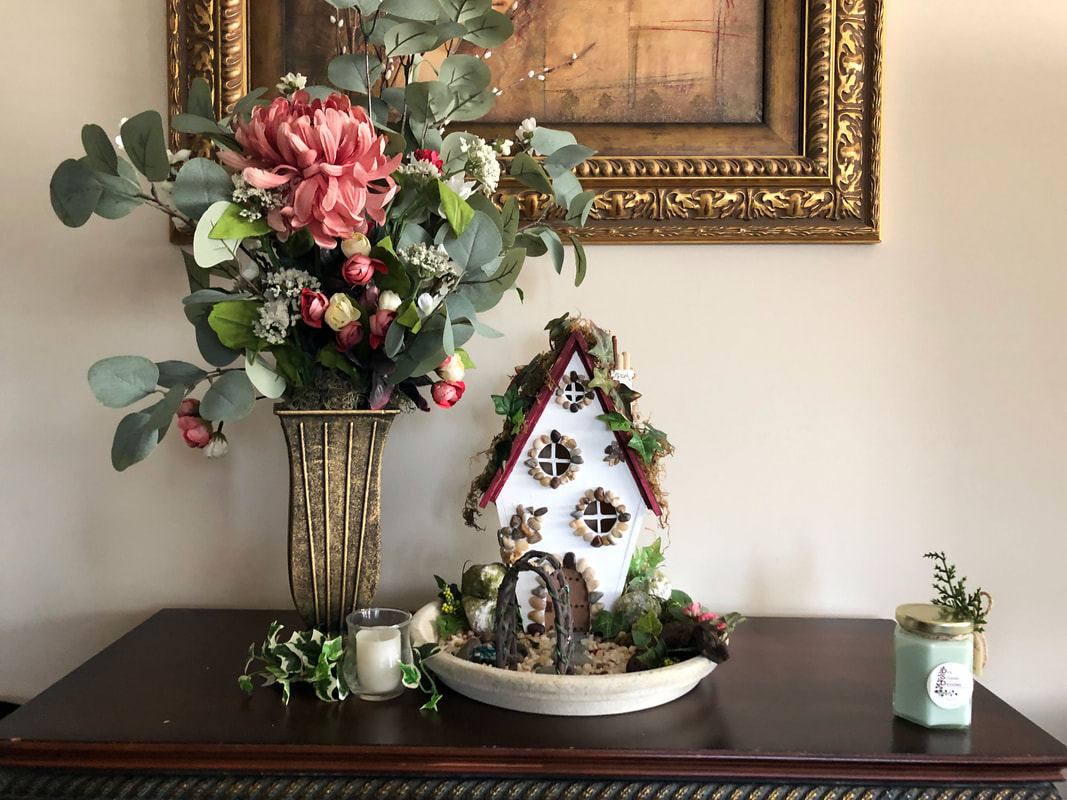 Fairy Cottage indoor fairy garden by Di's Studio Designs. Photo by Diane M. Lilly, 2021. To be honest, it has been really tough wrapping the brain around anything comprehensive lately, but breaking this project down into three individual stages (so that each part gets the attention it deserves) made the process easier, and actually forced me to focus on the details. And I’m so glad I took the time to do it that way! I’m so happy with this year’s Spring fairy gardens, I thought I’d share my process and how I arrived at the final look. So if you love fairy houses and fairy gardens (which I can assume you do, since you are reading this!), keep on reading to see how I worked through each step, overcame obstacles, and made my design decisions. Step 1…Spray painting terra cotta bases The bases for my indoor fairy gardens are these two terra cotta plant bases I bought two years ago at Home Depot. I’m ashamed to say I am only just getting around to painting them this year, but don’t judge—I’ve been busy…for two years…Okay there’s no excuse. Anyway, this year I finally painted the bases! 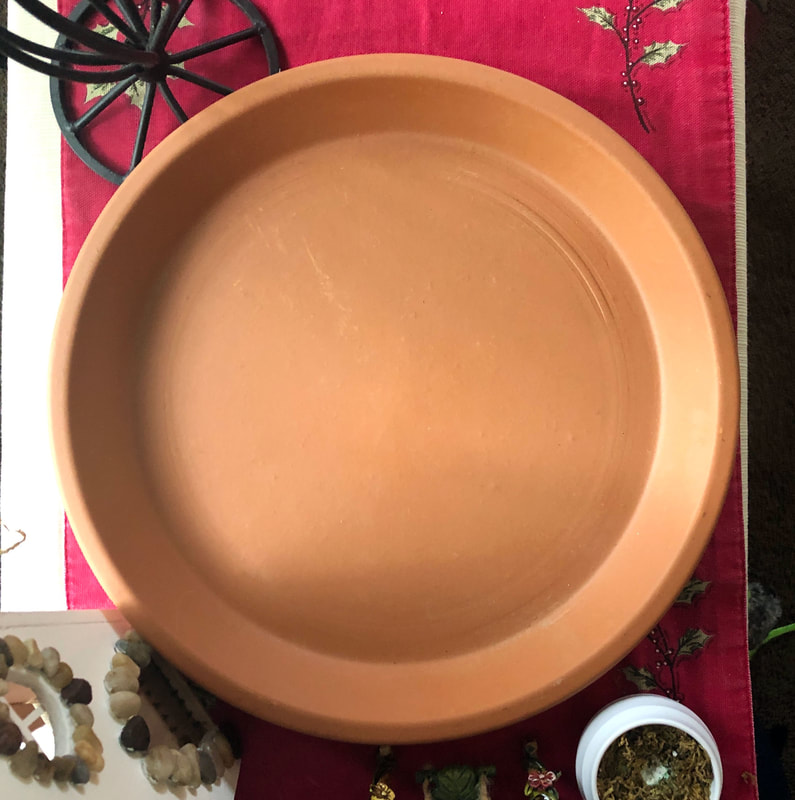 Terra cotta base. Photo by Diane M. Lilly, 2021. 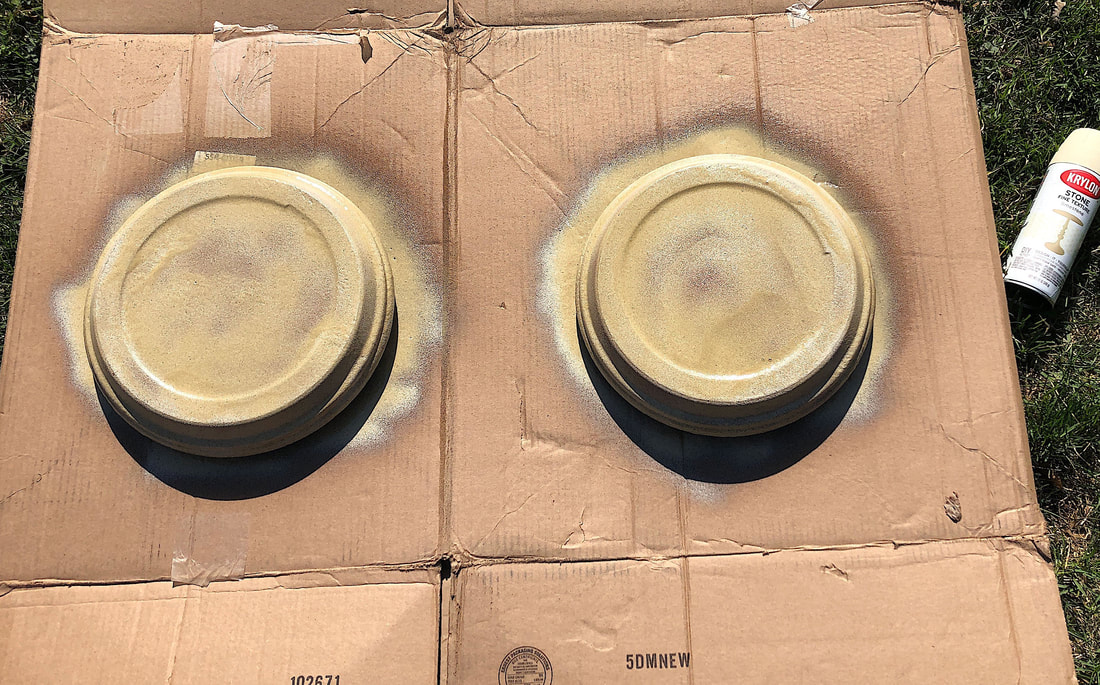 Spray painting terra cotta bases. Photo by Diane M. Lilly, 2021. For ventilation purposes both plates were taken outside, propped up with wood pieces and laid on cardboard. Each plate was spray painted (two coats each side) with a cream colored stone texture paint. Unfortunately for me, I rushed the process. I was experiencing a dental issue and had an emergency dentist appointment in an hour and for some reason I thought I could get much of the painting done before the appointment. It ended up being a huge mistake! I had runs and pools…It was horrible! So when the bases were dry I experimented with sanding them, originally thinking I would just paint over the whole mess, but then a crazy thing happened…I loved the results from the sanding! I was using 100 grit sandpaper which left a beautifully aged chalky finish that I immediately fell in love with! At this point I decided against using any type of sealant, as the bases were going to be used in a dry application and I didn’t want to lose that chalky finish. Talk about a happy accident! Just look at the depth of color and texture, as if this was old stoneware that had been exposed to the elements! 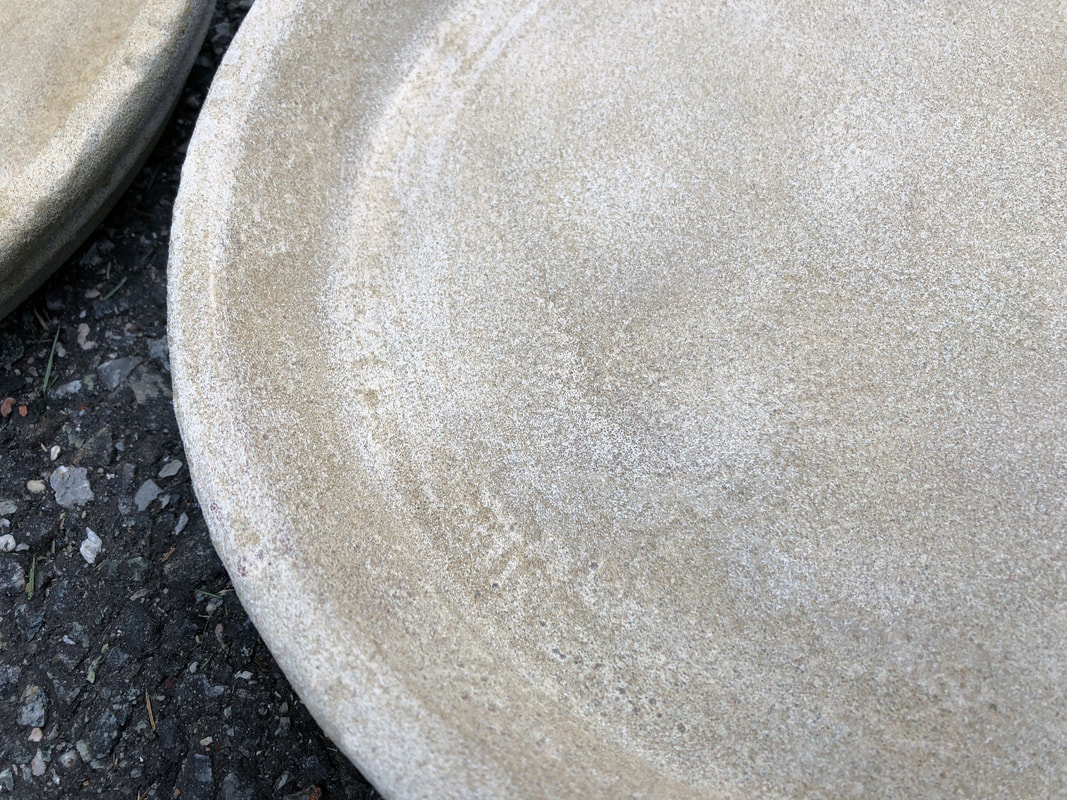 Terra cotta base finished. Photo by Diane M. Lilly, 2021. Step 2…Adding in the faux florals and decor Once the debacle with the bases was settled, I moved on to setting up the houses and decor. Inspiration for the decor for the English Cottage came after watching some videos on Youtube. I found myself clicking through videos of English gardens, admiring the “tamed” wildness of the gardens. The roses in particular caught my attention, because they just seemed to scream “English garden”. So off I went to Michaels and bought some pink and wine colored miniature rose bunches. And I just love them! See how they create such a pleasing and visually stimulating contrast against the normally drab grey colors of the cottage? Love it! Love it! Love it! The hues in the roses also perfectly compliment my existing living room decor, which is important as this indoor fairy garden occupies a place of high visibility in that space. The rest of the decor was deliberately kept minimal and simplistic, with small stones lining the base surrounding a stone slab path (made with stacking stones) and some additional supporting florals. Just a simple fairy cottage surrounded by rose bushes! 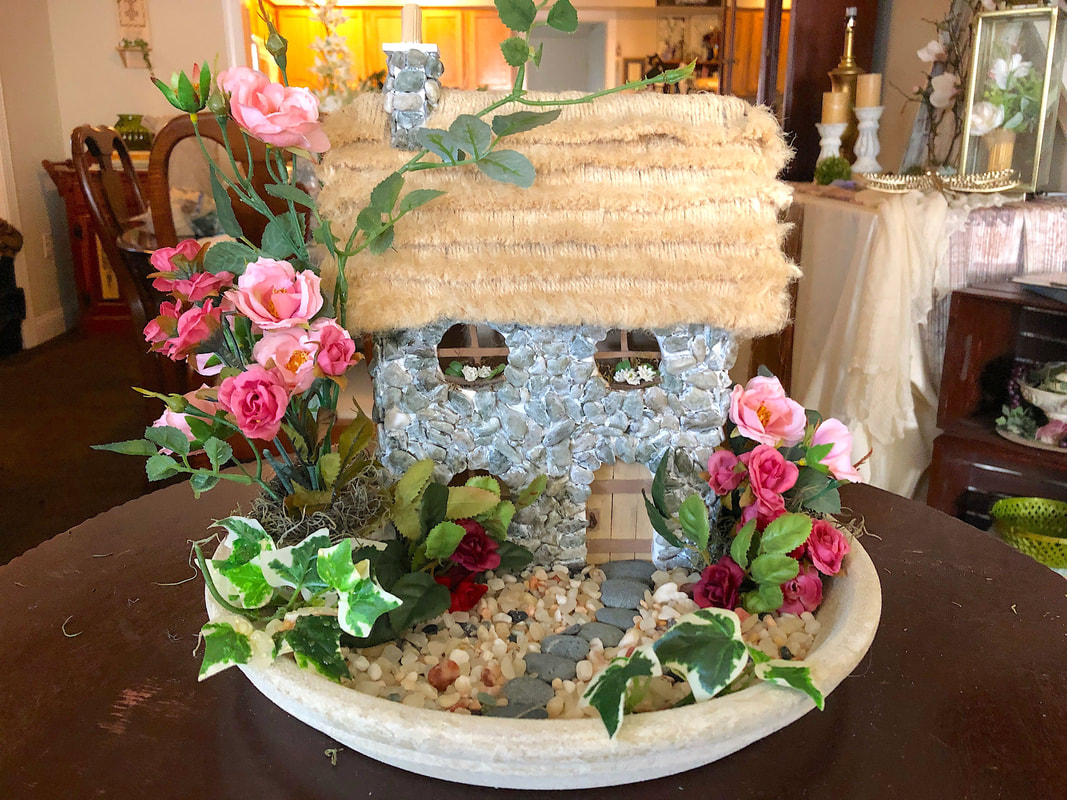 English Cottage indoor fairy garden by Di's Studio Designs. Photo by Diane M. Lilly, 2021. 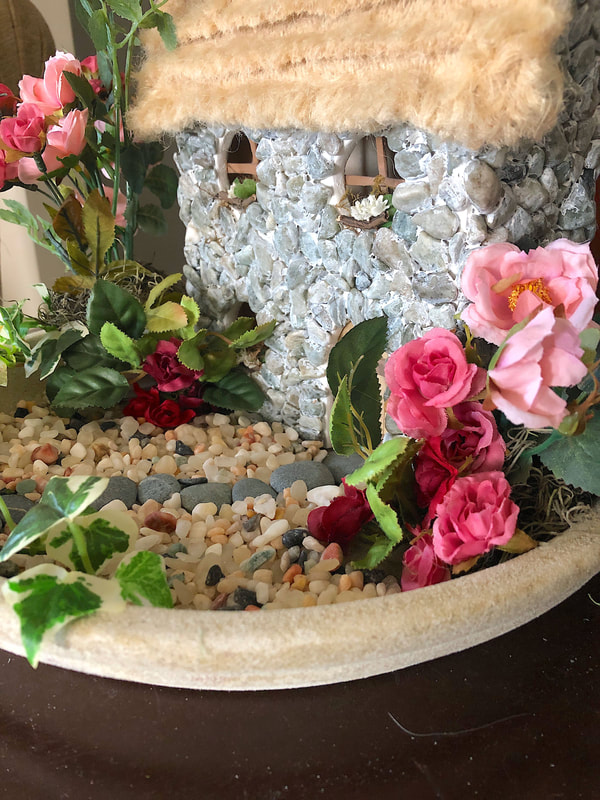 English Cottage indoor fairy garden walkway closeup, by Di's Studio Designs. Photo by Diane M. Lilly, 2021. 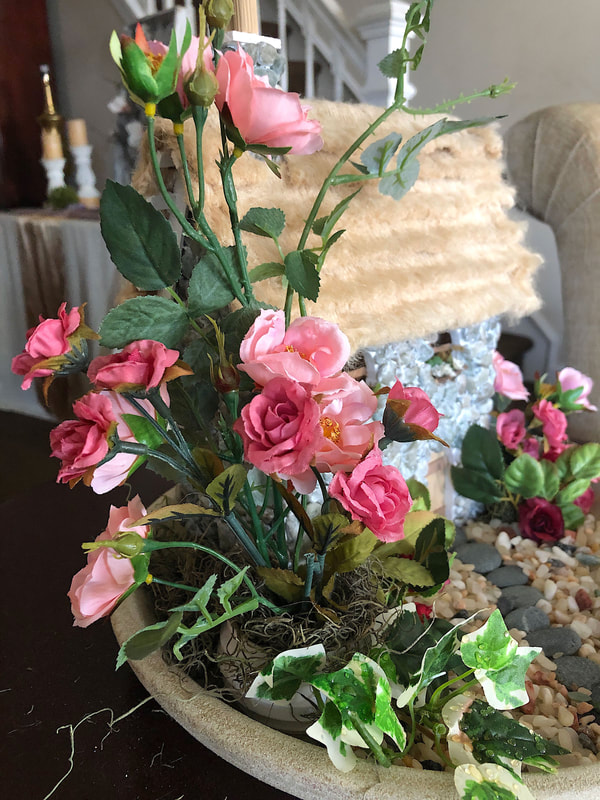 English Cottage indoor fairy garden faux rose closeup, by Di's Studio Designs. Photo by Diane M. Lilly, 2021. The vision for the Fairy Cottage was clear to me from the get-go. I wanted it to be adorned with moss and ivy, with a minimal amount of florals, if any. The colors in my vignette were already very strong and made a clear design statement, so all I needed from this Fairy Cottage garden was some simple greenery just to make it feel more whimsical. A couple of moss covered rocks, a piece of “forest wood”, and a trellis, and my design was done! Like with the English Cottage, I used small rocks to line the base and stacking stones for the pathway. And, just like that, my second fairy garden was done! (Actually, I tell a lie. it wasn’t “just like that”…I agonized over every mundane detail because I was having a “day”!) 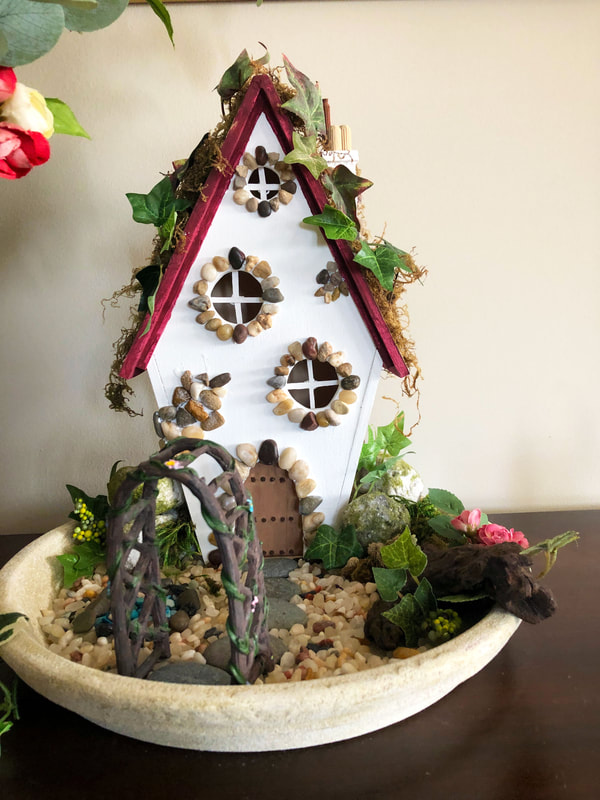 Fairy Cottage indoor fairy garden by Di's Studio Designs. Photo by Diane M. Lilly, 2021. 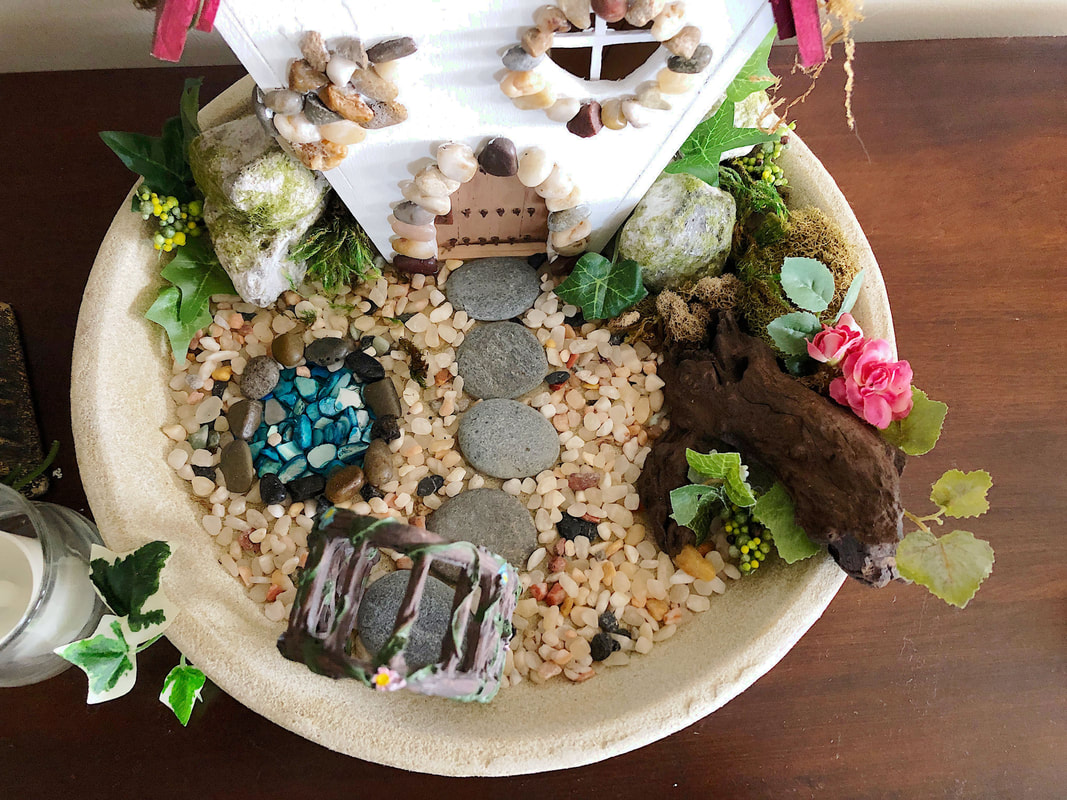 Fairy Cottage indoor fairy garden walkway closeup, by Di's Studio Designs. Photo by Diane M. Lilly, 2021. 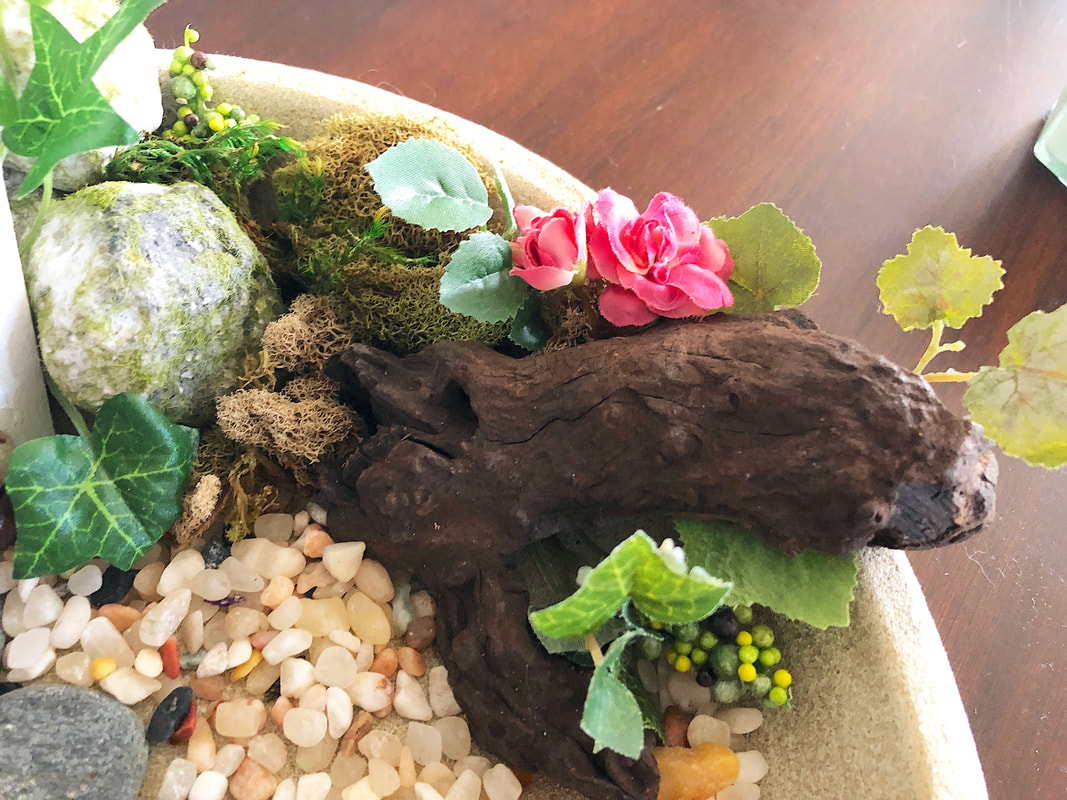 Fairy Cottage indoor fairy garden driftwood closeup, by Di's Studio Designs. Photo by Diane M. Lilly, 2021. Step 3…Lighting up my indoor fairy gardens I always love to finish my indoor fairy gardens with fairy light strands, and this time was no different. A fairy strand was strung over and around each house and surrounding garden to light up as much of the house, florals, and greenery as possible. (I may go back later and apply a second strand to light things up even more.) To light up the house itself I stuffed a balled up fairy light strand into the opening in the back of each house. Both indoor fairy gardens and houses look so whimsical in the evenings and they add so much character to my living room! 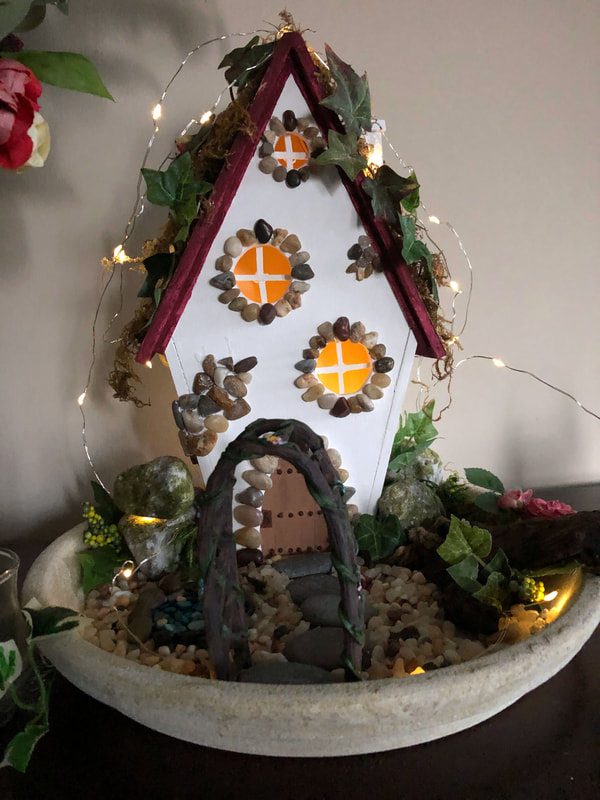 Fairy Cottage indoor fairy garden lit up (front view), by Di's Studio Designs. Photo by Diane M. Lilly, 2021. 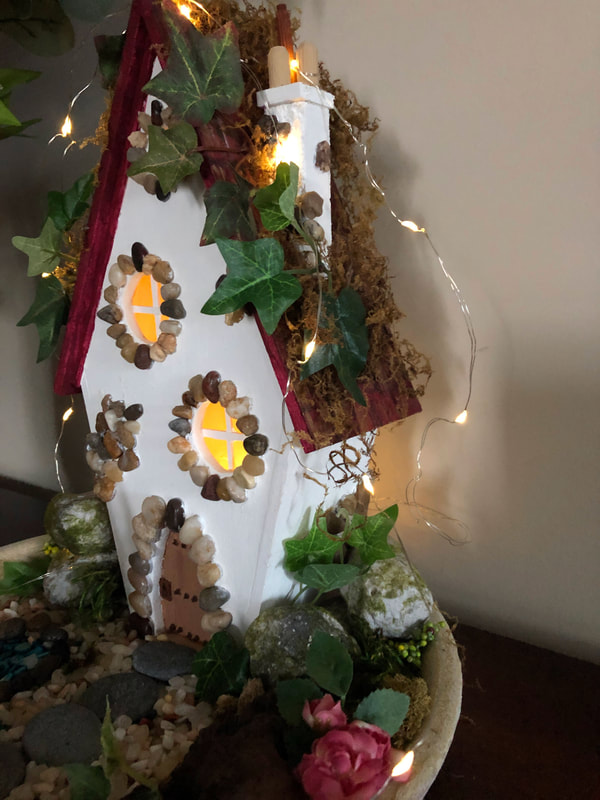 Fairy Cottage indoor fairy garden lit up (side view), by Di's Studio Designs. Photo by Diane M. Lilly, 2021. 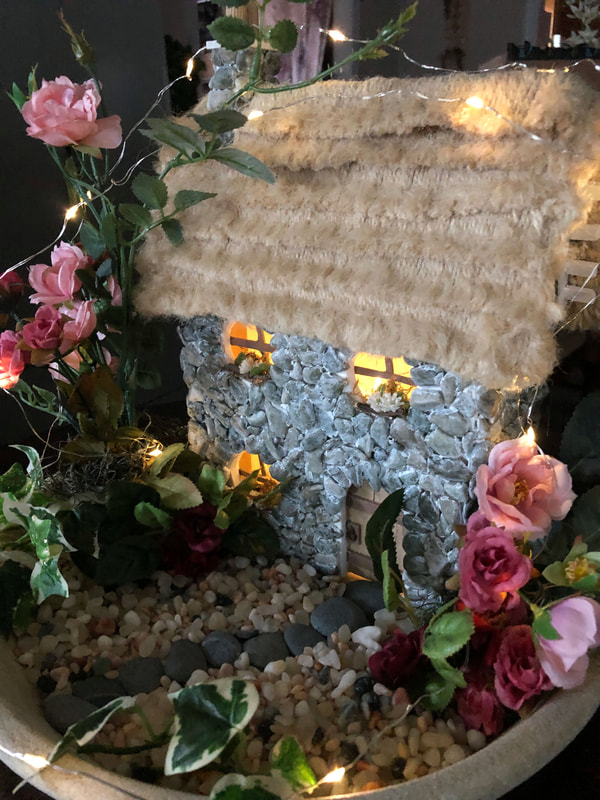 English Cottage indoor fairy garden lit up (side view), by Di's Studio Designs. Photo by Diane M. Lilly, 2021. 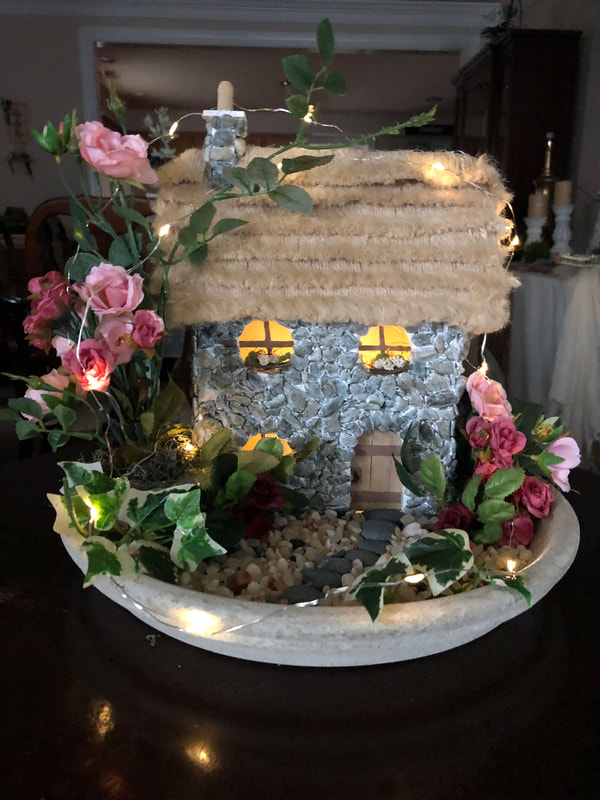 English Cottage indoor fairy garden lit up (front view), by Di's Studio Designs. Photo by Diane M. Lilly, 2021. And that’s it! The whole Spring decorating project took me a few days, but that was mainly down to bad timing and an emergency with a broken tooth (and, of course, I was in no mood afterwards)! I’m glad I forced myself to finish, though, because I love sitting on my sofa and looking over at each fairy garden in turn and daydreaming about the fairy that lives there! (Really I’m just admiring my own handiwork, but we won’t tell anyone.) If you’d like to see more about the original concept for my houses, the design process, and previous seasonal incarnations of my fairy gardens, hop on over to here. If you would like to subscribe to my email list, I will be compiling a new newsletter in the coming months to help you keep track of new items for sale on my web site, new blog articles I will be posting, and any social media stuff I decide to throw in there for good measure! Please feel free to share your thoughts and comments below. And if you like this article, give it a share to your friends and family. It would mean the world to me and help me build my following! This article contains external links for demonstration purposes only, and are not endorsements for specific products or brands. Related blog posts you may want to read: My outdoor fairy garden My fairy house project Can you feel summer in the air? It’s hot enough! Today, I thought I’d share a little project from a previous summer that I like to call Tropical Paradise. 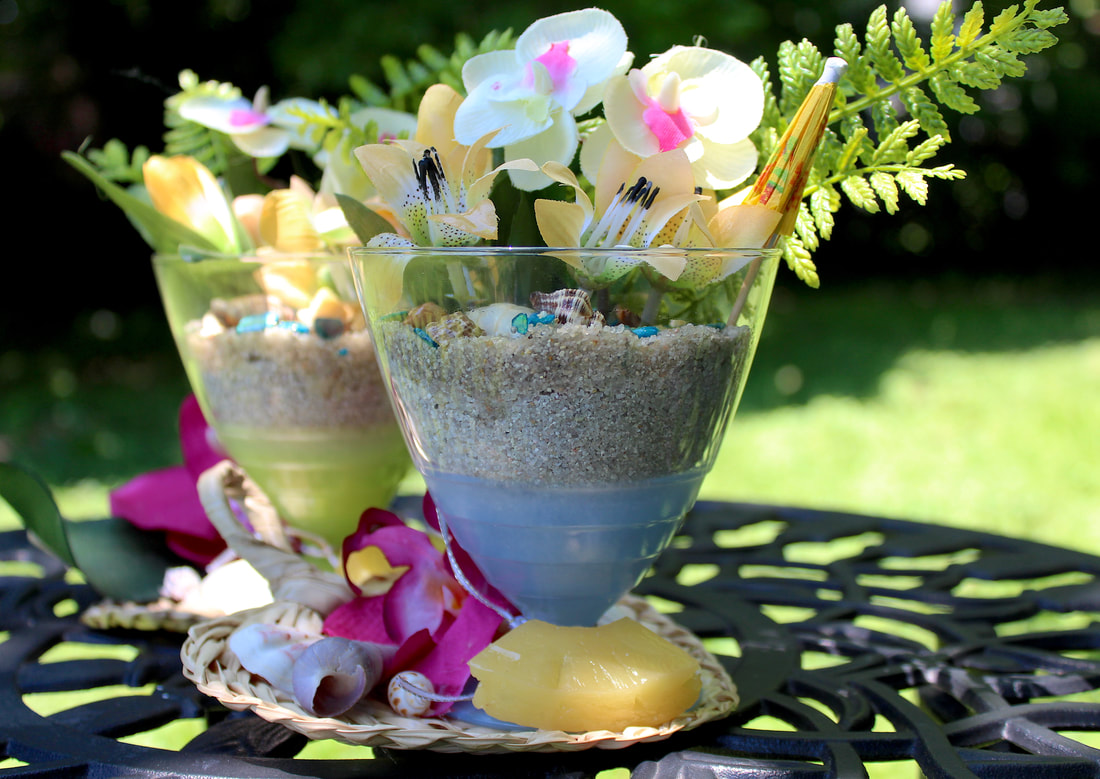 The inspiration for this design came from some unique colored dessert cups I bought at a thrift store. Just like in a previous strawberry-themed project, as soon as I saw these dessert cups, I knew I wanted to do something summer-themed. It took me a while to brainstorm ideas, and I toyed with several potential designs that included drinks and paper cocktail umbrellas. I’d take the cups out of the cabinet, stare at them, try hard to visualize a design, and then put them back in a dark cabinet for an agonizingly long time. 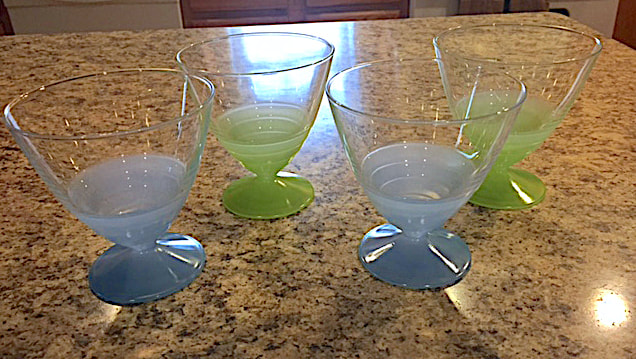 They finally saw the light of day when I saw miniature bamboo mats on my favorite craft site--then the proverbial lightbulb turned on. Once the idea for the base was in place, I settled on a tropical beach design that included sand, shells, tropical flowers, and pineapple slices. The palm fronds (which seemed so perfect for the base) did not want to adhere to the plastic cups, and it took a lot of E6000 glue to keep the two pieces stuck together! But once the glue set and I was sure they were well and truly stuck, I added the shells, faux orchids, and pineapple slice…although I had similar problems getting everything to stick together. 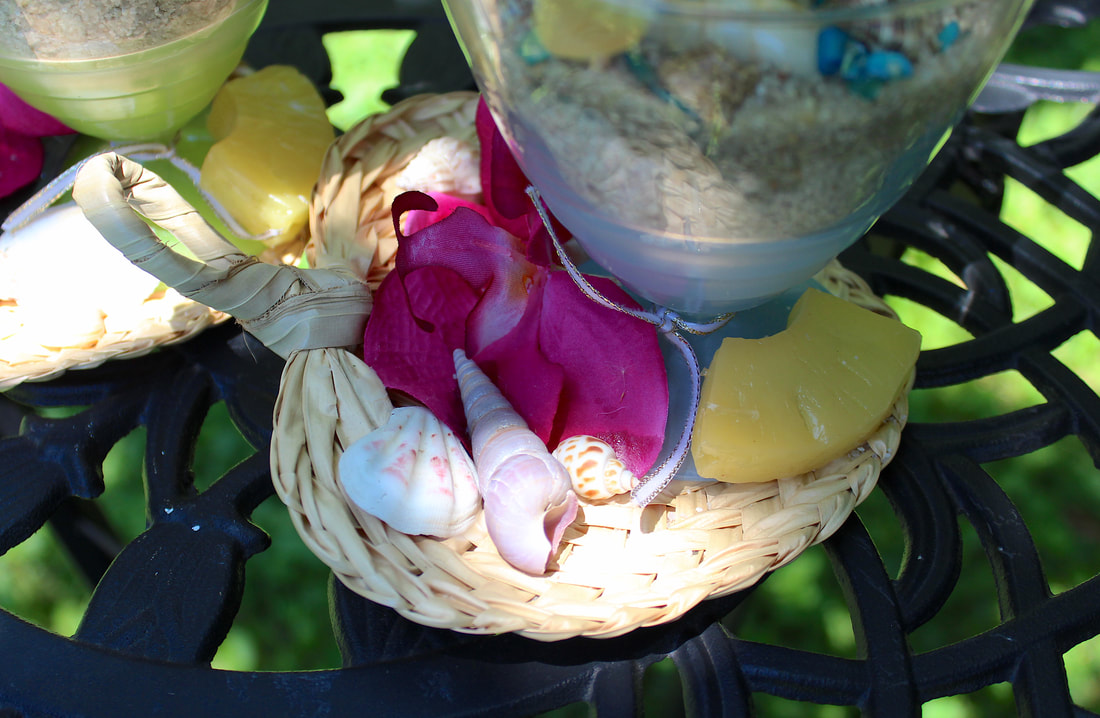 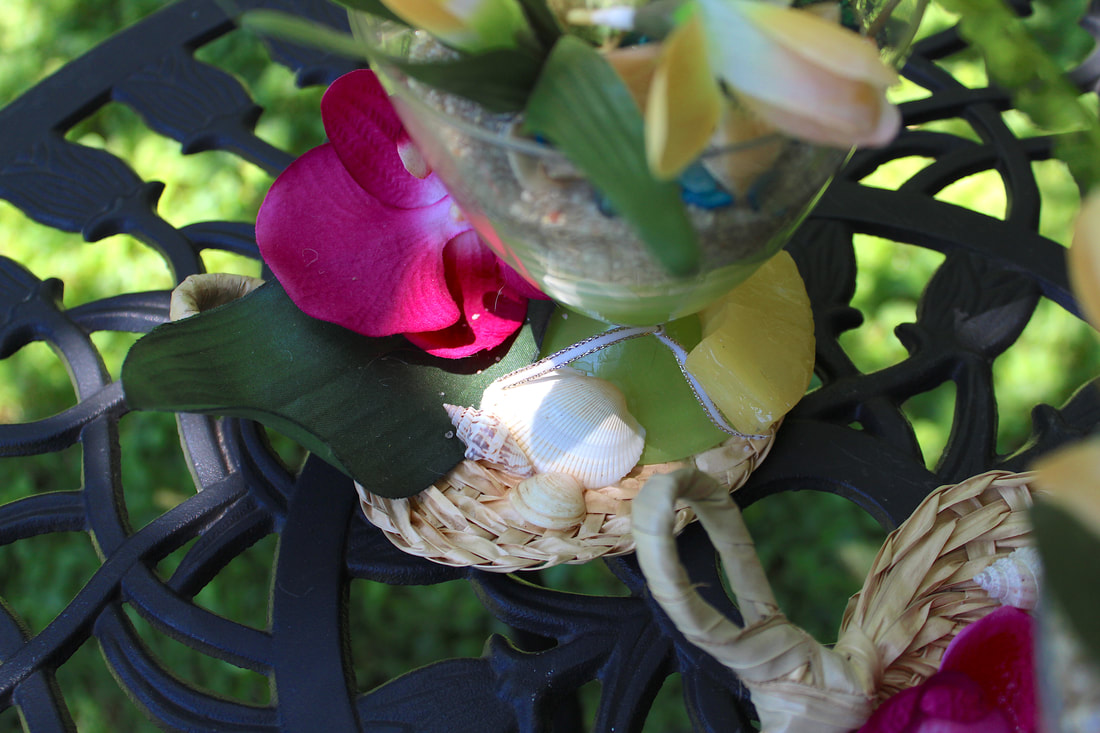 I got the pieces to stay together and moved on to the items inside the cup. Faux orchids and ferns, shells, a drink umbrella (all from FDC), and some sand were carefully arranged in the cup, but I had to work out how to keep the sand—and other decorative elements—from spilling out. I finally decided to use Water Effects (by Woodland Scenics), and that did the trick. It even made my sand look a little wet! 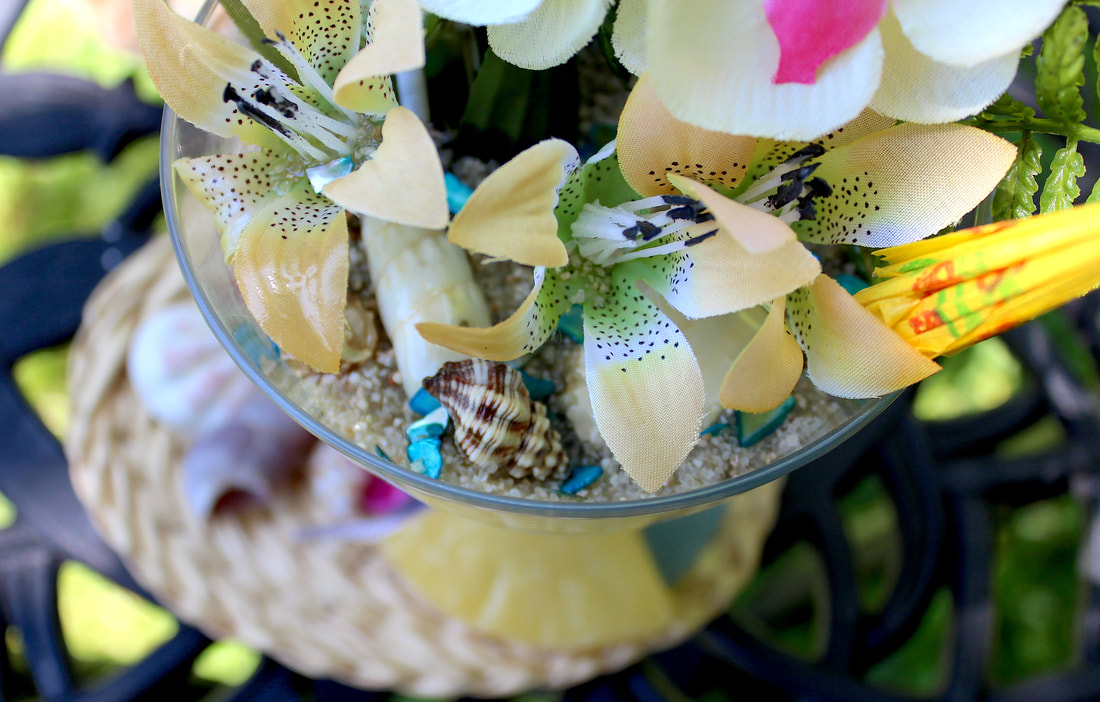 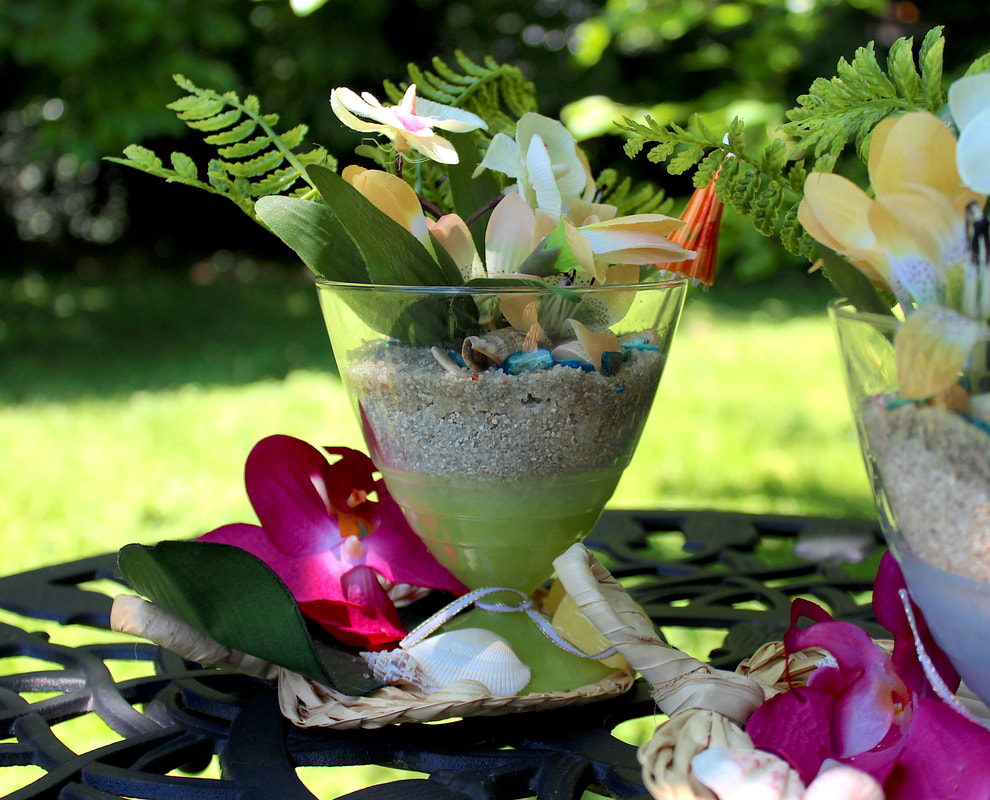 In the end I was happy with this little project. I’d like to make more items with this same tropical theme… someday. But that’s another thrift store trip! Do you have any tropical DIY projects to share? Feel free to drop a line in the comments below! This article contains external links for demonstration purposes only, and are not endorsements for specific products or brands. Related blog posts you may want to read: Strawberry themed projects with repurposed dessert cups Repurposed candy dish and cocktail glasses DIY with faux florals, birds and repurposed thrift store finds Who is in the mood for strawberries?!  Image from Pixabay. Thrift shops are heaven on earth for creative people like myself. I constantly find new and exciting pieces of unique, vintage glassware and dishware. On one such trip a few years back, I found a couple of slightly rusted metal dessert cups, simple votive glasses with vertical ridges, and some beautiful glass dessert plates with an elegant vine design. 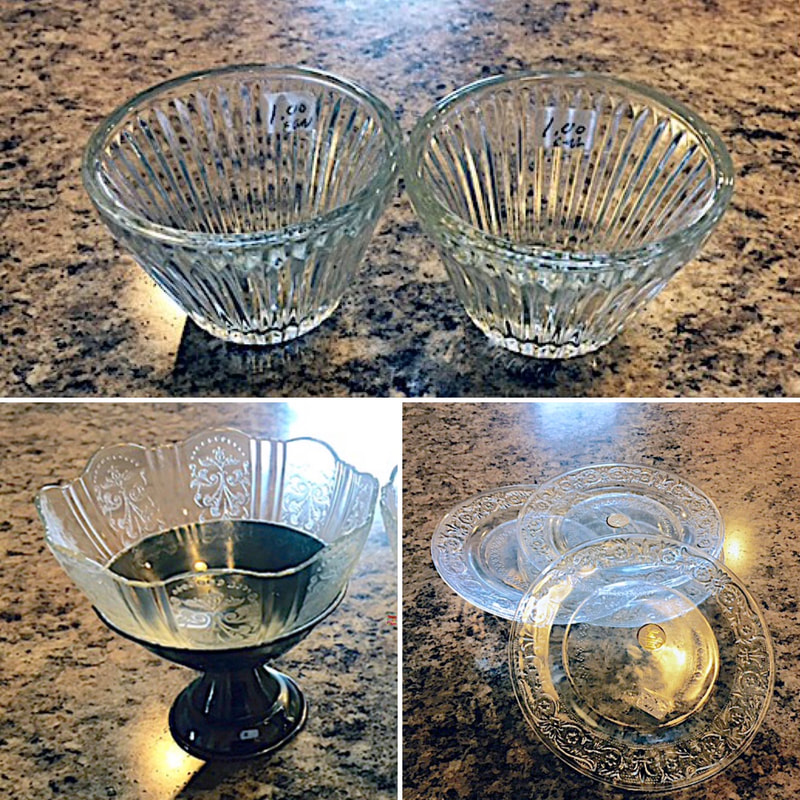 As soon as I saw the metal dessert cups, I knew I would create something sweet! Visions of an old-fashioned ice cream parlor and strawberry desserts slowly crept into my mind.  Image from Pixabay. I played with ideas ranging from strawberry sorbet to ice cream to flowers but eventually settled on actual strawberries. I found faux strawberries on my favorite site and bought some pure white miniature roses to serve as an abstract whipped topping. I had small white doilies left over from a previous project and thought they would go well with this project. So, the project wasn’t too challenging. I glue the white doilies (with E6000 glue) onto the plates. Once set, the dessert cups (spray-painted silver to cover the rust) and glass votive holders were also glued onto the plates. The cups were then filled with faux strawberries topped with mini roses, and a few strawberries were attached to the plates, along with the final touch of sundae spoons (found on Amazon)—all carefully glued into place and allowed to set. 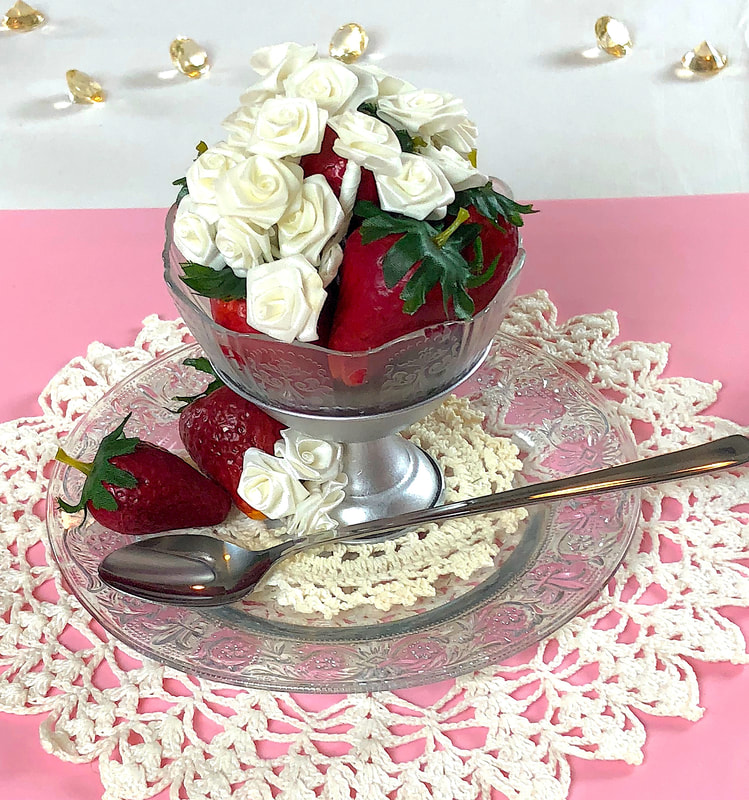 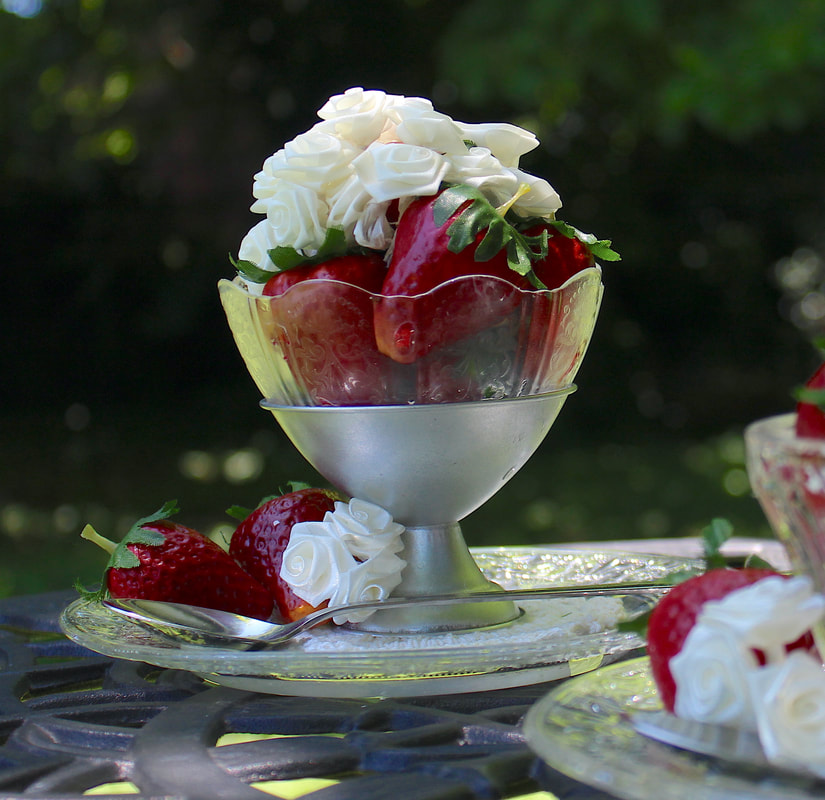 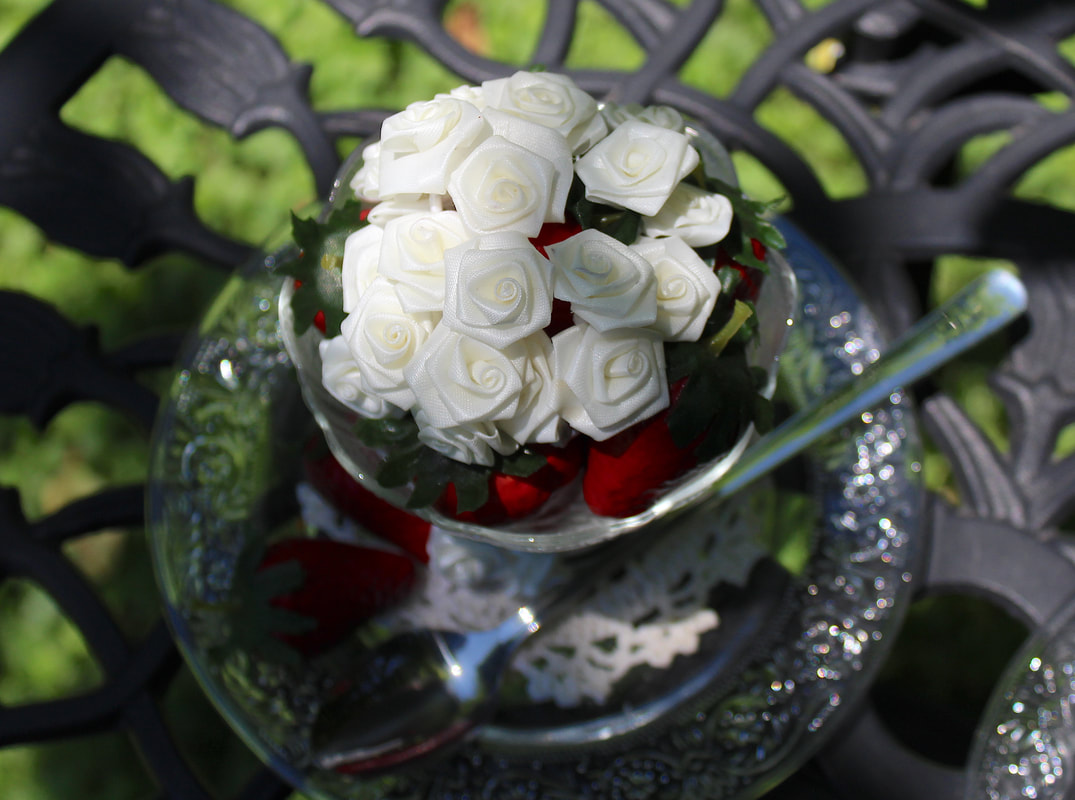 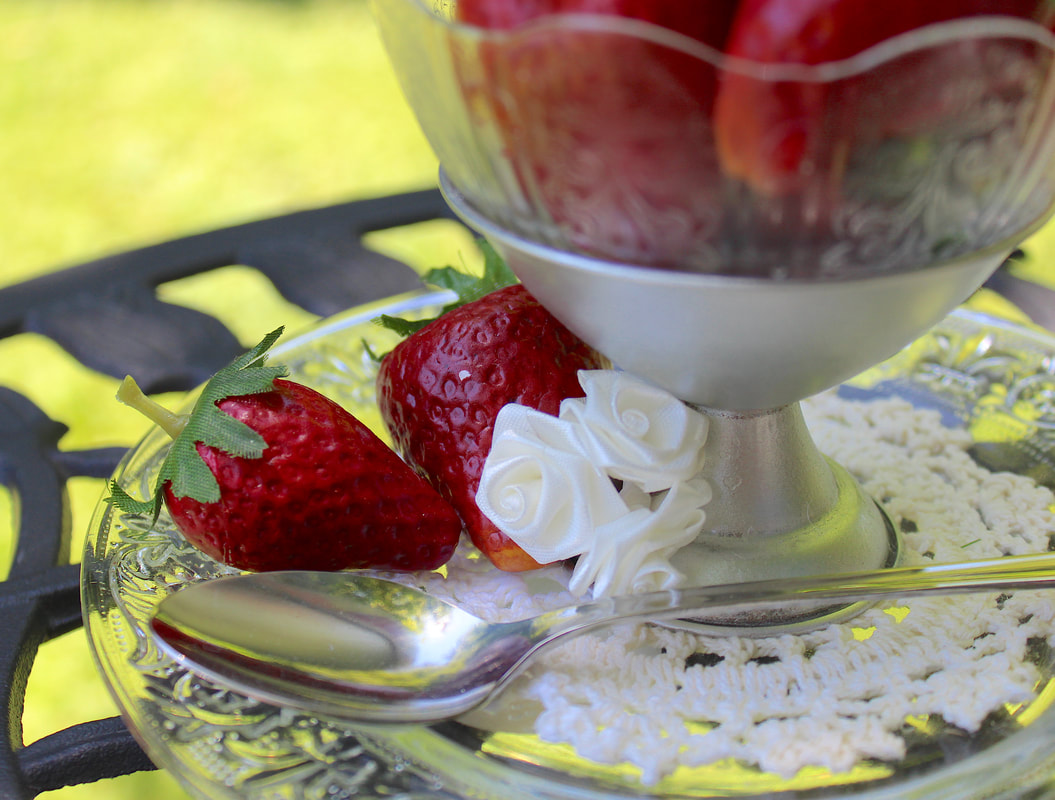 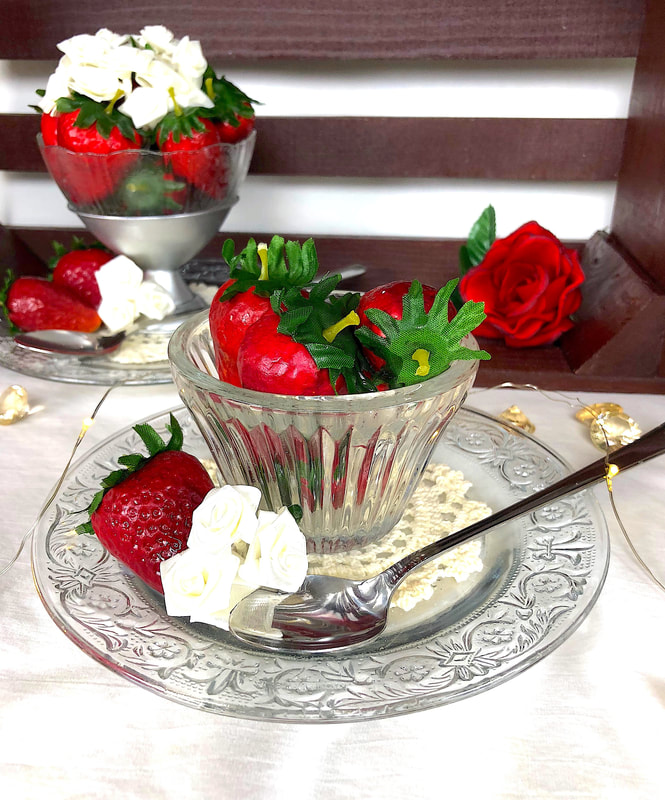 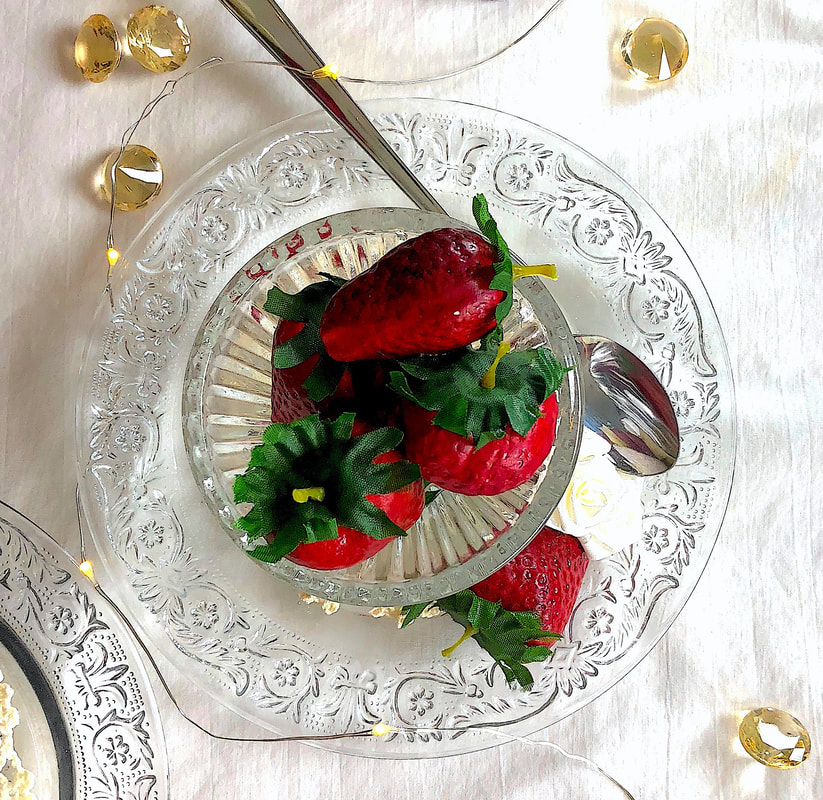 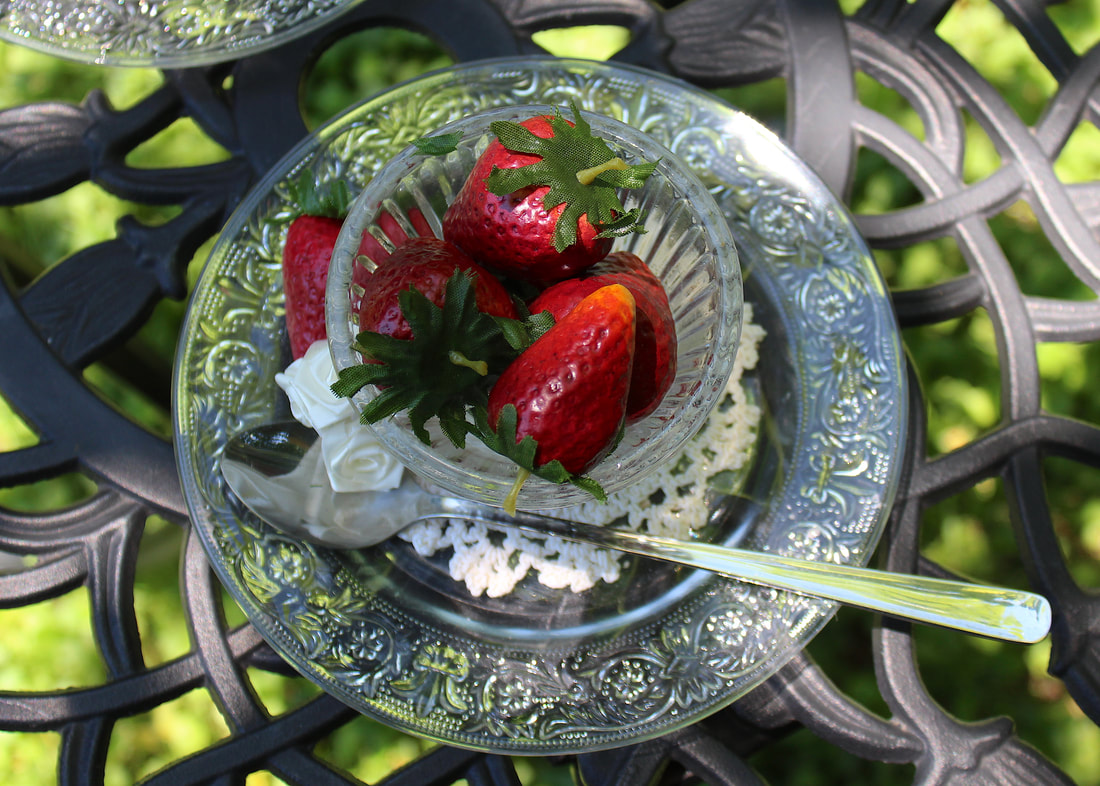 The strawberries look so real!!! I’ve had people ask and touch them to make sure… This ended up being such a charming and delicious-looking display for the kitchen! So what do you think? Do you have any DIY kitchen decor you’d like to share? Feel free to drop a line in the comments! This article contains external links for demonstration purposes only, and are not endorsements for specific products or brands. Related blog posts you may want to read: Tropical themed projects with repurposed dessert cups Repurposed vintage candy dish and cocktail glasses DIY with faux florals, birds, and repurposed thrift store finds Faux florals, miniature birds, and repurposed thrift store finds…Three of my favorite things! The weather is warm, and the sun is shining brightly today—the perfect day to reflect on a couple of previous “make me happy” projects. 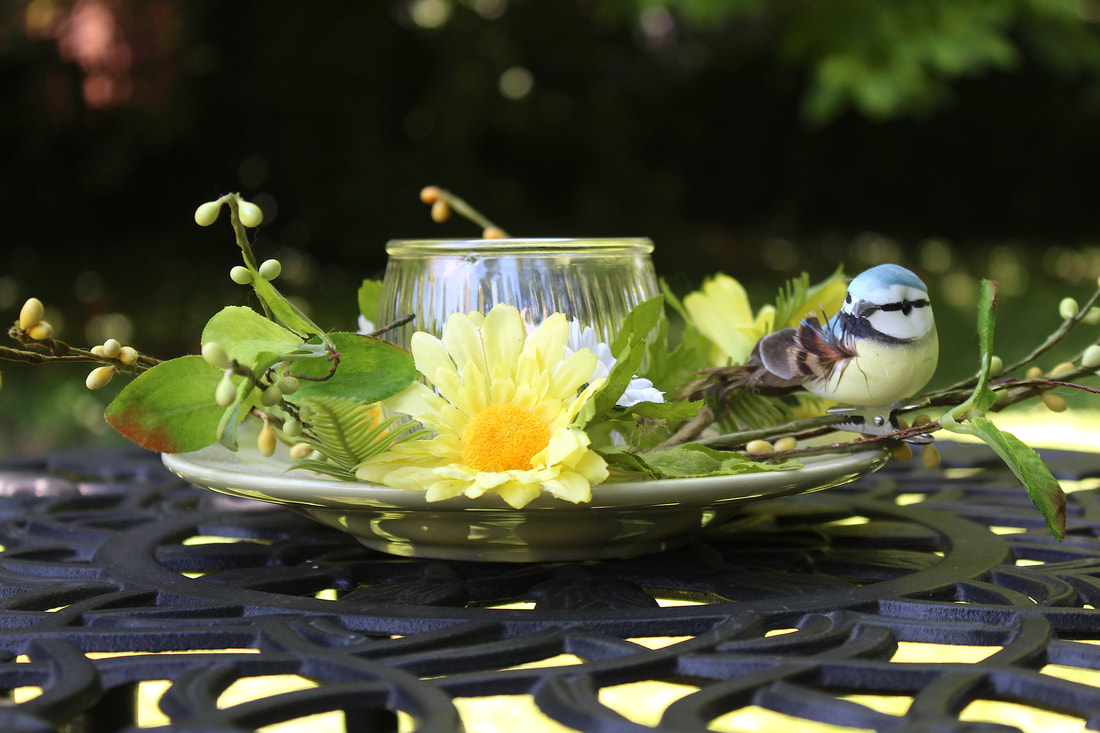 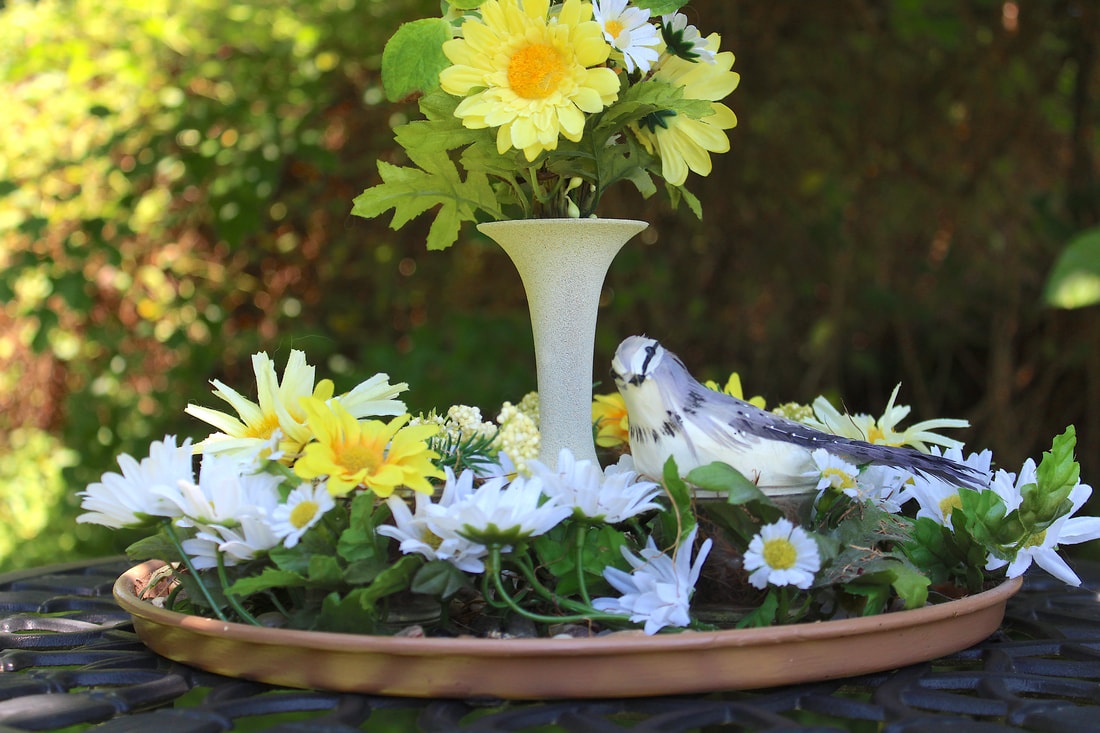 I comb local thrift stores occasionally, looking for used and vintage glassware and plates that would work well in unique home decor projects. On one such trip, I found a set of green salad plates and fell in love with the pale shade of green, instinctively sensing they would come in handy in a future creative project. In the same shop, I found small round glasses that were so simple and sweet! You know when you get a sense about something—that there’s something creative hidden there, waiting to come out, but you don’t quite know what it is yet? I felt that and bought them immediately with all the enthusiasm of an artist and designer…And then they just sat in a cabinet…for like a YEAR! 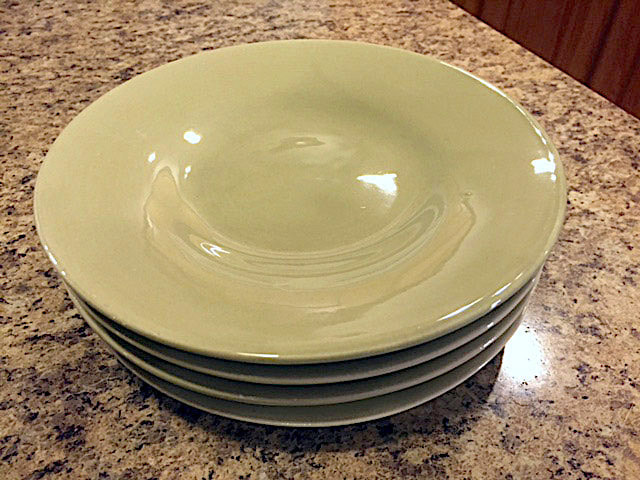 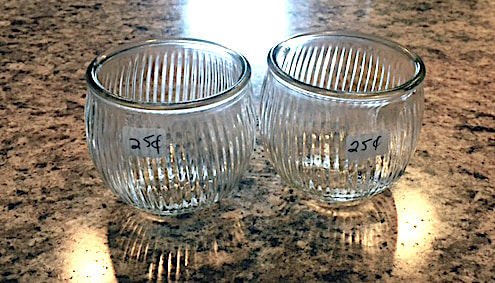 In my defense, though, once I did pull things out of the cabinet to assess my materials, the creative juices started flowing relatively quickly. As the ideas and inspiration started to flow, a final vision emerged. While scouring my favorite internet sites, I found a floral candle ring (from Factory Direct Craft) with vibrant yellow and white flowers that looked perfect with the pale green plates…and the rest was easy! The glass was attached to the plate with E6000 glue, the candle ring was placed around the glass and glued down, and a precious little blue bird was attached to the foliage. It was just that simple! A couple of thrift store items, a candle ring, a blue bird…and a bit of E6000 glue. 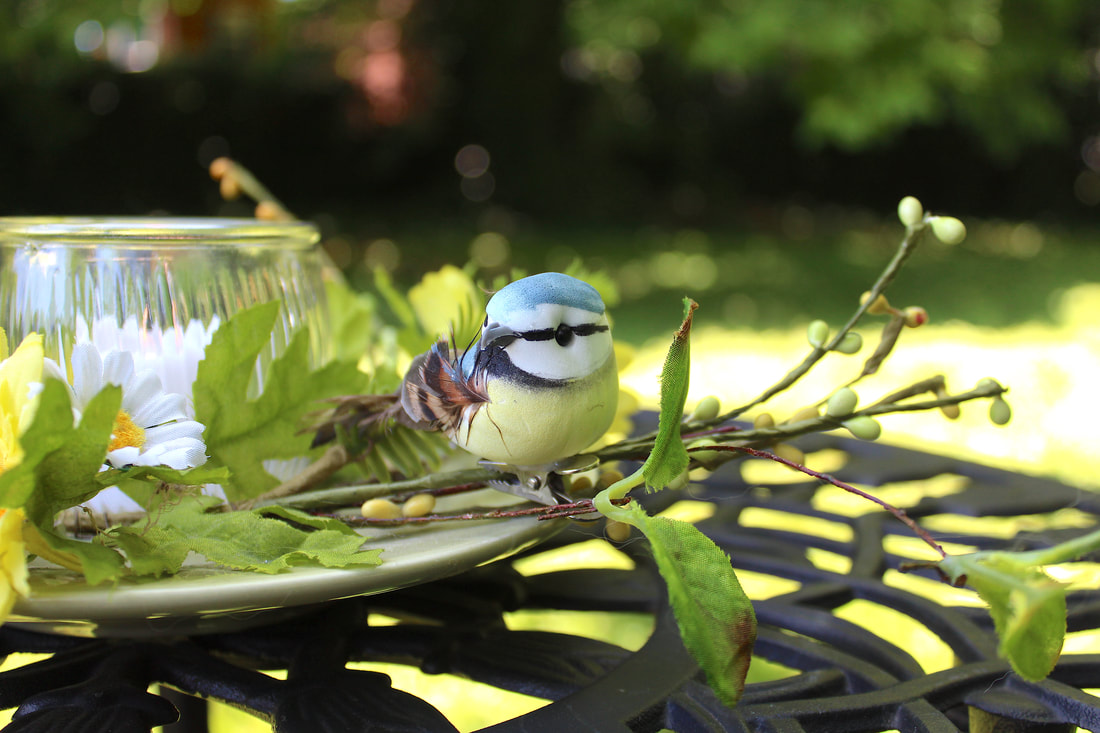 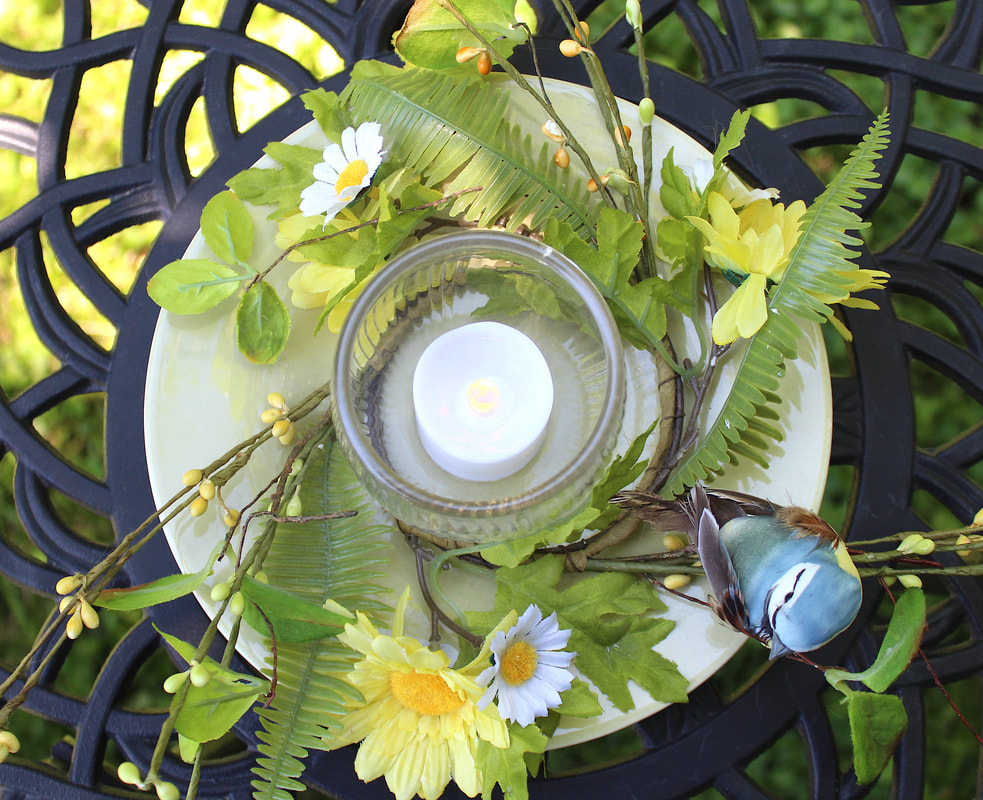 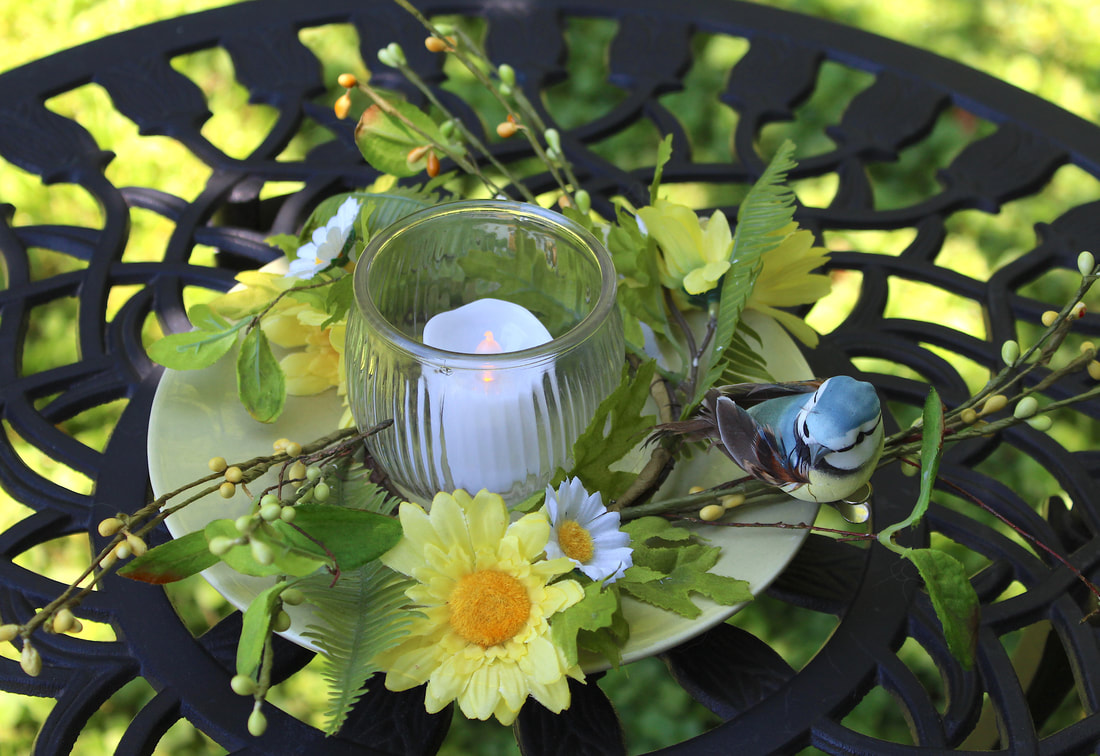 The finished candleholder looks whimsical with an LED candle! I use it in a tablescape, surrounded with scatter and fairy lights, and often pair it with my next project, which I called Spring Flower Bed. For the second floral project, I used items I discovered at a local thrift shop (because I love my thrift shops!)—a blue metal plate (that was scratched up) and a well-worn metal vase. When purchased, these became a couple more pieces hidden away in a cabinet for an inexcusable amount of time! But I made up for it in the end… 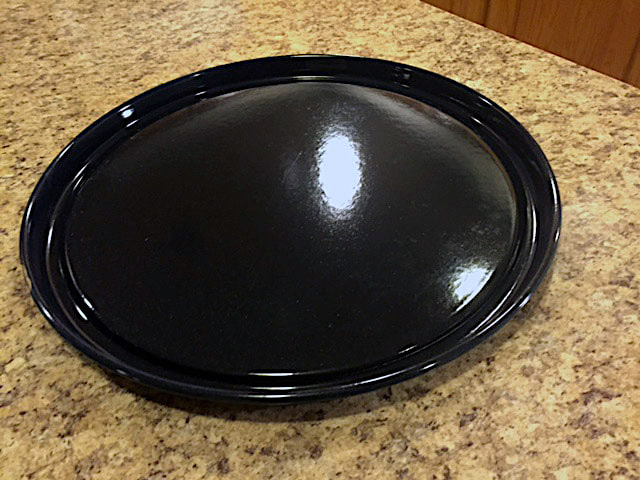 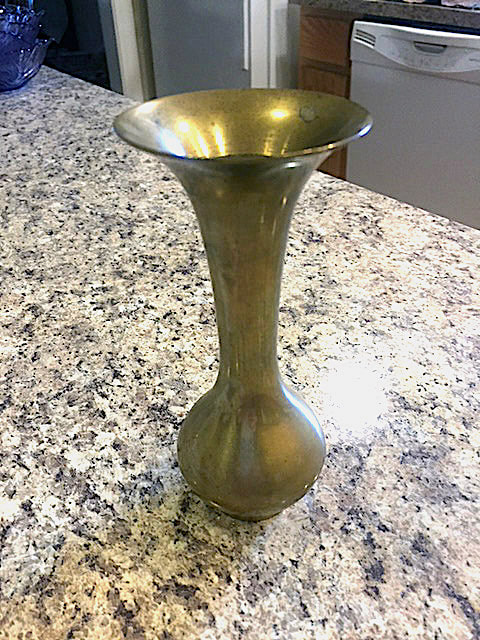 I chose similar white and yellow daisies and flowers (also from Factory Direct Craft) for this project because I wanted something bright, cheerful, and warm. I decided to paint the tray with craft paints to make it look “earthen”, like a real flower bed, but it didn't look finished, so I splattered it with black, white, and grey paint to give it a more textured look. The metal vase was sprayed with a stone textured spray paint (from Michaels) to make it look more like a stone planter in a garden. 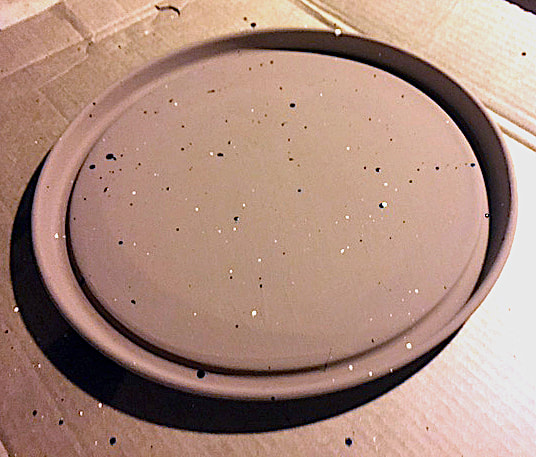 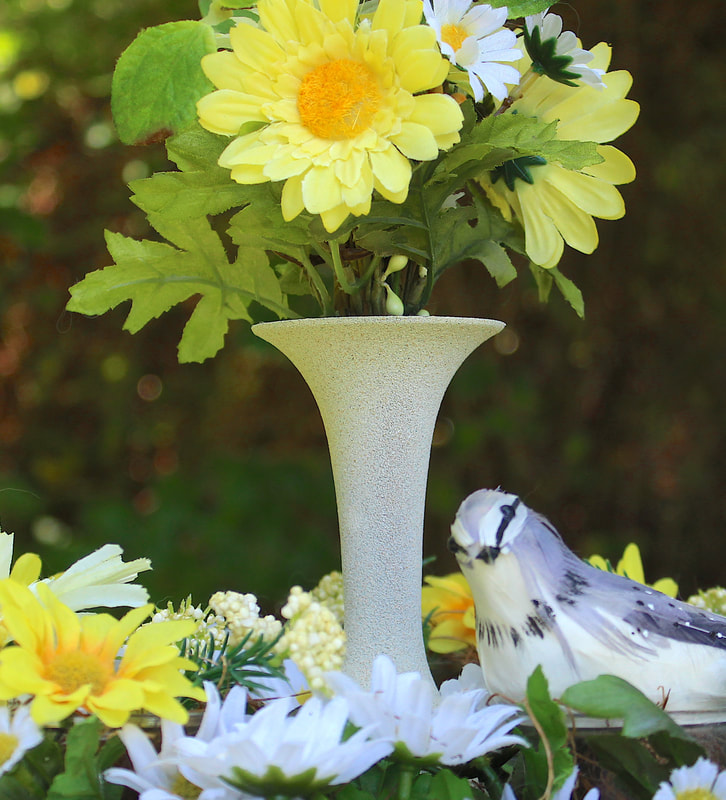 Once all the paint was dry, the vase was glued into the center of the tray. Oyster votives were glued around the perimeter, and the space in between was filled with small river rocks, all glued into place and allowed to set for a day or two. The oyster votives were eventually stuffed with Spanish moss and faux flowers, and additional floral sprays were set and glued into the vase. Something was missing, so I bought another bird at Michaels to sit on one of the “nests”. This project was quite a bit more work than the first one! Everything—every little stone and every flower—was glued down with E6000 so that nothing would move once set. 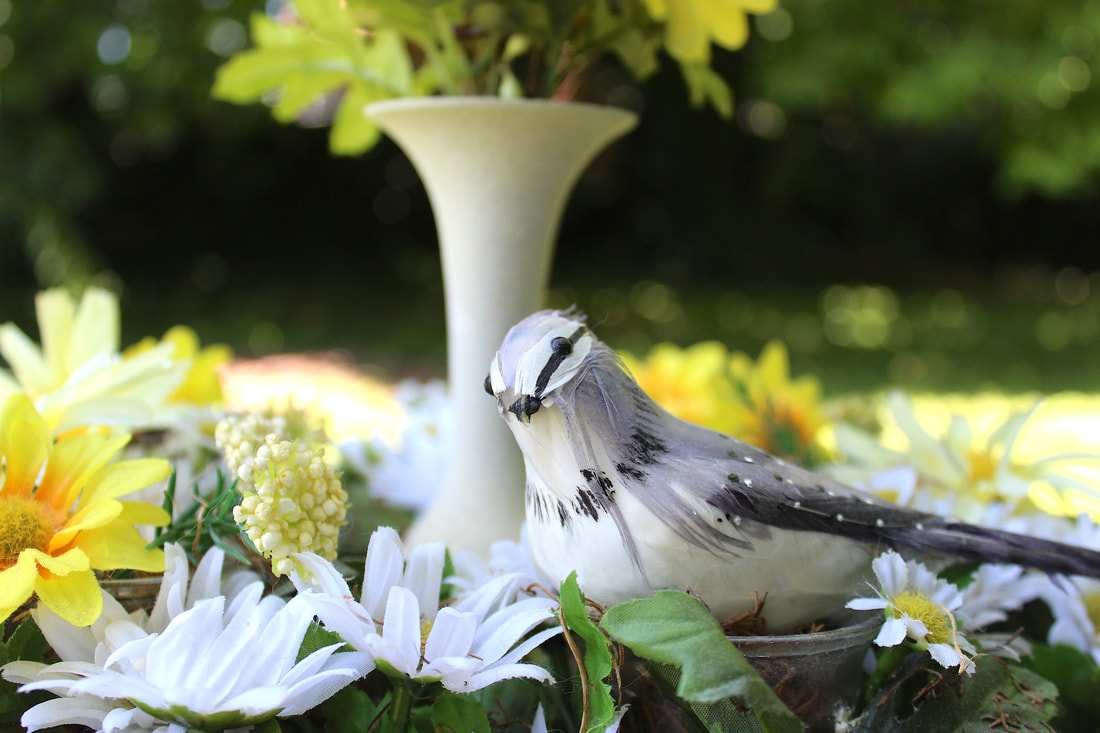 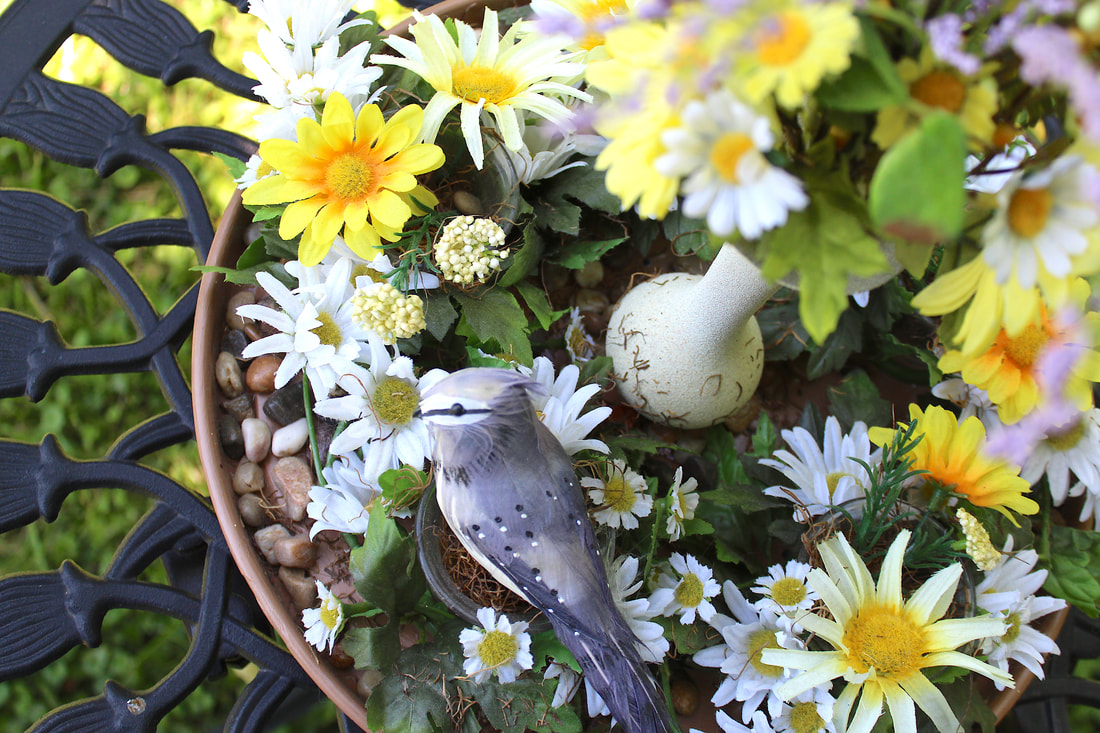 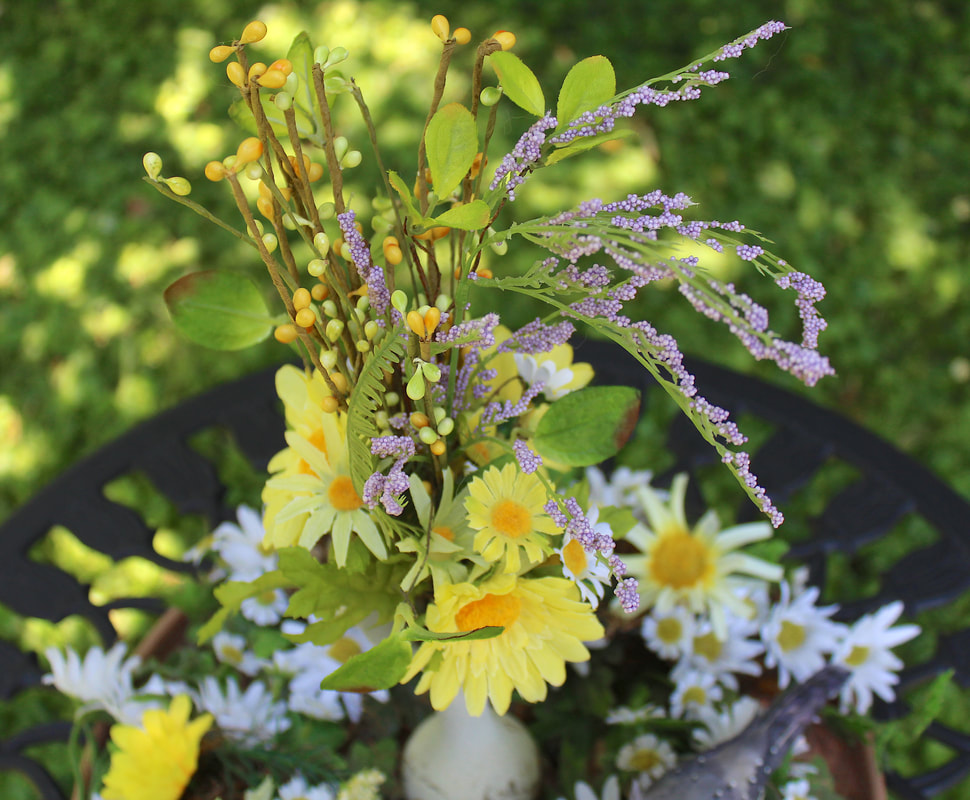 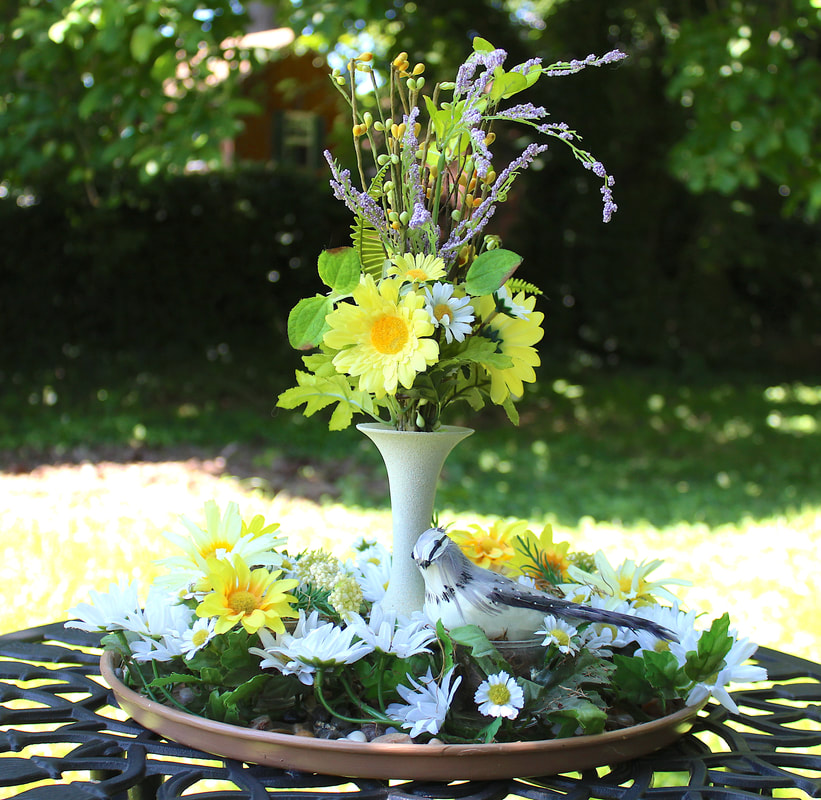 This second project was a bit more challenging and complicated. This faux floral decor is now one of my go-to pieces for Spring/Summer decor for my home! I hope you enjoyed a little look at a couple of creative Spring/Summer home decor projects. Are you now inspired to go rummaging through a thrift store near you? Please feel free to share in the comments below any thrift store finds that inspired you to tackle a creative project. This article contains external links for demonstration purposes only, and are not endorsements for specific products or brands. Related blog posts you may want to read: Tropical-themed projects with repurposed dessert cups Strawberry-themed projects with repurposed dessert cups Repurposed vintage candy dishes and cocktail glasses 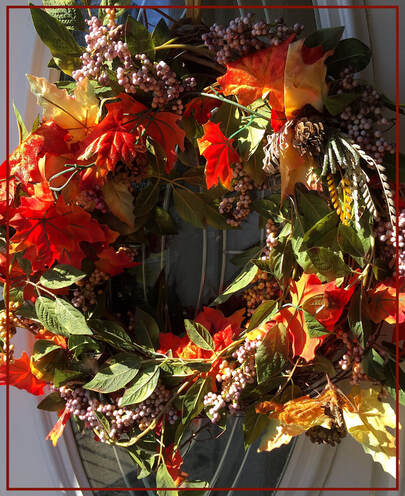 Photo by Diane M. Lilly, 2017.
HOMEMADE APPLE PIE WITH CRUMB TOPPING
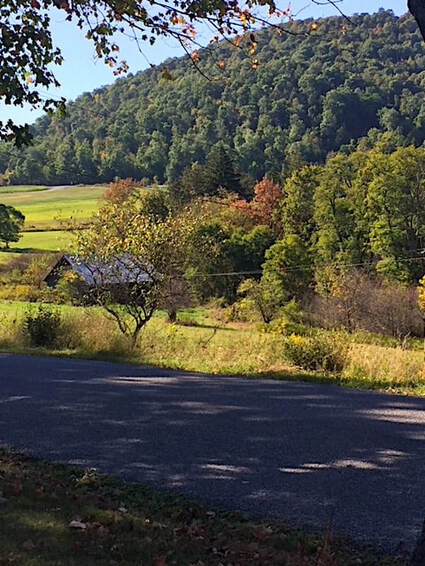 Photo by Diane M. Lilly, 2017.
Ancient peoples celebrated Samhain (or Halloween as we know it today) out of fear of the upcoming winter and reverence for the natural world. Despite our intellect, technology, and human ingenuity, we are still minuscule next to the power of nature. Fall will give way to winter, whether we like it or not. I am no big fan of winter…It’s cold and dark, and I could do without the ice and high energy bills! But just the same, I respect the seasonal transitions and what they mean in the greater scheme of things. Autumn is that in-between time—the bridge between the warm summer and the cold winter. I draw my personal and creative inspiration from nature and natural things, and Fall is my favorite season by a landslide! Fall is pure perfection--nature’s last defiant celebration before the onset of the cold weather with ice, snow, and plummeting temperatures. Autumn is the season that fearlessly faces the end of nature’s bounty and prepares us for the coming cold. But until that time arrives, let it be glorious!  Photo by Diane M. Lilly, 2017. Find Di’s Studio Designs here! Related blog posts you may want to read: Decorating for Thanksgiving with Fall decor Finding creative inspiration from nothing |
Author
Some of the posts on this site contain affiliate links. This means if you click on the link and purchase the item, I will receive an affiliate commission. 
Categories
All
Archives
April 2024
|