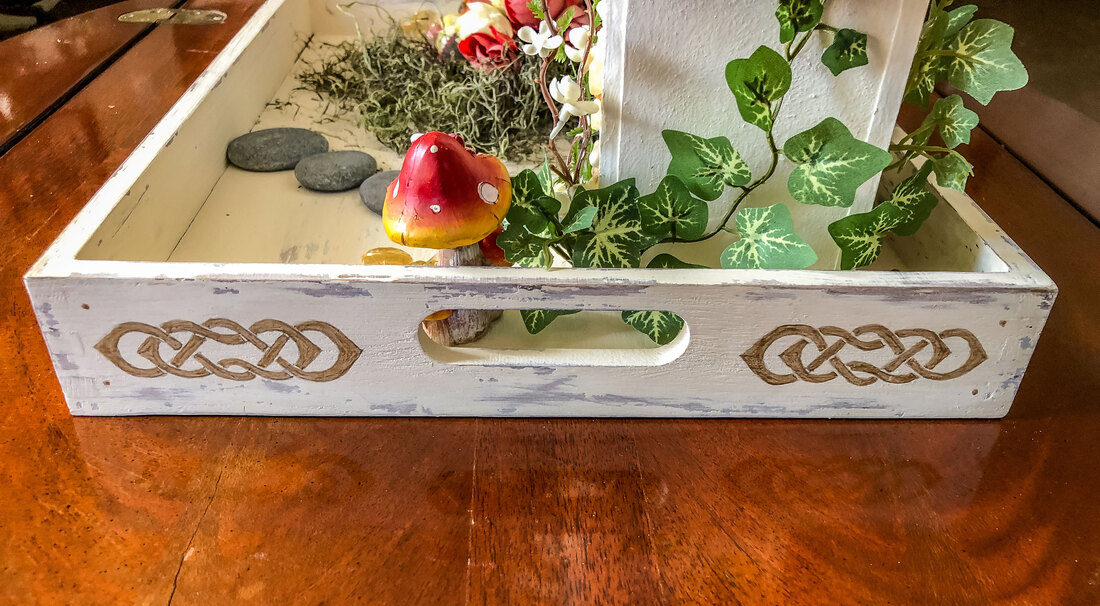
 Celtic knot painted on a decorative tray. Photo by Diane M. Lilly, 2022. Welcome to part two of my DIY chalk-painted tray project! In part one, I chalk-painted a decorative tray using a “chippy” weathered effect. Now, let's go through the steps I took to design and paint a border around the vertical exterior sides of the tray. This will not be a tutorial on creating Celtic knots—that would turn this blog post into a book (which is in the works, by the way)! The goal is to help you create a simple design that can be traced onto the newly painted decorative tray for a bit more pizzazz. 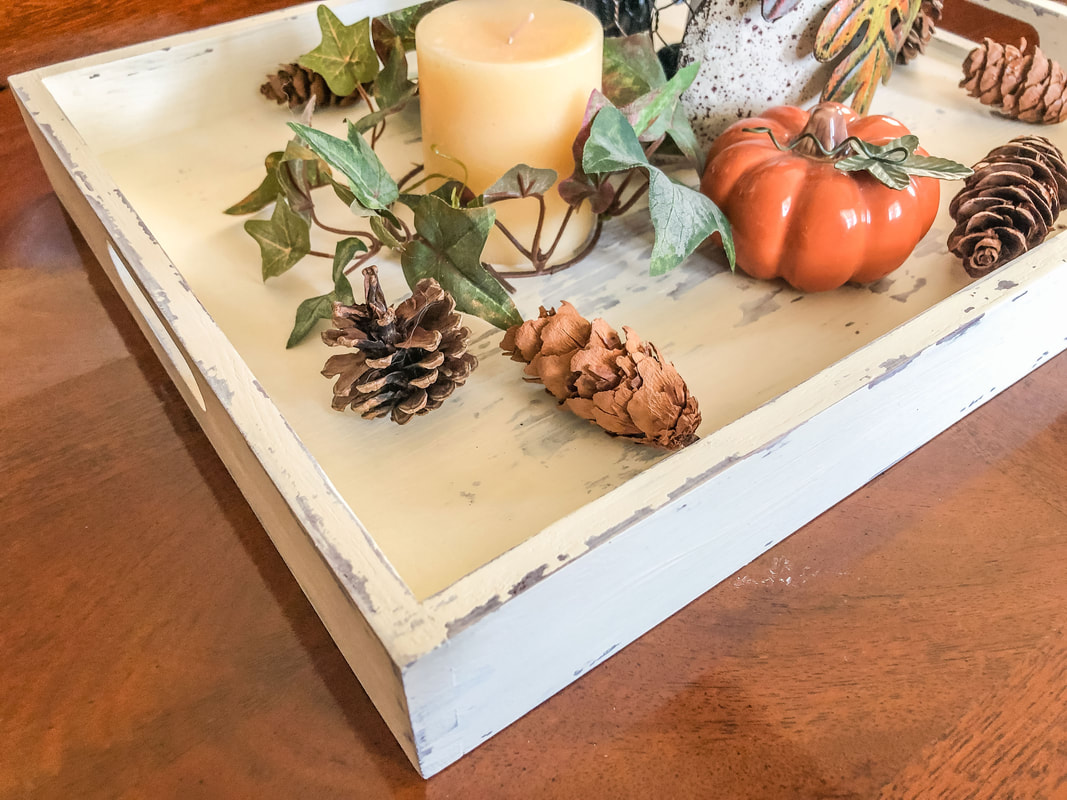 DIY chalk painted decorative tray before knotwork details were added. Photo by Diane M. Lilly, 2022. I love Celtic art and knotwork! I am always looking for ways to sneak some Celtic knots into my decor, so when I started painting a decorative wood tray for my living room, it was inevitable that it would end up adorned with a Celtic knot border! So here we are at part 2 of this project, where I walk you through how I drew and painted a beautiful knot border onto the sides of my newly painted tray. So let’s dive right in and go through this process step by step… Materials needed: pencil eraser ruler grid paper tracing paper tape scissors craft paint sandpaper (optional) varnish (optional) Step 1—Get measurements The first thing you need to do in a project like this is to get some basic measurements. My tray is 16” x 12” with 2” H sides. The long side of my tray is 16” L x 2” H. The short sides of the tray have holes for handles that split the empty areas into two parts that are 4 1/2” L x 2” H each. Step 2—Plot out measurements on grid paper If you’re creating a freehand design, you won’t need grid paper, but you’ll still need to measure the drawing area on your paper so your template will fit the area to be painted. Using grid paper may help keep your design symmetrical and more accurately aligned. For this project, I plotted out one section measuring 16”x 2” and another measuring 4 1/2” x 2” on my grid paper. Marking the edges, I then plotted out the ‘working” area, meaning I made decisions on how much space to leave between the design and the edges of the tray. I took this opportunity to mark the midpoints for each section on the paper and the tray. This helps tremendously later on when we have to align the template onto the tray to get the design perfectly level…so don’t skip this step! 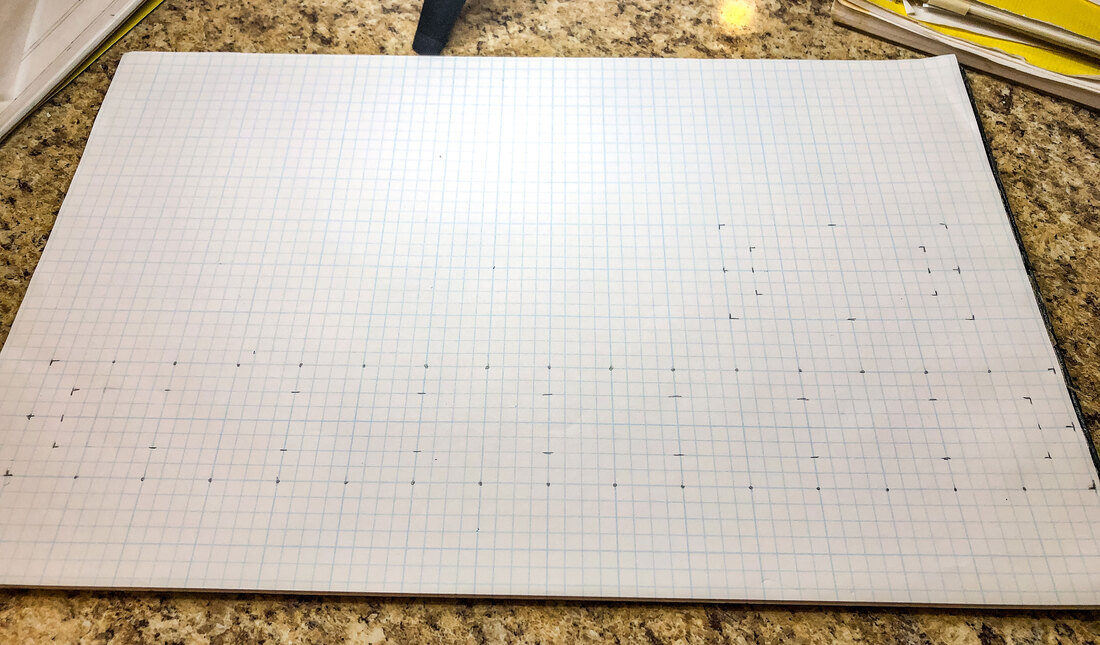 Grid paper maps out the exact measurements for the tray sides and work areas for the knotwork border. Photo by Diane M. Lilly, 2022. Step 3—Create a simple line design I am in the process of putting together future tutorials on how to create Celtic knots, but for the sake of this project, I will share one of the simplest ways to draw a Celtic knotwork border—starting with drawing a single line. I found a Celtic-style border knot in a linked pattern and then reverse-engineered it to make it work for the dimensions of my tray. To speed up and simplify the process, I decided to work it out with a single line first. (My rough grid includes the “breaks”—I’ll go into more detail on how to do that in a future tutorial.)  The grid pattern with breaks planned out before the knot is drawn. Photo by Diane M. Lilly, 2022. 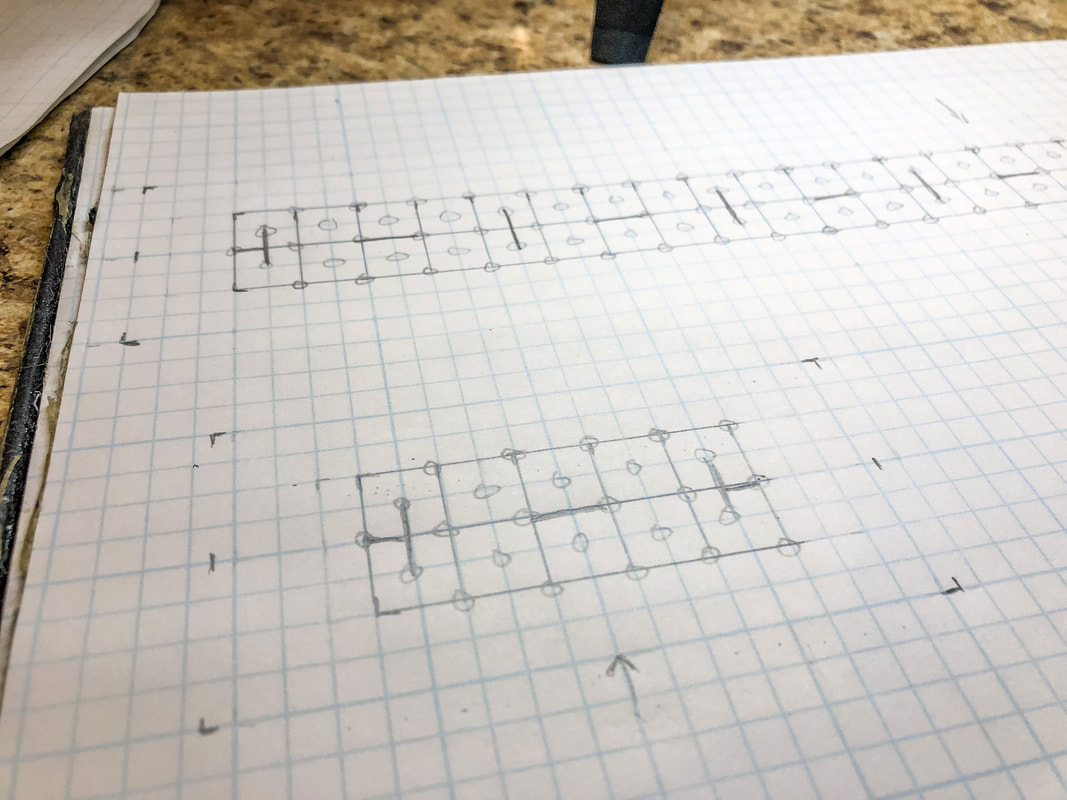 A section of the small knot mapped out on the grid with breaks. Photo by Diane M. Lilly, 2022. 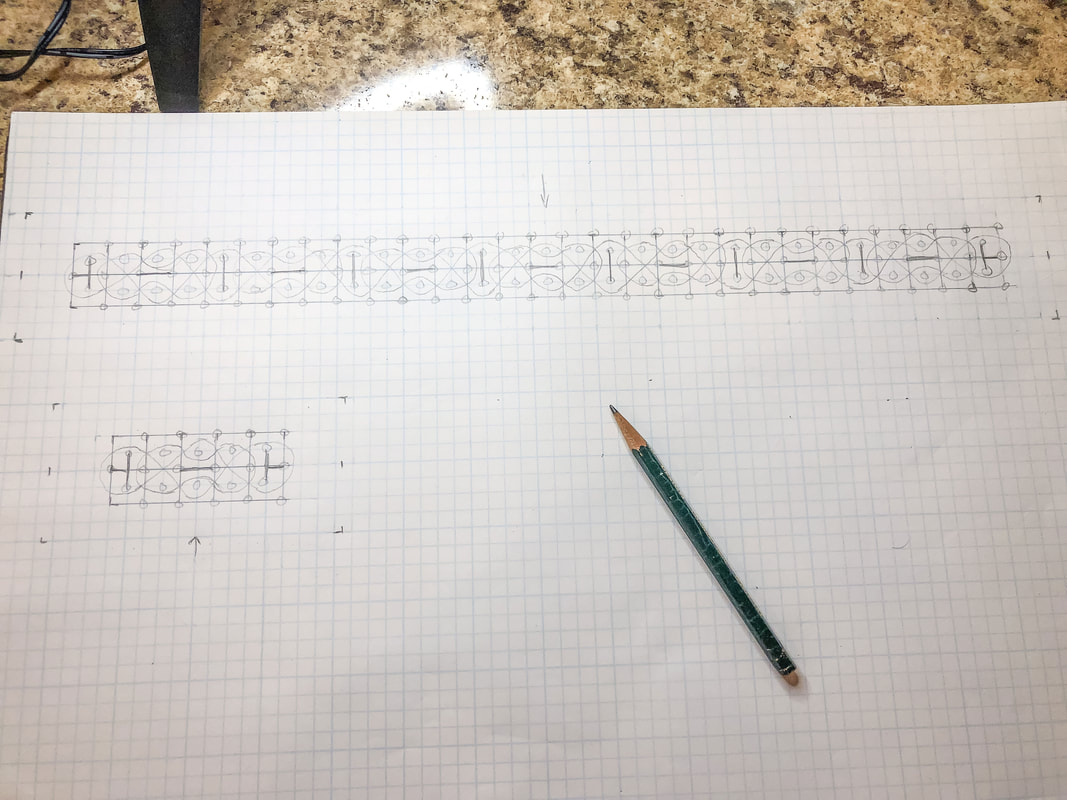 My basic line for my design drawn out on the plotted grid pattern. Photo by Diane M. Lilly, 2022. Step 4—Create the “thread” with “overs” and “unders” Now, it’s time to use the simple line as a guide to create the actual thread. Draw parallel lines on either side of your single line, working your way through your design. Don’t worry about drawing over other lines. All unnecessary lines will get erased when you start marking out the “overs” and “unders” (the weave pattern for your design). Once the “thread” has been established, erase that first single line. It’s done its job, and you don’t need it anymore! 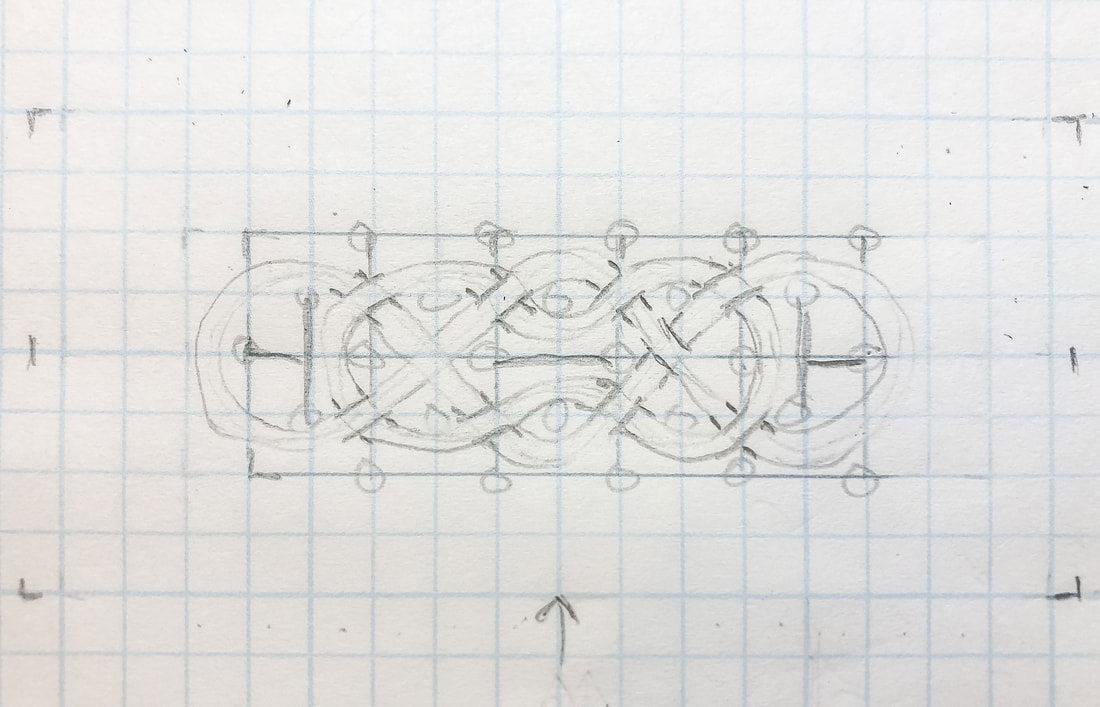 The double lines have been drawn and the single line erased to create the thread, overs, and unders. Photo by Diane M. Lilly, 2022. Now it is time to work through the “overs” and “unders”… Pick a starting junction and decide which thread will go under and which will go over, creating what some call a “bridge and tunnel” or the beginnings of a weave. Erase the lines accordingly and work through the design by following that thread, alternating over and under. DO NOT JUMP AROUND! Stay with that thread until you come back to your starting point. Work through any additional threads, double-checking that your overs and unders alternate. Once satisfied with your overs and unders, clean up the drawing and add stylistic details. 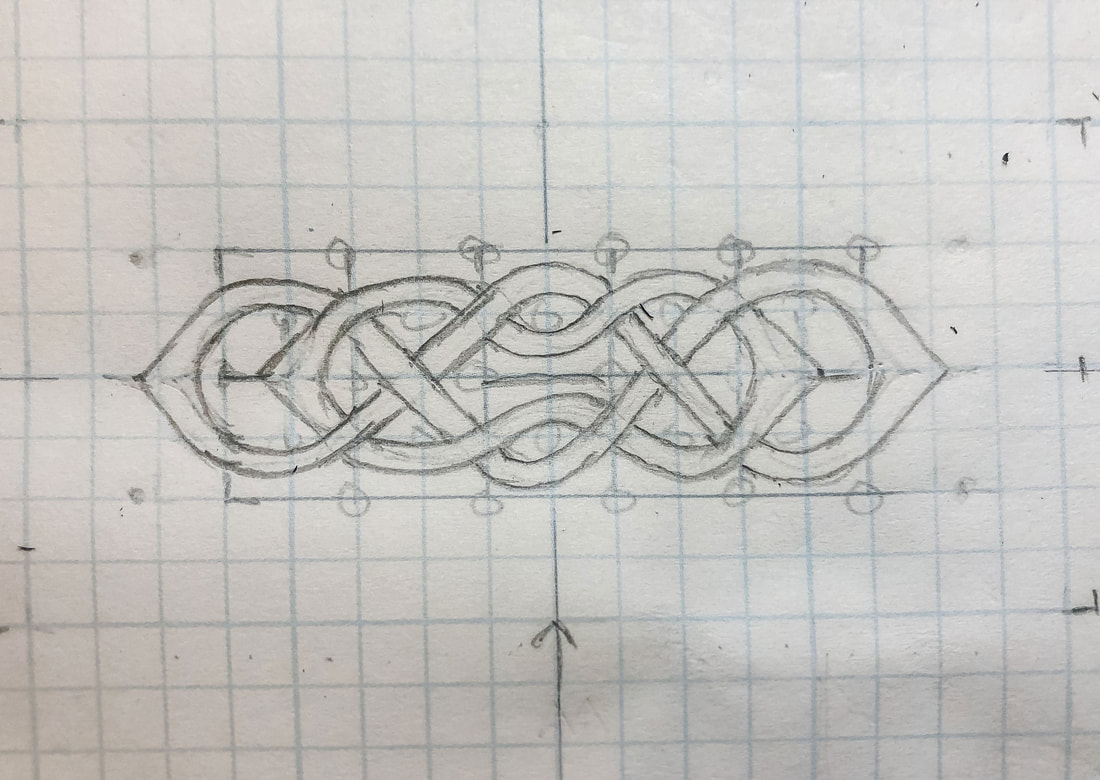 My basic thread knot has been stylized by adding points at the end. Photo by Diane M. Lilly, 2022. 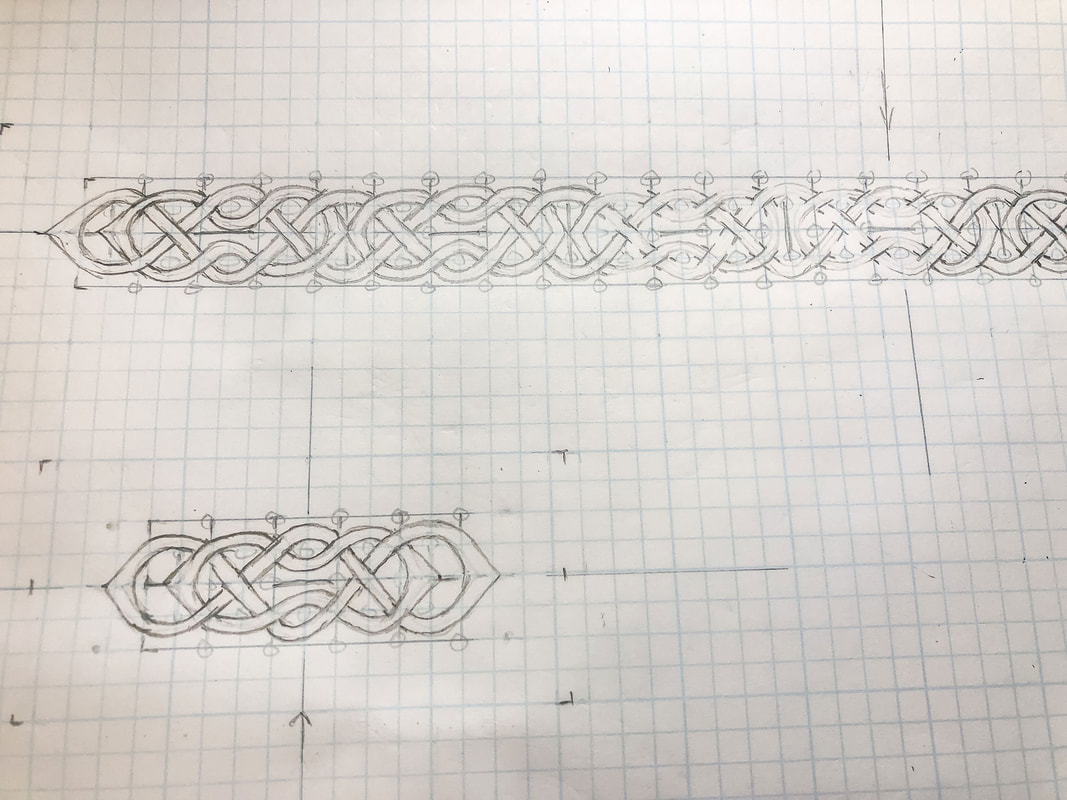 The small knot and a section of the large knot. Photo by Diane M. Lilly, 2022. Step 5—Create the template using tracing paper The new design can now be traced onto tracing paper to create the template. There are many techniques for creating templates--I am just sharing one that has worked well for me. Place a sheet of tracing paper over your drawing and securely tape it in place so it doesn’t move or bubble. Carefully trace your design lines with a pencil using fairly hard pressure. Mark the edges of your template (using a straight edge) and indicate the midlines on all four sides.  My knotwork redrawn on tracing paper for a template. Photo by Diane M. Lilly, 2022. Carefully cut out the templates along the edges. You should now have two templates with your new knotwork borders that perfectly fit your working space on your project. For my project, one template measured 16” x 2” and the other 4 1/2” x 2”. 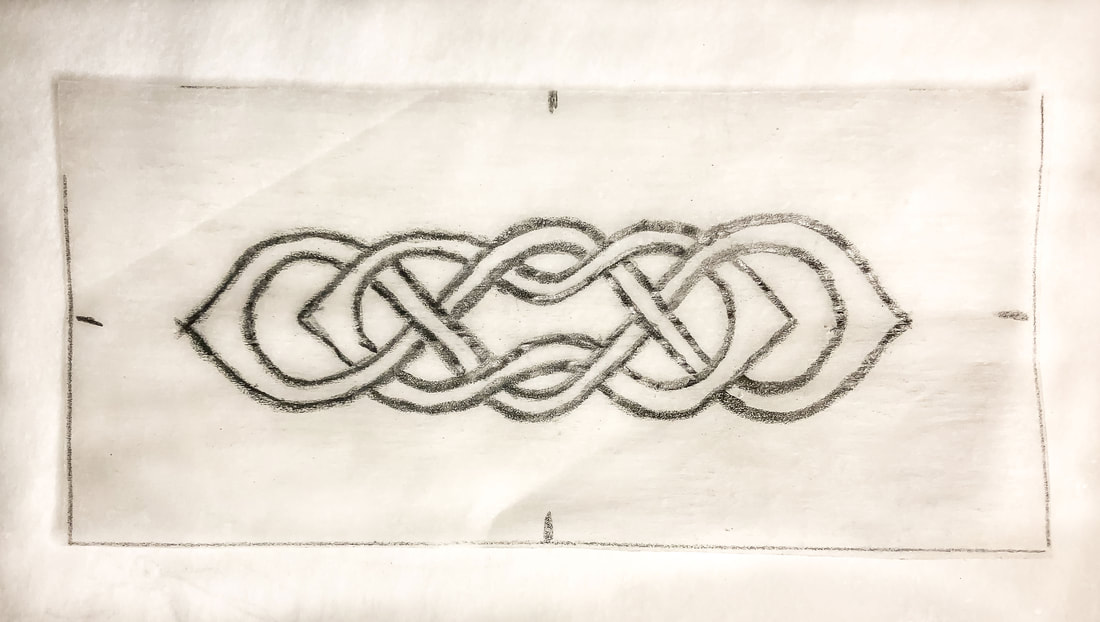 The small knot cut out as a template. Photo by Diane M. Lilly, 2022. Step 6—Trace the design onto the tray Turn the template pencil side down and securely tape it into a place where you want your design, carefully lining up the edges and midpoints for each of the four sides. Trace the lines with a pencil. Use enough pressure to transfer the pencil marks onto your workspace. If you’re unsure if you’re using enough pressure, remove a bit of tape (carefully) and check to see if you can see the design on the tray. Repeat this step on all four sides of the tray. 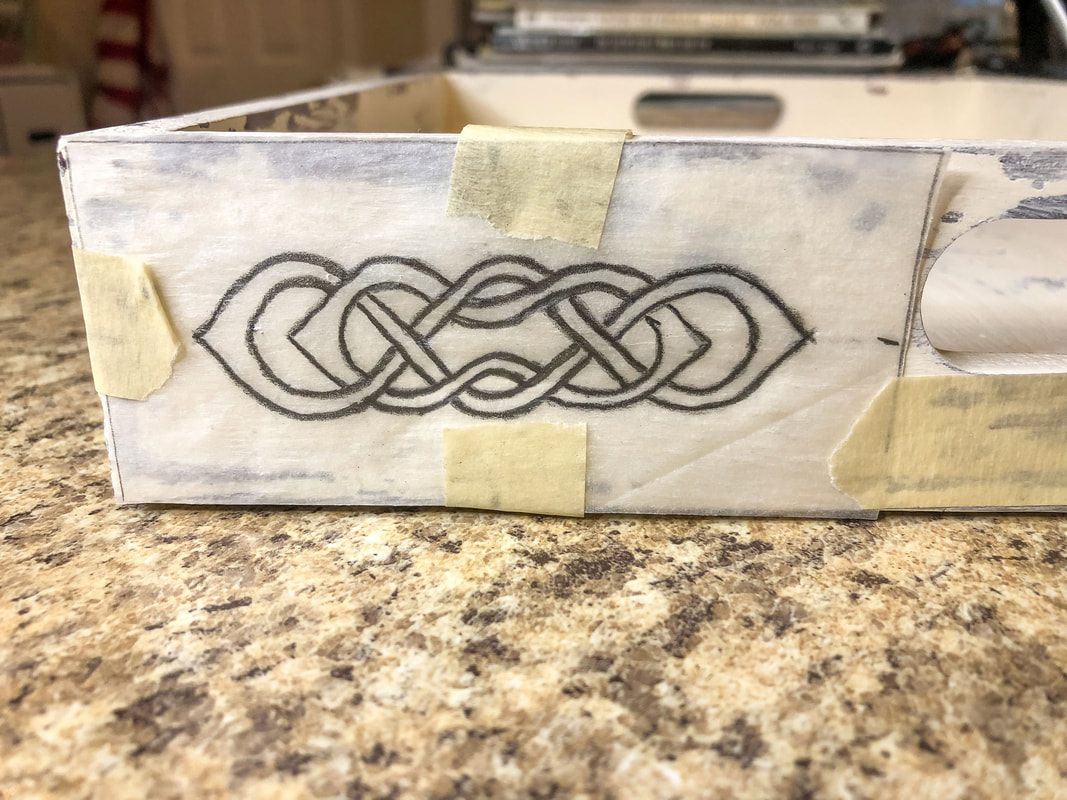 The small knot template taped onto the tray. Photo by Diane M. Lilly, 2022. 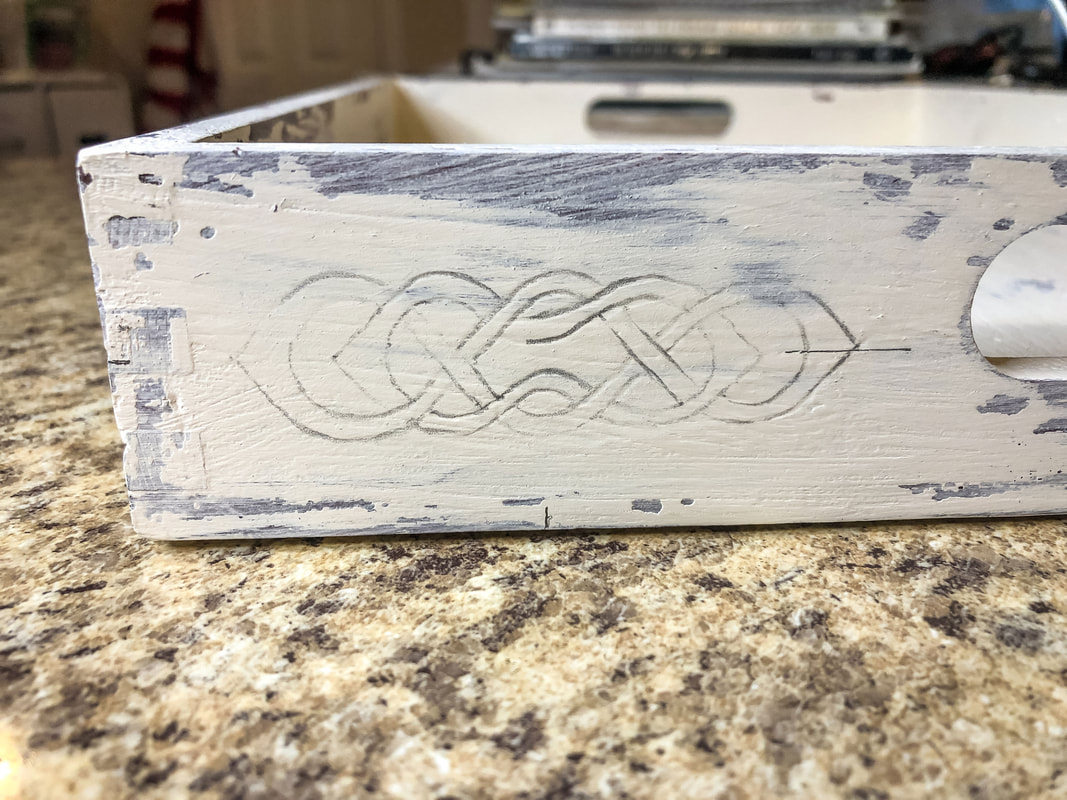 The small knot traced onto the tray. Photo by Diane M. Lilly, 2022. 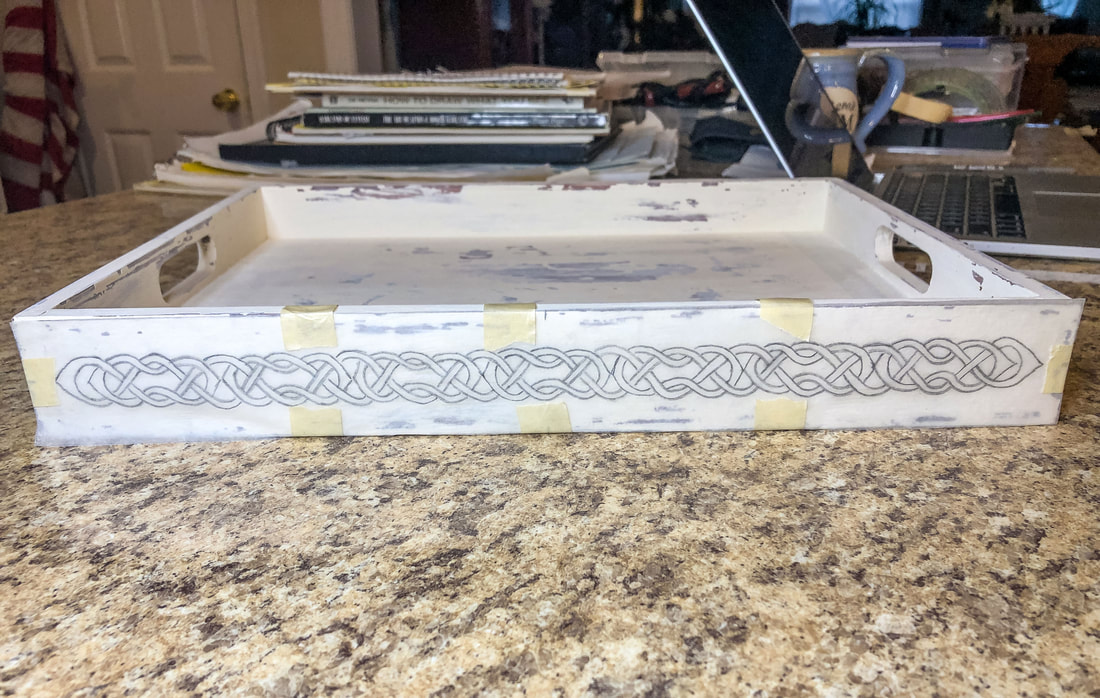 The large knotwork border template taped into place. Photo by Diane M. Lilly, 2022. 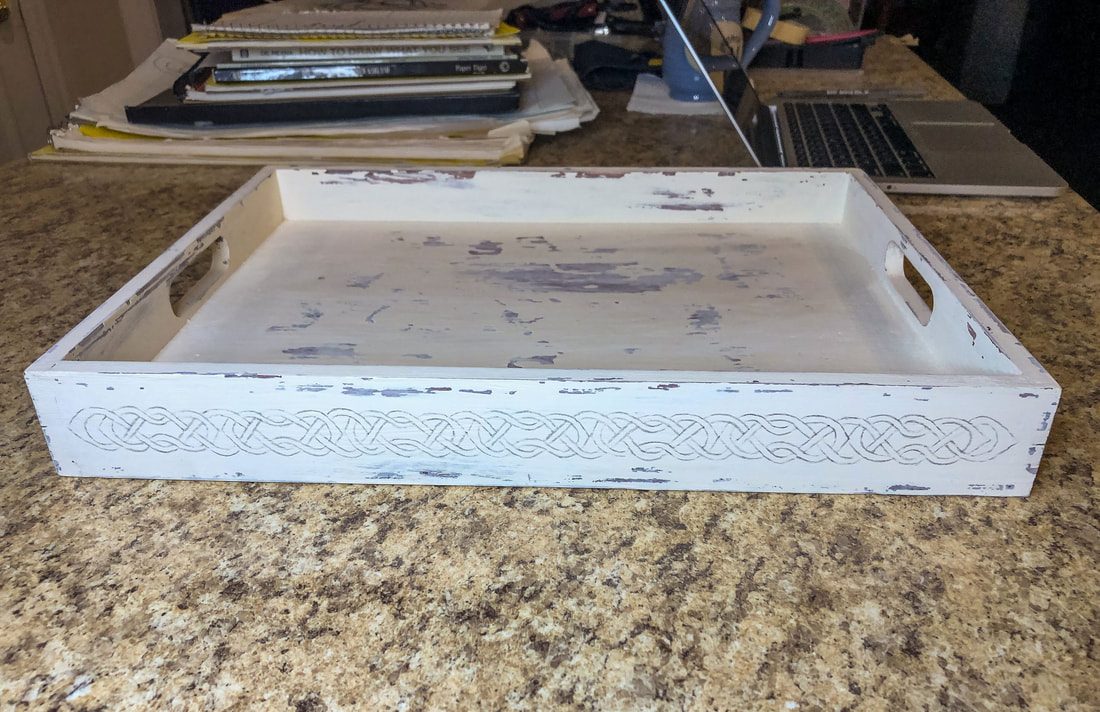 The large knotwork border traced onto the tray. Photo by Diane M. Lilly, 2022. Step 7—Paint the design Choose a paint color and a small paintbrush with pointy bristles, and start painting your design! This may require two to three coats, depending on the desired look. 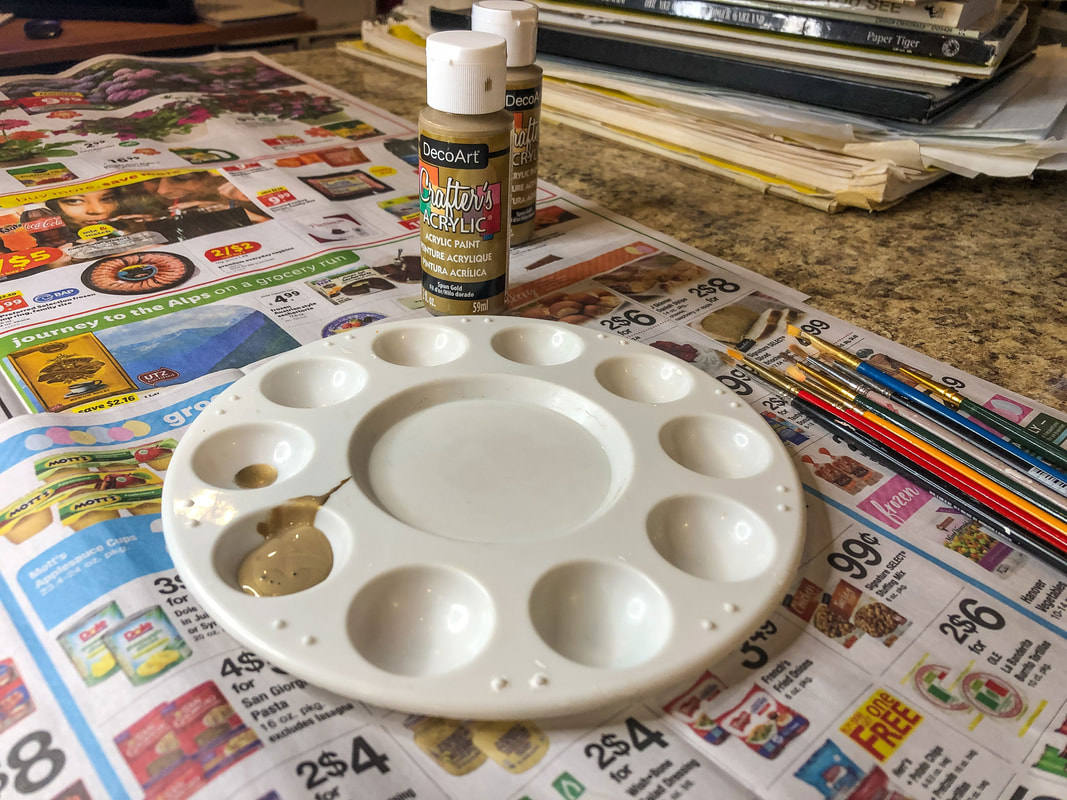 Gold craft paint. Photo by Diane M. Lilly, 2022. If you do not have a steady hand--or do not have the patience for hand painting--try using paint pens instead. For this project, I suffered through it and used the paint and brush technique, but I also purchased some gold paint pens from Amazon for another project and found the process much easier. The technique you use for this project is completely up to you. In part one of this project, the tray was painted to look used and battered, and I was satisfied with the results. Once the knotwork was finished, however, I decided the tray still needed more work. So, I took some 220 grit sandpaper and did a bit more sanding to get the final weathered effect. 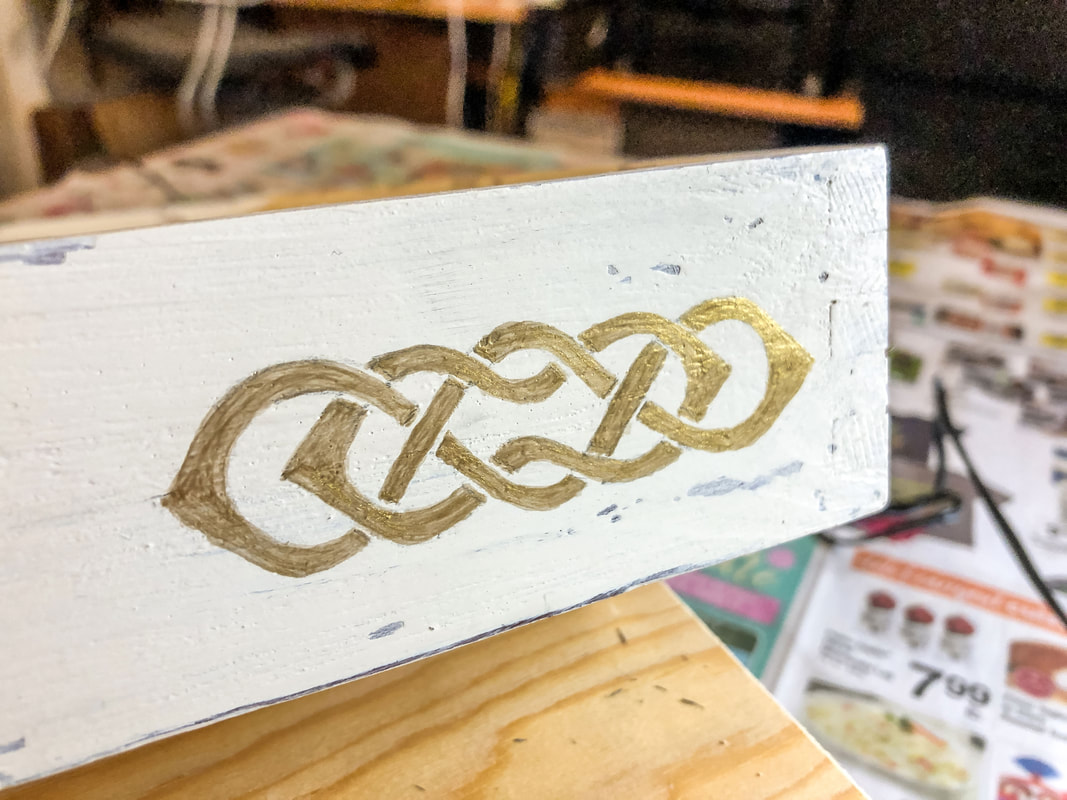 The small knot painted on tray in gold. Photo by Diane M. Lilly, 2022. 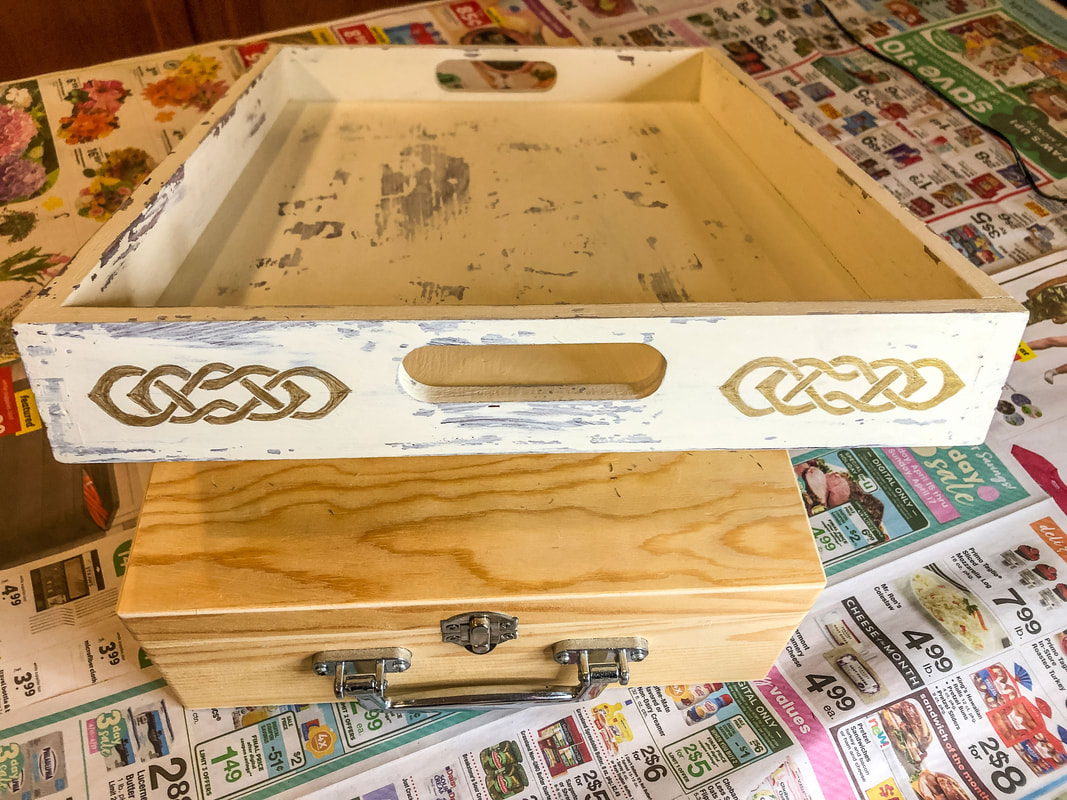 Knots painted on short end of tray. Photo by Diane M. Lilly, 2022.  The long end of the tray being painted with a gold knotwork pattern. Photo by Diane M. Lilly, 2022. 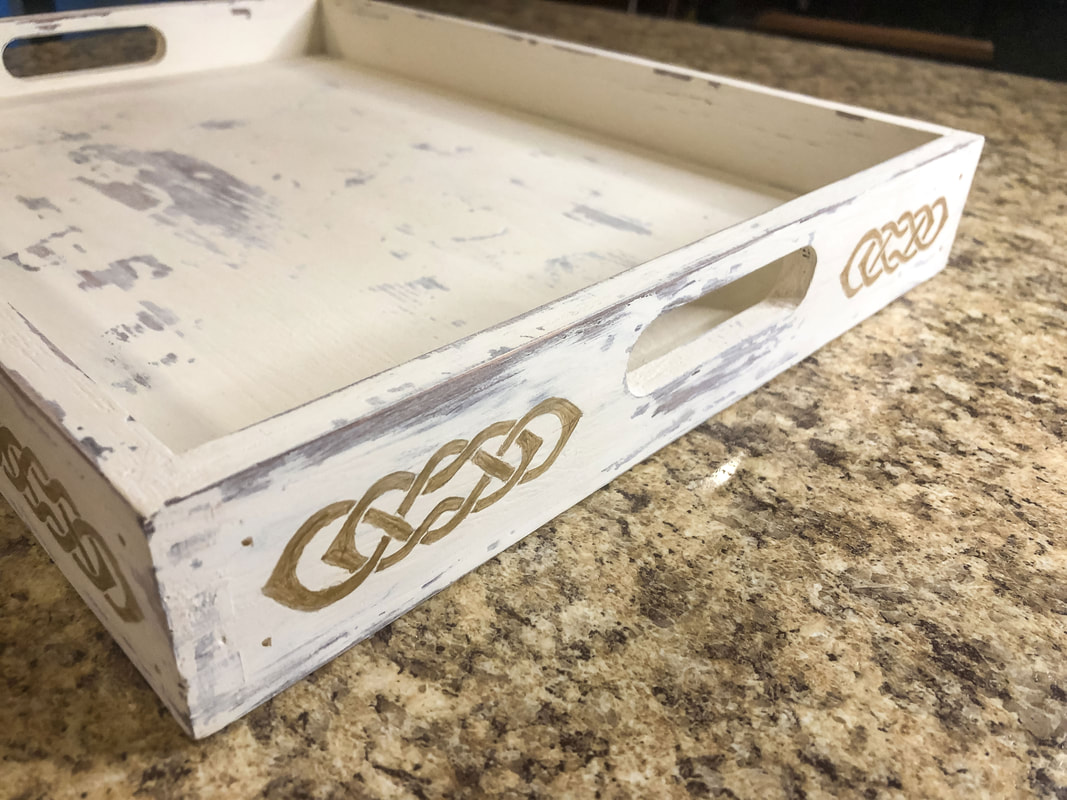 Celtic borders finished and more sanding done to tray. Photo by Diane M. Lilly, 2022. 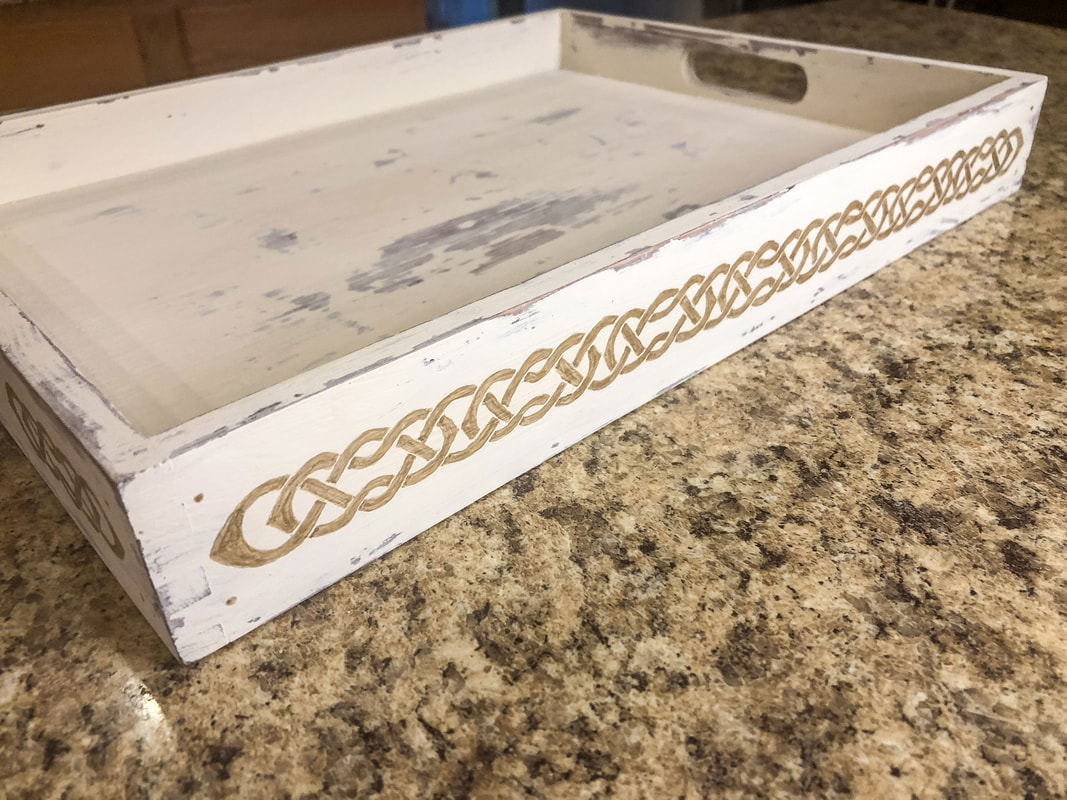 The long side of the tray with its new Celtic knotwork border. Photo by Diane M. Lilly, 2022. Step 8—Varnish to protect the paint (optional) This step is optional, but it can be a good way of protecting all your hard work! I’ve decided not to varnish my tray, at least for now. Usually, when I do a project like this, I add soft pads to the bottom to protect surfaces, but I may decide to make alterations or additions to this tray, so for now, I will forego the pads and varnish until later. So there you have it! The Celtic border knot was WAY more work than planned for this project, but I’m glad I did it. I love that I now have another decorative piece with beautiful Celtic art on it--Celtic art I drew and painted myself! This tray was a lot of work, but I love the rustic, charming look. 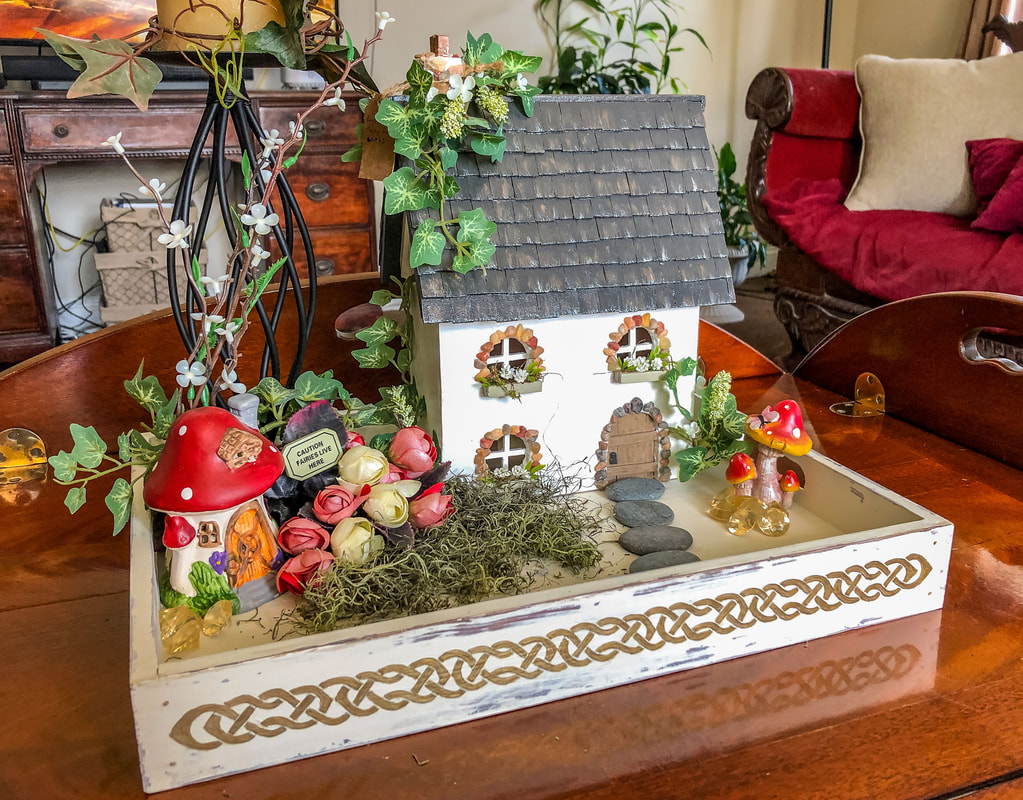 My tray is finished and staged with one of my new Celtic fairy houses. Photo by Diane M. Lilly, 2022. 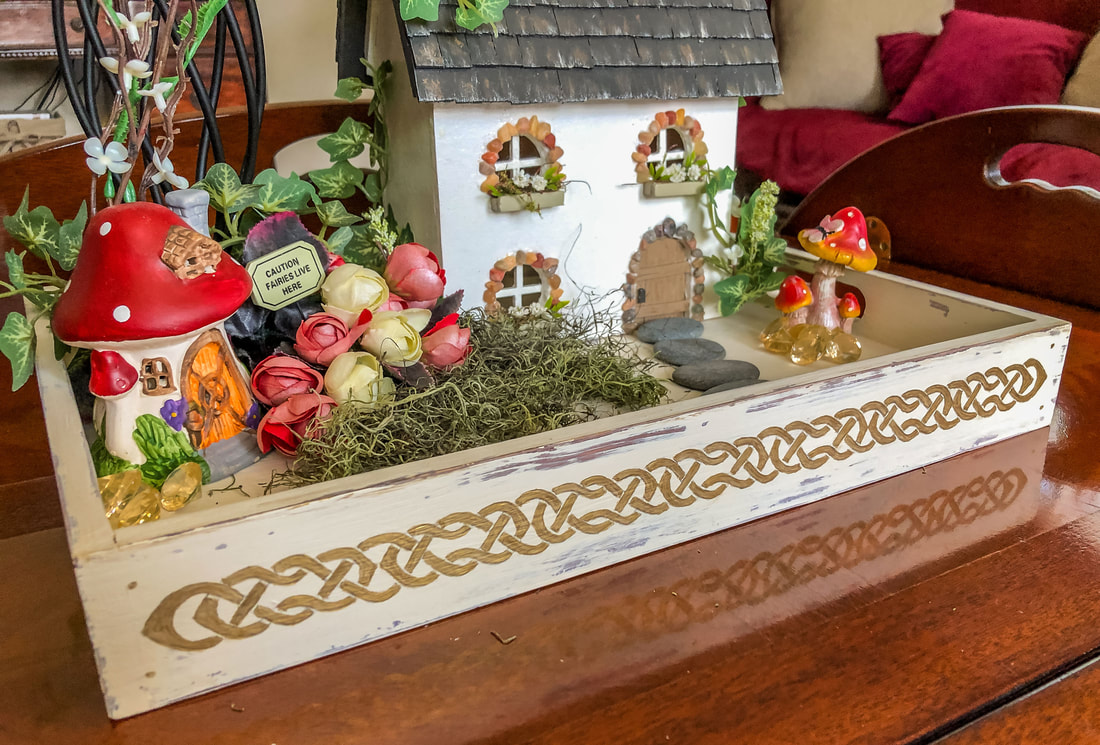 A look at the long side of the tray. Photo by Diane M. Lilly, 2022. 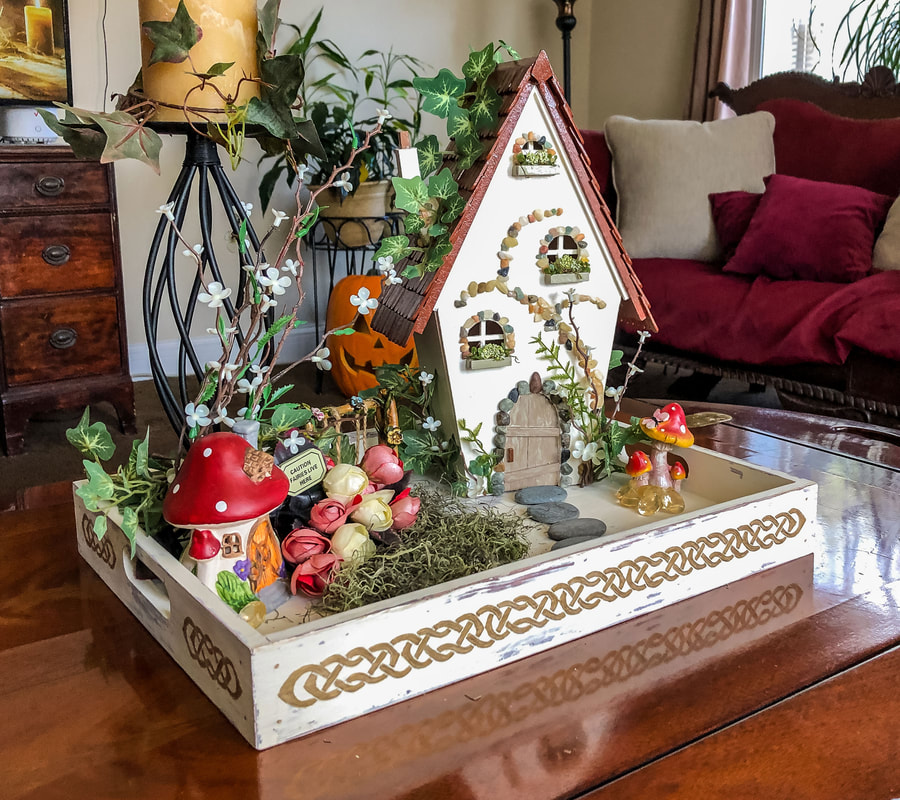 My Celtic inspired diy tray staged with the new Fairy House cottage. Photo by Diane M. Lilly, 2022. 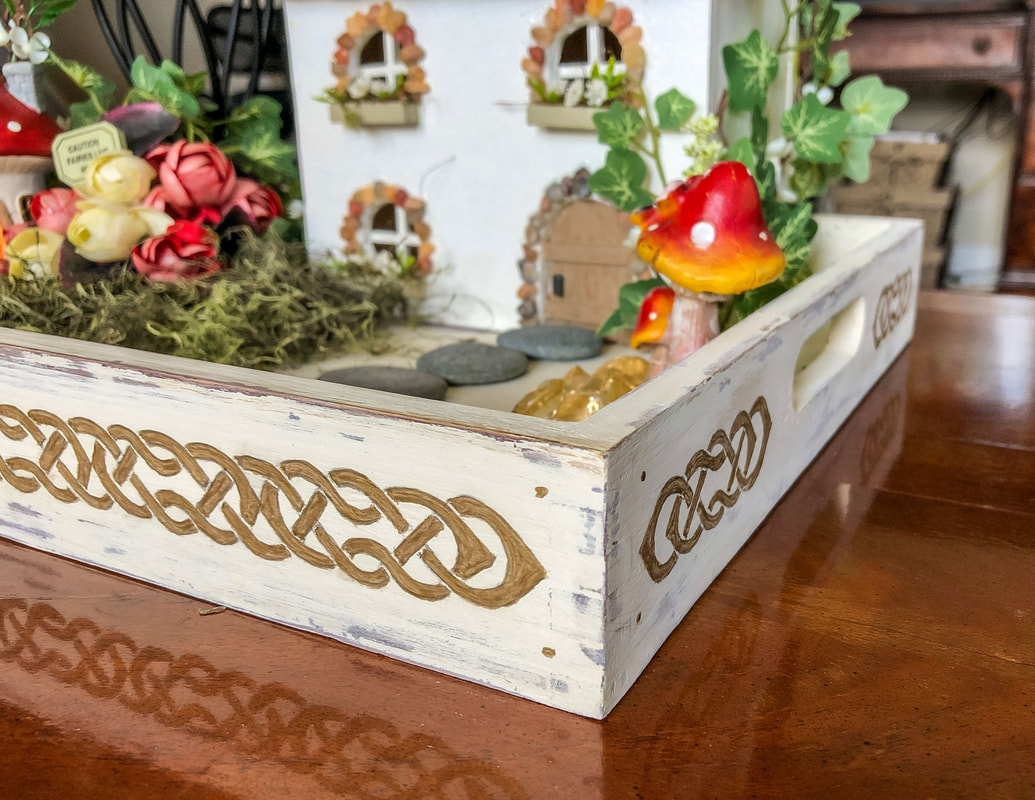 Closeup of the tray corner with views to both sides and Cletic knot borders. Photo by Diane M. Lilly, 2022. I know this was a complex project to throw out there, and the thought occurred to me that people might want to learn how to draw this kind of intricate artwork, so I have decided to start work creating and compiling downloadable ebooks with tutorials on how to construct Celtic knots. I’m unsure when they will be available, but sign up for periodic emails for updates on these ebooks and other projects. Let me know in the comments if you've done anything similar and what you think of this project! Related blogs you may want to read: DIY chalk painted tray with chippy effect A little project with jute twine and an old foot stool DIY refurbishment of a dining room cabinet A fun DIY project with paint and a thrifted mirror part 1 A fun DIY project with paint and a thrifted mirror part 2 Creating a kitchen coffee bar On a mission to recycle this neglected vintage stool The stain stripping stage of rescuing my vintage stool Staining my vintage stool with brewed tea My tattered vintage stool transformed into a beautiful plant stand Homemade candle recipe with a eucalyptus fragrance Homemade candle recipe with a hazelnut fragrance Affiliate Disclosure Some of the posts in this article contain affiliate links. This means if you click on the link and purchase the item, I will receive an affiliate commission at no extra cost to you. I will only recommend products or services I use personally and/or believe will add value to my readers, so there is no conflict of interest.
0 Comments
Leave a Reply. |

Author
Some of the posts on this site contain affiliate links. This means if you click on the link and purchase the item, I will receive an affiliate commission. 
Categories
All
Archives
October 2025
|
 RSS Feed
|
|
Major credit cards accepted through Square. Apple Pay option available. This site also accepts PayPal payments for better online security, and it's free to sign up! Gift cards are now available for purchase!
Copyright 2025 |