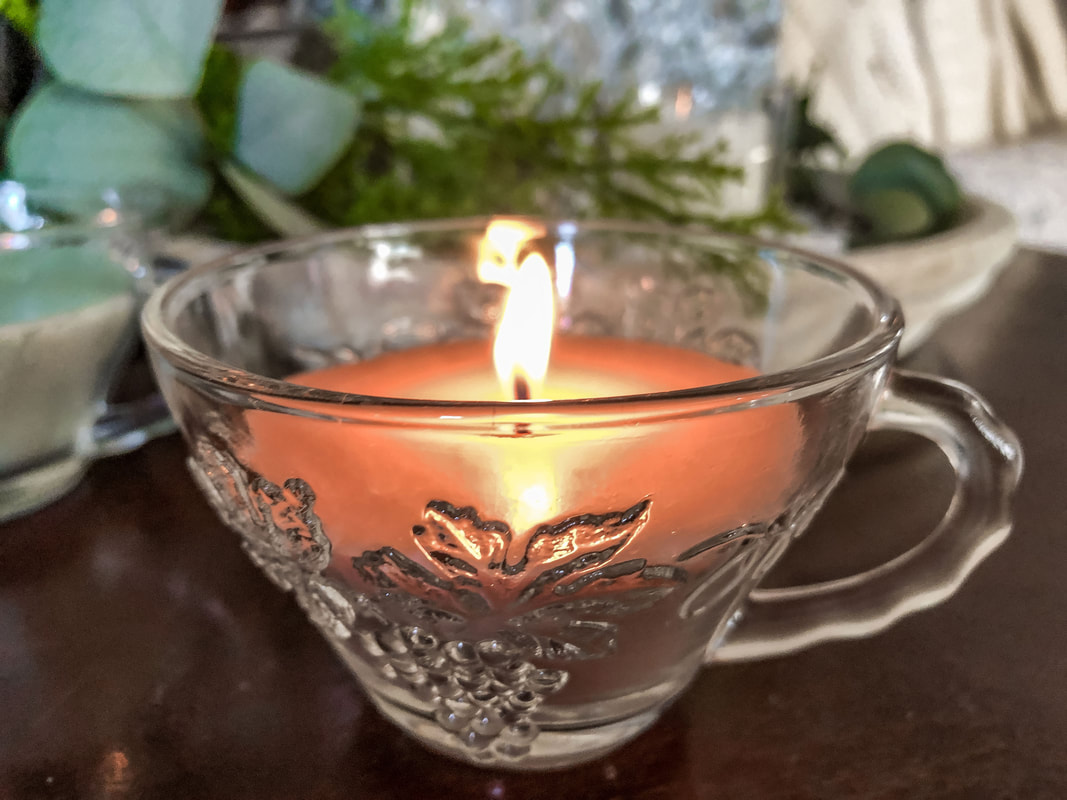
 Burning a homemade candle with hazelnut fragrance. Photo by Diane M. Lilly, 2022. It’s cold outside…and I’m on a mission to make the inside of my home feel cozy. If you’ve read any of my recent blogs, you’ll know by now that I am currently embracing a common theme—hygge. Hygge is a Danish concept of finding joy and coziness in your everyday life, and candles are a core part of that life view, especially in winter. And as it turns out…I know how to make my candles! It’s been several years since I’ve made homemade candles, and I’ve been seriously missing the way my whole house used to be filled with beautiful scents for days and days. It’s been so long since I’ve made candles I wasn’t entirely sure I would remember the process, but thankfully, it all came back to me! And—spoiler alert—they turned out amazing! So, for this project, I decided to break the ice with a simply delicious fragrance called Mountain Hazelnut Cafe. I decided to talk you through my process, step by step, so you can follow along and see how homemade candles are made. So here goes… The materials you will need First, you will need a container that is candle-safe. I am using glass tea cups for this project purchased from a local thrift shop. 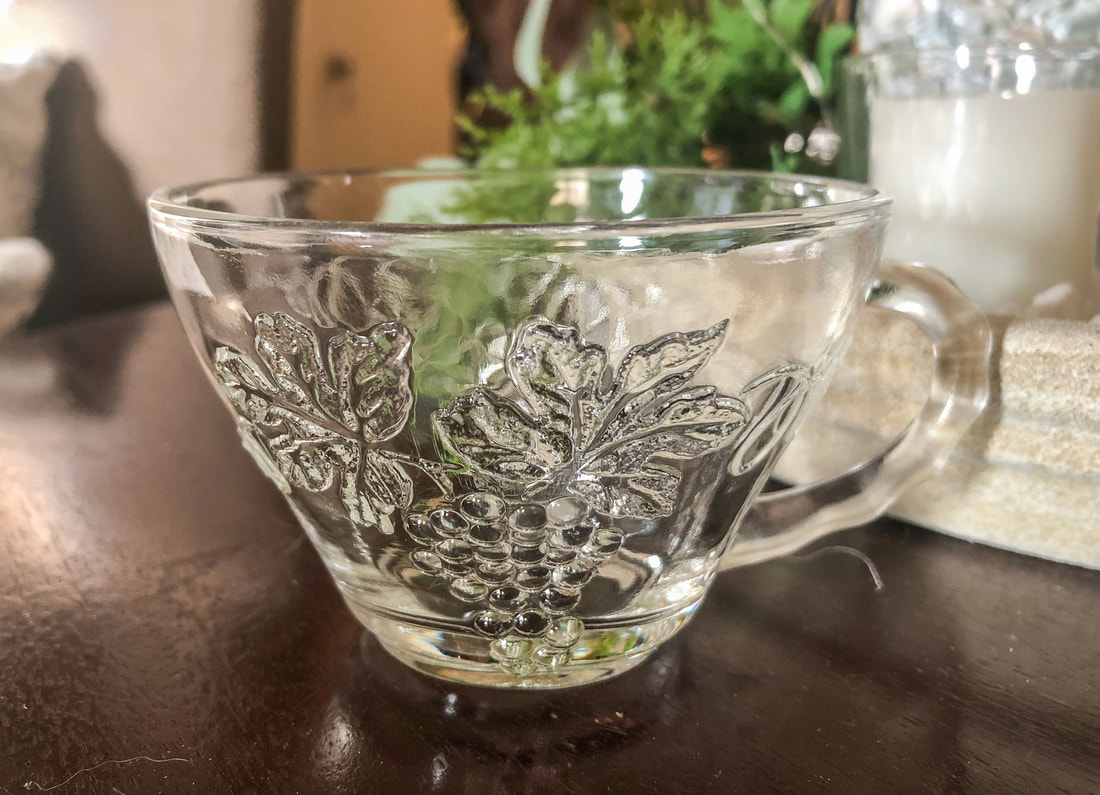 Glass tea cup from a thrift store. Photo by Diane M. Lilly, 2022. You'll also need to purchase candle wax. I use soy wax because it is more environmentally friendly. Candle wax can be bought at places like Michaels, but I purchase most of my candle supplies online from Natures Garden Candles because I love their products. 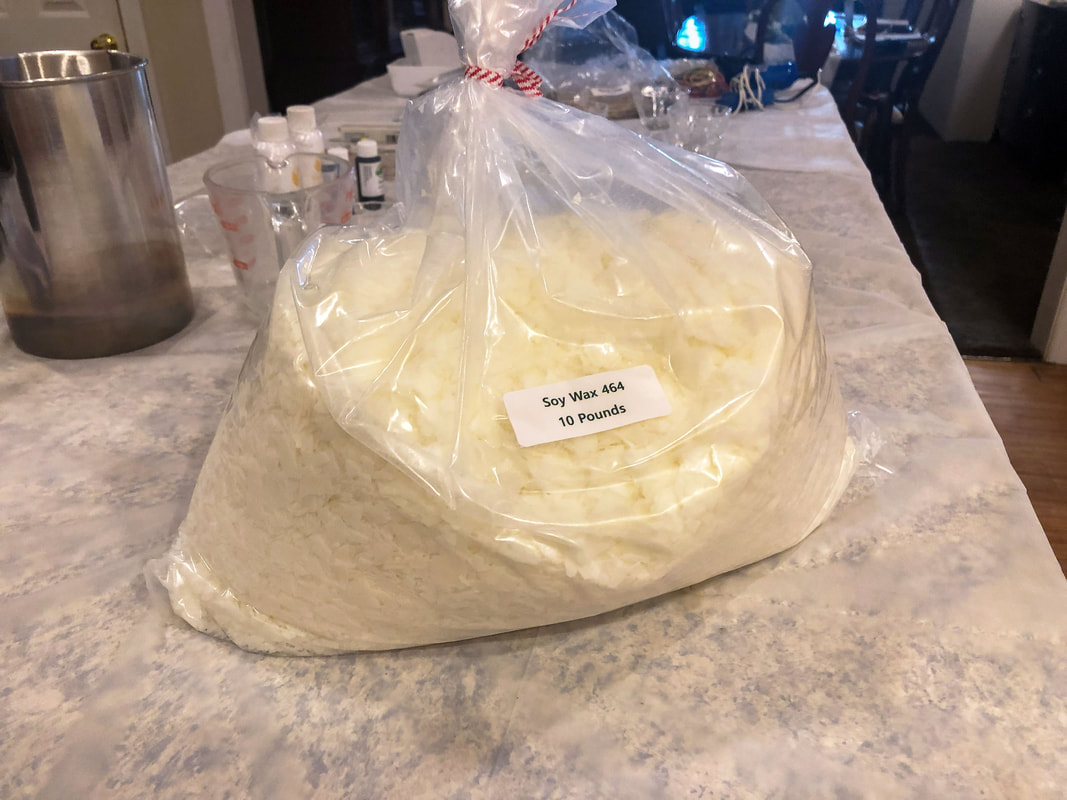 464 wax. Photo by Diane M. Lilly, 2022. You'll need wicks and tabs for a burning candle (as opposed to a wax melt). Michaels sells wicks and tabs, but better quality supplies can be sourced elsewhere. You can buy wicks and tabs separately and assemble them yourself, but I prefer pre-made hemp core wicks with attached tabs from Natures Garden. 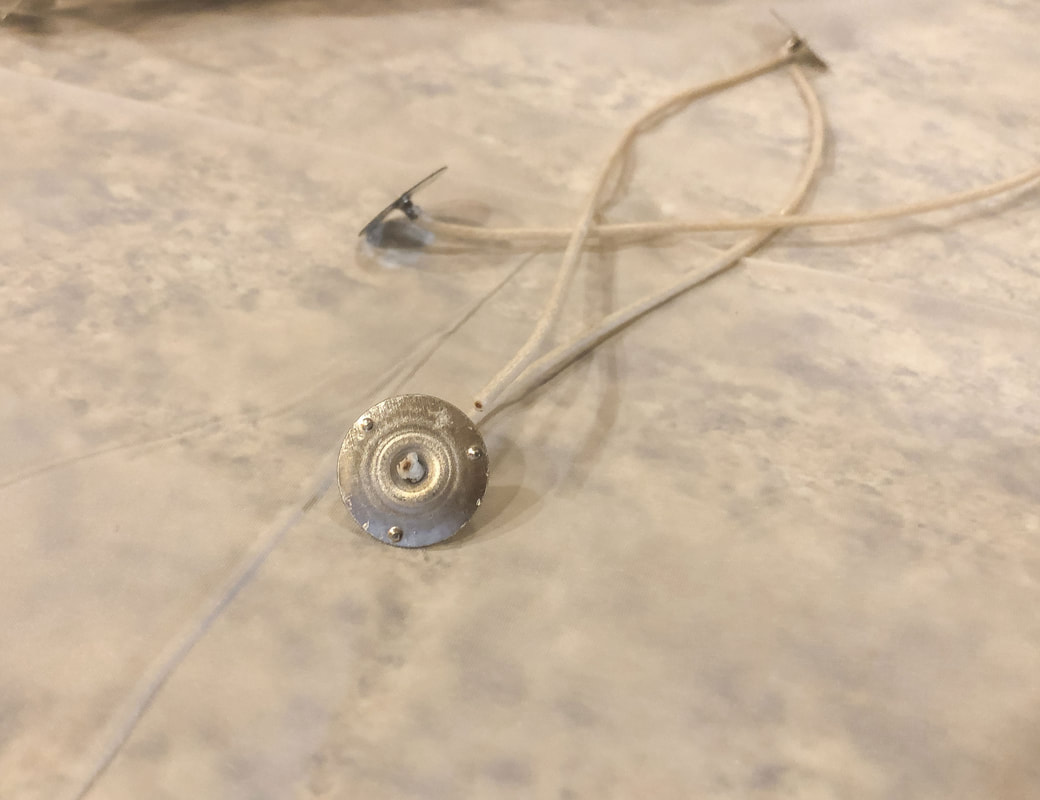 Hemp core wicks. Photo by Diane M. Lilly, 2022. Use fragrance oil and additives specifically for candles. Contrary to what you see on Pinterest, you can't just throw anything into a candle, as it can be a fire hazard. (I learned this the hard way!) 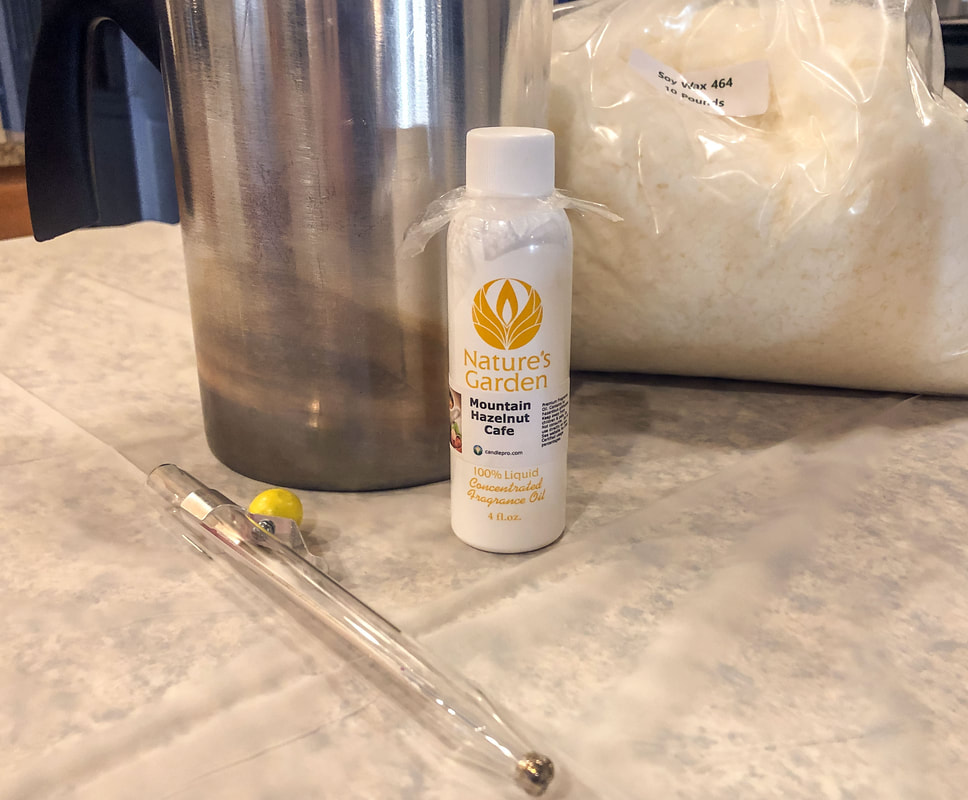 Mountain Hazelnut Cafe Fragrance Oil. Photo by Diane M. Lilly, 2022. 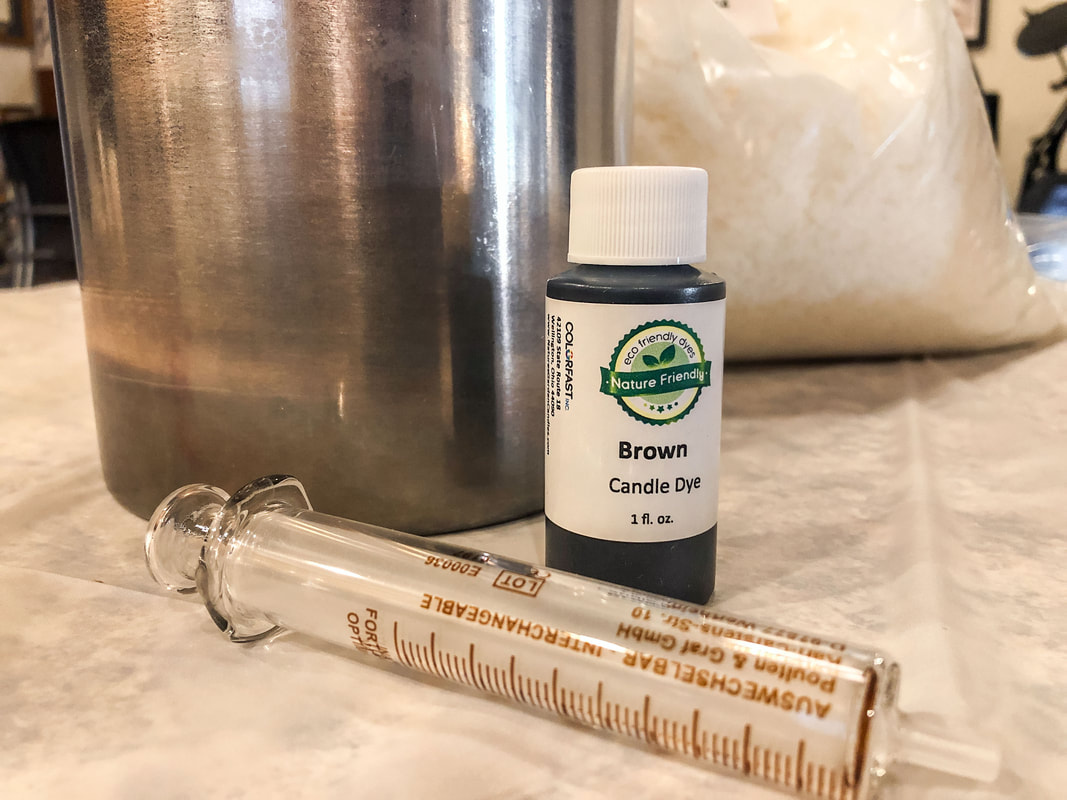 Brown candle dye. Photo by Diane M. Lilly, 2022. Misc. materials needed—Scissors, hot glue gun, syringe (for FO), eye dropper (for dye), candy thermometer, metal pot for hot water, metal pot for cold water, pot for melting wax, stirring sticks, sticks and rubber bands for propping wicks, heat gun or hair dryer, glass bowl or cup to hold FO, paper towels, newspaper, cardboard, plastic tablecloth. 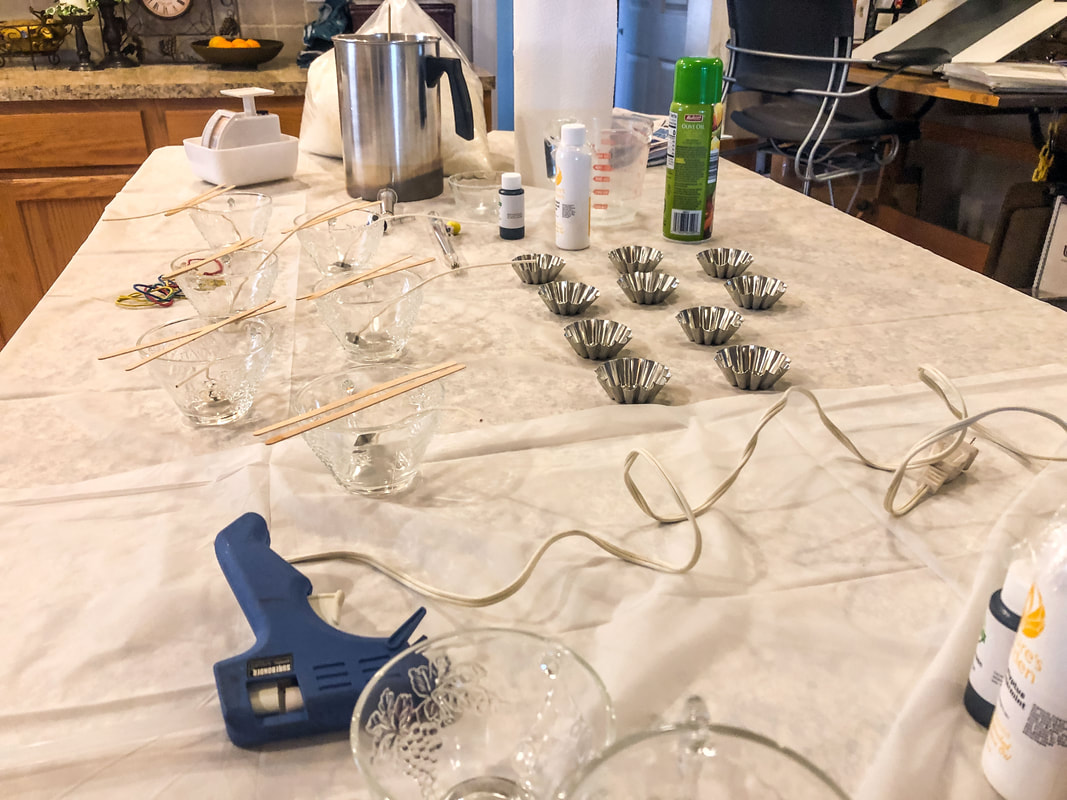 Counter prepped for today's candle making project. Photo by Diane M. Lilly, 2022. Prep your workspace Prep all of the surfaces you will be using for this project! FRAGRANCE OIL IS DIFFICULT TO REMOVE FROM SURFACES, AND CANDLE DYE DOES PERMANENTLY STAIN! Protect your counters and work surfaces with plastic tablecloths, newspaper, and cardboard, and have plenty of paper towels and disposable rags on hand for quick and easy cleanup. Clean any drips or spills immediately with soap and water. Prep your candle containers Start with clean containers that have been washed with soap and water and are at room temperature. Use a hot glue gun to secure wicks to container bottoms. Prop the wicks in place using sticks and rubber bands (or any other technique that works for you). 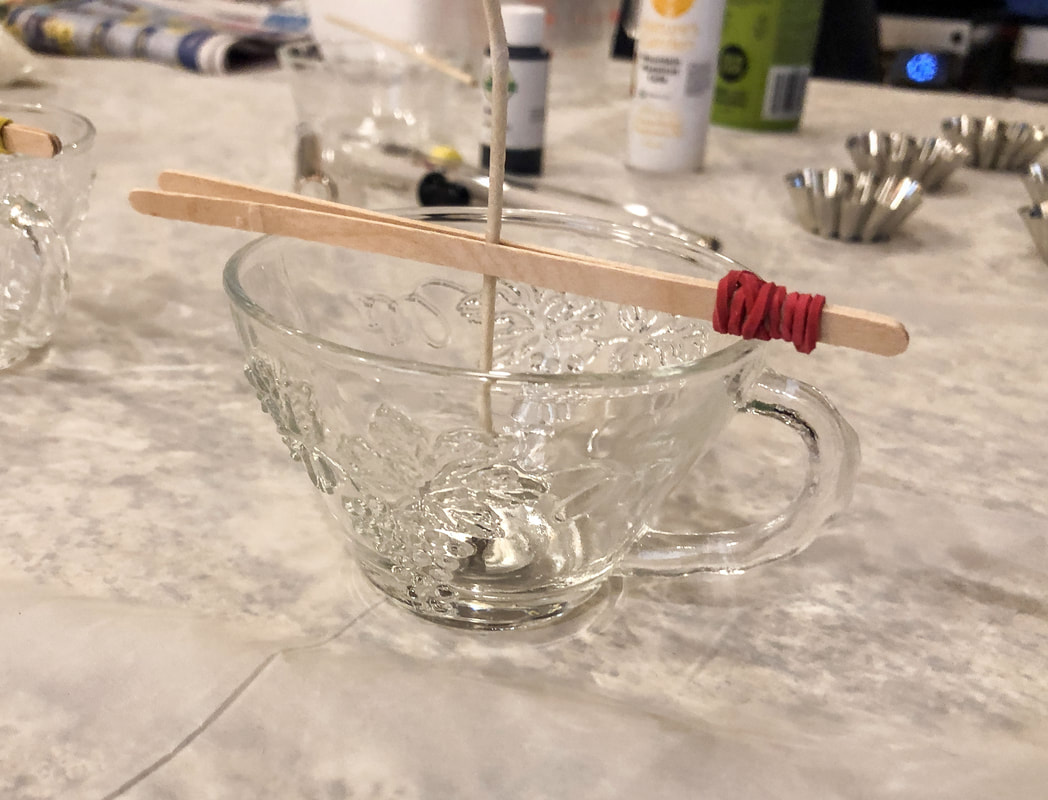 Glass tea cup with wick prepped and propped. Photo by Diane M. Lilly, 2022. About the wax… You can use any desired wax, but I am using 464 soy wax. Each wax (and fragrance oil) has specific temperature criteria, which we’ll talk about in a minute. There are different types of soy wax, but 464 soy sets creamier than, say, 415 soy wax. I used to use 415 but hated the frosting when the candles set. For this project, I used two full measuring cups of dry wax flakes (equal to 1 lb 3 oz). These flakes will melt down to half, or about 18 fl. oz. (The melted wax goes a lot further than it looks!) About the wick… There are many options for candle wicks, and the ones you use will depend on your wax and chosen scent. My wick type is a pre-tabbed 1400 hemp core for use in a 2.5"-3.5" diameter container (my container is 3 1/4” diameter). About the fragrance oil… I used 30 ml (equals 1 fl oz) Mountain Hazelnut Cafe FO for this project. (Always use candle-safe FOs.) This is a strong scent, so I am not exceeding 1 fl. oz. Generally speaking, you should use about 1-1.5 oz of FO (30-40 ml) for each pound of soy wax. The amount of FO you will use for our project will depend on your wax type, the amount of wax used, your candle dye, and the specific properties of your FO. This is not a cut-and-dry process, as each part depends on a combination of factors and often requires trial and error to get it right. Just be careful not to add too much FO due to fire hazards. About the candle dye… My candle dye is Brown Nature Friendly Candle Dye from Natures Garden Candles. I intended to use three drops but accidentally added four or five! But the finished product came out perfect...So, no harm, no foul! The melting process… And now we begin! Fill a large pot halfway with water. Place on the stove. Have a second pot nearby filled with a couple of inches of cold water. Pour your dry wax flakes into your wax melting pot and place this pot right into the large pot on your stove. 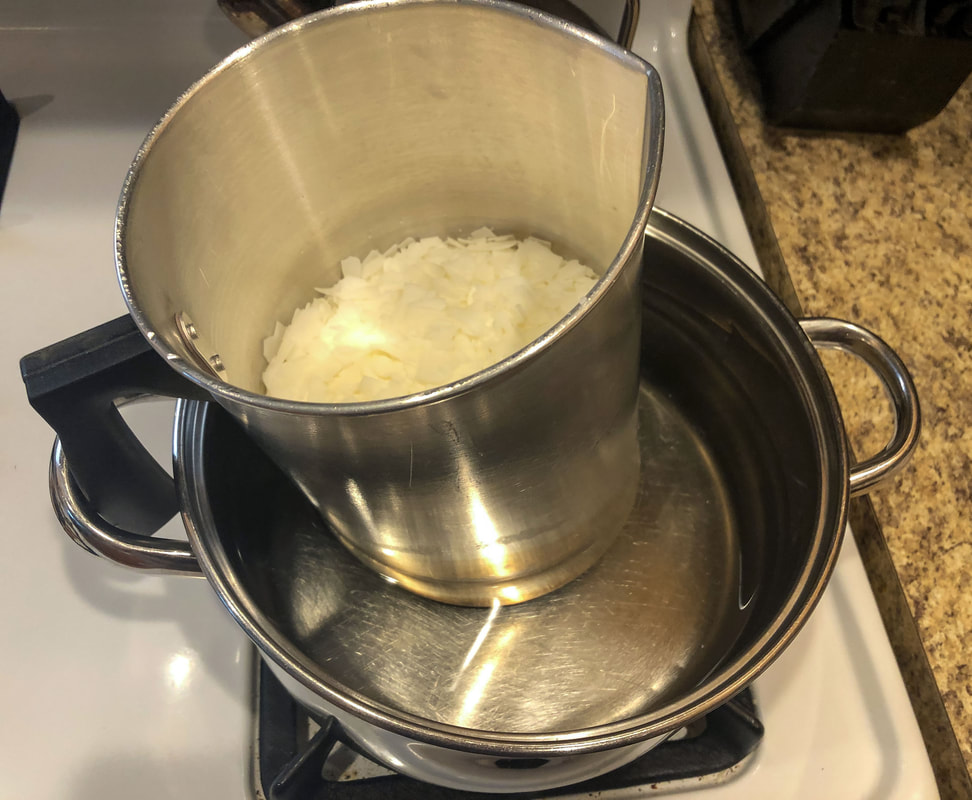 Wax melting pot placed into larger pot partially filled with water. Photo by Diane M. Lilly, 2022. Boil the water until all of the wax melts down to a liquid. 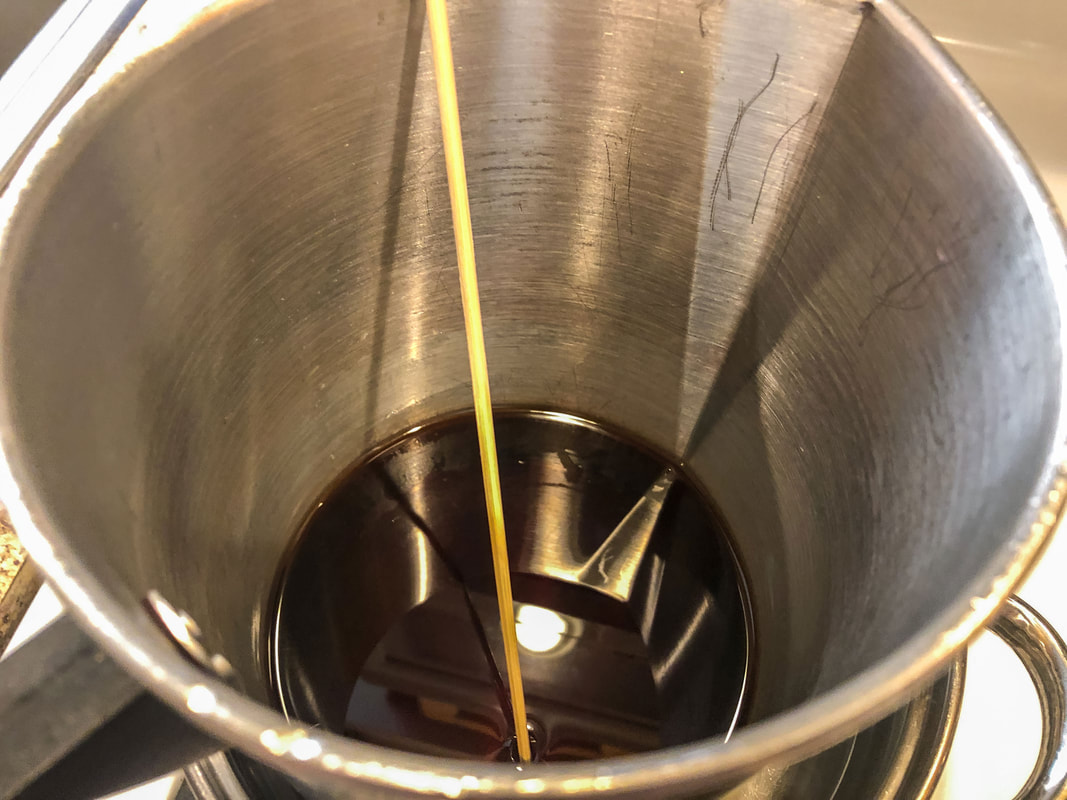 Wax melted down with fragrance oil and colorant added. Photo by Diane M. Lilly, 2022. Use the candy thermometer to monitor the temperature of the melted wax. For this specific wax type and FO, the temperature should reach 185 degrees F. 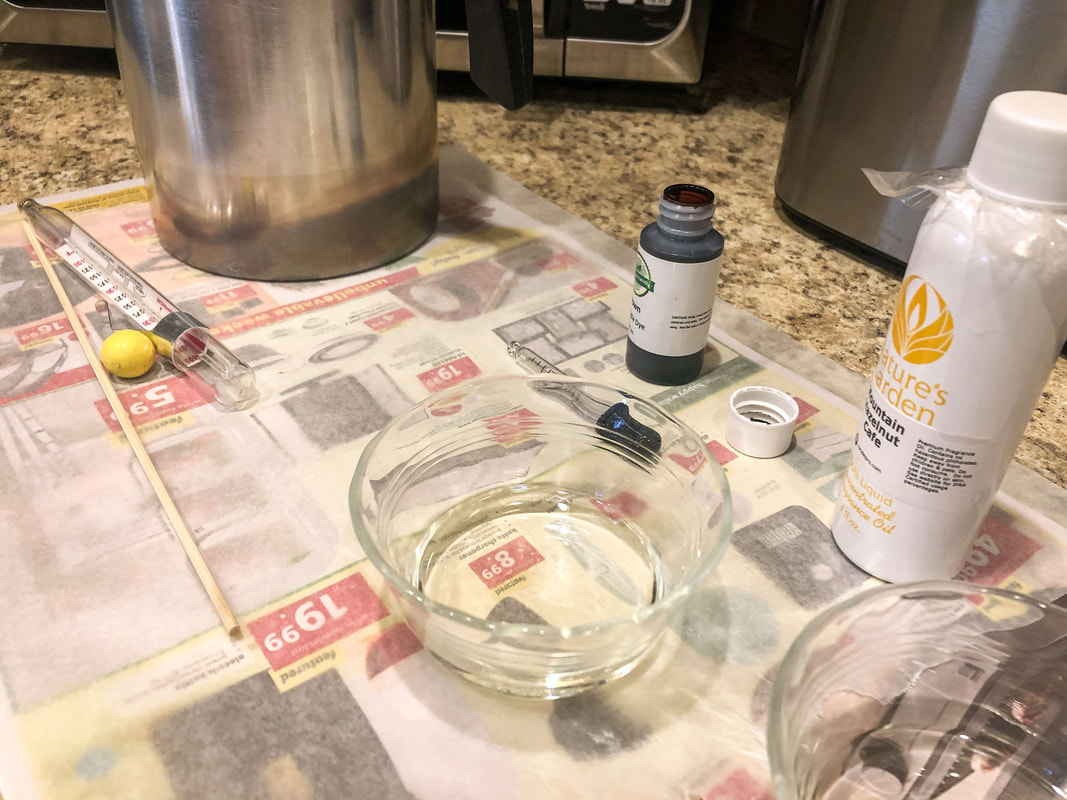 Small glass bowl is handy for measuring out the fragrance oil. Photo by Diane M. Lilly, 2022. NEVER LEAVE MELTING WAX UNATTENDED. Add fragrance oil and mix well, then turn off the burner. You can add the candle dye now and stir well. Let the candle wax cool to 110 degrees F or less—or until slushy—mixing occasionally and monitoring with the thermometer. I use a second pot with cold water (with ice cubes added if necessary) to cool down the wax to an ideal pouring temperature (110 or below, or when it’s like slush) but don’t cool too quickly, or your pouring process may not go well. The pouring process… So take a deep breath and don’t be in a hurry during this step. Pour cooled wax into your containers to the desired height. Pour VERY SLOWLY to prevent cave-ins and air bubbles, keeping an eye on the wicks so they stay centered and don’t move. If the wax starts to set in your pouring pot, quickly dip it into your pot of hot water to remelt and continue pouring. 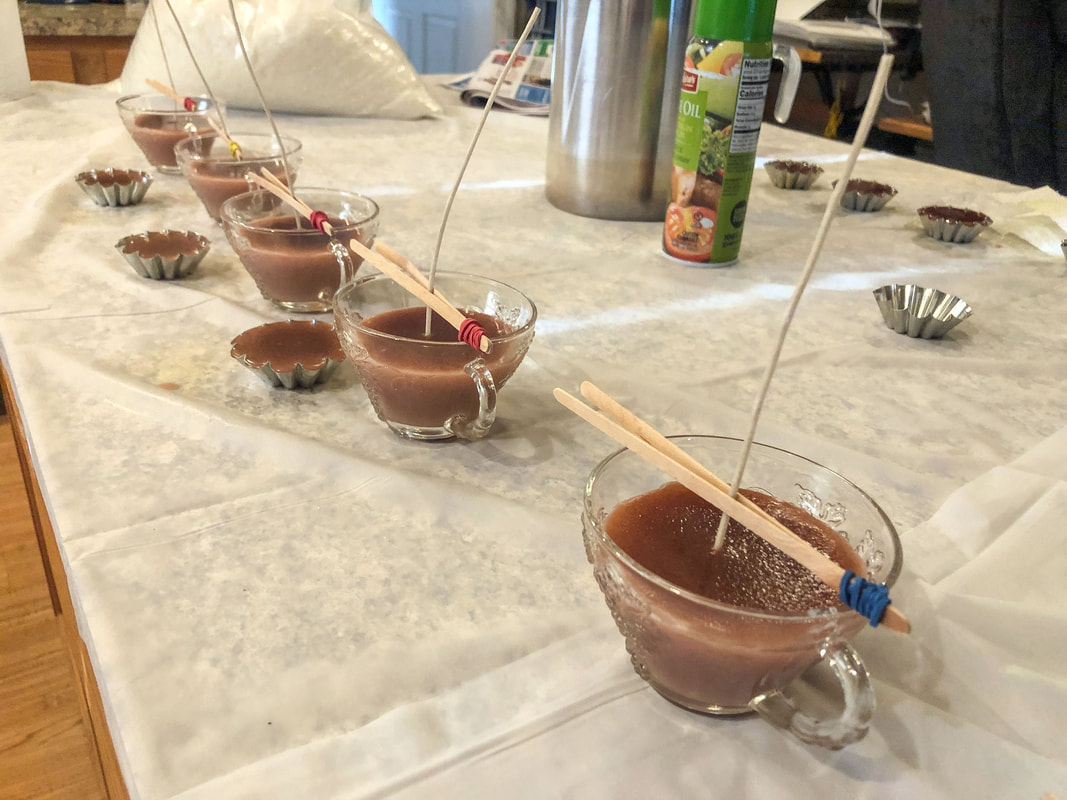 Shortly after pouring, wax is setting and looking good. Photo by Diane M. Lilly, 2022. 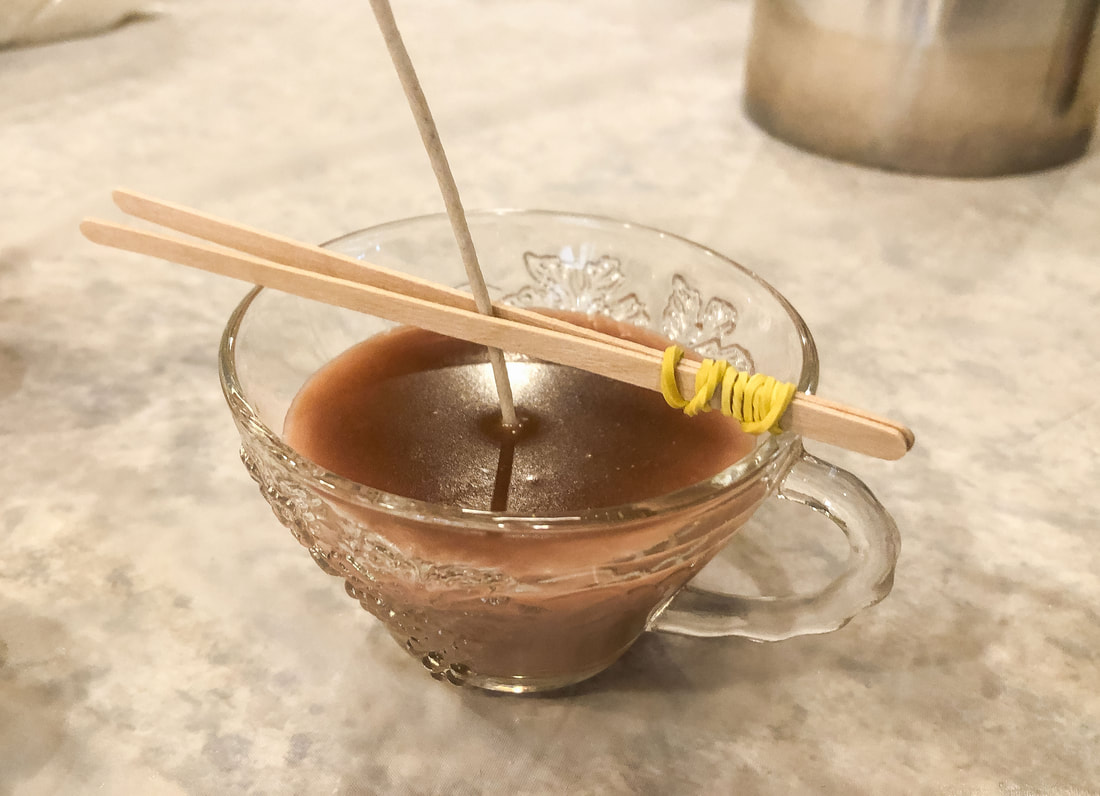 Wax setting in the glass tea cup. Photo by Diane M. Lilly, 2022. I always have a little extra wax after filling my candle containers. This wax gets poured into a few votive holders or wax melt molds sprayed with vegetable oil to prevent sticking. 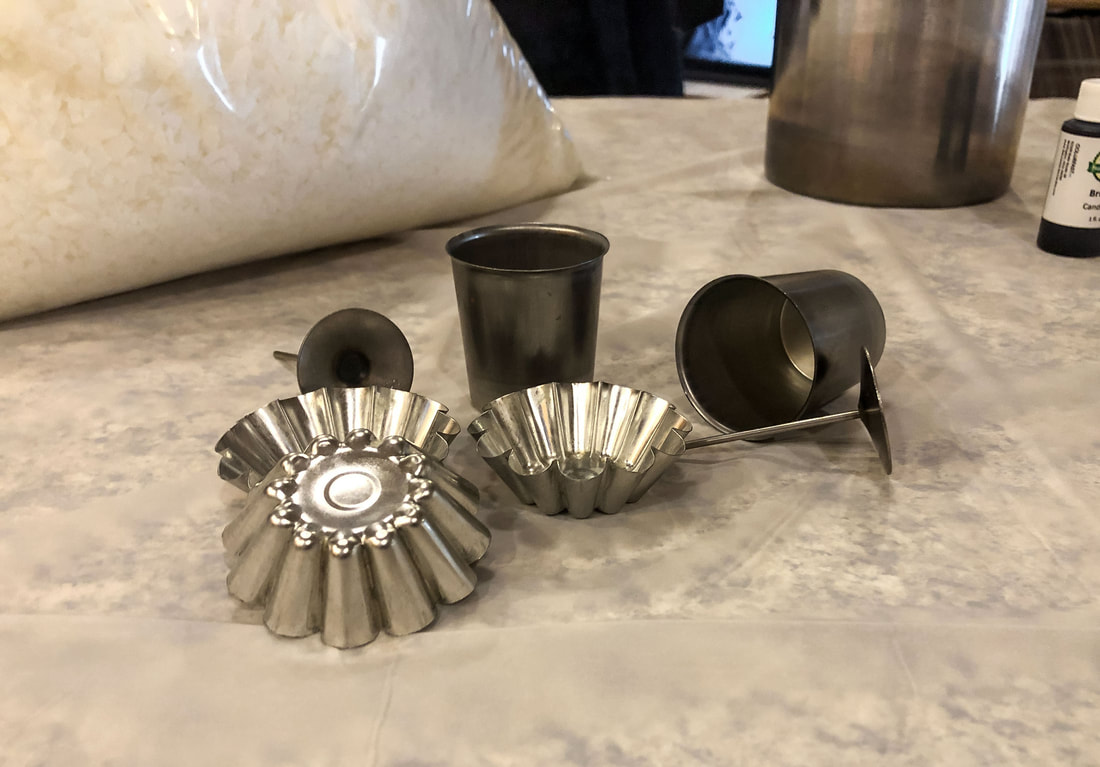 Metal floating candle molds and votive holders for the extra wax. Photo by Diane M. Lilly, 2022. Five tea cups and seven wax melt molds were filled in this project. 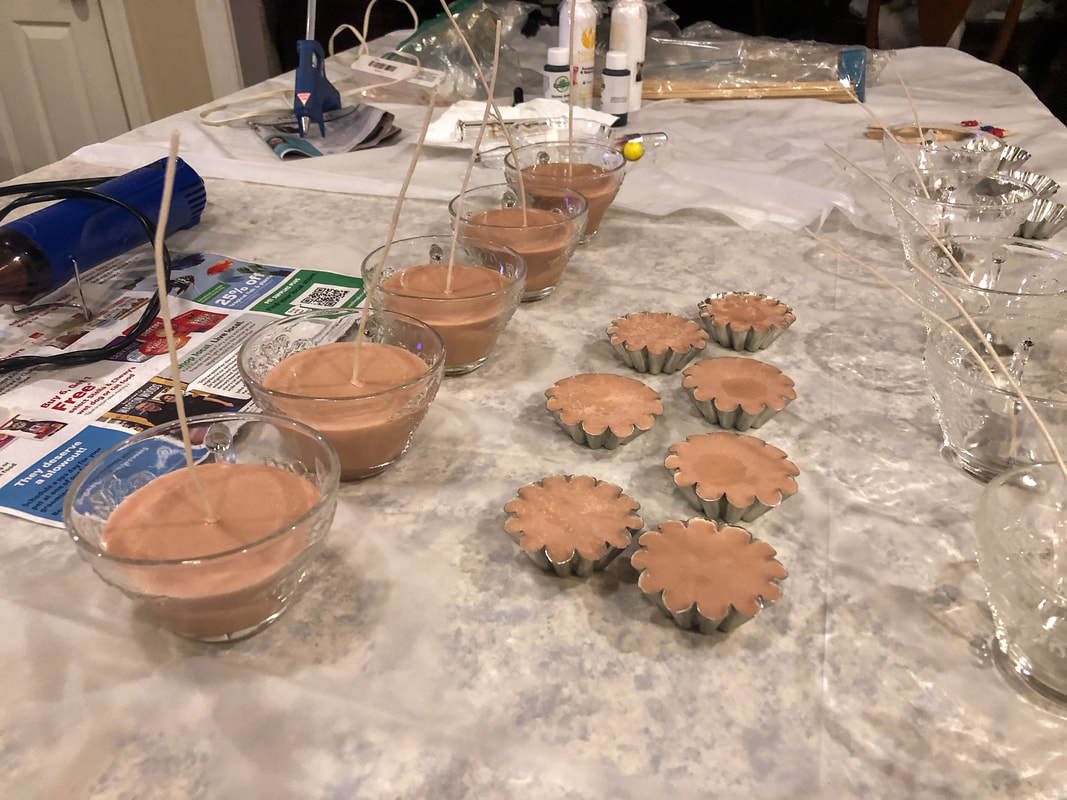 Candles setting about an hour later. Photo by Diane M. Lilly, 2022. If you see holes and cave-ins, you can do a second pour, but a line may show where the second pour began, so it’s always better to do it right the first time! Pour slowly (and at the right temp), and you should be fine. The cooling process and curing It will take a couple of hours for the candles to set enough to be moved, so just let them alone until you see that the candles are pretty much solid, and then you can move them somewhere out of the way to cure for up to a couple of weeks before you burn them. You could try to burn them after 48 hours, but the longer you let them cure, the better they will burn. 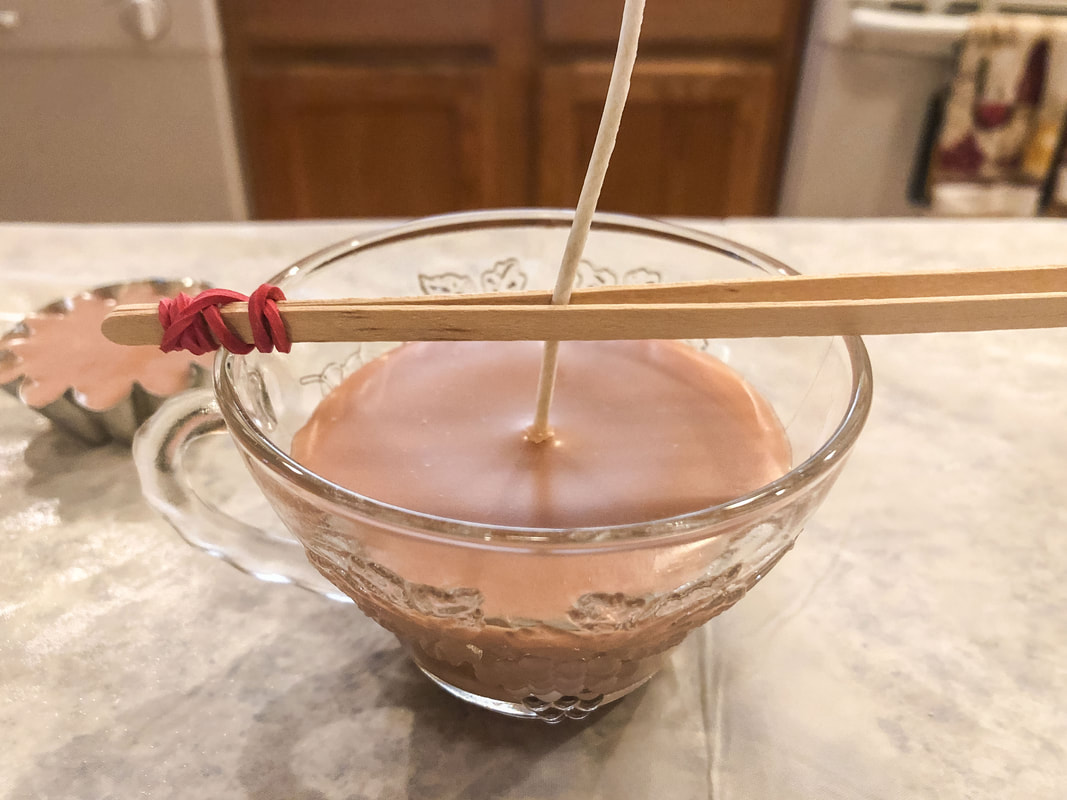 Candle is setting beautifully, with no cave-ins and a nice smooth finish. Photo by Diane M. Lilly, 2022. Once the candles are set well, trim the wicks to 1/4-1/2 inches and clean up any drips around the edges. The cleanup Do not dump wax residue down the drain! Melt the wax (with a hair dryer or heat gun) until it’s manageable enough to wipe off with paper towels or newspaper. Wipe containers until no more wax is on the surface, then rinse in water and towel dry if you like. Wash anything with fragrance oil with soap and water immediately. Use soap and hot water to clean the dropper used for the candle dye. Tip for cleanup…I highly recommend having a hair dryer or heat gun on hand. It is much easier to clean up the wax when it is melted! Final product! So here is my final product… I noticed an issue with adhesion with some of my glass tea cups, where some of the candle looks darker in places through the glass. This is usually because the containers weren’t warm enough when the wax was poured. It doesn’t affect the burn at all, but it messes up the appearance of your pretty candle due to the wax not adhering uniformly. A heat gun can be used to remelt the areas that need more adhesion if the defects bother you. It has been my experience that remelting the wax can sometimes cause frosting and discoloration, so I just left my finished candles alone.  Candle set with a little issue with adhesion to the inside of the glass. Photo by Diane M. Lilly, 2022. 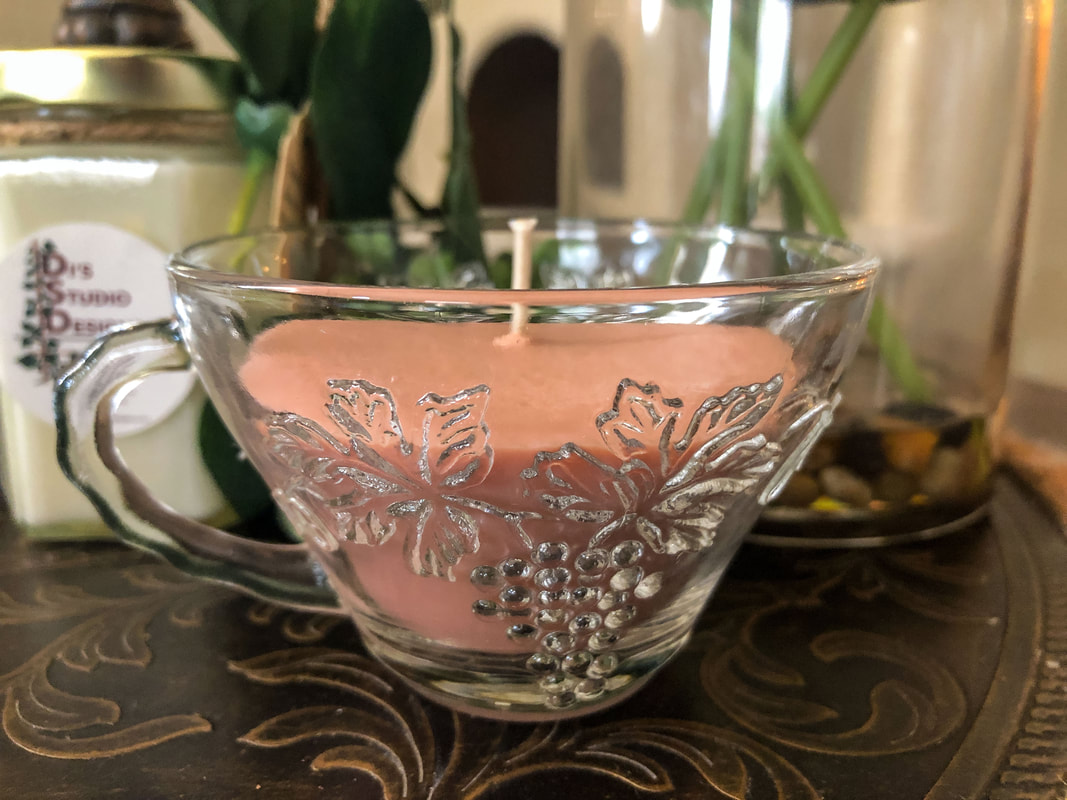 Candle is set, and now waits at least 48 hours to cure. Photo by Diane M. Lilly, 2022. 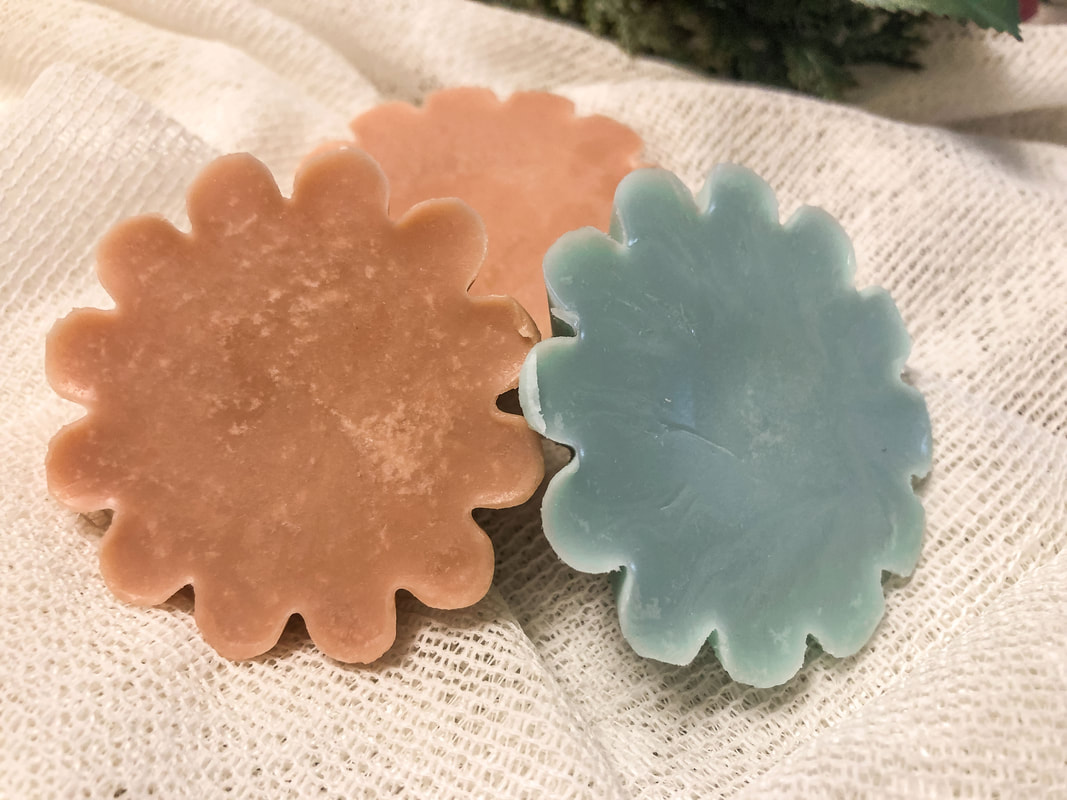 Wax melts are set and curing for at least 48 hours before use in a warmer. Photo by Diane M. Lilly, 2022. 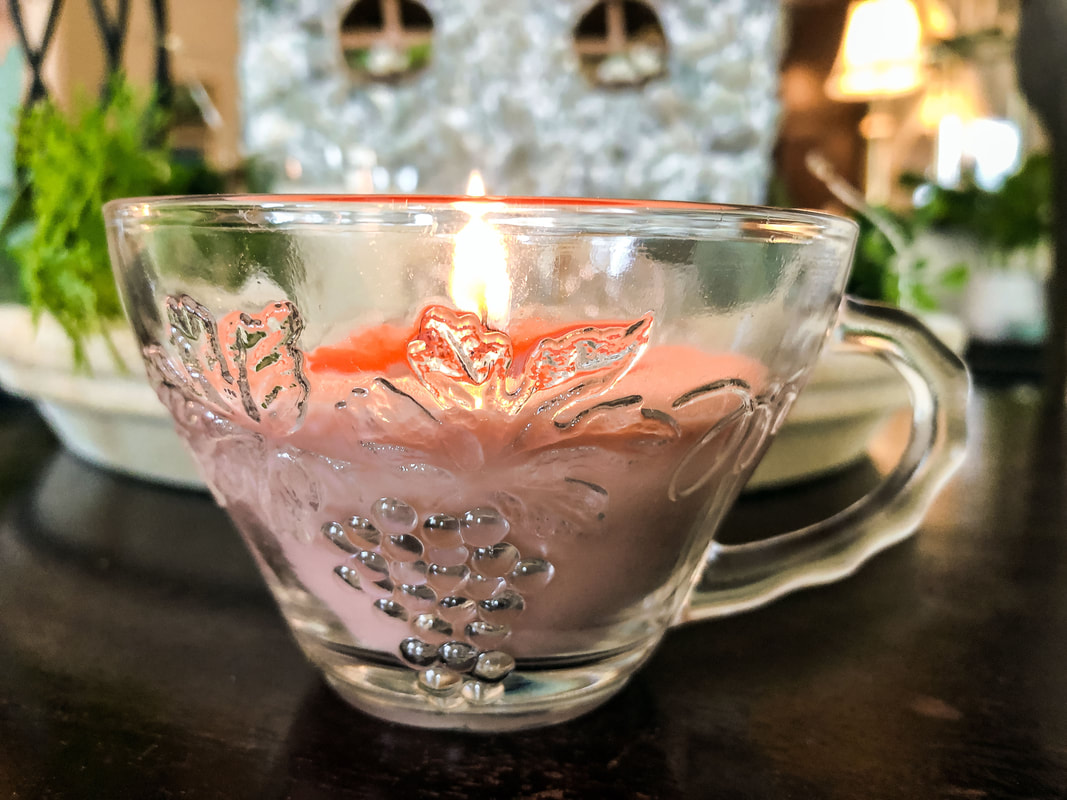 About a week later and the candle is ready to burn. Photo by Diane M. Lilly, 2022. 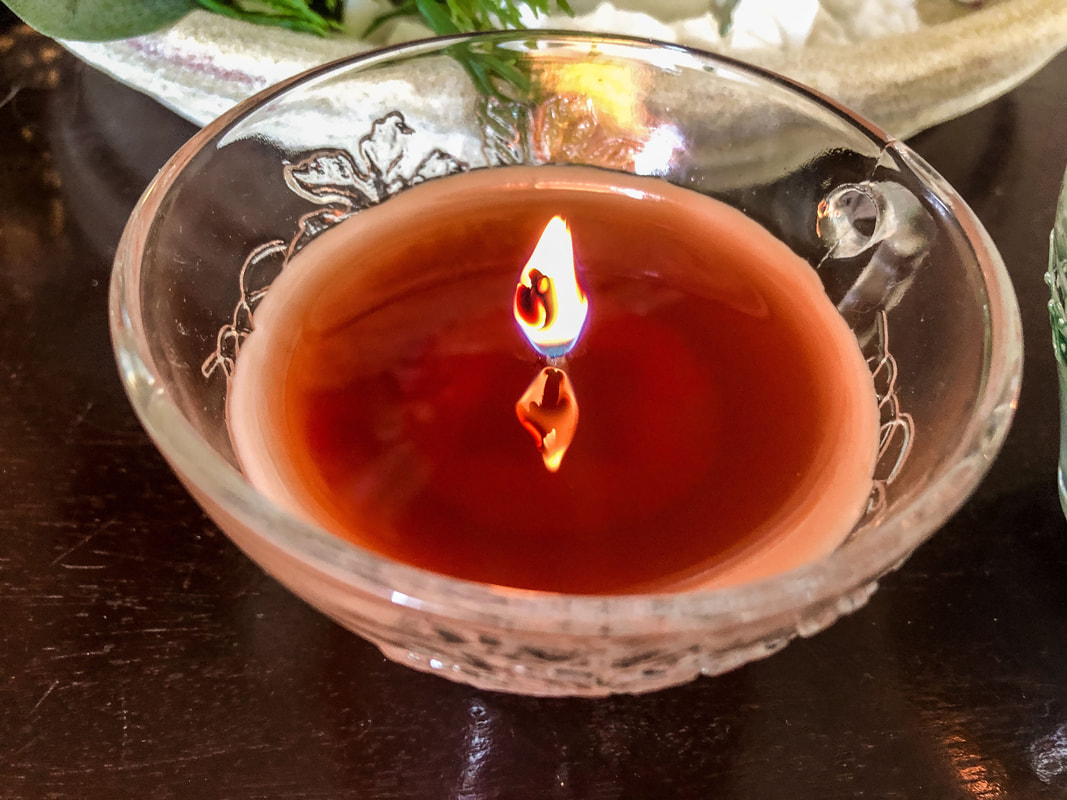 This homemade hazelnut candle has burned beautifully, with a fragrant hot throw, no smoking, and a nice pool. Photo by Diane M. Lilly, 2022. I am so happy with my new candles…And my house smells incredible! Let me know in the comments below if you have ever made candles. Feel free to post any tips or questions about making homemade candles! Related blogs you may want to read: Homemade candle recipe with a eucalyptus fragrance Winter color palette ideas for your home decor Nine design trends for 2022 Eight ways to create cozy winter interiors after the holiday decor comes down Nine hygge decor ideas This article may contain a few items or commercial mentions, but I only used them for demonstration purposes only. I am not endorsing any particular product or receiving any monetary gain for this blog.
0 Comments
Leave a Reply. |

Author
Some of the posts on this site contain affiliate links. This means if you click on the link and purchase the item, I will receive an affiliate commission. 
Categories
All
Archives
October 2025
|
 RSS Feed
|
|
Major credit cards accepted through Square. Apple Pay option available. This site also accepts PayPal payments for better online security, and it's free to sign up! Gift cards are now available for purchase!
Copyright 2025 |