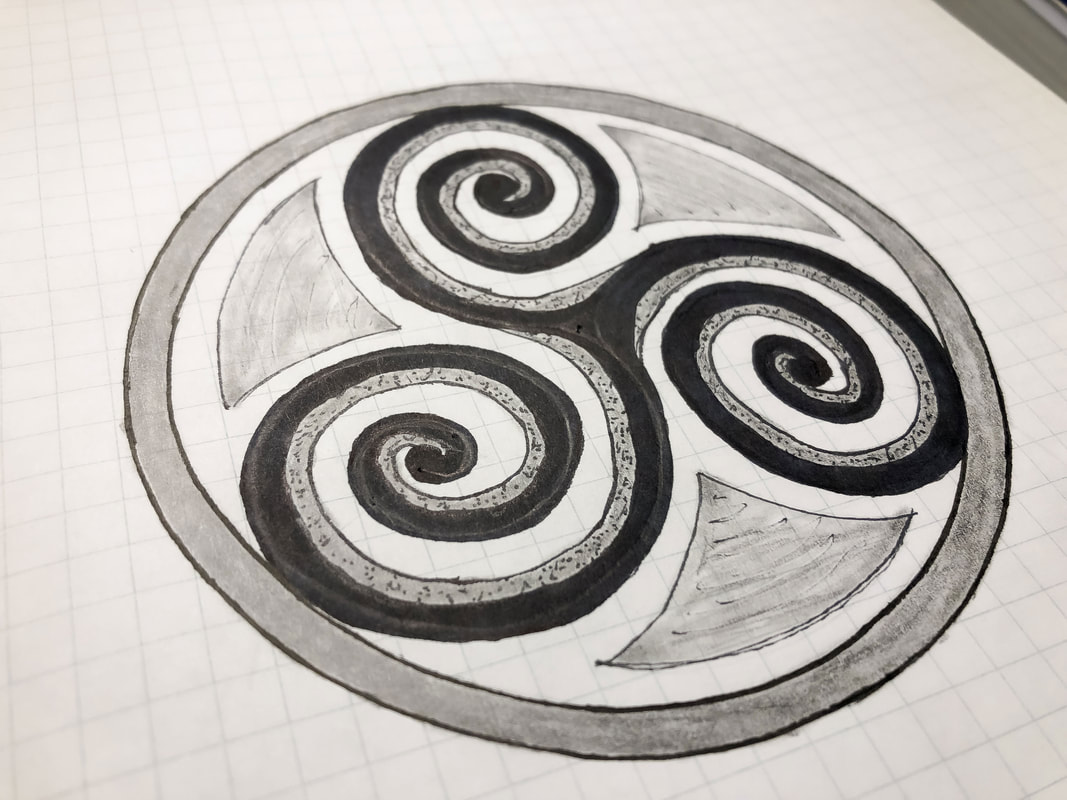
 If you want to learn how to draw a triskele—like those seen in Ireland—you’ve come to the right place! In today’s blog, I will take you through a step-by-step process for drawing a basic triskele design. You can then use this simple design as a base for a more complicated design. All you will need for this tutorial is a compass, eraser, ruler, and paper, but I have provided a list below of supplies you may want for this and other drawing projects. (Disclaimer: I am a Blick Art affiliate so this list contains affiliate links. If you click on the link and purchase the item, I will receive an affiliate commission at no extra cost to you. I will only recommend products or services I use personally and/or believe will add value to my readers, so there is no conflict of interest.) Gather your supplies: Drawing pencils Markers Blending stumps Eraser Click eraser Ruler Horse hair brush Grid paper Sketch pad Tracing paper Step 1: Draw a circle Draw a circle using a compass and mark the midpoint of that circle. Step 2: Divide the circle in half vertically Use a ruler to divide the circle in half vertically and mark the center. 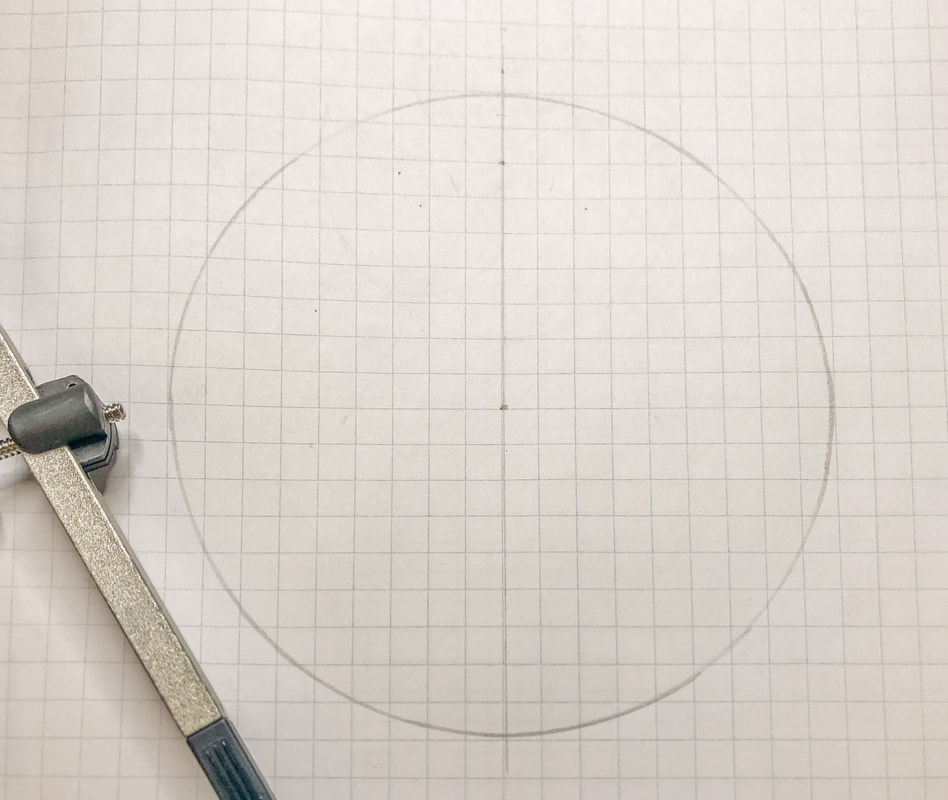 Step 3: Divide the circle into six sections For this step, you will use the same settings and radius on your compass as you used to draw the circle. Place the sharp point at the bottom of the vertical line and draw an arc on either side of the line on the circle’s circumference. Use a ruler to draw a line from the point where one arc intersects the line, through the circle’s center, to the opposite side of the circle. Do the same for the other arc. You should now have six equal triangular sections in your circle. 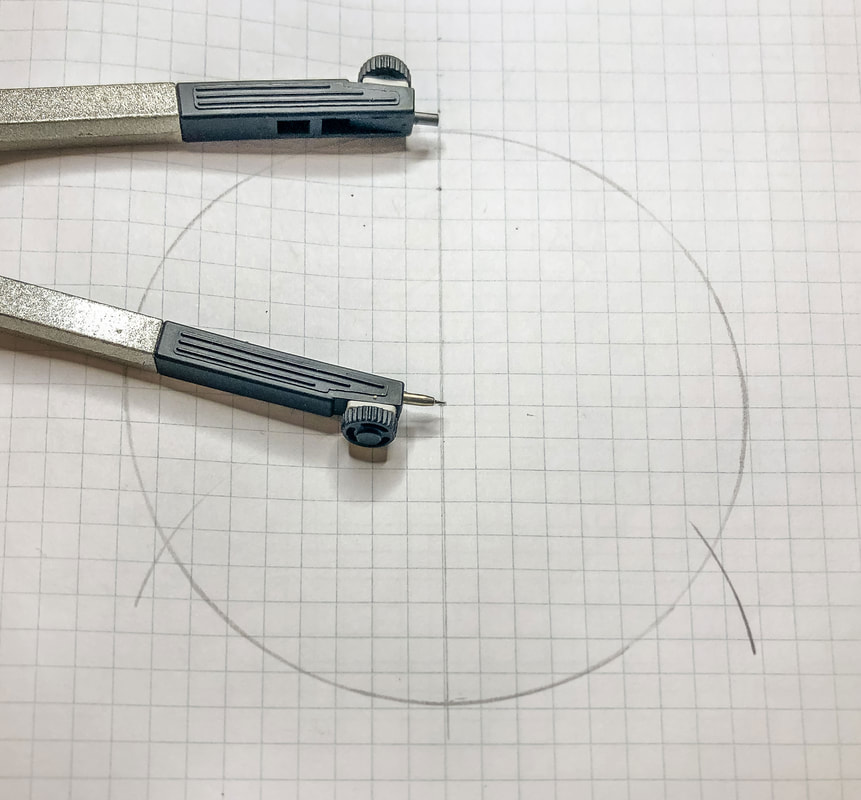 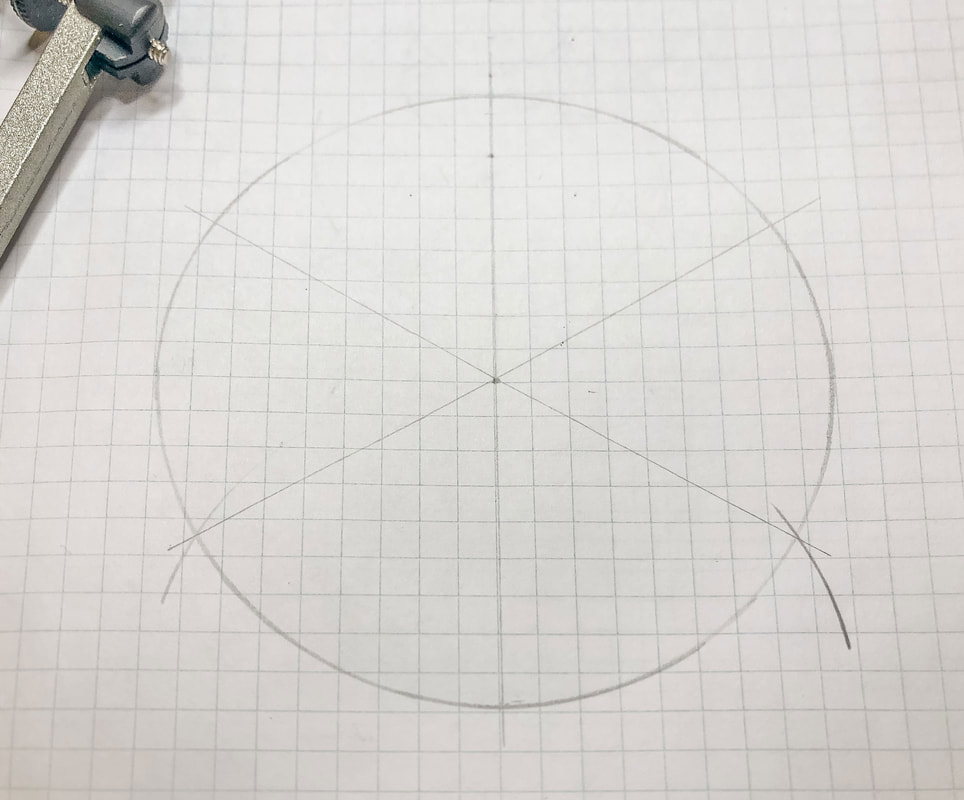 Step 4: Find the midpoint of three lines Take a look at the first image below. To draw a triskele, you will use the top half of the vertical line and the two lines that come off the center at an angle, forming an upside-down “Y”. In this step, you will find the midpoint of these three line segments. Set the compass a little wider than half the length of the line segment. Place the compass point at the circle’s center and draw an arc on either side of the line. Now, move the point to the opposite end of the line segment and draw an arc again on either side of the line segment. (If you need a tutorial for finding the midpoint of a line, you can click here for the blog or view the video tutorial here.) As you can see in the second image below, you end up with crossing arcs on either side of the line segment. Use a ruler to line the intersections of these arcs up, and where this line crosses your line segment is the middle of the line. Use this method to find the midpoint for the other two line segments in your upside-down “Y”. 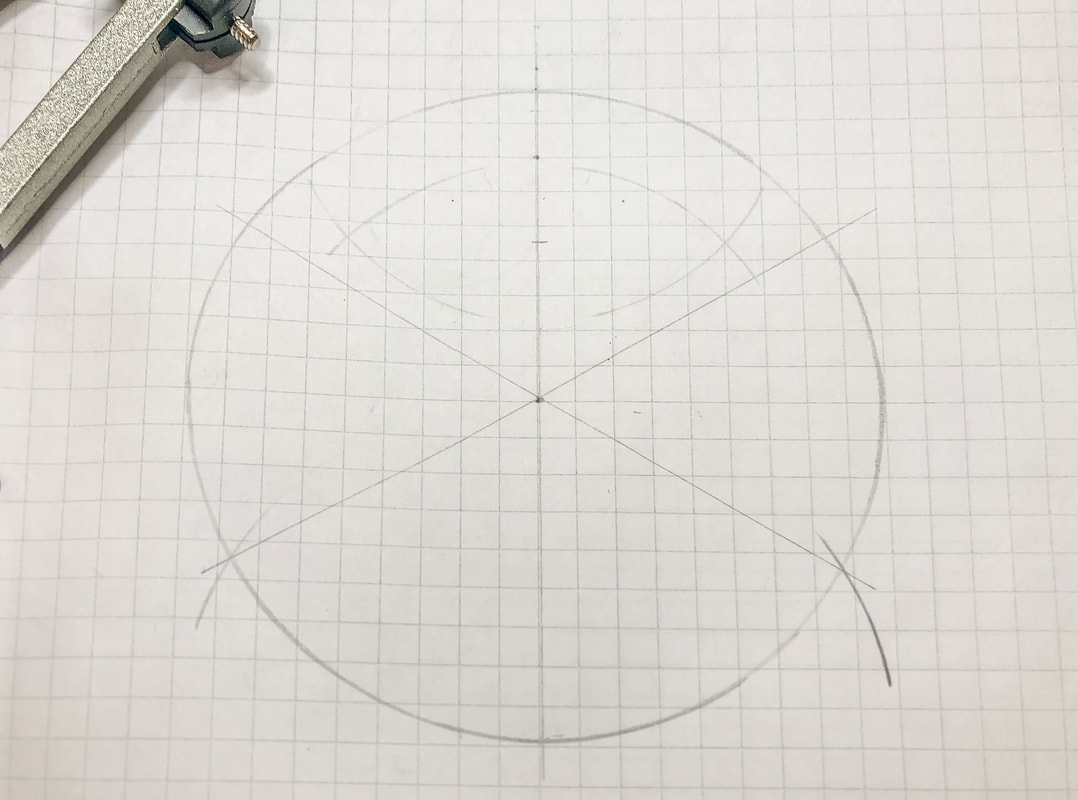 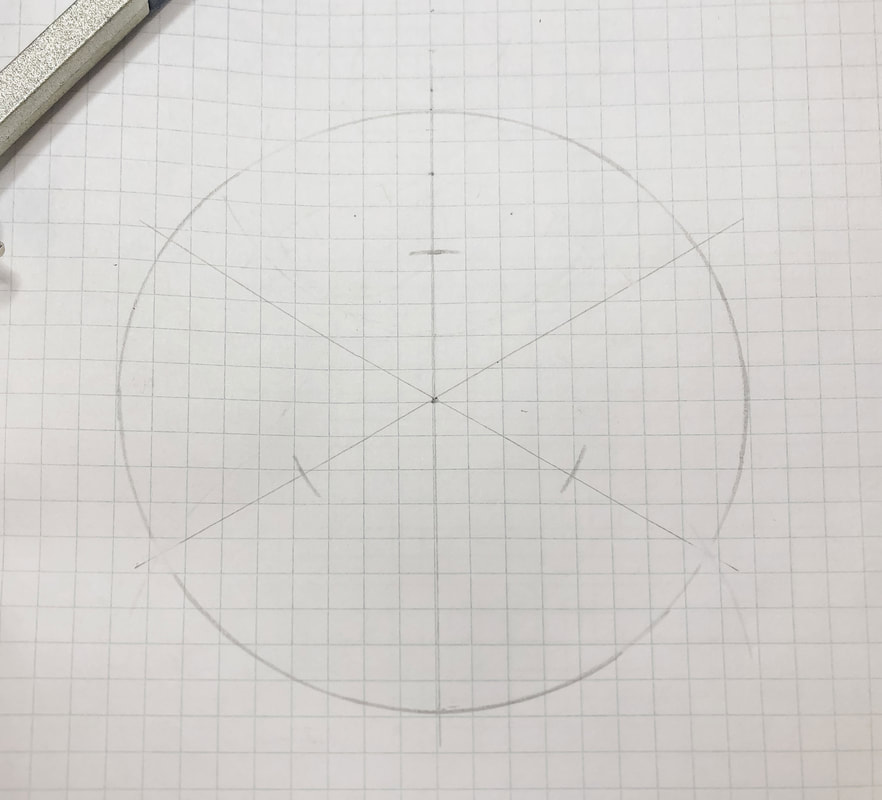 Step 5: Further divide the line segments in half Once those three line segments are divided in half, you will divide each of the resulting six line segments in half again using the same method as above. When you are finished, each line in your upside-down “Y” should have three tick marks. 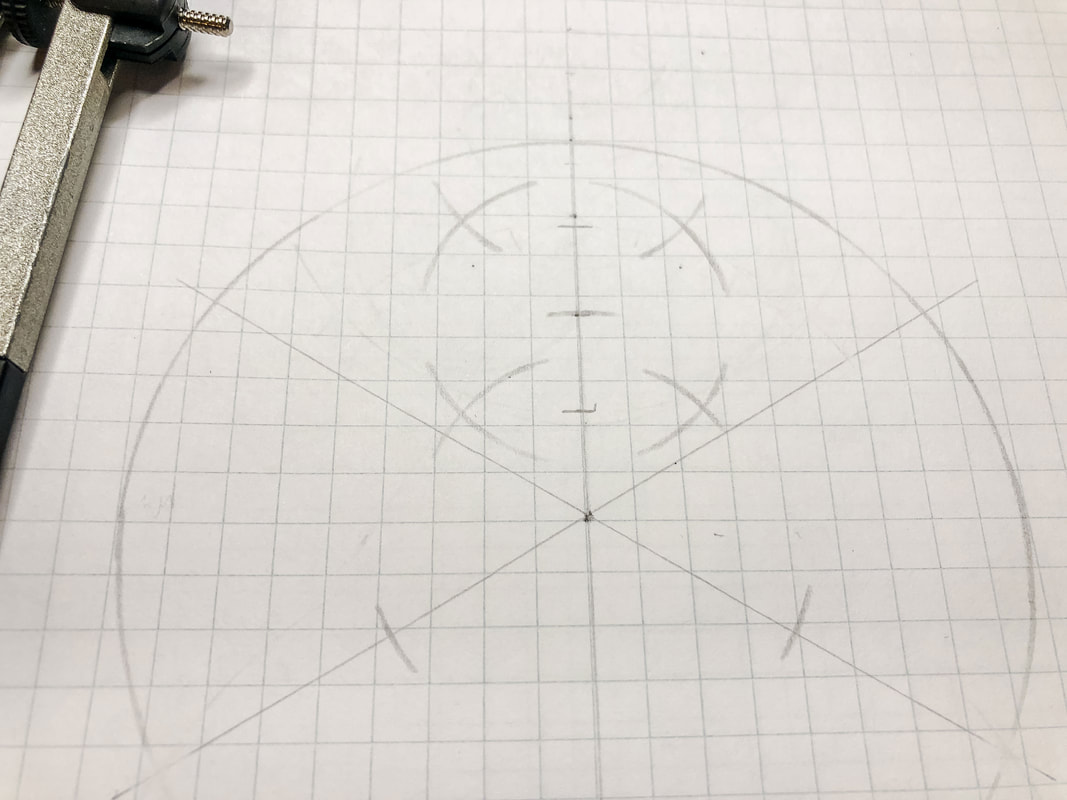 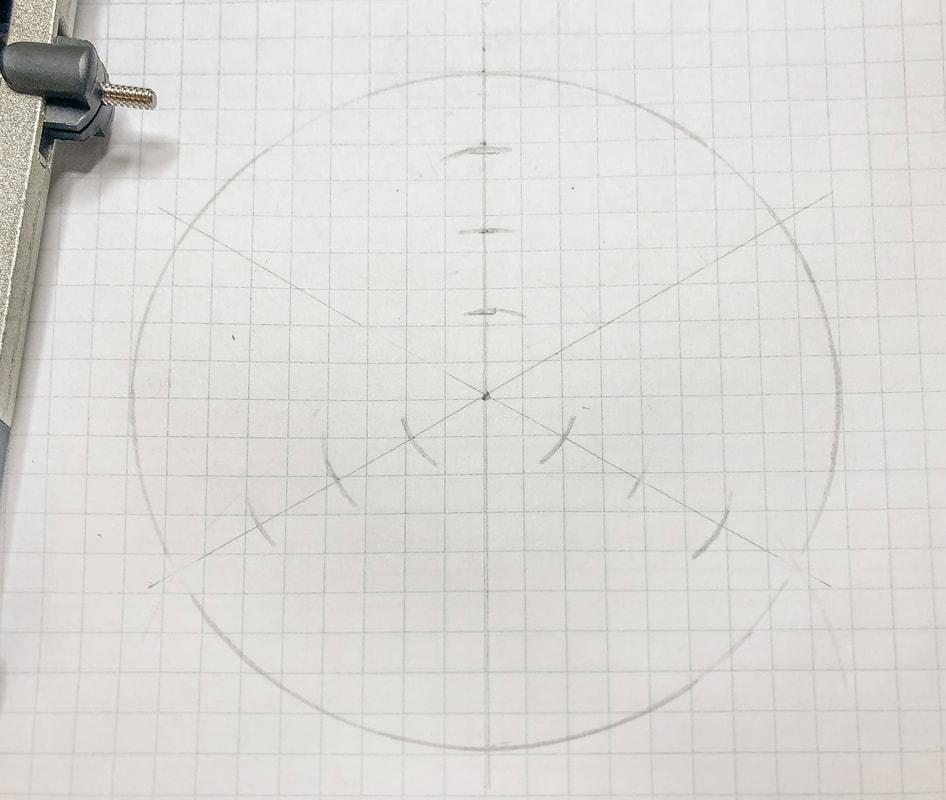 Step 6: Draw the first curves Starting with the top vertical line, place your compass point in the center of that line segment and draw a semi-circle from the circle’s center to the circumference (the top of the line). Do this for the other two lines with the tick marks. 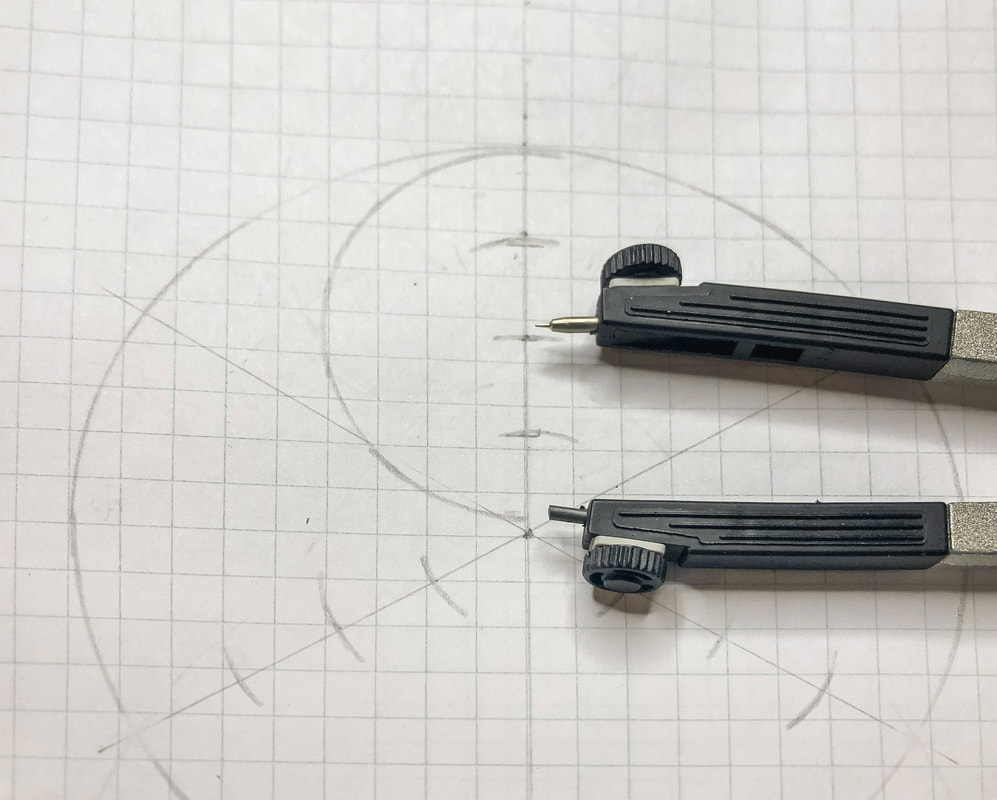 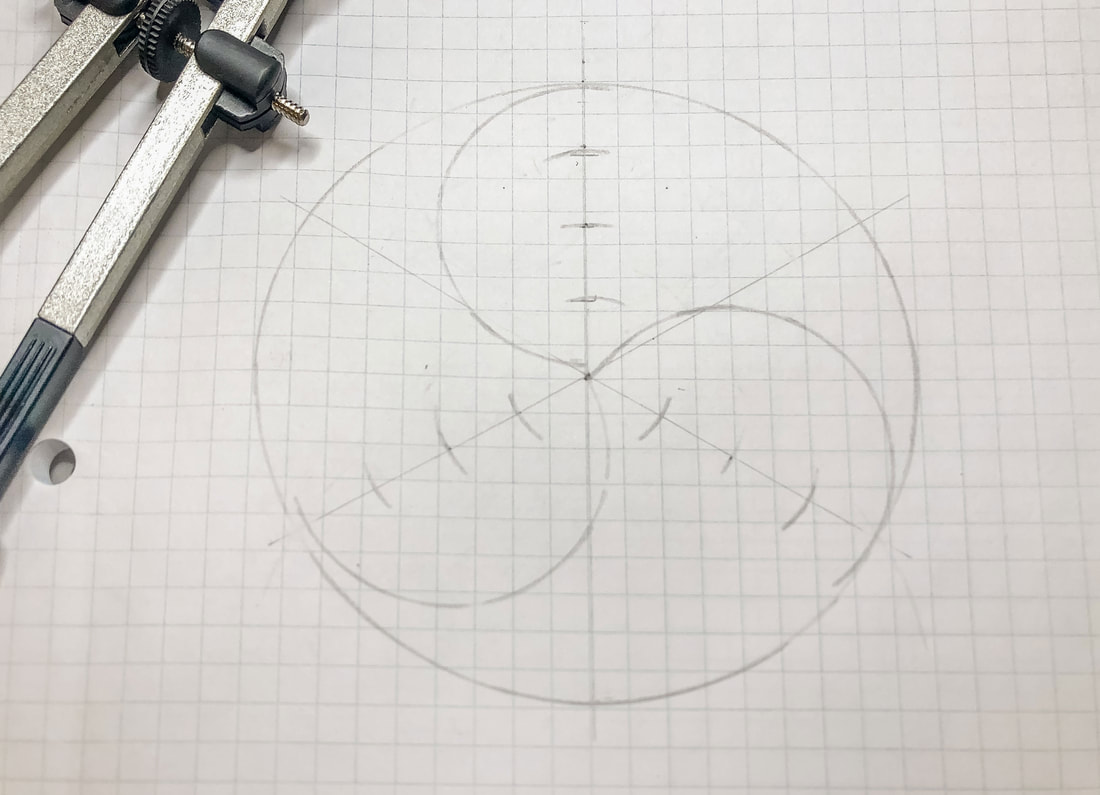 Step 7: Find the midpoint for the second curve Before you draw the second part of the curve, find the midpoint between the first and second tick marks (see the image below). 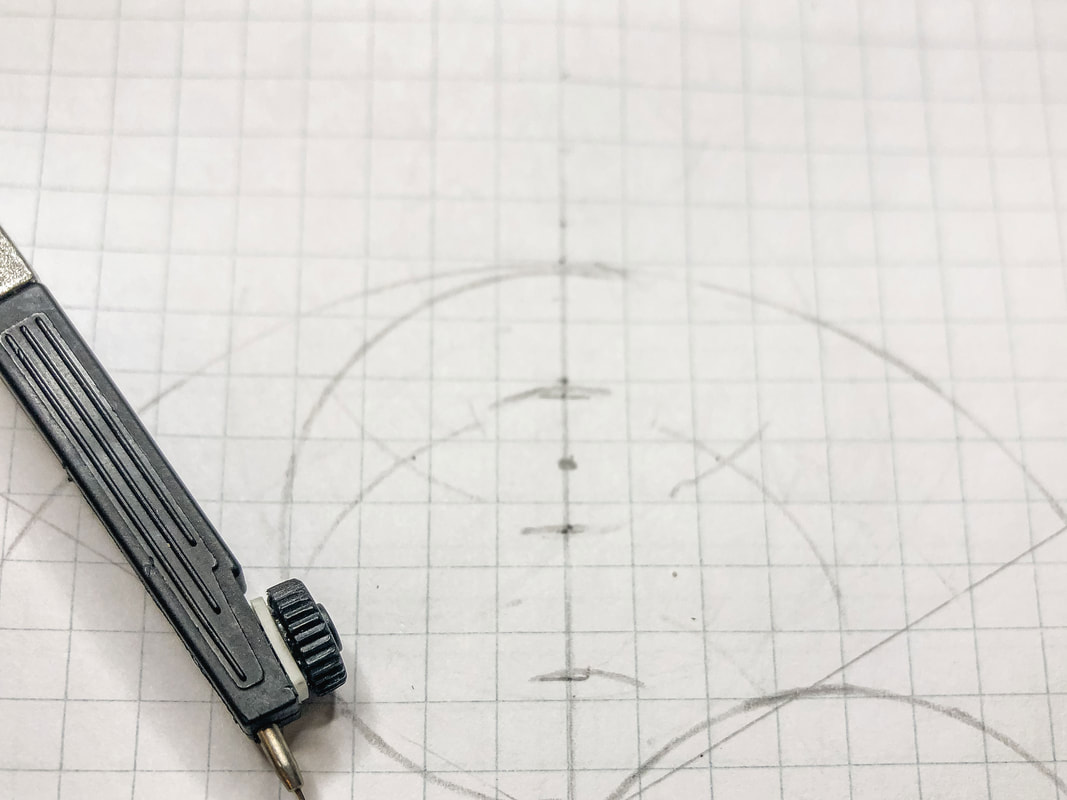 Step 8: Draw the second curves Now that you have the midpoint, place the compass point on it and draw a semi-circle from the top of the circle down to the third tick mark. Do the same thing for the other two “Y” lines. 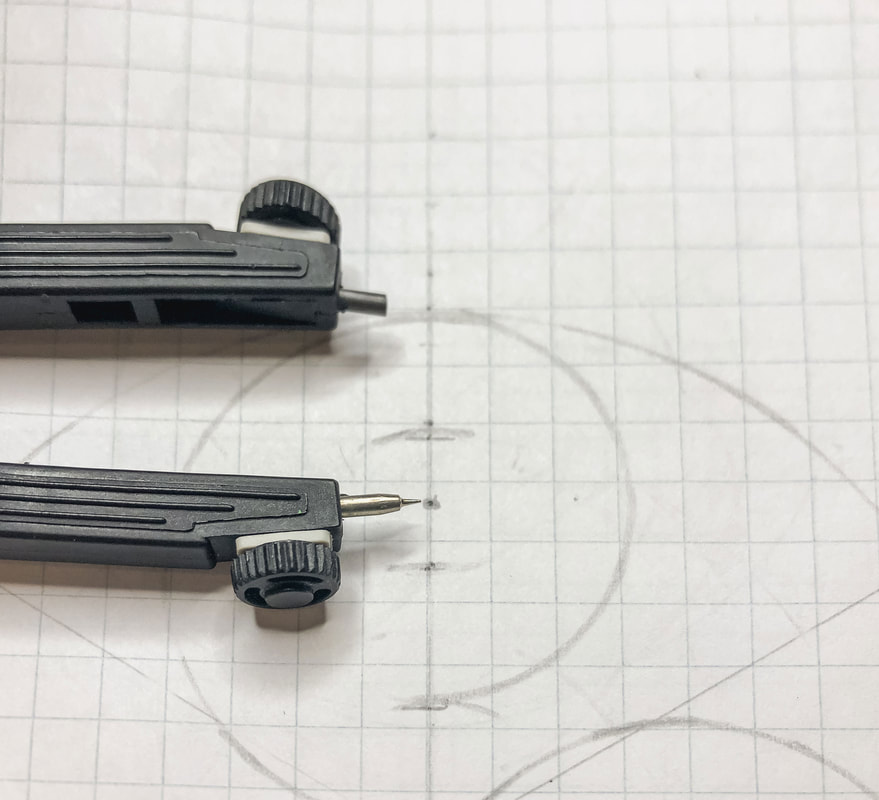 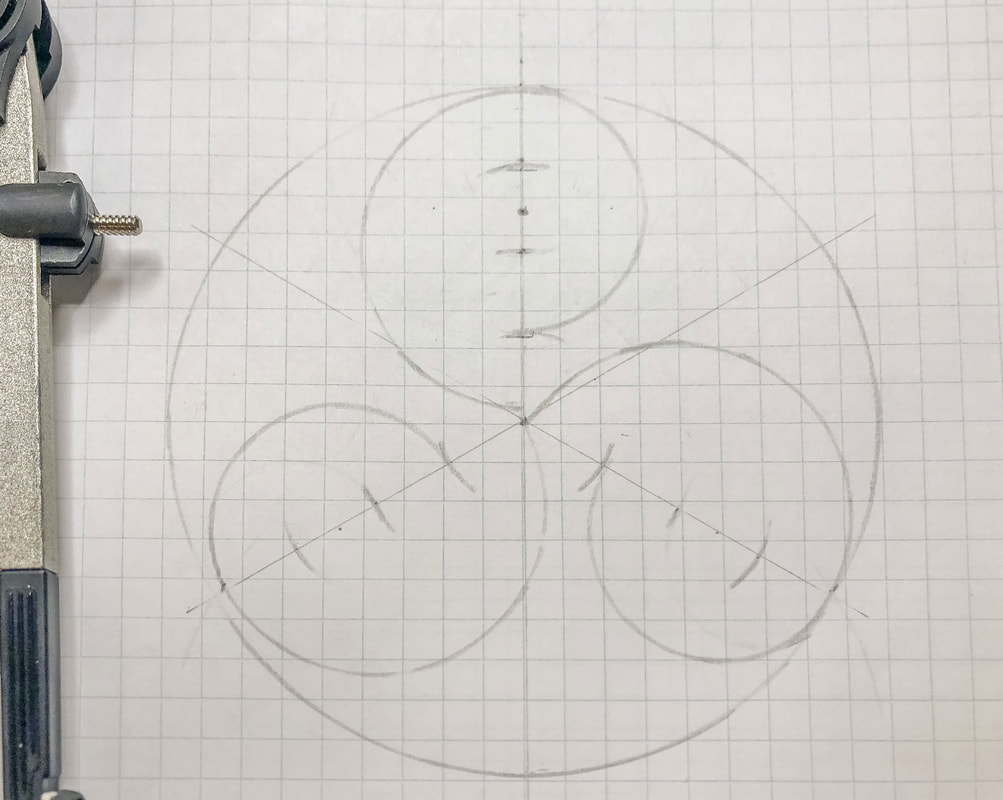 Step 9: Draw the third set of curves Go back to the top line and find the second tick mark. Place the point of the compass on that tick mark and draw a semi-circle from the first to the third tick mark. Do the same thing for the other two “Y” lines. 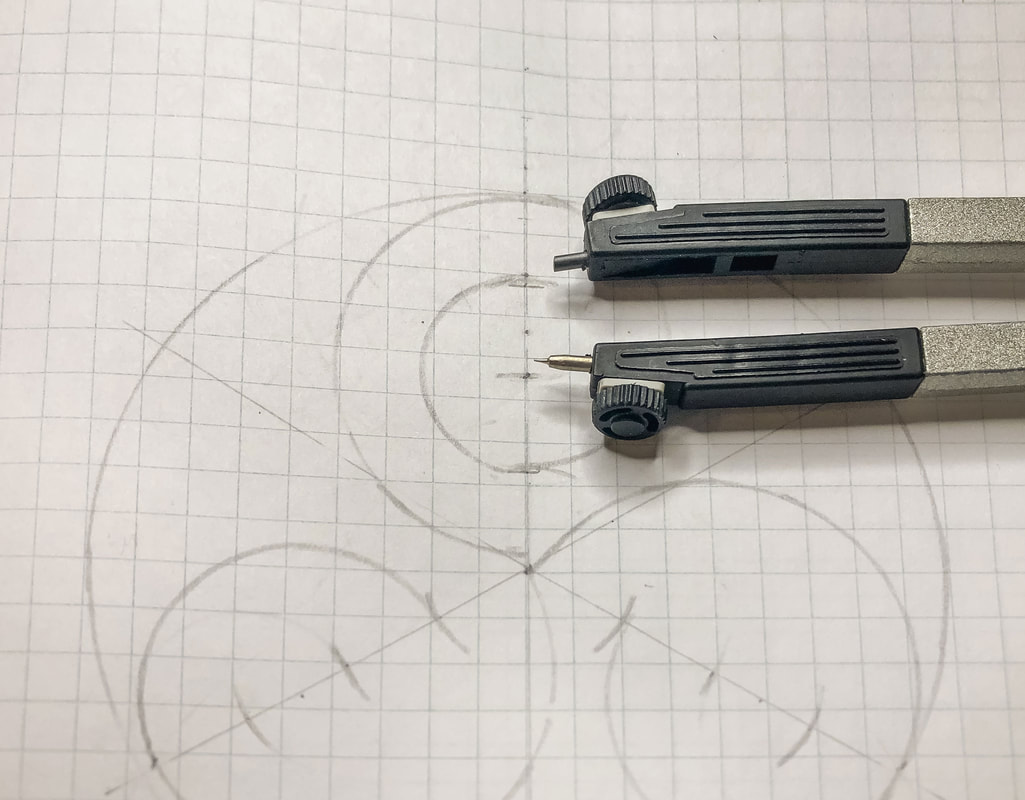 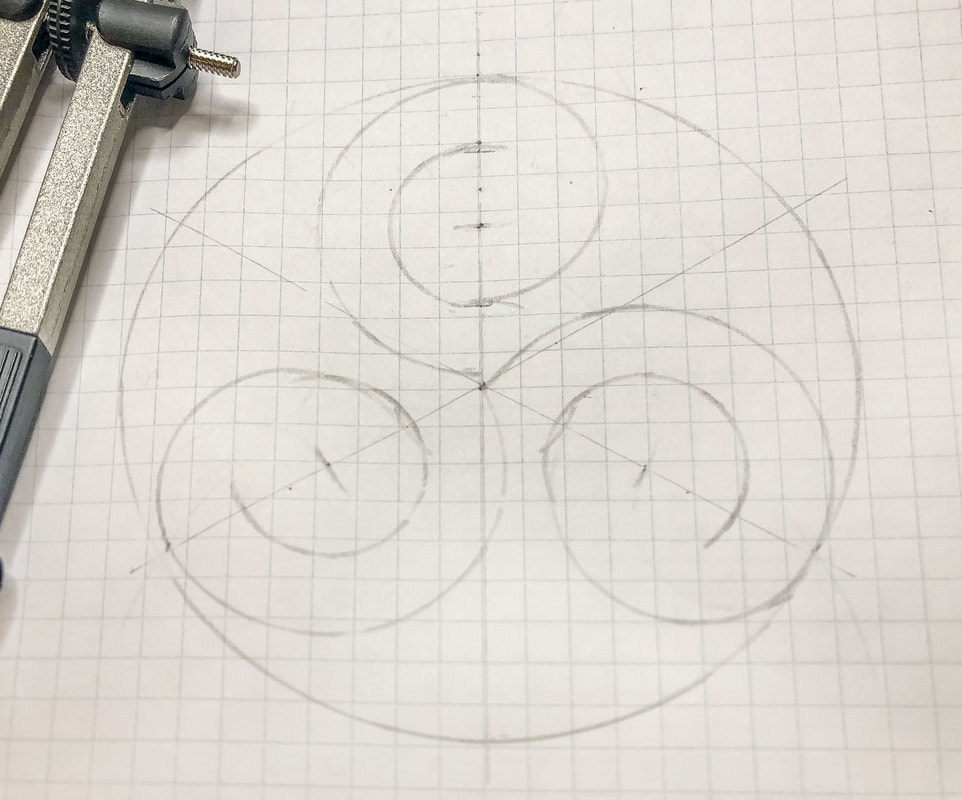 Step 10: Draw the fourth set of curves Go back to the top vertical line and find the center point between the first and second tick marks. Place the point of the compass on that mark and draw a semi-circle from the first to the second tick mark. Do the same thing for the other two “Y” lines. 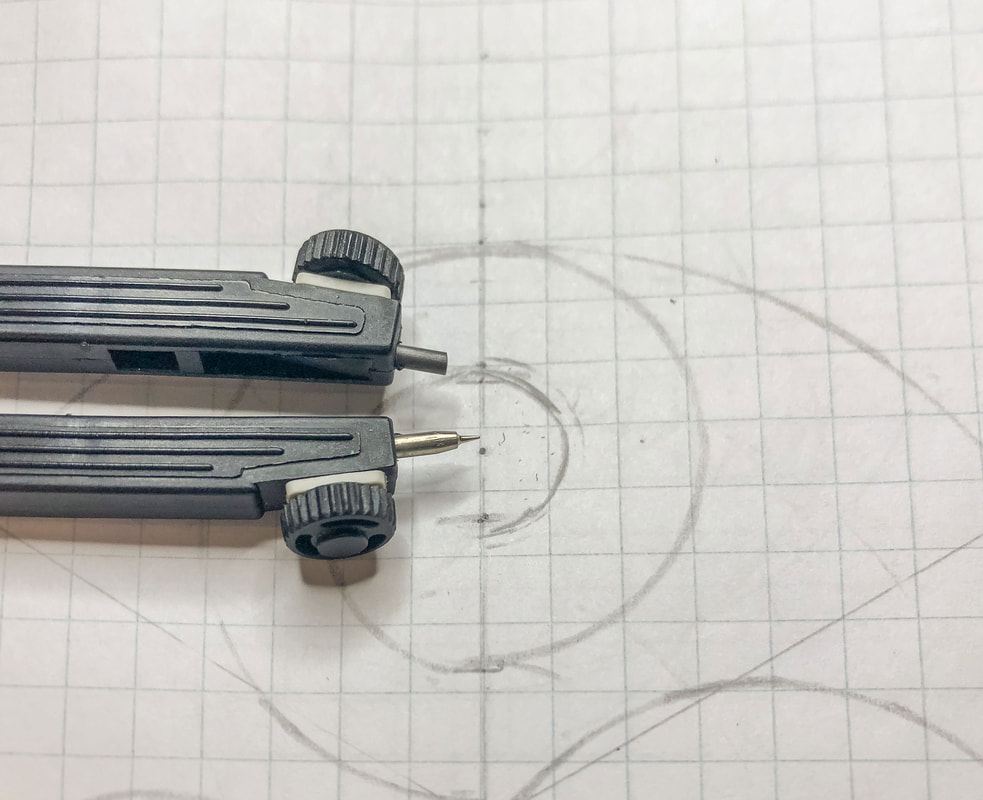 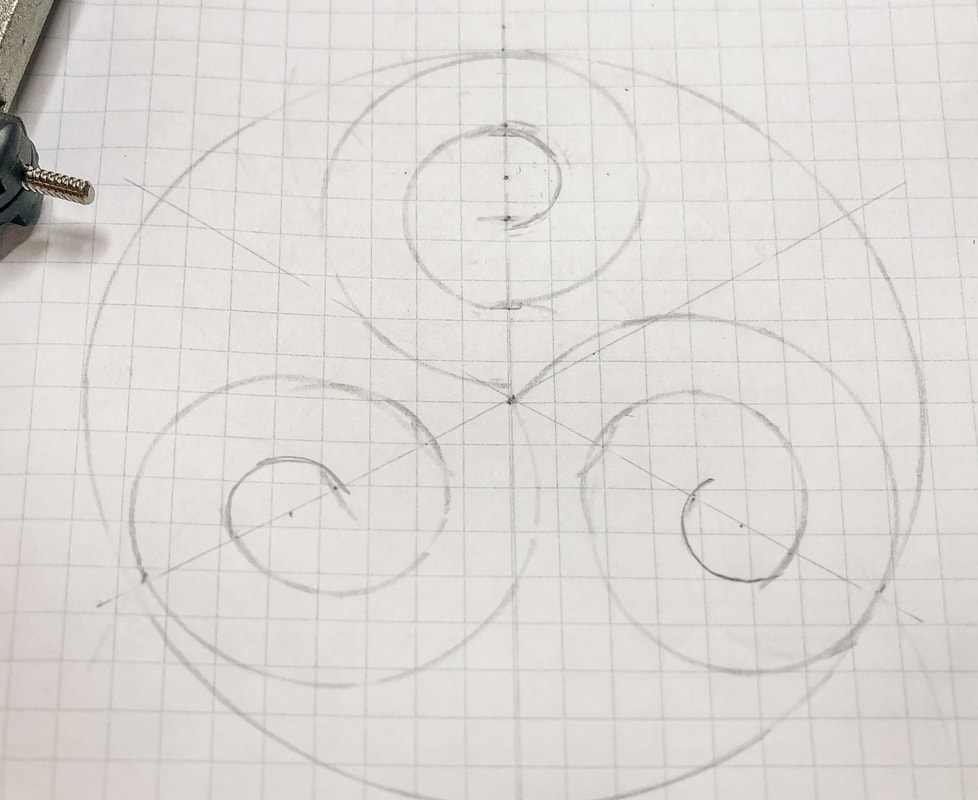 Step 11: Darken your lines and stylize And now you have the basic line drawing for a triskele. Create shading, texture, outlines, and finishing touches to give your triskele some style. 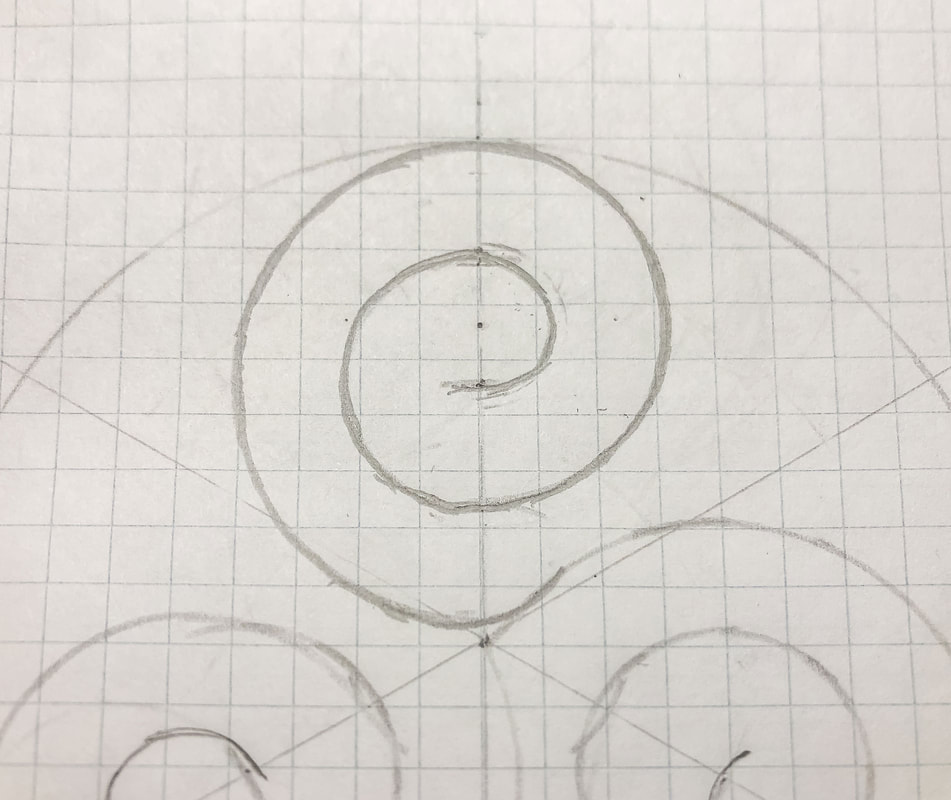  The number of tick marks you create with your “Y” segments will determine how loose or tight your spiral will be. One or two tick marks per line will result in a loose spiral. Four or more tick marks per line will result in a spiral with several tight loops. Also, you can draw your spiral facing either direction. It all depends on your preference. So, how did you do? Was this tutorial helpful? Let me know in the comments how it went! Related blogs you may want to read: How to draw a simple Celtic triquetra using three circles Circular Celtic border knot tutorial, basic braid Basic twist step-by-step drawing tutorial using grid paper Celtic braid step-by-step drawing tutorial Basic border knot with vertical breaks, step-by-step drawing tutorial Basic border knot with horizontal breaks, step-by-step drawing tutorial DIY chalk-painted tray with Celtic border A fun DIY project with paint and a thrifted mirror part 2 The Celtic Motherhood Knot, a symbol of love Celtic Tree of Life Basic Celtic Knot Tutorial Part 1 Celtic Knot Tutorial Part 2
4 Comments
Stella
4/30/2025 09:26:03 am
Just wanted to say thank you so much for making this tutorial 5/1/2025 07:49:18 am
You are very welcome! Triskelles are such a beautiful ancient symbol (predating the Celts by thousands of years). It's a privilege to keep the design alive!
Annie
10/5/2025 07:54:09 pm
Very helpful! It worked great! Thank you. 10/8/2025 07:17:41 am
You're very welcome! Glad to be of help and I hope it inspired you to create more designs! Leave a Reply. |

Author
Some of the posts on this site contain affiliate links. This means if you click on the link and purchase the item, I will receive an affiliate commission. 
Categories
All
Archives
October 2025
|
 RSS Feed
|
|
Major credit cards accepted through Square. Apple Pay option available. This site also accepts PayPal payments for better online security, and it's free to sign up! Gift cards are now available for purchase!
Copyright 2025 |