|
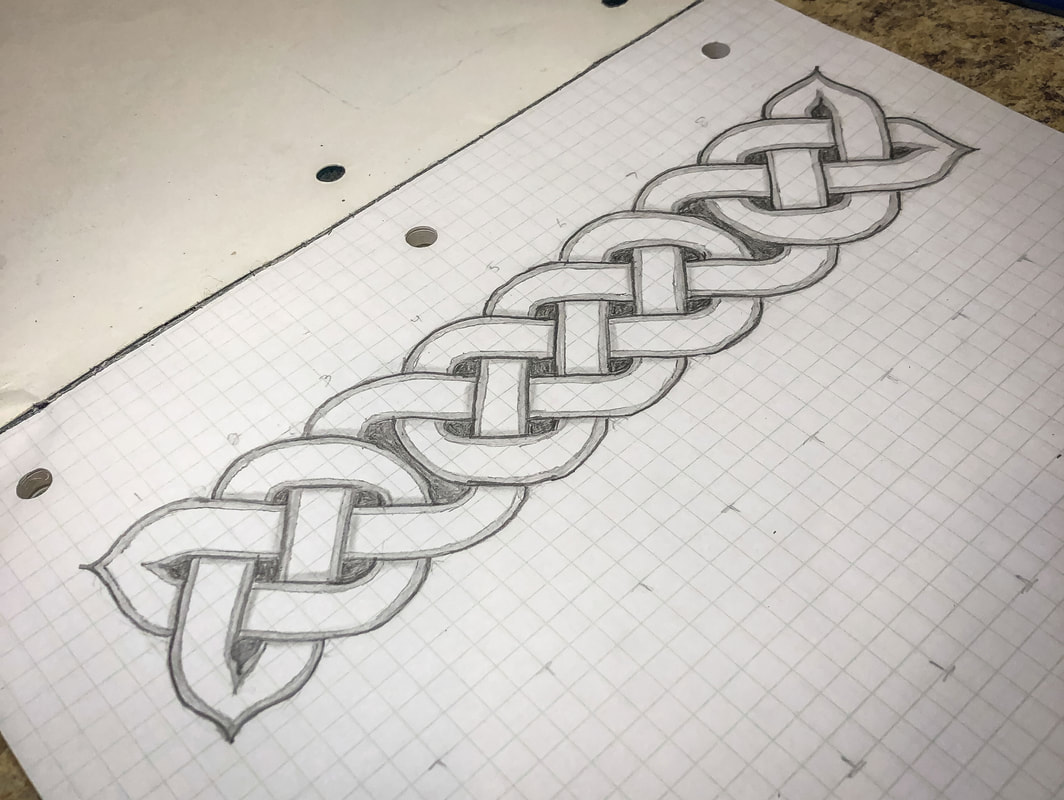
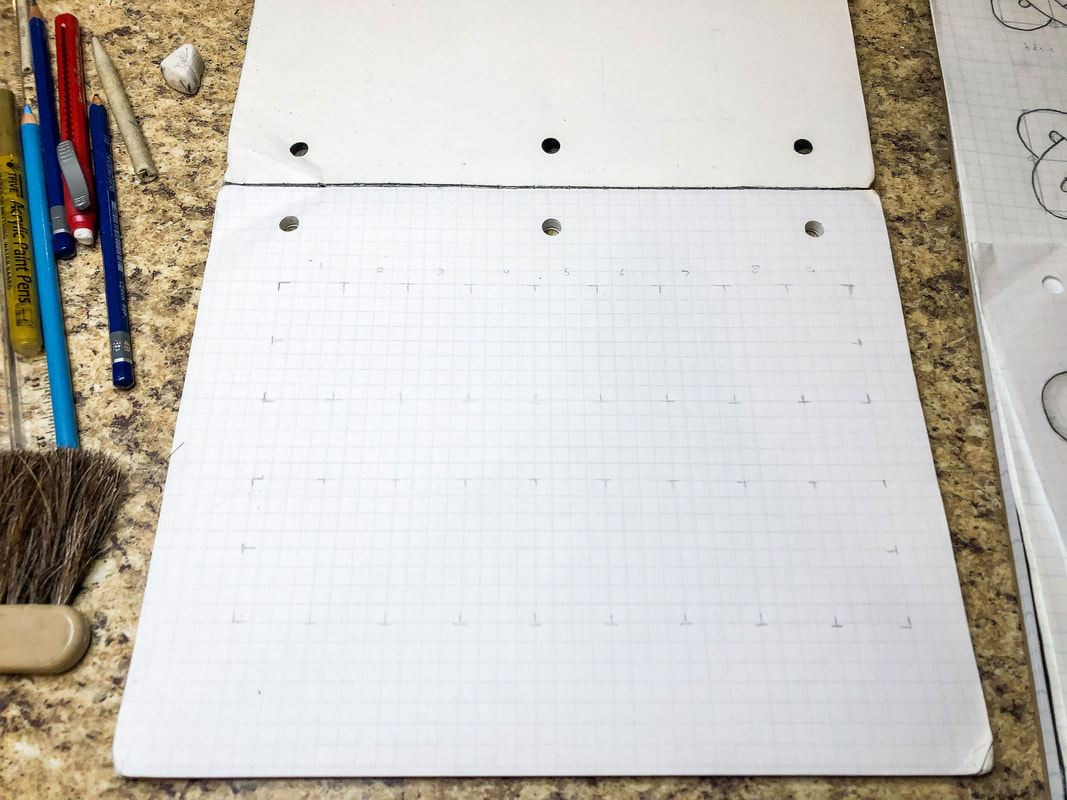
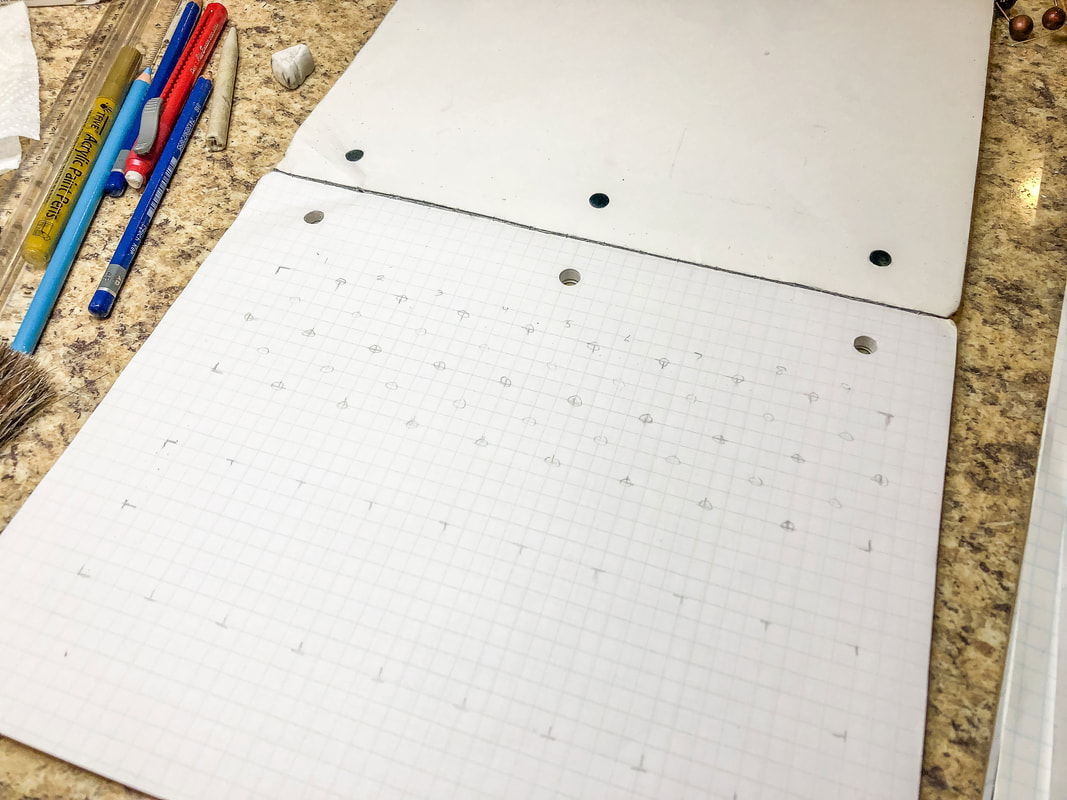
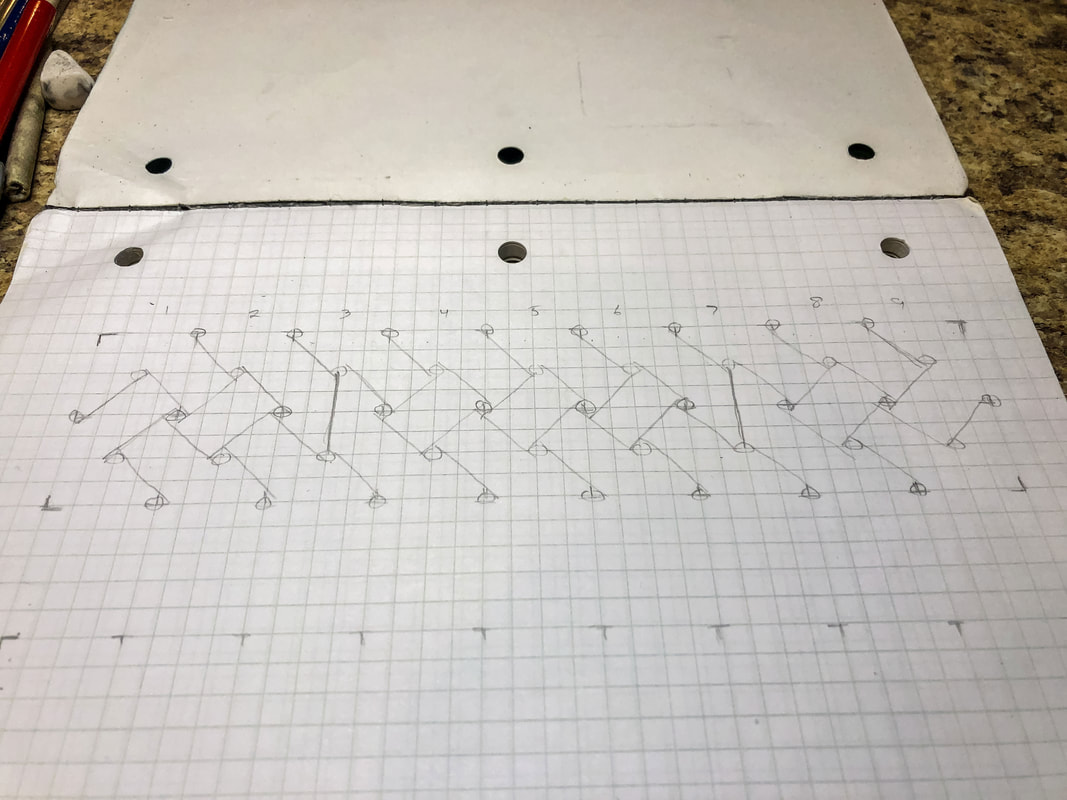
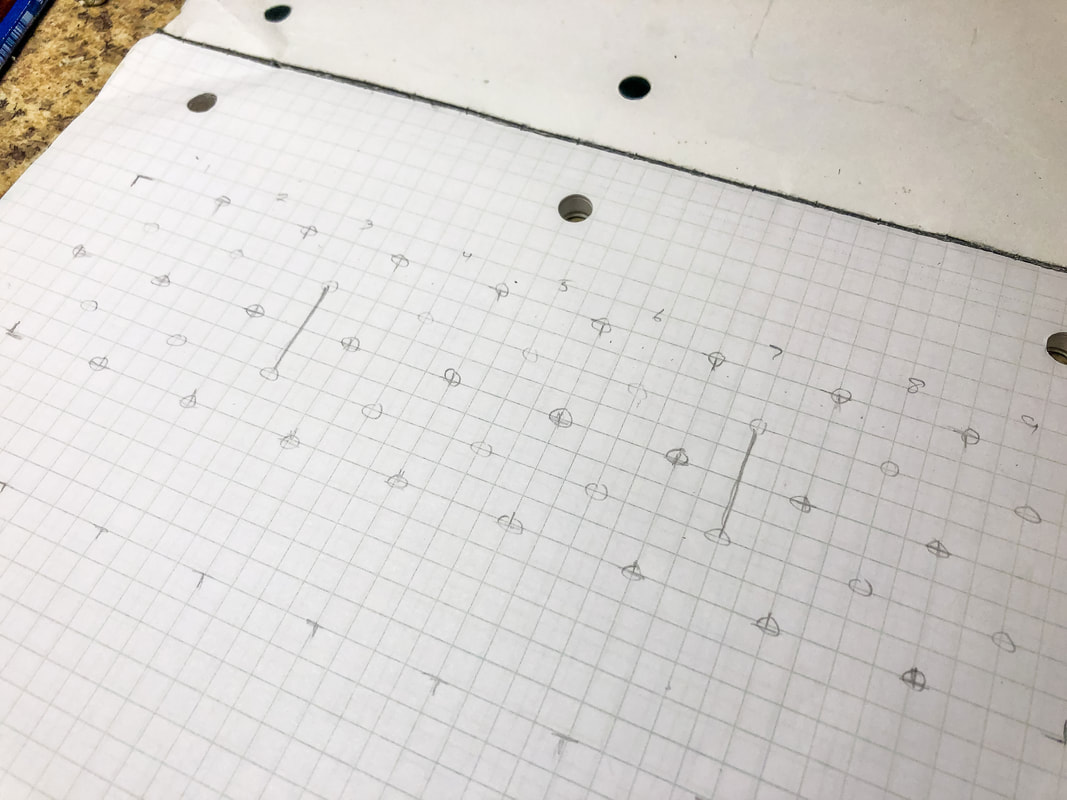
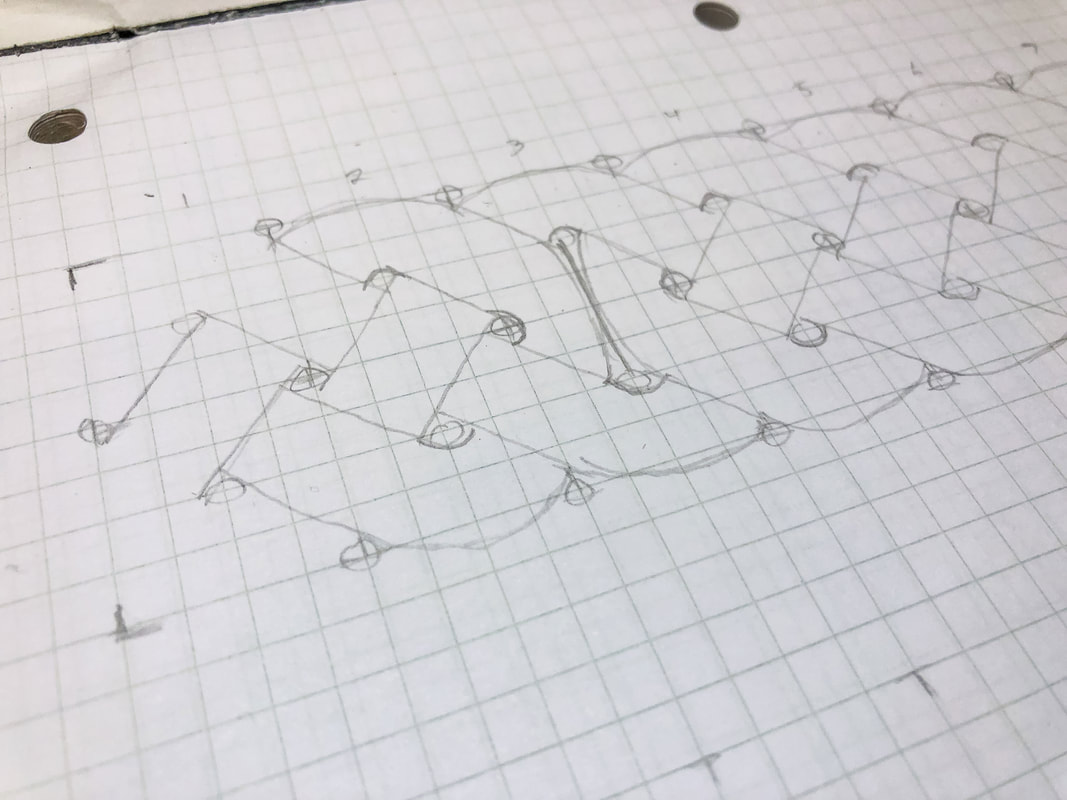
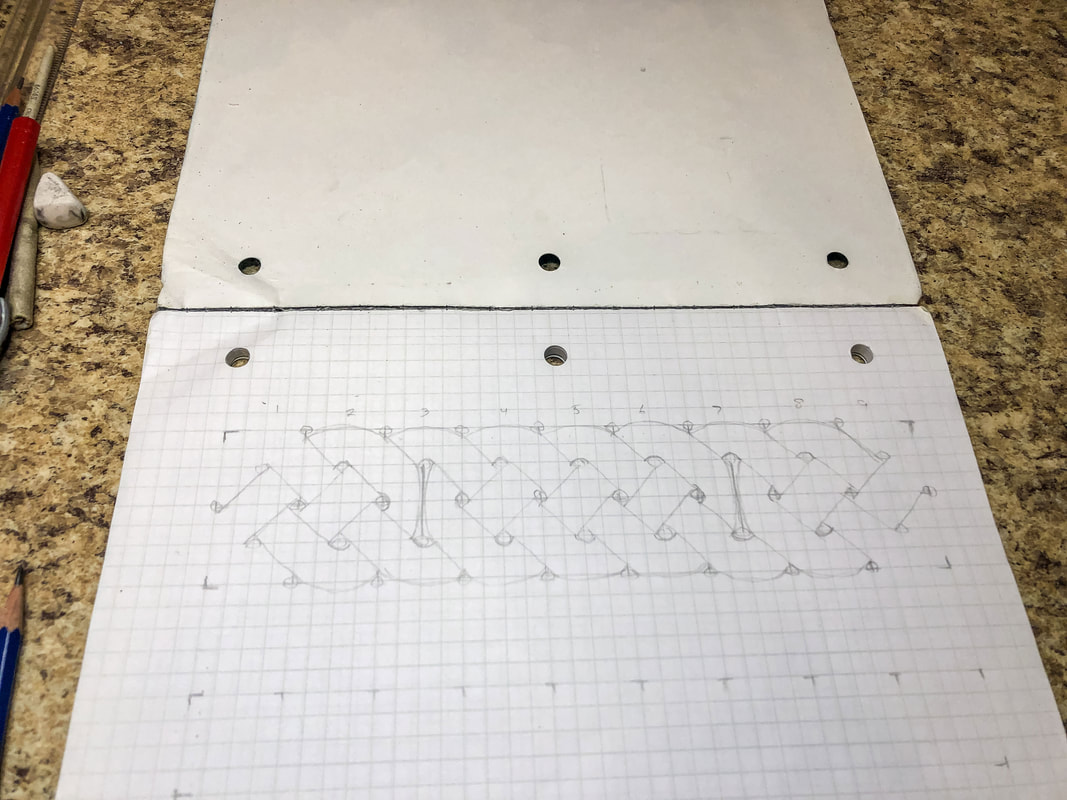
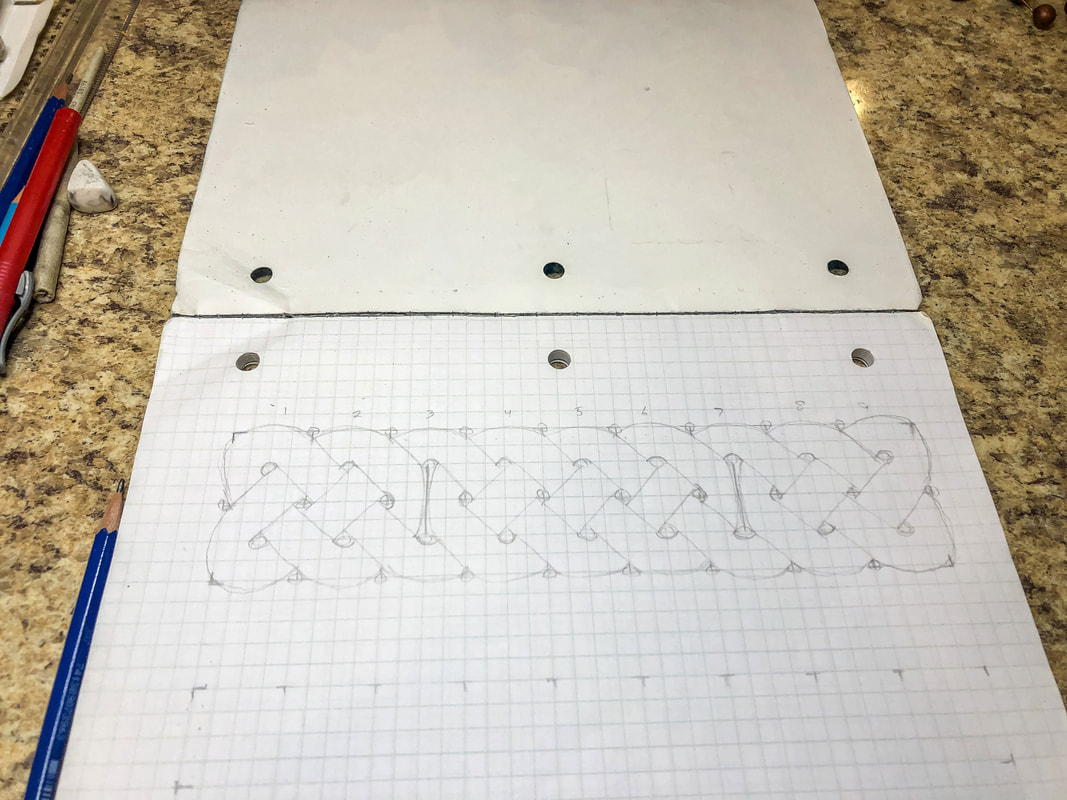
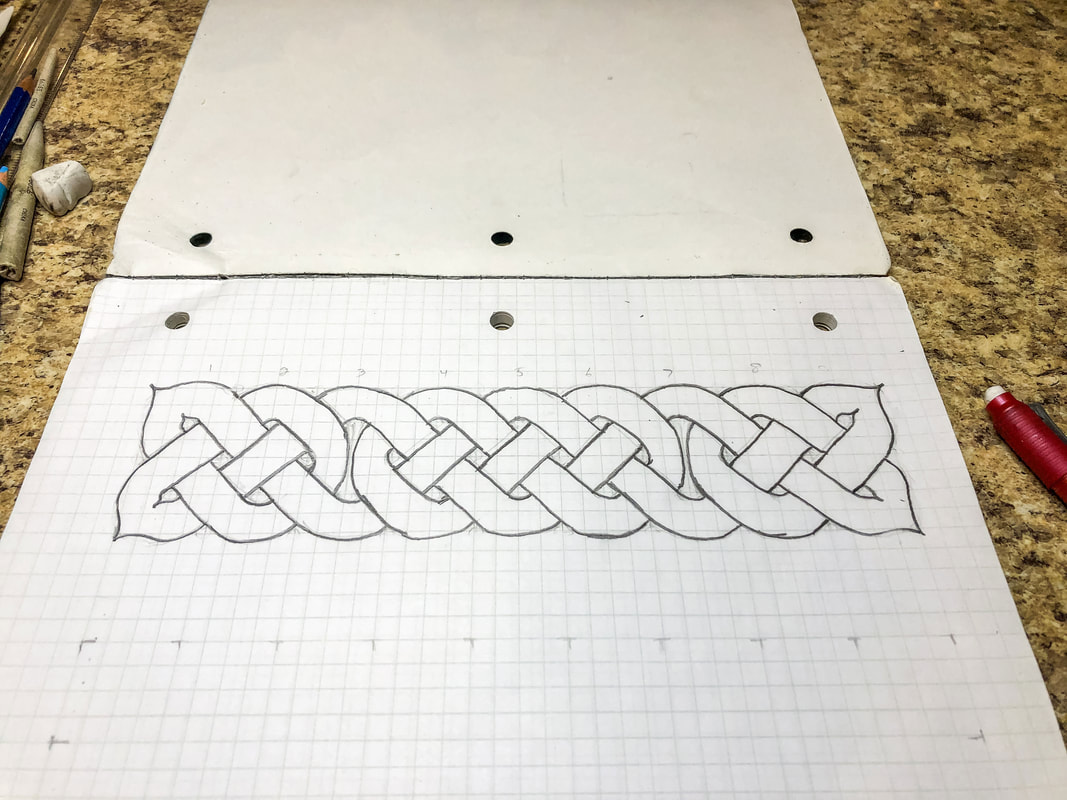
This drawing tutorial is the third in a short series of lessons to teach you how to draw a few variations of Celtic border knots. In lesson one, we learned how to draw a simple twist. In lesson two, we used a grid system to draw a basic braid pattern. In this third tutorial, we will build on what we have learned to create a variation using vertical breaks. Breaks introduce a level of complexity to the design that adds visual interest. There are many ways to add breaks to a border pattern, but today’s lesson will show you how to add two simple vertical breaks to the braid we have previously drawn. Below is a list of supplies you may want on hand (Amazon affiliate links are included), but you certainly don’t have to have all of these supplies to do this tutorial. Just find yourself a piece of paper, a pencil, and an eraser, and let’s get to drawing! Gather your supplies: Drawing pencils Markers Blending stumps Eraser Click eraser Ruler Horse hair brush Grid paper Sketch pad Step 1: Draw a grid of 9 squares across and 2 squares down. Use a ruler If drawing the grid by hand so all the squares end up the same size. Step 2: Draw circles at the intersections of each corner and then in the middle of each square. Keep the circles the same size. Small circles will give you a thicker thread, while large circles will allow you to create a thinner thread. Step 3: Starting from the left, draw a pair of parallel lines touching the inside edges of the first four circles. Find the set of four circles above that first pair of lines, and draw a second set of perpendicular lines. Return to the first pair of lines and create another pair of perpendicular lines to the side, as shown. This sets up an alternating pattern of lines that you will continue across the grid to create a weave. Ignore any places where you only have three circles for now. Step 4: Draw a vertical line connecting the two circles in columns 3 and 7, as shown. Step 5: Erase any lines that cross over those two new vertical lines, looping them back around to link up with the threads as shown. Step 6: Sketch in the top and bottom edges of the loops as shown. Step 7: Create the loops at each end of the grid. For this design, there will be a loop at each corner. Step 8: Erase any guidelines and trace over the pattern with a darker pencil, creating any stylistic changes you may want. Step 9: Add in the shadows for a 3D effect, blend, and add final details. Go over your finished design with markers if desired. I hope you enjoyed this project and are encouraged to try more designs! I created a YouTube tutorial to go with this blog for those of you who are visual learners like myself! You can view the full video tutorial on my YouTube channel here! Related blogs you may want to read: Basic twist step-by-step drawing tutorial using grid paper Celtic braid step-by-step drawing tutorial Basic border knot with horizontal breaks, step-by-step drawing tutorial DIY chalk-painted tray with Celtic border A fun DIY project with paint and a thrifted mirror part 2 The Celtic Motherhood Knot, a symbol of love Celtic Tree of Life Basic Celtic knot tutorial part 1 Celtic knot tutorial part 2 Some of the posts in this article contain affiliate links. If you click on the link and purchase the item, I will receive an affiliate commission at no extra cost to you. I will only recommend products or services I use personally and/or believe will add value to my readers, so there is no conflict of interest.
4 Comments
Lynda Hearn
5/31/2024 11:25:43 pm
I really like the way you teach your art. I am so happy that I found you. I want so much to learn, I have gotten the first two, but this one is really making me work for it. Thank you so much for your site that I can really study. 🤔
Reply
6/1/2024 08:44:59 am
Hi Lynda! I'm so glad you found this tutorial useful! I enjoy breaking down the patterns and love sharing my passion for knotwork and Celtic art. Plans are in the works for more drawing tutorials, whenever I can fit them in! Make sure to follow me on my YouTube and social media sites to keep up to date when I post new blogs and video tutorials!
Reply
Lynda Hearn
6/1/2024 06:11:45 pm
I did it! 🙂
Reply
6/2/2024 08:39:11 am
Congratulations!!! Isn't it magical to watch it come to life?!
Reply
Leave a Reply. |
Author
Some of the posts on this site contain affiliate links. This means if you click on the link and purchase the item, I will receive an affiliate commission. Categories
All
Archives
October 2025
|


 RSS Feed
