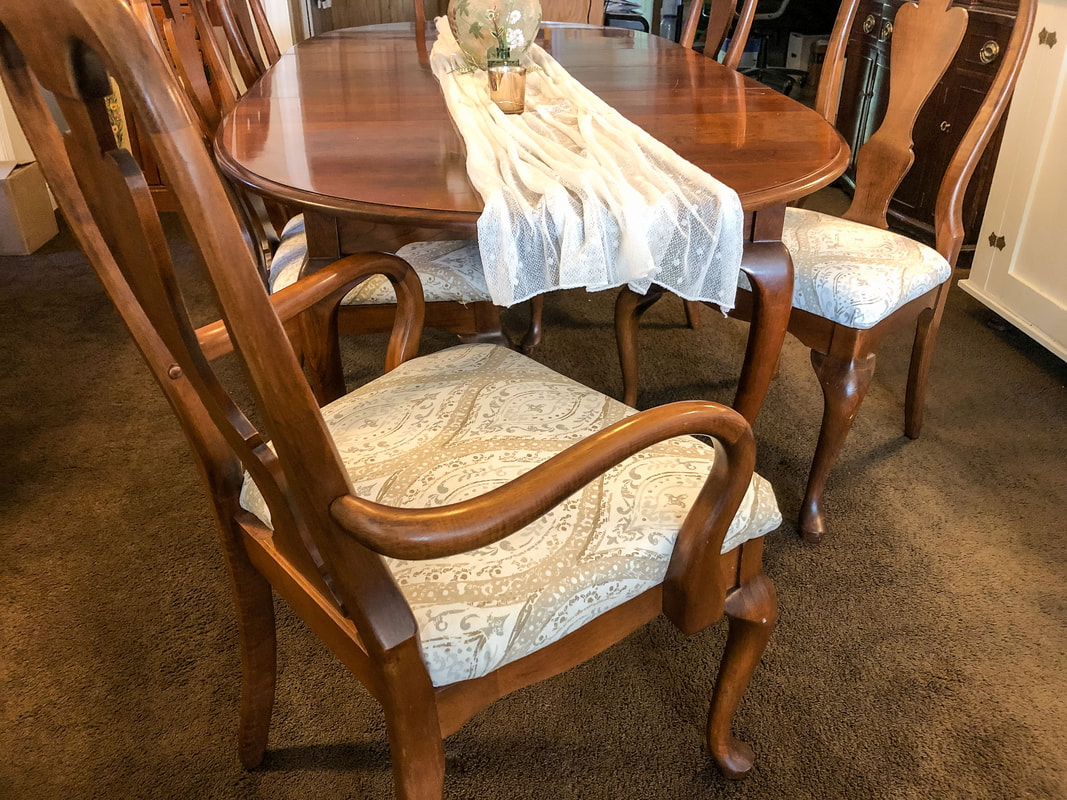
 Finished upholstered dining room arm chair. Photo by Diane M. Lilly, 2022. It’s been a year since we bought our dining room set from an upscale consignment shop in our area. It’s a beautiful set, but the chair upholstery was not looking its best. I tried cleaning it (I even did a blog about it last year), but ultimately, I was unhappy with the fabric. Anyway, the padding is so worn it feels like you’re sitting on a board--time for a reupholstery project! 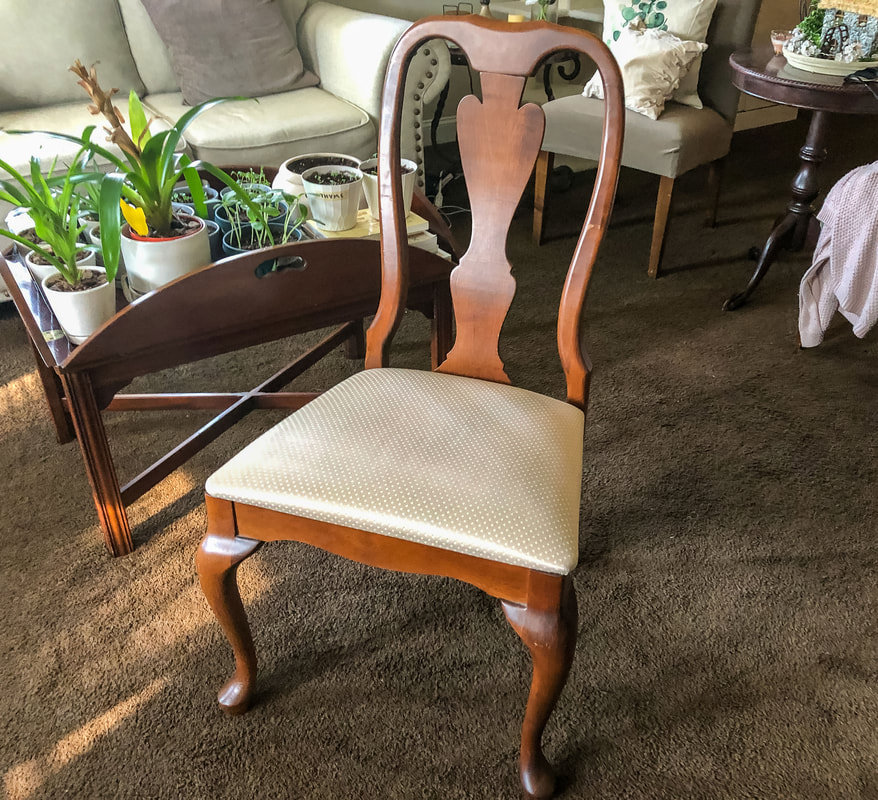 Dining room chair before reupholstering. Photo by Diane M. Lilly, 2022. Here’s where I put in a disclaimer--I am a complete upholstery novice! But I did a lot of research on upholstery methods and watched tons of videos on “YouTube University”! It’s not hard to do simple chair seats, but I did learn a few things by actually doing the project, things you can’t learn from simply watching a few videos. There’s nothing like real life to teach you…So today’s blog shows you my process and offers some tips I learned along the way… Tools needed for this project: electric screwdriver upholstery staple remover electric staple gun pliers scissors utility knife glue/adhesive (opt) marker/pencil foam batting duster (opt) fabric 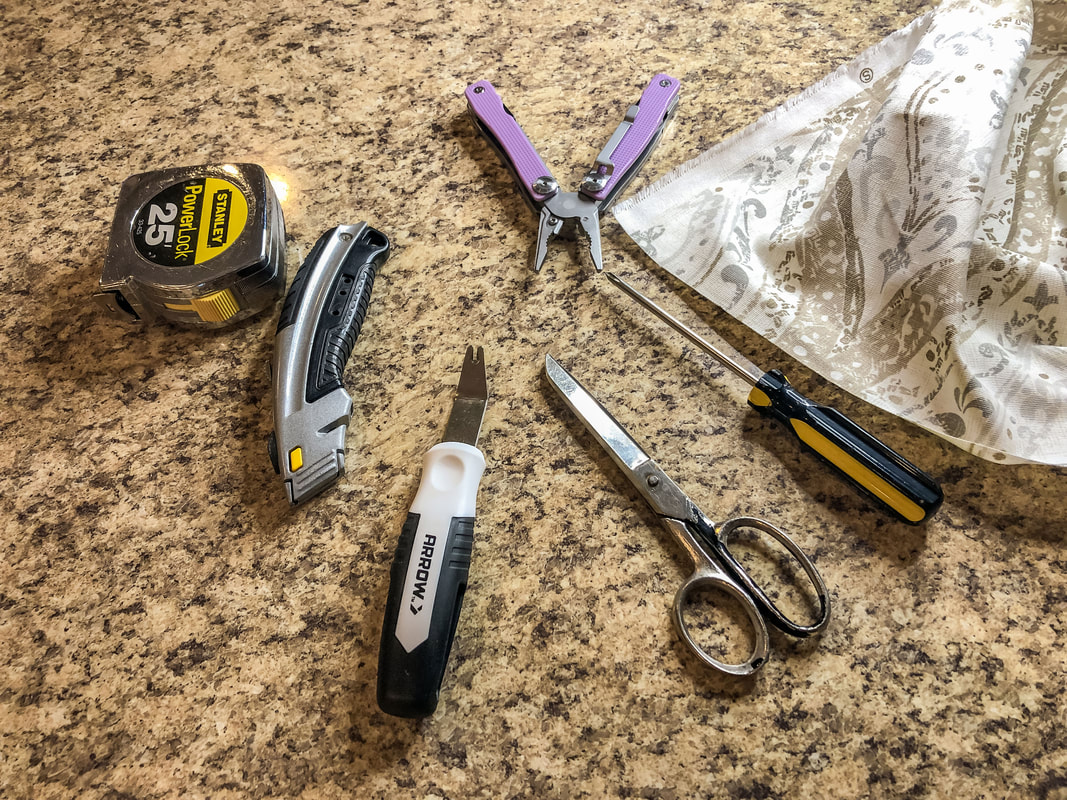 Upholstery tools I will be using for this project. Photo by Diane M. Lilly, 2022. Before I get into the steps I took for this project, I'll say a few words about tools. Upholstery takes elbow grease! You will be working for your arms and hands intensely, and if you have any shoulder or back problems (like myself), be aware of that and work accordingly. A couple of tools that will help with this issue are an electric screwdriver and corded stapler. I started this project with all old-fashioned hand tools…and I was laid up for two days with pain in my spine from irritating an issue in my neck. So, be aware that upholstering is quite physical, so use power tools where you can because it is hard work! Step 1…removing the seat Removing the chair seat from the chair frame was easy. I turned the chair upside down and unscrewed the screws in each corner bracket that attaches the seat to the chair frame. 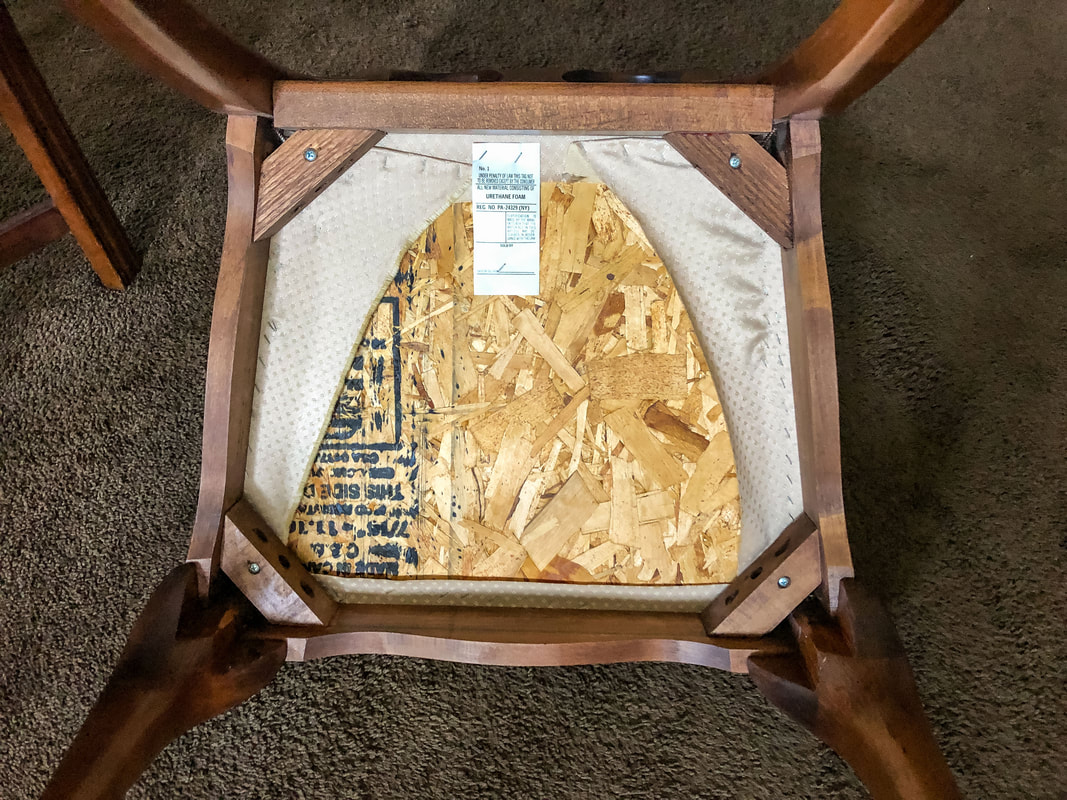 Underneaththe dining room chair where the seat is attached to the frame. Photo by Diane M. Lilly, 2022. 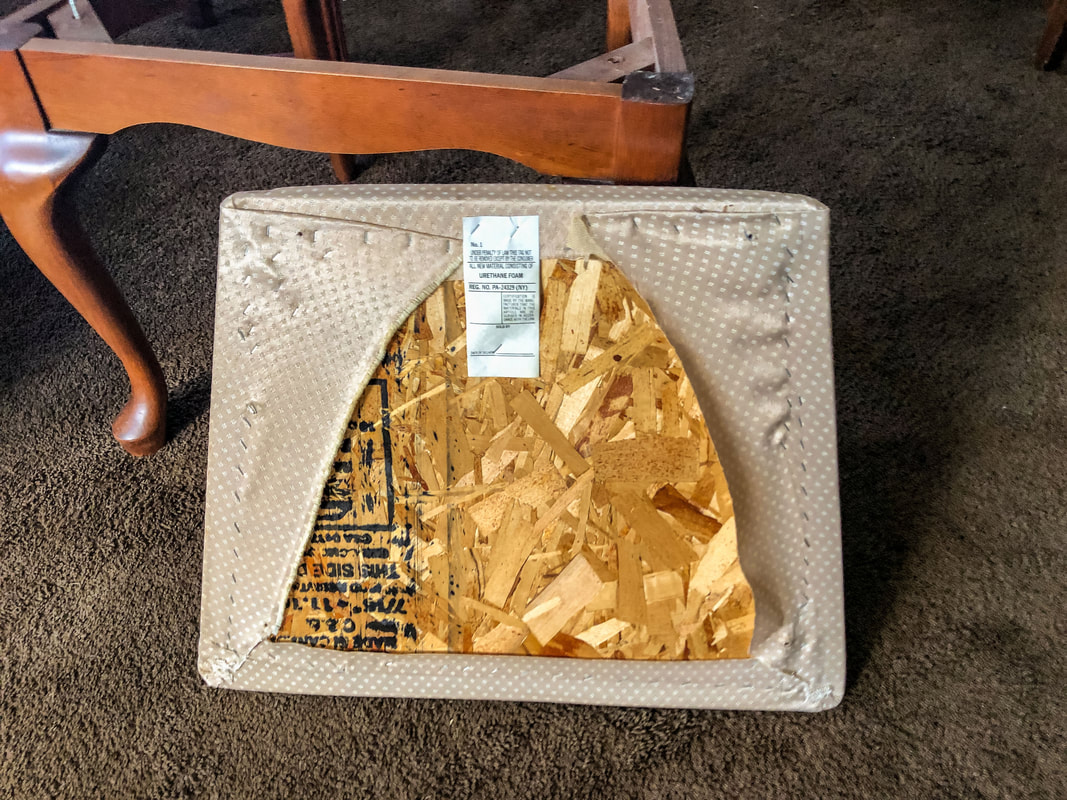 A view of the underneath of the chair seat before reupholstering. Photo by Diane M. Lilly, 2022. Step 2…remove all the existing staples This part can be tedious and a bit tough on the hands. But saying that, it’s not hard to do, depending on how your predecessor went about upholstering the seat. Turn the seat upside down and use a staple remover tool (you can find one cheap on Amazon) to remove as many old upholstery tacks or staples as possible. You will want to start your new project with a clean surface so your new staples go in easily. In my case, the old staples were thin and neatly done, so there wasn’t a huge mess to clean up. And that was a good thing because removing staples from fabric and wood is tedious work and hard on the hands! Just make sure you work in an area where you can easily collect the extracted staples so you or your pets don’t step on tacks or staples. 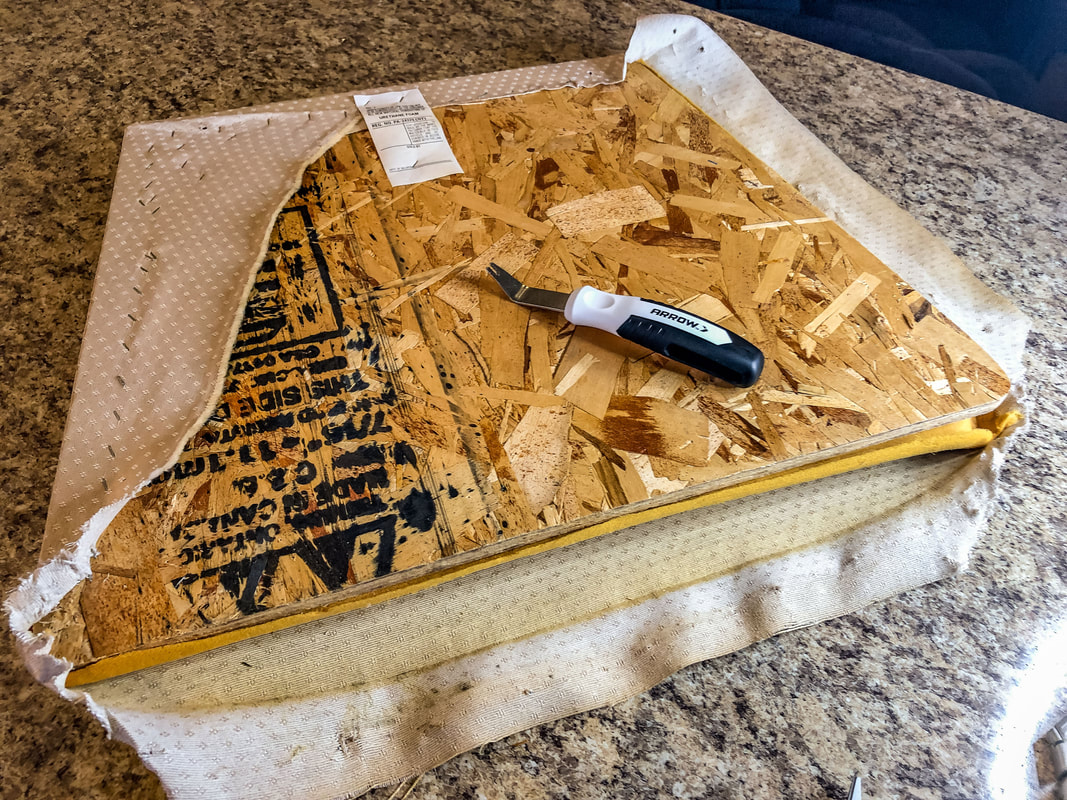 Removing the old fabric and staples from the seat board. Photo by Diane M. Lilly, 2022. Step 3…measuring and cutting the padding The existing padding for my chairs was worn, thin, and needed to be replaced. The chairs needed more lift, so I chose 2” thick padding for this project. I discarded the old padding, except for the small square piece for the center of the chair board. (There is sometimes a smaller piece of padding in the center to add extra support.) I made sure to cut the new padding just a touch larger on all sides of the board so that the new padding could sink and wrap around the edges of the hard board underneath. 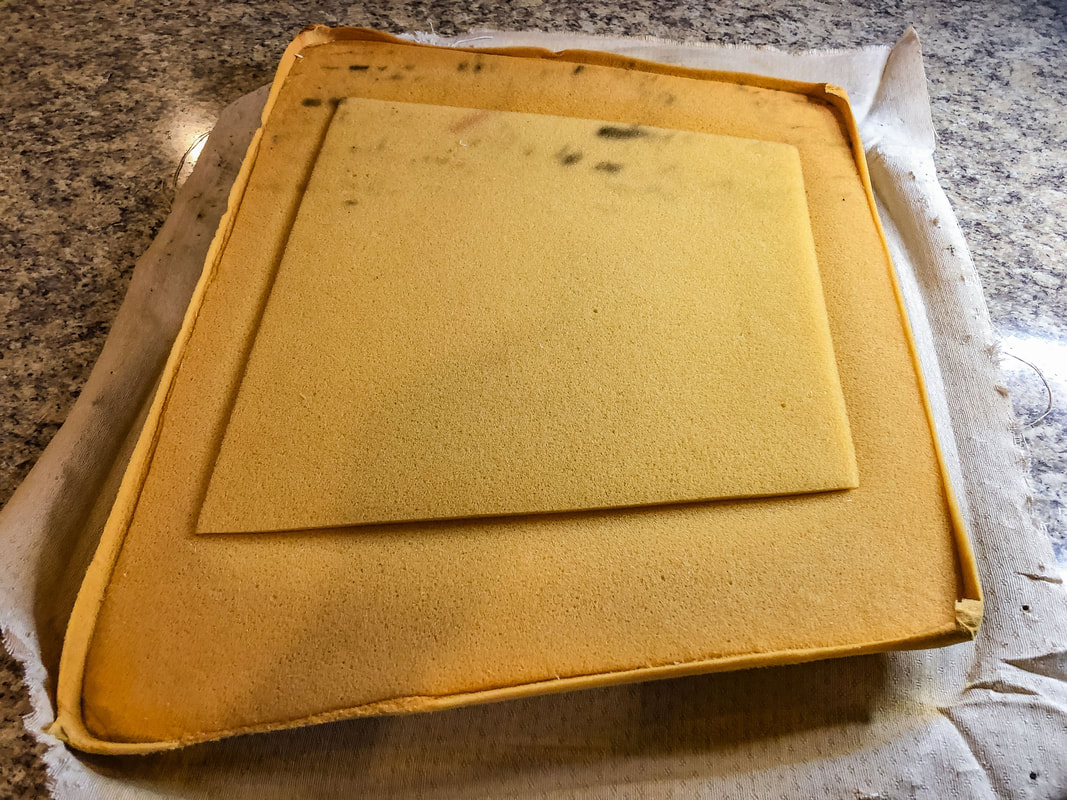 A view of the old chair padding that will be replaced. Photo by Diane M. Lilly, 2022.  Tracing the old padding on the new padding. Photo by Diane M. Lilly, 2022. 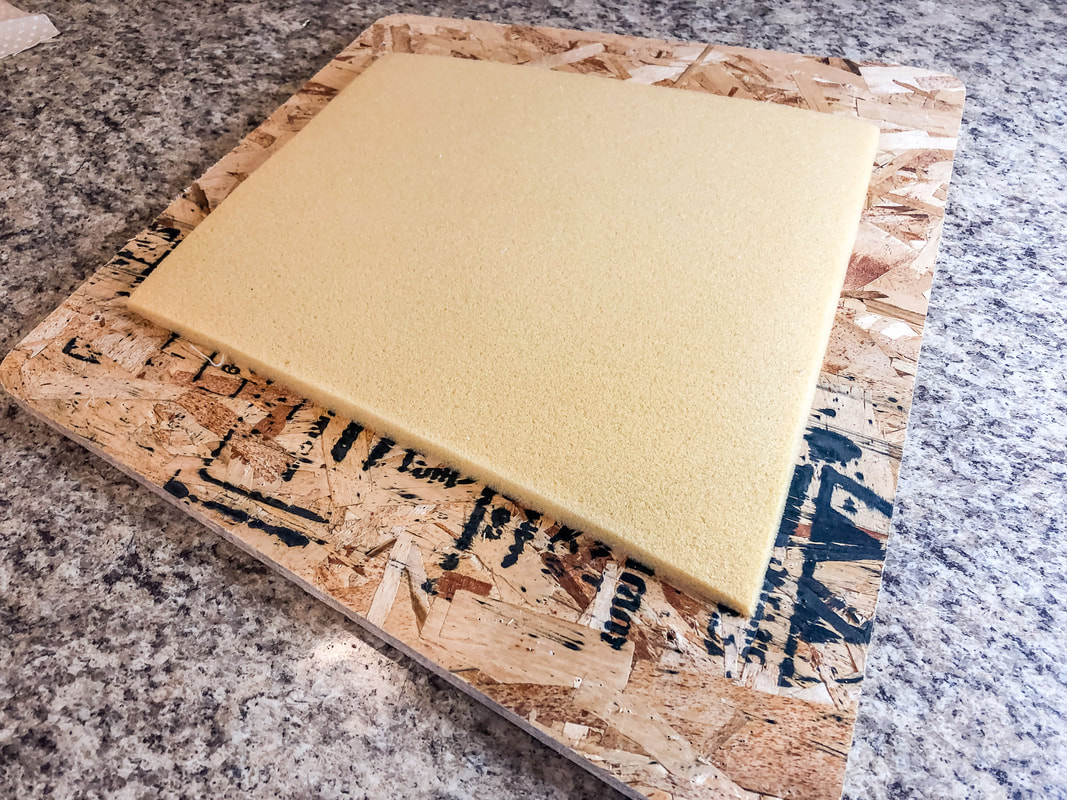 A view of where the small chair pad will sit on the seat board under the new padding. Photo by Diane M. Lilly, 2022. Step 4…measuring and cutting the batting The next step is to measure out and cut the batting. My existing chairs didn’t have batting, but the seats needed that extra padding. You could probably skip this step depending on your chair type and preference. Anyway, measure enough batting that the fabric wraps around the entire seat (padding included) and can be easily attached underneath the board. You’ll want to cut it a few inches longer on each side (I think mine was about 4-5 inches because of the two-inch padding) to allow plenty of room for pulling taut and stapling to the underside of the board. 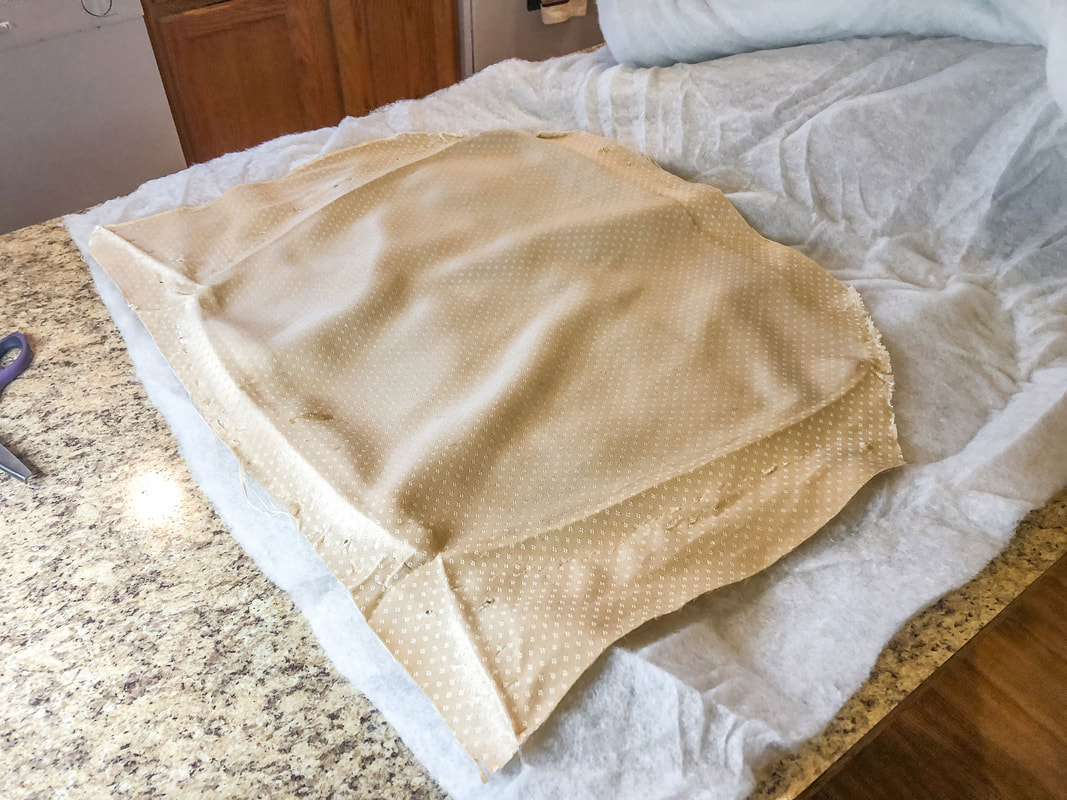 Using the old fabric to measure out the new batting (adding a few inches on each side). Photo by Diane M. Lilly, 2022. Step 5…attaching the batting When you start stapling the batting, place one staple in the center on each of the four sides, making sure to pull it as tight as you can without tearing the batting. Pull and secure it tight, for a properly supported and tailored-looking cushion. Once you have the batting attached with one staple, staple the rest of the fabric on each side, making sure to pull the fabric as taut as you can while you go. Stop a few inches from the corners--they will be dealt with last. 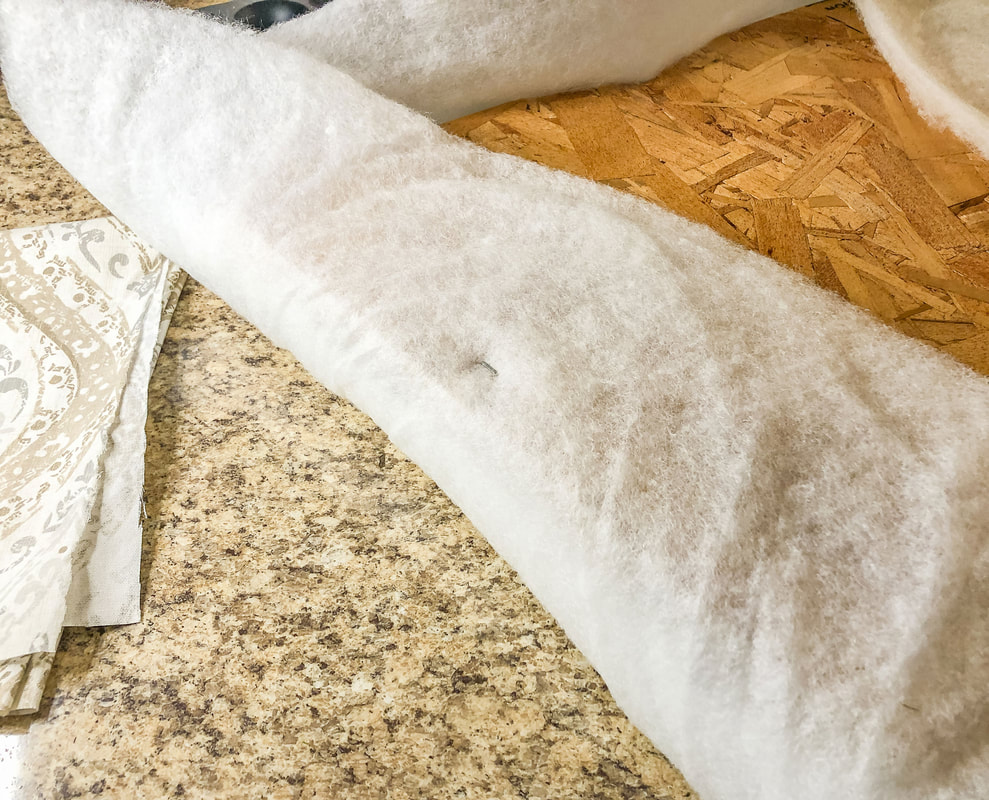 Placing one staple in the middle of each side to start attaching the batting. Photo by Diane M. Lilly, 2022. 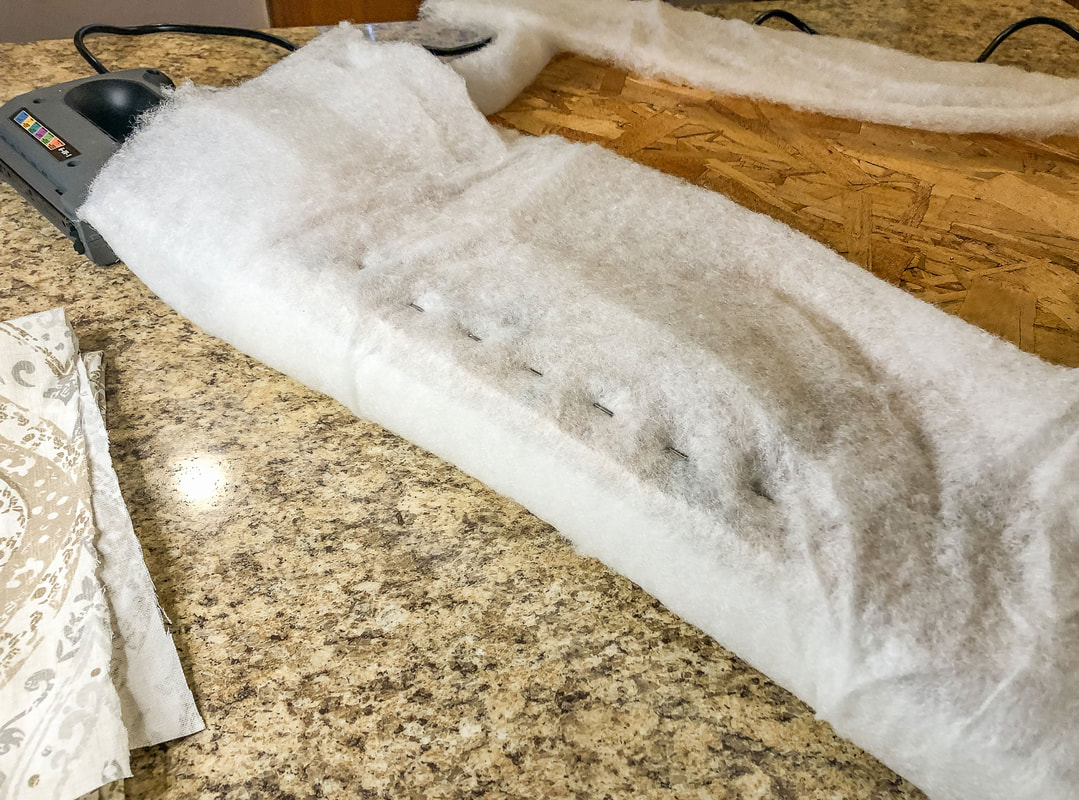 New staples along one side attaching the batting to the seat board. Photo by Diane M. Lilly, 2022. Once all the sides are stapled, you can staple the corners. See my images below for how to do that… 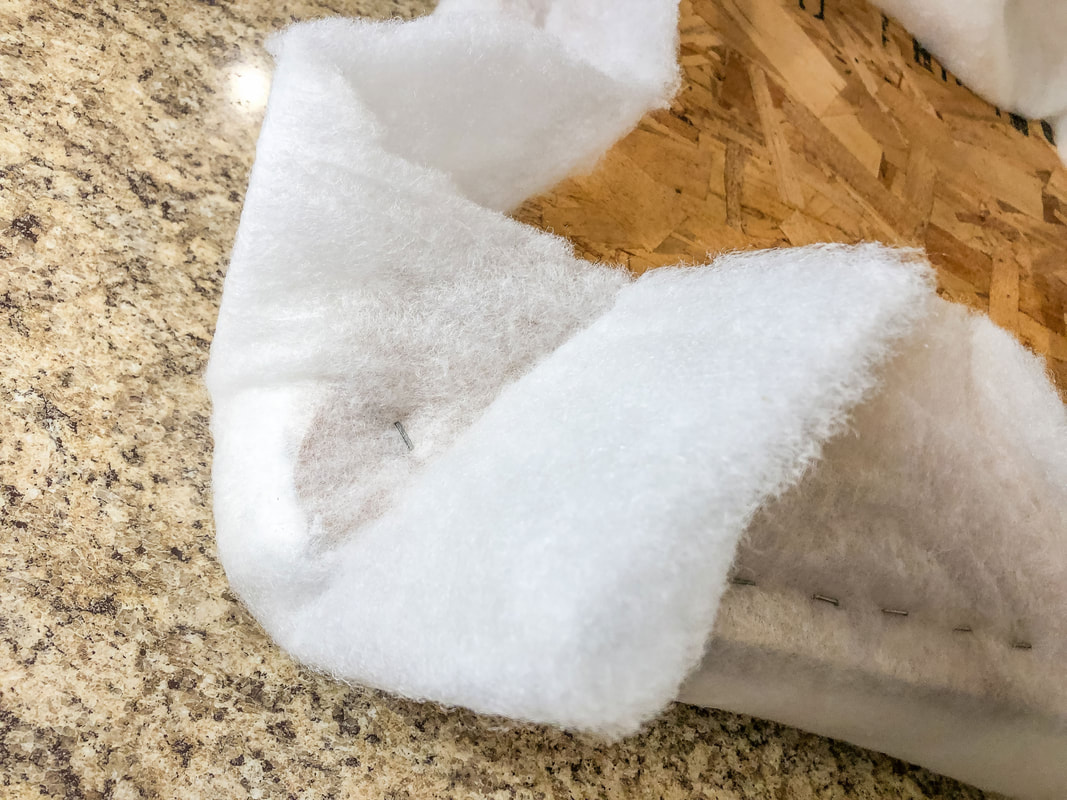 Start attaching the batting to the corner by folding the batting in and attaching with one staple, then making folds on either side of that staple to securely attach. Photo by Diane M. Lilly, 2022. 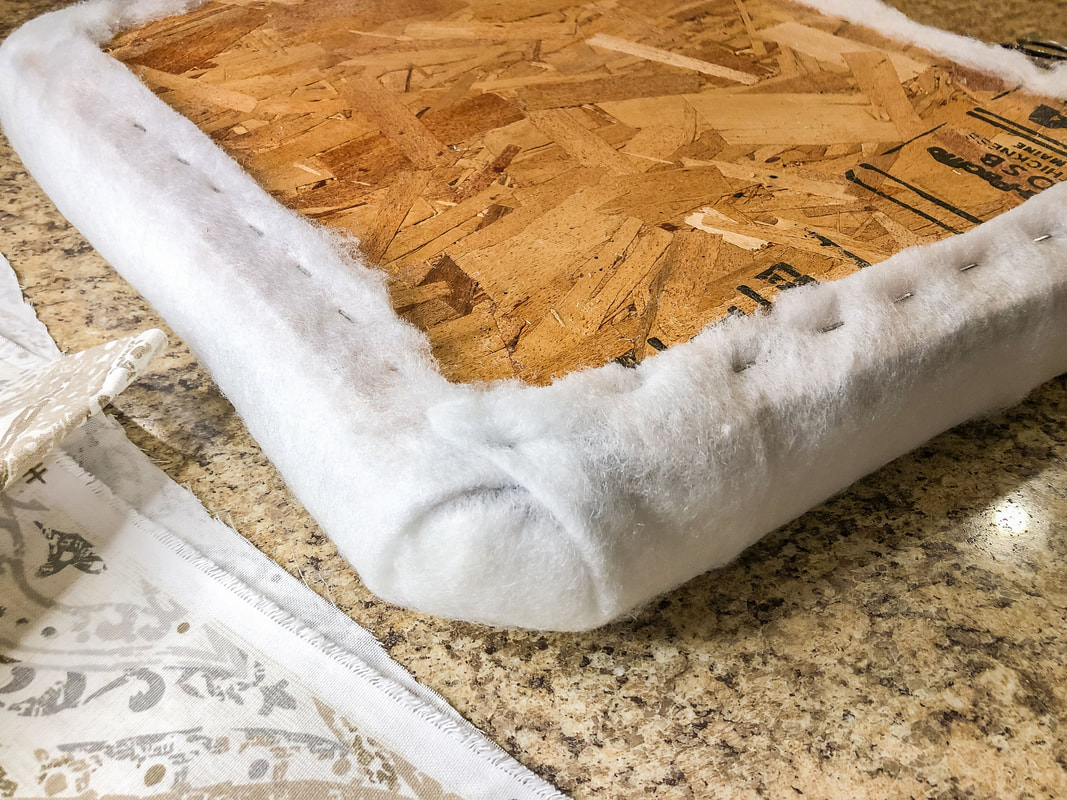 A view of the bottom of the seat board with batting securely stapled on all sides and corners, and excess batting material trimmed. Photo by Diane M. Lilly, 2022. 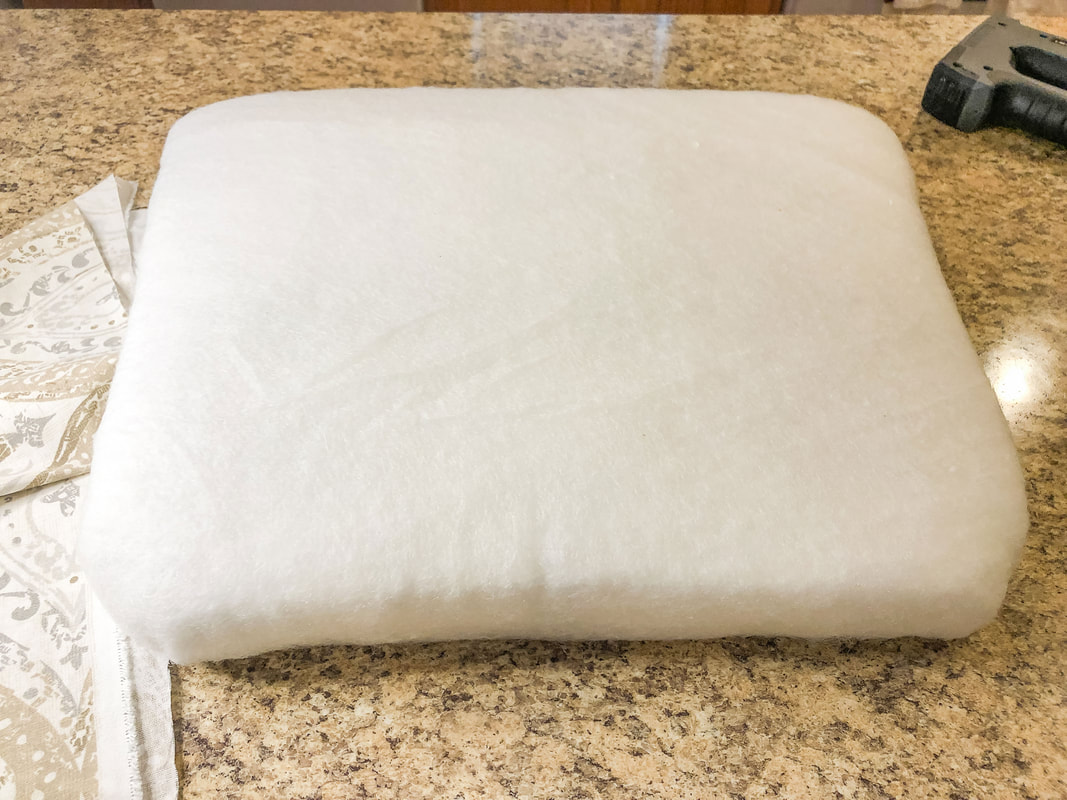 A view of the chair seat with finished padding and batting. Photo by Diane M. Lilly, 2022. Trim off all the excess batting to clean up the seat and prep for the upholstery fabric. Step 6…measuring and cutting the fabric For the fabric, use the same steps as the batting. The only difference in this step is to make sure your thread weave (called warp and weft) is straight (horizontally and vertically) across the chair seat. Center any pattern on your chair seat because an off-centered pattern will be very obvious in the finished piece. So, take your time to get this part right! 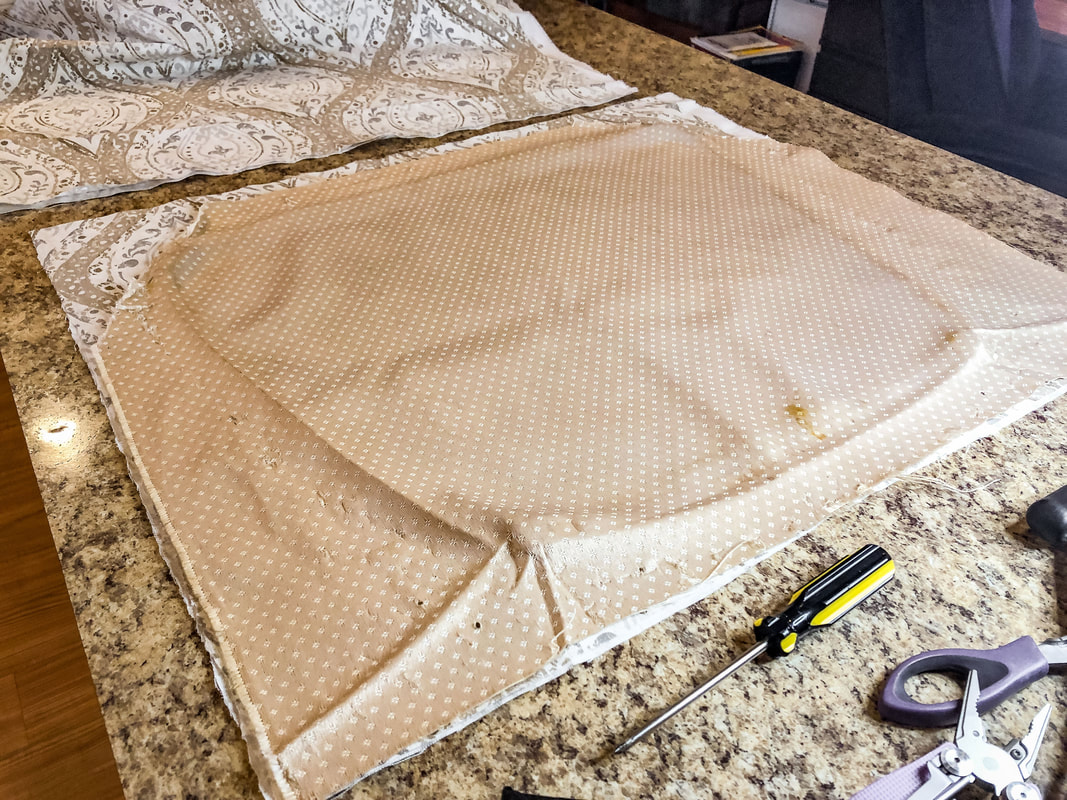 Using the old fabric to measure out the amount of new fabric needed, with a few extra inches on each side to accommodate the thicker padding. Photo by Diane M. Lilly, 2022. 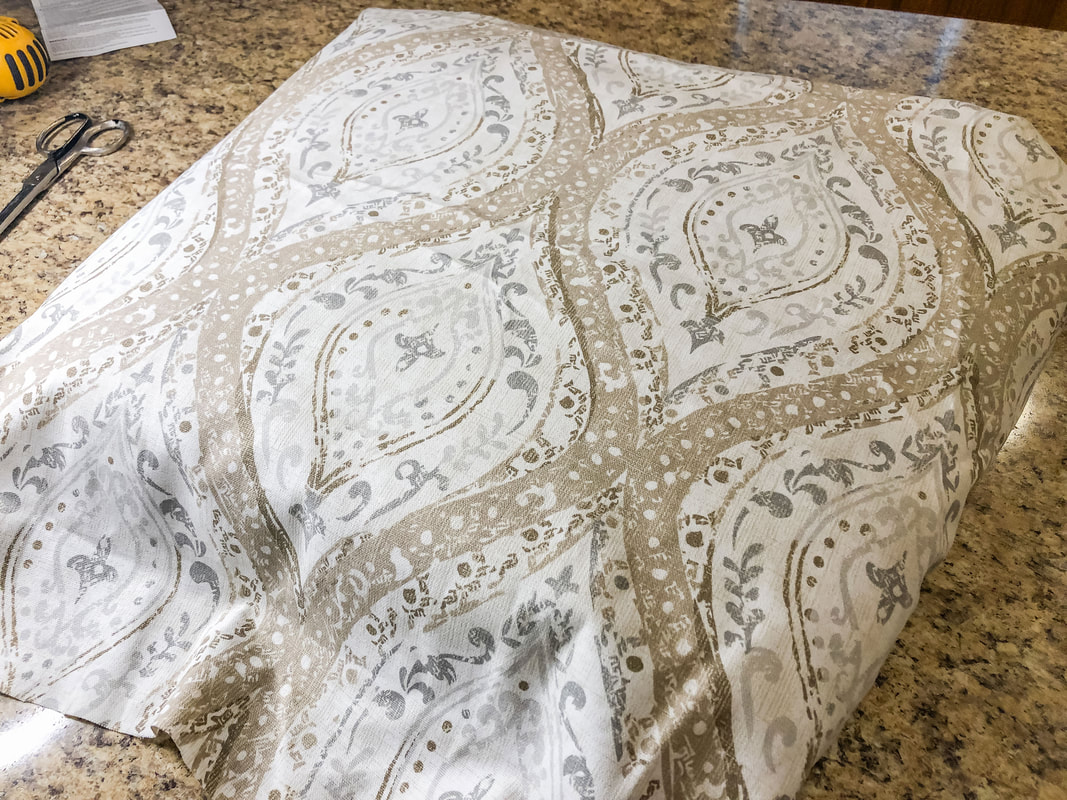 Align the pattern on the fabric with the seat before attaching to the bottom of the seat board. Photo by Diane M. Lilly, 2022. Step 7…attaching the fabric The rest of the stapling process is the same as when we attached the batting, so follow those instructions to attach the new fabric. Trim excess fabric on the bottom of the board. 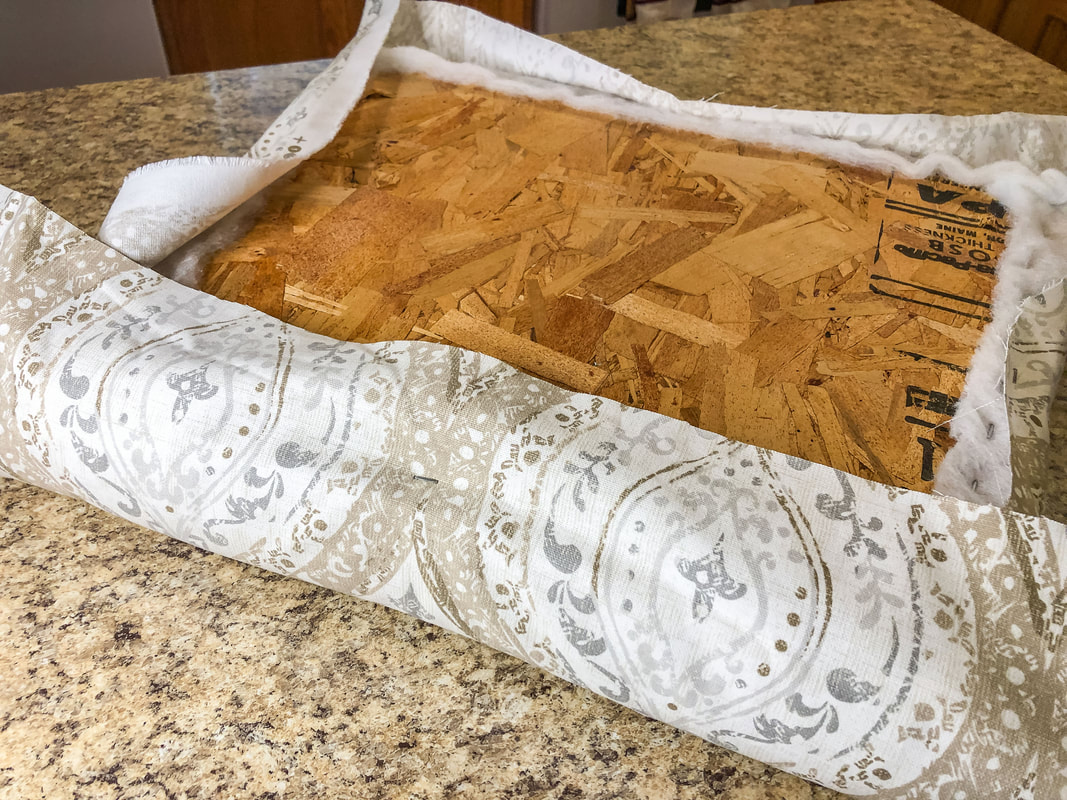 Place one staple in the center of each side (making sure to pull the fabric tight) to start attaching fabric to the seat board. Photo by Diane M. Lilly, 2022. 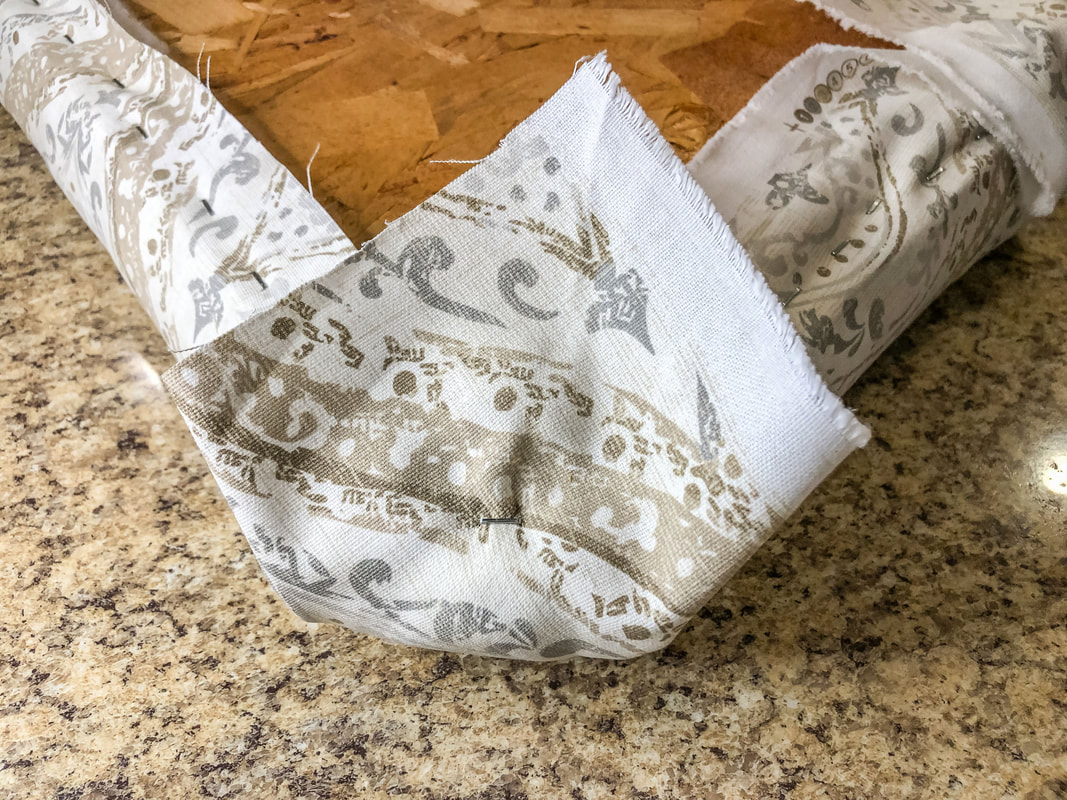 After the sides are stapled, start securing the corners by folding the fabric in and securing with a staple. Fold fabric down on either side, pulling taut to create a smooth corner and secure with staples. Photo by Diane M. Lilly, 2022. 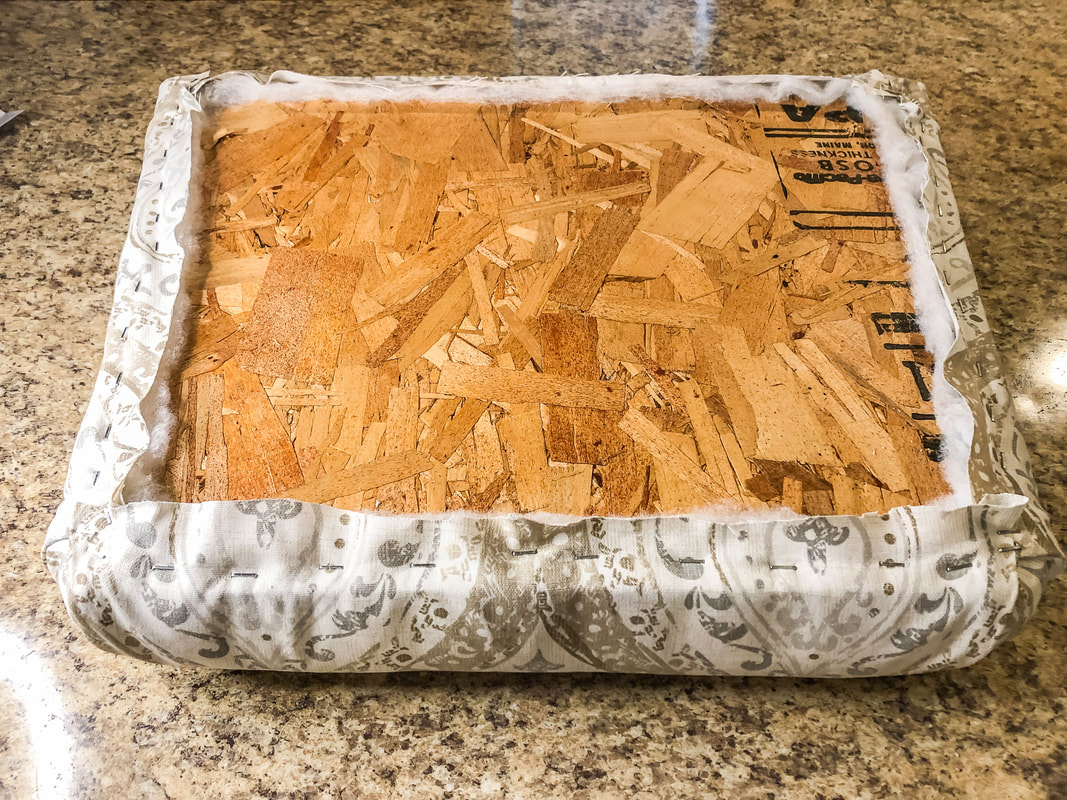 A view of the bottom of the cair seat after new padding, batting, and fabric have been attached and secured. Excess fabric has been trimmed for a clean look. Photo by Diane M. Lilly, 2022. At this point, I discovered a way to cut my stapling process in half. I found that it was possible—if I was careful—to staple both the batting and fabric at the same time. The only issue I had with that technique is that the corners must be done individually, meaning the batting needs to be secured first and then the fabric on top. (If you try to staple both the batting and fabric in the corners at the same time, you'll be fighting with too much material.) So, stapling both the batting and fabric at the same time is a convenient way to cut down time (and work) on a simple seat upholstery project like this one. Step 8…attaching the duster When I started this project, I decided I didn’t need a dust cover since the existing chairs did not have dust covers. That was a bit of a mistake on my part--as it helps cover all the stapled fabric and makes for a cleaner finished look--but it won’t be difficult to fix later. Being a novice at upholstery, the underneath of my chairs didn’t look quite as neat as the original upholstery and a duster would’ve finished it off and made it all look more professional…but I hadn’t purchased that material. Sometime in the future, I will have to unscrew the seats and staple on a dust cover. It’s a simple process of cutting material to just a bit smaller than the bottom of the chair board, using enough material to cover the upholstery edges and stapling. Make sure to fold over the edges—leaving no raw fabric edges showing—and the bottom of your chair will look finished and polished. Step 9…reattach the seat And the last part of the process is to reattach the seat and admire your handiwork! This part of the process is much easier with an electric screwdriver, by the way… Secure the chair frame and new chair seat with screws, making sure there are no gaps. This may take using clamps or another person to help you hold the two chair parts together tightly while you screw them back together. I had an issue with my first attempt; the screws would not hold, and there was a gap, so I needed my husband to help me hold things down while I screwed the seats back together. Other than that, you’re done! 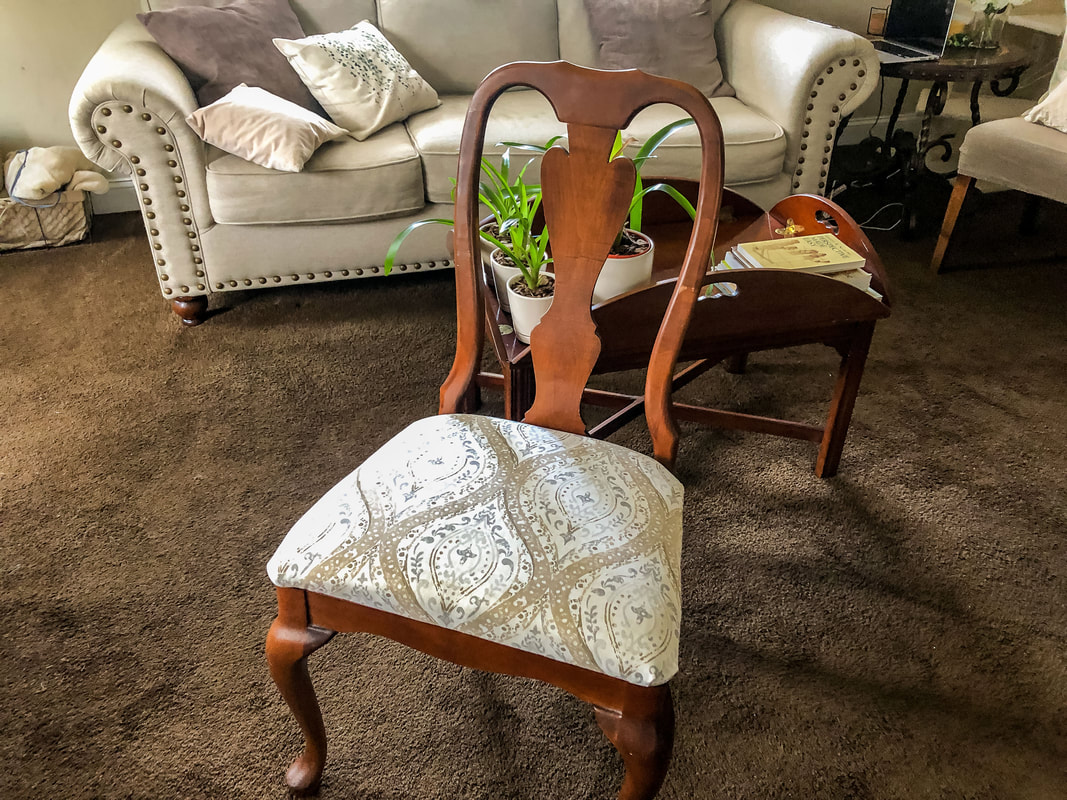 Finished side chair, freshly reupholstered. Photo by Diane M. Lilly, 2022. 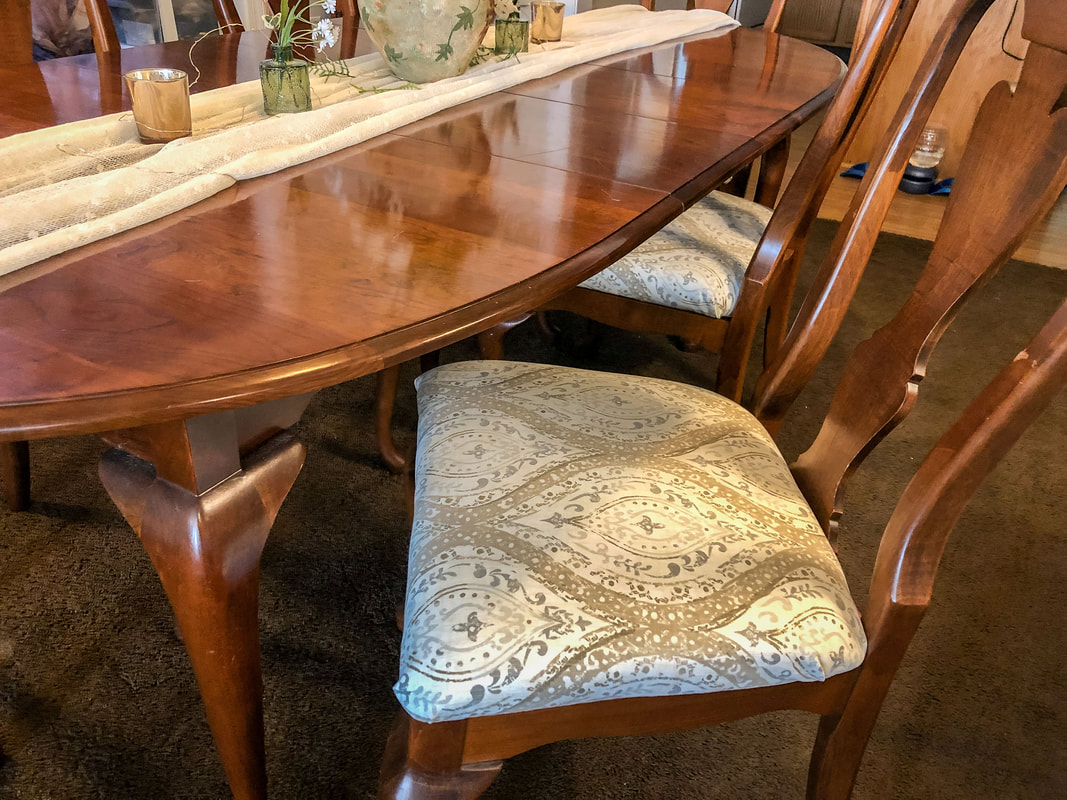 Dining room chair newly reupholstered. Photo by Diane M. Lilly, 2022. 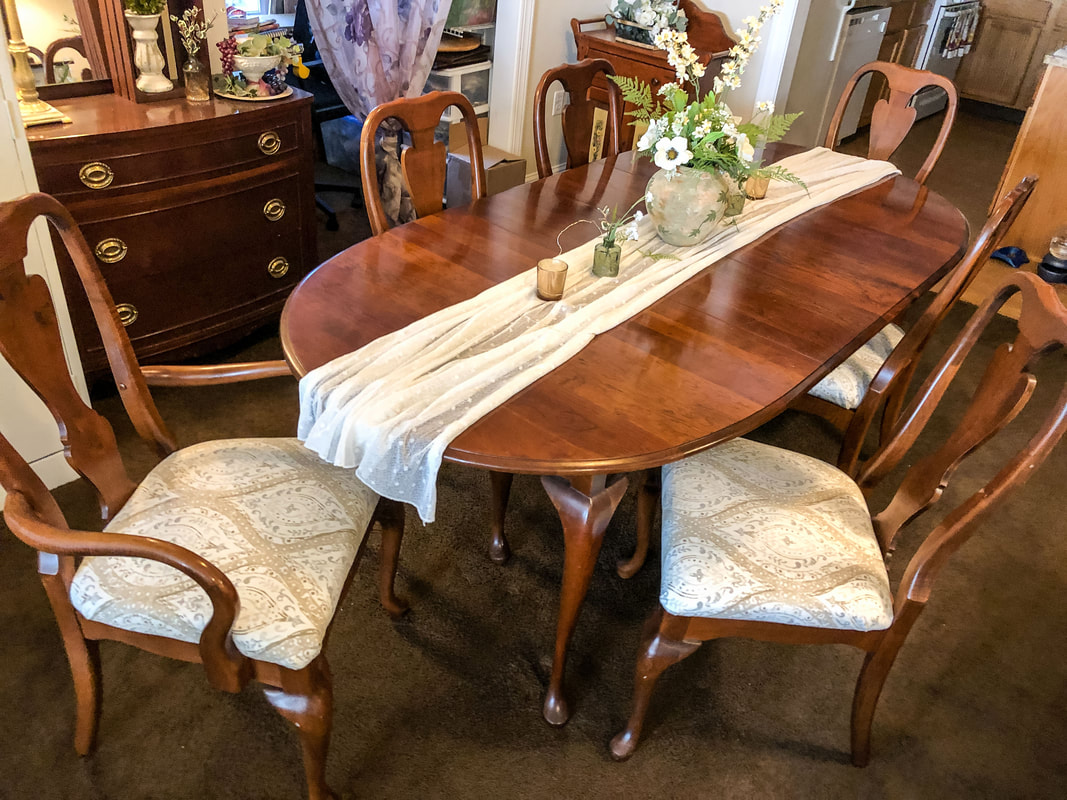 My finished reupholstered dining room chairs. Photo by Diane M. Lilly, 2022. So, as I said, this is a relatively straightforward process, but it is very physically demanding, so be aware of that before you start. My advice is to practice on a few simple chair seats first if you have more complicated pieces to upholster (like I do). I have an antique settee that needs upholstering, but I wanted to do these dining room chairs first to get some experience before jumping into the deep end! And I’m glad I did because I now feel more prepared for the big project. But that’s a DIY for another day…so stay tuned! Related blogs you may want to read: Comparing DIY upholstery cleaning methods A little project with jute twine and an old foot stool DIY refurbishment of a dining room cabinet A fun DIY project with paint and a thrifted mirror part 1 A fun DIY project with paint and a thrifted mirror part 2 Creating a kitchen coffee bar How to replace a clock mechanism On a mission to recycle this neglected vintage stool The stain stripping stage of rescuing my vintage stool Staining my vintage stool with brewed tea My tattered vintage stool transformed into a beautiful plant stand Affiliate Disclosure Some of the posts in this article contain affiliate links. This means if you click on the link and purchase the item, I will receive an affiliate commission at no extra cost to you. I will only recommend products or services I use personally and/or believe will add value to my readers, so there is no conflict of interest.
0 Comments
Leave a Reply. |

Author
Some of the posts on this site contain affiliate links. This means if you click on the link and purchase the item, I will receive an affiliate commission. 
Categories
All
Archives
October 2025
|
 RSS Feed
|
|
Major credit cards accepted through Square. Apple Pay option available. This site also accepts PayPal payments for better online security, and it's free to sign up! Gift cards are now available for purchase!
Copyright 2025 |