|
Creating the finishing touches 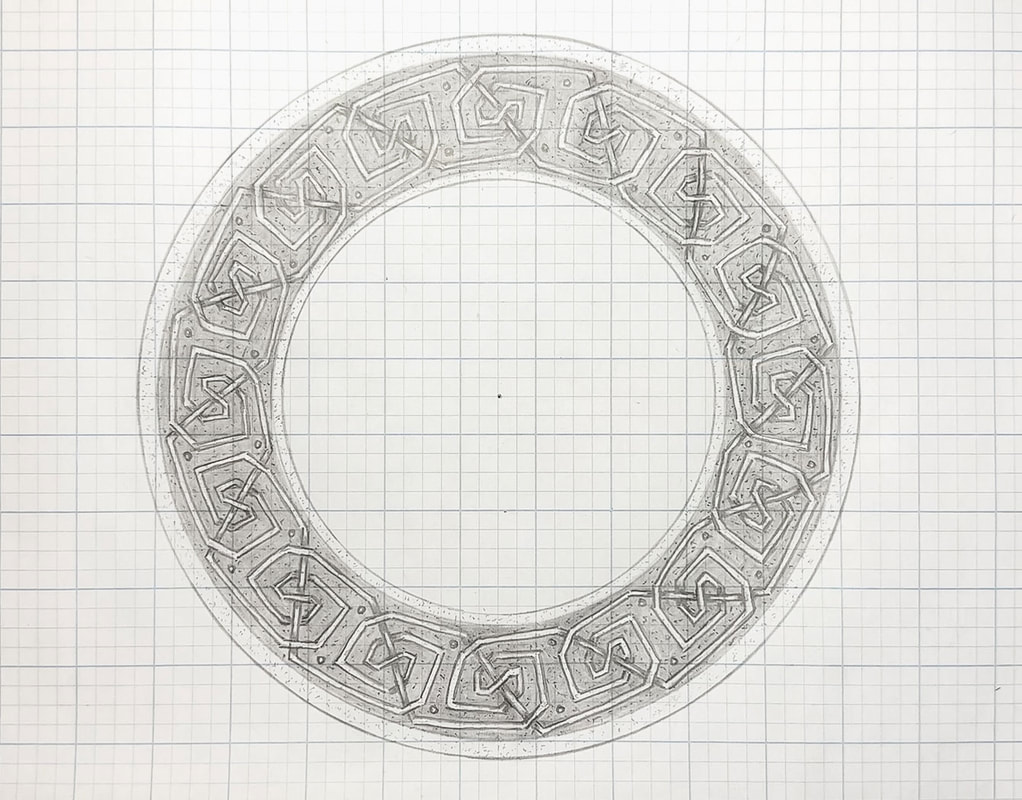 Welcome to the fourth and final part of my latest drawing tutorial series featuring a spiral knot border design. This blog post includes helpful tips and resources for you to consider while finalizing the design details for your new artwork. We will discuss mediums, line definition, texturing, the use of color, and creative applications for this border template. The hard work is done…Now it’s time to get creative! Suggested supplies Grid paper Tracing paper Clic eraser Ruler Compass Blending stumps Drawing pencils Charcoal Micron pens Colored pencils Colored Markers Watercolor paints Paint brushes Watercolor or all-purpose paper Wood-burning tools Useful books How to Draw What You See by Rudy De Reyna Pyrography Basics: Techniques and Exercises for Beginners by Lisa S. Irish The Treasury of Celtic Knots by Aidan Meehan The Celtic Design Book by Aidan Meehan I am an affiliate associate of Amazon and Blick Art Materials, so some of the posts in this article contain affiliate links. If you click on the link and purchase the item, I will receive an affiliate commission at no extra cost to you. I will only recommend products or services I use personally and/or believe will add value to my readers, so there is no conflict of interest. Tips for creating the finishing touches for your circular spiral knot border 1. Gather materials and prep your work area This is an often overlooked part of working on a creative project! An organized space with all the necessary supplies within arm’s reach frees your brain space, allowing you to focus on the work at hand. So, before you start, take the time to gather the drawing materials you will need for your final piece, and don’t forget to protect your work surface from any accidental damage from tools, paints, and other supplies. 2. Choose your medium If you’re like me, you have a favorite medium, right? There are times, however, when you may want to step out of your comfort zone and try something new. This is the point in the project when you have to decide which path to take. My favorite medium is graphite drawing pencils! But you may use other mediums, like Micron pens, colored pencils, watercolors, colored markers, charcoal, or a combination of materials. Choose your medium and have fun with it! 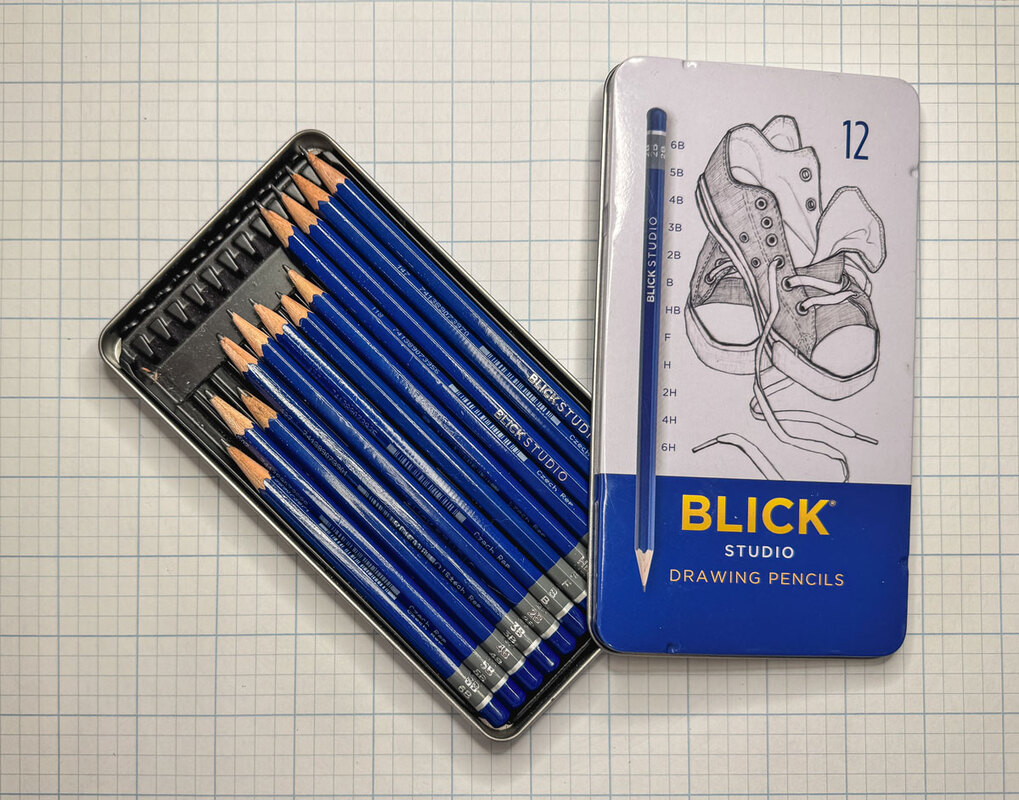 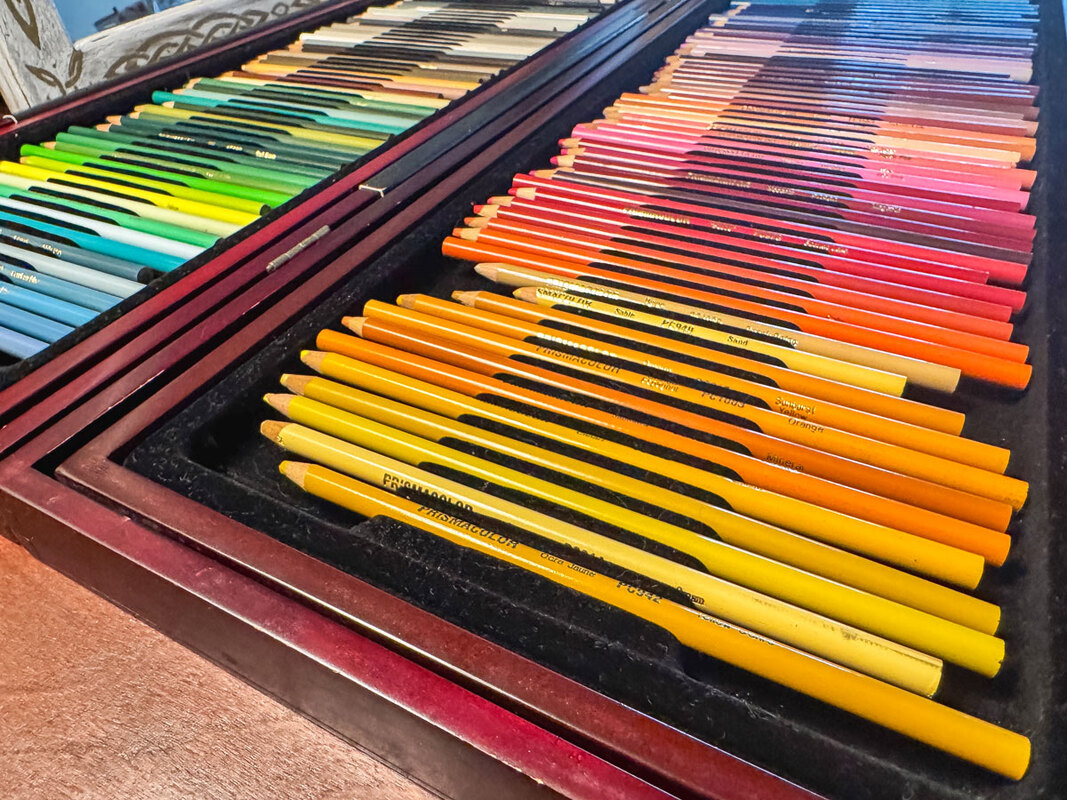 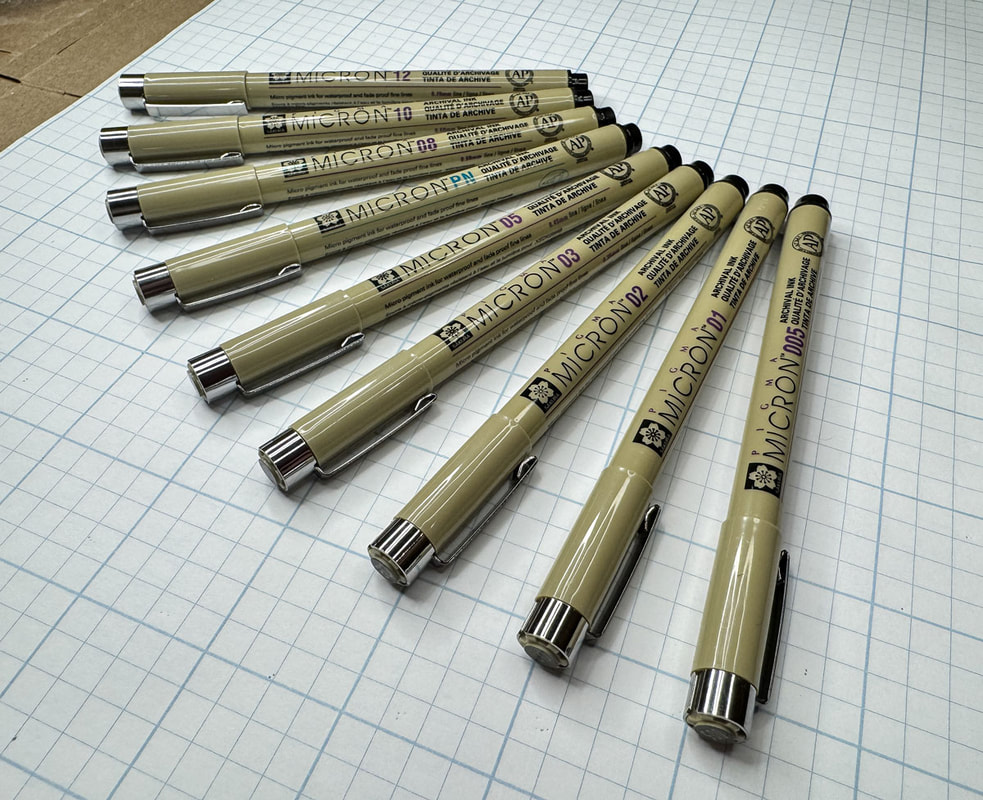 3. Clean up the drawing and strengthen your line work If you plan to use this border as a template or want to keep it as a pencil drawing, this final stage is your opportunity to clean up and erase any stray lines. Use a variety of lead pencils to tighten up the artwork, retrace the rough lines, add visual variety, and fix any line issues. This is the time to decide which lines will be heavy or light and define the line—and thread—style and width. 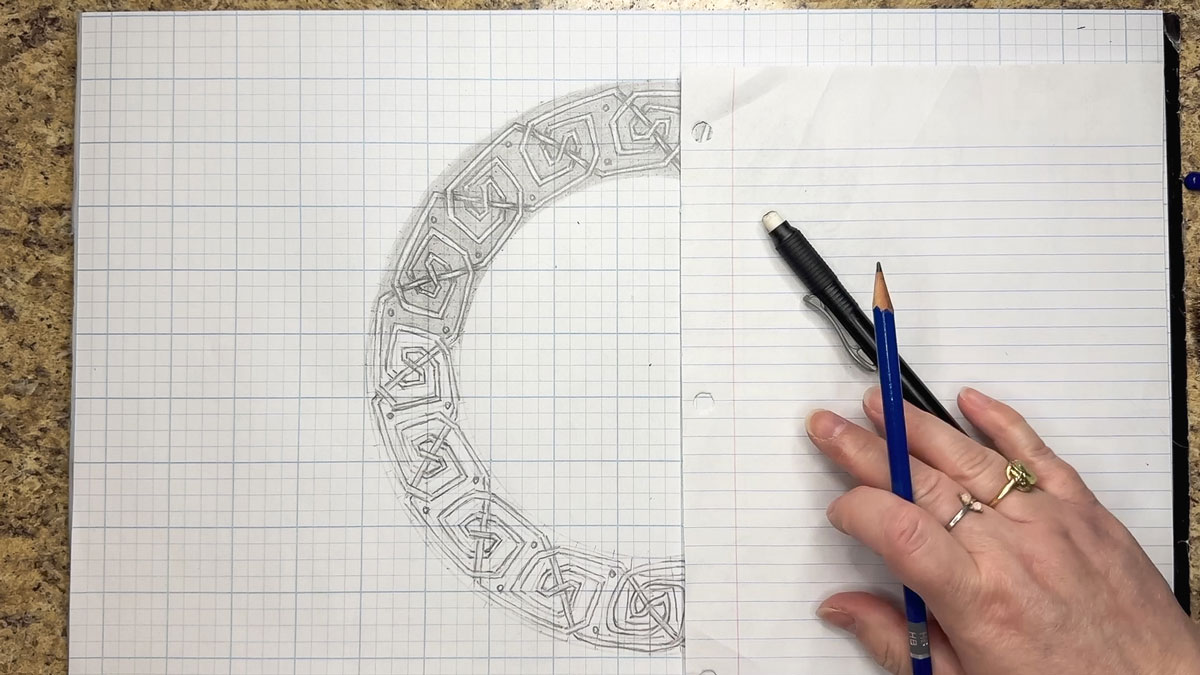 4. Give your drawing depth Add shading and highlights to the thread to create a sense of depth, using techniques such as stippling, cross-hatching, Xs, + marks, or other line work to add texture. Is your spiral border shiny, grainy, rounded, or flat? Asking yourself these questions will help you create a cohesive look for the overall artwork. Think about your background and how it will sit beside your threads, as that is an important visual interaction for a successful design. 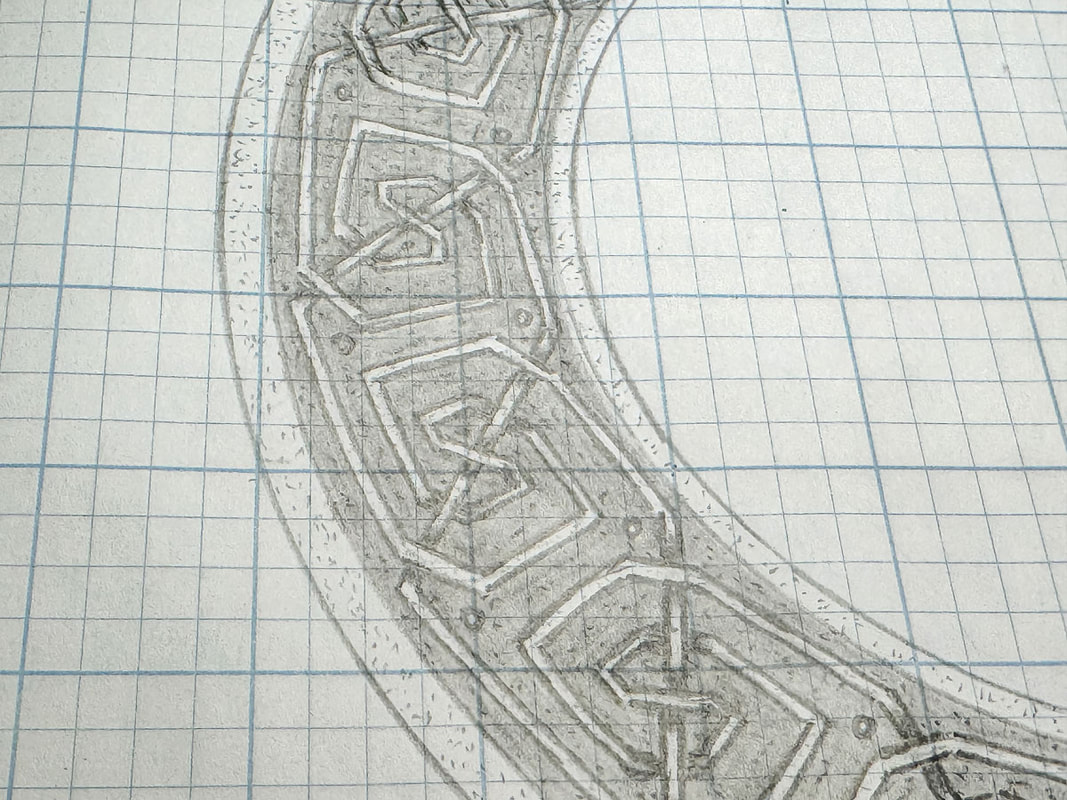 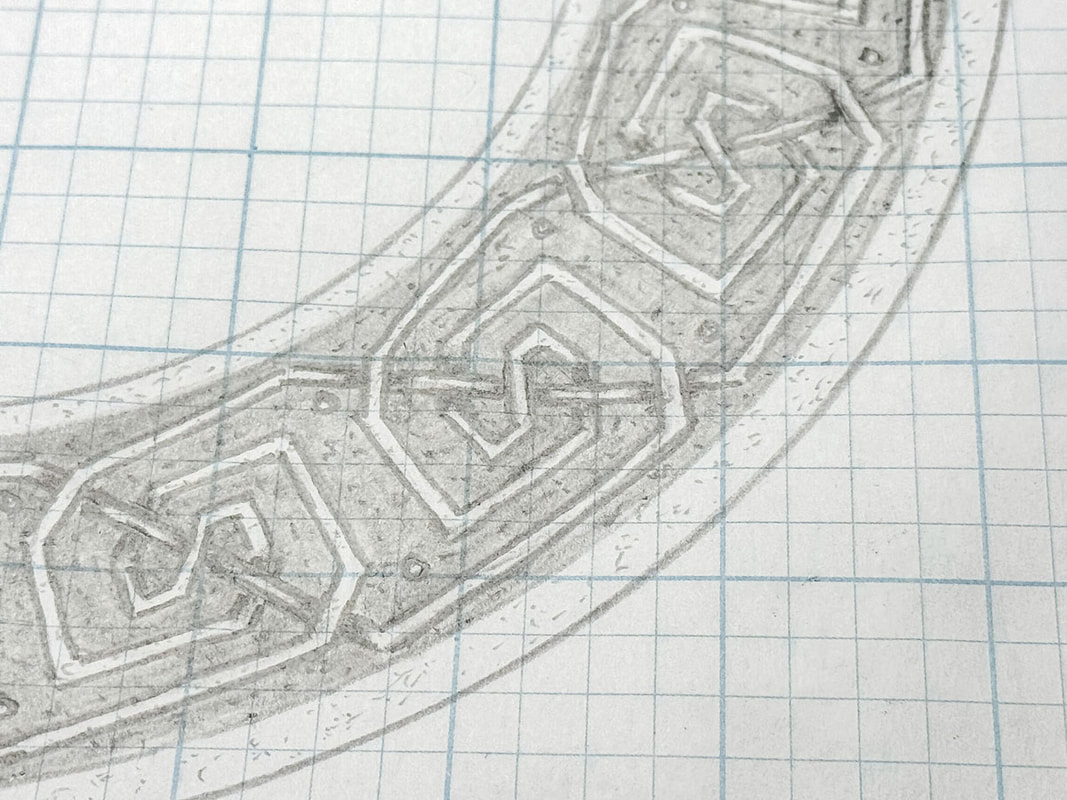 5. Stylize the background Decide on embellishments and stylistic details for your background. Where are your dark and light areas? Dark colors recede, so a dark background might work well against other light elements. Empty spaces around the knotwork can be filled with artistic accents to create more detail and visual interest. You can also add to the interior and exterior of the border. This circular border looks striking between two thin circular frames! 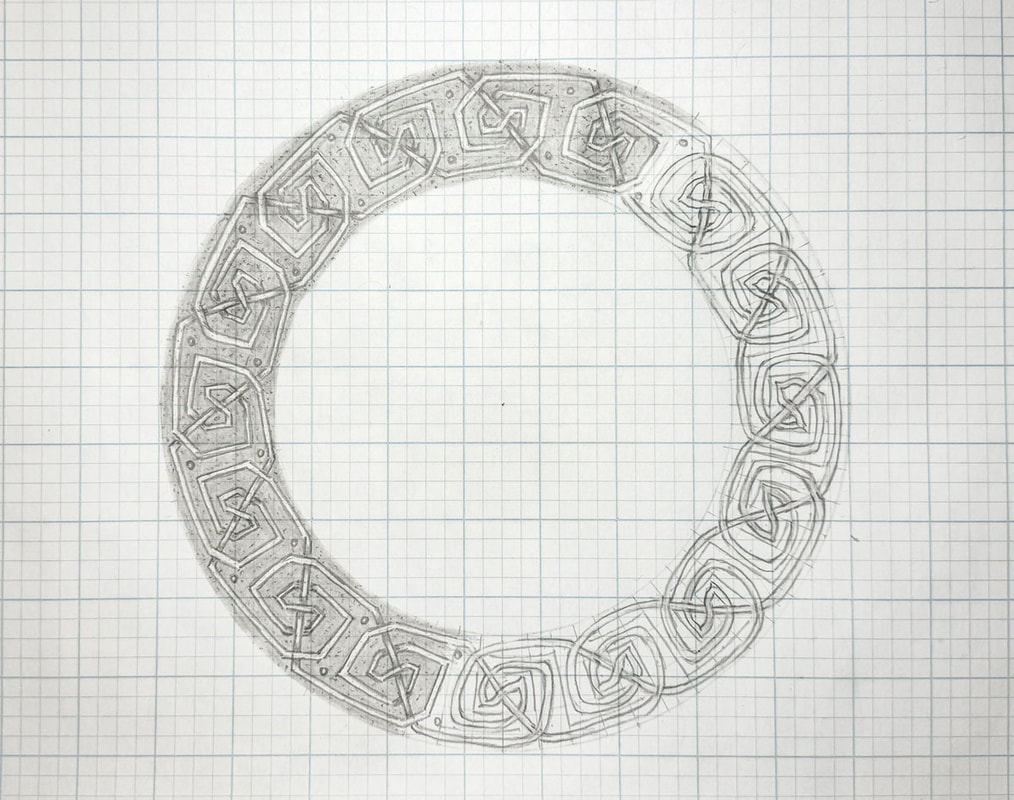 6. Use a range of grey tones If you’re working with black, white, and grey for your design—and your design is not strictly dependent on light weights for visual interest—try using the widest tonal range possible. The more variation you have between the lightest light and darkest dark, the more visually appealing your work will be. Create swatches for quick reference. 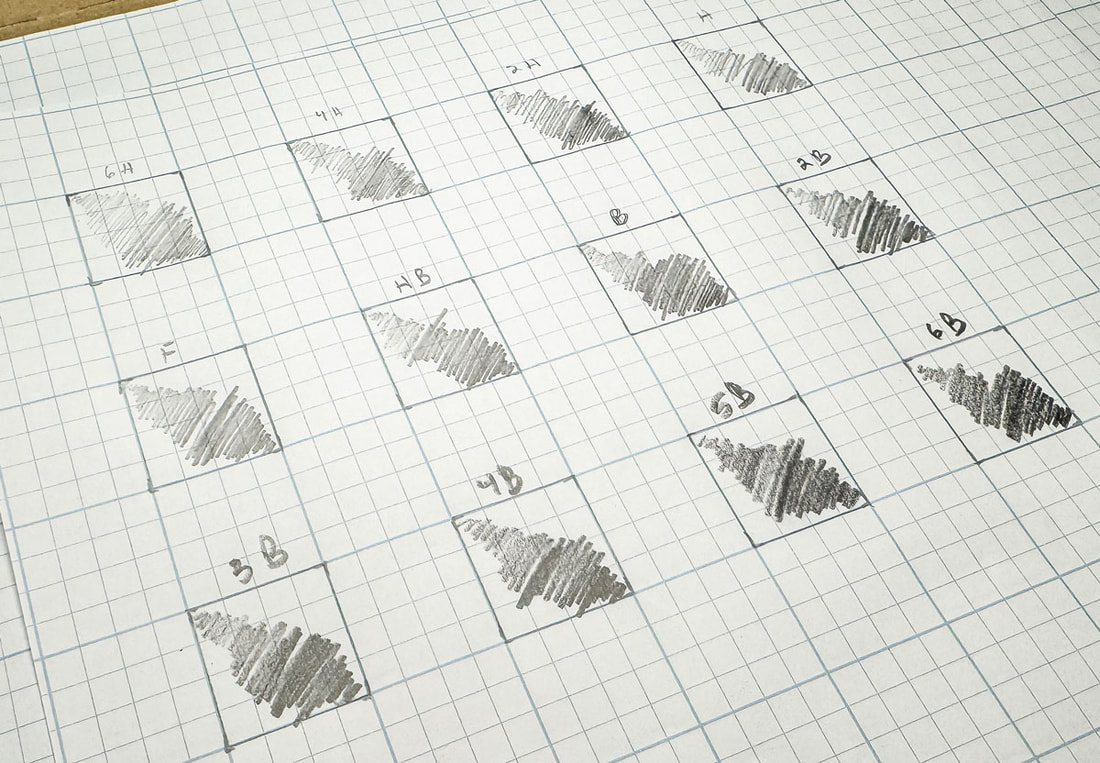 7. Choose color combinations What color combinations will work for your designs? Use the color wheel to make harmonious color combinations based on hue, tones, and tints. Complimentary colors face each other from opposite sides of the color wheel and tend to create a harmonious contrast (i.e., red and green, orange and blue, yellow and purple). Other options can be to choose three colors next to each other on the color wheel (analogous) or three colors equally spaced apart on the color wheel (triadic). Be mindful of saturation, tones (colors with added grey), and tints (colors with added white) of your color choices; keep a sense of consistency in your design. 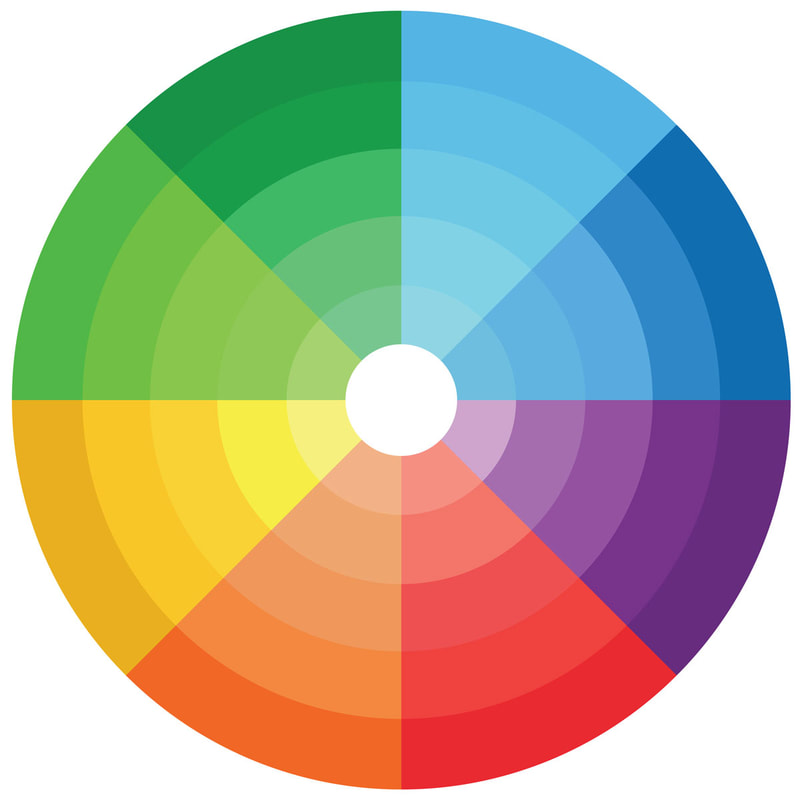 8. Create embellishments on craft projects Use this spiral border drawing as a template for three-dimensional art pieces! I use knotwork borders on decorative wood-burned plates, painted trays, mirror frames, and wood boxes. The only limit is your imagination! Invest in tracing paper so you can recreate your design again and again on all your craft and DIY projects! 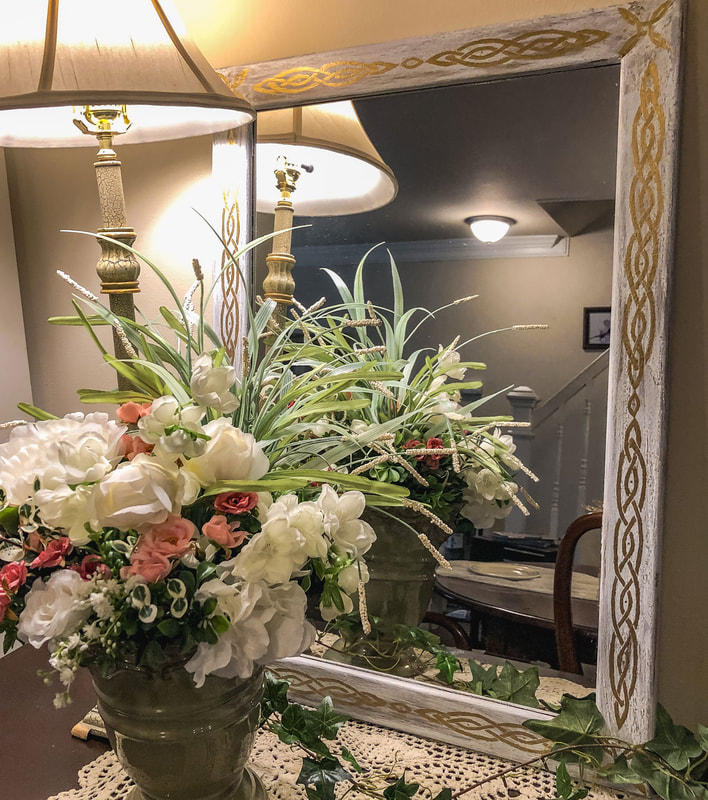 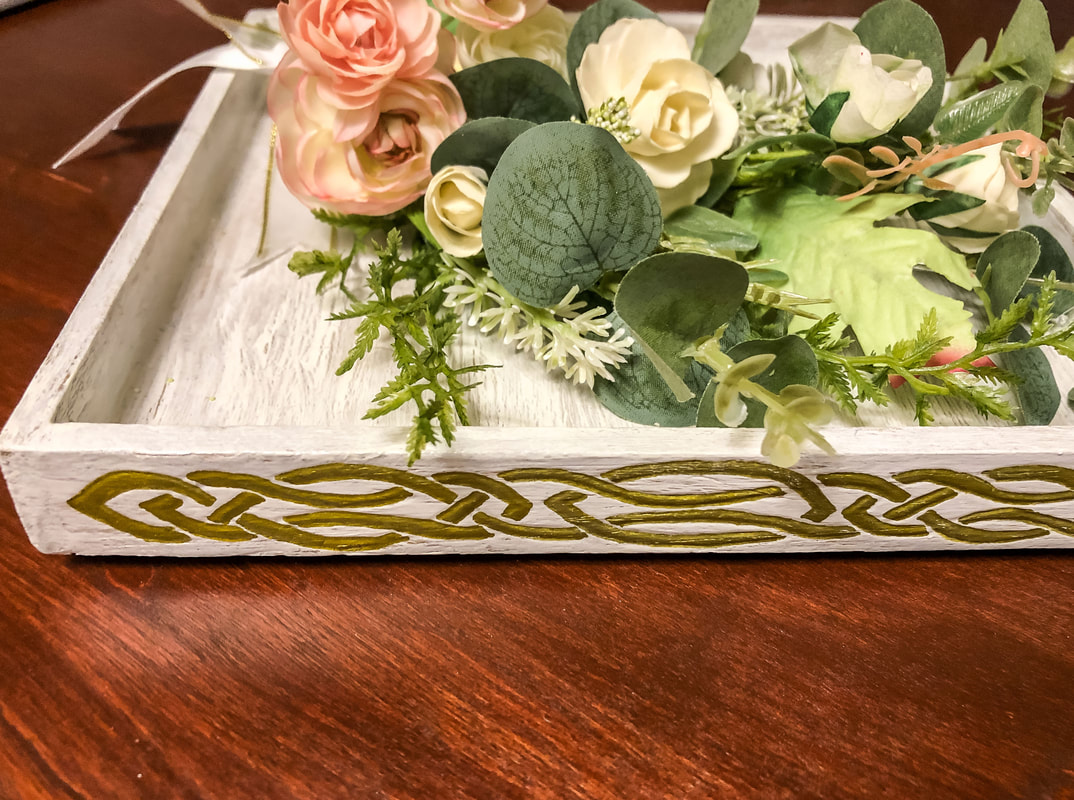 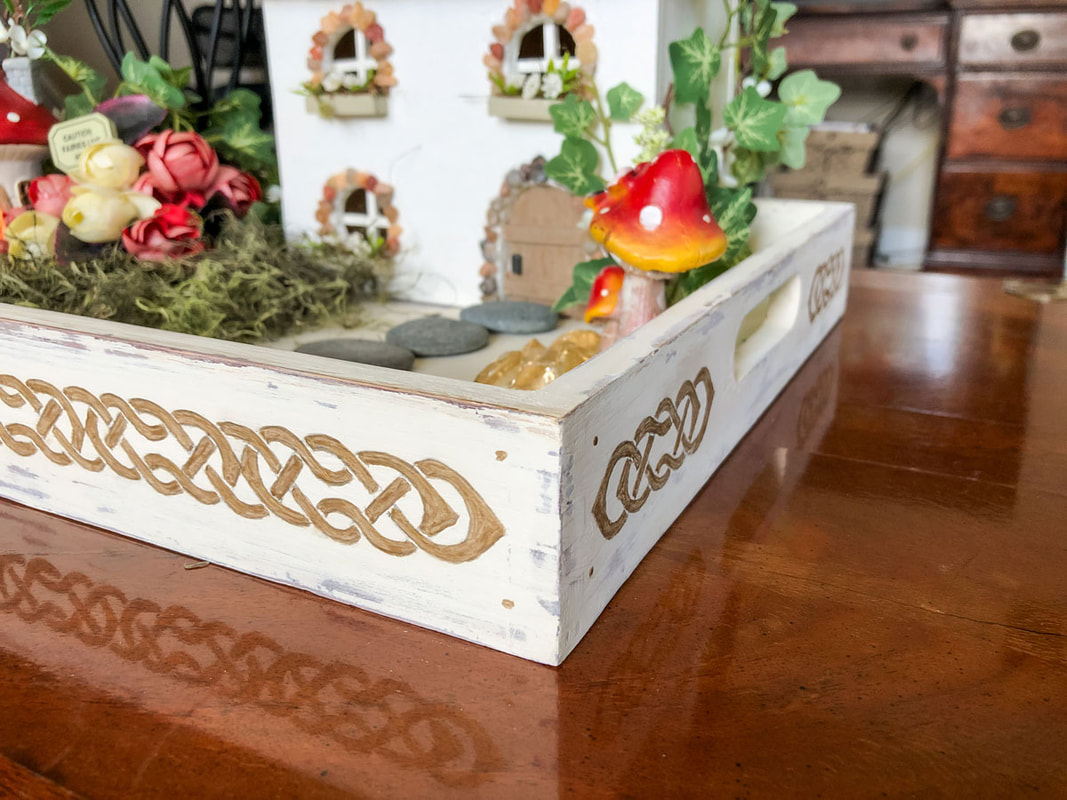 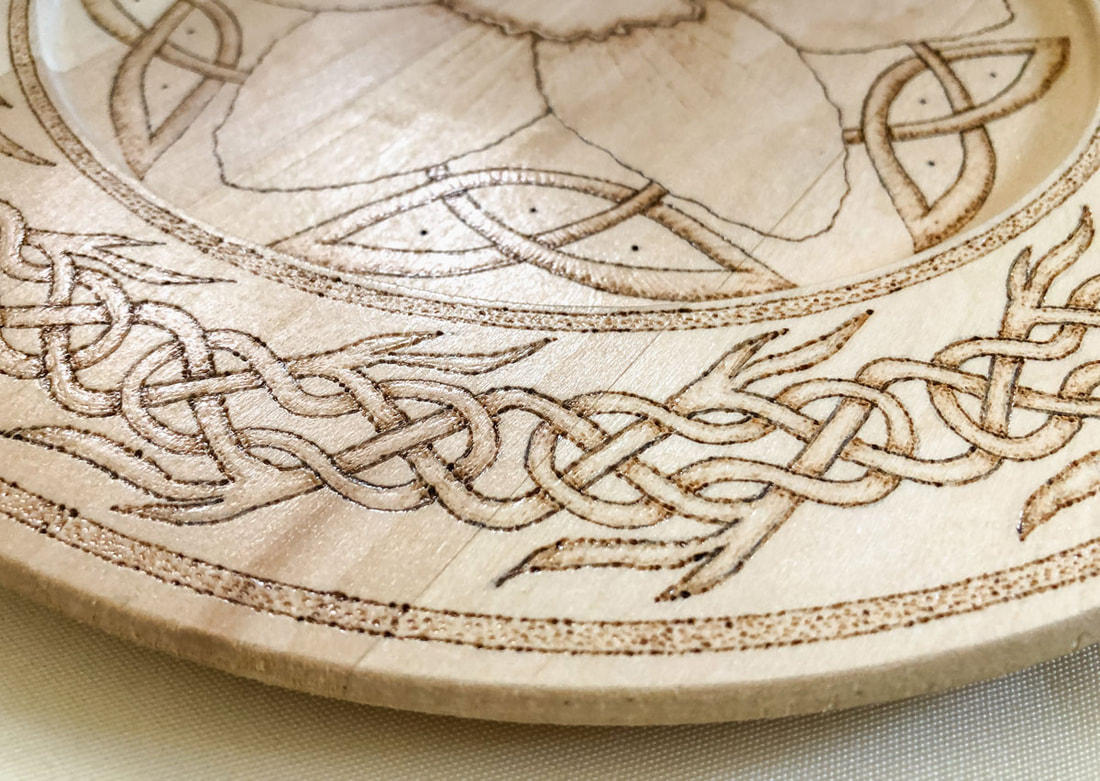 In case you missed the first three parts of this series: https://disstudiodesigns.com/blog/how-to-draw-a-round-spiral-knot-border-part-1 https://disstudiodesigns.com/blog/how-to-draw-a-round-spiral-knot-border-part-2 https://disstudiodesigns.com/blog/how-to-draw-a-round-spiral-knot-border-part-3 Join me on Patreon! You can join for free to see tutorials and DIY projects. Become a member for $4 monthly to see this final art piece and more, learn expert drawing tips, find resources, get historical insights, see the behind-the-scenes goings-on, and more! And if you’d like to read more art-related blog posts, click here! Thank you for following along with this drawing tutorial, and leave a comment below to let me know your thoughts on this series or ask any questions you may have!
0 Comments
Leave a Reply. |

Author
Some of the posts on this site contain affiliate links. This means if you click on the link and purchase the item, I will receive an affiliate commission. 
Categories
All
Archives
October 2025
|
 RSS Feed
|
|
Major credit cards accepted through Square. Apple Pay option available. This site also accepts PayPal payments for better online security, and it's free to sign up! Gift cards are now available for purchase!
Copyright 2025 |