|
Creating the rough spiral knot design  Welcome to Part 3 of this circular spiral knot border drawing tutorial series! In parts 1 and 2 of this tutorial series, we created grid sections and break lines for a round border for a spiral knot design. In this tutorial (Part 3), we will begin working on the spiral design. We will draw our design as a single line, establish the over-under weave pattern for the thread, and finish this part with a rough sketch of the entire thread. So grab your art supplies, and let’s have some fun drawing spiral knots! Project supply list Grid paper Drawing pencils Clic eraser Ruler Compass I am an affiliate associate of Blick Art Materials, so some of the posts in this article contain affiliate links. If you click on the link and purchase the item, I will receive an affiliate commission at no extra cost to you. I will only recommend products or services I use personally and/or believe will add value to my readers, so there is no conflict of interest. Steps for drawing a circular spiral knot border 1. Draw light diagonal lines connecting all the Xs from the Part 2 tutorial. 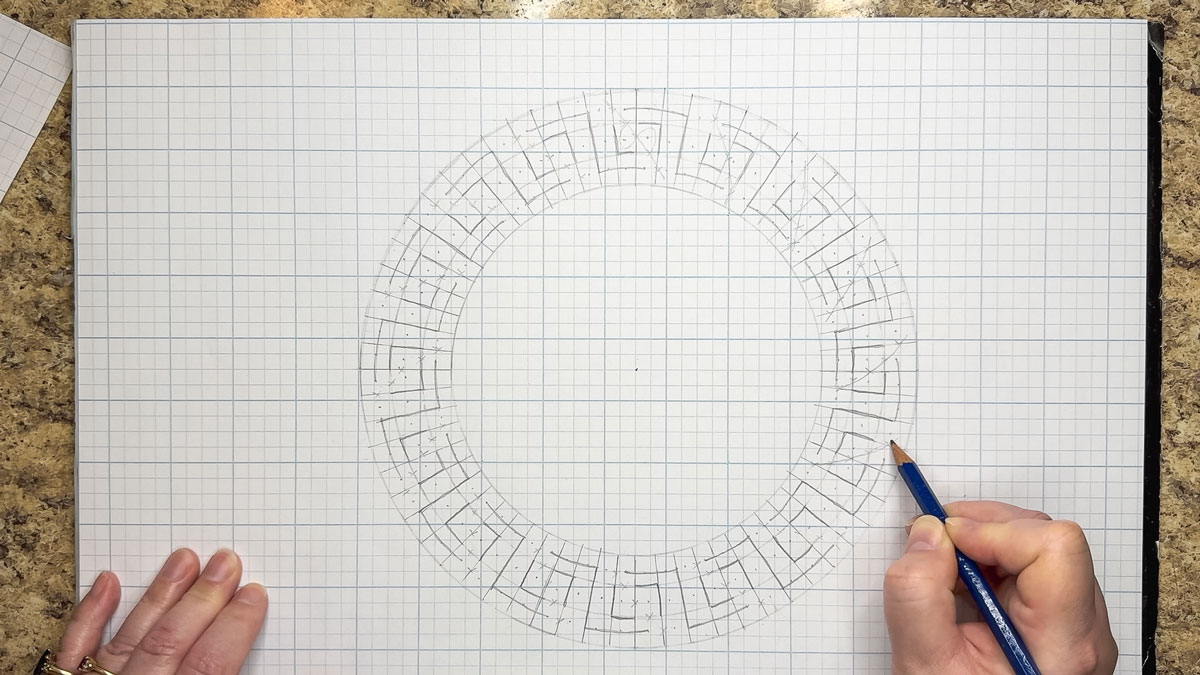 2. Draw an S-shaped line through this diagonal line, as shown below.  3. Draw a curved line around both L-shaped breaks until you connect with the diagonal line on either end.  4. Once all of your S-shapes are linked to the diagonal lines, connect each link with the one next to it, with lines drawn through the center of the top and bottom grids, going around the Z-shaped breaks. (See below.) You should now have a line that will form the backbone of your thread. 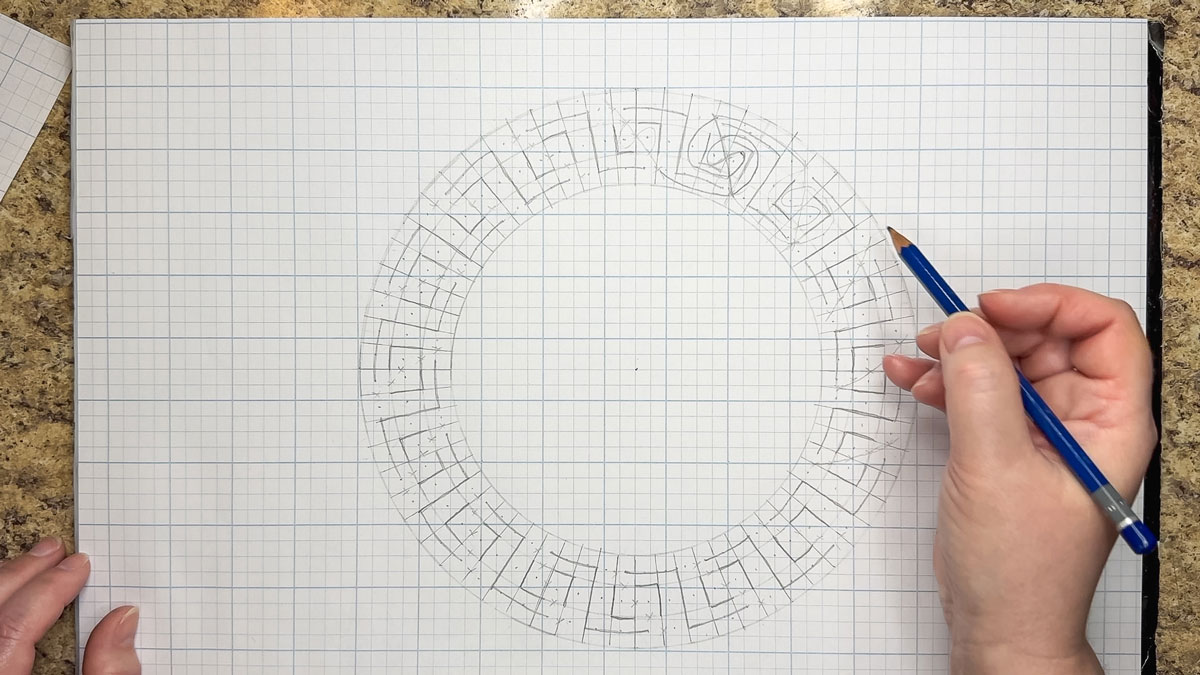 5. Pick a starting point to establish the first over-under intersection. Create an X-shape with parallel lines, with one “thread” going over the other. 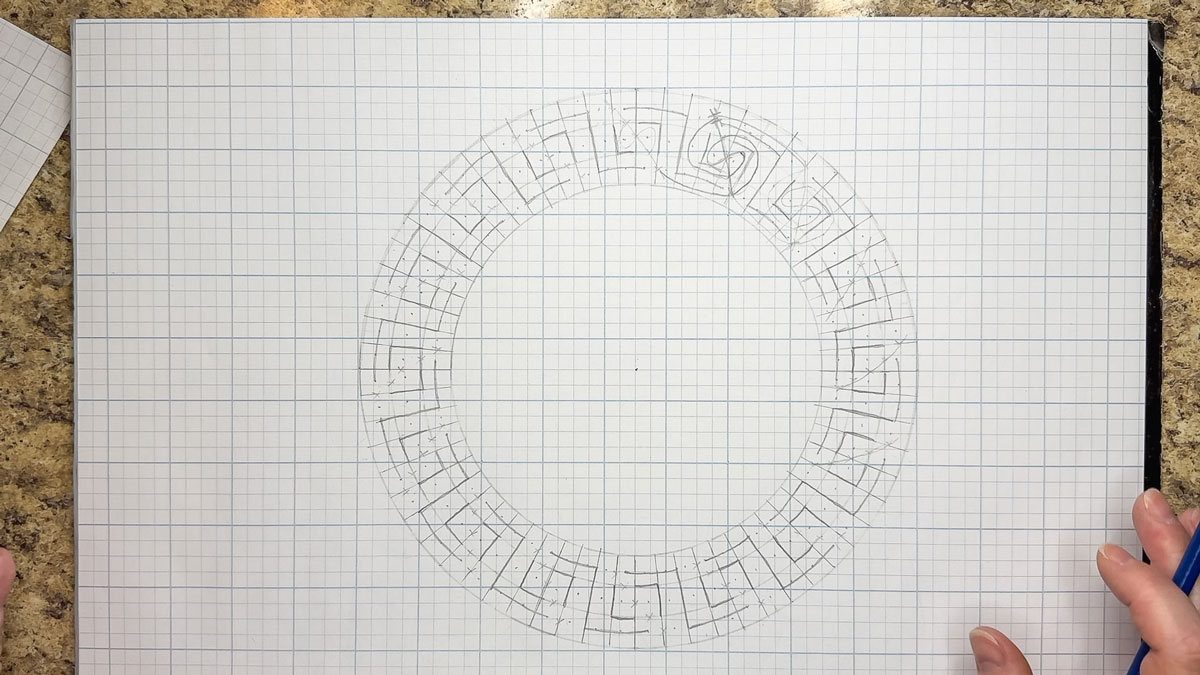 6. Move to the next junction along the diagonal path and create another overlapping thread section, alternating the over-under weave with the opposite thread going over. 7. Repeat this alternating weave pattern at each intersection along the diagonal line. You should now have five alternating over-under X shapes, as seen below. 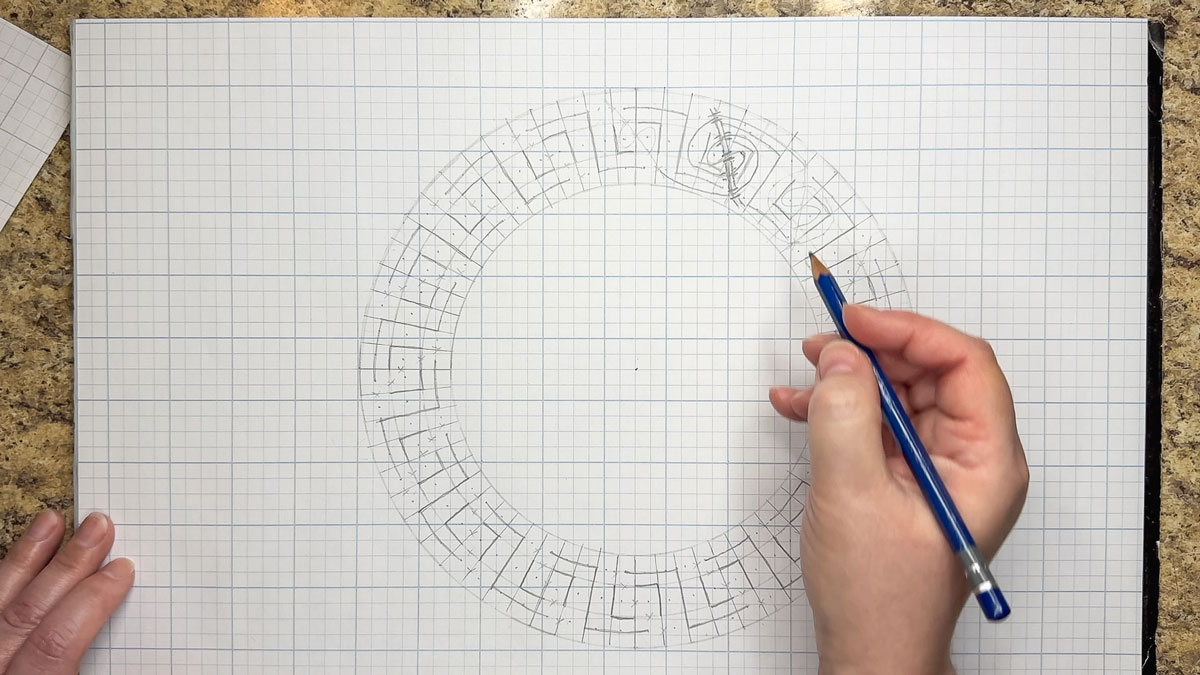 8. Draw this alternating weave pattern for each link along the circular border. 9. Use these X-shapes to draw the rest of the thread, creating parallel lines on either side of the single line we drew at the beginning. 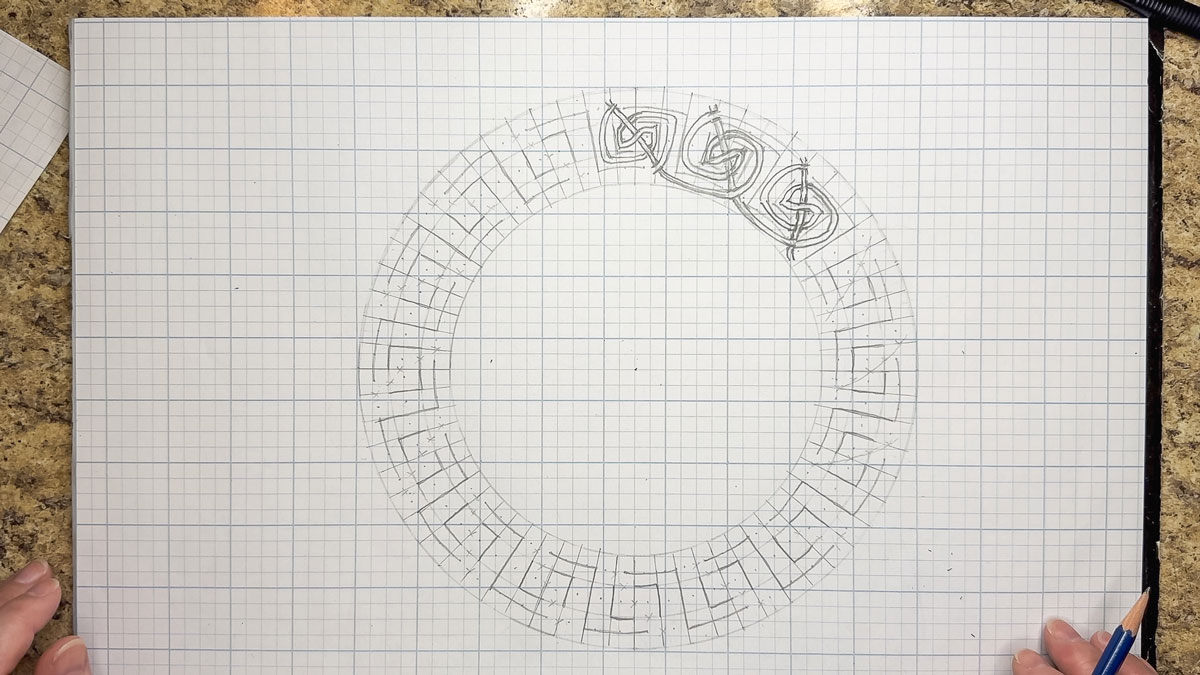 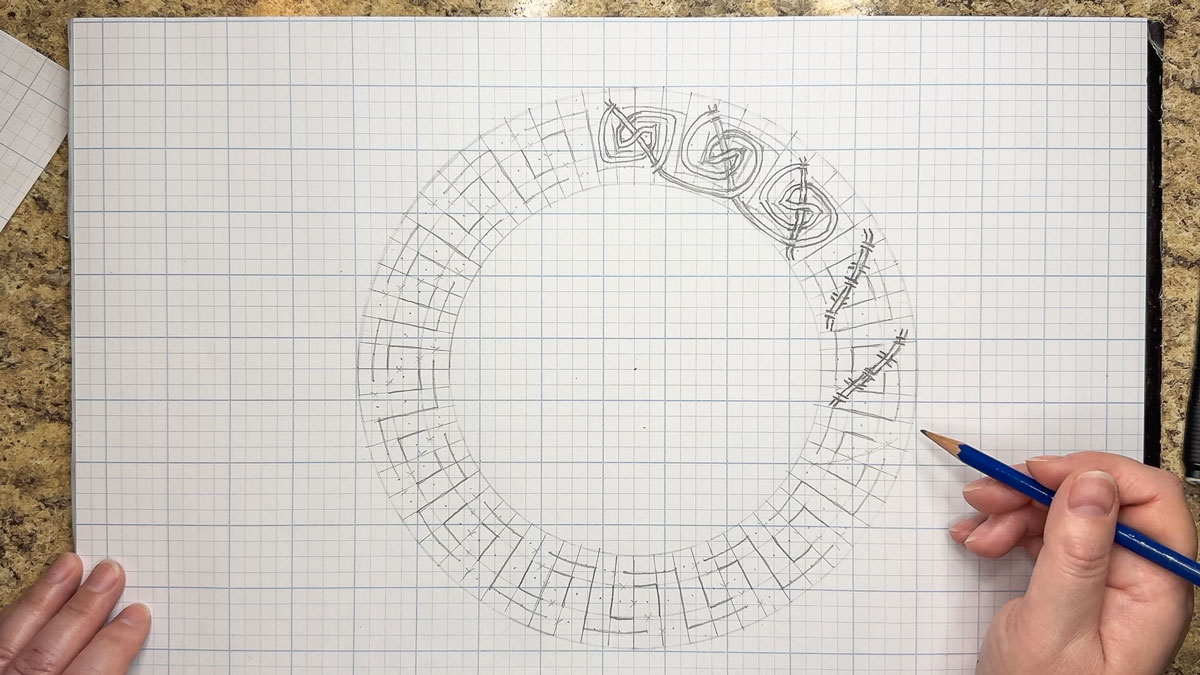 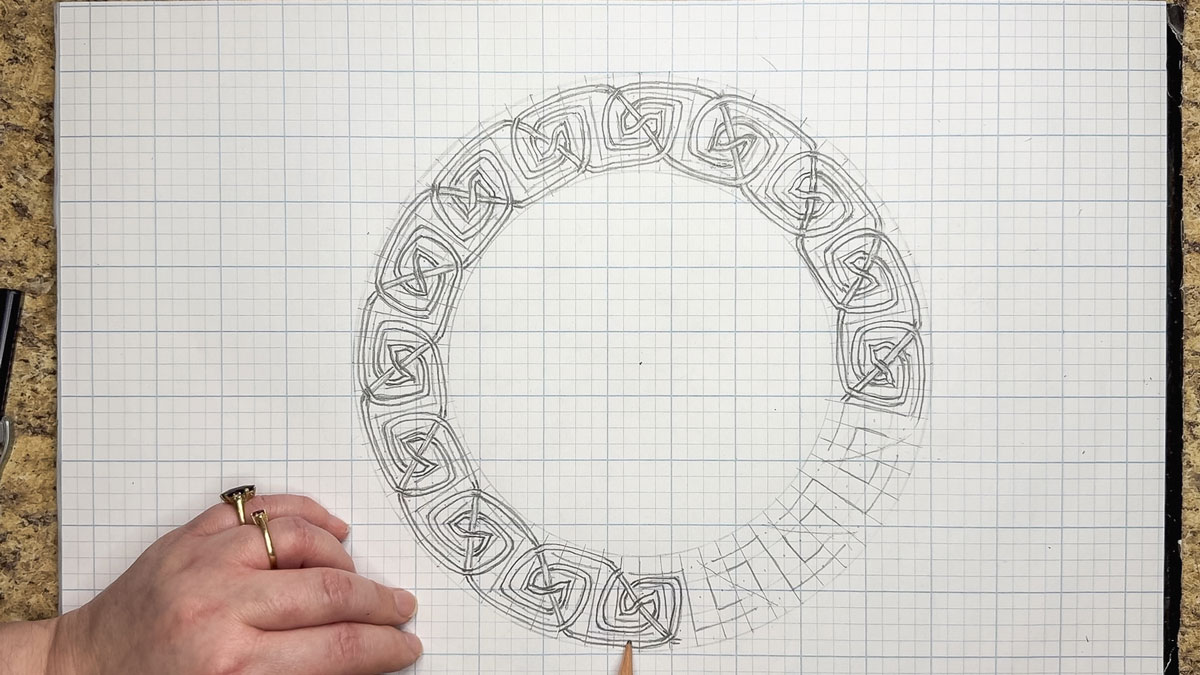 10. You can now erase the initial single line (we don’t need it anymore) and any other guidelines that will not feature in your final drawing (i.e., break lines, circles, grid lines, and dots).  How did you do? If you made it this far, thank you for joining the fun! You are now ready to take this rough drawing to the next level. Btw: If you missed the first two parts of this tutorial click the links below to read: https://disstudiodesigns.com/blog/how-to-draw-a-round-spiral-knot-border-part-1 https://disstudiodesigns.com/blog/how-to-draw-a-round-spiral-knot-border-part-2 In Part 4, you will clean up your lines and add shading, texture, and color using whatever creative medium you like to bring this circular spiral knot border to life! See you in the next tutorial! To view the companion video to this blog tutorial on my YouTube channel, click here! Check out my new community page, and support me on Patreon! And if you liked this blog tutorial, click here to find more Celtic-inspired drawing blog posts!
0 Comments
Leave a Reply. |

Author
Some of the posts on this site contain affiliate links. This means if you click on the link and purchase the item, I will receive an affiliate commission. 
Categories
All
Archives
October 2025
|
 RSS Feed
|
|
Major credit cards accepted through Square. Apple Pay option available. This site also accepts PayPal payments for better online security, and it's free to sign up! Gift cards are now available for purchase!
Copyright 2025 |