|
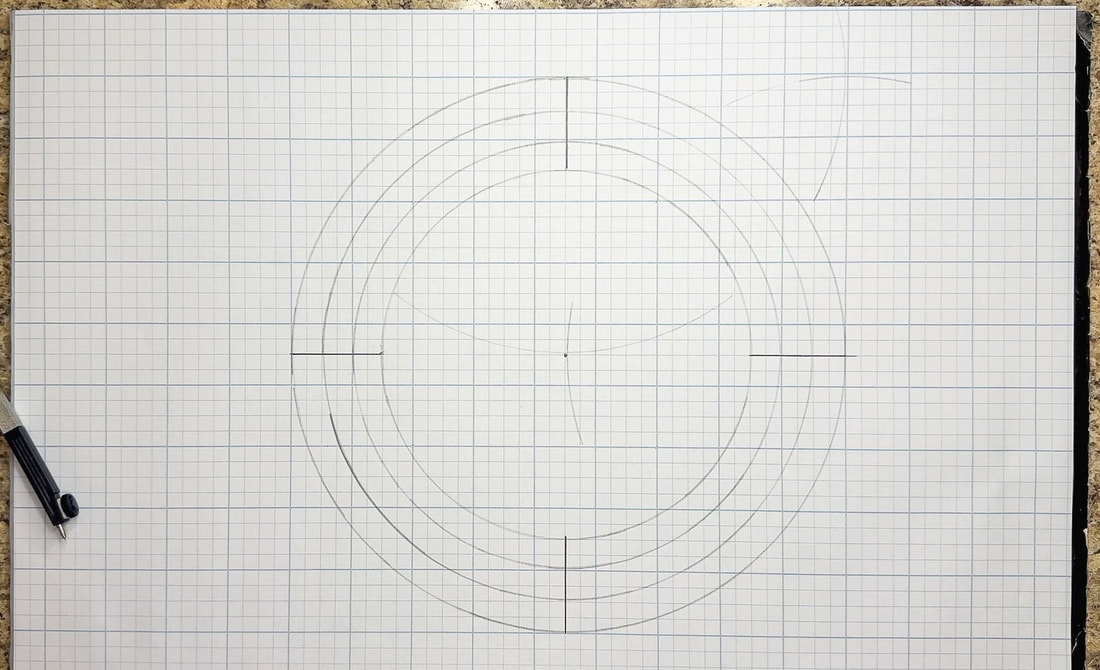
Dividing a circle into 64 equal parts using a compass 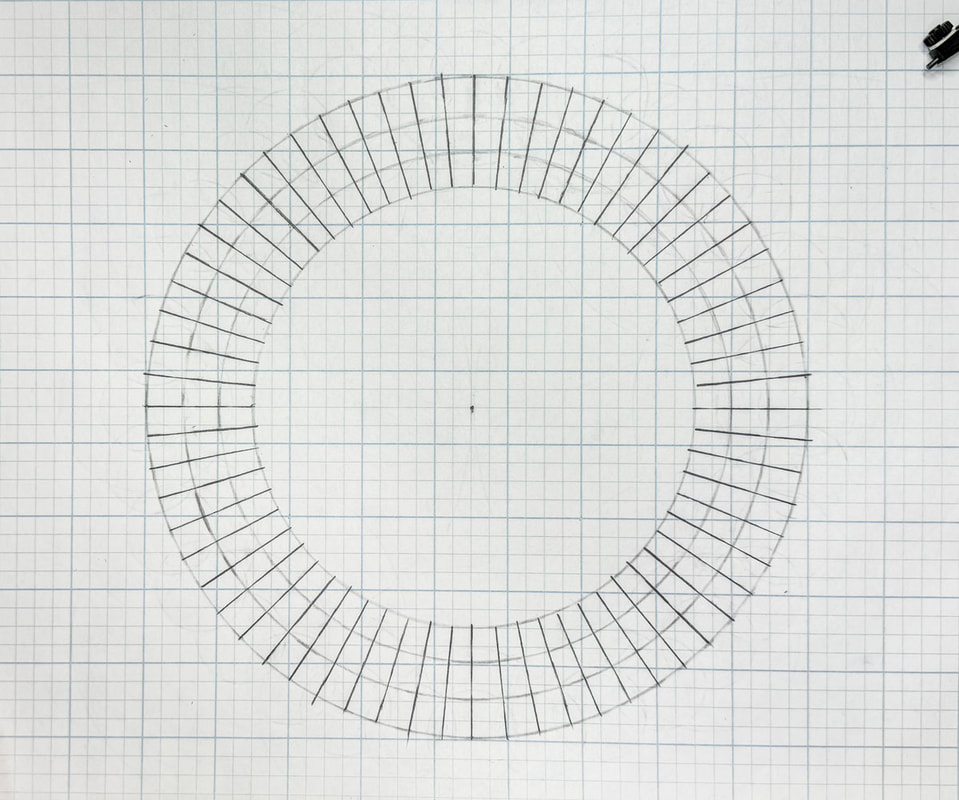 In a previous tutorial, I showed you how to draw a straight spiral interlace border. Today’s tutorial is the first in a four-part series that builds on that premise, walking you through using the same design pattern in a circular border. (You can find that tutorial here.) In this series, you will plot the basic template on a grid, add the break pattern, draw the rough lines, plot the overlaps, and stylize the final design. So, let’s start with Part 1, where you will draw the circles for your round border and then break that border into 64 equal sections. Below, you will find my suggested supply list for this project. Project supply list Grid paper Drawing pencils Clic eraser Ruler Compass I am an affiliate associate of Blick Art Materials, so some of the posts in this article contain affiliate links. If you click on the link and purchase the item, I will receive an affiliate commission at no extra cost to you. I will only recommend products or services I use personally and/or believe will add value to my readers, so there is no conflict of interest. Steps for creating the grid 1. Draw four equally spaced concentric circles with a compass. Mark the center of the circle. 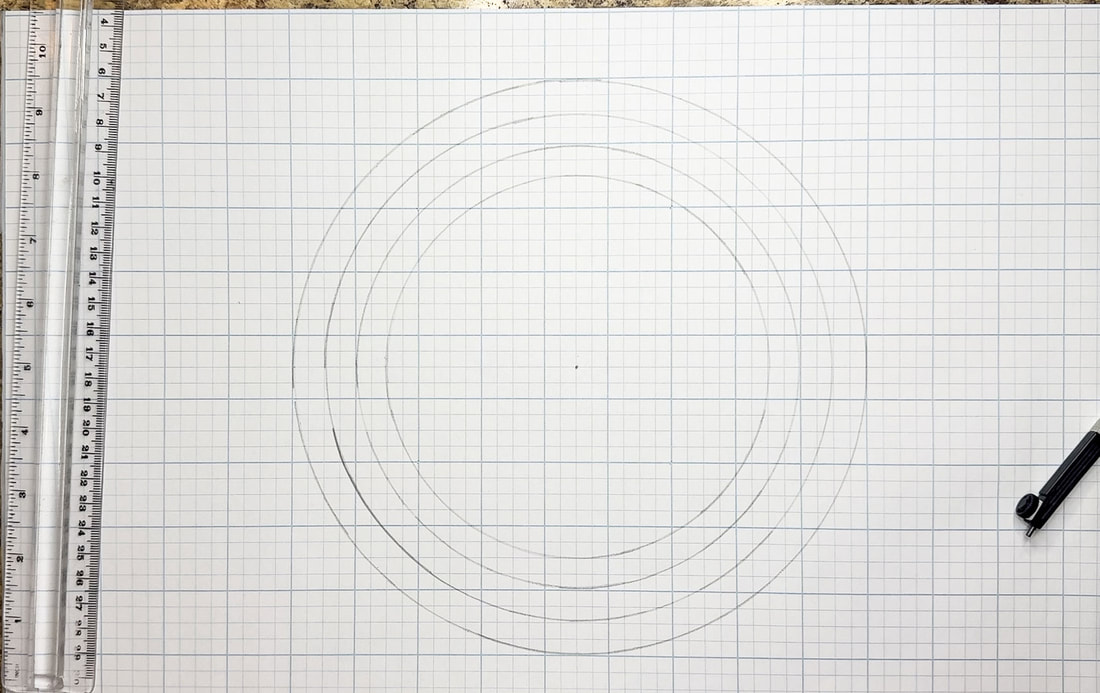 2. Divide the circular border into four equal parts using a ruler. If you are not using grid paper, divide the circle in half, then divide it into quarters using the compass technique I am about to show you. You will repeat this technique to create all the equal sections in your border.
  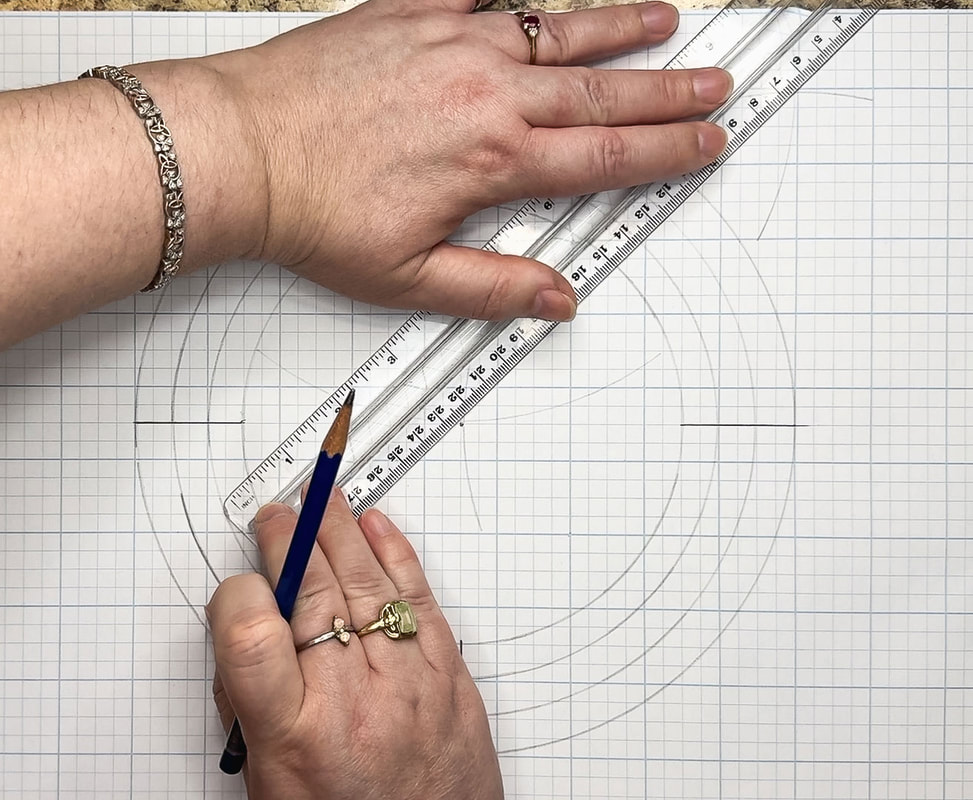 3. Now, divide each quadrant in half. Place your compass point on the outer circle at one end of a line that divides a quadrant. Follow the steps above to get eight equal parts. 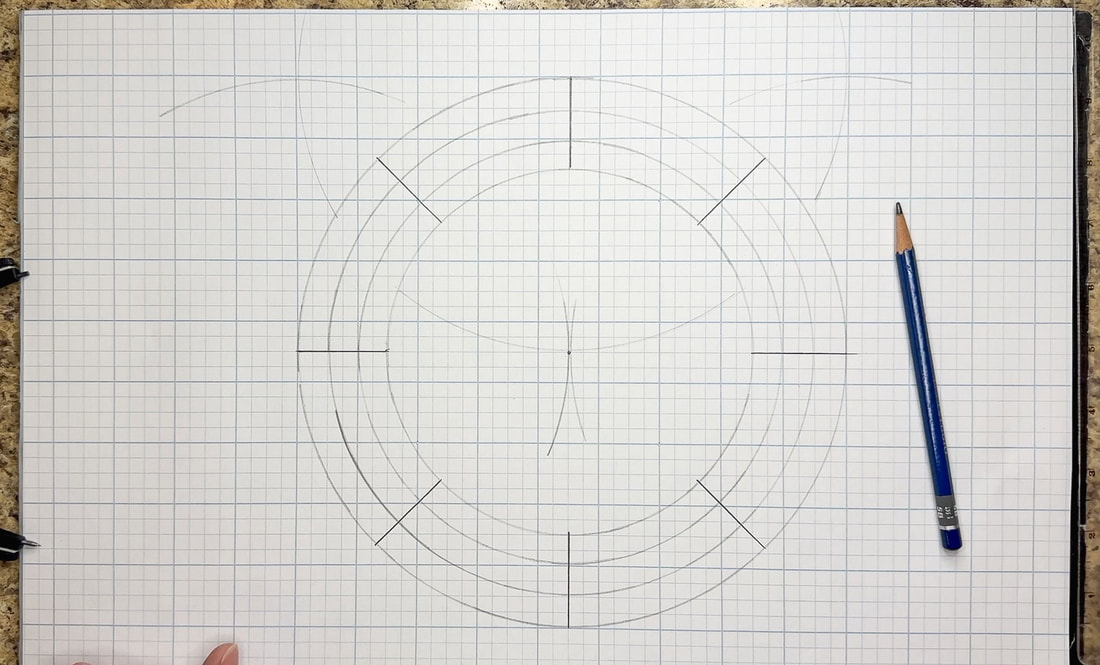 4. Next, divide each of these sections in half. Place your compass point on the outer circle at one end of one of these eight sections. Follow the steps above to get 16 equal parts. 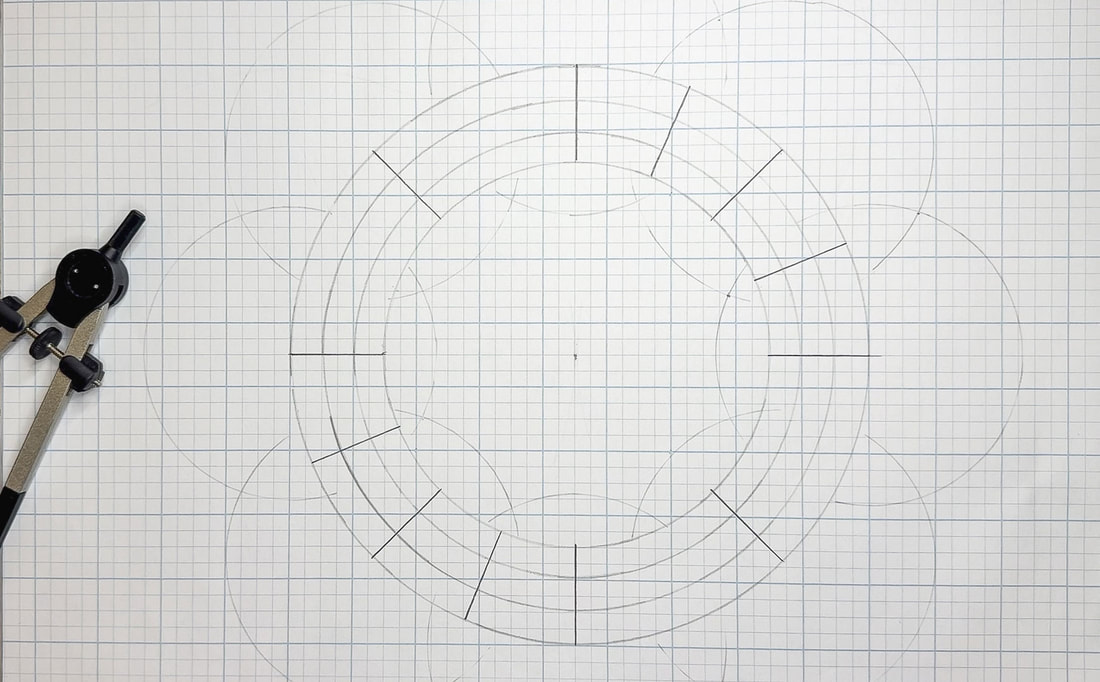 5. Follow the same steps to divide the sections again to get 32 equal parts.  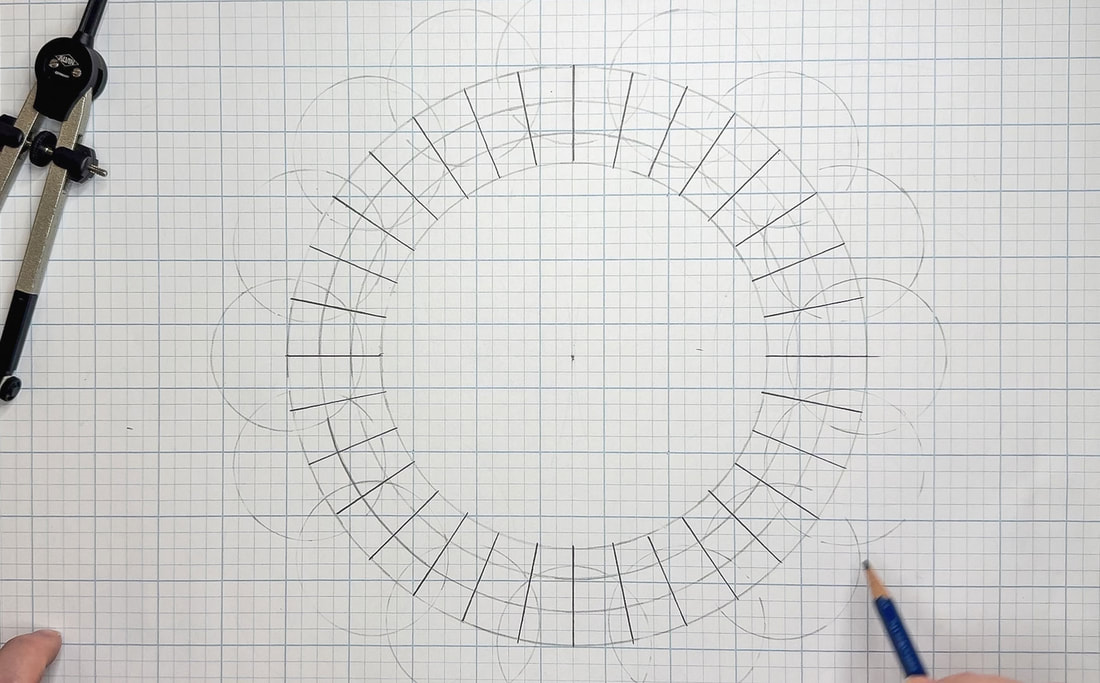 6. Finally, divide one last time for 64 equal parts. 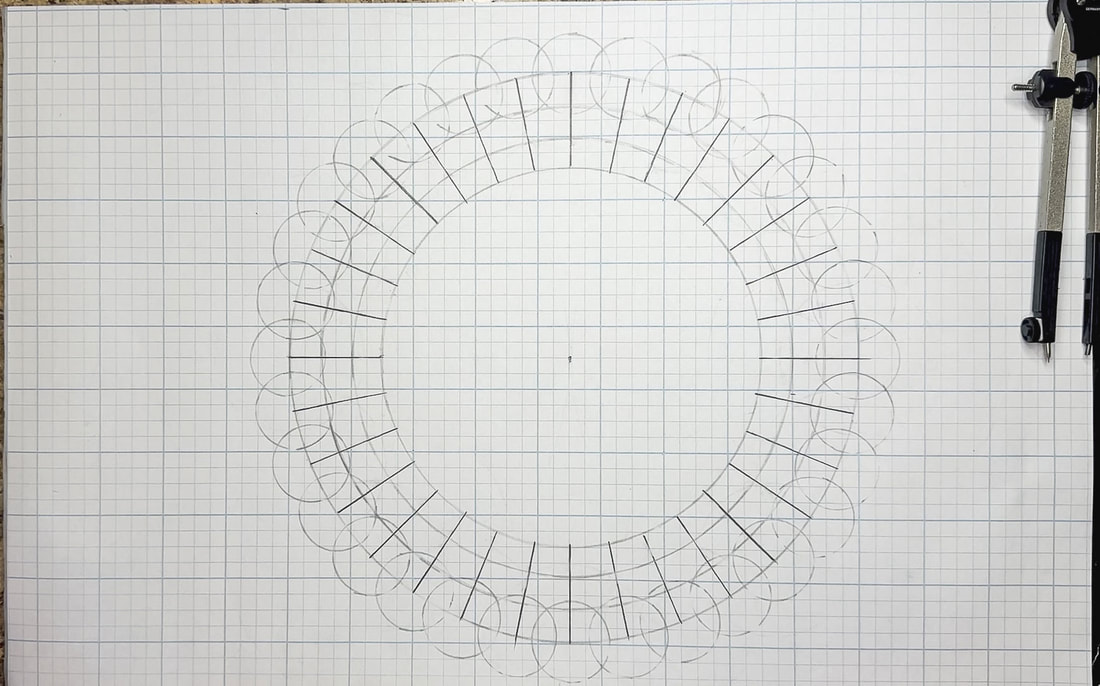 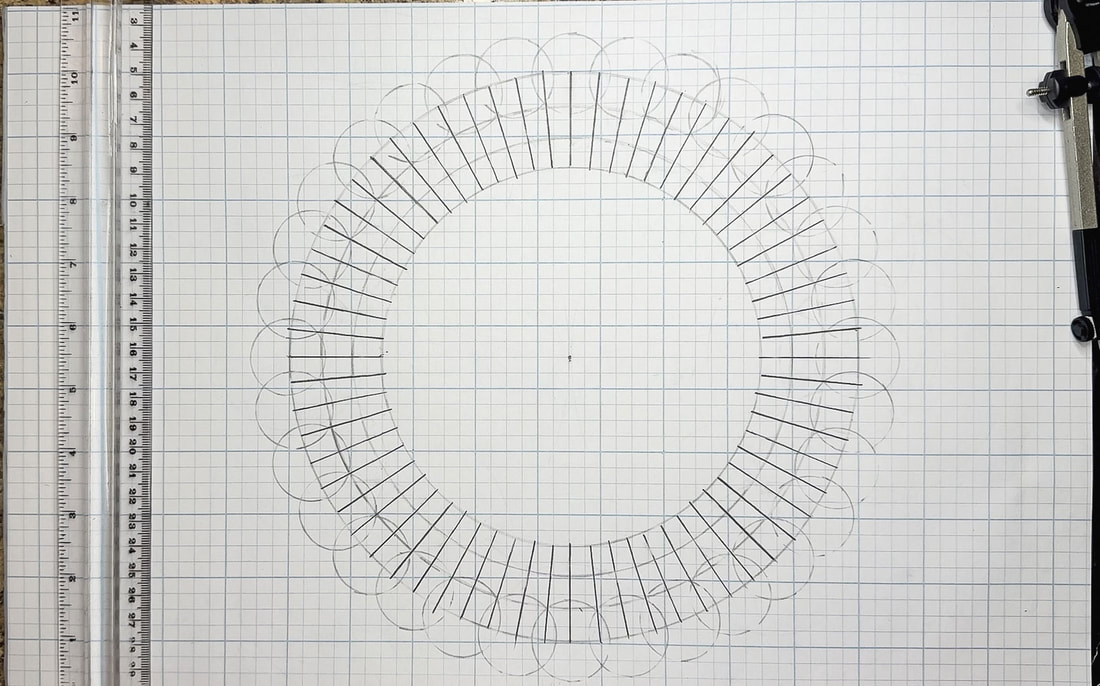 Your circular border is now set up with a grid, and you are ready to move on to Part 2, where we will set up the breaks! There is a companion video to this blog tutorial on my YouTube channel, which you can find here. If you want to support my work, check out my new Patreon community page here. Click here to read more Celtic-inspired art tutorials!
0 Comments
Leave a Reply. |

Author
Some of the posts on this site contain affiliate links. This means if you click on the link and purchase the item, I will receive an affiliate commission. 
Categories
All
Archives
October 2025
|
 RSS Feed
|
|
Major credit cards accepted through Square. Apple Pay option available. This site also accepts PayPal payments for better online security, and it's free to sign up! Gift cards are now available for purchase!
Copyright 2025 |