|
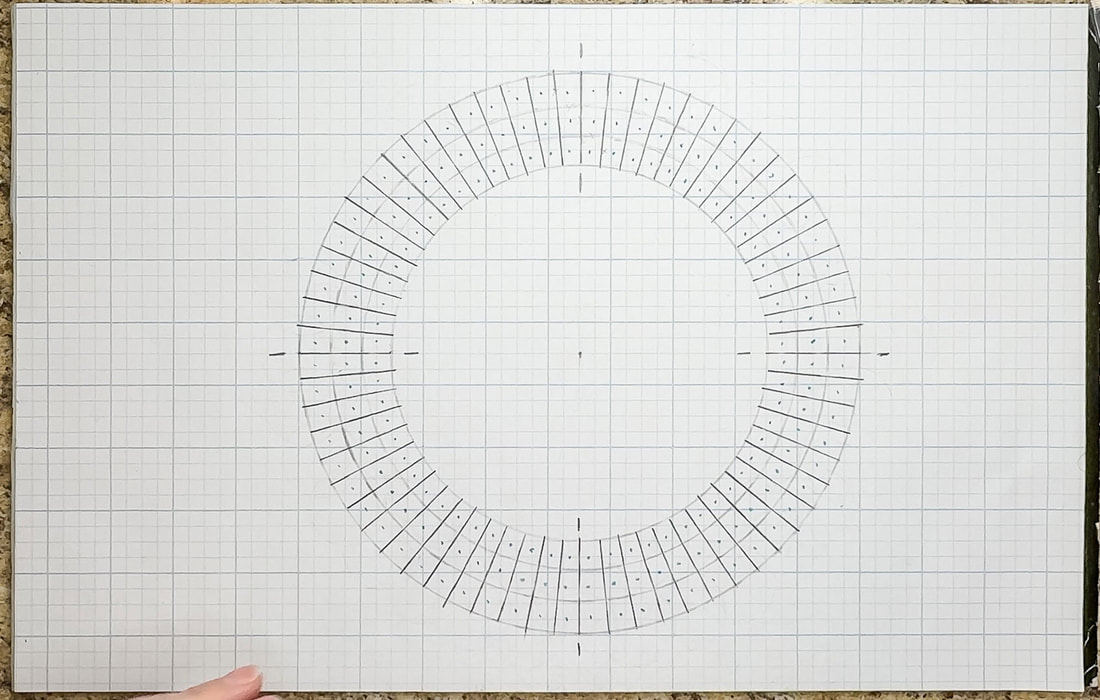
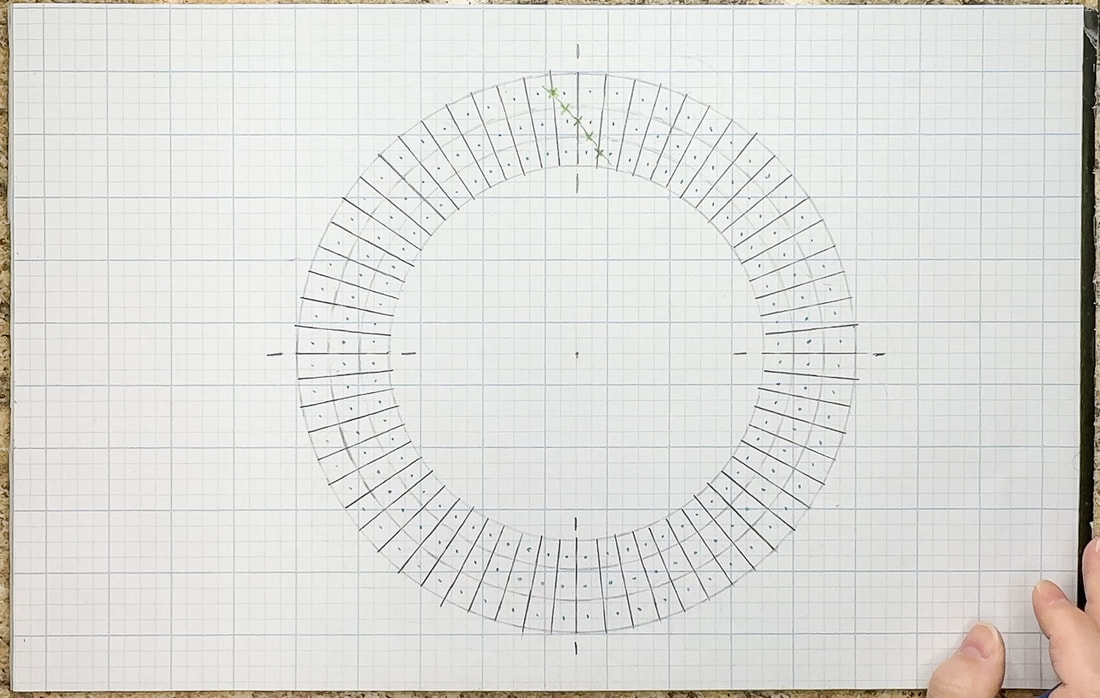
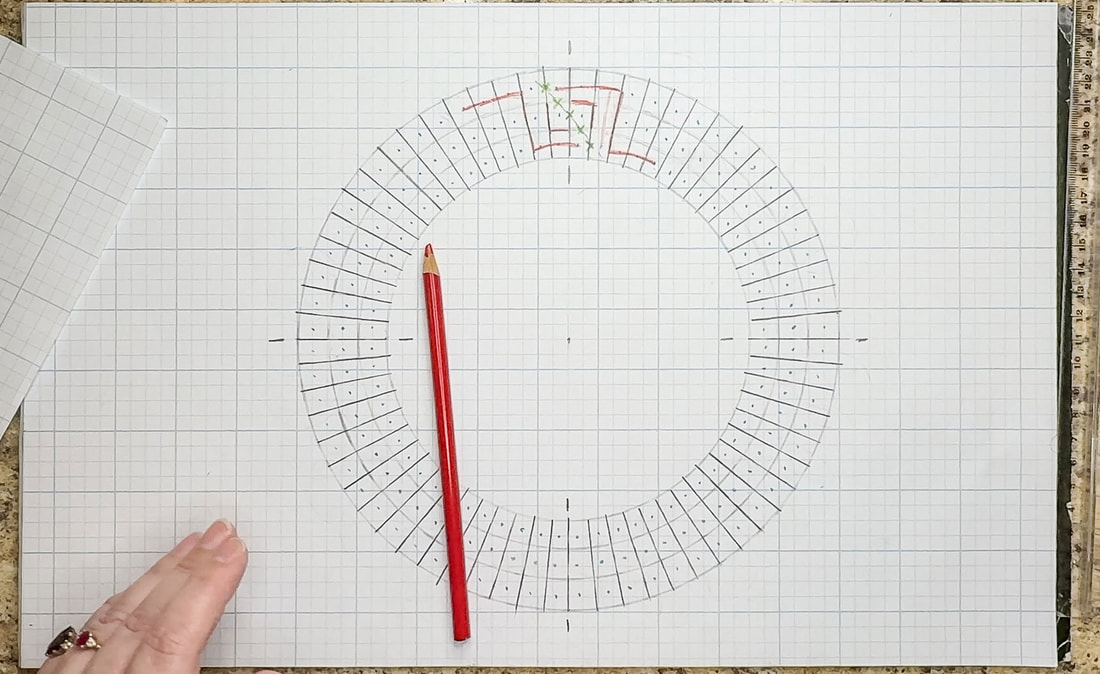
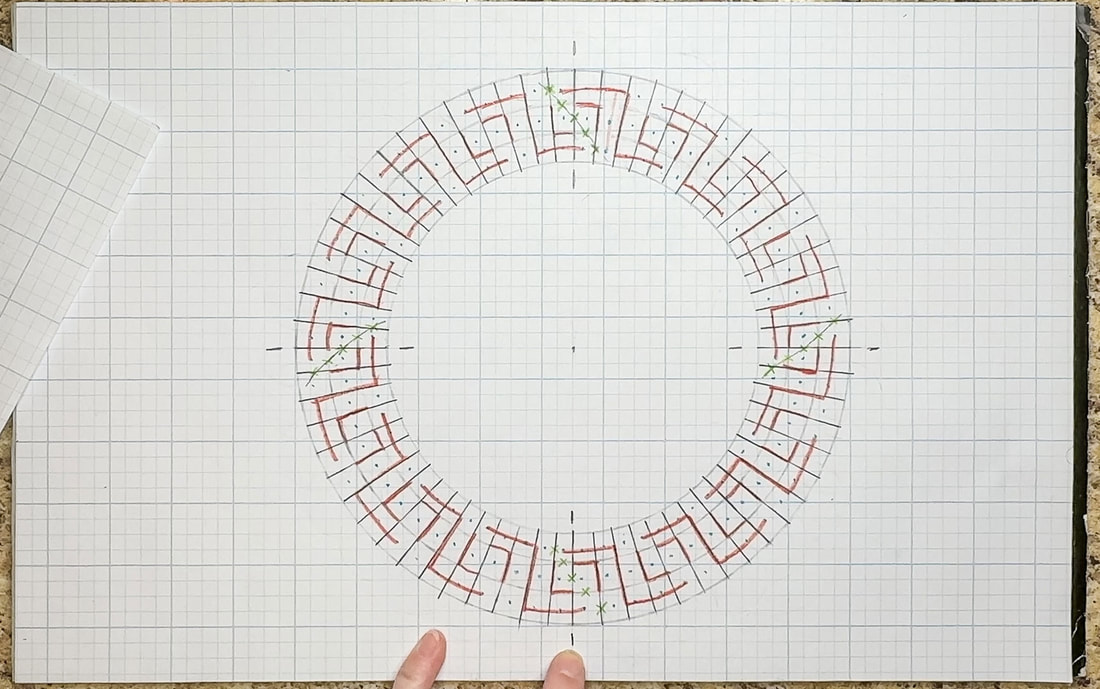
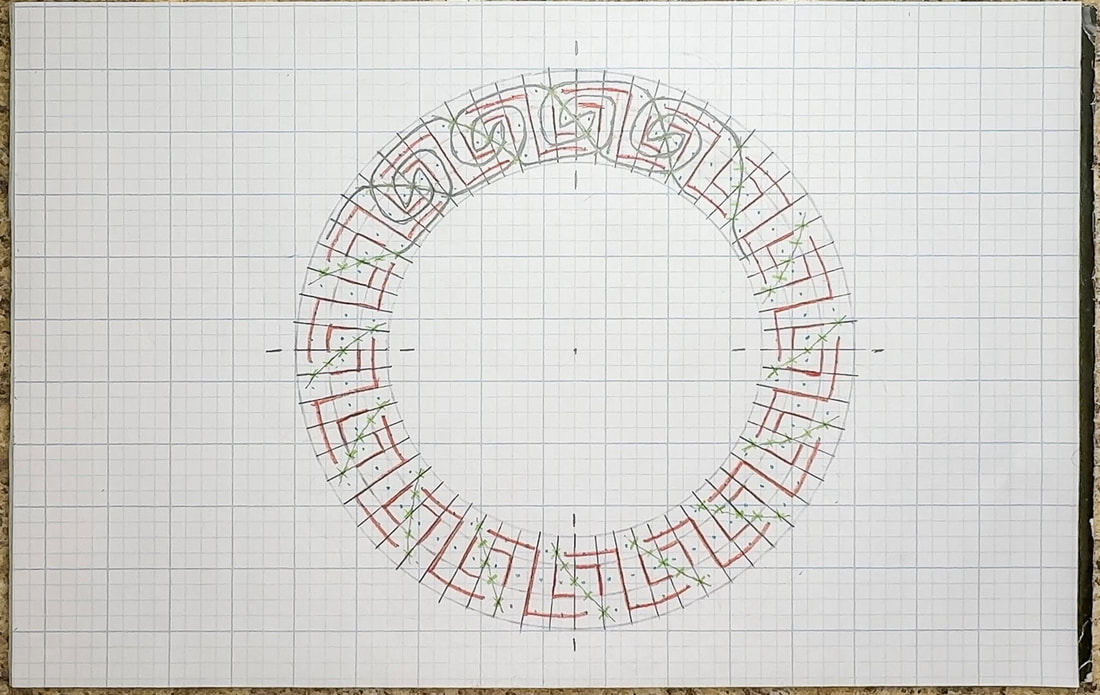
Creating the grid and breaks Welcome to Part 2 of this four-part series on how to draw a circular spiral interlace border! If you haven’t read Part 1 yet, I suggest checking that out first before proceeding with this tutorial. (Click here to read Part 1.) In Part 1, we drew the circular borders and divided them into equal sections to create a grid. Now, we will plot out the break patterns that will determine the style and direction of your spiral design. So grab your drawing supplies (my suggested supply list is below), and let’s delve into today’s tutorial! Project supply list Grid paper Drawing pencils Clic eraser Ruler Compass Colored pencils I am an affiliate associate of Blick Art Materials, so some of the posts in this article contain affiliate links. If you click on the link and purchase the item, I will receive an affiliate commission at no extra cost to you. I will only recommend products or services I use personally and/or believe will add value to my readers, so there is no conflict of interest. Steps for creating the break pattern 1. Place a dot in the center of each grid box. 2. Starting at the top of the border, mark the center of the dividing line with an X, then draw Xs along the diagonal, as shown below. 3. Next, draw L-shaped breaks on either side of these diagonal X marks, as shown below. 4. Draw Z-shaped breaks on either side of the L breaks, as seen below. 5. Repeat this process around the circular border grid until you reach the point where you started. 6. Check the top, bottom, right, and left sides to ensure the L-shaped breaks are centered at each quadrant. 7. Draw diagonal Xs through the center of each pair of L-shaped breaks, just like we did at the top. Now that you have completed Part 1 and Part 2 of this tutorial, you should have a circular border with a grid and breaks for your rough linework. In Part 3, we will use this guide to create the thread and over-under pattern for the spiral knot design. If you have any questions or additional tips to add, feel free to leave a comment below. I’d love to hear your thoughts on these tutorials! There is a companion video to this blog tutorial on my YouTube channel, which you can find here. I’ve created a Patreon page with additional video material related to Celtic-inspired art and DIY home decor. Click here to support me on Patreon!
And finally, if you’d like to read more Celtic-inspired art tutorials, click here!
0 Comments
Leave a Reply. |
Author
Some of the posts on this site contain affiliate links. This means if you click on the link and purchase the item, I will receive an affiliate commission. Categories
All
Archives
October 2025
|



 RSS Feed
