|
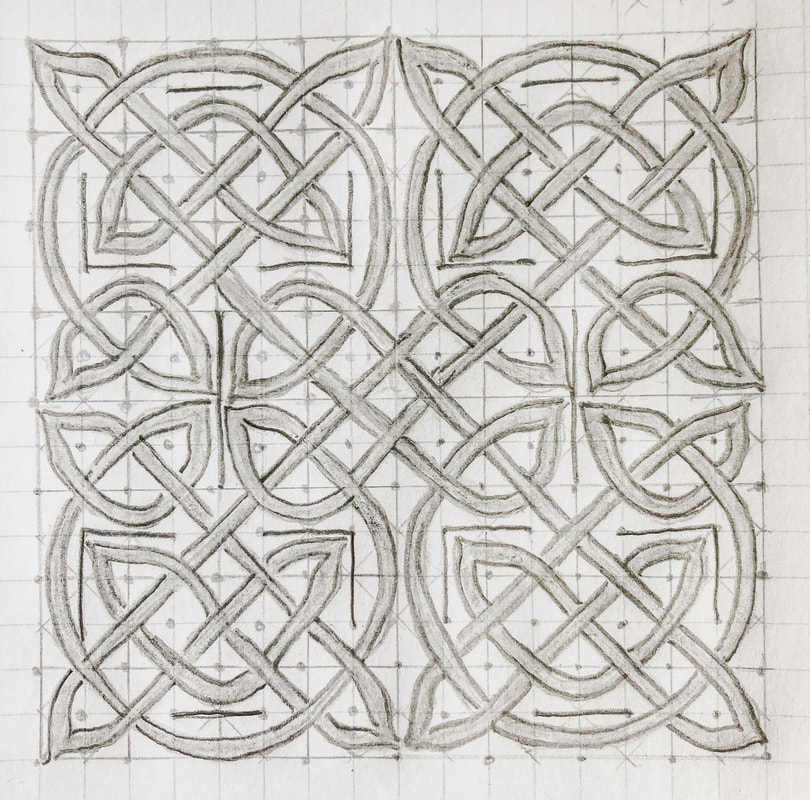
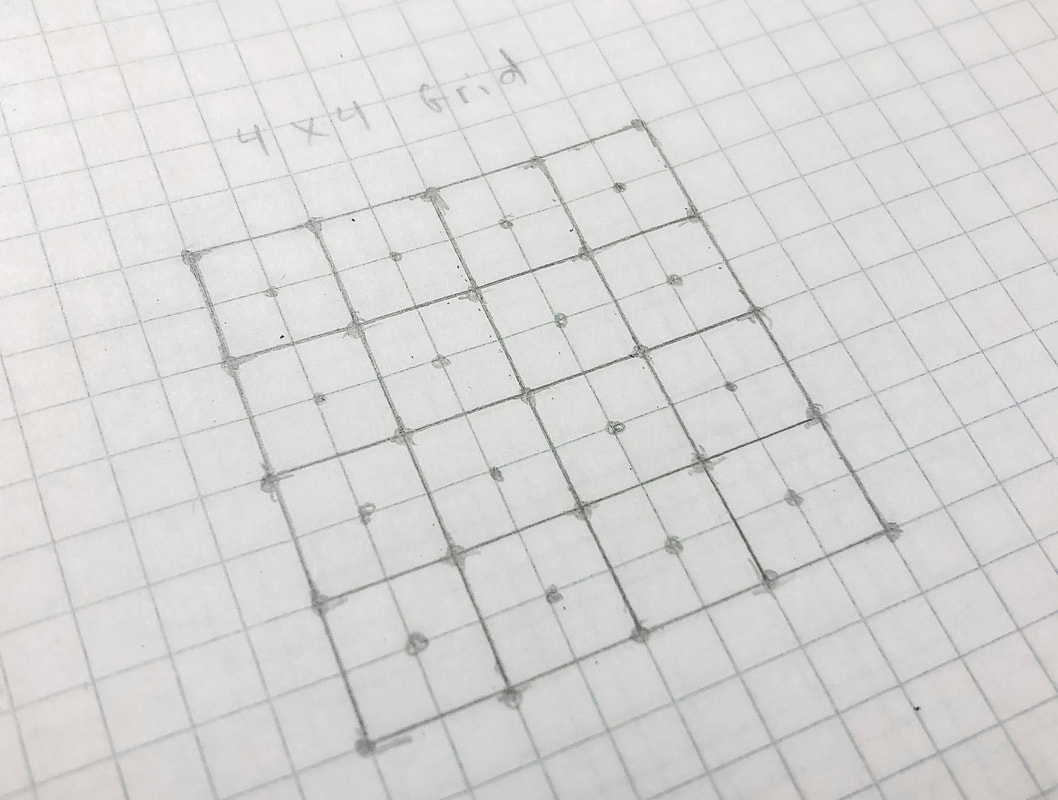
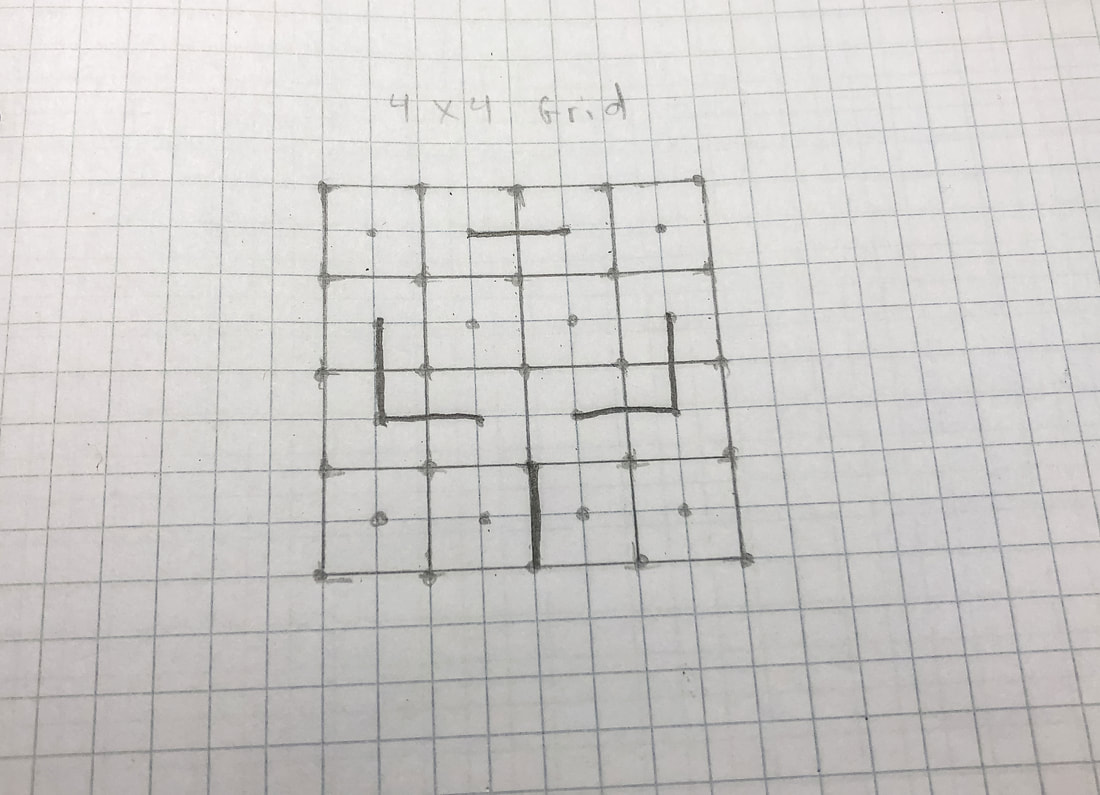
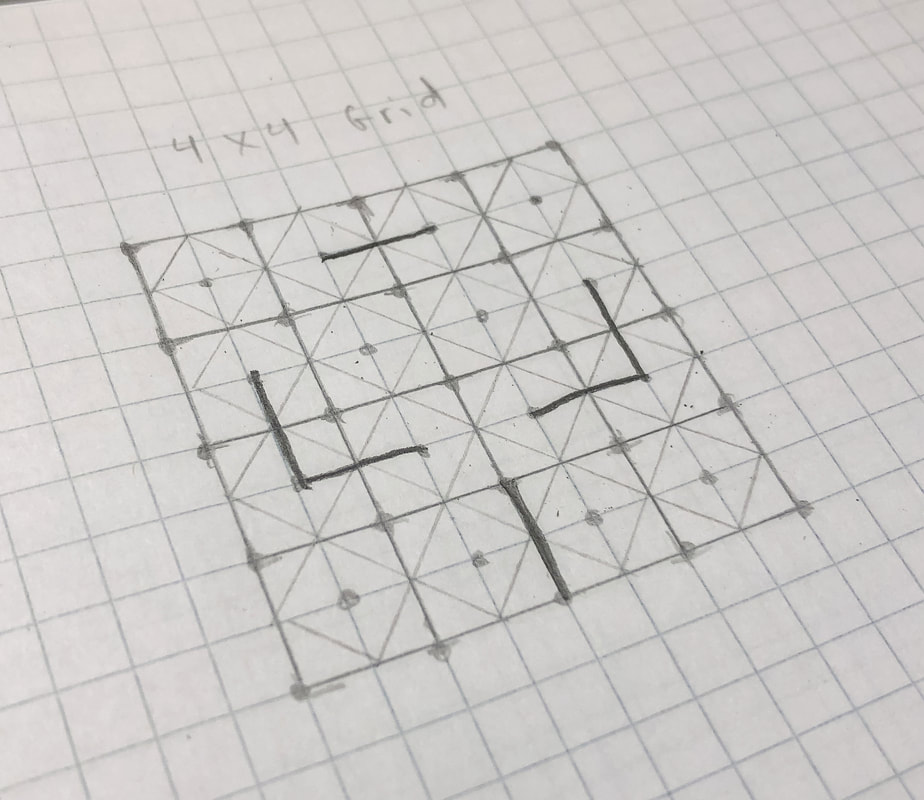
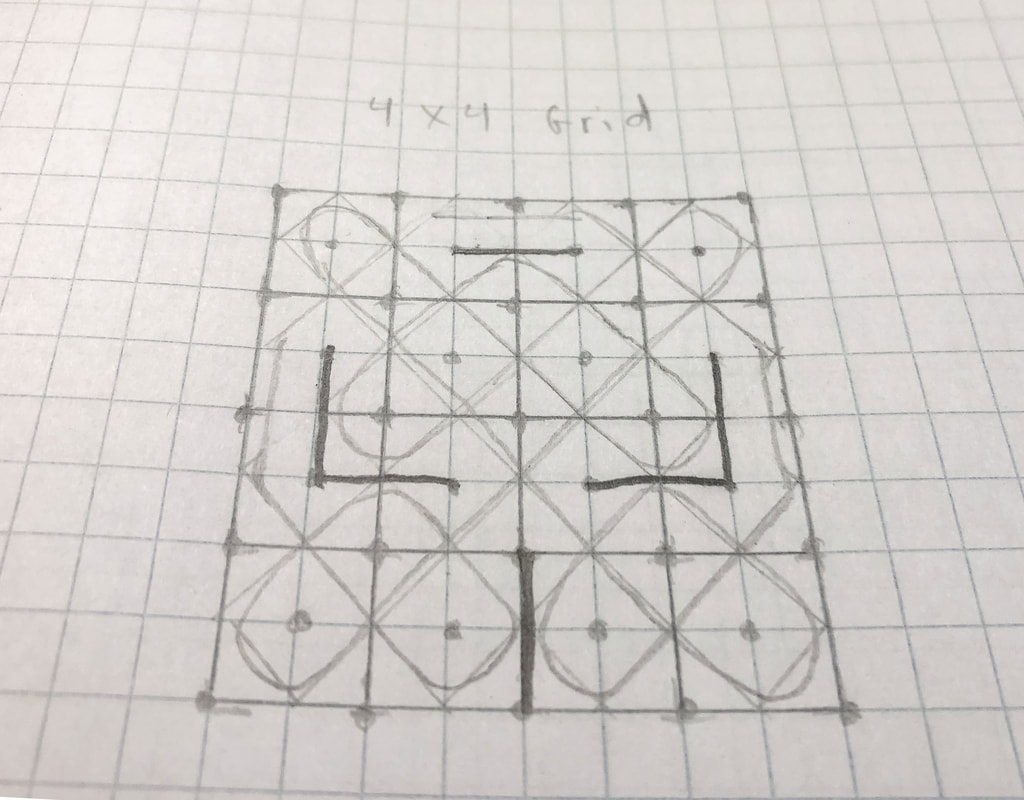
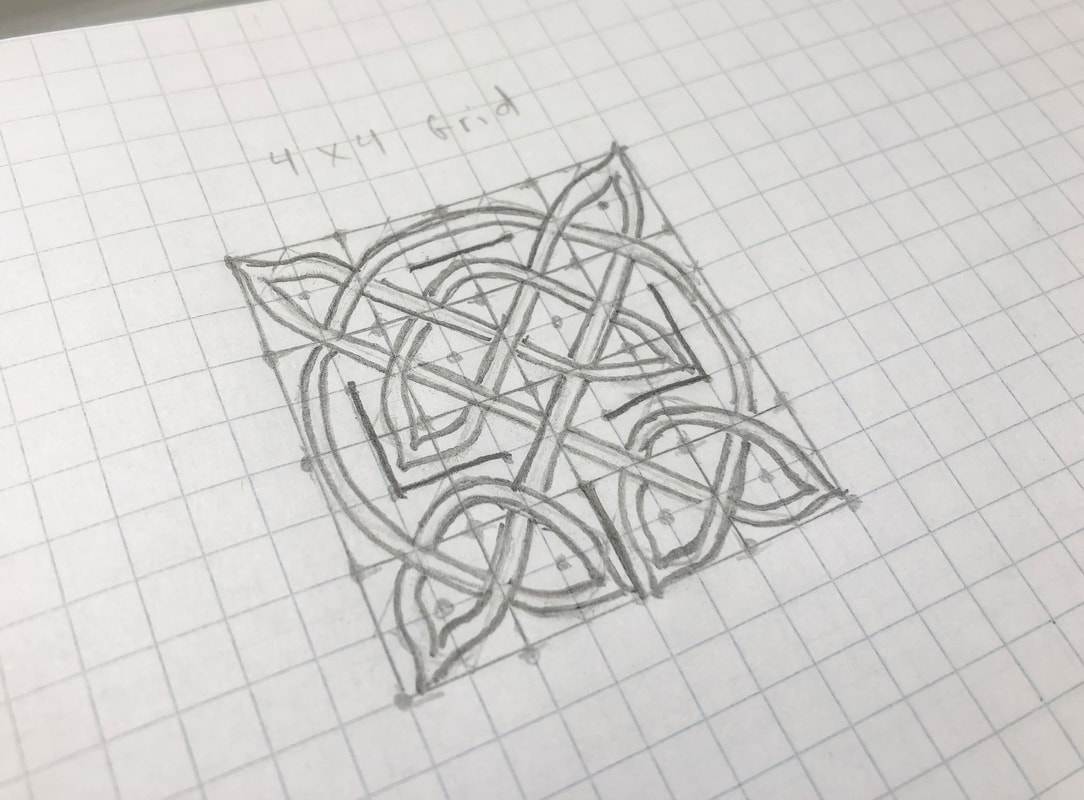
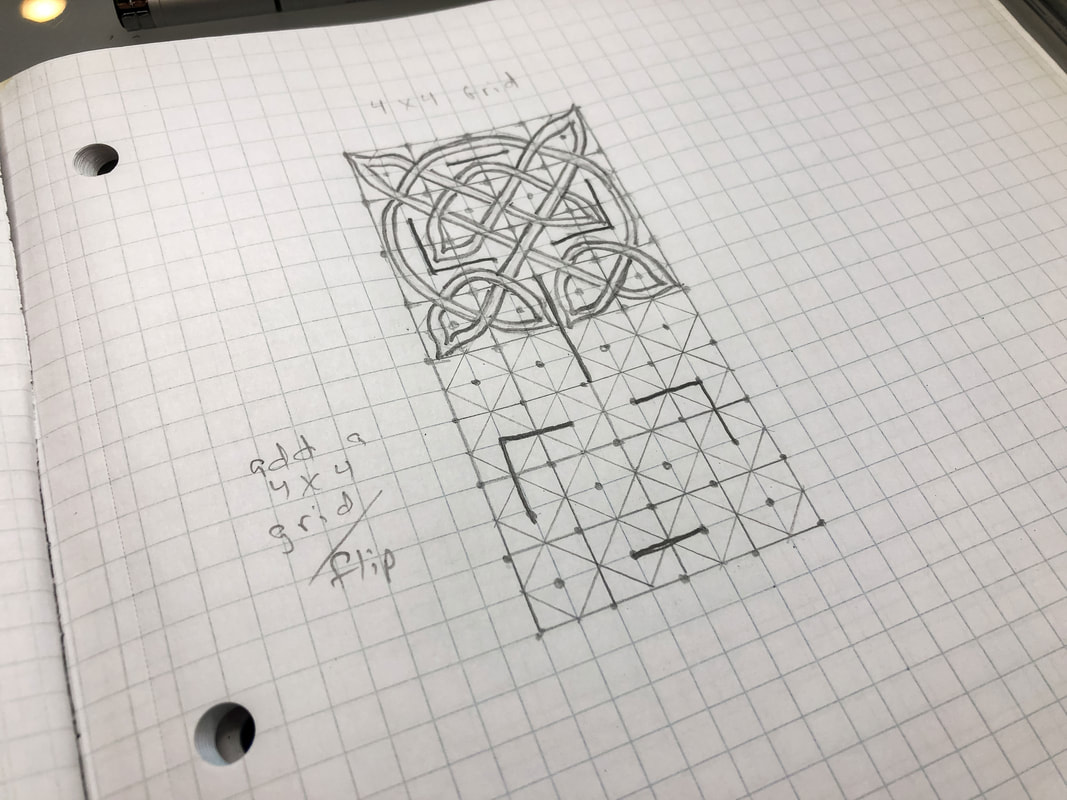
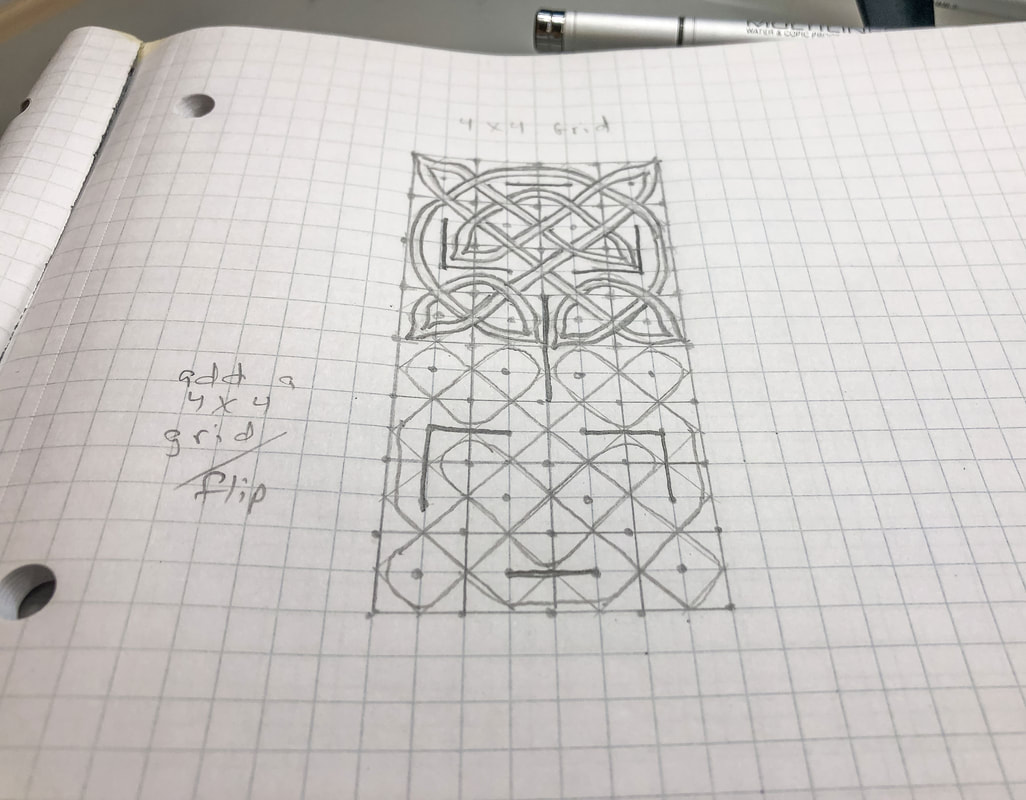
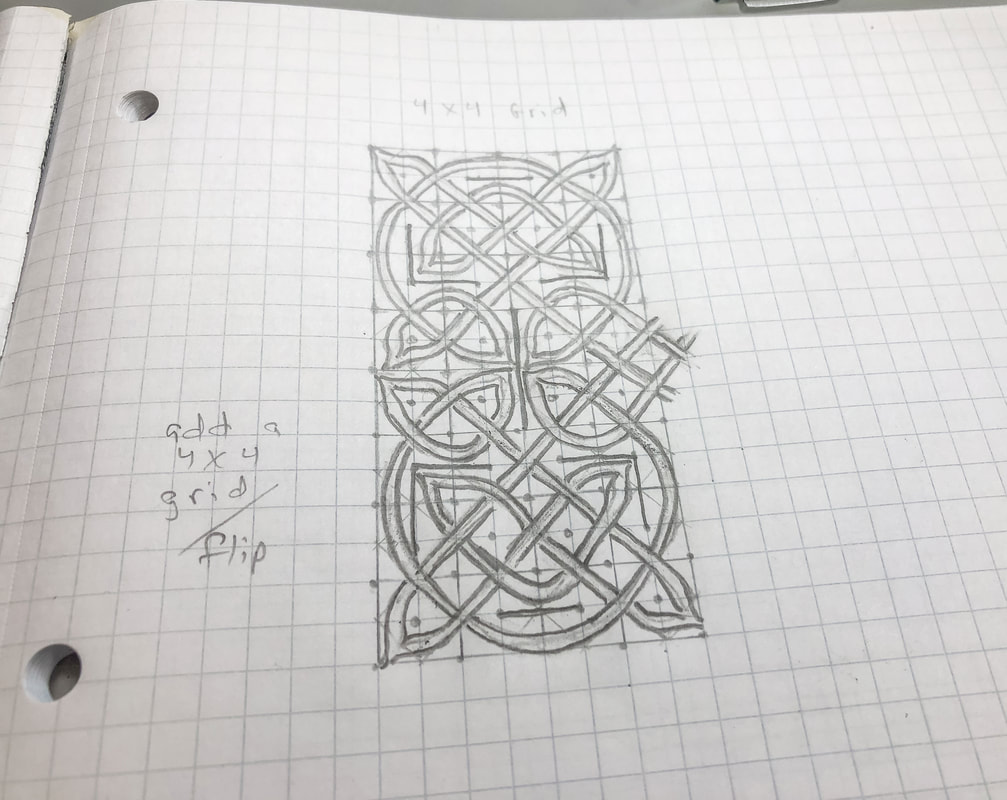
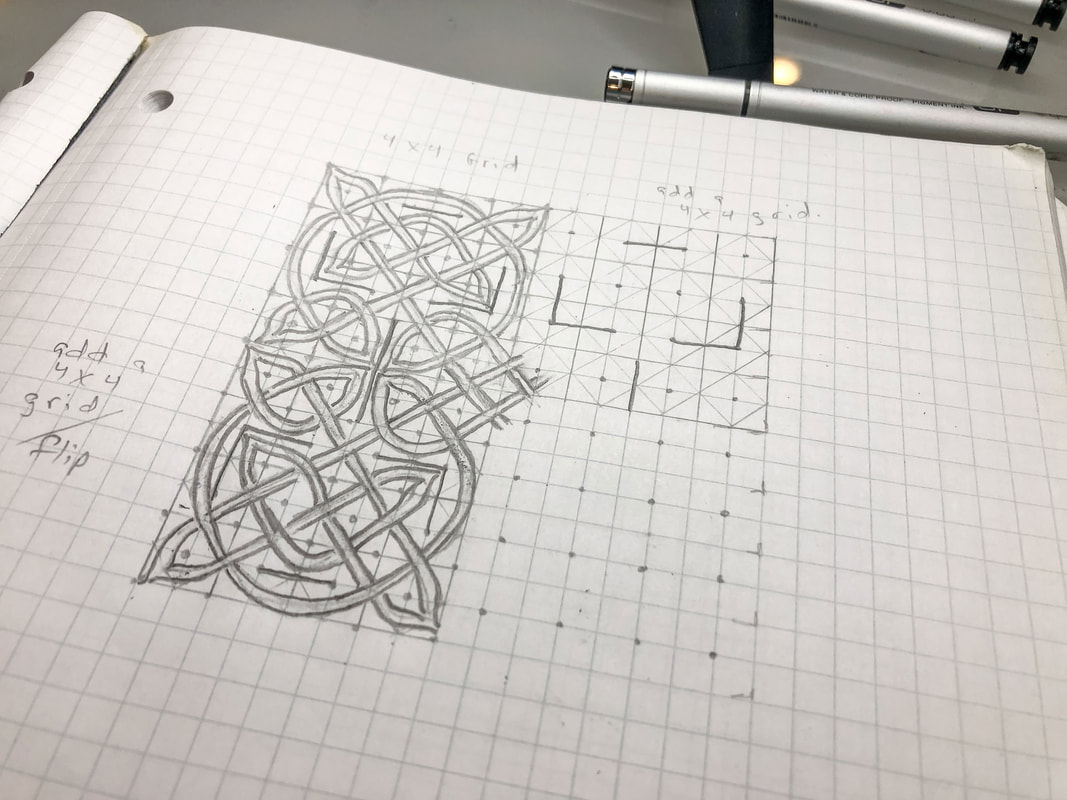
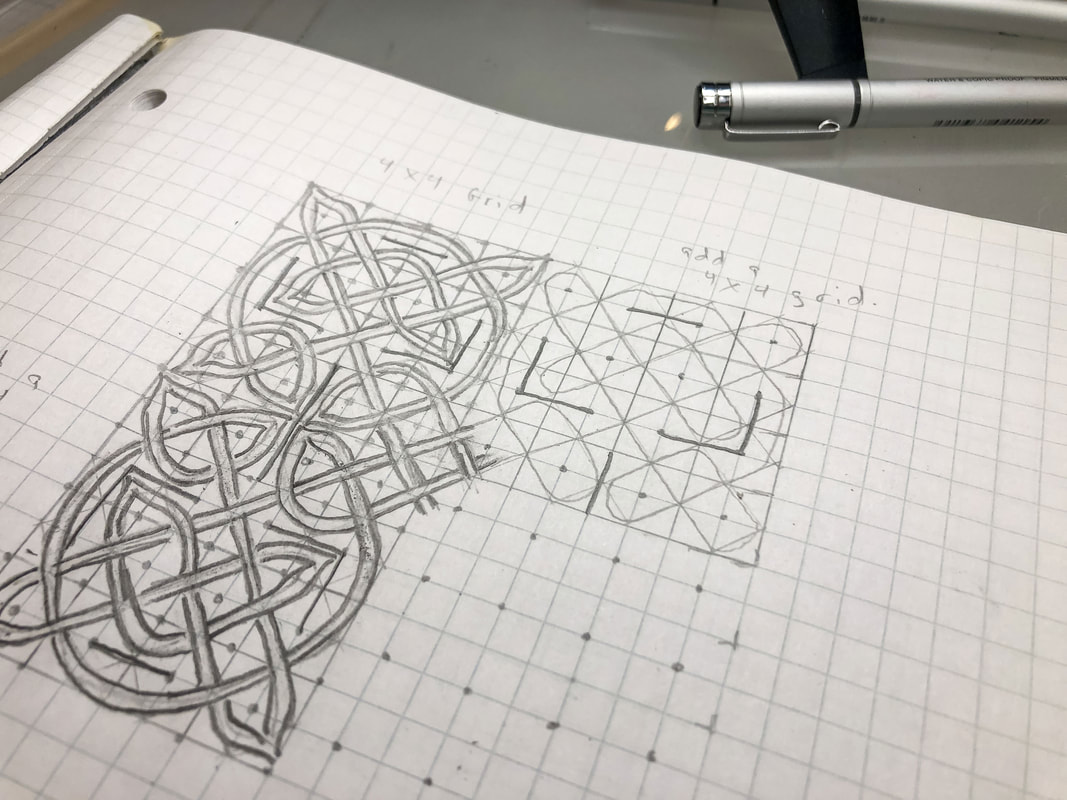
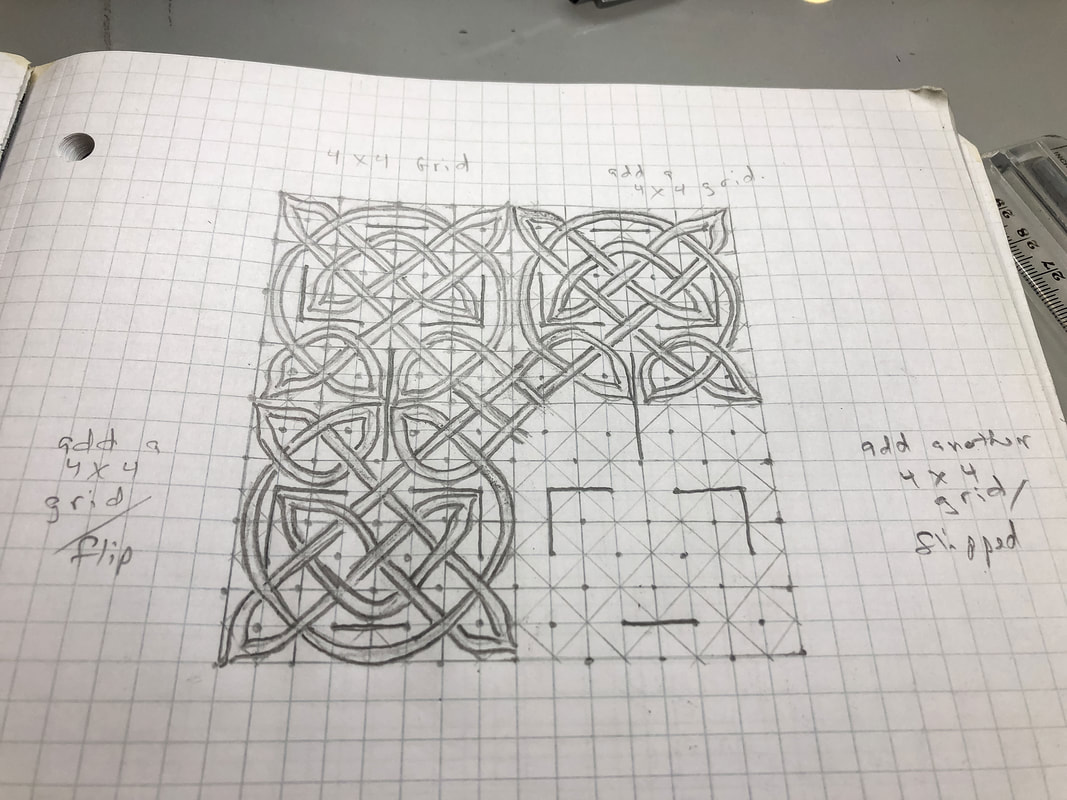
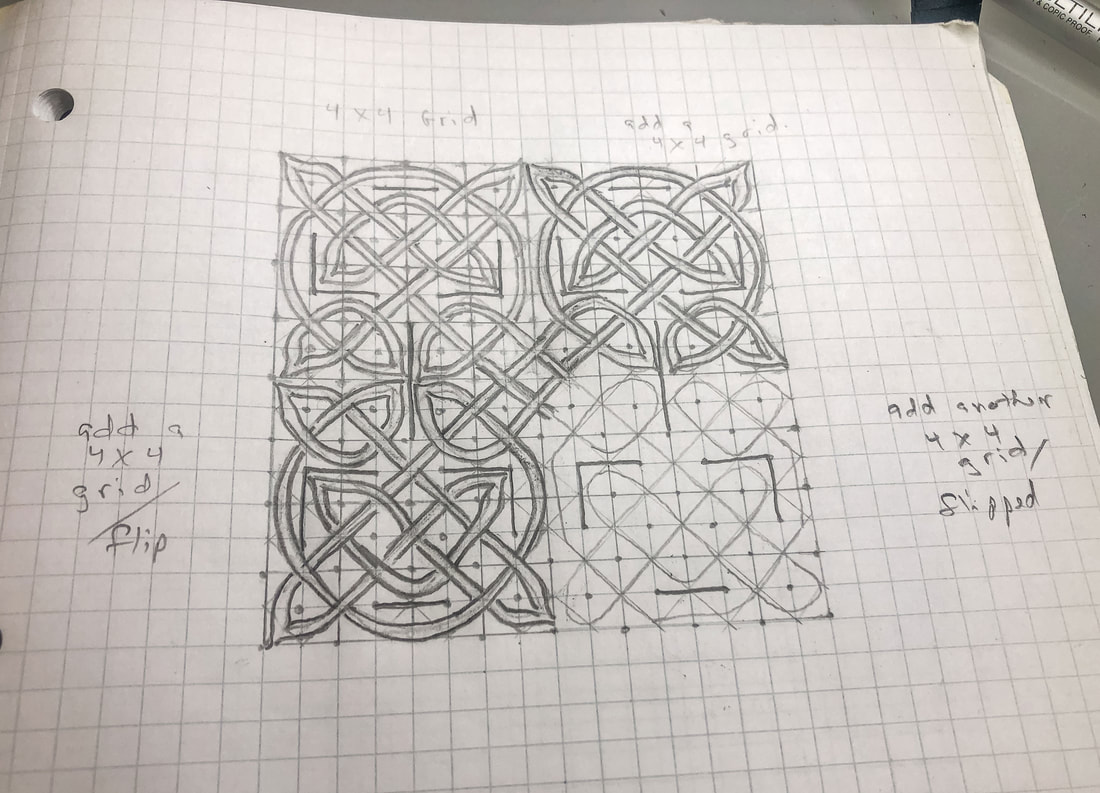
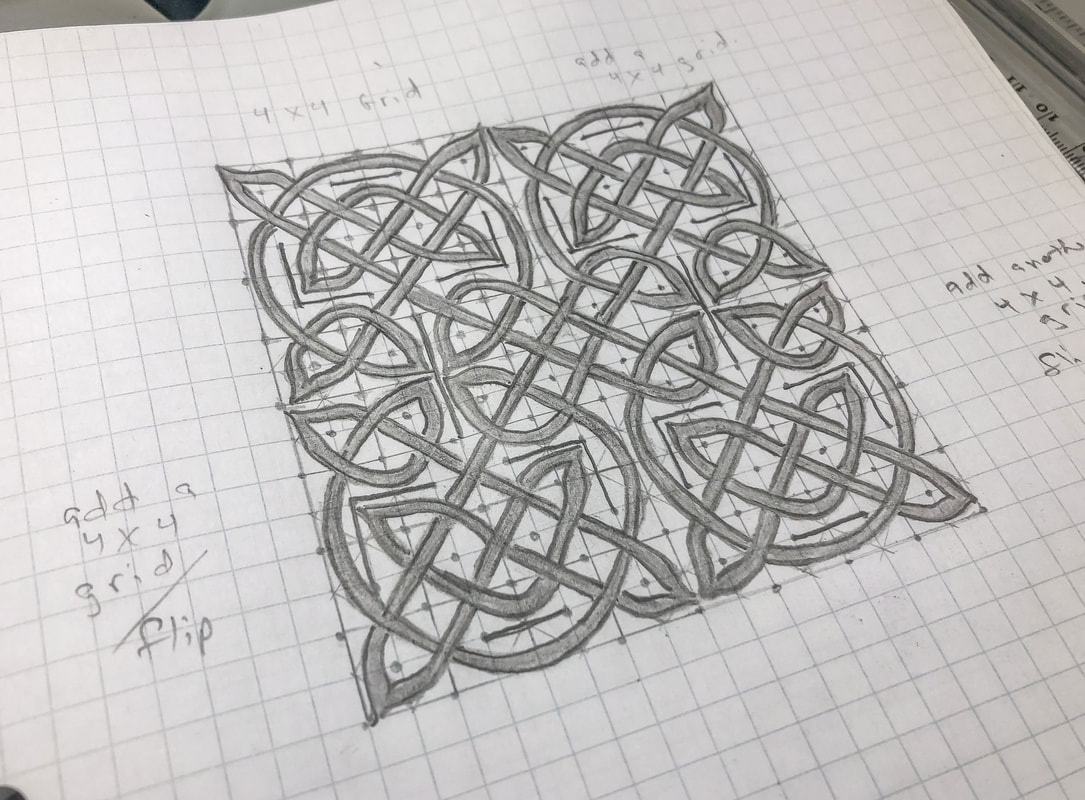
In today’s blog, I’d like to walk you through creating a panel with Celtic knotwork inspired by those seen on a Celtic Cross in Clonmacnoise, Ireland. We will draw four 4 x 4 grids that are interconnected using the same repeated design. So grab some grid paper, a ruler, and a pencil, and let’s get started! If you need drawing supplies, my recommended supply list is below. (Disclaimer: I am a Blick Art affiliate, so this list contains affiliate links. If you click on the link and purchase the item, I will receive an affiliate commission at no extra cost to you. I will only recommend products or services I use personally and/or believe will add value to my readers, so there is no conflict of interest.) Gather your supplies: Drawing pencils Markers Blending stumps Eraser Click eraser Ruler Horse hair brush Grid paper Sketch pad Tracing paper Draw any grid lines, dots, and guidelines lightly so they can be easily erased when you finalize your design. (I use a 2H pencil or light pressure.) Step 1: Create a 4 x 4 grid Draw a 4 x 4 grid on grid paper. Place dots in the center of each box and at each intersection. Step 2: Draw the breaks Draw the breaks for the pattern as shown. Step 3: Draw a diagonal grid Create a diagonal grid running between the dots as shown. Step 4: Draw the spine for the thread Pick a corner and start drawing the spine for the thread following the diagonal grid. When you hit a break or wall the line should turn 90 degrees, except at the two sides (see the diagram). Follow this spine back to the point where you started. Step 5: Create the thread Draw parallel lines to the spine to create the thread for this pattern. Pick a starting intersection and create alternating overs and unders at each successive intersection. This is the basic knot pattern you will use for the rest of the panel. Step 6: Create a second grid below the first Repeat steps 1-5 to create a grid below the first one for the second part of the panel. Adjust the intersections so that the threads from the top grid intertwine with the bottom grid (as shown). Step 7: Create a third grid next to the first Repeat steps 1-5 to create a grid next to the first one for the third part of the panel. Adjust the intersections so that the threads from the first two grids intertwine with the third grid (as shown). Step 8: Create the fourth grid Repeat steps 1-5 to create the fourth part of the panel in the bottom right corner. Adjust the intersections so that the threads from the first three grids intertwine with the fourth grid (as shown). Step 9: Stylize Clean up the lines, and add shading, texture, and finishing touches to the final panel design. And you're done! How did you do? Let me know in the comments. If you'd like to follow along with me in my YouTube video tutorial you can find it here! Related blogs you may want to read:
How to draw a simple Celtic triquetra using three circles Circular Celtic border knot tutorial, basic braid Basic twist step-by-step drawing tutorial using grid paper Celtic braid step-by-step drawing tutorial Basic border knot with vertical breaks, step-by-step drawing tutorial Basic border knot with horizontal breaks, step-by-step drawing tutorial DIY chalk-painted tray with Celtic border A fun DIY project with paint and a thrifted mirror part 2 The Celtic Motherhood Knot, a symbol of love Celtic Tree of Life Basic Celtic Knot Tutorial Part 1 Celtic Knot Tutorial Part 2
0 Comments
Leave a Reply. |
Author
Some of the posts on this site contain affiliate links. This means if you click on the link and purchase the item, I will receive an affiliate commission. Categories
All
Archives
October 2025
|


 RSS Feed
