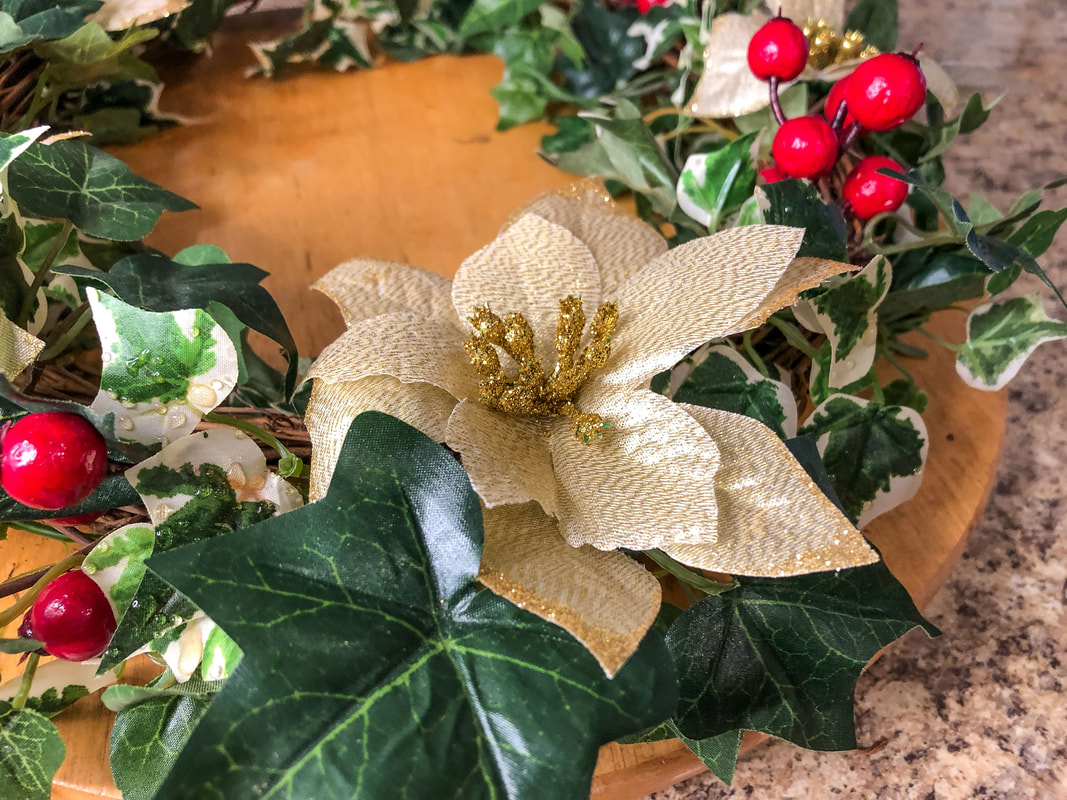
 Closeup of ivy, gold poinsettia, and berries on this DIY wreath. Photo by Diane M. Lilly, 2022. This holiday decorating season has seen a lot of DIY projects, including this super simple ivy vine wreath! As with another recent DIY wreath project (see below), I started with a twisted vine wreath base stripped of all its old faux florals.  Another DIY wreath with red berries for my front door. Photo by Diane M. Lilly, 2022. Why so many DIY decor projects, you may ask? Well, it’s all about being economical this year and working with materials I already have rather than going out and spending money that I need for other things…like gifts! So what you see on this table (plus a box or two of Christmas ornaments) is all I had to work with for this holiday season’s greenery. A lot of thought also went into creating a sense of continuity in design between the different groupings, the dining room table, and the living room decor. Just because you are on a budget doesn’t mean you skimp on design!  This year's Christmas tree. Photo by Diane M. Lilly, 2022. 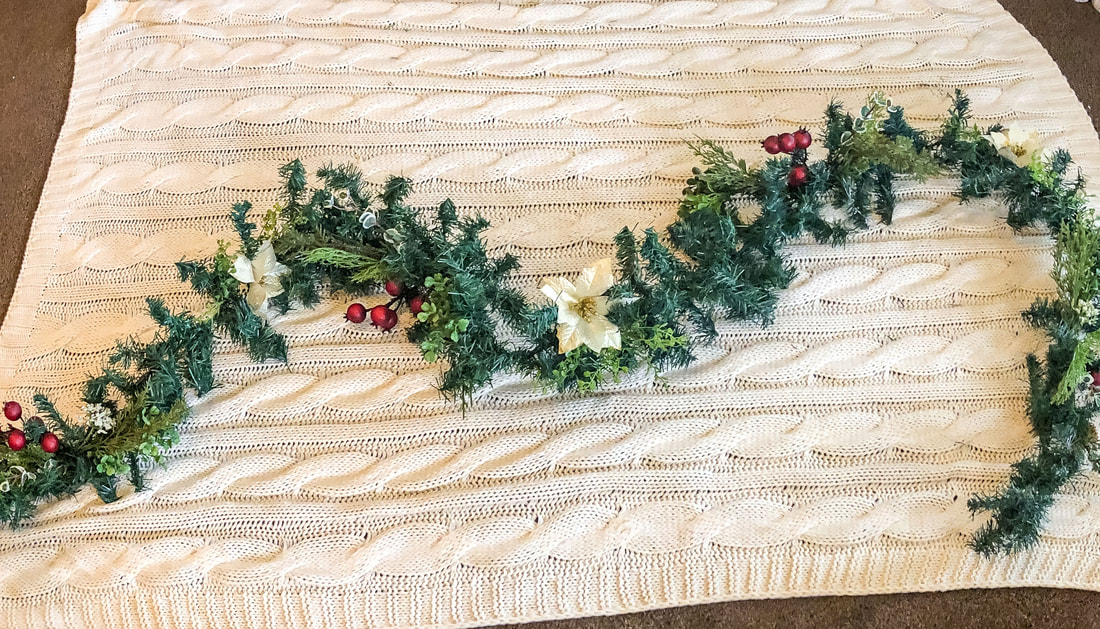 A DIY garland with gold poinsettias and red berries. Photo by Diane M. Lilly, 2022. This faux ivy wreath design was so quick and easy that I had to share it! Here are the four steps to make this simple wreath… Step 1—Wrap the green ivy Wrap the solid green ivy around the wreath and secure it into place by pushing the ends into the twisted vine. Wrap as much ivy as you like to create the desired thickness of the wreath. 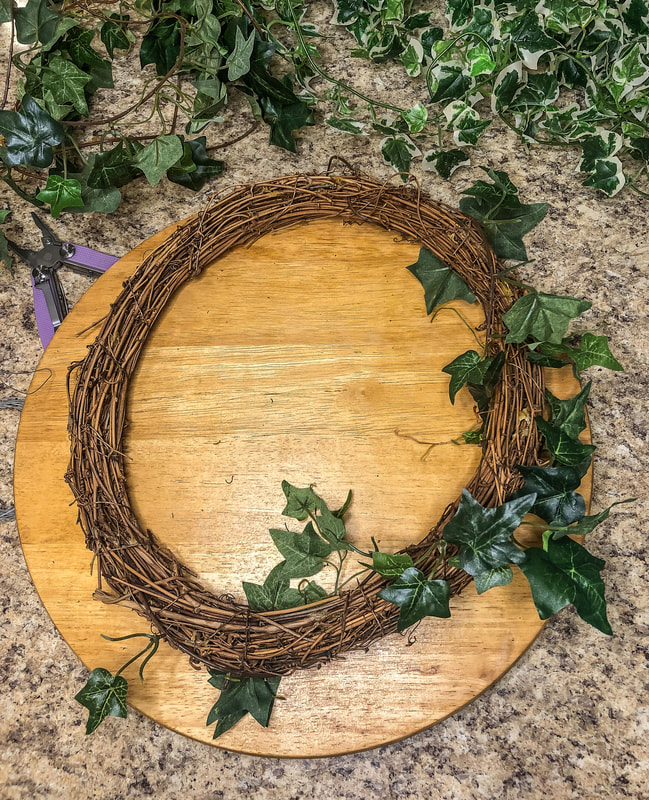 Vine wreath base with a few pieces of green ivy. Photo by Diane M. Lilly, 2022. 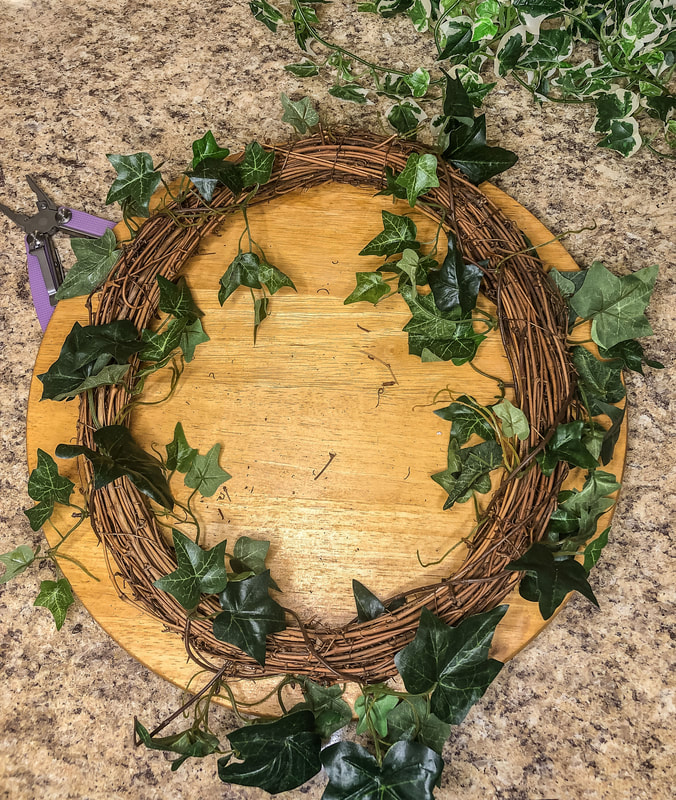 Working out how I want to fill the wreath base with the ivy. Photo by Diane M. Lilly, 2022. Step 2—Wrap the variegated ivy The variegated ivy—which provides visual contrast—can be wrapped over the green ivy, filling in the gaps between the vines. As with the green ivy, wrap it as many times as you like to create the desired thickness for your wreath, and push the ends into the wreath base to secure it in place. Keep the spacing even for a more balanced finished look. 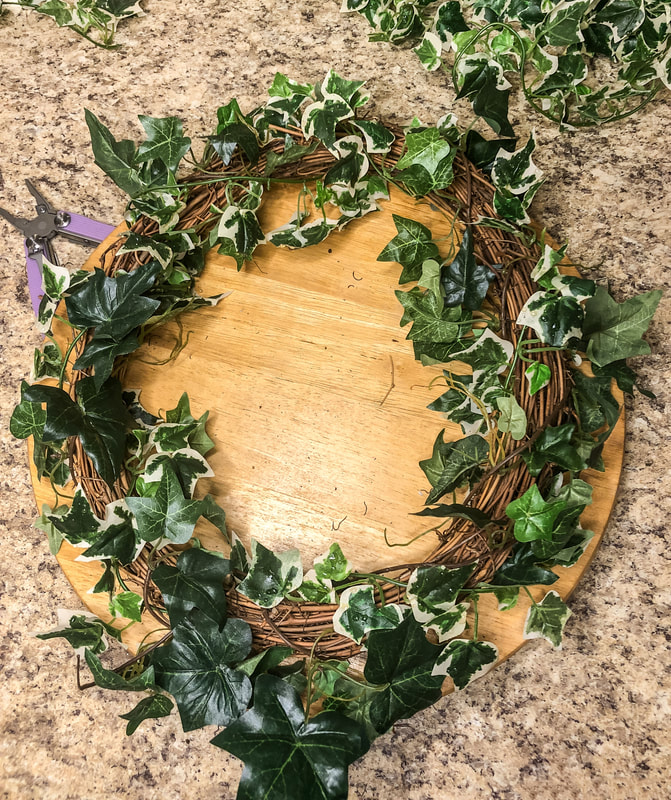 Wrapping the wreath base with the variegated ivy. Photo by Diane M. Lilly, 2022. Step 3—Add in berries This design calls for clusters of red berries to provide contrast and visual interest. When working with wreaths, it is essential to evenly space florals to create a sense of balance. Odd numbers are preferable, so I used five clusters, but this design would also work perfectly well with just four berry clusters. The berry picks are secured into place by pushing the stems into the twisted vine base. If the stems are too short, add thin wire to attach to the wreath. 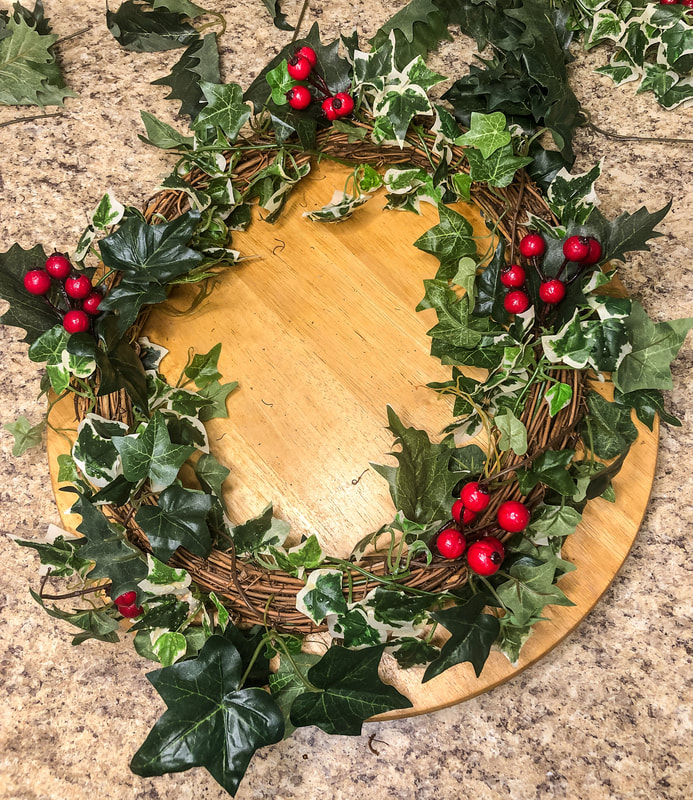 Adding the berry clusters to the wreath. Photo by Diane M. Lilly, 2022. Step 4—Attach gold poinsettias As with the berries, the poinsettias should be evenly spaced around the perimeter of your wreath. Five poinsettias were evenly spaced between the red berries. Since these poinsettia flowers had no stems, I used thin wire to attach each to my wreath.  The finished wreath with gold poinsettias added. Photo by Diane M. Lilly, 2022. And that’s it! Super simple, and yet very festive! All that’s left is to hang and dress up your wreath with fairy lights. I even had enough ivy left over to create a small wreath with no base—just ivy vines twisted into an oval and topped with a bow! 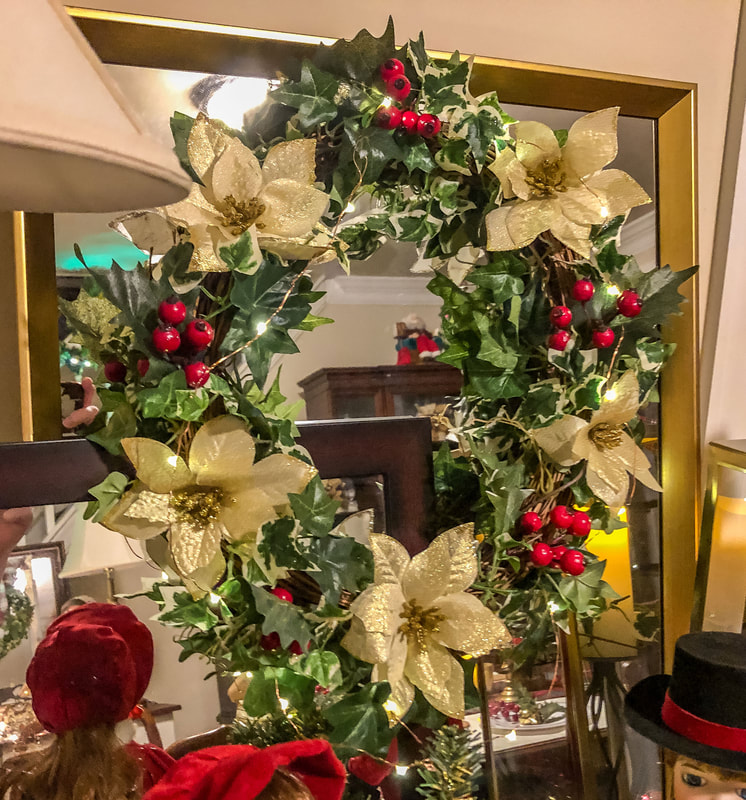 One view of the finished ivy wreath hanging over some mirrors in my dining room. Photo by Diane M. Lilly, 2022.  Another view of the finished ivy wreath. Photo by Diane M. Lilly, 2022.  The extra wreath made by twisting the remaining vines into and oval shape. Photo by Diane M. Lilly, 2022. 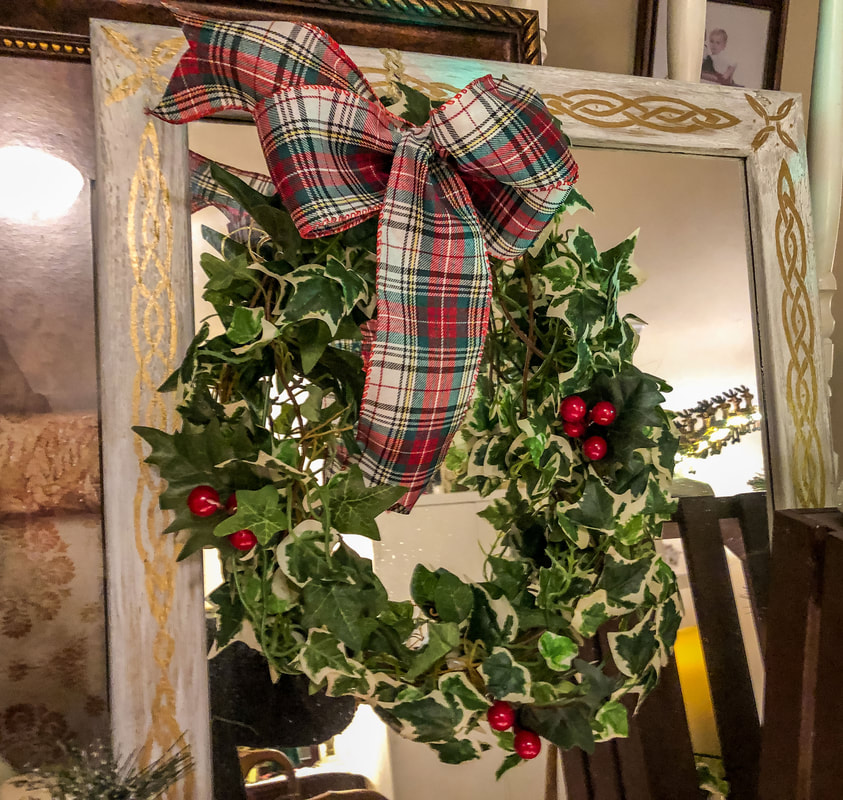 The extra ivy vine wreath with a plaid bow. Photo by Diane M. Lilly, 2022.  A final look at the finished DIY faux ivy vine wreath with red berries and gold poinsettias. Photo by Diane M. Lilly, 2022. So let me know in the comments whether you have tried anything similar, and don’t forget to check out my other holiday wreath DIY (listed below). Happy Holidays! Related blogs you may want to read: How to make a simple faux floral wreath for the winter How I decorated my Christmas tree on a budget this year How to make cheap garland look festive for the holidays in just six steps DIY chalk painted tray with chippy effect DIY chalk painted tray with Celtic border Tips for creating a floral spring wreath A spring makeover for my small rental bathroom How to care for faux florals Nine hygge decor ideas Eight ways to create cozy winter interiors after the holiday decor comes down This article may contain a few items or commercial mentions, but I only used them for demonstration purposes only. I am not endorsing any particular product or receiving any monetary gain for this blog.
0 Comments
Leave a Reply. |

Author
Some of the posts on this site contain affiliate links. This means if you click on the link and purchase the item, I will receive an affiliate commission. 
Categories
All
Archives
October 2025
|
 RSS Feed
|
|
Major credit cards accepted through Square. Apple Pay option available. This site also accepts PayPal payments for better online security, and it's free to sign up! Gift cards are now available for purchase!
Copyright 2025 |