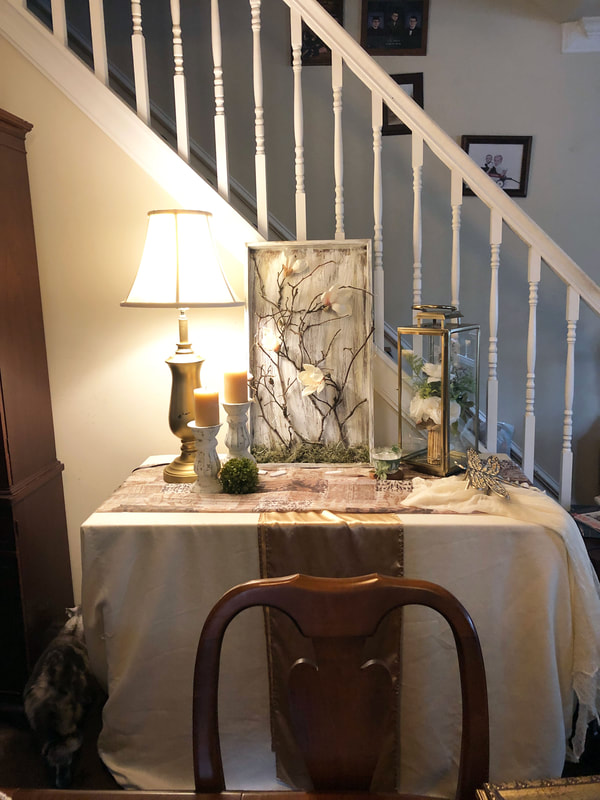
 "New" thrift lamp, rehabbed and staged. Photo by Diane M. Lilly, 2021. While casually strolling through a local thrift shop, I happened to spy these two gorgeous lamp bases. I knew they were just perfect for my dining room vignettes, but they needed a little work first. One was missing the lamp shade and harp components, while the other just needed some TLC. Both lamps needed to be completely rewired to replace the cords that were older than grandma. Don’t need any electrical fires here! So today’s project will be to replace the lamp cord for each lamp. 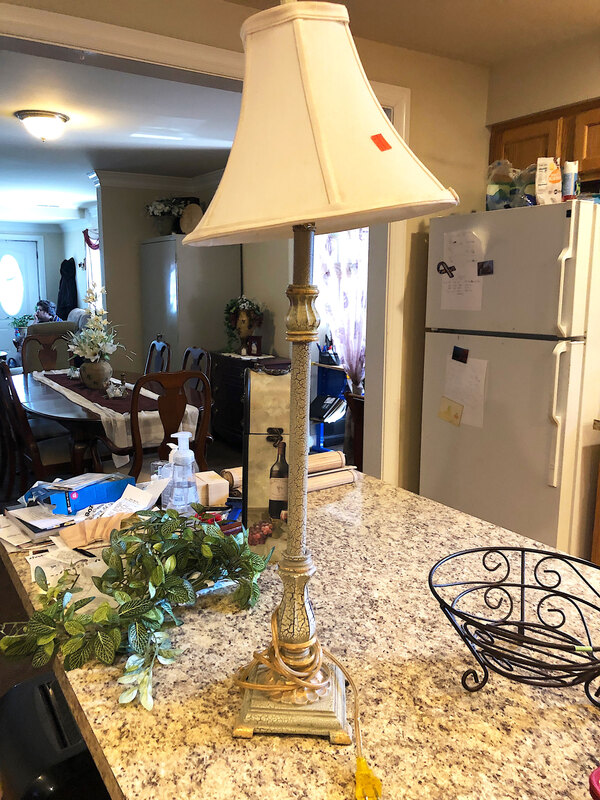 Candlestick lamp purchased at Goodwill. Photo by Diane M. Lilly, 2021.  Base of a gold lamp purchased from Goodwill. Photo by Diane M. Lilly, 2021. Two lamp kits from my local Home Depot cost me about $17 each. They have three way switches, so that I can adjust the light…Perfect! Saving energy already! I also needed to purchase a new harp and lamp shade for the gold lamp base, which was the most expensive part of this project by far! So I have my two lamp bases and the lamp kits and shades... 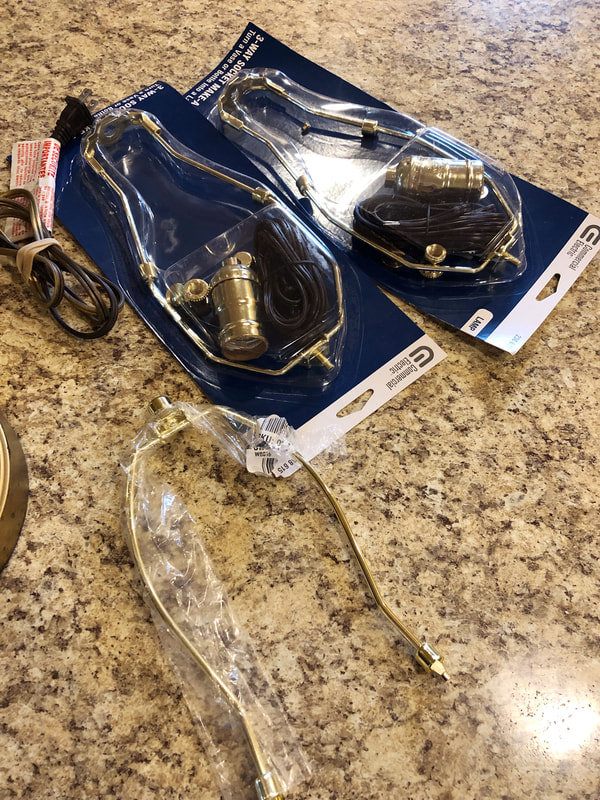 Lamp kits purchased from Home Depot. Photo by Diane M. Lilly, 2021.  Harp for lamp shade. Photo by Diane M. Lilly, 2021. 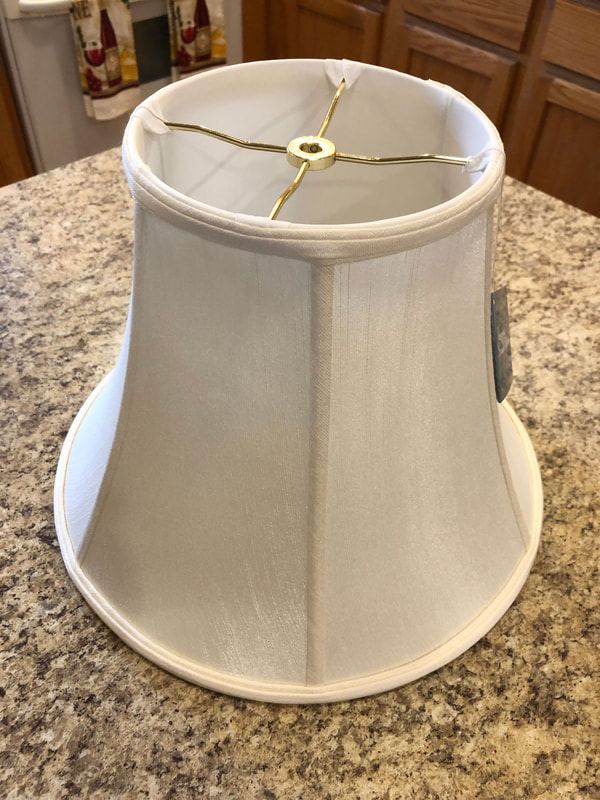 New lamp shade. Photo by Diane M. Lilly, 2021. 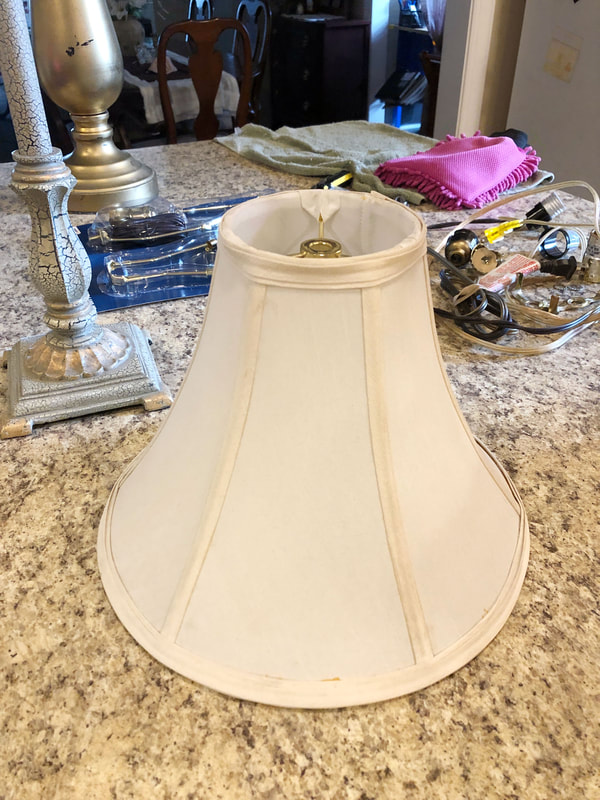 Existing lampshade from candlestick lamp to be cleaned. Photo by Diane M. Lilly, 2021. All I need to do now is take out the old wiring and put in the new and improved wiring, but first let’s sort out the basic anatomy of a lamp and its electrical fittings… 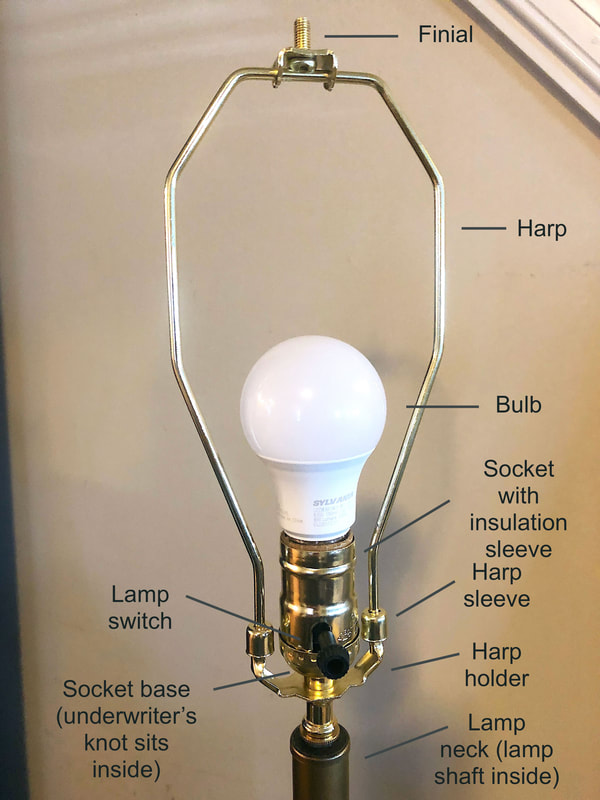 Lamp anatomy. Photo & diagram by Diane M. Lilly, 2021. You may need to refer back to this diagram from time to time during the process, so that’s why I thought this diagram would be useful! After all, it’s not like any of us replace lamp cords every day, right? Taking out the old wiring… First…please, please, unplug the lamp first! Never, ever do electrical work when an appliance is plugged in! You can start with something easy—unscrewing the decorative top finial (if there is one) from the harp (see diagram). Remove the harp by lifting the sleeves that hold it in place, pushing the ends of the harp towards each other. You can remove the felt base of the lamp (if there is one) to access the cord and cut at the bottom. Remove the top part of the socket and insulator. (Try squeezing it to get it out. There may also be a screw that will require removal on the socket base, so if it doesn’t come off look around for that screw.) Unscrew the wires from either side of the socket. (May have two different color screws corresponding to the positive and negative wires.) Unscrew the base of the socket. Untie the knot (underwriters knot) in the cord that holds it in place and pull the cord out. 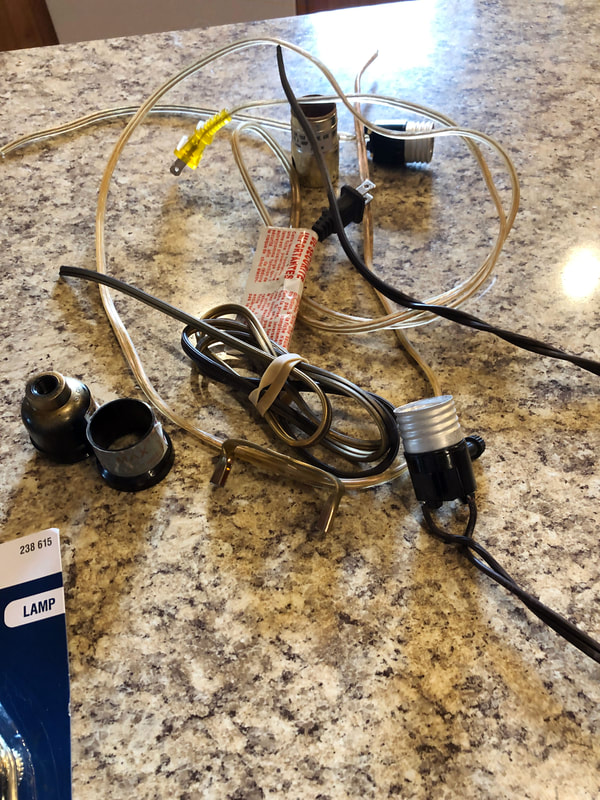 Old wiring taken out of thrift lamps. Photo by Diane M. Lilly, 2021. And putting in the new wiring… Take the new cord and twist the two separated ends together (if they are not together already) so you can feed the cord through the bottom of the lamp and up through the shaft. Once the cord is all the way through you can put the new base cap back on, screw it down, tighten set screw (if it has one). Separate the two strands of wire to give enough wire needed to tie a knot and wrap around the screws. Tie an underwriter’s knot…Loop one wire end in front of the cord (like half a bow), loop the second wire end around the back of the main cord shaft and push it through the first loop, now take the end of the first loop and push it through the second loop, then pull both ends to create a knot. After you tie the knot, pull the cord through the lamp shaft to tighten the slack. Now it’s time to attach the wires to the socket. Take the new socket apart to find the part where the wires are attached. Note about the cardboard insulator inside the socket…You must have it because it is the insulation and is a safety mechanism for the the electrical components. Do not throw it away! It’s supposed to be there, so leave it in place. Look for the brass and silver screws—these create the polarization. Brass is hot, silver is neutral and these screws correspond to the plug at the other end of the cord, with the wide side being neutral and small side being hot. When you look at you lamp cord, one side of the wire is smooth (for the hot screw) and one is ribbed (for the neutral screw). So match up the brass screw with the smooth wire (sometimes wire will have a black tip) and the silver screw with ribbed wire (sometimes wire will have a silver tip). This part is really important for electrical safety and lamp function. Loosen two screws and wind the corresponding wire to the appropriate screw, using needle nose pliers to create a clockwise turn with the wire around the screw. Once the wires are connected—and double checked for safety—put the socket pieces back together by pushing down until everything goes into place. All that’s left is to attach the harp and shade, and screw in the lightbulb! 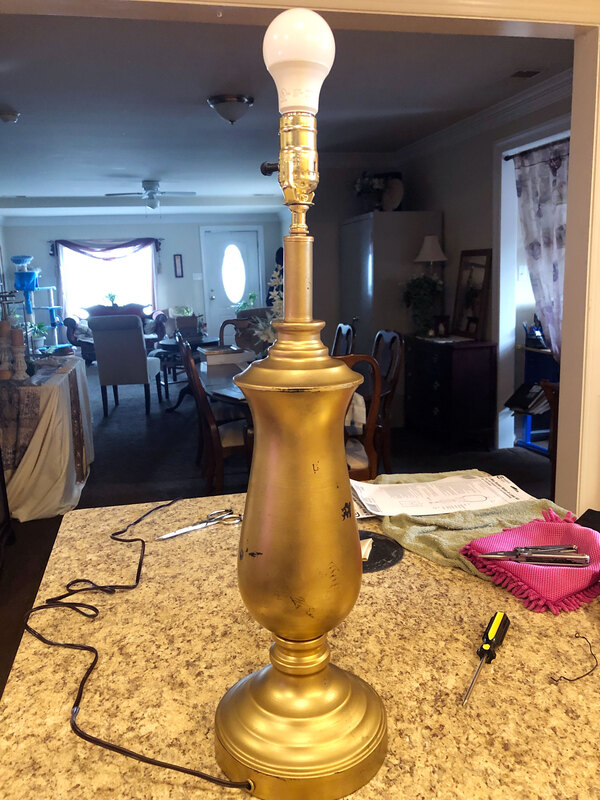 Gold lamp rewired and lit. Photo by Diane M. Lilly, 2021. 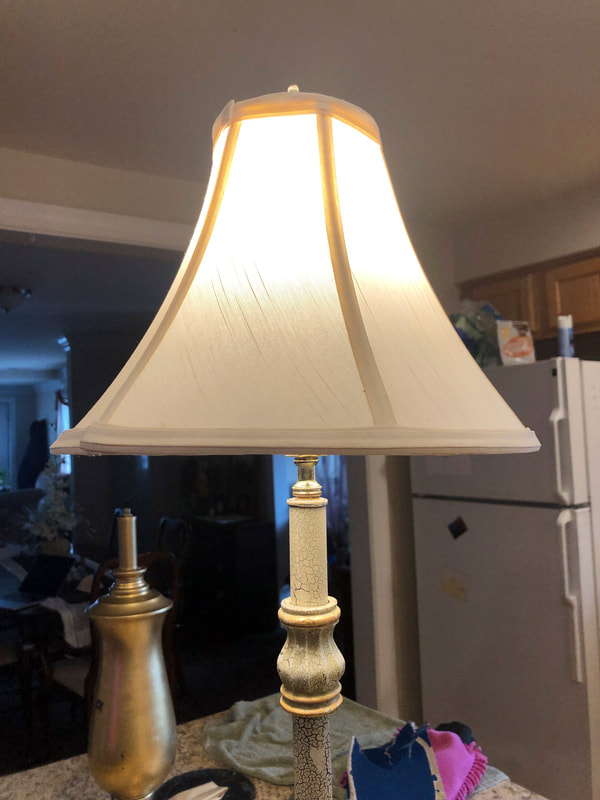 Candlestick lamp rewired and lit. Photo by Diane M. Lilly, 2021. A couple of real life situations… Ok, so now that I’ve shared the steps required for taking apart and re-assembling a lamp to rewire it, let me share with you my ACTUAL experiences with the two lamps I recently rehabbed. 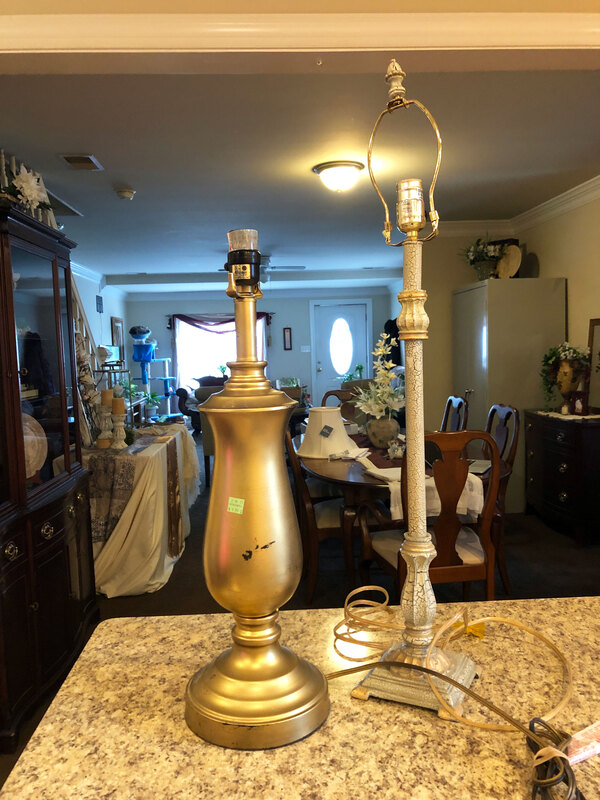 Two lamp bases before rewiring. Photo by Diane M. Lilly, 2021. Lamp #1…My new candlestick lamp Whoever owned this lamp before me not only re-assembled the socket crooked, they glued the top and bottom of the lamp shaft. Long story short, it took my son and I—and several tries with a variety of wrenches and tools—to pry this baby apart. We had to untighten the shaft from the lamp base so that we could get the top bit out to get a handle on the crooked socket base and glued in washer and harp seat. This lamp gave us such a problem! What should’ve take no more than maybe 15 minutes to do, took us almost an hour. Once we were able to sort that mess out though, it was smooth sailing! We just followed the instructions on the package (which are essentially the same as the ones listed above) and had my salvaged lamp wired and lit up in no time. Oh and I almost forgot to mention—I had to clean the filthy shade with soapy water and thankfully I didn’t ruin it! 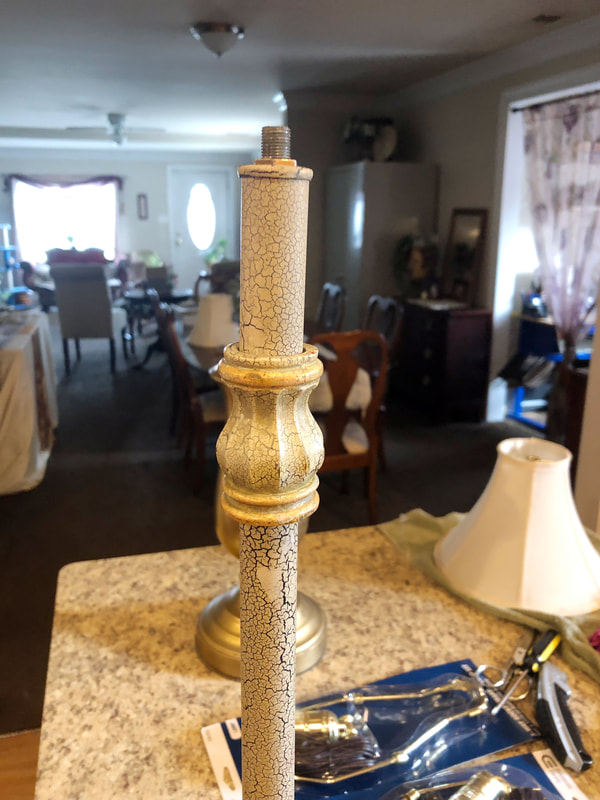 Candlestick lamp base after the socket base was removed. Photo by Diane M. Lilly, 2021. 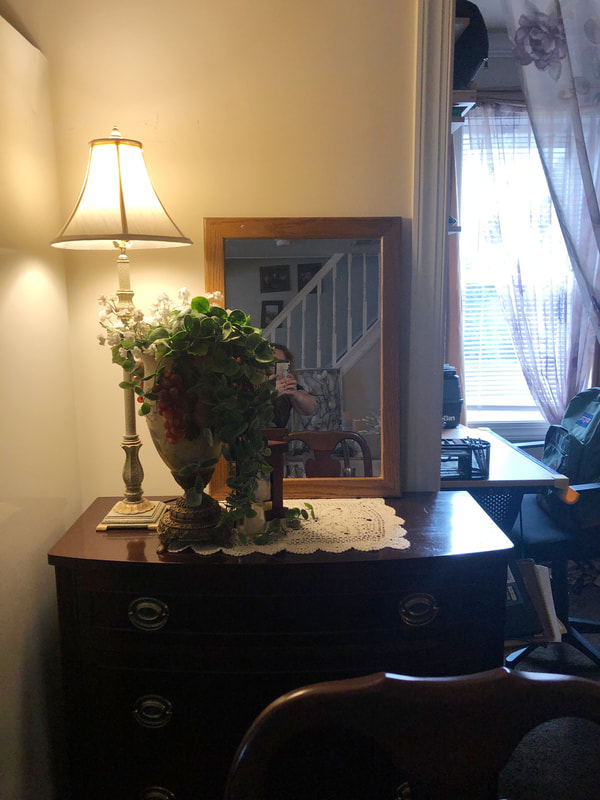 Candlestick lamp finished and staged in my dining room. Photo by Diane M. Lilly, 2021. Lamp #2…My new gold lamp This one was much easier, but sort of had the opposite problem. Unlike the candlestick lamp—where the shaft was all one piece—the gold lamp’s shaft was in three pieces, and loose, and when I tried to fish the new wire through it just got stuck. So we had to take the whole lamp apart and fish the wire through bit by bit, then re-assemble and tighten the whole ensemble. Then it was smooth sailing…again. 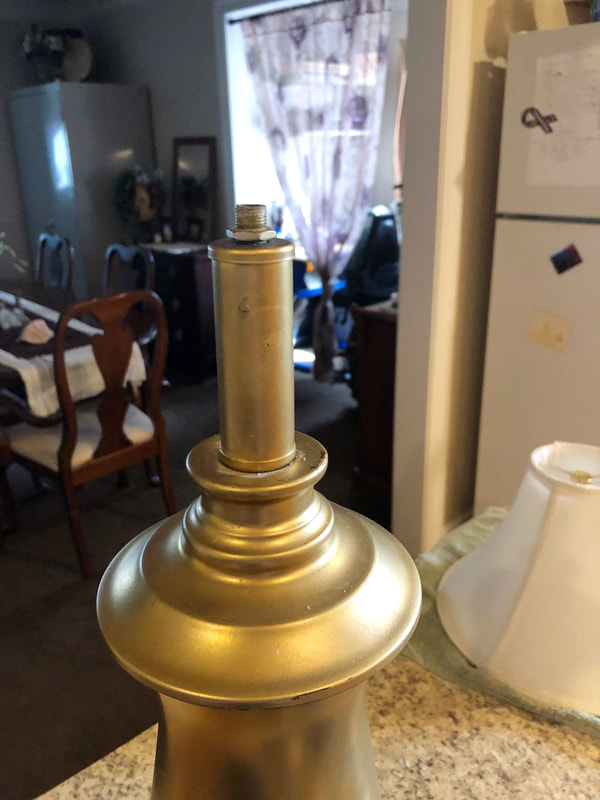 Gold lamp after socket base was removed. Photo by Diane M. Lilly, 2021. 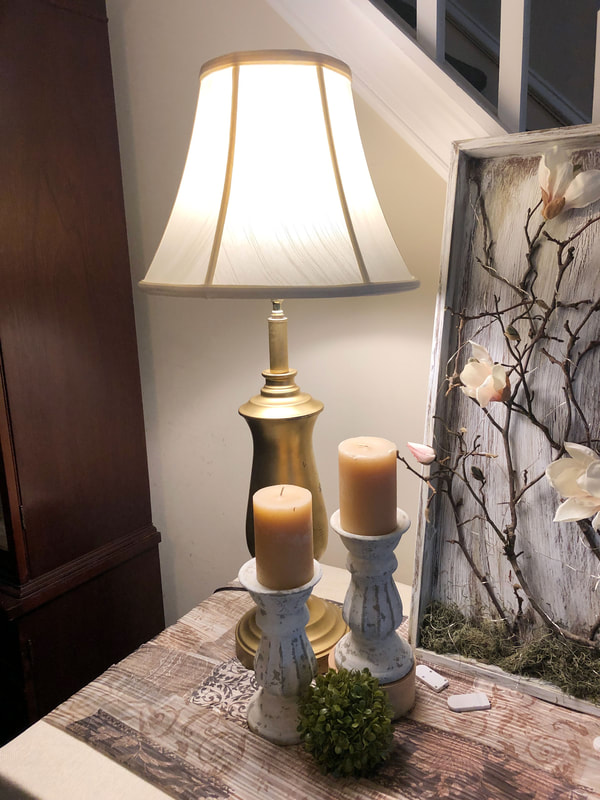 Gold lamp rewired and staged in my dining room. Photo by Diane M. Lilly, 2021. The moral of the story is when you are dealing with thrift lamps, expect the unexpected! It probably will not be as easy as you hoped, so leave a little time to figure it out. Unlike Youtube videos—which make it look and sound soooo easy—the real thing can be tricky, but with a little perseverance and elbow grease it will be well worth it to rehab an interesting old lamp! Even with all of the problems I encountered with these lamps, I love the special character they each bring to the room and the vignettes in which the were placed! Please feel free to add your own comments and experiences below. And, as always, you can to add your name to my email list to start receiving monthly notifications for new blog posts, new items, sales, and other exciting stuff from Di’s Studio Designs. I am an Amazon affiliate so some of the posts in this article may contain affiliate links. If you click on the link and purchase the item, I will receive an affiliate commission at no extra cost to you. I will only recommend products or services I use personally and/or believe will add value to my readers, so there is no conflict of interest. Related blog posts you may want to read: My dining room redesigned as a multi-function space How to replace a clock mechanism How to frame small canvas art Creating a kitchen coffee bar Comparing DIY upholstery cleaning methods DIY refurbishment of a dining room cabinet
0 Comments
Leave a Reply. |

Author
Some of the posts on this site contain affiliate links. This means if you click on the link and purchase the item, I will receive an affiliate commission. 
Categories
All
Archives
October 2025
|
 RSS Feed
|
|
Major credit cards accepted through Square. Apple Pay option available. This site also accepts PayPal payments for better online security, and it's free to sign up! Gift cards are now available for purchase!
Copyright 2025 |