|
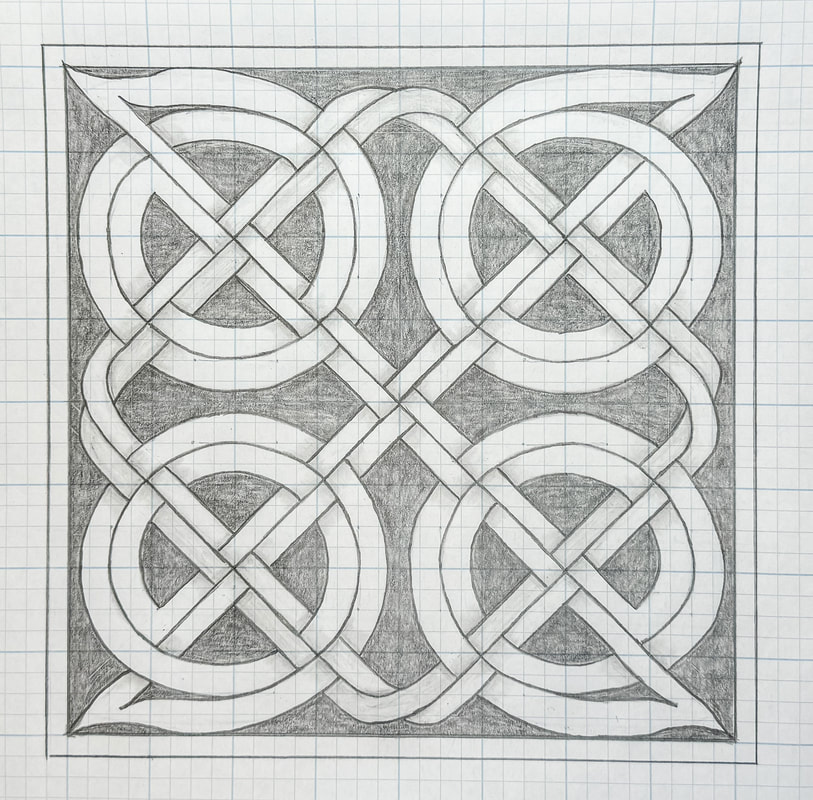
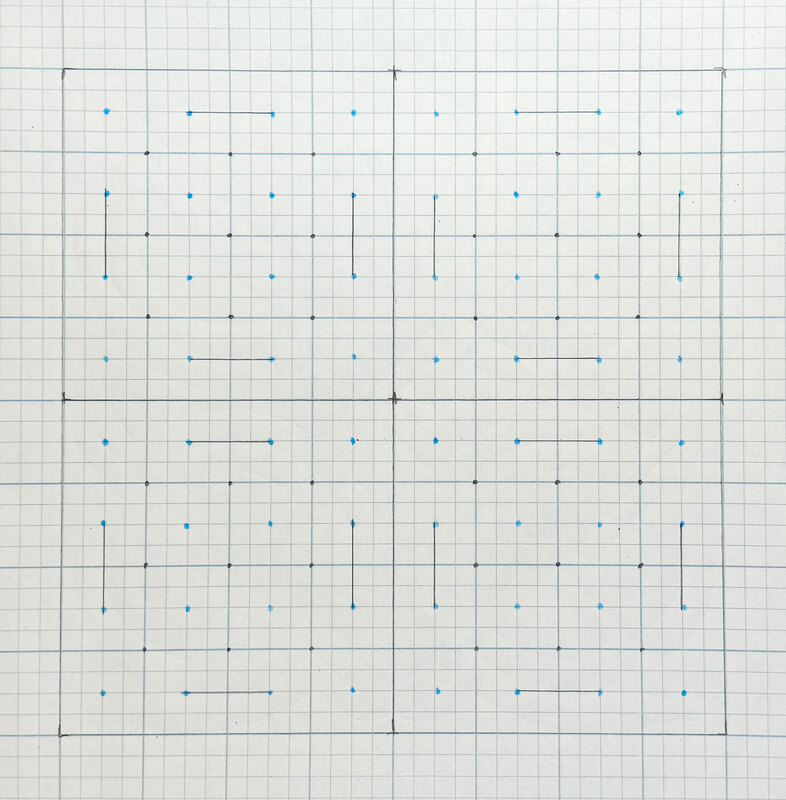
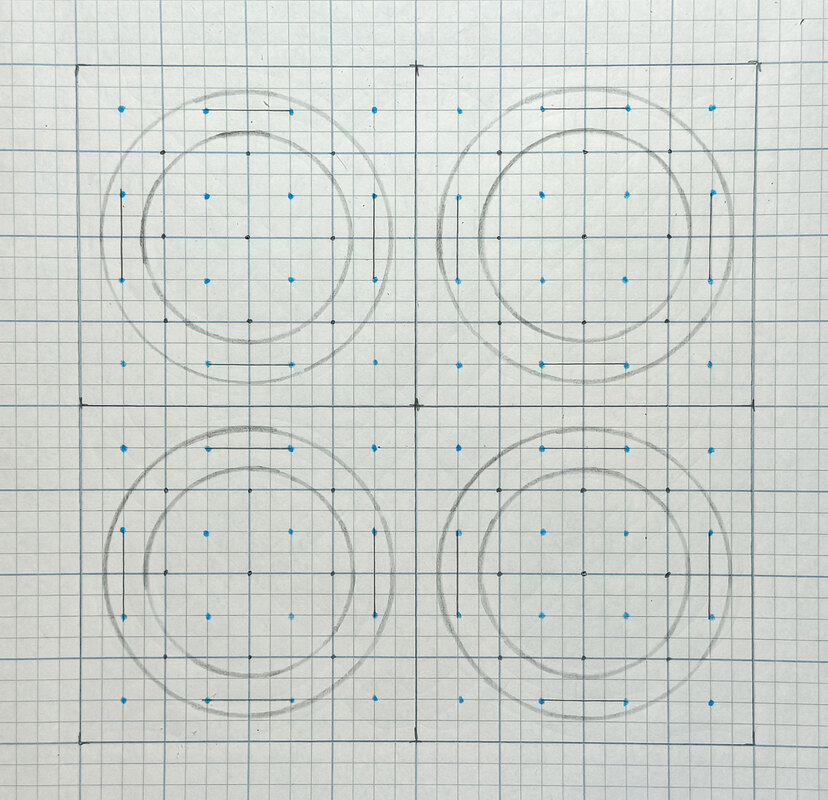
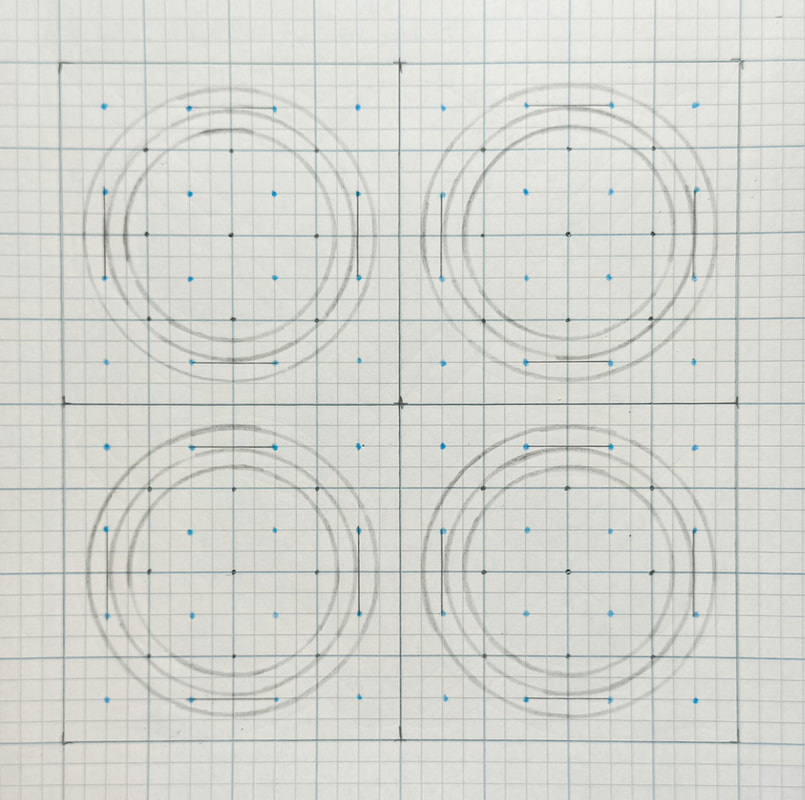
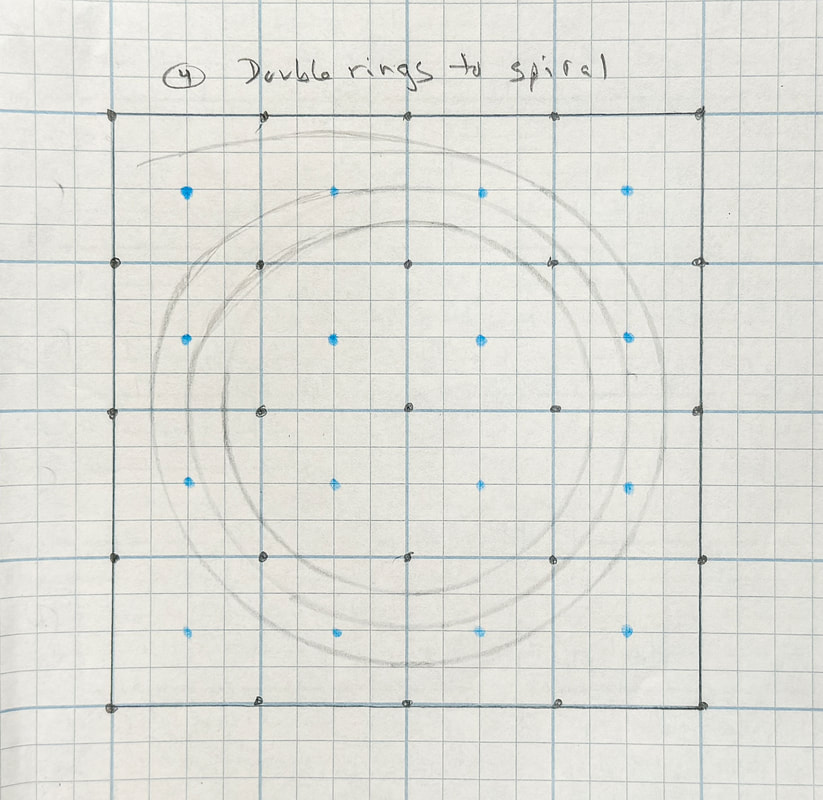
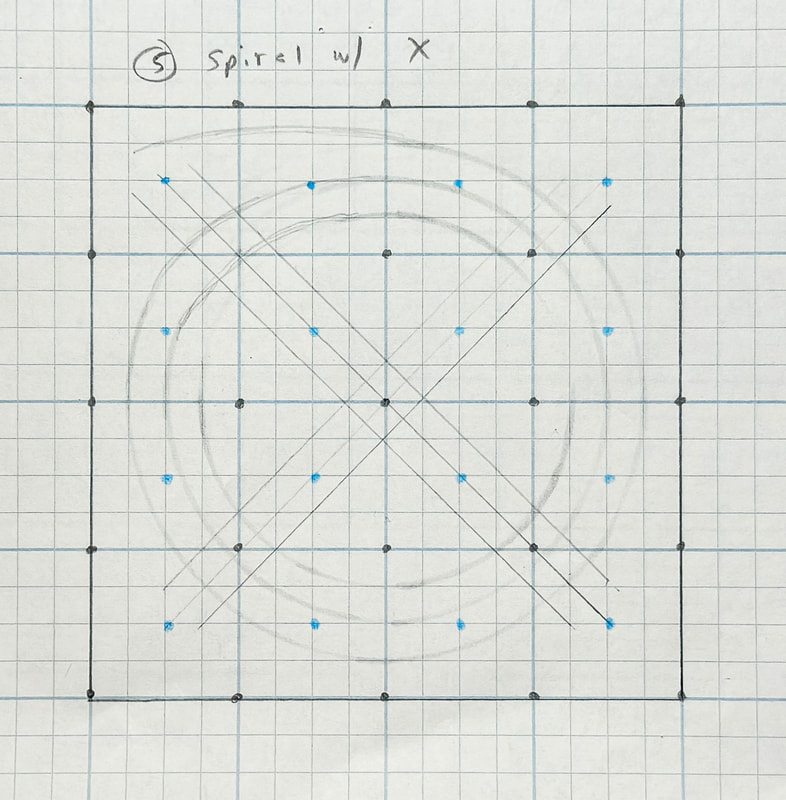
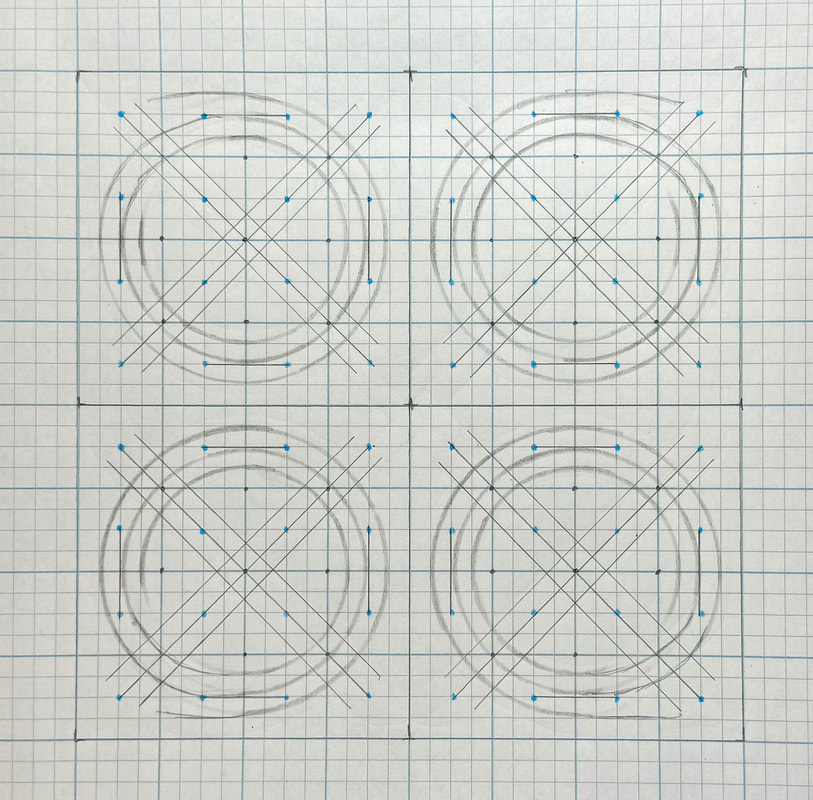
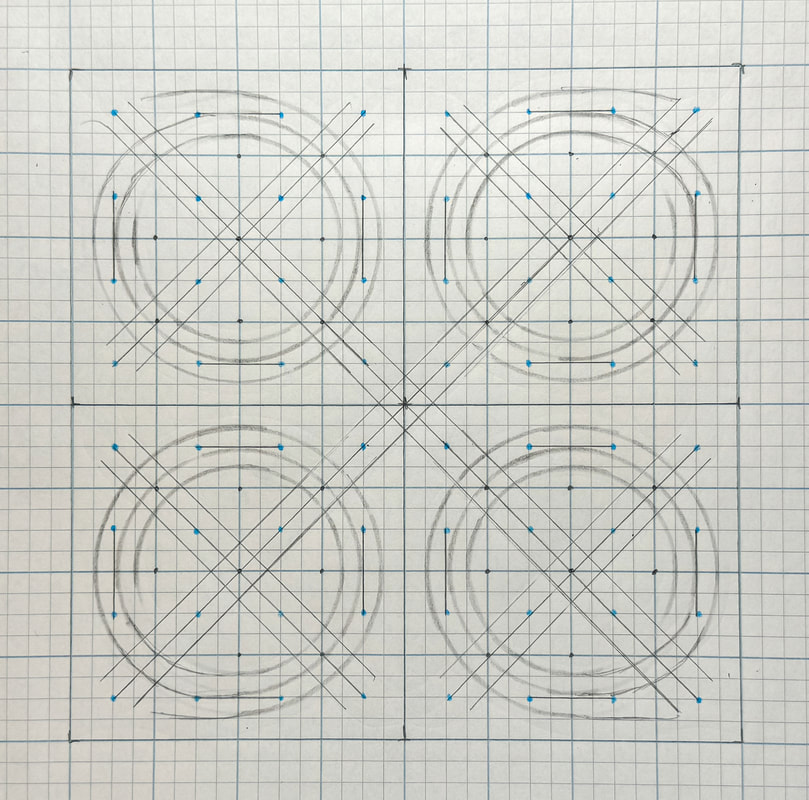
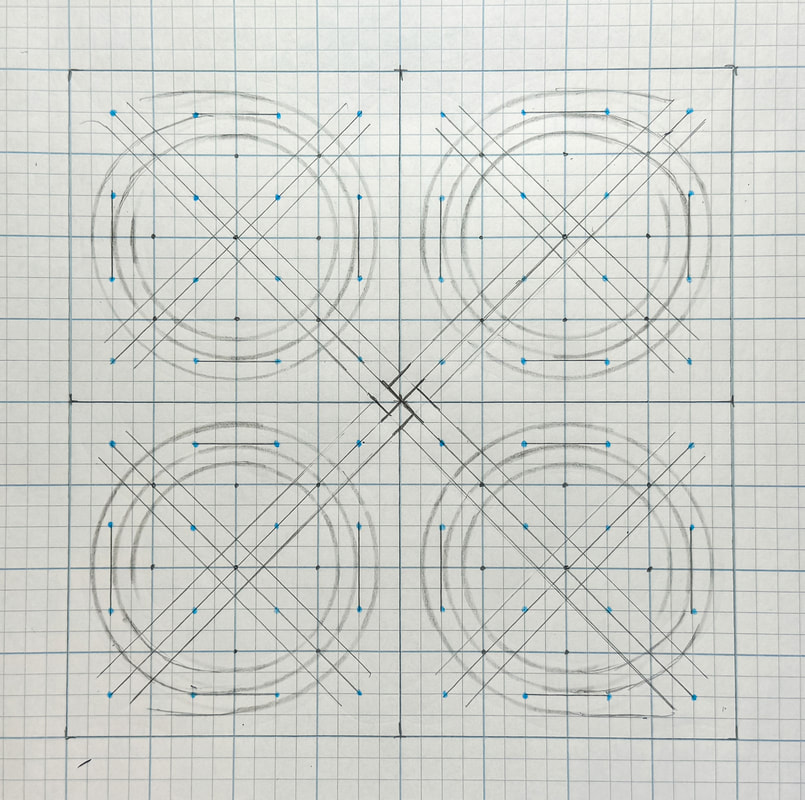
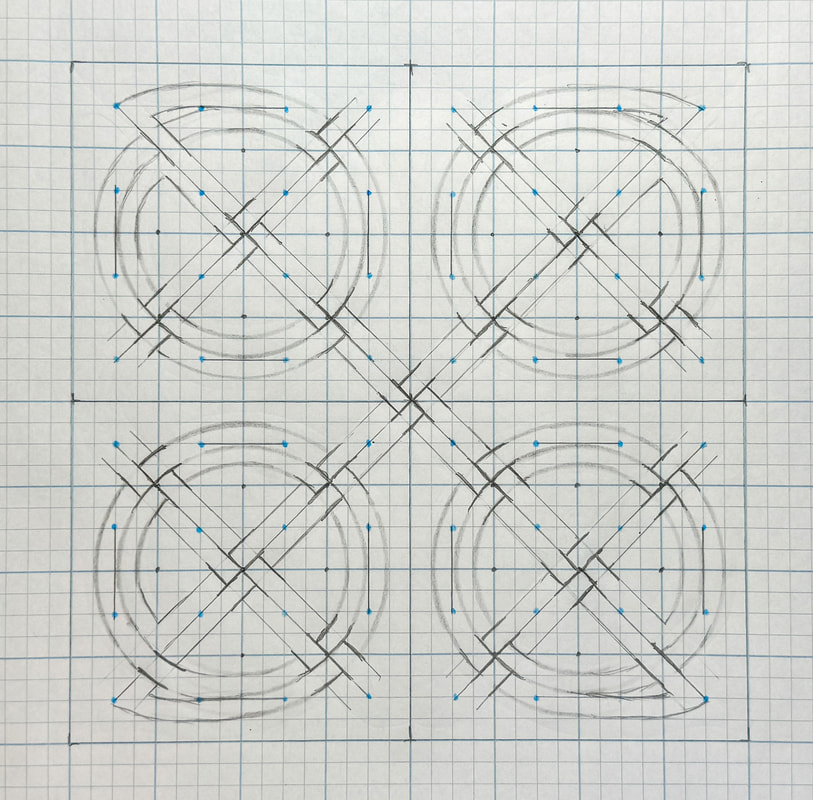
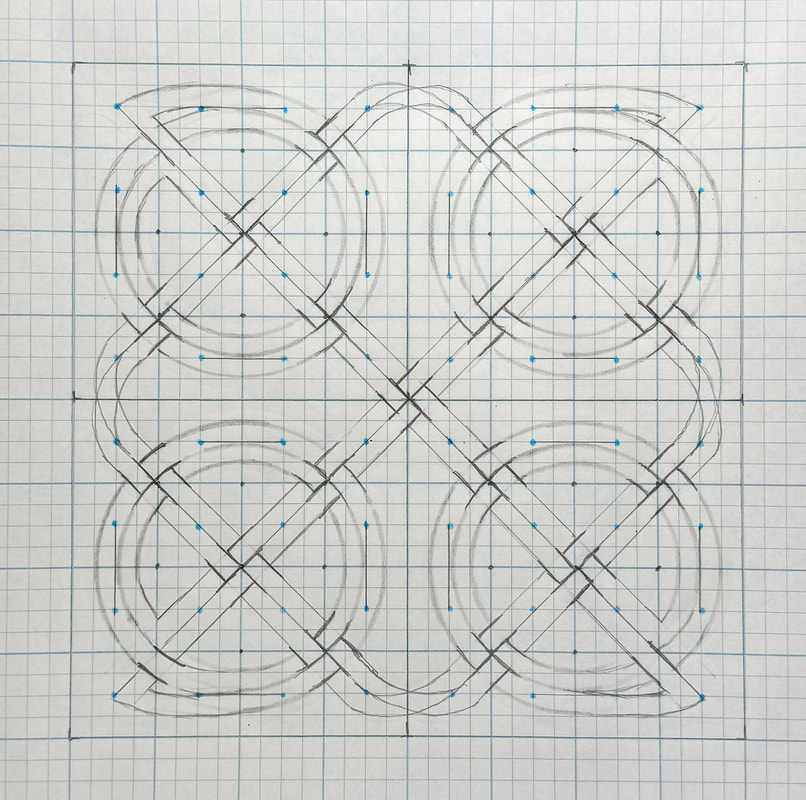
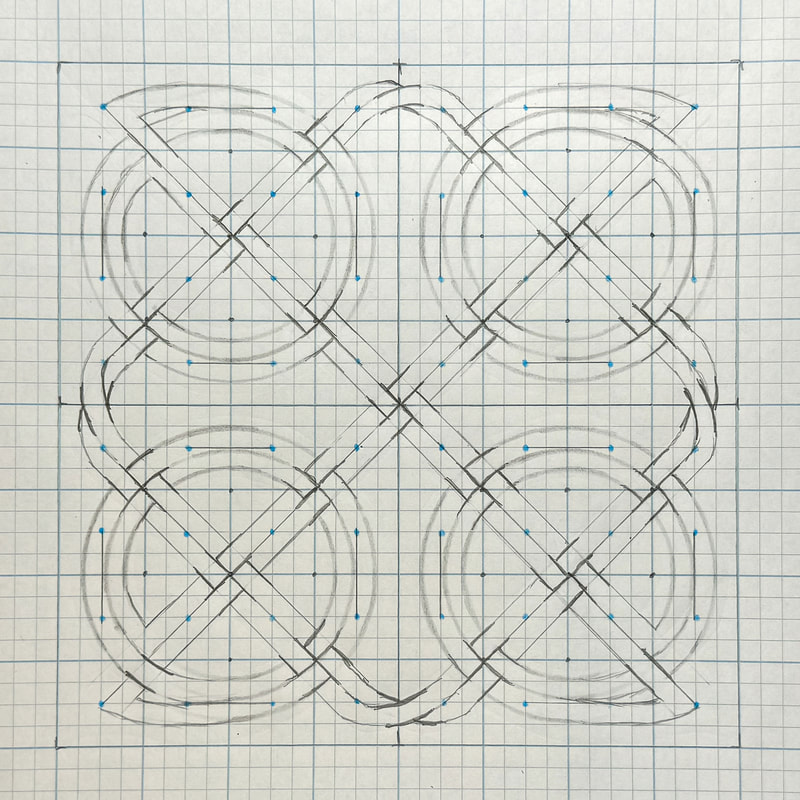
Welcome to another drawing tutorial blog! Today’s drawing tutorial uses multiple spirals in an expanded 8 x 8 grid. This tutorial will make more sense if you first read my previous blog (or watch the video) on how to draw a basic spiral knot, as this exercise will expand on that design to create a more complex panel with four spirals. If you are ready to tackle the next step, grab your drawing supplies, and let’s get creative! Project supply list Grid paper Drawing pencils Clic eraser Ruler Compass I am an affiliate associate of Amazon and Blick Art Materials so some of the posts in this article contain affiliate links. If you click on the link and purchase the item, I will receive an affiliate commission at no extra cost to you. I will only recommend products or services I use personally and/or believe will add value to my readers, so there is no conflict of interest. Step 1: Set up the four-panel grid Create (4) attached 4 x 4 grids for an 8 x 8 grid total. Place a dot at each grid intersection. Use a second color pencil to place dots in the center of each grid square. Draw break lines at the top, bottom, and sides of each 4 x 4 grid (as seen below). Step 2: Draw concentric circles in the 4 x 4 grids Use a compass to draw circles around and then through the break lines to create three concentric circles in each of the four 4 x 4 grids. Step 3: Erase each corner and reconnect the lines to form spirals Erase a section of each of the concentric circles at the outer corners. Reconnect the lines to form a spiral. The opposite ends of the line will dangle (for now). Step 4: Draw Xs through each of the 4 x 4 grids Draw an X through the center of each of the four 4 x 4 grids, then draw parallel lines on either side of each to match the width of the spiral. Step 5: Connect the four 4 x 4 grids in the center Extend the lines of the Xs to meet in the center of the 8 x 8 grid. Step 6: Create an over-under weave in the center of the 8 x 8 grid Starting at this center, create an alternating over-under weave. Work outwards from this point to draw the rest of the over-under pattern. Leave the top and sides where the 4 x 4 grids connect alone, as we’ll tackle that in the next step. Step 7: Draw lines to connect the threads at the top and sides of the grid Connect each 4 x 4 grid at the top and sides by extending and arcing the lines from the Xs. Finish the over-under weave pattern, making sure to alternate appropriately. Now it’s time to check your work. Pick a starting point on the 8 x 8 grid. Follow your threads and check each overlapping junction to ensure the weave is correct. Step 8: Clean up the lines and add finishing touches Give your spiral knot panel design some finishing touches! Erase unnecessary lines, add shading, and add your own style to the design. Visit my YouTube channel for the companion video to this blog. Like, share, subscribe, and click on the notification bell to see my latest drawing and DIY videos! If you’d like to support a growing creative community head on over to my new Patreon page where you will find drawing tutorials, behind-the-scenes videos, and fun DIY decor projects. Want to see more blogs like this one? Click here to see more of my Celtic art drawing tutorial blogs! Full disclosure: I took the inspiration for this spiral knot design and tutorial from an amazing author and artist Aidan Meehan. I’ve been pouring over the Celtic art breakdowns in one of his books--The Celtic Design Book. The material is a little advanced and potentially challenging for a beginner but don’t let that scare you! This author’s books are a gold mine of valuable insights for anyone serious about expanding their understanding of knotwork construction and historical context. The Treasury of Celtic Knots is another excellent book by this same author. Both books can be found on Amazon.
0 Comments
Leave a Reply. |
Author
Some of the posts on this site contain affiliate links. This means if you click on the link and purchase the item, I will receive an affiliate commission. Categories
All
Archives
October 2025
|


 RSS Feed
