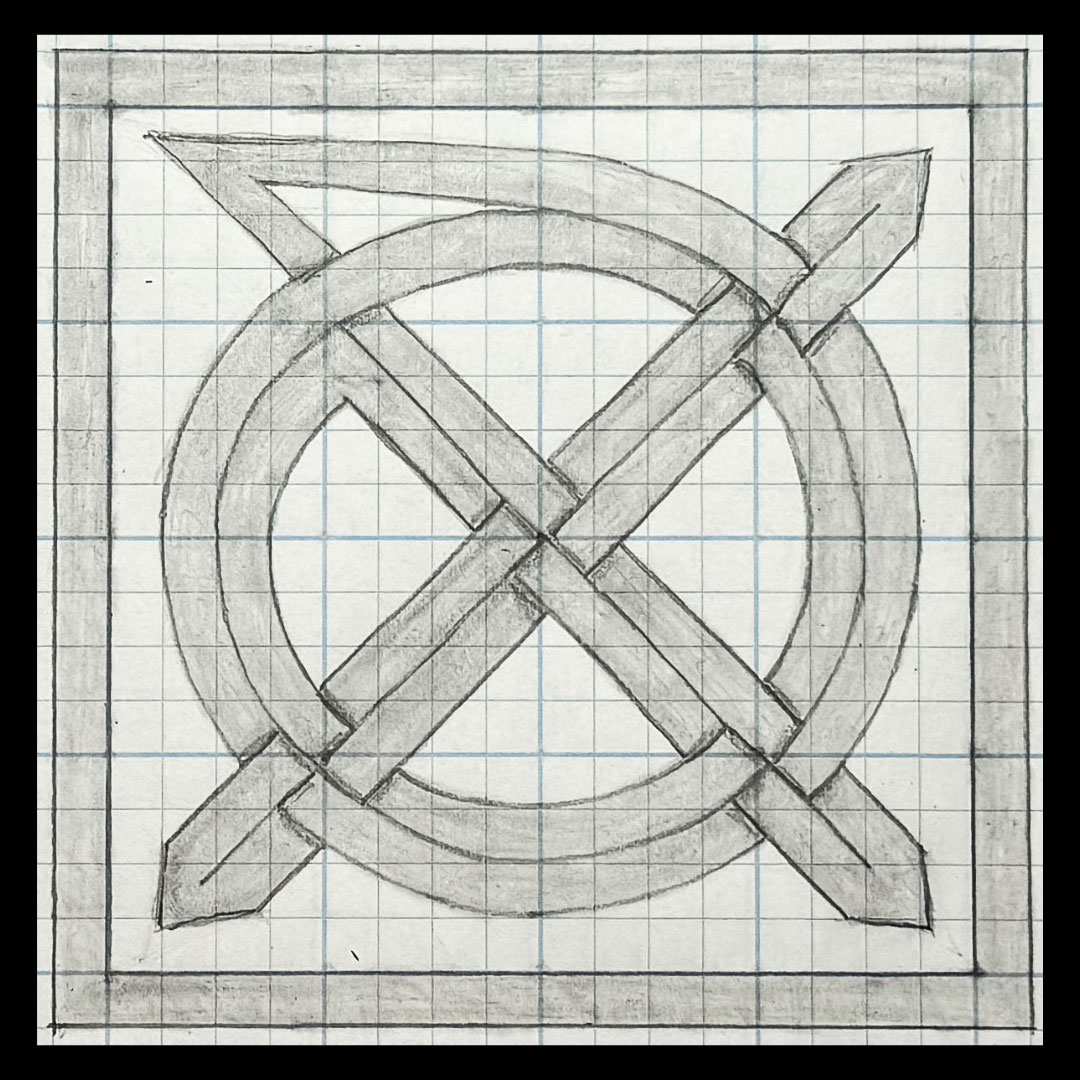
 Welcome back to another Celtic knot drawing tutorial! This tutorial is the beginning of a series dealing with various styles of spiral knots and their application. In this blog, you will learn how to draw one type of simple spiral knot, setting the stage for the next tutorial where we will explore a more complex panel pattern. This particular spiral knot can be found in the ancient illuminated manuscript, the Book of Durrow, where it appears in border designs on pages full of intricate artwork. We’ve covered other design elements from this book in previous drawing tutorials (see the links at the end of this blog) so we’ll continue our journey with one more! Grab your drawing supplies and let’s get started! Project supply list Grid paper Drawing pencils Clic eraser Ruler Compass I am an affiliate associate of Amazon and Blick Art Materials so some of the posts in this article contain affiliate links. If you click on the link and purchase the item, I will receive an affiliate commission at no extra cost to you. I will only recommend products or services I use personally and/or believe will add value to my readers, so there is no conflict of interest. Step 1: Set up the grid Draw a 4 x 4 grid. Add dots on the intersections of each grid square. Pick another color or lighter pencil for the dots in the center of each grid square. You can add break lines on each side of the 4 x 4 grid (as shown below), although they are not required. In this tutorial, the breaks are guidelines for the rings drawn in the next step. 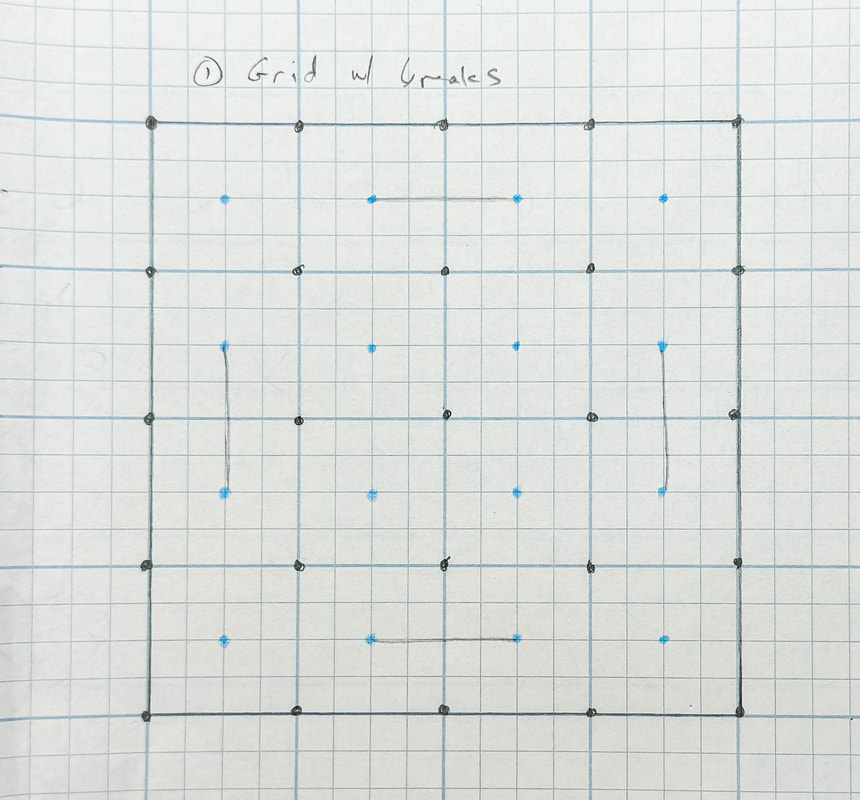 Step 2: Draw the rings Use a compass to draw a circle on either side of the break lines, forming a donut ring. These rings should be equally spaced from the break lines. Now draw a third circle through the break lines to divide the donut ring in half. 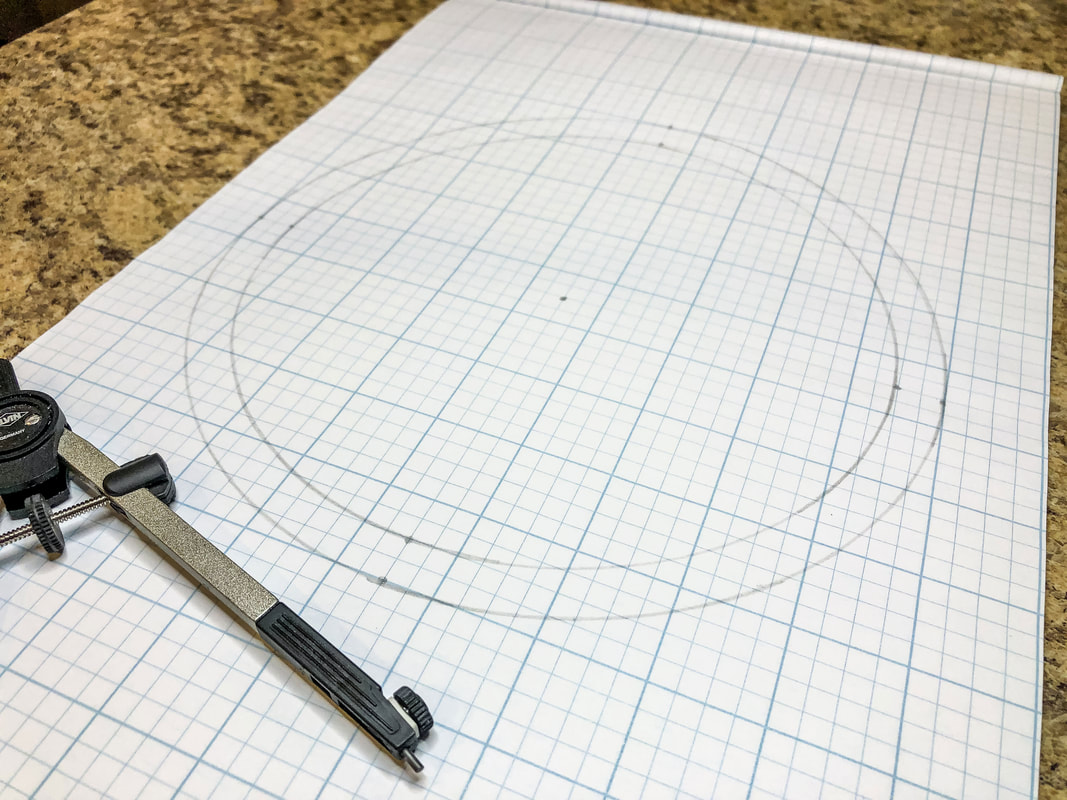 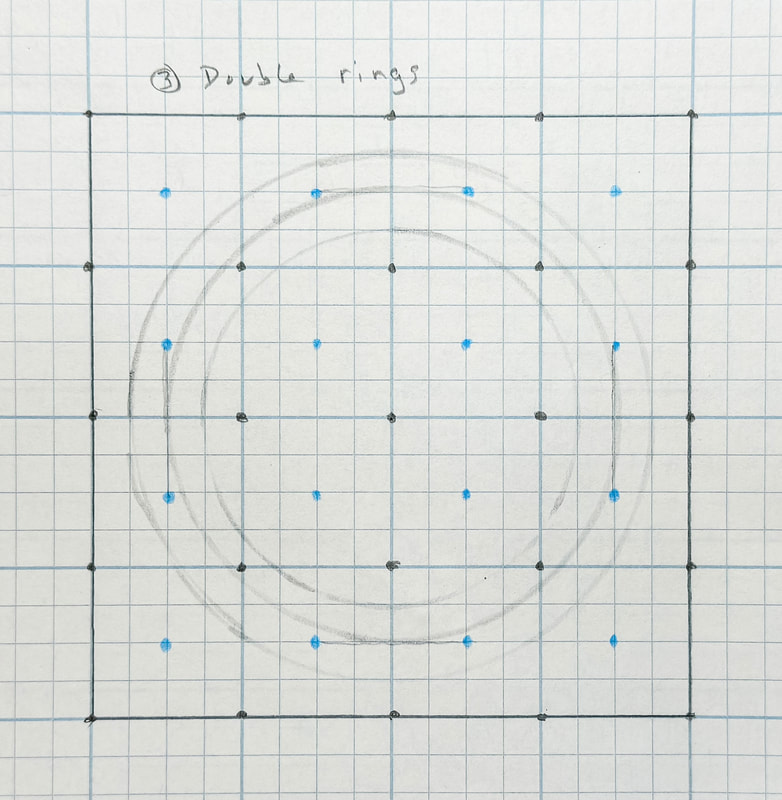 Step 3: Erase line segments to create the spiral Now we are ready to set up the spiral. Erase the top left corner segment of the three rings to create an opening. Find the outside line on the left and draw a curved line connecting it to the middle ring at the top. Now draw a curved line connecting the middle line on the left to the inner ring at the top. This gives you the spiral pattern for the rest of this tutorial. 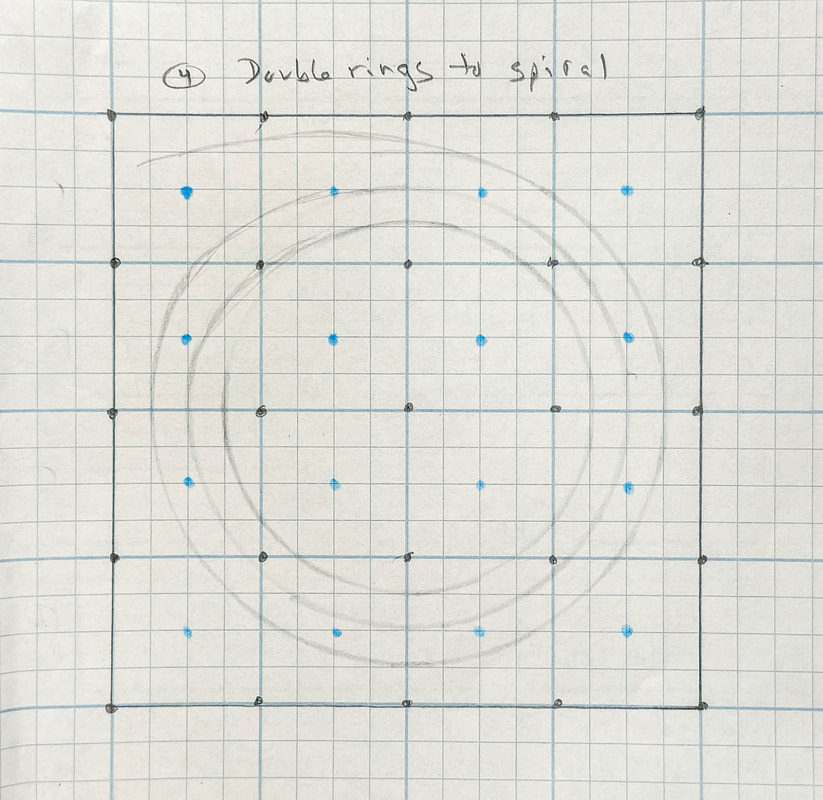 Step 4: Draw an X through the center of the grid Draw an X in the center of the grid as shown. Draw equally spaced parallel lines on either side of the X. Match the spacing of the parallel lines with the spacing between the spiral rings. 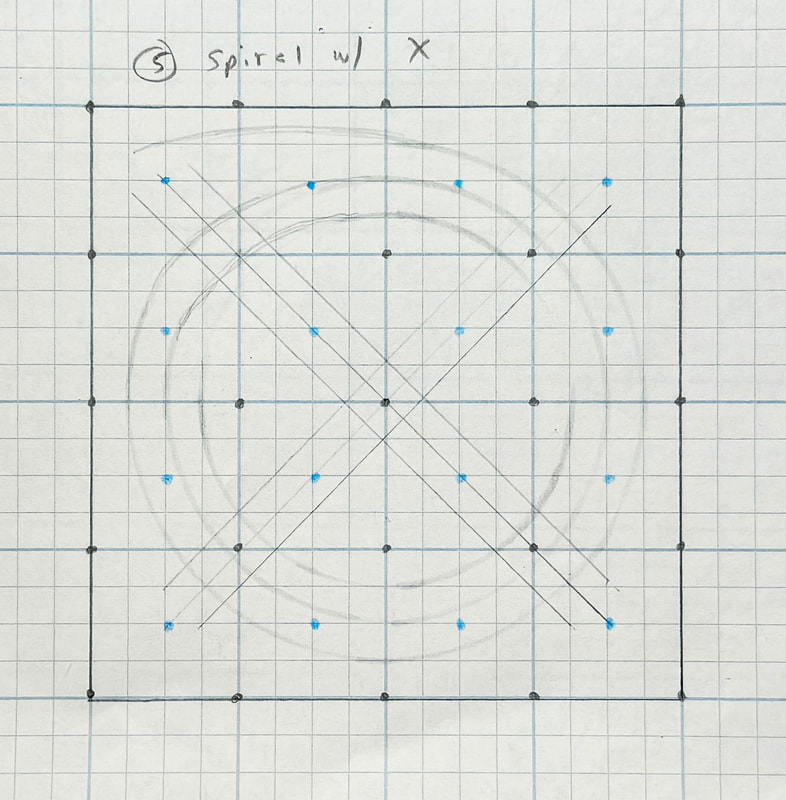 Step 5: Connect and enclose the lines to form the design Now it’s time to connect all the lines to create a thread. Find the end of the inner spiral ring and connect it to the bottom line of the X, as shown below. Erase the top portion of the X line, as it is no longer needed. Connect the top side of the X to the spiral lines at the top of the grid. Draw and adjust the curved lines to fit the style you want for the corner. Enclose the lines at the other three corners so that they loop around on each other. 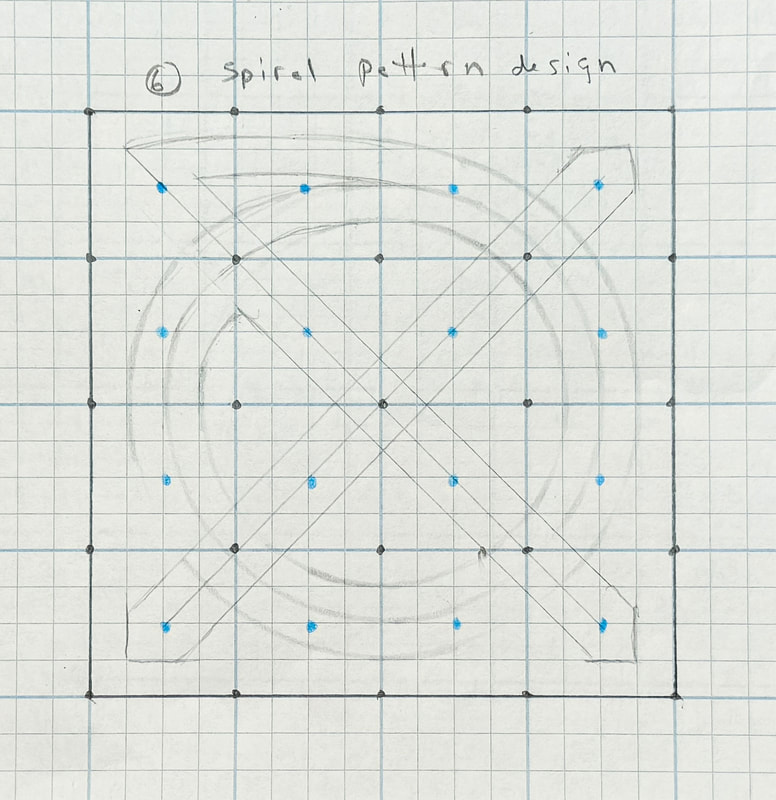 Step 6: Create the under-over pattern Pick an intersection to start the under-over weave pattern. I started at the top left and worked through each intersection along that thread to create an alternating under-over pattern. When you are done check your accuracy by following the thread through the entire design to ensure all intersections are alternating properly. 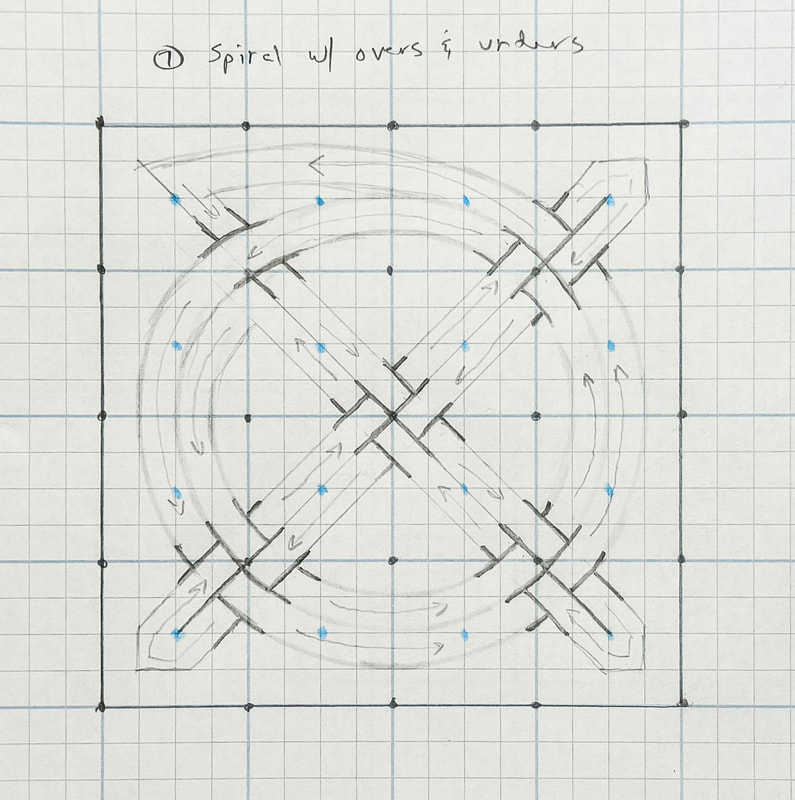 Step 7: Details, shading, and finishing touches Now give your spiral knot some flair! Erase unnecessary lines, add shading, and stylize. You can take this basic design in any direction by texturizing, shading, creating line definitions, shading the background, or adding a border. Or you can use this spiral knot design in a larger design to form a panel or border. 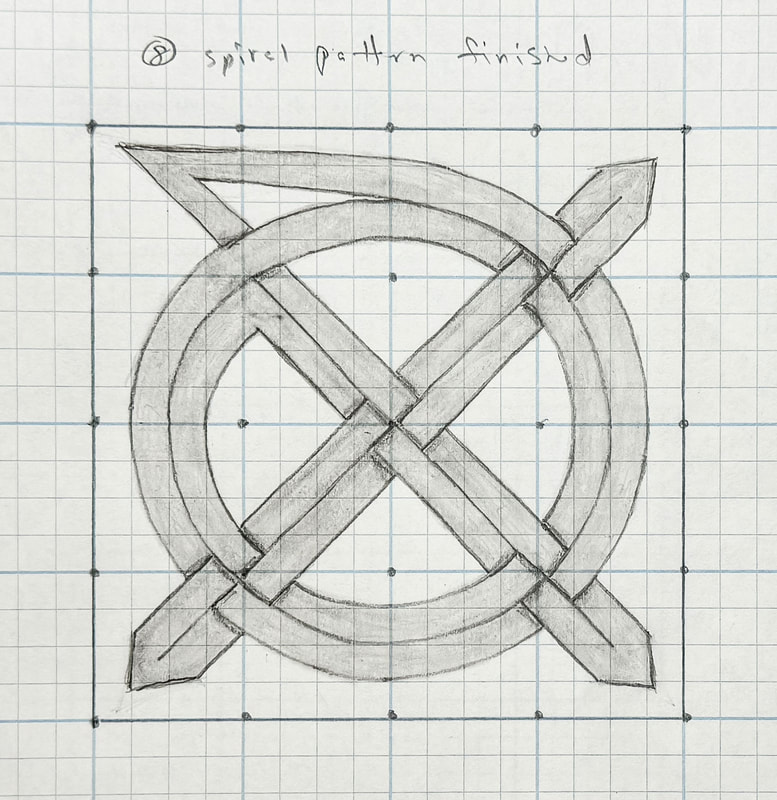 The companion video to this tutorial is available on my YouTube channel. Don’t forget to like, share, subscribe, and click on the notification bell to see my latest videos when they are posted! This video will also be available for free on my Patreon page. Help support a growing creative business and community and watch in-depth views of drawing tutorials, behind-the-scenes videos, and fun DIY decor projects. Want to see more blogs like this one? Click here to see more of my Celtic art drawing tutorial blogs! Once you have the hang of this tutorial, check out the next step where we use this simple spiral knot design in a four-grid panel. You can read the spiral knot panel blog here or view the spiral knot panel video on YouTube. Full disclosure: I took the inspiration for this spiral knot design and tutorial from an amazing author and artist Aidan Meehan. I’ve been pouring over the Celtic art breakdowns in one of his books--The Celtic Design Book. The material is a little advanced and potentially challenging for a beginner but don’t let that scare you! This author’s books are a gold mine of valuable insights for anyone serious about expanding their understanding of knotwork construction and historical context. The Treasury of Celtic Knots is another excellent book by this same author. Both books can be found on Amazon.
0 Comments
Leave a Reply. |

Author
Some of the posts on this site contain affiliate links. This means if you click on the link and purchase the item, I will receive an affiliate commission. 
Categories
All
Archives
October 2025
|
 RSS Feed
|
|
Major credit cards accepted through Square. Apple Pay option available. This site also accepts PayPal payments for better online security, and it's free to sign up! Gift cards are now available for purchase!
Copyright 2025 |