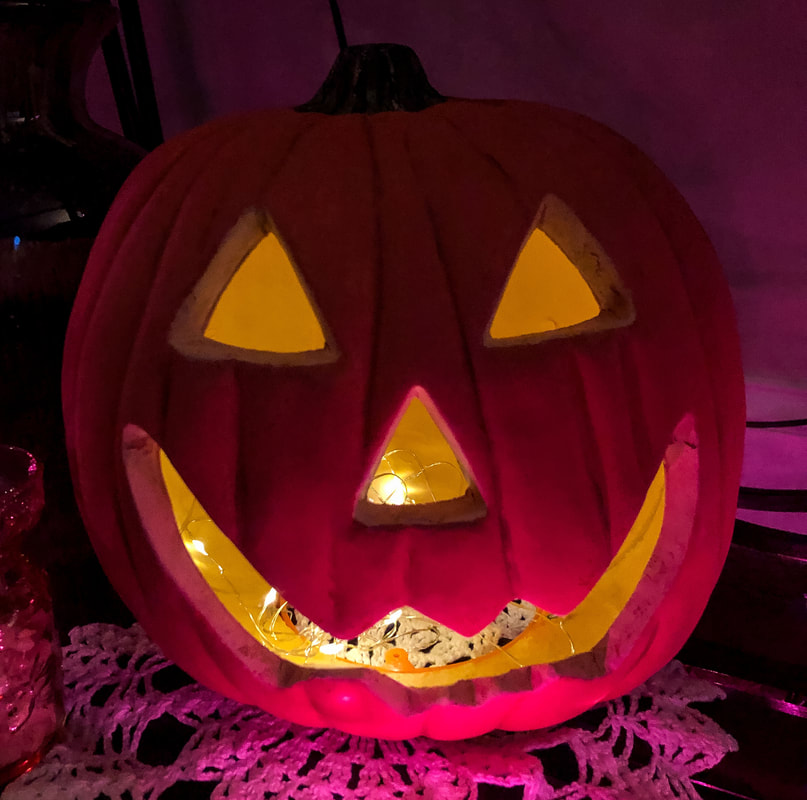
 Money is tight this year, so the focus for the fall decorating season has been on up-cycling and reusing wherever possible. But, just to make my life more difficult, I also wanted to change my usual fall decor. Every year I pull out these light-up jack-o-lanterns along with the rest of my bright orange, yellow, and red fall and Halloween decor. This year, I decided I’d had enough of these bright colors! My kids are all grown, and I want more muted colors for this fall season. So, a Halloween DIY project was born!   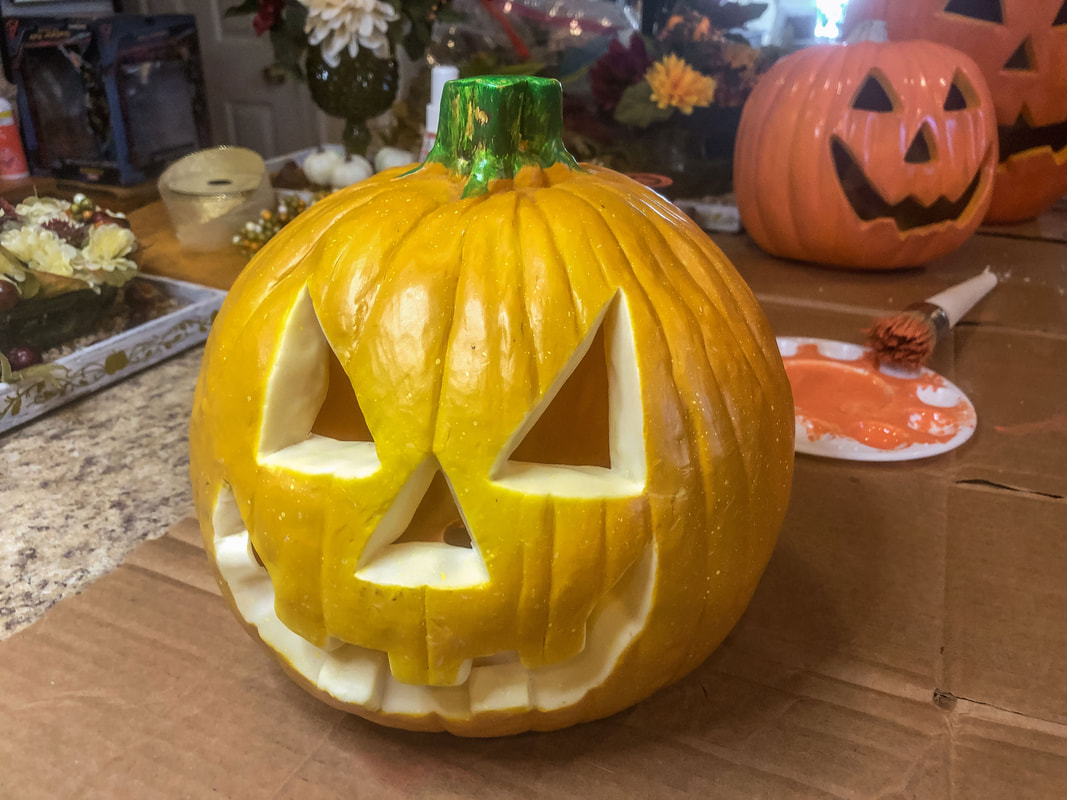 I gutted the lights of the three pumpkins and gave each one a good clean. I decided to use chalk paint and acrylic craft paint for this project, but you can use Mod Podge if that’s more to your liking. I’ve listed some supplies below that you may need for this project. (Items contain affiliate links.) Materials you’ll need: Old jack-o-lantern Chalk paint Craft paint Mod Podge Chalk paint brush Thin paint brush Foam brush Artist’s paint palette LED candle Fairy lights Step 1 Give your old jack-o-lantern a thorough wipe-down to clean off all the dust and grime. Step 2 Choose an orange shade of chalk paint (or Mod Podge) and a paintbrush. Liberally apply the first coat of paint over the surface of the pumpkin. Step 3 Allow the first coat to dry for a couple of hours, then apply a second coat of chalk paint. Allow that second coat to dry. Step 4 Use a thin brush and dark brown, red, orange, or green craft paint to lightly paint in the creases of the jack-o-lantern to give it some depth. Keep this process fluid and fun! Don’t use too much paint.  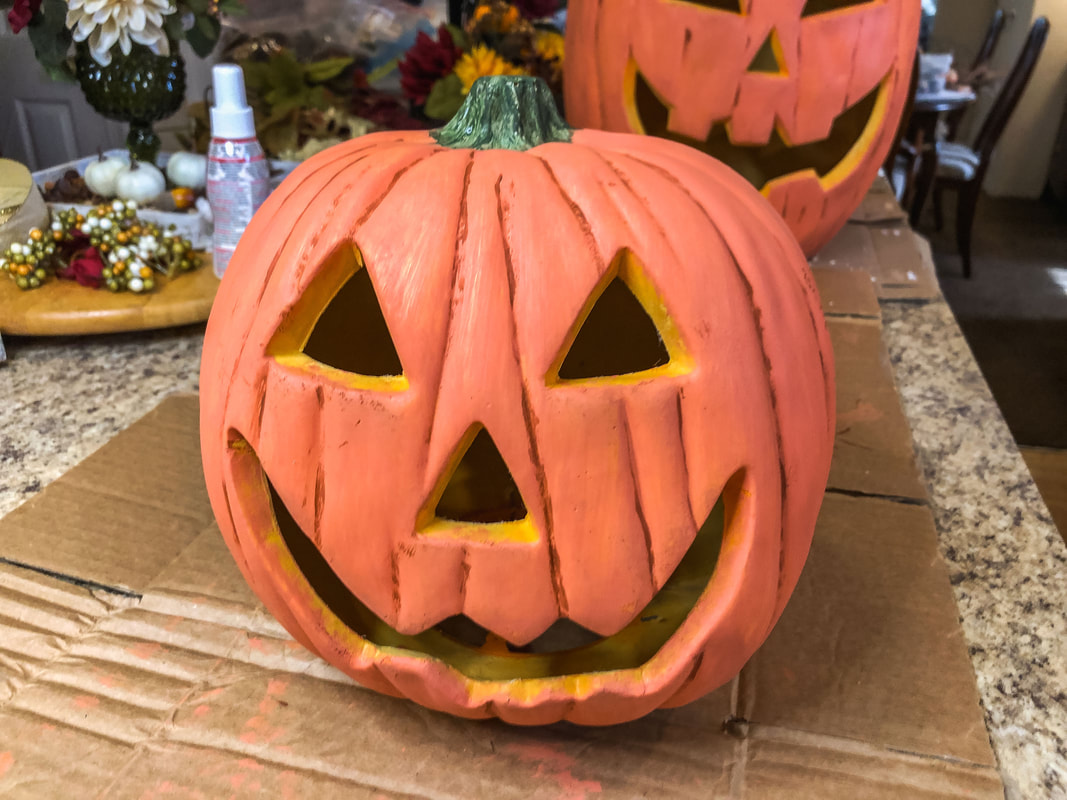 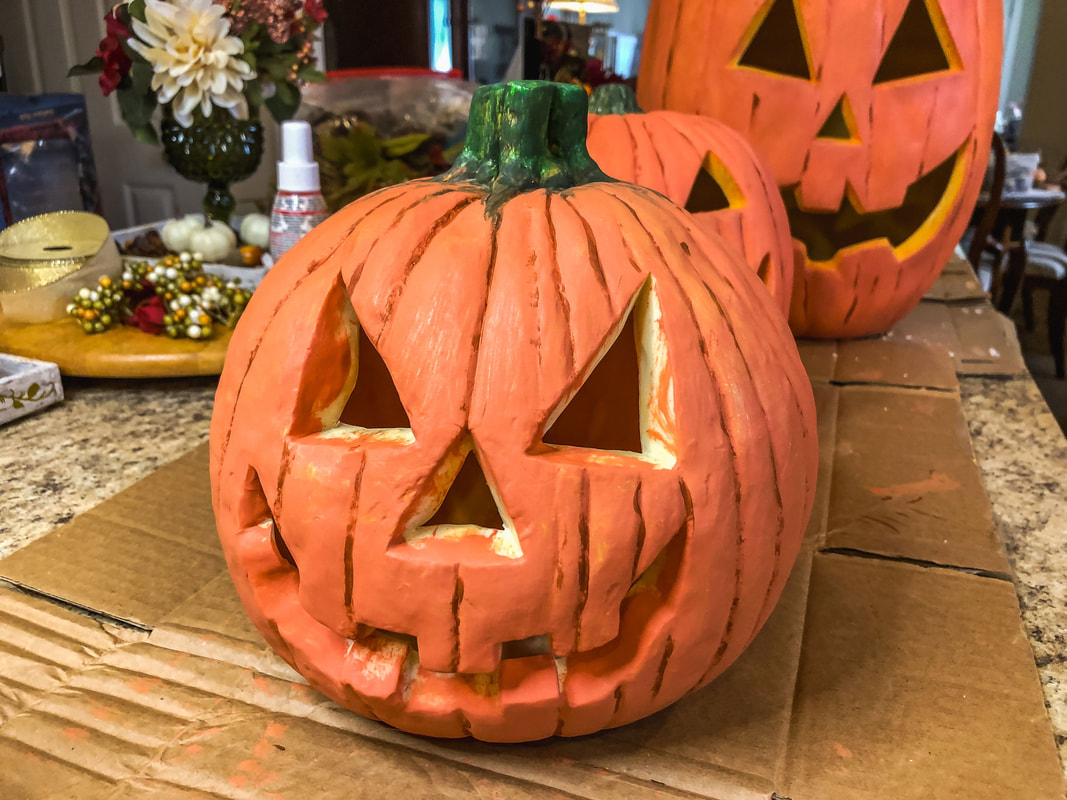 Step 5 Now choose a desired shade of green and paint the pumpkin’s stem. Step 6 Allow all the paint to dry so you can handle the pumpkin. Lightly apply a third coat of chalk paint. Do not use too much paint. You just want enough coverage to lighten the creases. (Think about blending makeup and contouring. Same concept.) Steps 7 and 8 Now for the finishing touches! Apply two coats of cream, orange, or yellow paint to the inside of the mouth, nose, and eyes. And that’s it! 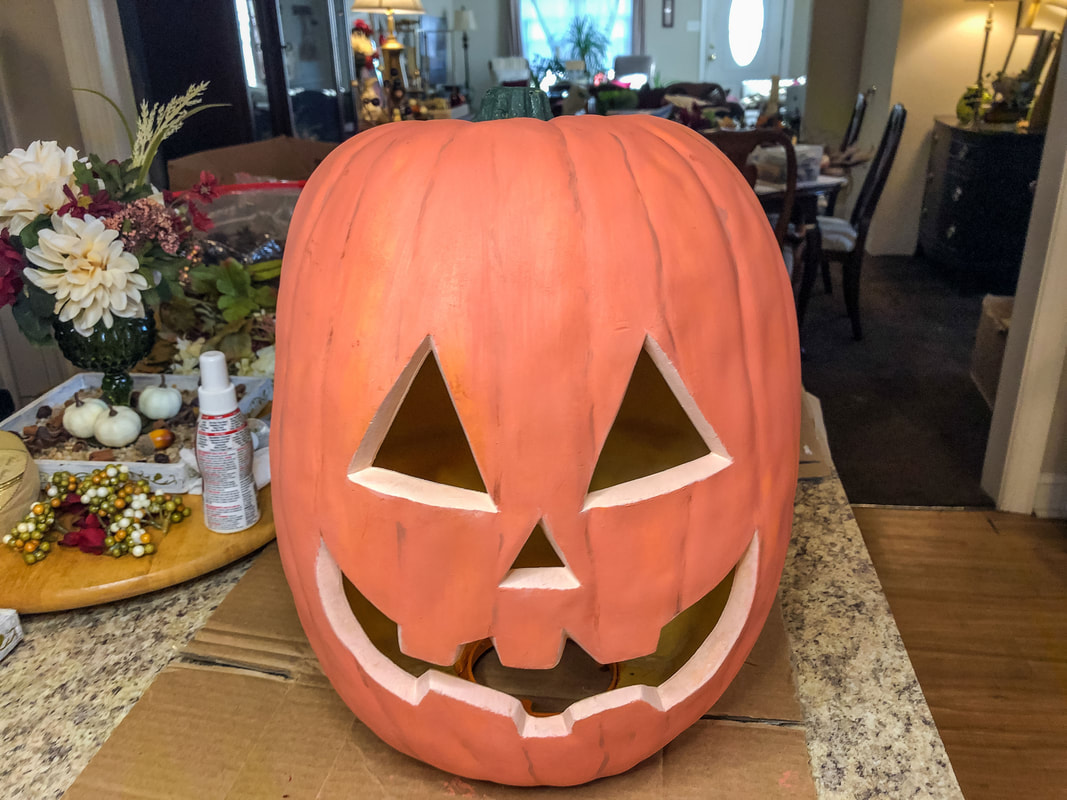 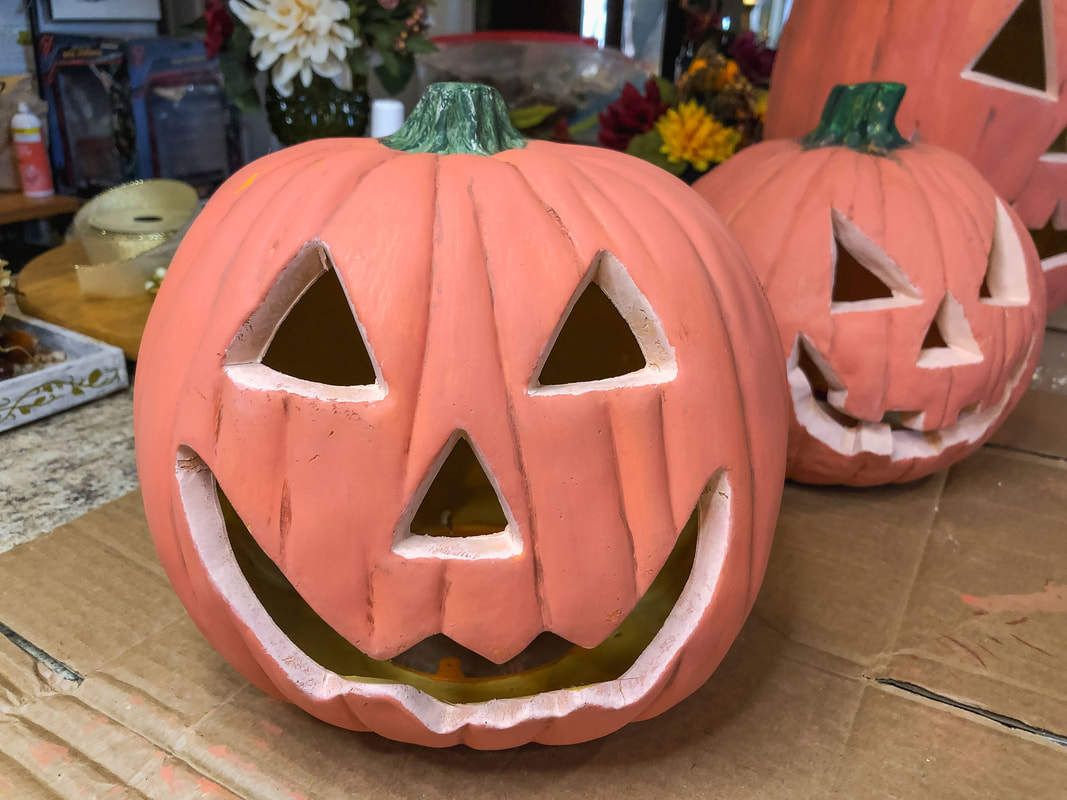 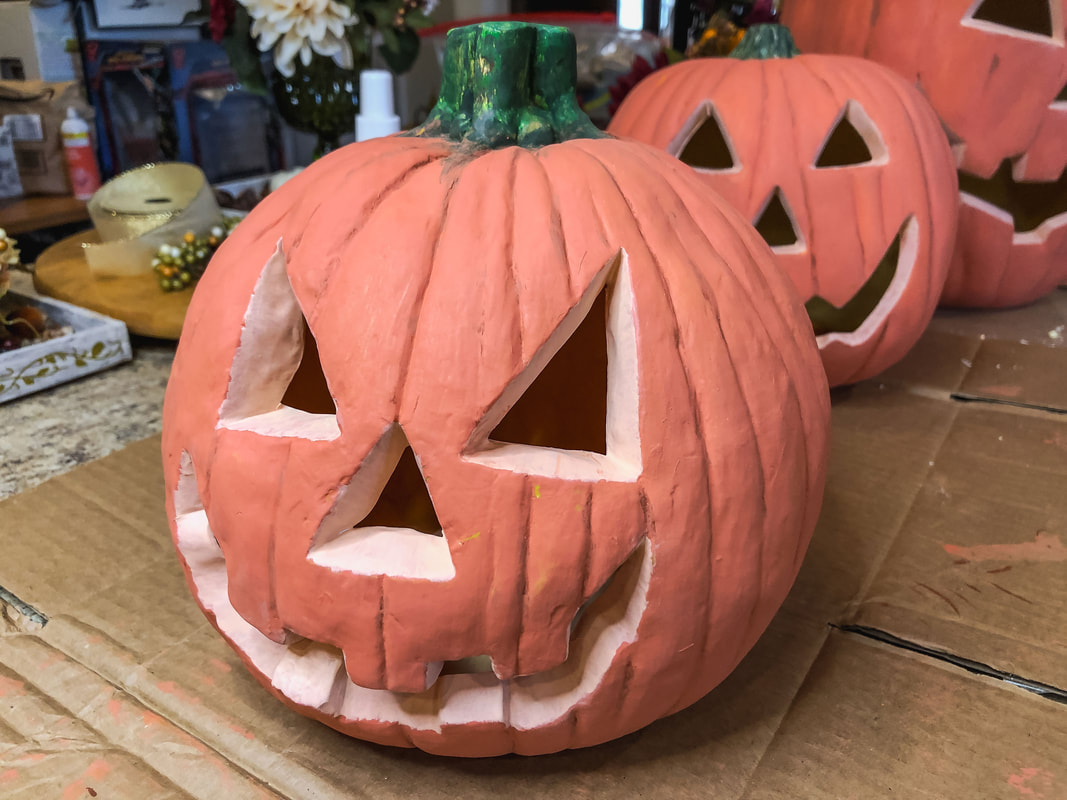   Light up your freshly painted, up-cycled jack-o-lantern with an LED candle or fairy lights!  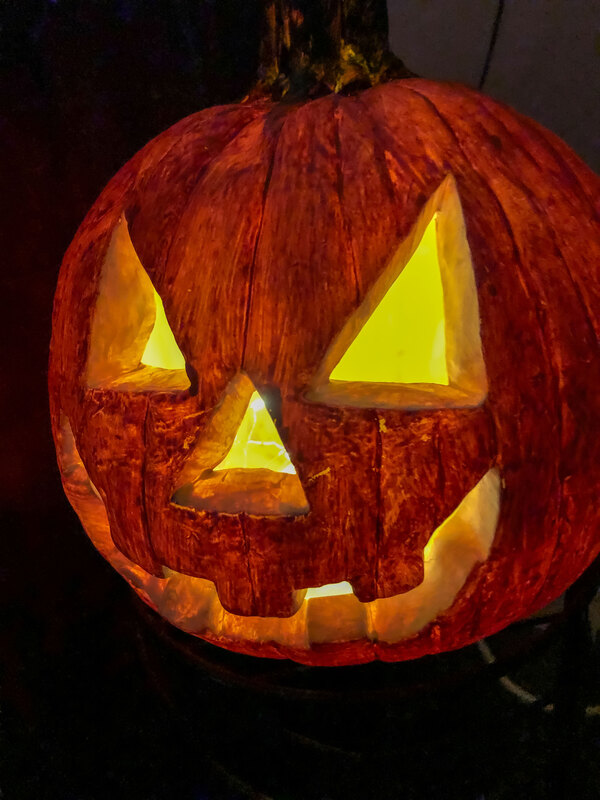  Related blogs you may want to read: DIY lighted pumpkin stack using up-cycled candy buckets Indoor Halloween Decor Inspiration Halloween Lawn Decor Ideas Some of the posts in this article contain affiliate links. If you click on the link and purchase the item, I will receive an affiliate commission at no extra cost to you. I will only recommend products or services I use personally and/or believe will add value to my readers, so there is no conflict of interest.
0 Comments
Leave a Reply. |

Author
Some of the posts on this site contain affiliate links. This means if you click on the link and purchase the item, I will receive an affiliate commission. 
Categories
All
Archives
October 2025
|
 RSS Feed
|
|
Major credit cards accepted through Square. Apple Pay option available. This site also accepts PayPal payments for better online security, and it's free to sign up! Gift cards are now available for purchase!
Copyright 2025 |