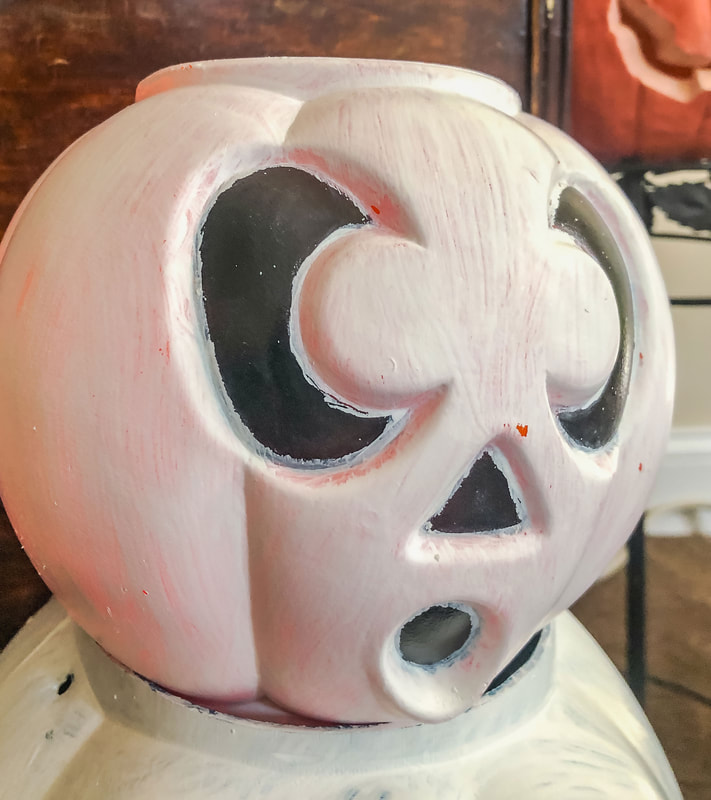
 In a previous blog, I showed you how to up-cycled old jack-o-lanterns using chalk and craft paint. In this blog, I will share how I transformed a few old plastic Halloween candy buckets into “new” decor for my home. Reusing and updating old decor is such a fun and budget-friendly way to create a fresh look in your home for the season without breaking the bank! I don’t know about you, but money has been extraordinarily tight this year…And my kids are all grown now, so they don’t need those old buckets anyway! Here are some supplies that you may need for this project. (Items contain affiliate links.) Three plastic pumpkin buckets Dowel rod (optional) White craft paint Sponge brush General paintbrush Paint palette Thin paintbrush Spray sealant (optional) LED candles Fairy strands Step 1 Prep your buckets by pulling off the handles and giving them a thorough clean. 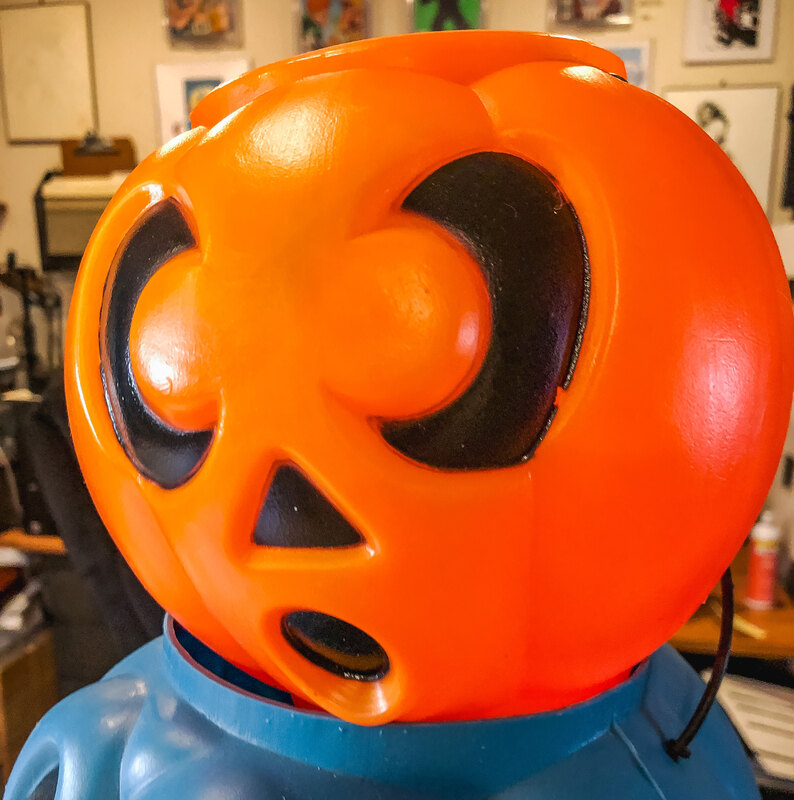 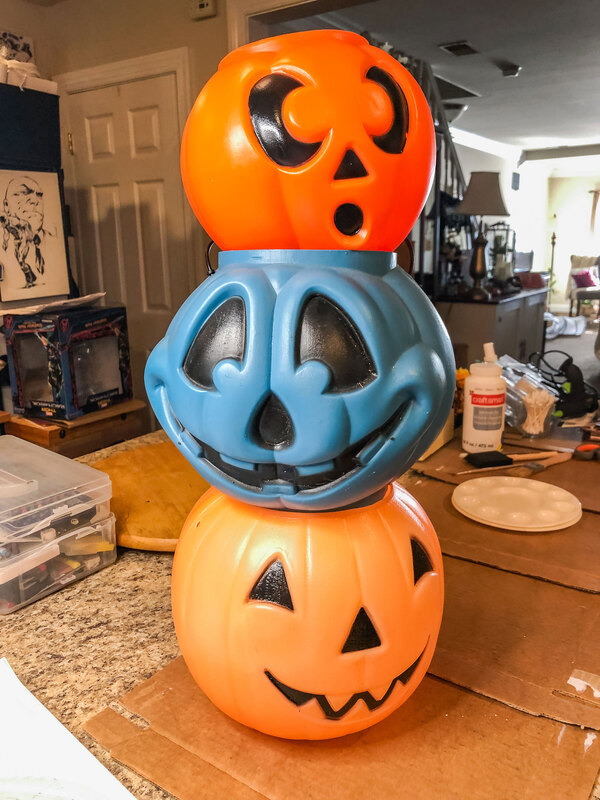 Step 2 (optional) Drill holes in the bottom of each bucket. Using a sharp blade, carefully cut out the eyes, nose, and mouth. Step 3 Apply the first couple coats of white paint on each pumpkin and let dry. You can opt for Mod Podge instead of craft paint if you’d like. The idea is to use something as a primer. 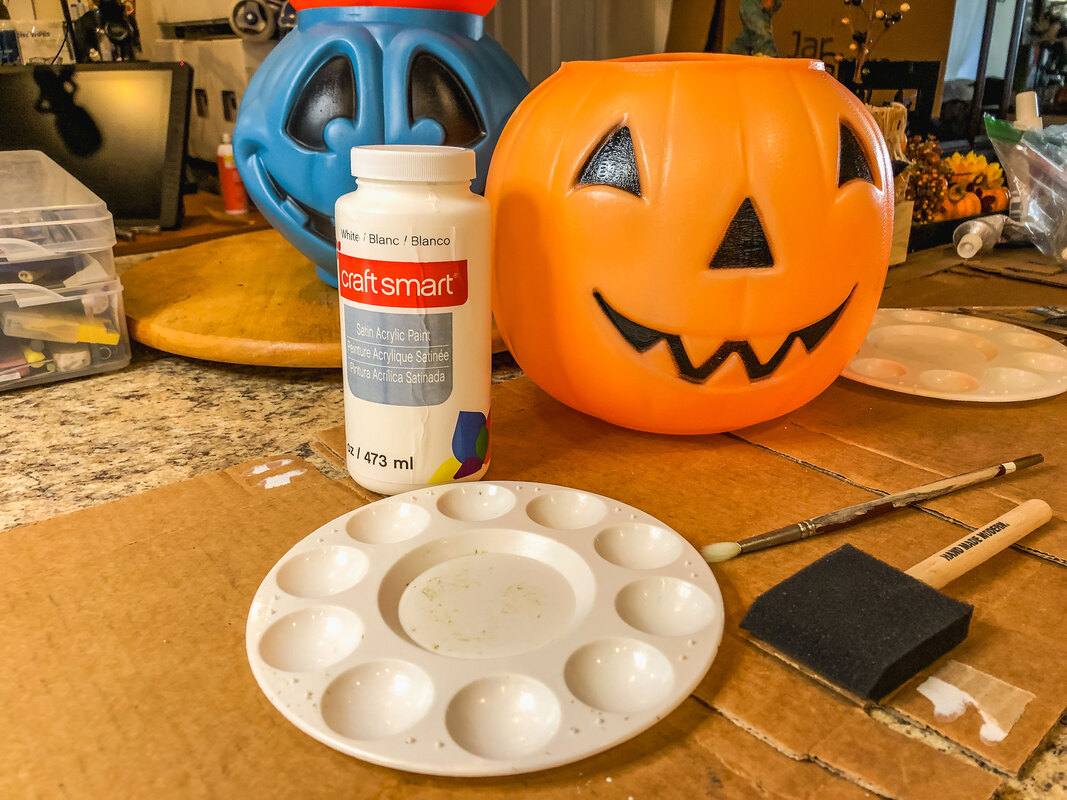 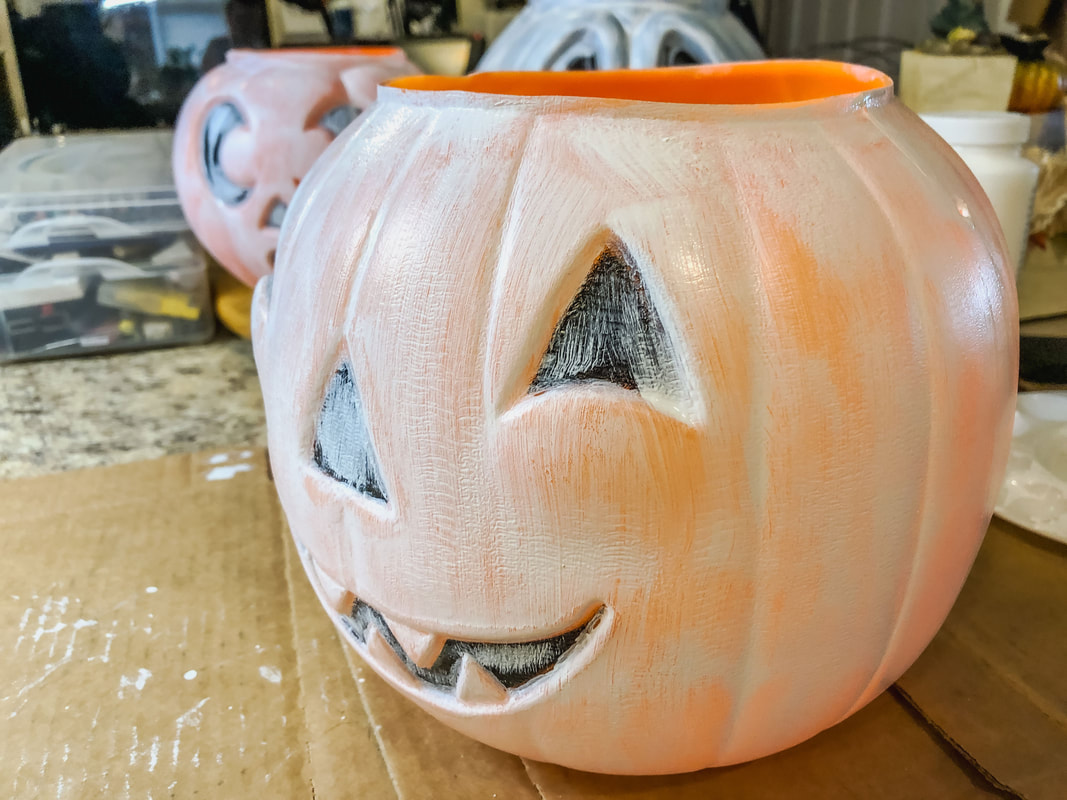 Step 4 Using a thin brush, paint inside all the creases of the pumpkins, including the areas inside the eyes, nose, and mouth that are not black. Use the same white paint for this step or a darker color to create a sense of depth. 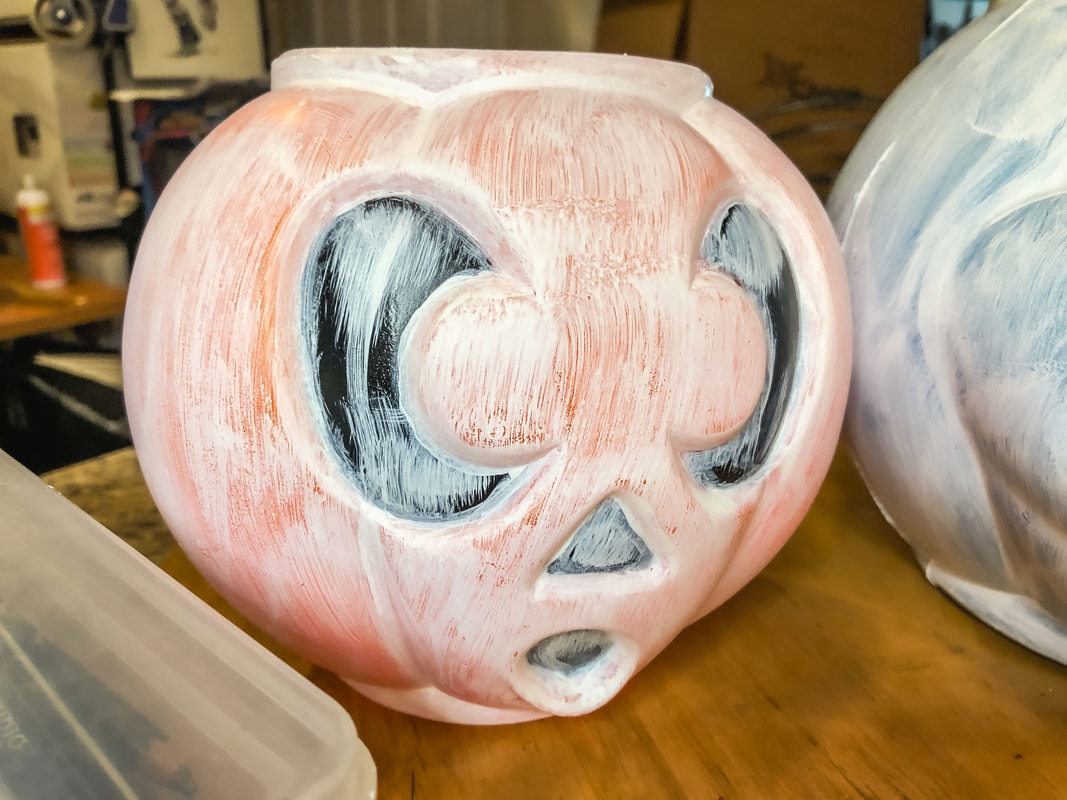 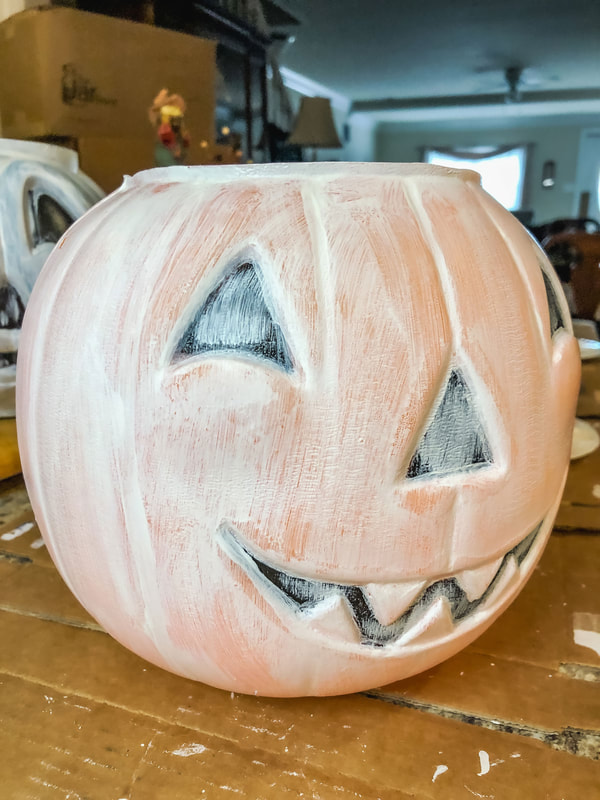 Step 5 Add a third coat of white paint, applied heavier this time to get full coverage. Let dry. Add a final coat of paint if desired. Step 6 Clean off any paint that may have gotten in the black areas of the eyes, nose, and mouth. (If you didn’t cut them out. ) 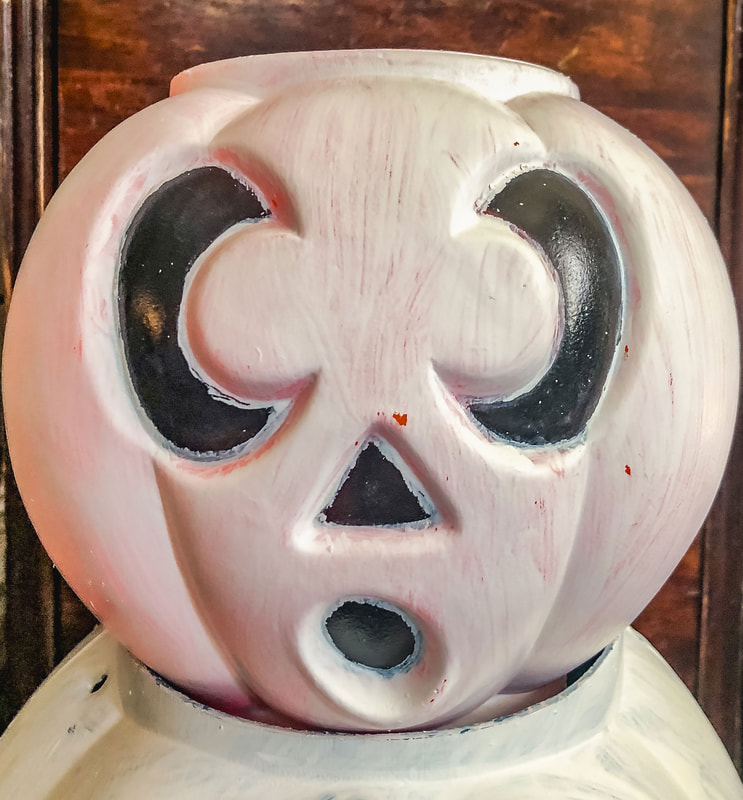 Step 7 (optional) Spray with a sealant if you will be using this decor outside. Step 8 Stack the newly painted pumpkin buckets one on top of another or attach them with a long, thin dowel rod. Light them up with LEDs or fairy strands to create a spooky glow!  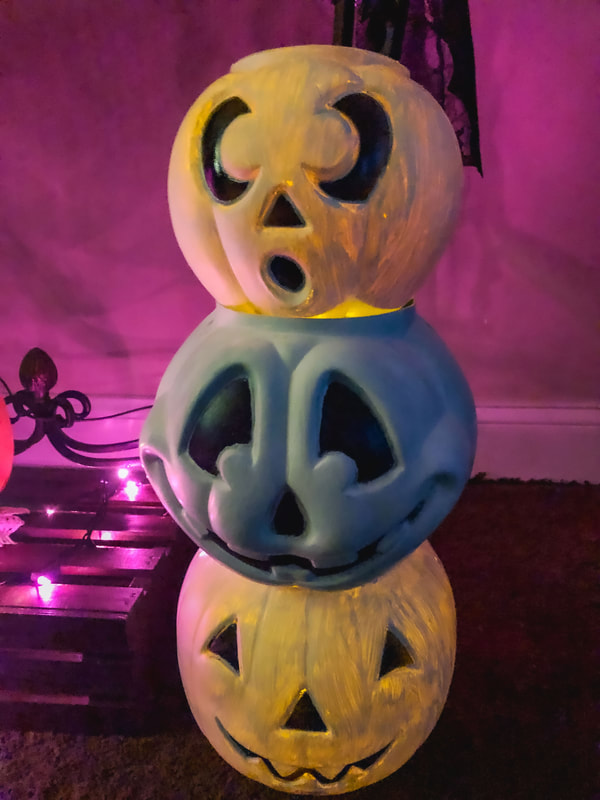 Related blogs you may want to read: Halloween DIY using chalk paint to revive an old plastic pumpkin Indoor Halloween Decor Inspiration Halloween Lawn Decor Ideas Some of the posts in this article contain affiliate links. If you click on the link and purchase the item, I will receive an affiliate commission at no extra cost to you. I will only recommend products or services I use personally and/or believe will add value to my readers, so there is no conflict of interest.
0 Comments
Leave a Reply. |

Author
Some of the posts on this site contain affiliate links. This means if you click on the link and purchase the item, I will receive an affiliate commission. 
Categories
All
Archives
October 2025
|
 RSS Feed
|
|
Major credit cards accepted through Square. Apple Pay option available. This site also accepts PayPal payments for better online security, and it's free to sign up! Gift cards are now available for purchase!
Copyright 2025 |