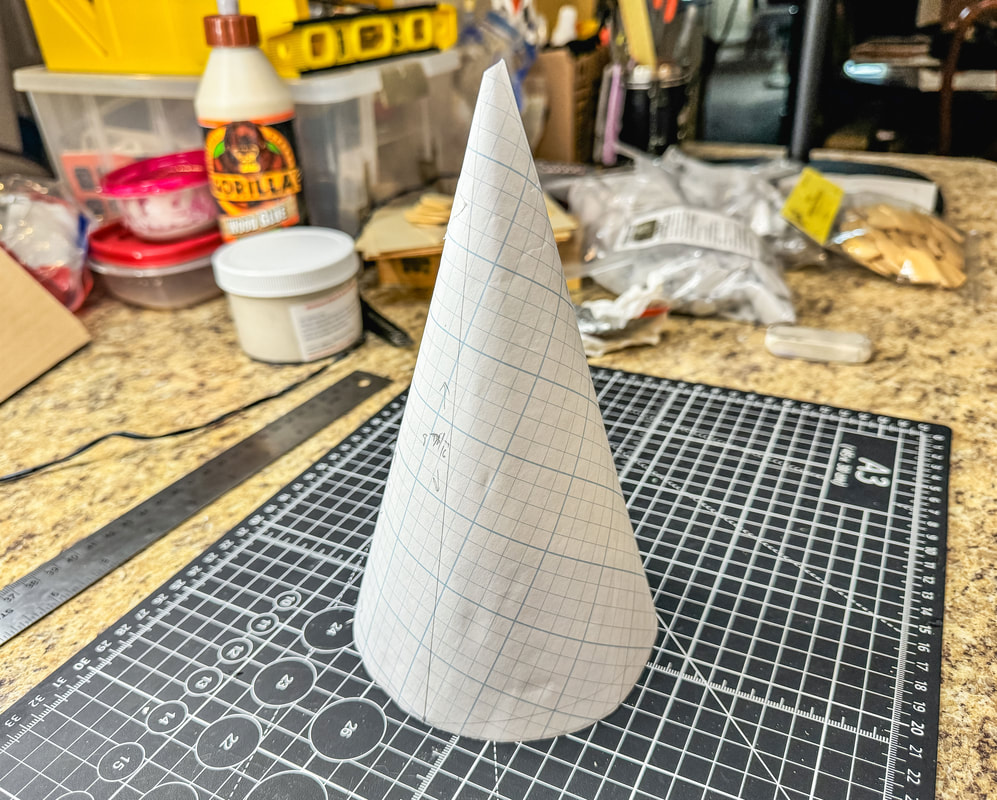
 If you are a crafter or artist who would like to know how to create a three-dimensional cone shape from a 2D drawing this article is for you! In today’s blog, I will share three simple ways to draw a 2D pattern for a cone. We will try the following techniques: 1) use a triangle point to draw a circle, 2) use a triangle’s diagonal line to draw an arc, or 3) draw triple triangles. Before we get started… Let’s delve into a bit of light geometry. (I promise to keep it simple!) We are essentially working with two geometric forms—a triangle and a circle. The 2D drawing will be a triangle shape that will become a 3D conical form with a circular opening. Picture the top point of the triangle as the point of the cone and the bottom edge of the triangle as the opening of the cone. Once you understand that concept the rest is easy! Let’s first talk about a few circle terms: circumference, diameter, and radius. The circumference is the measurement around the circle’s edge. The diameter is the length across a circle if you draw a line from one spot on the circumference to the opposite side, dividing the circle in half. The radius is half the distance of the diameter. Now let’s discuss how this relates to the triangle we will work with in this tutorial. The triangle we will use measures 3” W x 2 1/2” H. This means the bottom edge—the edge that will become the opening to the cone—has a diameter of 3” and a radius of 1 1/2”. You don’t necessarily need to measure your triangle this way, but I just wanted to show the correlation between a 2D triangle drawing and a 3D conical shape. 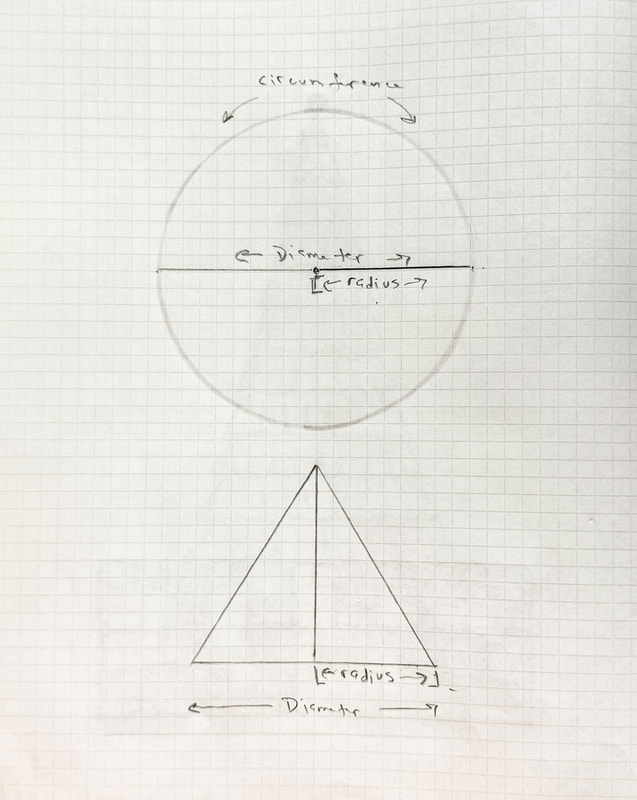 Now that we understand the basics let’s get to the three methods of creating a conical pattern. Grab a few supplies and let’s get drawing! Tip before you start: If you make your cone a little bigger than needed you can make adjustments when working with your 3D cone and trim off the excess. I am an affiliate associate of Blick Art Materials so some of the posts in this article contain affiliate links. If you click on the link and purchase the item, I will receive an affiliate commission at no extra cost to you. I will only recommend products or services I use personally and/or believe will add value to my readers, so there is no conflict of interest. Method 1: Draw a circle using the center line of the cone This is the simplest of the three methods. You will use the length of the diagonal line and the top point of a triangle to create a circle that will become a cone once cut out. What you’ll need: Draw a triangle to fit the height and width of your project (to scale). Divide the triangle in half along the vertical axis. Open your compass to the length of one of the triangle’s diagonal lines. Set the compass point at the top corner of the triangle and draw a circle going through the bottom point of that diagonal line. Make a hole at the top of the cone and cut down the center line. Carefully fit the sides together to form the cone, securing the overlapping sides with tape. 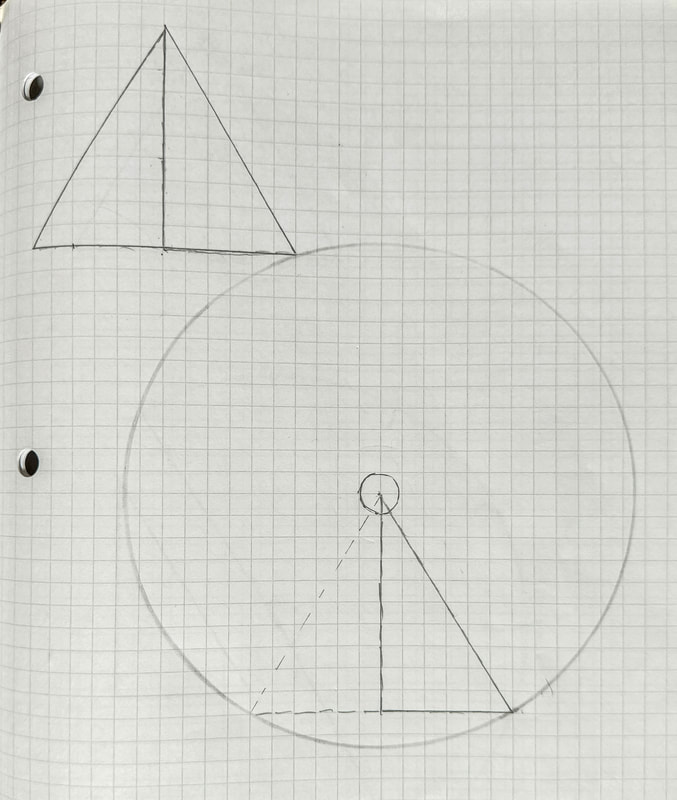 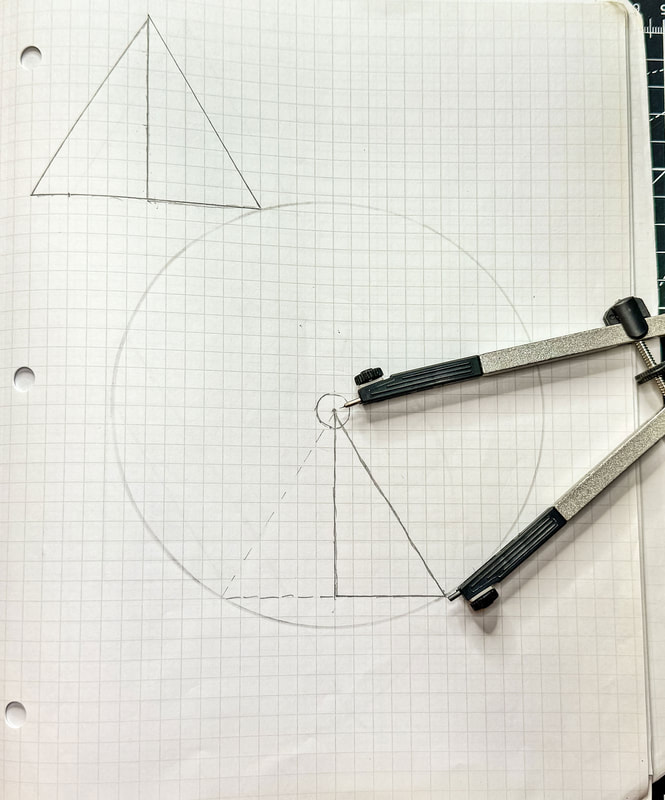 Method 2: Draw an arc to one side of a triangle and use the radius to divide the arc six times In this method, you’ll create a cutout pattern using the triangle radius six times to get the correct size for your cone. This method is a little more complicated than the first one but still easy to do in just a few minutes. What you’ll need: Draw a triangle to fit the height and width of your project (to scale). Divide the triangle in half along a vertical axis. Open your compass to the length of one of the triangle’s diagonal lines. Place the point of the compass somewhere off to the side of the bottom point of that diagonal line and draw an arc. Mark the center. Draw a line connecting that center point with the top of the arc. Open the compass to the length of the radius (half the distance of the triangle’s bottom edge). Place the compass point at one end of the arc and create a tick mark on the arc. Move the compass point to that tick mark and make another mark further down the arc. Repeat this process four more times until you have six tick marks. Draw a line connecting the arc’s center point to the last tick mark. Make a small hole for the top and cut out the arc form you just drew. Line up the edges of your cone pattern and tape together. 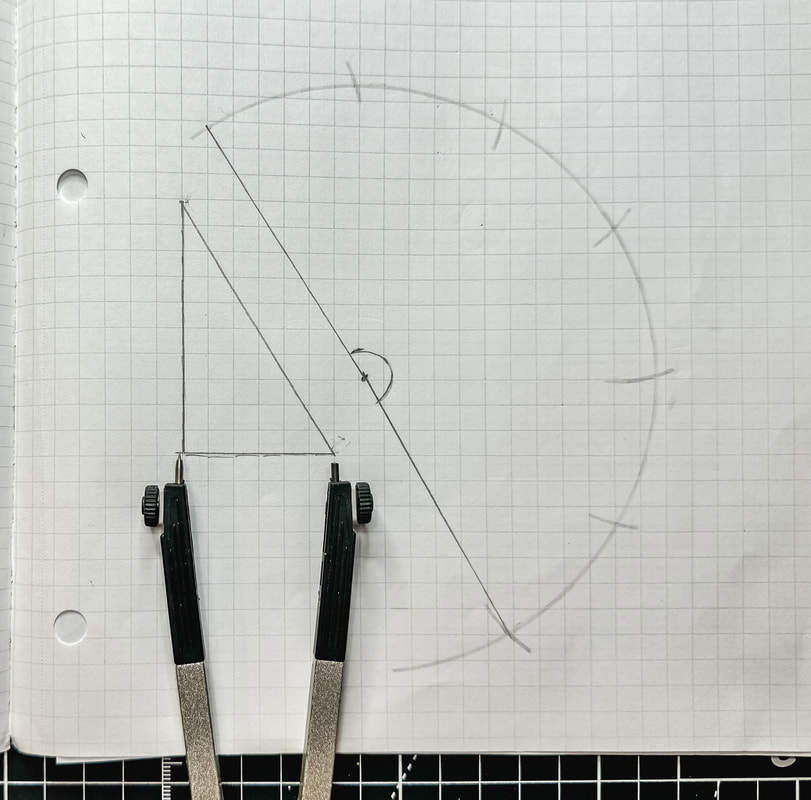 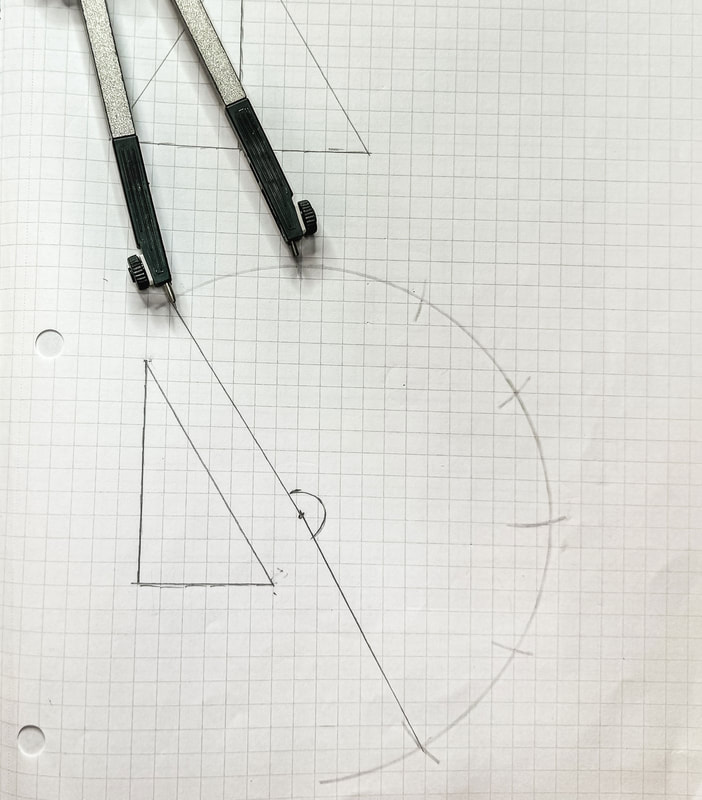 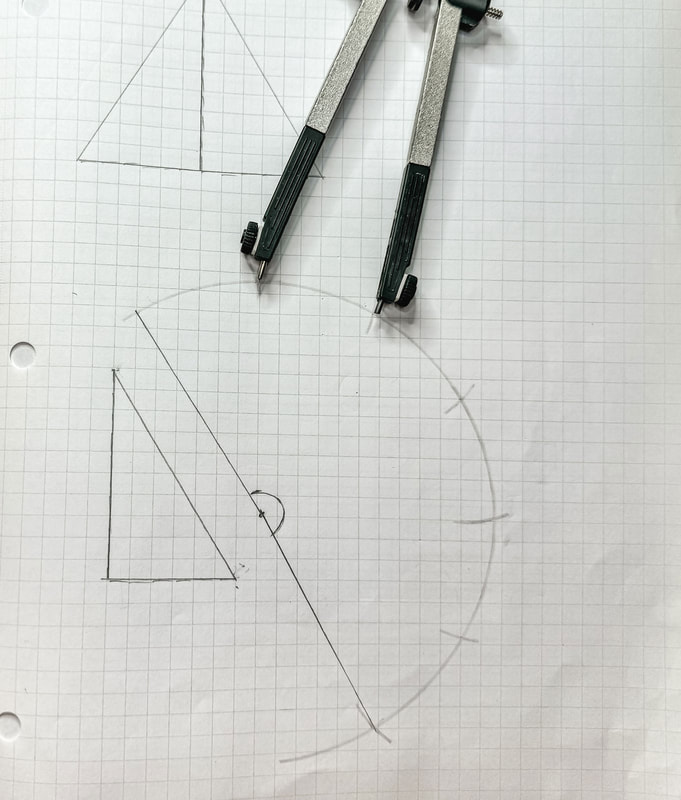 Method 3: Draw three identical triangles stacked next to each other In this method, you will use the diameter (bottom edge) and angle at the top of the triangle to create two more identical triangular shapes along a diagonal edge. The shape the three triangles make aligned together creates a faceted arc that you can adjust into a smooth curved edge for the cone’s bottom opening. This is the most complex of the three methods but it works like a charm! What you’ll need:
Draw a triangle to fit the height and width of your project (to scale). Using the protractor calculate the angle at the top of the triangle. Line the protractor up with the left edge of the triangle to get the angle. (Here is a quick helpful video I found on YouTube that shows you how to use a protractor to find and draw angles.) Move the protractor to the other diagonal edge and make a mark at the same angle to one side of your original triangle. Draw a line from the original triangle’s top point through the mark you just made. Repeat this process, moving the protractor to the new line you just drew to calculate the angle again. Draw a line from the triangle’s top point through the new mark. Measure the length of the diagonal line of the triangle and mark that length on the two new lines you just drew. 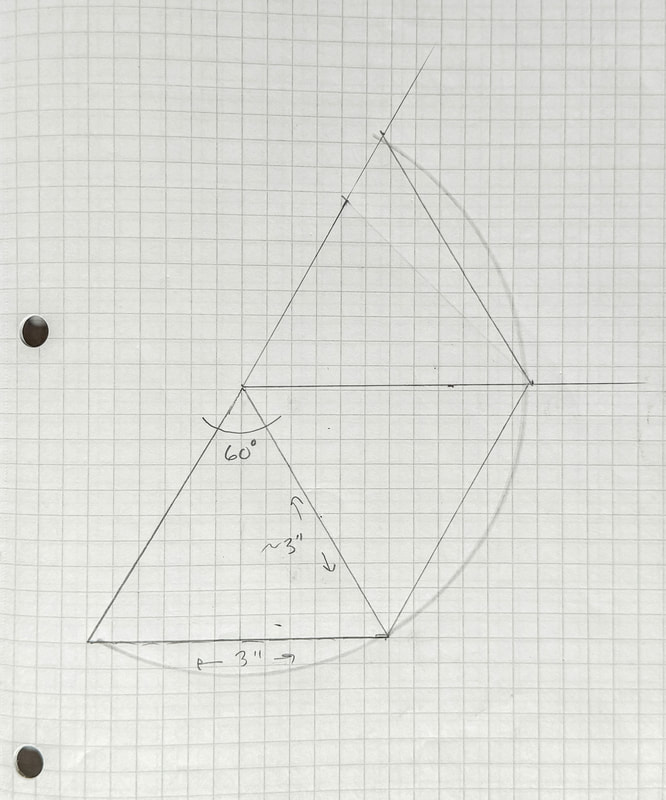 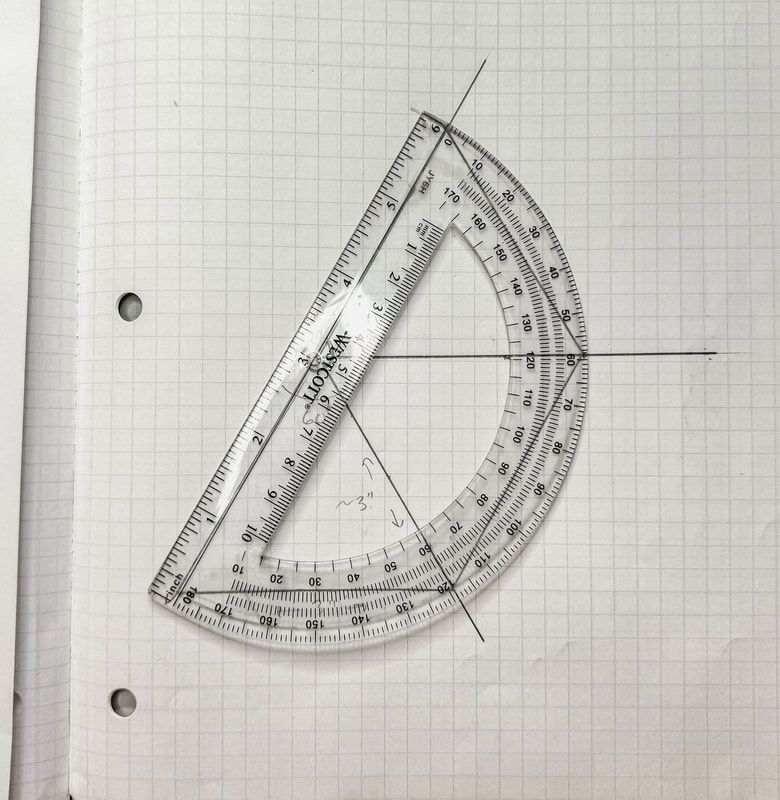 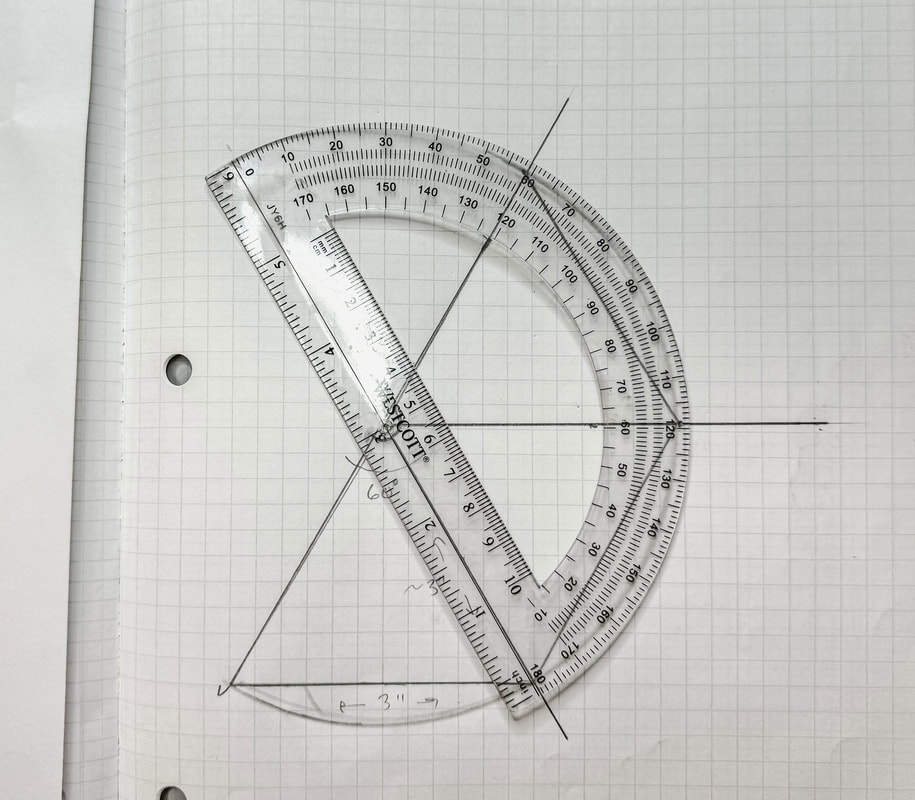 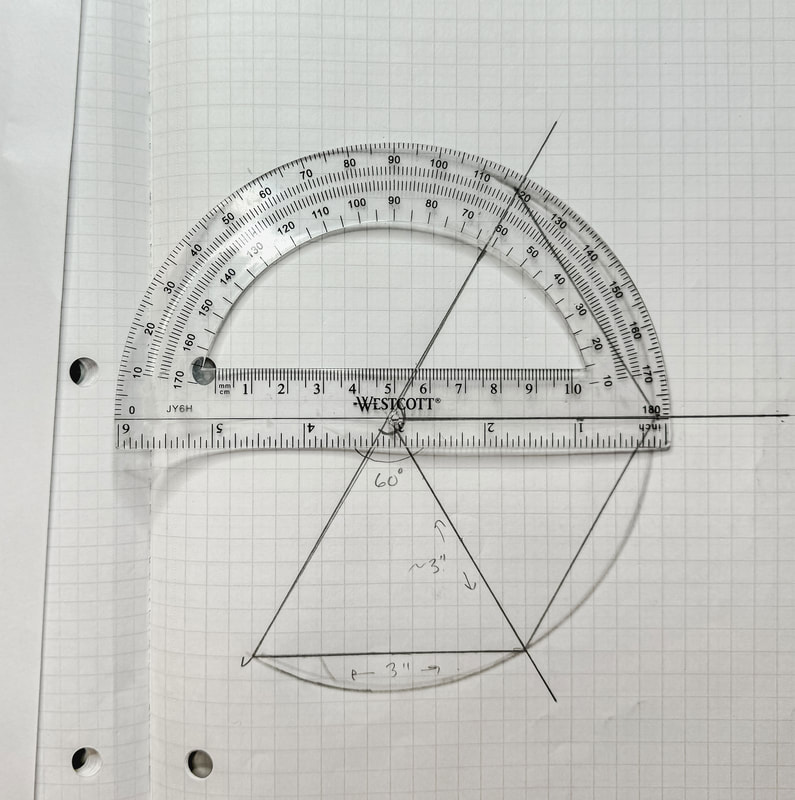 Connect the two new marks to the bottom edge of the original triangle. They should all be the same length. You should have three identical triangles stacked along their edges. Now we will create a smooth curve around the bottom of the three triangles. Open the compass to the length of the triangle’s diagonal side. Place the point of the compass at the top corner and draw an arc connecting (or going around) the corners of the three triangles. Make a small hole for the top and cut out the arc form you just drew. Line up the edges of your cone pattern and tape together. 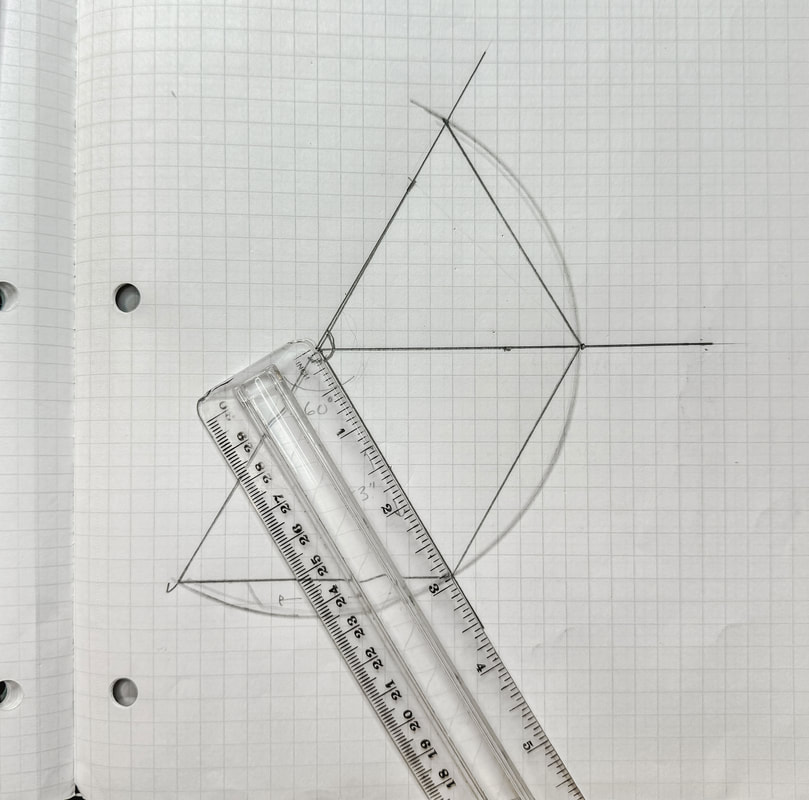 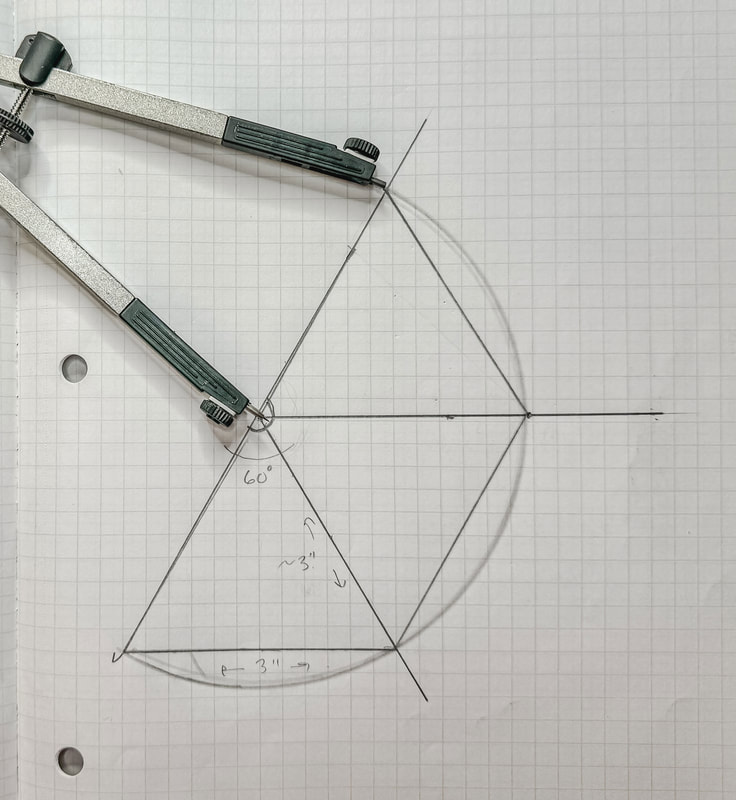  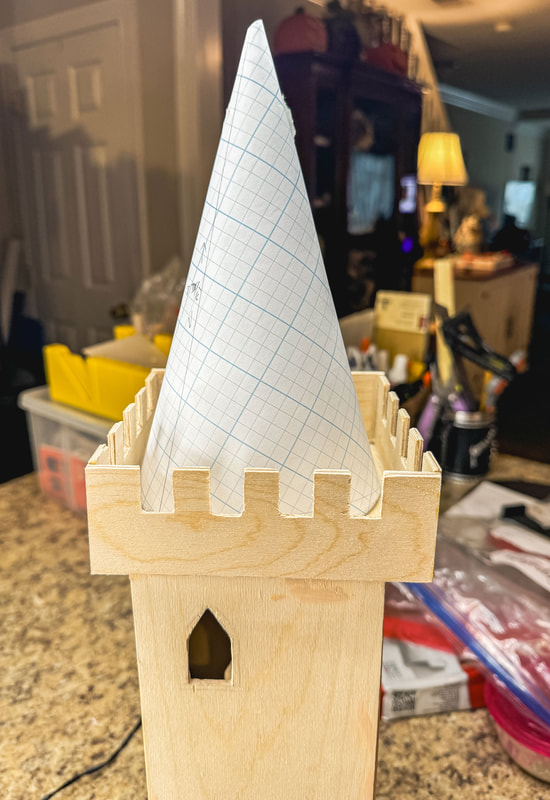 If you’d like to see the video for this tutorial (for all you visual learners!) you can find the YouTube tutorial here. Please remember to like and subscribe for more tutorials like this one and other DIY craft projects. Or join me on Patreon! Become a member for only $4/month to see more in-depth tutorials, DIY projects, and behind-the-scenes videos. Would you like to read more drawing tutorial blogs? Visit my blog page and click on the Celtic Inspired and DIY Projects categories for tons of fun and informational tutorials! And—as always—happy drawing!
0 Comments
Leave a Reply. |

Author
Some of the posts on this site contain affiliate links. This means if you click on the link and purchase the item, I will receive an affiliate commission. 
Categories
All
Archives
October 2025
|
 RSS Feed
|
|
Major credit cards accepted through Square. Apple Pay option available. This site also accepts PayPal payments for better online security, and it's free to sign up! Gift cards are now available for purchase!
Copyright 2025 |