|
I don’t know why, but miniature worlds fascinate me. I think it was preordained that I would one day design a fairy house. I mean, why wouldn’t I?! And so it was a couple of years ago I came up with a hair brained scheme to design two distinctly different fairy houses, with the main goal to use them in indoor fairy gardens or as part of a vignette. The design concept for one of these miniature houses was inspired by images of old English and Irish cottages, with their rough hewn walls and thatched roofs. The second fairy cottage (pictured below) developed out of childhood memories of enchanting illustrations in fairy tales. The vision behind these designs was to create miniature houses for use with faux florals and seasonal decor that can be refreshed as needed and illuminated with either LED candles or fairy light strands, creating a magical little focal point on a table. Since Spring has certainly sprung, it is now time for my home—and my fairy gardens—to transform into something more suitable for the season! This year I wanted to give my indoor fairy gardens an updated look, and that means new florals and freshly painted bases. 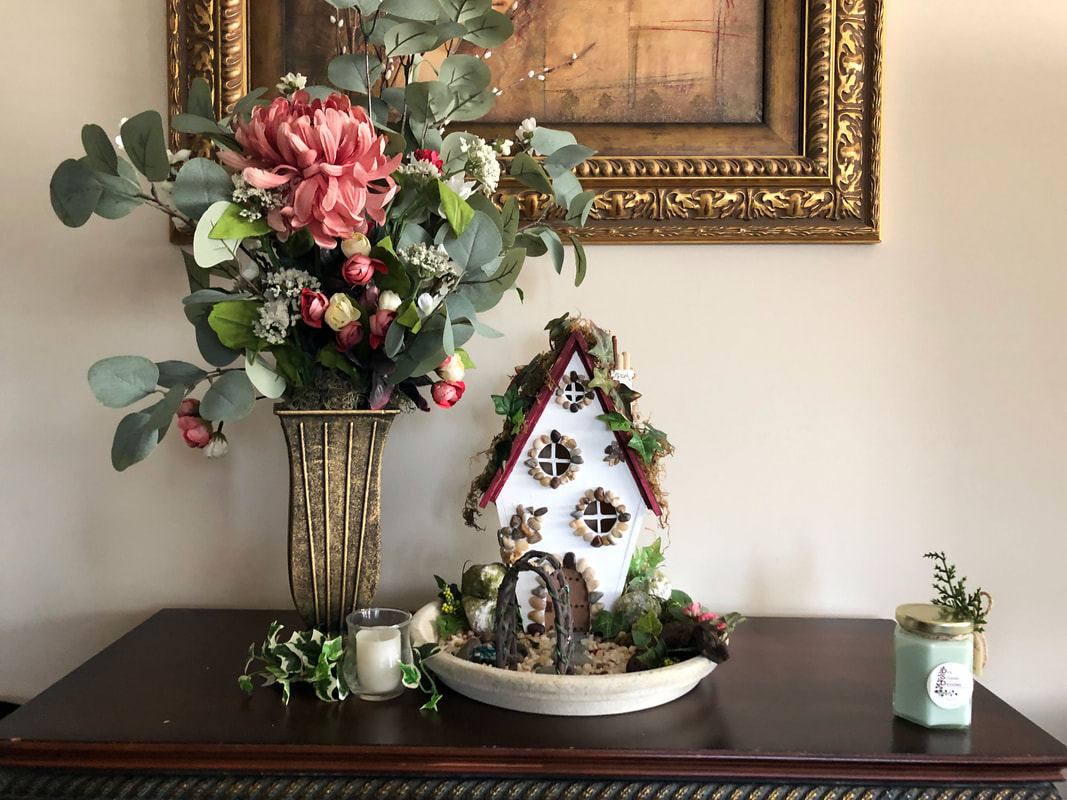 Fairy Cottage indoor fairy garden by Di's Studio Designs. Photo by Diane M. Lilly, 2021. To be honest, it has been really tough wrapping the brain around anything comprehensive lately, but breaking this project down into three individual stages (so that each part gets the attention it deserves) made the process easier, and actually forced me to focus on the details. And I’m so glad I took the time to do it that way! I’m so happy with this year’s Spring fairy gardens, I thought I’d share my process and how I arrived at the final look. So if you love fairy houses and fairy gardens (which I can assume you do, since you are reading this!), keep on reading to see how I worked through each step, overcame obstacles, and made my design decisions. Step 1…Spray painting terra cotta bases The bases for my indoor fairy gardens are these two terra cotta plant bases I bought two years ago at Home Depot. I’m ashamed to say I am only just getting around to painting them this year, but don’t judge—I’ve been busy…for two years…Okay there’s no excuse. Anyway, this year I finally painted the bases! 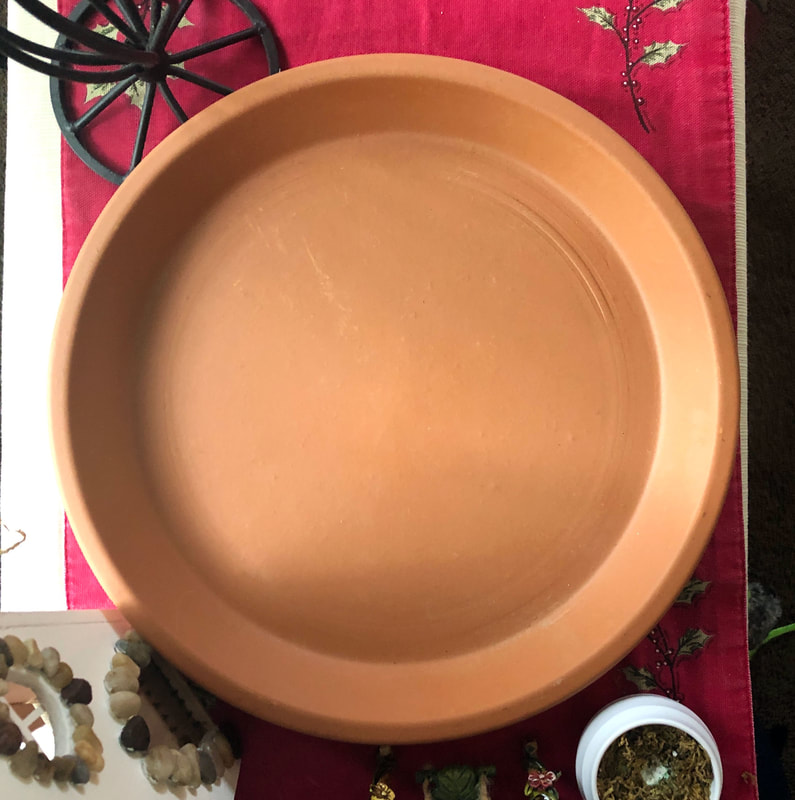 Terra cotta base. Photo by Diane M. Lilly, 2021. 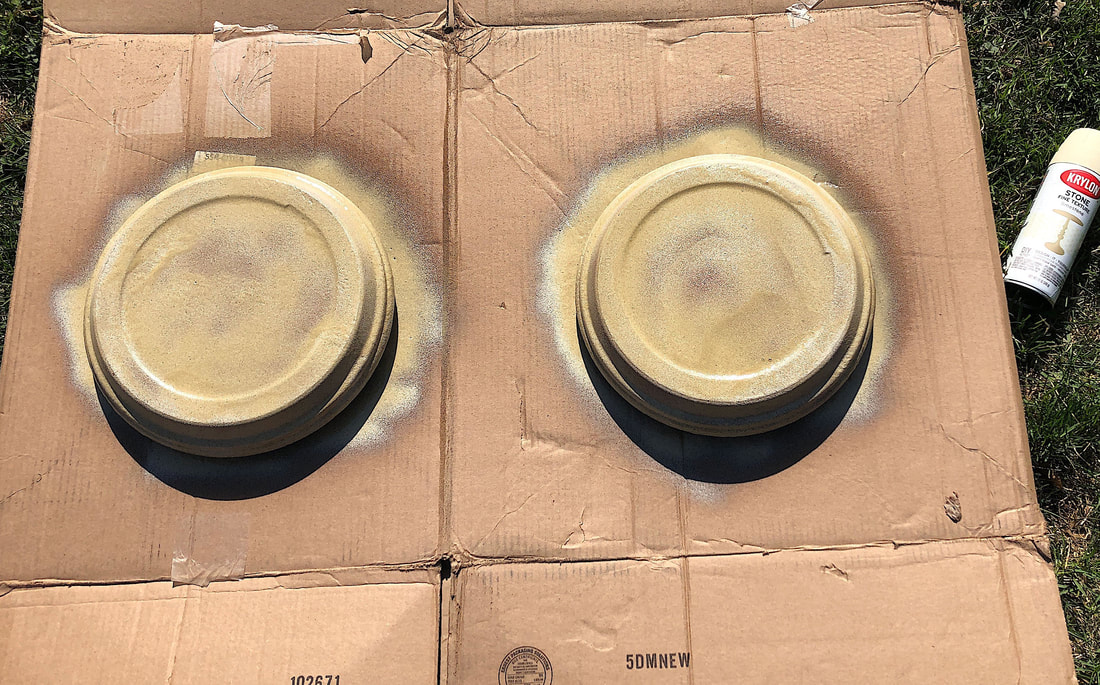 Spray painting terra cotta bases. Photo by Diane M. Lilly, 2021. For ventilation purposes both plates were taken outside, propped up with wood pieces and laid on cardboard. Each plate was spray painted (two coats each side) with a cream colored stone texture paint. Unfortunately for me, I rushed the process. I was experiencing a dental issue and had an emergency dentist appointment in an hour and for some reason I thought I could get much of the painting done before the appointment. It ended up being a huge mistake! I had runs and pools…It was horrible! So when the bases were dry I experimented with sanding them, originally thinking I would just paint over the whole mess, but then a crazy thing happened…I loved the results from the sanding! I was using 100 grit sandpaper which left a beautifully aged chalky finish that I immediately fell in love with! At this point I decided against using any type of sealant, as the bases were going to be used in a dry application and I didn’t want to lose that chalky finish. Talk about a happy accident! Just look at the depth of color and texture, as if this was old stoneware that had been exposed to the elements! 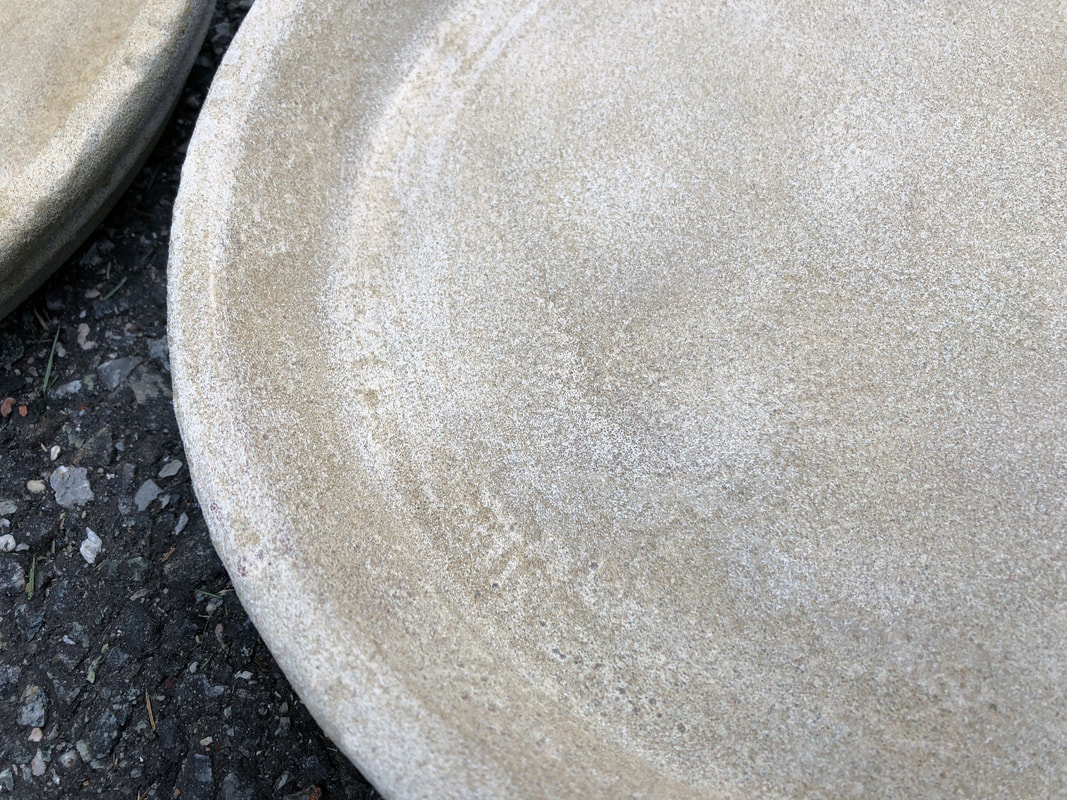 Terra cotta base finished. Photo by Diane M. Lilly, 2021. Step 2…Adding in the faux florals and decor Once the debacle with the bases was settled, I moved on to setting up the houses and decor. Inspiration for the decor for the English Cottage came after watching some videos on Youtube. I found myself clicking through videos of English gardens, admiring the “tamed” wildness of the gardens. The roses in particular caught my attention, because they just seemed to scream “English garden”. So off I went to Michaels and bought some pink and wine colored miniature rose bunches. And I just love them! See how they create such a pleasing and visually stimulating contrast against the normally drab grey colors of the cottage? Love it! Love it! Love it! The hues in the roses also perfectly compliment my existing living room decor, which is important as this indoor fairy garden occupies a place of high visibility in that space. The rest of the decor was deliberately kept minimal and simplistic, with small stones lining the base surrounding a stone slab path (made with stacking stones) and some additional supporting florals. Just a simple fairy cottage surrounded by rose bushes! 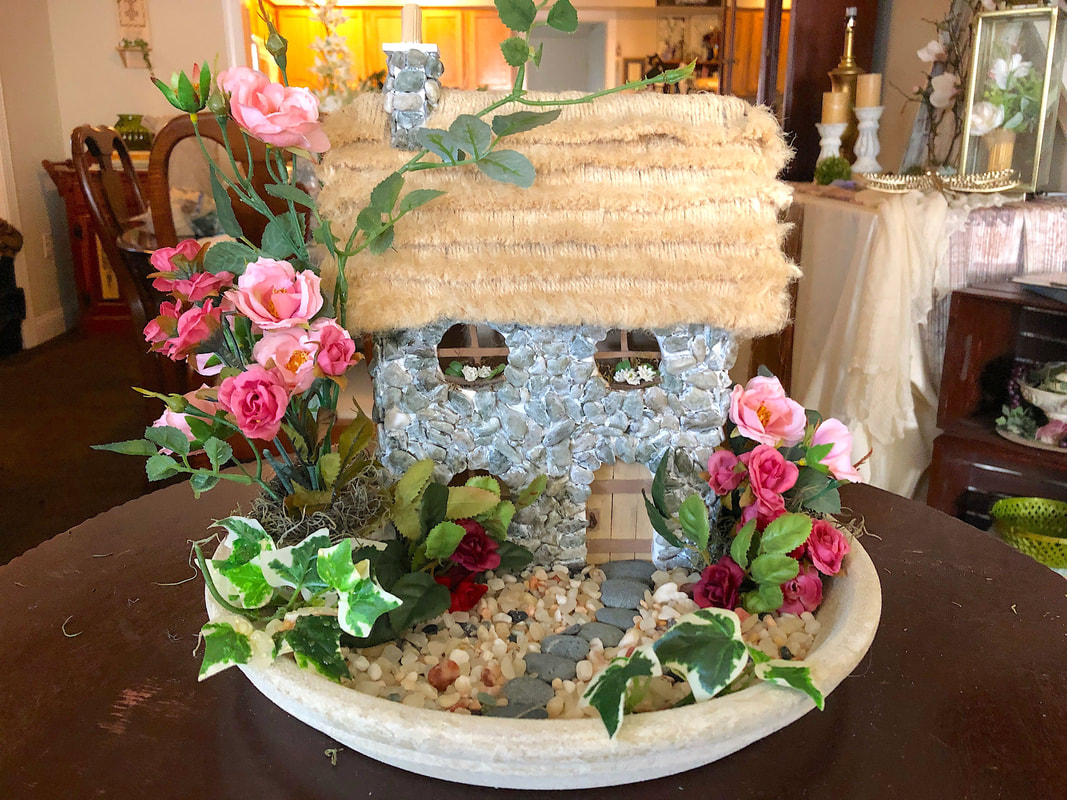 English Cottage indoor fairy garden by Di's Studio Designs. Photo by Diane M. Lilly, 2021. 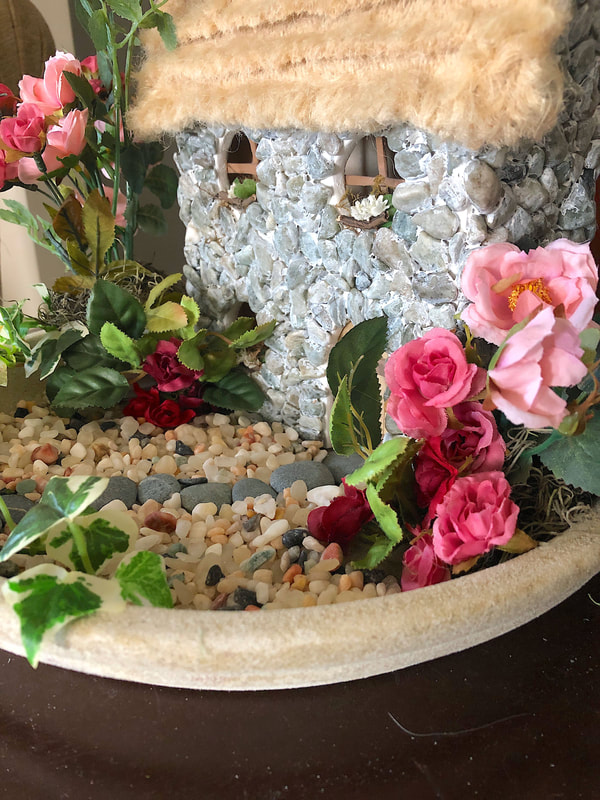 English Cottage indoor fairy garden walkway closeup, by Di's Studio Designs. Photo by Diane M. Lilly, 2021. 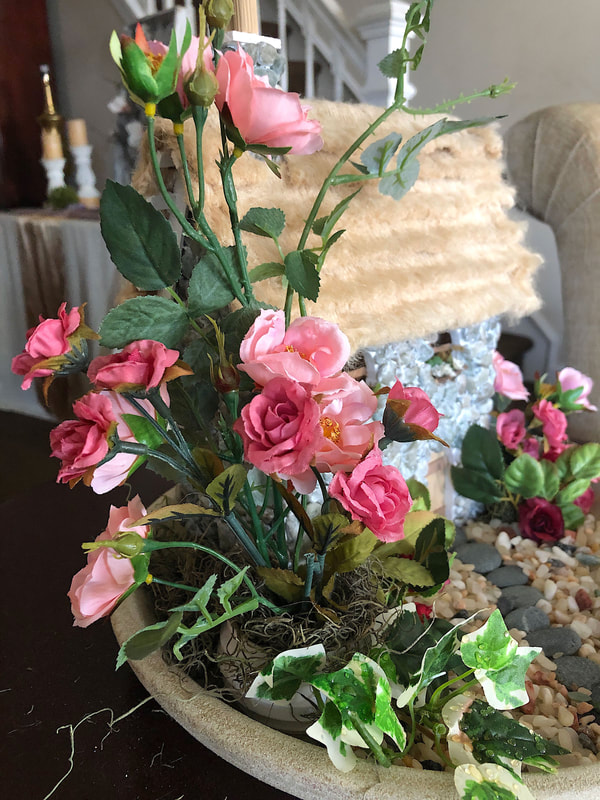 English Cottage indoor fairy garden faux rose closeup, by Di's Studio Designs. Photo by Diane M. Lilly, 2021. The vision for the Fairy Cottage was clear to me from the get-go. I wanted it to be adorned with moss and ivy, with a minimal amount of florals, if any. The colors in my vignette were already very strong and made a clear design statement, so all I needed from this Fairy Cottage garden was some simple greenery just to make it feel more whimsical. A couple of moss covered rocks, a piece of “forest wood”, and a trellis, and my design was done! Like with the English Cottage, I used small rocks to line the base and stacking stones for the pathway. And, just like that, my second fairy garden was done! (Actually, I tell a lie. it wasn’t “just like that”…I agonized over every mundane detail because I was having a “day”!) 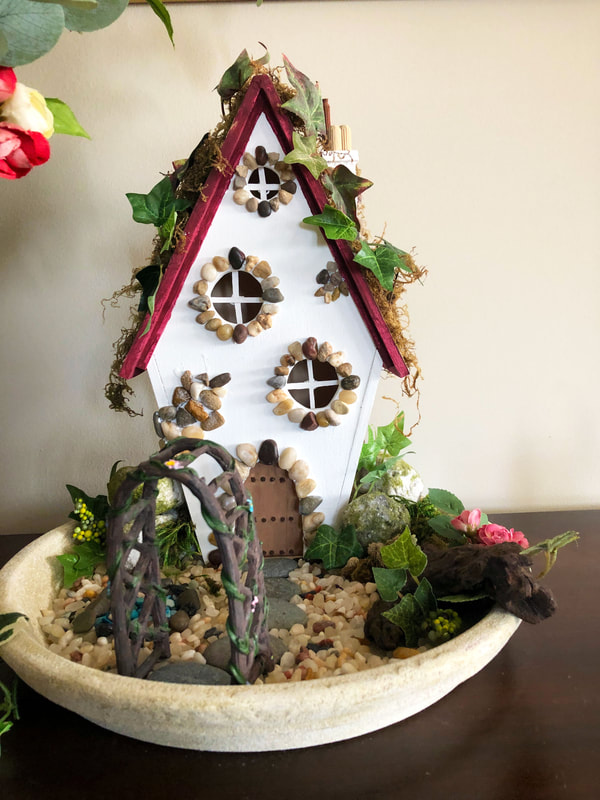 Fairy Cottage indoor fairy garden by Di's Studio Designs. Photo by Diane M. Lilly, 2021. 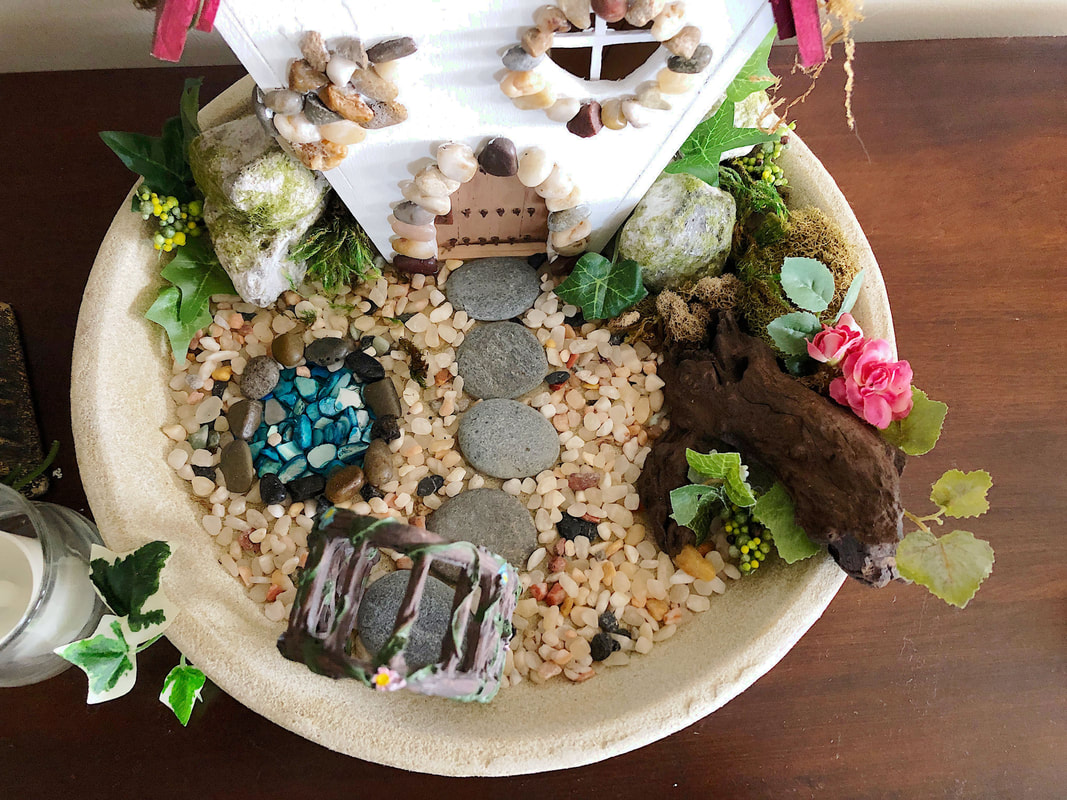 Fairy Cottage indoor fairy garden walkway closeup, by Di's Studio Designs. Photo by Diane M. Lilly, 2021.  Fairy Cottage indoor fairy garden driftwood closeup, by Di's Studio Designs. Photo by Diane M. Lilly, 2021. Step 3…Lighting up my indoor fairy gardens I always love to finish my indoor fairy gardens with fairy light strands, and this time was no different. A fairy strand was strung over and around each house and surrounding garden to light up as much of the house, florals, and greenery as possible. (I may go back later and apply a second strand to light things up even more.) To light up the house itself I stuffed a balled up fairy light strand into the opening in the back of each house. Both indoor fairy gardens and houses look so whimsical in the evenings and they add so much character to my living room! 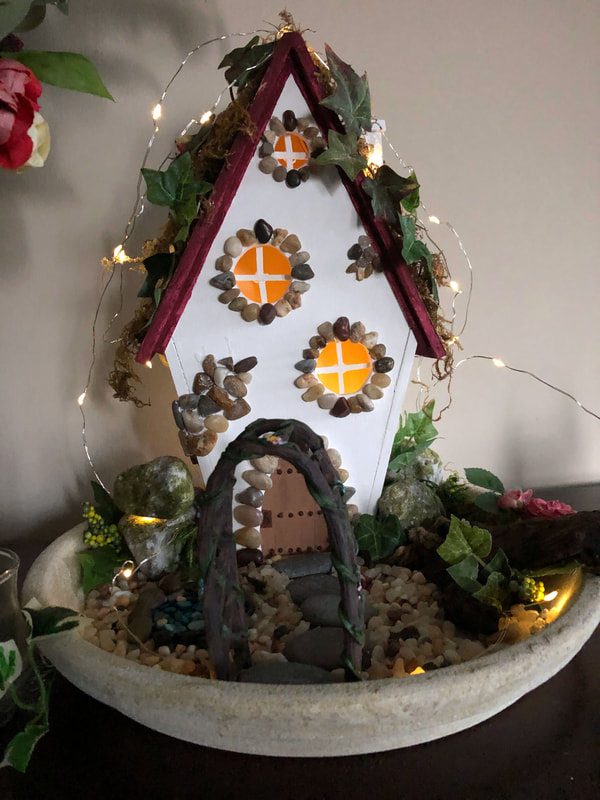 Fairy Cottage indoor fairy garden lit up (front view), by Di's Studio Designs. Photo by Diane M. Lilly, 2021. 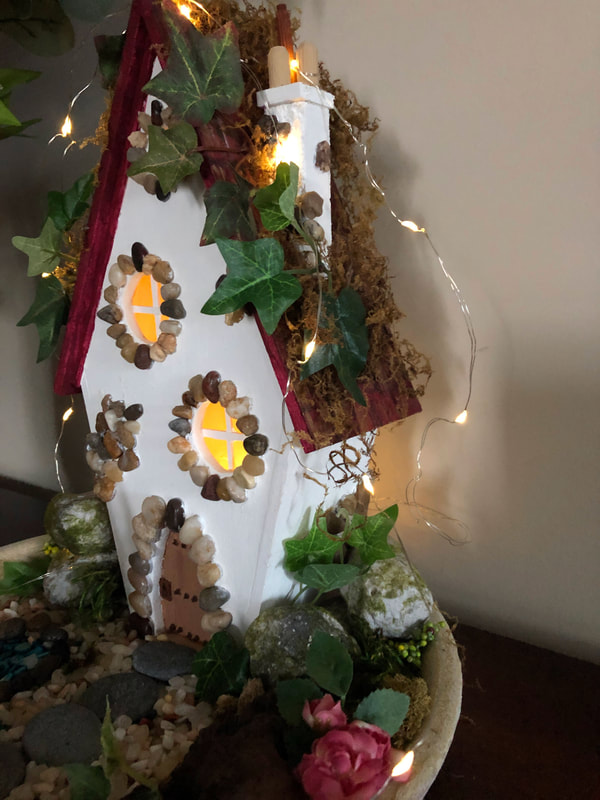 Fairy Cottage indoor fairy garden lit up (side view), by Di's Studio Designs. Photo by Diane M. Lilly, 2021. 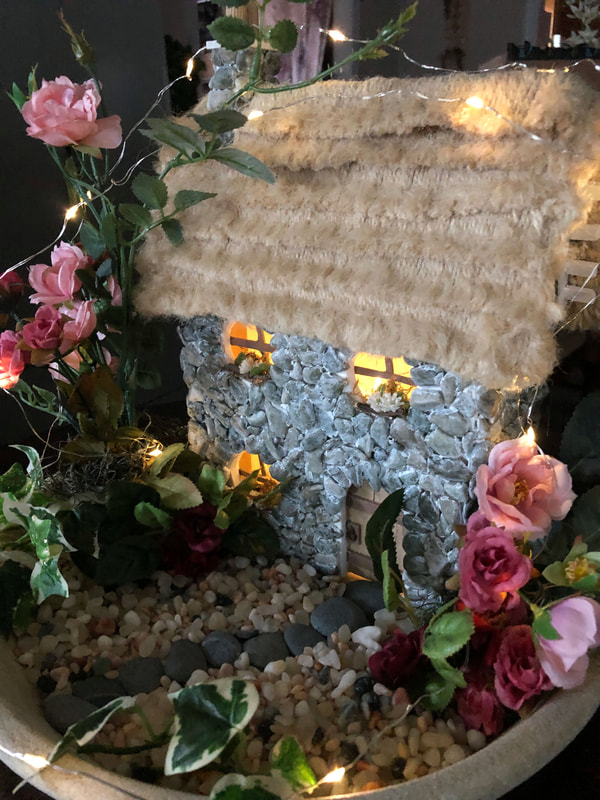 English Cottage indoor fairy garden lit up (side view), by Di's Studio Designs. Photo by Diane M. Lilly, 2021. 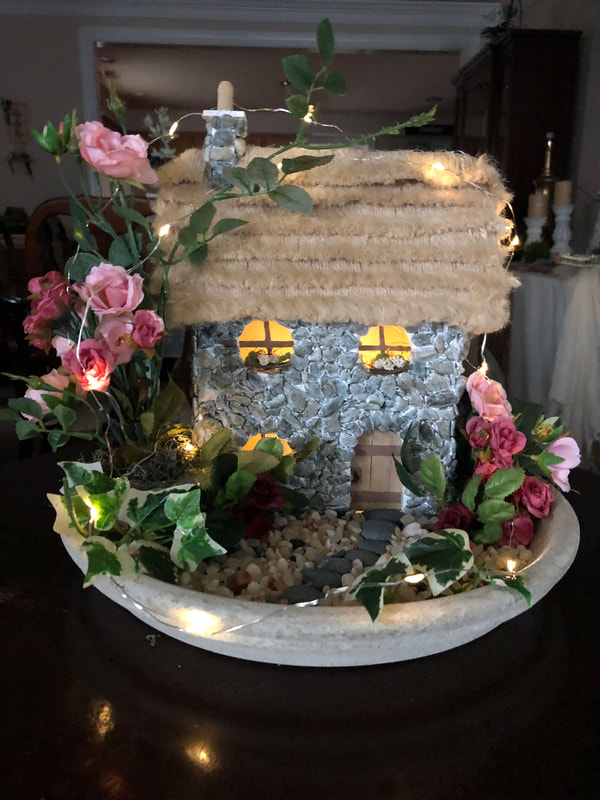 English Cottage indoor fairy garden lit up (front view), by Di's Studio Designs. Photo by Diane M. Lilly, 2021. And that’s it! The whole Spring decorating project took me a few days, but that was mainly down to bad timing and an emergency with a broken tooth (and, of course, I was in no mood afterwards)! I’m glad I forced myself to finish, though, because I love sitting on my sofa and looking over at each fairy garden in turn and daydreaming about the fairy that lives there! (Really I’m just admiring my own handiwork, but we won’t tell anyone.) If you’d like to see more about the original concept for my houses, the design process, and previous seasonal incarnations of my fairy gardens, hop on over to here. If you would like to subscribe to my email list, I will be compiling a new newsletter in the coming months to help you keep track of new items for sale on my web site, new blog articles I will be posting, and any social media stuff I decide to throw in there for good measure! Please feel free to share your thoughts and comments below. And if you like this article, give it a share to your friends and family. It would mean the world to me and help me build my following! This article contains external links for demonstration purposes only, and are not endorsements for specific products or brands. Related blog posts you may want to read: My outdoor fairy garden My fairy house project
0 Comments
Leave a Reply. |

Author
Some of the posts on this site contain affiliate links. This means if you click on the link and purchase the item, I will receive an affiliate commission. 
Categories
All
Archives
October 2025
|
 RSS Feed
|
|
Major credit cards accepted through Square. Apple Pay option available. This site also accepts PayPal payments for better online security, and it's free to sign up! Gift cards are now available for purchase!
Copyright 2025 |