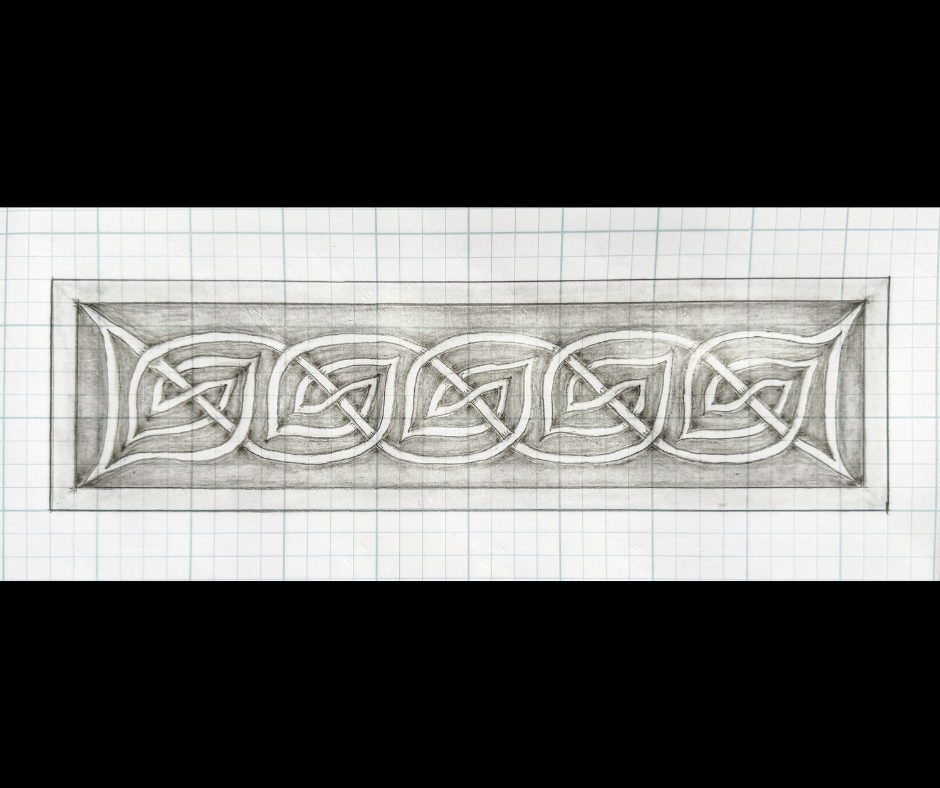
 Hello, and welcome to another Celtic-inspired art drawing tutorial. Today’s tutorial will feature a simple spiral knot border that you can use to decorate line art, drawings, or craft items. Grab your drawing materials, and let’s get this party started! I am an affiliate associate of Blick Art Materials, so some of the posts in this article contain affiliate links. If you click on the link and purchase the item, I will receive an affiliate commission at no extra cost to you. I will only recommend products or services I use personally and/or believe will add value to my readers, so there is no conflict of interest. Step 1: Draw a 3 x 16 grid For this tutorial, I drew a 3 x 16 grid. The length of the border is up to you, but the height will be 3 grid squares unless you double the border. 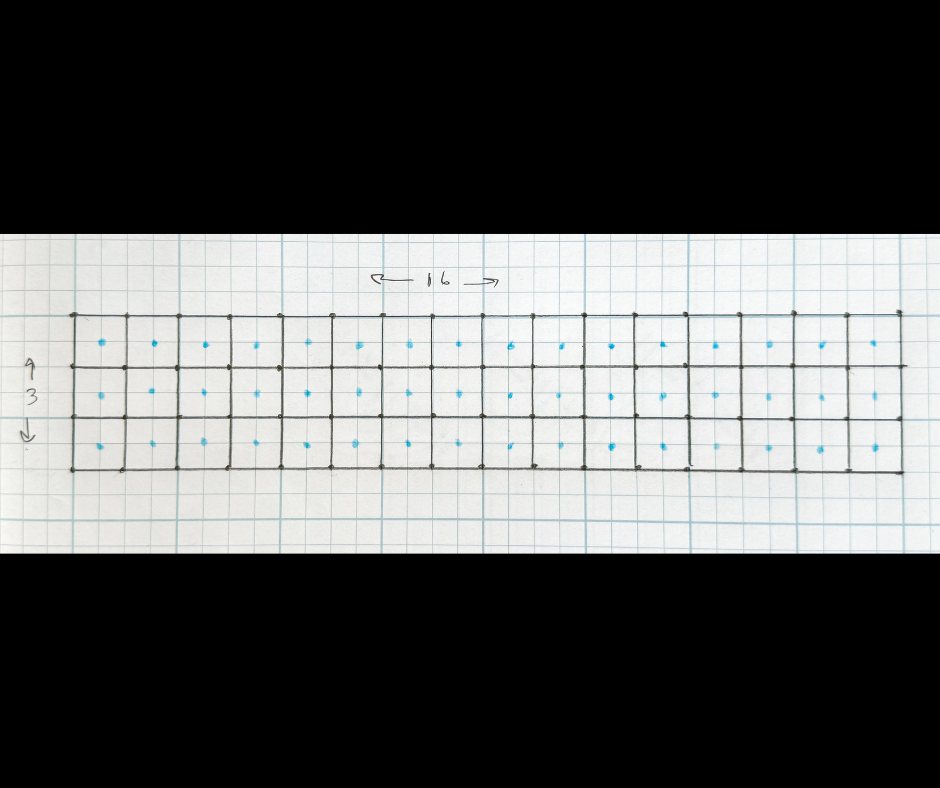 Step 2: Add in the break lines The break lines for this pattern are an established design, with L and Z break lines forcing the thread to loop around. 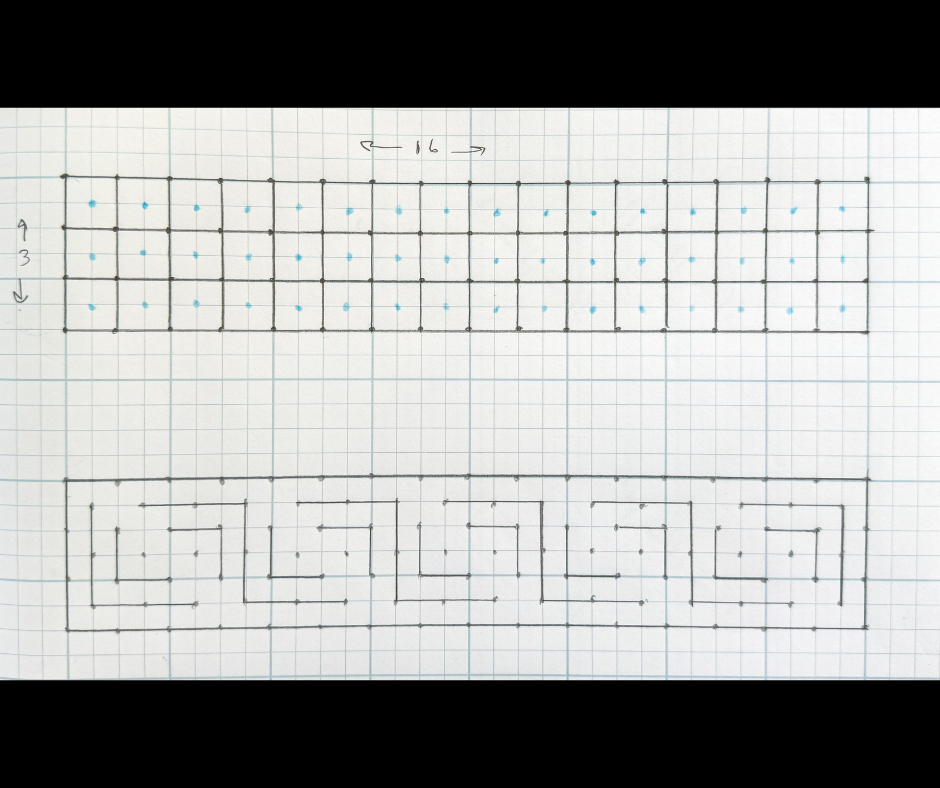 Step 3: Mark the overlap spots Next, I marked the diagonal line where the thread overlaps to help me visualize the design. 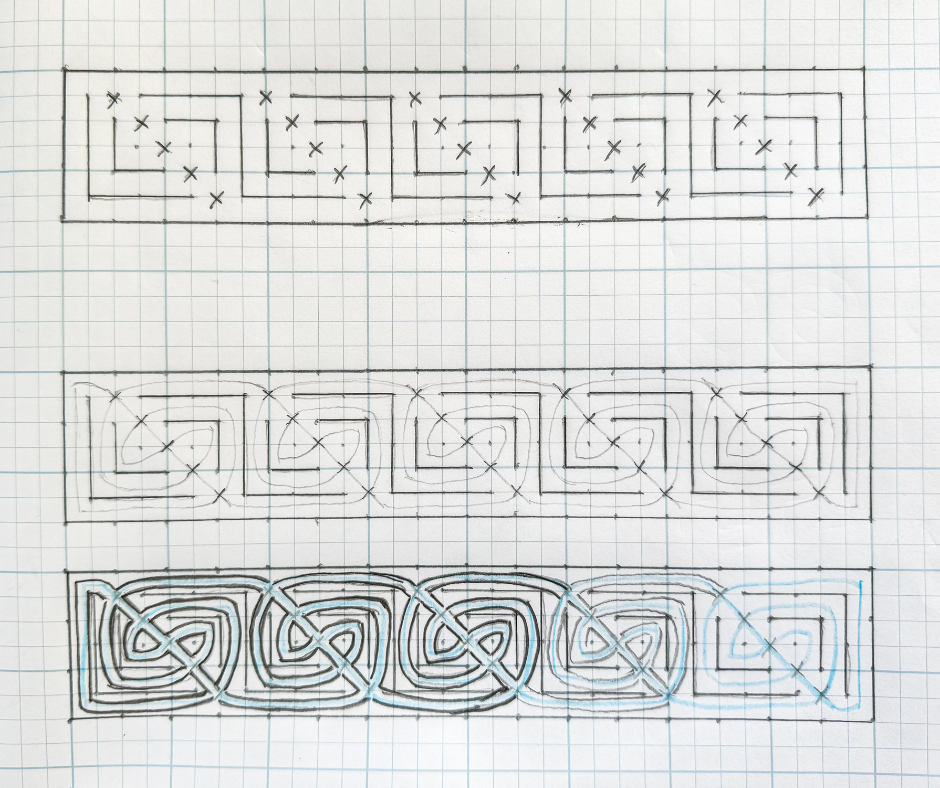 Step 4: Draw the single-line design The next step is to draw the design in a single line. Keep this line light, as it will be erased. Step 5: Draw the double lines to make the thread Once the single line is finished, draw the parallel lines on either side to form the thread. Leave the intersections open for now. Step 6: Create the under-over pattern When all of the double lines are drawn, pick a starting point at one intersection. Create the first over/under. Move on to the next intersection along the thread and create the opposite under/over. Follow the thread until all under/overs are done. 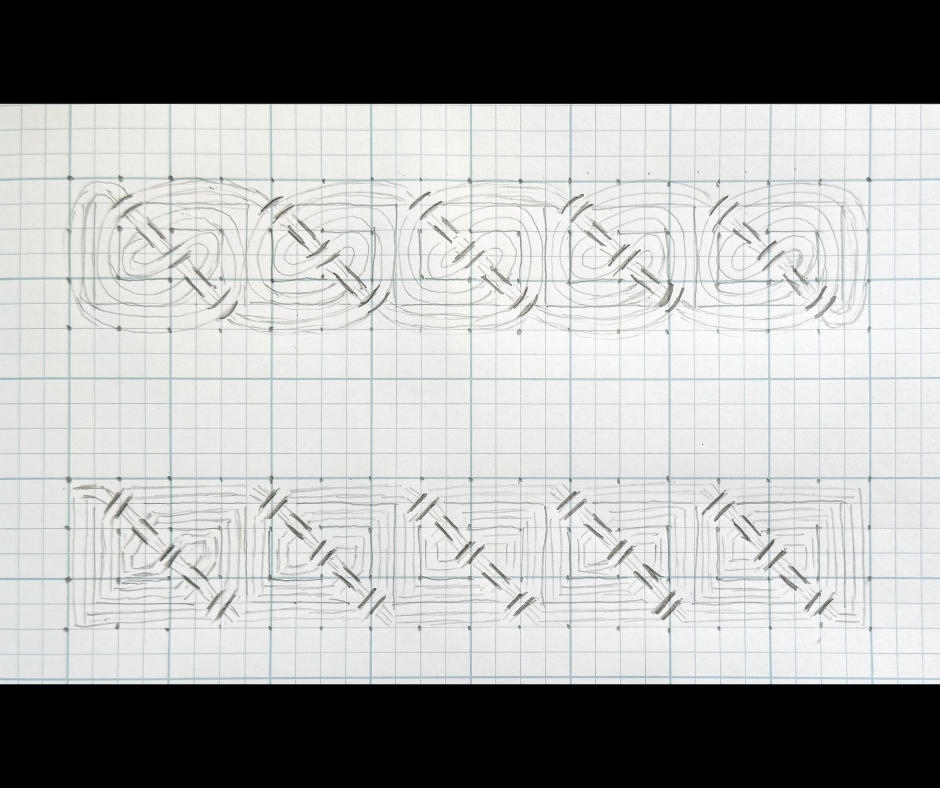  Step 7: Erase nonessential lines and stylize Erase all lines and marks that will not be in the final design. Add in shading, darken lines, add a border, color the background, stylize the lines, and add any other finishing touches you desire. 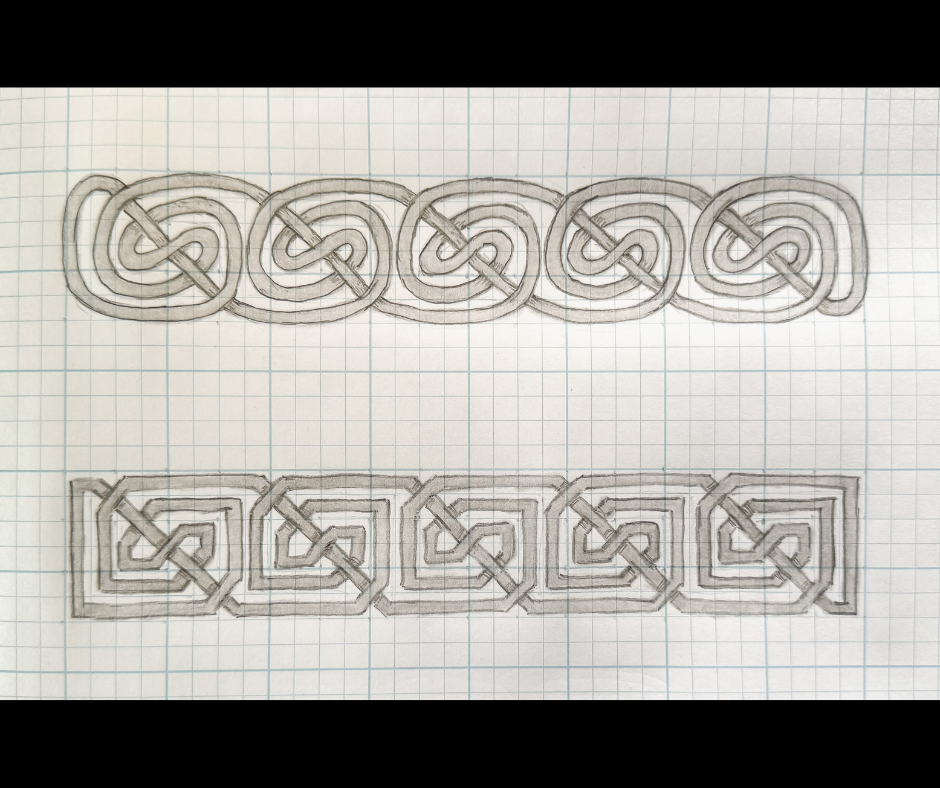 Do you like video art tutorials? You can find the accompanying video to this tutorial on my YouTube channel here. If you would like to support me on Patreon, click here to check out my new Patreon community page. Want to read more art tutorial blog posts? Click here to see all my Celtic-inspired art tutorials.
0 Comments
Leave a Reply. |

Author
Some of the posts on this site contain affiliate links. This means if you click on the link and purchase the item, I will receive an affiliate commission. 
Categories
All
Archives
October 2025
|
 RSS Feed
|
|
Major credit cards accepted through Square. Apple Pay option available. This site also accepts PayPal payments for better online security, and it's free to sign up! Gift cards are now available for purchase!
Copyright 2025 |